EASTER BUNNY IN A BASKET CAKE

EASTER BUNNY IN A BASKET CAKE

Author: MILENE HABIB

Skill level: BEGINNERS

You will need:

  • Cake drum
  • Cake with 14cm diameter and 10/12cm high
  • Chocolate mousse or another filling
  • Chocolate ganache (3:1 ratio chocolate/cream)
  • Serrated knife
  • Spatula
  • Smoothers
  • 1kg white Pasta Top
  • 250gr white Pasta Model
  • Modelling tools
  • 3 x 18 gauge floral wire
  • Floral tape
  • Cake pop sticks
  • Small dowel for the bunny support 
  • Cocoa butter
  • Dust colours: white, brown, skin, pink, black, green and yellow
  • Soft brushes
  • Optional colourful chocolate eggs and sprinkles to decorate


Step 1

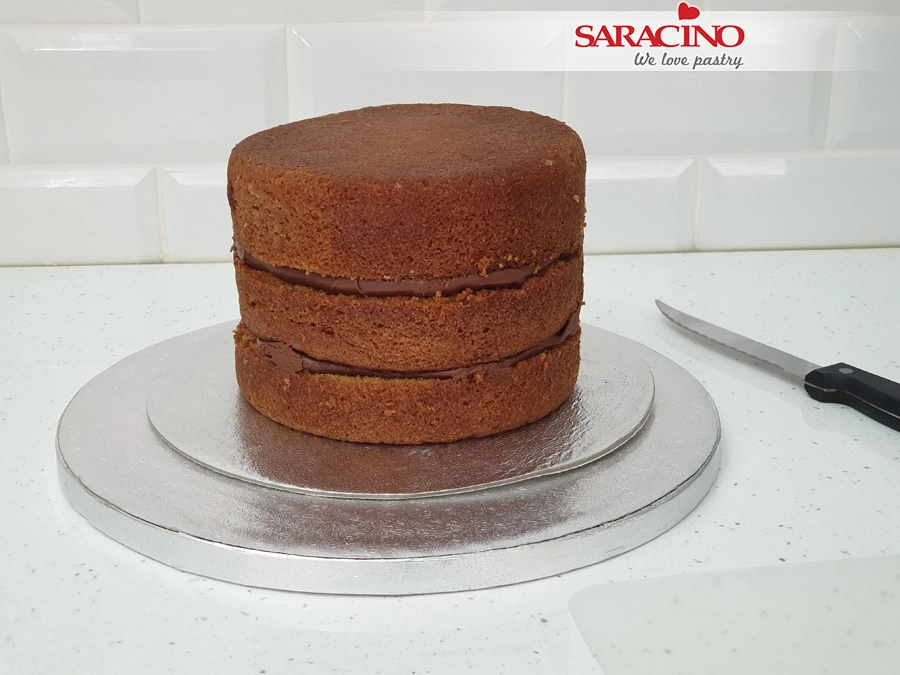
Using your filling layer your cake.
 

Step 2

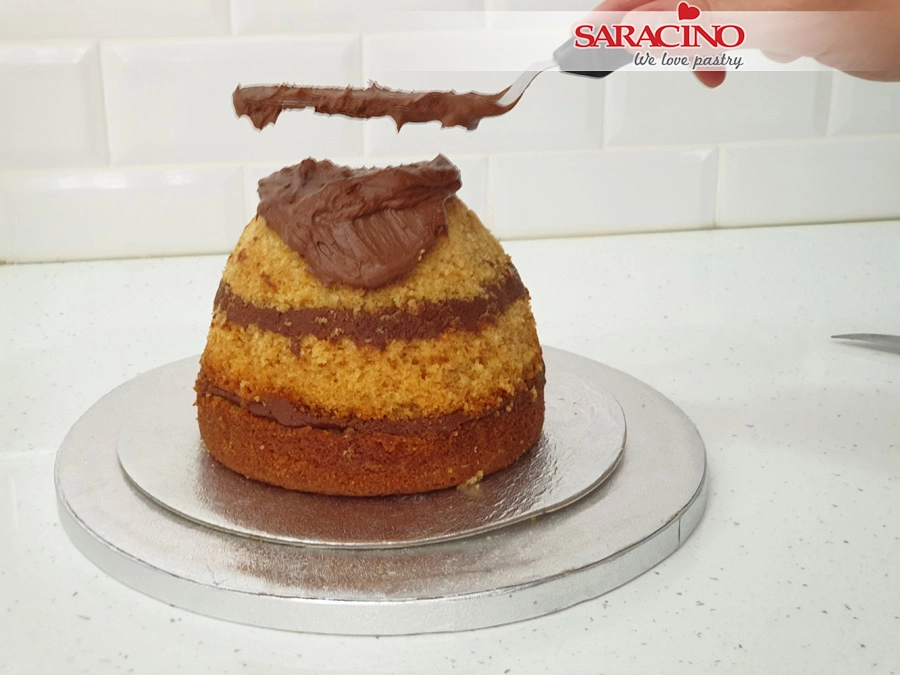
Using your serrated knife carve the cake to a dome shape. This will be the basket when we turn it over. Cover the outside with the ganache.
Step 3

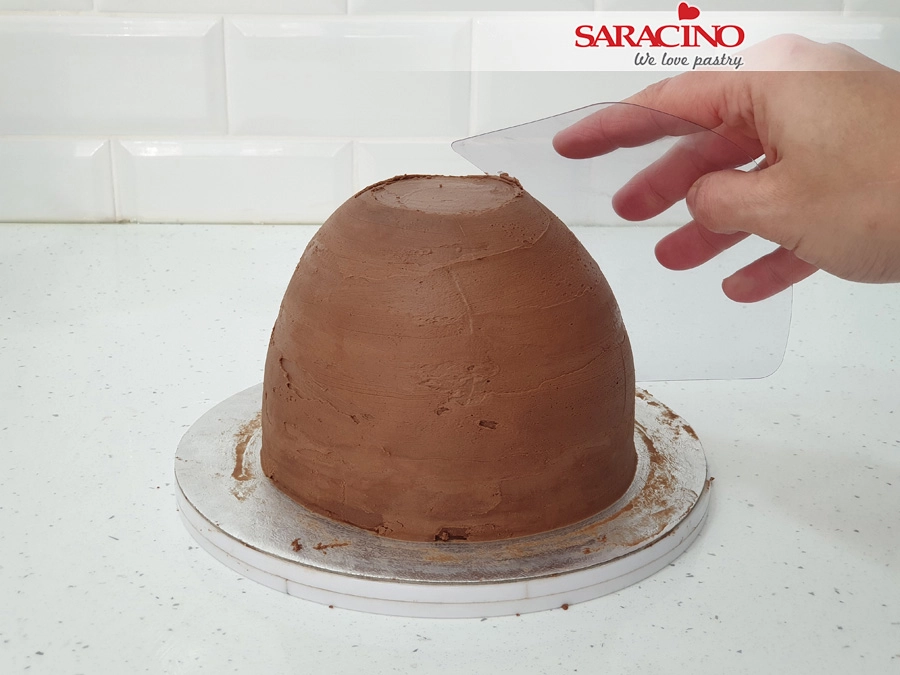
Use a smoother to give the ganache a smooth finish.
Step 4

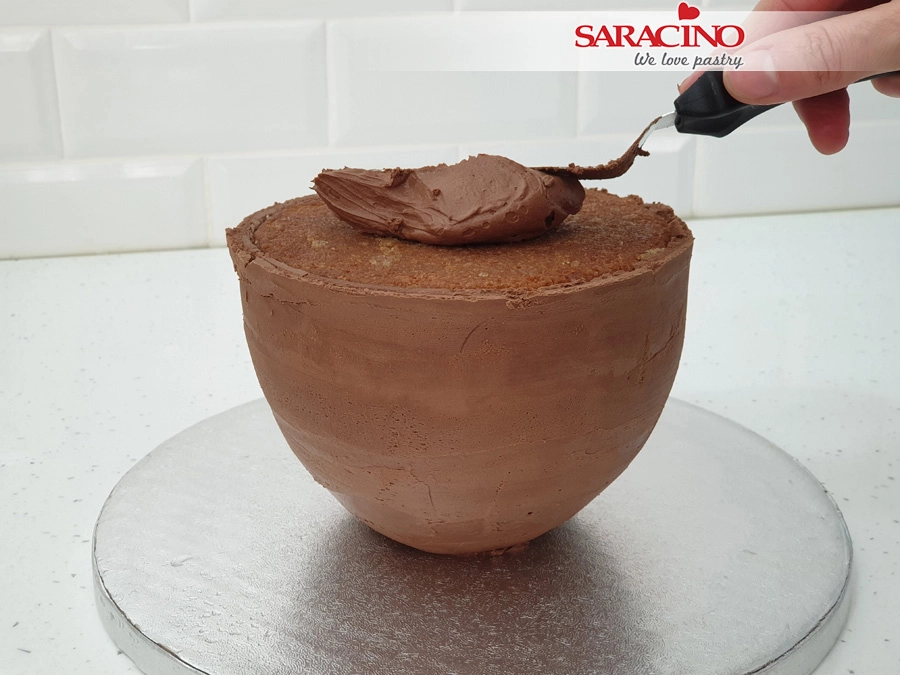
Turn the cake over and place on your drum. Cover the top with ganache.
Step 5

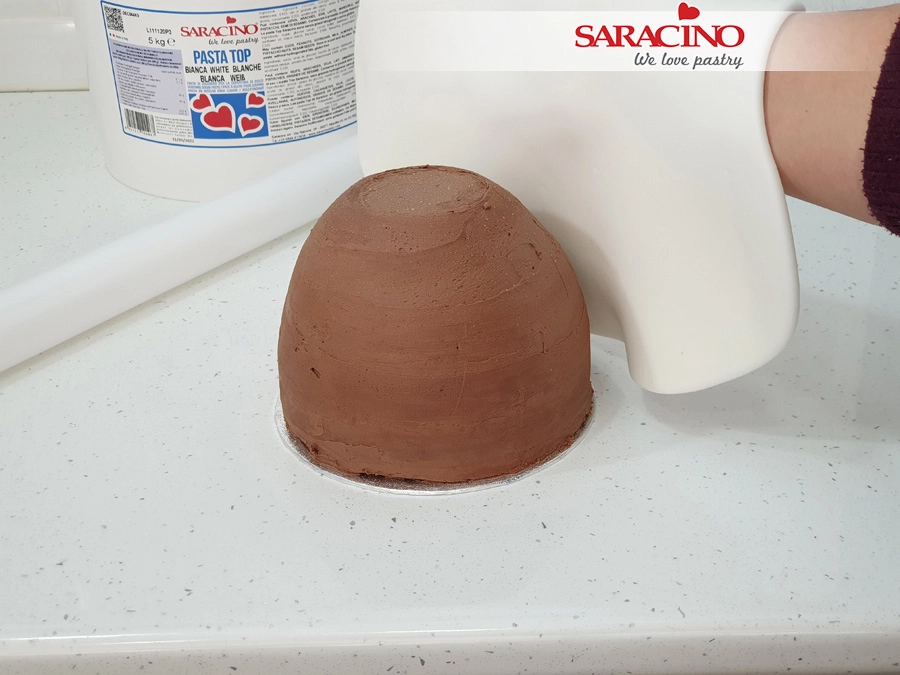
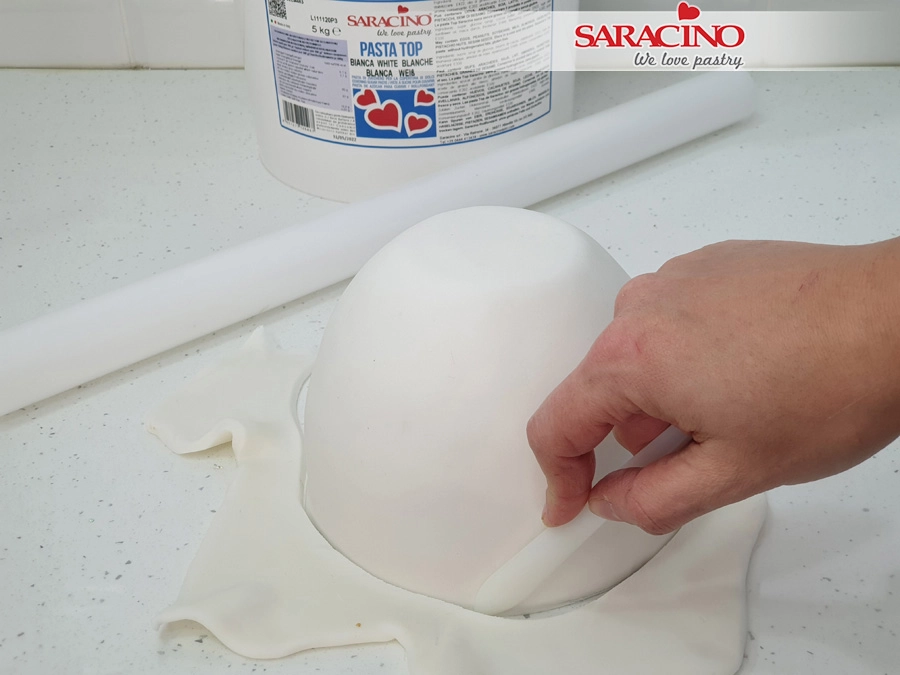
Using a thin cake board turn the cake back over. Roll out your white Pasta Top and cover the cake.
 

Step 6

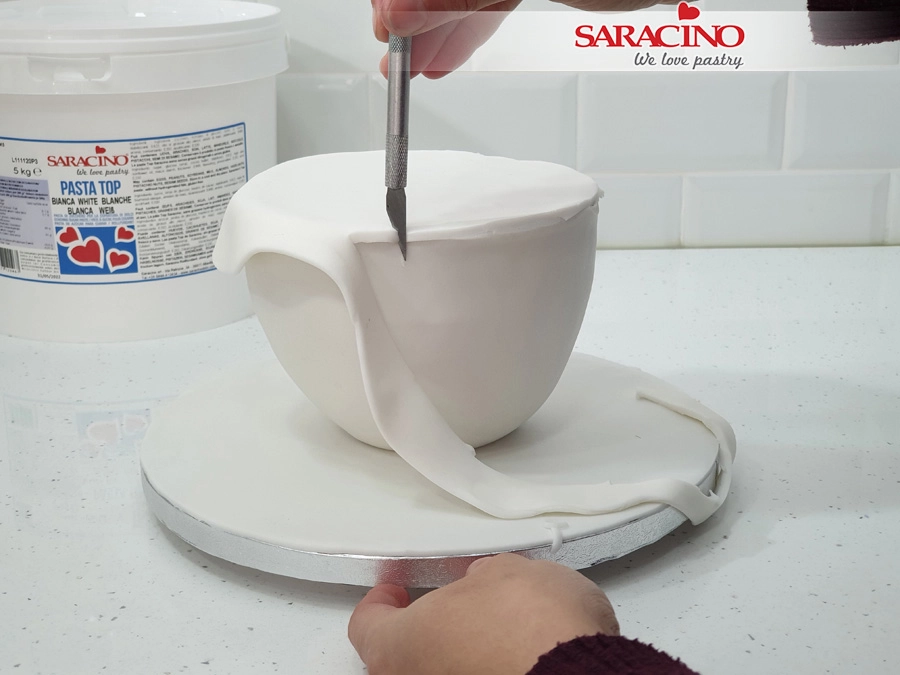
Use a knife to trim away the excess paste.
 

Step 7

Cover the cake drum. Turn the cake back over and place on the drum. Cover the top and trim off any excess.
Step 8

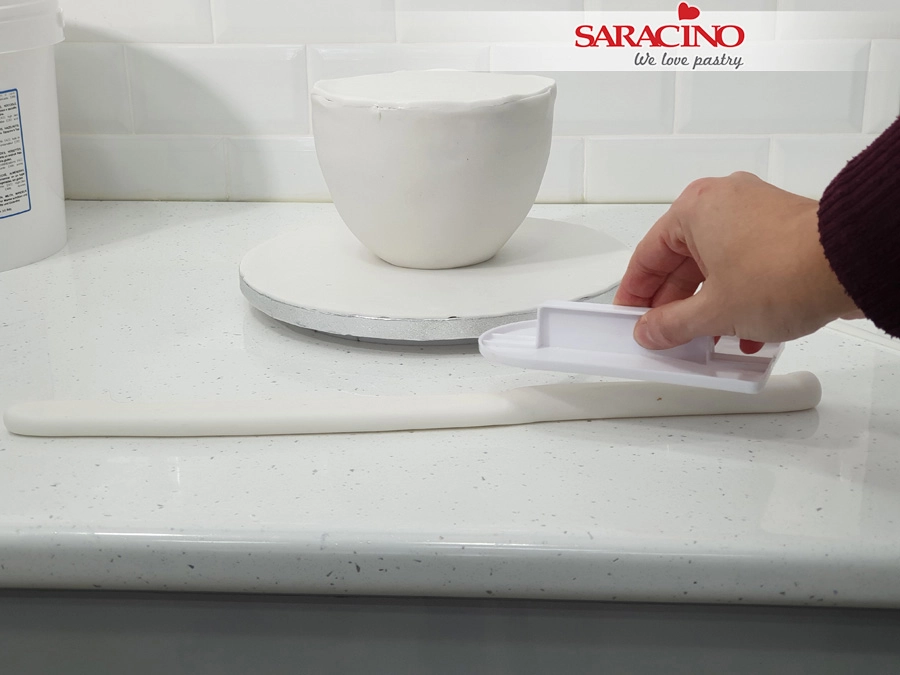
For the band around the top of the basket roll out white Pasta Top to a long sausage shape. Flatten using a side smoother.
 

Step 9

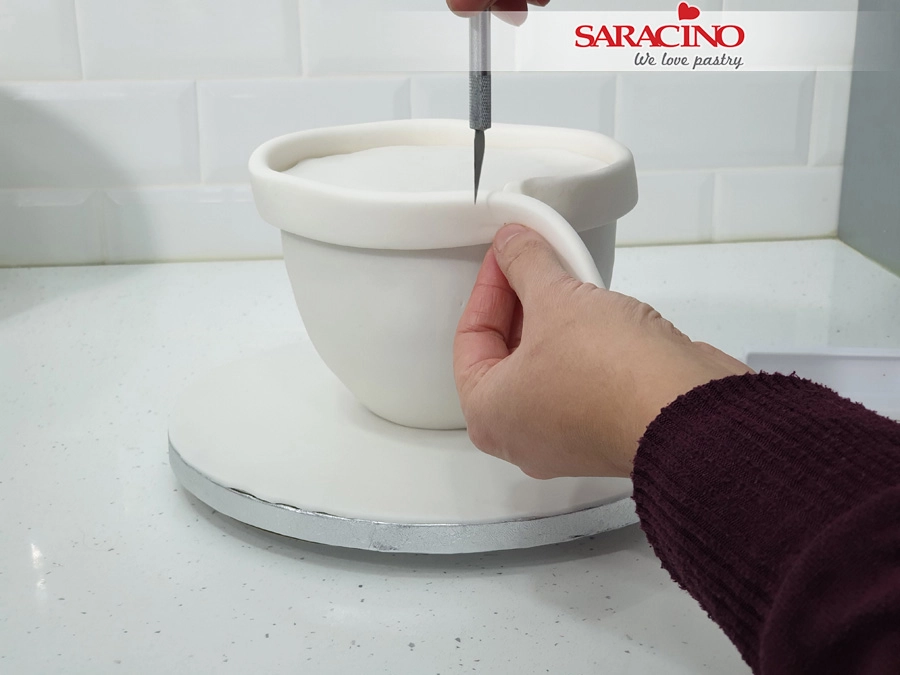
Fix the band around the top of the basket. Trim off any excess length.
Step 10

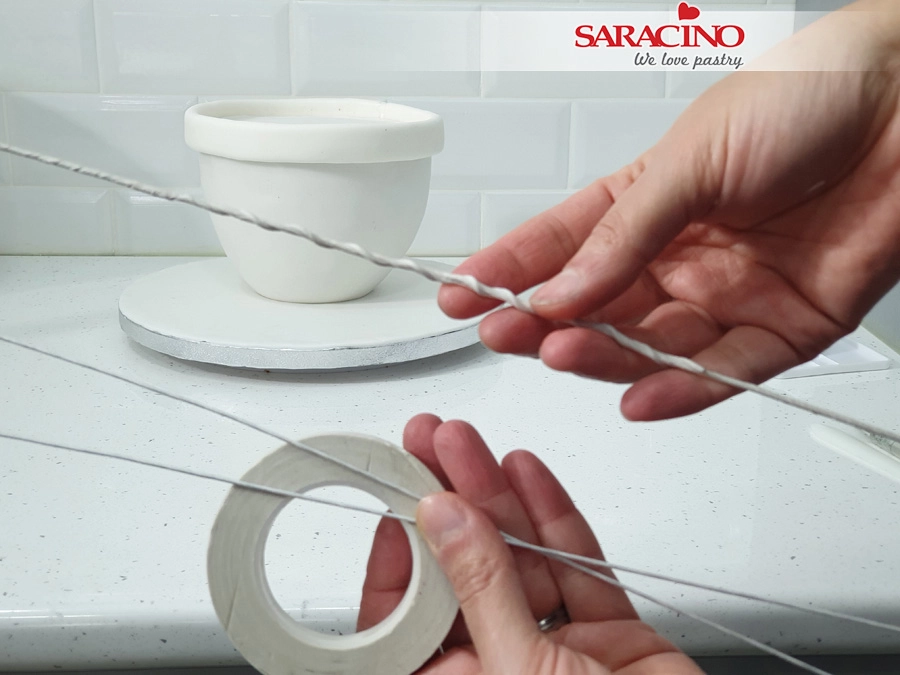
Using your flower wires wrap them together using the florists tape.
Step 11

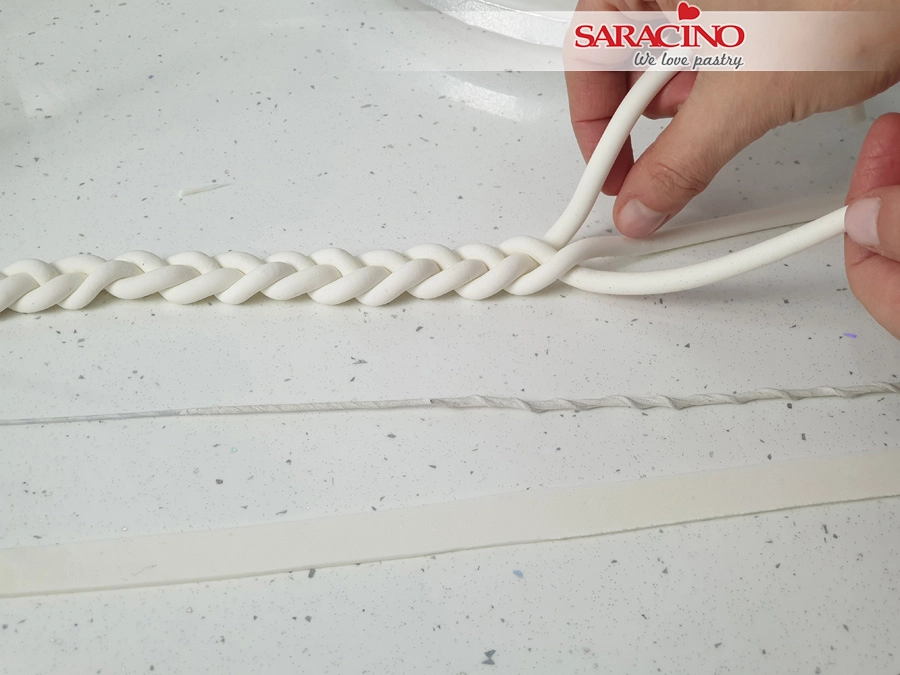
Using an extruder form three long lenghts of white Pasta Model. Plait as shown. Roll a thin band of Pasta Model to the same length as the plait.
Step 12

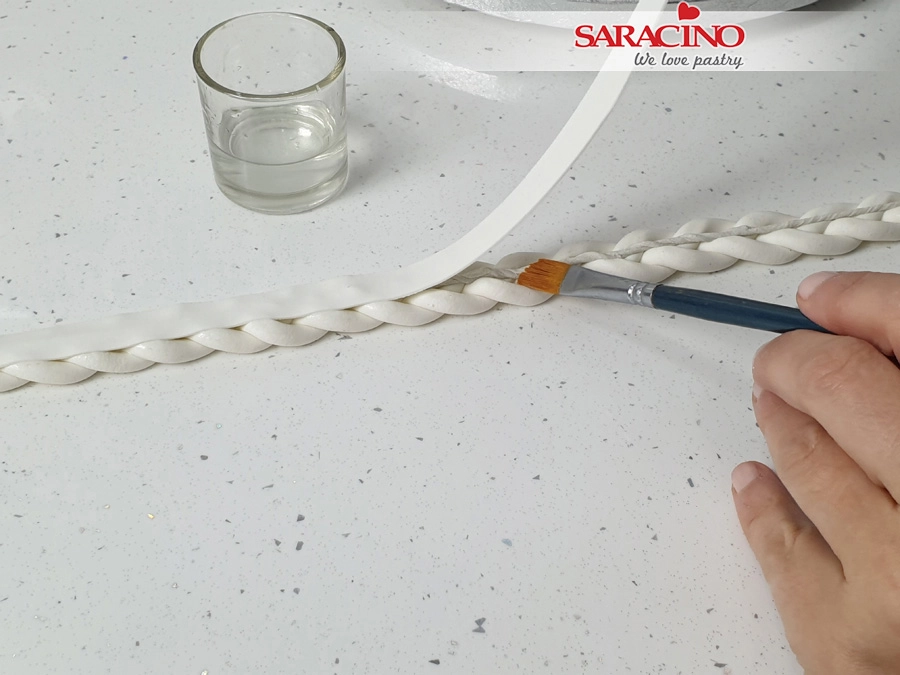
Place the wrapped flower wires over the plait. Moisten with a little water and cover the wire with the thin band of paste. You will need to leave a small length of wire protruding from each end ready for mixing into the cake.
Step 13

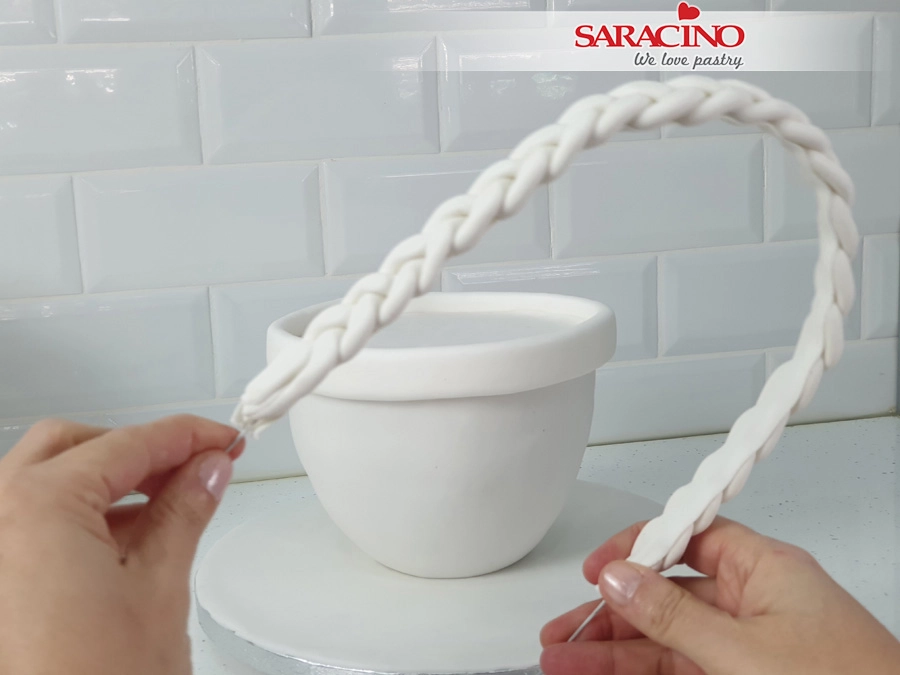
Bend as shown to the width of your basket.
Step 14

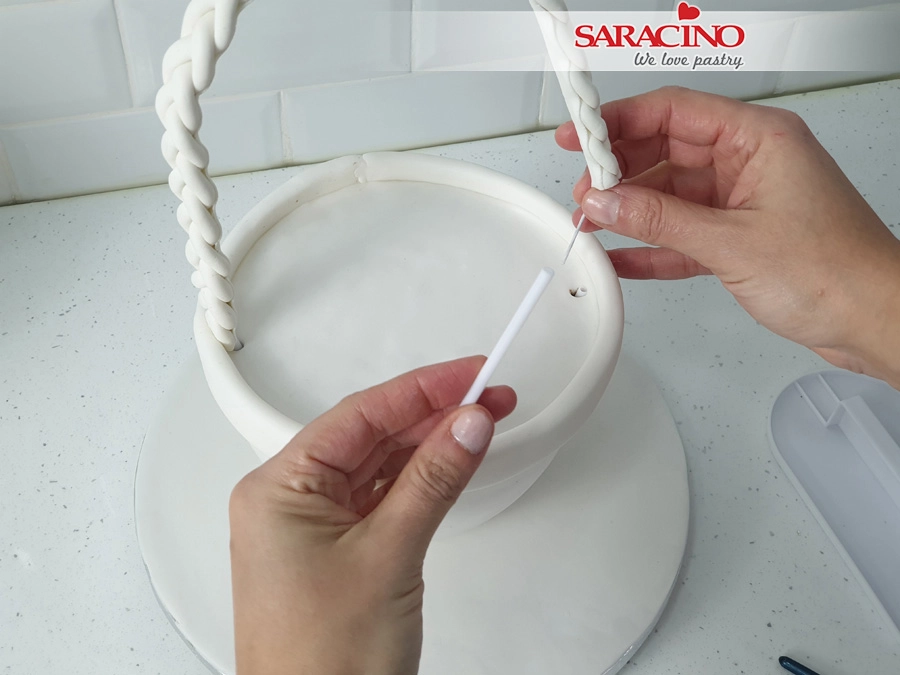
Insert two plastic straws into the top of the cake and slide the wires into each.
Step 15

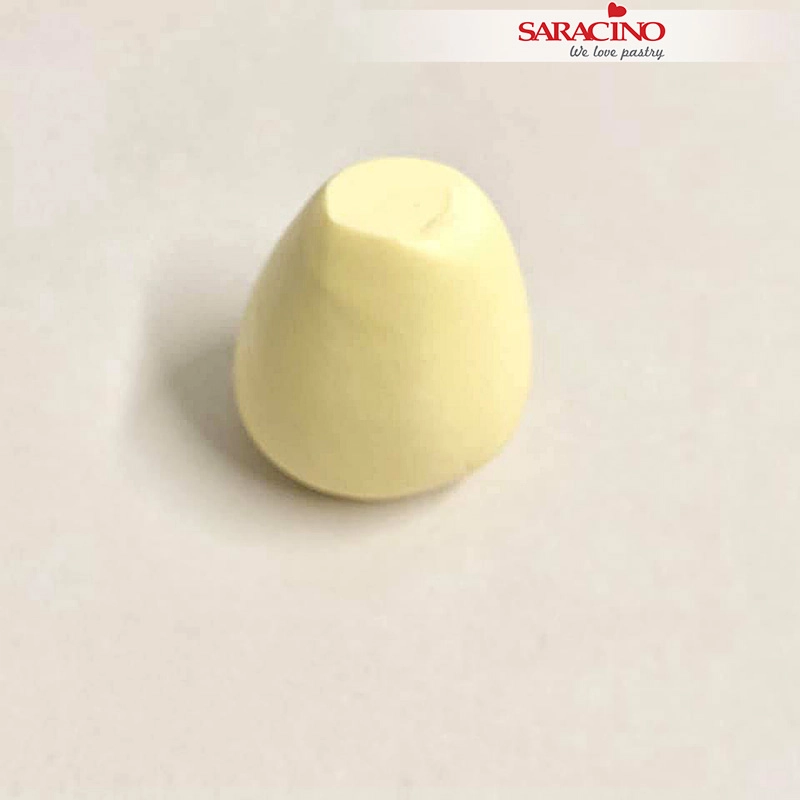
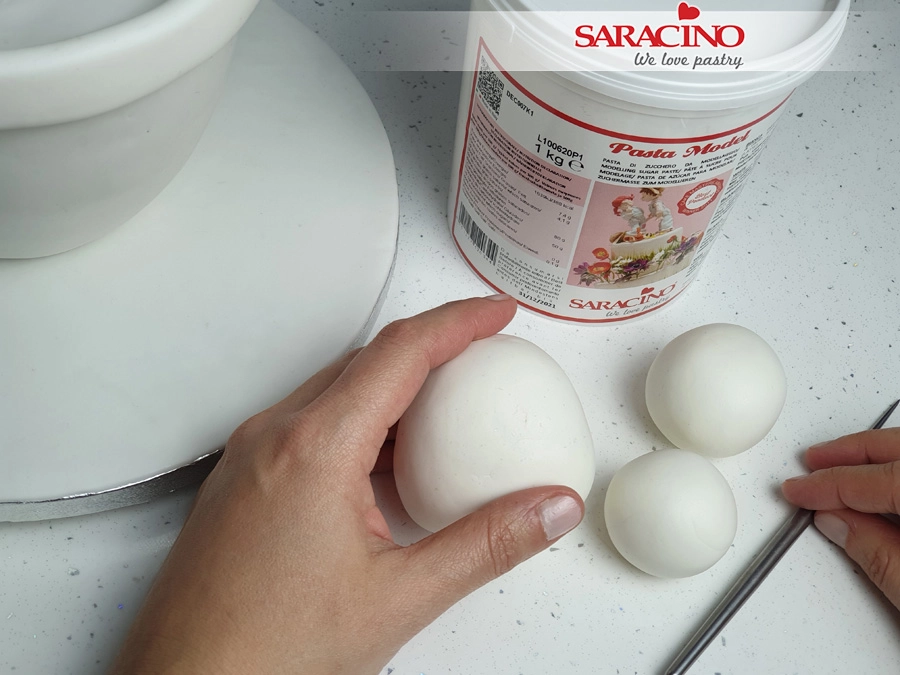
Using your Pasta Model roll a pear shape for the rabbit’s head.
Step 16

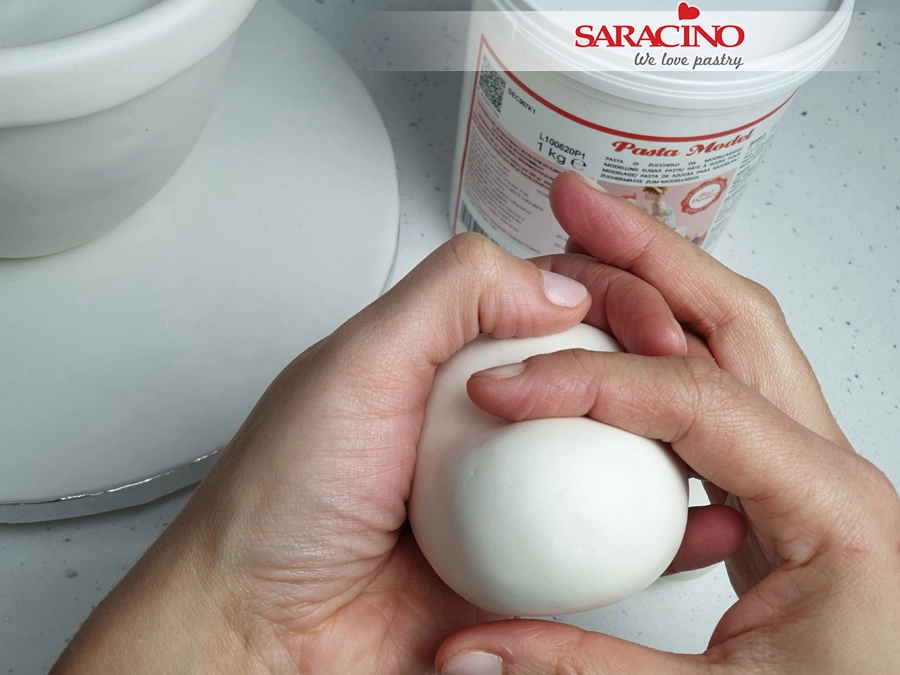
Using your finger press a dent into the top of the face to form the eye area.
Step 17

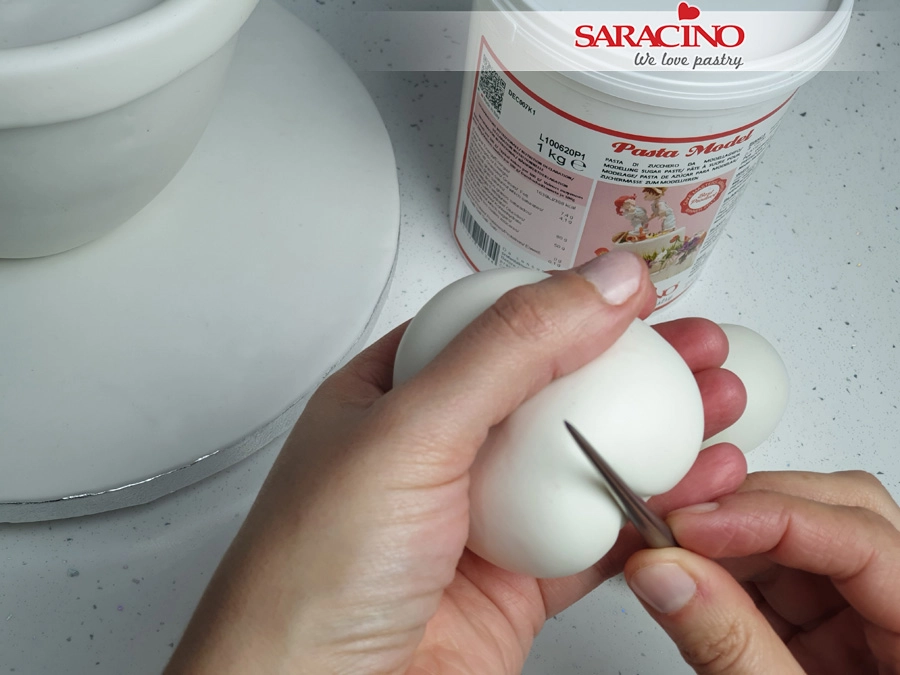
Using a modelling tool form a groove for the chin.
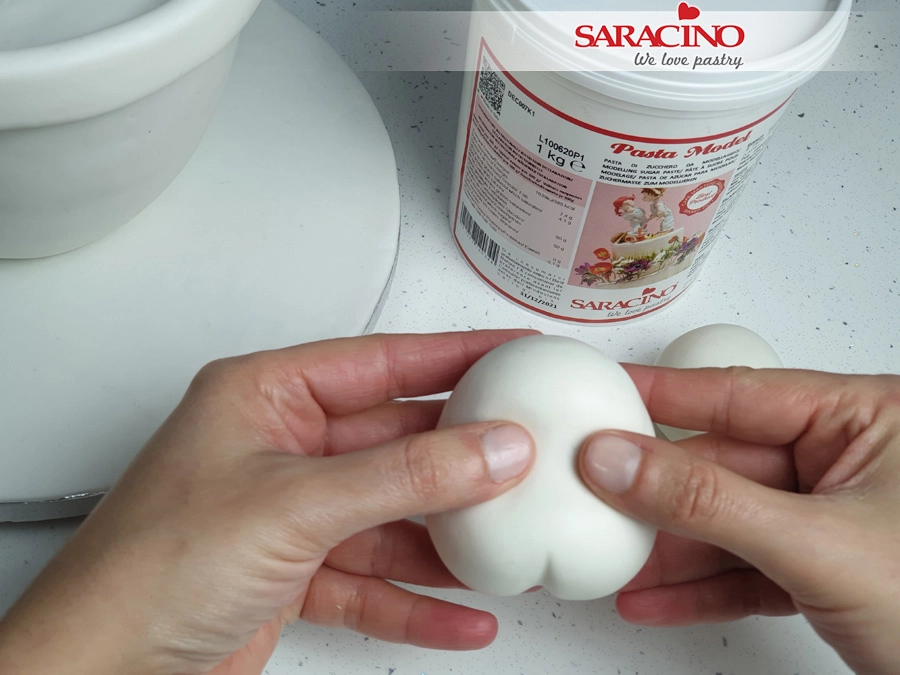
Step 18

Use your thumbs to press gently to form the eye sockets.
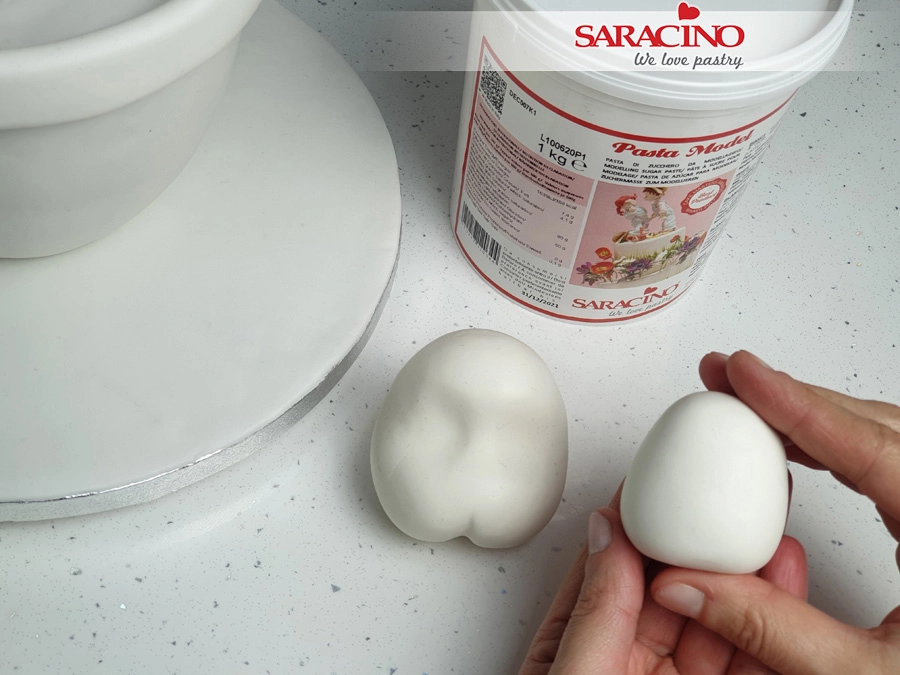
 

Step 19

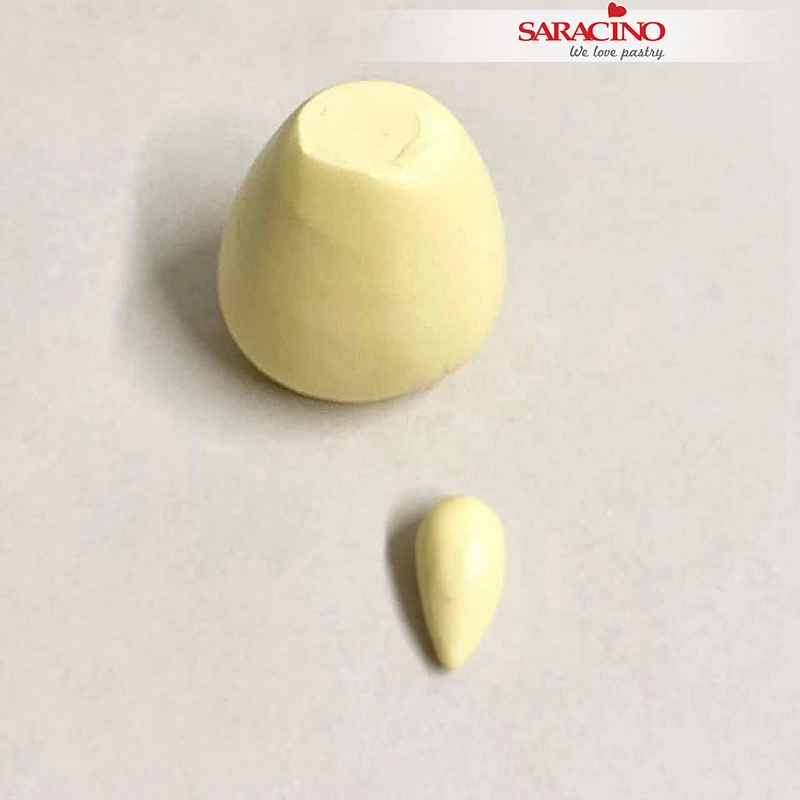
For the body roll a smaller pear shape and flatten the bottom larger end.
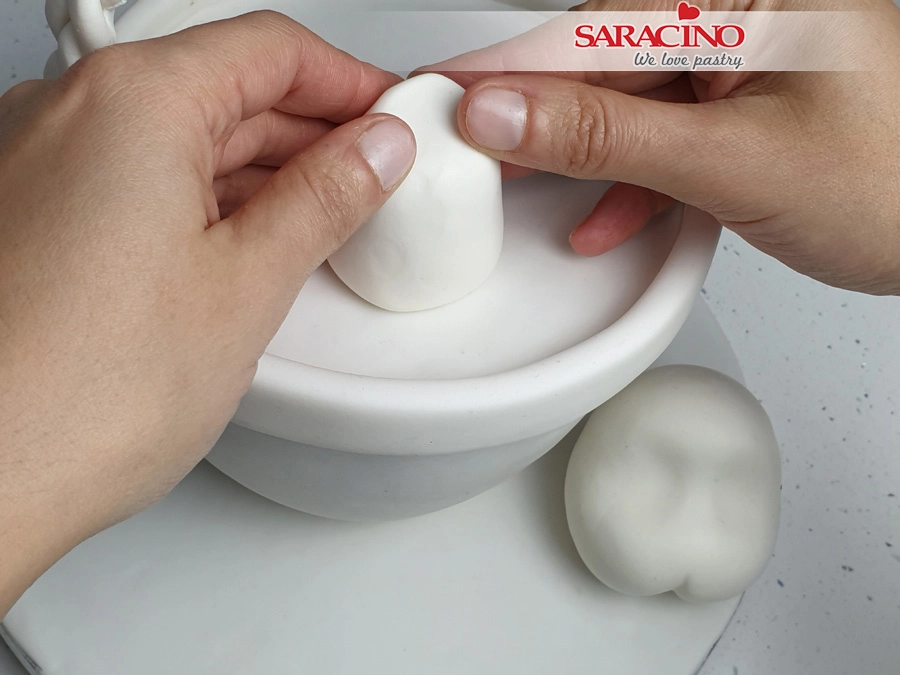
 

Step 20

Fix onto the top of the basket.
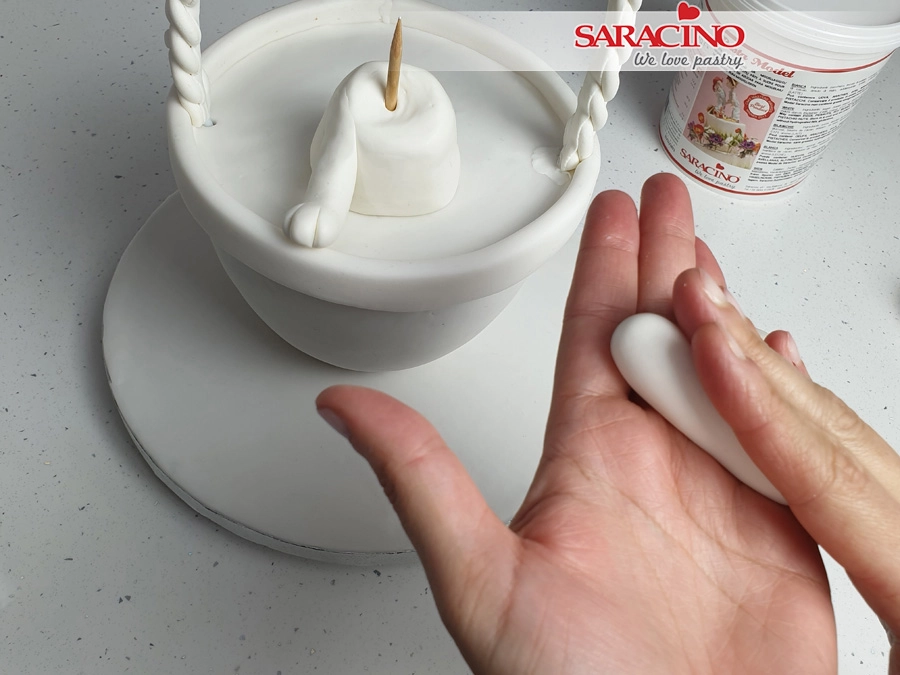
Step 21

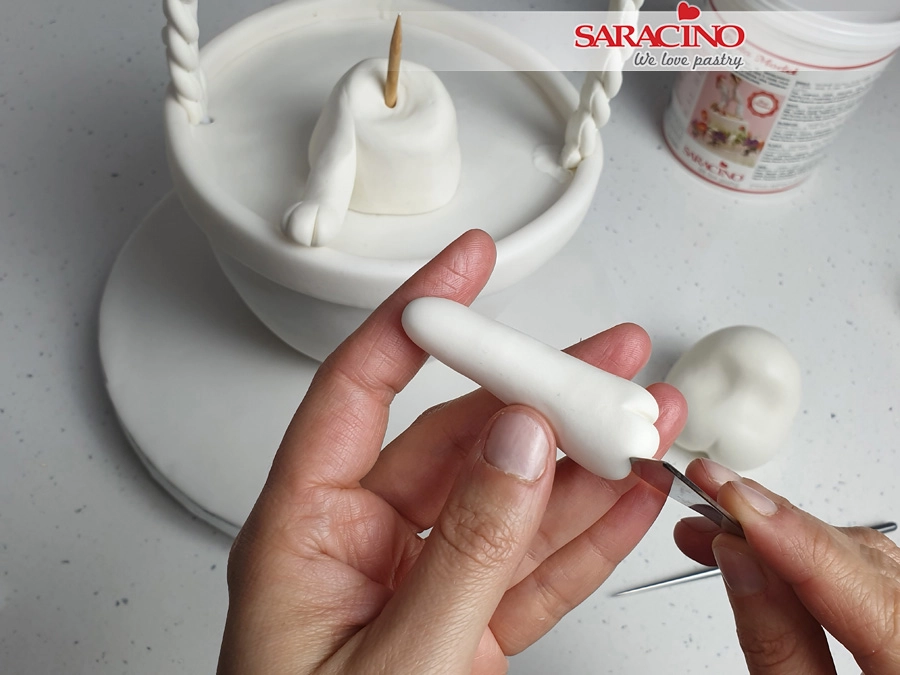
Use your fingers to form a dent in the top of the body ready for the head. Insert a wooden skewer through the body leaving the top exposed to fix the head. Roll out two equal pieces of Pasta Model to form sausage shapes for the arms. 
Step 22

Use a sharp knife to form the paws.
Step 23

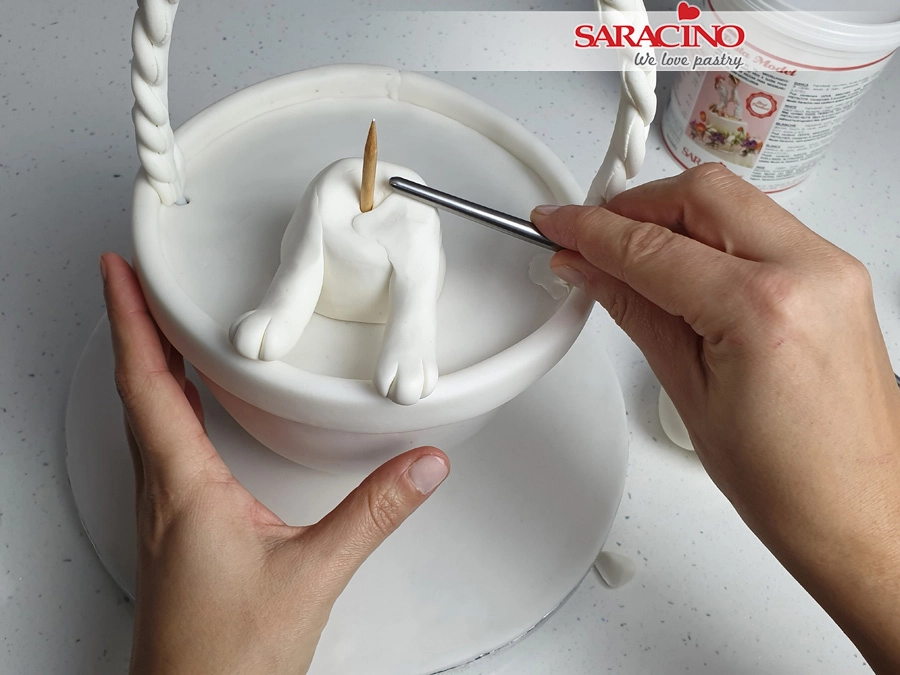
Fix each arm to the body as shown. Blend to smooth out the joints.
Step 24

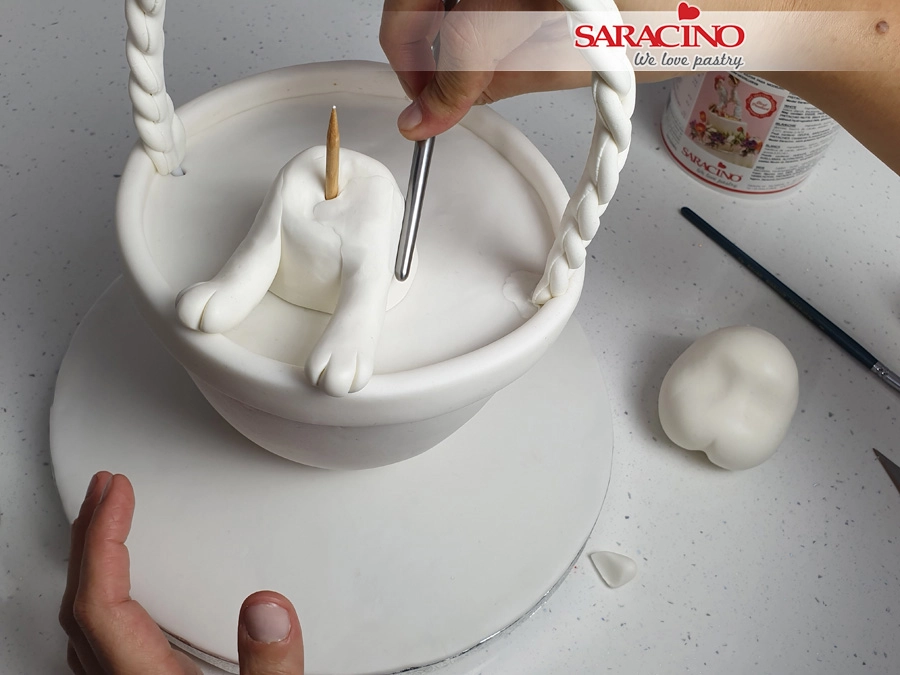
Blend the back of the arms also.
 

Step 25

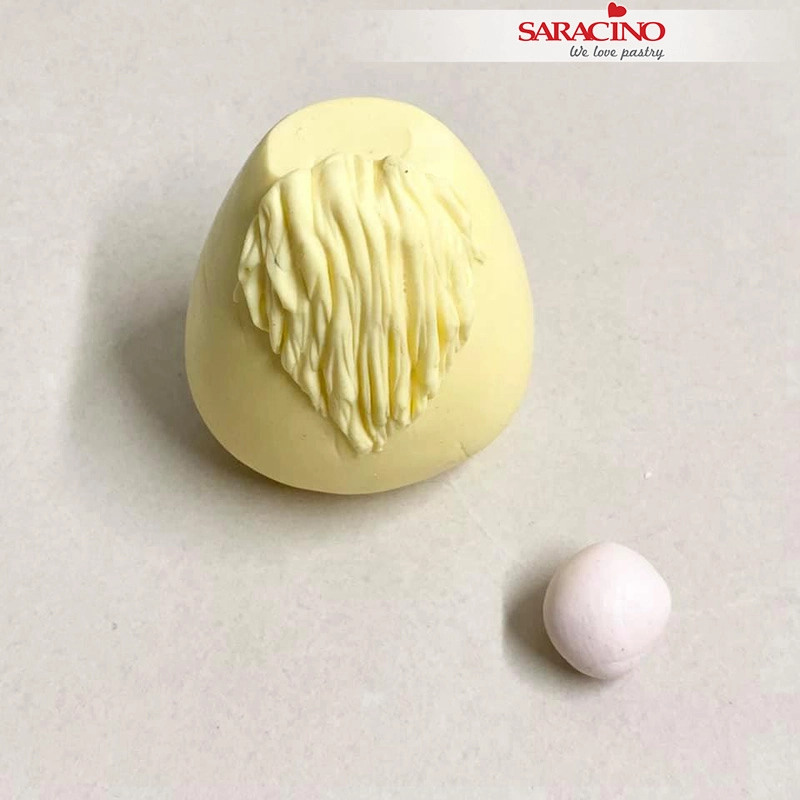
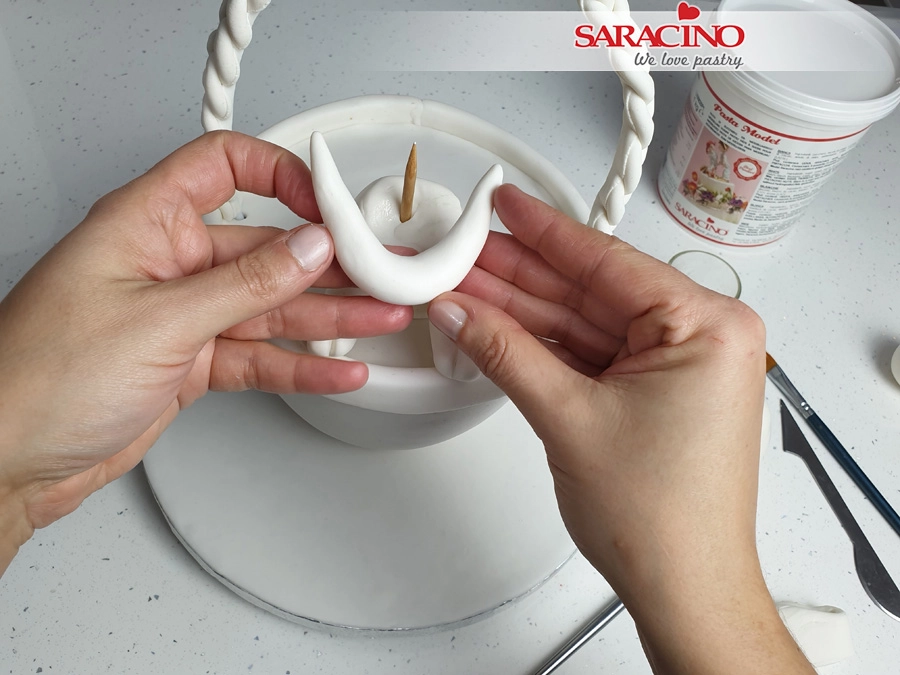
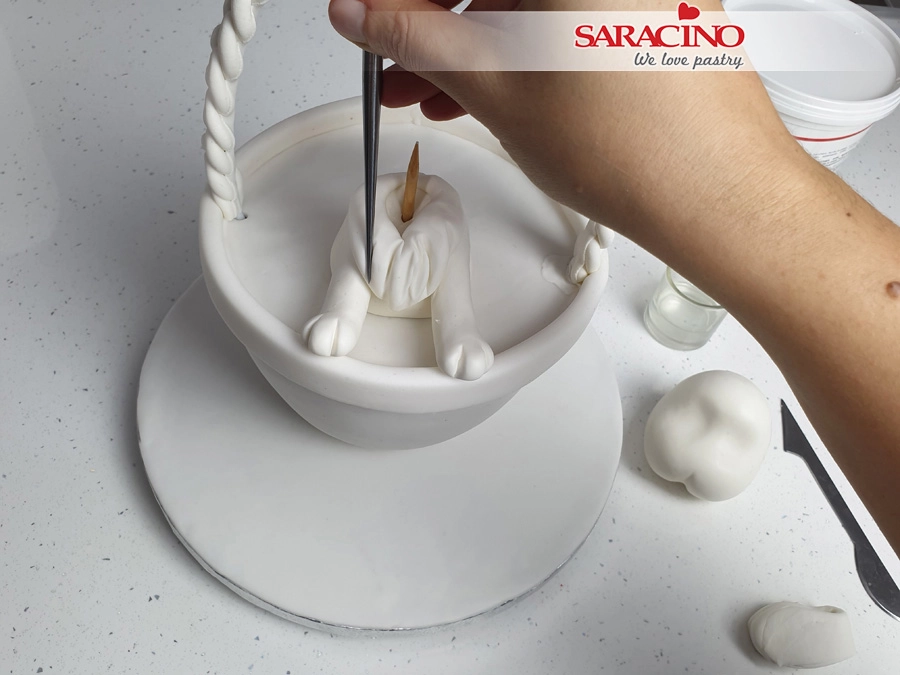
For the fluffy chest roll a sausage shape of Pasta Model and roll each end to a point. 
 

Step 26

Fix to the chest area. Using a modelling tool add texture to give the hair appearance. 
Step 27

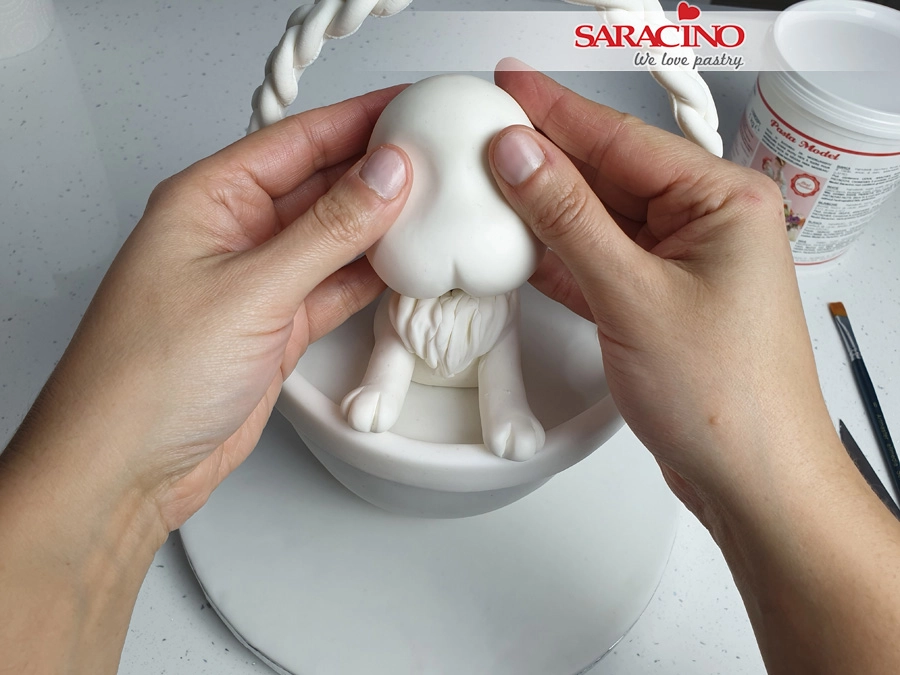
Fix the head onto the skewer in the body.
Step 28

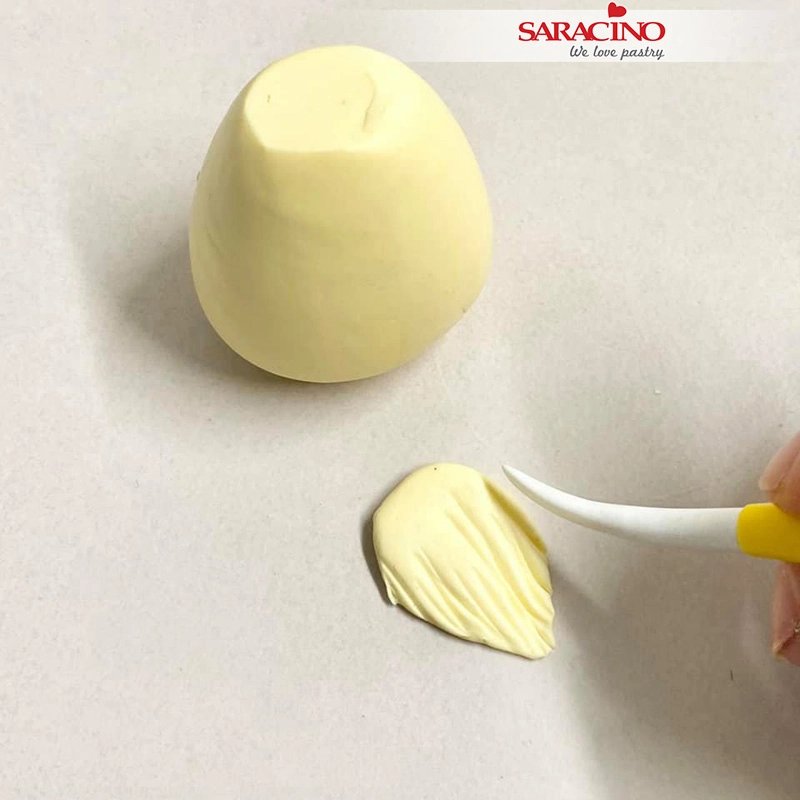
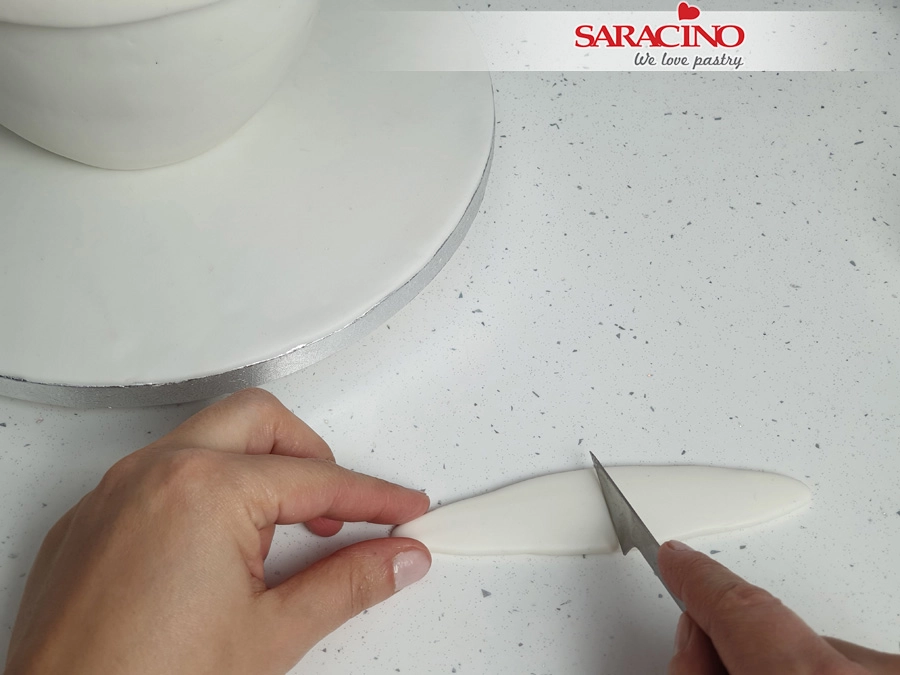
For the ears roll a long sausage shape of Pasta Model and flatten. Cut in half.
Step 29

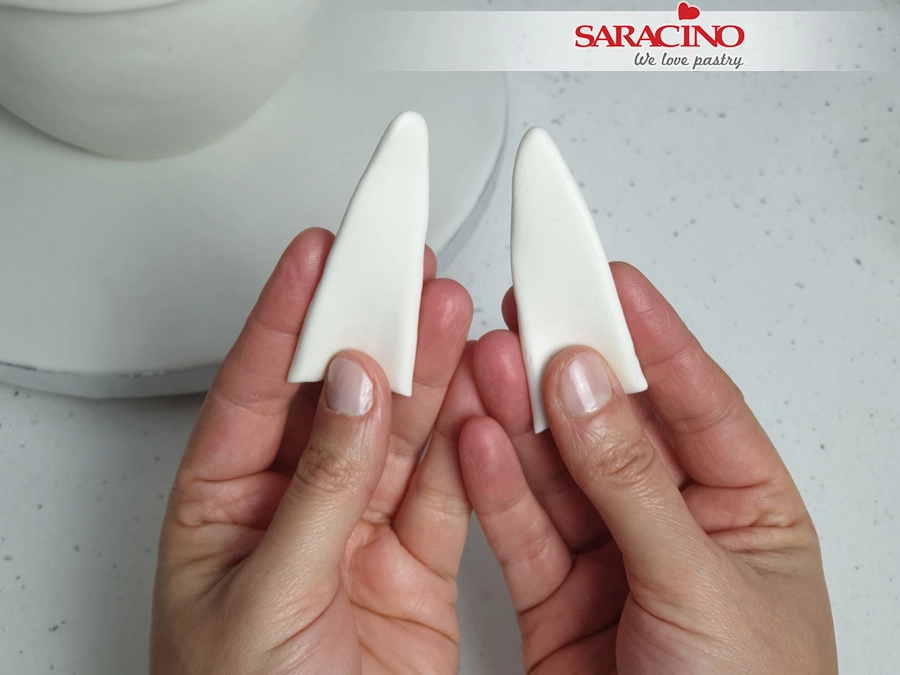
Pinch with your thumbs to give shape.
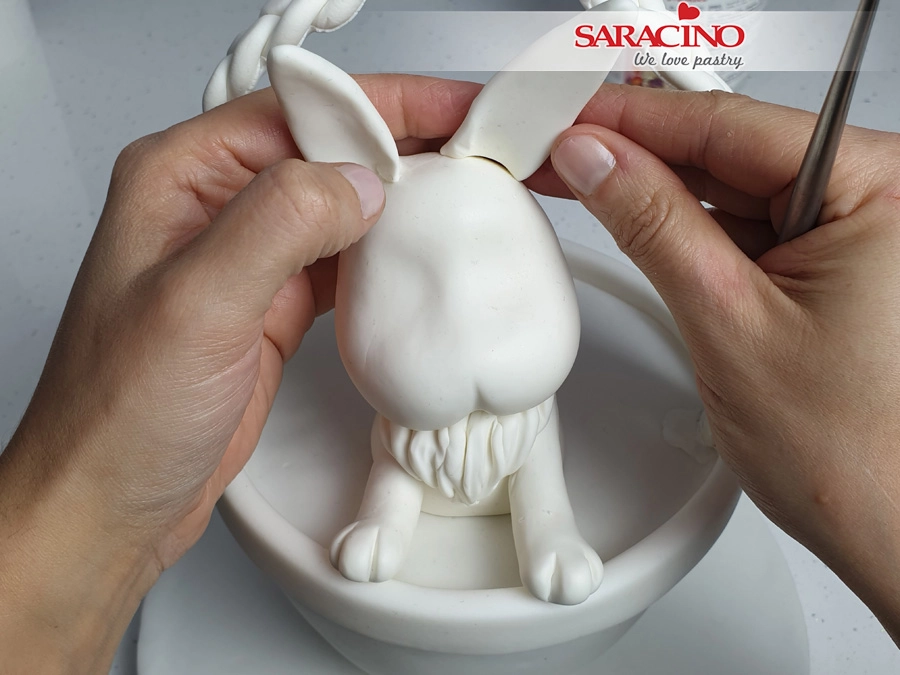
Step 30

Fix the ears to the top of the head using a little water if required.
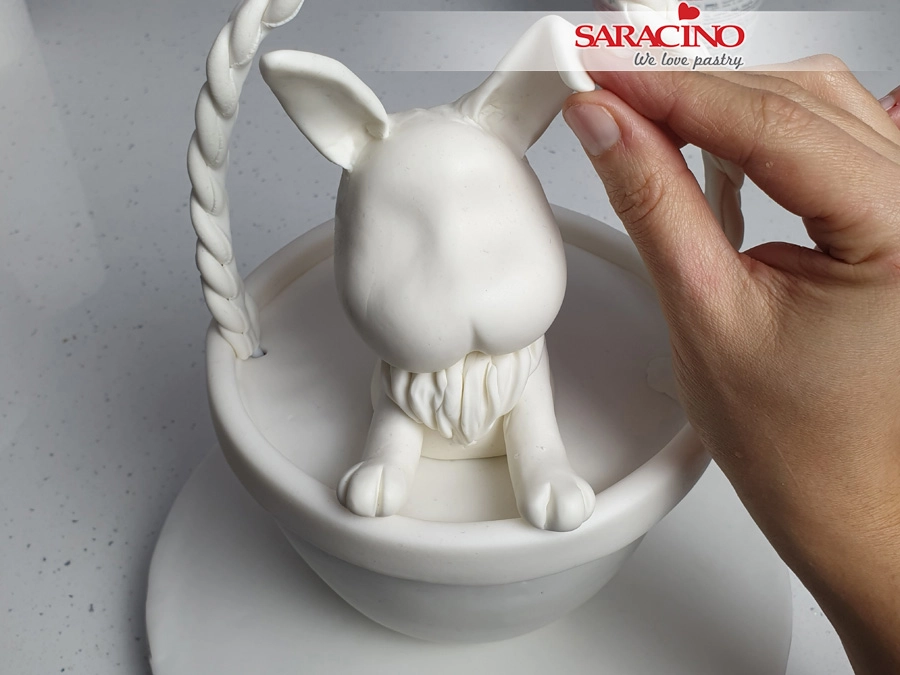
Step 31

Add a little character to the rabbit by bending an ear.
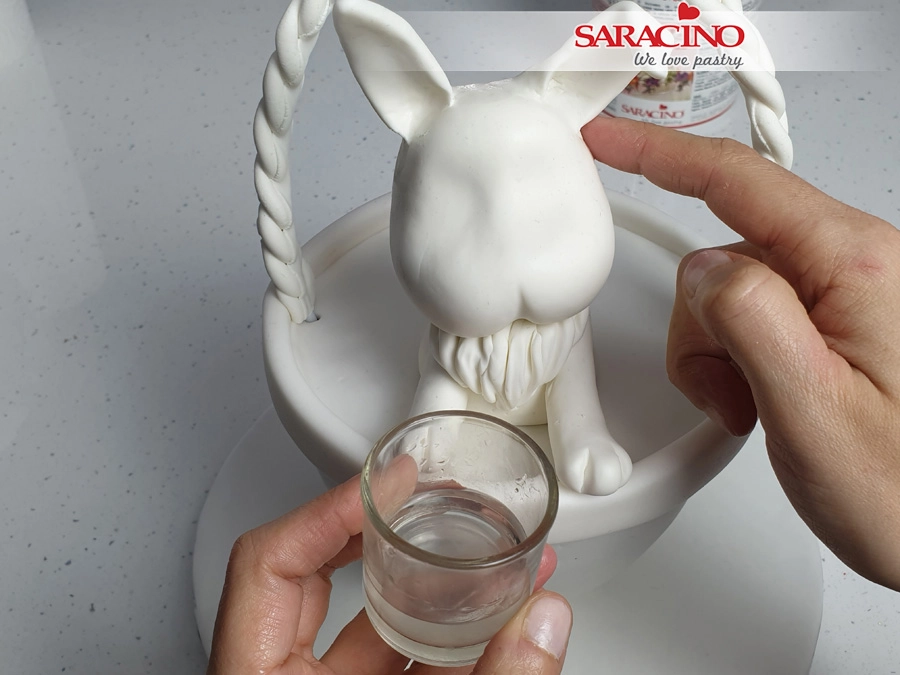
Step 32

Using a little water blend the ears to the head.
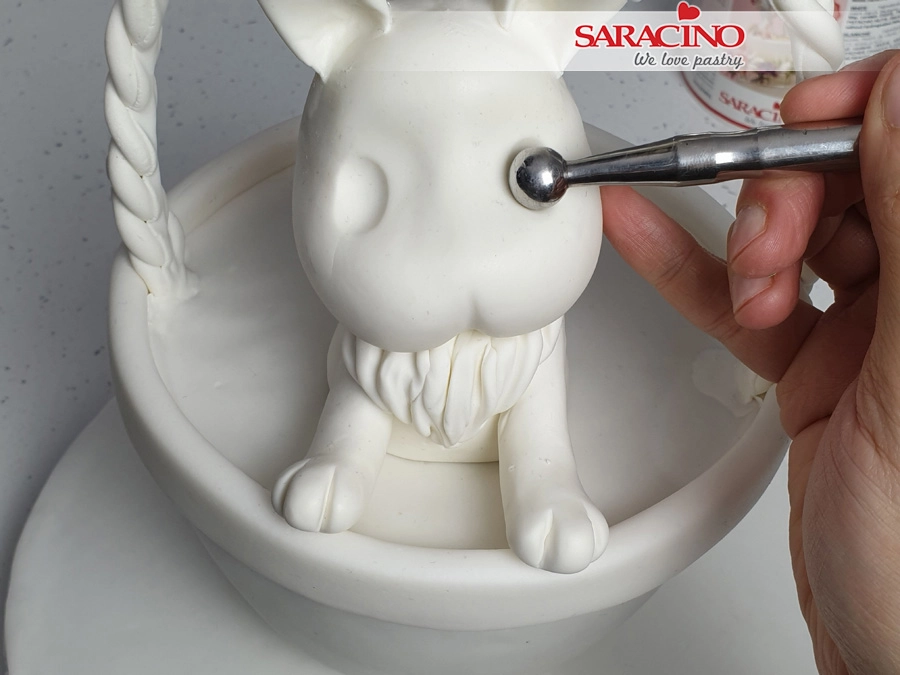
 

Step 33

Use a ball tool to form eye sockets.
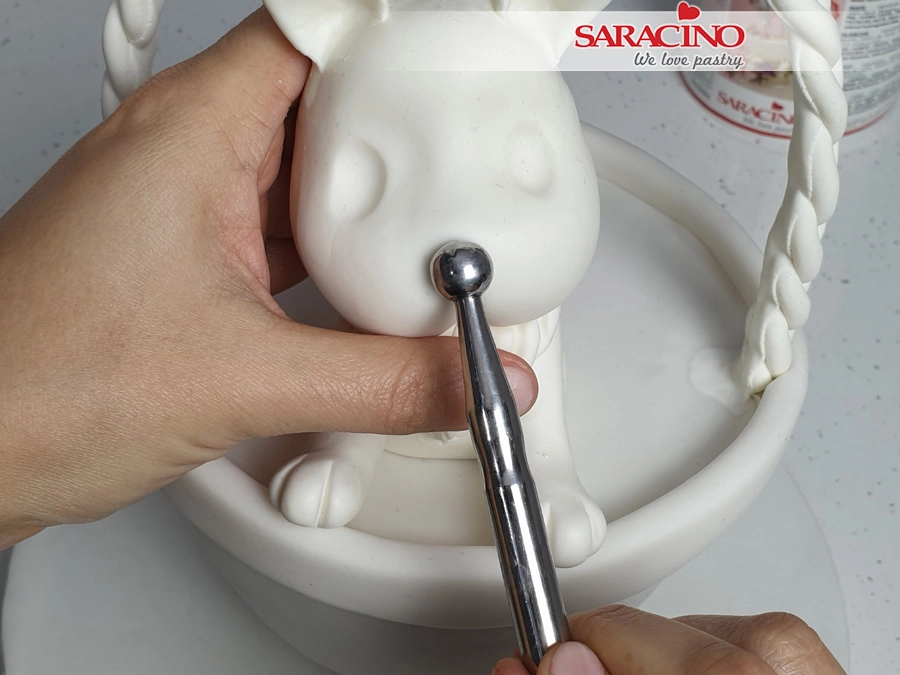
Step 34

Using a ball tool form a dent for the nose.
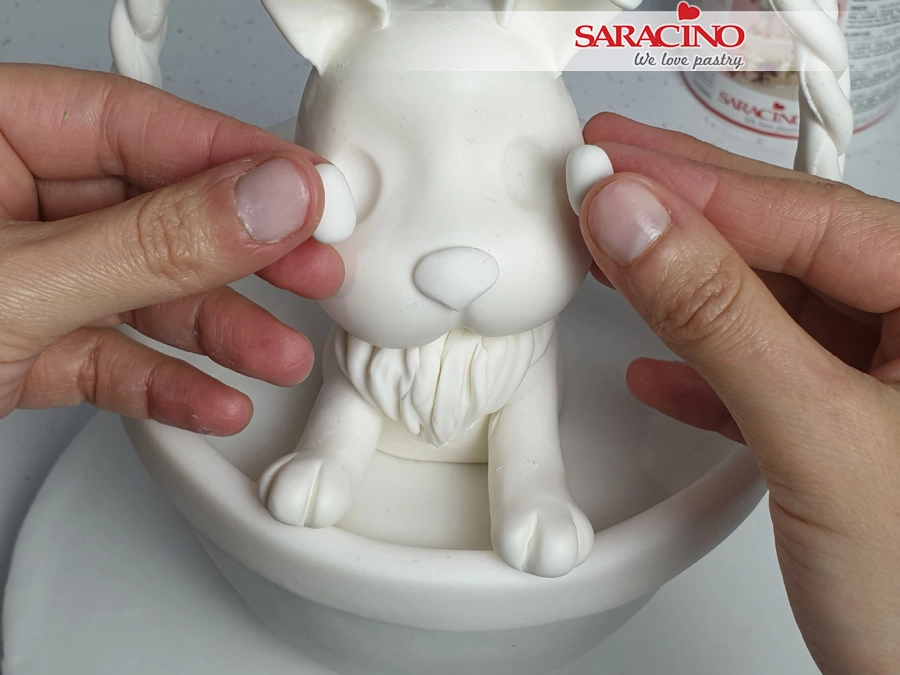
Step 35

Roll three balls of Pasta Model. Two round for the eyes. Fix the eyes into the sockets. Shape the third to form the nose.
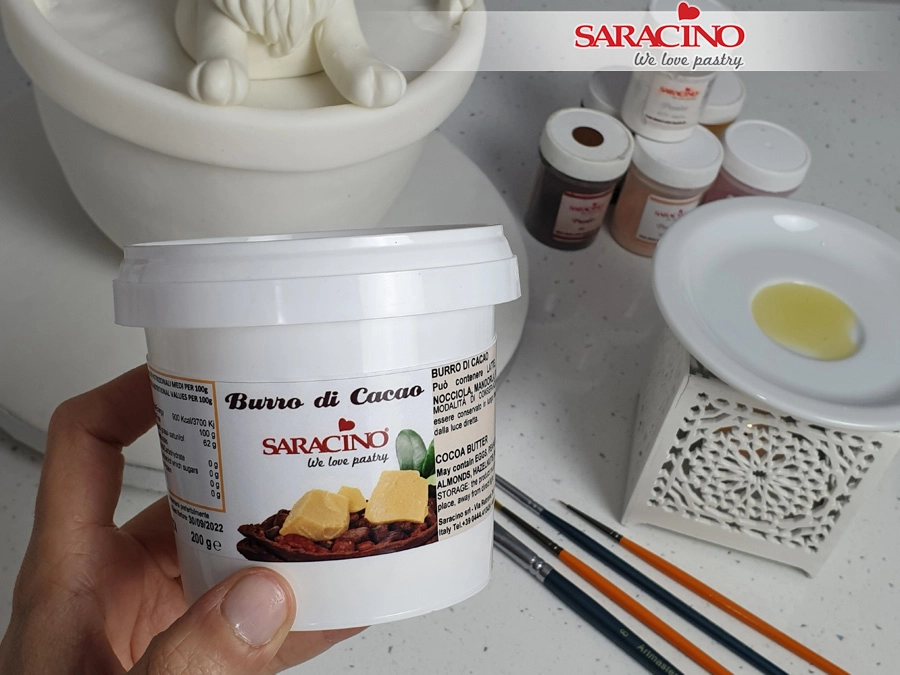
Step 36

On a plate over a candle melt a little of your cocoa butter.
Step 37

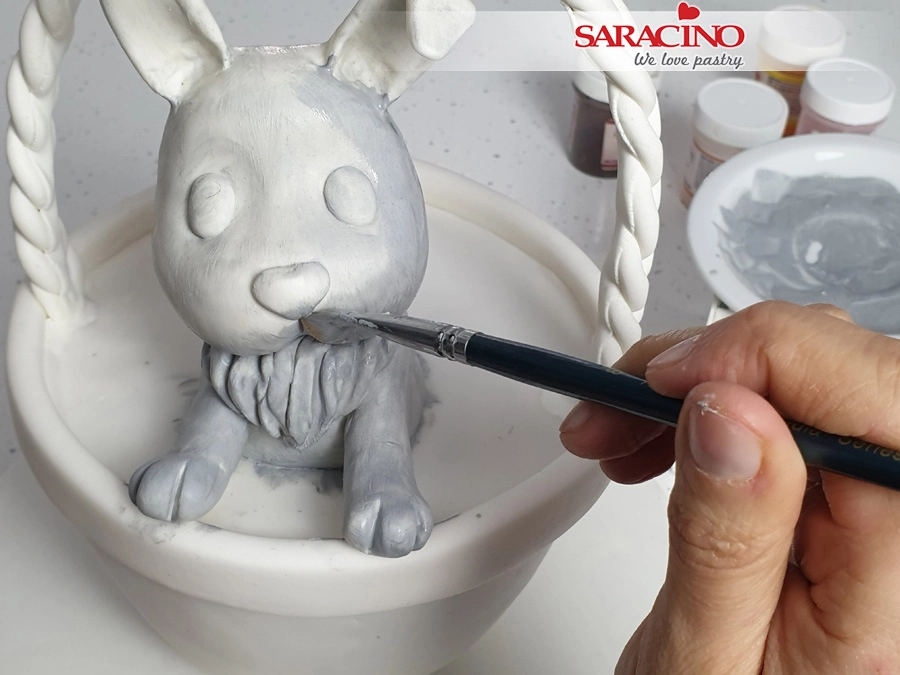
Add a little black powder to the cocoa butter and mix to make the paint. You can add a little white powder if your shade is too dark.
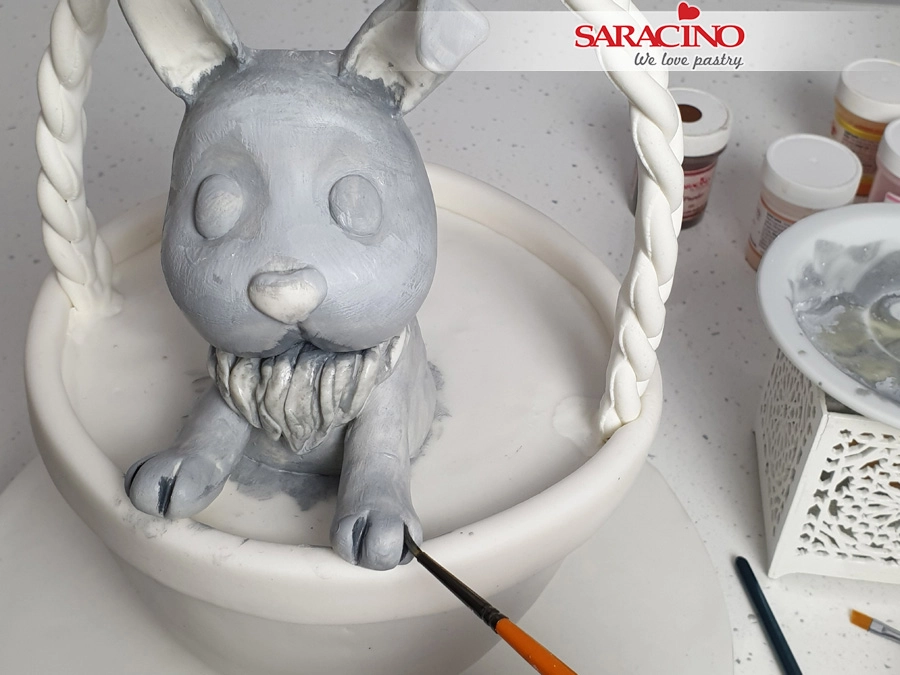
Step 38

Paint the rabbit grey as shown. Leave the insides of the ears white. Using a fine brush paint between the paws with a darker grey paint.
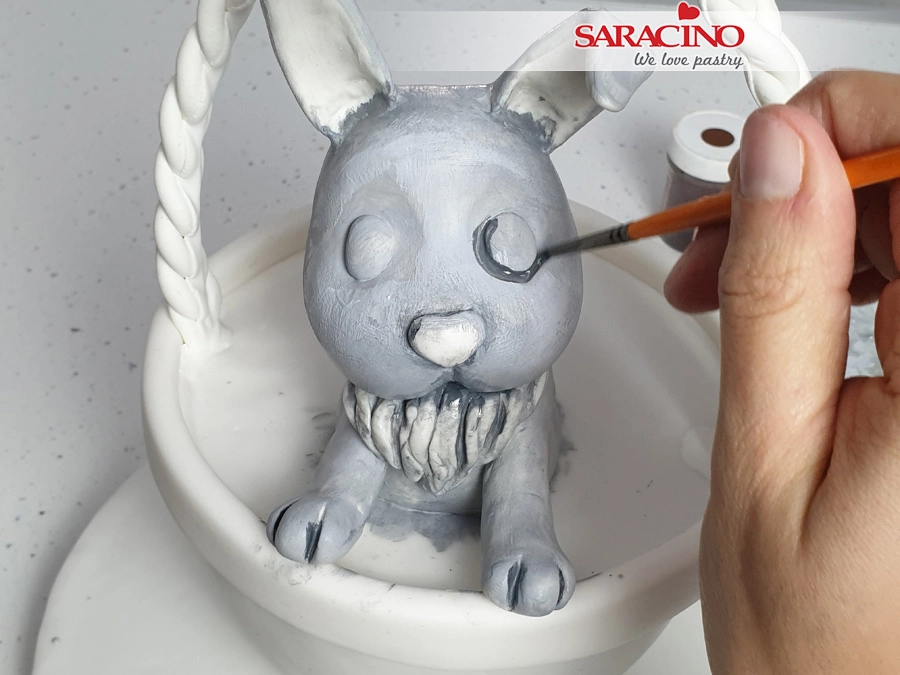
 

Step 39

Paint the darker grey around each eye to give shading. 
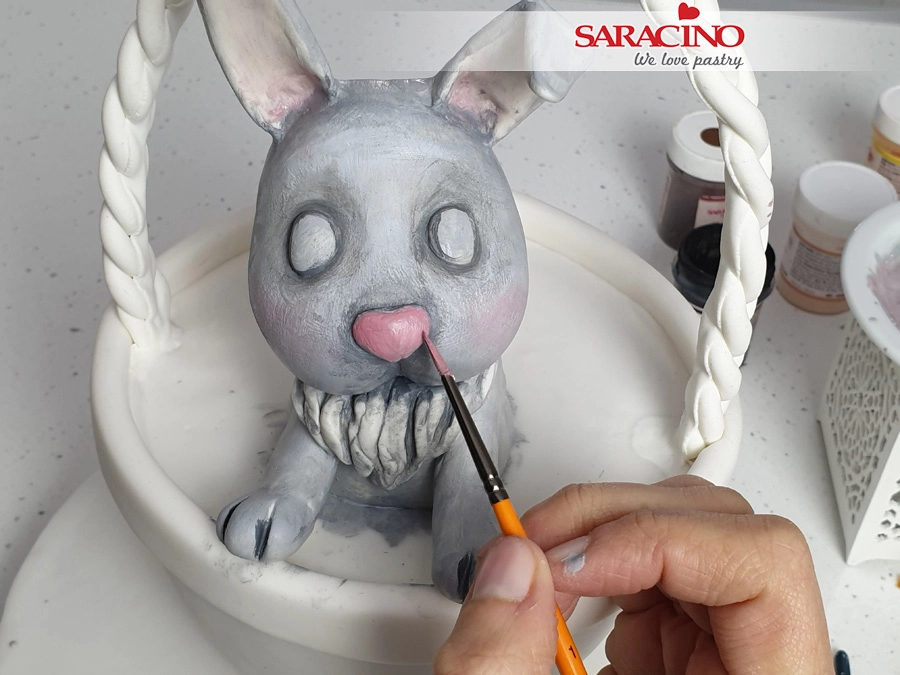
Step 40

Paint the nose with your pink powder colour mixed with cocoa butter. Using pink dust and a soft brush lightly dust the cheeks and inside the ears.
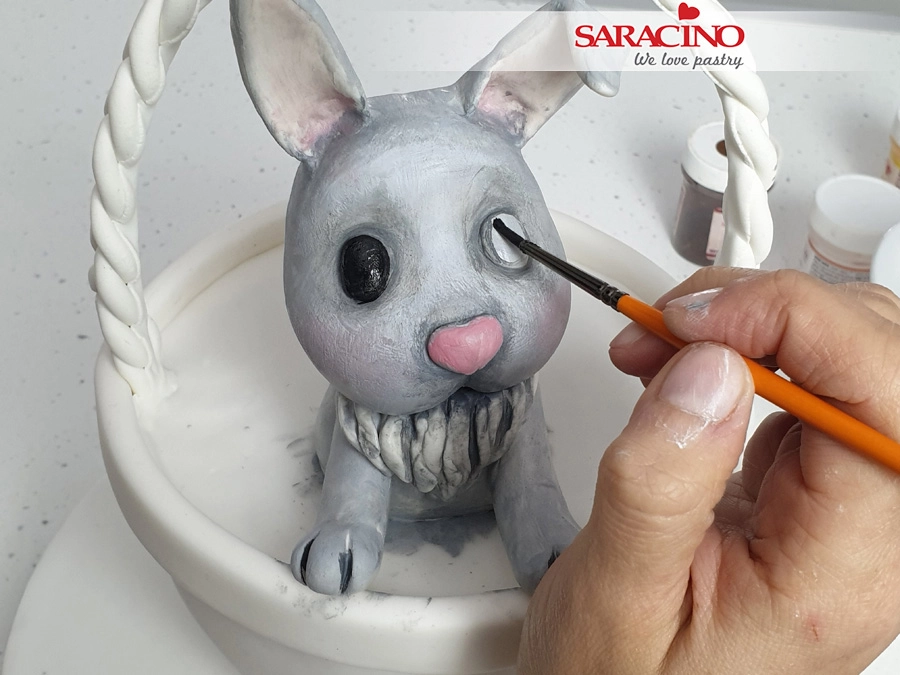
Step 41

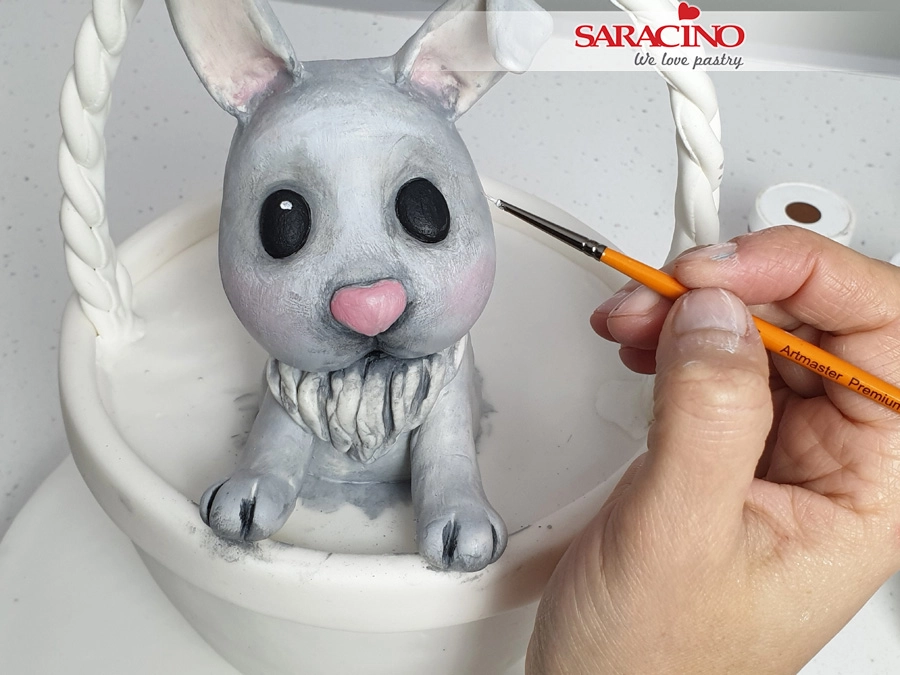
Mix black powder with cocoa butter and paint the eyes.
Step 42

Use a little white paint to add a small dot to each eye.
Step 43

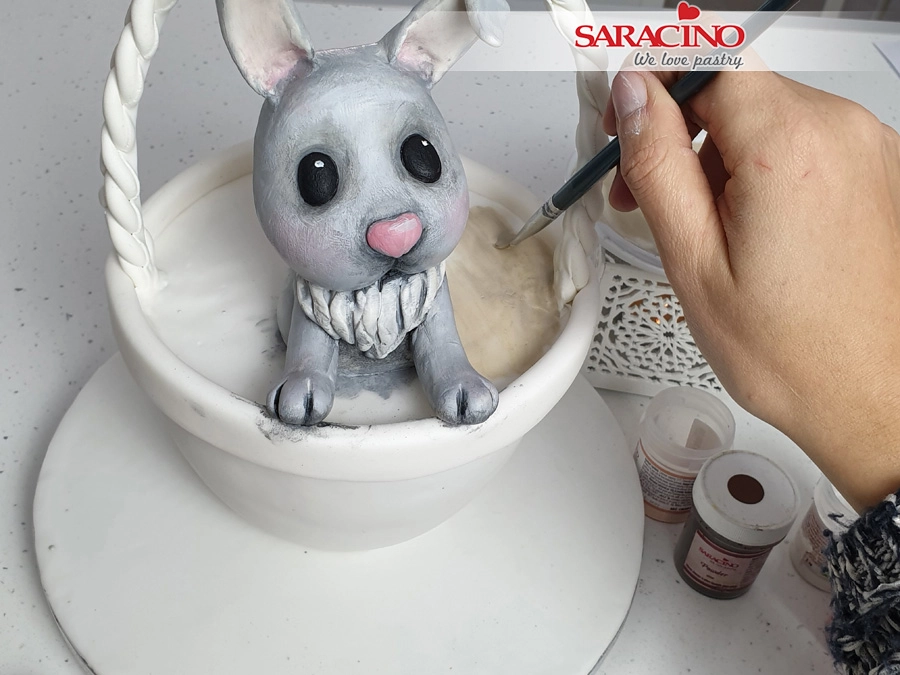
Using your brown and skin tone powder mix with the cocoa butter and paint the basket as shown.
Step 44

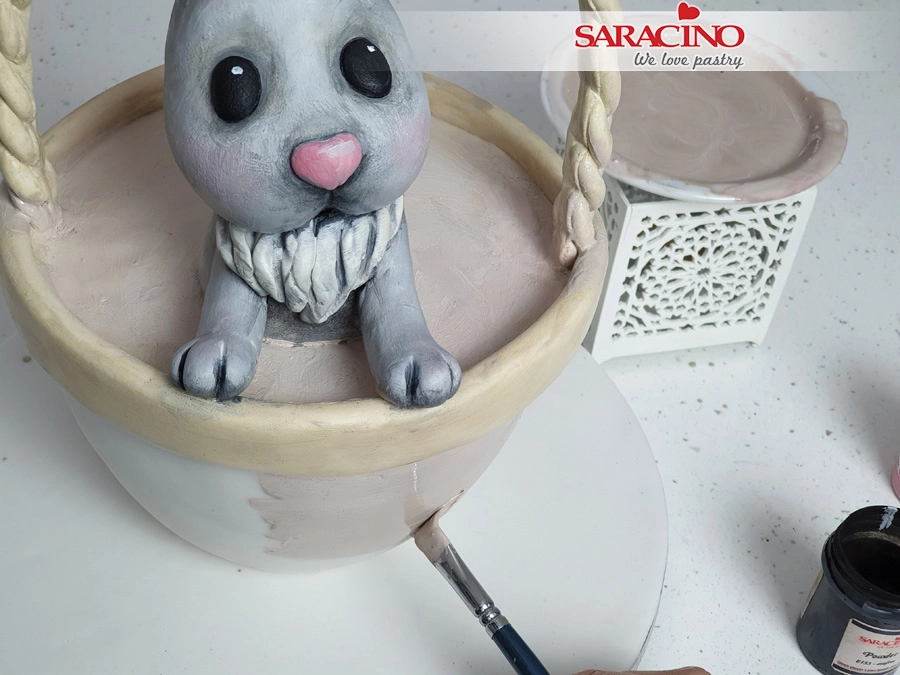
Continue painting around the outside of the basket.
Step 45

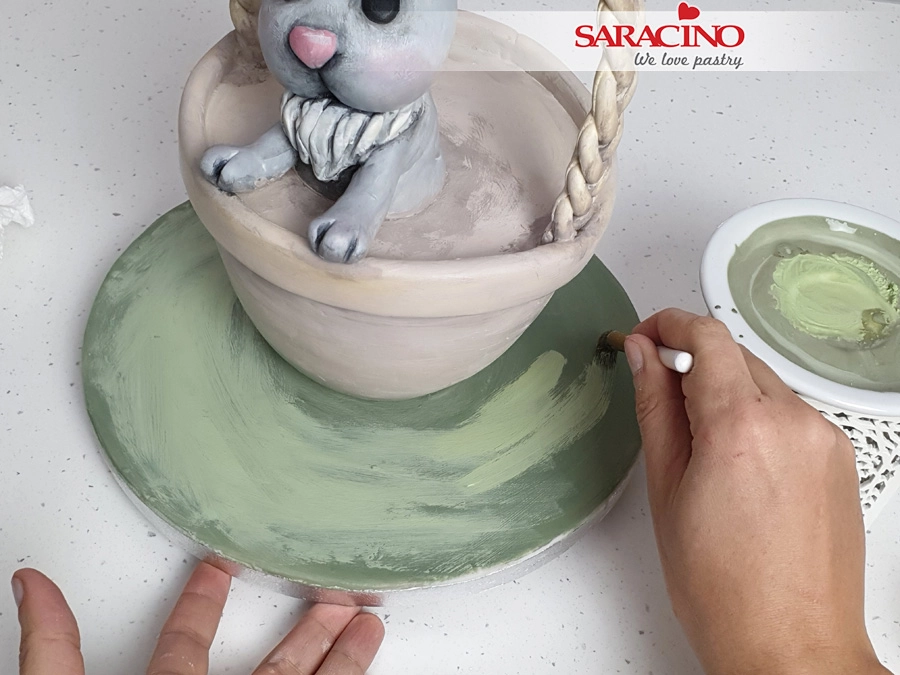
Using green and yellow powder mix with cocoa butter and apply to the base.
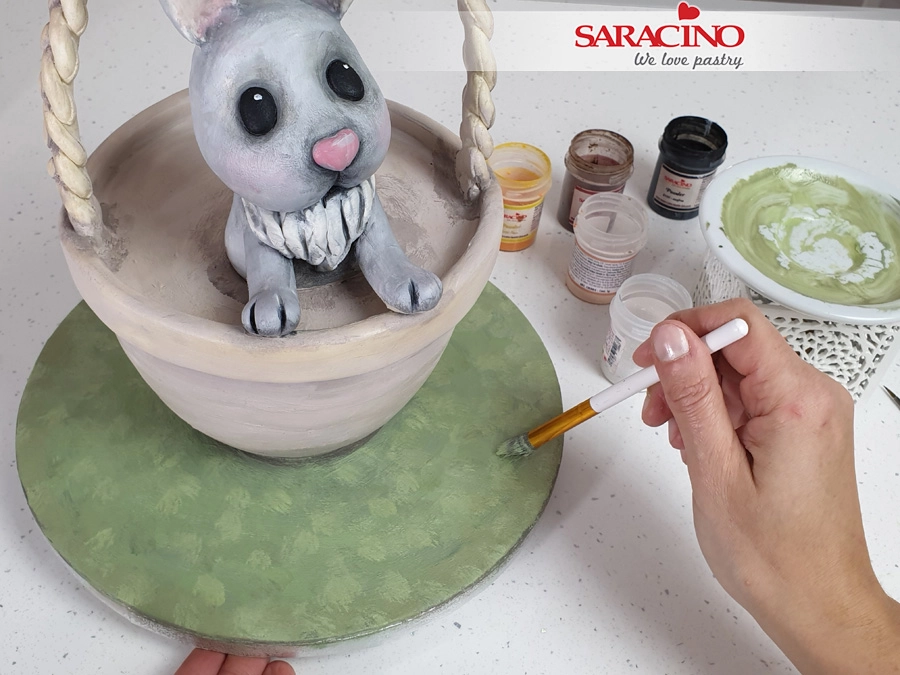
Step 46

Dab using a wide brush to blend and give the textured appearance.
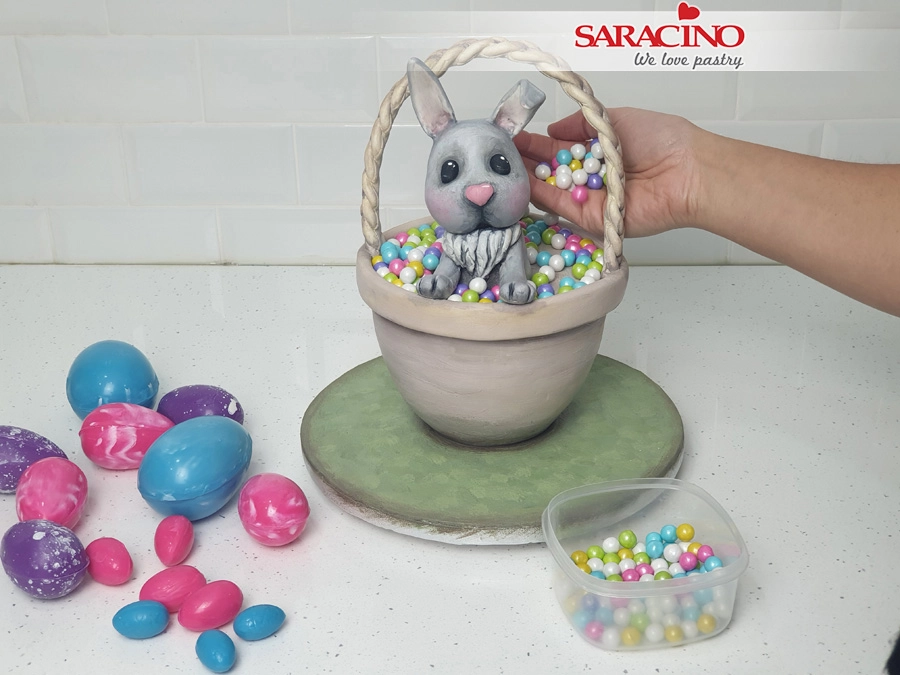
Step 47

Using brightly coloured chocolate balls or eggs fill the basket.
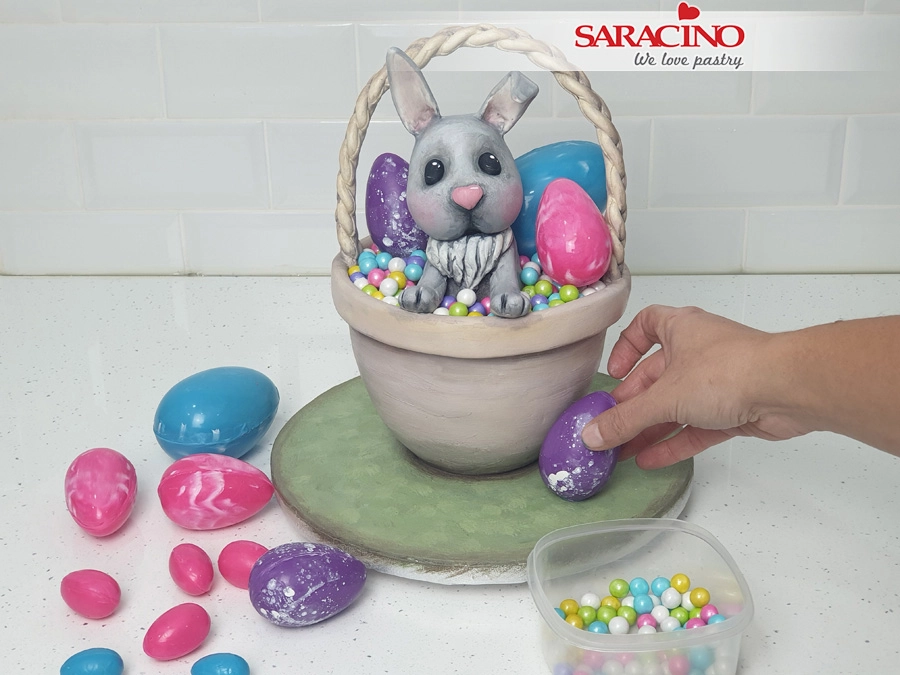
Step 48

Decorate the board as you would like.

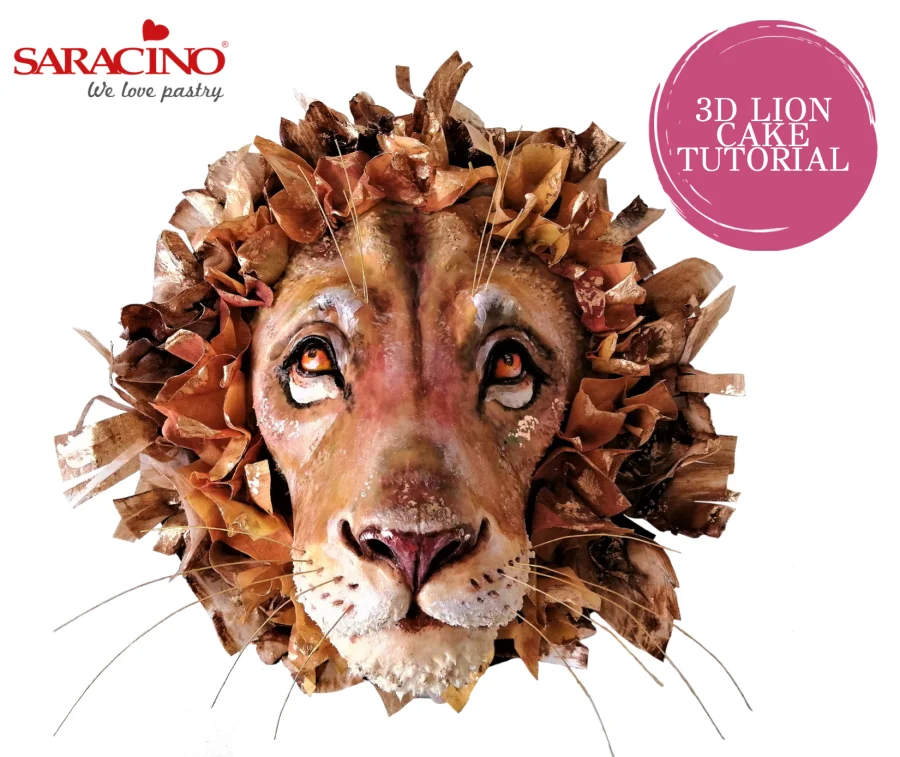
3D LION CAKE TUTORIAL

3D LION CAKE TUTORIAL

Skill level: ADVANCED

YOU WILL NEED:

EDIBLES:

  • Saracino Pasta Model – white, skin tone, yellow, red, brown
  • Edible powder paints – black, orange, yellow, pink, white, dark blue, green, brown, gold
  • Saracino Pasta Scultura
  • Wafer paper
  • Edible glue
  • Confection glaze 
  • Clear alcohol

EQUIPMENT:

  • Silicone pad
  • Roller
  • Brushes
  • Modelling tools
  • Scissors
  • Spatulas
  • Sponge
  • Gold wires

STEP 1

Bake and layer cake flavours and filling of your choice.

Step 2

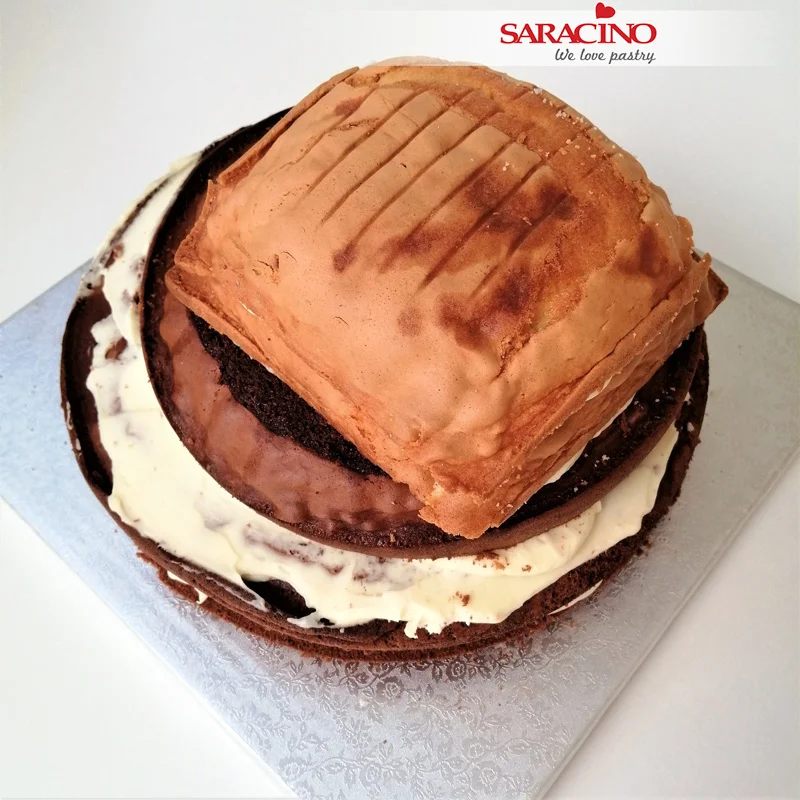
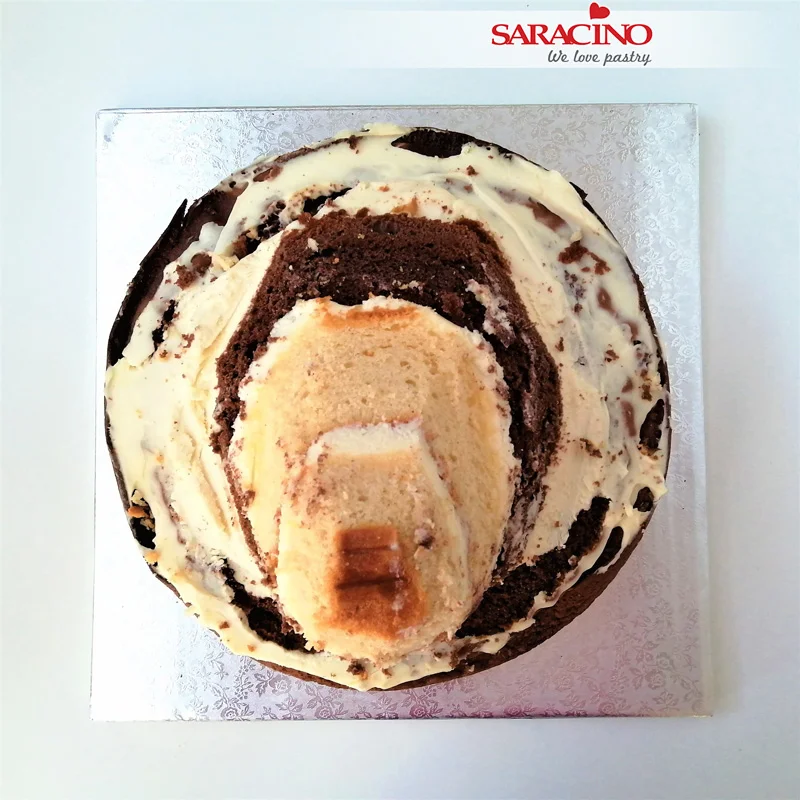
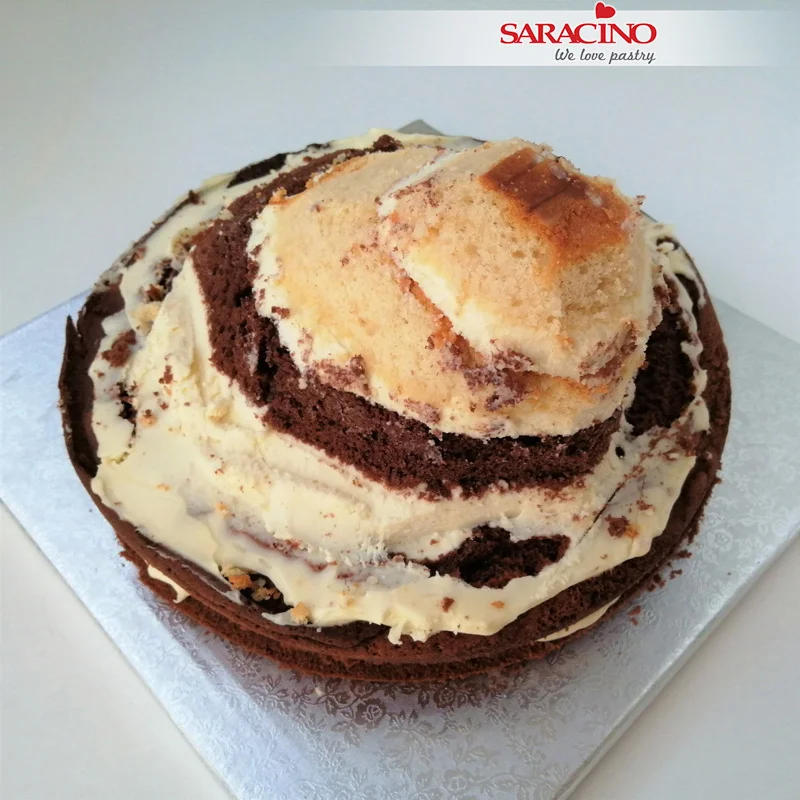
Cut the filled cake to the desired shape. If you cut too much sponge off don’t worry. You can always fill any gaps using pieces of the off-cuts.

Step 3

Your carved cake should look similar to the picture.

Step 4

Cover the cake with ganache

Step 5

Smooth and shape the eye sockets and snout with the ganache.

Step 6

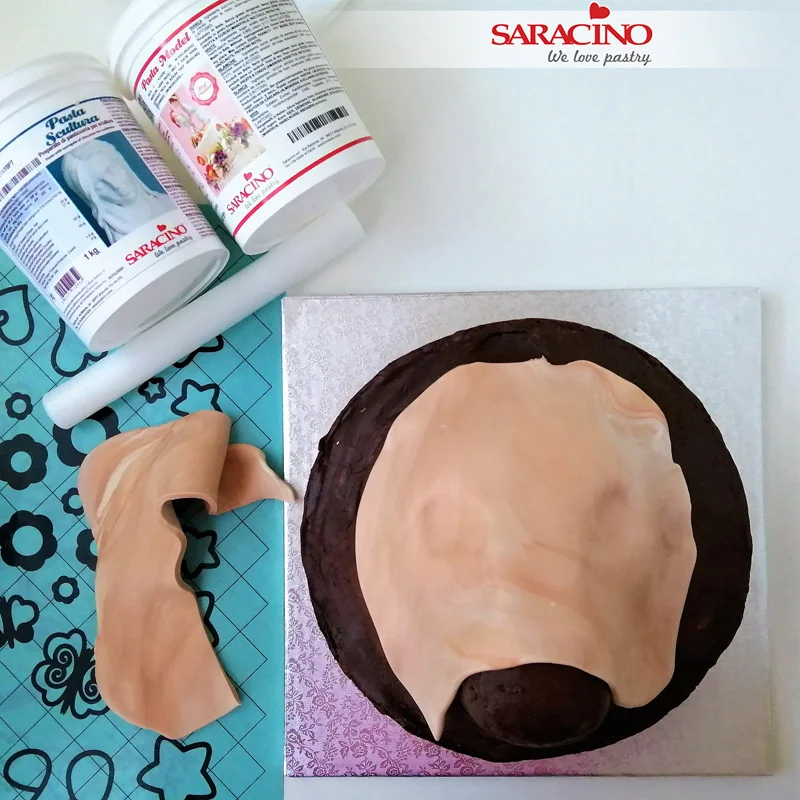
Mix modelling paste with Pasta Scultura. 1/3 Pasta Scultura to 2/3 combination of white, skin tone, a little brown, red and yellow modelling paste. It is not necessary to mix the paste to a solid colour, you can leave a fine marbling. Roll the paste and cover the cake up to the chin.

Step 7

Using the paste shape the snout and the semi circular eye lid arches using your fingers.

Step 8

Cover the chin using white modelling paste and smooth the joints. Pinch the nose to form a V shape over the chin area.

Step 9

Use the modelling tools to shape the cheeks and chin.

Step 10

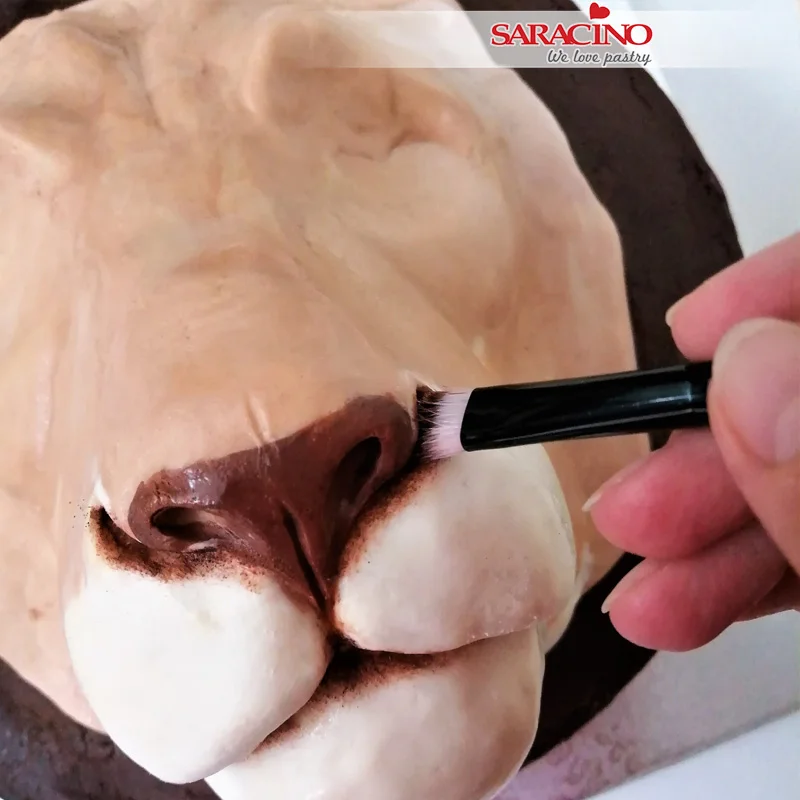
Using modelling tool form the holes for the nose. Paint the snout with brown powder paint that has been mixed with the clear alcohol.

Step 11

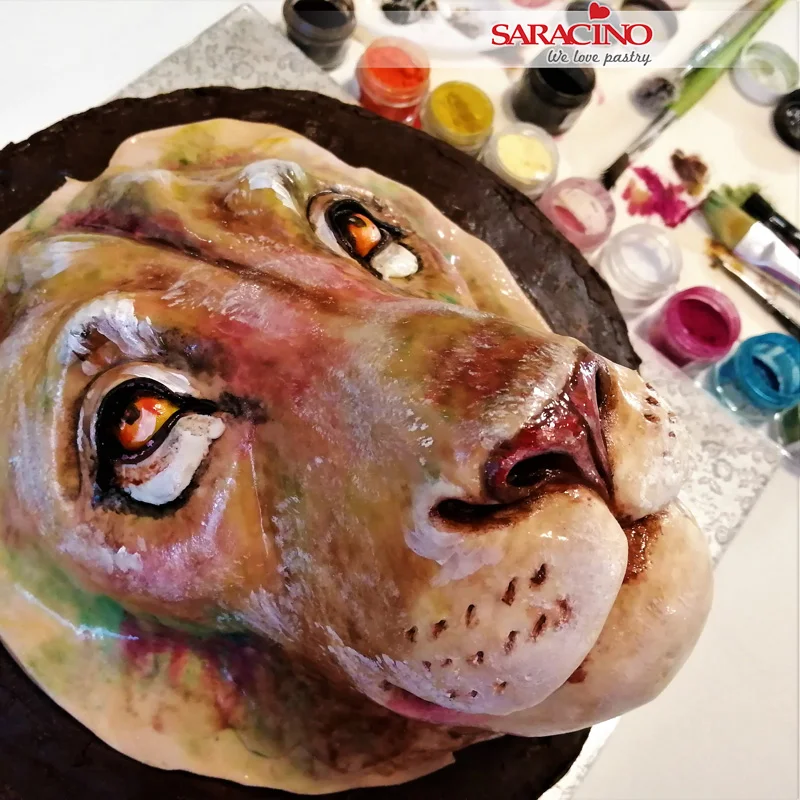
Mix the flesh powder colour with alcohol and start painting the cake. Start with the brightest colour. All of the colours should be mixed with the clear alcohol.
Step 12

Gradually add a little pink, blue and green dusts. Finally use brown for places where there is shadow (eye sockets, wrinkle in the middle of the forehead, etc.)

Step 13

Now for the eyes. Shape a little yellow paste and attach into the eye socket. Colour with a little orange paint. Roll a crescent shape out of white paste and attach beneath the eye. Using the same paste you used for the face shape the eyelids and fix. Roll out brown paste thinly and add an outline to the eyes.
Step 14

Using black powder mixed with clear alcohol paint the pupils. Colour the eye lid, and beneath the eye with brown powder paint. Mix white powder with clear alcohol and add detail to the eyes. Using the white add highlights where required on the face, this should be mainly on the eye lids and forehead. Elsewhere only add fine highlights touching gently with the end of your brush.

Make indents on the cheeks and colour inside with brown for the whiskers.

Using the confectioners glaze paint the whole face.

Step 15

Your face should look like this.

Step 16

Use scissors to cut the chin and parts of the forehead above the eyes to create the illusion of fur.

Step 17

Mix brown and orange powder with clear alcohol. Lightly stain the wafer paper with a sponge on both sides. Prepare darker shades for the bottom of the mane and lighter shades around the face.

Step 18

Cut the coloured wafer paper into various sized rectangles, gently moisten it and shape it into a “shaggy” mane look with your fingers. Cut some lines to the edges. Now to build up the mane, glue the wafer paper in two layers around the entire face, gluing the larger, darker pieces to the bottom and edge of the face and gluing the smaller and lighter ones above. Finally, you can gently highlight it with gold dust mixed  with clear alcohol.

Step 19

Keep adding the wafer paper until this effect is achieved. Cut lengths of gold wire and form the whiskers and eye lashes. Remember if the cake is to be eaten the ends of the wires should be protected where inserted into the cake.
Step 20

Your lion cake is ready

CUTE EASTER BUNNY MODELLING TUTORIAL

CUTE EASTER BUNNY MODELLING TUTORIAL

Skill level: ADVANCED

You will need:

  • Saracino Pasta Model white , fuchsia , skin, tiffany, orange, yellow, brown, pink, light blue, violet and black
  • Saracino Pasta Bouquet
  • Gel food colours: pink, yellow and green
  • Cake gel
  • Powder colours: yellow, pink, green, black, white and blue
  • White Pasta Top
  • Rolling Pin
  • Dummy 15cm x 10cm and cake board
  • Smoother
  • Fine tip brush for eyes and lips
  • Glue brush
  • Ball tool medium and small
  • Primrose mould and cutter
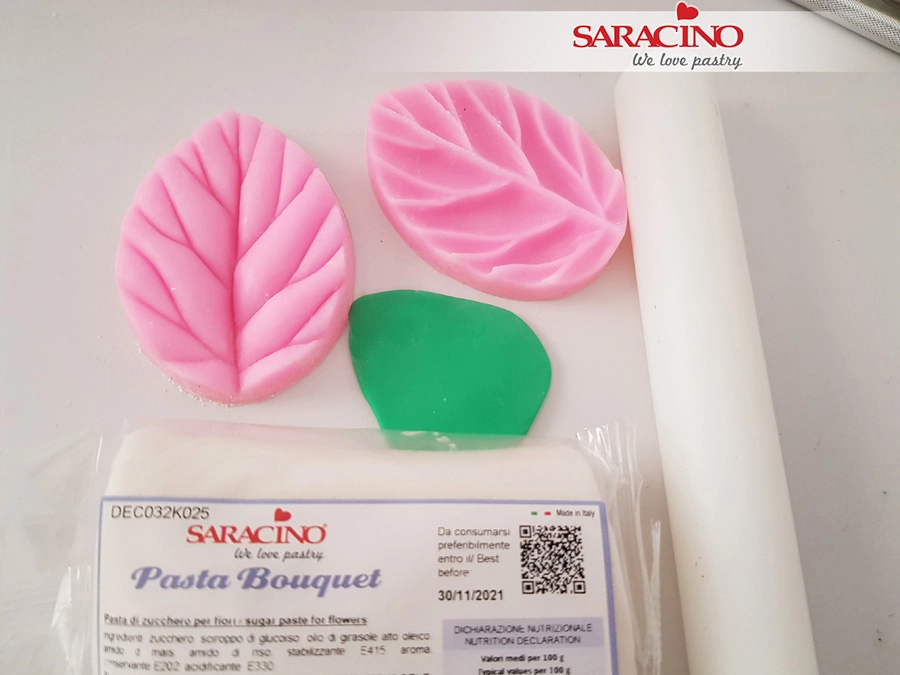
  • Leaf mould
  • Smooth plastic knife
  • Scalpel
  • Leaf shaping tool
  • Cone tool silicon
  • Toothpick
  • Two brushes for blending
  • Clear alcohol
  • Palette
  • Gauge 22 flower wires
  • Pointed tools or pin 

Step 1

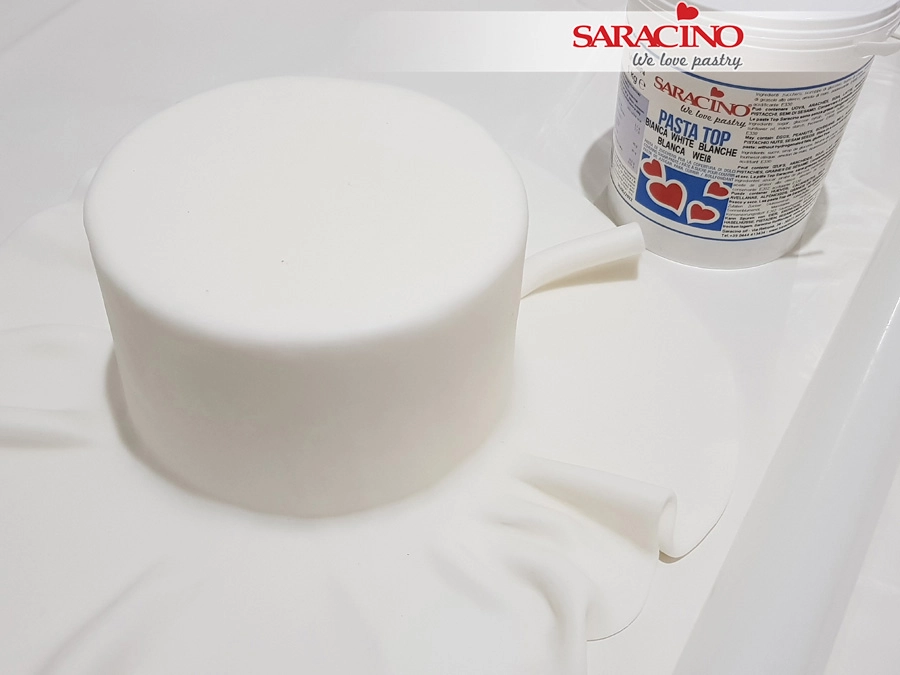
Roll out the Pasta Top and cover the dummy. Repeat for the cake drum. Trim the excess and place the dummy on the cake drum.


Step 2

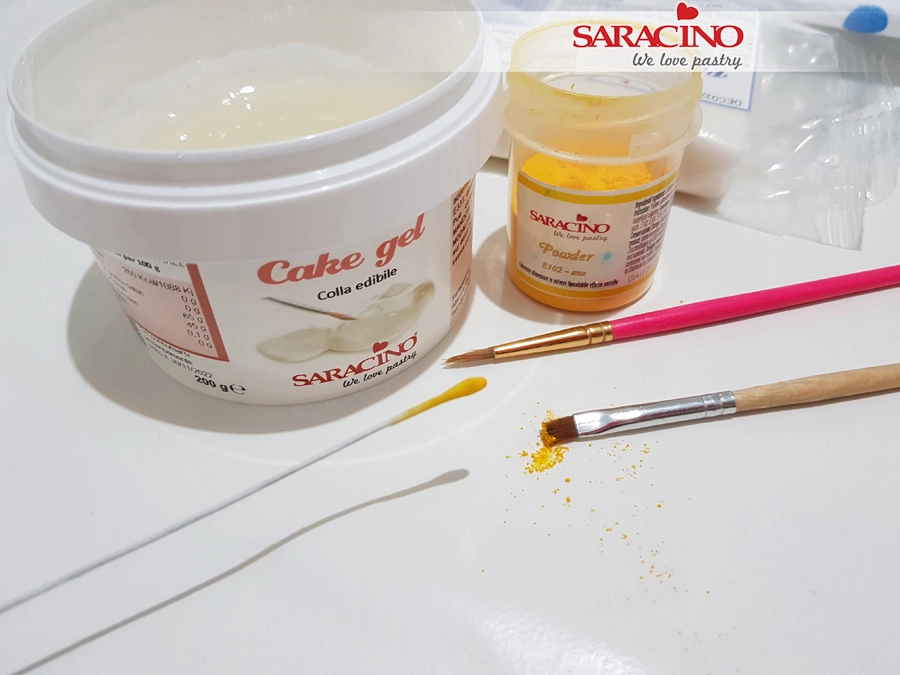
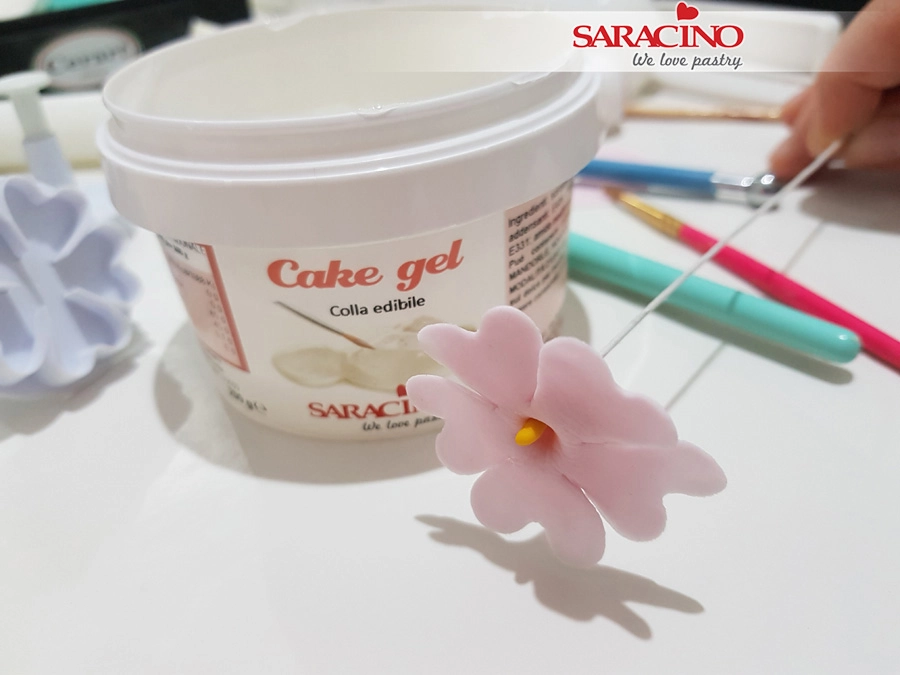
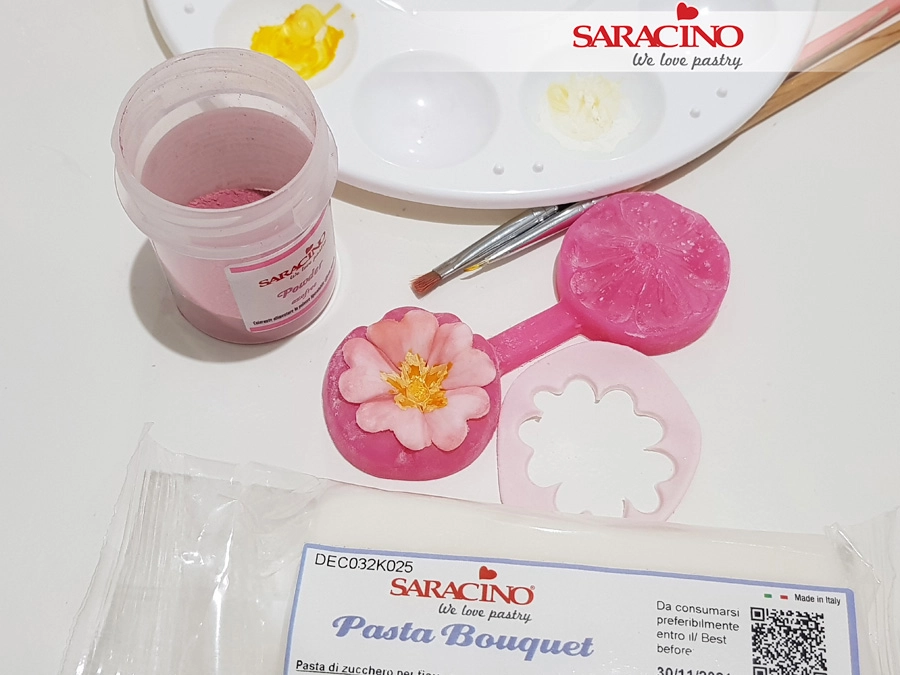
Use a small amount of Pasta Bouquet to make a rounded end to your flower wire. Dip the end of the flower wire in cake gel and form the Pasta Bouquet around to the shape shown. Allow to dry and then dust with a soft brush and yellow powder colour.
Step 3

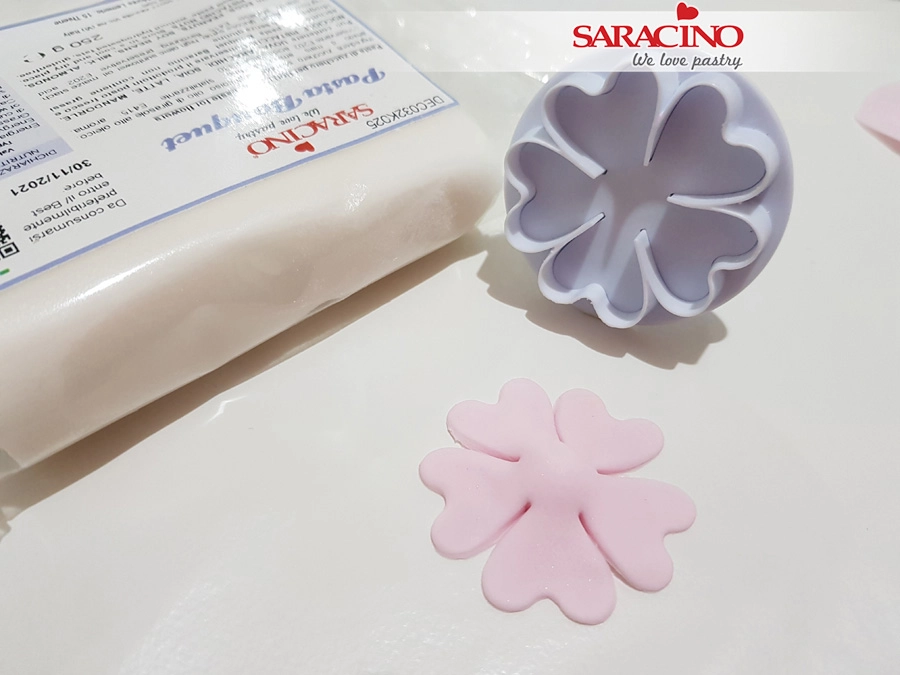
Add a small amount of pink colouring to the white Pasta Bouquet. Mix well. Roll out the paste thinly. Using the Primrose cutter cut out the petals.

Step 4

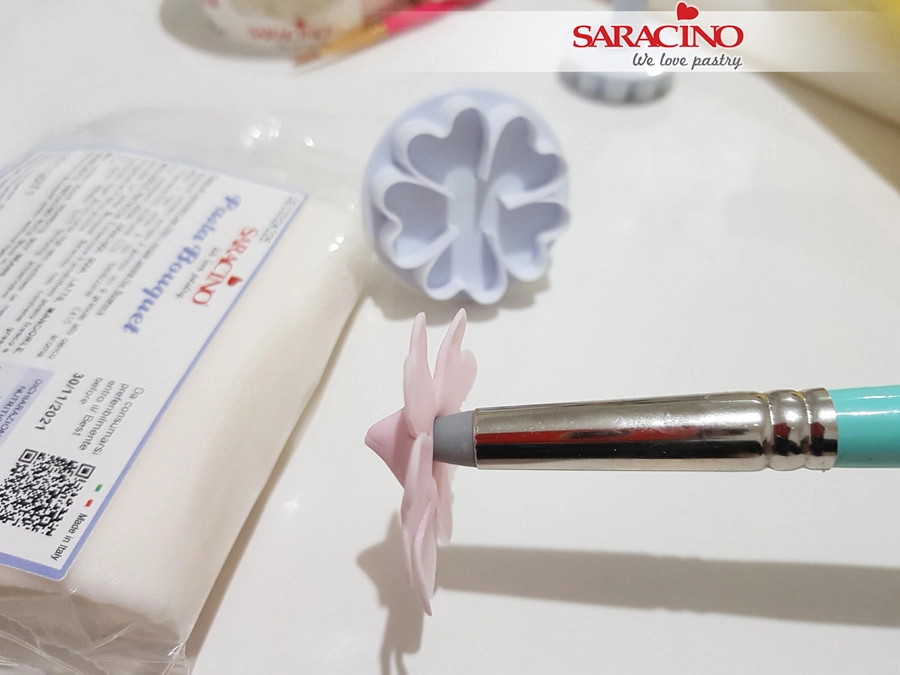
Smooth the edges of the flower and use your silicon tool to form an indent in the centre.

Step 5

Insert the flower wire through the centre of the flower. 

Step 6

Allow to dry. 

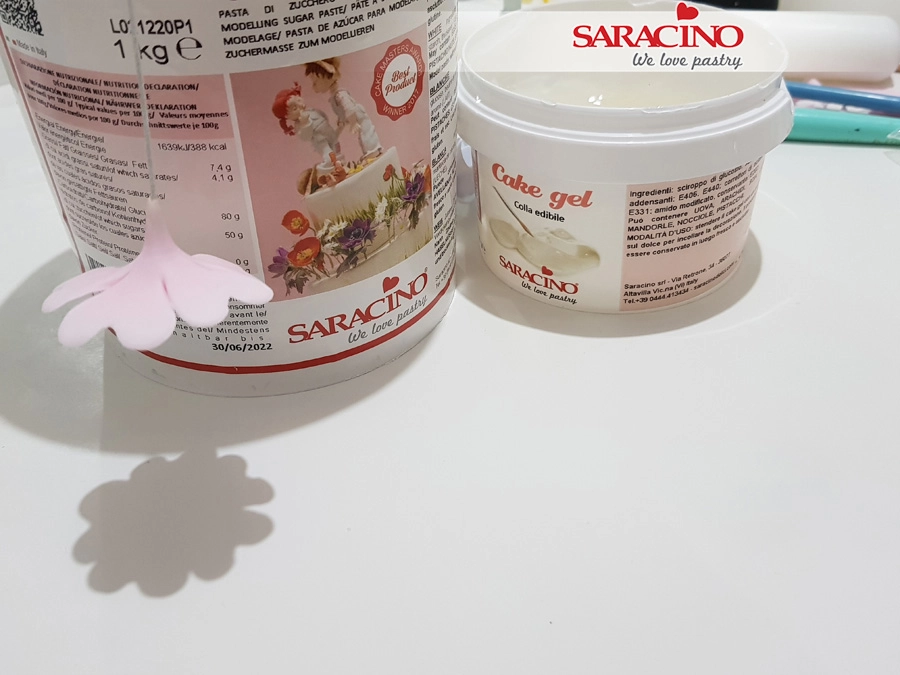
TIP: I bend the end of my wire and use a Saracino tub lid to hang the flowers off.


Step 7

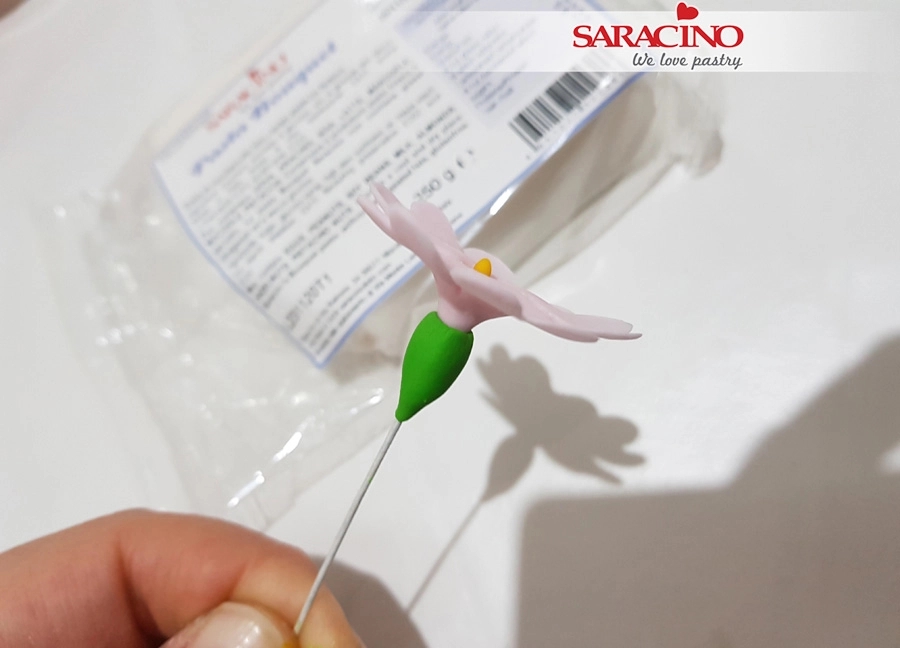
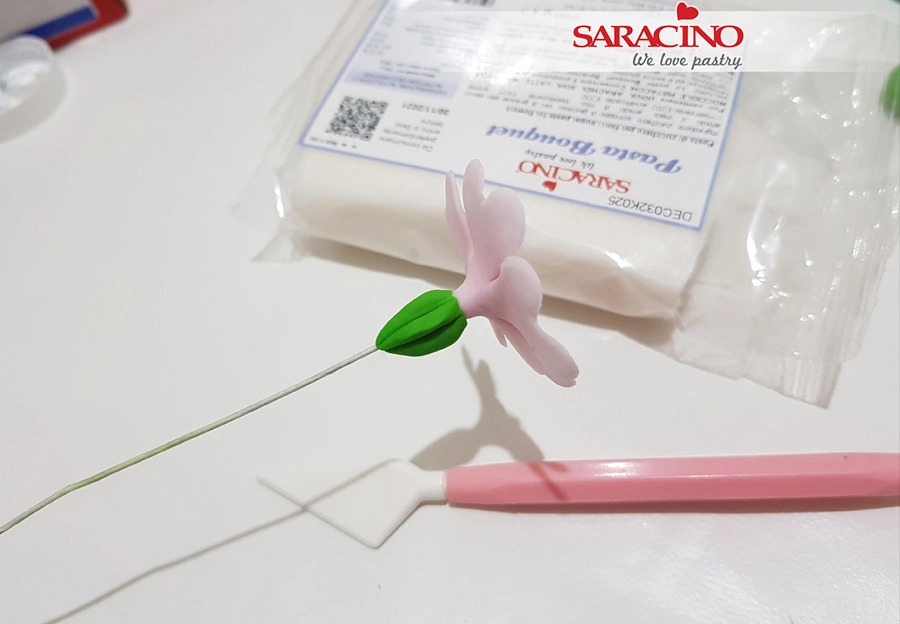
Using green coloured Pasta Bouquet form the bud beneath the petals. Use your fingers to form the shape shown.


Step 8

Use a modelling tool to form the grooves on the bud as shown.


Step 9

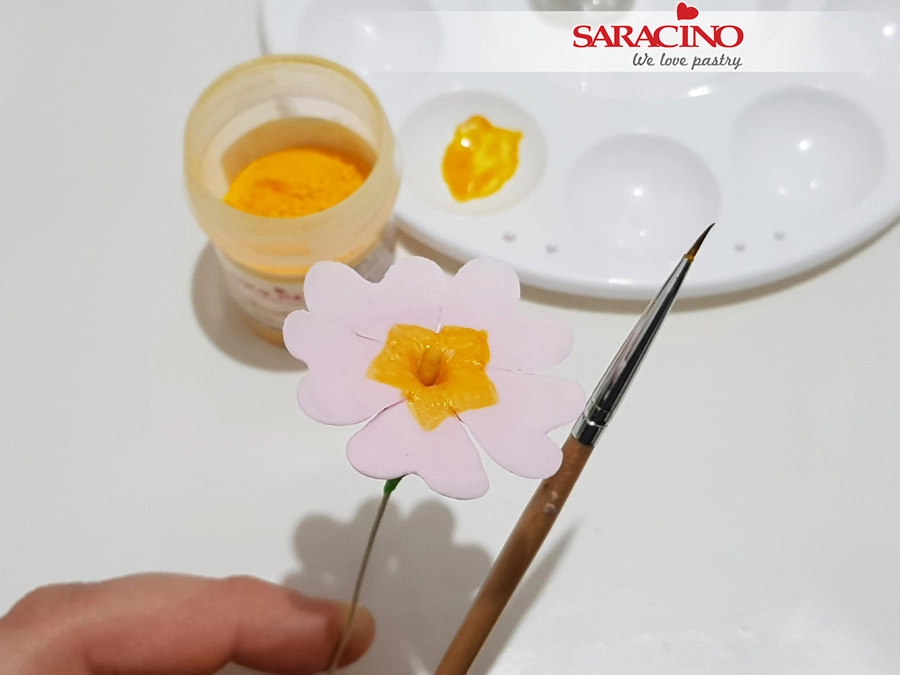
Mix some of your yellow powder colour with clear alcohol. Use a fine brush to paint the yellow centre of the flower.

Step 10

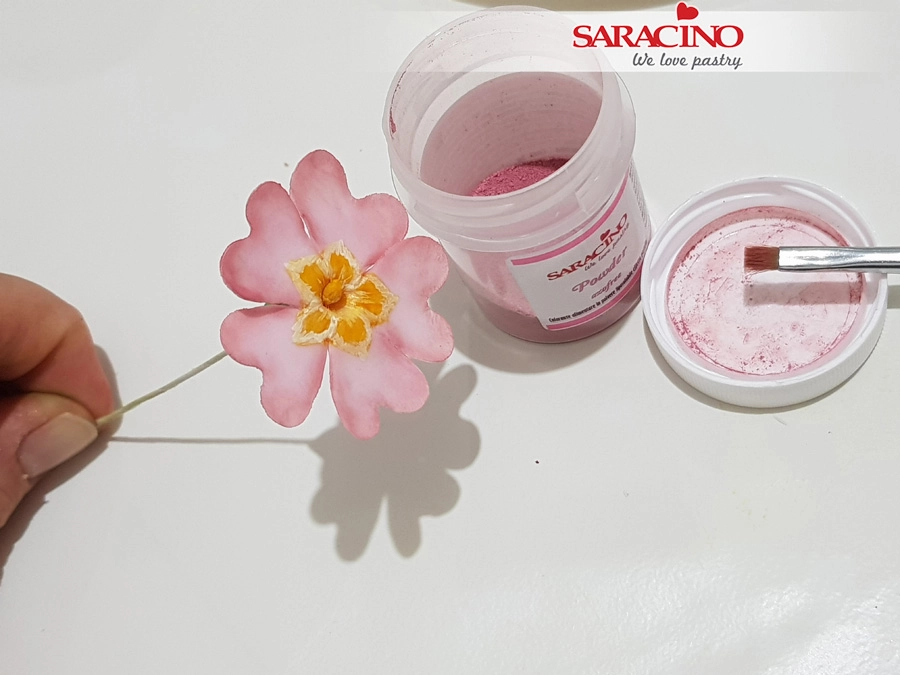
Mix a lighter shade of yellow and outline the centre. Use a fine brush and pink powder colour to dust the petals. Take care not to over dust. 


Step 11

Repeat the above steps for the flower we need on the wreath. Place in the veiner and add texture.

Step 12

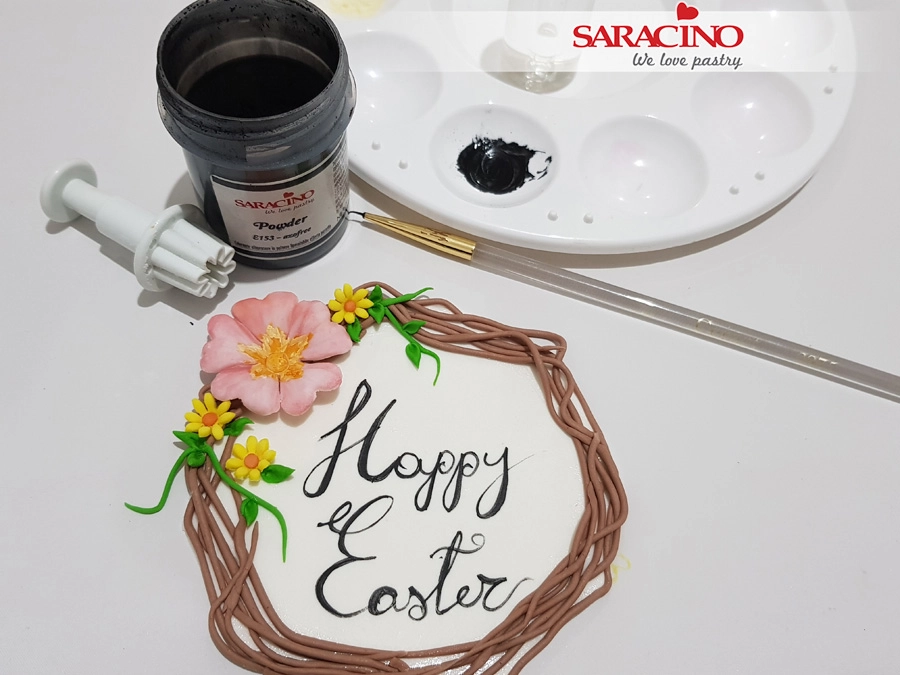
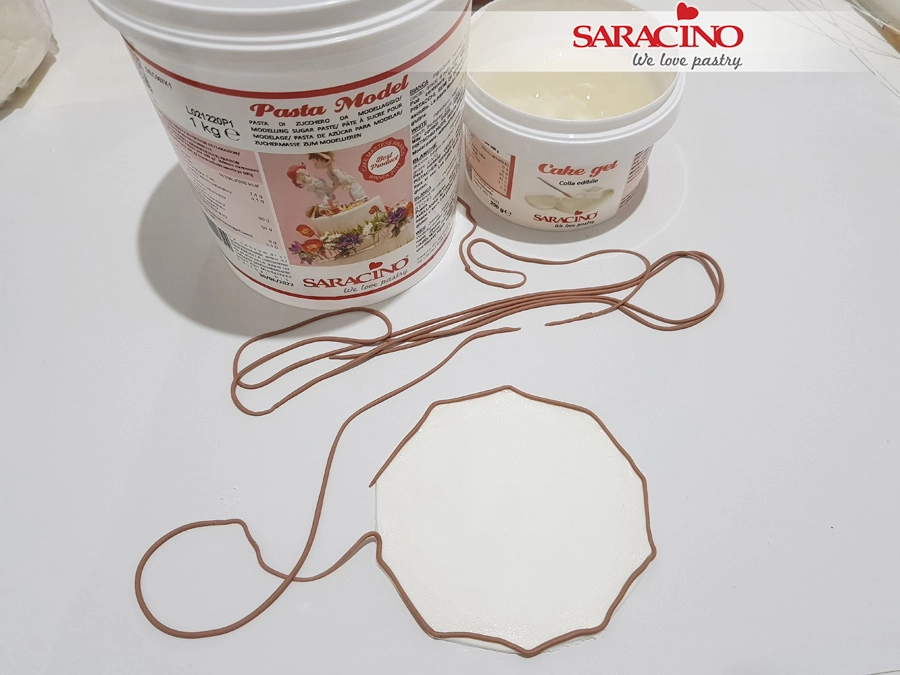
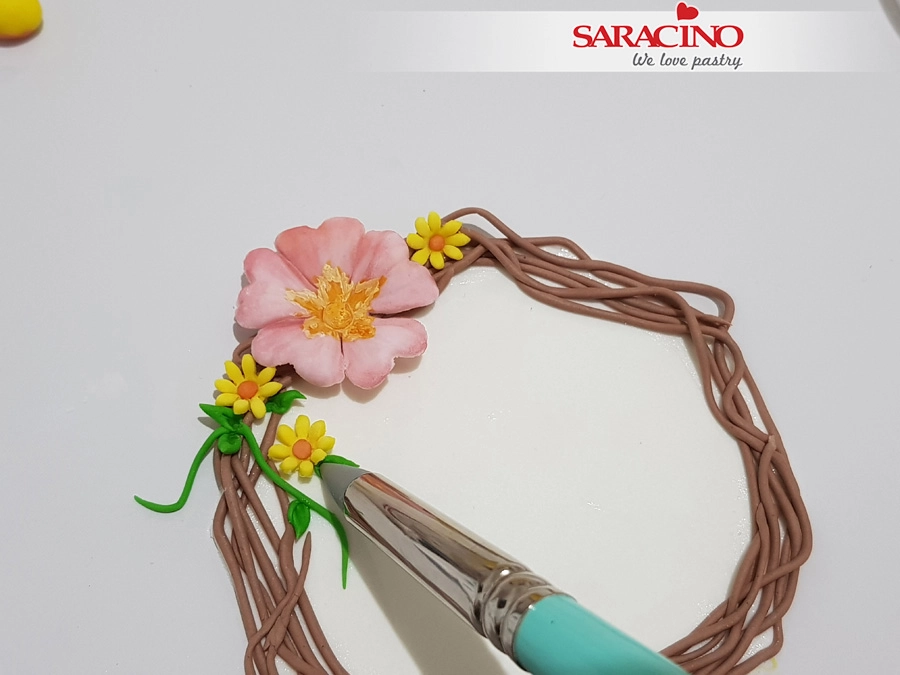
Using Pasta Model roll out a thin piece and cut out the shape you would like for the plaque. Now to give the wreath effect add brown Pasta Model to your extruder and extrude fine strings to place around the outside of the plaque.

Step 13

Fix the primrose we made earlier. Add filler flowers and leaves as required. 

Step 14

Mix black powder with clear alcohol. Using a fine brush paint your message. Allow to dry.

Step 15

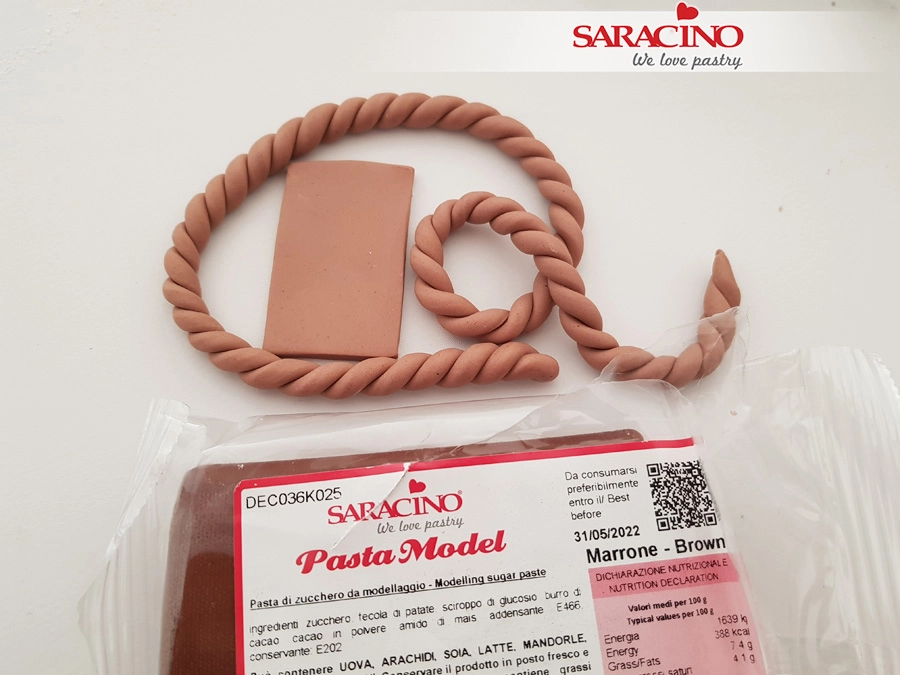
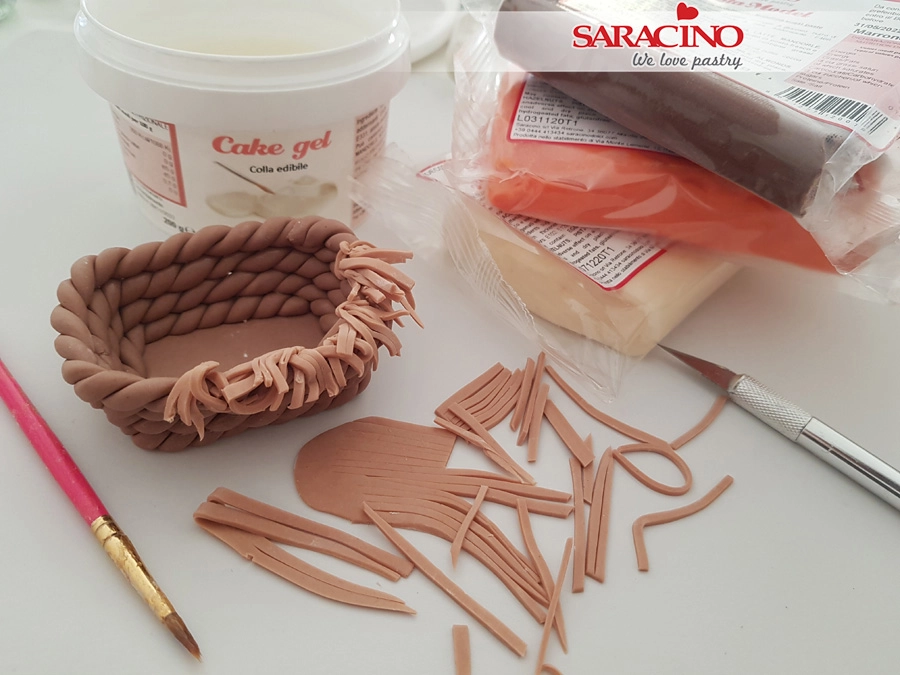
For the egg basket use brown Pasta Model in your extruder to extrude a thick strand of paste. When extruded use your fingers to twist the strand so it forms a rope. Using the same colour paste roll and cut the rectangle shape for the basket base.

Step 16

Roll out more of your brown paste. Use a sharp knife to cut strands. Fix to the outside of the top of the basket using a little cake gel if required.

Step 17

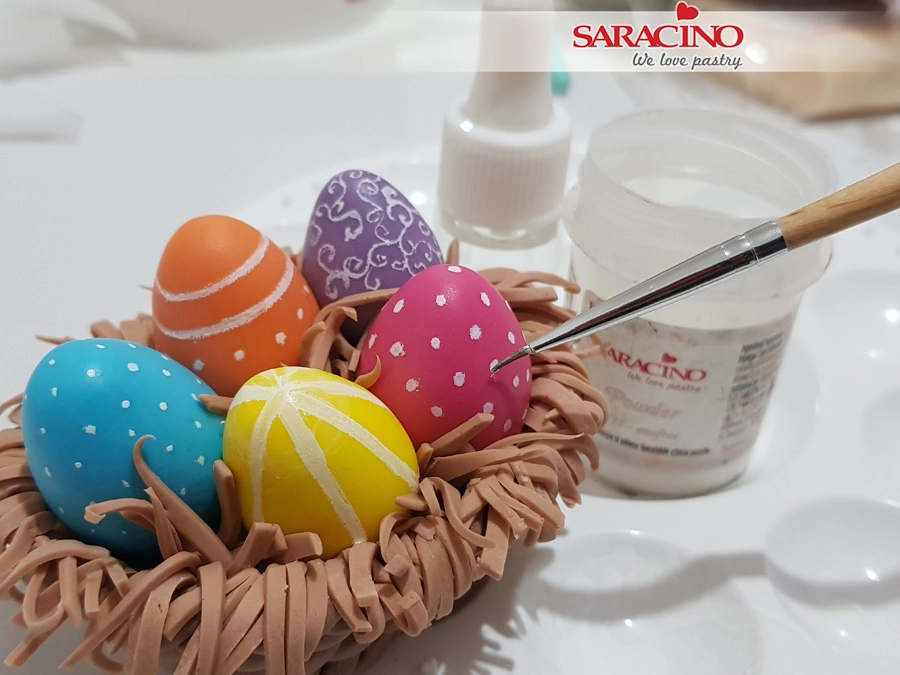
Add some decorated eggs into the basket.

Step 18

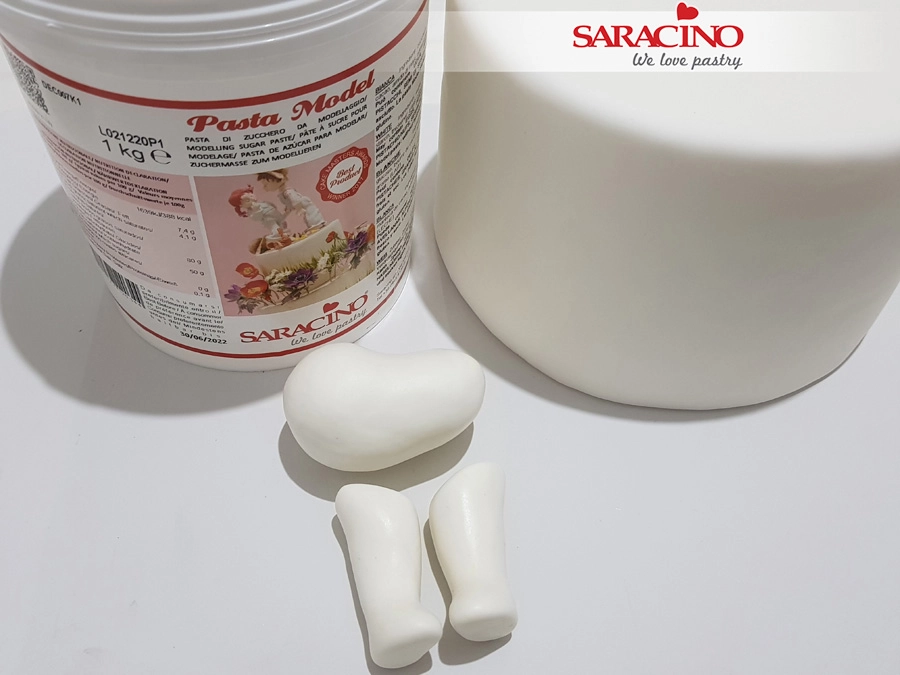
For the torso and the legs use some of your white modelling paste. The Body is to be a pear shape flattened at the chest area. Roll each leg to a sausage shape and then trim the top and form the feet.

Step 19

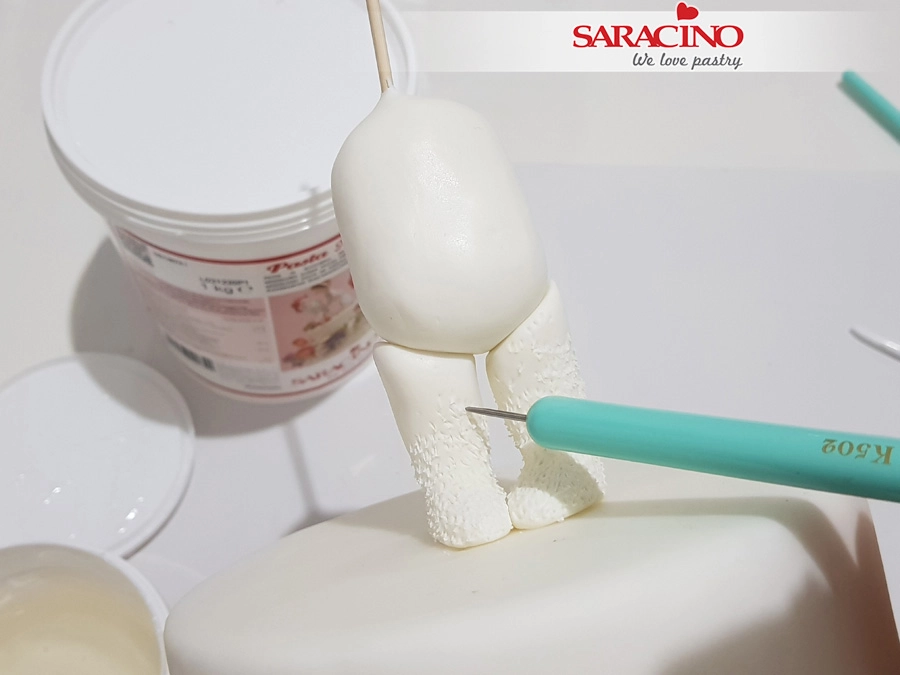
Insert a cocktail stick into the body ready for the head fixing. Use a sharp tool to add a fur texture to the legs.

Step 20

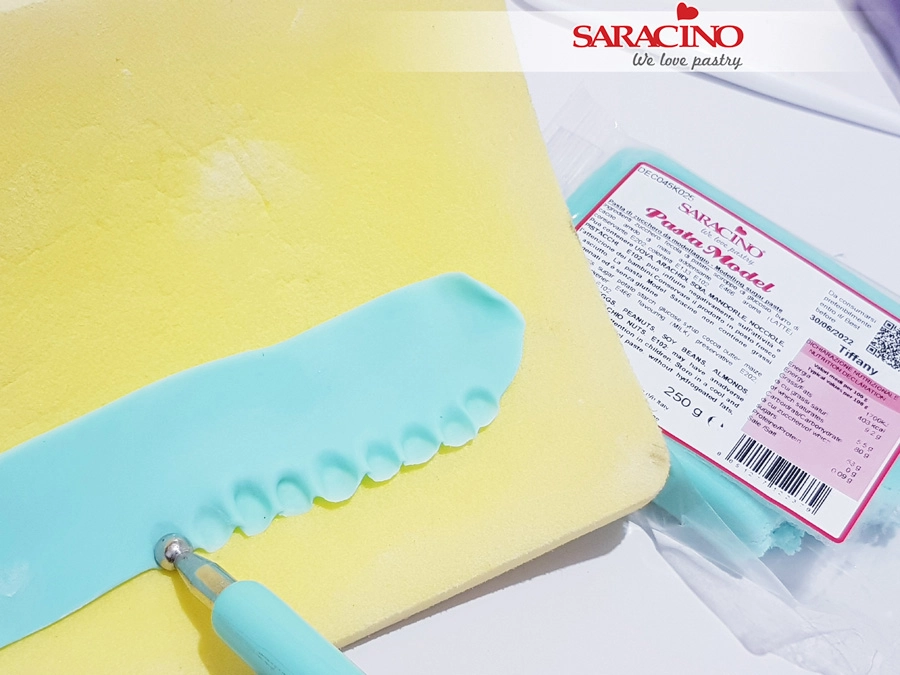
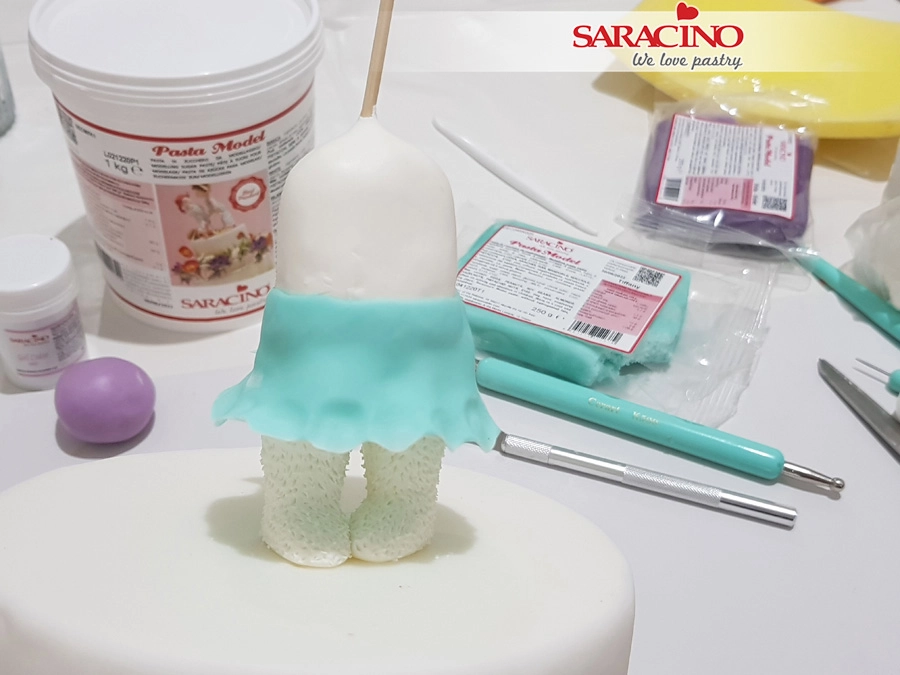
Roll some of your Tiffany Pasta Model thinly and cut out the skirt. Use a ball tool to add the hem detail.


Step 21

Fix around the body.


Step 22

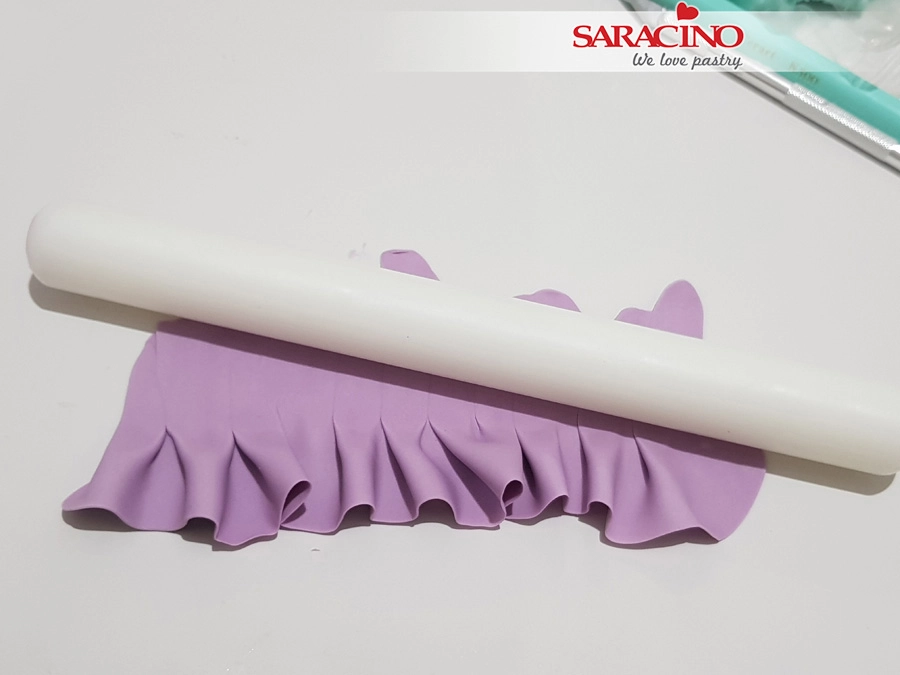
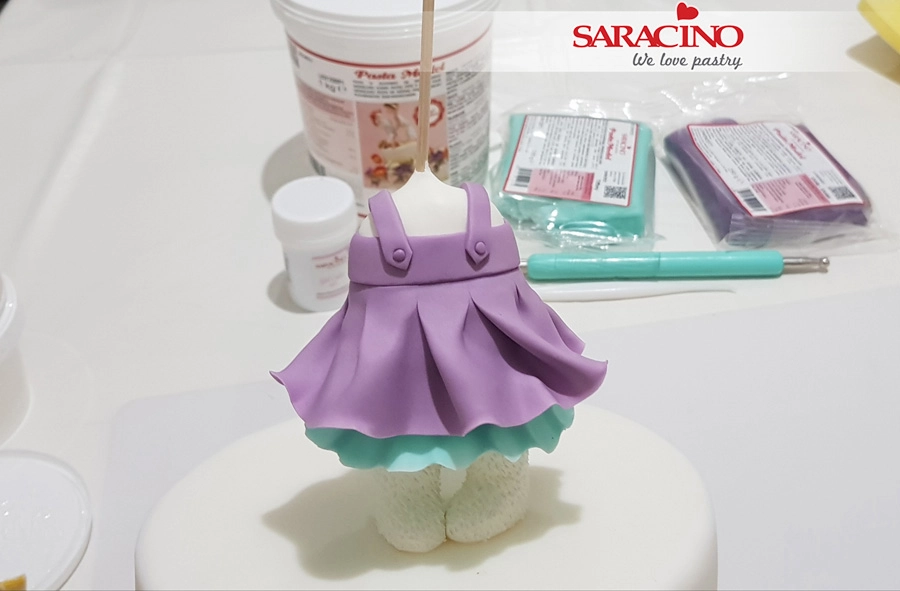
Roll the violet Pasta Model for the dress. Pinch the hem to form pleats and then re-roll to create the smooth top.

Step 23

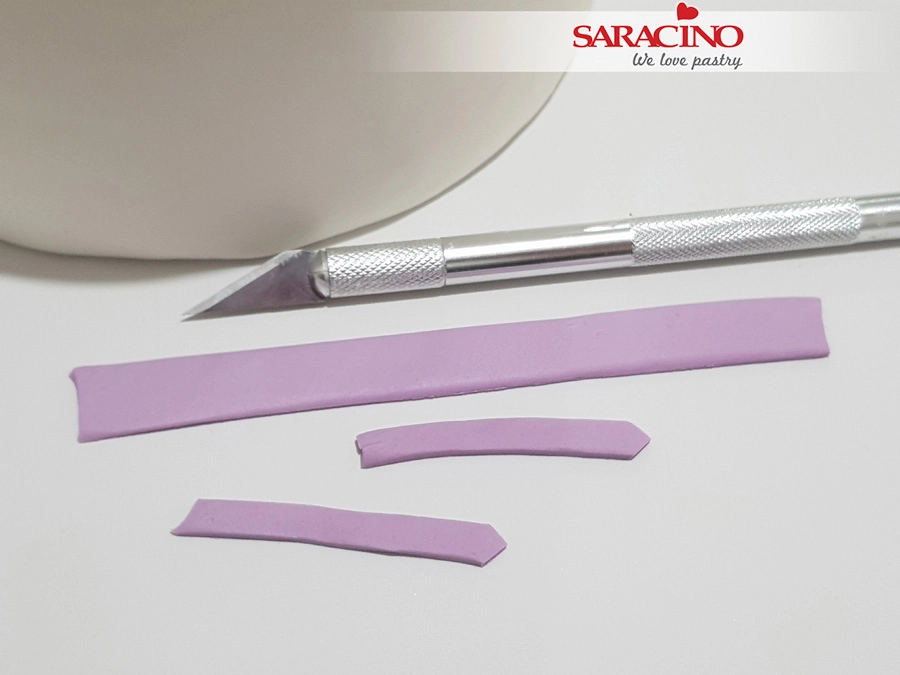
Use the same colour to shape the belt and straps. Use a sharp knife to cut out the shapes.

Step 24

Fix to the body as shown. Add two small balls of paste for the buttons.

Step 25

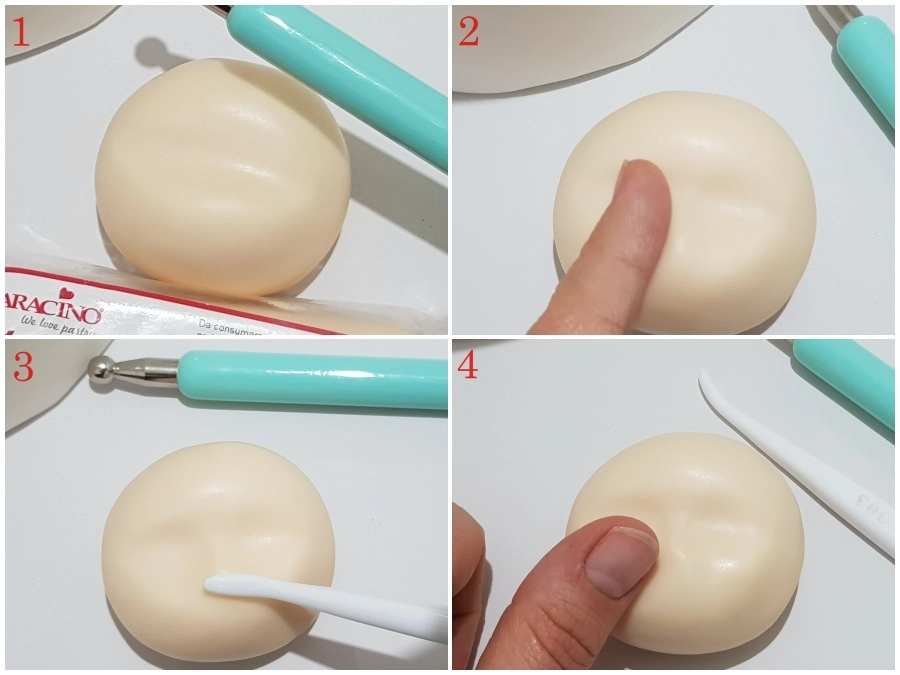
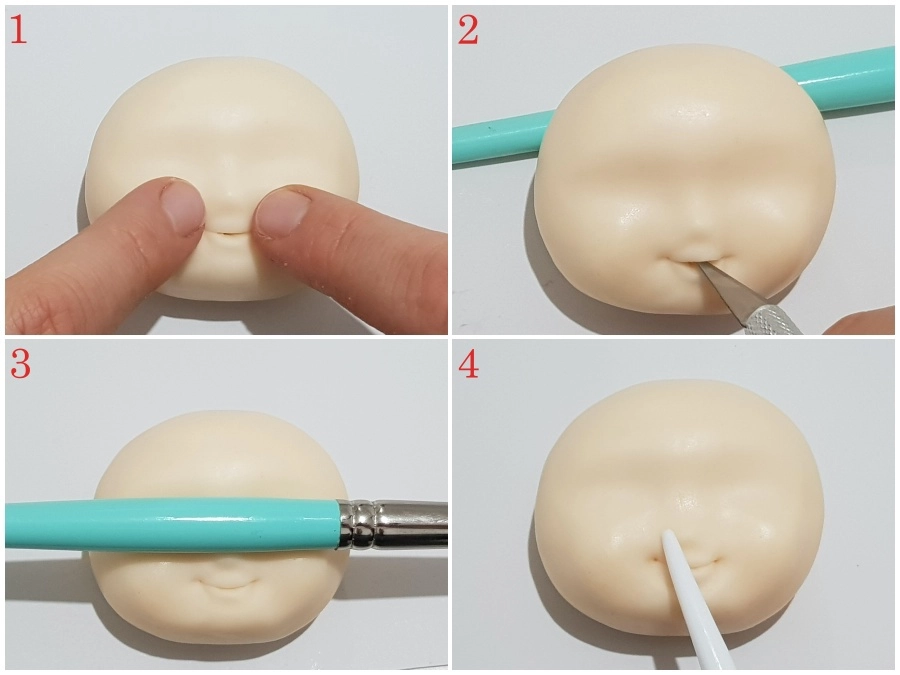
  1. Using skin colour Pasta Model roll a ball. Use the handle of a ball tool make a groove across the centre.
  2. With a finger, apply light pressure to form the nose shape.
  3. Use a Dresden tool to shape the nose
  4. With your thumb or fingers gently push the cheeks outwards.

Step 26

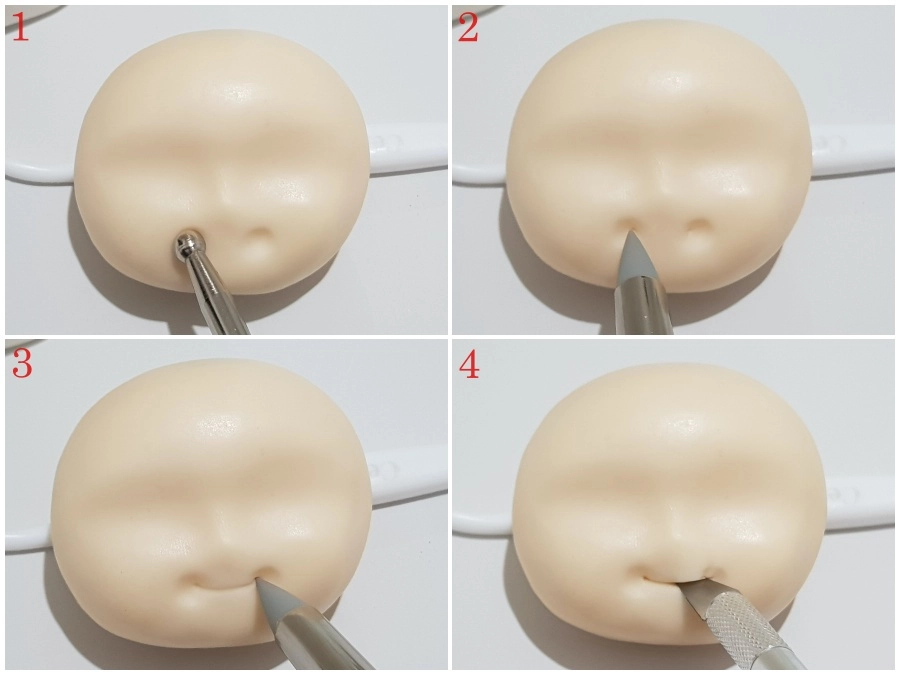
  1. Use a small ball tool to form the dimple either side of the mouth.
  2. Mark the start of the smile with a sharp modelling tool.
  3. Use a sharp tool to mark the smile.
  4. Use a sharp knife to form the mouth.

Step 27

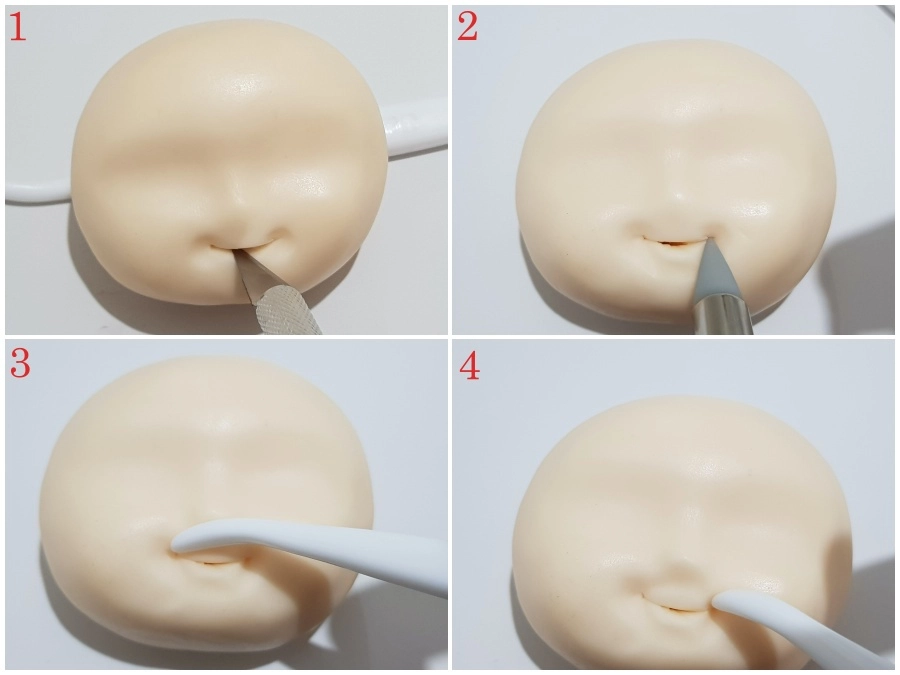
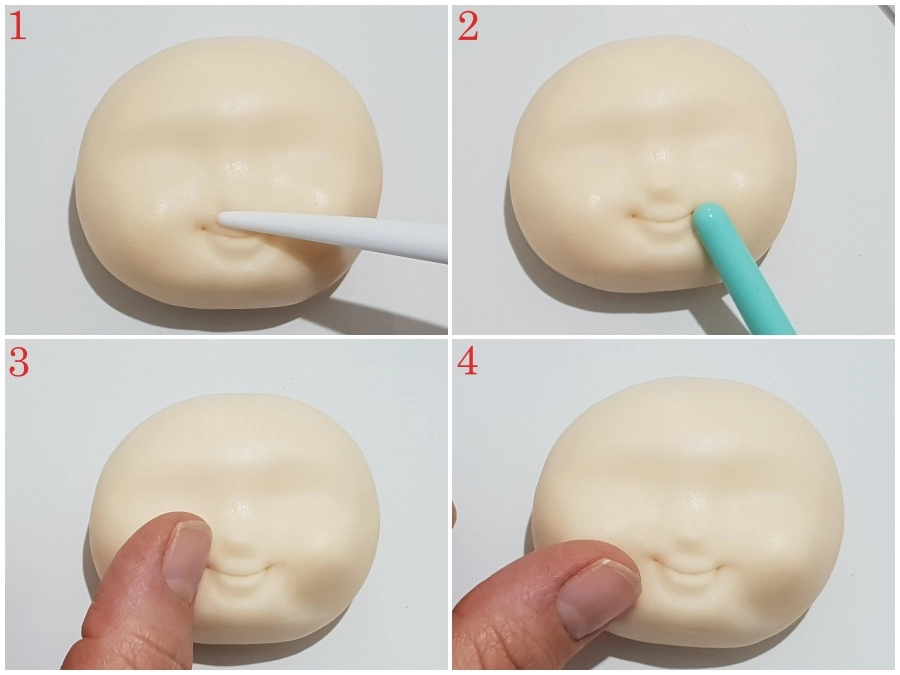
  1. When forming the mouth lift the upper lip to open the mouth slightly.
  2. Use your silicone tool to form the bottom lip.
  3. Use your Dresden tool to form and shape the upper lip. You will need to do this as the previous steps may have pushed the mouth out of line.
  4. Finish off the mouth area modelling with the blunt end of your Dresden tool.

Step 28

      1. Use your fingers to re-shape the cheeks
      2. Open the mouth with the scalpel and slightly pull out the upper lip that may have been pushed down with the previous pressure.
      3. With the handle of the brush press over the top of the nose.
      4. Use the sharp end of the Dresden tool to re-shape the nose if required.

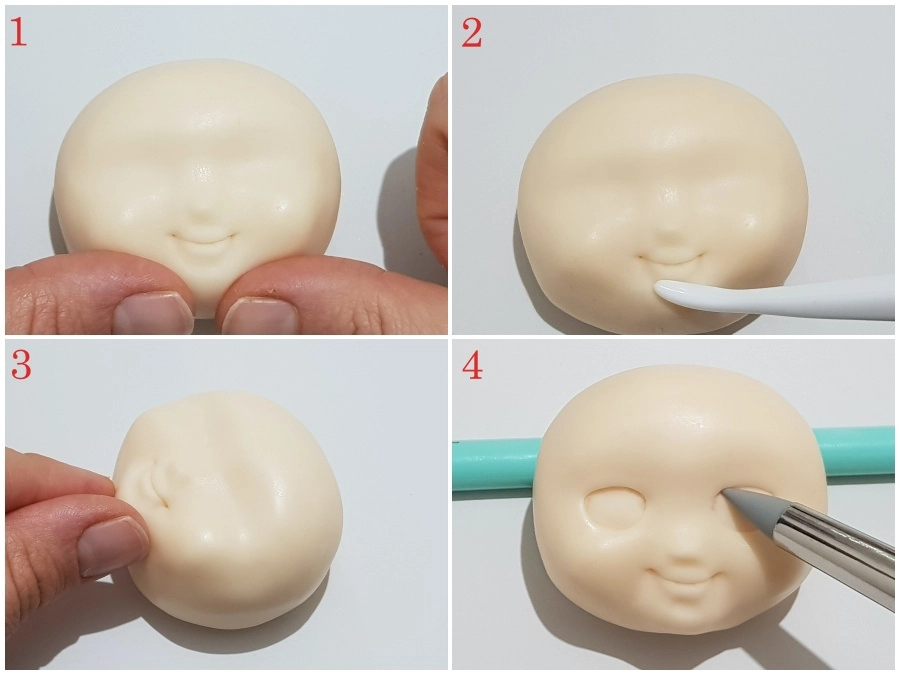
Step 29

  1. With the same tool push up to form the nose tip.
  2. Use the end of a brush to press and start forming the chin shape.
  3. Push the cheeks outwards with your finger or thumb.
  4. Repeat to give a lift to the cheeks.

Step 30

  1. Pinch the chin together using thumbs or fingers.
  2. Use your Dresden tool under the lower lip to create the chin dimple.
  3. Reshape the chin with your fingers by gently pinching.
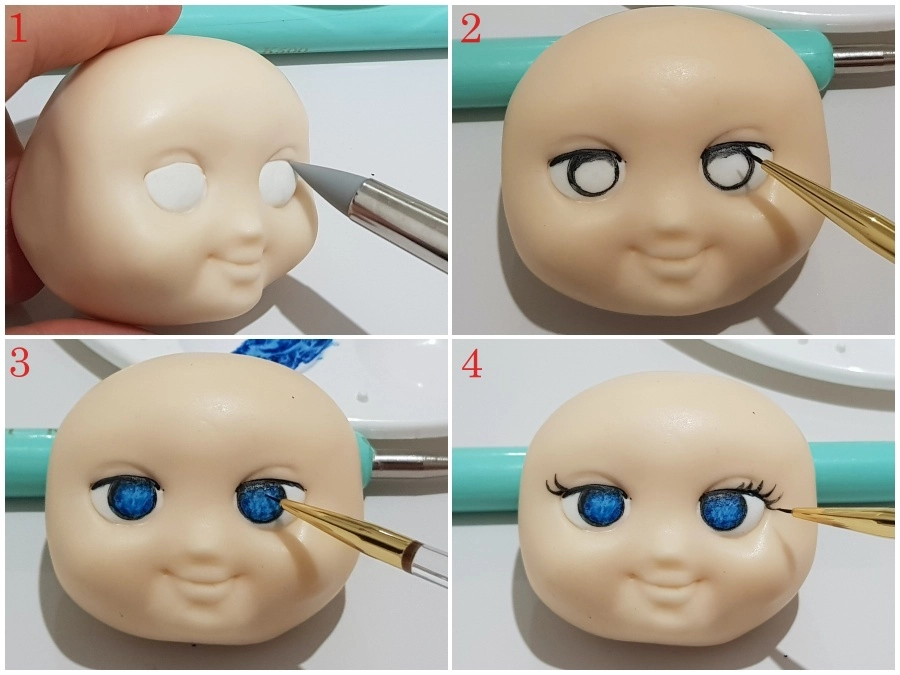
  4. Use the silicone tool to outline the eyes.

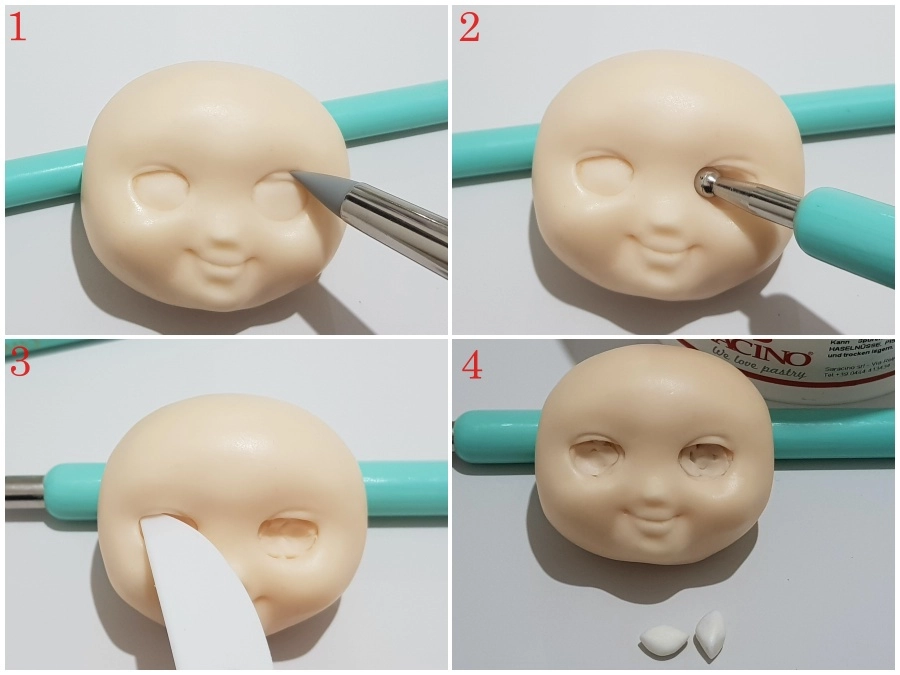
Step 31

  1. Using the same tool, shape the eyelids.
  2. Use a small ball tool to push in the eye sockets.
  3. Remove any excess paste with a knife.
  4. Roll two balls to form the eye balls.

Step 32

  1. Insert the white eye balls into the eye sockets. Blend around the outside using the silicone tool.
  2. Mix black powder colour with clear alcohol. Use a fine brush to paint lines beneath the eyelids. Form the pupil outline. Add a little shade to the top of the eyeball.
  3. Mix your blue powder colour with clear alcohol. Paint the inside of the pupil blue, taking care to give a lighter shade towards the centre.
  4. With the black, paint the eyelashes on the outer sides of the eyes with a fine and tapered line.

Step 33

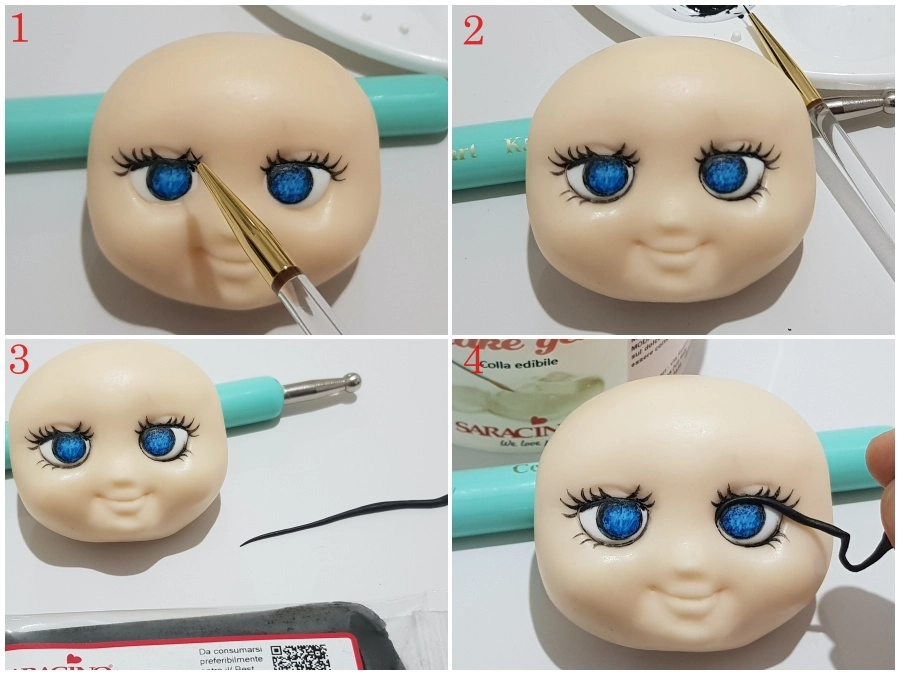
  1. Repeat on the other side of each eye.
  2. Complete with the lower lashes and with an ultra-thin line paint the perimeter of the eye.
  3. Create a thin tapered strip with the black Pasta Model.
  4. Position each lash over the eye. Cut the excess with a scalpel with an oblique cut upwards.

Step 34

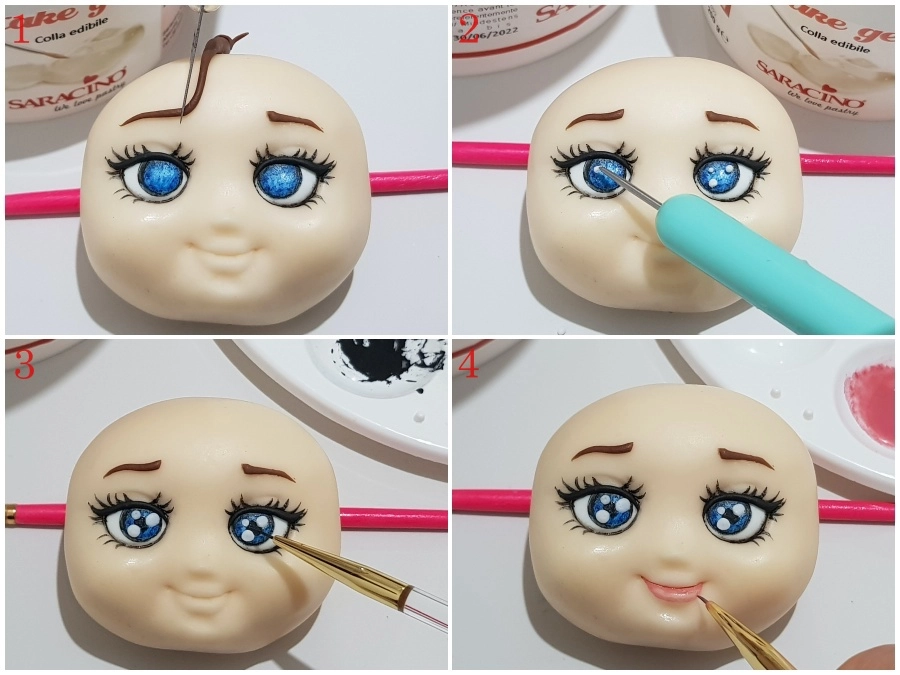
  1. Using the same technique, create the eyebrows with brown Pasta Model.
  2. Roll six tiny dots of white paste. Apply to the eyes as shown using a small amount of cake gel if required.
  3. With the black dye, paint centre of the pupil.
  4. Mix pink powder colour with clear alcohol. Use a fine brush to paint the lower lip.

Step 35

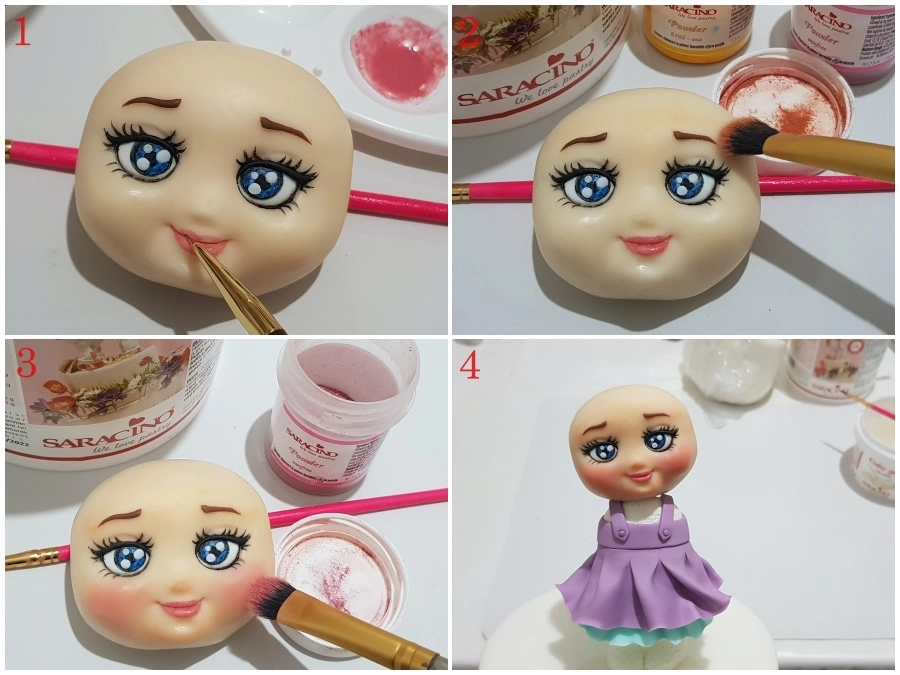
  1. Use the same technique to finish the upper lip.
  2. Mix pink and yellow powder colours. Use a soft brush to dust the forehead, chin, nose and eyelids.
  3. For the cheeks use pink only.
  4. Place the head onto the cocktail stick.

Step 36

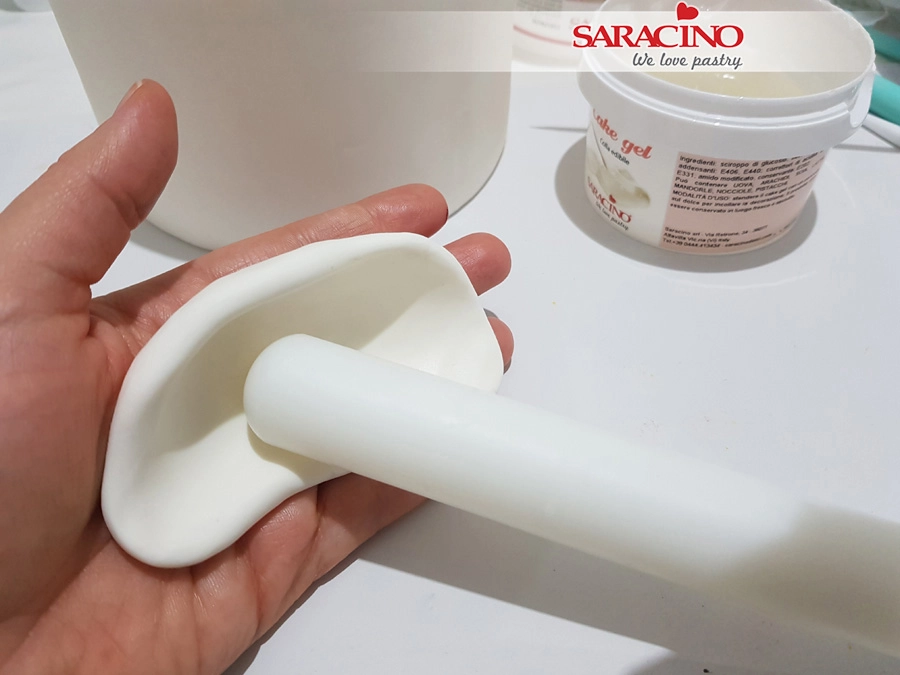
Using white modelling paste shape the bonnet with the end of your rolling pin.

Step 37

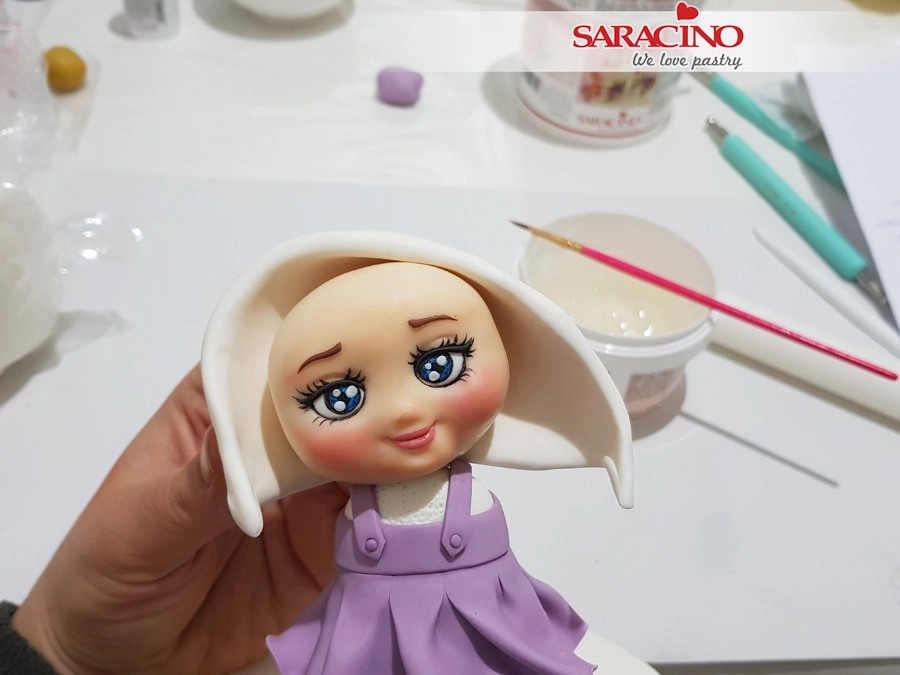
Pinch each end of the bonnet. Place over the head to check for size.

Step 38

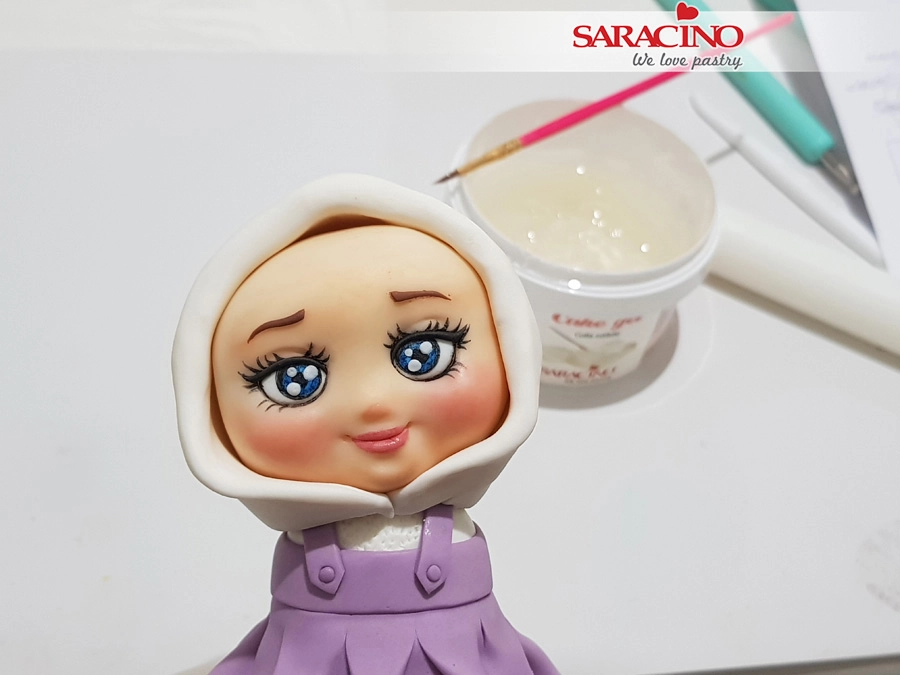
Apply a little cake gel to fix the bonnet and the straps under the chin.

Step 39

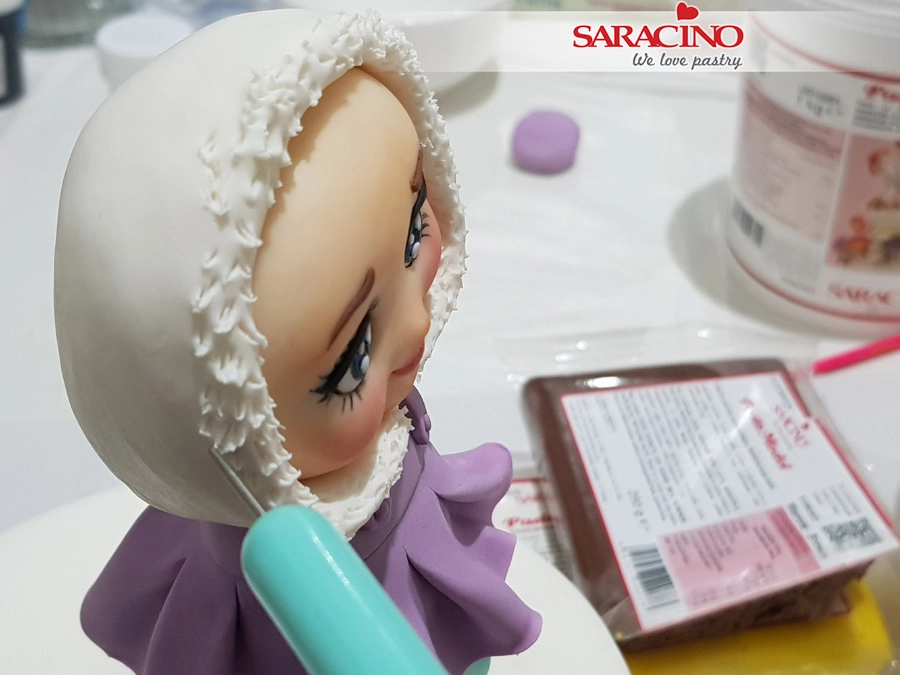
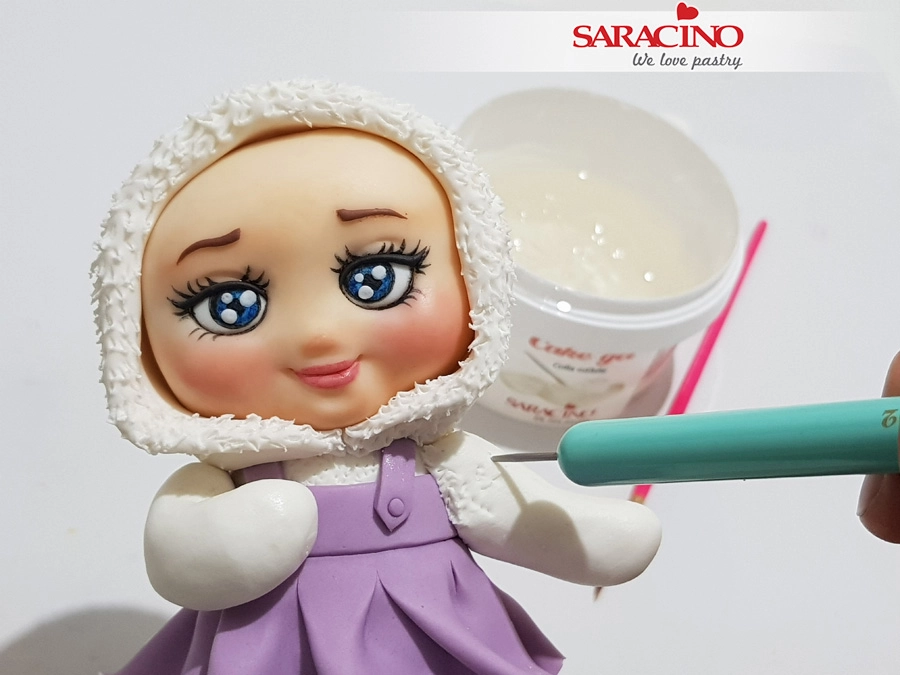
Using a sharp modelling tool add texture to give the fur effect around the hood.

Step 40

Using white Pasta Model roll two equal length sausage shapes for the arms. Attach to the shoulders. Use a sharp modelling to add texture.

Step 41

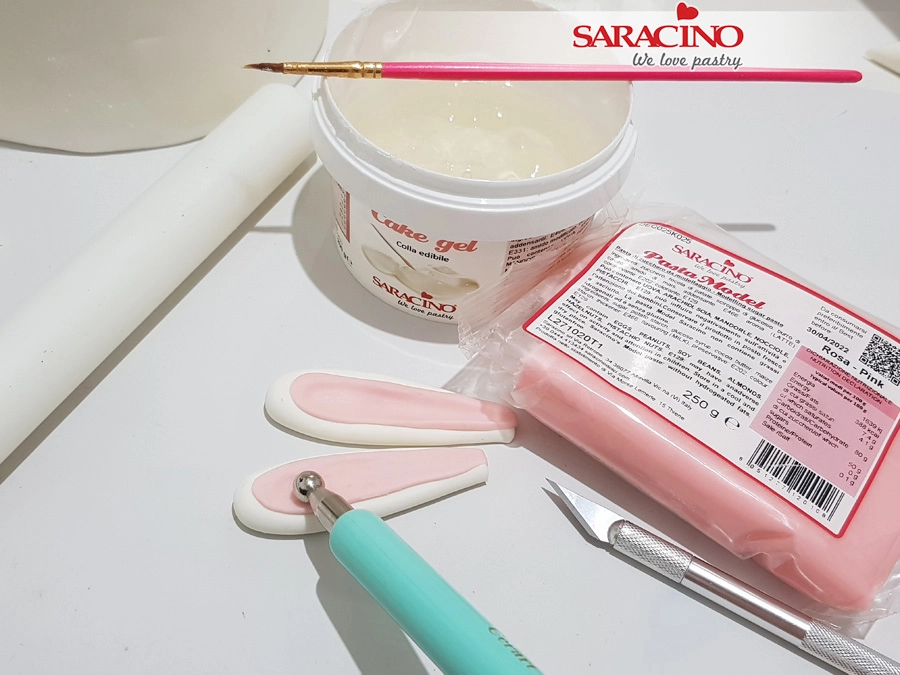
For the ears roll white modelling paste and elongate. Fill the inside with pink paste as shown.

Step 42

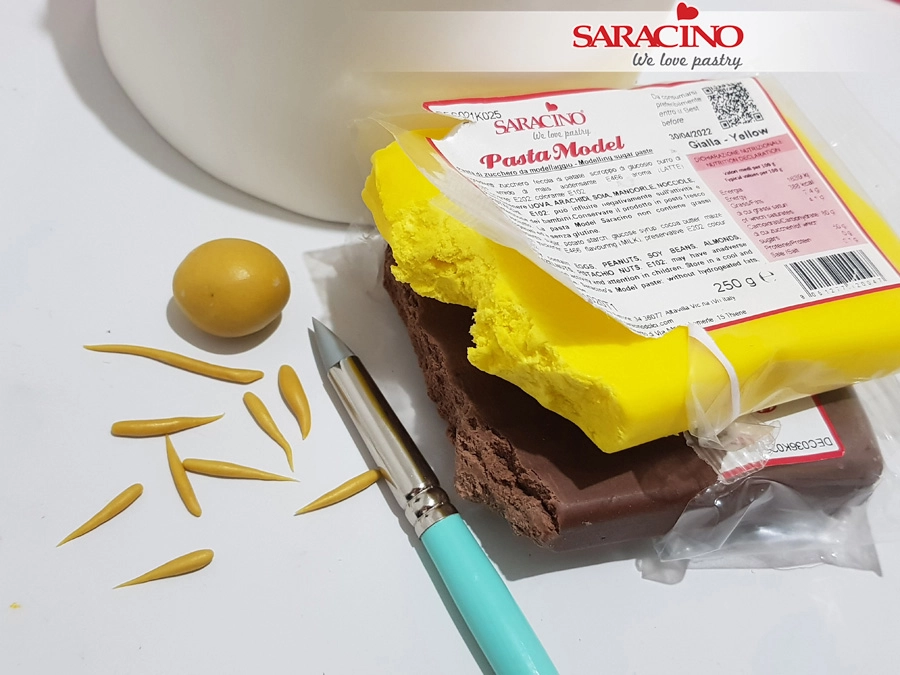
Mix yellow and brown modelling paste. Roll into thin tapered shapes.

Step 43

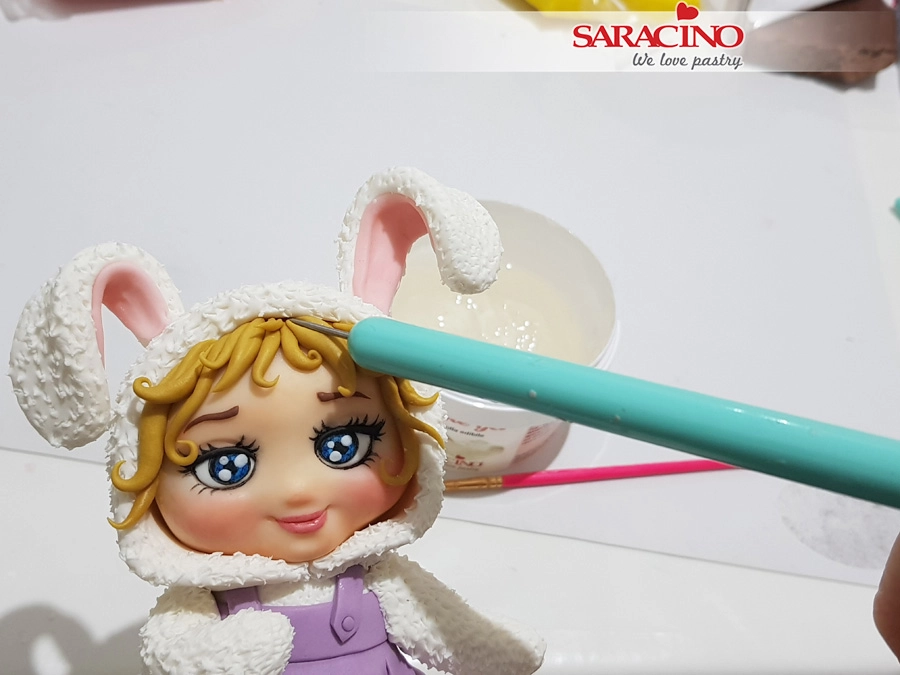
Add texture to the ears. Fix and bend into shape to give character. Add the hair strands applying curl to the ends.

Step 44

Colour Pasta Bouquet with green. Roll out thinly ready to form our leaf.

Step 45

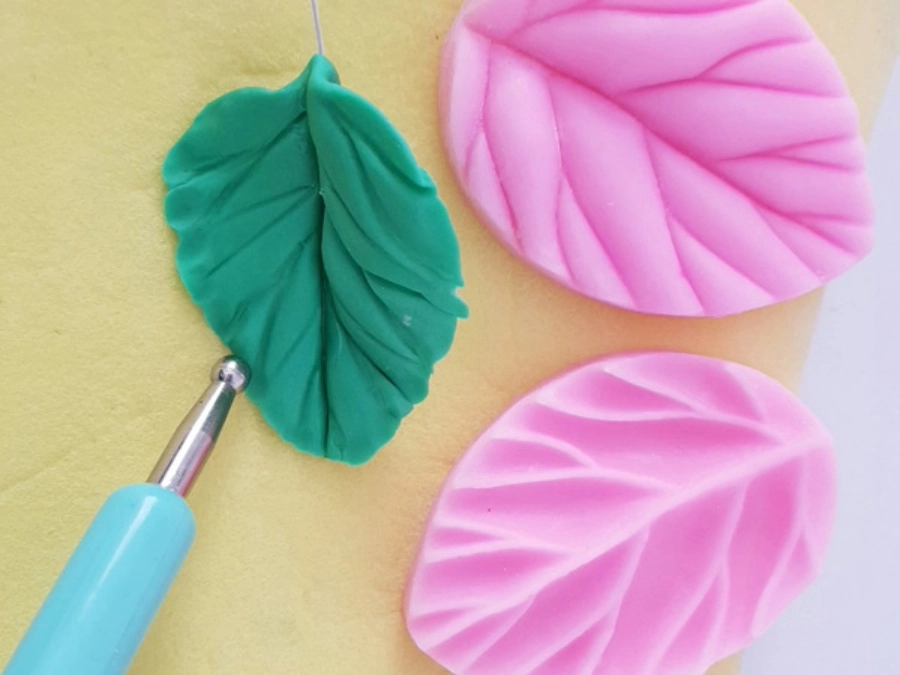
Using a flower wire in the centre form the leaf in the mould. Smooth the outside using a ball tool on a foam mat. 

Step 46

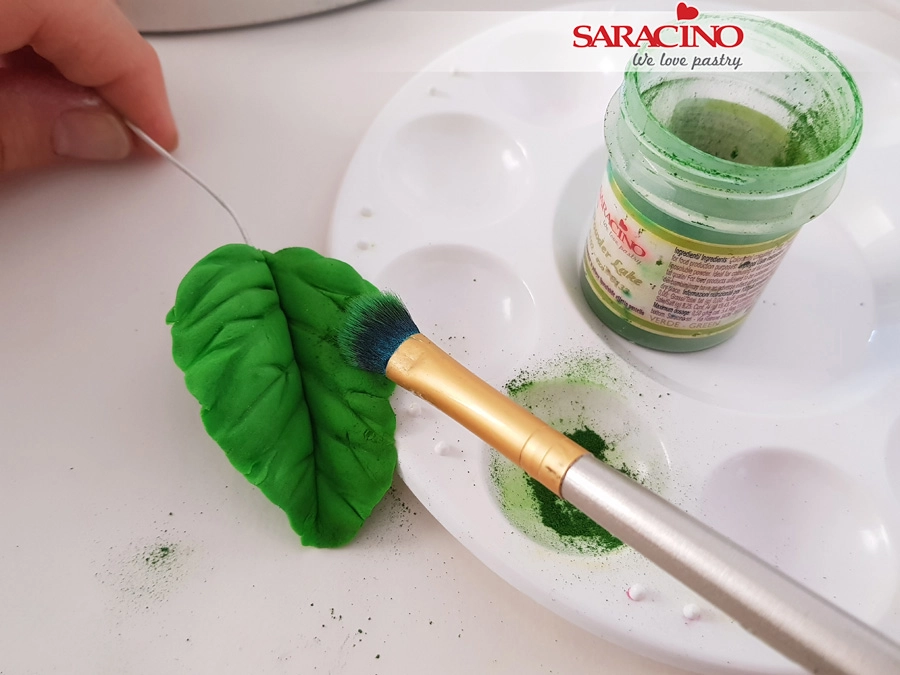
Use a soft brush and green powder to dust the leaf.

Step 47

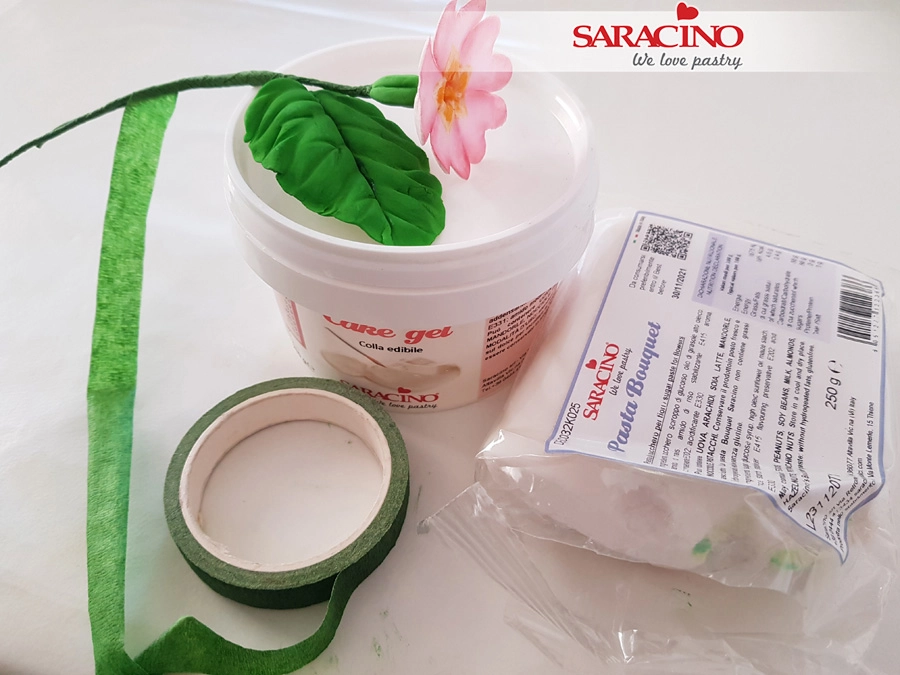
Using green florist tape connect the leaf to the previously prepared flower setm. 

Step 48

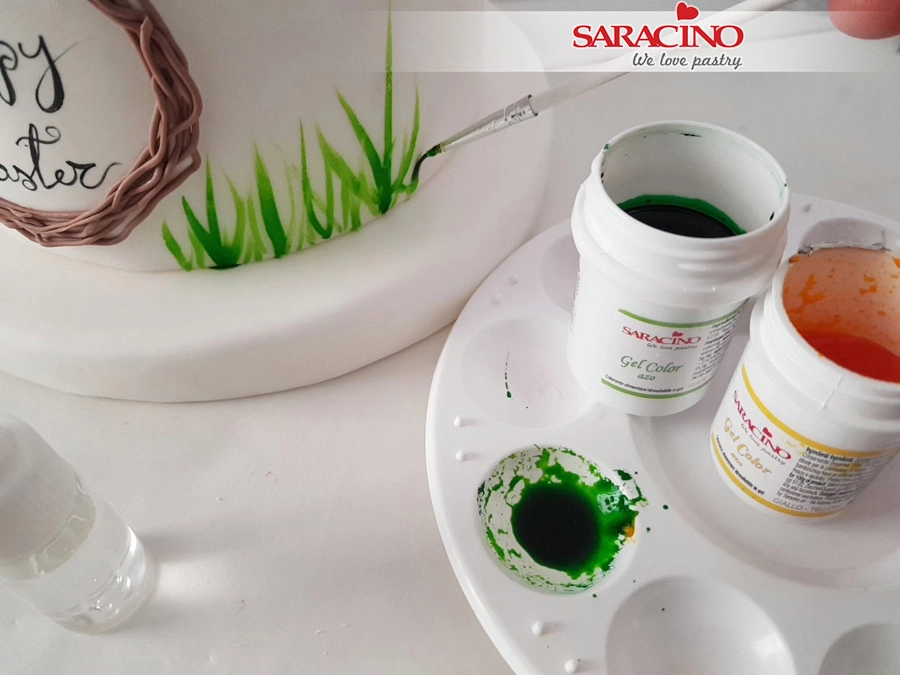
Attach the plaque wreath to the front of the cake. Mix a little green and yellow gel colour with clear alcohol and using a fine brush paint grass to the perimeter of the cake.

Step 49

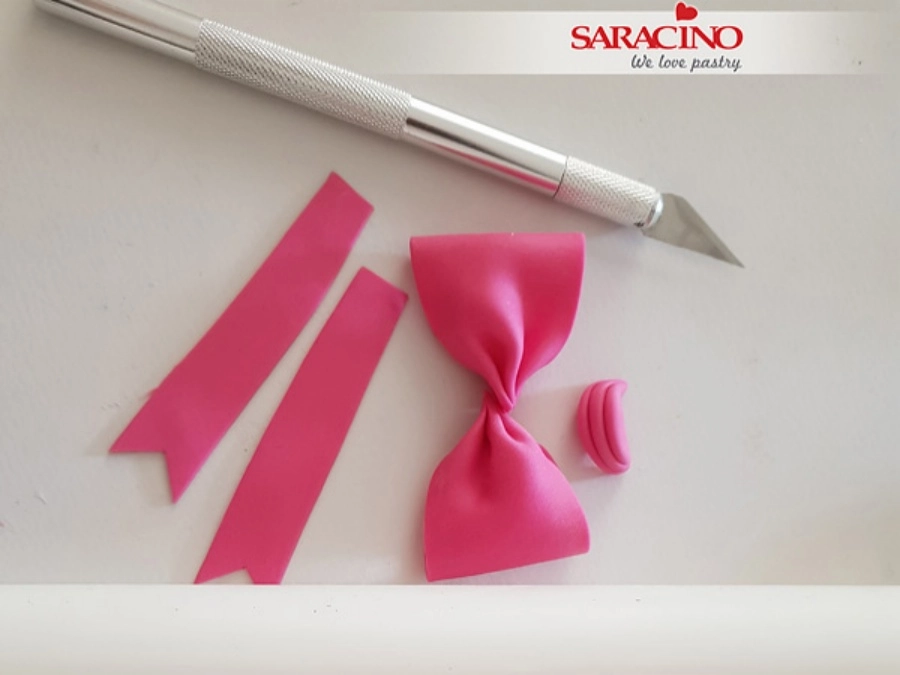
Using Pasta Model coloured pink create a bow. 

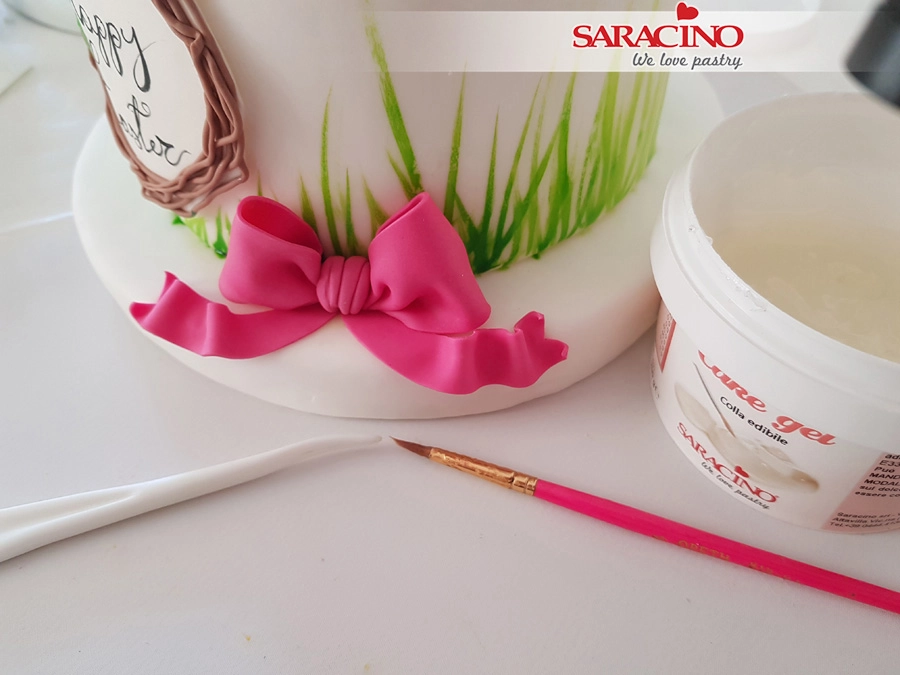
Step 50

Fix the bow to the side of the cake. 

Step 51

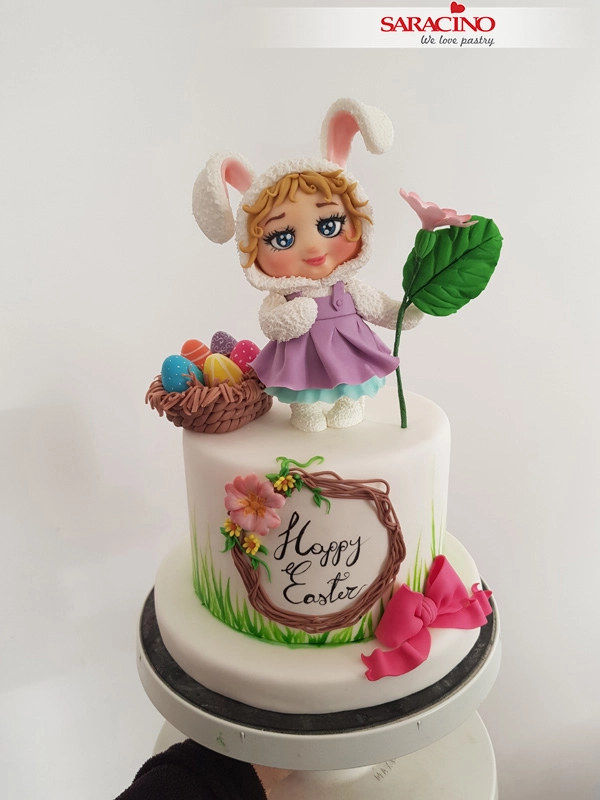
Place the figurine, basket and flower to the top of the cake. Your cute Easter celebration is ready!

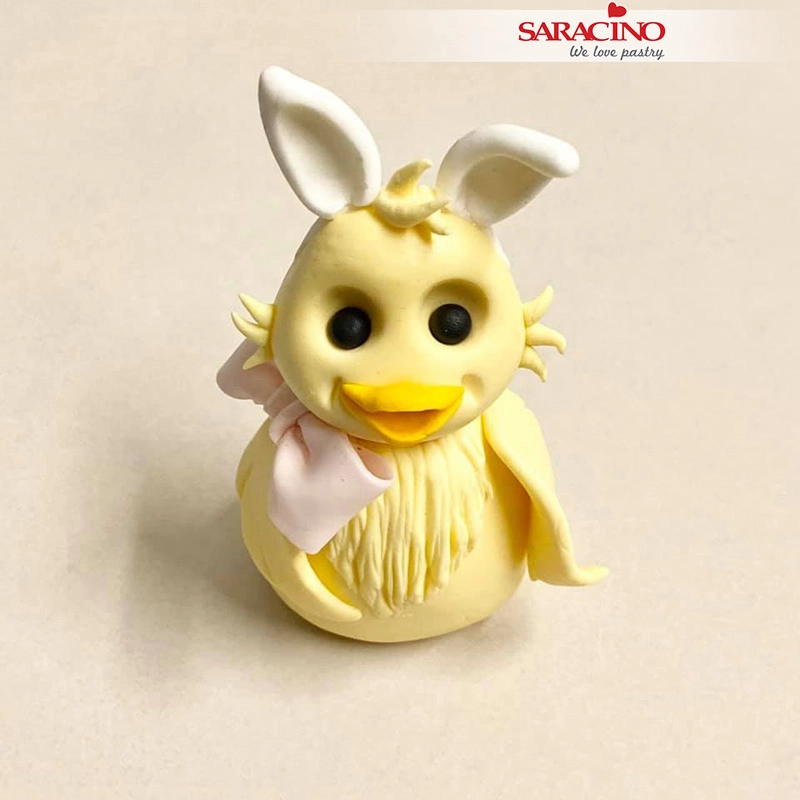
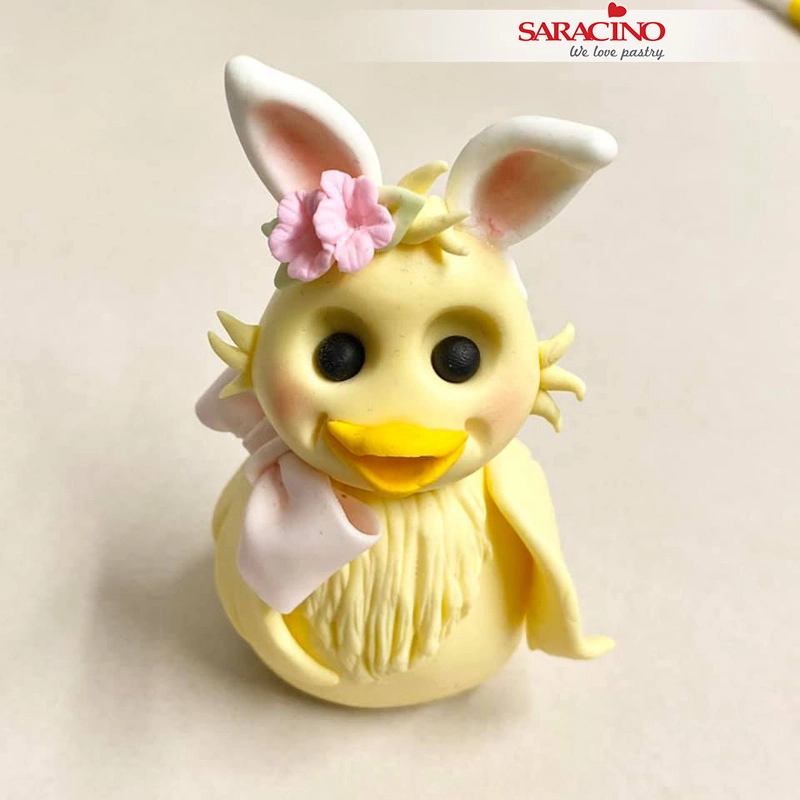
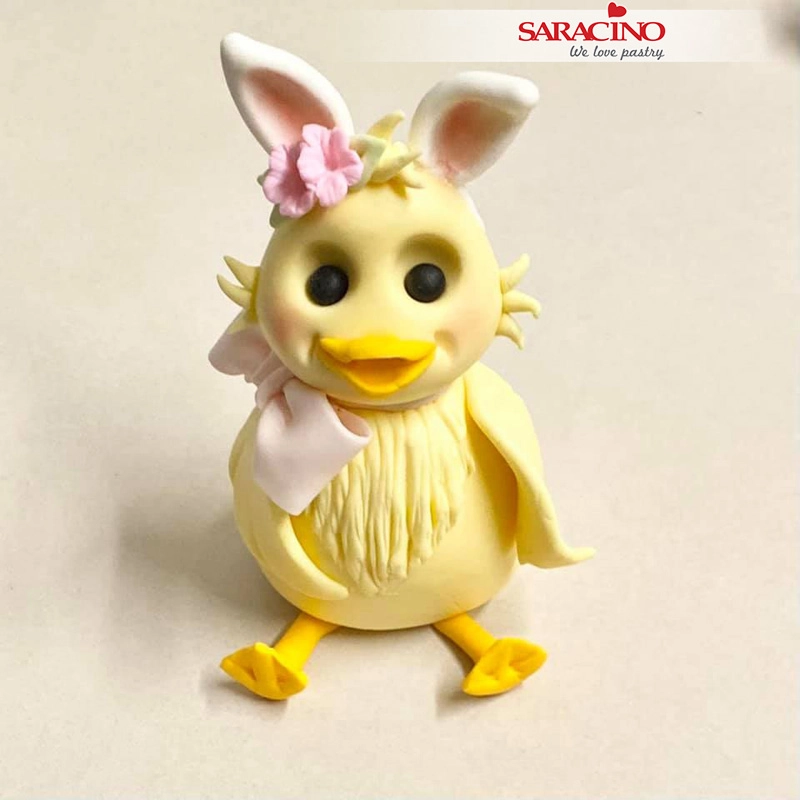
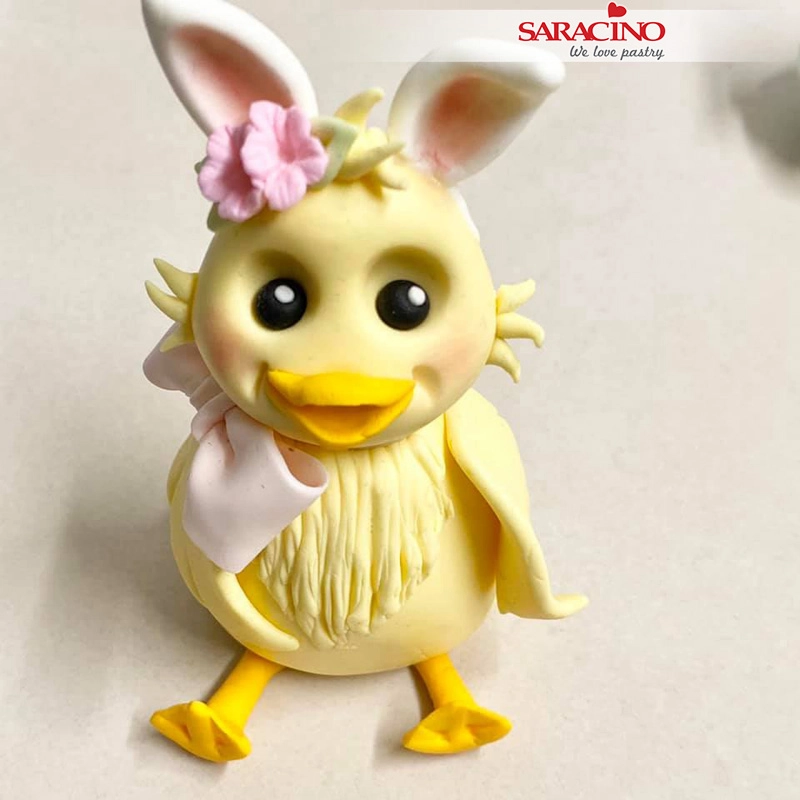
EASTER CHICKS MODELLING TUTORIAL

EASTER CHICKS MODELLING TUTORIAL

Skill level: BEGINNERS

You will need:

  • Saracino modelling paste in the following colours: pale yellow, light blue, light green, light pink, white, black
  • Saracino pink powder colour
  • Flower former or paint palette
  • Large and small circle cutters
  • Craft knife and a smooth blade knife
  • Dresden tool
  • Medium and small ball tools
  • Foam mat
  • Small PME circle plunger cutter
  • PME blossom plunger cutters
  • Petunia flower mould/veiner

Step 1

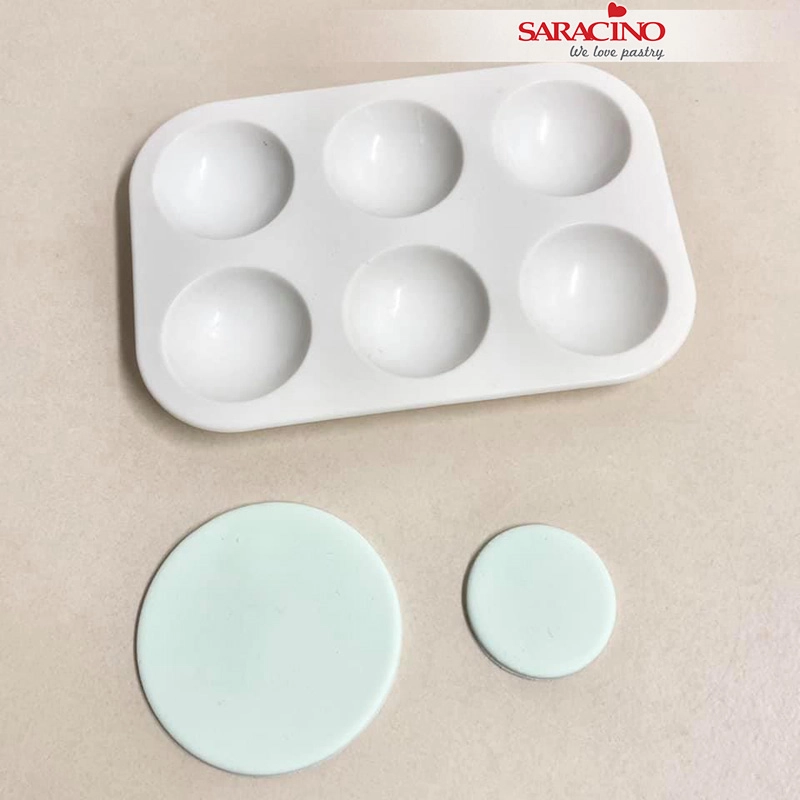
Roll out the light blue paste to approximately 2mm thick and cut out a large and small circle.


Step 2

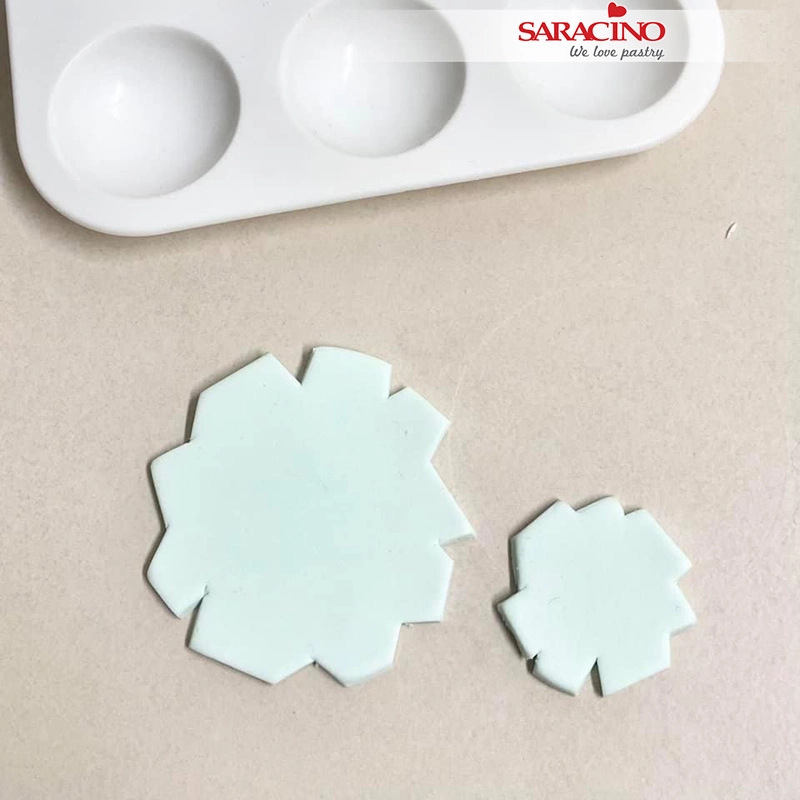
Use a sharp craft knife and start cutting the edges of the circles and cut some V shapes and then also cut a few edges straight.

Step 3

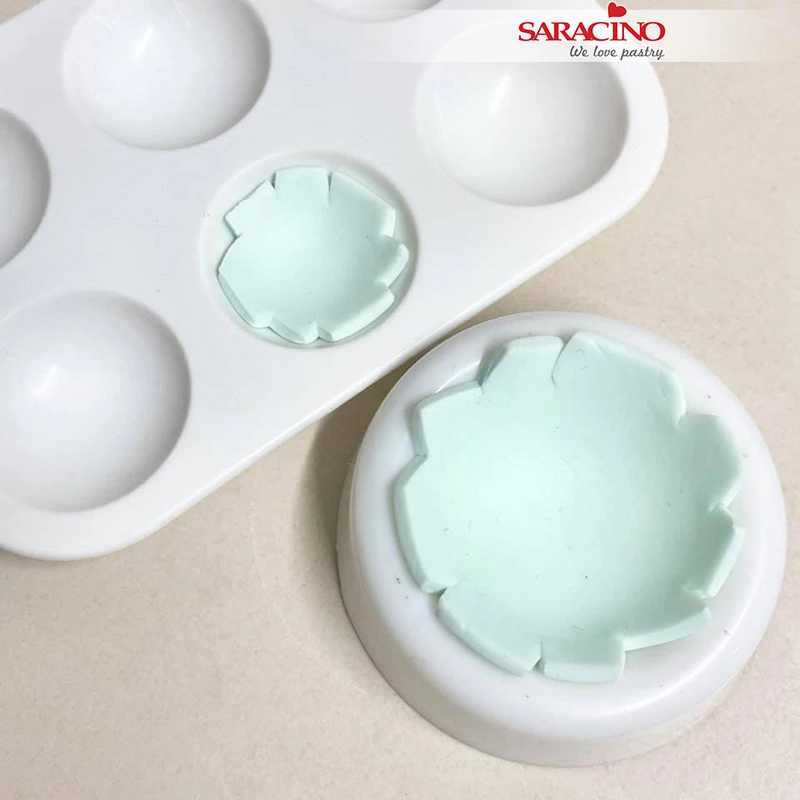
Gently press each circle into a former so it can dry rounded, ready to use later.

Step 4

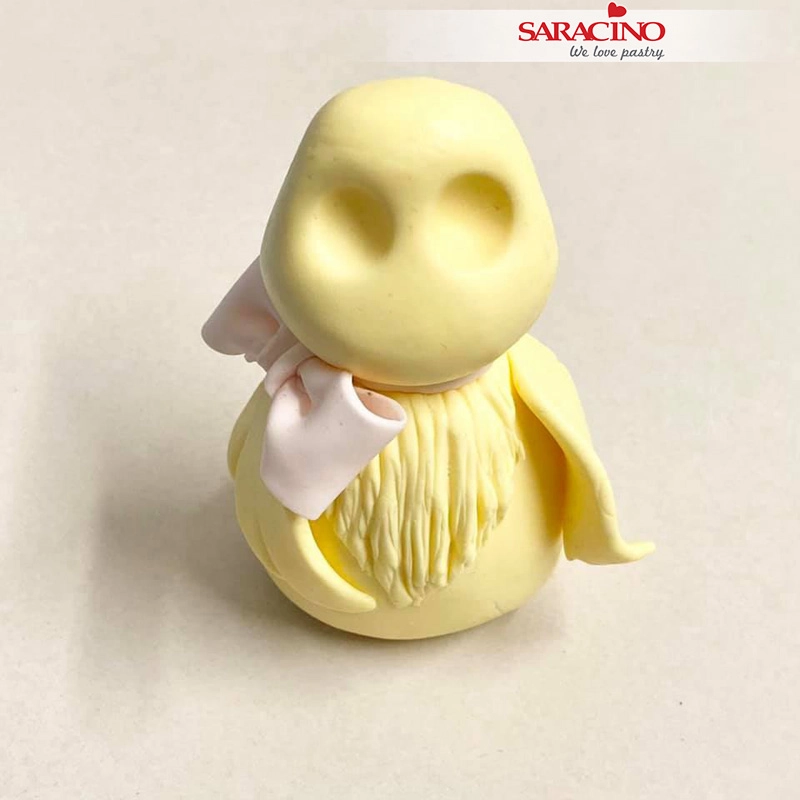
To start the large chick, roll yellow modelling paste into a teardrop shape. Trim off the top part so the head will fit nicely on to the body.

Step 5

Roll a small teardrop shape for the chest.

Step 6

Flatten the teardrop shape using your finger and use the back of your Dresden tool to texture this piece of icing.

Step 7

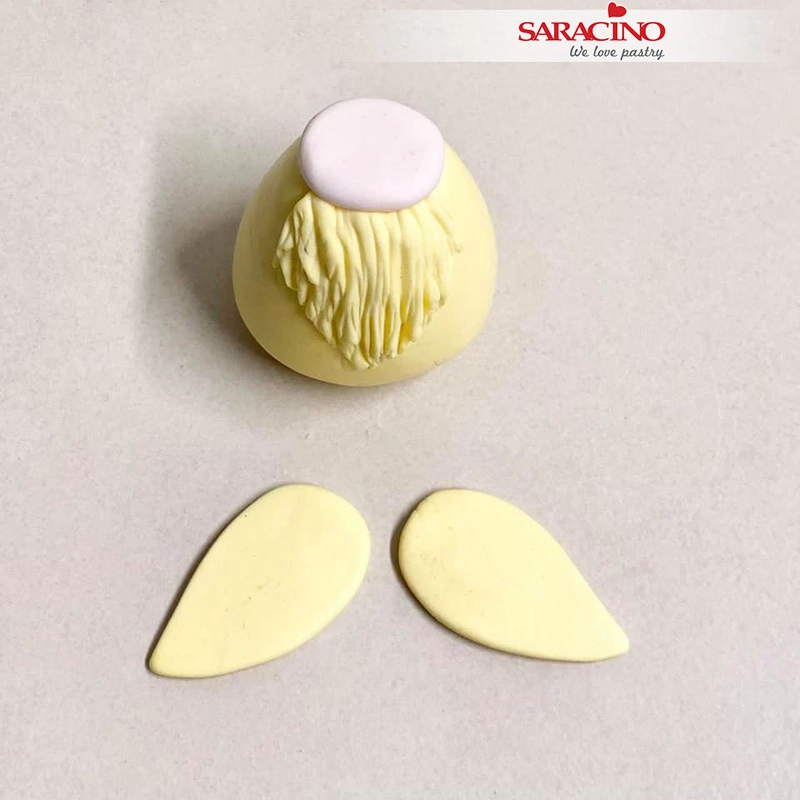
Fix the textured piece to the front of your chick and roll out a small piece of light pink modelling paste.

Step 8

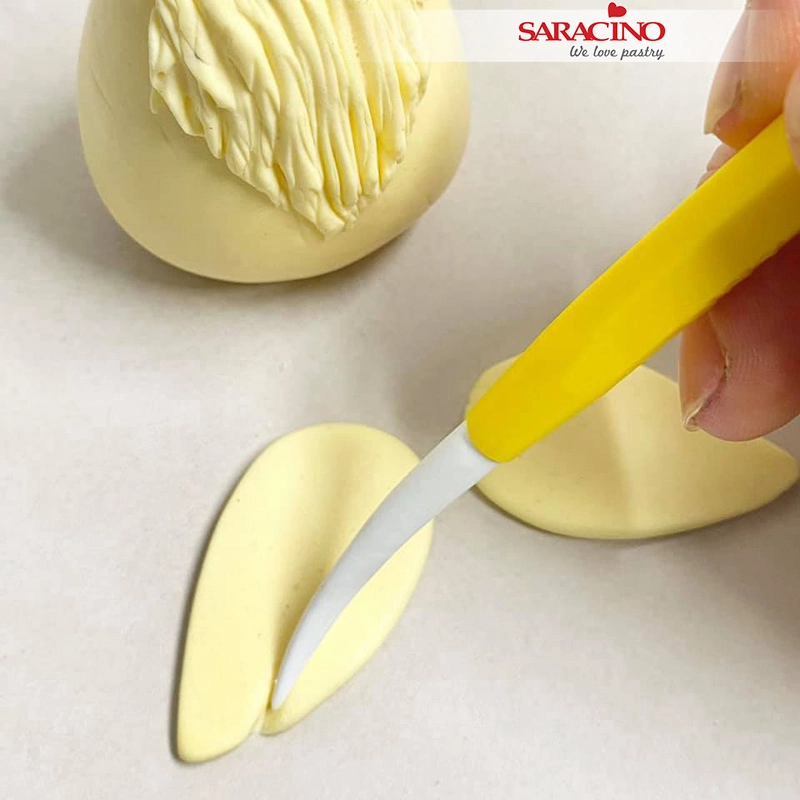
Flatten the pink ball and fix to the top of the body. Roll 2 smaller pieces of yellow paste into teardrop shapes for the wings. Flatten using your finger.

Step 9

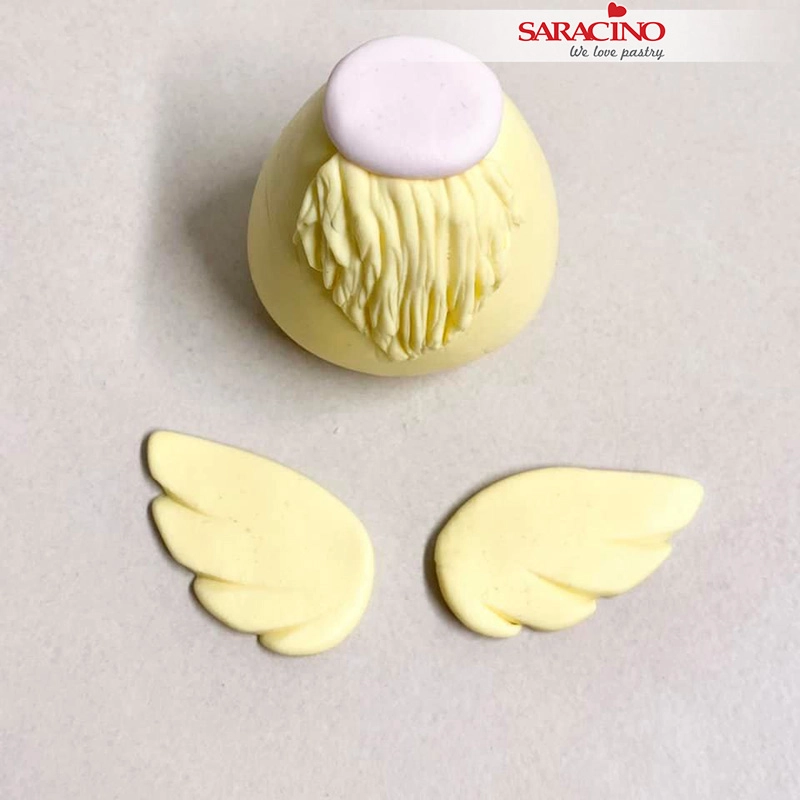
Use your Dresden tool to make little wing indents.

Step 10

Mark 3 on each wing

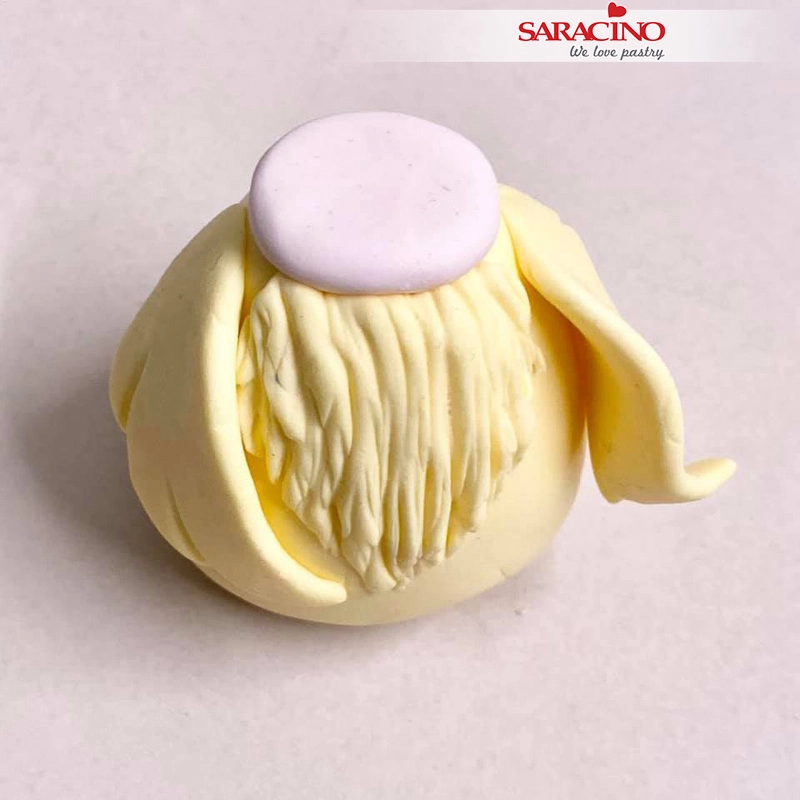
Step 11

Add the wings to the body.

Step 12

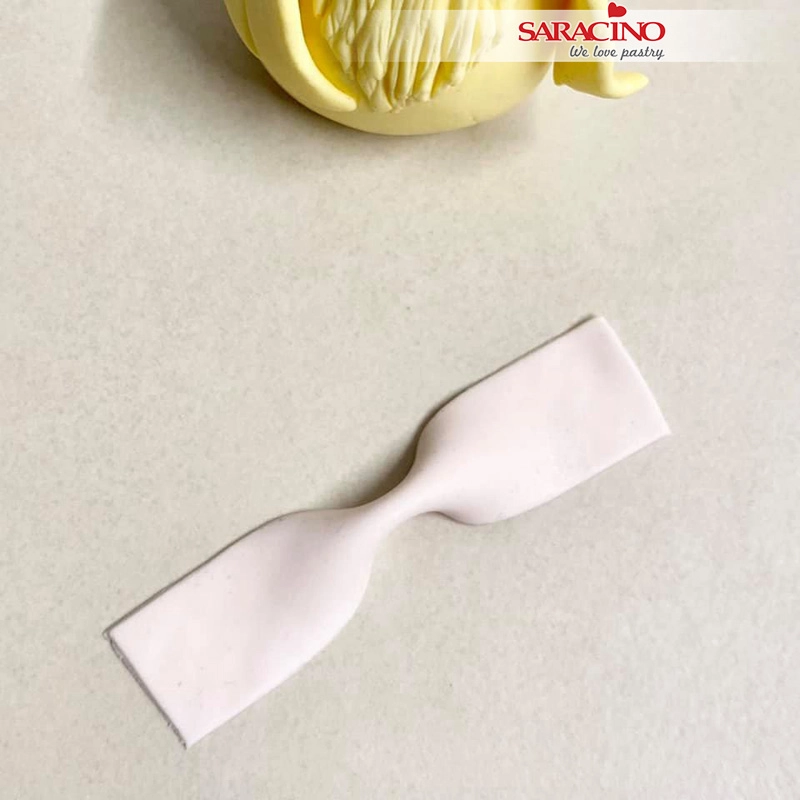
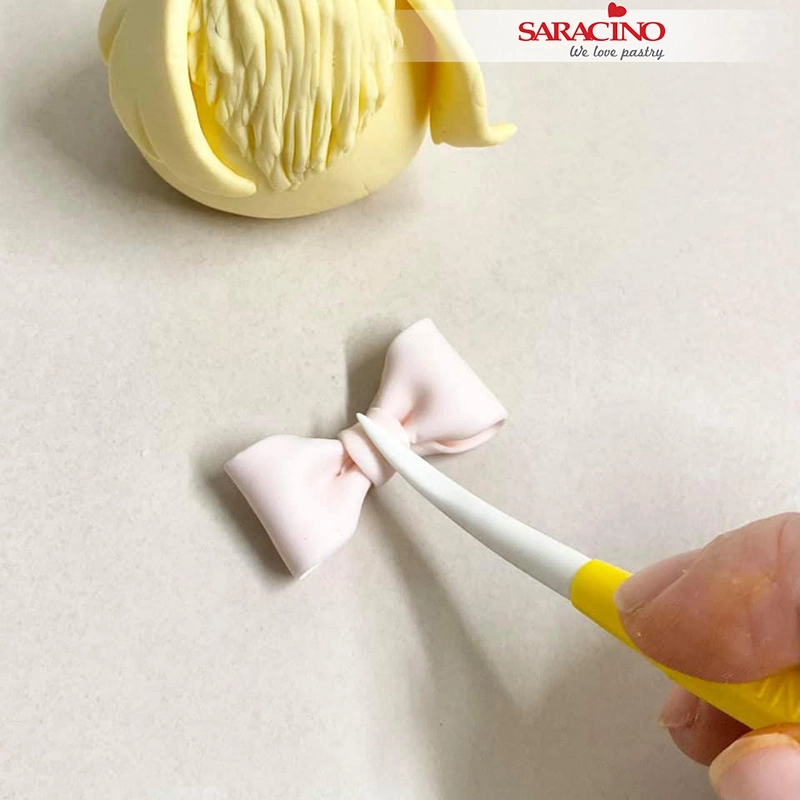
For the bow – roll a long rectangle shape and cut so you have straight edges. Find the middle of the rectangle and pinch it with your fingers to make a dent for the middle of your bow.

Step 13

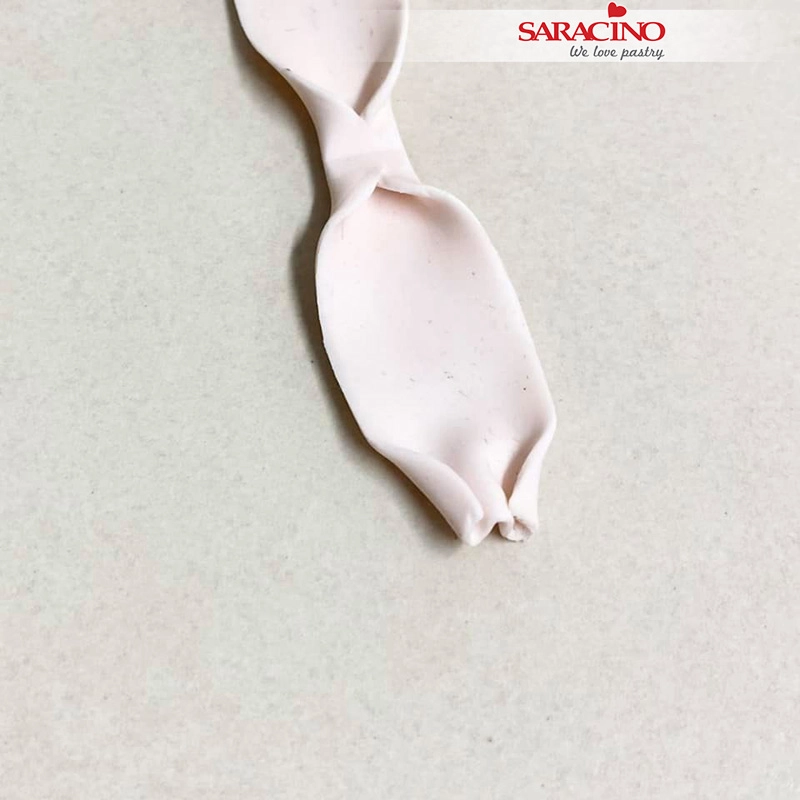
Turn the bow over and on each end of the bow gather the paste as you would do with fabric

Step 14

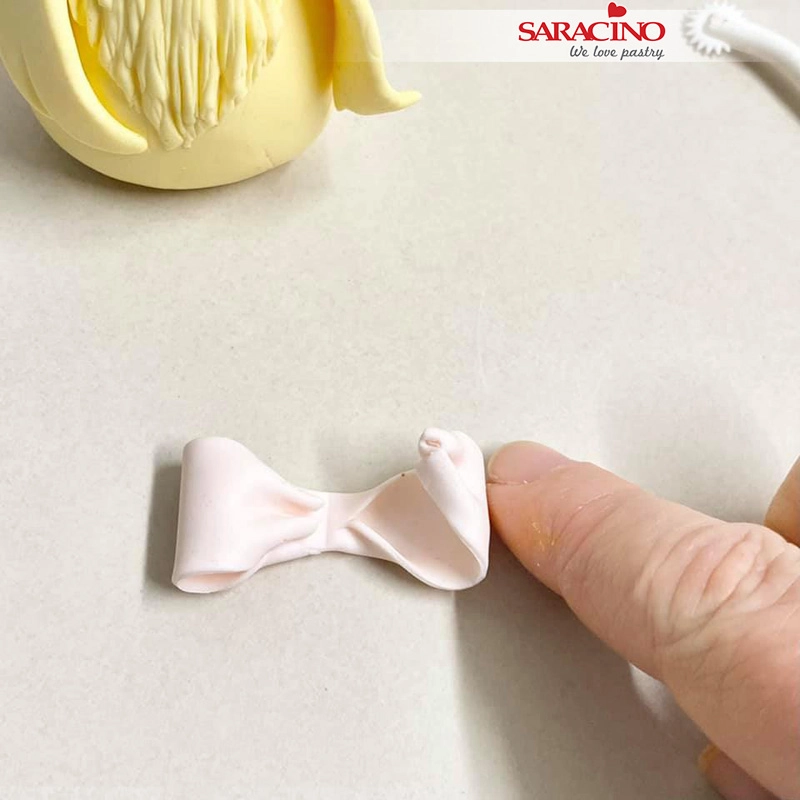
Bring one side up and over into the centre. Repeat for the other side.

Step 15

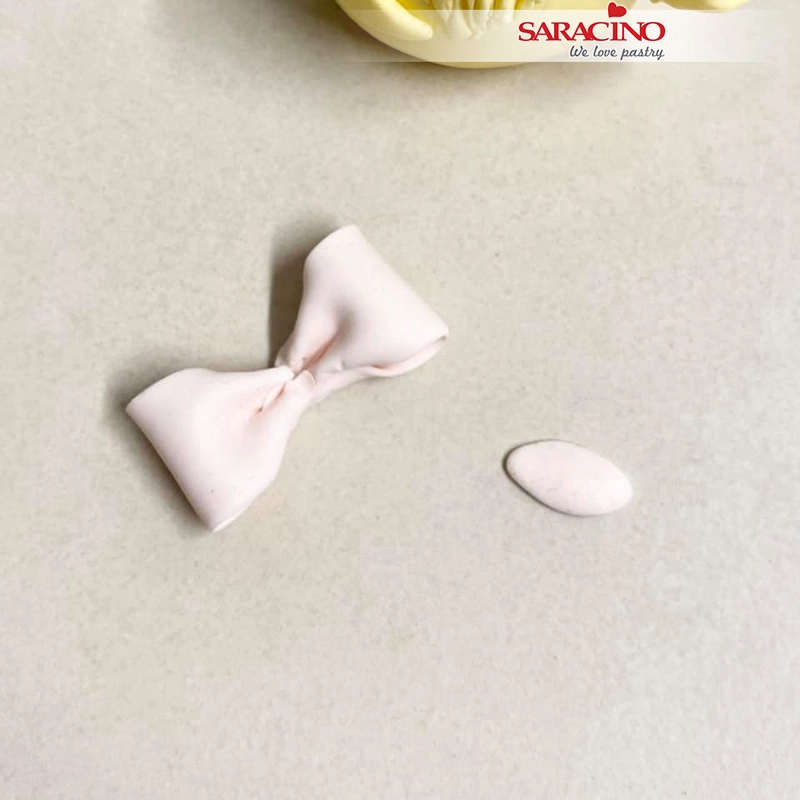
Roll and flatten a little oval piece of pink paste for the centre.

Step 16

Glue the little piece over the middle of your bow. Use your Dresden tool in the middle of the centre piece to add texture.

Step 17

Add the bow to the side of the neck on your chick. Roll a ball for the head.

Step 18

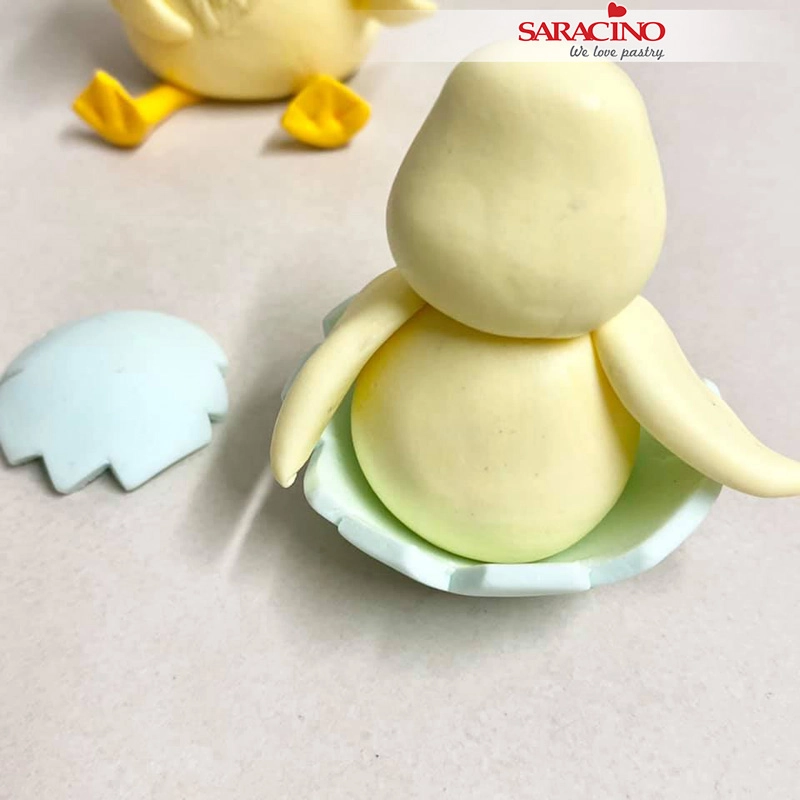
Shape the head a bit so it’s smaller on top and wider at the bottom and add your head to the body.

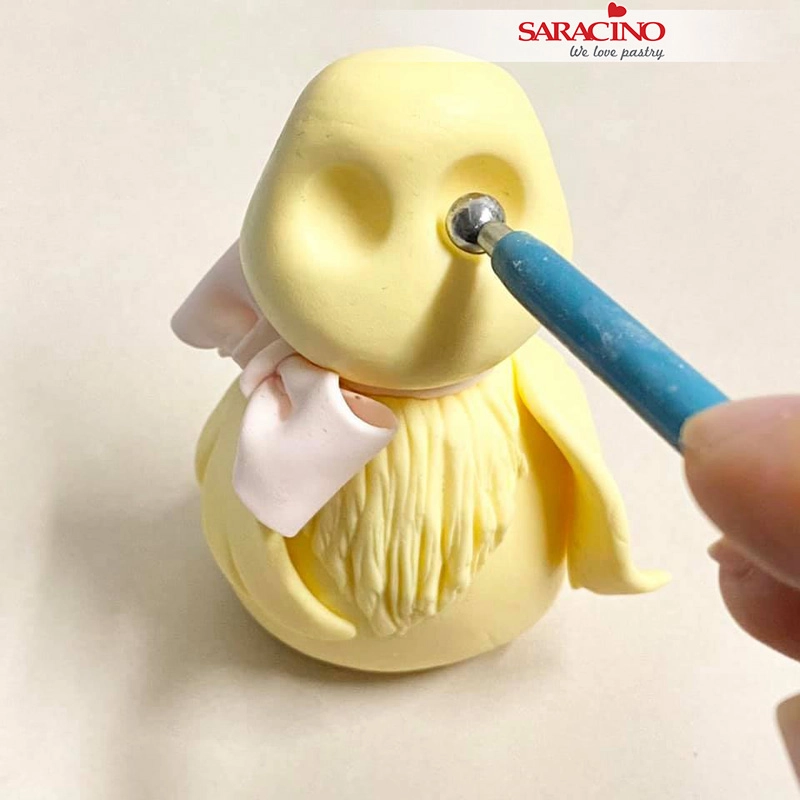
Step 19

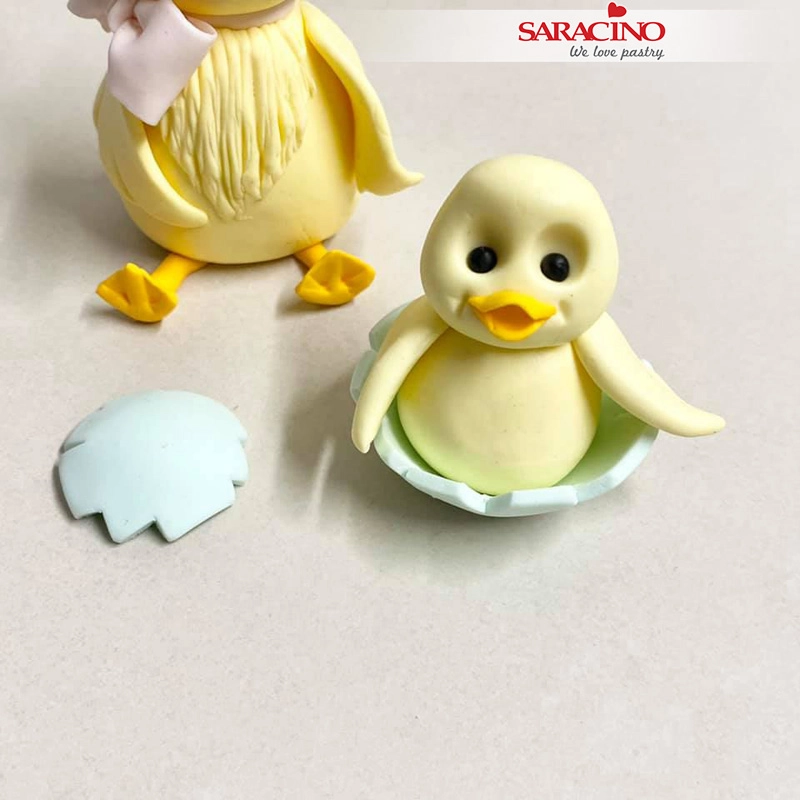
Use a medium ball tool to create some eye sockets. Smooth the edges slightly on the eye sockets to ‘soften’ the look a bit

Step 20

Use a smaller ball tool to make little holes for the eyes

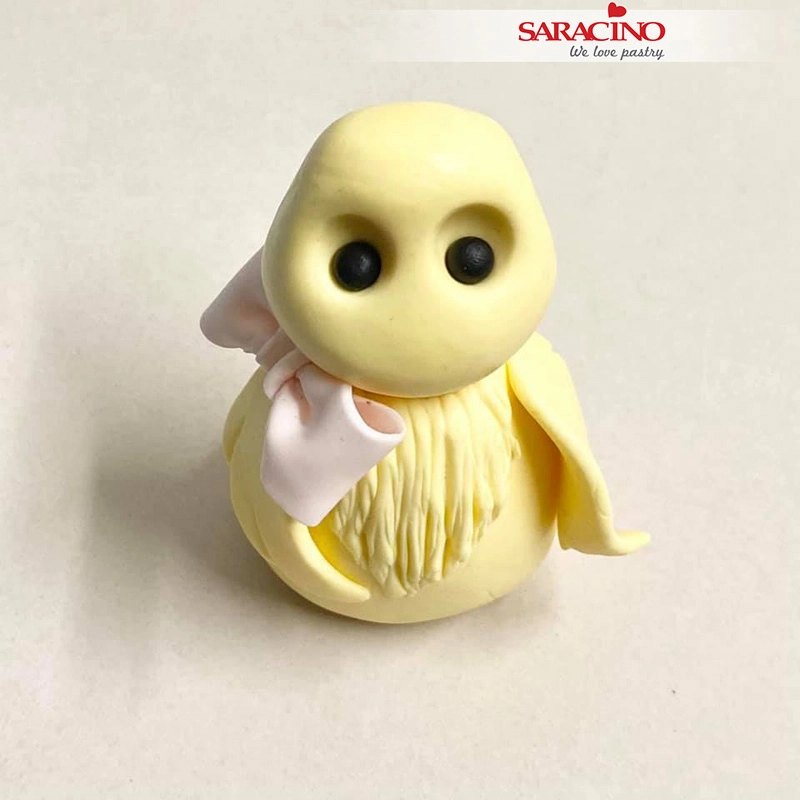
Step 21

Roll 2 small balls of black modelling paste for the eyes to fit in the smaller holes. Add the eyes to your character.

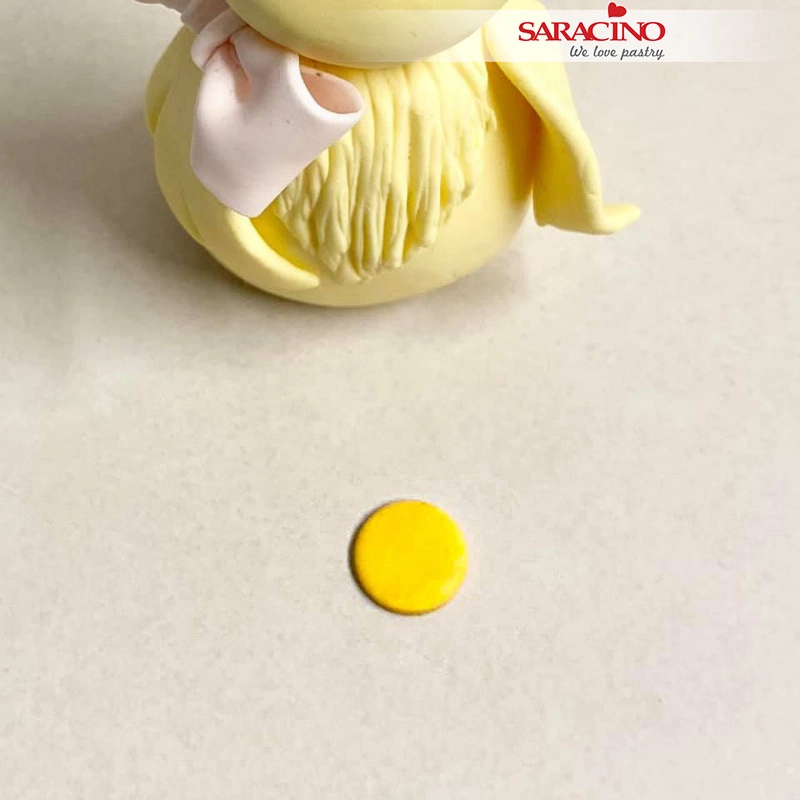
Step 22

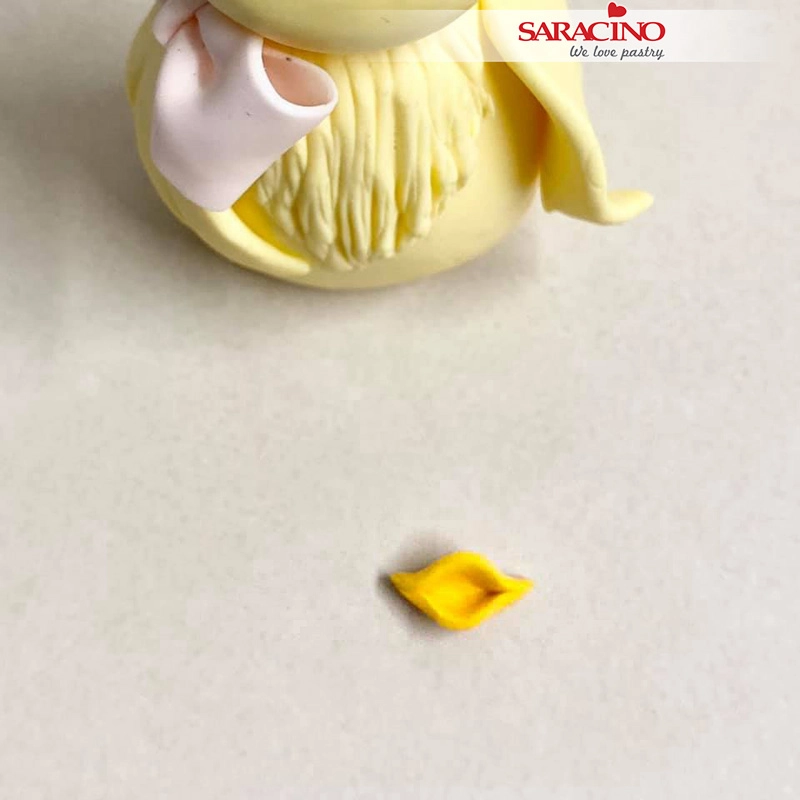
For the beak, cut out a small circle from dark yellow.

Step 23

Gently fold this circle over and pinch each side, leaving the centre open a little bit.

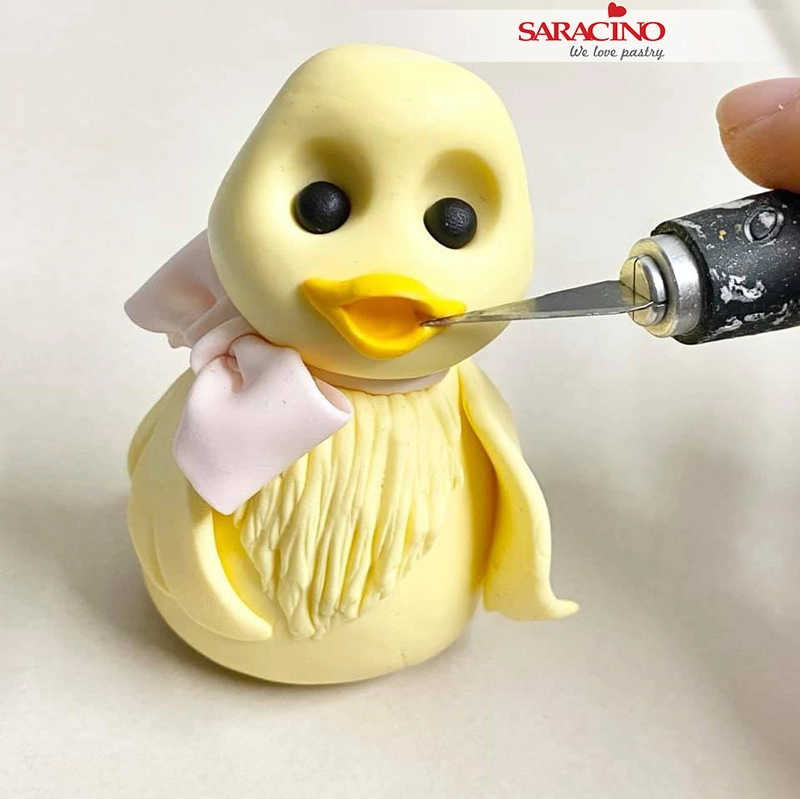
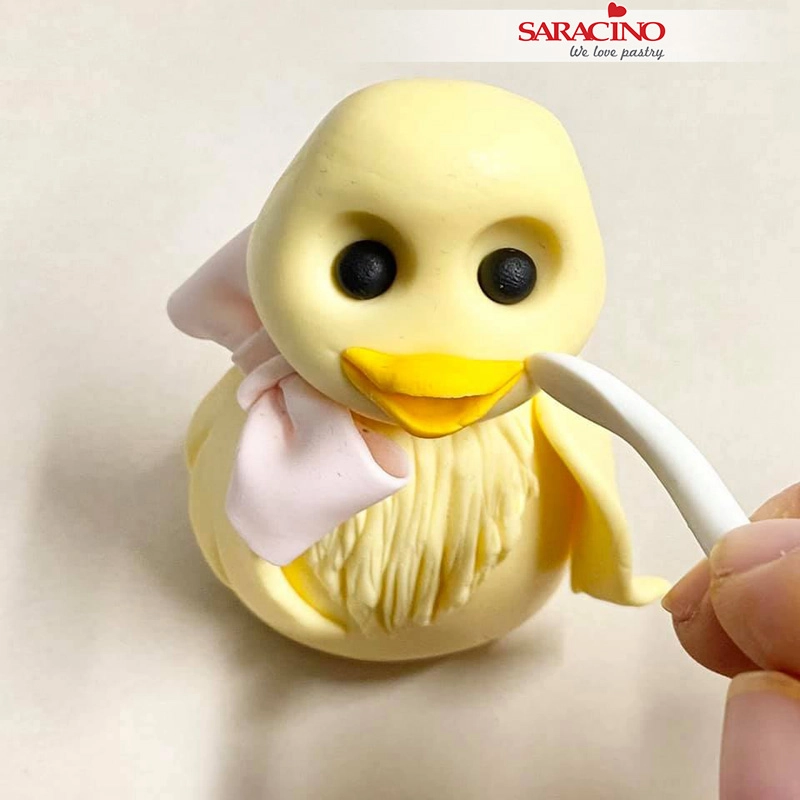
Step 24

Add the beak to the face, I used a ball tool to press it in place. Use the back of your craft knife for each side of the beak to make it more defined.

Step 25

Use the scoop side of the Dresden tool to make little dimples each side of the beak

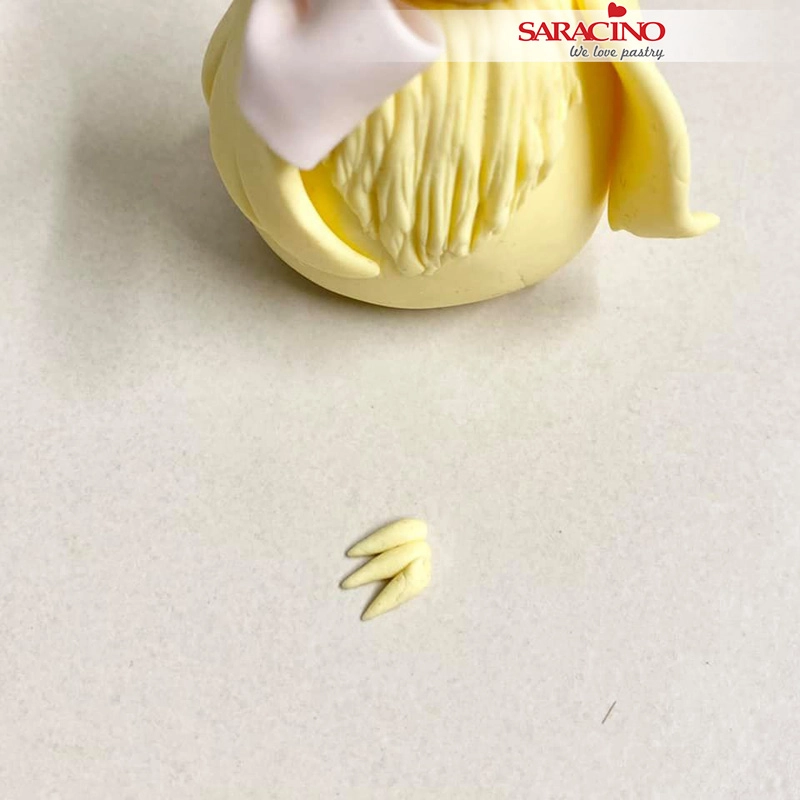
Step 26

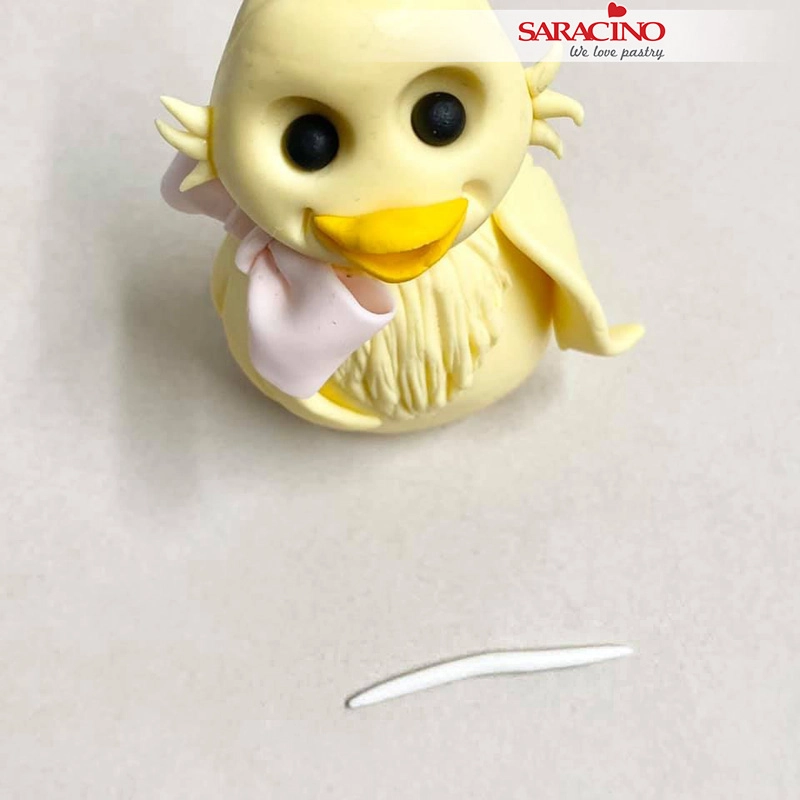
Roll 3 small pieces of yellow icing and press them together for some feather effect on the sides of the face.

Step 27

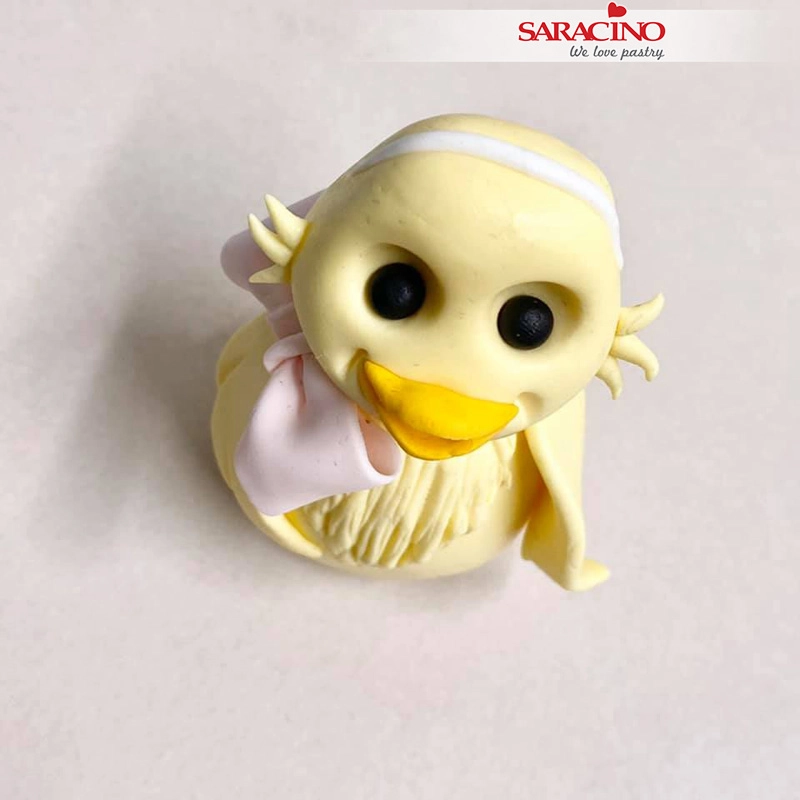
Trim the larger side of these feathers and glue in place on the side of each cheek. Roll a thin white piece of paste to add to the top of the chick’s head.

Step 28

Glue the white piece in place as a head band.

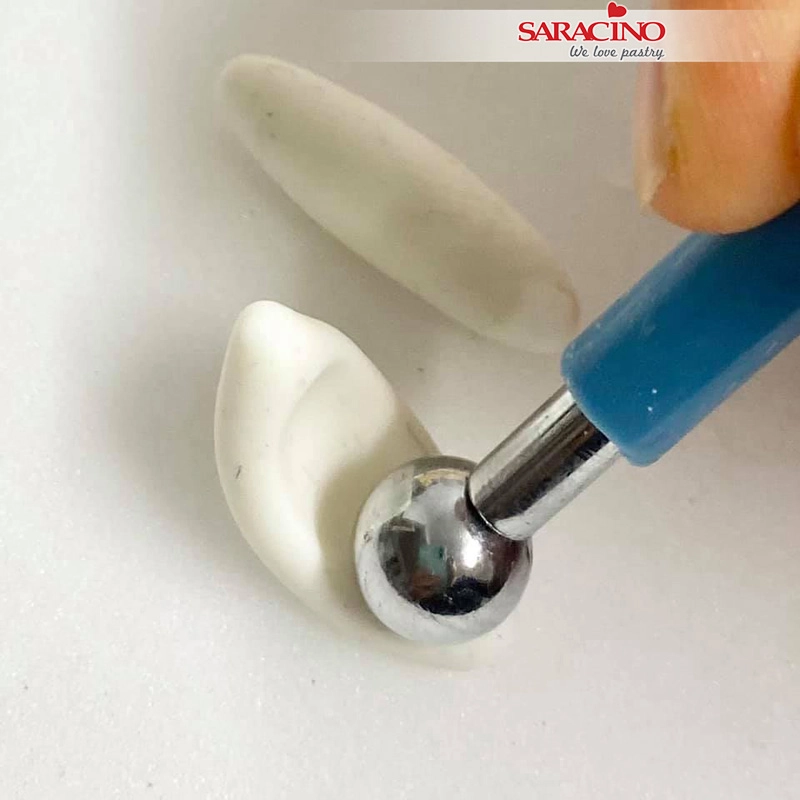
Step 29

For the ears roll out 2 white pieces of paste. Use a foam mat and ball tool to indent the ears, roll the ball tool up and down the ears.

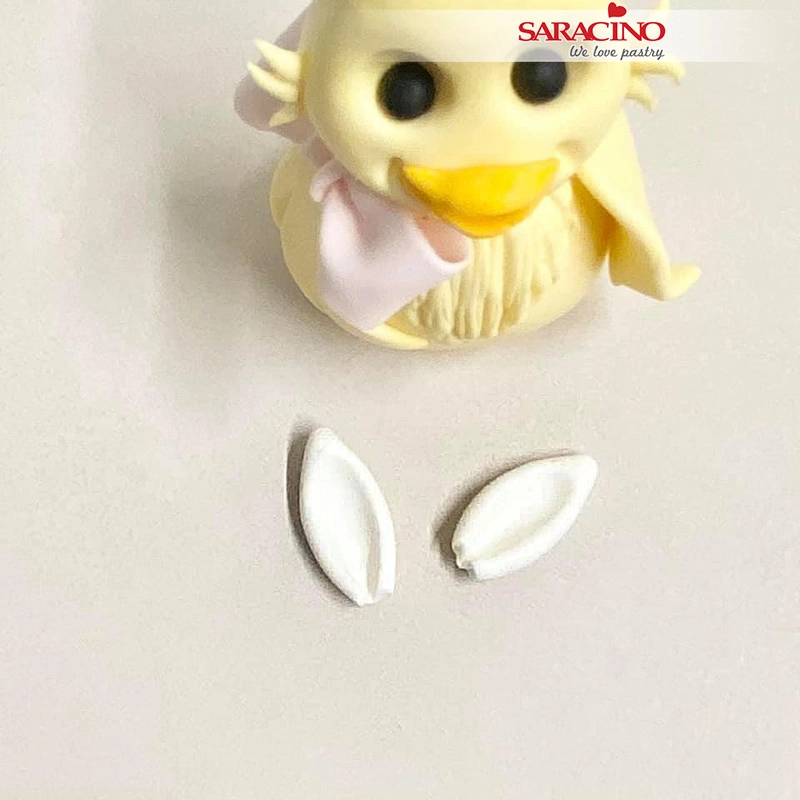
Step 30

Trim off the bottom of each ear. Pinch the base slightly to fold it in a little bit

Step 31

Add the ears to the headband on your chick. Add some little feathers between the ears

Step 32

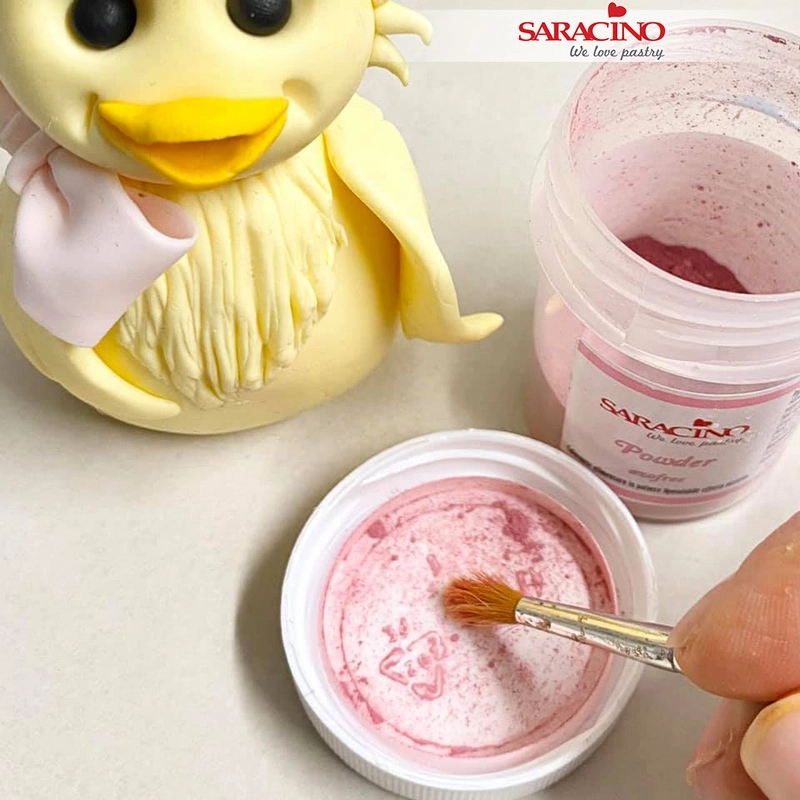
Using  pink Saracino dust and a soft brush dust the inside of the ears and the cheeks.

Step 33

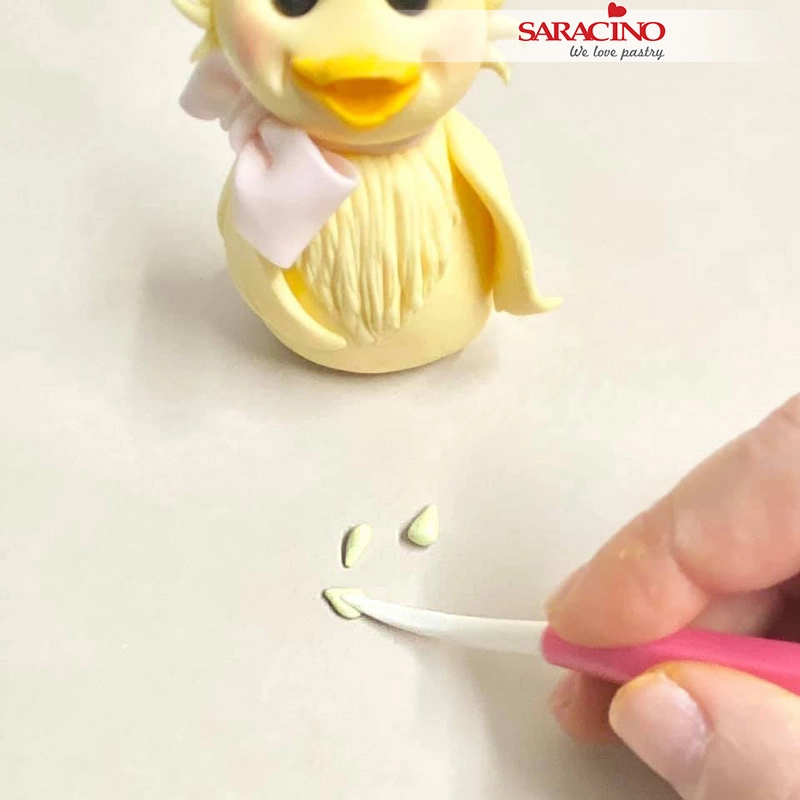
Roll 3 small pieces of light green paste into little teardrop shapes. Use the back of your Dresden tool to indent each shape to make little leaves.

Step 34

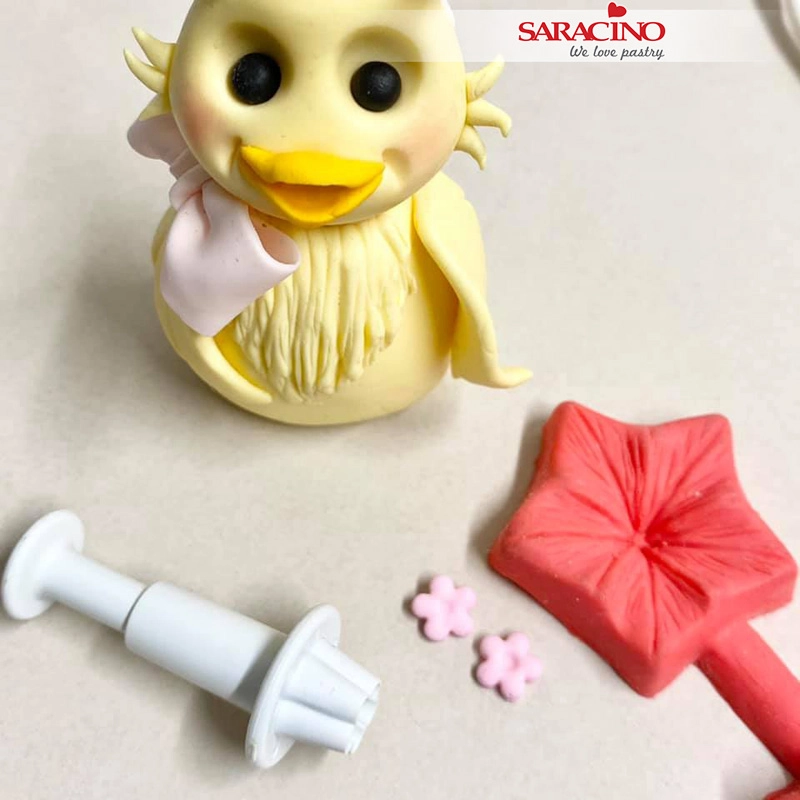
Use a small blossom cutter and a petunia mould to make some flowers. Press the flowers in the mould to give them extra texture

Step 35

Add the leaves and flowers to the head next to the ear

Step 36

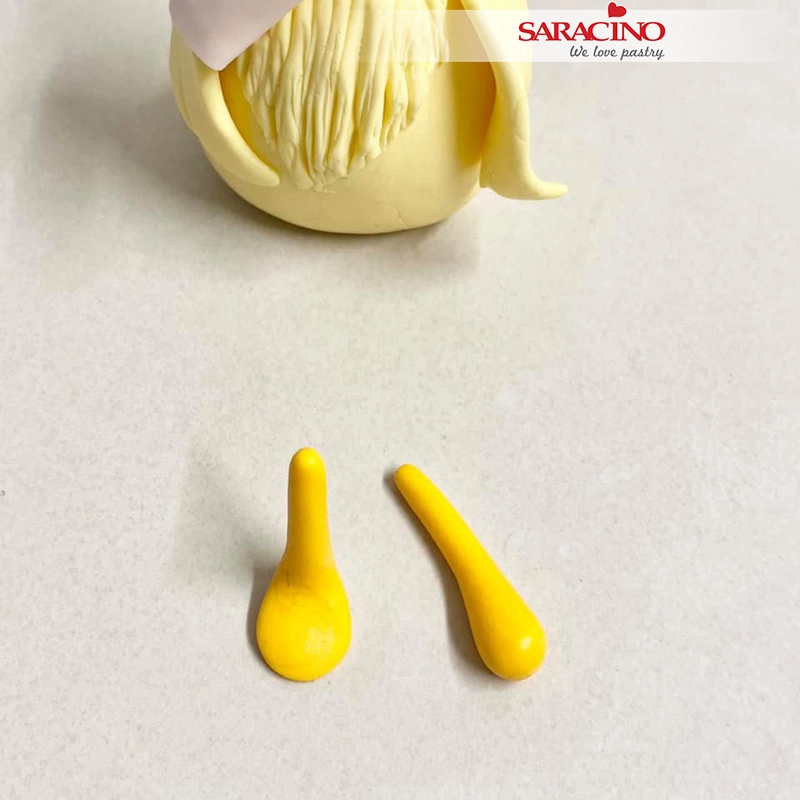
For the legs, roll 2 pieces of dark yellow paste with a wider part on each end. Press the wider part flatter and bend the leg up

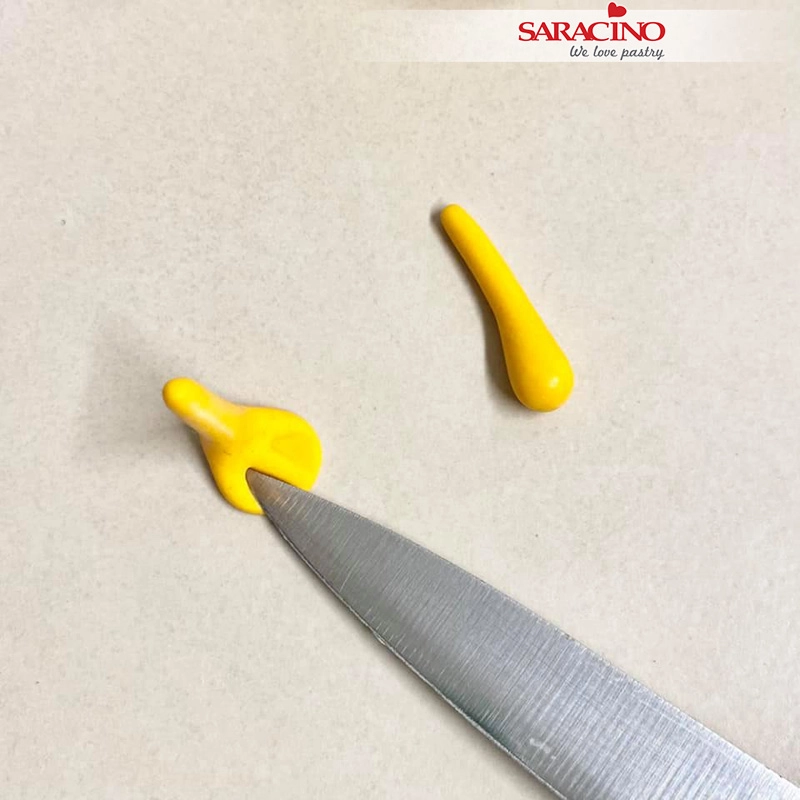
Step 37

Use the blade of a knife to mark the foot of the chick. Mark each end of the foot

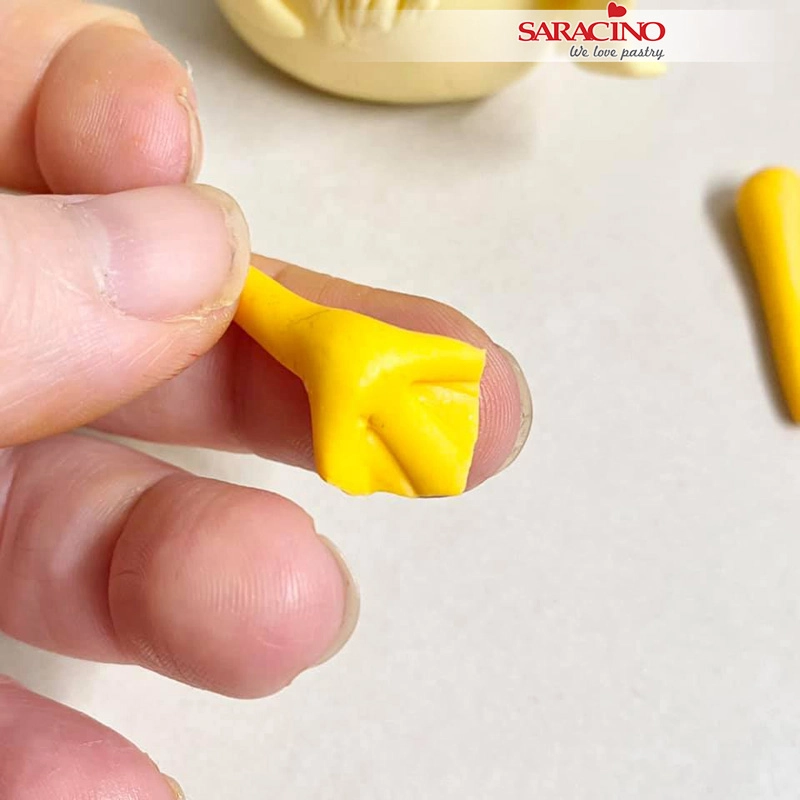
Step 38

Trim each end with a craft knife so you have a V shape. Turn the foot over on your finger and mark it the same underneath

Step 39

Add the legs to the character

Step 40

Using a small ball tool mark each eye and add some small white balls to the eyes. 

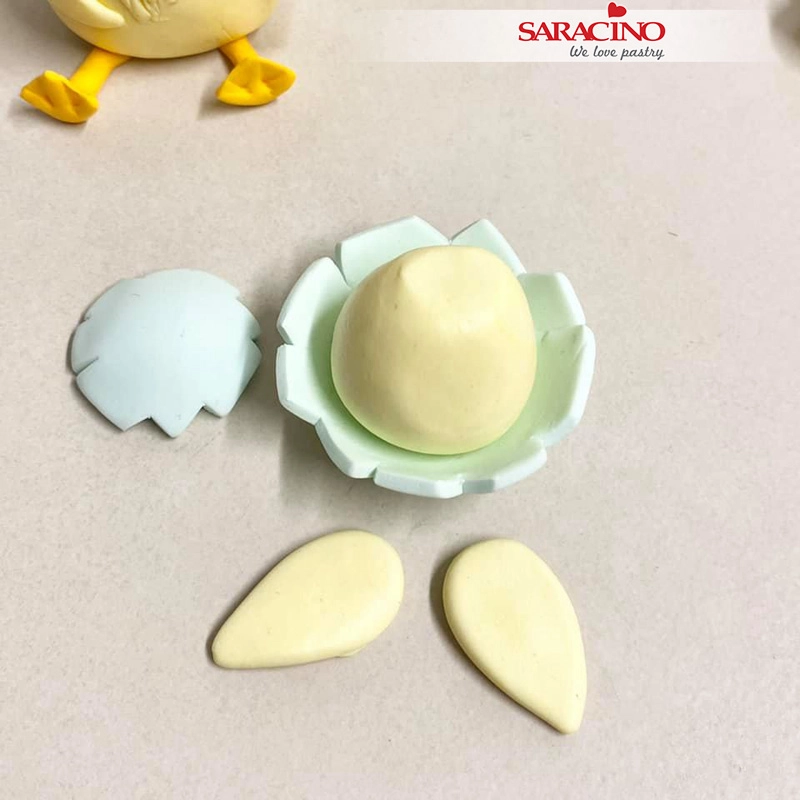
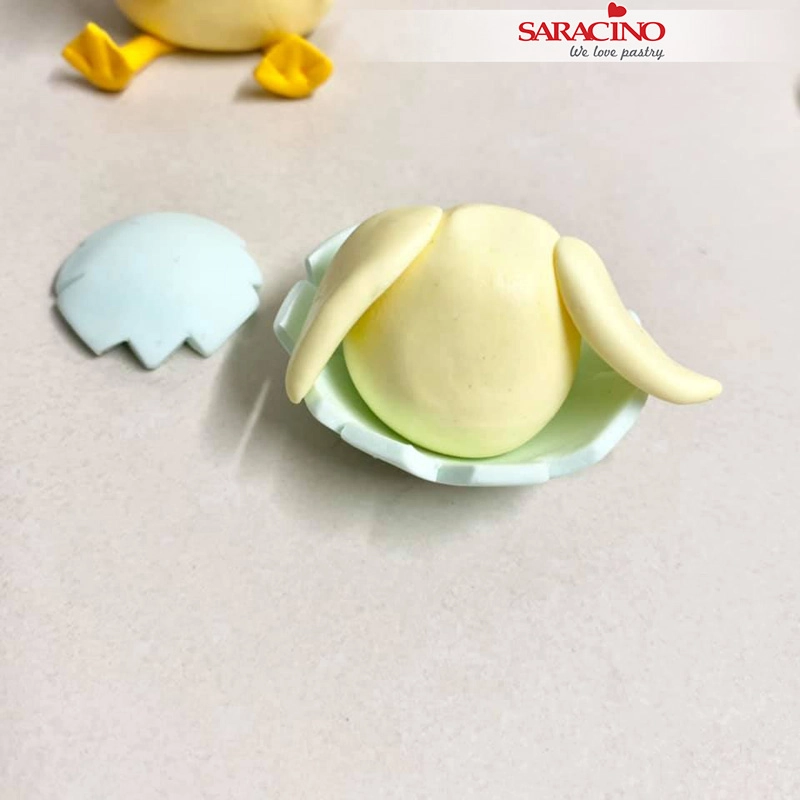
Step 41

For the body of the baby chick roll a ball of light yellow paste and shape into a pear shape. Cut off the top ready for the head. Roll two teardrop shapes and press with your finger to form the wings.

Step 42

Fix the wings to the body.

Step 43

Shape the head as with the larger chick. Fix to the body. 

Step 44

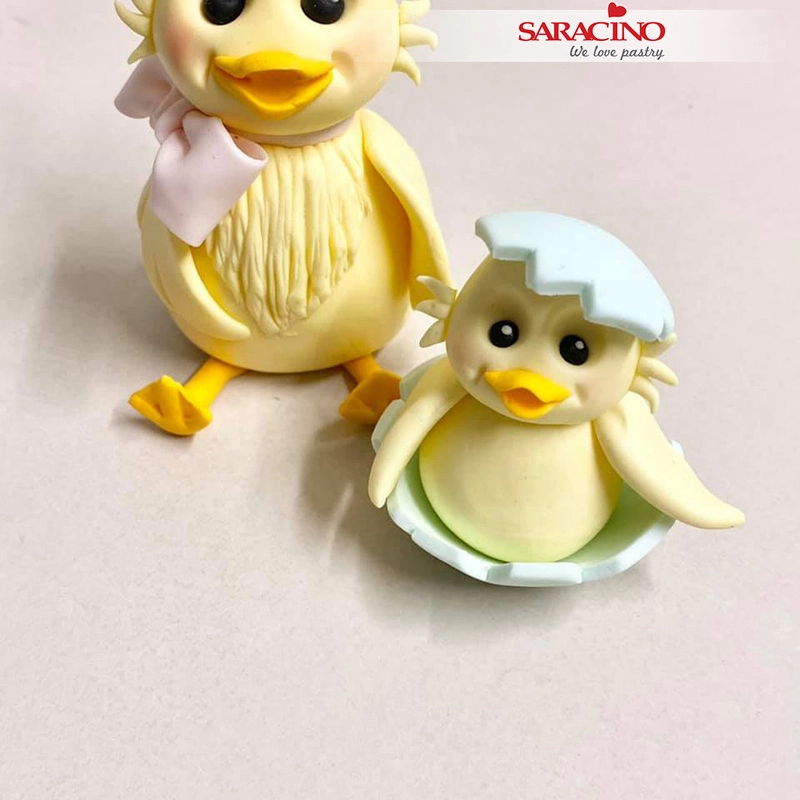
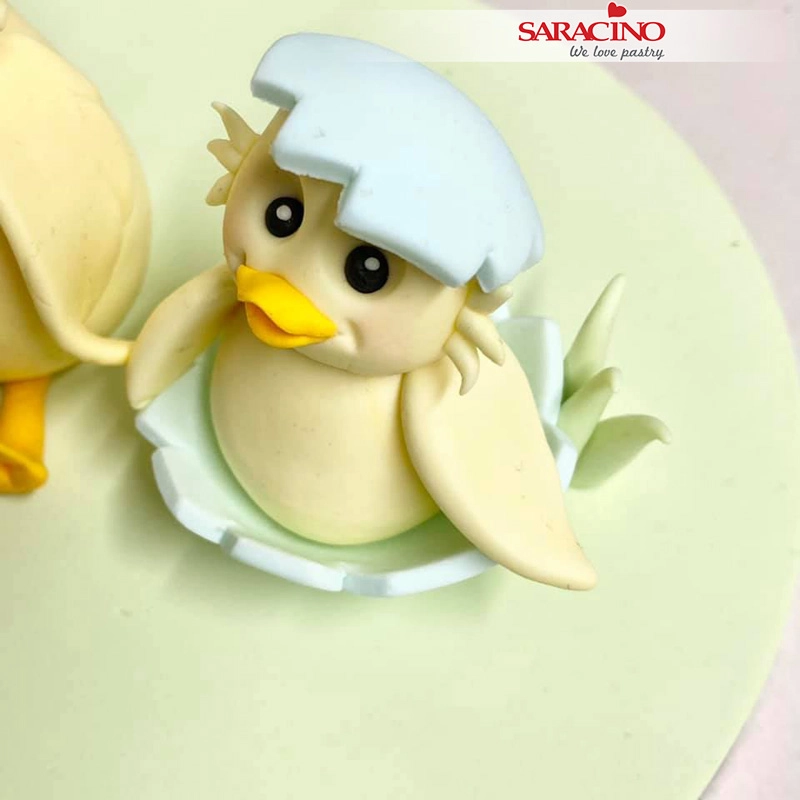
Create the eye sockets, eyes, beak and dimples the same as we did for the large character

Step 45

Add some little ‘feathers’ each side of the cheek and the shell on the baby’s head

Step 46

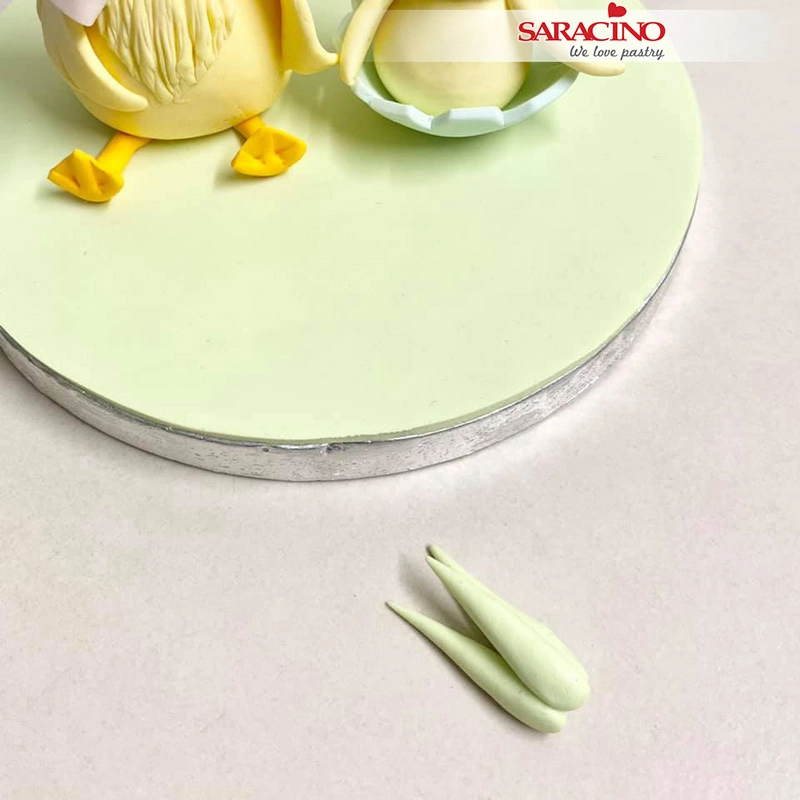
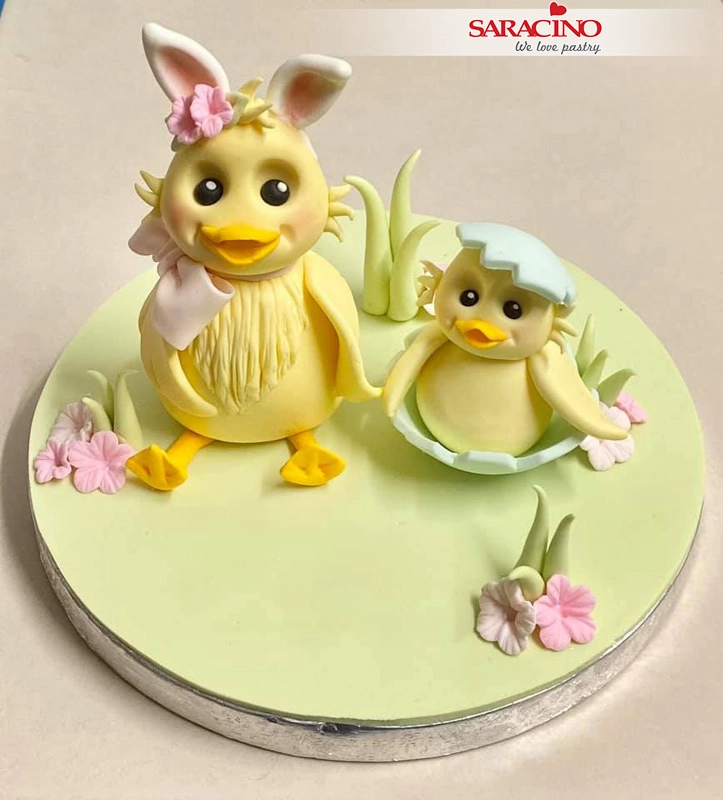
Add your characters to a board or cake and using green paste roll 3 long teardrop shapes for grass. Stick the pieces of grass together

Step 47

Trim off the rounded pieces of the grass and add to the cake board

Step 48

Cut some extra flowers in different sizes and add them randomly

MACARONS WEDDING TOWER

MACARONS WEDDING TOWER

Skill level: BEGINNERS

Recipe:

www.indulgewithmimi.com​ 

You will need: 

  • Saracino almond flour
  • Icing sugar
  • Caster sugar
  • Eggs
  • Buttercream
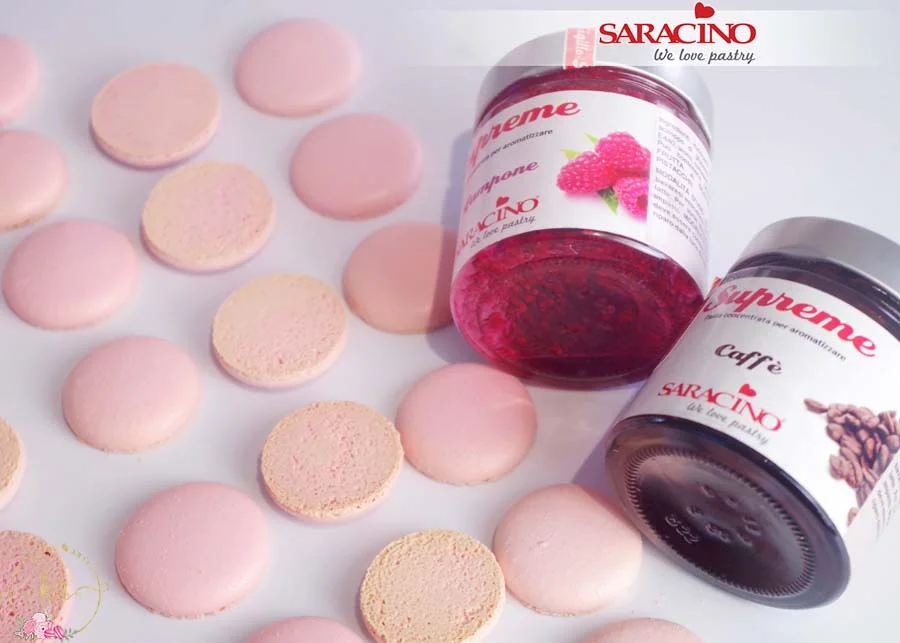
  • Saracino raspberry flavouring
  • Saracino coffee flavouring
  • Saracino gel colours – Pink
  • Pinch of salt or cream of tartar

Optional ingredients:

  • Jam
  • Titanium dioxide
  • Other Saracino food gel colours

Equipment:

  • Oven
  • Mixer with whisk attachment
  • Silicone Spatula
  • Glass or metal bowl
  • Sieve
  • Piping bags and nozzles no. 10/12
  • Baking tray – flat
  • Silicone/ Teflon mat or baking paper


Step 1

Clean all your equipment with vinegar to take away any possible oil residue.
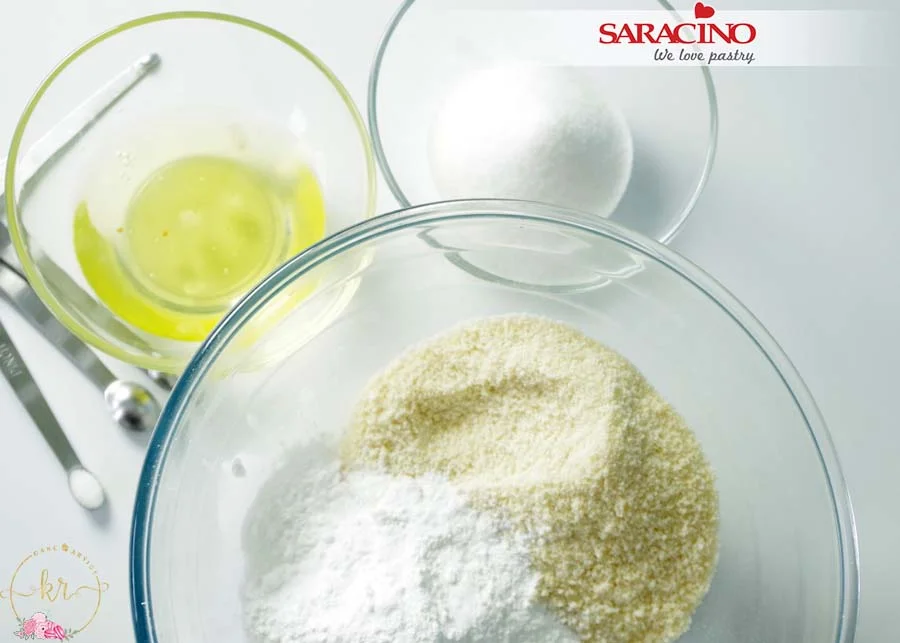
Separate the egg whites. Weigh all the ingredients. Combine almond flour with icing sugar. Add a pinch of titanium dioxide to the egg white (not essential but i like it for more of a pastel look).

Step 2

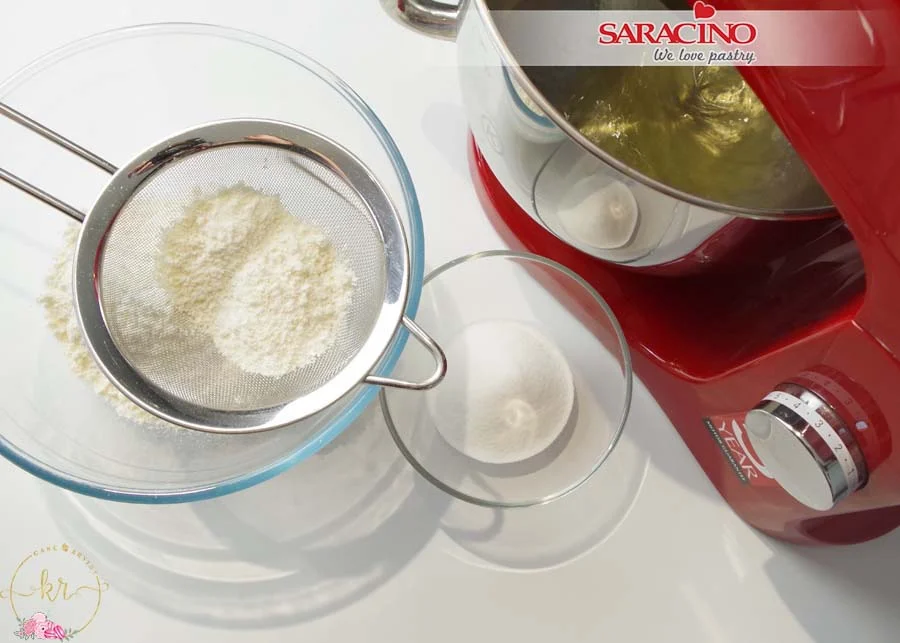
Add a pinch of salt or cream of tartar to your egg whites and start whipping, meanwhile sift your almond flour and icing sugar.

Step 3

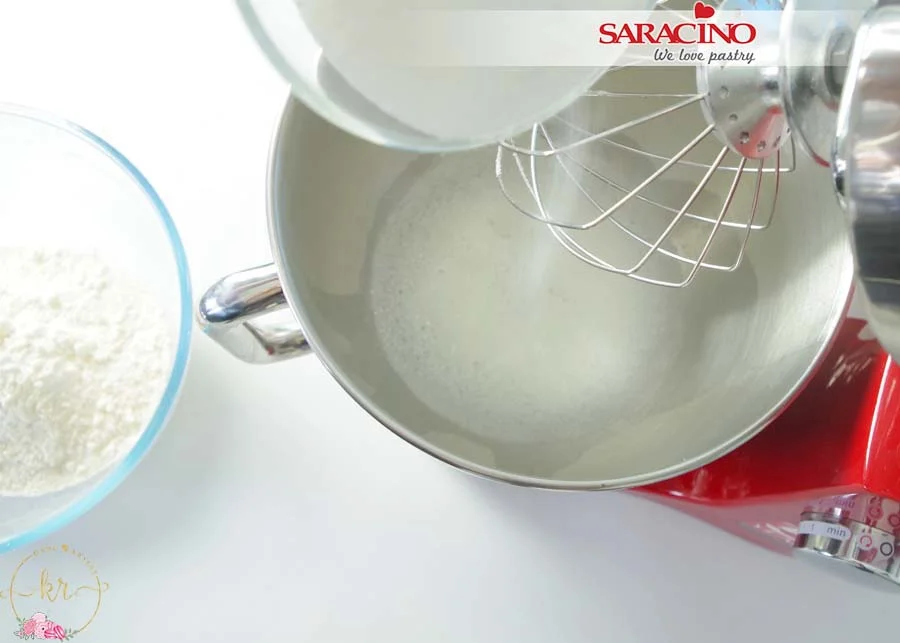
Once your egg whites start looking frothy start adding caster sugar 1⁄3 at a time leaving around a minute in between adding each 1/3.

Step 4

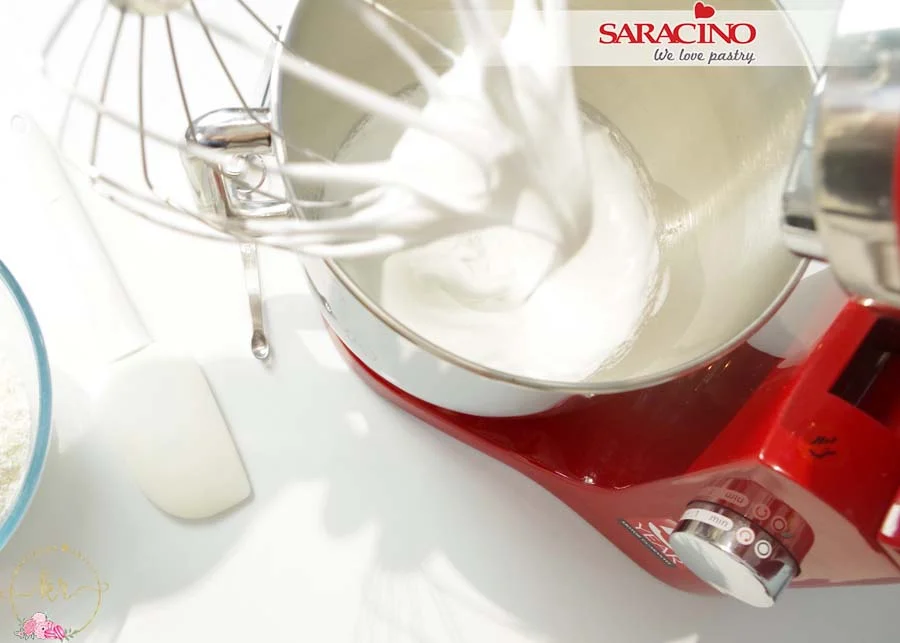
Keep whipping on medium until we achieve soft peak consistancy.

Step 5

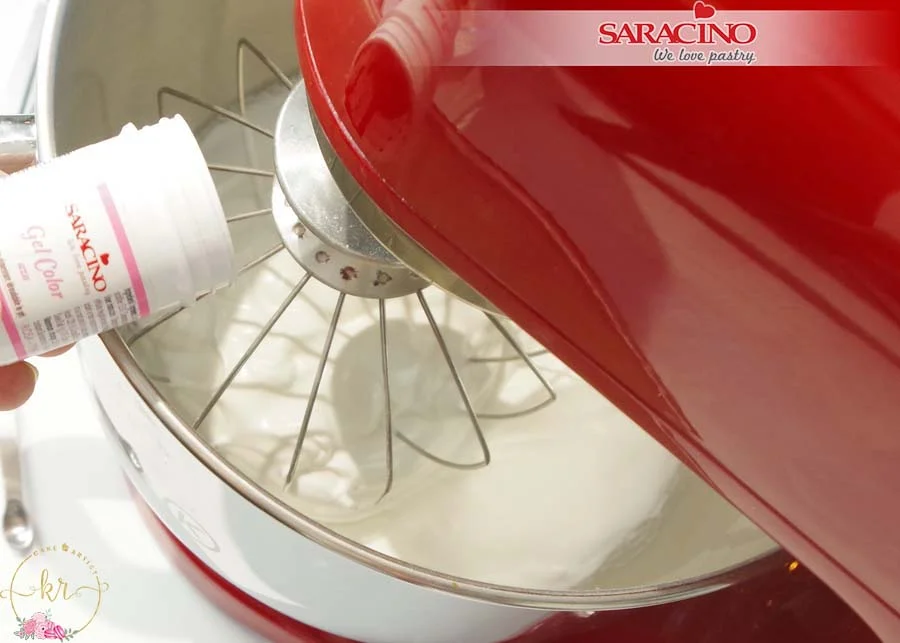
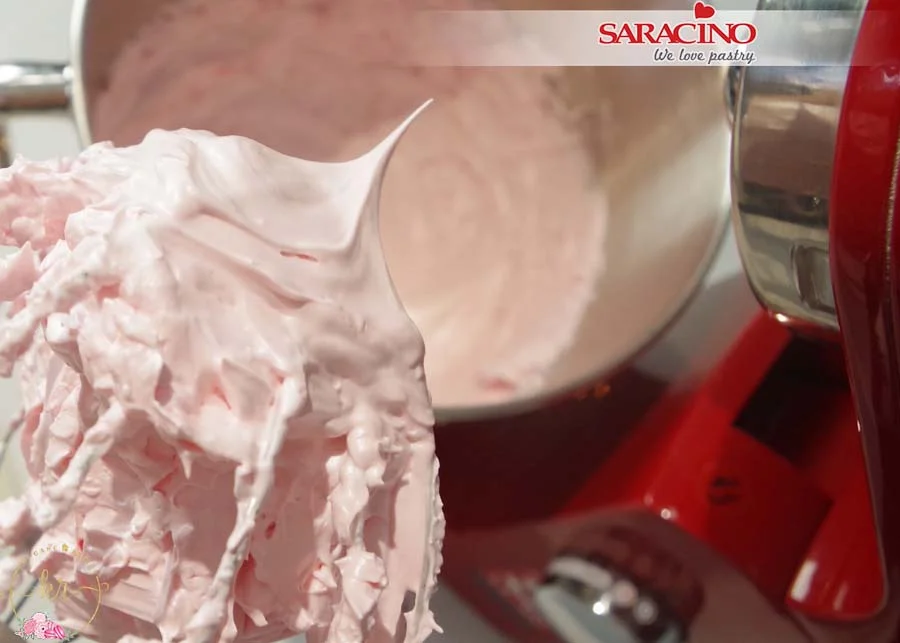
Add the colouring and increase the speed to a higher number for the last minute or two.

Step 6

Carefully watch your meringue mixing in the bowl. When it balls in your whisk stop and check. You want to achieve stiff peaks.

Step 7

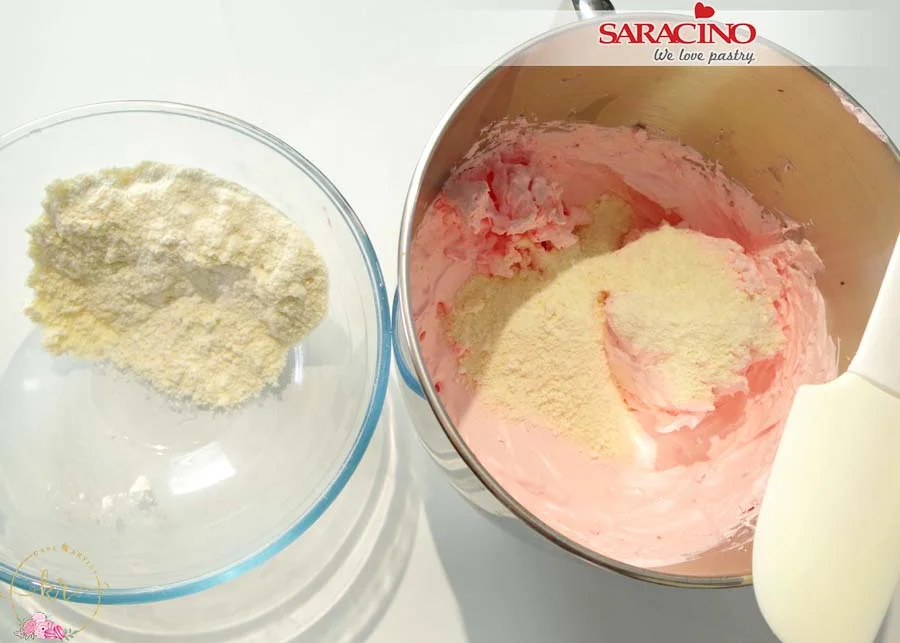
Add 1⁄2 of the almond and icing sugar mix to your meringue and gently fold it in (fold dont mix you don’t want to deflate it at this stage).

Step 8

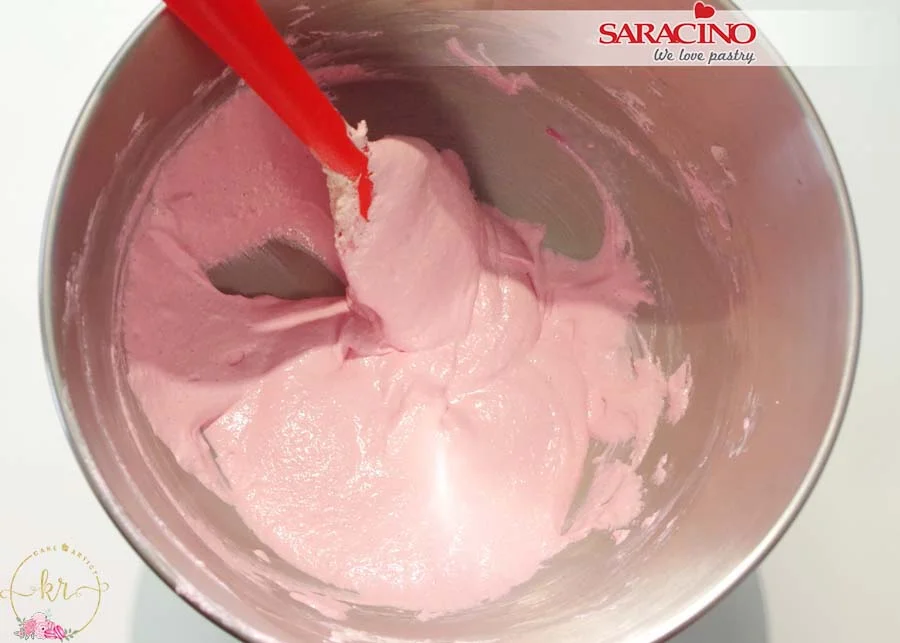
Add the second half of the almond and icing sugar mixture and now you fold and slide your spatula through the middle of your mixture pressing against the bowl as you want to deflate some of that air but not all of it. Your mix should be getting more shiny and runnier.

Step 9

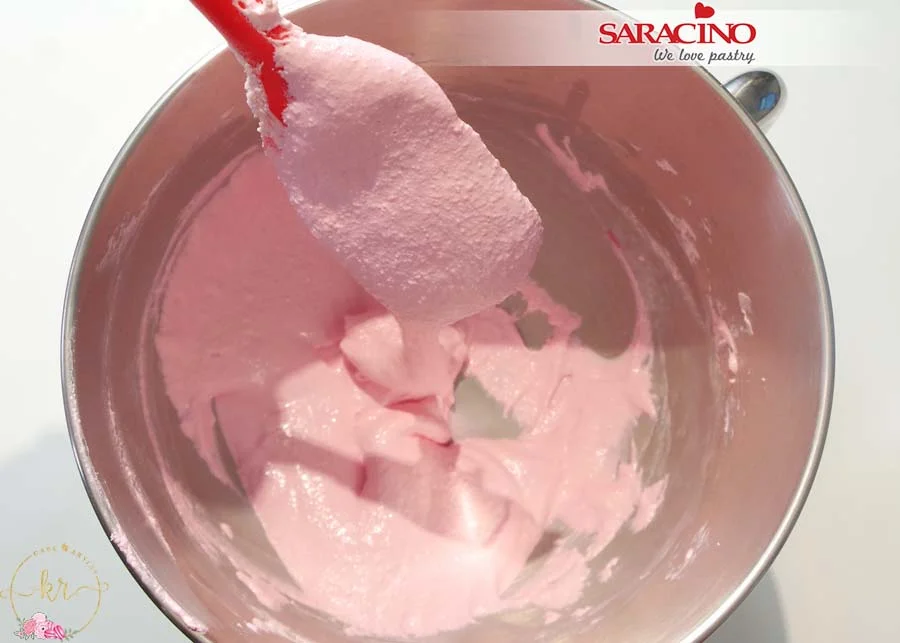
Your mix should be flowing nice and gently from the spatula.

TIP: You can do a figure of 8 test – take some mix onto your spatula. Draw a number 8 slowly with the mix into the bowl. Flowing off the spatula (we dont want it to all fall off at once). If you manage to draw the whole number 8 then it is ready.

Step 10

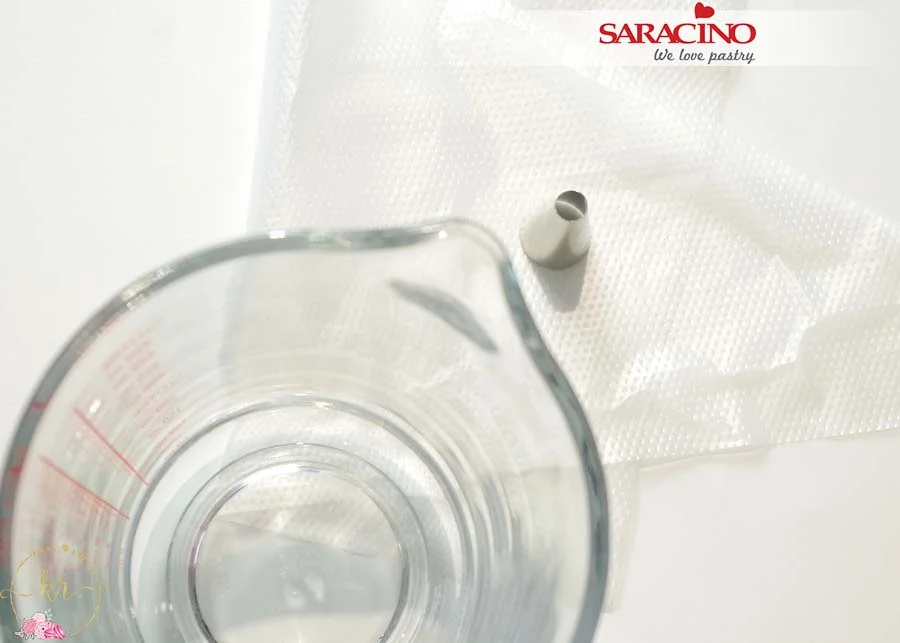
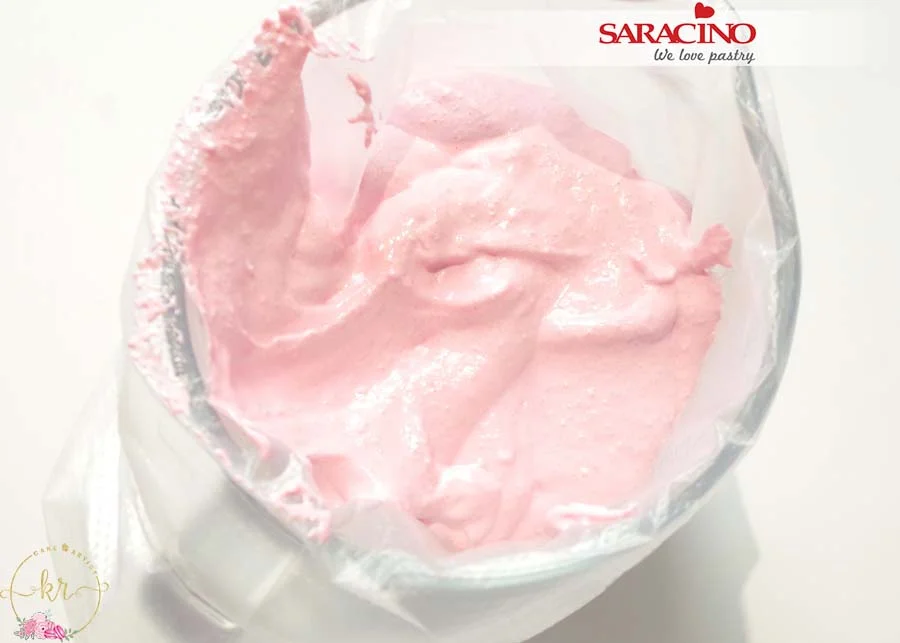
Prepare your piping bag and Wilton size 12 round piping nozzle. If you don’t have anyone to hold your piping bag open place it into a tall glass or similar for support. If you are experienced in piping you can go for a larger nozzle. I like this one as it gives you more accuracy when piping the circles.

Step 11

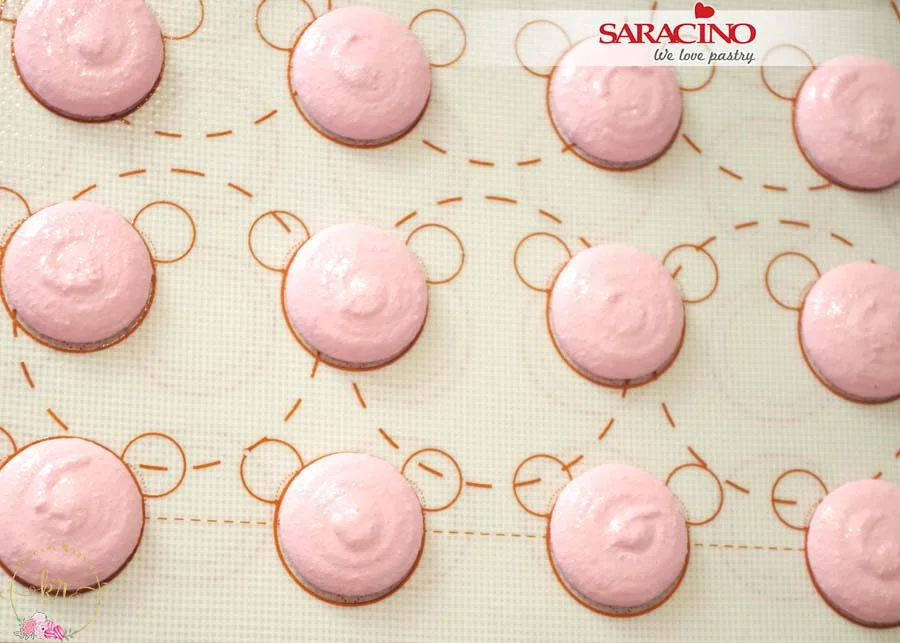
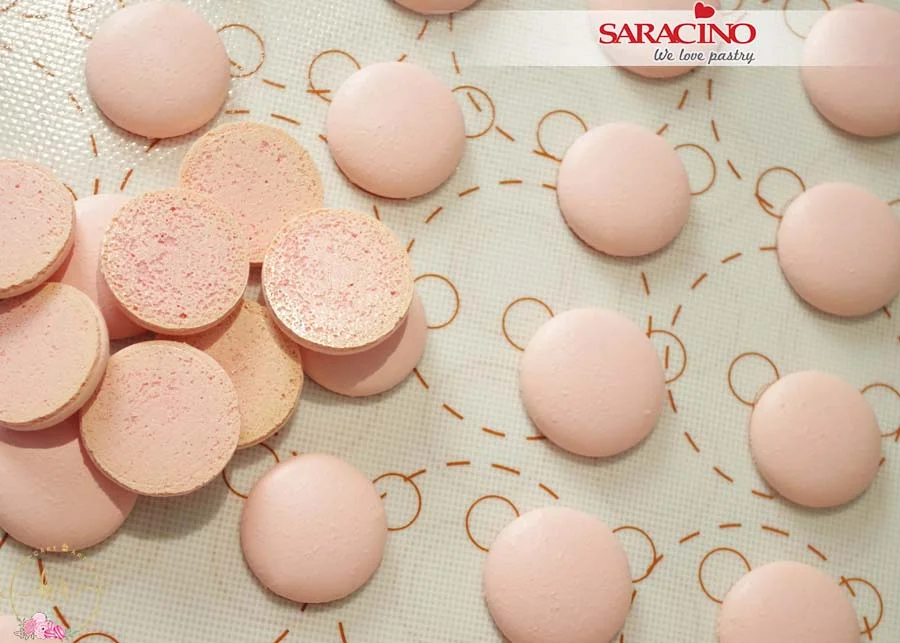
Add the mixture to the piping bag and start piping. Keep your bag vertical to the mat. Gently squeeze to the middle of the circle and don’t move the bag around as the batter will spread itself. When it reaches the circle line on the mat stop squeezing. Flick the nozzle tip or do a quick small rotation. Do not pull directly upwards as this will leave a little bump in the middle.

Step 12

Your silicon mat is to be on your baking tray. Tap your tray on the counter several times to pop any air bubbles.

Step 13

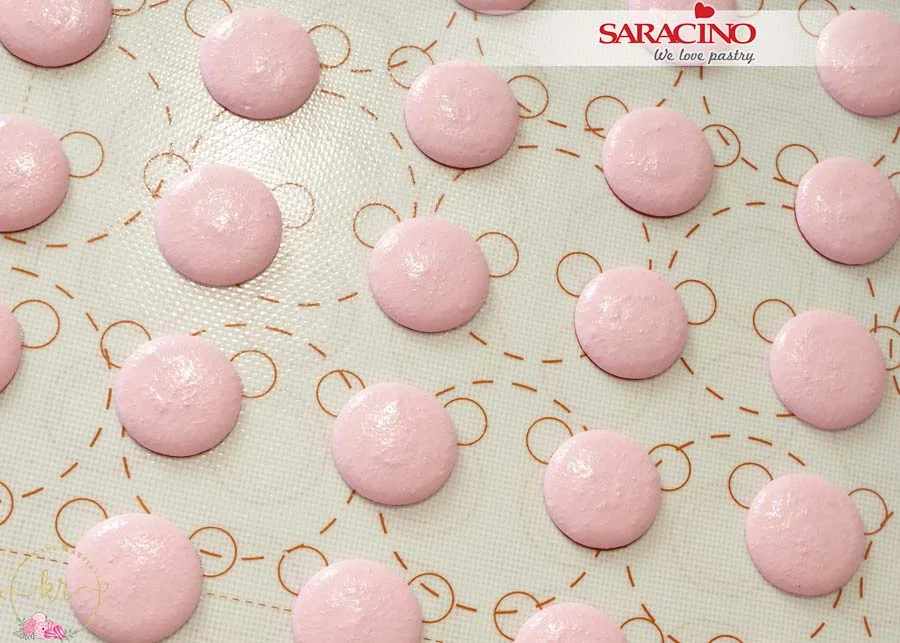
The surface should be pretty smooth after step 12 but it will get even smoother after resting. Preheat the oven to 150c and leave your tray for about 30 to 45 min (depending on the humidity this maybe longer). We want the macarons to form a skin. Check after 30 minutes and add time as necessary. To check if they are ready to bake gently touch the top of the macaron, if it’s not sticky to the touch it is ready to go into the oven. Add for 20 minutes turning the tray halfway through the baking process.

Step 14

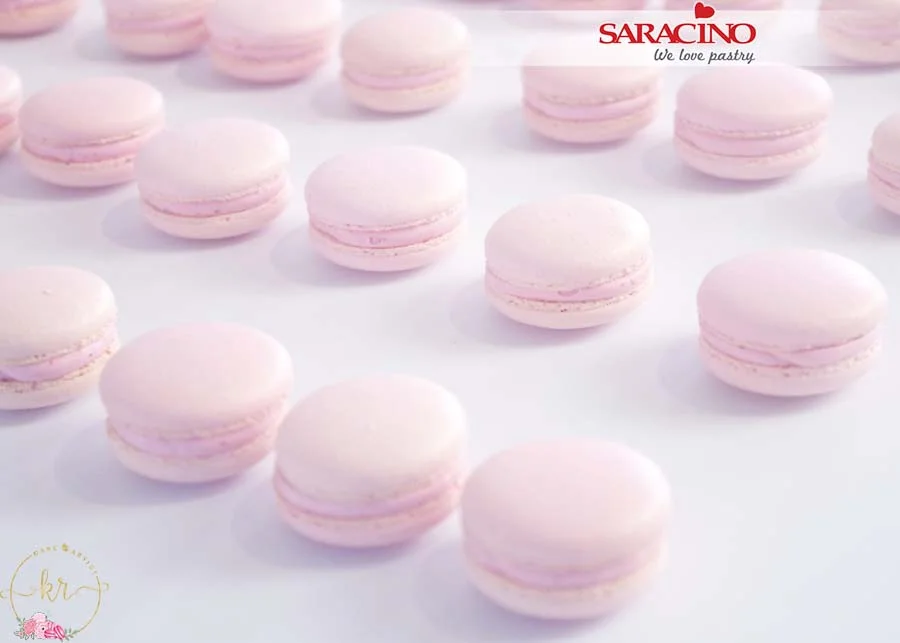
Before removing them from the oven gently nudge one of the macarons to check if it’s ready to come out. If it still wiggles, give it another minute or two. Remove from the oven and let them cool completely before removing the mat. Remember to peel the mat from the macaron not the other way round.

Step 15

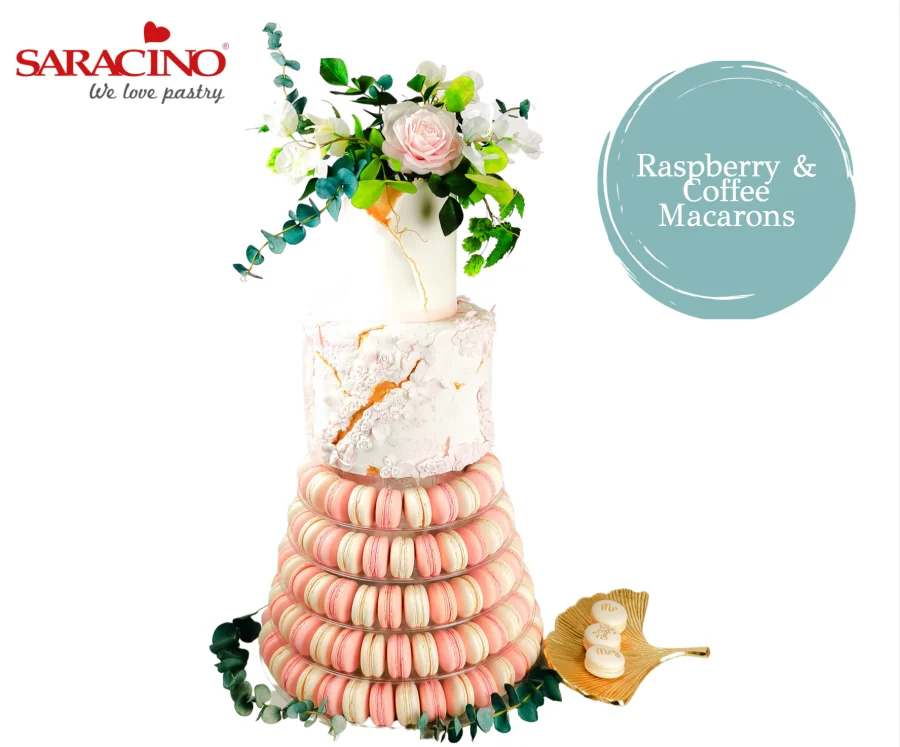
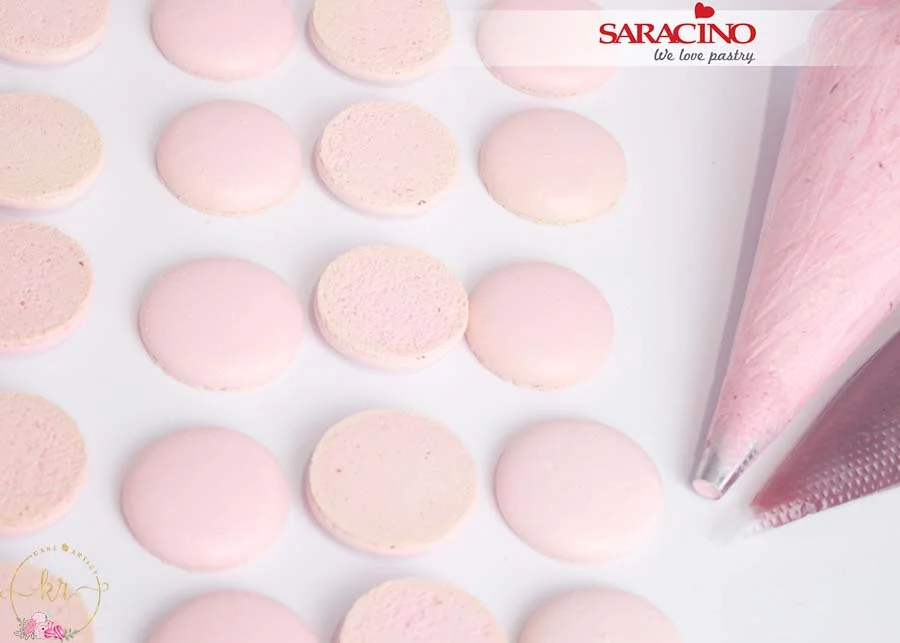
Now the macarons are ready, it’s time to fill them up with a flavour of your choice. You will need your favourite buttercream mix and Saracino natural food flavouring. For this tower I have used a raspberry buttercream and a coffee buttercream. I find it easier to pair the circles before piping with one facing up and one facing down.

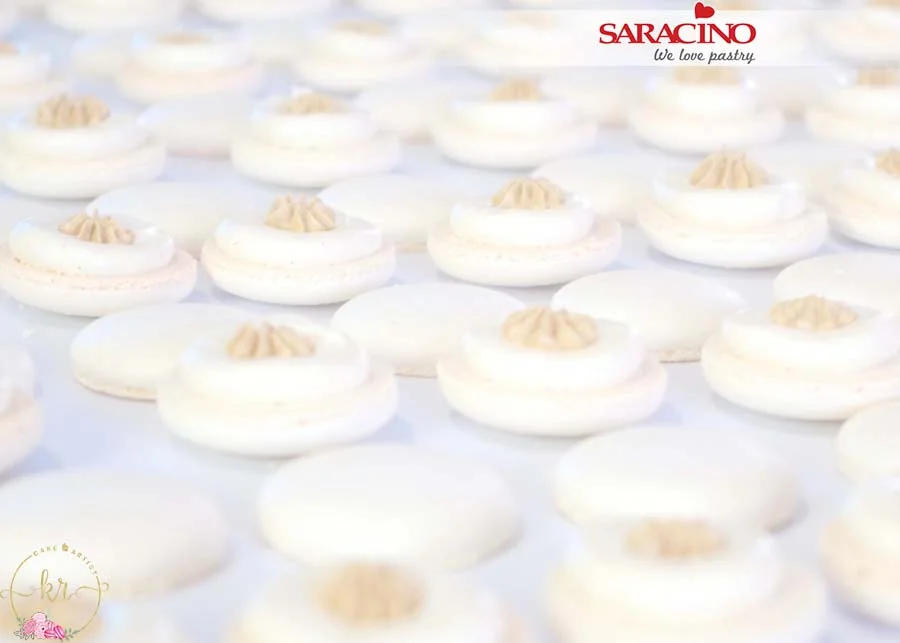
Step 16

For this tower I used 250g buttercream and 50g of Saracino raspberry flavouring. I find the coffee flavouring stronger so to another 250g of buttercream I only use 30g of the flavouring (this is to personal taste). Mix together and transfer to a piping bag with nozzle no. 10/12 (it is not necessary to pipe but this does give a cleaner and more professional look). I like to add something to the centre so I have raspberry jam in another piping bag.

Step 17

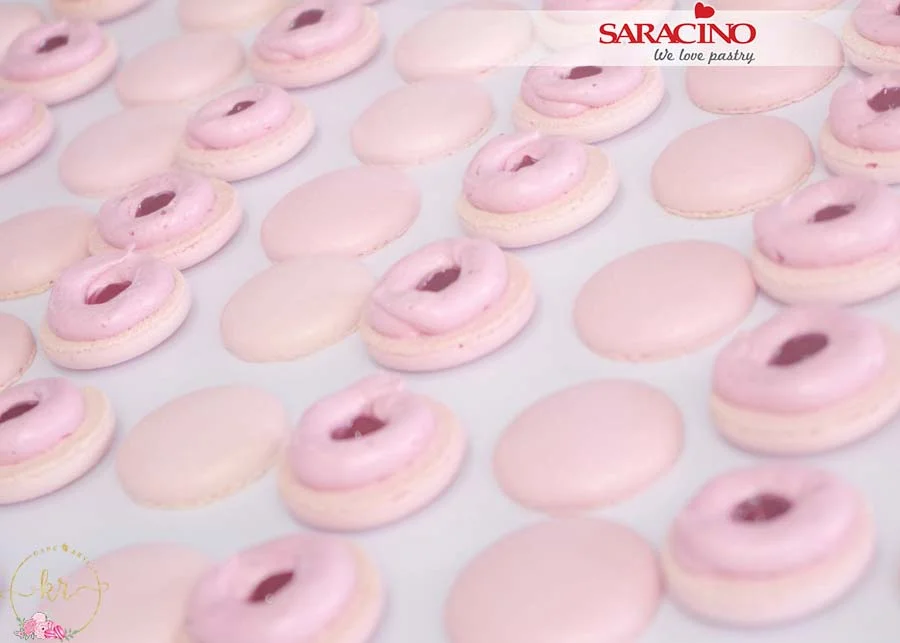
If you adding the jam in the centre, pipe a circle of buttercream a millimeter or two from the edge and add the jam in the middle. If you are not using the jam just pipe the buttercream in the centre of your macaron.

Step 18

Repeat step 17 for all of your colours and flavours if you have a different ones. This one is caffe latte – vanilla buttercream with coffee buttercream centre.

Step 19

Sandwich the halves of your macarons together Place them  let them in the fridge for 24h. You are then ready to arrange and enjoy.

Step 20

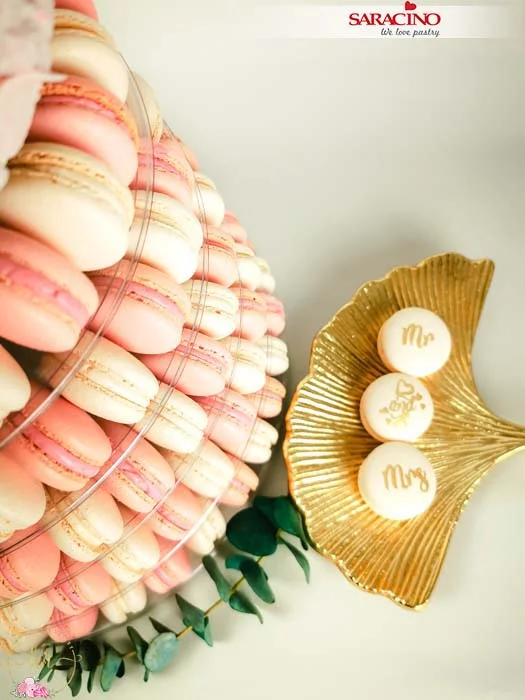
Stack them on a macaron tower if required. Let your imagination go wild on how to display them.