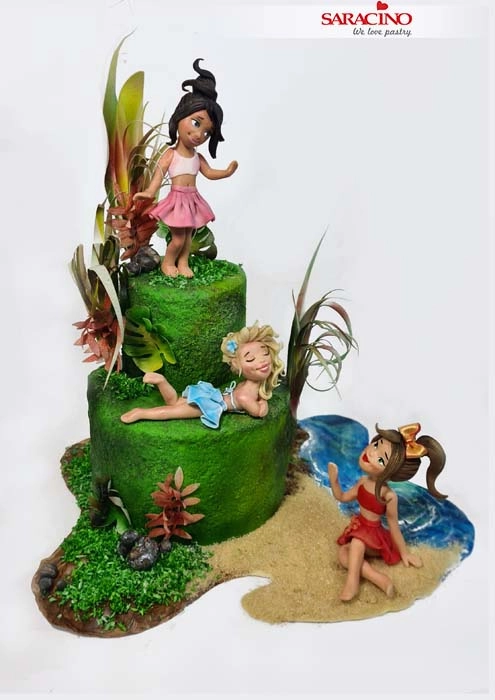
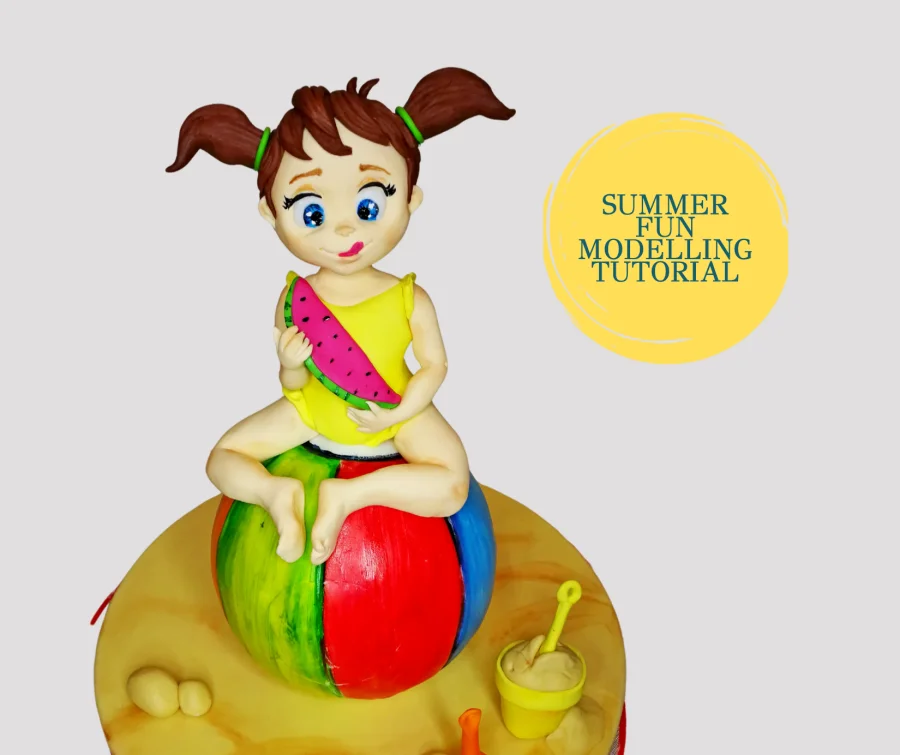
SUMMER FUN ON A BEACH MODELLING TUTORIAL

SUMMER FUN ON A BEACH MODELLING TUTORIAL
Skill level: INTERMEDIATE

You will need:

  • Saracino white Pasta Top
  • Saracino white Pasta Model
  • Saracino colouring gel: green, skin tone and brown
  • Saracino powder colour: orange, green, yellow
  • Destilled water
  • Edible glue
  • Thin soft brushes
  • Flower wire gauge 18
  • Wooden skewer
  • Rolling pin
  • Modelling tools
  • Scalpel or a sharp knife
  • 1 styrofoam ball

Step 1

Cover your styrofoam ball with Saracino Pasta Top.

Tip: If you want your piece to be entirely edible, make the ball out of Rice Krispie Mix.
Step 2

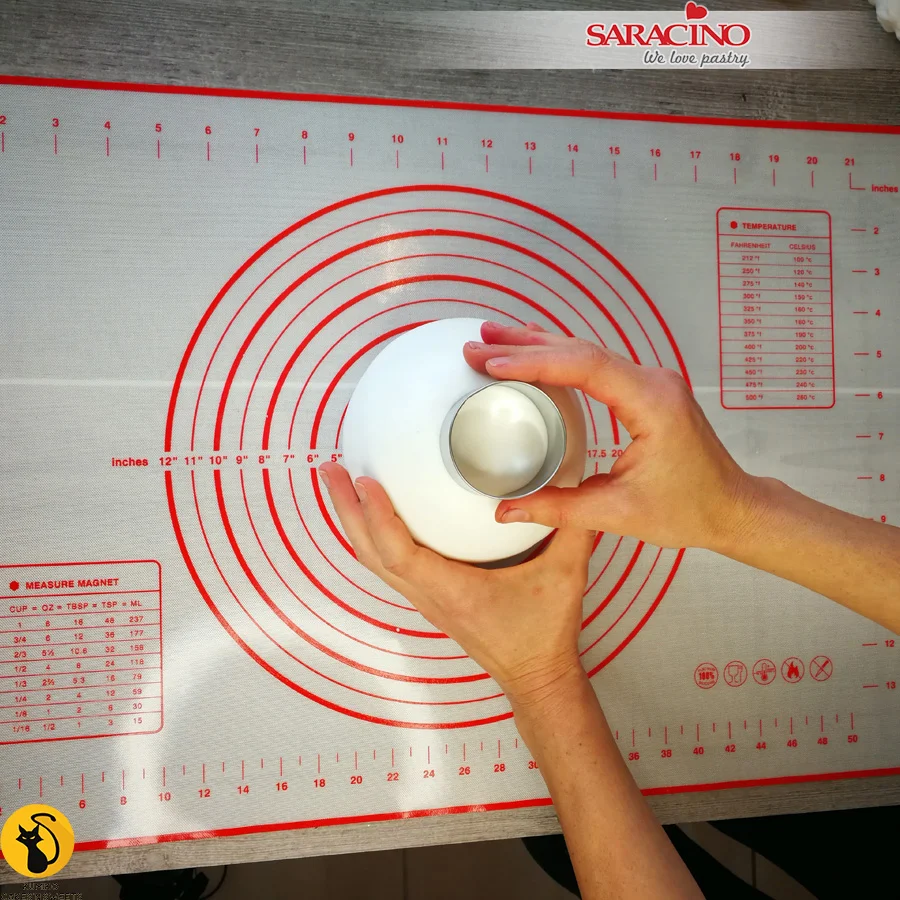
Mark a circle on the top of the ball by pressing the circel cutter gently on it.
Step 3

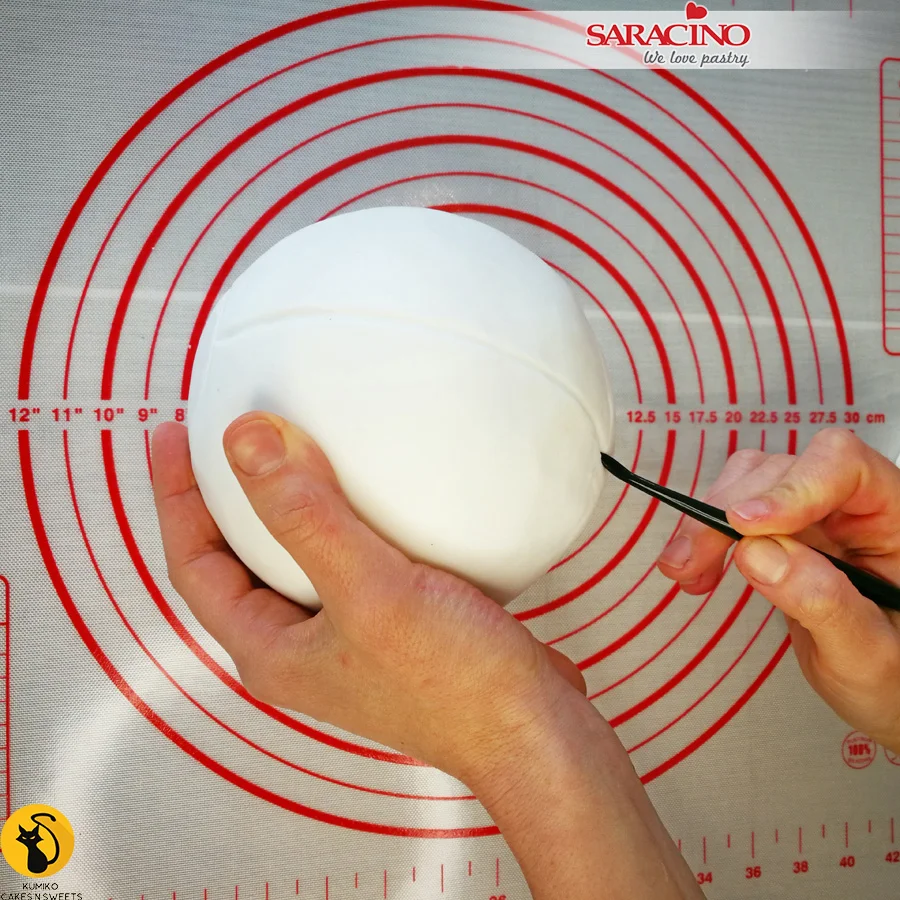
Mark the lines on the ball using your Drseden tool or similar.
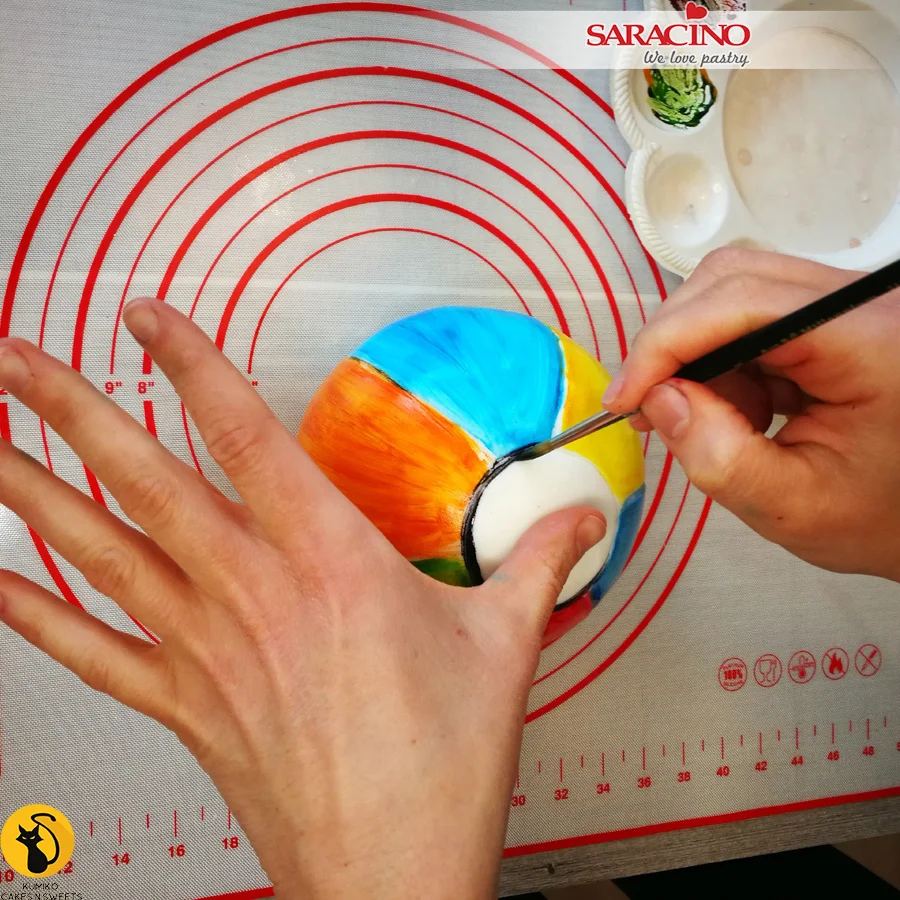
Step 4

Paintthe ball using Saracino colouring gel mixed with distilled water.
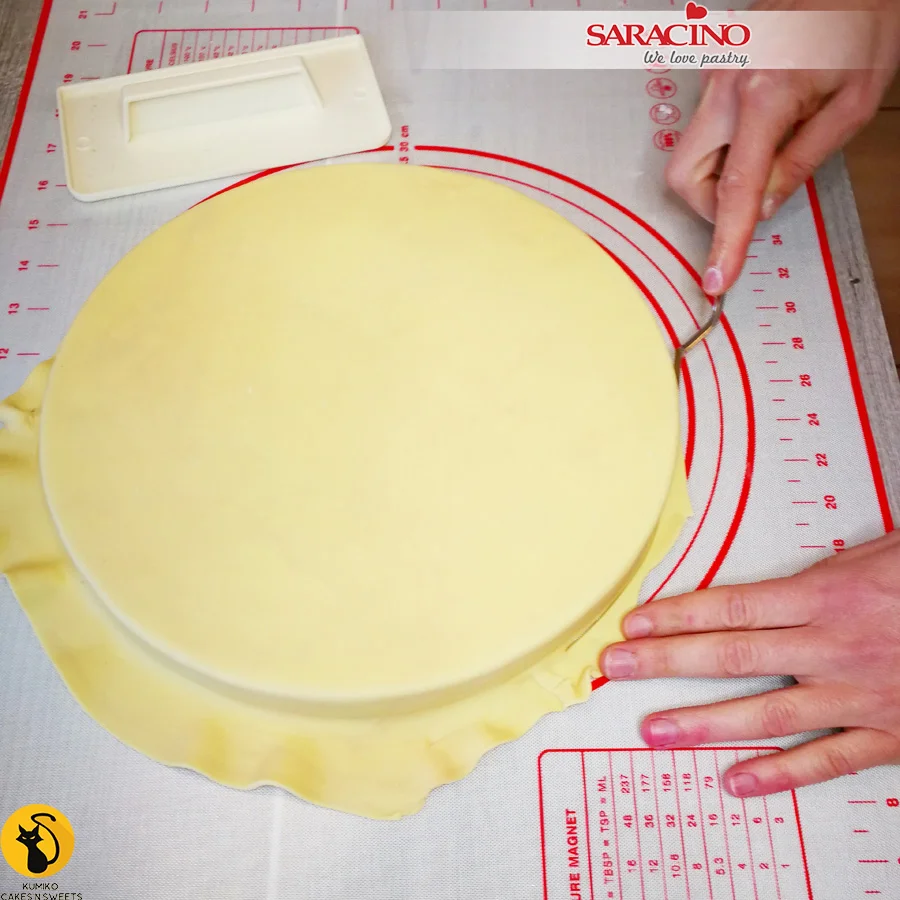
Step 5

Cover your board with Saracino Pasta Top which has been coloured with yellow and a little brown Saracino gel colour. Don’t add too much brown otherwise it will be too dark. Trim the excess paste using a sharp knife.
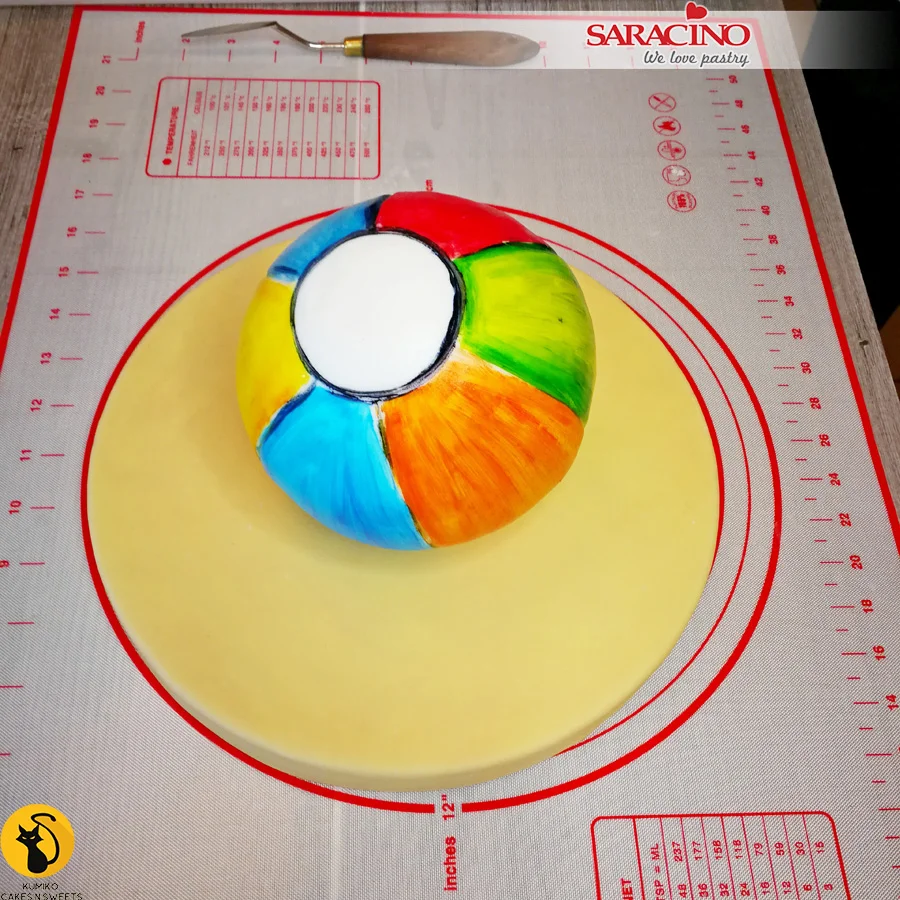
Step 6

Place the ball in the centre of the board.
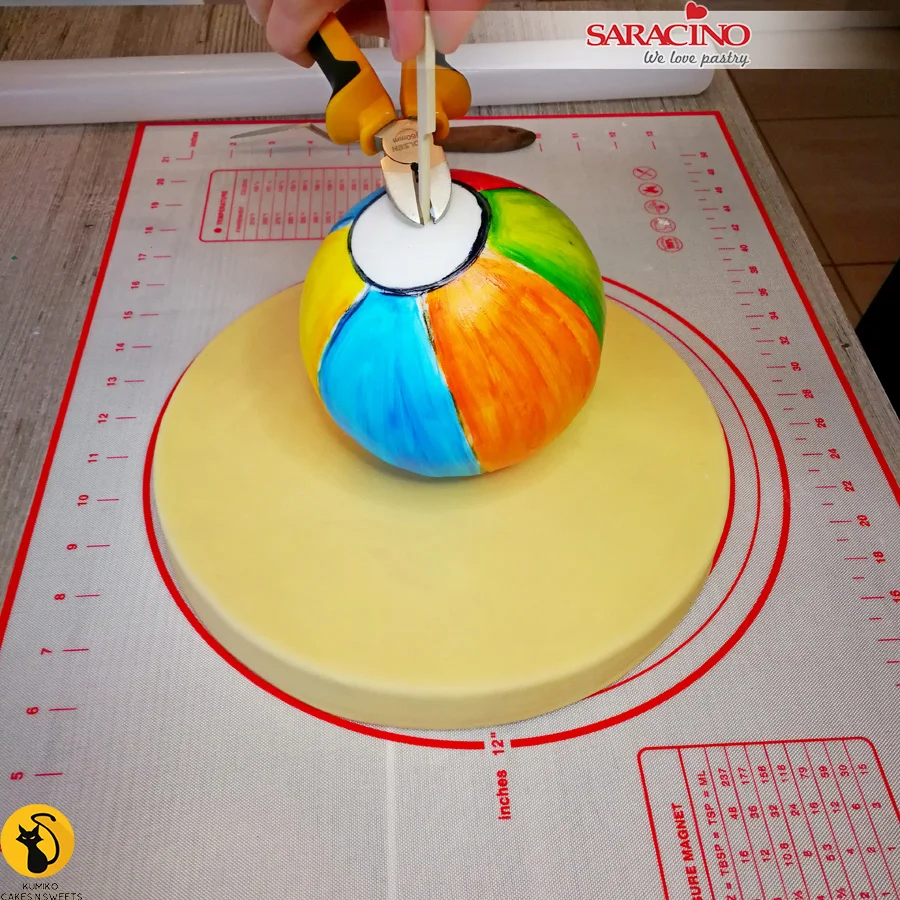
 

Step 7

Pin the ball to the board with a sharp wooden skewer to make secure. Cut the excess skewer with pliers.
Step 8

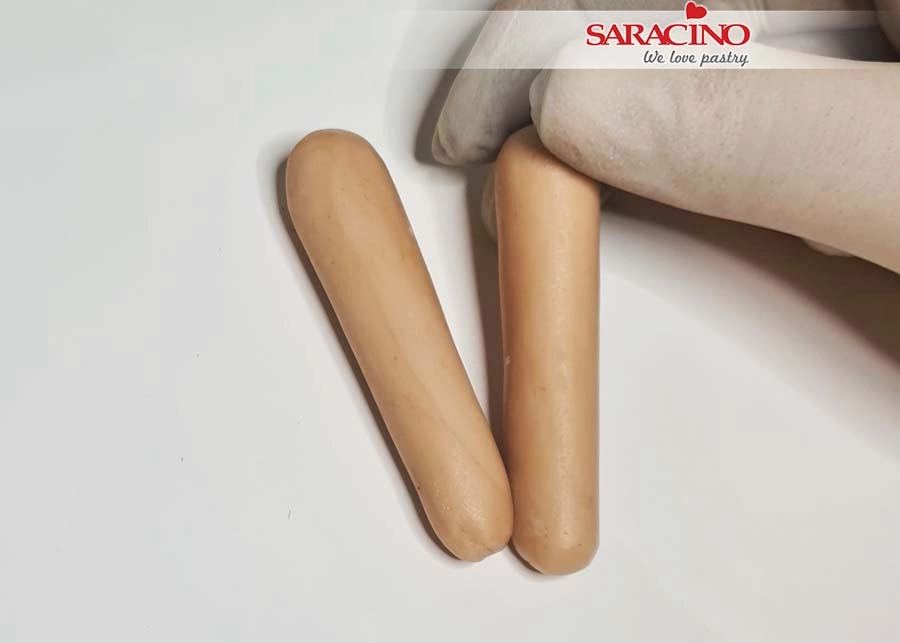
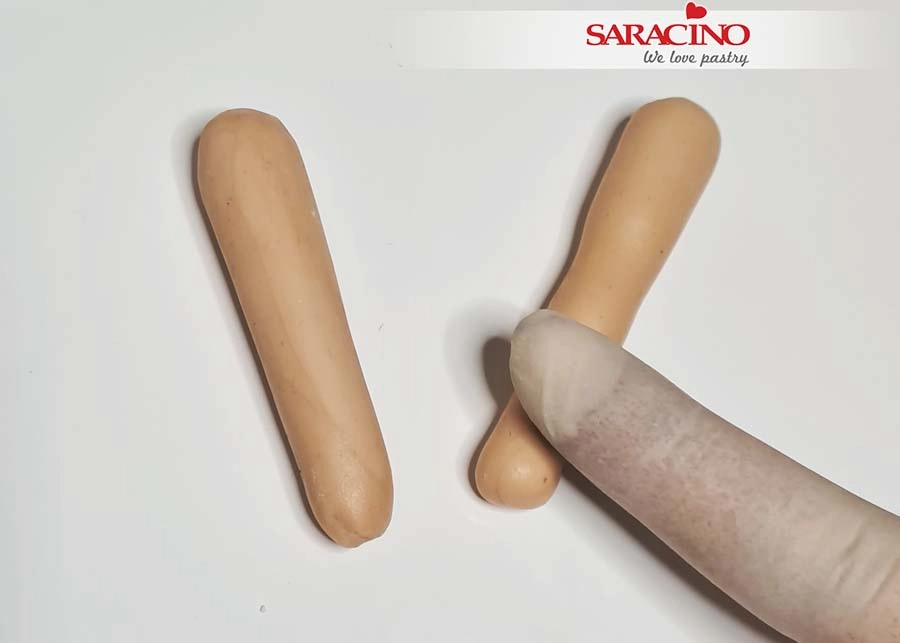
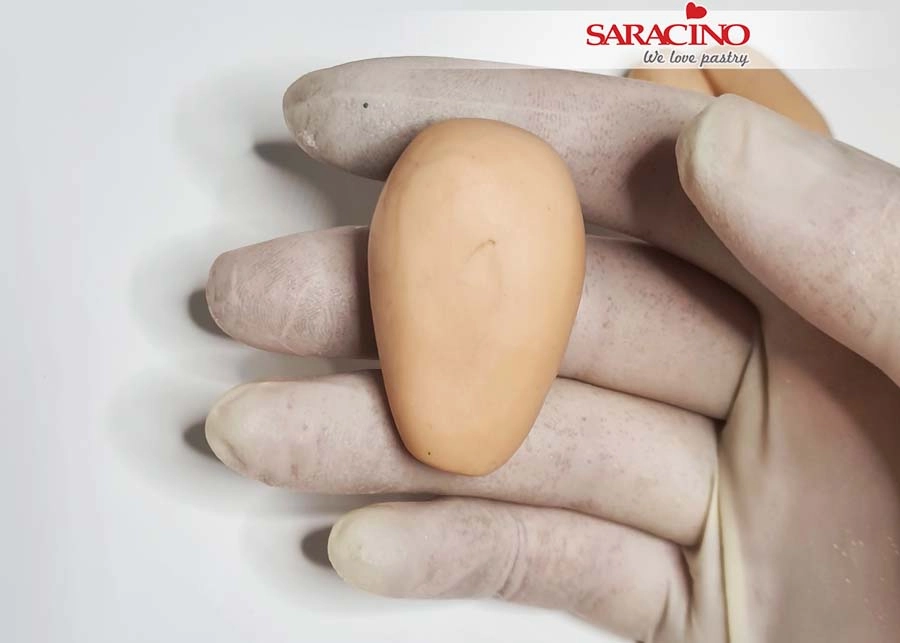
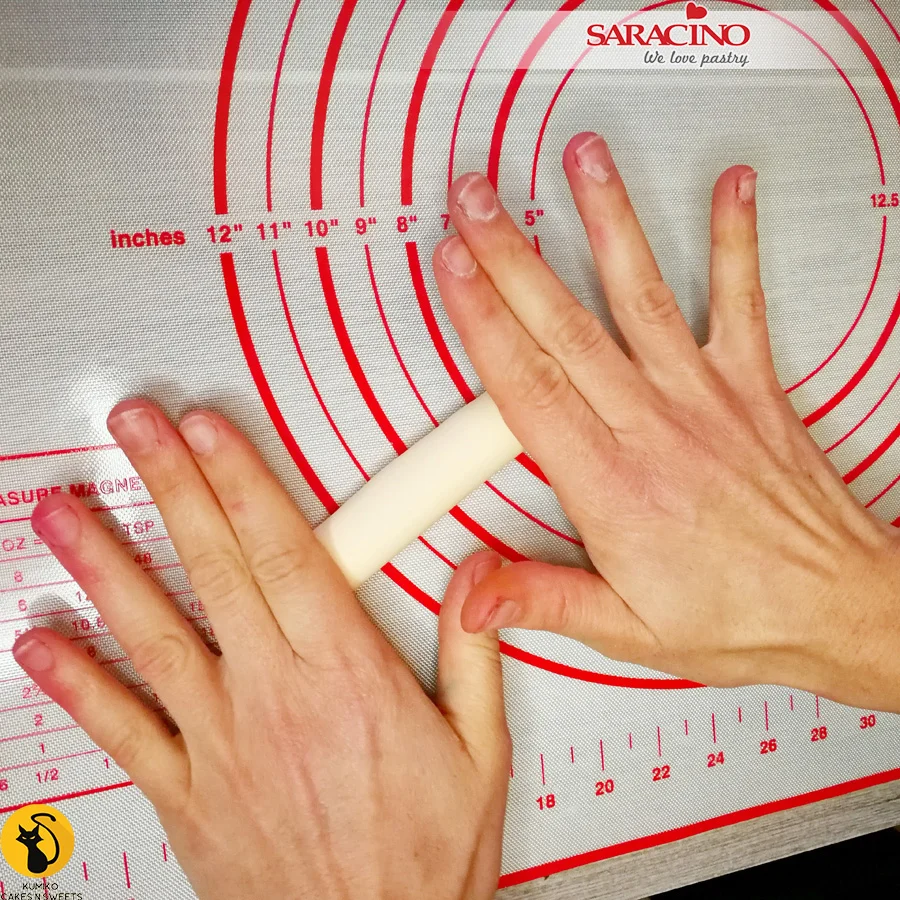
For the legs colour Saracino Pasta Model skin tone (or use pre-coloured skin tone) and roll with the palms of your hands to achieve a cylindrical shape.

Tip: Always try to use your palms more then your fingers, that way the piece will look smoother.
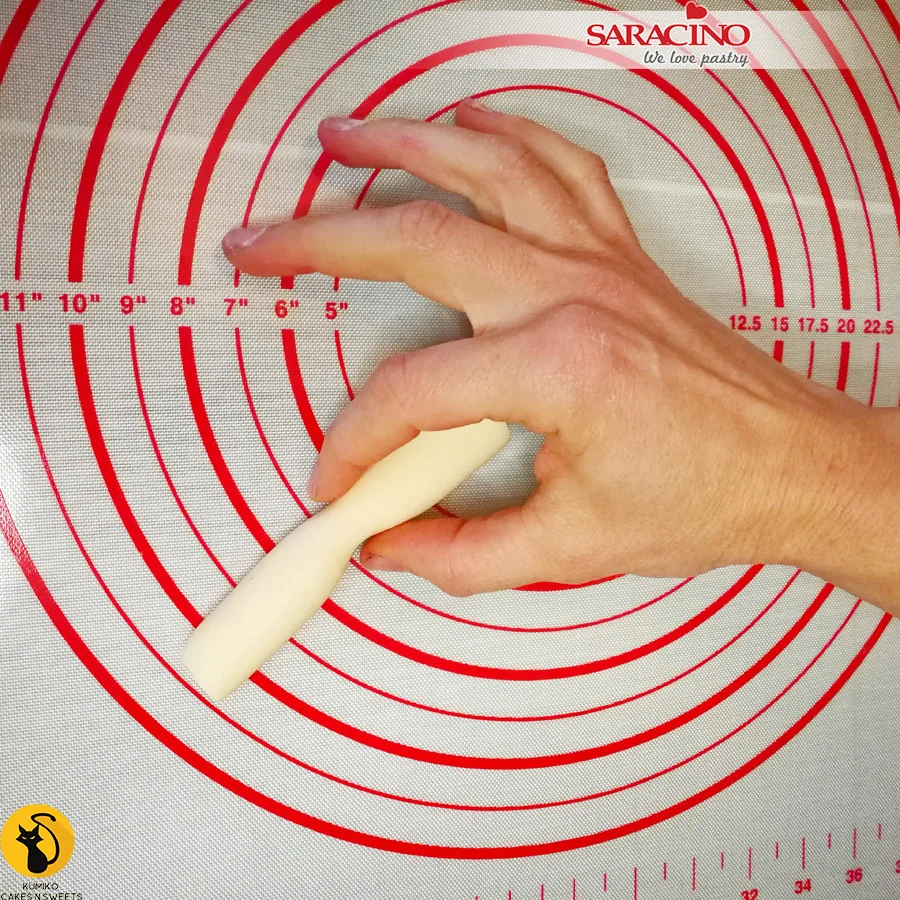
Step 9

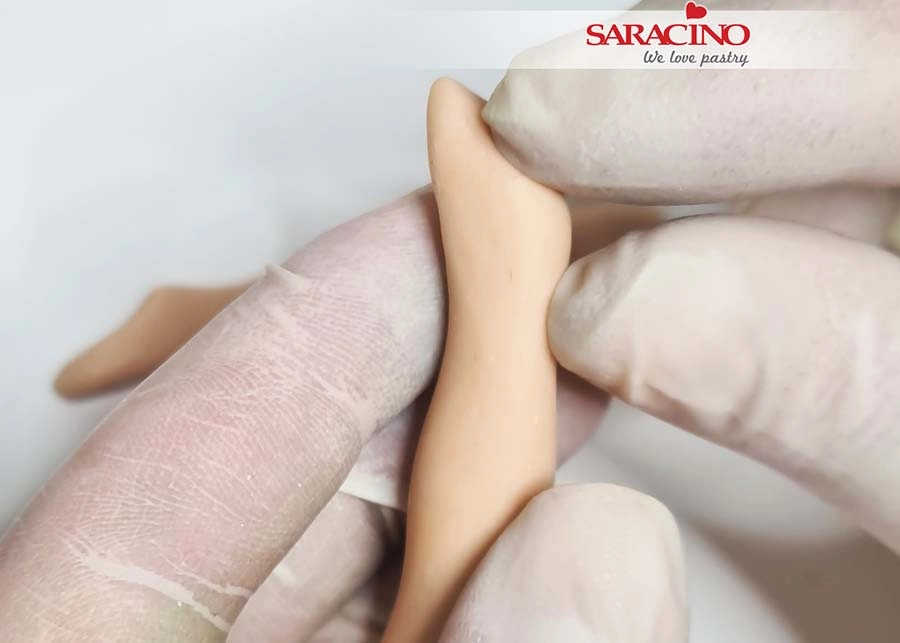
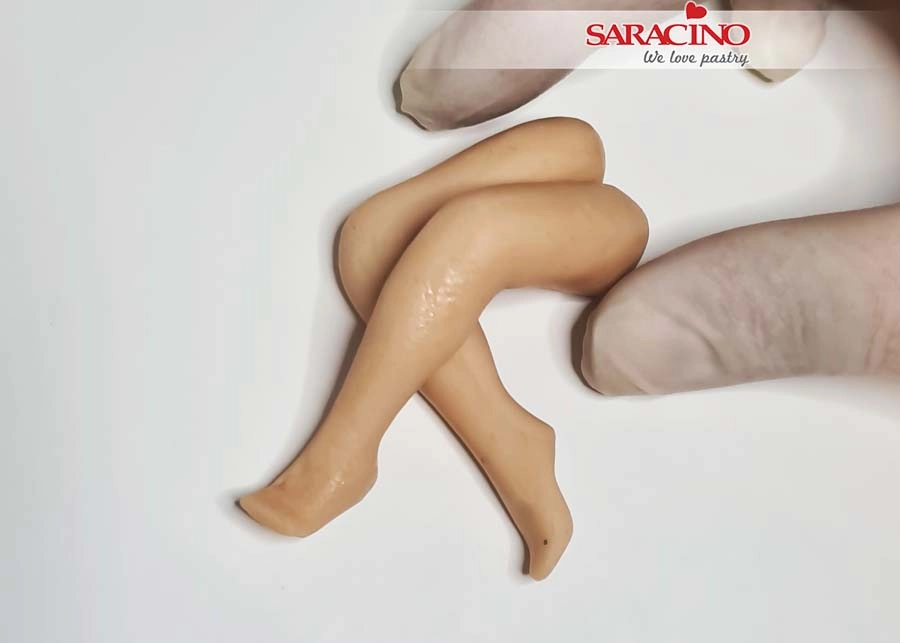
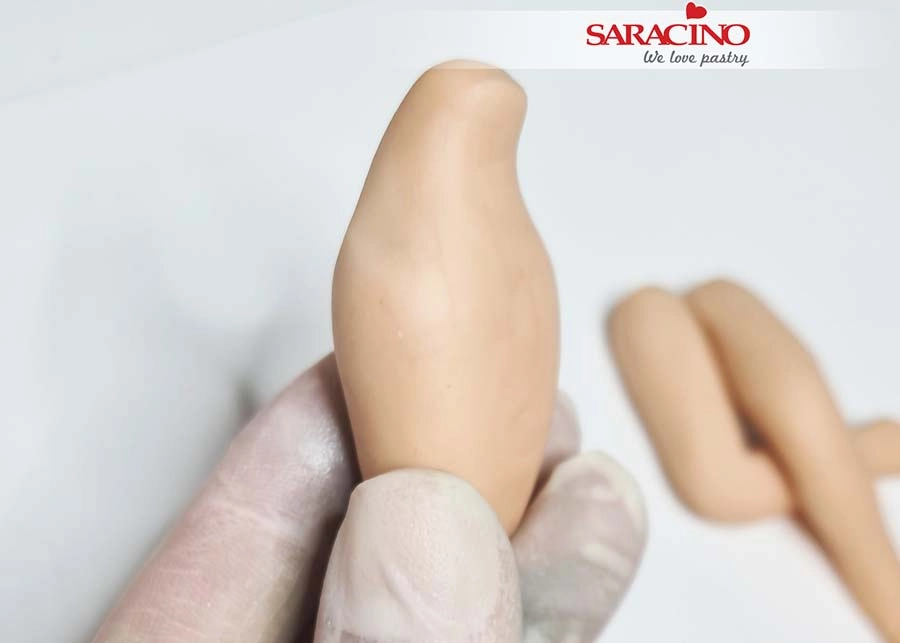
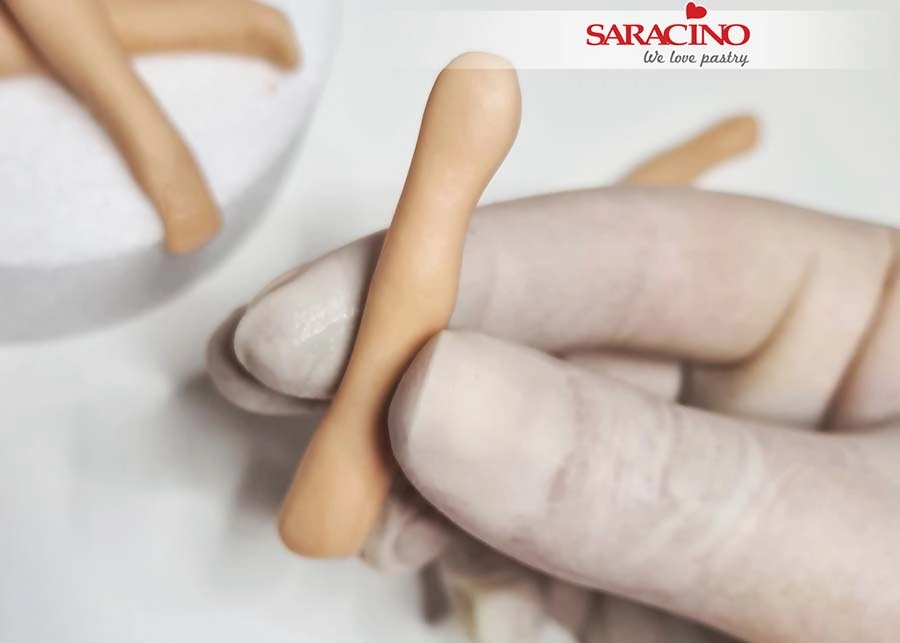
Pinch in the middle to shape the knee.
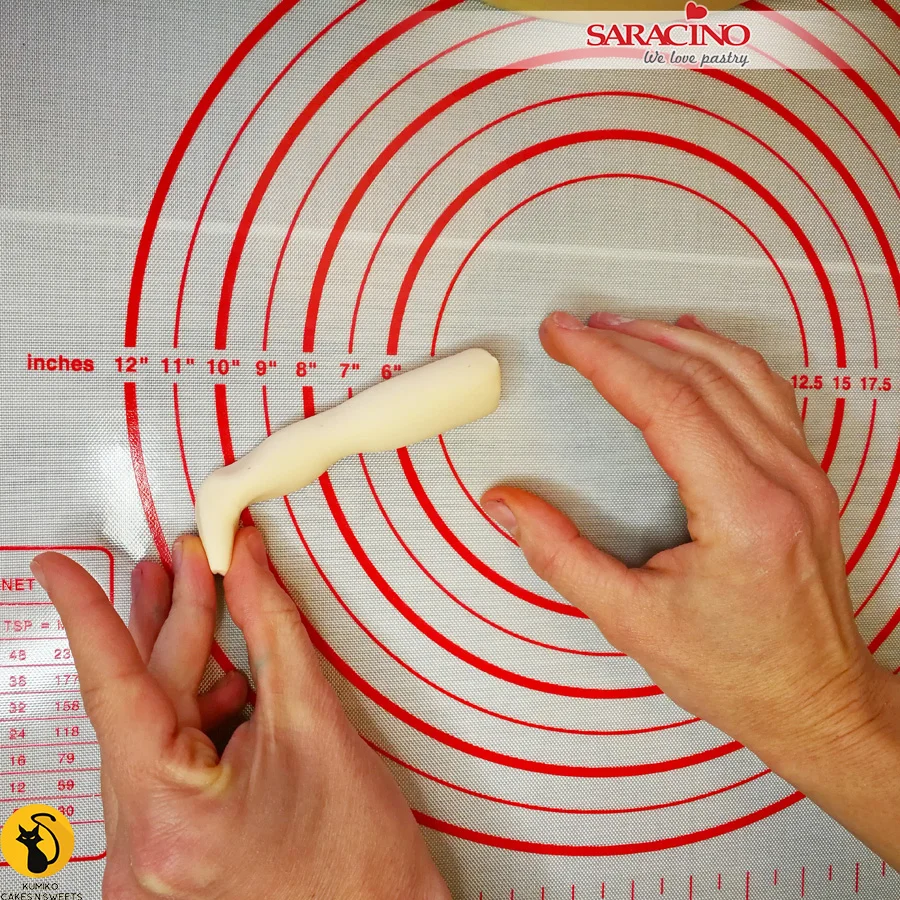
Step 10

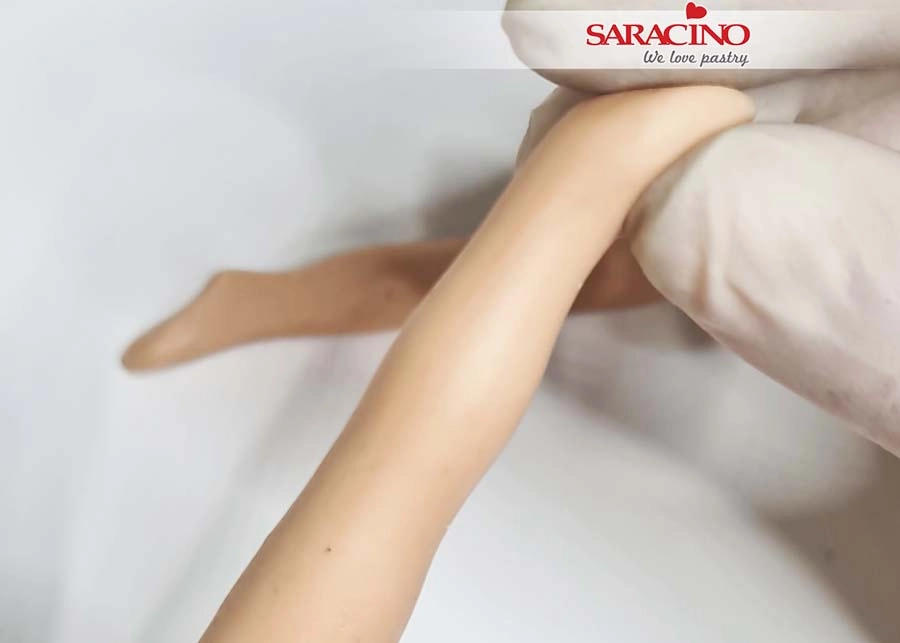
Pinch it again to form the ankle then fold back to form a foot.
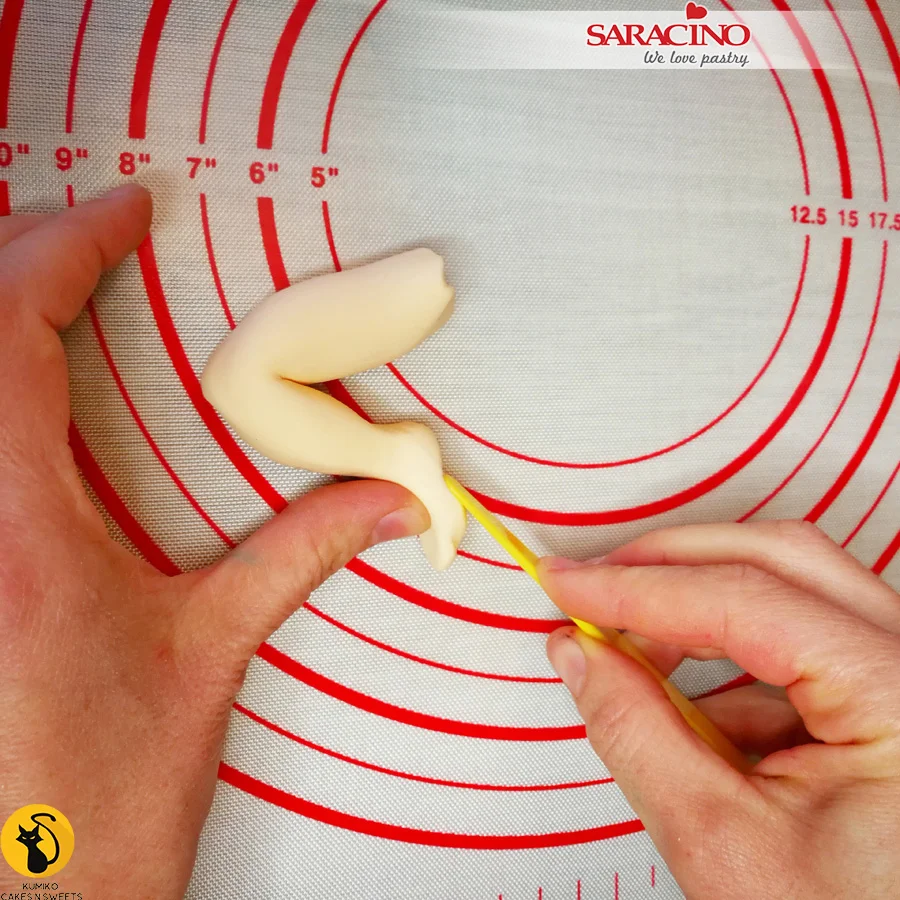
Step 11

Bend the leg at the knee. Model and shape the foot using your modelling tools.
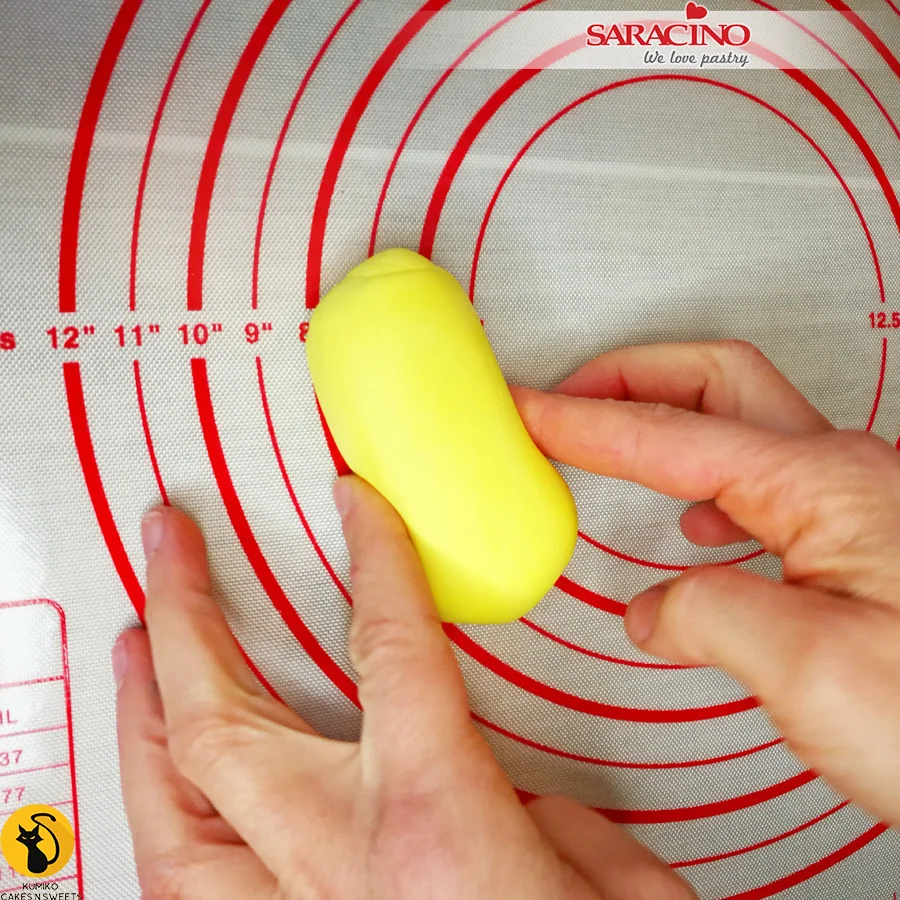
Step 12

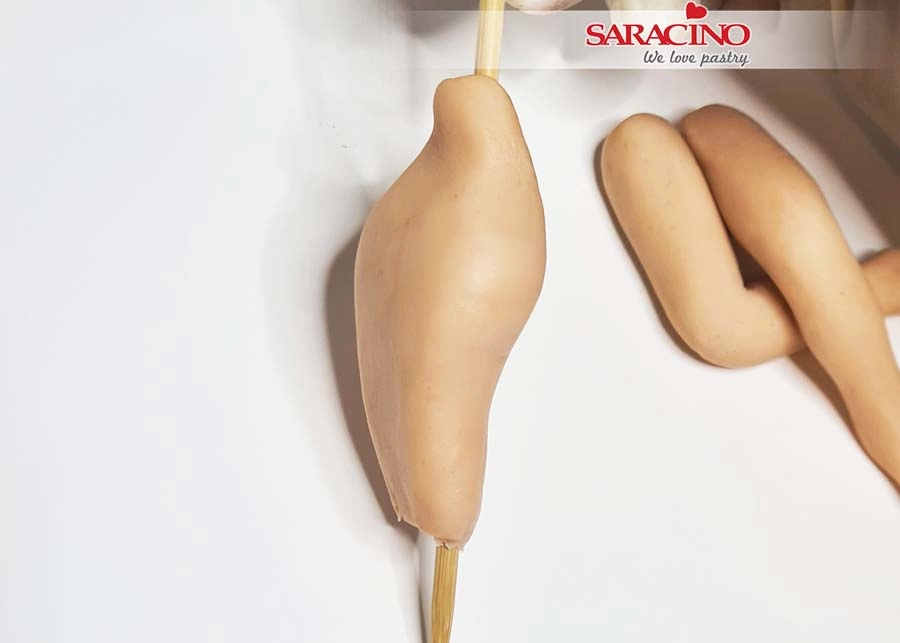
For the body colour Pasta Model with a few drops of Saracino yellow colouring gel (or use pre-coloured paste). Roll a cylindrical shape then press it slightly in the middle to shape the waist.
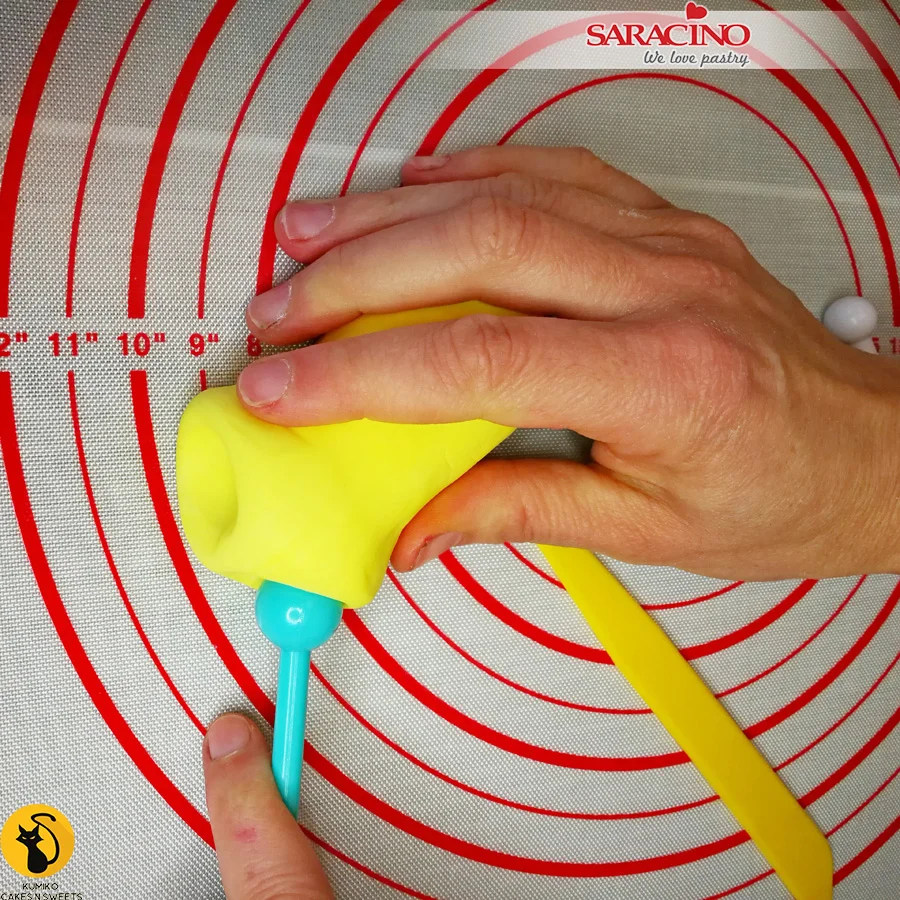
Step 13

Using a ball tool form two shallow sockets at the bottom for the legs.
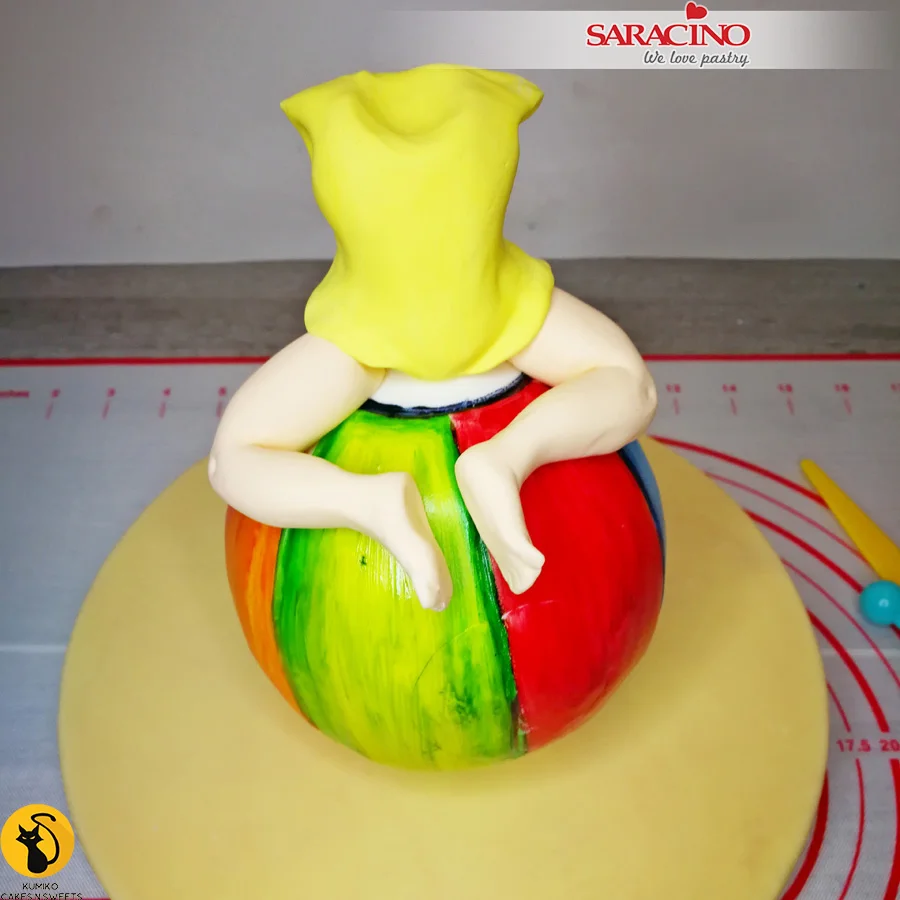
Step 14

Place the body on the top of the ball and insert the legs into the sockets made for them. Apply a little glue if necessary.

Tip: Don’t use too much edible glue as it can make the modelling paste too soft and sticky.
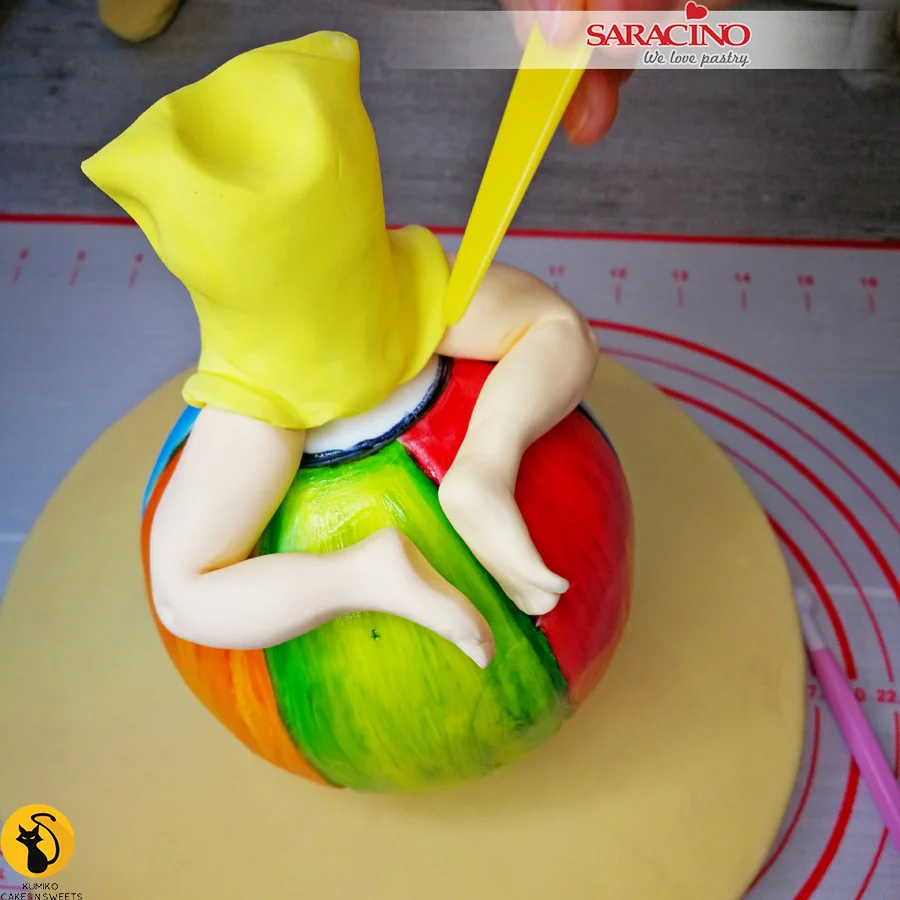
Step 15

Using a modelling tool create curved details on the swimming suit at the top of each leg. This adds to the model and also covers the joints.
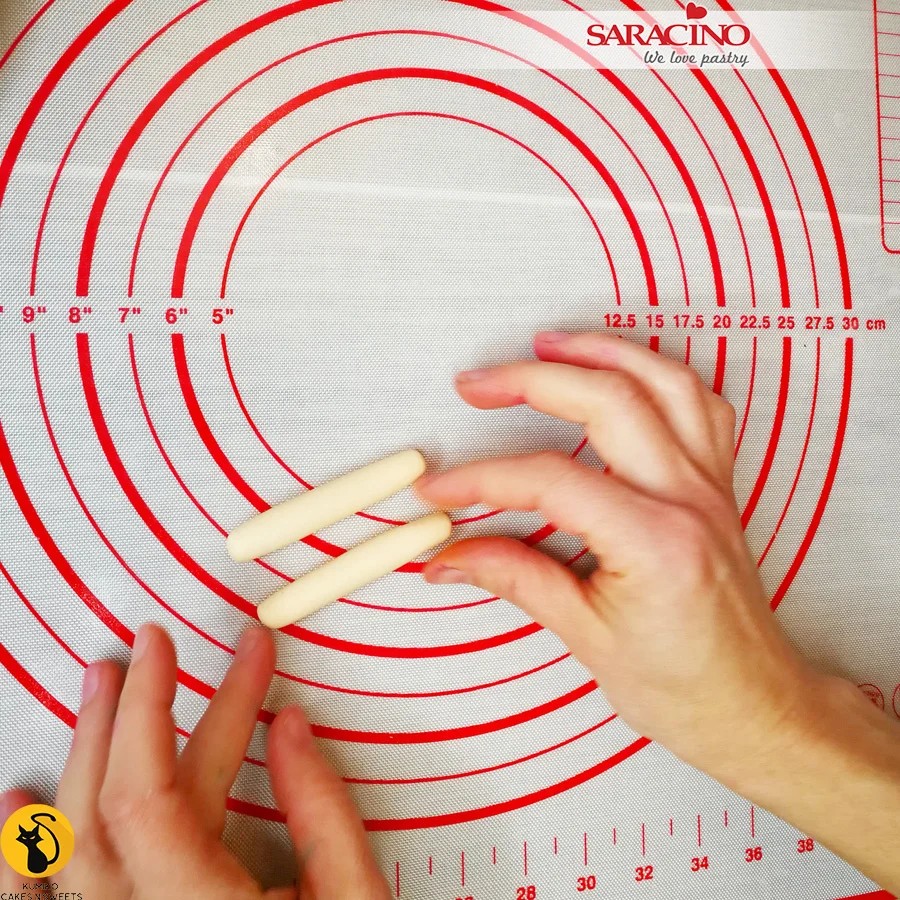
Step 16

Using skin tone coloured Pasta Model roll two sausage shapes for the arms.
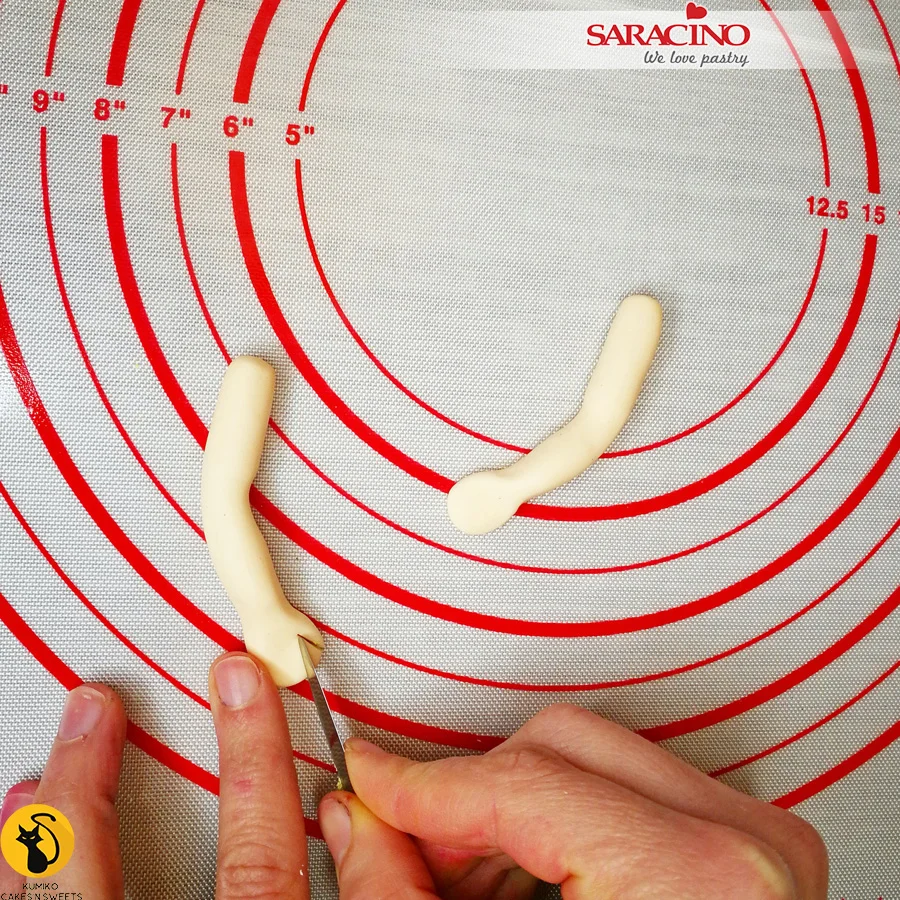
Step 17

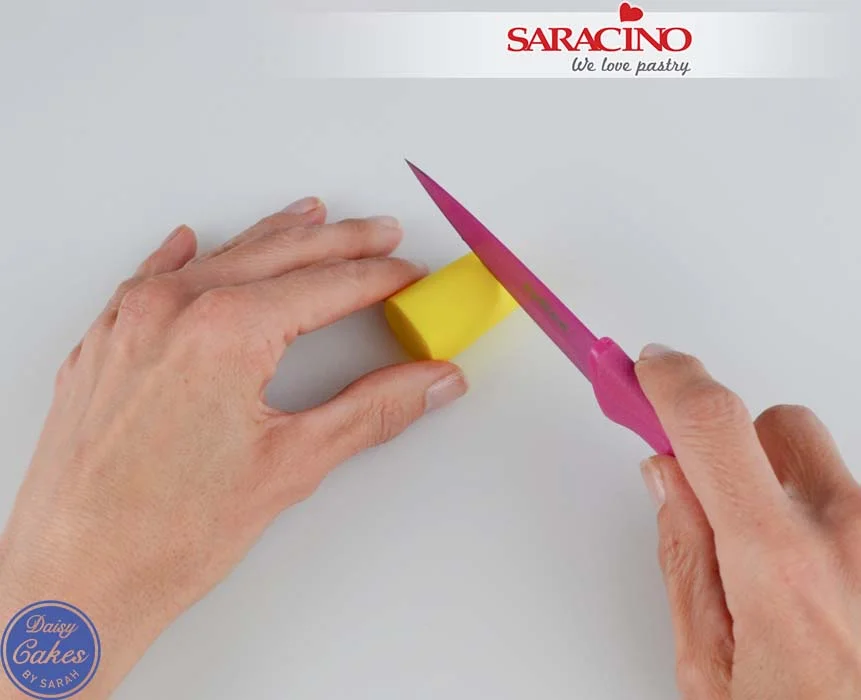
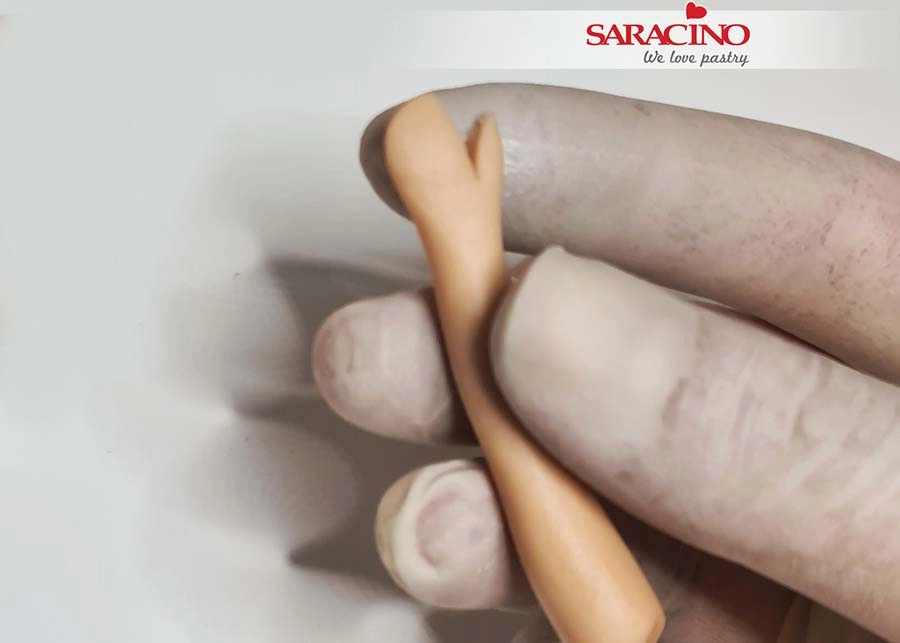
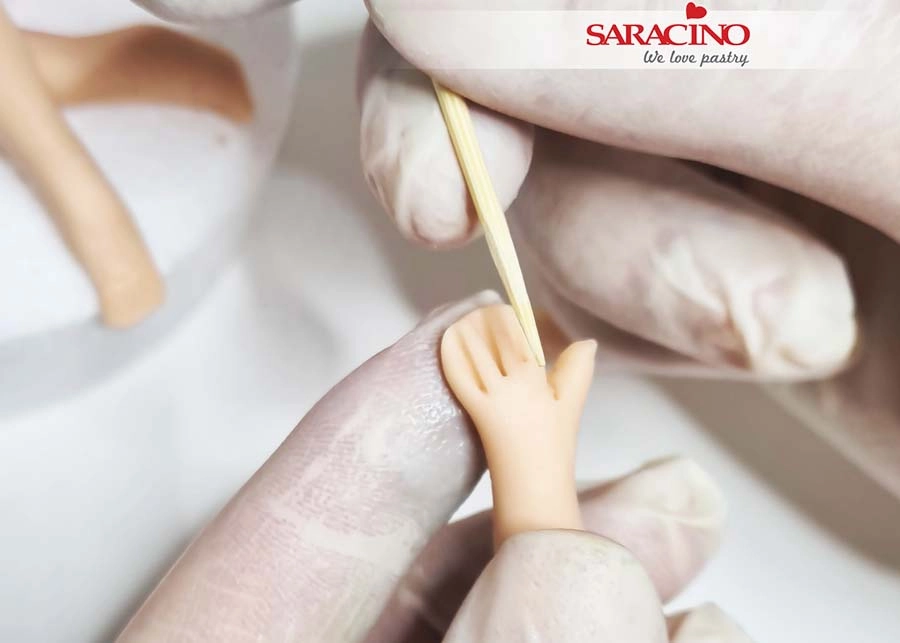
Bend and pinch it in the middle to form the elbows. Press it at the end to form the flat palms. Cut the thumb and fingers with a knife or scalpel.
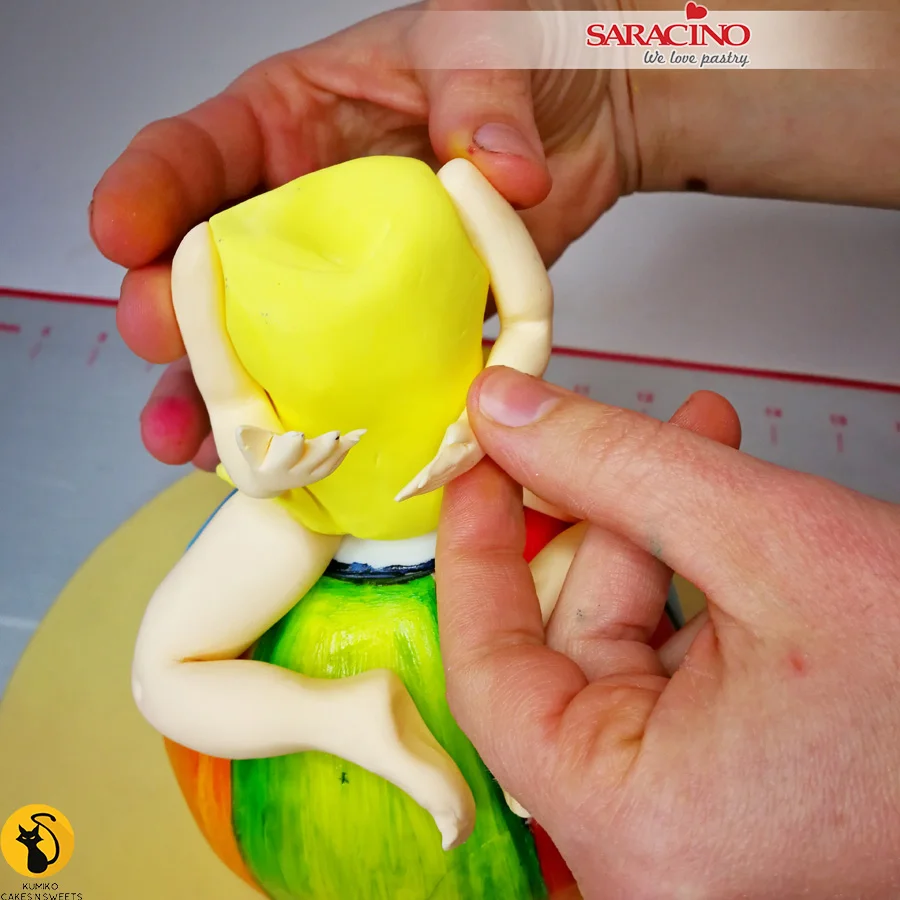
Step 18

Fix the arms to the shoulders using a little edible glue if needed.
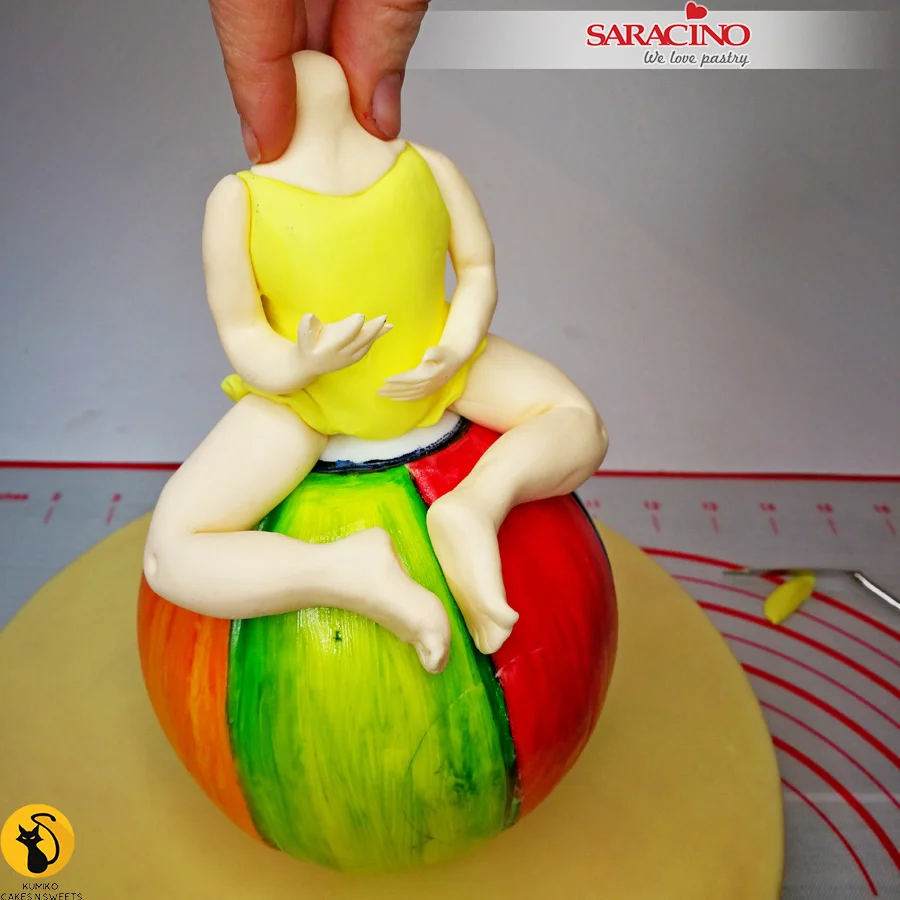
Step 19

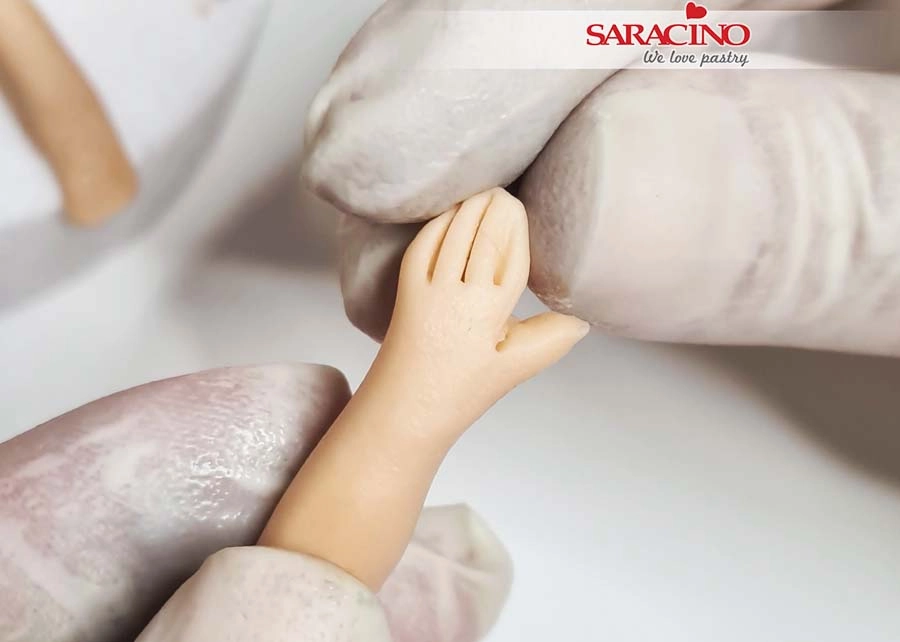
Use your fingers to smooth the fingers into shape. Using skin tone Pasta Model shape a neck and fix it on the top of the body.
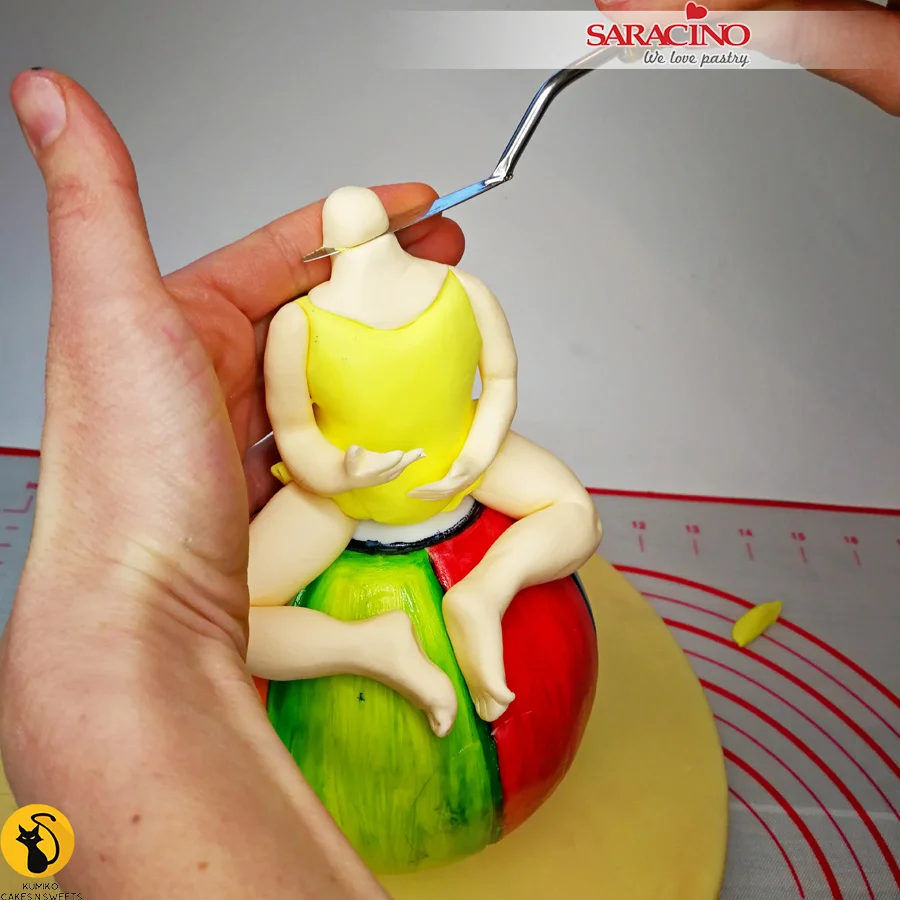
Step 20

If the neck looks too long trim the top to the required length.
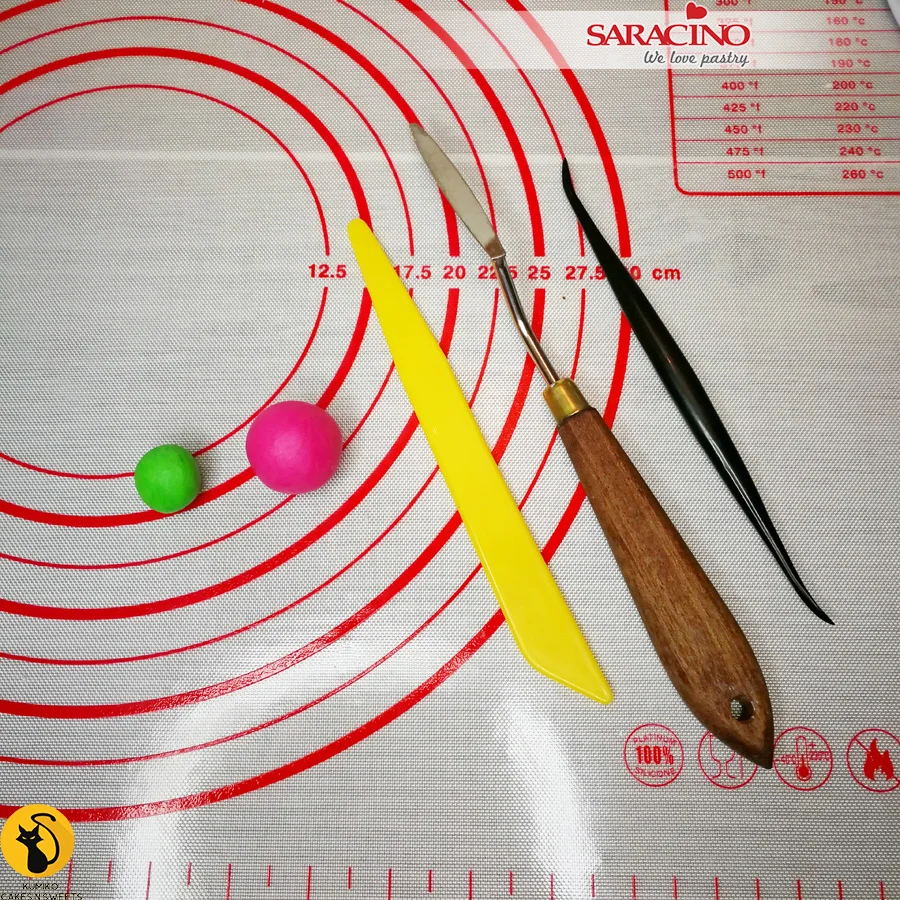
Step 21

For the watermelon prepare a small amount of fuchsia and light green modelling paste.
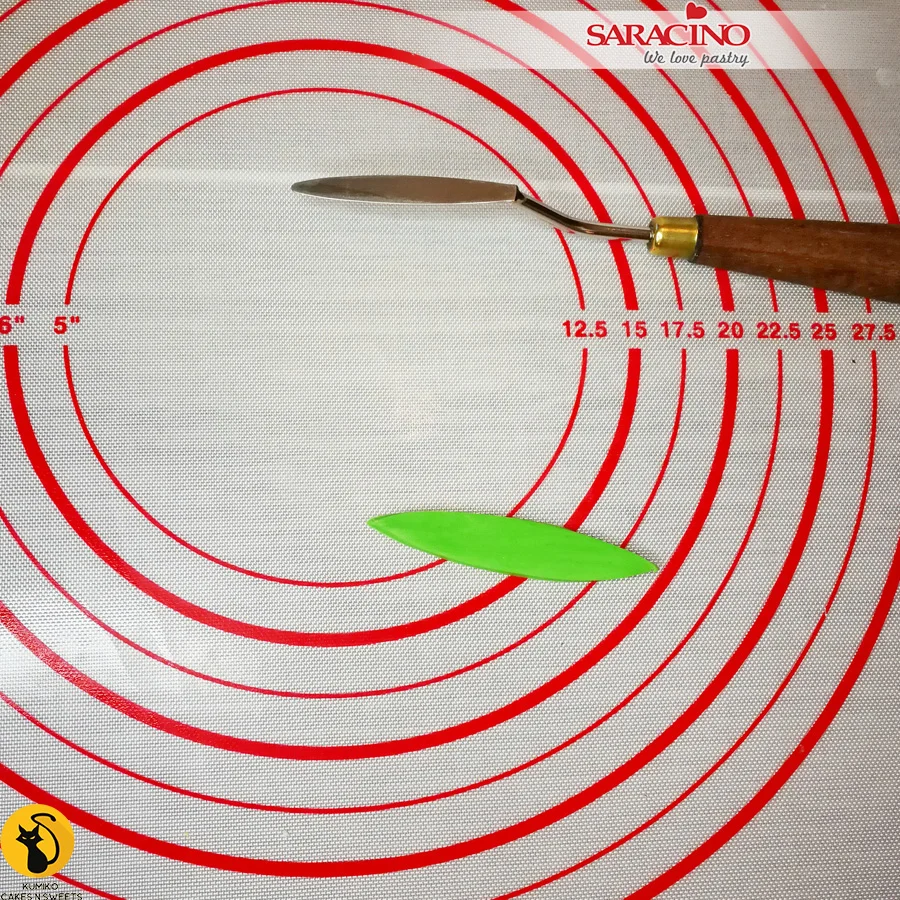
Step 22

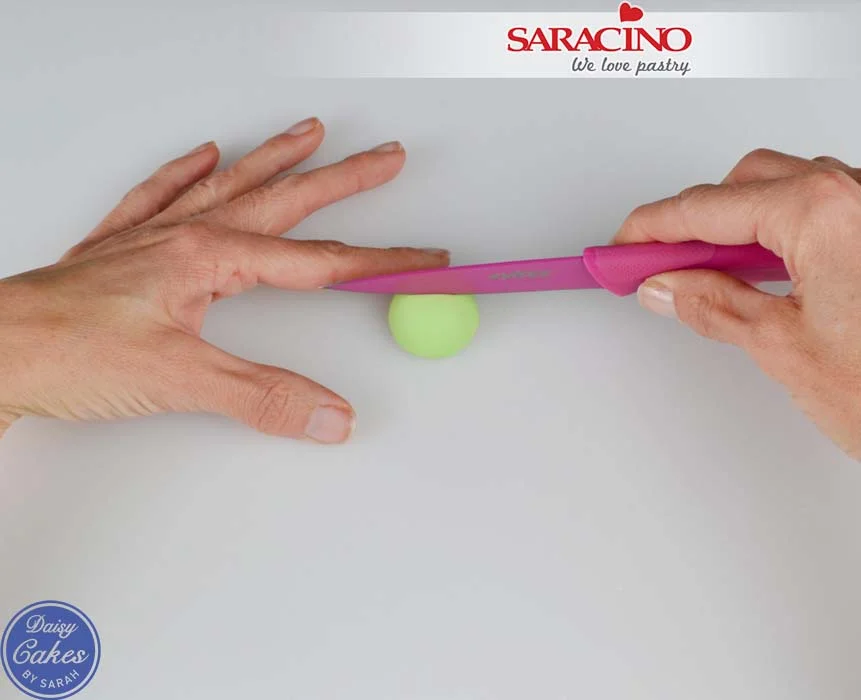
Roll the green pasta model and cut out to an elongated leaf shape.
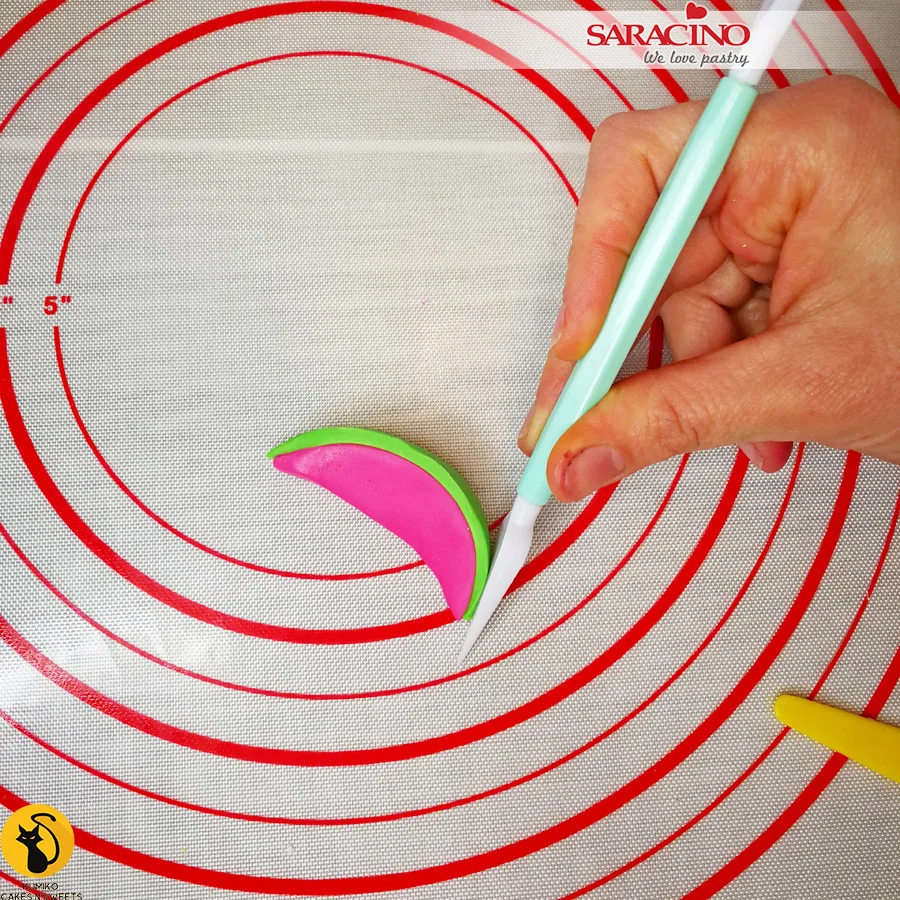
Step 23

Model the fuchsia paste to the shape of a watermelon slice. Fix the two parts together using a little edible glue. 
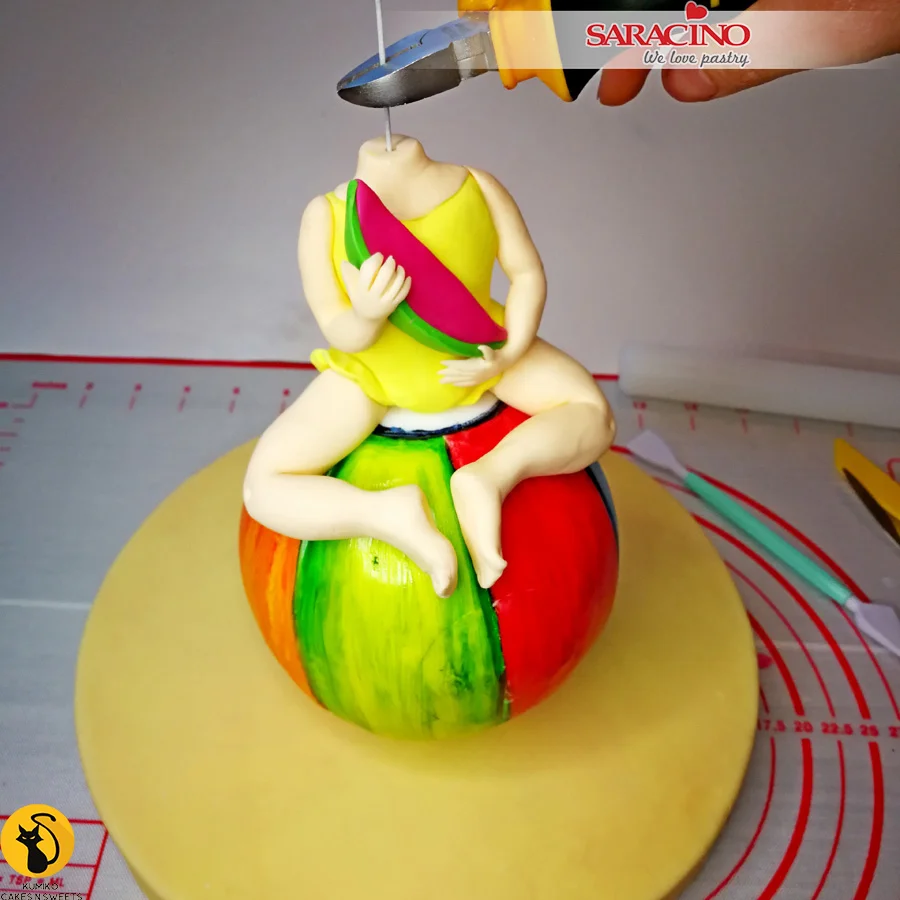
Step 24

Insert your gauge 18 flower wire through the body and the ball down to the board. Cut off any unnecessary wire. Leave enough wire to support the head.
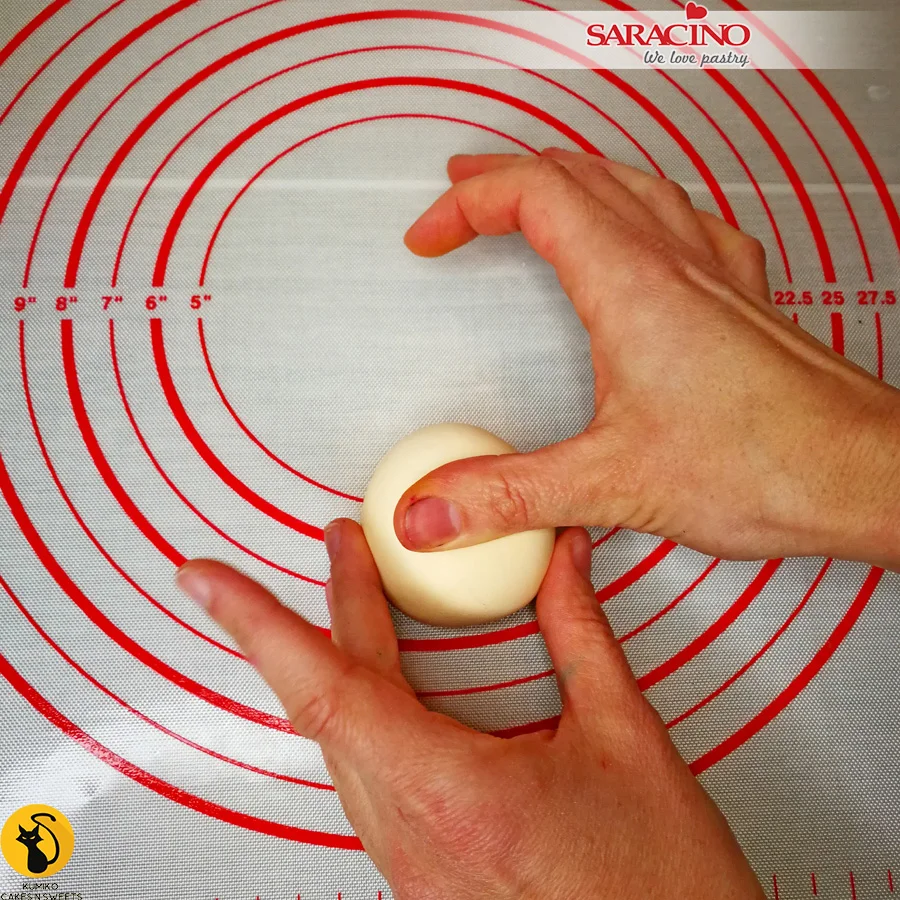
Step 25

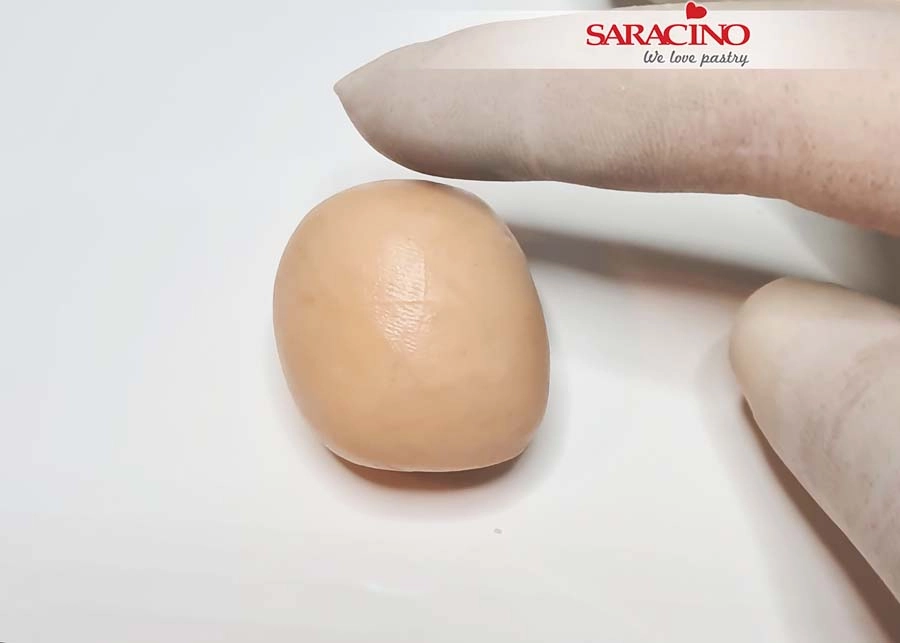
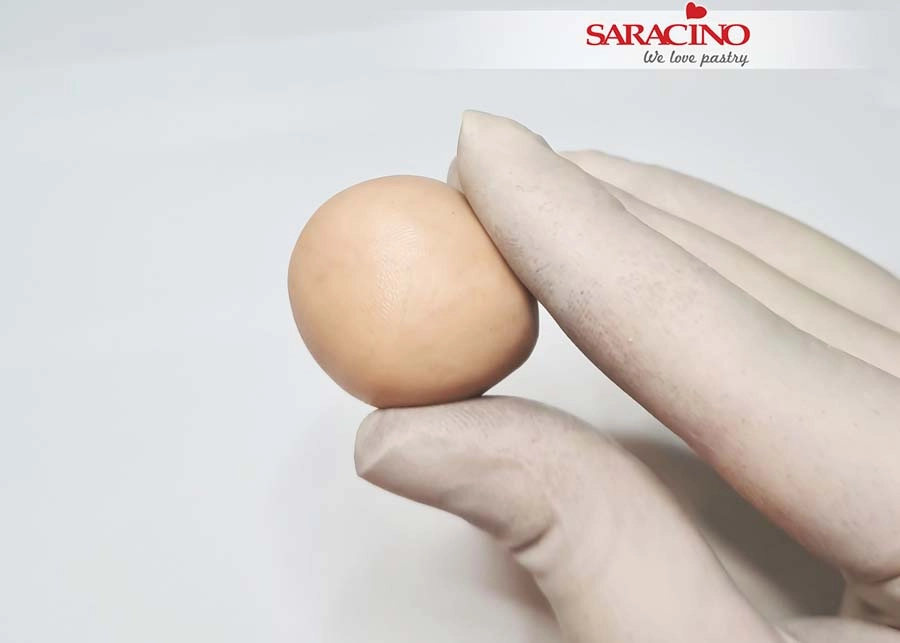
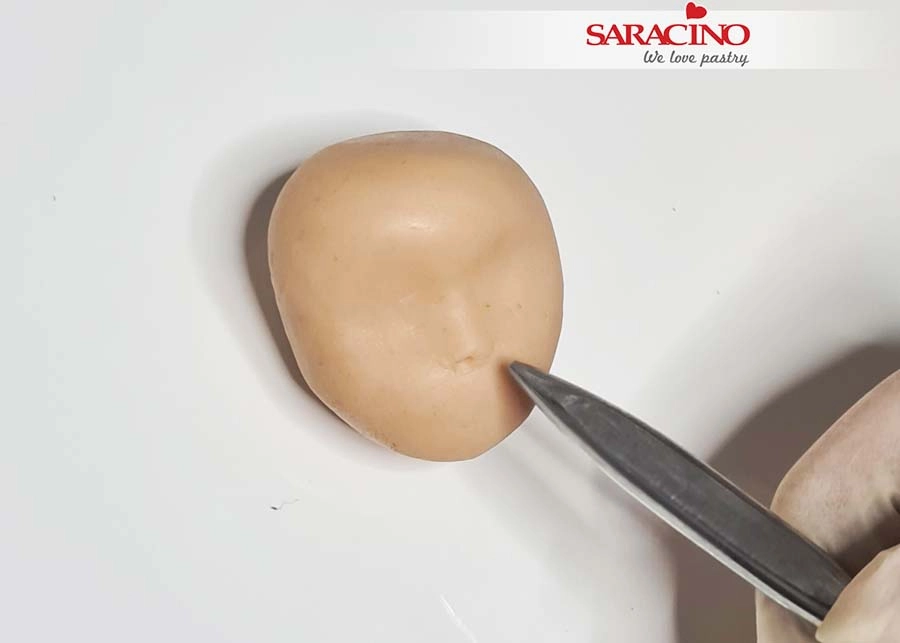
For the head use Saracino skin tone Pasta Model and roll a ball. Using your thumb or finger press it gently below the centre.

Tip: Always make the head slightly larger when modelling a cartoon or kids character. This way it looks cuter.
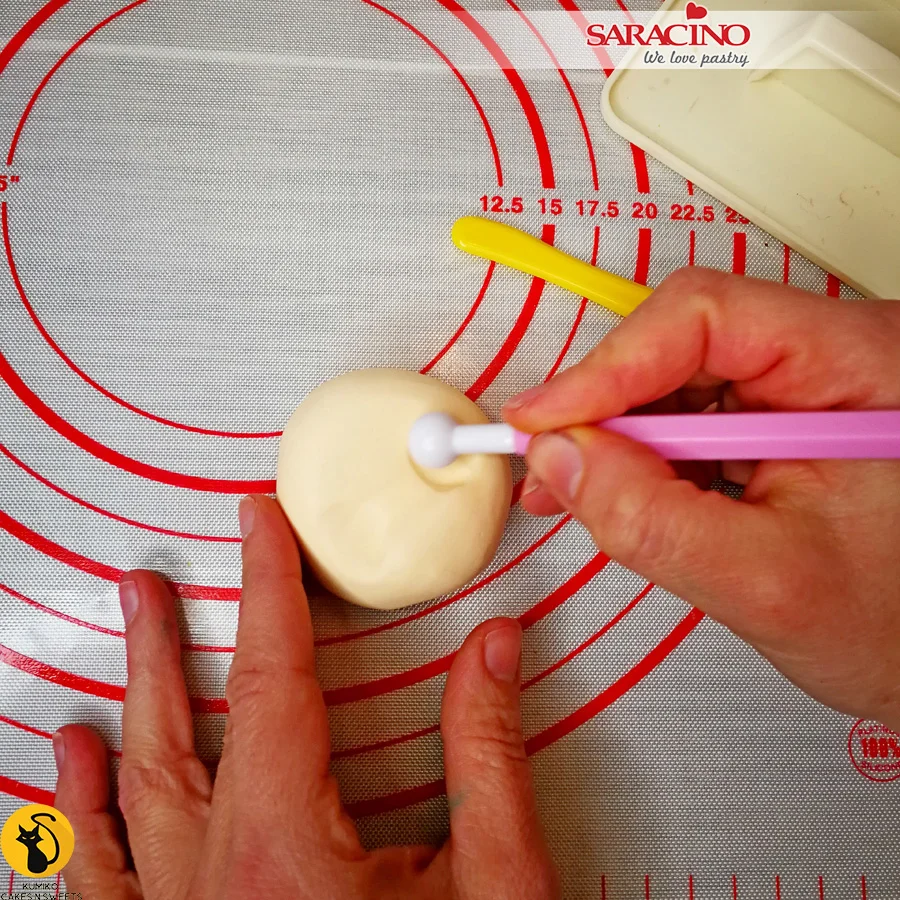
Step 26

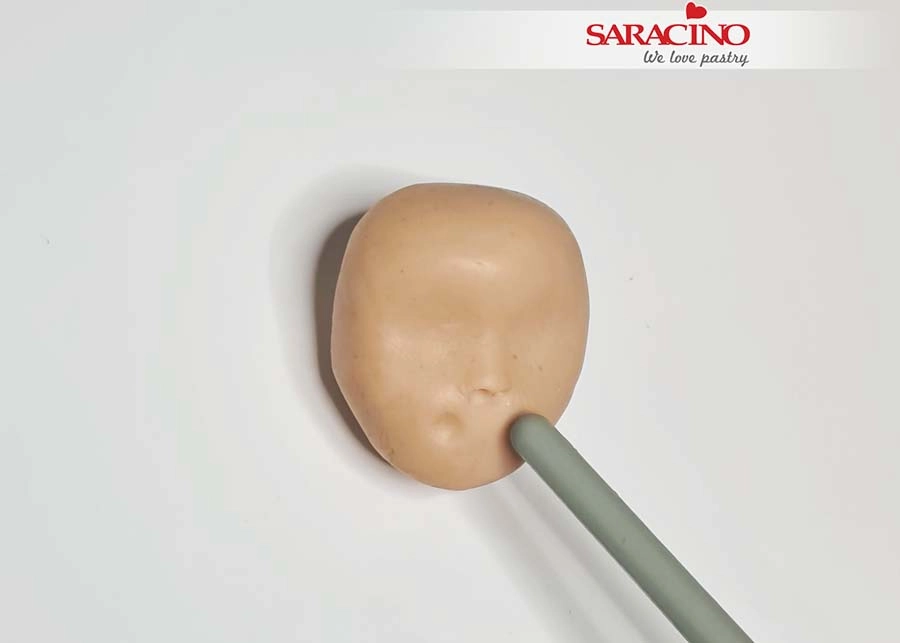
Using your ball tool form two sockets for the eyes.
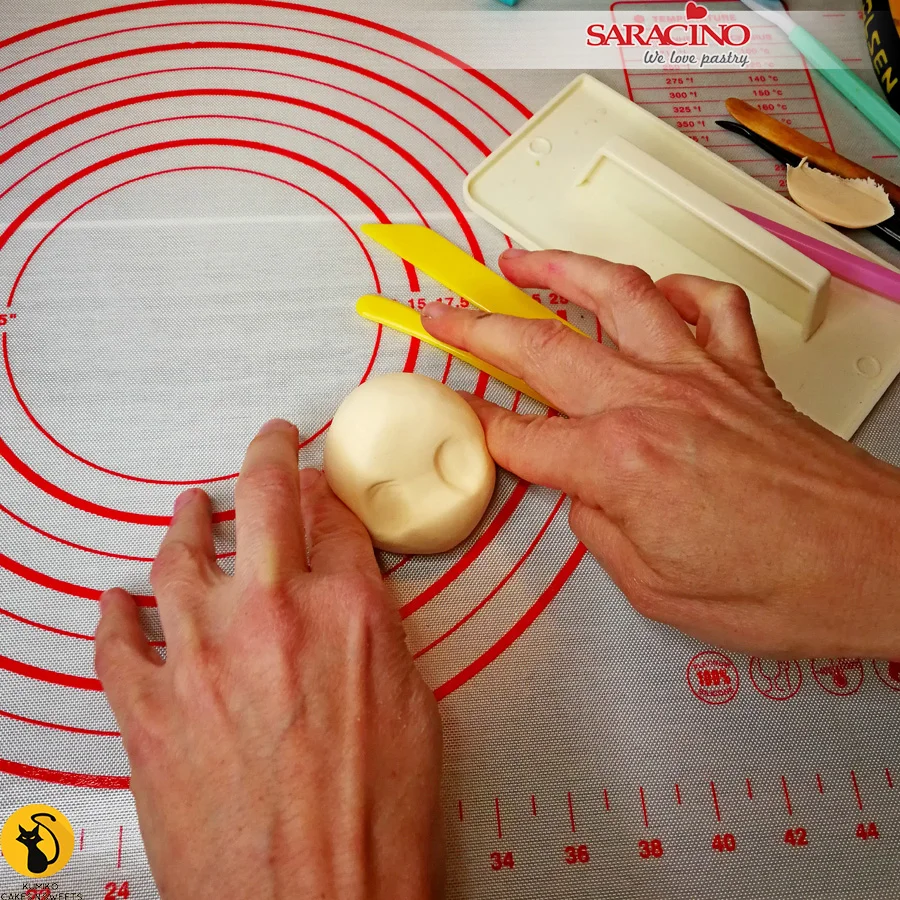
Step 27

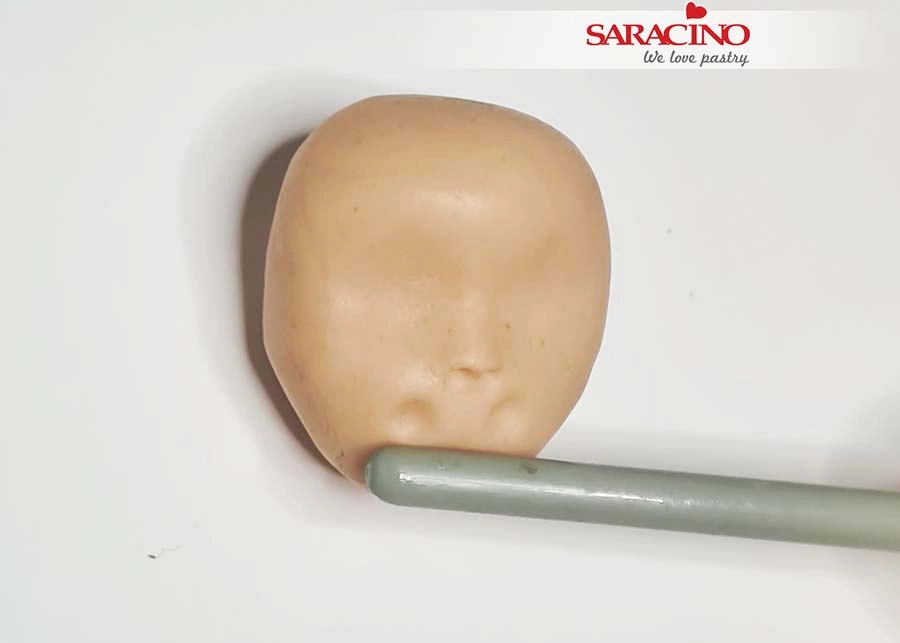
Form the cheek definition. Use your fingers to push the head from each side.
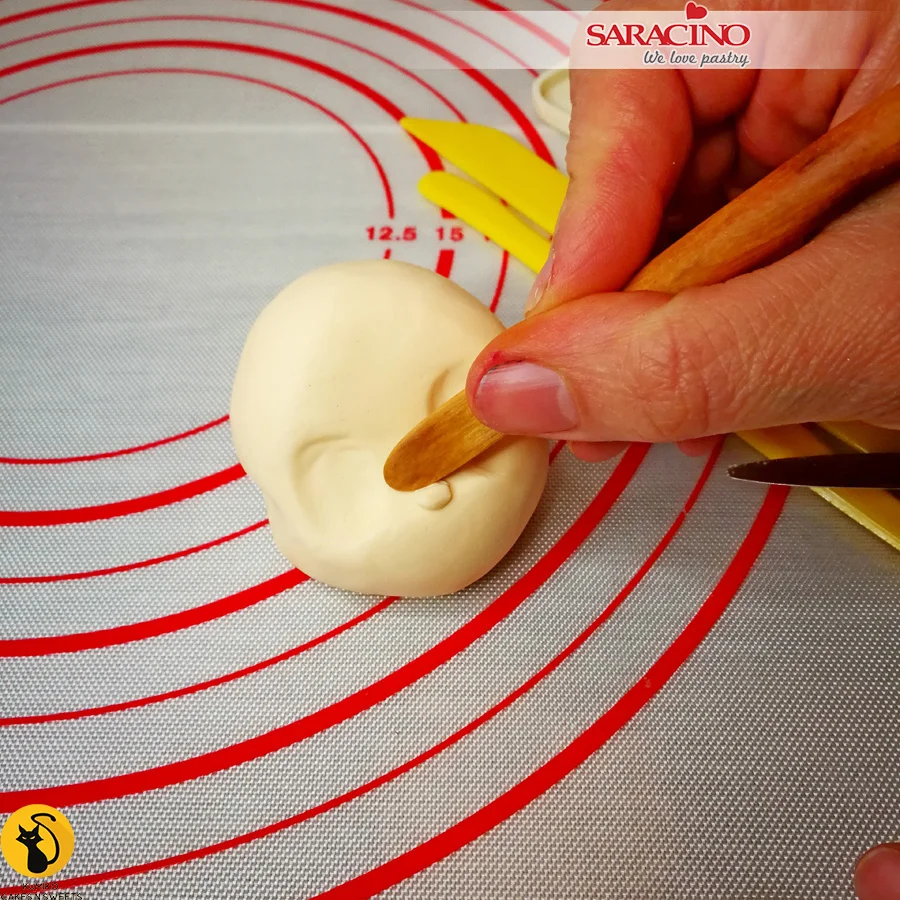
Step 28

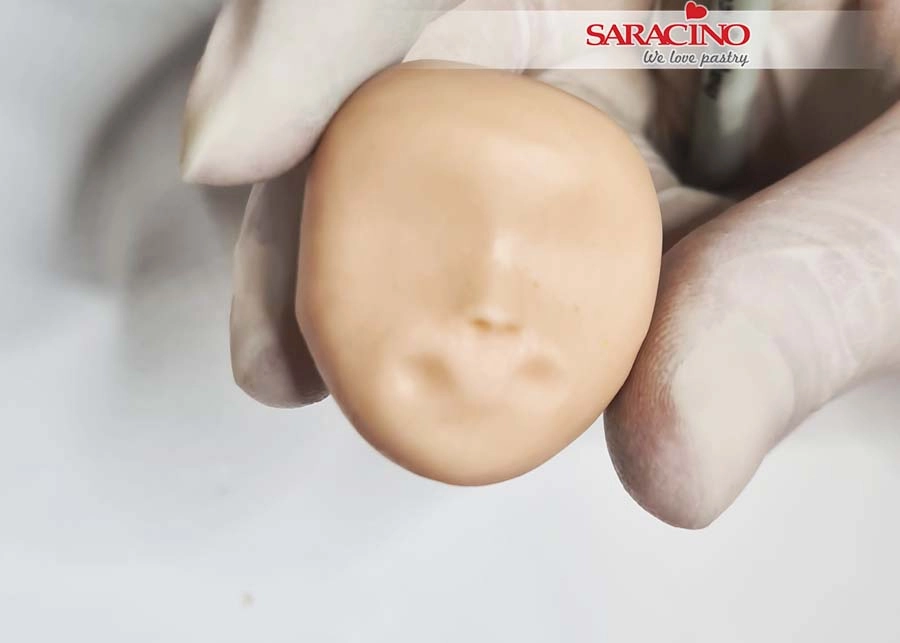
For the nose roll a small ball and place it in the centre of the face. Use a modelling tool to blend the joints and smooth it to a nose shape.
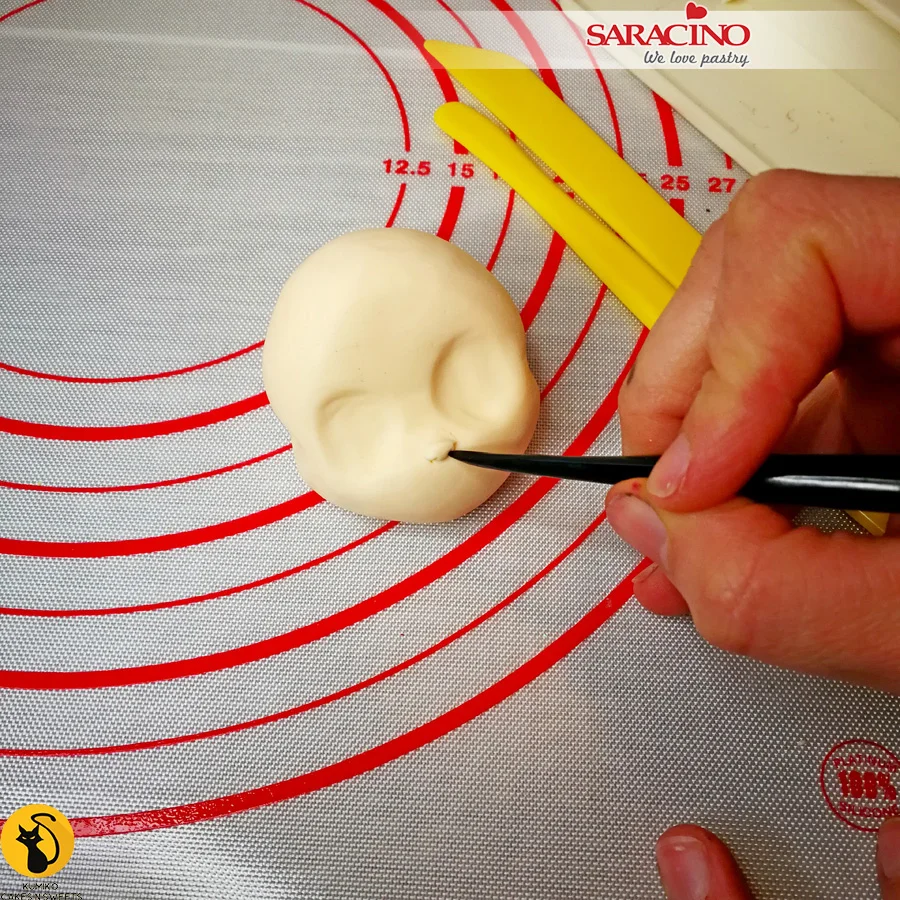
Step 29

Use a sharp tool to make nostrils.
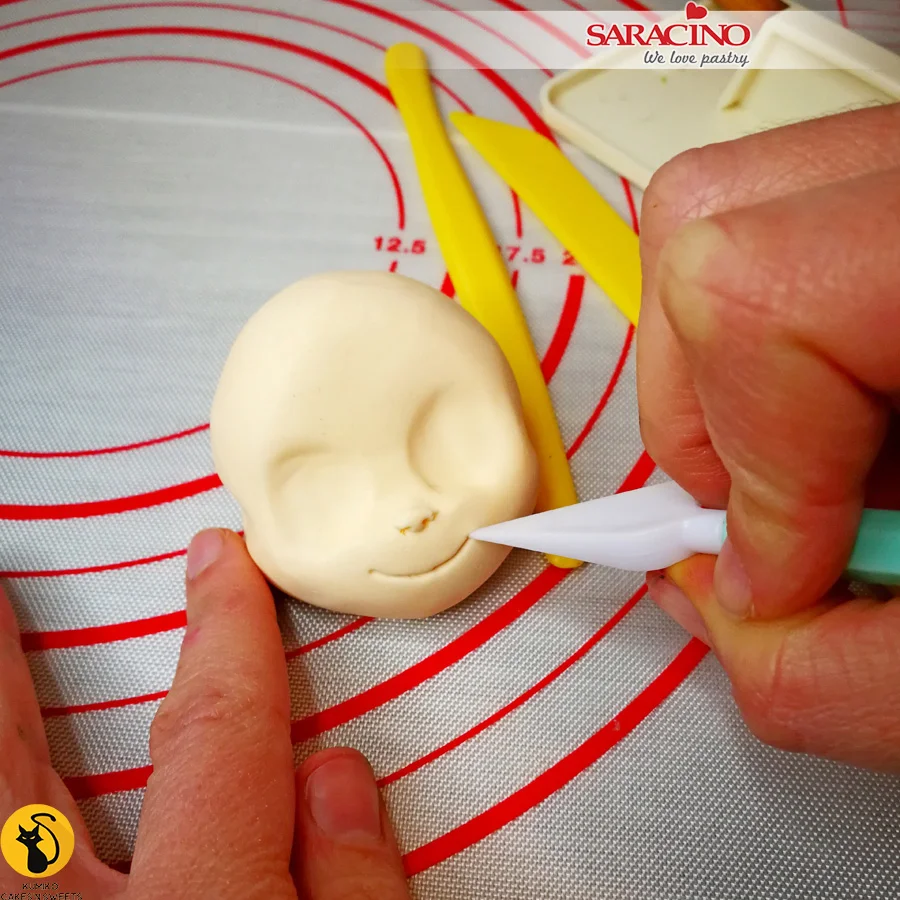
Step 30

Using a sharp tool draw a line for the mouth.
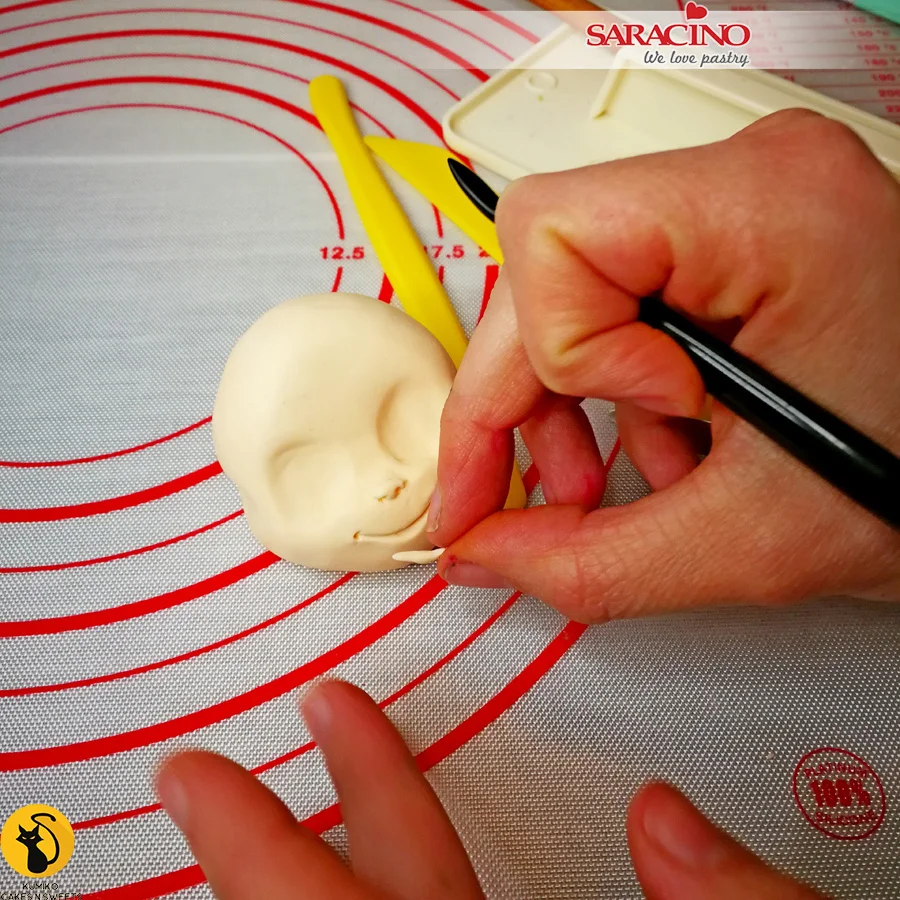
Step 31

Using skin tone Pasta Model roll a thin small piece and attach it to the line to form the lower lip. Blend with a modelling tool.
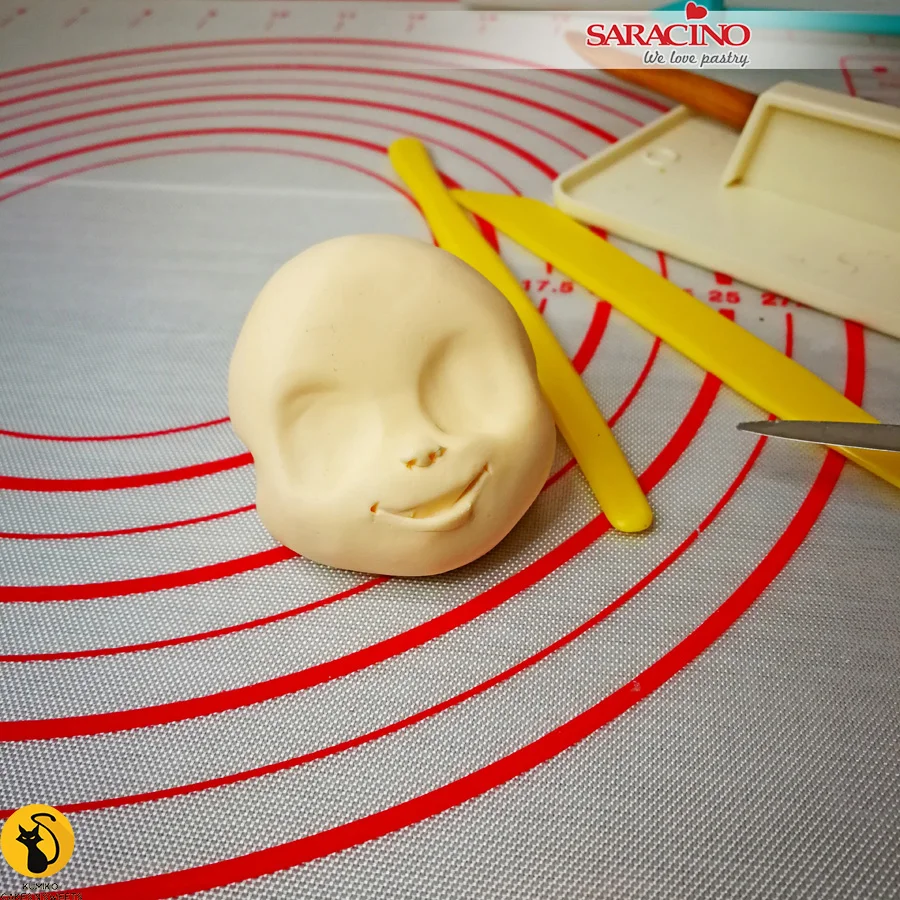
Step 32

Use a Dresden tool to give the mouth a slightly open look.
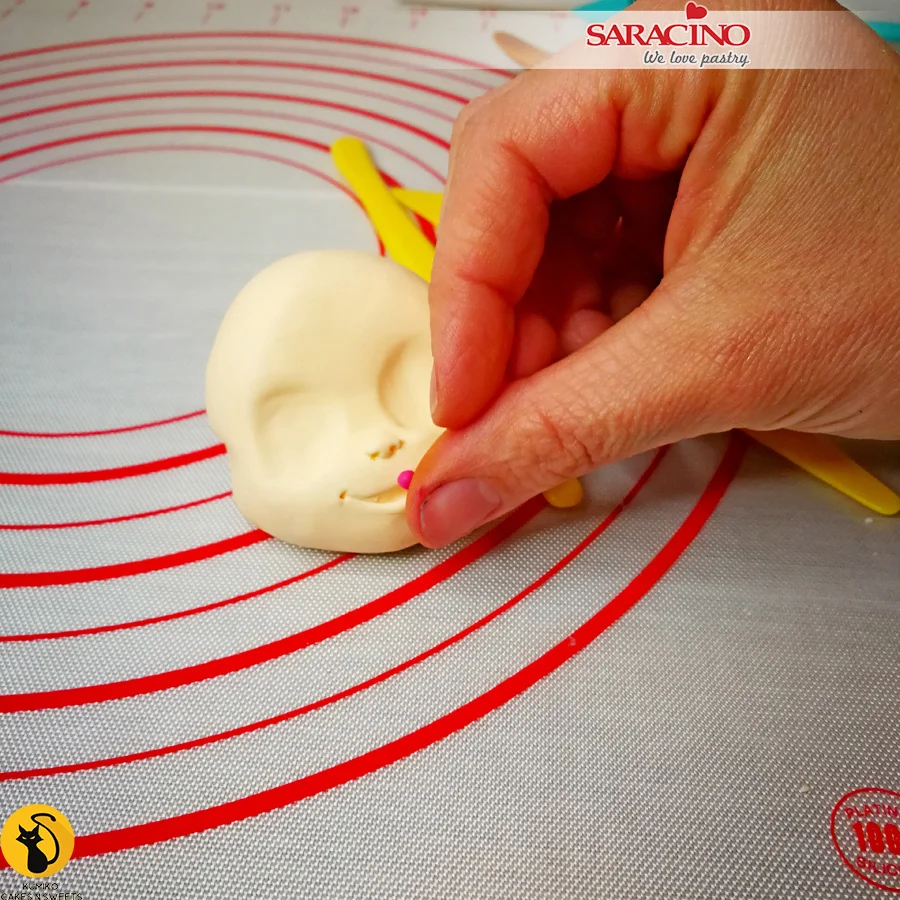
Step 33

For the tongue roll a small ball of pink paste and fix inside the mouth.
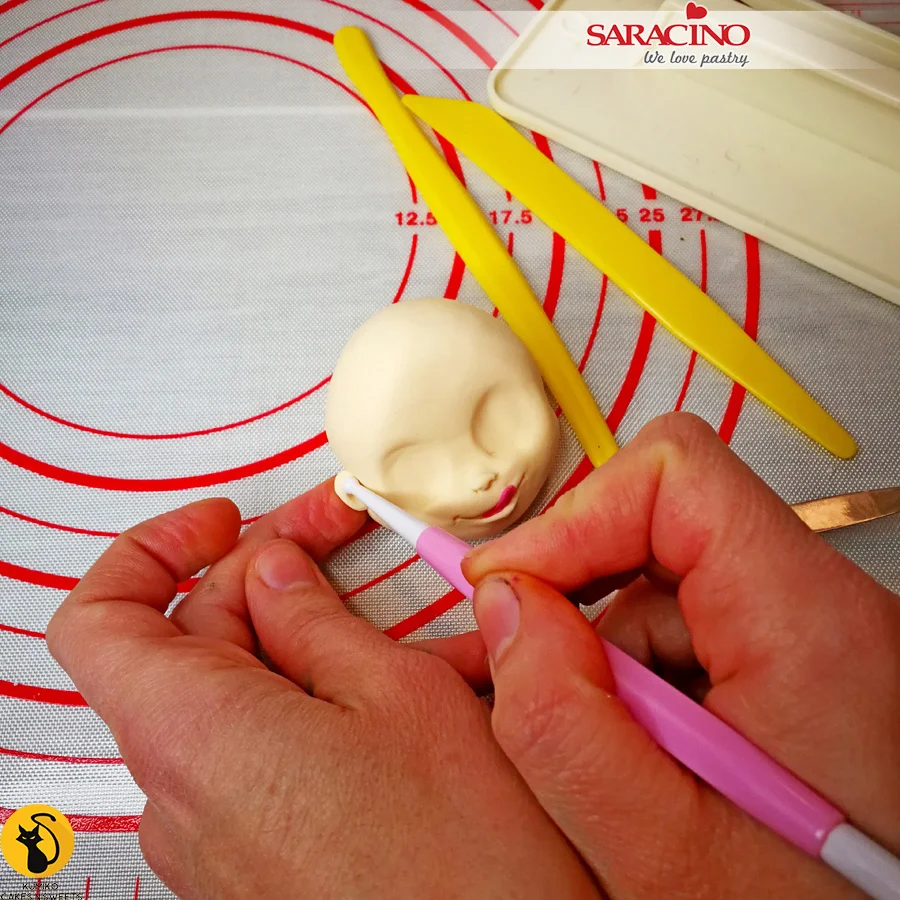
Step 34
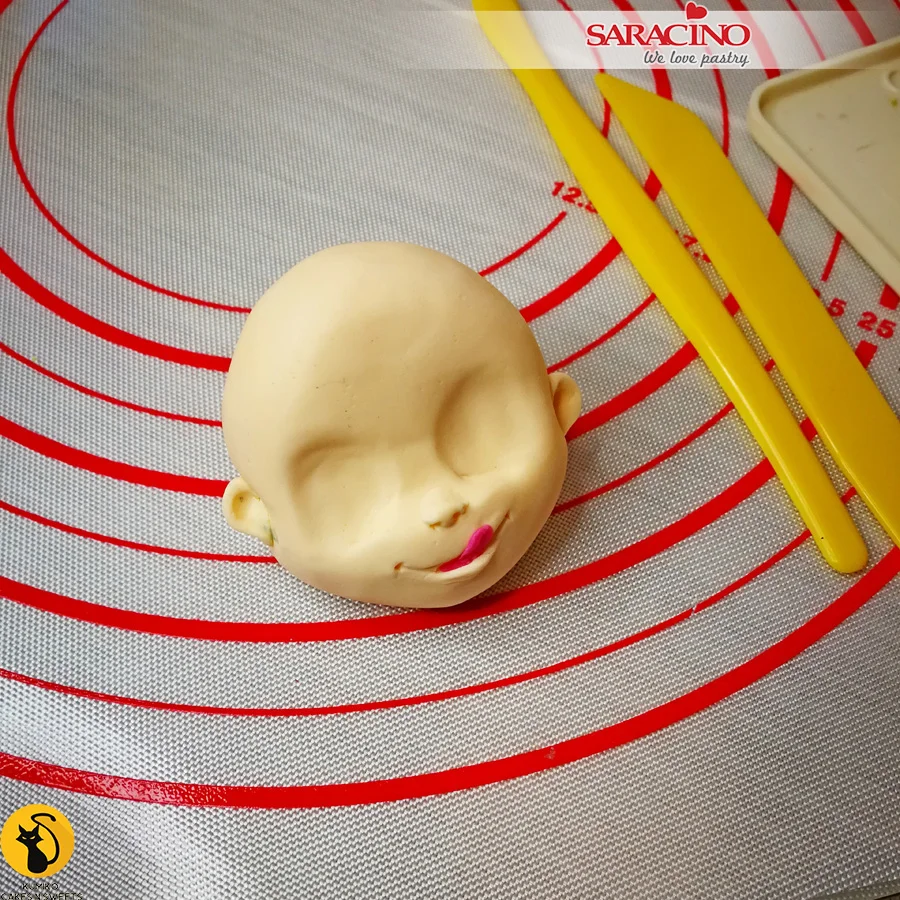
For the ears roll two small balls of skin tone Pasta Model. Squeeze each one between your fingers to flatten. Attach to each side of the head using a little edible glue.

Step 35

Use the small end of a ball tool to form the holes at the centre of each ear.
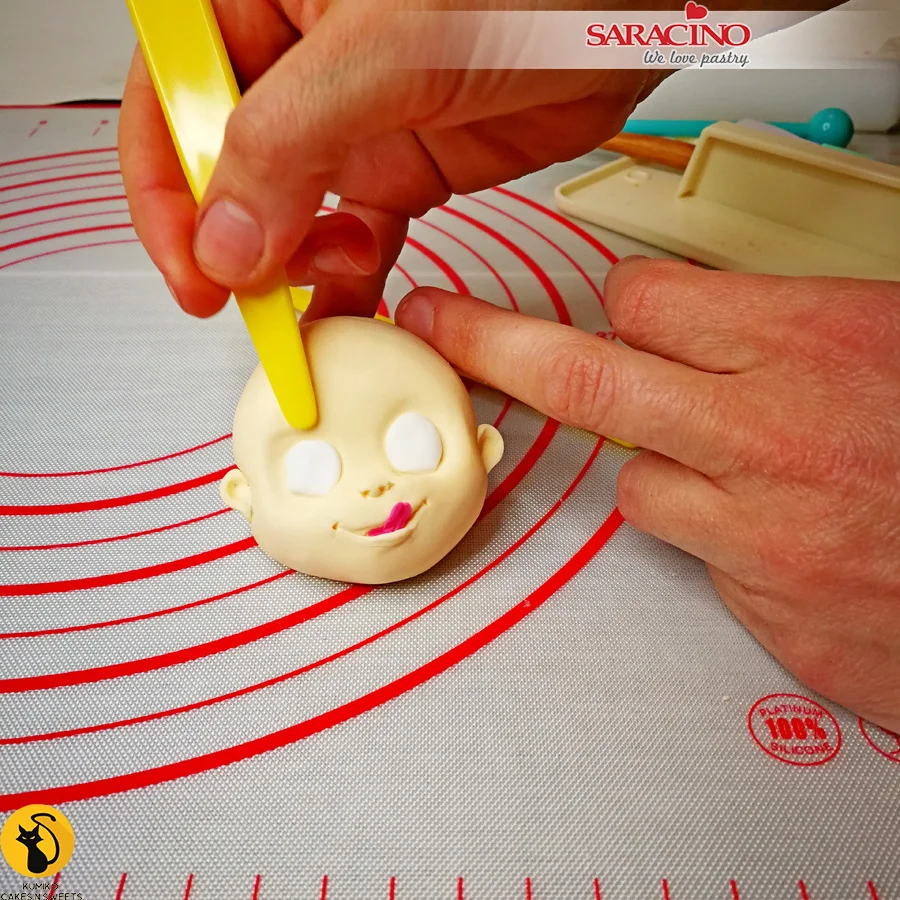
Step 36

For the eyes roll two small balls of white Pasta Model. Squeeze them until flat then insert them into the eye sockets.

Tip: To give a cuter look make the eyes slightly larger.
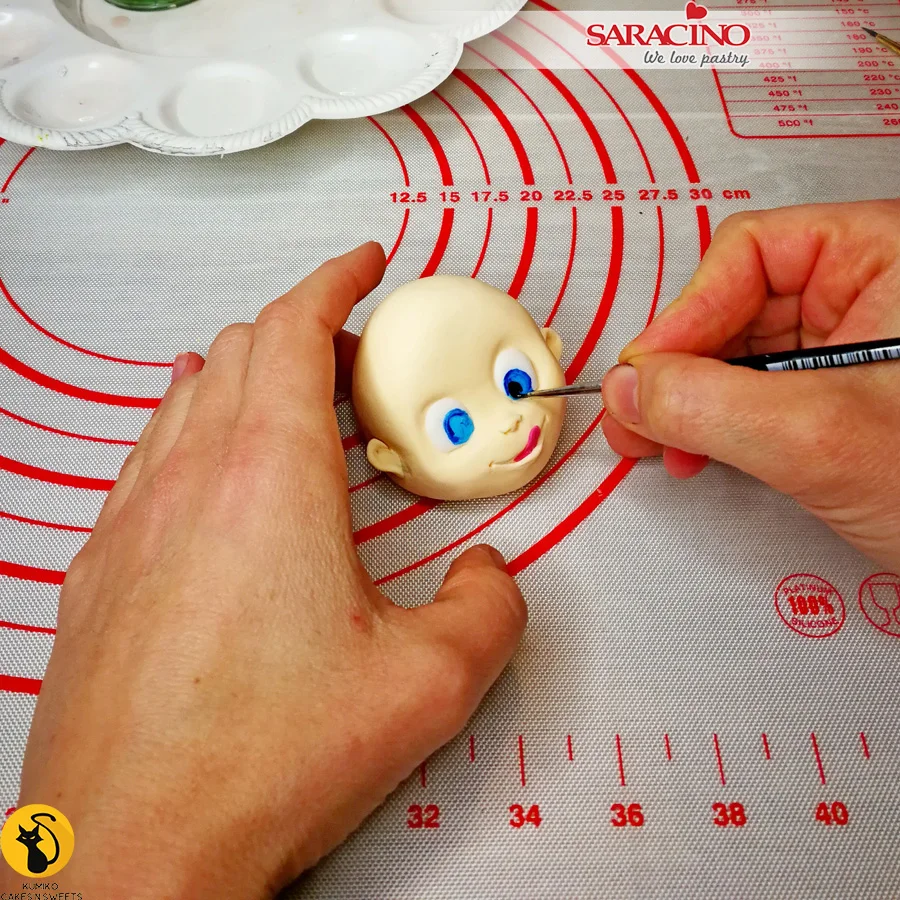
Step 37

Paint the eyes using Saracino colouring gel mixed with distilled water. Paint the eye pupils with black colouring gel.
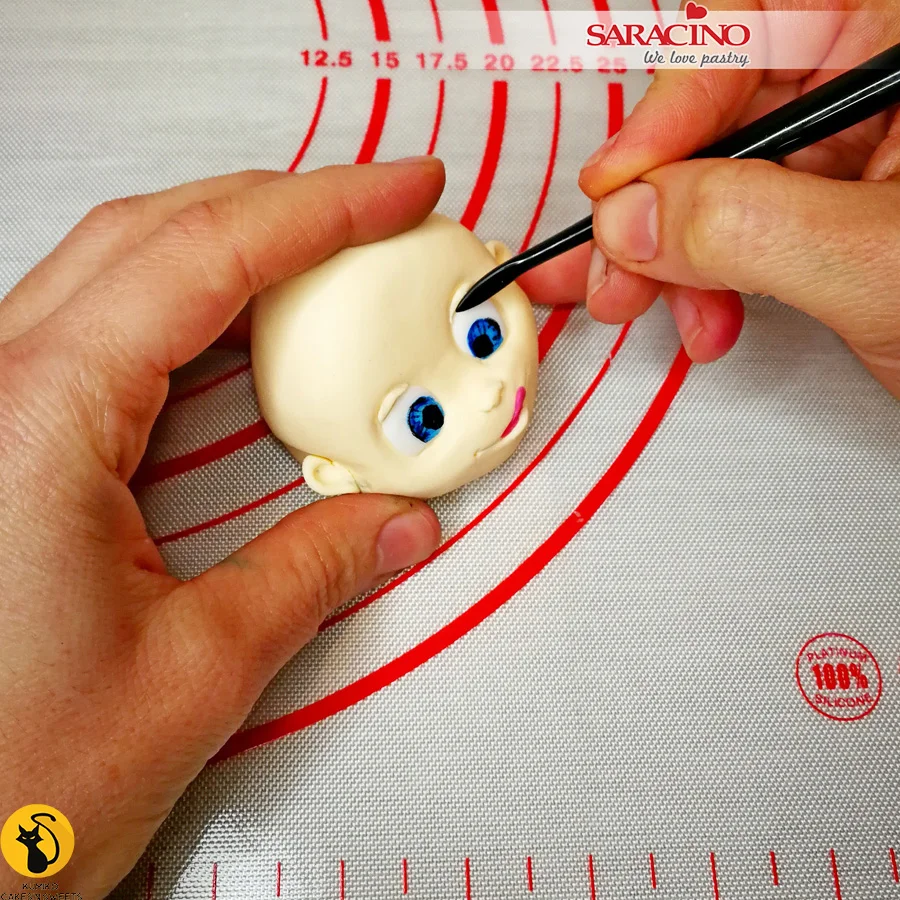
Step 38

Using a little skin tone paste roll the eyelids and attach.
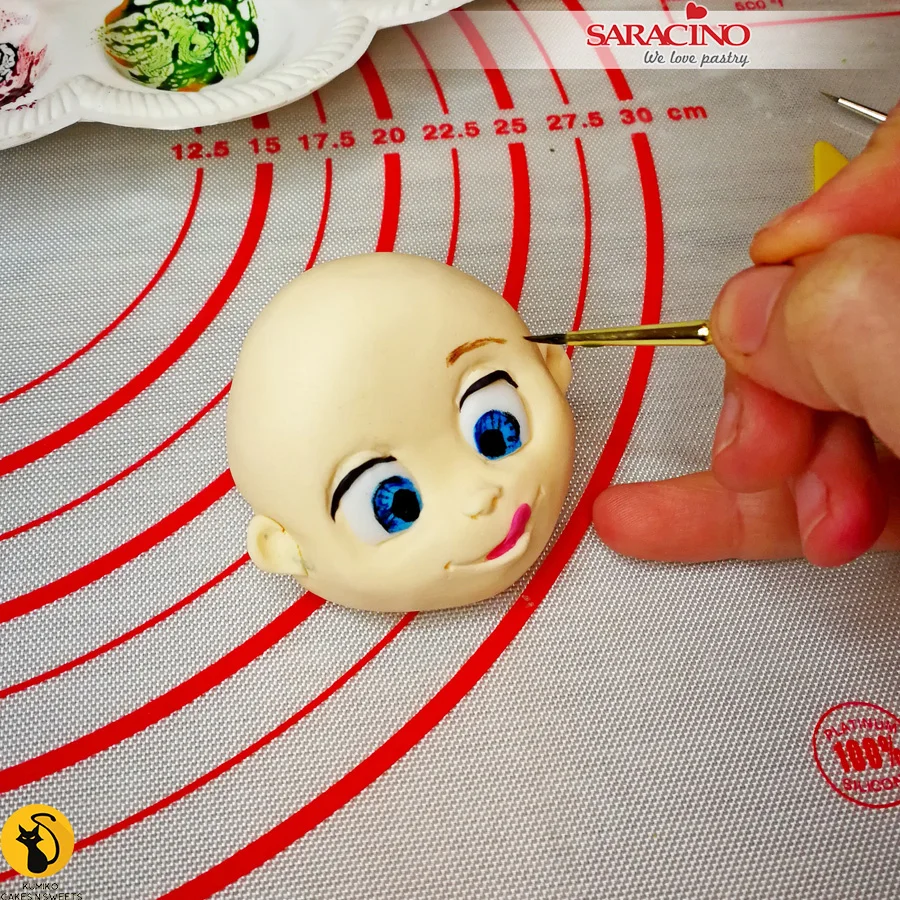
Step 39

Paint eyebrows and eyelashes using brown and black colouring gel.
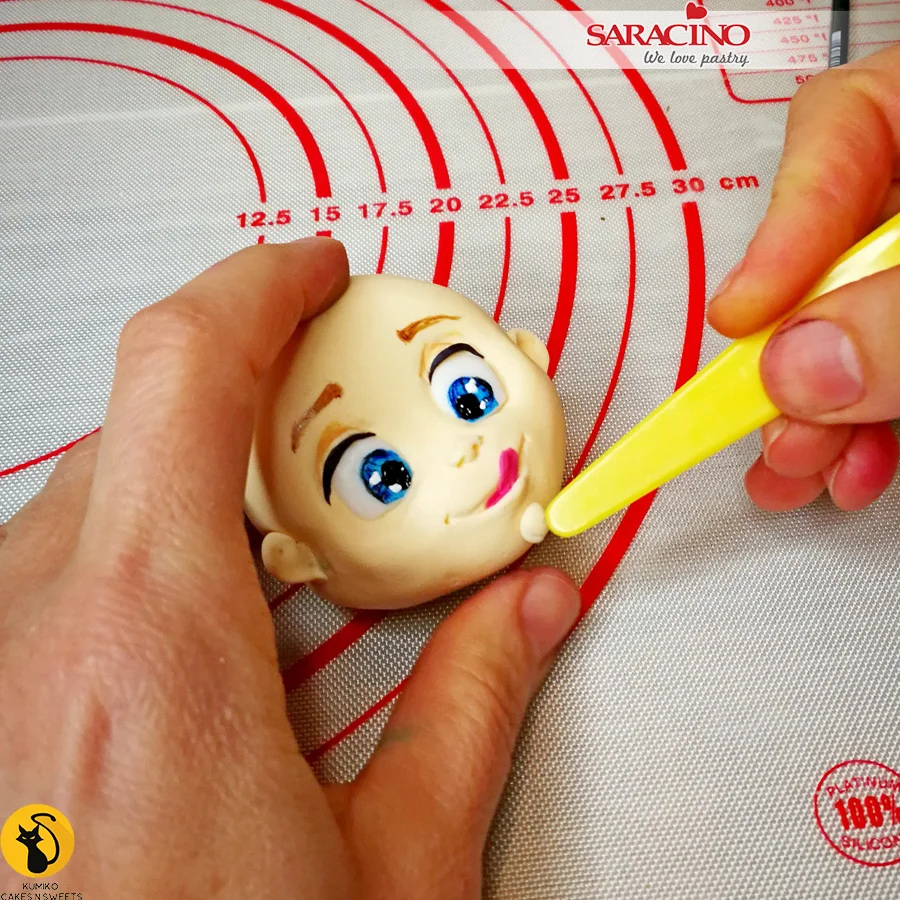
Step 40

Paint white dots onto the eyes to give reflection. Roll a small piece of Saracino skin tone Pasta Model and attach it to the face for the chin. Use a modelling tool to smooth and shape a cute chin.
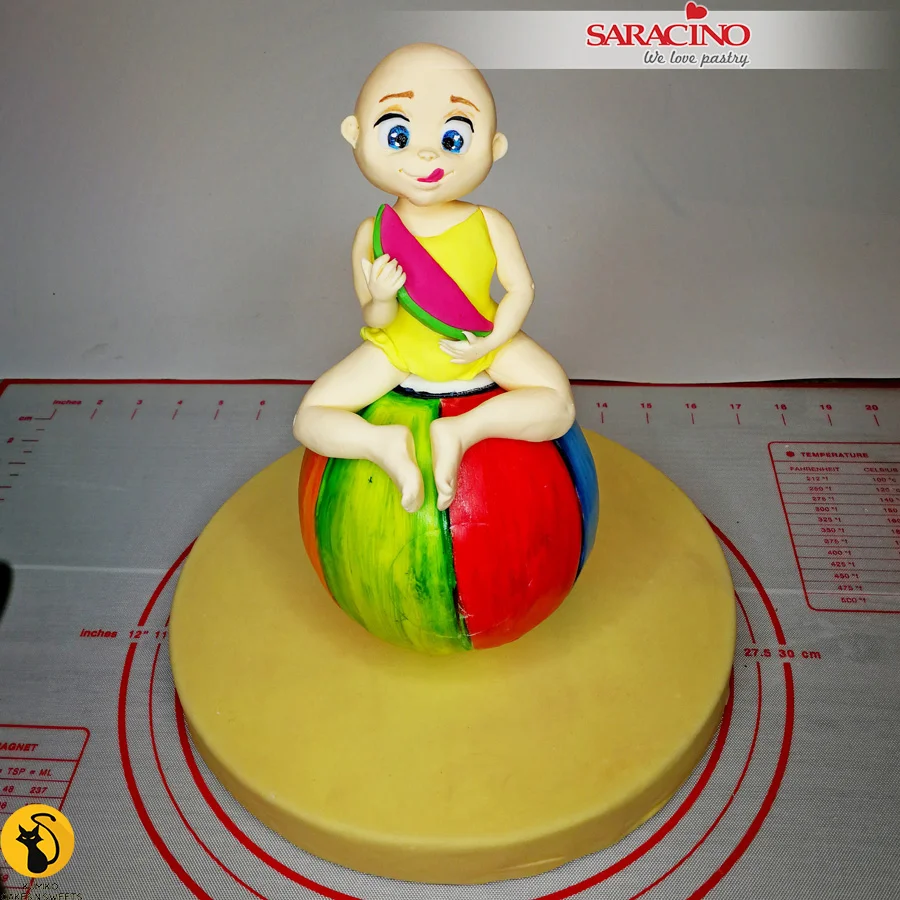
Step 41

Attach the head to the body using edible glue and place the watermelon slice into the girls hands.
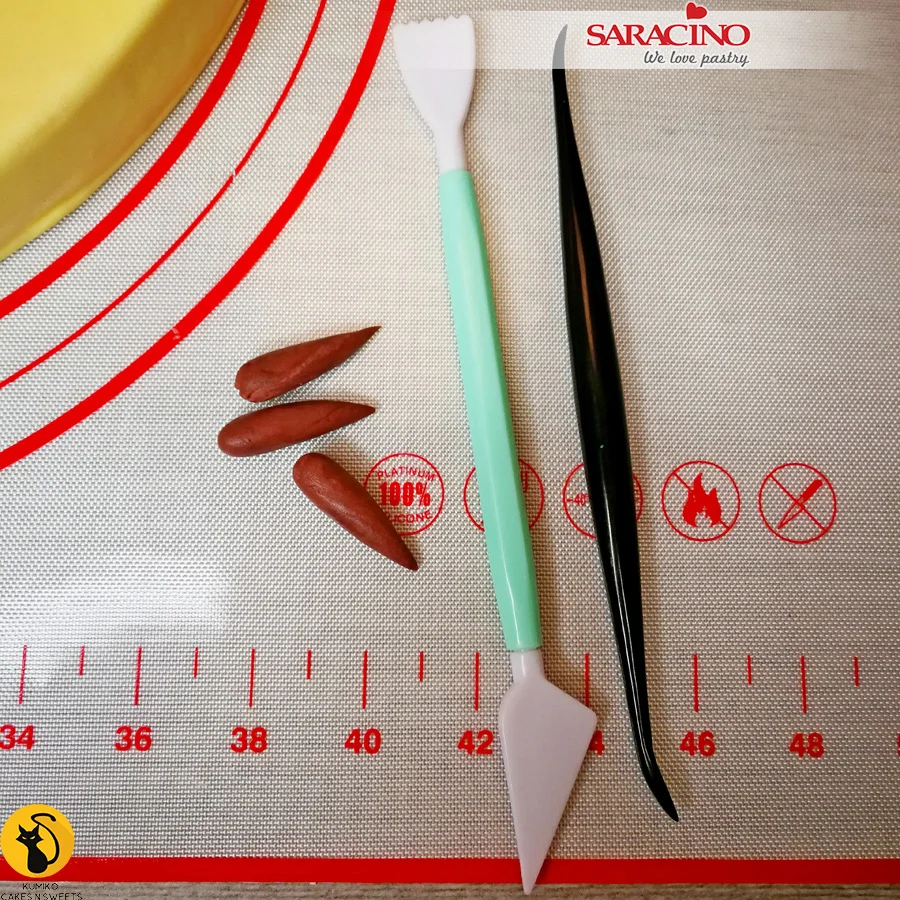
Step 42

For the hair use brown Pasta Model and roll tear drop shapes.
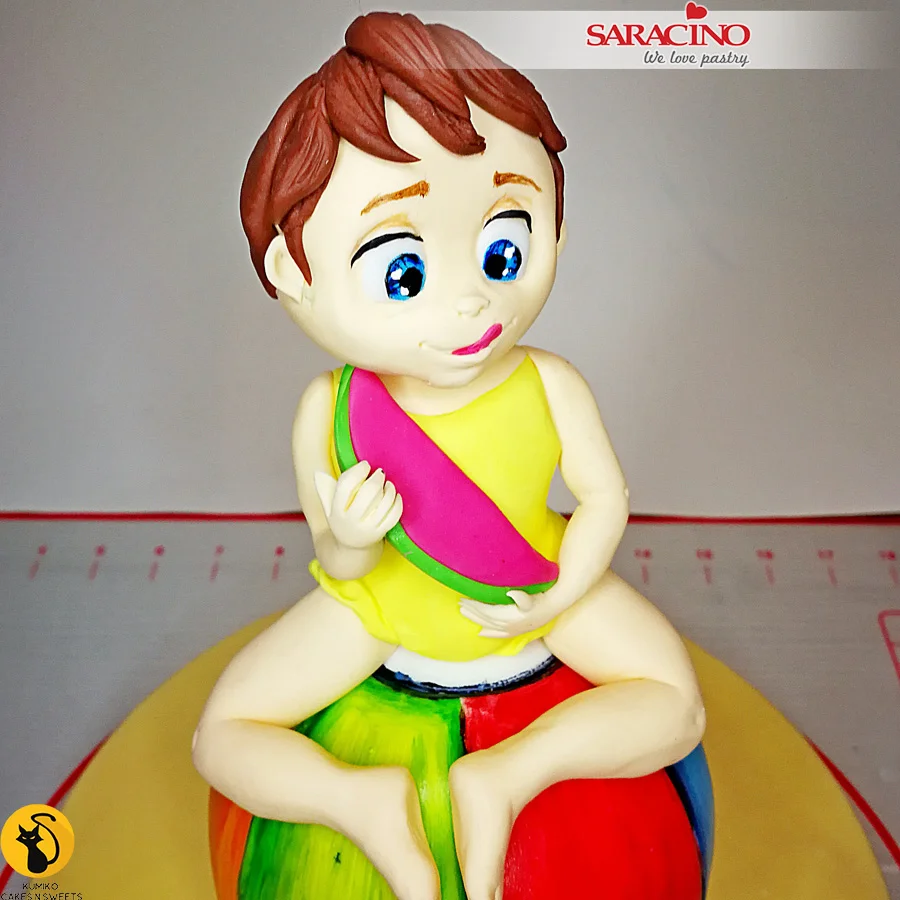
Step 43

Fix the hair to the head using edible glue. Add hair texture with a sharp modelling tool by pressing each piece gently. Cover all the head with hair to achieve the look shown.
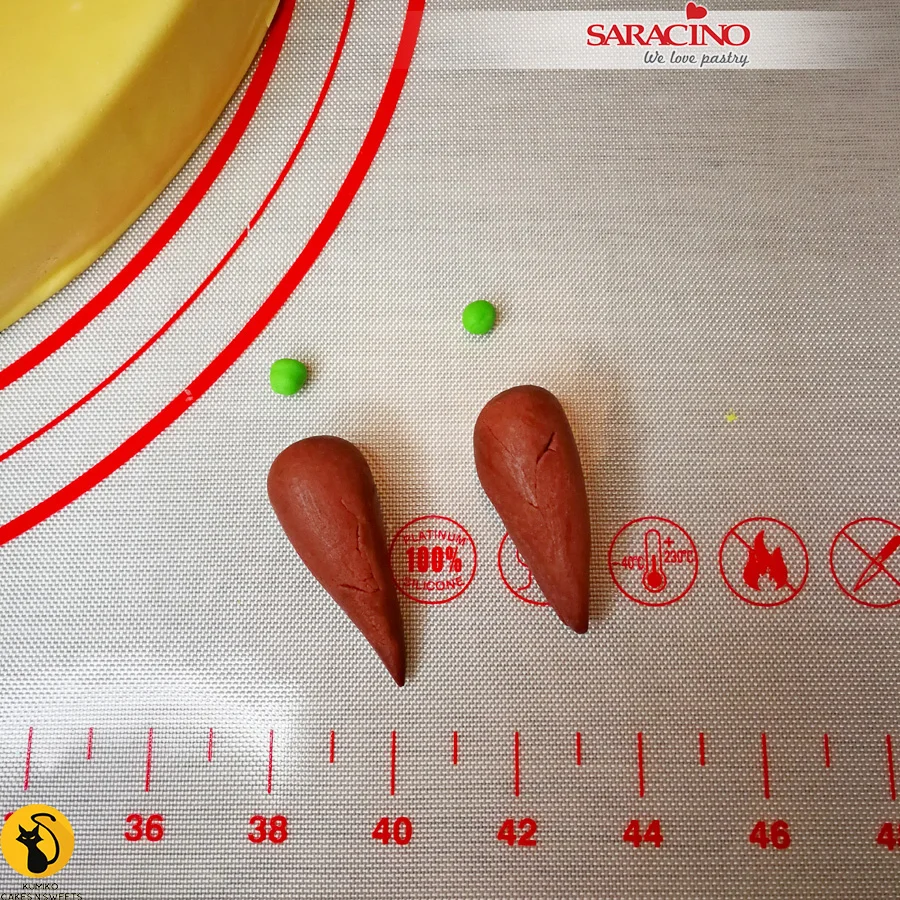
Step 44

For the pony tails roll two brown teardrop shapes. Roll two green balls for the hairbands.
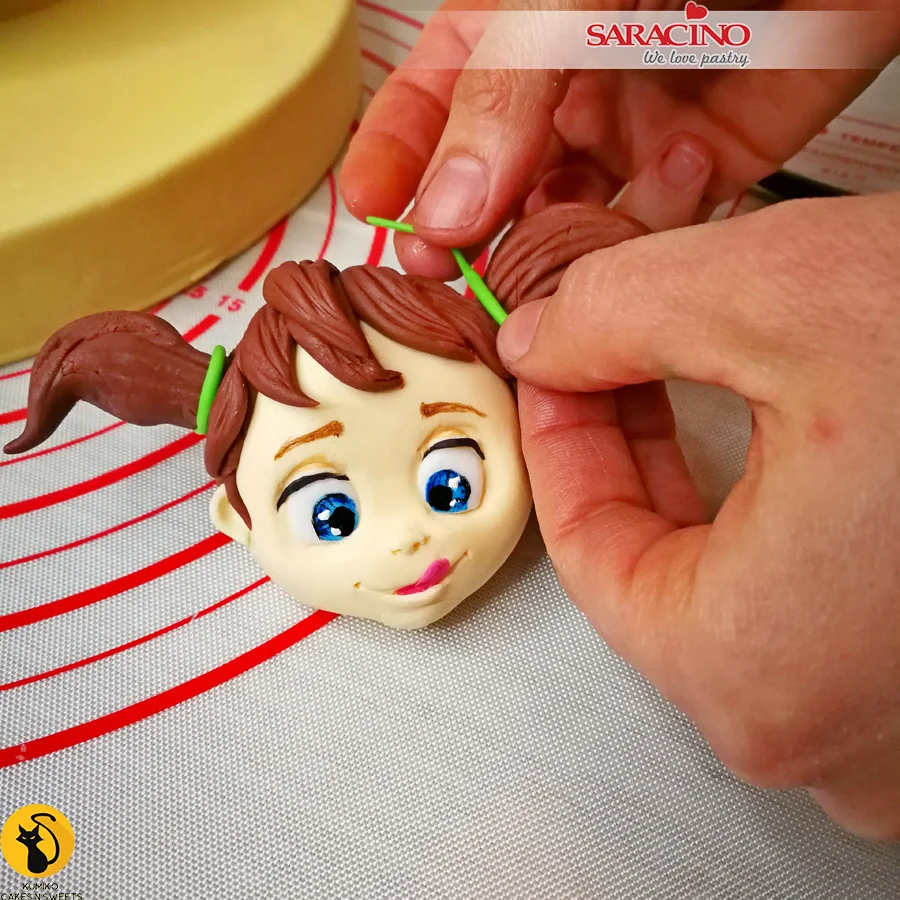
Step 45

Shape and give texture to the pony tails and glue them on each side of the head. You can use a short lenght of flower wire to make them more stable if required. Roll the green balls to form a thin strand of paste and add to the pony tail for the hair band.
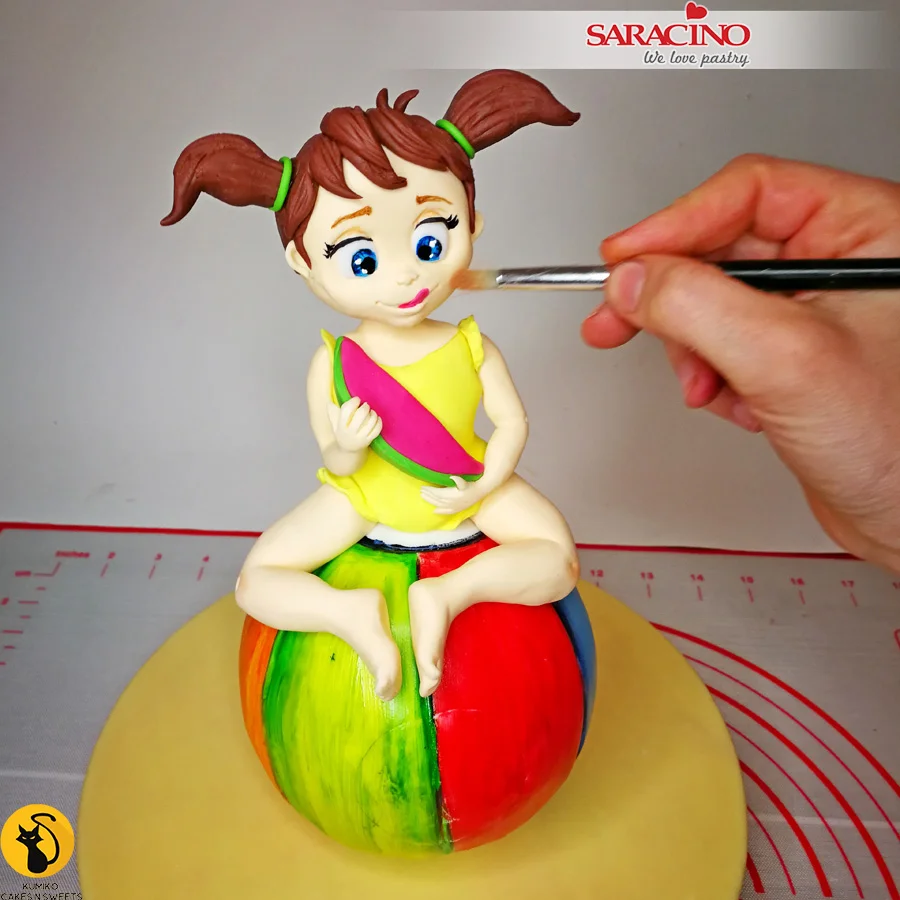
Step 46

Using yellow paste add a small frill detail to each shoulder. Using pink Saracino powder colour lightly dust the cheeks, elbows and knees.
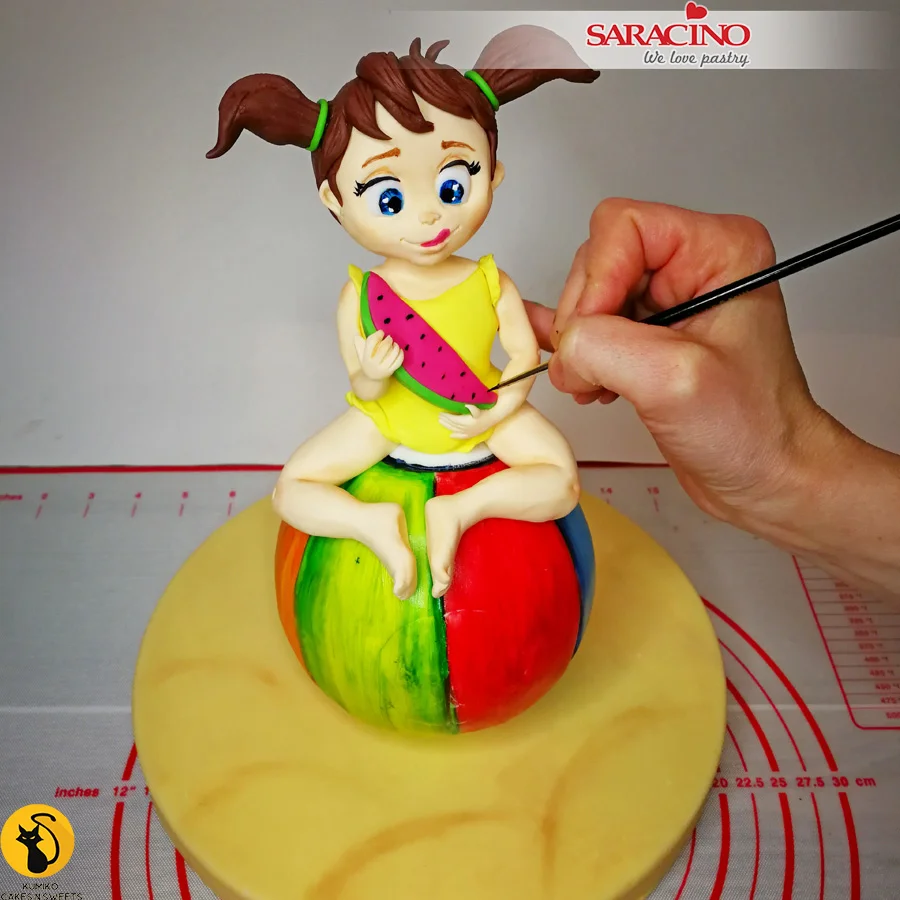
Step 47

Paint black dots and green stripes on the watermelon slice.
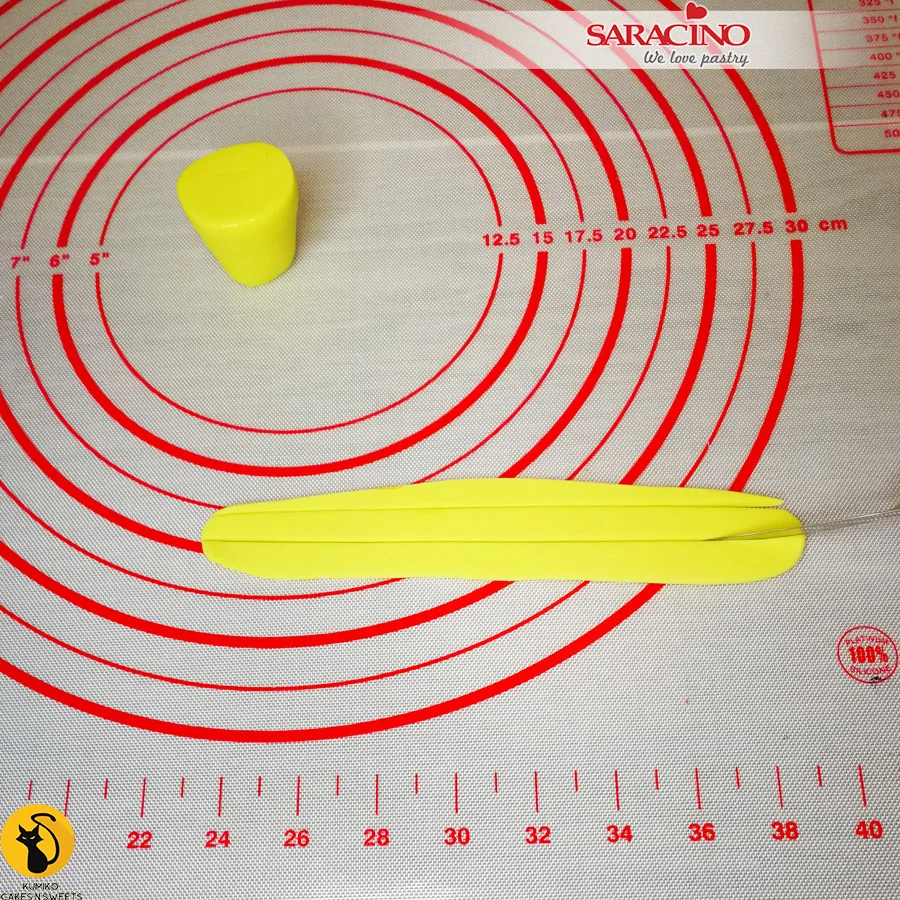
Step 48

Using yellow Pasta Model form a bucket shape. Roll more yellow flat and cut a strip.
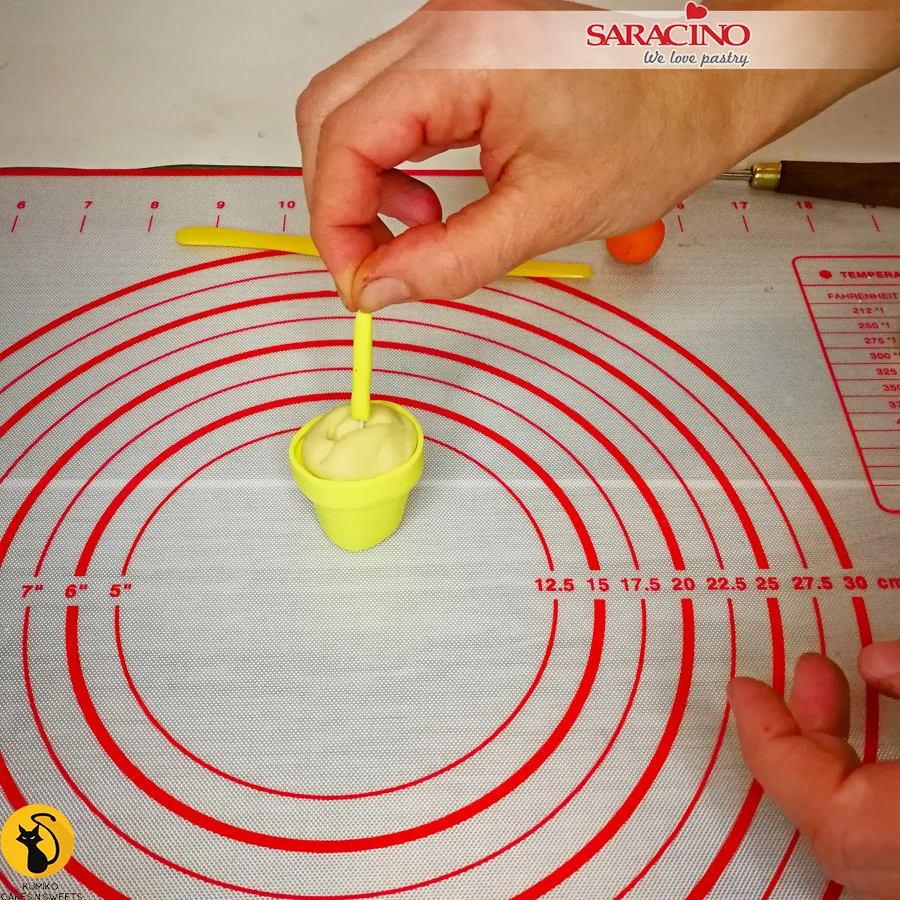
Step 49

Fix the strip around the top of the bucket. Add some textured paste to the top of the bucket to look like sand. Make a little yellow shovel handle and stick it into the sand using a flower wire.
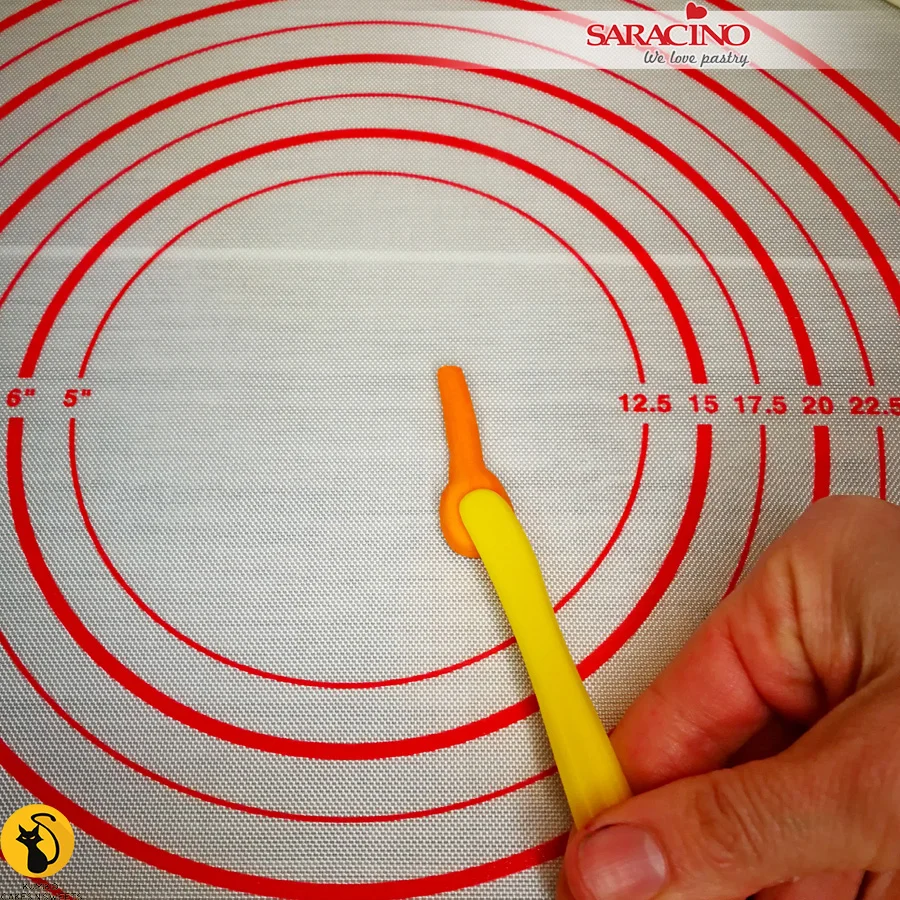
Step 50

Make another little shovel from the orange ball.
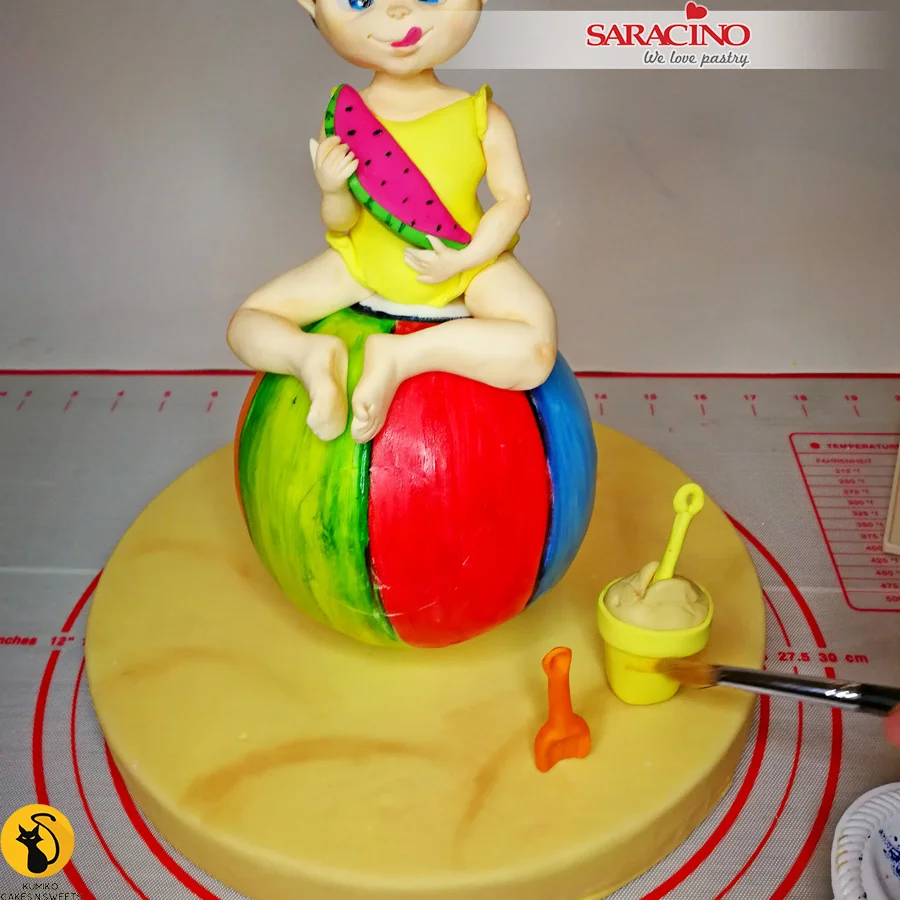
Step 51

Using powder colours lightly dust the board and bucket to add character and depth.
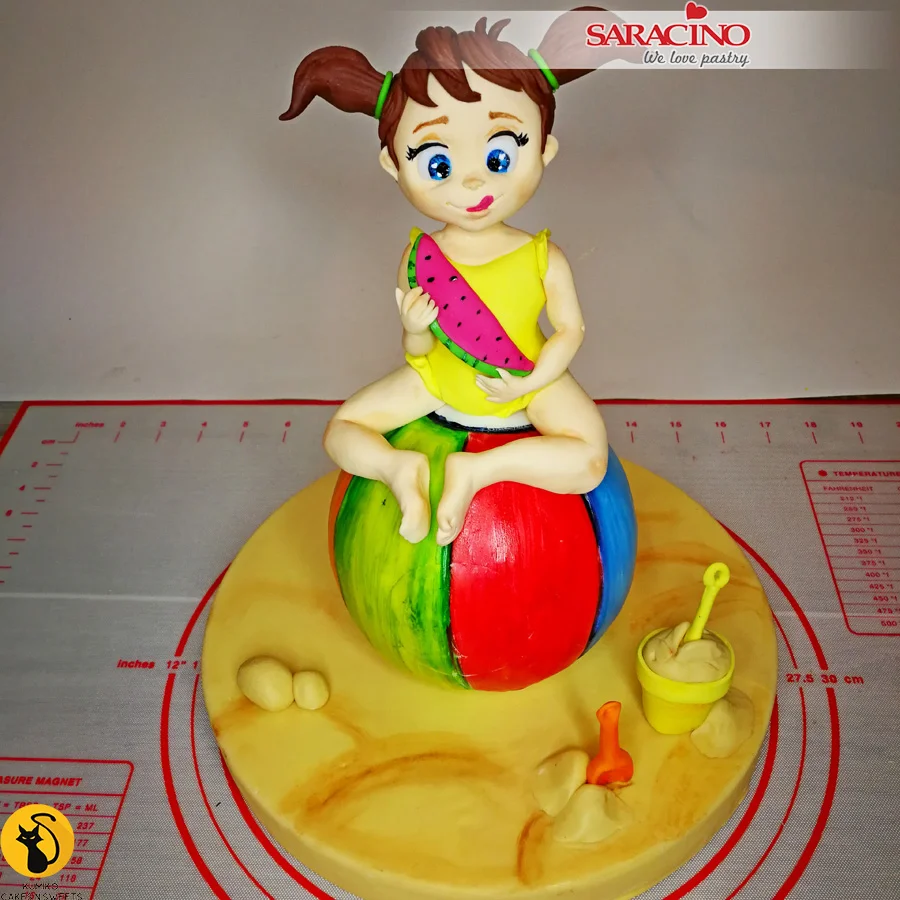
Step 51

Add any seaside decoration of your choice. Your cute little girl is ready!

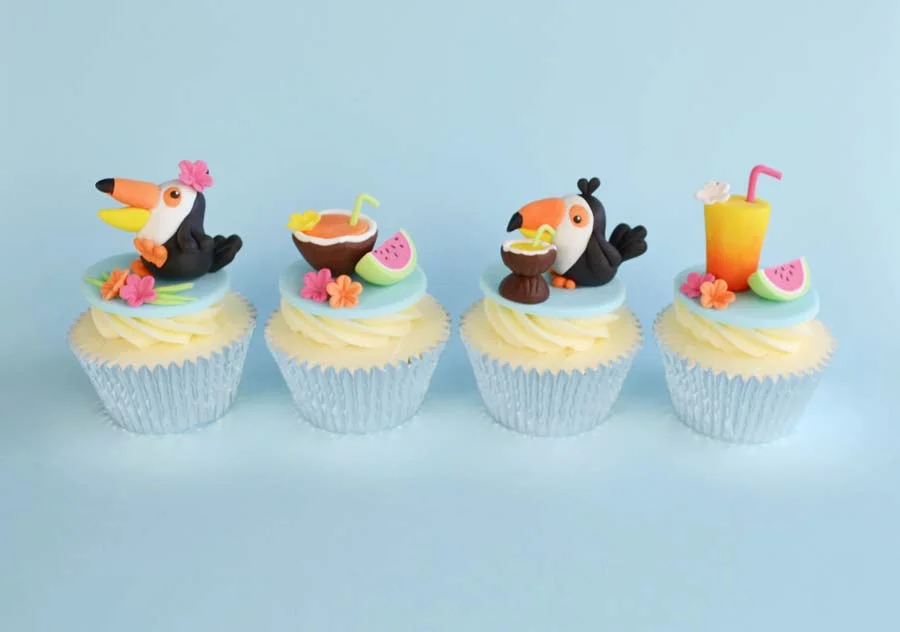
TROPICAL TOUCANS CUPCAKE TOPPERS

TROPICAL TOUCANS CUPCAKE TOPPERS

Author: SARAH BRAY

Skill level: BEGINNERS

You will need:

  • White Pasta Top Sugarpaste coloured with blue gel colour and treated with CMC

  • Saracino Pasta Model: black, yellow, orange (half yellow and half orange mixed), fuchsia, white, brown, green

  • Saracino edible dusts: orange, red, black, white

  • Saracino cocoa butter

  • Edible glue

  • Black edible pen

  • 58mm circle cutter

  • 30-32mm circle cutter

  • Small ball tool

  • Paintbrush

  • Sharp knife

  • Dresden tool

  • Small daisy plunger cutter

  • Petunia veiner (Blossom Sugar Art)

  • Smoother

  • Soft brush

Step 1

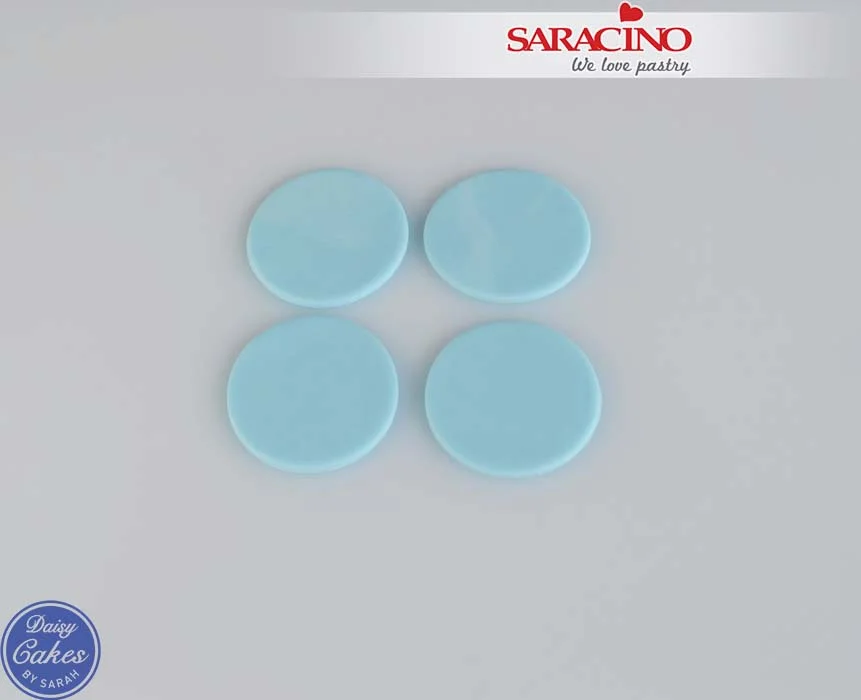
Roll out the blue Pasta Top and cut out four 58mm circles and set aside to dry completely.

Step 2

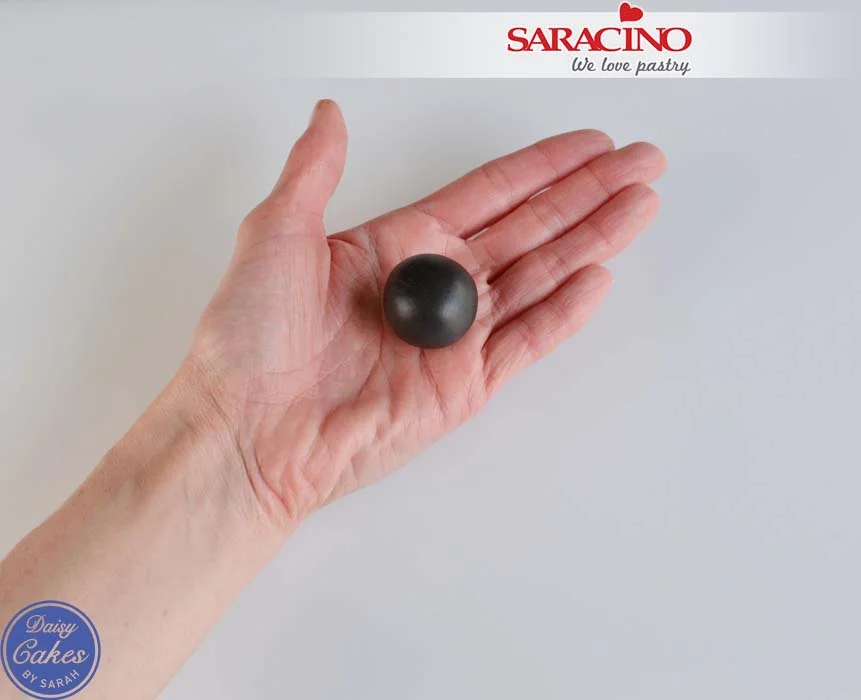
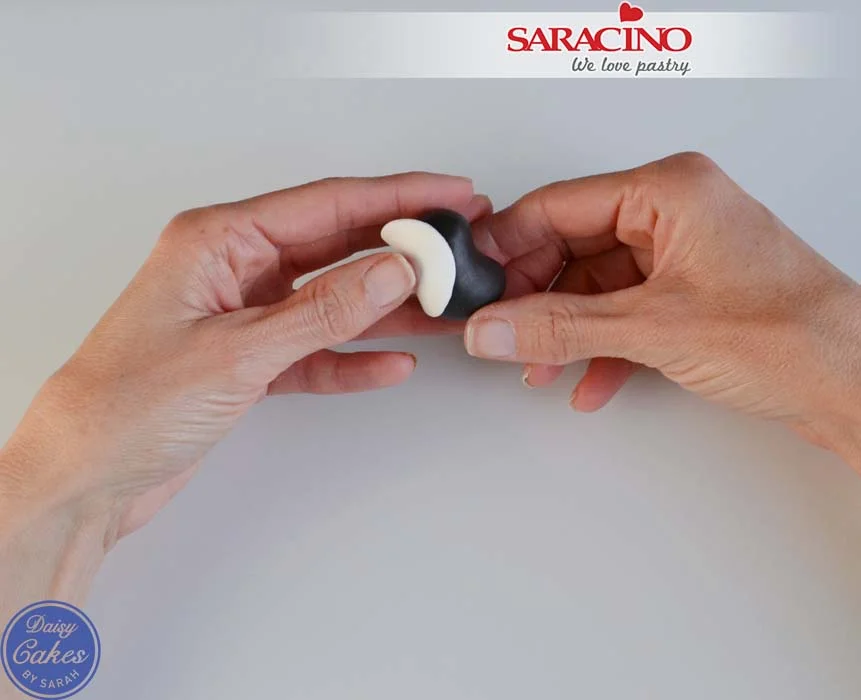
Roll a large cherry tomato sized piece of black modelling paste into a ball.

Step 3

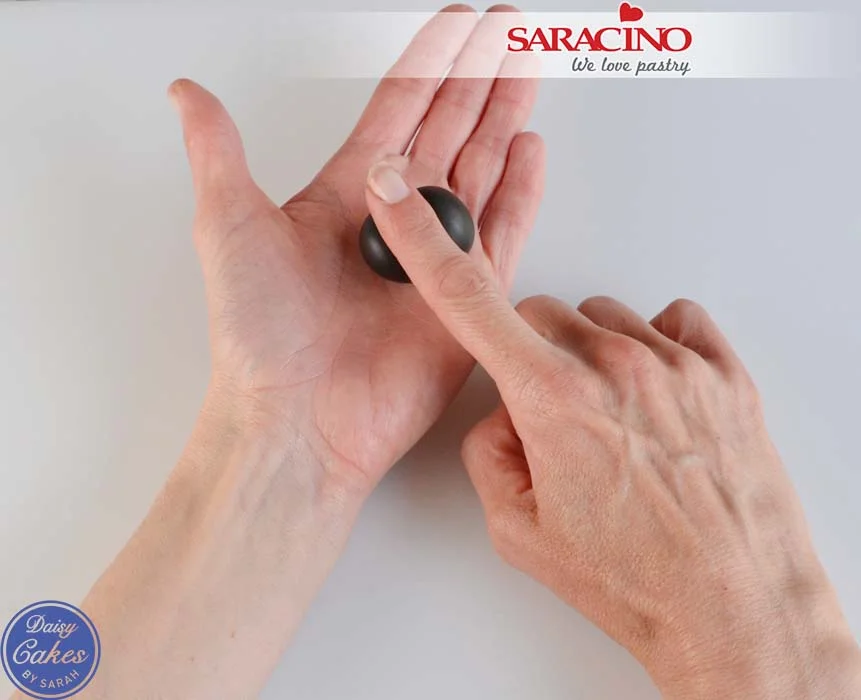
Holding the piece in your hand use your finger to roll the paste back and forth in the middle to create the body of the toucan.

Step 4

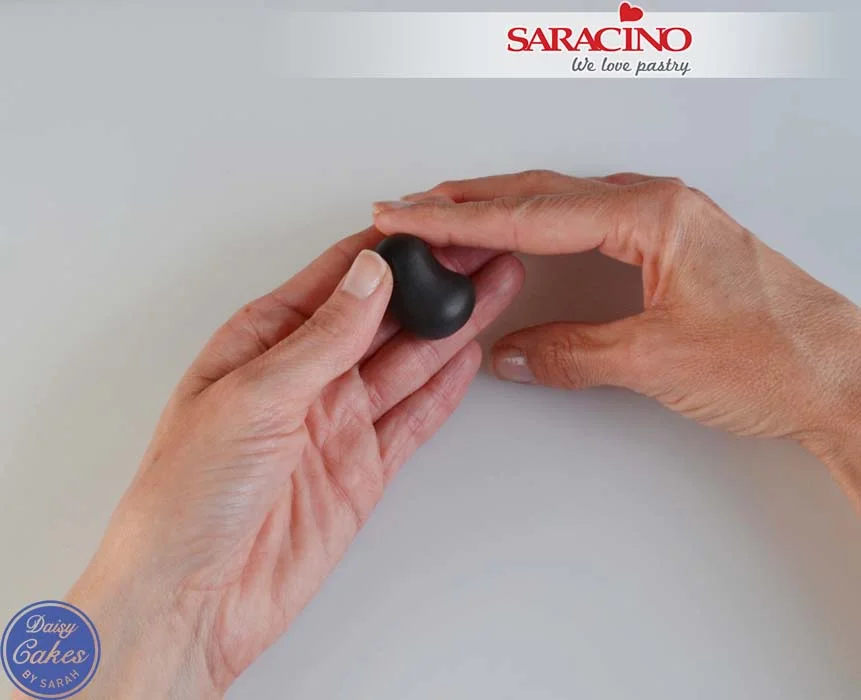
Use your fingers to smooth off the top for his head.

Step 5

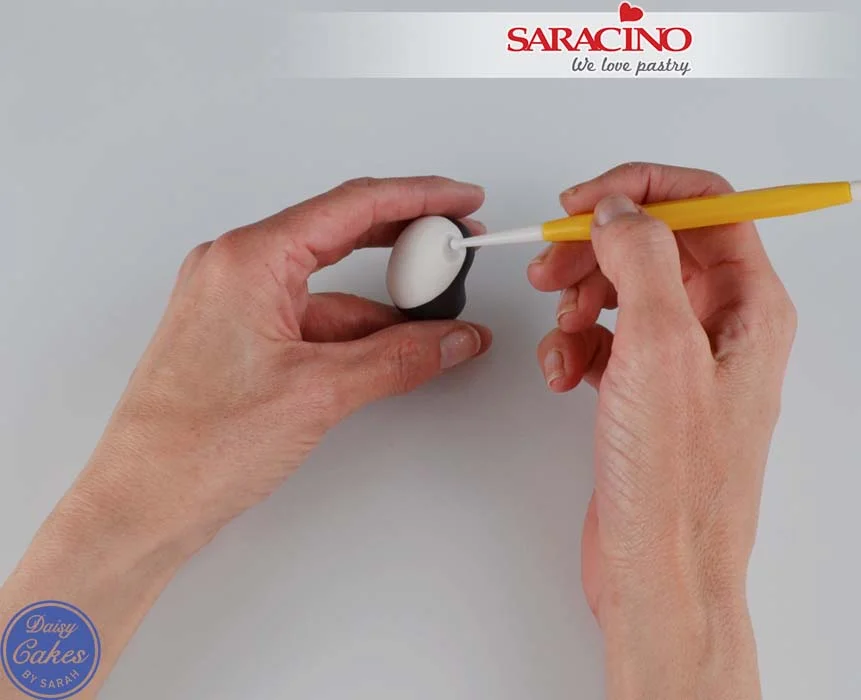
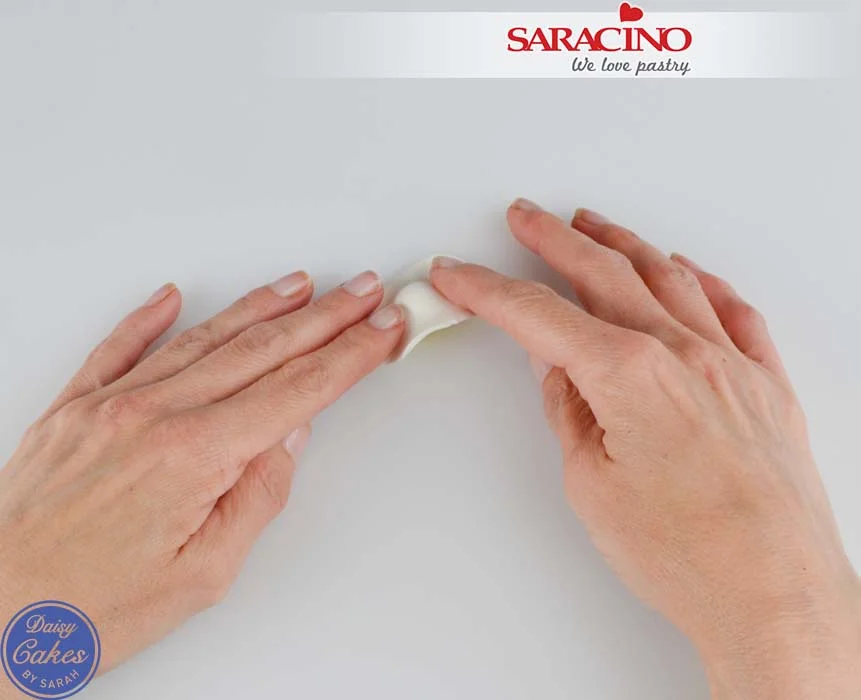
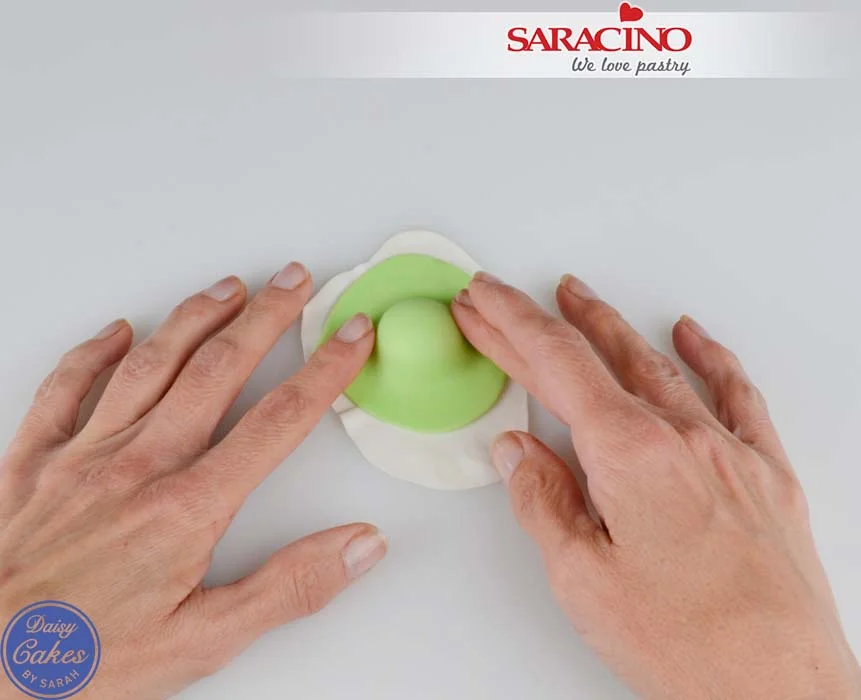
Cut a circle of white paste (approx. 30-32mm) and press onto the tummy and face of the toucan.

Step 6

Use a small ball tool to make a small egg-shaped dent for the colour of his eye (repeat on the other side for the other eye).

Step 7

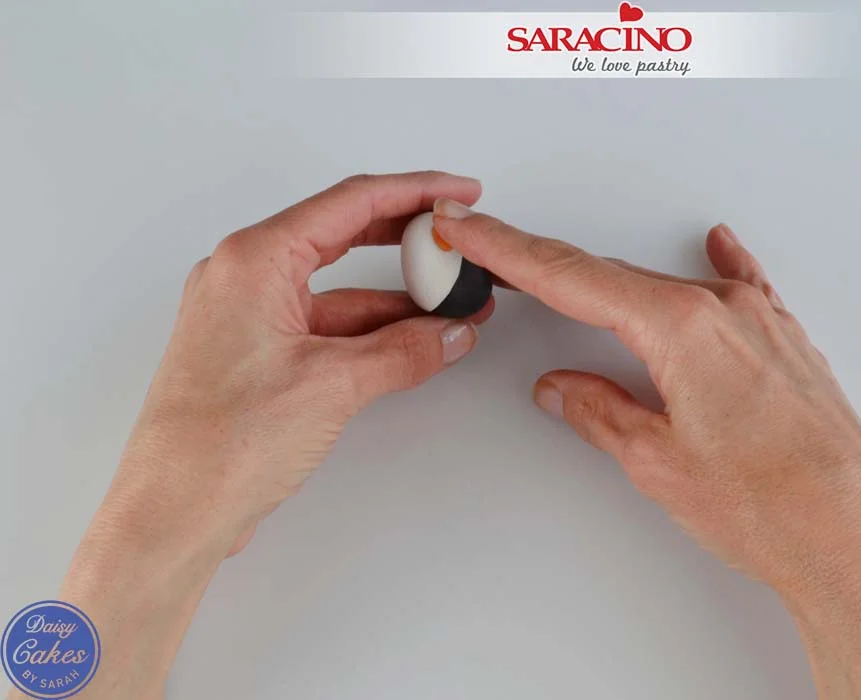
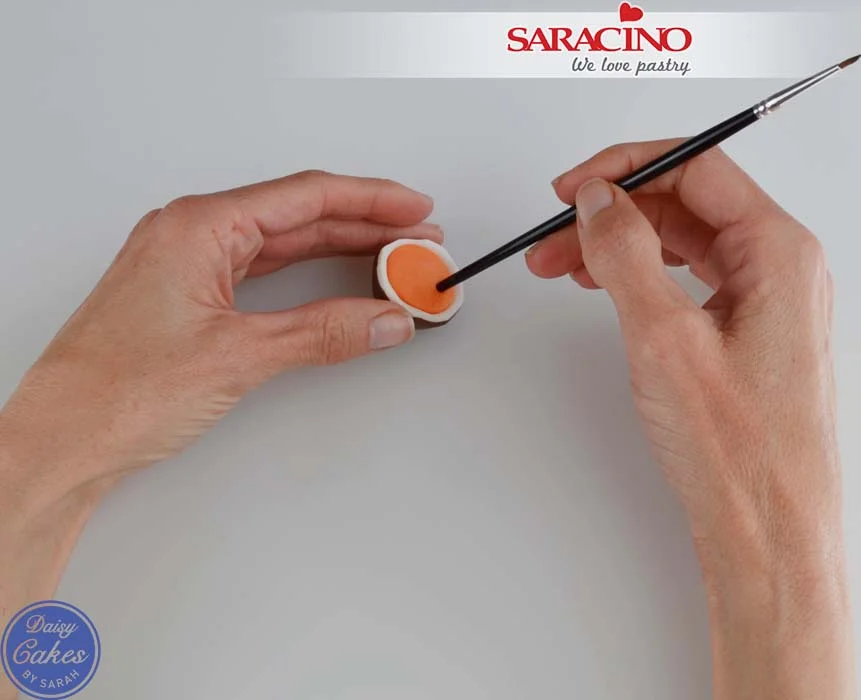
Fill the dent with a small piece of orange paste.

Step 8

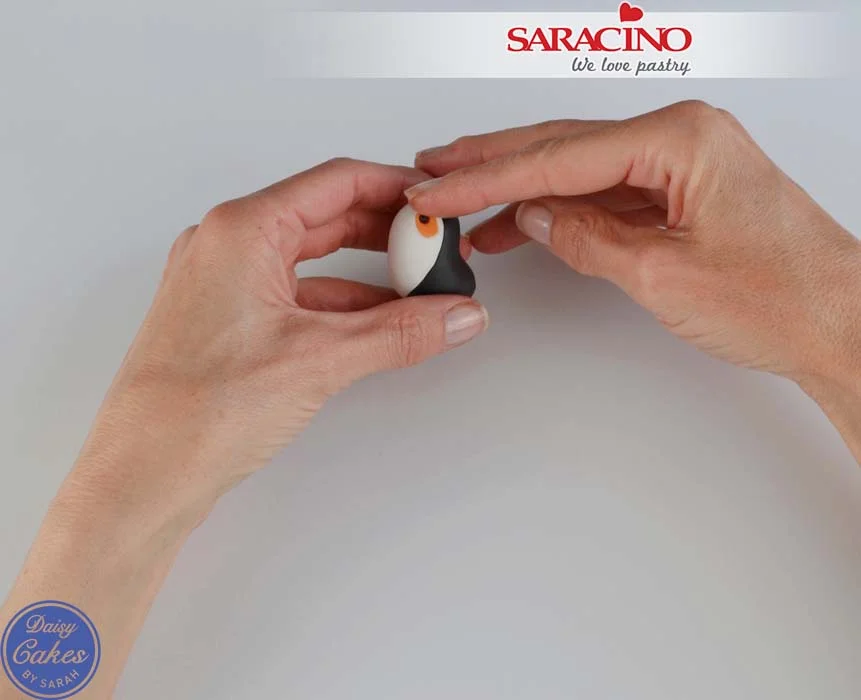
Make a little hole using the end of a paintbrush and fill with a tiny ball of black paste. Repeat for the second eye.

Step 9

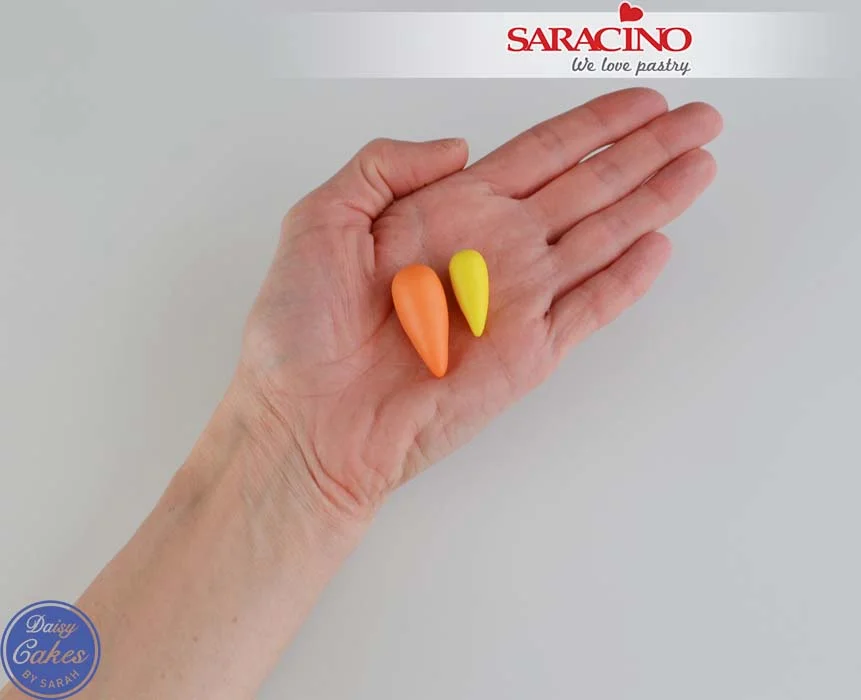
To make his beak roll a teardrop shape of orange paste and a smaller yellow teardrop.

Step 10

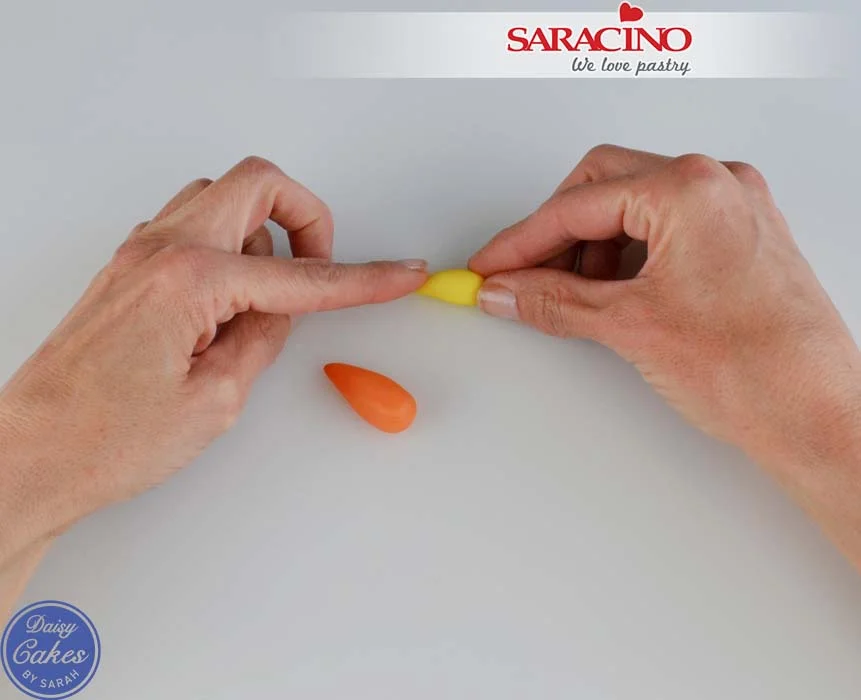
Use your fingers to press both pieces onto the board to flatten the base.

Step 11

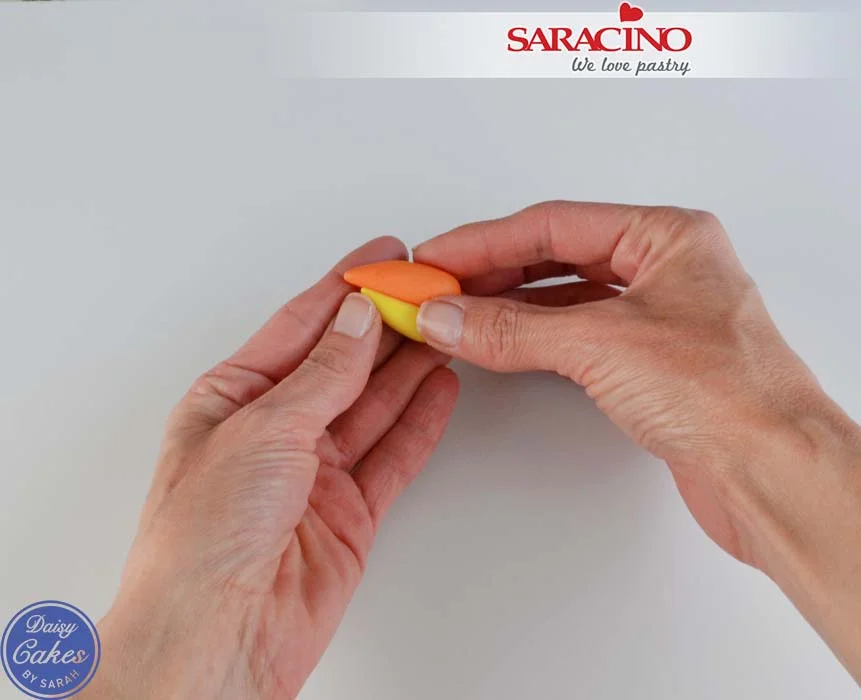
Push the two flat sides together to form the beak making sure that the larger orange piece is slightly overhanging the yellow piece.

Step 12

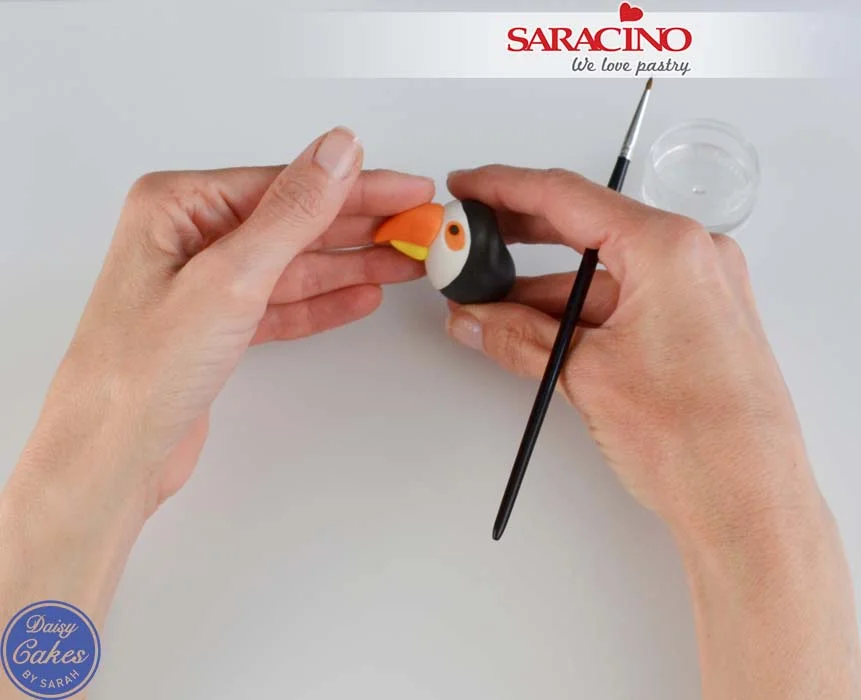
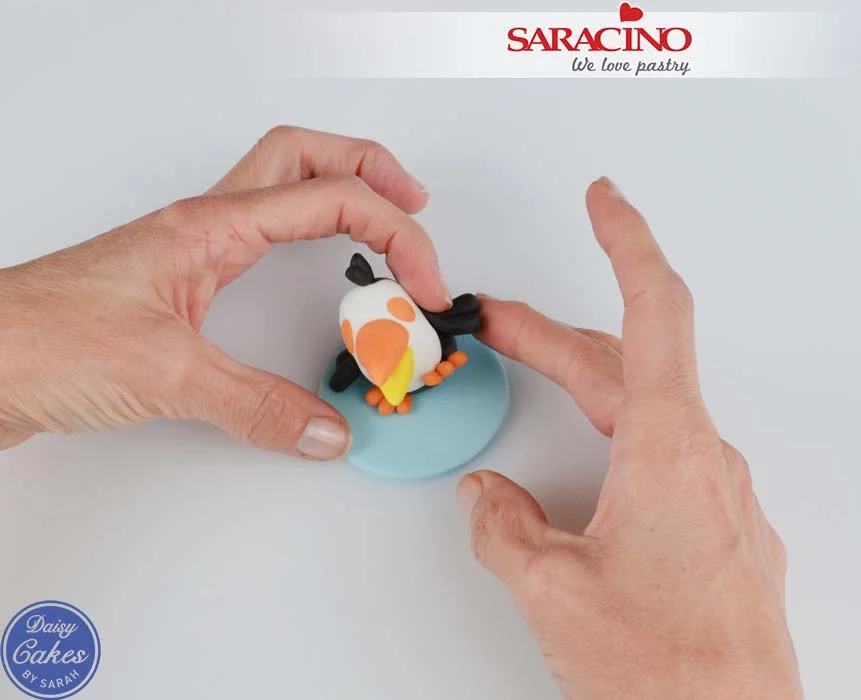
Cut the excess off with a sharp knife and stick onto the toucan’s face. Bend the tip of the top beak over the bottom slightly. At this point you may find that it won’t stand properly due to the weight of the beak, just put it aside on a piece of sponge until he’s attached to the topper.

Step 13

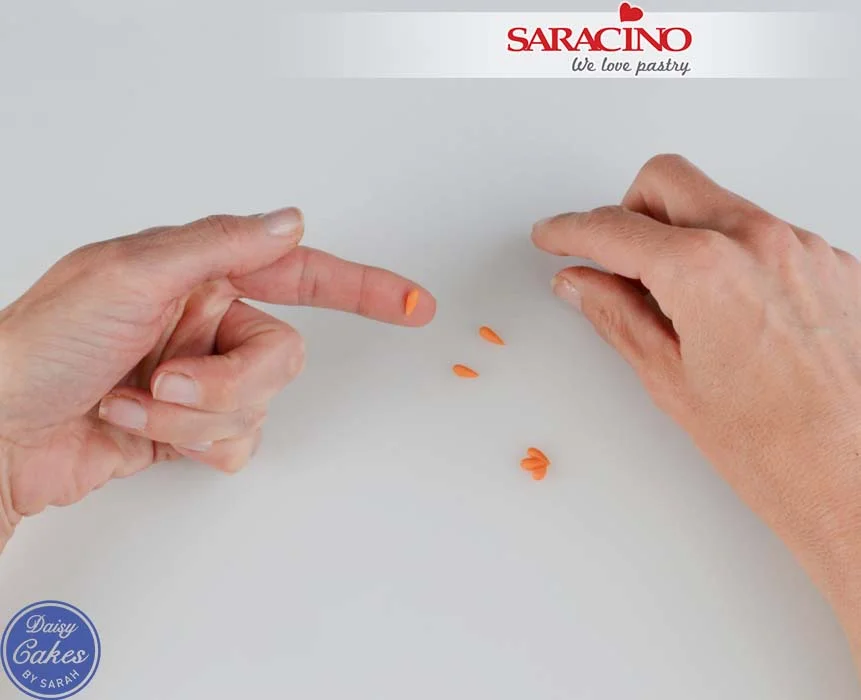
To make the feet roll three small teardrops of orange paste and push together at the pointed end. Repeat to make second foot.

Step 14

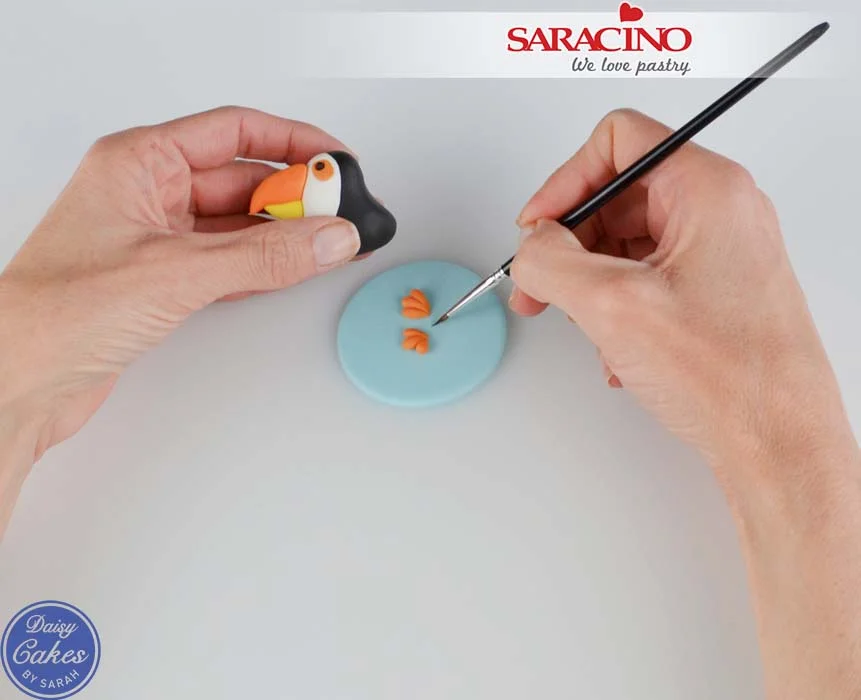
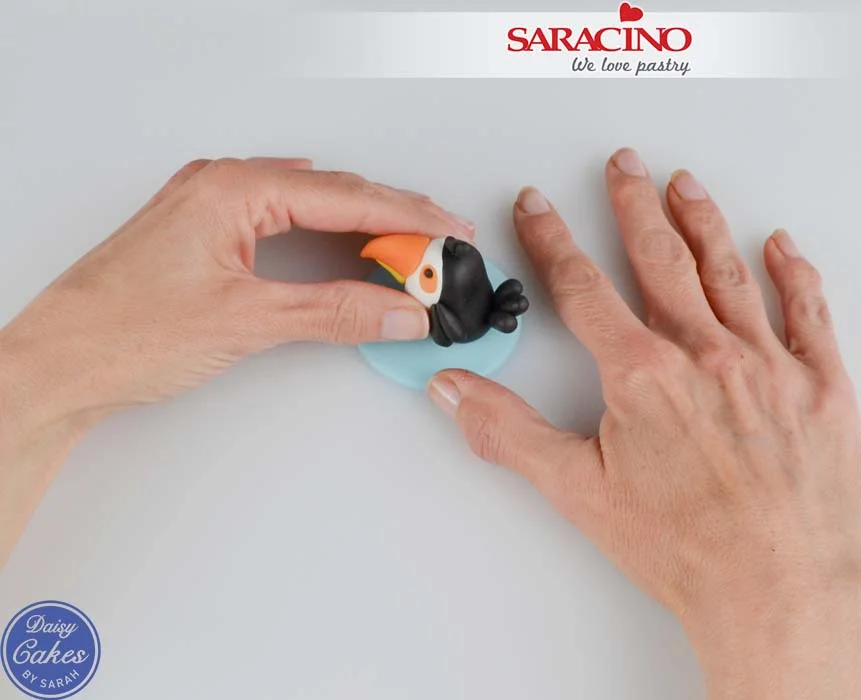
Using the toucan as a guide, stick the two feet onto the topper and glue his body on the top.

Step 15

To make the feathers on his head roll two small teardrops and push together, for his tail roll three slightly larger teardrops and push together and his wings a further two for each side. Stick all on to the toucan’s body.

Step 16

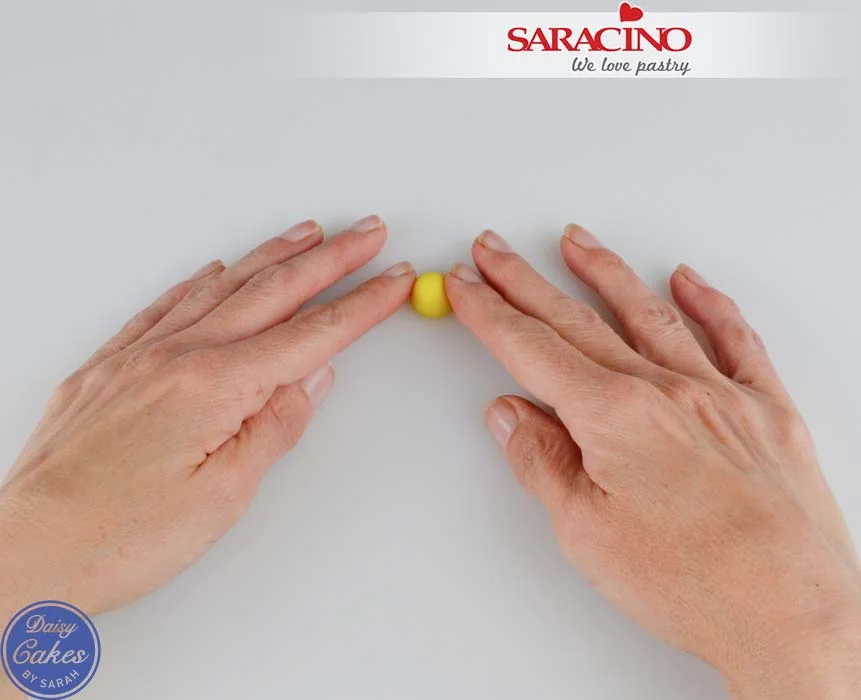
For his cocktail drink roll a small ball of yellow paste and flatten the base on the board.

Step 17

Cover this with a thin piece of white paste.

Step 18

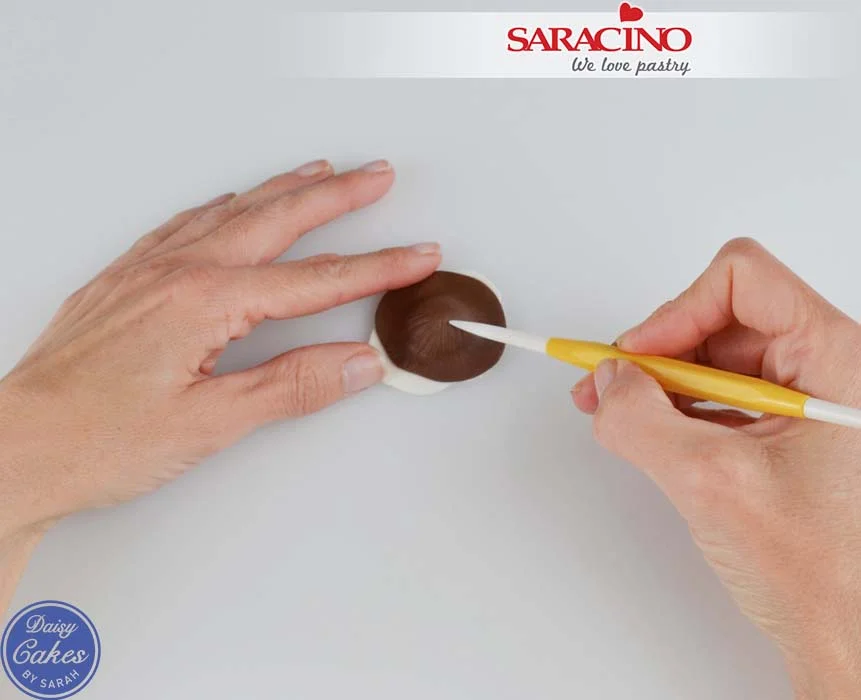
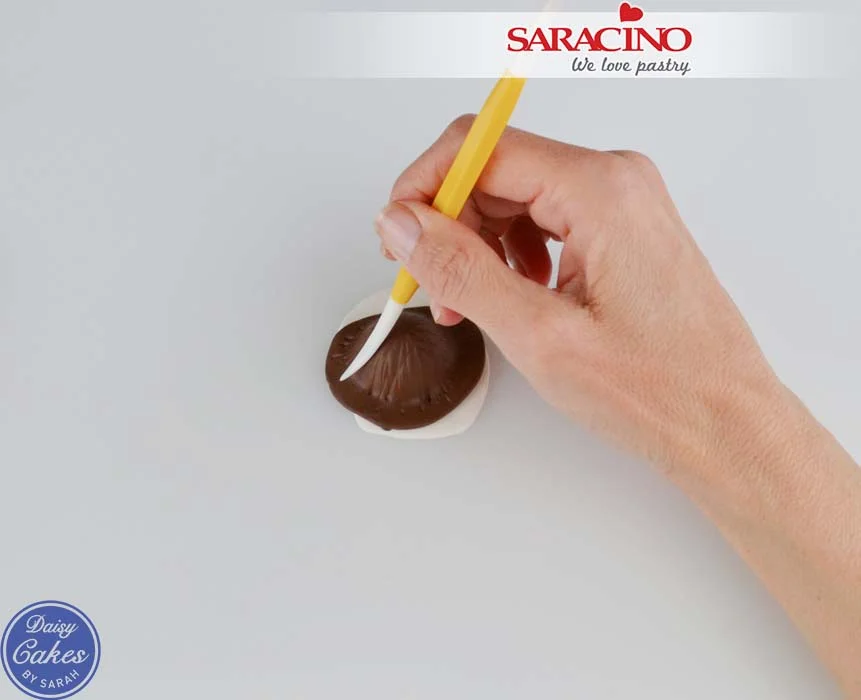
Cover this with a thin piece of brown paste and use a Dresden tool to add lines for the coconut shell.

Step 19

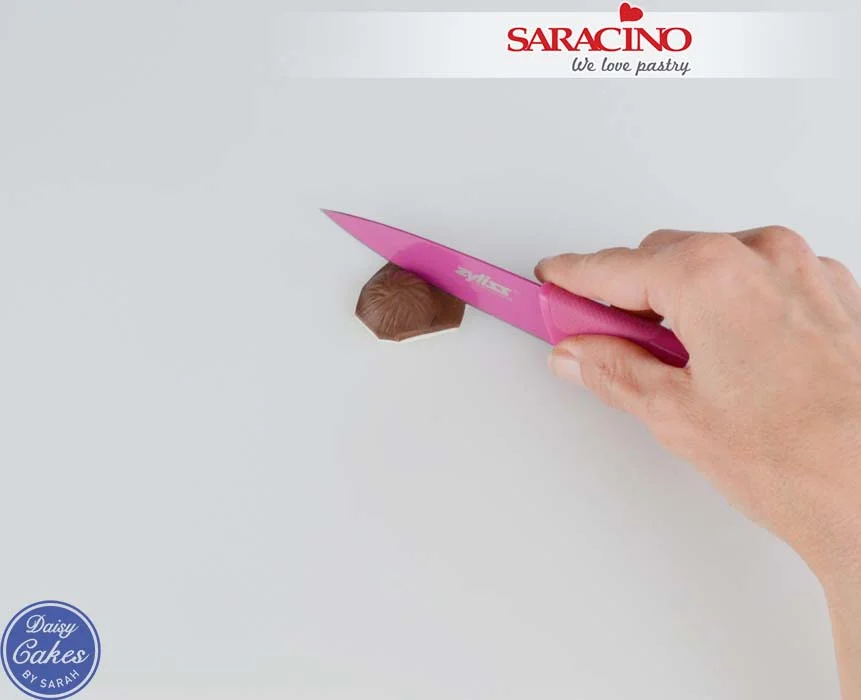
Cut the excess paste away using a sharp knife.

Step 20

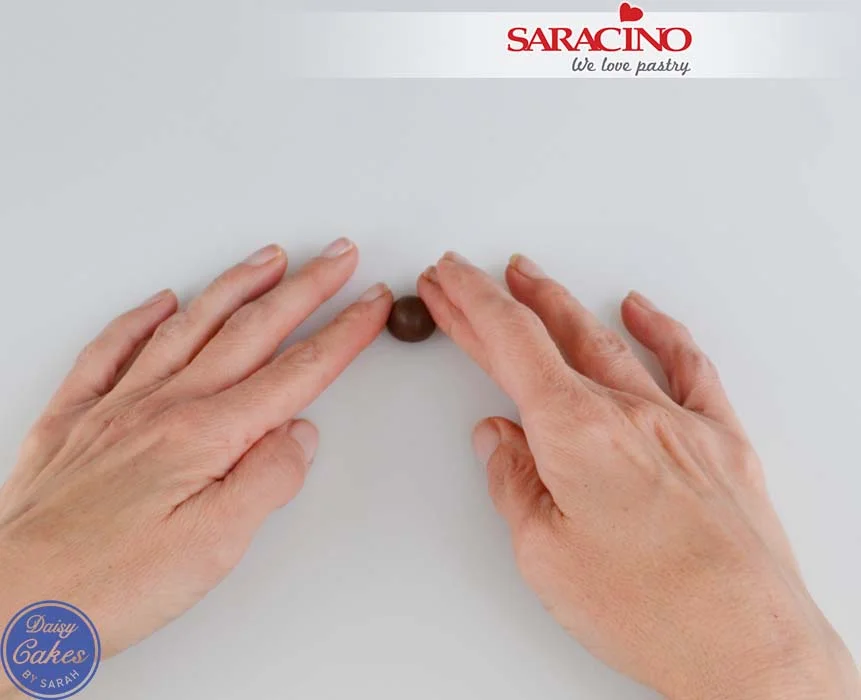
For the cocktail base roll another small ball of brown paste and flatten the base on the board. Add texture using a Dresden tool as before.

Step 21

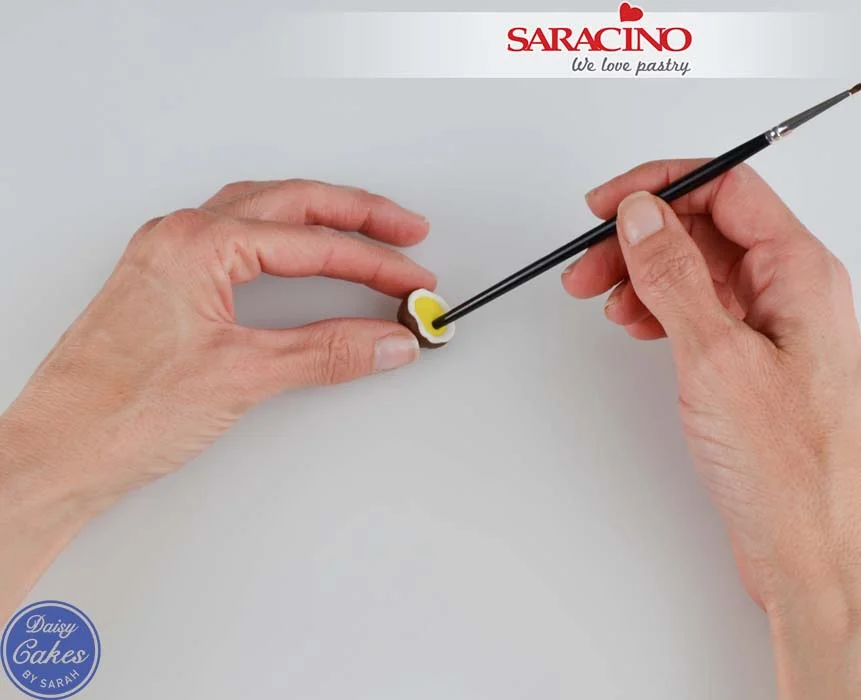
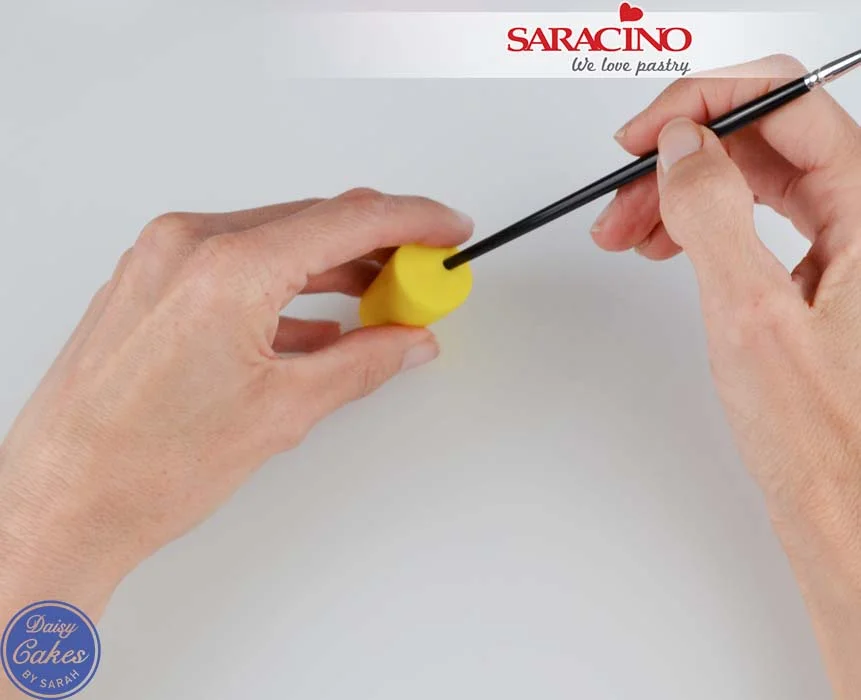
Indent a hole in the yellow drink with the end of a paintbrush.

Step 22

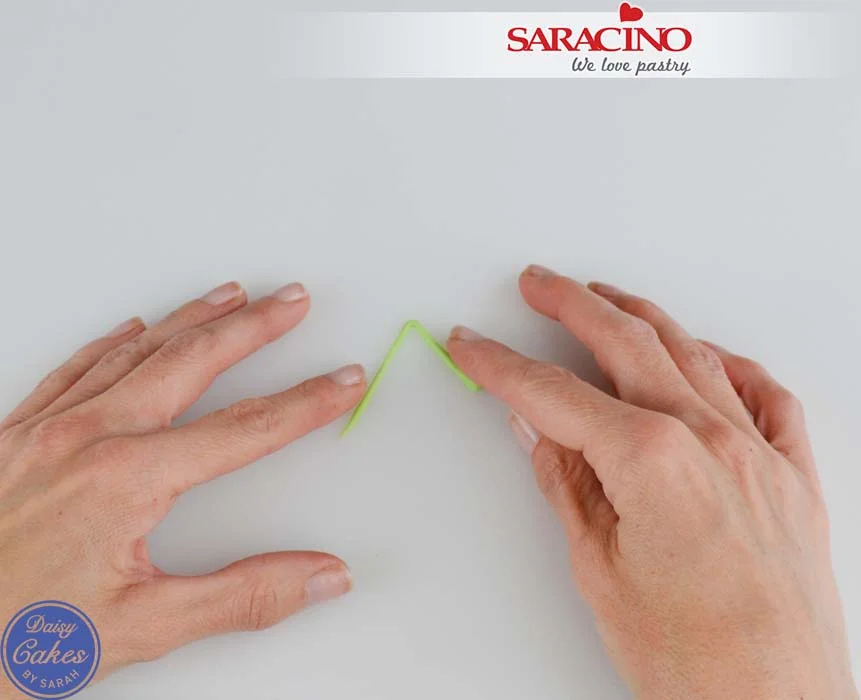
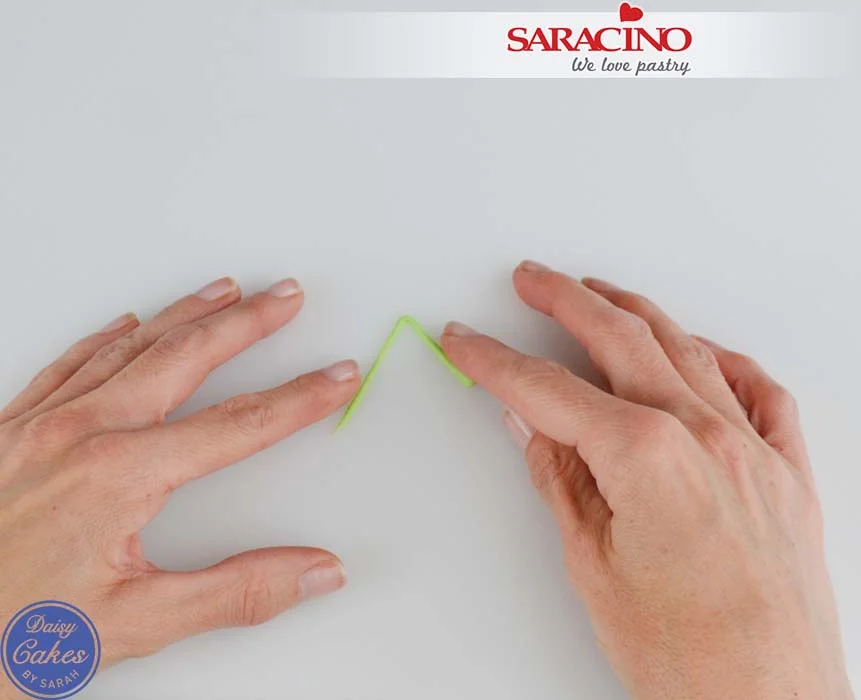
Roll a thin piece of green paste for a straw, bend and set aside to dry.

Step 23

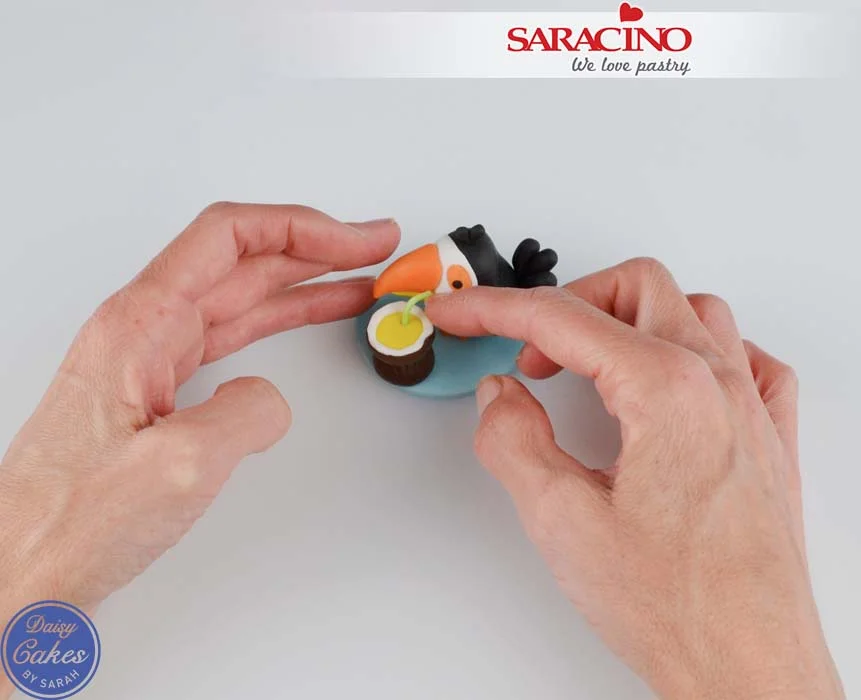
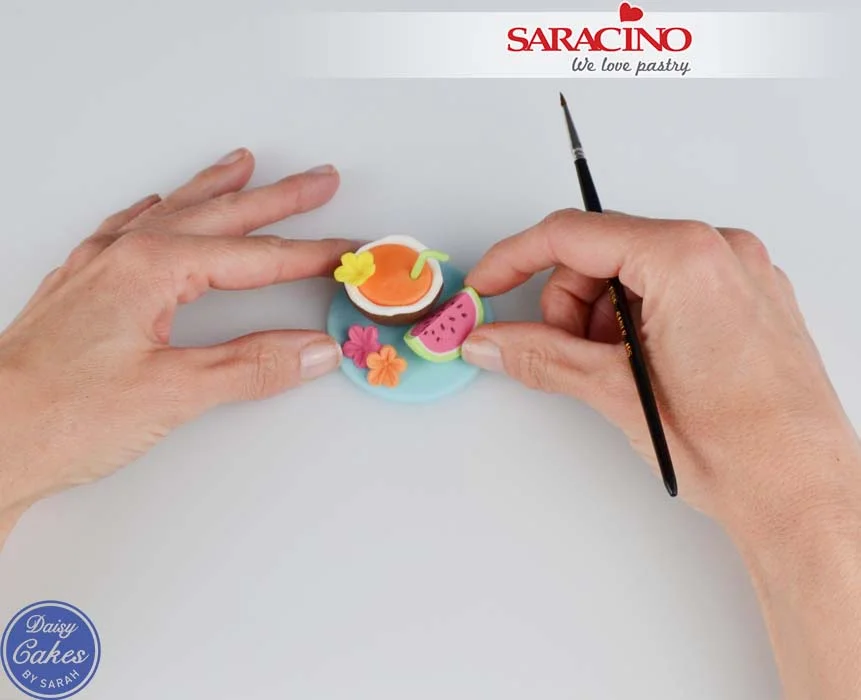
Stack the two coconuts on top of each other and glue to the topper. When the straw is dry enough to handle, cut to size and glue into cocktail. That is your Toucan Topper finished and ready to use.

Step 24

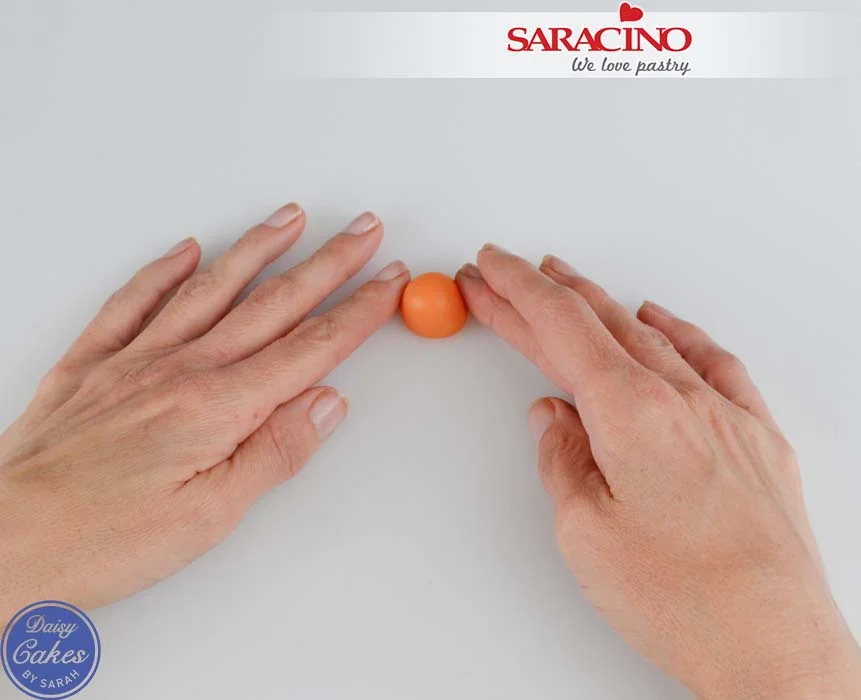
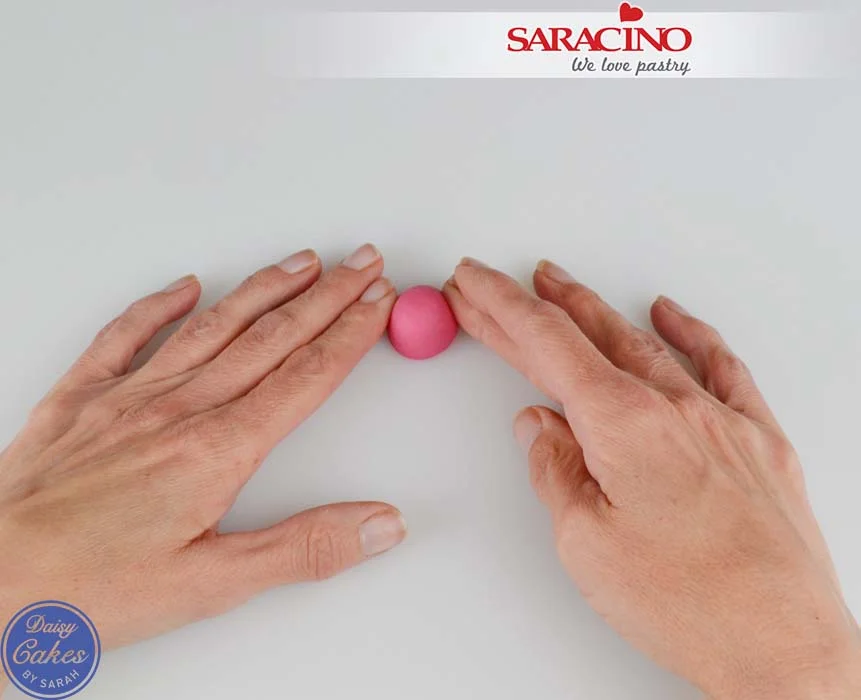
For the next topper roll a large marble size piece of orange paste into a ball and flatten the base on your board.

Step 25

To form the coconut look cover in a thin piece of white paste and then brown paste as before. Use a Dresden tool to mark lines of the coconut shell. Cut away the excess paste with a sharp knife as before. When cutting edges don’t do it in one smooth line as it looks less realistic. Lots of little cuts look much better.

Step 26

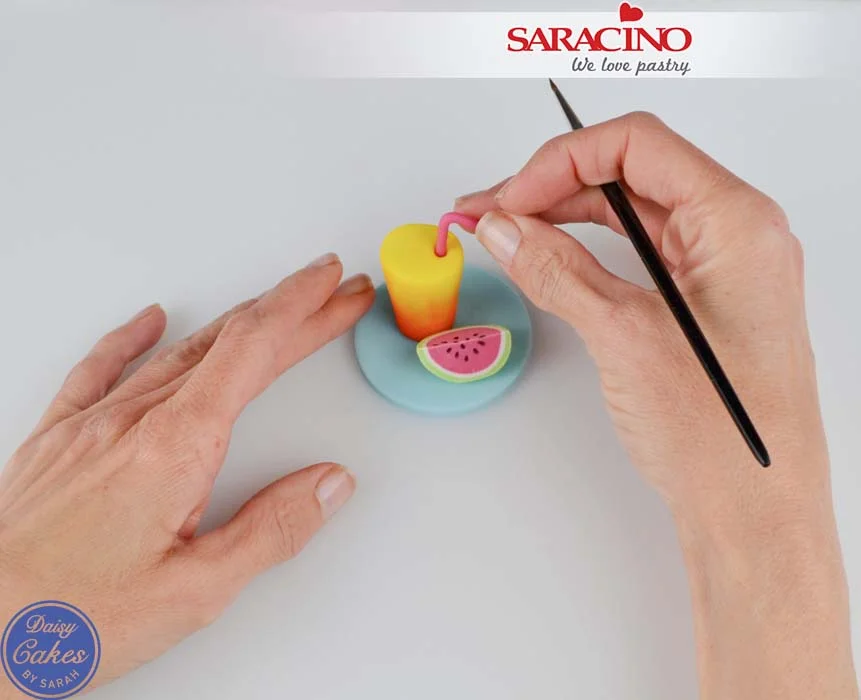
Use the end of your paintbrush to form a small hole ready for the straw.

Step 27

Roll a thin piece of green paste into a straw and set aside to dry.

Step 28

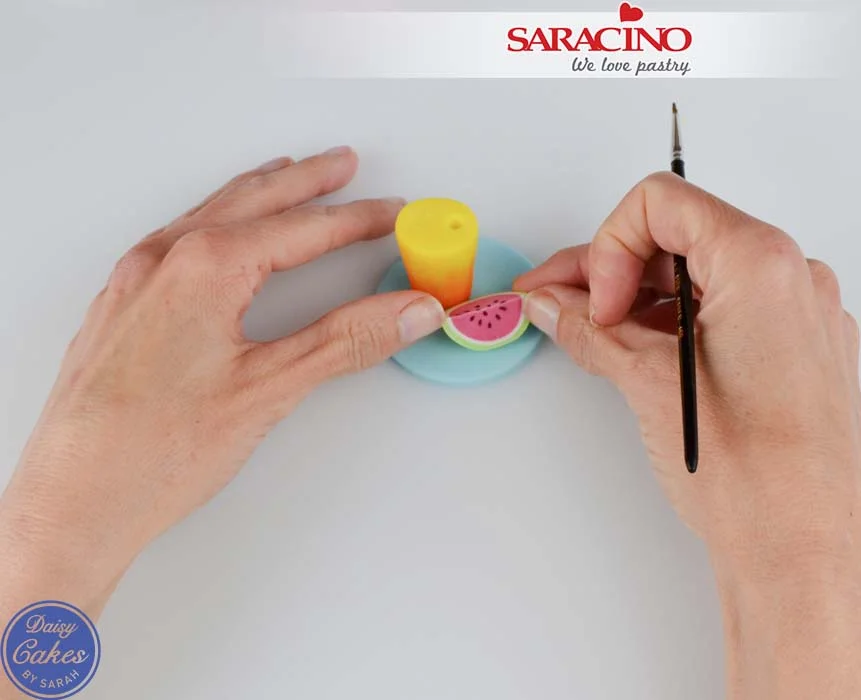
To make the watermelon roll a large marble sized piece of fuchsia paste and flatten the base on the board.

Step 29

Cover with a thin layer of white paste and then a thin layer of green paste. Cut around the edge as smoothly as possible using a sharp knife.

Step 30

With the flat side of the melon on the board, use a sharp knife to cut the melon in half and set aside to dry (keep the other part for later).

Step 31

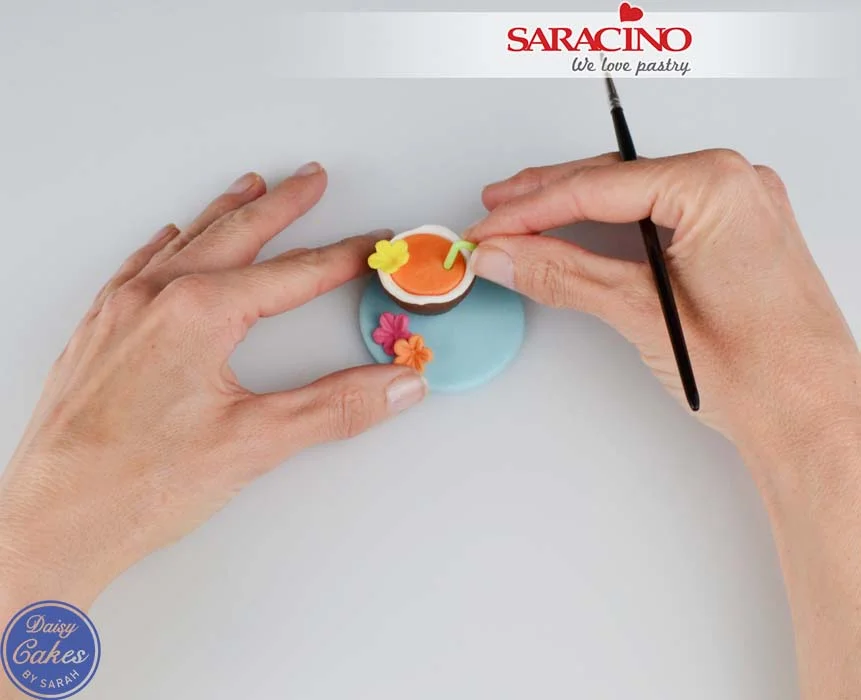
Fix the coconut cocktail on to one of the toppers using edible glue.

Step 32

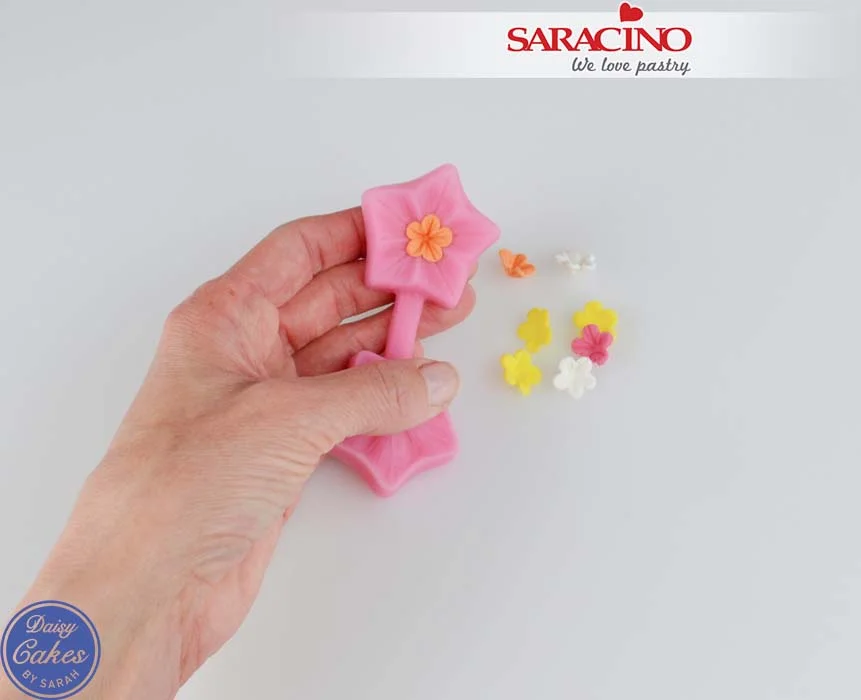
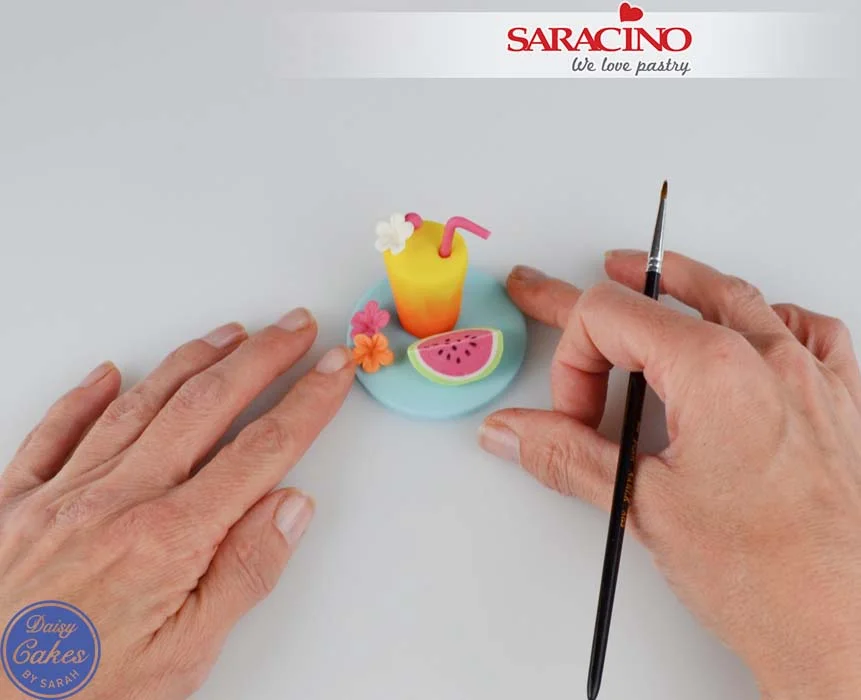
Cut out a variety of little flowers using a small blossom cutter and vein them.

Step 33

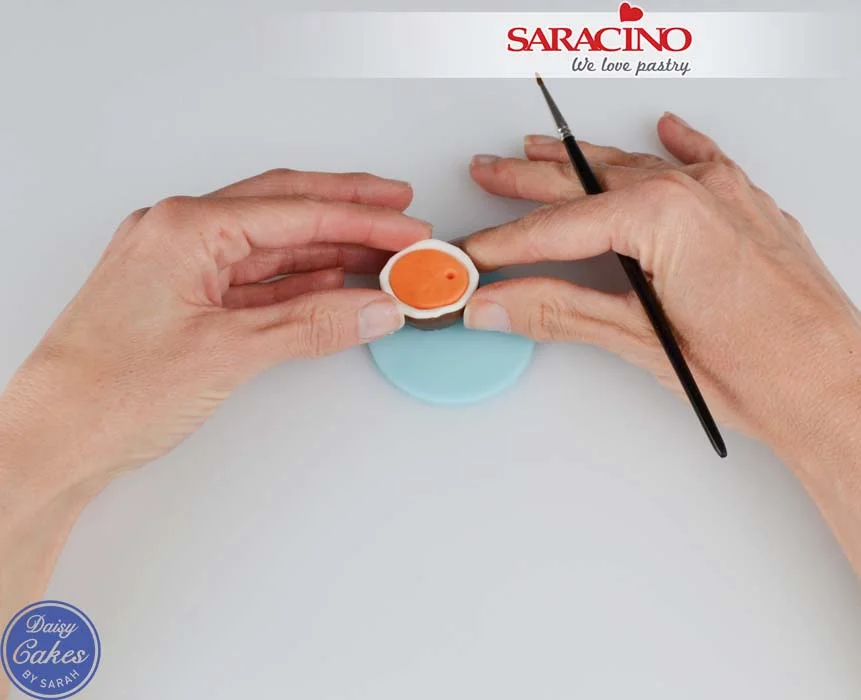
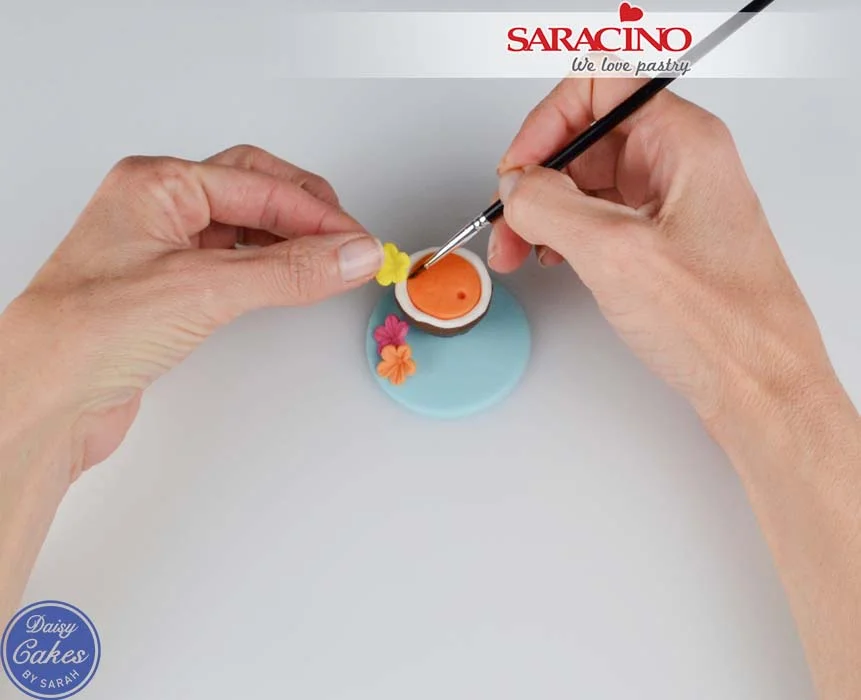
Stick two smaller flowers onto the topper and one onto the rim of the coconut.

Step 34

When it is dry enough to handle cut the straw to size and glue into the hole.

Step 35

Using an edible black pen mark seeds on the watermelon and glue this onto the topper.

Step 36

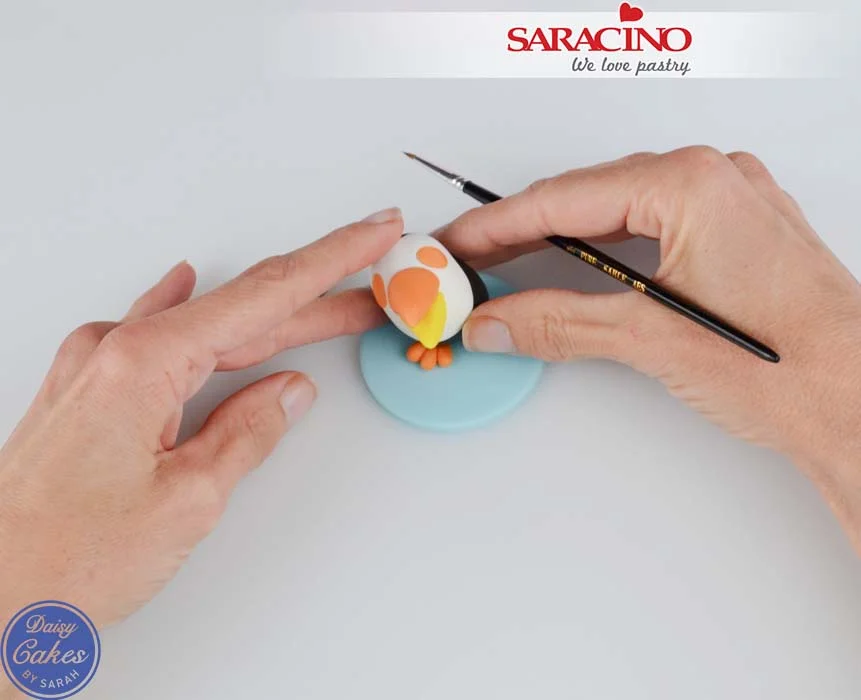
Create another toucan following the previous steps. Stick one foot onto the topper and attach the toucan’s body on top at a slight angle.

 Tip: If you flatten the base of the body on the board slightly it makes attaching it at an angle easier.

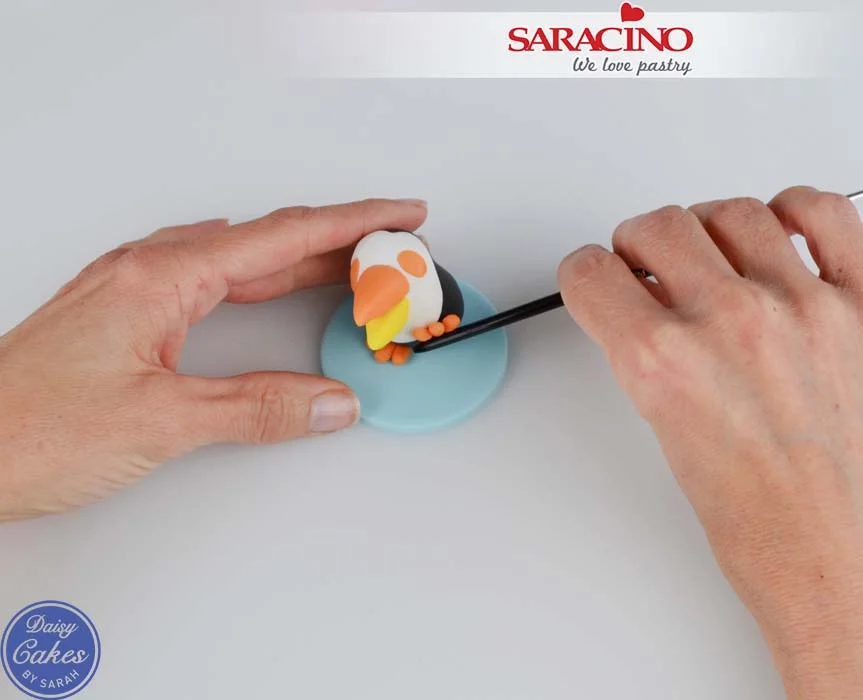
Step 37

Attach the second foot onto the body and push on using a paintbrush handle.

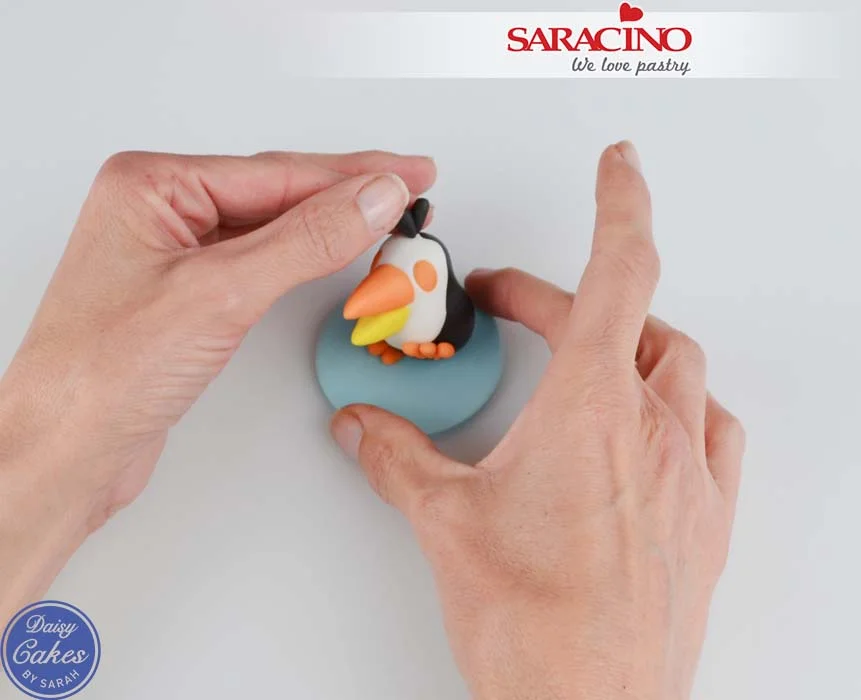
Step 38

To make the feathers on the head roll two small teardrops of black paste and push onto the top of the toucan’s head.

Step 39

To make the wings roll two small teardrop shapes for each and push onto the side bending them up slightly.

Step 40

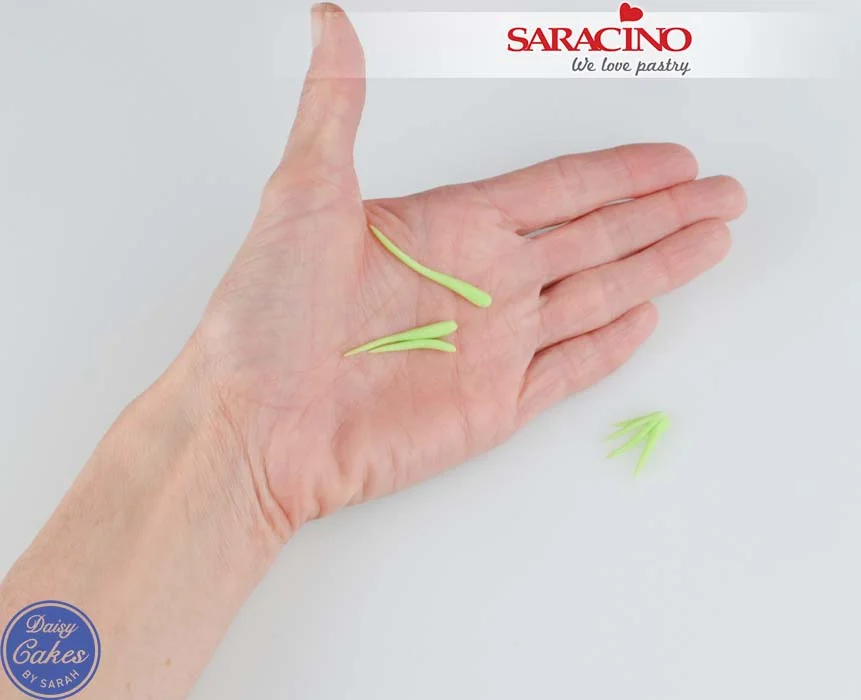
Roll out several pieces of green paste and push them together at the thicker end. Repeat to make a second leaf.

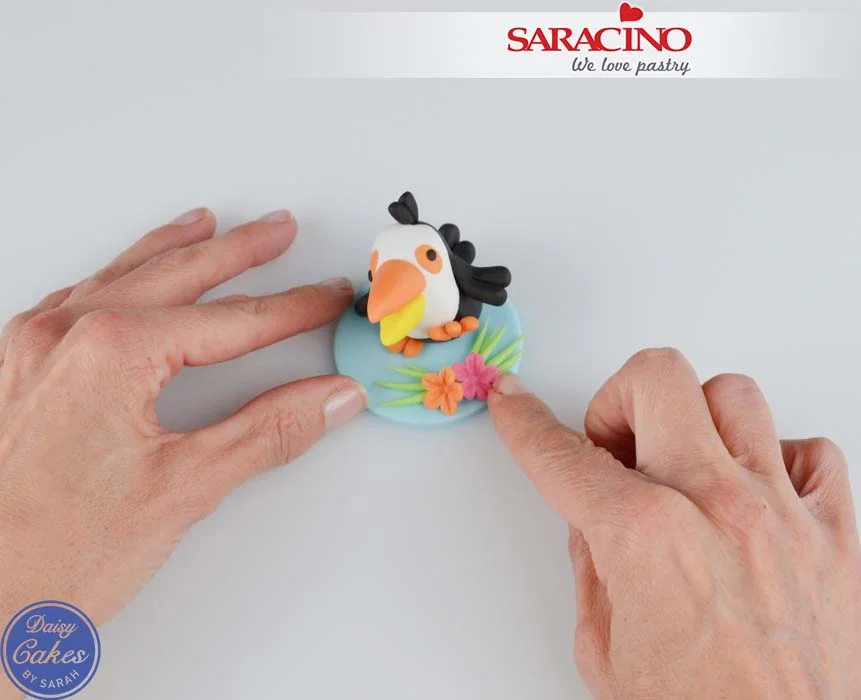
Step 41

Stick these to the topper and decorate with a couple of small flowers made earlier.

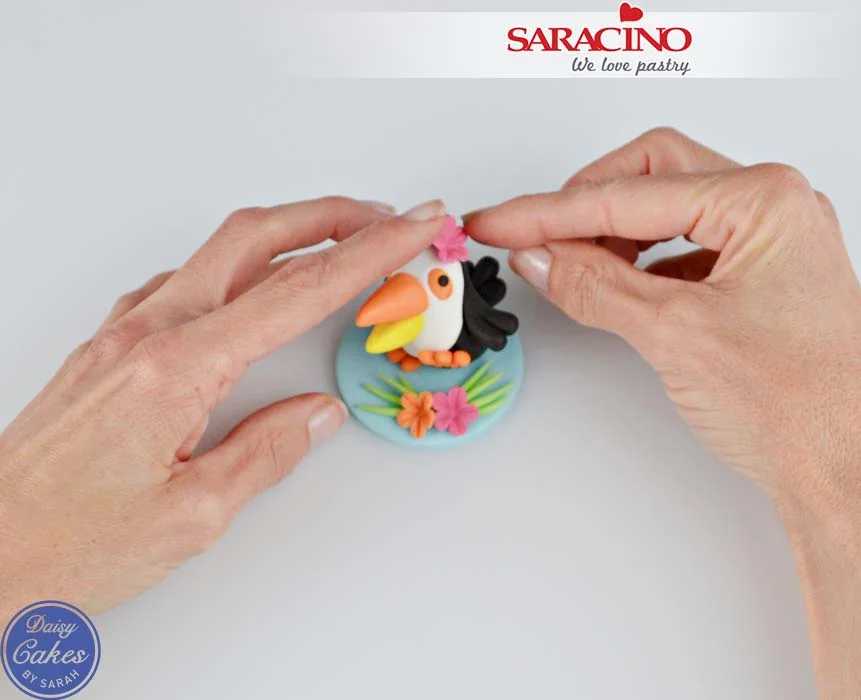
Step 42

Add one little flower to the toucan’s head

Step 43

For the second cocktail roll a piece of yellow paste using a smoother so one end is narrower than the other. Using a sharp knife cut a piece approx. 3cm in length with a sharp knife. Use a smoother to reshape it if necessary.

Step 44

Using the end of a paintbrush make a small hole for the straw. Set aside to dry.

Step 45

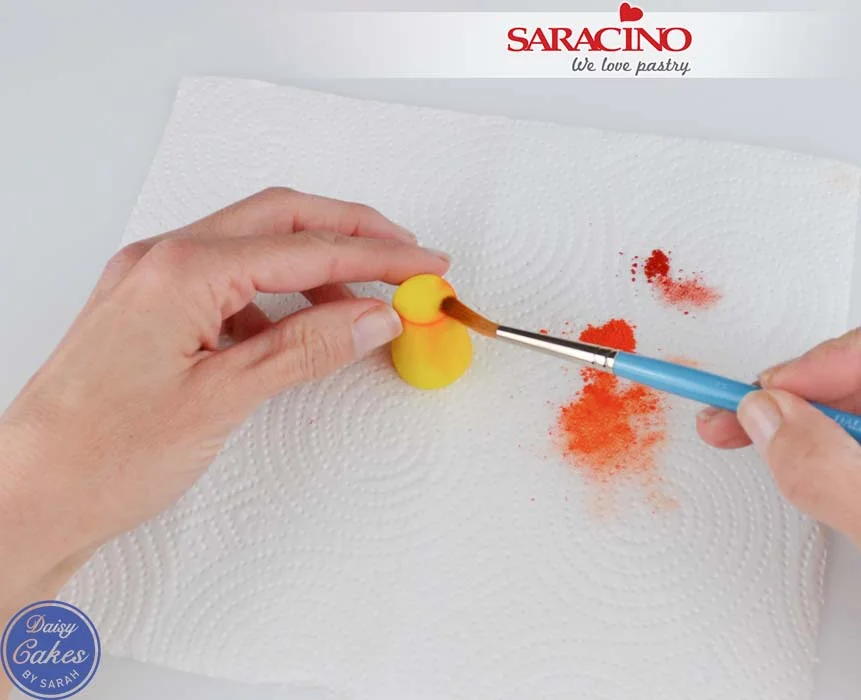
With a soft brush gradually dust the bottom of the cocktail glass with orange dust upto about half way. Then apply a small amount of red dust to the very bottom.

Step 46

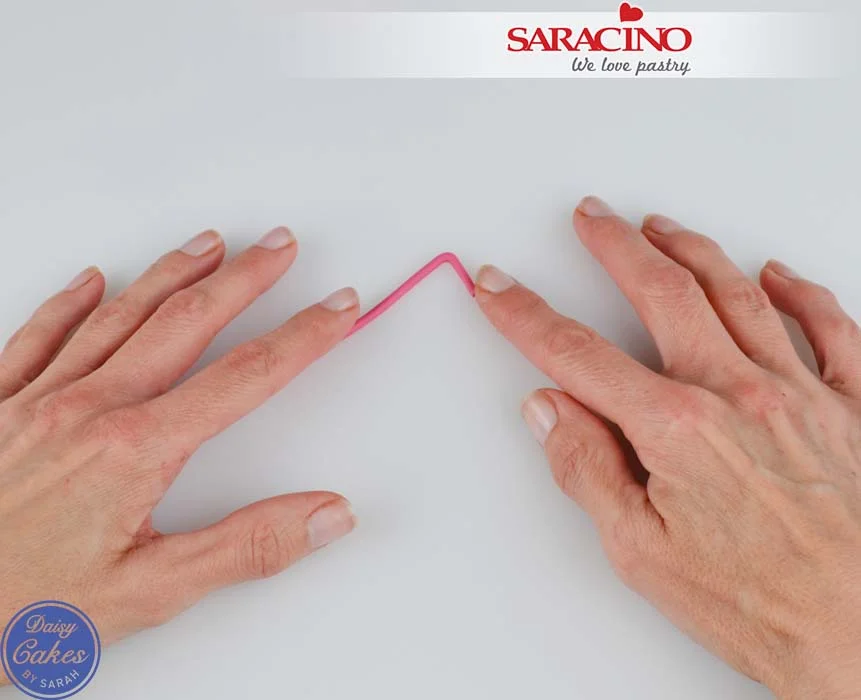
To make the straw roll a thin piece of fuchsia paste and bend over the top. Set aside to dry.

Step 47

Mark the seeds on the watermelon with a black edible pen as before. Attach the glass and melon to the topper with edible glue.

Step 48

Cut the straw to size and use a small amount of edible glue to attach it in the hole.

Step 49

Roll a small ball of fuchsia paste for a cherry and attach to the rim of the glass with a flower made earlier. Add another couple of flowers to the topper.

Step 50

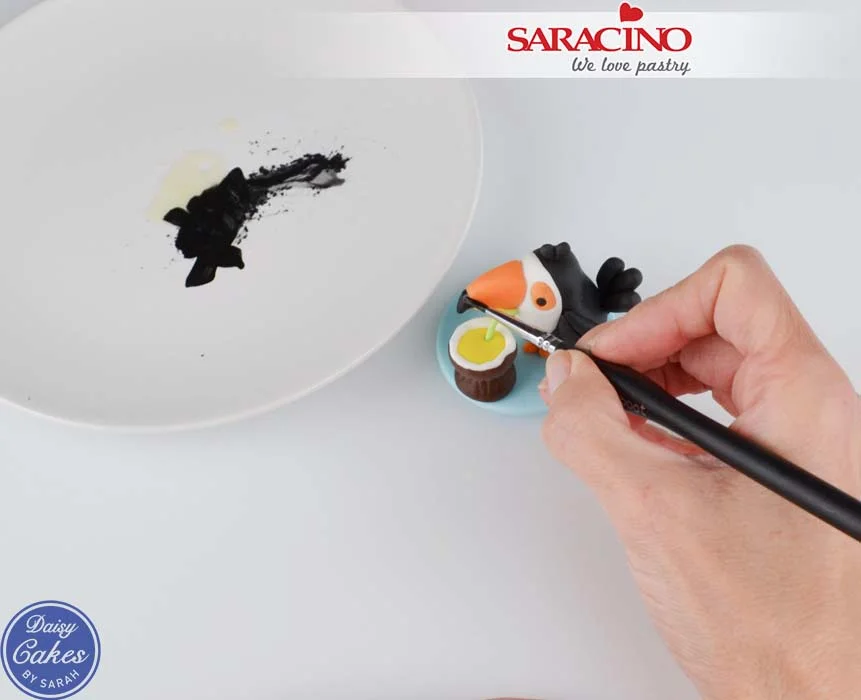
Melt a small amount of cocoa butter. With black dust added paint the tip of the toucan’s beaks. Add a small amount of white dust to the cocoa butter and add highlights to the toucan’s eyes with a fine paintbrush.

SUMMER MODELLING TUTORIAL

SUMMER MODELLING TUTORIAL

Skill level: INTERMEDIATE

TIP:

Remember!

  • When we mix colours they become a shade darker after some time / during work and drying. Take this into account especially when blending your skin tone
  • To protect the paste from drying out, pack it into a bag and take out only as much as you need each time
  • Before using the paste always knead well to make more workable and smoother to use

You will need:

  • Nude – a combination of Saracino Pasta Model and Saracino modelling white chocolate in a 1:1 ratio.

  • For colouring I used a copper Saracino powder for my chosen skin tone. You can use any colour you wish.

  • Head 20g 

  • One leg 8g 

  • Torso 15g 

  • One hand 3g

  • Red Pasta Model approx 5g

  • Brown Pasta Model approx 30g 

  • Green and black Pasta Model – a small amount for the eyes and their finish

  • Powder colours – black or brown and pink or red

  • Gold powder colour

  • Green powder colour for the eyes

  • Kitchen scale

  • Non-stick silicone mat

  • Non-stick silicone roller

  • Scalpel

  • Knife

  • Ball tool with a diameter of 10mm and 1mm

  • Brush (soft for shading) 6mm or similar

  • Contour brush

  • Toothpicks

  • Wooden skewer

  • Water

  • Corn flour

  • Latex / nitrile gloves

  • Wet wipes

  • Dry wipes

Step 1

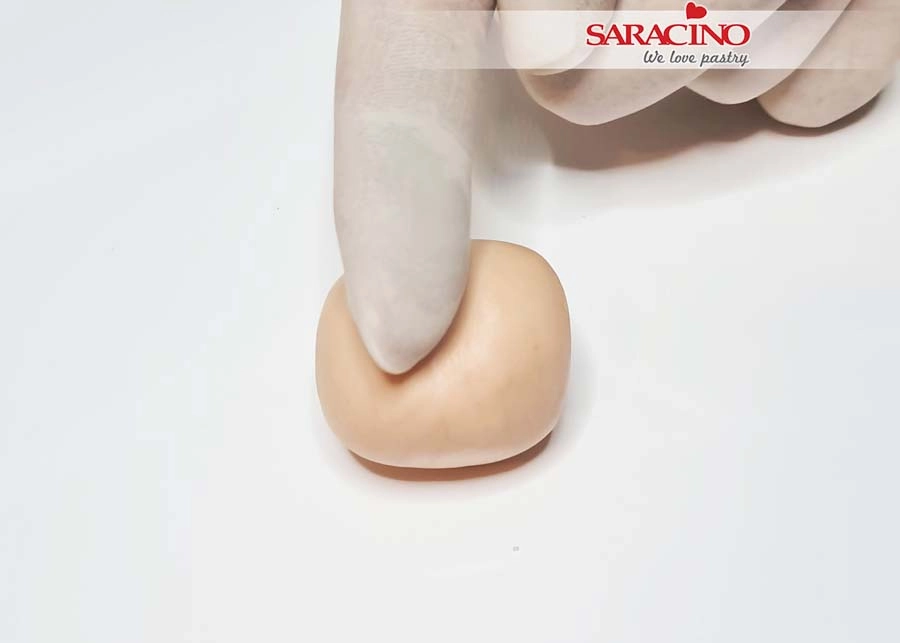
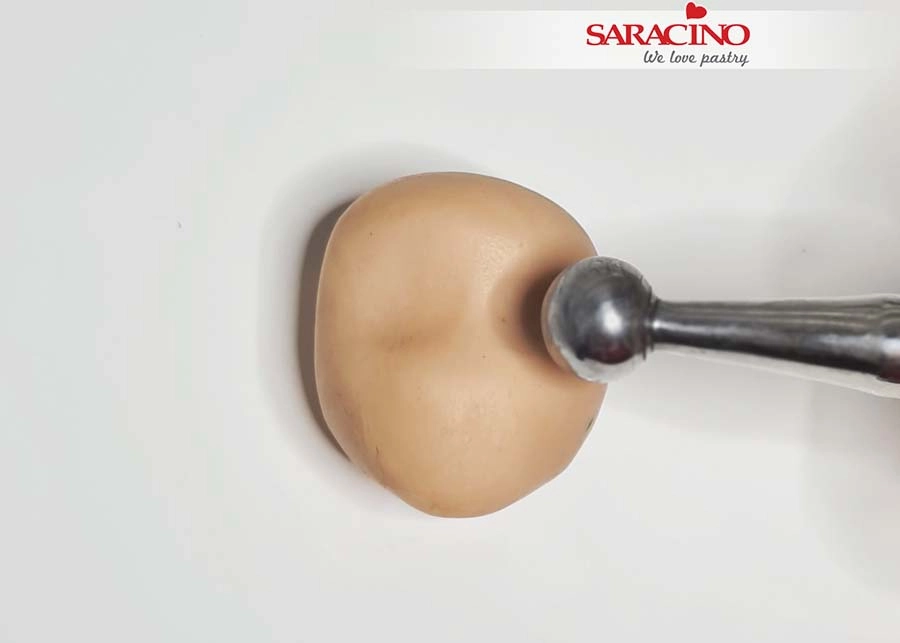
For the head roll an oval shape.

Step 2

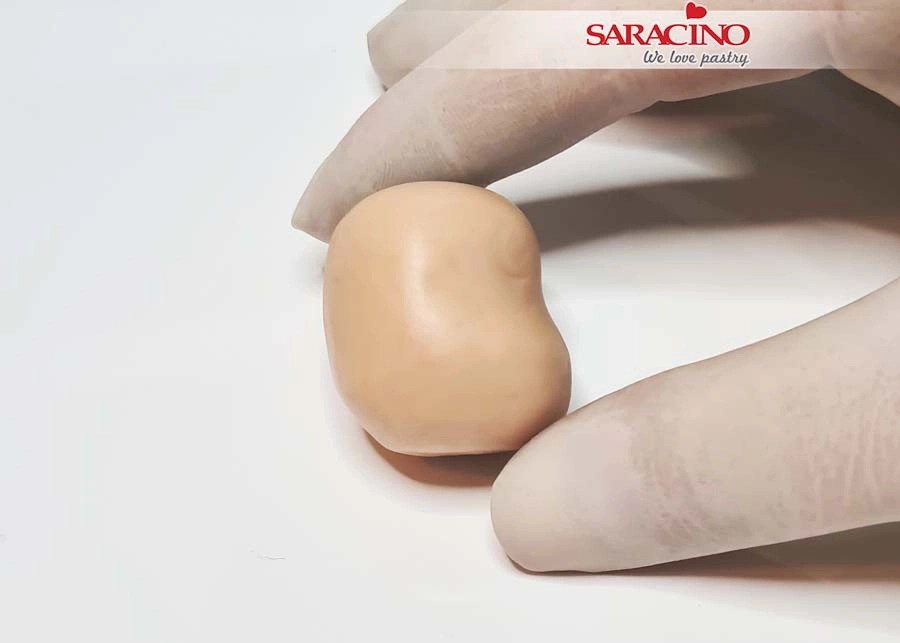
Then place your thumb on the underside at a slight angle. Use your index finger to bend and flatten / shape the top a little.

Step 3

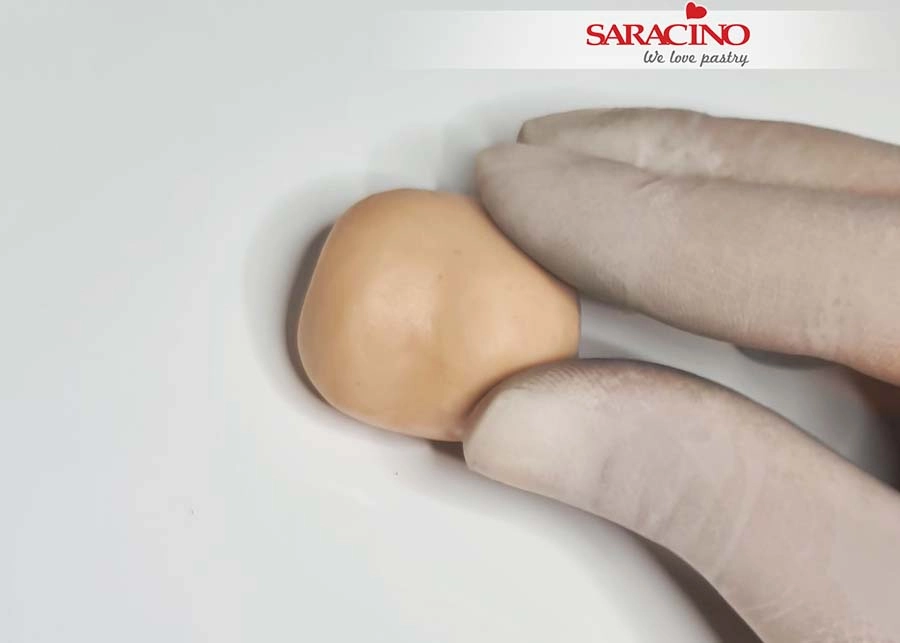
Approxiamtely 1/3 from the top, press a wide indentation with your finger for the eye area.

Step 4

Shape so the groove slightly extends over each side.

Step 5

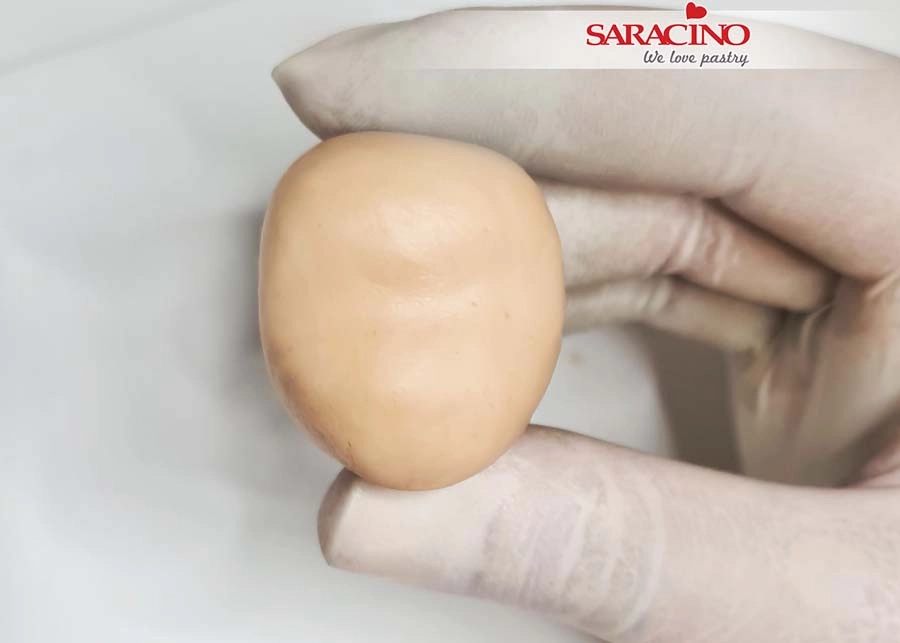
Use your fingers to shape the chin area.

Step 6

The head of the figurine should have a slightly triangular shape to the chin area.

Step 7

Use a ball tool to form eye sockets.

Step 8

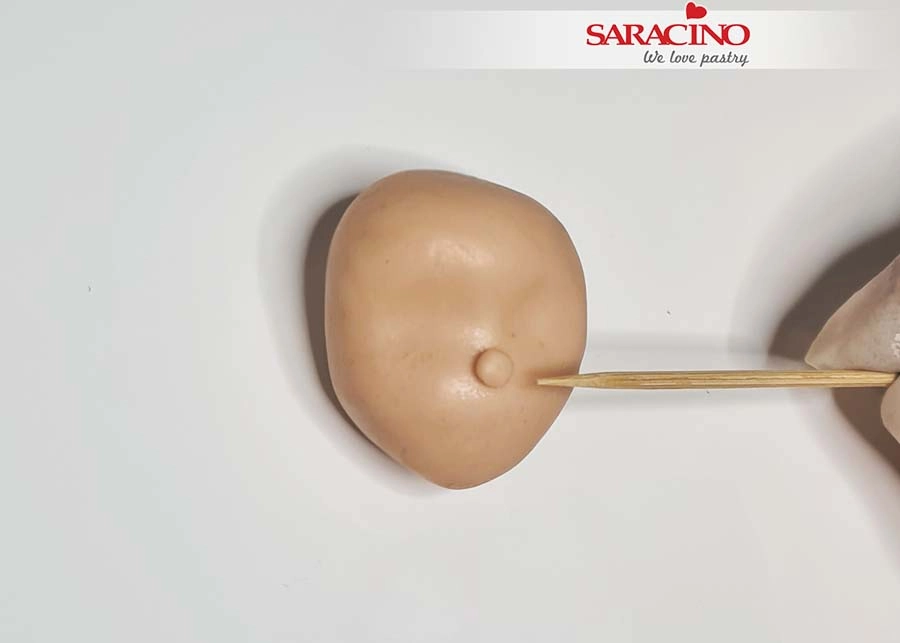
For the nose place a small ball below the eye area.

Step 9

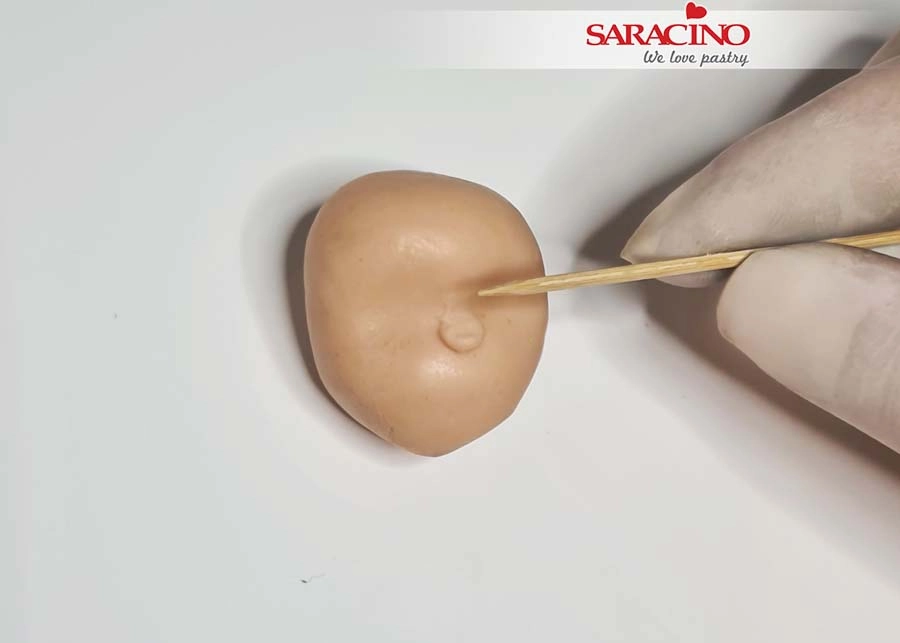
Using a cocktail stick blend a little paste upwards. You can also use a modelling tool if you prefer.

Step 10

Repeat to the sides of the nose. 

Step 11

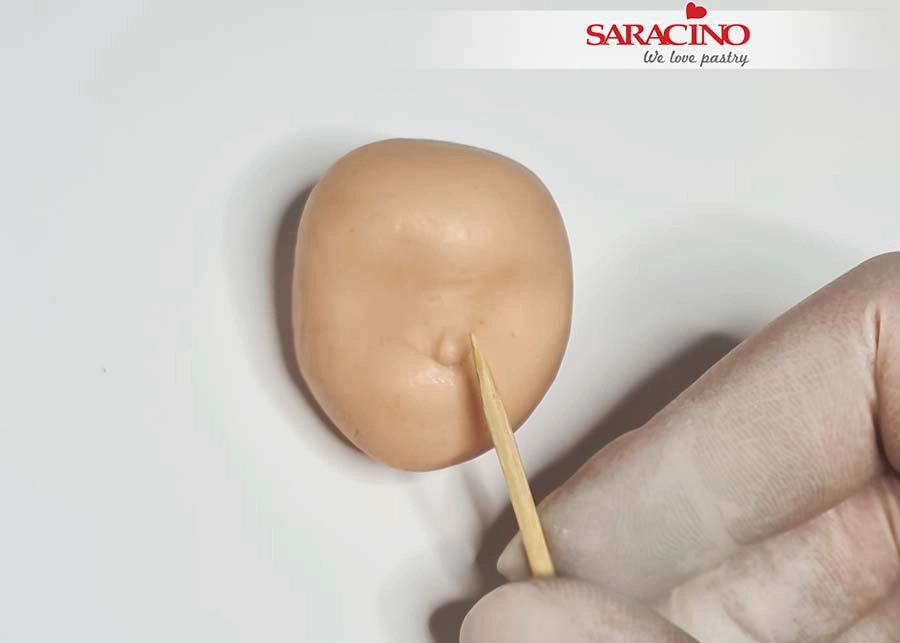
Using a modelling tool or cocktail stick form two nostils.

Step 12

For the mouth area mark the dimples shown in the photo. Ideally these should be halfway between the nose and the base of the chin.

Step 13

Use the side of a modelling tool to add more shape to the chin below the dimples.

Step 14

Doing this will push paste upwards to add to the mouth area.

Step 15

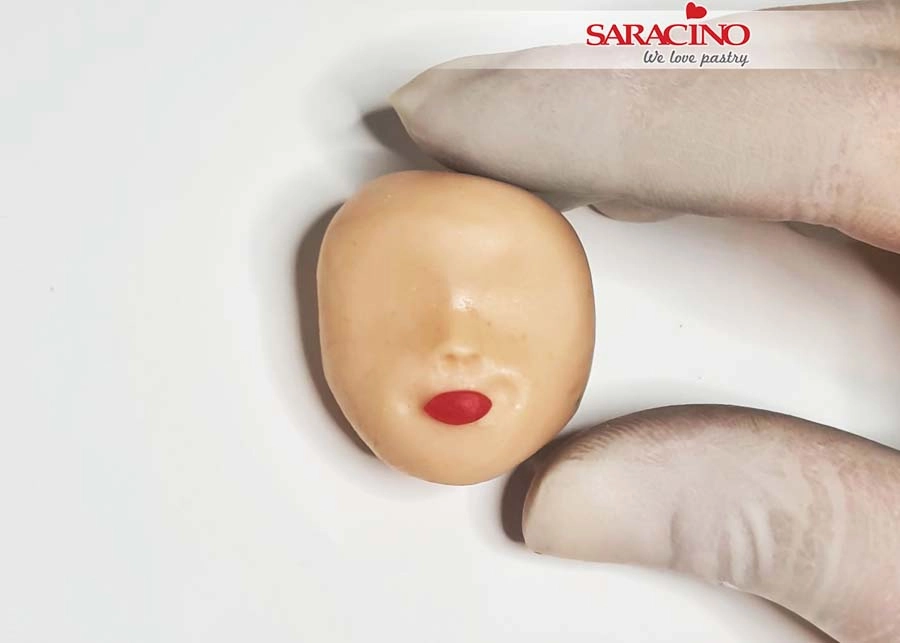
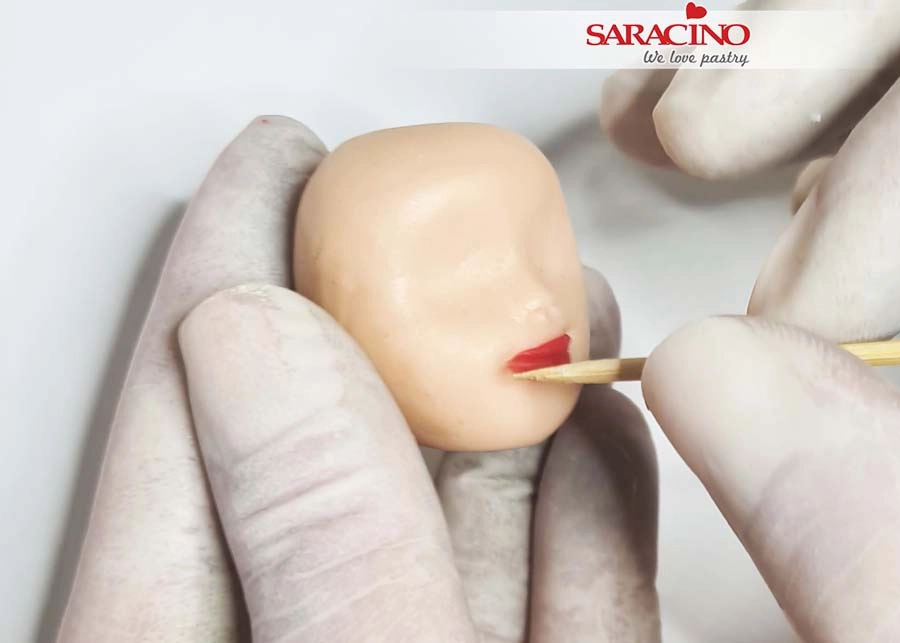
Roll a little red Pasta Top to the shape shown and add to the mouth. Be careful not to add too much paste or the lips will be too big.

Step 16

Use a cocktail stick to spread the paste to the corners of the mouth.

Step 17

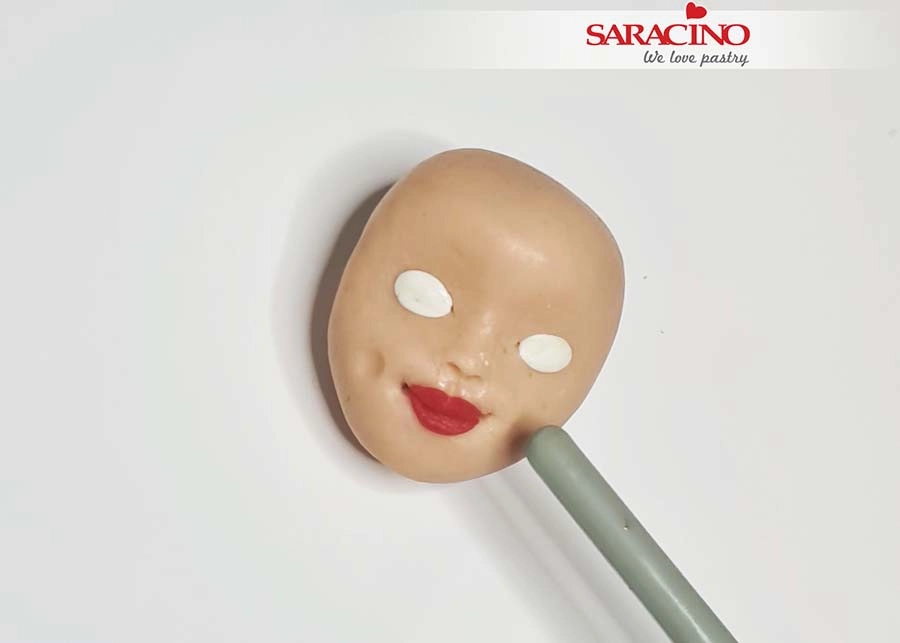
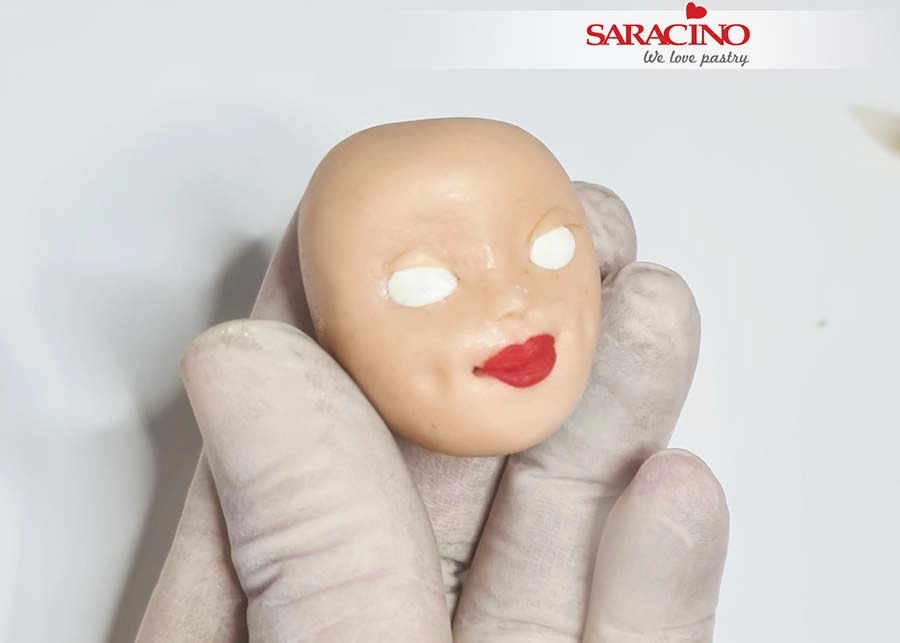
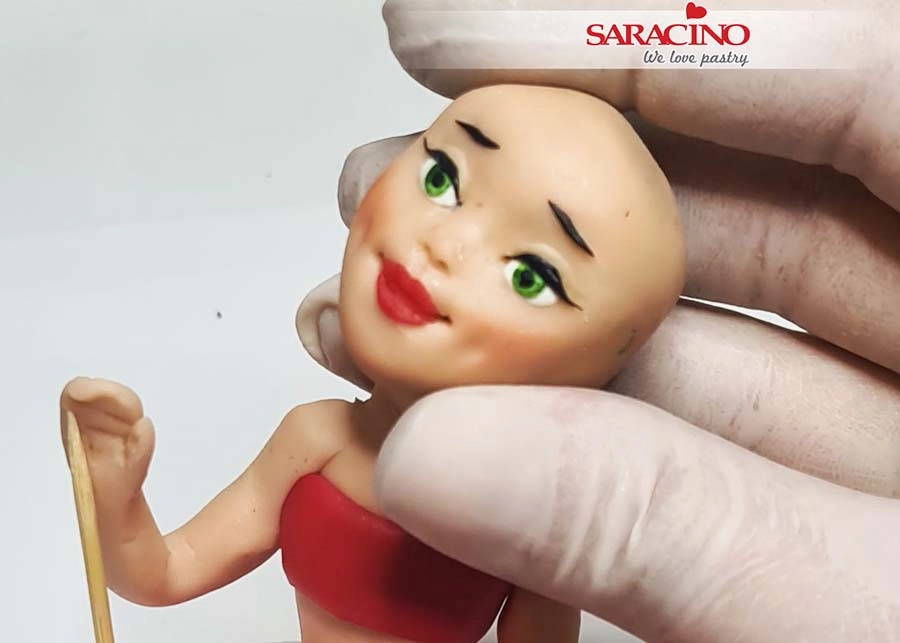
Roll two small balls of Pasta Model. Add them to the eye sockets as shown using a little glue if required. In order for the face to look attractive it is good practice to have the gap between each eye the same width as one eye. This way proportions are well balanced. Now add two dimples to the cheeks.

Step 18

Using the coloured Pasta Model fix the small upper eyelids

Step 19

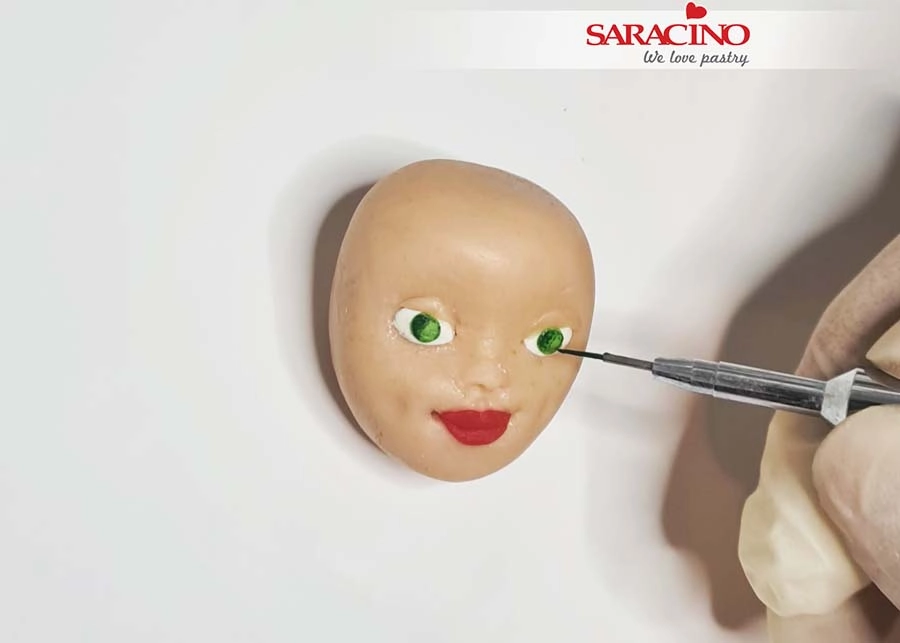
Roll two balls for the eye colouring. Fix using a little glue and paint around the edge using a fine paintbrush.

Step 20

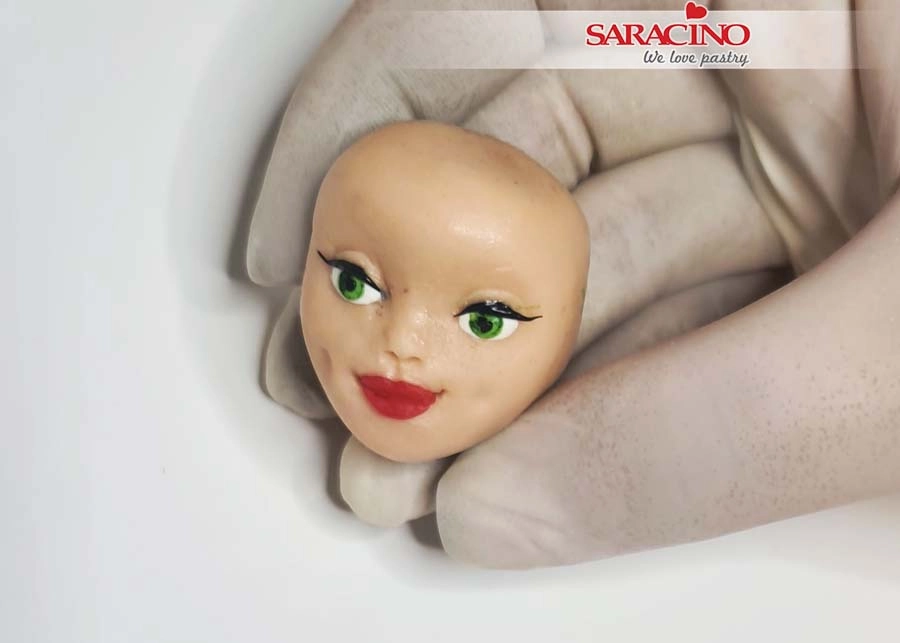
Roll two smaller balls of black paste and fix for the pupils. Roll a thin line of black Pasta Model and fix above each eye for the eyelashes.

Step 21

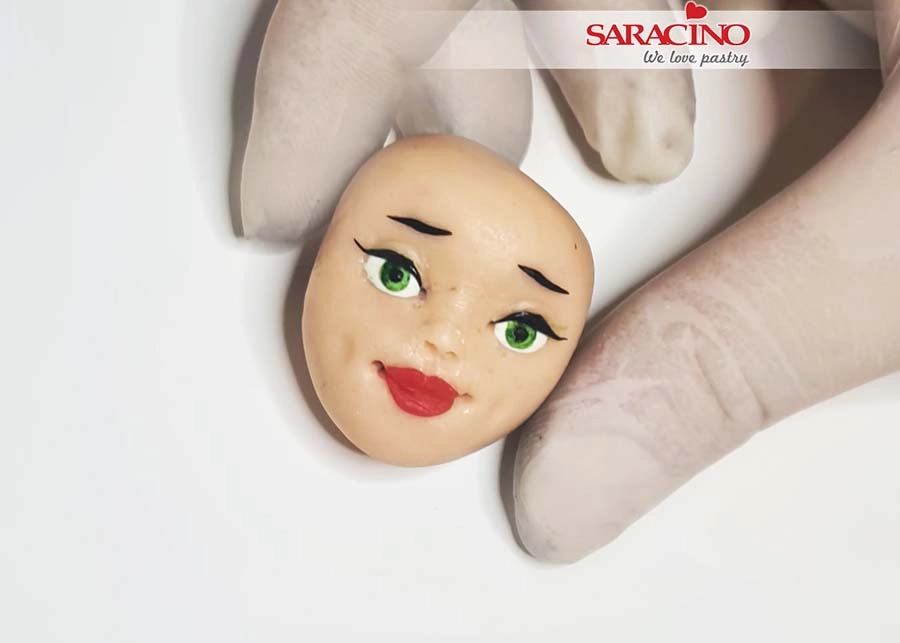
Repeat a similar procedure for the eyebrows.

Step 22

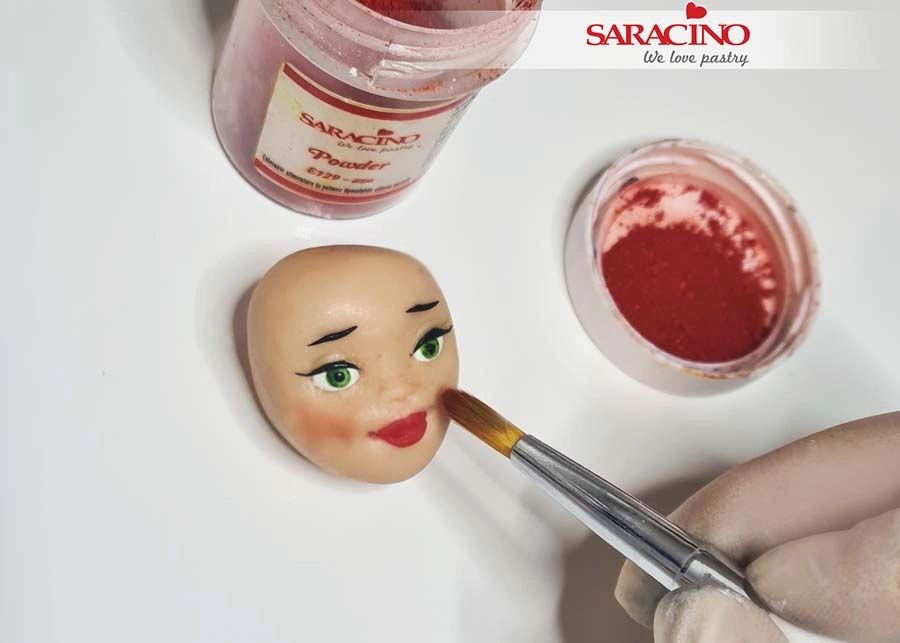
Use red or pink powder colour and a soft brush to add blush to the cheeks. Be careful not to add too much. It is easier to add more if needed than remove too much!

Step 23

For legs roll two sausage shapes slightly wider on one end.

Step 24

Halfway up each leg roll with your finger to form the knee area. Repeat 1/3 from the bottom for the ankle and to form the foot.

Step 25

Gently bend to form the foot.

Step 26

Using your thumb and forefinger model the heels.

Step 27

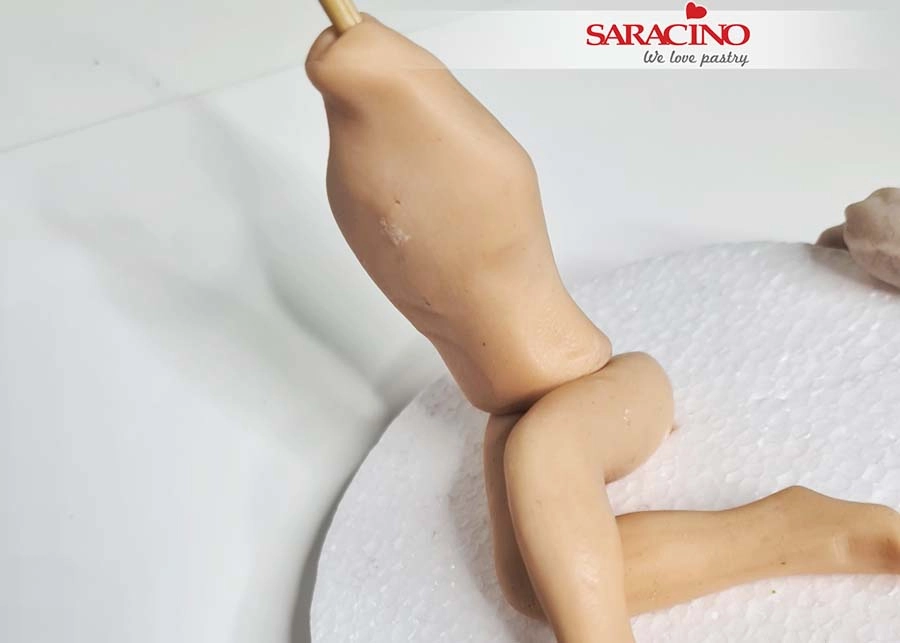
As our character is sitting with crossed legs bend the legs at the knees and place them on the board crossed as shown.

Step 28

For the torso begin with this shape.

Step 29

Roll the paste in your fingers to form the neck shape to the proportions shown. Bend it forward slightly.

Step 30

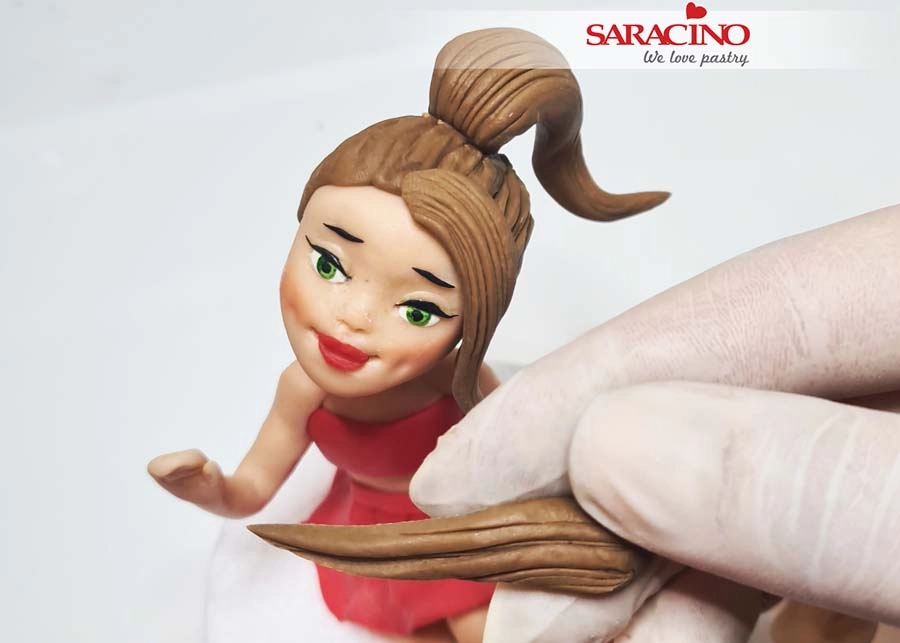
Insert the wooden skewer through the torso. When inserting gently twist the skewer and keep the shape of the torso.

Step 31

Place the torso over the top of the legs inserting the skewer into the base below. You do not need to blend the torso and legs together as the area will be covered with the skirt.

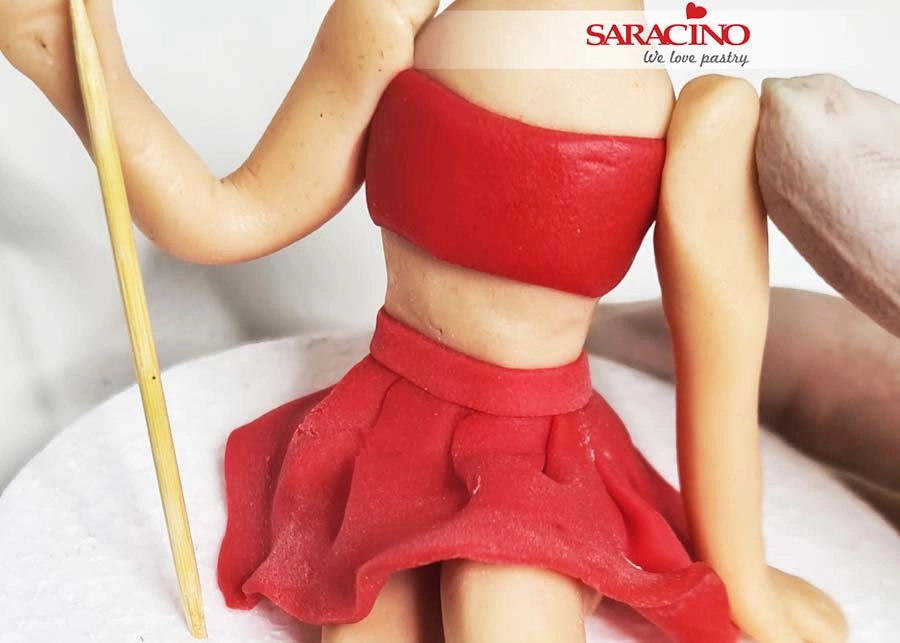
Step 32

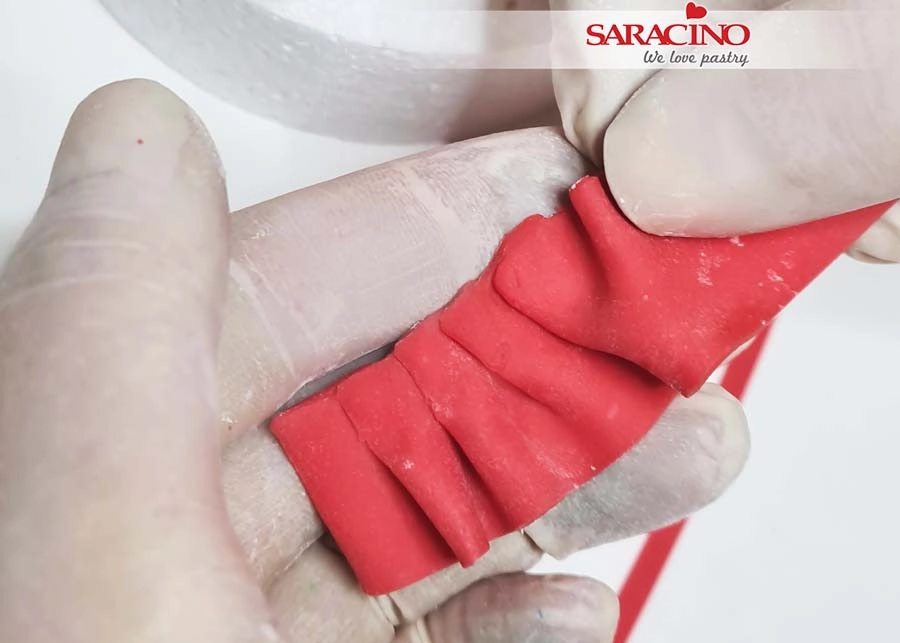
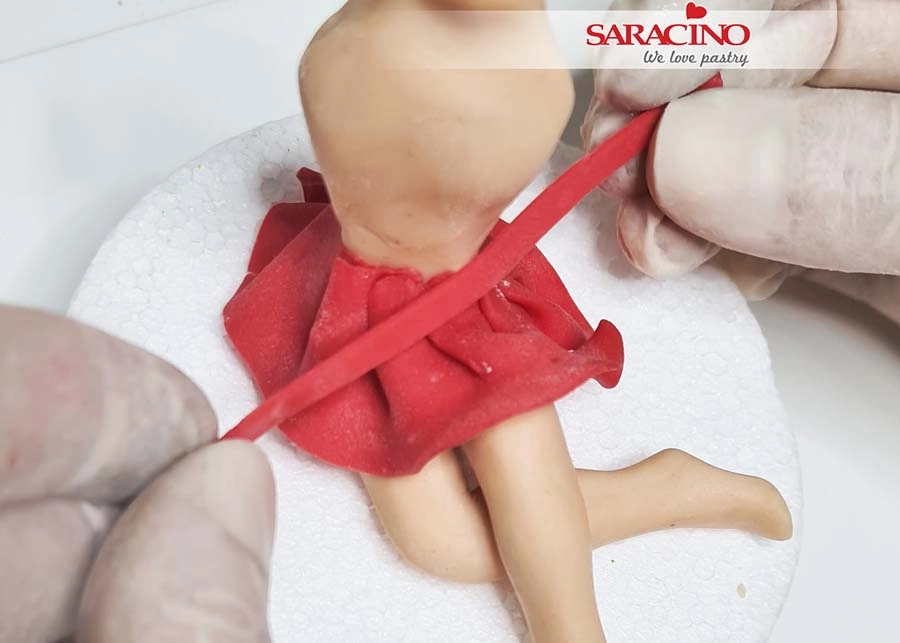
Roll out red Pasta Model thinly and cut a rectangle of 2 x 20cm. Then fold pleats to create a frill.


Step 33

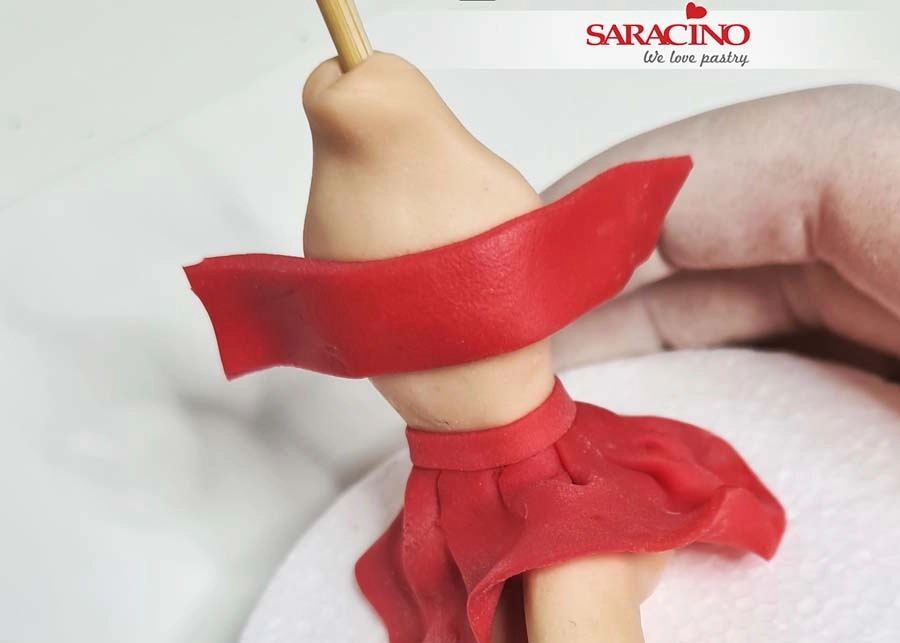
Using the same paste cut a thin strip for the waist of the skirt.

Step 34

Using the same paste cut a rectangle shape for the top. Fix around the chest area. 

Step 35

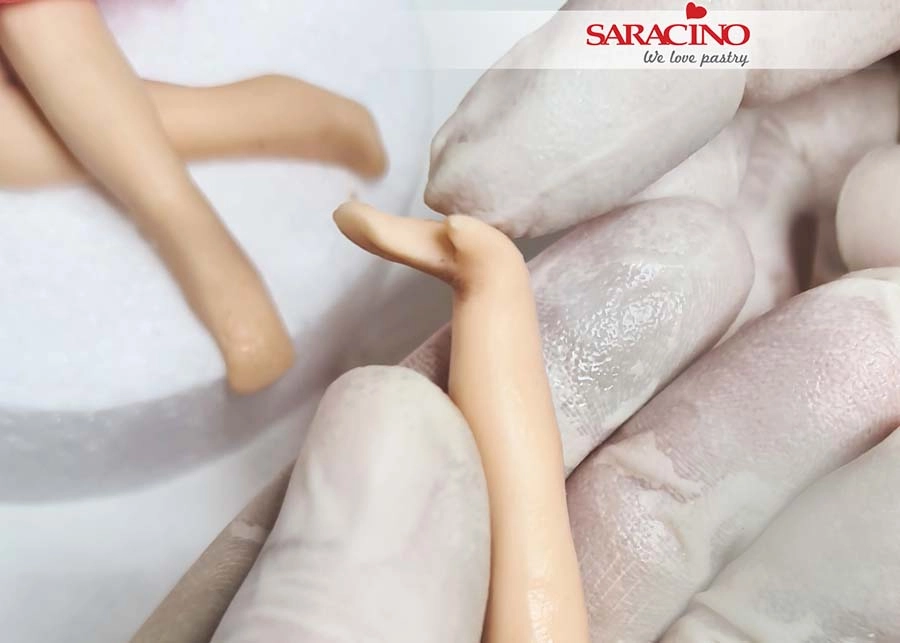
We form the arms and hands similar to the legs. Use your finger to roll the elbow and wrist area leaving paste for the hand.

Step 36

For the thumb use a scalpel or sharp knife to remove a triangle of paste from the hand. Remember to leave sufficient paste for four fingers.

Step 37

Use the back of a cocktail stick to form three grooves for the fingers. Do not cut through all the way.

Step 38

When you do this the palm will spread. Use your fingers to lengthen and thin the fingers. 

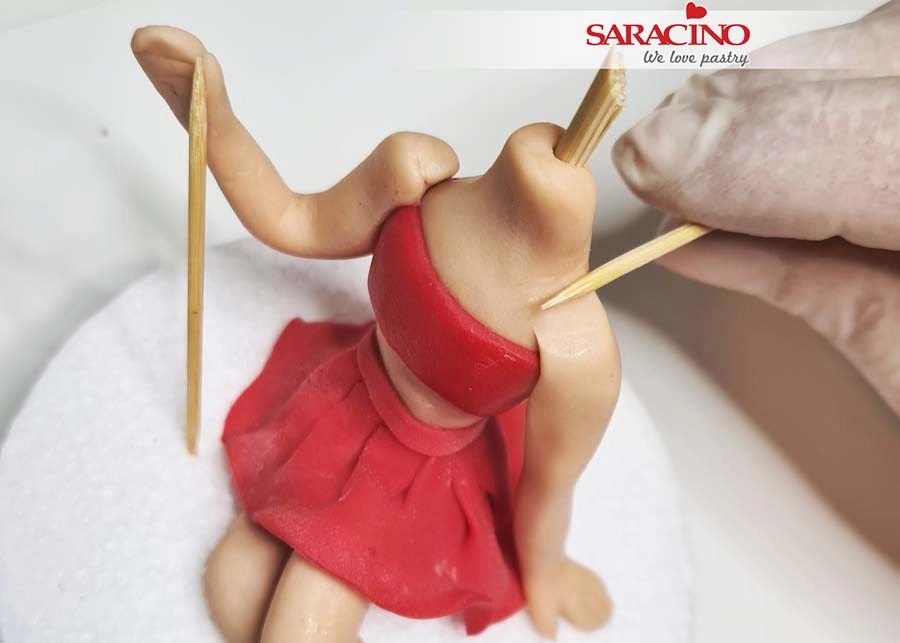
Step 39

Bend the left arm at the wrist.

Step 40

Bend the right arm at the elbow. Fix both arms to the shoulders. The right arm can be temporarily supported using a cocktail stick until dry.

Step 41

Blend each arm into the shoulders. As we have used Modelling Chocolate in our mix this will assist with flawless blending.

Step 42

Trim the timber skewer in the torso to a shorter length. Fix the head onto the neck at the required angle.

Step 43

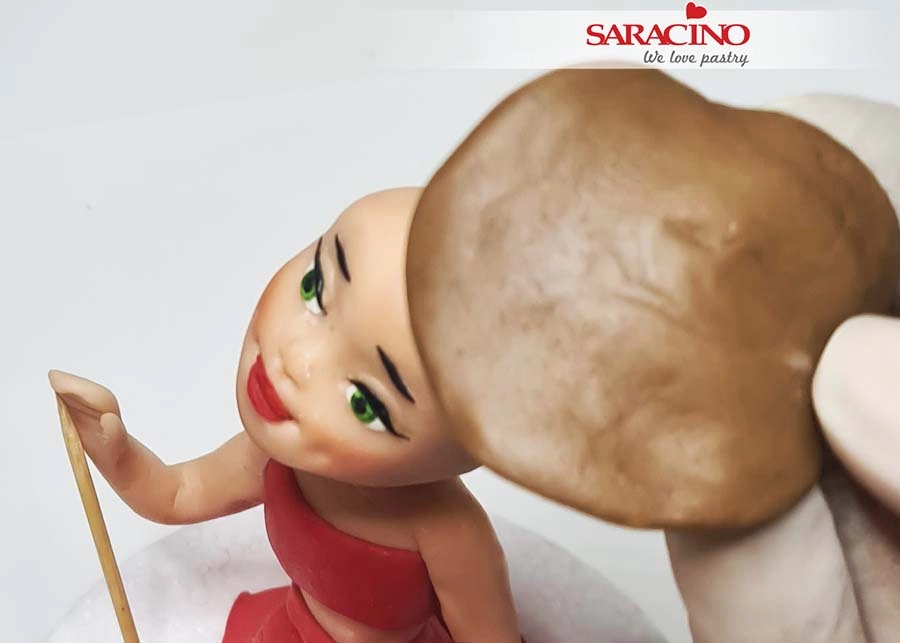
Roll a piece of flat brown paste large enough to cover the back and top of the head.

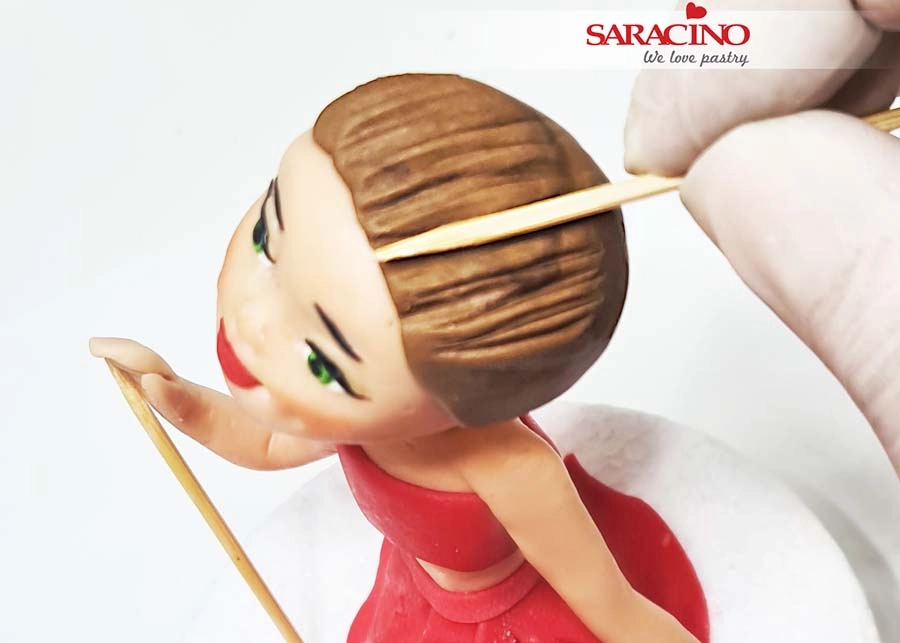
Step 44

Fix to the head and add lines using a modelling tool, cocktail stick or knife.

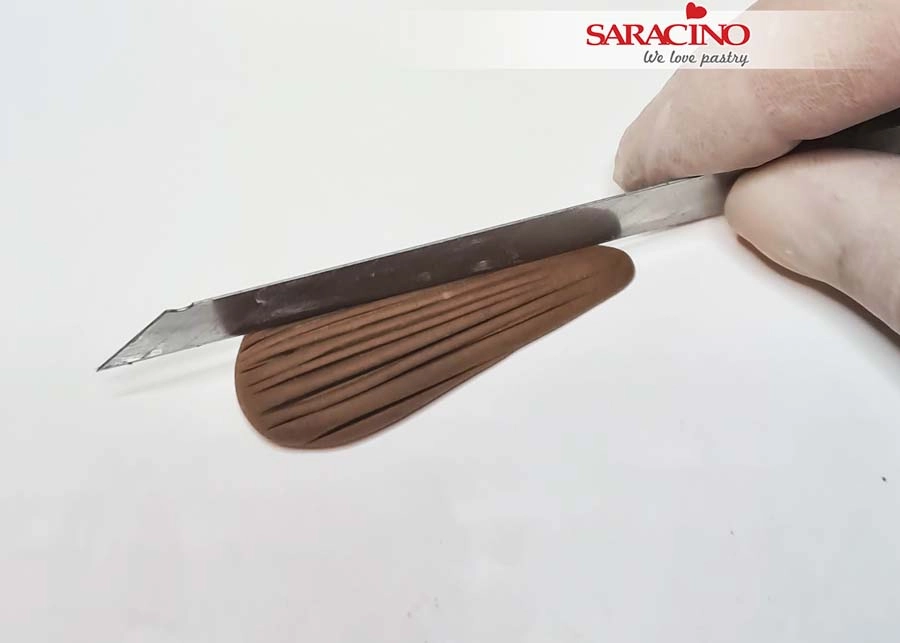
Step 45

For the ponytail roll a longer piece of brown paste. Add lines. 

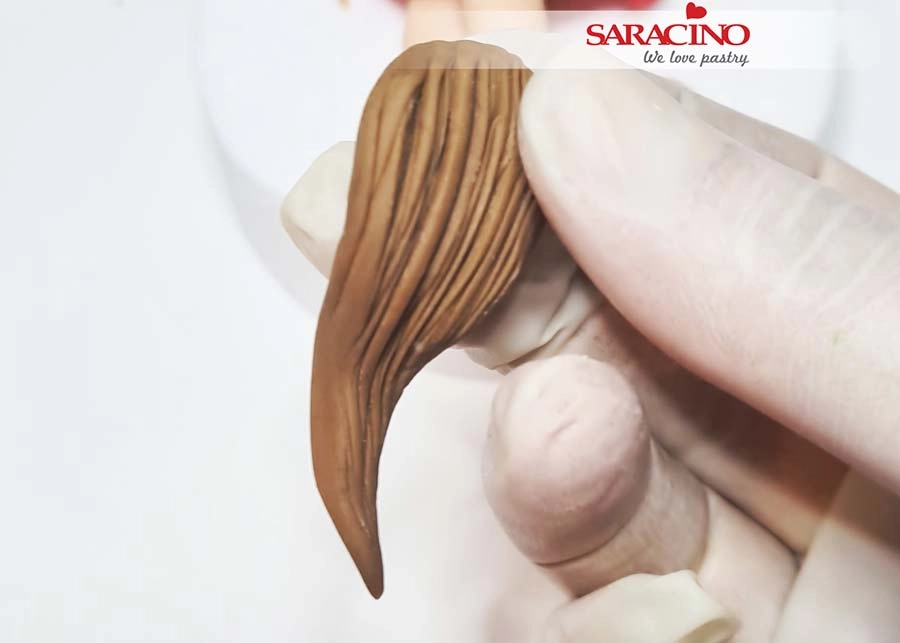
Step 46

Shape the ponytail as you would like.

Step 47

Repeat this for the fringe and fix them to the head.

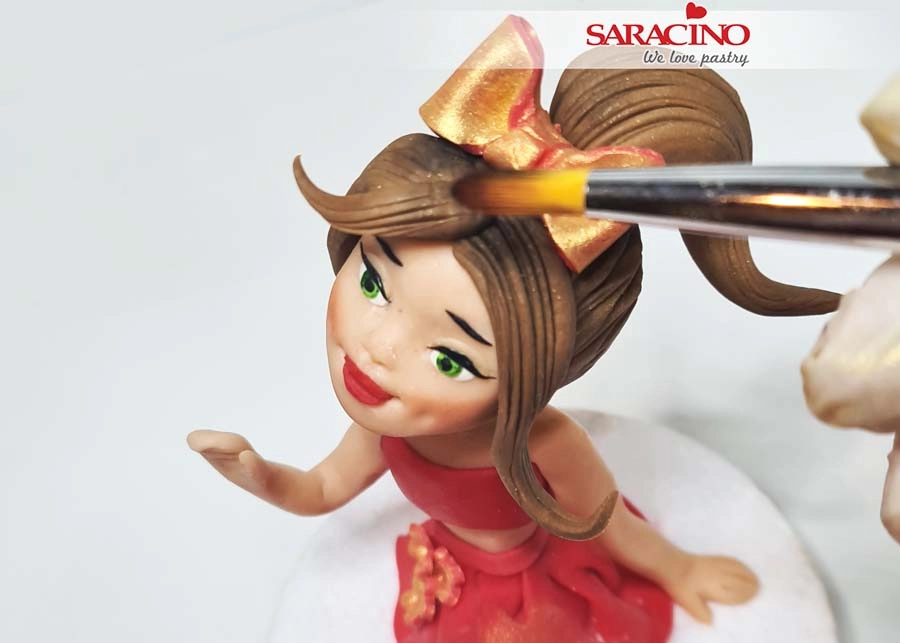
Step 48

Dust the hair using brown or black powder to give shade and definition. Do the same to the arms and legs using a shade darker than your chosen skin colour. You can add accessories to the figure such as a bow to the hair or flowers to the dress. 

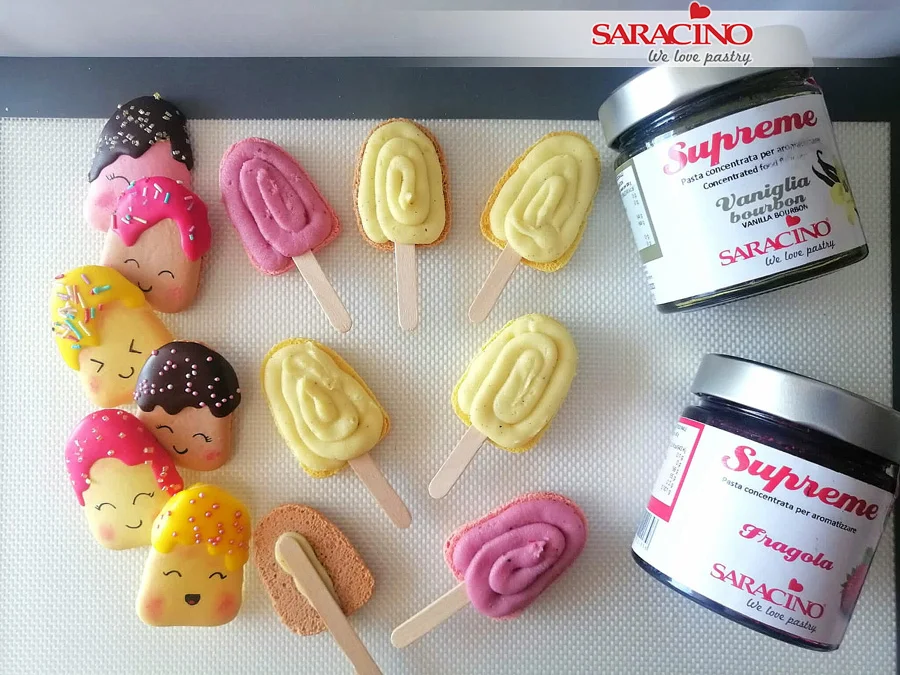
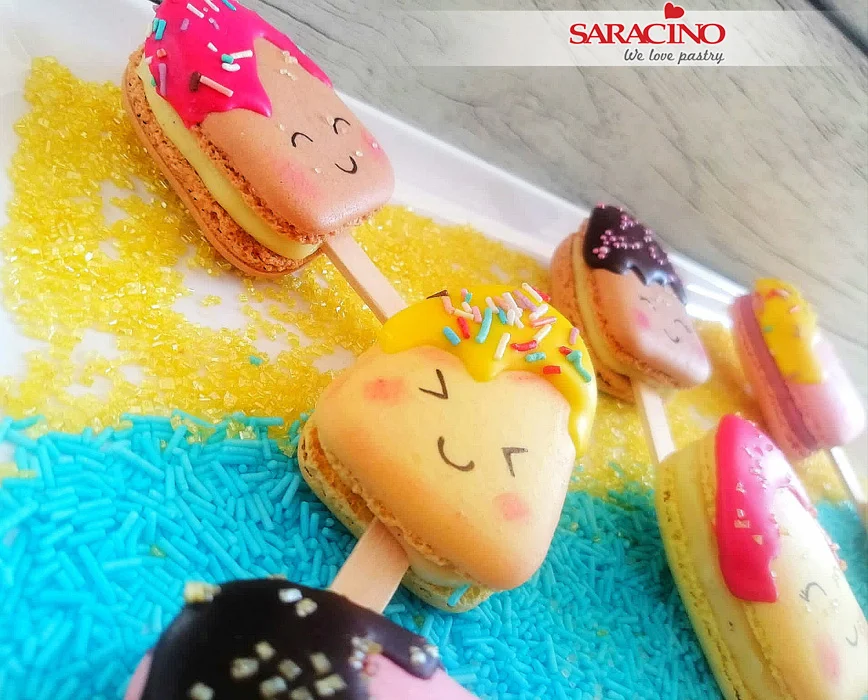
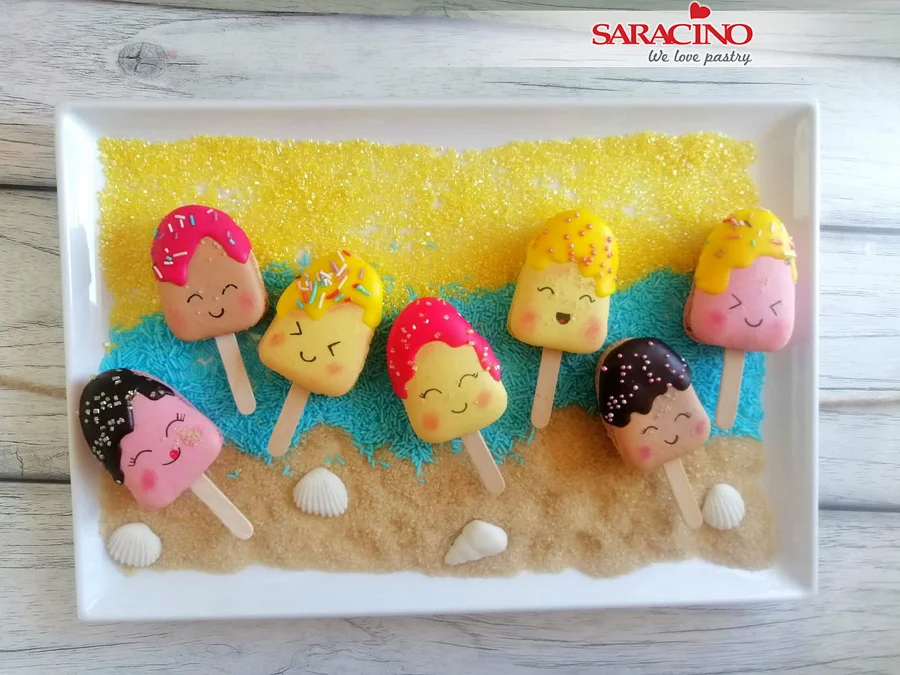
SUMMER CAKE POPS MACARONS

SUMMER CAKE POPS MACARONS

Author: Pina di Pascale

Skill level: BEGINNERS 

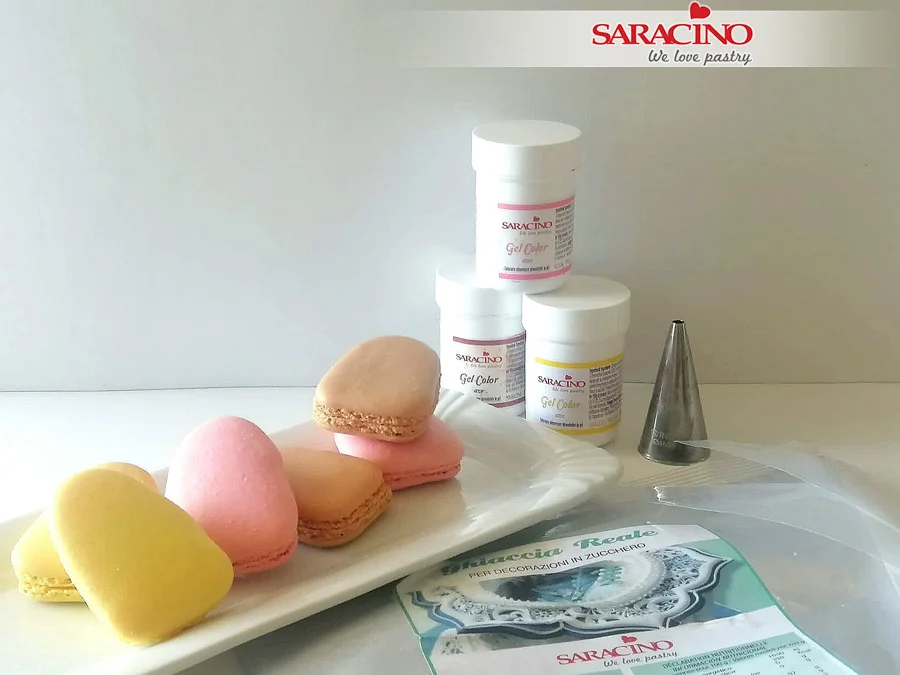
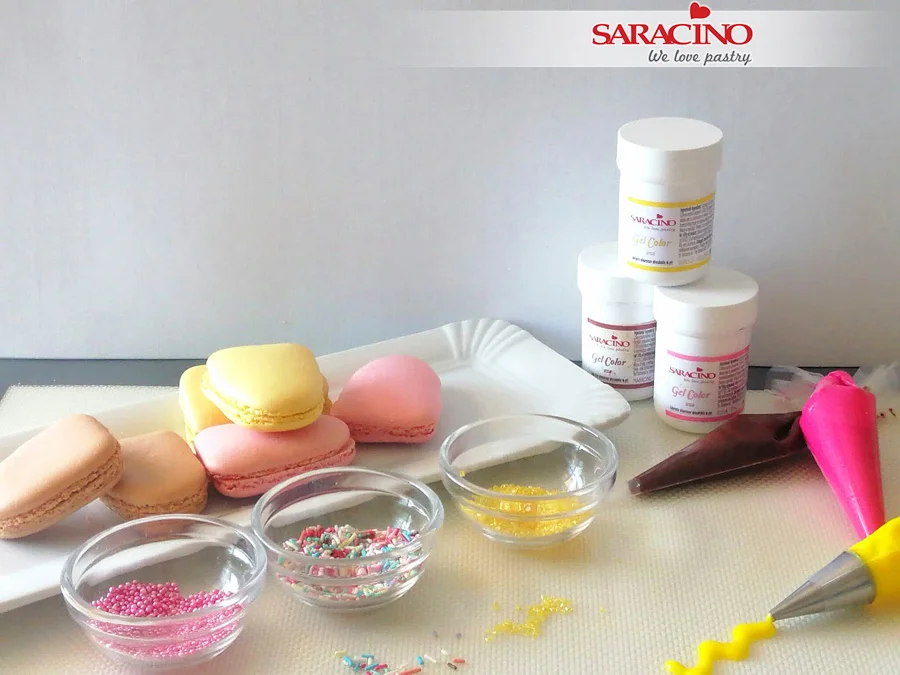
You will need:

  • Saracino pink powder colour
  • Saracino Supreme food flavourings: strawberry and vanilla 
  • Saracino gel colours: yellow, pink, brown
  • Saracino Royal icing
  • Guide sheet or template
  • Piping bags and round nozzles number 4 and 6
  • Sprinkles
  • Brush for blending
  • Black edible food pencil 
  • Lollipop sticks
  • Macaron mixture

TIP: Saracino Almond flour is ideal for perfect macarons.


Step 1

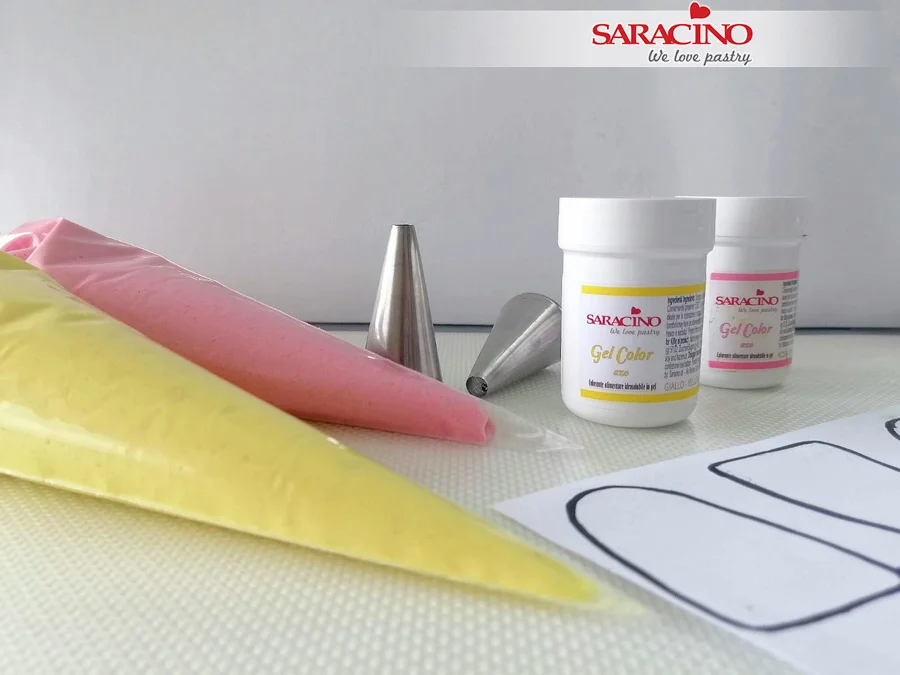
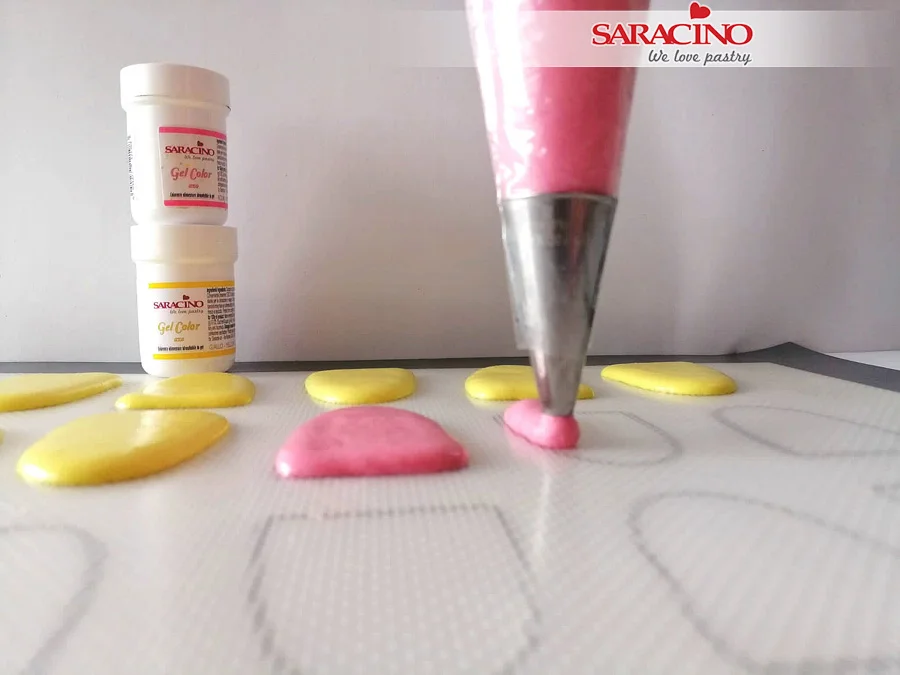
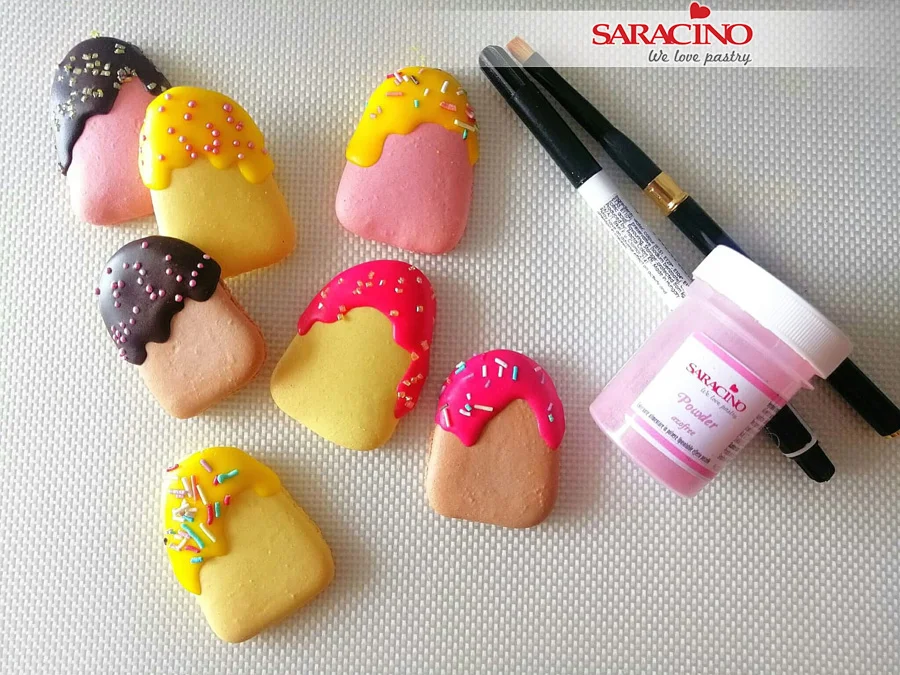
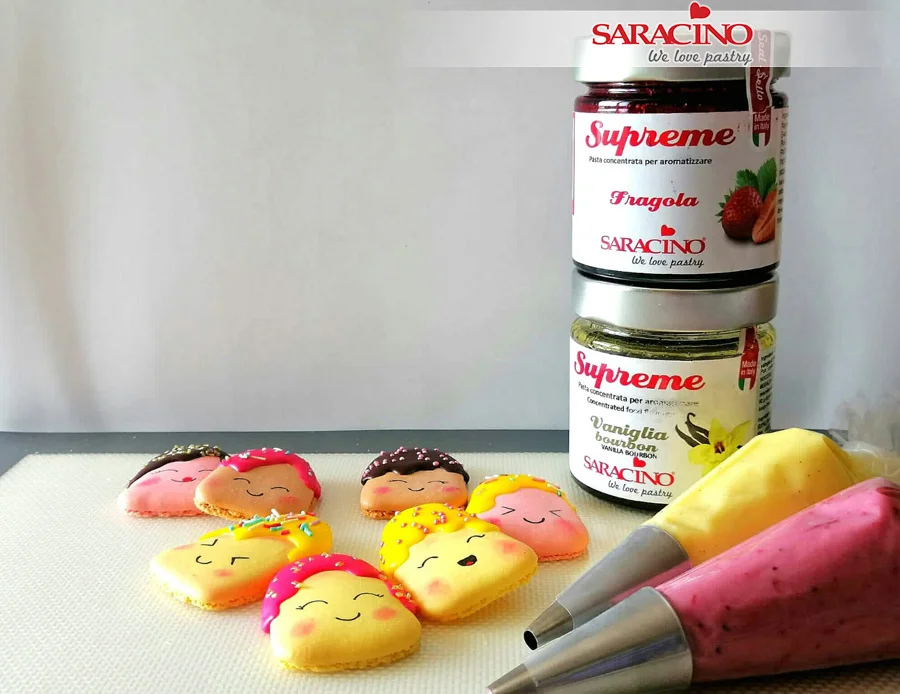
Colour your macaron dough using yellow, brown and pink gel colour. Add to piping bags. Make sure your piping nozzles are in the bags before adding the mixture (I forgot for this picture!) 

Step 2

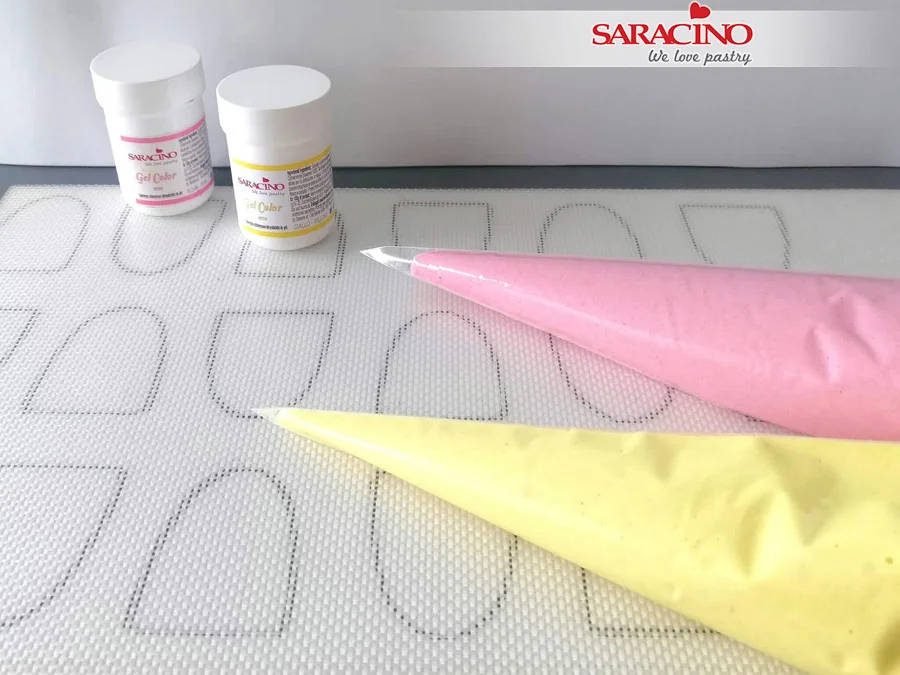
Place the guide sheet under the mat or parchment paper.

Step 3

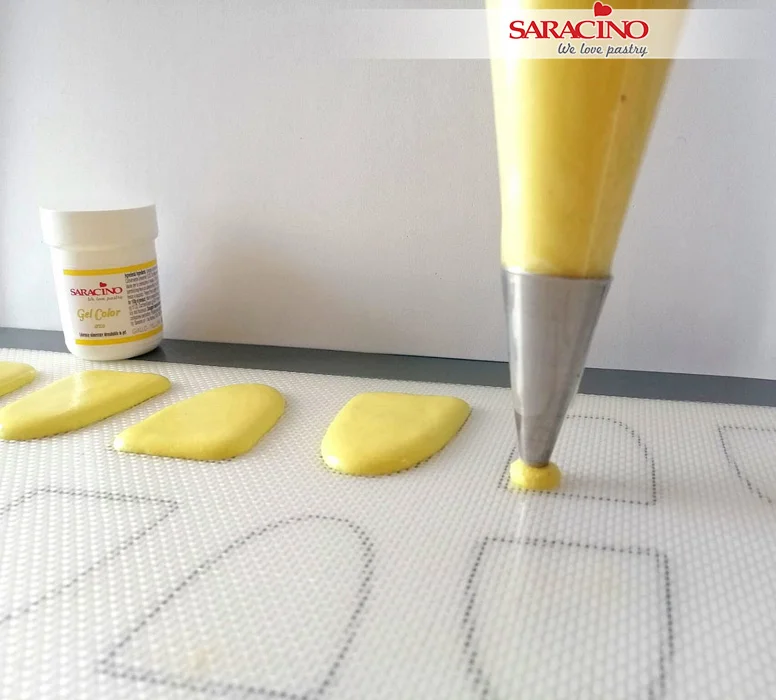
Using a number 6 nozzle pipe mixture to the lines of the template.

Step 4

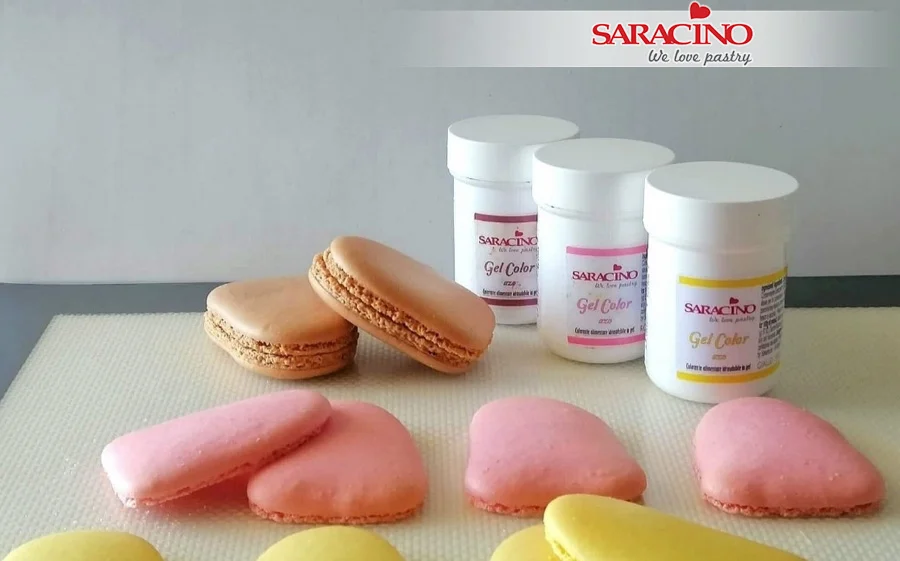
Pipe the remaining colours and bake the macarons.

Step 5

Remove from oven and allow to cool.

Step 6

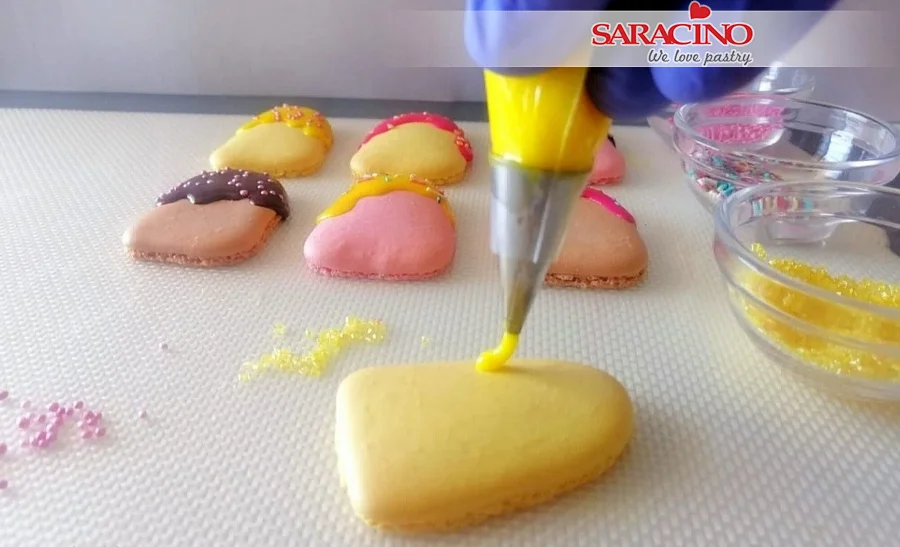
Prepare piping bags, round nozzle number 4 and Saracino Royal icing.

Step 7

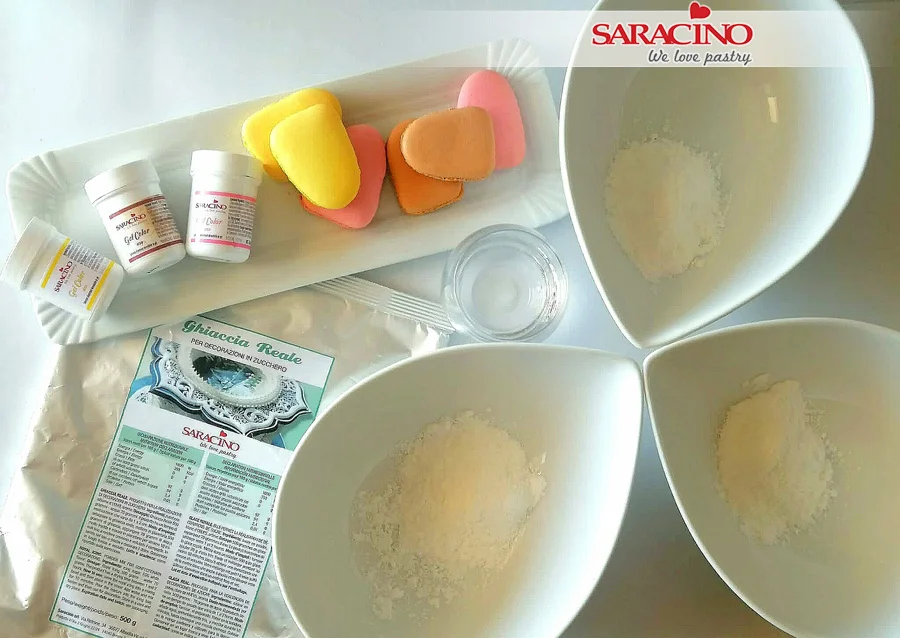
Sift the royal icing into three bowls then add cold water a little at a time  until you get a soft piping consistency (when you stir the icing with a spatula the mixture should fold on itself within ten seconds).

Step 8

Colour the icing by adding Saracino gel dyes and pour each colour into piping bags with a number 4 nozzle. Prepare three bowls of different sprinkles.

Step 9

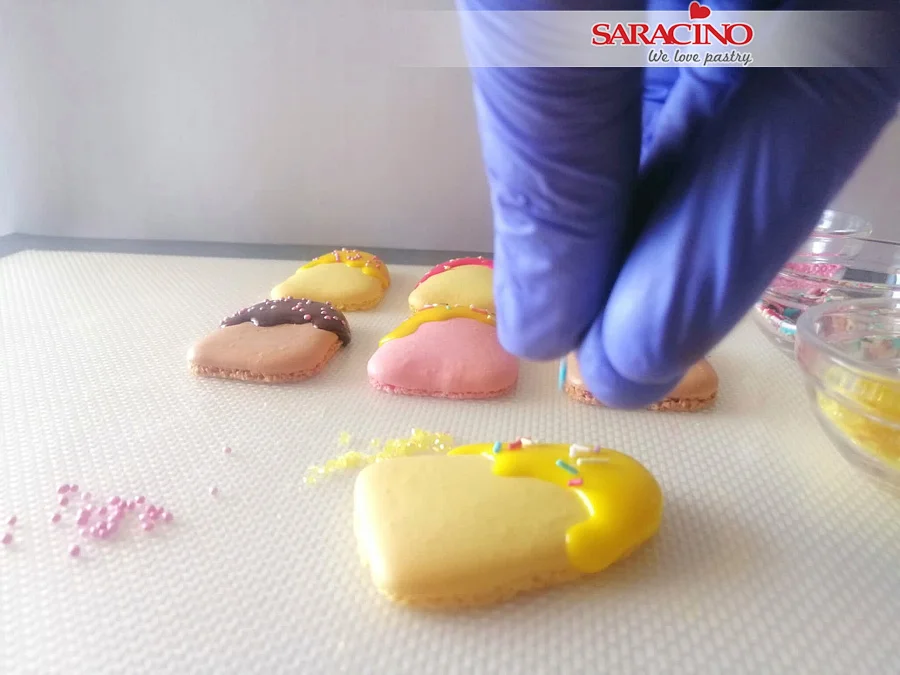
Decorate the front shell of the macarons with icing.

Step 10

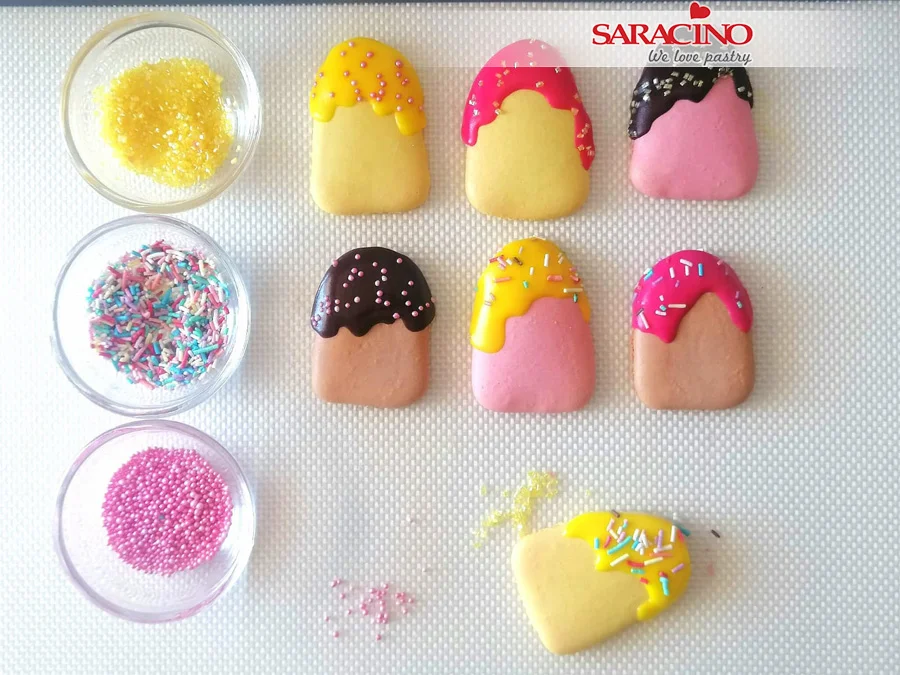
Before the icing dries, decorate with sprinkles.

Step 11

Allow to dry.

Step 12

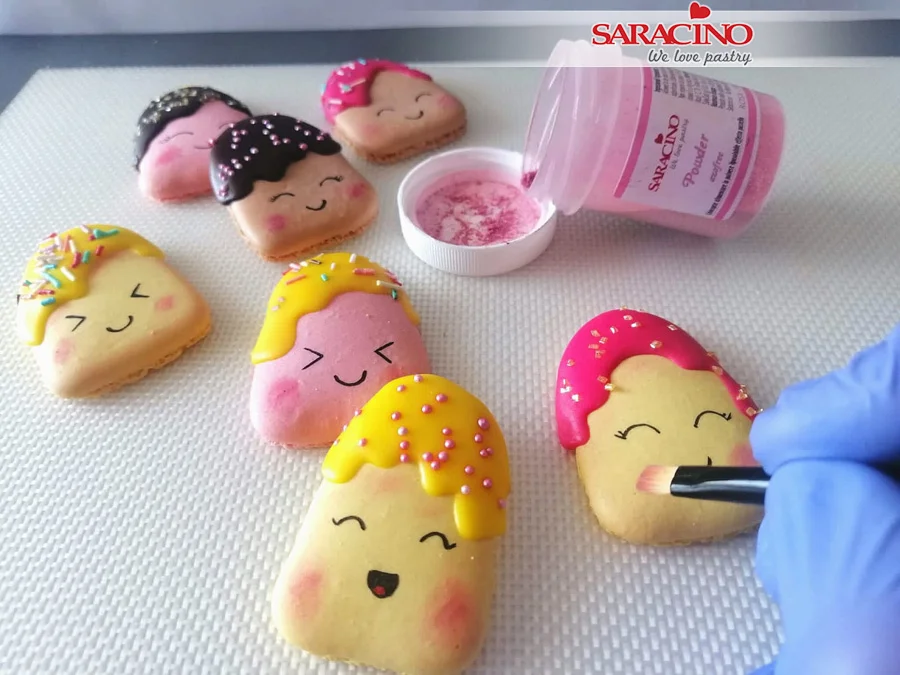
Prepare your edible black marker pen, brush and pink dust powder.

Step 13

Draw eyes and mouths to give different expressions.

Step 14

Dust the cheeks lightly to give a blush look.

Step 15

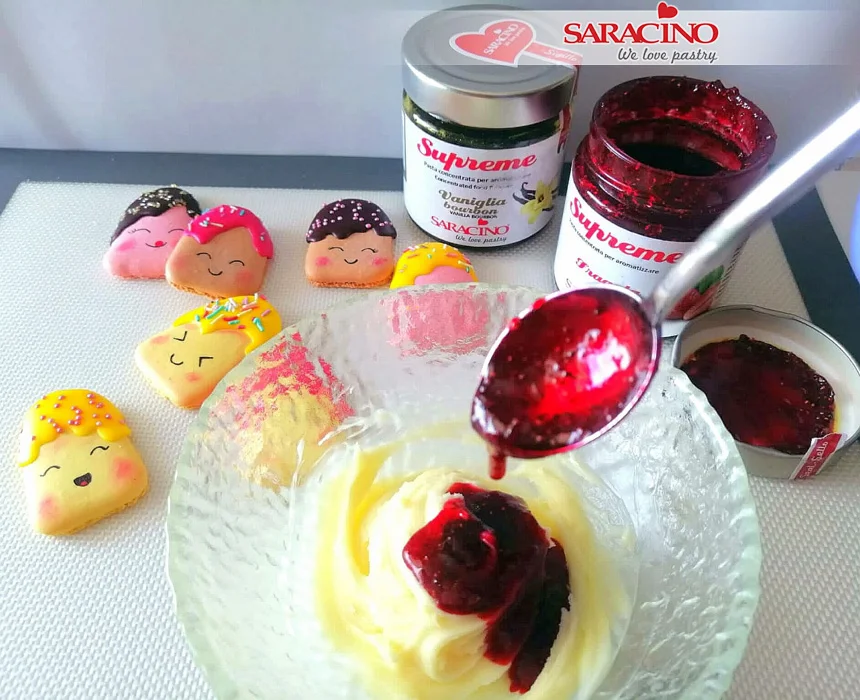
Make a white chocolate ganache and flavour half with Strawberry Supreme and the other half with Vanilla Supreme. 

Step 16

Put your flavoured ganaches into piping bags with a number 6 nozzle. Fix lollipop sticks to the back of the undecorated macarons with a little ganache. Pipe over with a thin layer of ganache for the centre.

Step 17

Place the decorated ‘faces’ onto the layer of ganache to finish each macaron.

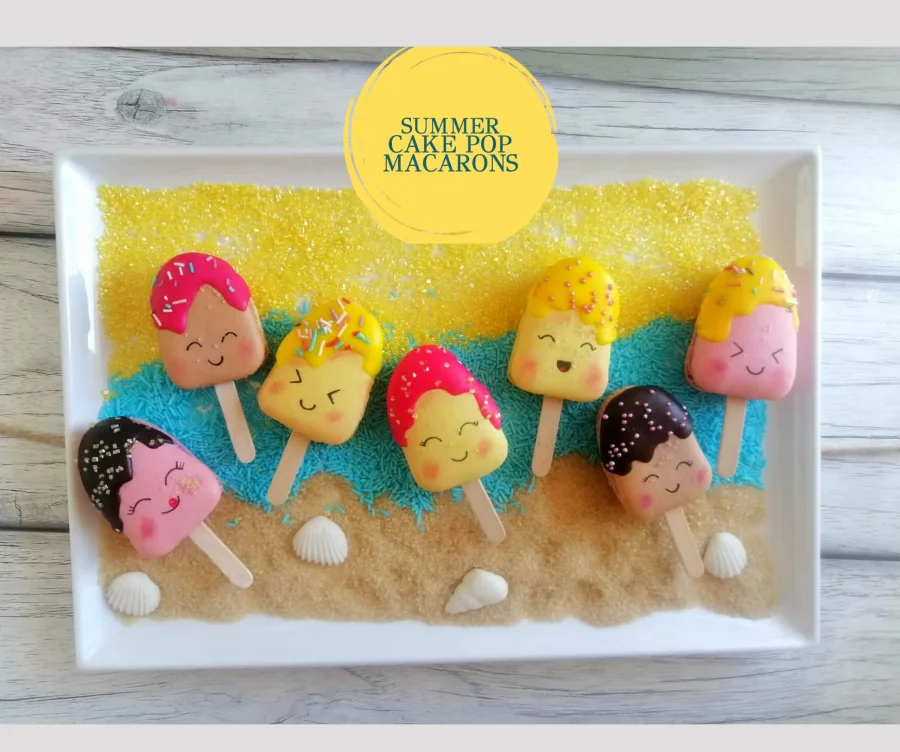
Step 18

Ready for a sweet summer but delicious any time of the year!

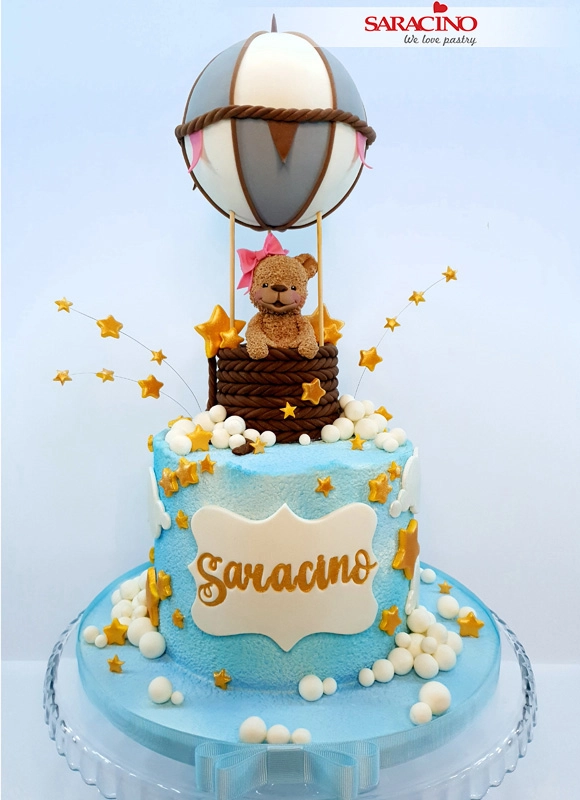
HOT AIR BALLOON CAKE TUTORIAL

HOT AIR BALLOON CAKE TUTORIAL

Skill level: BEGINNERS

You will need:

INGREDIENTS:

  • 8″ cake or dummy covered with Swiss meringue buttercream
  • Saracino cocoa butter
  • Saracino white chocolate drops
  • Saracino white powder
  • Saracino airbrush colour sky blue
  • Saracino brown modelling paste
  • Saracino skin tone modelling paste
  • Saracino white modelling paste
  • Saracino black modelling paste
  • Saracino pink modelling paste
  • Saracino fucsia modelling paste
  • Saracino pink powder
  • Saracino silver lustre powder
  • Saracino light gold powder
  • Saracino push pump glitter dust gold

EQUIPMENT:

  • Hand blender
  • Thermometer
  • Scale
  • Paint sprayer
  • Airbrush
  • Dummy 2” or 3” round for the basket
  • Scalpel
  • Small rolling pin
  • Extruder
  • Toothpick
  • Water pen
  • Scriber needle
  • Small craft pin
  • Dresden tool
  • Small and large soft brush
  • 10/0 brush
  • 3 wooden skewers
  • Pliers
  • 12cm styrofoam ball
  • Black edible pen
  • Ruler
  • Parchment paper
  • Plaque cookie cutter
  • Embosser stamps
  • Clear alcohol
  • Pallette
  • 2 sizes small star cookie cutters
  • Small star plunger cutter
  • Fondant smoother
  • 30 gauge florist wire
  • Wooden dowel
  • Flower picks
  • Scissors
  • Palette knife
  • Buttercream
  • Turntable
  • Blue ribbon

Step 1

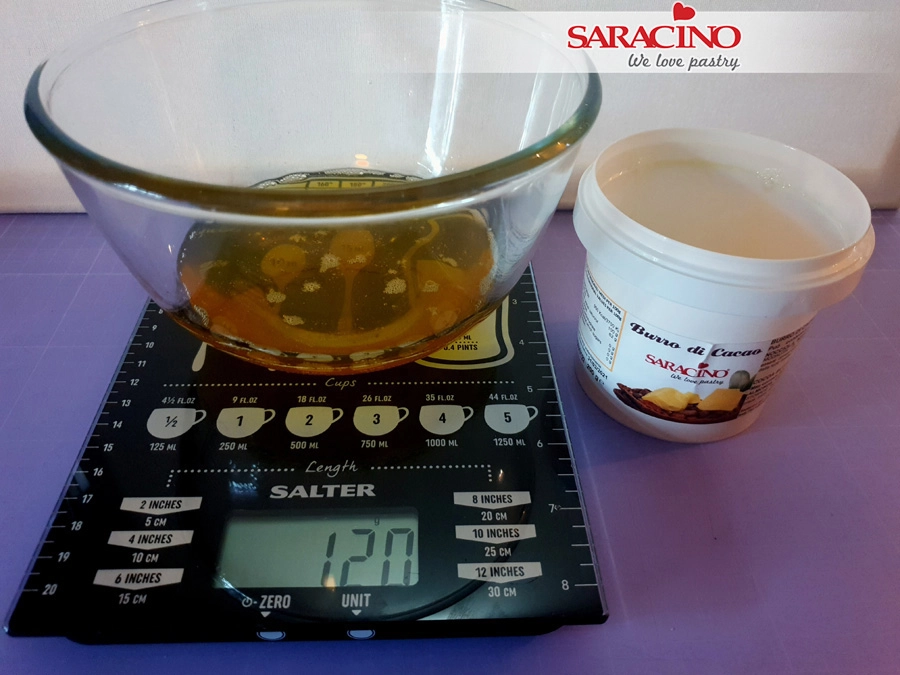
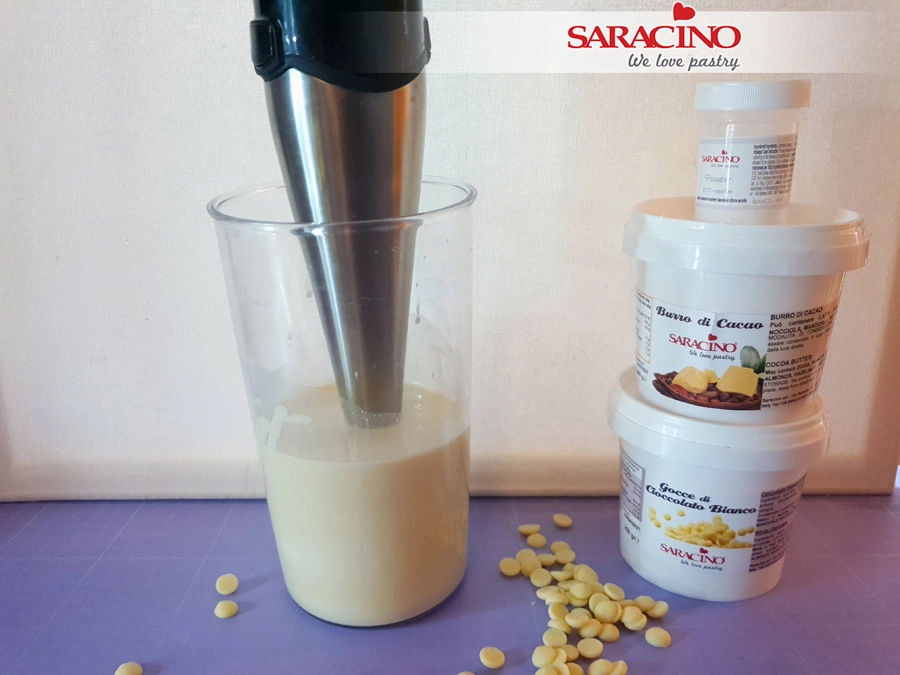
Prepare the cocoa butter, the white chocolate drops and your white powder for melting. You will need your thermometer and a hand blender. Melt 120g of cocoa butter in the microwave.

Step 2

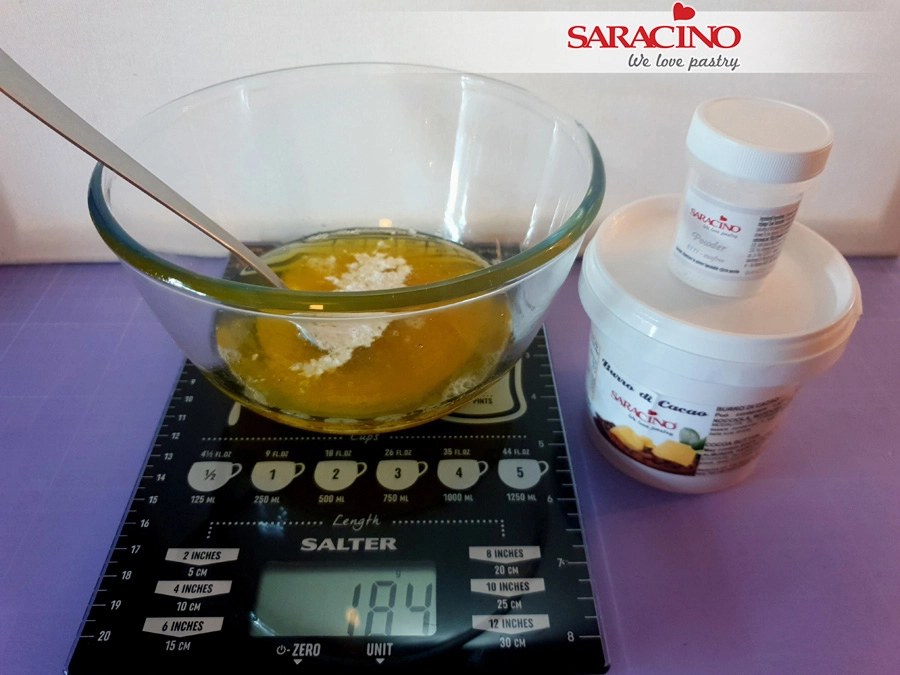
Add the white powder to achieve the required colour.

Step 3

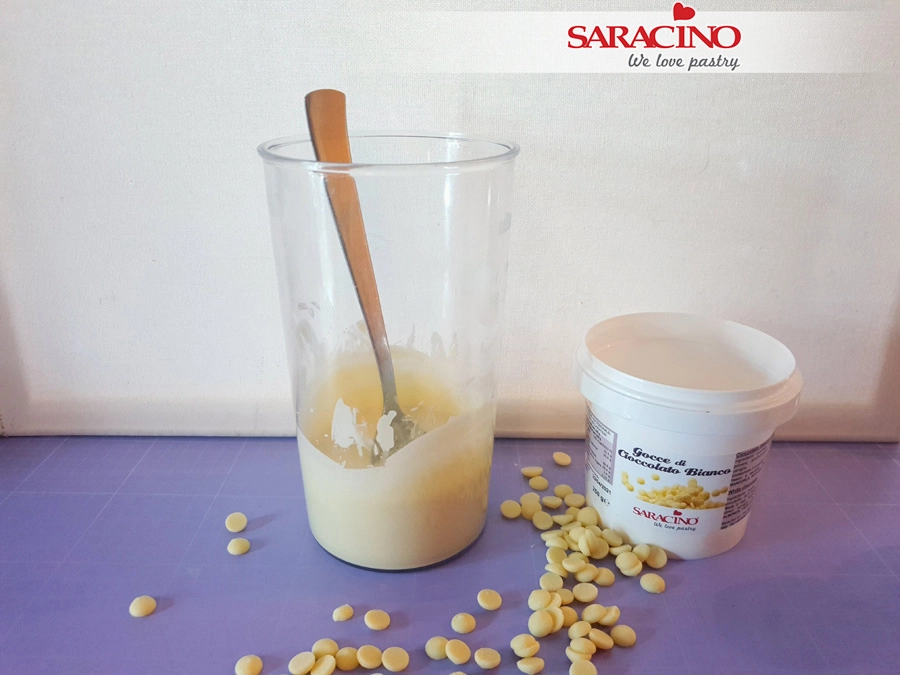
Weigh 210g white chocolate drops and melt in the microwave until it is smooth.

Step 4

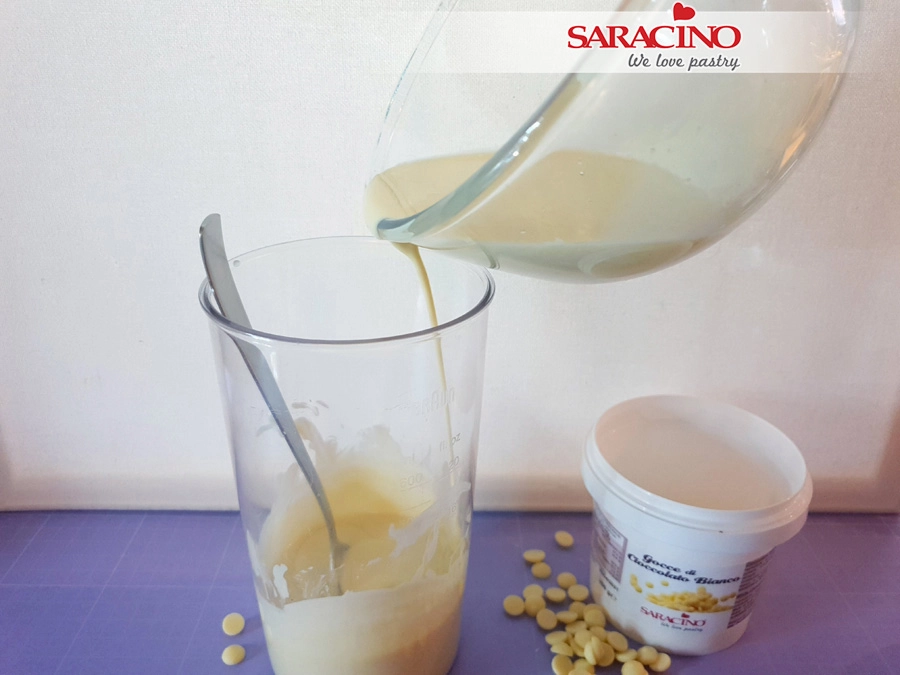
Gradually add the melted cocoa butter into the white chocolate.

Step 5

Blend it for couple of seconds.

Step 6

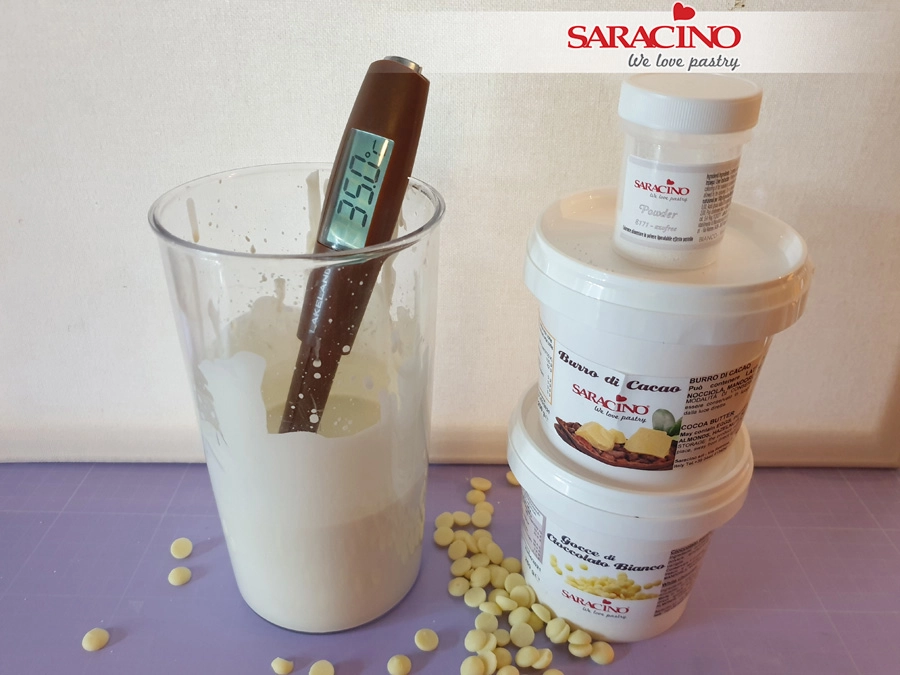
Leave it to cool down to 35°C.

Step 7

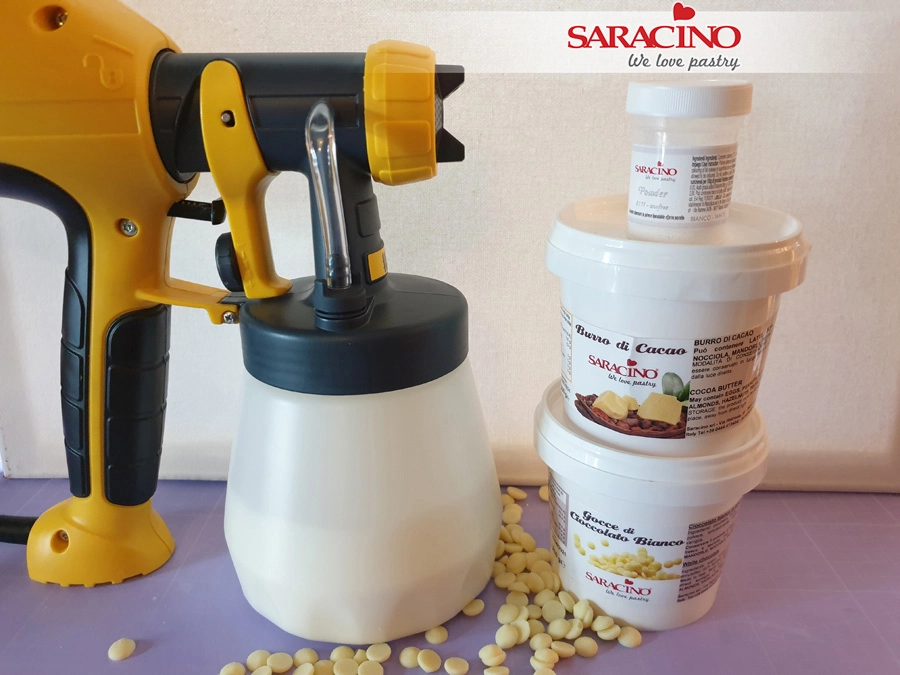
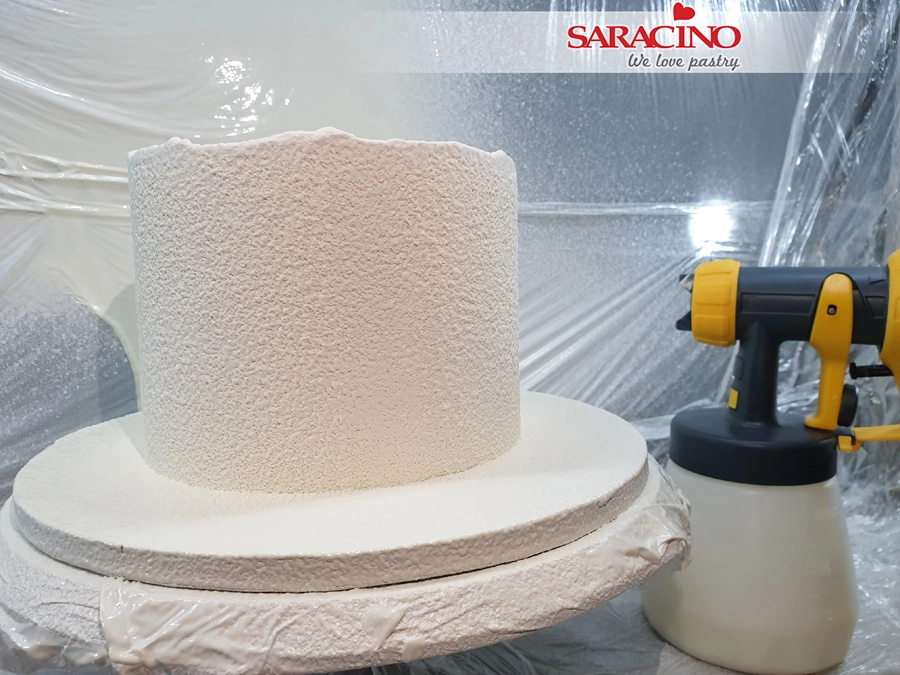
Pour the mixture into the paint sprayer container.

Step 8

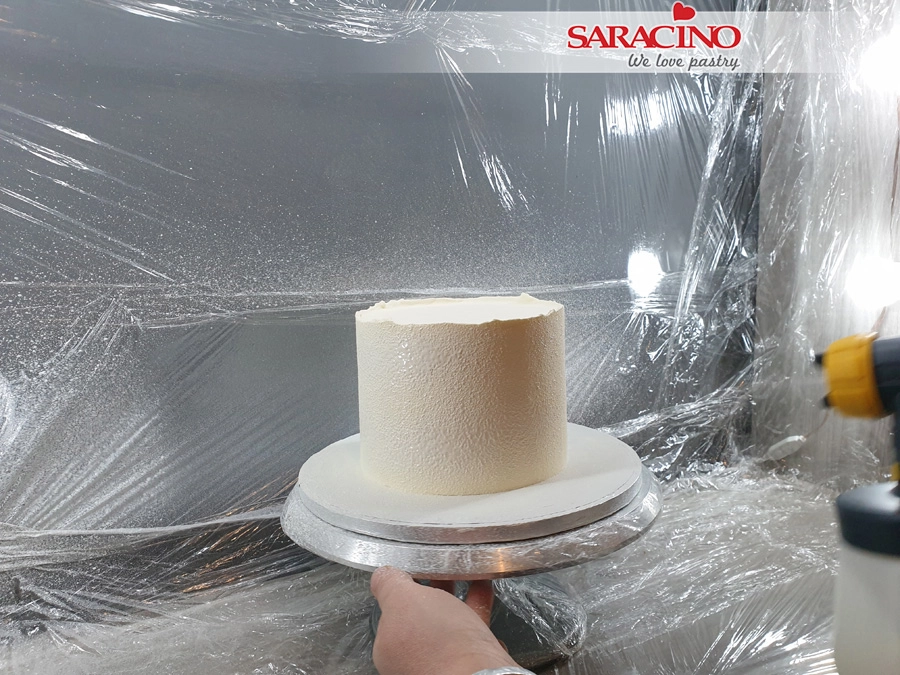
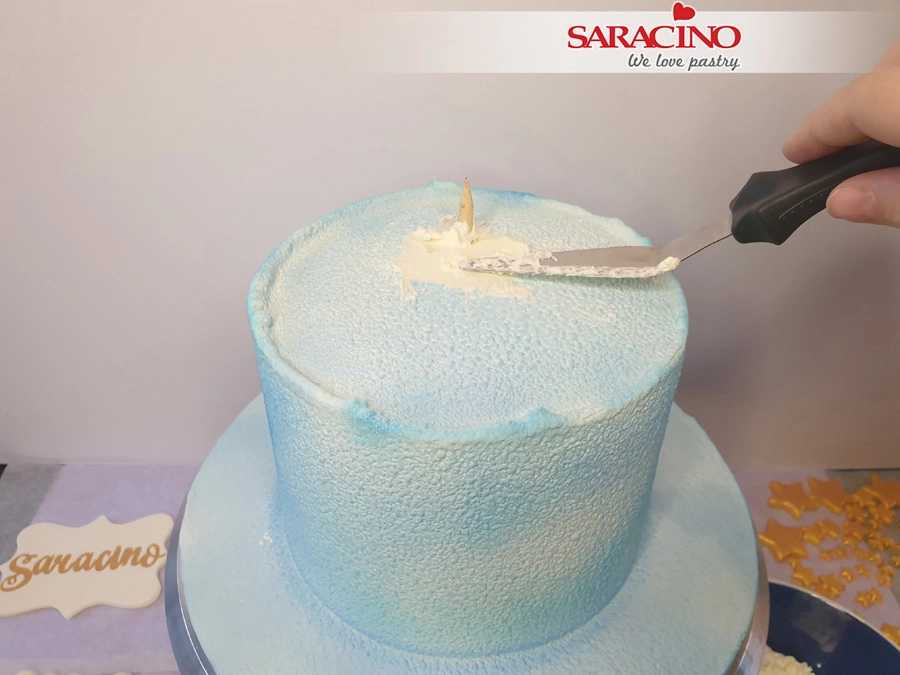
Take the cake from the fridge and spray it immediately to give an even textured finish.

TIP – I used Swiss meringue buttercream to cover my cake before spraying. You can also spray a cake covered in Saracino Pasta Top or even spray a dummy directly.

Step 9

This is the texture that you should achieve.

Step 10

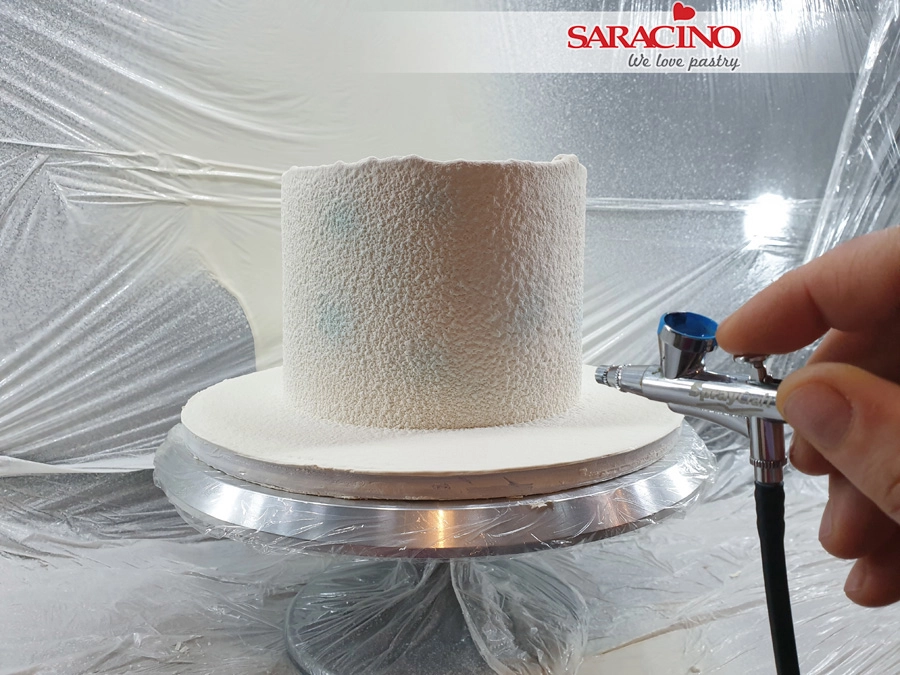
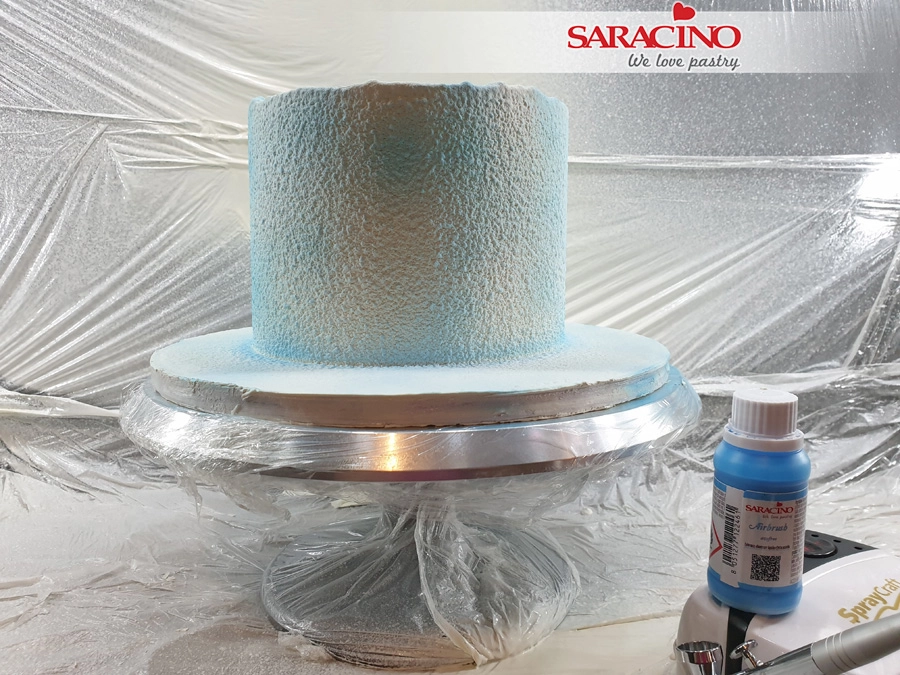
Spray the blue airbrush colour here and there, to look like a cloudy sky.

Step 11

This should be your final result.

Step 12

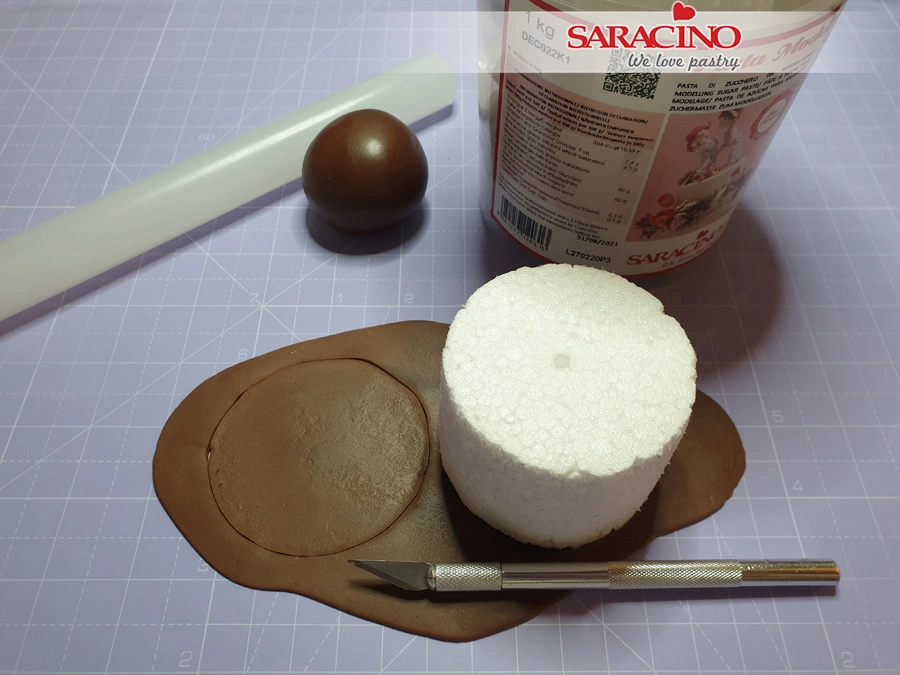
Roll out a piece of brown modelling paste and cut out 2 pieces to the shape of the top and bottom of your dummy. Fix them to the top and bottom.

Step 13

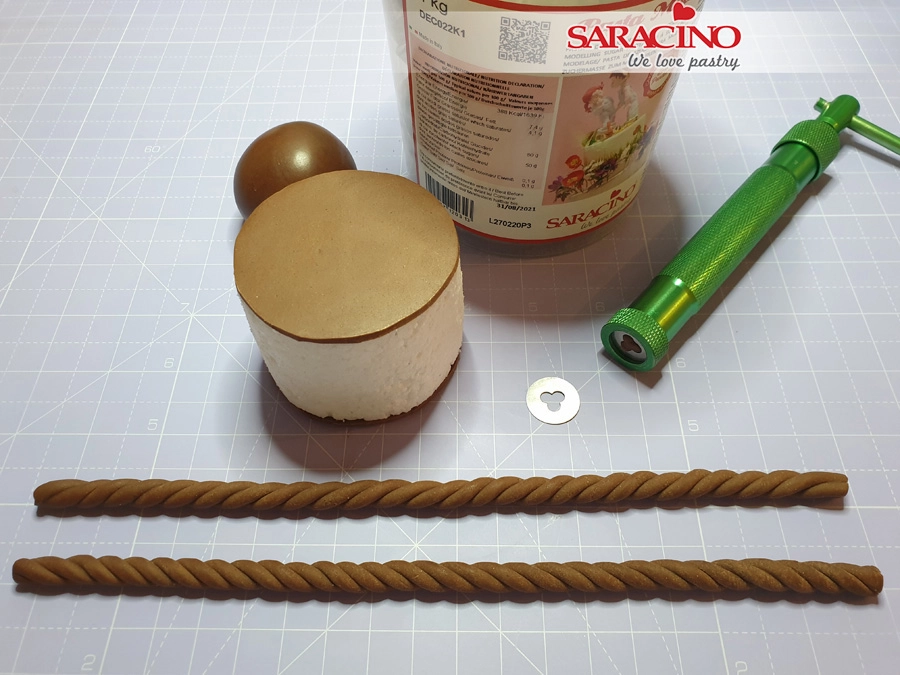
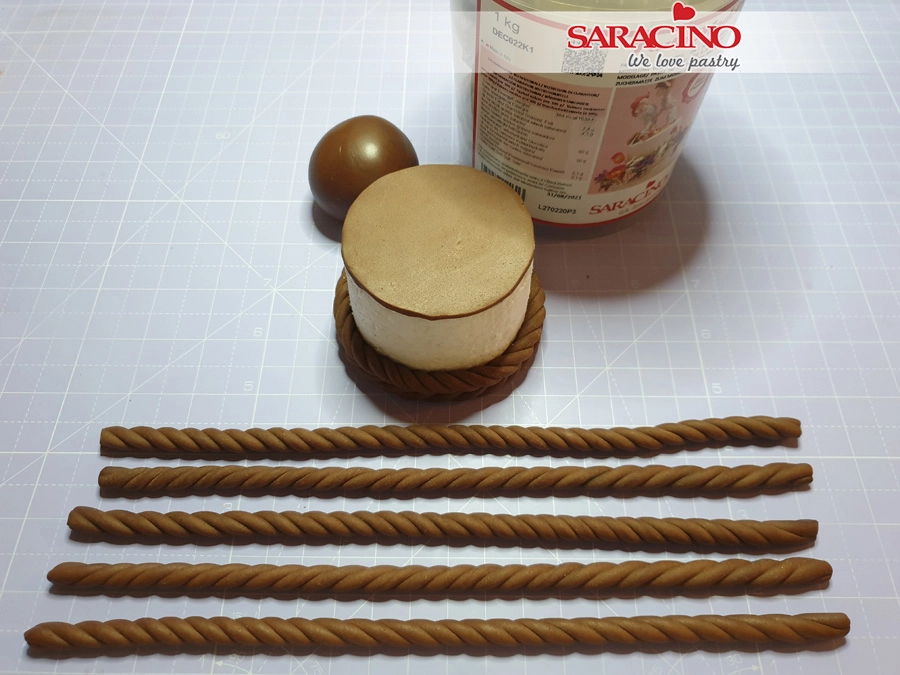
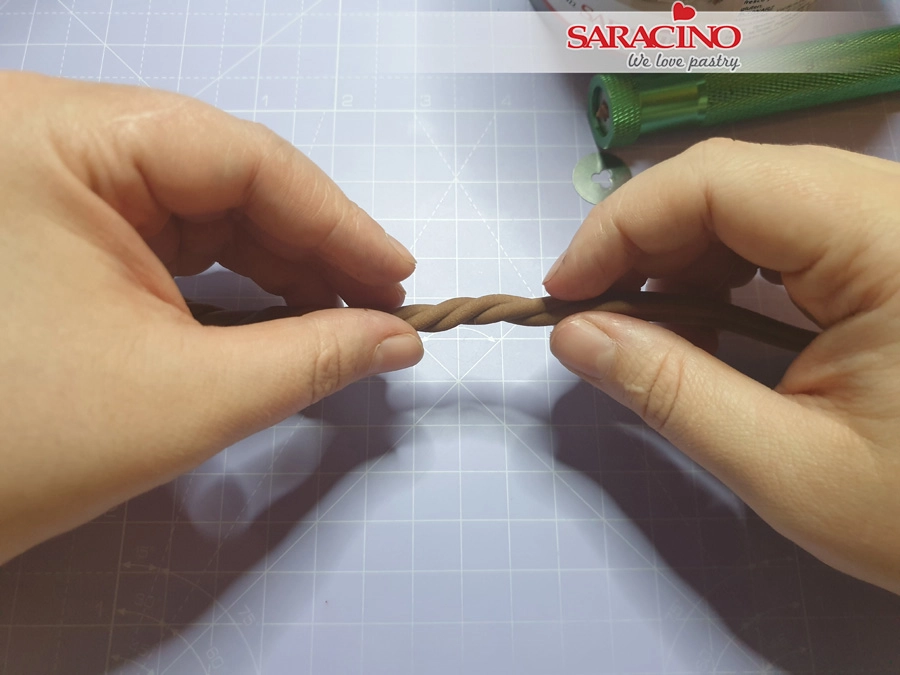
Fill the extruder with brown modelling paste and using the shape tip shown on the picture, extrude equal lengths to wrap around the side of your dummy. To achieve the rope pattern twist the extruded piece clockwise / counter-clockwise with both hands. Half of them should be in one direction and the other half in the opposite direction.

Step 14

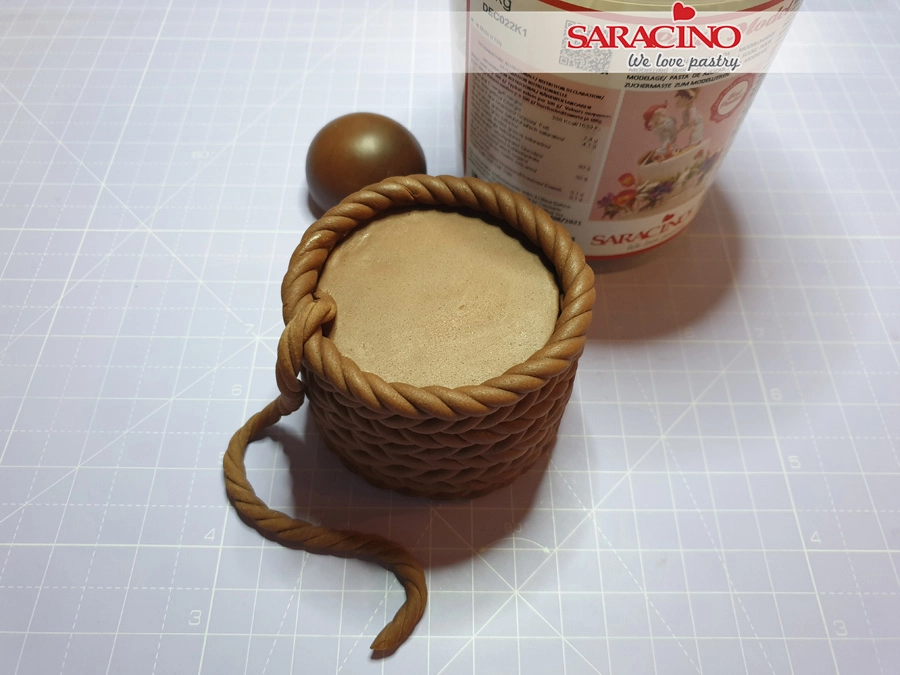
Start covering the whole side of the dummy by wrapping the rope around and fixing with a little water or edible glue if required.

Step 15

Fix one length of the rope to hang down the side of the basket.

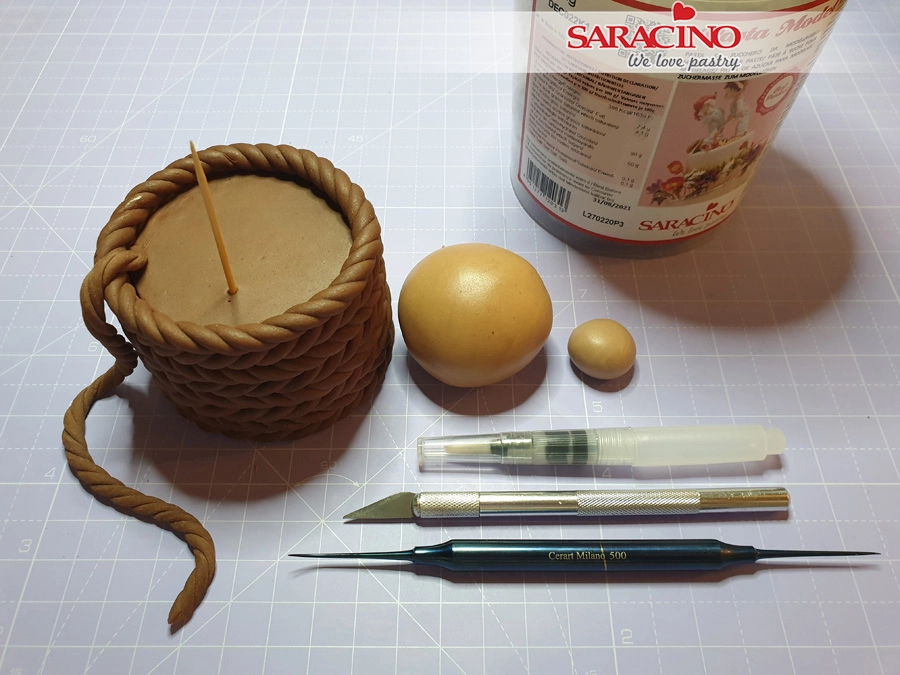
Step 16

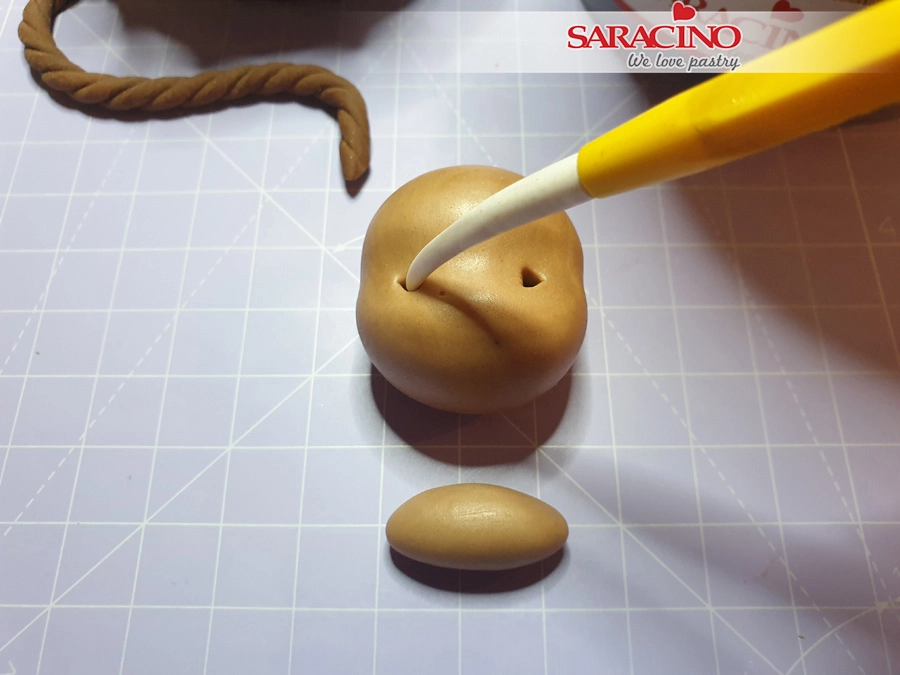
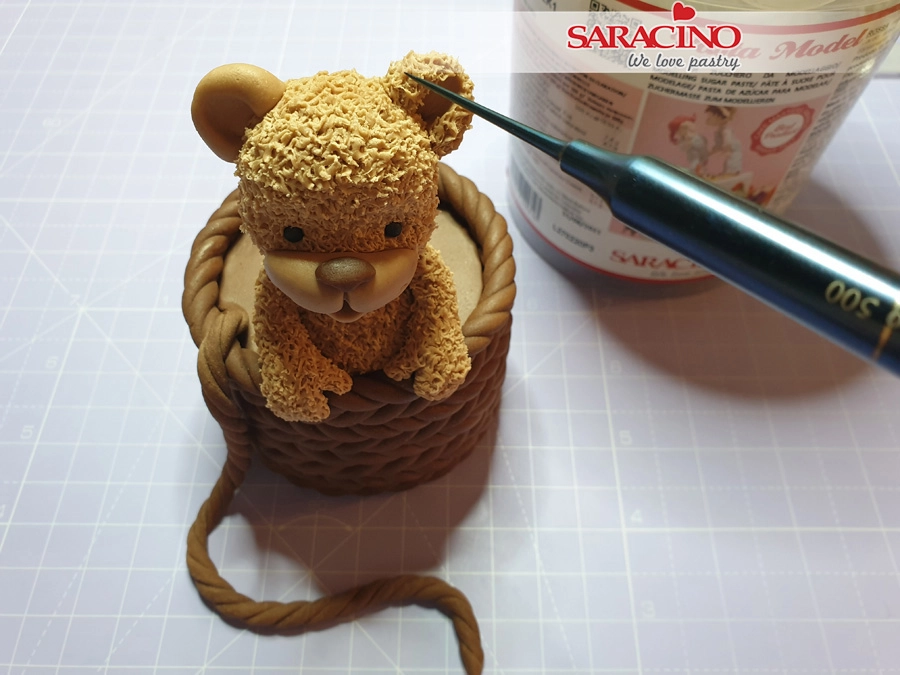
Insert a toothpick in the dummy as shown. Now for the bear mix brown and skin tone modelling paste to achieve a light brown colour. You will need the body to be slightly darker shade.

Step 17

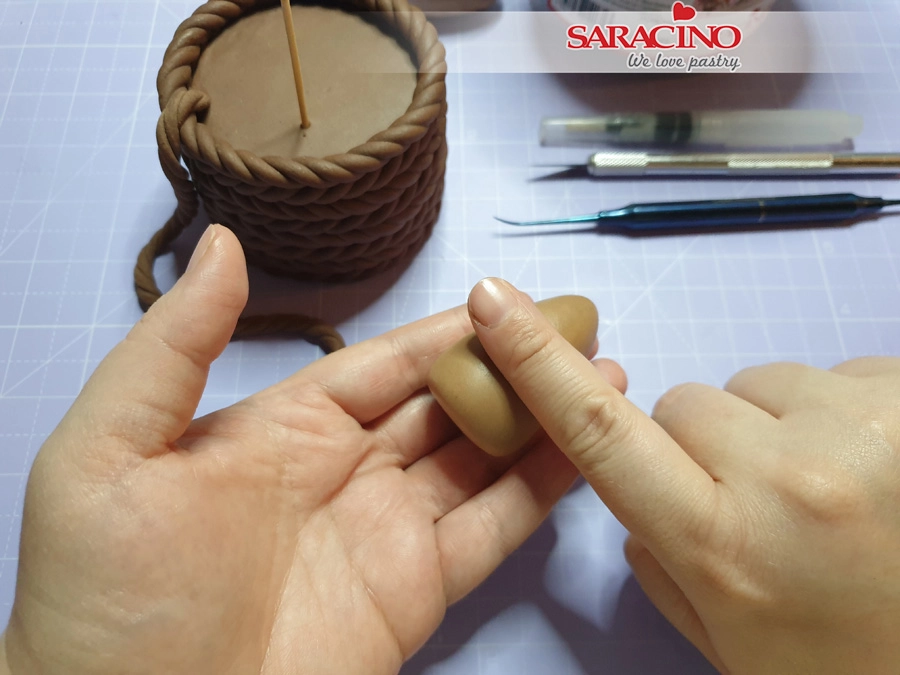
Take a piece from the darker shade and shape it to a teardrop / pear shape. With your index finger press to form the bears tummy.


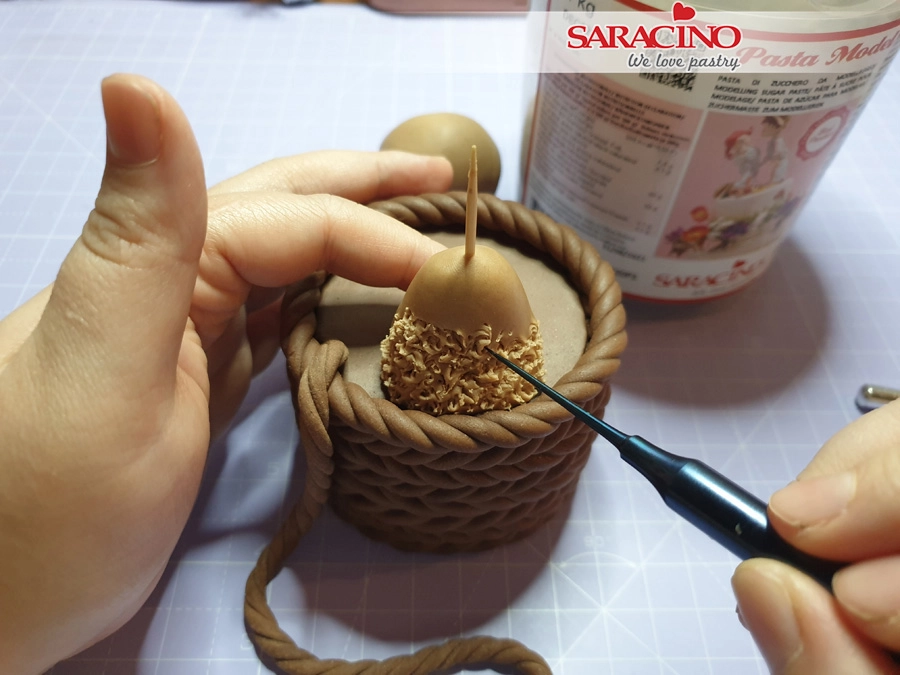
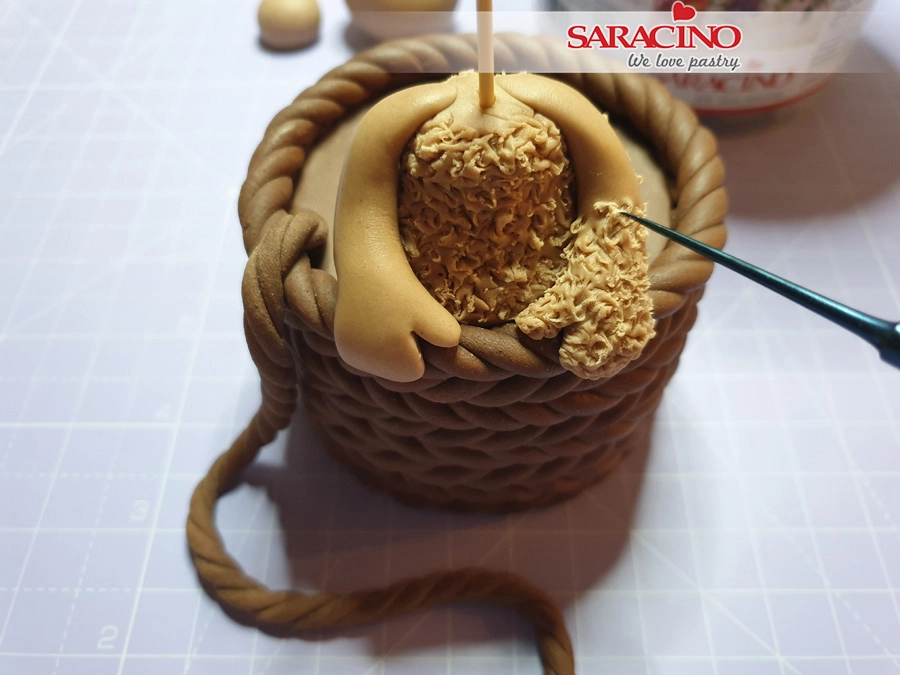
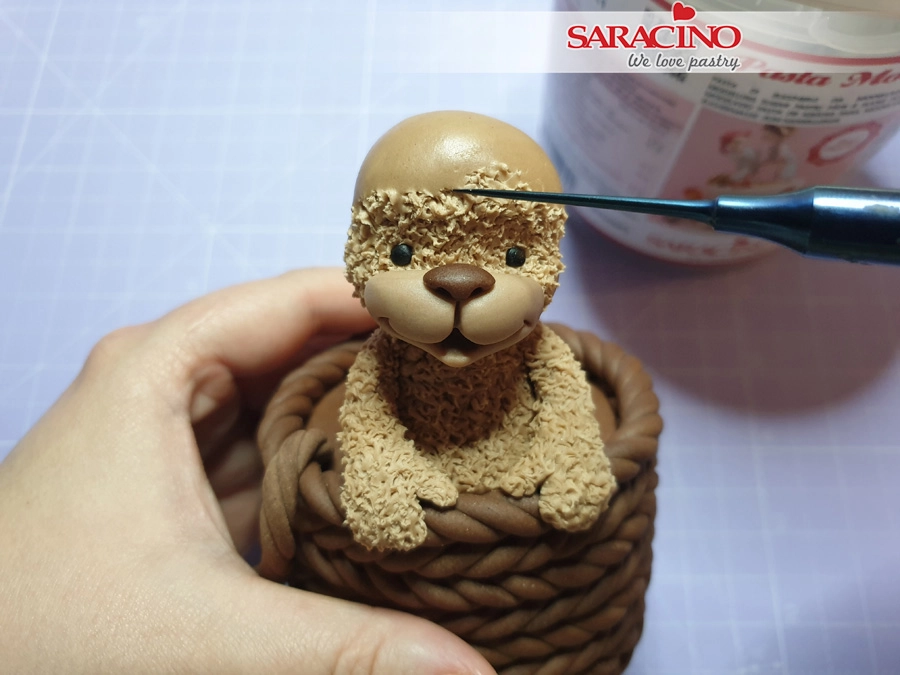
Step 18

Place the body of the bear over the toothpick. With a fine scriber needle add the texture by working and pushing in different directions.

Step 19

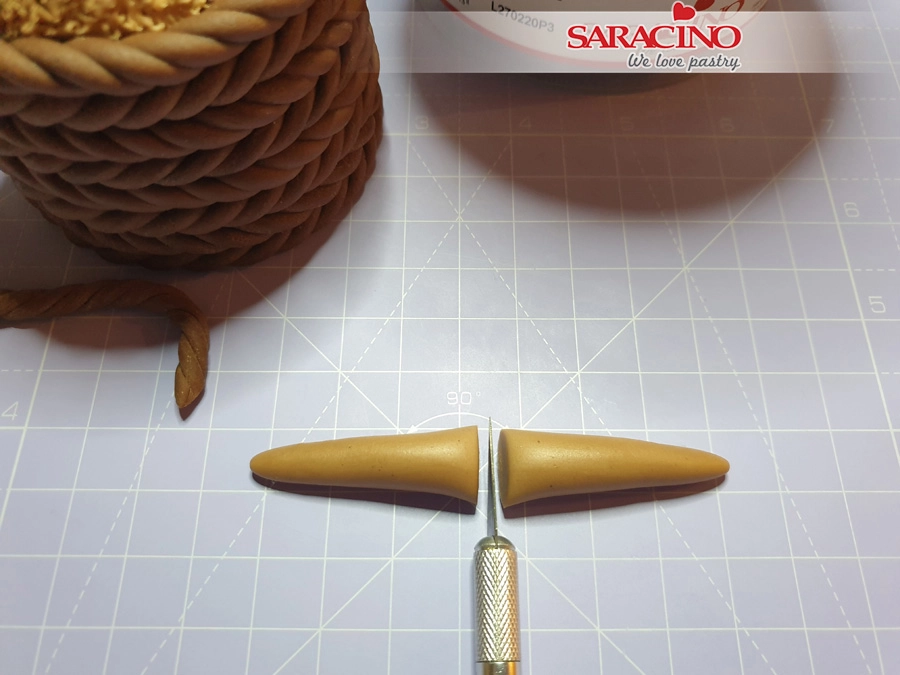
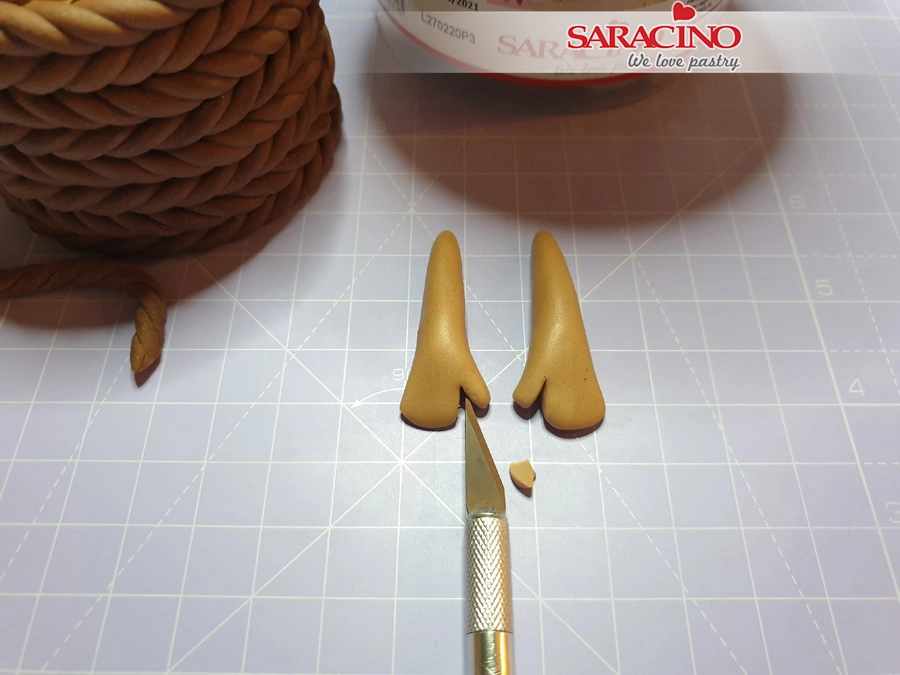
For the arms roll a sausage shape and cut it in two equal lengths.

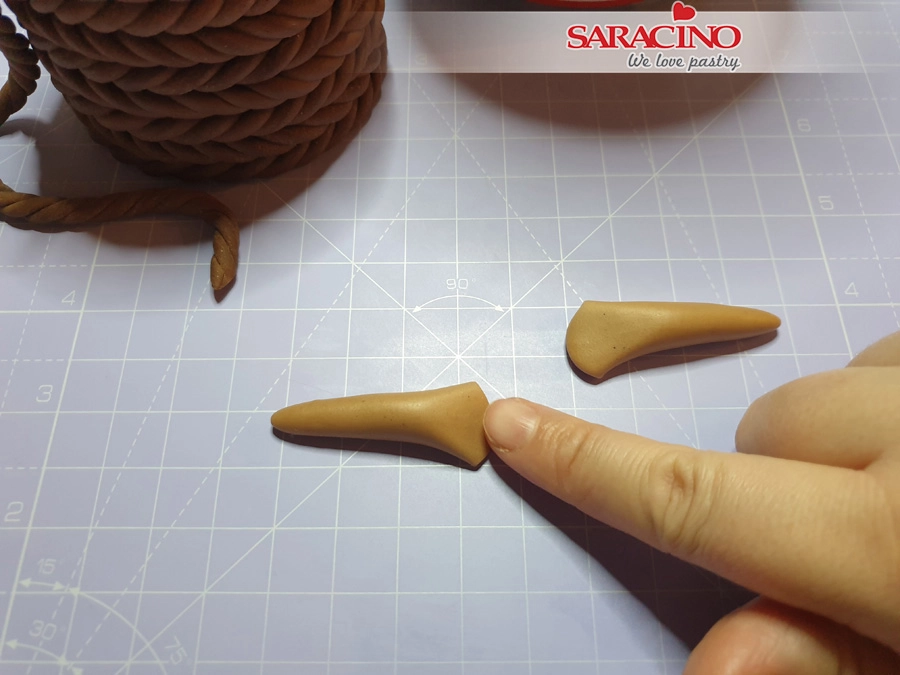
Step 20

Press it gently on the wider side.

Step 21

Cut a small triangle to form the thumbs.

Step 22

Attach the arms to the body and texture them as the body.

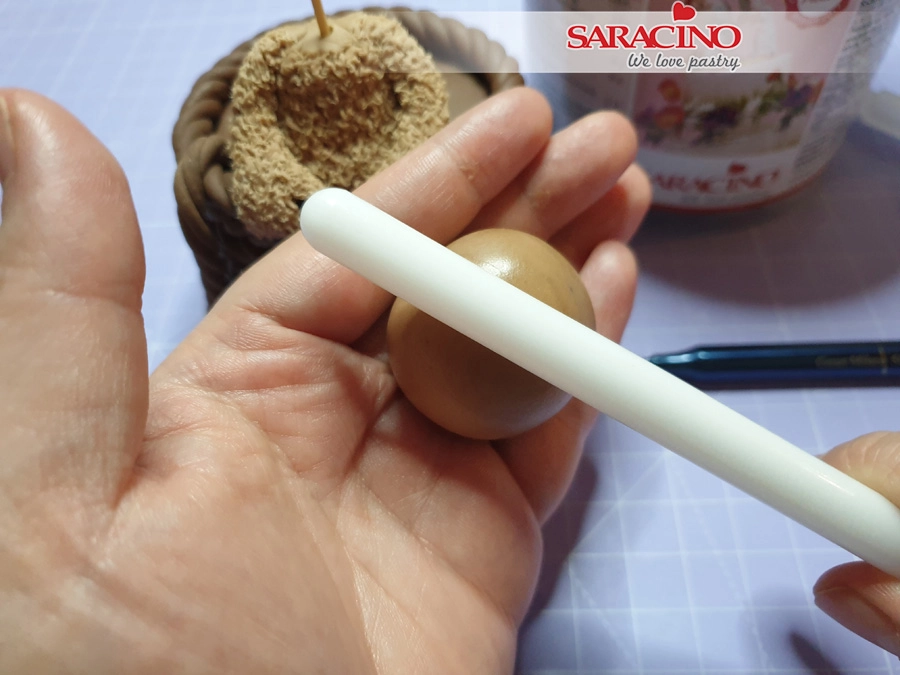
Step 23

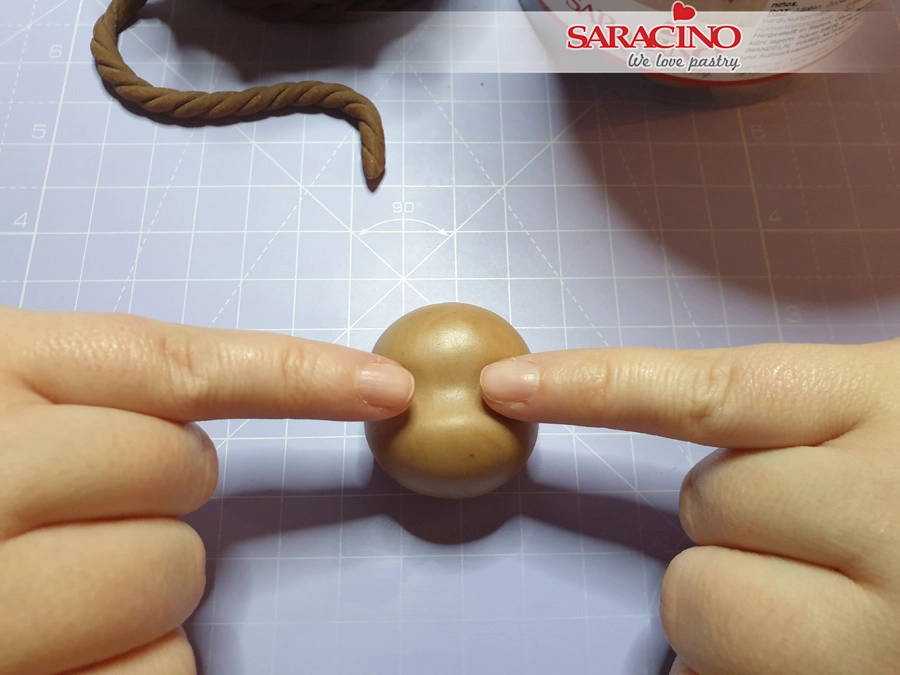
Using the lighter shade of brown roll a ball for the head and press gently in the centre with a small rolling pin.

Step 24

Use your fingers to press lightly to form the eye sockets.

Step 25

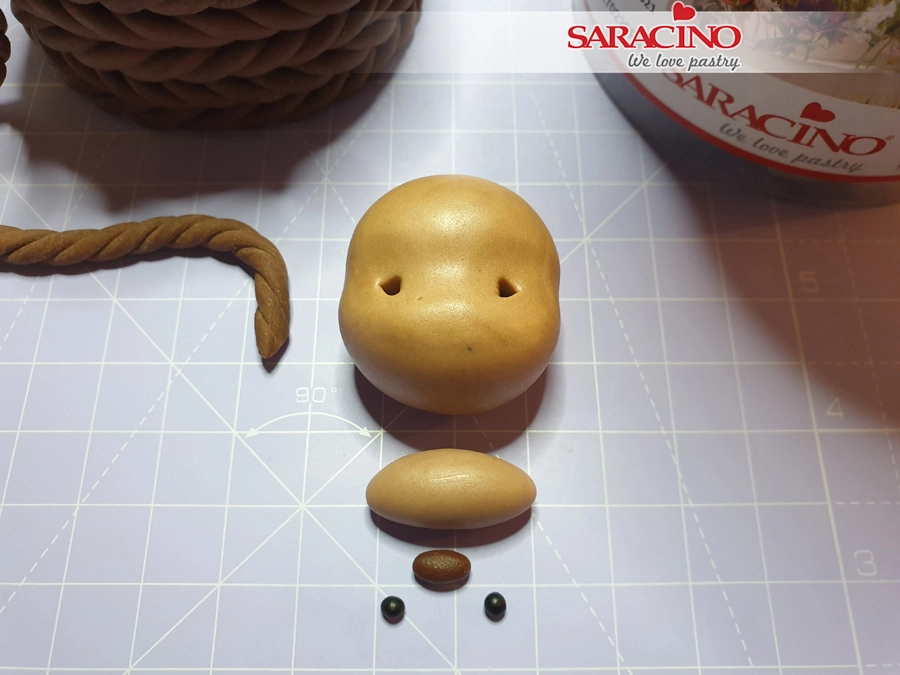
For the eyes make small holes with the Dresden tool.

Step 26

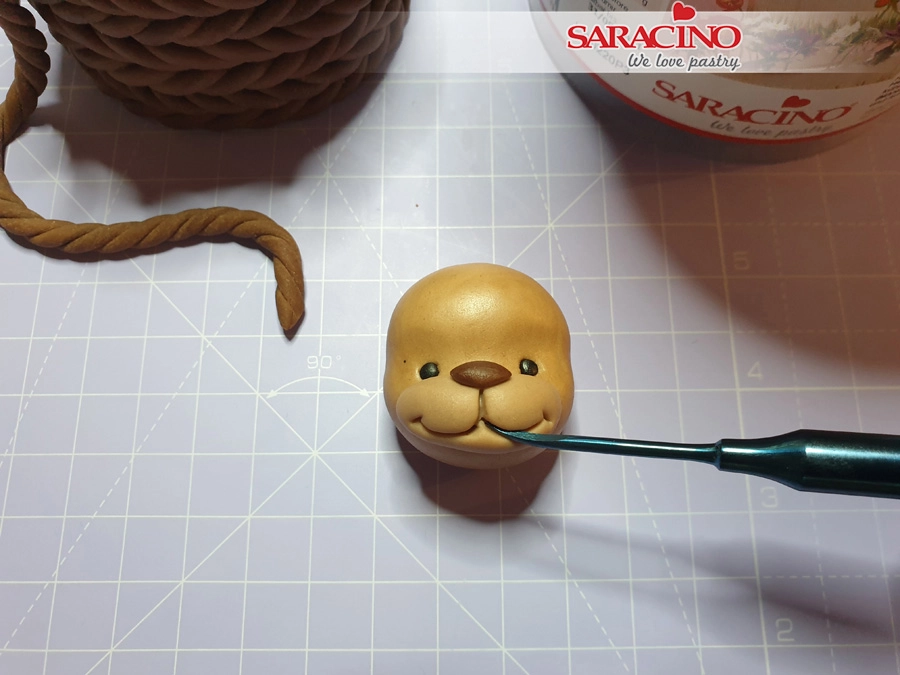
Using a small piece of the lighter brown roll for the snout shape, roll another smaller piece for the nose and two small balls of black for the eyes.

Step 27

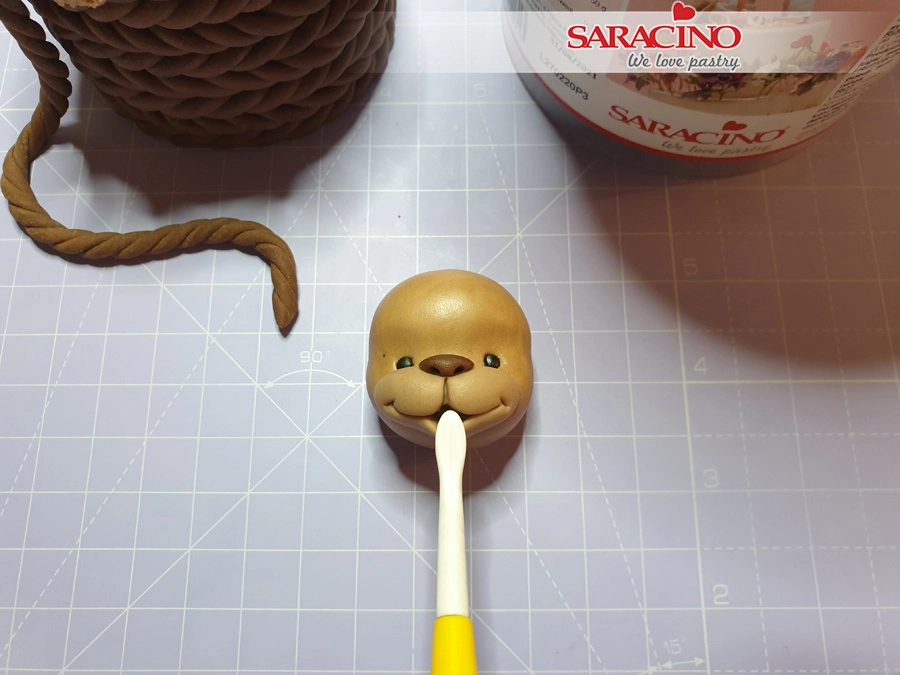
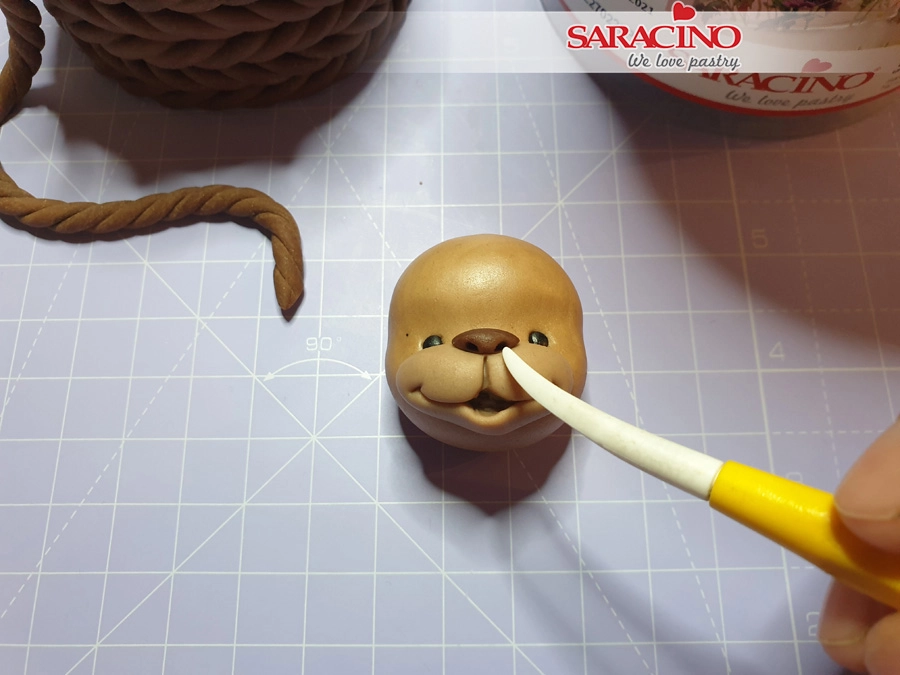
Fix the snout, nose and eyes as shown. With the Dresden tool form the mouth.

Step 28

Using the Dresden tool open the bear’s mouth.


Step 29

Use the Dresden tool to form the nostrils.


Step 30

Attach the head to the body and texturise as with the body and arms.


Step 31

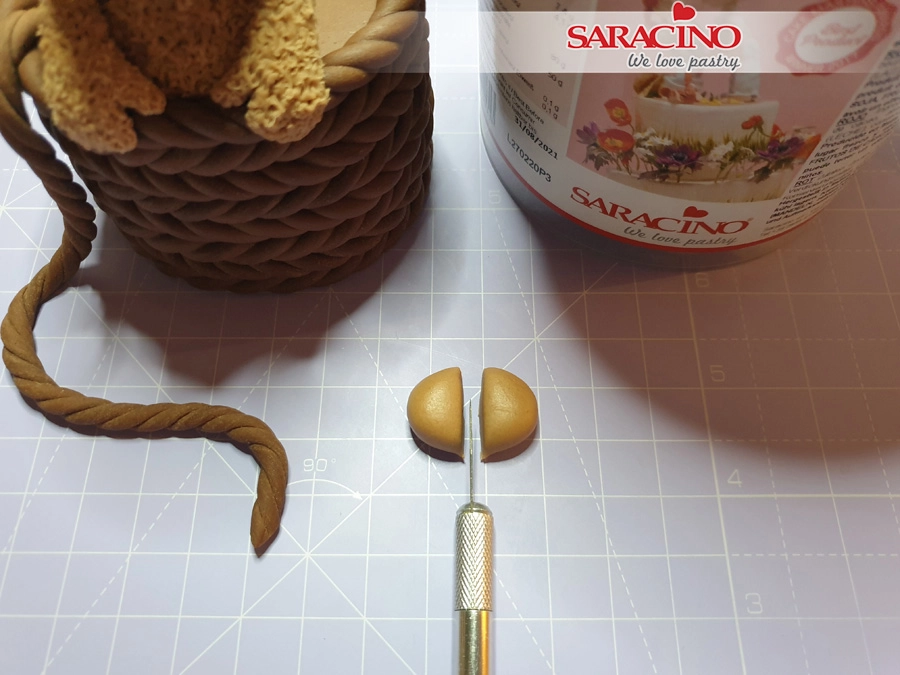
Take a small piece of brown paste and roll a ball, cut in half.


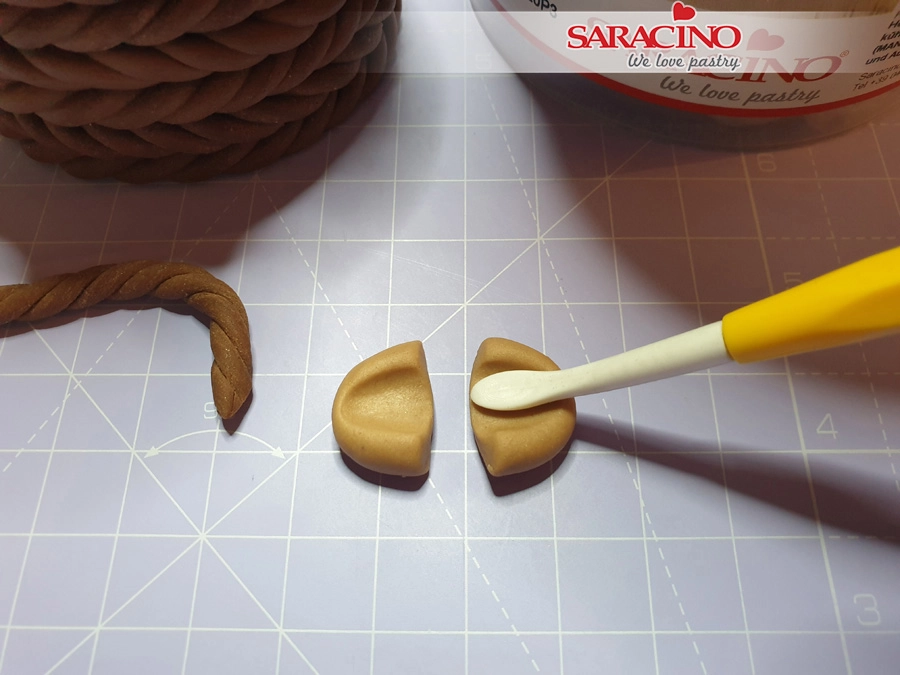
Step 32

Form the ears with the Dresden tool and attach them to the head.


Step 33

Texture them like the rest of the bear.


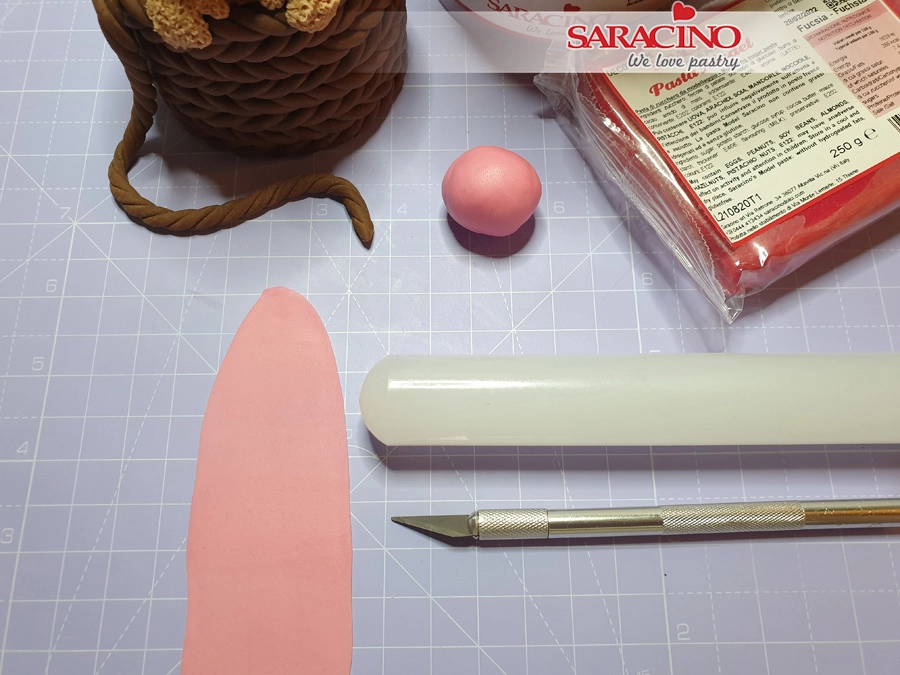
Step 34

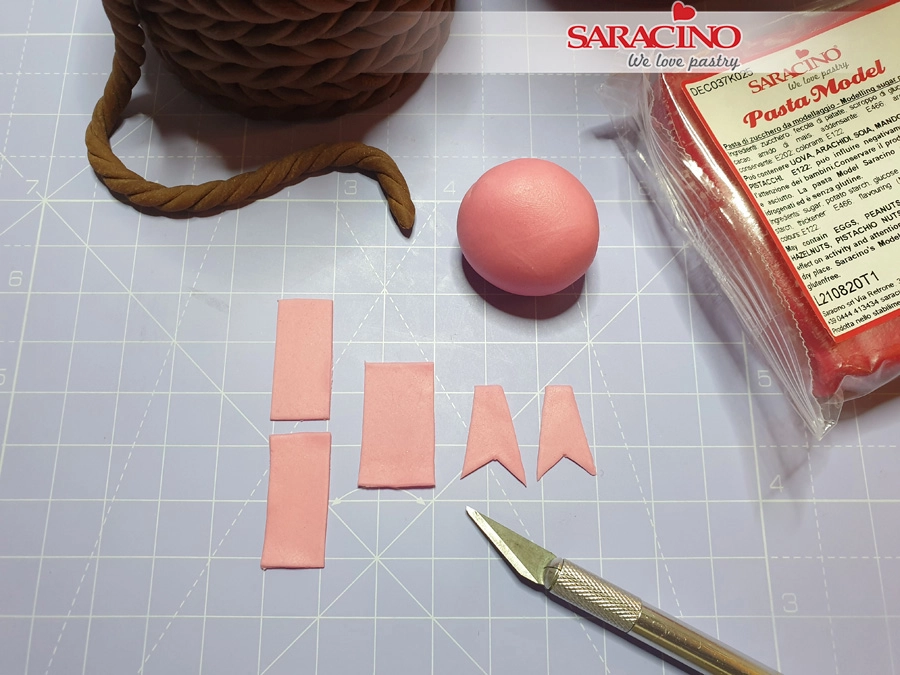
For the bow and flags combine pink and fuchsia modelling paste. Roll some of it thinly.


Step 35

For the bow cut the pieces with a scalpel.


Step 36

Fold the parts of the bow as shown. 


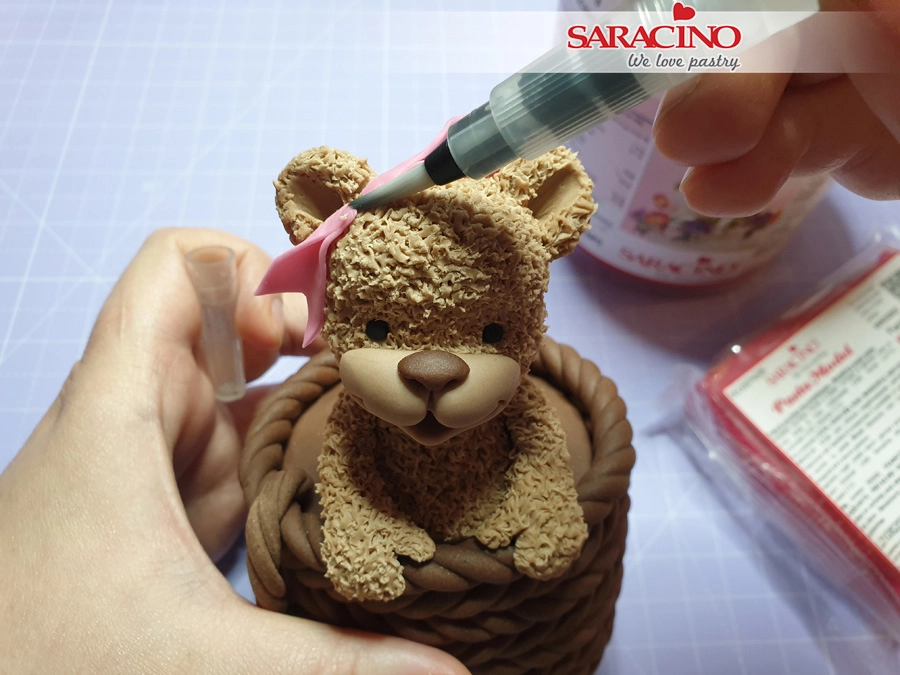
Step 37

Attach the bow to the bears head using a water pen if required.


Step 38

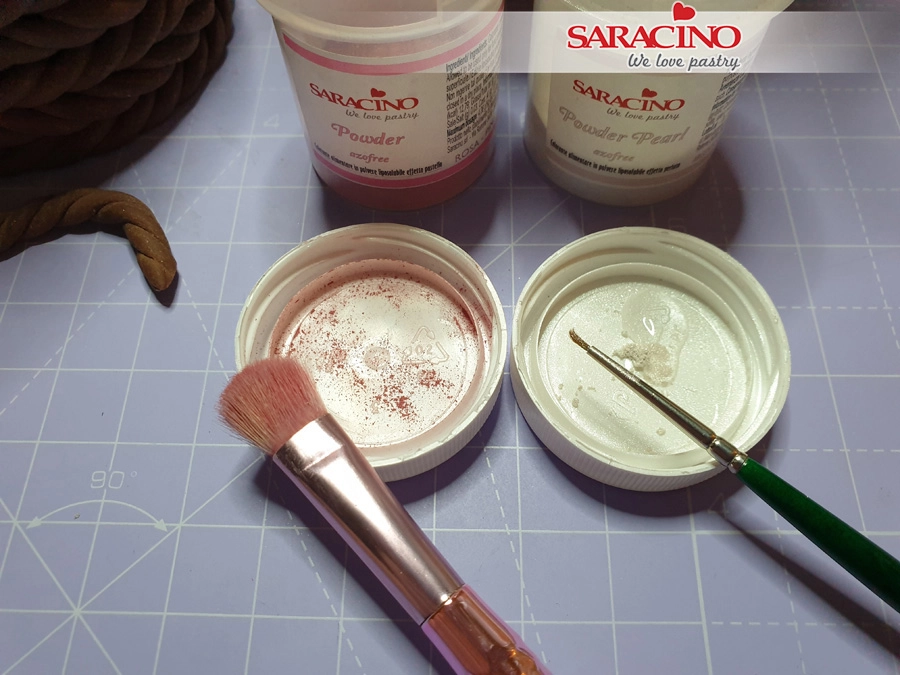
Now prepare white paint by mixing the white powder with clear alcohol. Also prepare pink powder dust and a soft brush.


Step 39

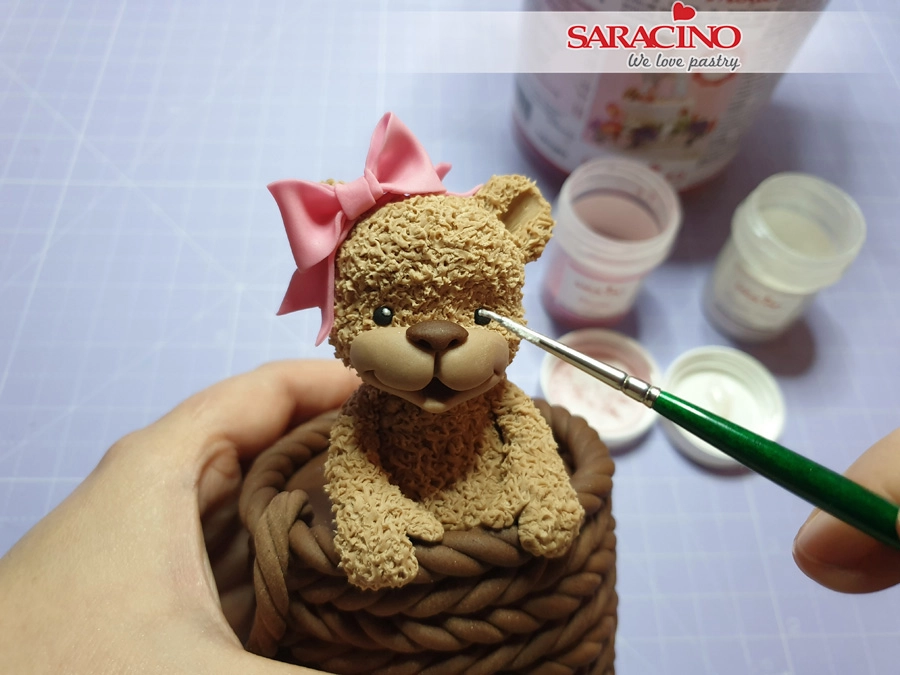
Using your fine artists brush use the white paint to apply a tiny dot into each eye.


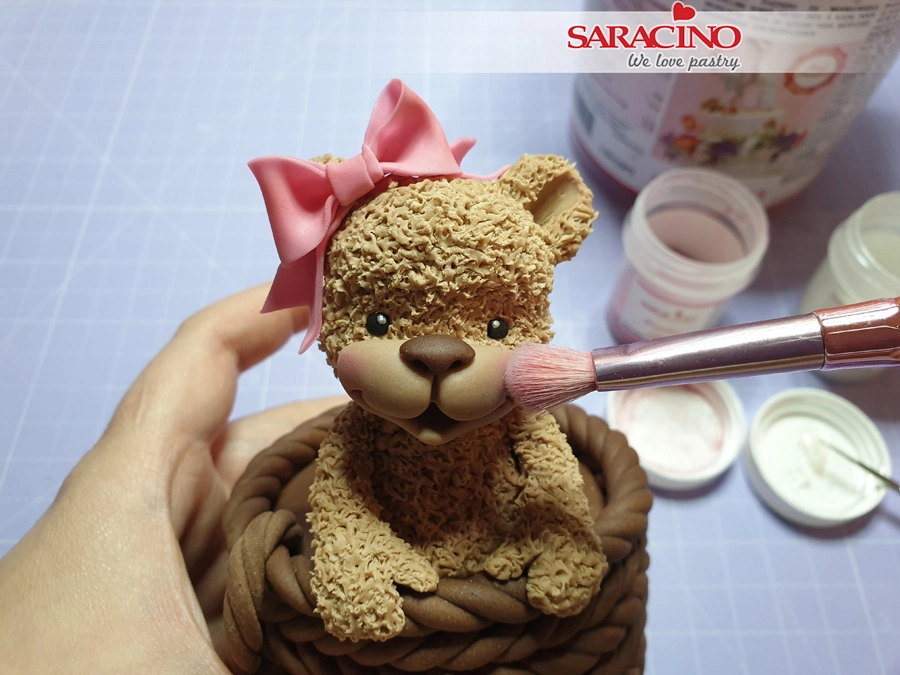
Step 40

Use a soft brush and the pink powder to lightly dust the cheeks.


Step 41

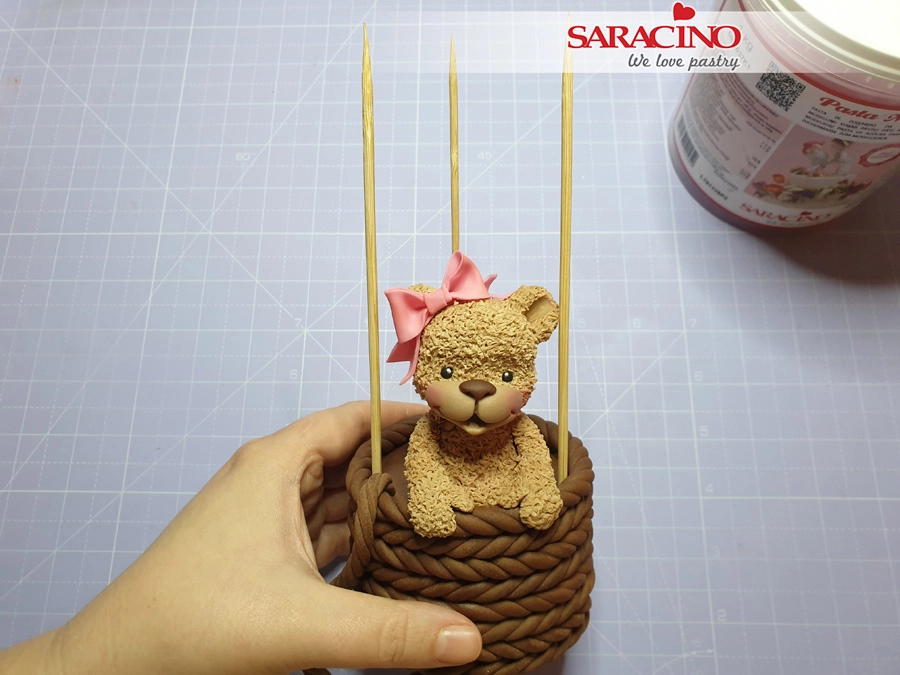
Cut 3 equal lengths of wooden skewer. Insert the skewers into the top of the basket with the sharp edge pointing upwards.


Step 42

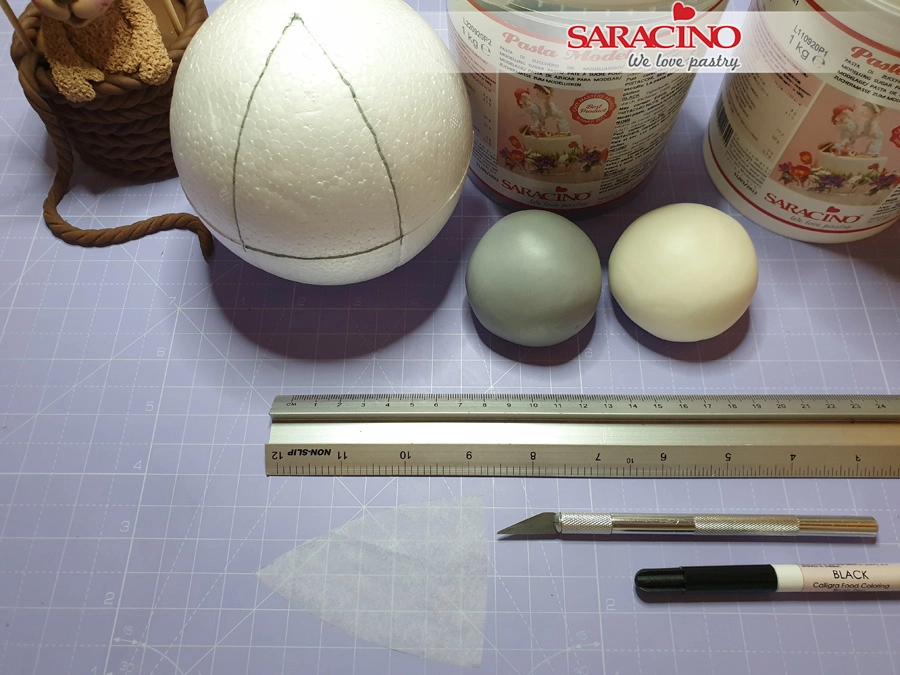
Measure the circumference of the polysterene ball and divide by 6. Take the measurement from the widest part of the ball to the top. Make a template to the shape shown. Mix a grey modelling paste by combining white and black paste.


Step 43

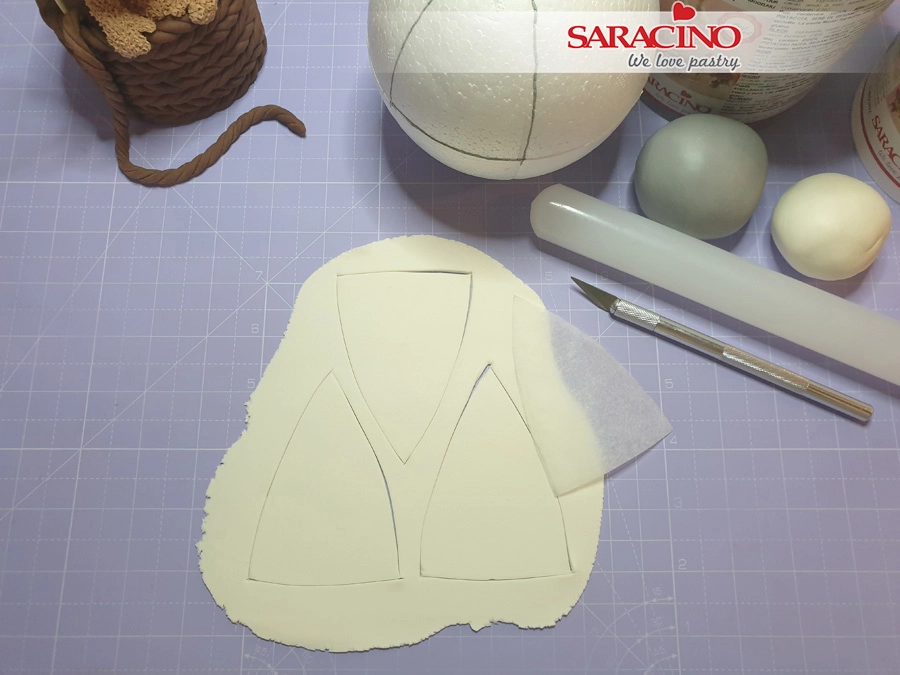
Roll out white modelling paste and cut 6 pieces using the template (three for the top and three for the bottom). Repeat with the grey paste.


Step 44

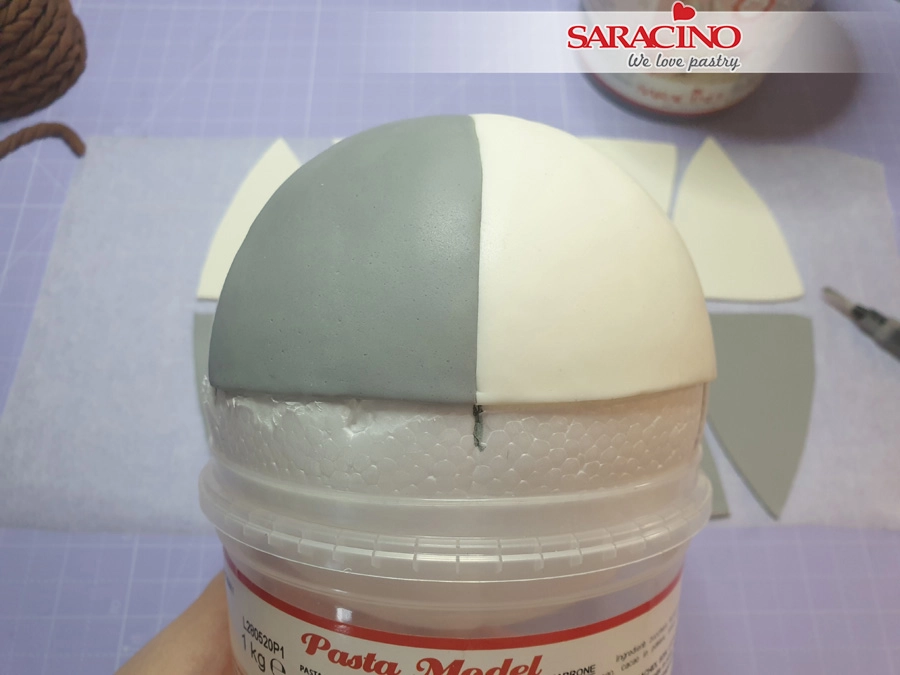
Fix the cut out pieces of paste to the ball. You may need a little water or edible glue.

TIP – You may find it easier to rest your ball dummy in the top of tub like I have.


Step 45

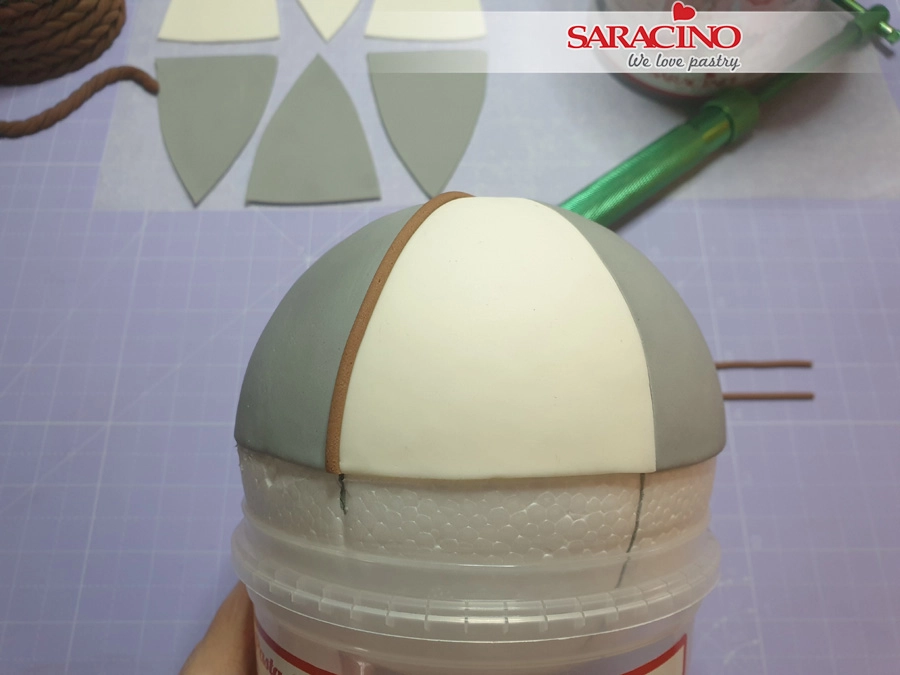
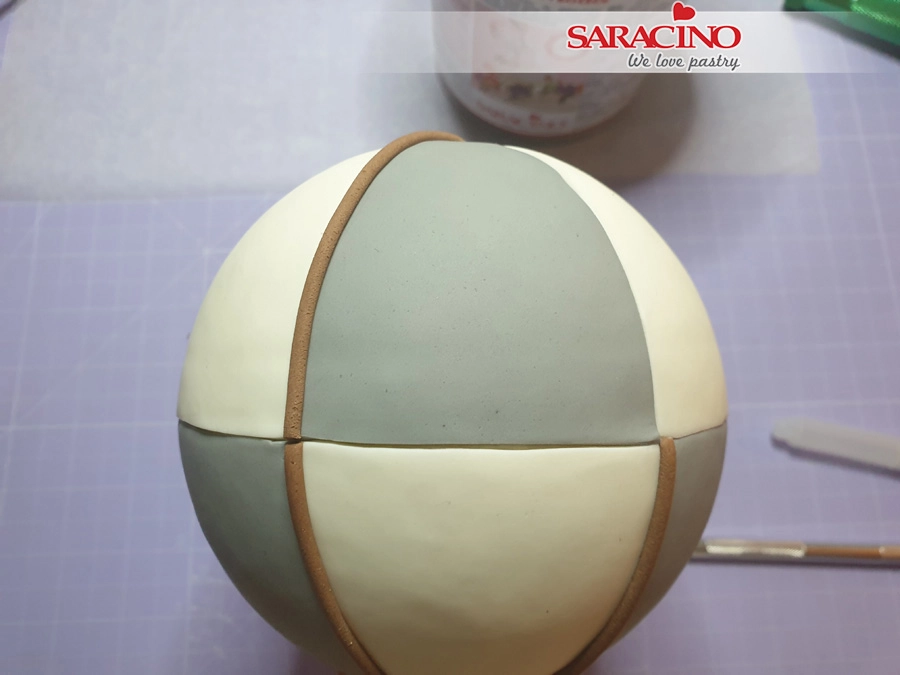
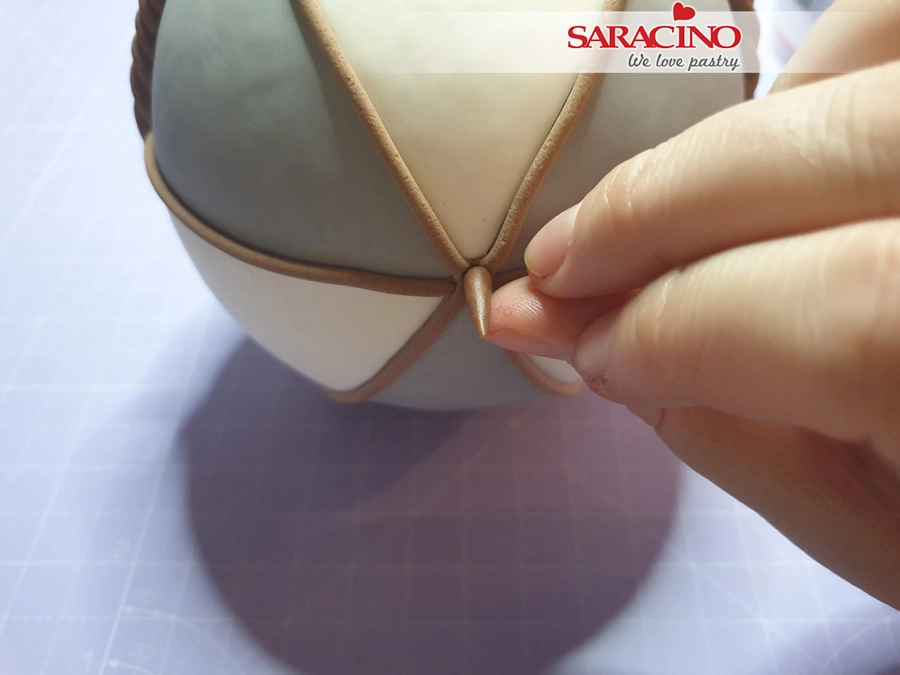
Measure the half circumference of the ball. With the small circle tip of the extruder make 6 laces of that length. You will need 3 lengths for the top half and three for the bottom. Attach them with water over the joints between the grey and white panels.


Step 46

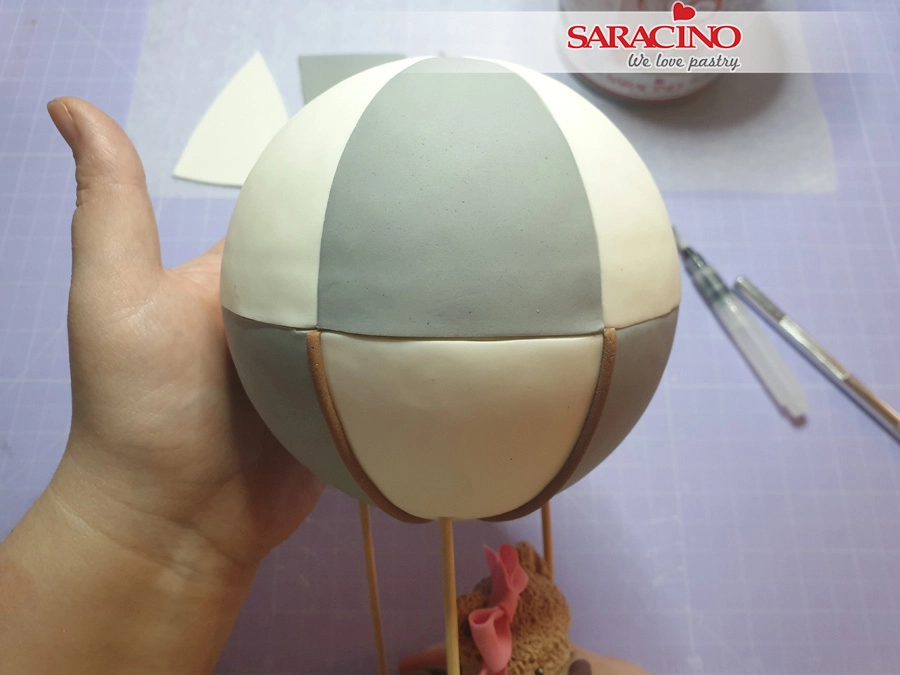
Turn the ball over and fix it on the sharp end of the skewers. Fix the remaining panels onto the balloon using an alternating pattern.


Step 47

Attach the remaining laces the same way.


Step 48

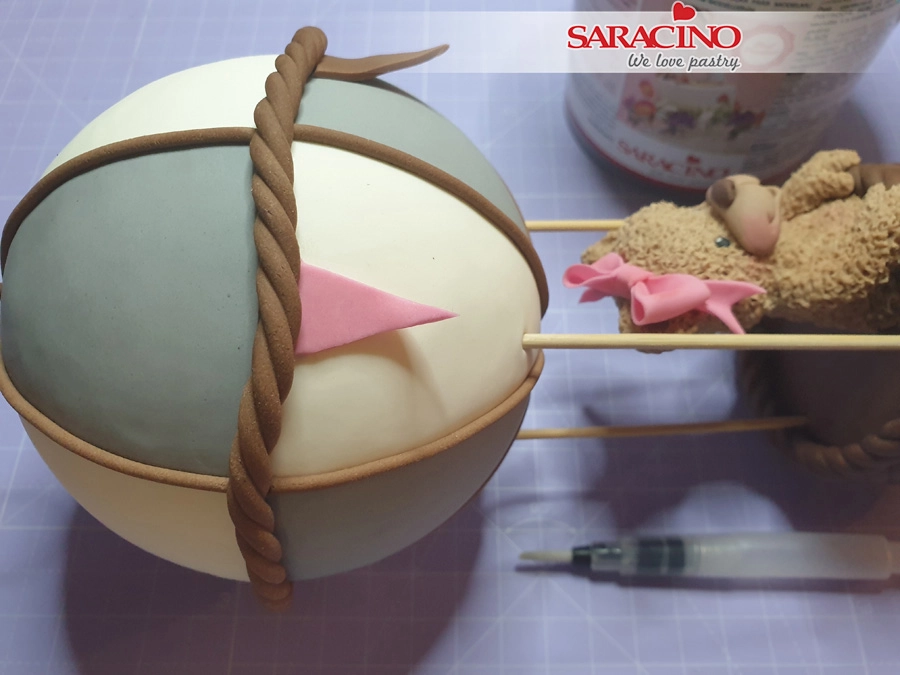
Make a brown rope with the extruder.


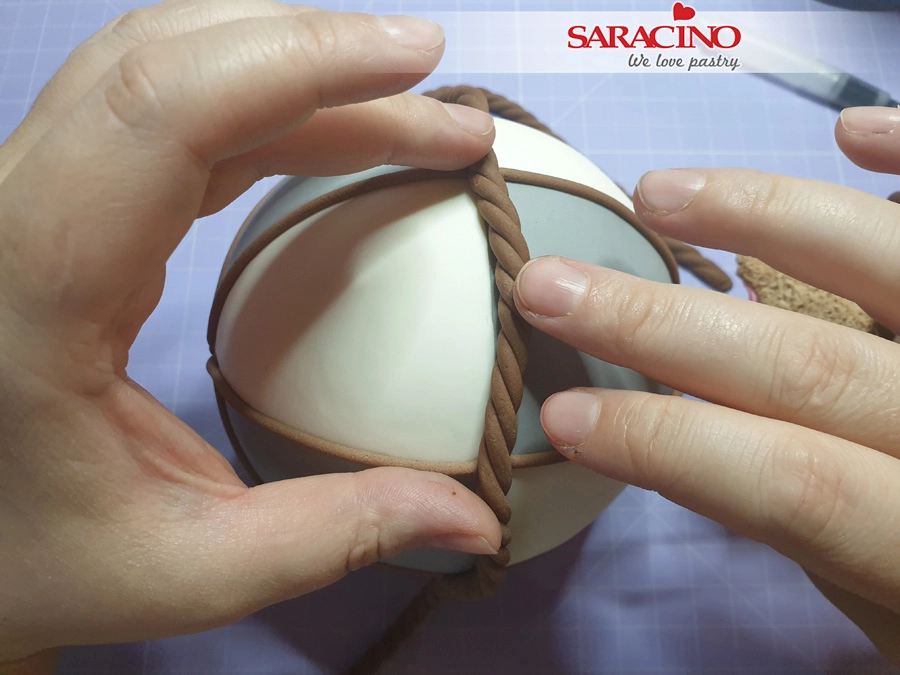
Step 49

Fix the rope around the centre of the balloon over the joint. Use a little water if required. Pull the rope down slightly at the centre of each panel so it looks like it is hanging naturally.


Step 50

Roll a small spike, and fix it on the top of the balloon.


Step 51

Roll out a small amount of brown and pink modelling paste, cut out triangles for the flags. Fix them under the rope in the centre of each panel.


Step 52

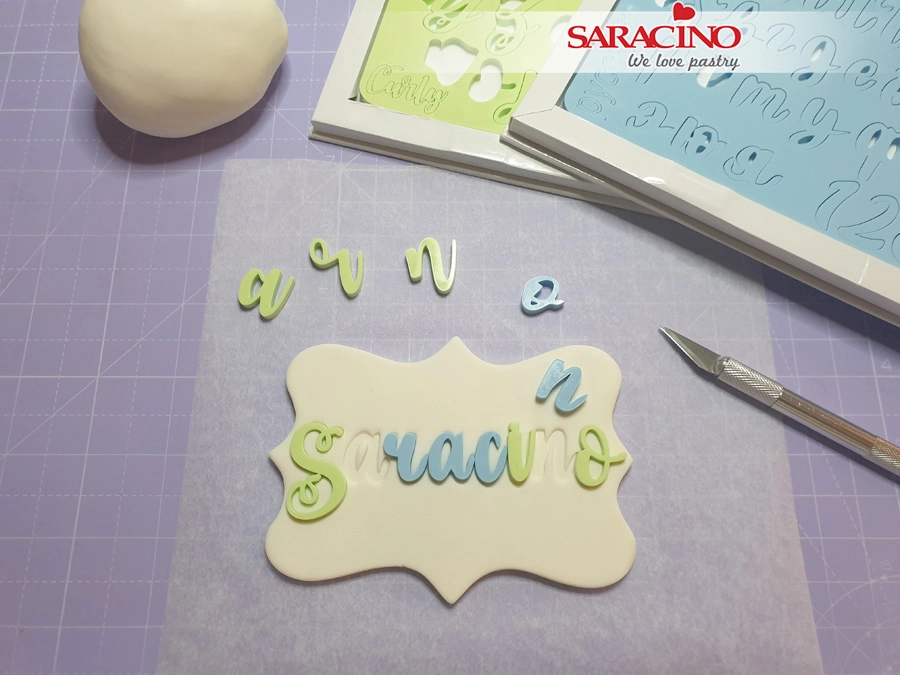
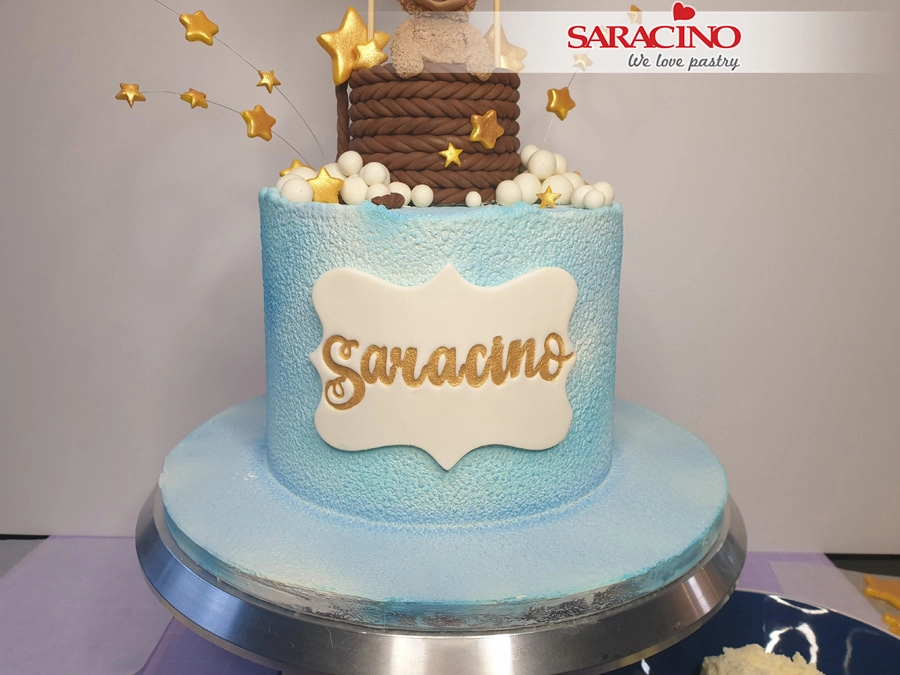
Roll out white modelling paste and cut the plaque for the inscription using your cutter. Using the embosser stamps press the message you would like on your cake.


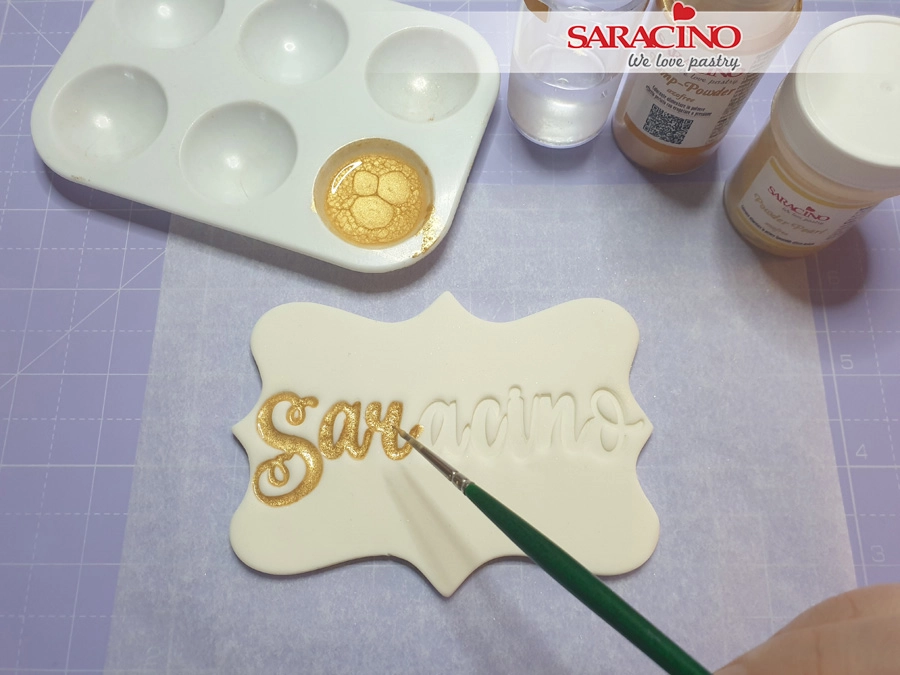
Step 53

Mix together the pump powder gold and light gold powder with clear alcohol. Paint the inscription with a fine brush as shown.


Step 54

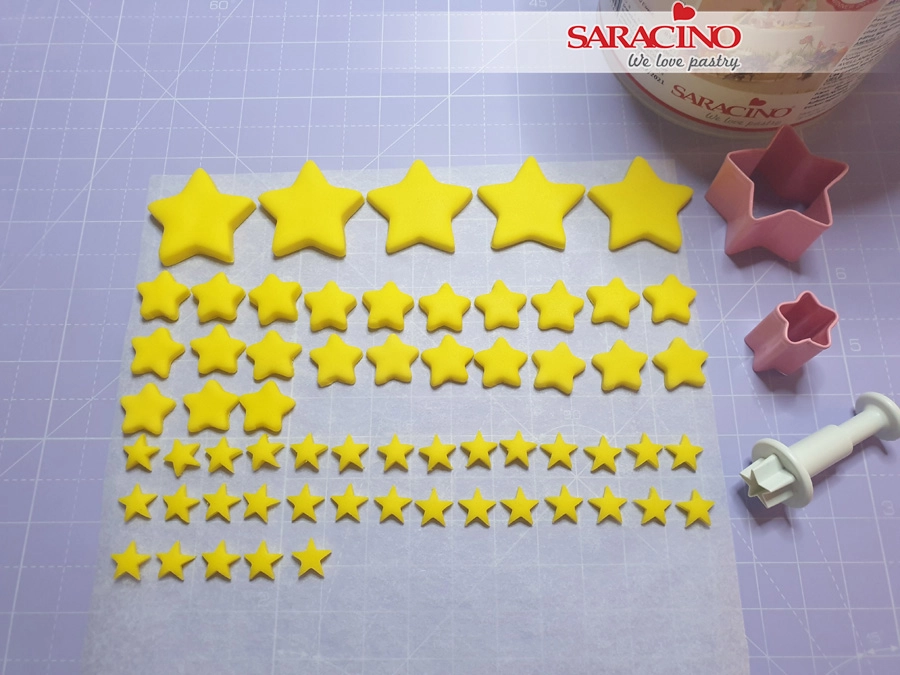
Roll out yellow modelling paste and cut out three different sizes of stars.  

Step 55

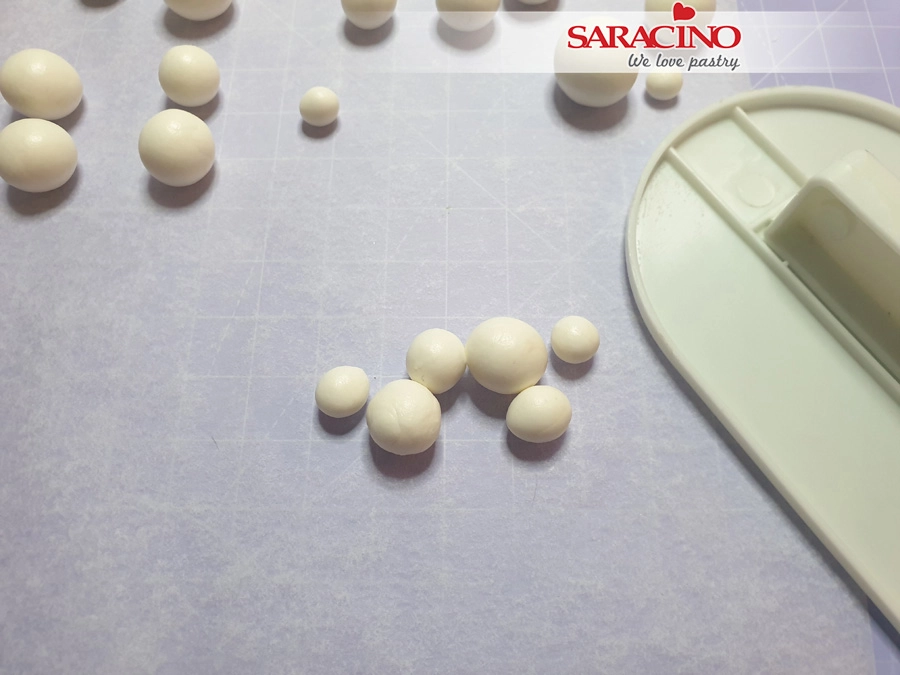
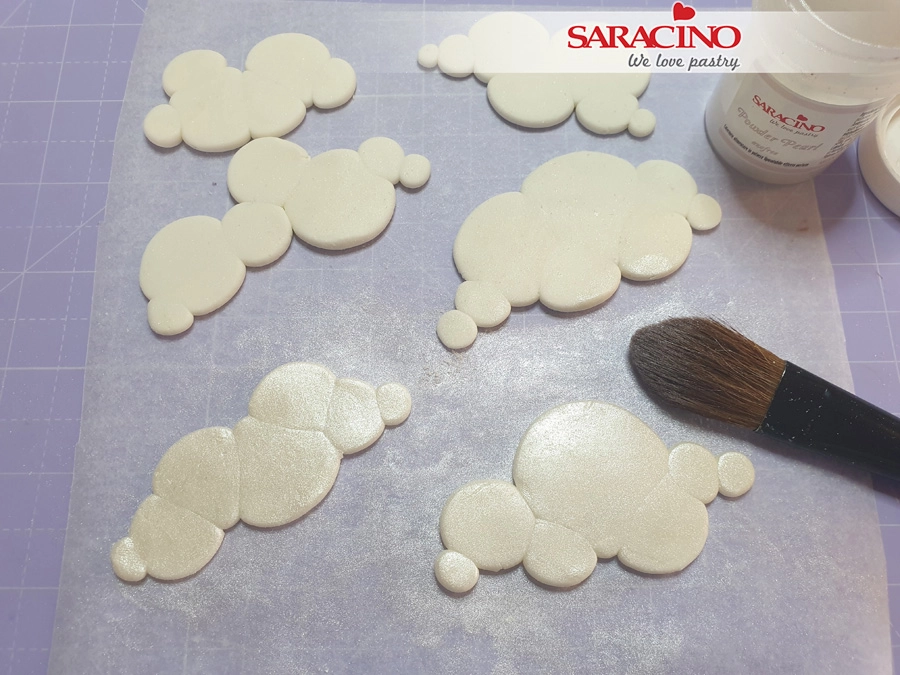
Roll differently sized white modelling paste balls. Group a few of them together to form a cloud shape leaving a little bit space between each ball. Don’t use them all at this stage.


Step 56

Press them down firmly using a fondant smoother. Dust them with silver lustre powder and a soft brush.


Step 57

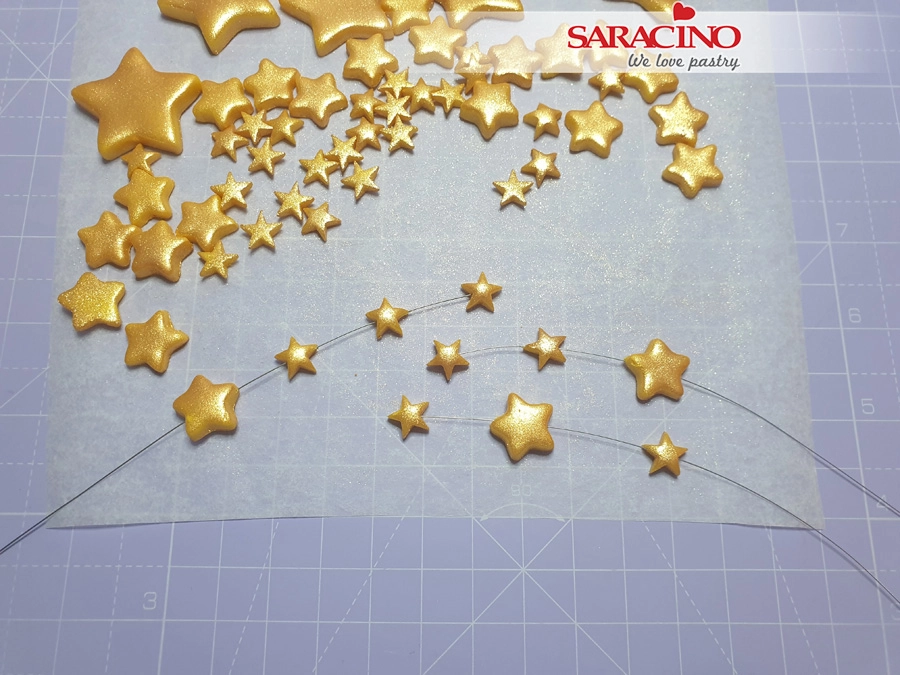
Using the same brush dust the stars with pump powder gold. Thread the medium and small sized stars onto the 32 gauge florist wire, and press them gently with the palm of your hand to secure them in place.


Step 58

Measure the height of the cake with the wooden dowel. Cut it to length so it is 4cm longer than the cake height. Insert the dowel into the cake and spread some buttercream around it, ready for attaching the balloon.


Step 59

Attach the balloon by pressing gently, so the dowel can pierce the dummy.


Step 60

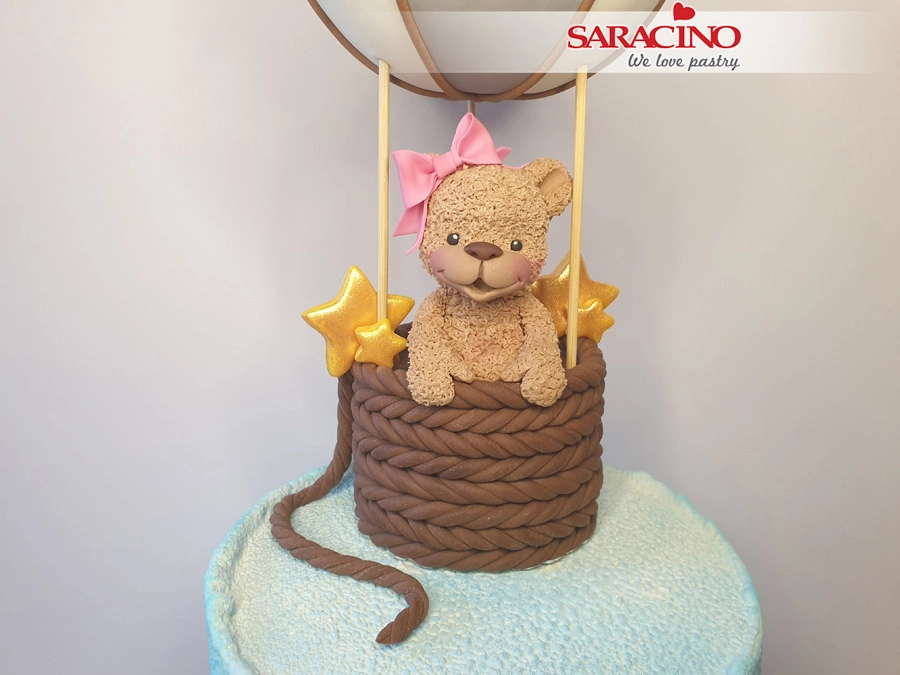
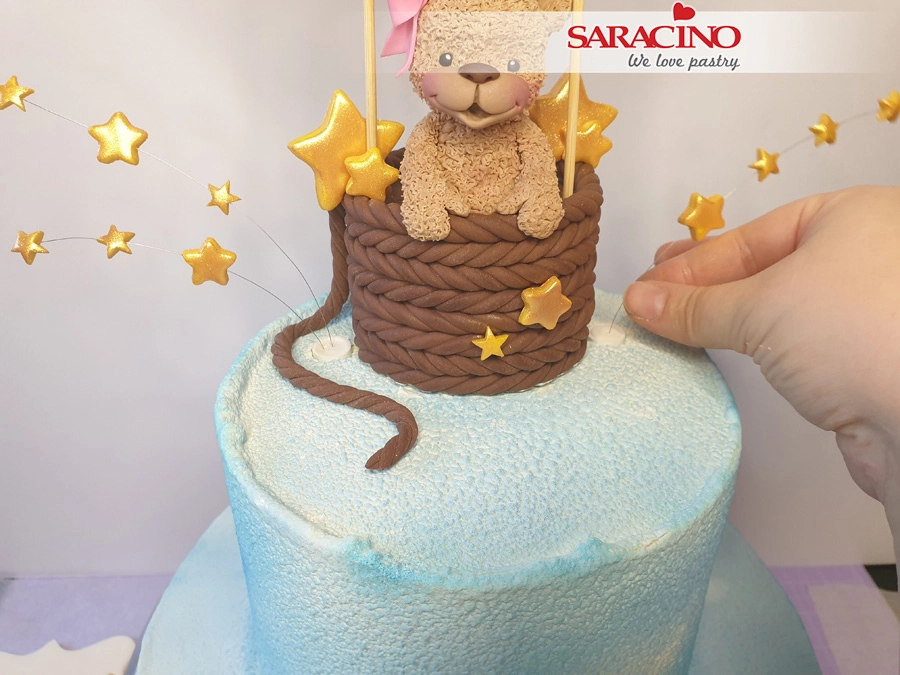
Attach two of the largest size, and two middle sized stars to the balloons basket either side of the bear. Use a little water if required.


Step 61

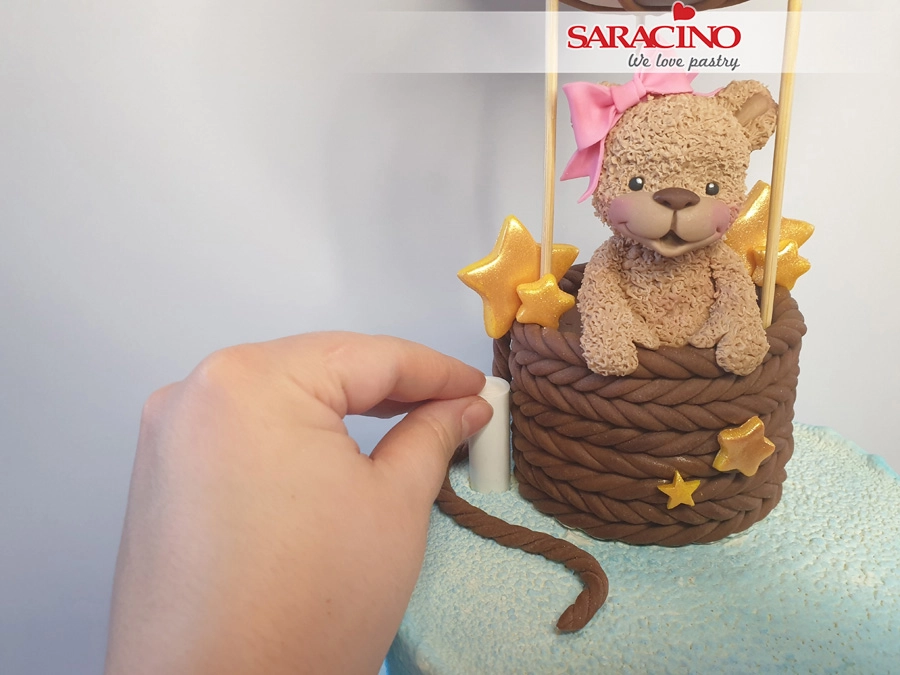
Insert two posy picks filled with white modelling paste either side of the balloon.


Step 62

Insert the wired stars into each. Two in one and one in the other.


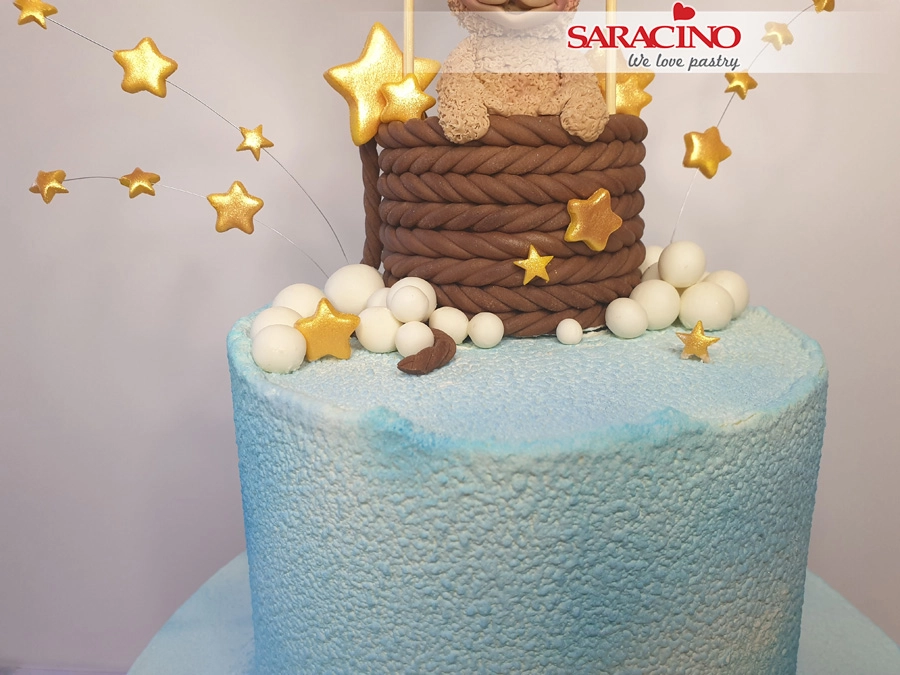
Step 63

Fix the remaining white balls around the base of the wires to cover them and appear like clouds. Add some stars where you would like. Repeat for the back of the cake.

Step 64

Apply a small amount of buttercream to the back of the plaque. Attach it to the front of the cake.

TIP – You can insert cocktail sticks to support the plaque until it is dry and fixed otherwise it may slide. Then remove the sticks.


Step 65

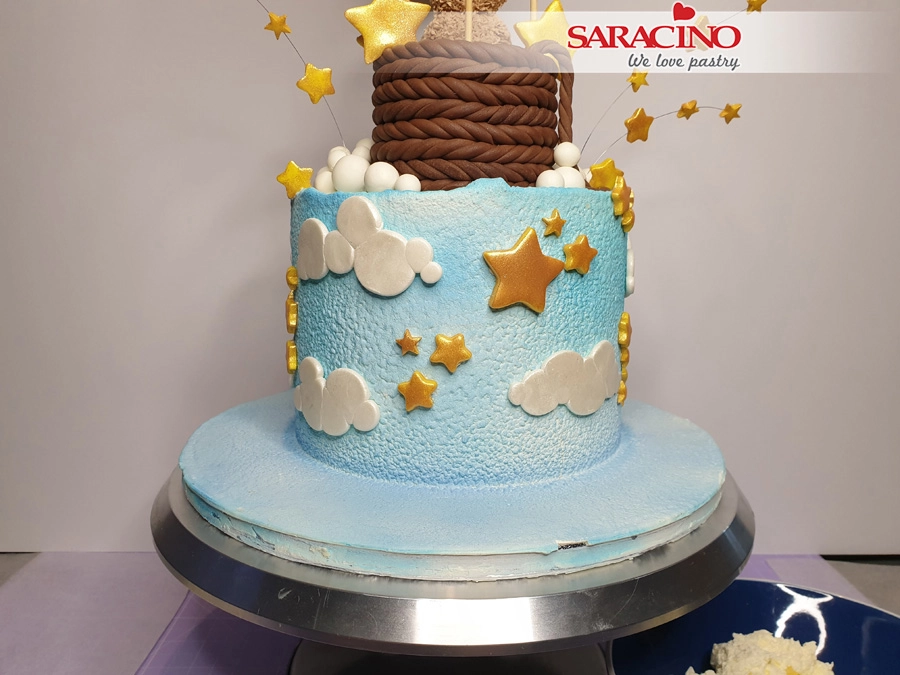
Attach the stars and the clouds using buttercream. 


Step 66

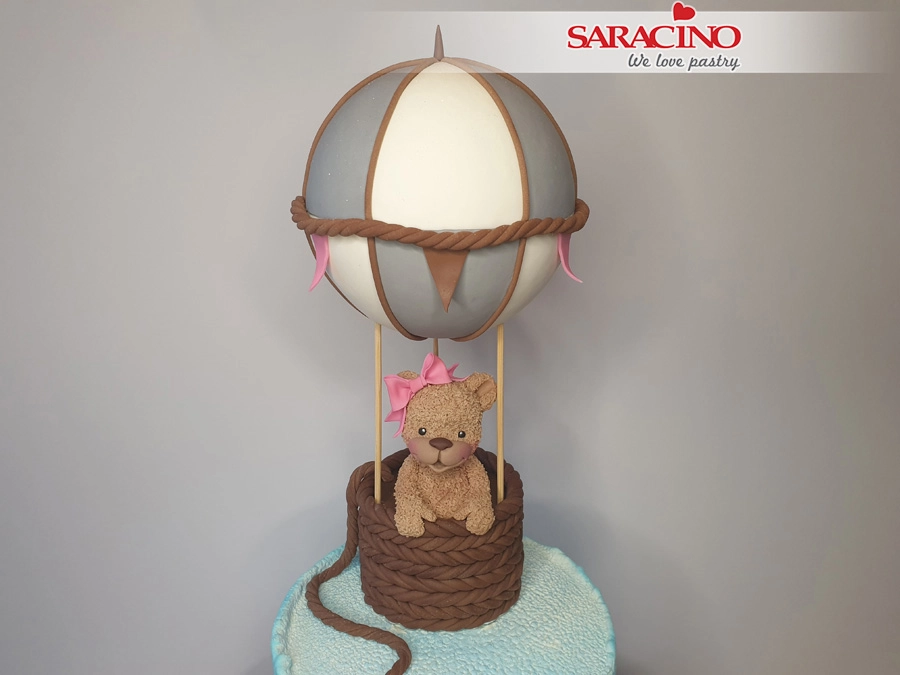
Your cake is ready! Up, up and away!
Â