
SWAN CAKE

SWAN CAKE

Skill level: BEGINNERS

You will need:

  • 2 tier cake
  • Saracino white Pasta Top
  • Saracino white Pasta Model
  • Saracino Wafer Paper 0.27
  • Florist Wire Nr.20 and Nr.28
  • Edible glue
  • Black edible marker
  • Cake drum
  • Sculpting tools
  • Small scissors
  • Two brushes
  • Clear alcohol
  • Powder colours: gold, white, yellow and 2 shades of apricot
  • Saracino Pasta Bouquet
  • Two daisy-shaped cutters of different sizes
  • Green florist tape

Step 1

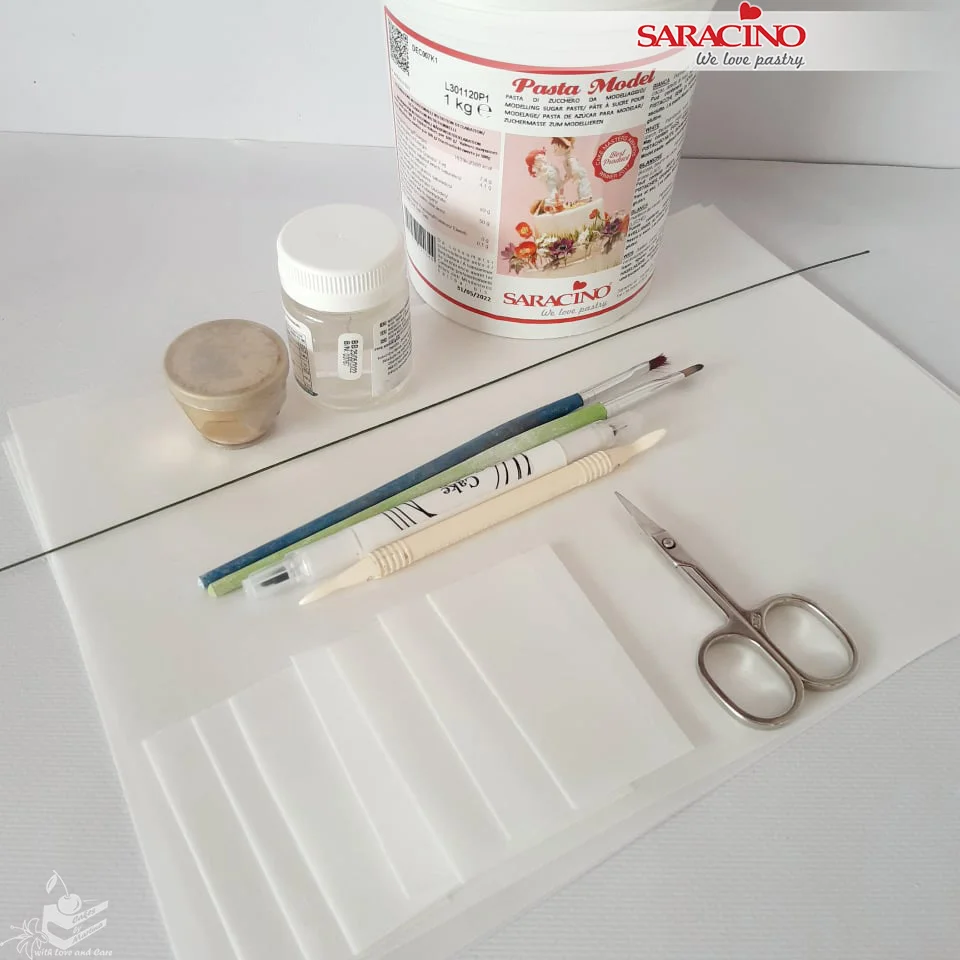
To make the swan you will need: 2 cake tiers, Saracino Pasta Top, Saracino Pasta Model, Saracino Wafer Paper, Florist Wire Nr.20, edible glue, edible marker (black), base, sculpting tool, small scissors, two brushes, clear alcohol, and gold powder colour.
Step 2

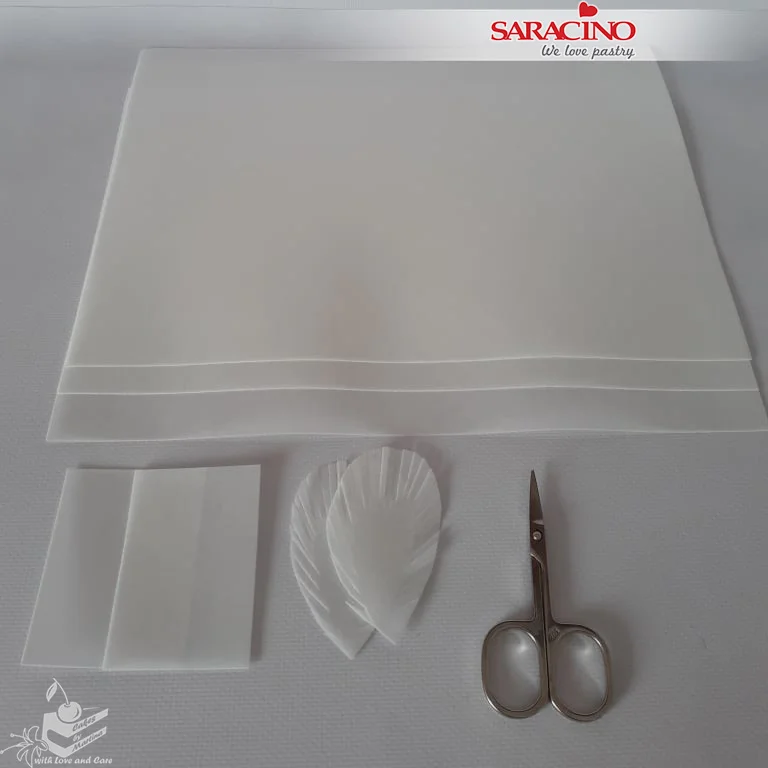
Prepare rectangles of the wafer paper and cut out various sized feathers. Make small cuts along the outer edges. You will need enough to cover the whole cake and the swan. 
Step 3

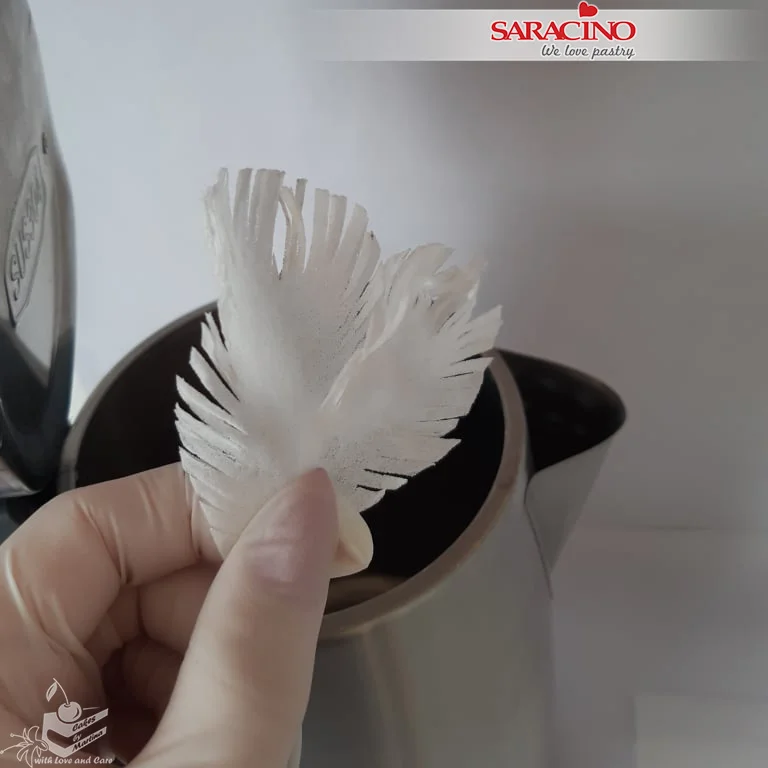
Carefully hold the prepared feathers over steam (e.g. from a kettle) to achieve a ruffled effect.
Step 4

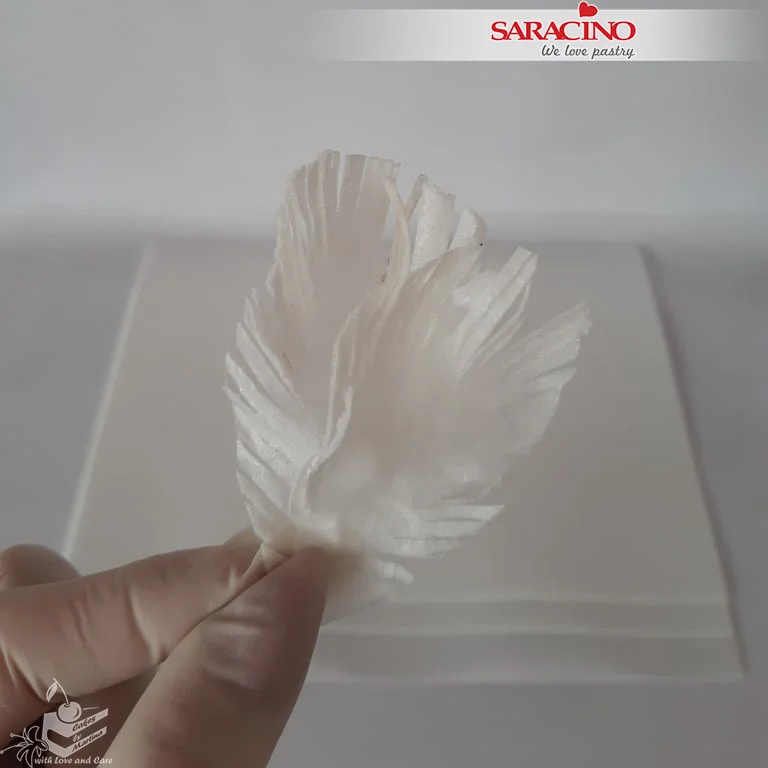
Continue to make feathers until you have enough to cover both wings and a cake tier.
Step 5

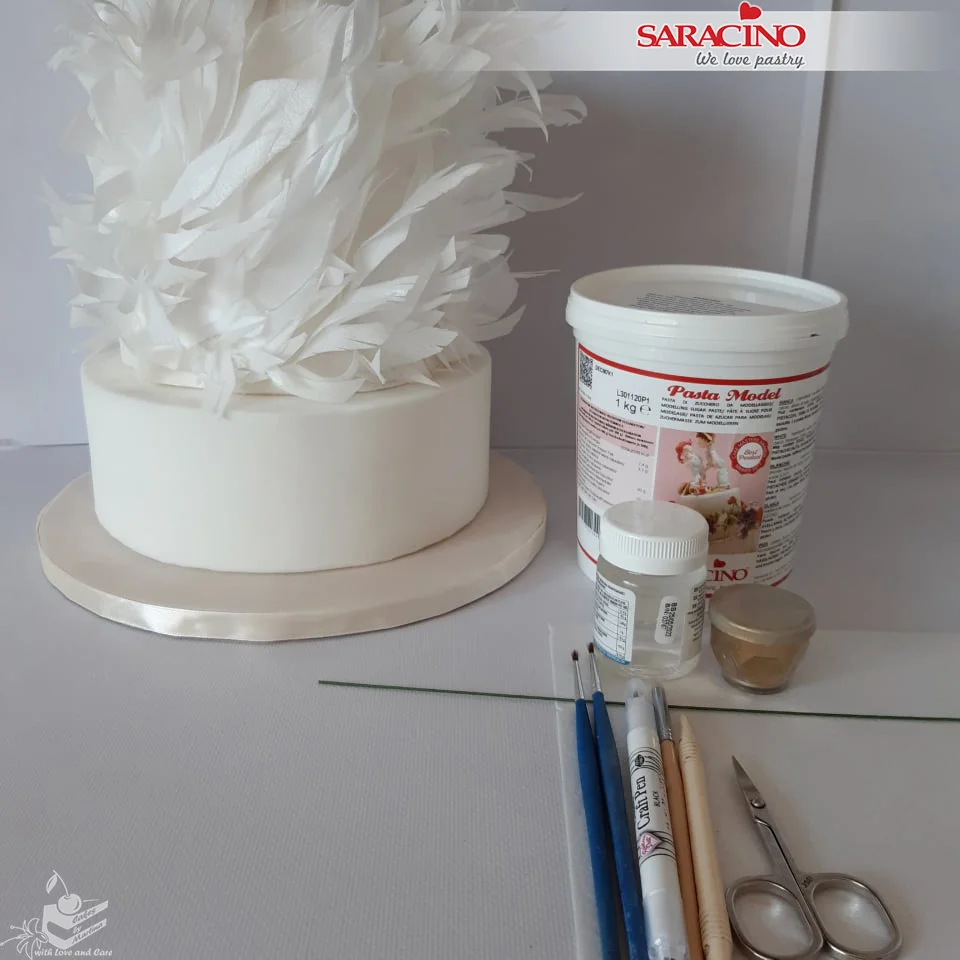
Cover the cakes using Saracino Pasta Top and place on the base. Using edible glue attach the feathers to the top tier of your cake giving it a random ruffled look.                                                            
Step 6

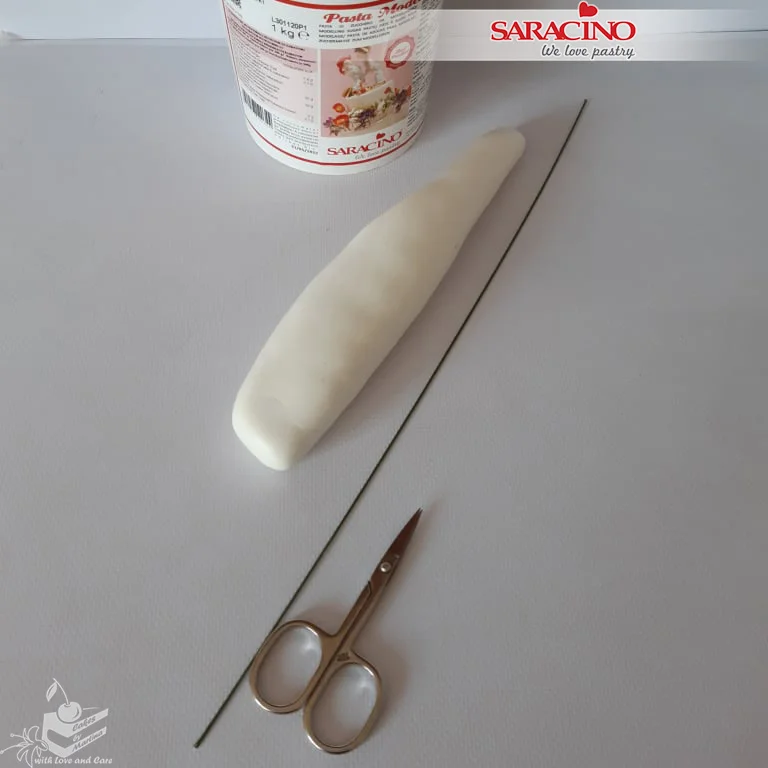
Use Pasta Model to roll the neck of the swan (approximately 23cm in length). Insert a flower wire into the centre of the neck.
Step 7

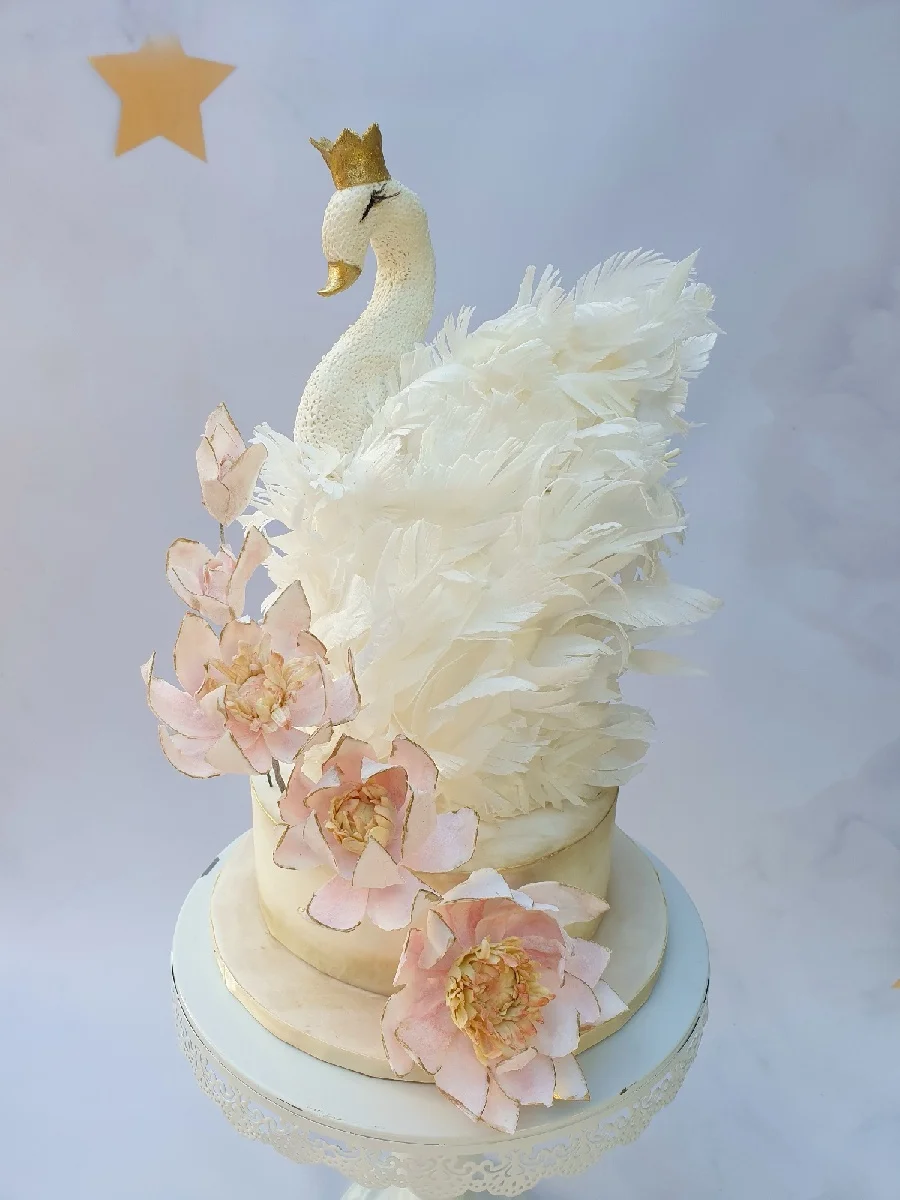
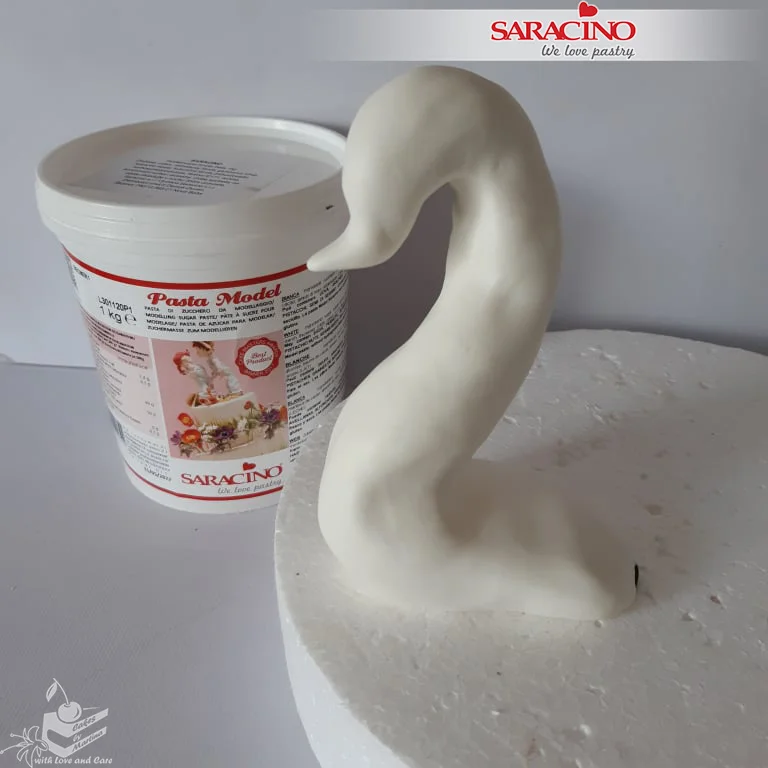
Model the neck and beak to match the shape in the picture. Smooth the surface.
Step 8

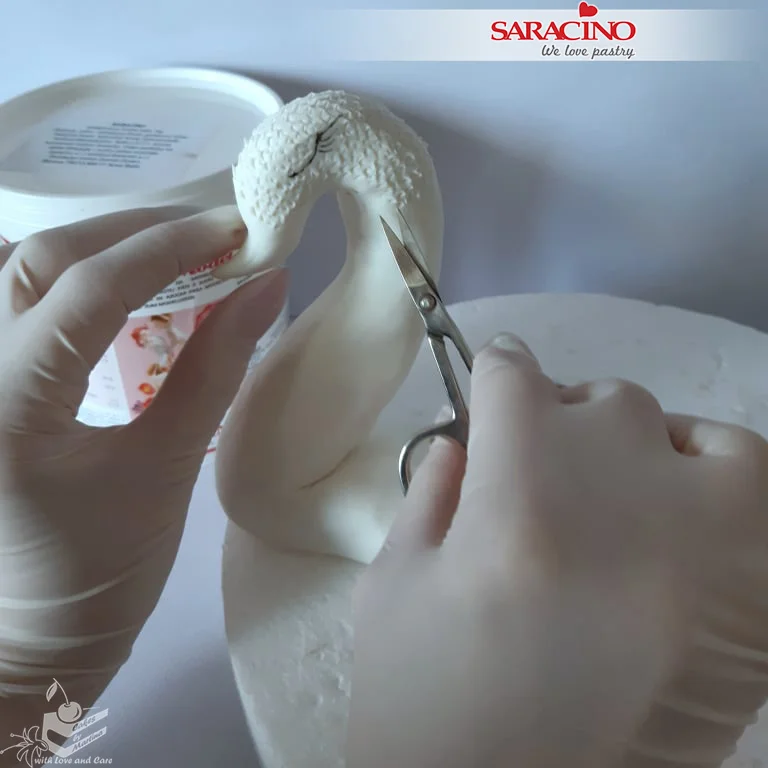
Using the edible marker draw the swan’s eyes. Use sharp scissors to give a feather texture.
Step 9

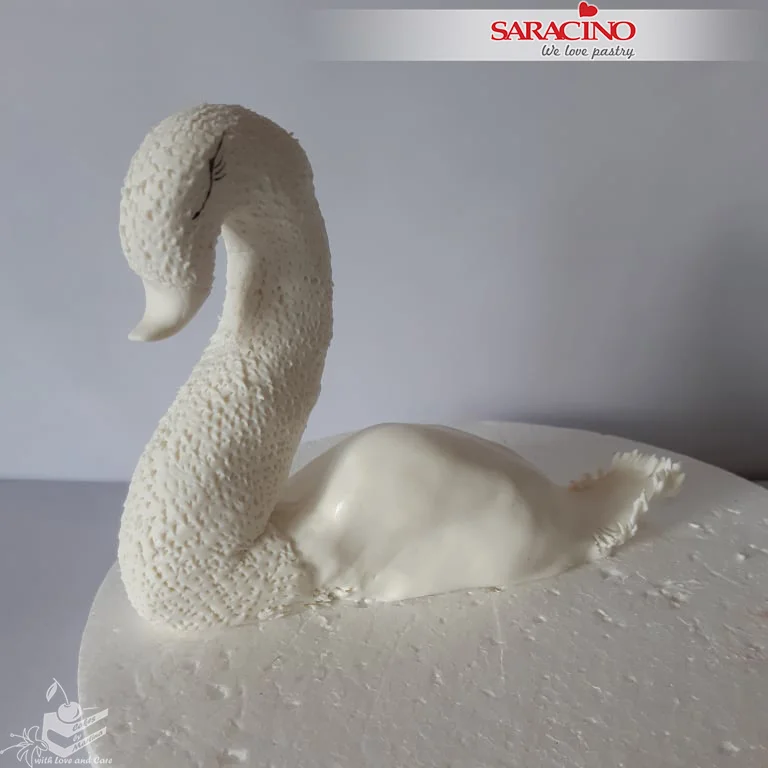
Model the swan’s body using Pasta Model. Use a sculpting or modelling tool to smooth the joints.
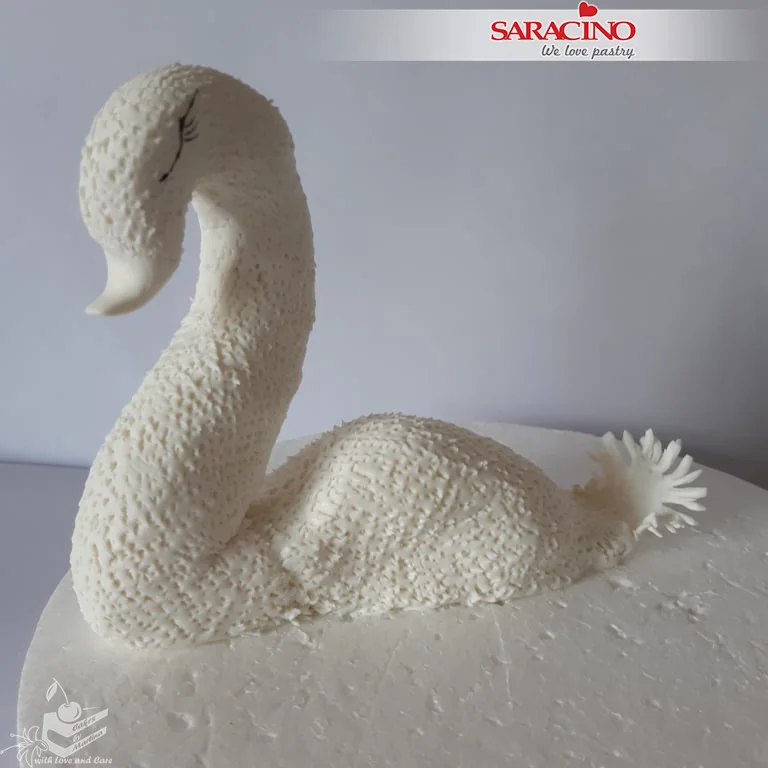
Step 10

Use the scissors to achieve the feather texture on the body.
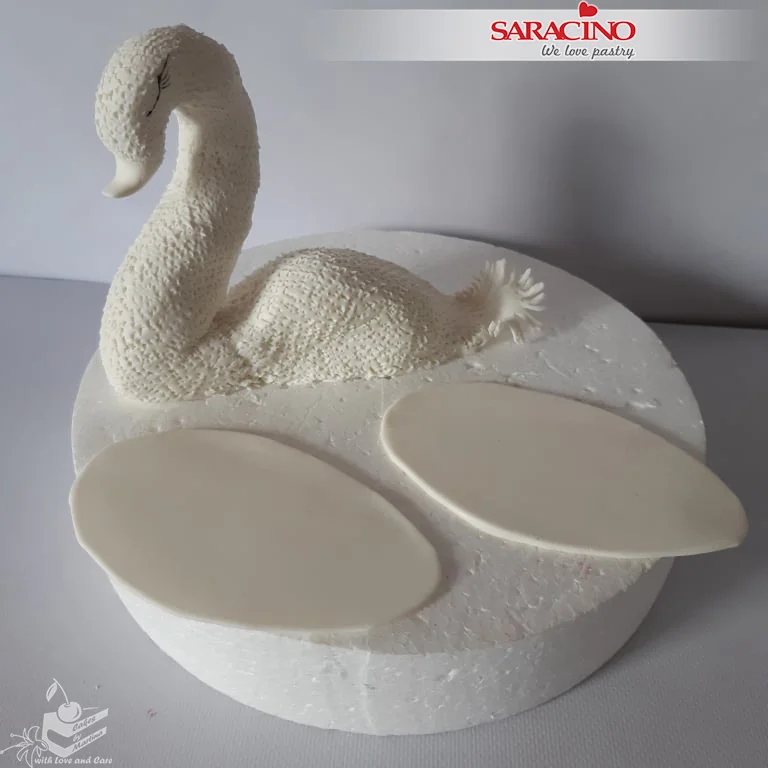
Step 11

For the wings roll white Pasta Model and cut out two oval shapes.
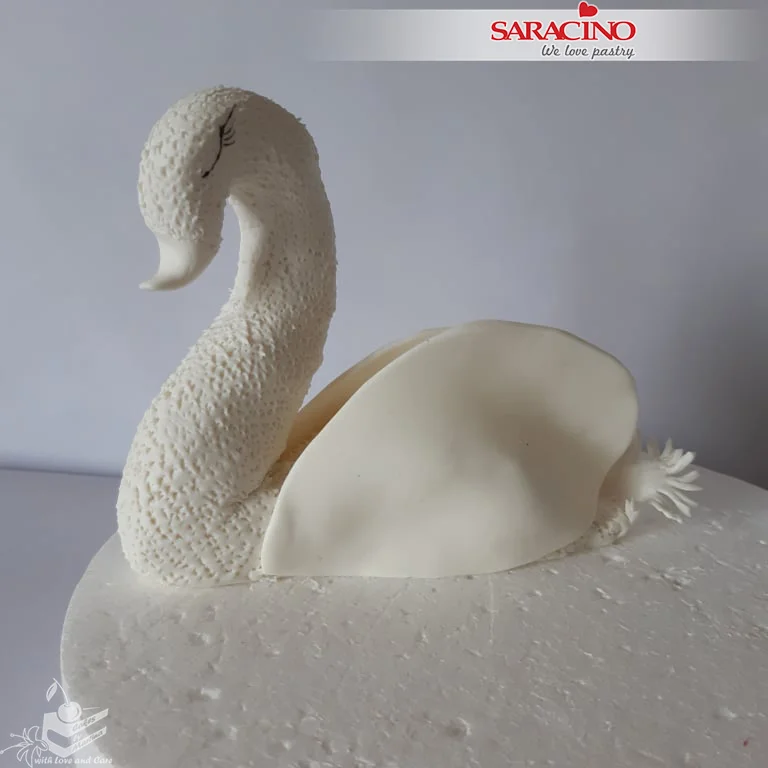
Step 12

Use a little edible glue to attach the wings either side of the body.
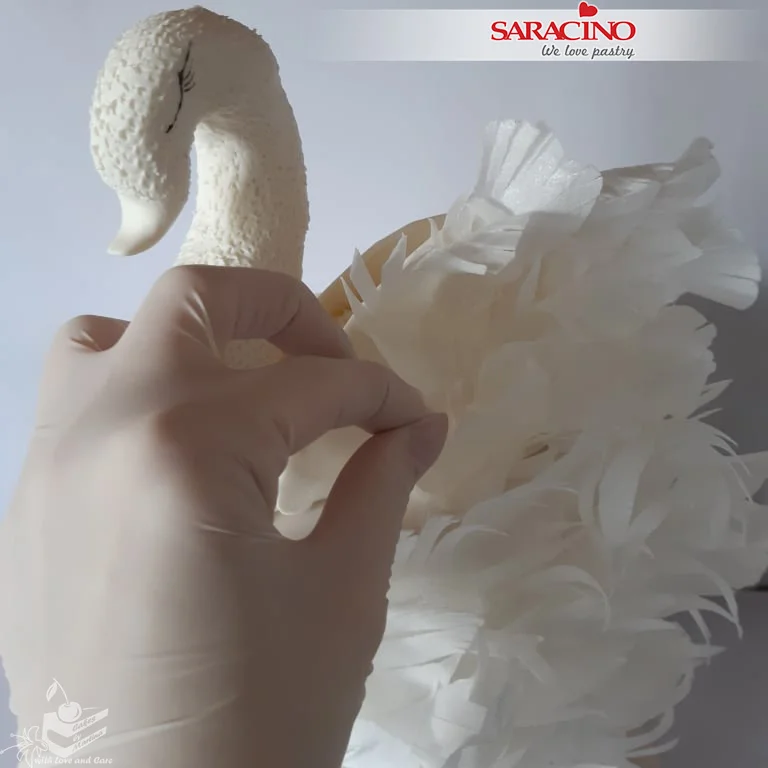
Step 13

Attach the wafer paper feathers to both wings using a little edible glue.
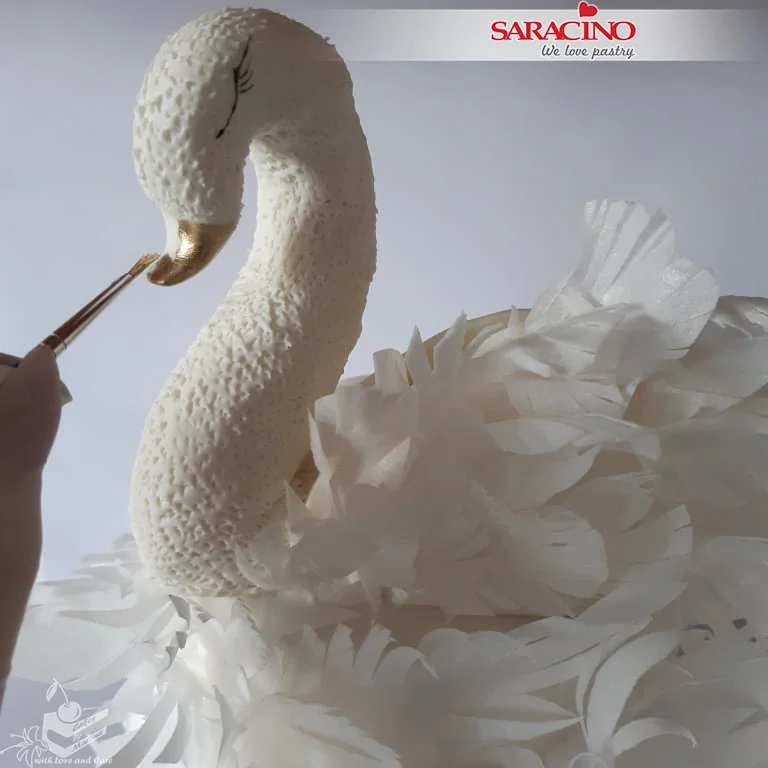
Step 14

Mix gold powder colour with the clear alcohol and paint the swans beak.
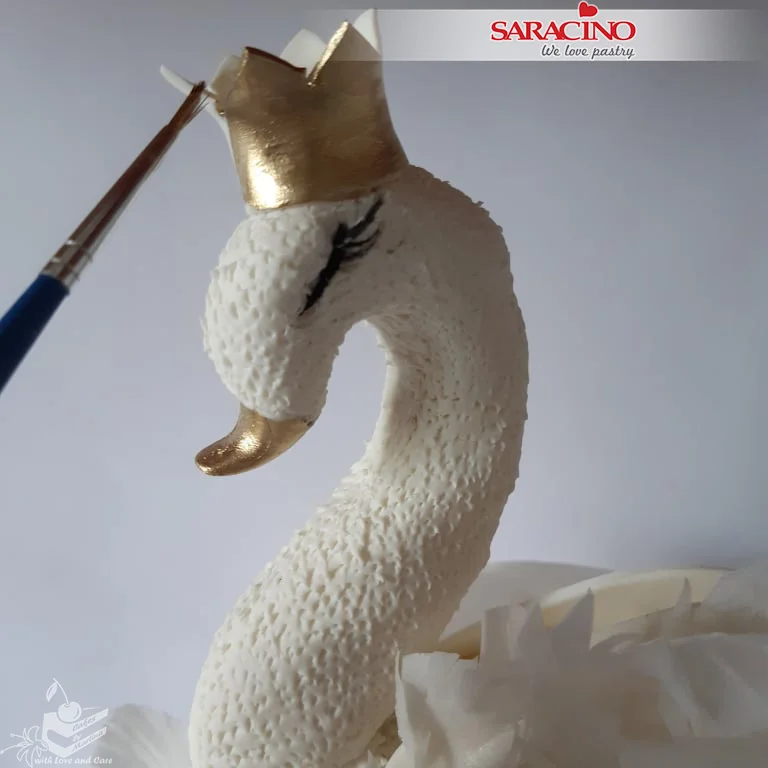
Step 15

Model a small crown using Pasta Model and fix to the swans head. Paint gold.
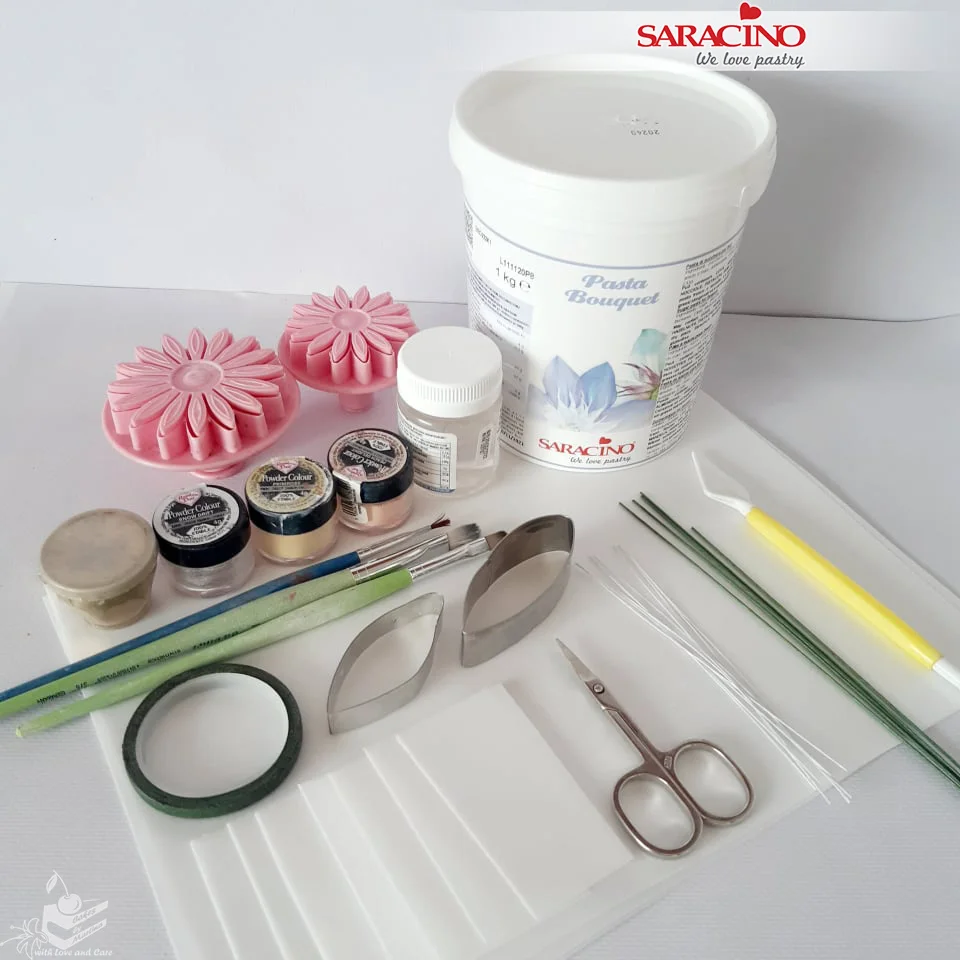
Step 16

To make the flowers you will need: Saracino Pasta Bouquet, Saracino Wafer Paper, two daisy cutters of different sizes, petal-shaped cutter, edible glue, florist wire Nr.20 and Nr.28, small scissors, brushes, green florist tape, sculpting tool, powder colours (gold, white and 2 shades of apricot).
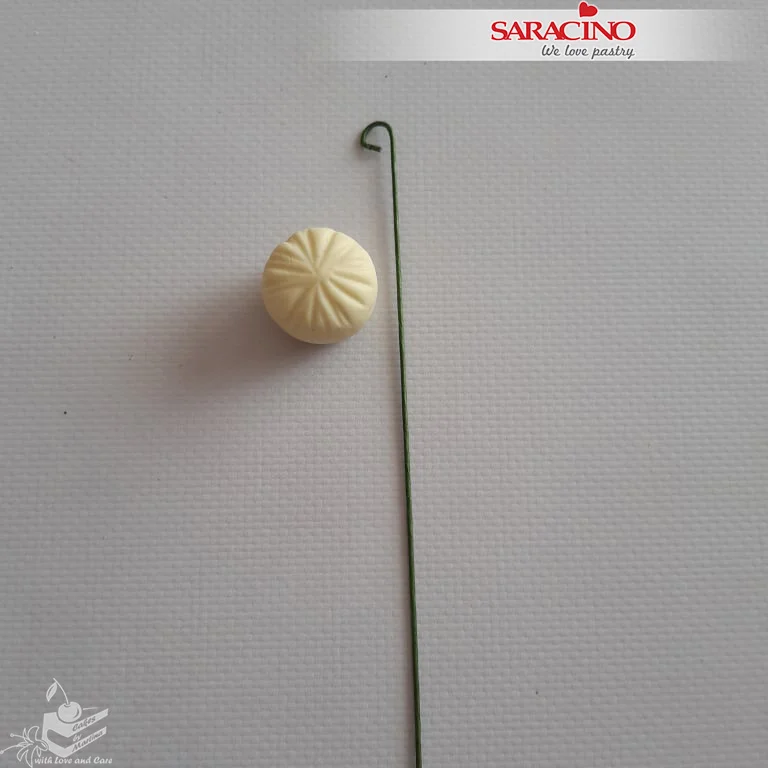
Step 17

Mix a little Pasta Bouquet with yellow powder colour. Roll a small ball and use a modelling tool to form shallow grooves. Loop the end of a florist wire Nr.20, heat and insert into the ball.
Step 18

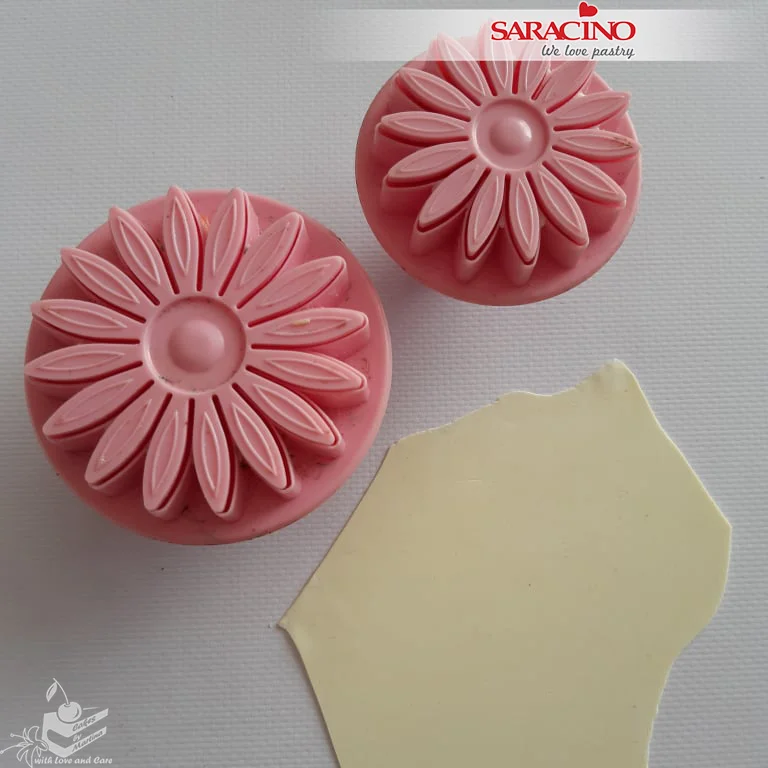
Roll out the yellow Pasta Bouquet and cut out 1 small and 2 large daisies.
Step 19

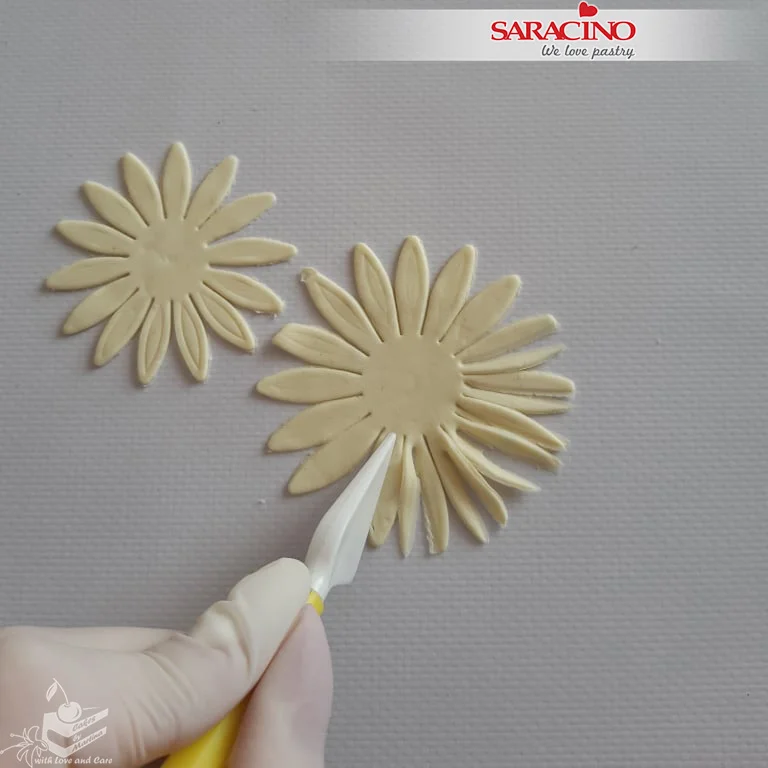
Use a knife or modelling tool to cut each of the daisy petals in half.
Step 20

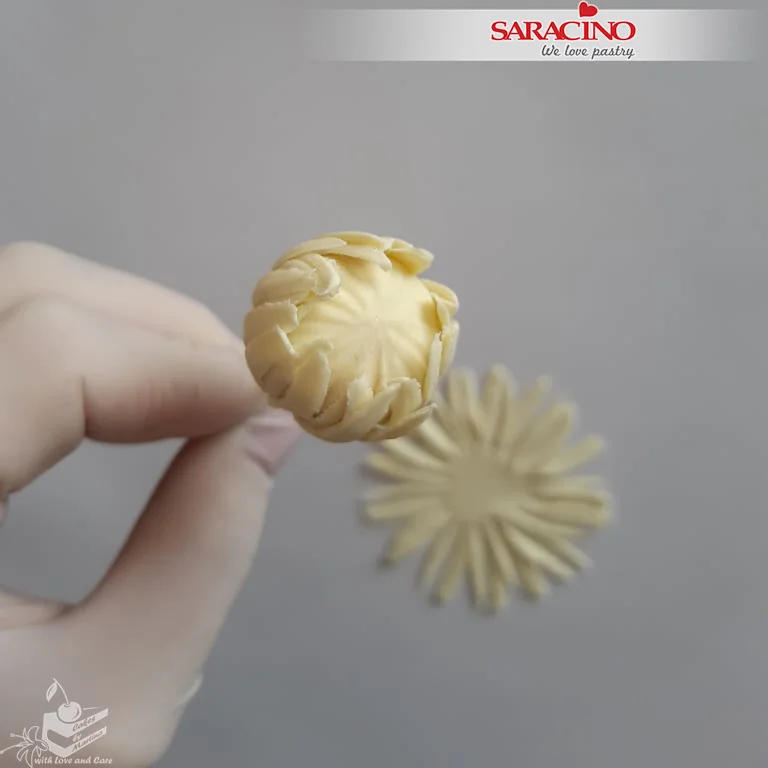
Use a little glue to attach the small daisy to the bottom of the centre ball.
Step 21

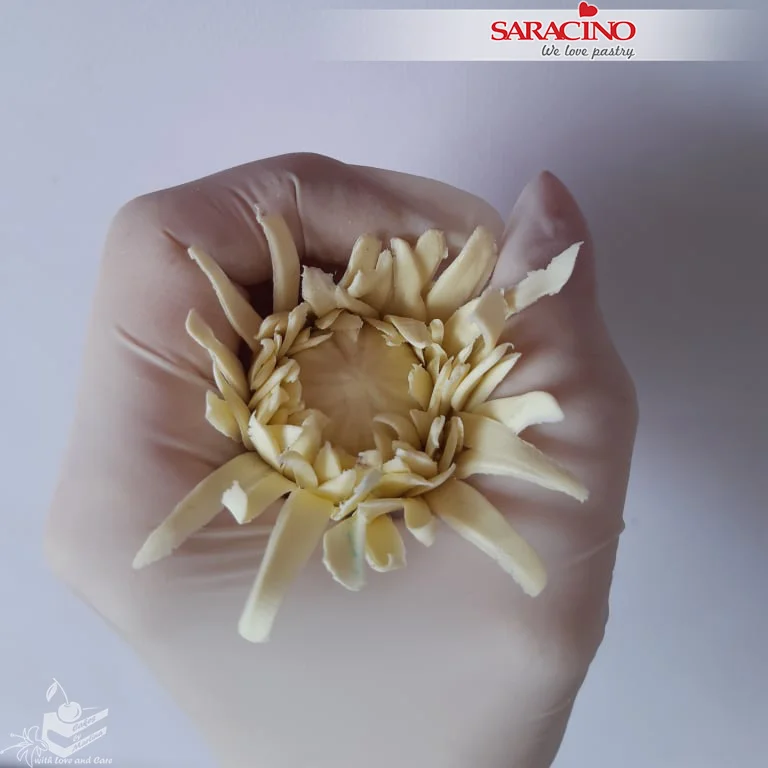
Repeat to fix the two larger daisies. Adjust the center of the flower to achieve a natural ruffled look.
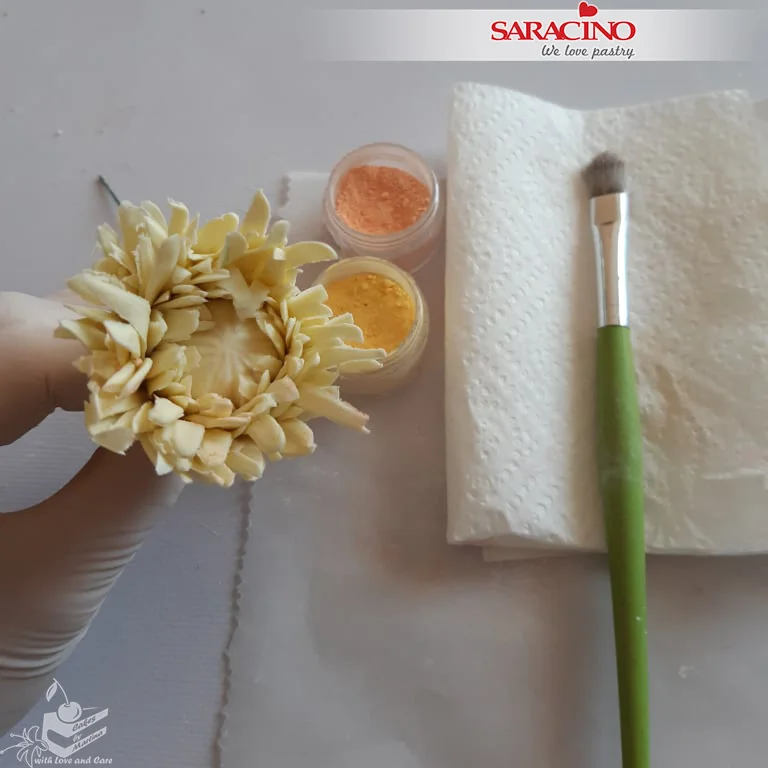
Step 22

Using a soft brush and the apricot powder colour lightly dust the centre of the flower.
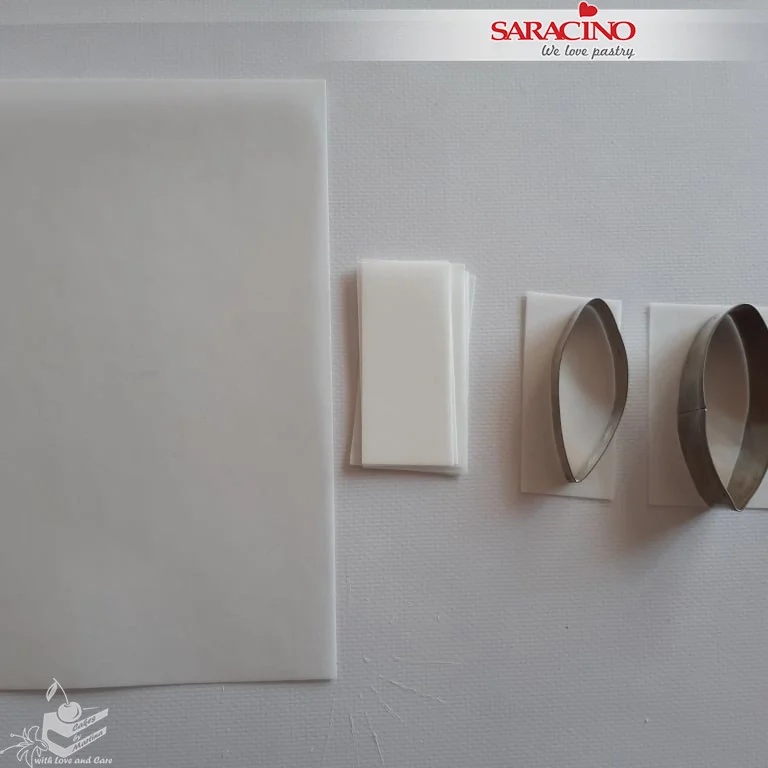
Step 23

Cut the wafer paper into rectangles. Using half of them cut petals using the petal cutters. You will need approximately 5 small and 7 large, depending on how large you would like your flower.
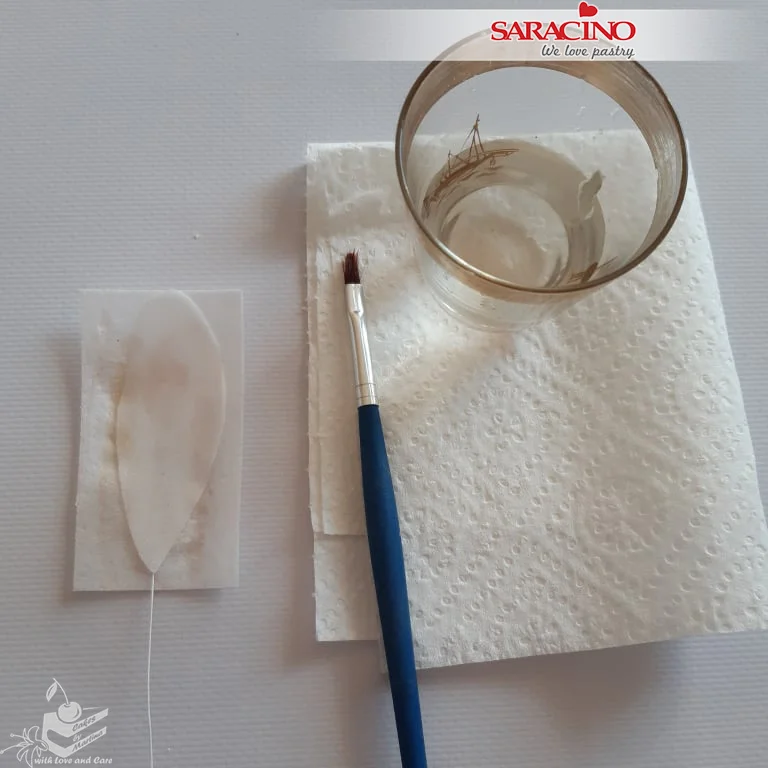
Step 24

Use a brush to apply a little water to the rough side of the rectangle. Place a Nr.28 wire and cover it with a petal with the rough side facing down. Press together.
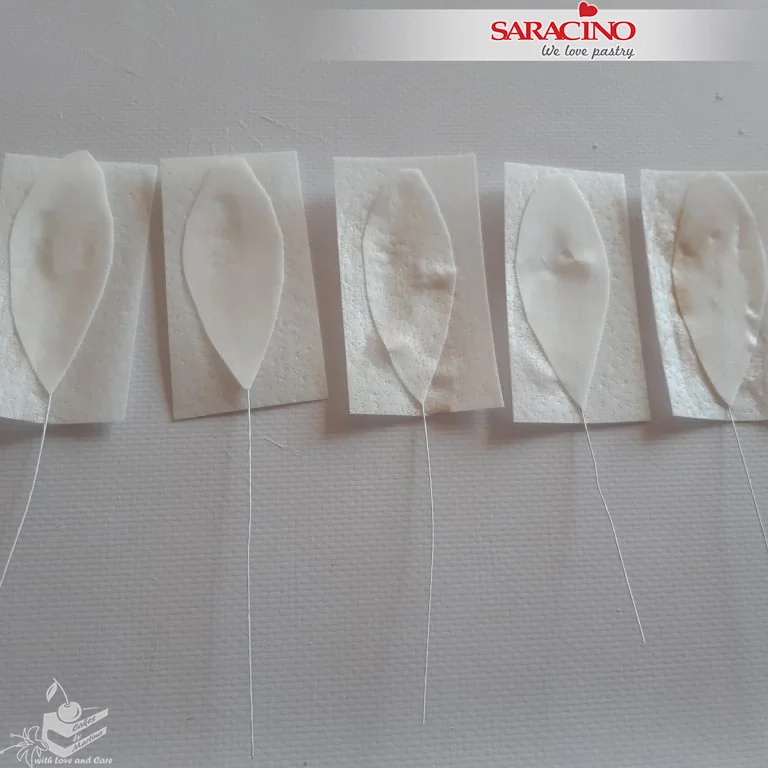
Step 25

Prepare approximately 5 smaller petals this way then cut the rectangles to match the shape of the petals.
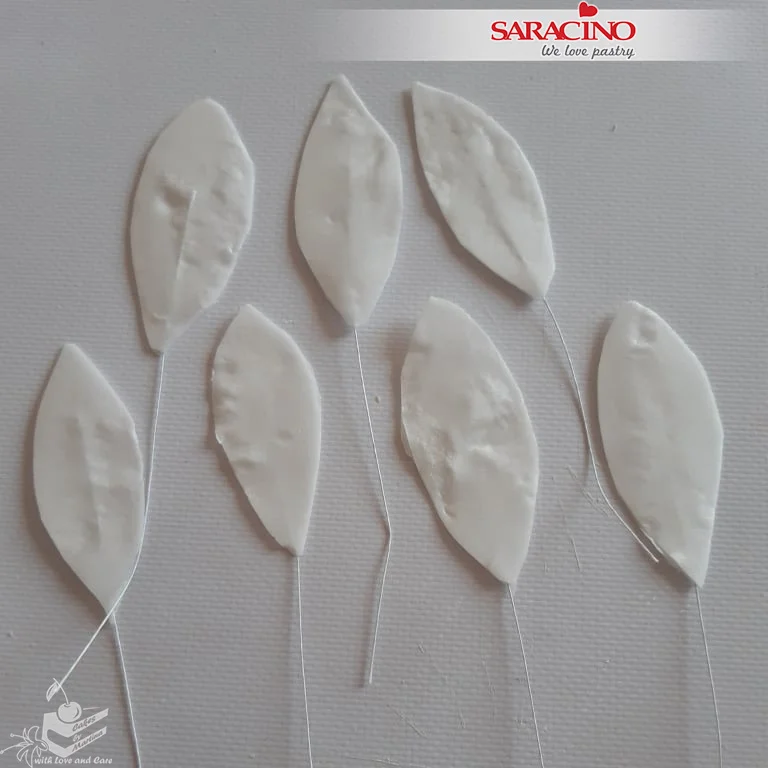
Step 26

Repeat to make seven larger petals.
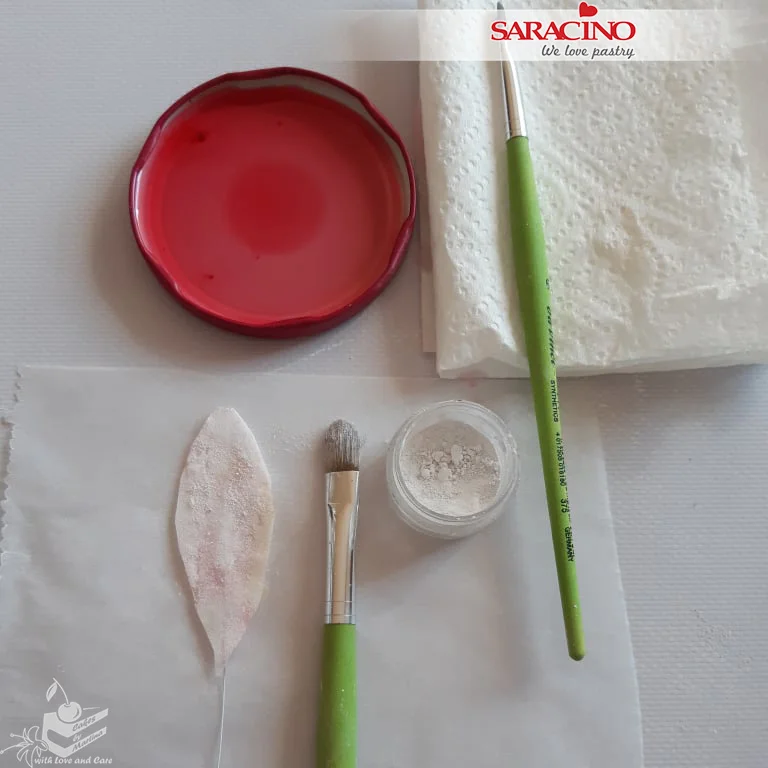
Step 27

Mix a little apricot and white powder colour with clear alcohol. Gently paint each petal.
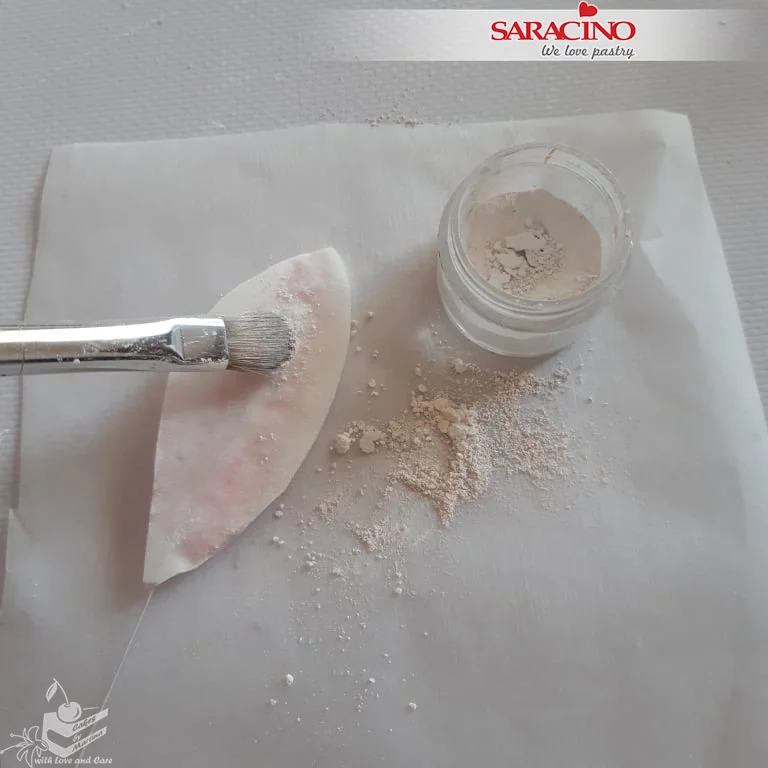
Step 28

Use a soft brush and white powder colour to dust each petal.
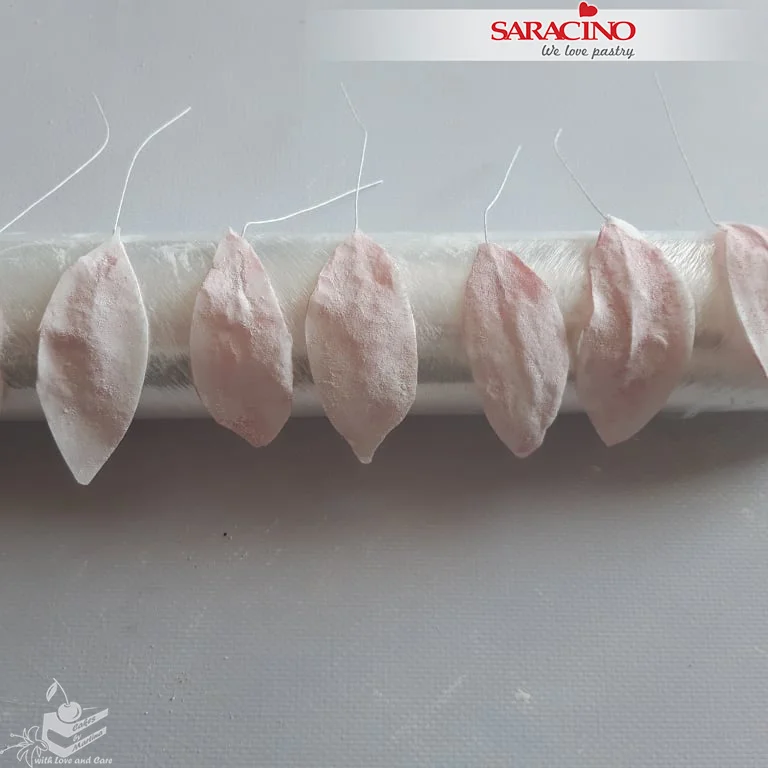
Step 29

Allow the petals to dry. Ideally on a rolling pin or other cylindrical object so they dry in a curved shape.
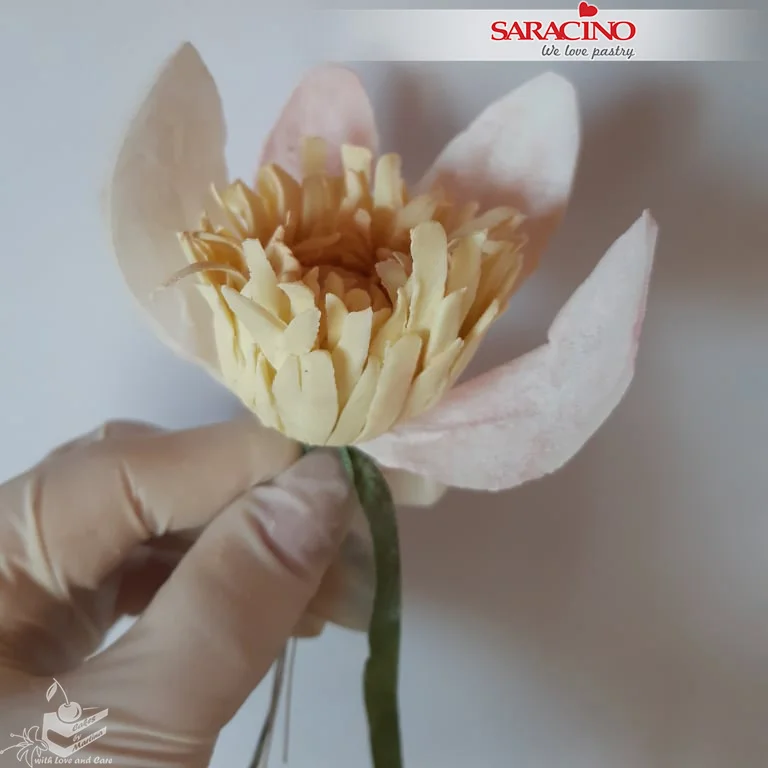
Step 30

Using the smaller petals attach one by one using green florist tape.
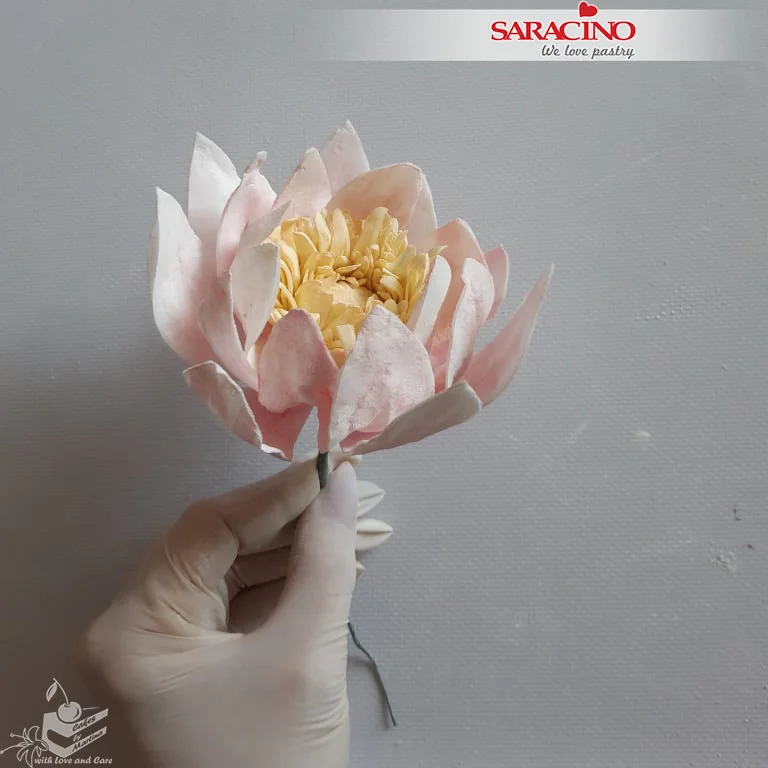
Step 31

Keep adding the petals to finish a flower. Repeat for as many flowers you need. Prepare some smaller flowers and buds using smaller and less petals on each.
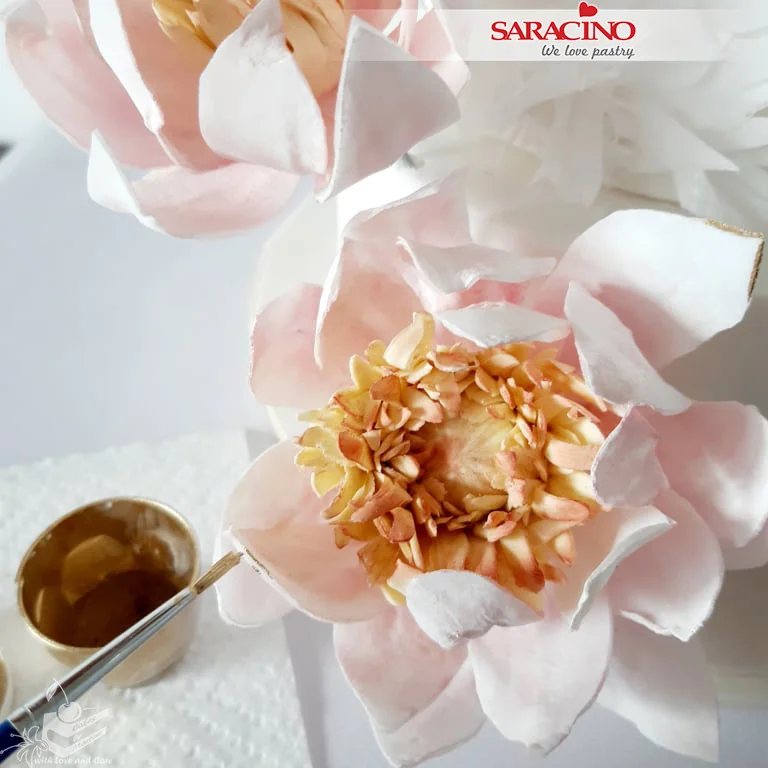
Step 32

Using the gold paint carefully paint the edges of the petals.

Step 35

Fix the flowers to the cake. Use posy picks if required.

SUGAR VEGETABLES

SUGAR VEGETABLES

Skill level: BEGINNERS

You will need:

  • Saracino Pasta Model
  • Saracino Modelling Chocolate

  • Saracino Wafer Paper 0.27 mm
  • Saracino gel colour green and white 
  • Cerart modelling tool 500 + 301 + 505
  • Knife
  • Large ball tool
  • Water
  • Brushes
  • Dust colour powders: alpine green, spring green, dark brown, light brown, aubergine, claret, peach

Step 1

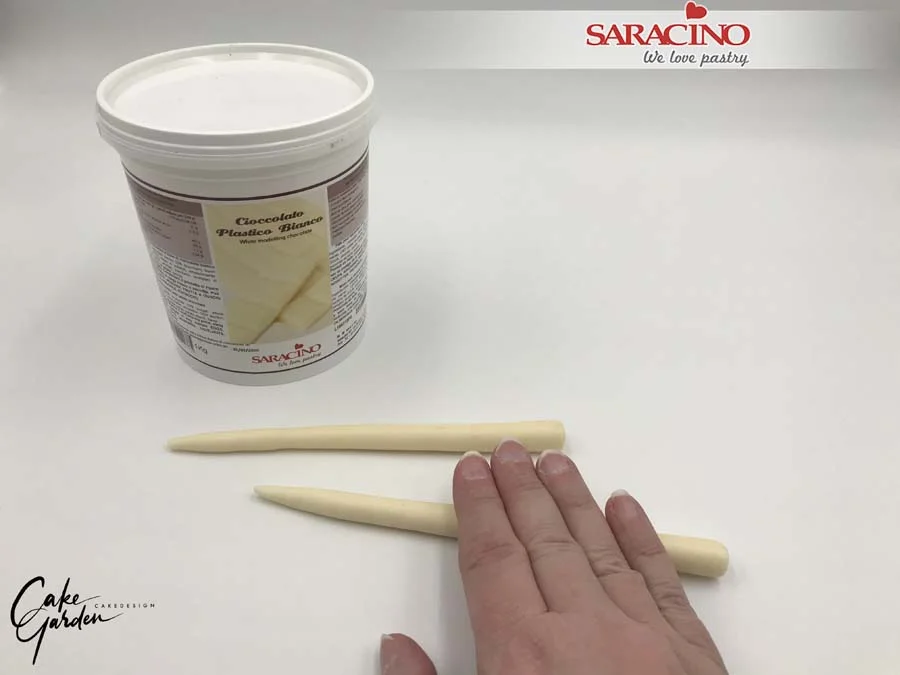
To make the asparagus you will need about 18-22g of white modelling chocolate. Knead the modelling chocolate until it is smooth and pliable. Roll a long cone shape to about 17-22cm long. If you create more asparagus make sure they are not exactly the same length. The thickest part has to be 1.2  to 1.5cm in diameter.

Step 2

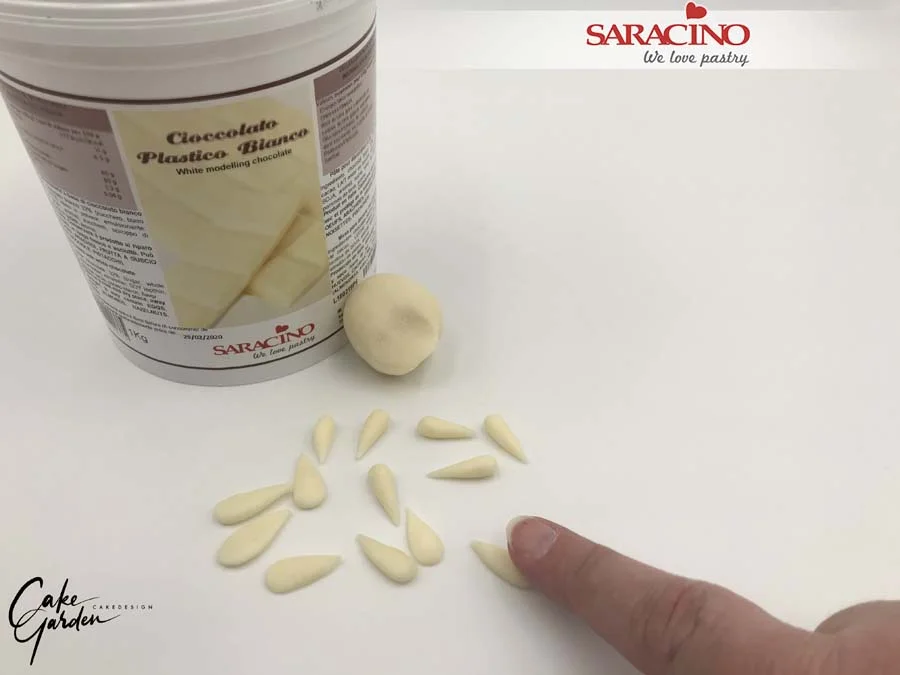
Create small cone shapes for the asparagus leaves and flatten each of them with your finger. Make sure the leaves are not too thin as they must have some thickness to look realistic.

Step 3

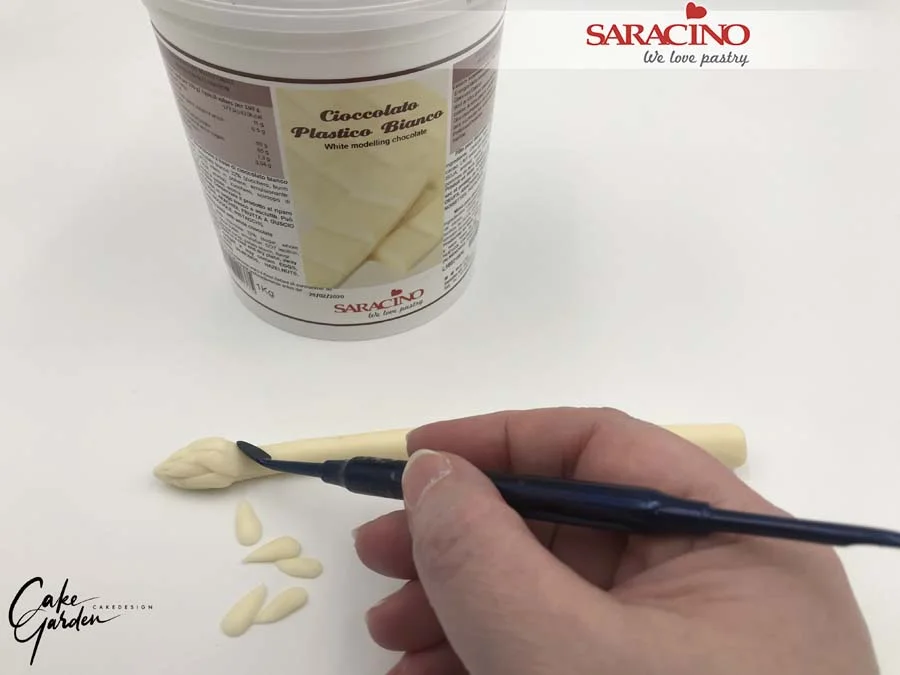
Start attaching the small leaves to the thin end of the stem with your modelling tool. Fix only the bottom of each leaf (the wide side) to your asparagus stem. Smooth the joints so the leaves blend into your stem. Repeat to attach the leaves around until you have a small flowerly like head.

Step 4

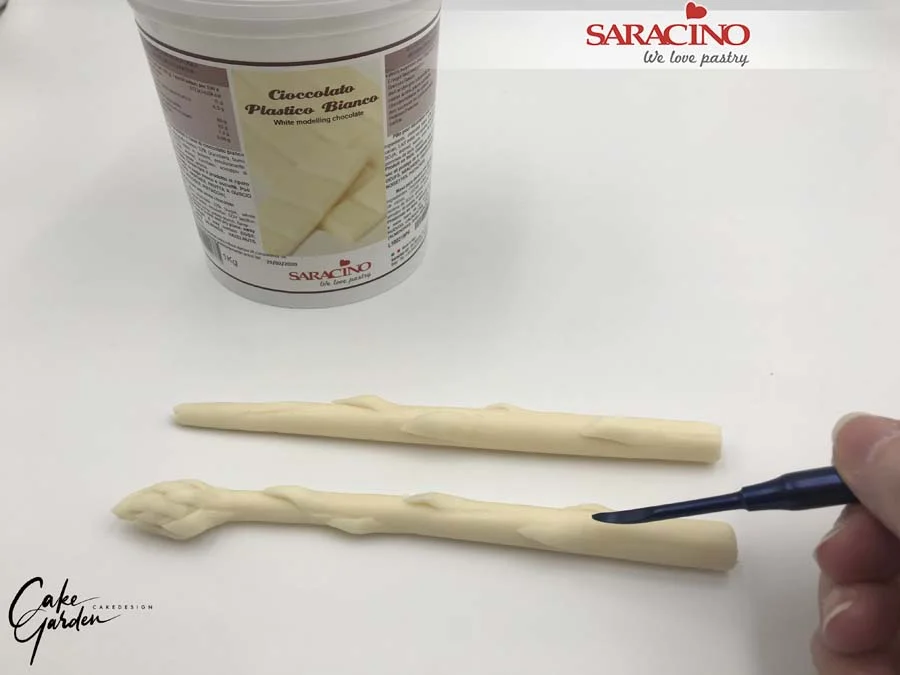
Attach a few leaves randomly to the stem. Using your modelling tool create some grooves (not too deep) on the stem and around the bottom.

Step 5

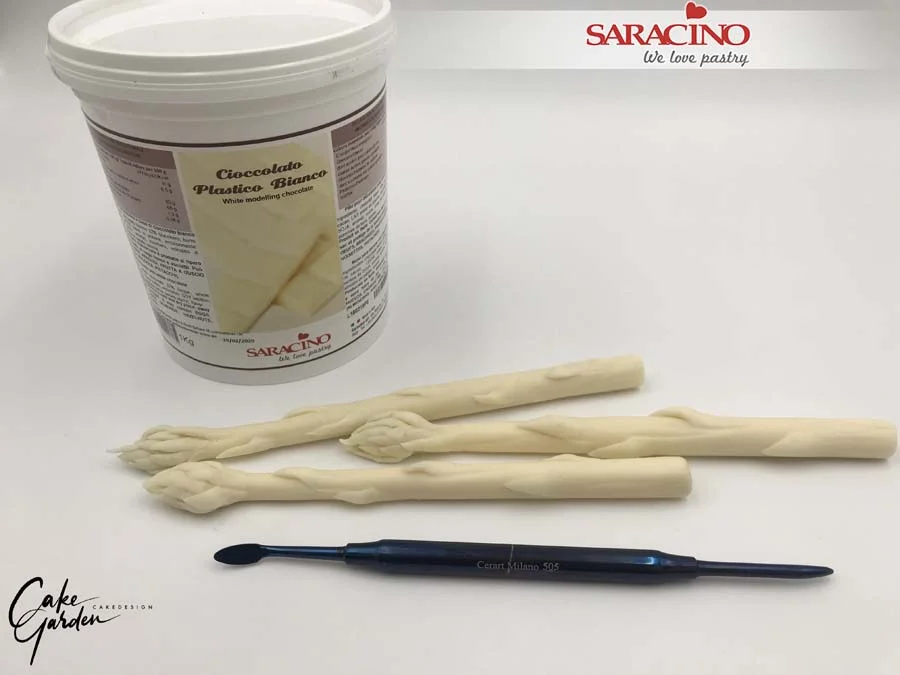
Repeat the previous steps if you want to create more asparagus. If you have enough asparagus made, leave them to harden.

Step 6

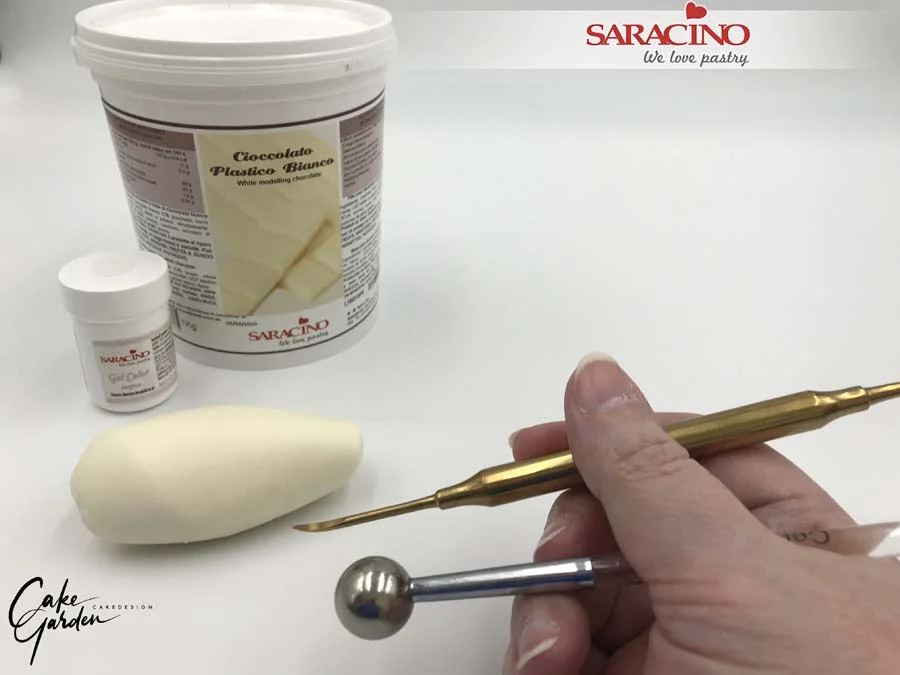
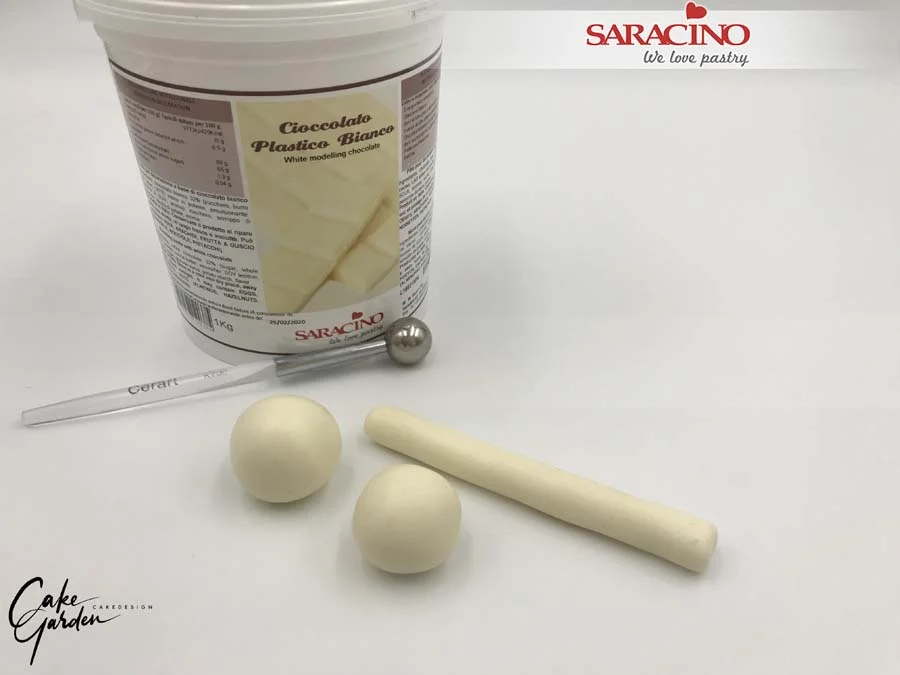
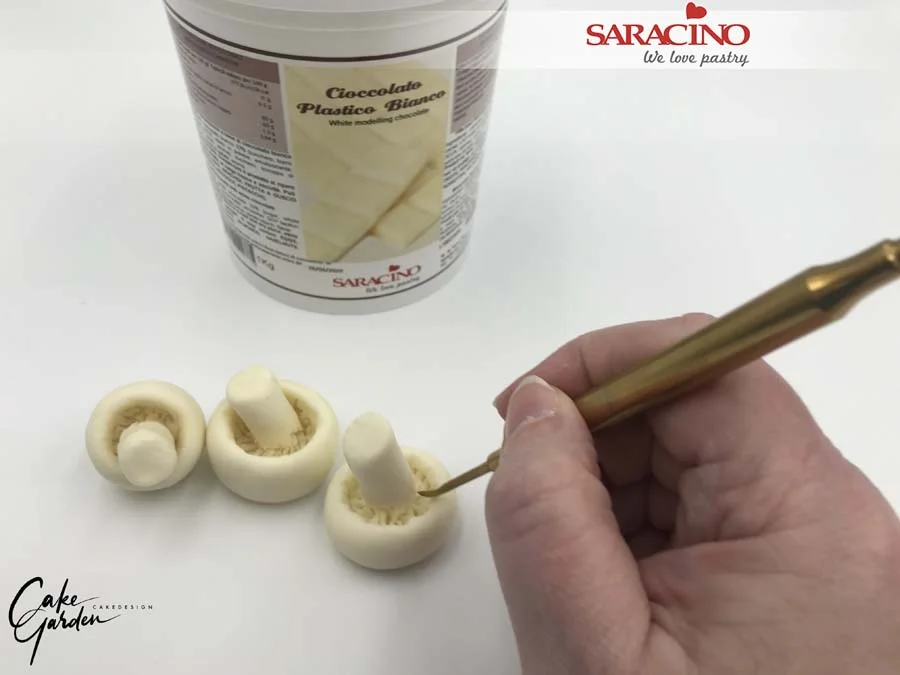
For the mushroom heads you will need about 8-14g of modelling chocolate for one mushroom. For the stalk you will need 4-6g of modelling chocolate. You will need about 18-20g for the whole mushroom. Knead the modelling chocolate until it’s smooth. I added some white gel colour to the modelling chocolate so it becomes less yellowish. You will need your modelling and ball tool for the next steps.

Step 7

Roll balls of modelling chocolate for the mushroom caps and a long stalk for the stem.

Step 8

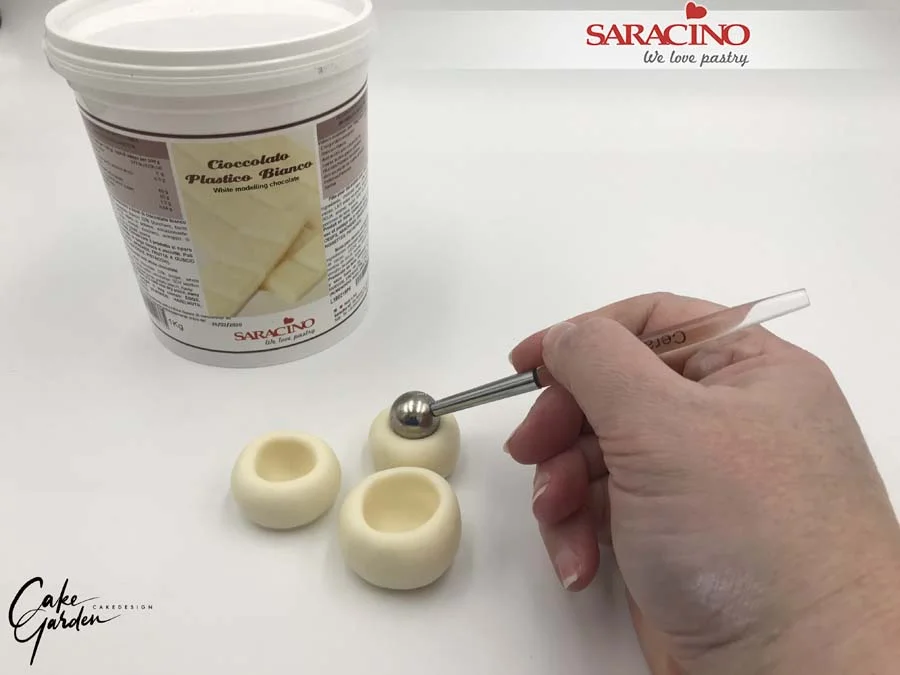
Use your ball tool to create sockets.

Step 9

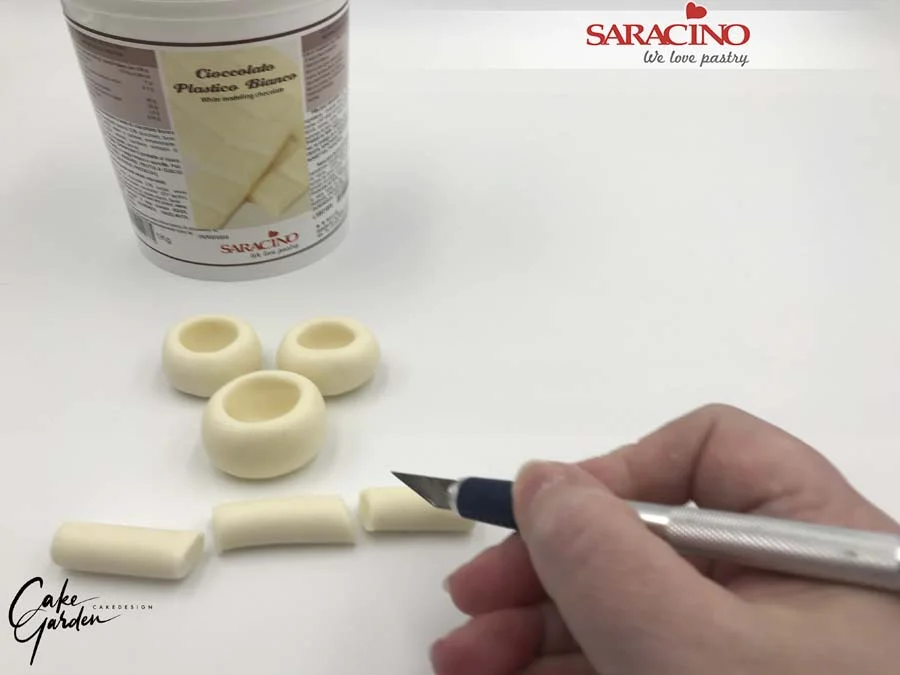
Cut the long stalk into smaller varying length pieces.

Step 10

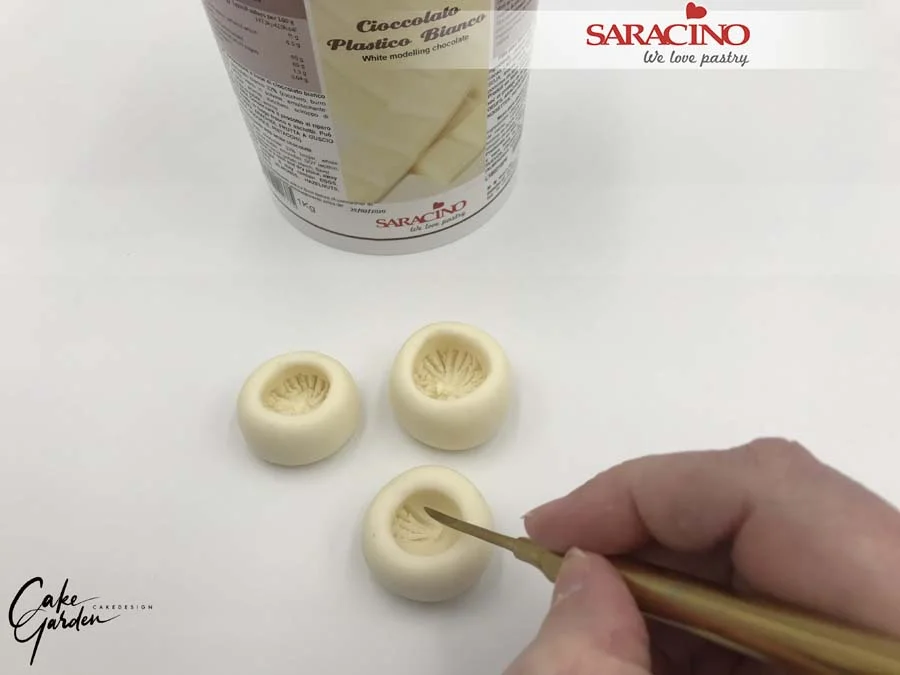
Use your modelling tool to create gills inside the caps. Make sure the inside of the cap remains wide enough to attach the stalk.

Step 11

Attach the stalk into the cap, using a modelling tool push some modelling chocolate from the stalk down onto the gills. Use your tool to create some small shallow notches at the bottom of the stalk. Set aside to harden.

Step 12

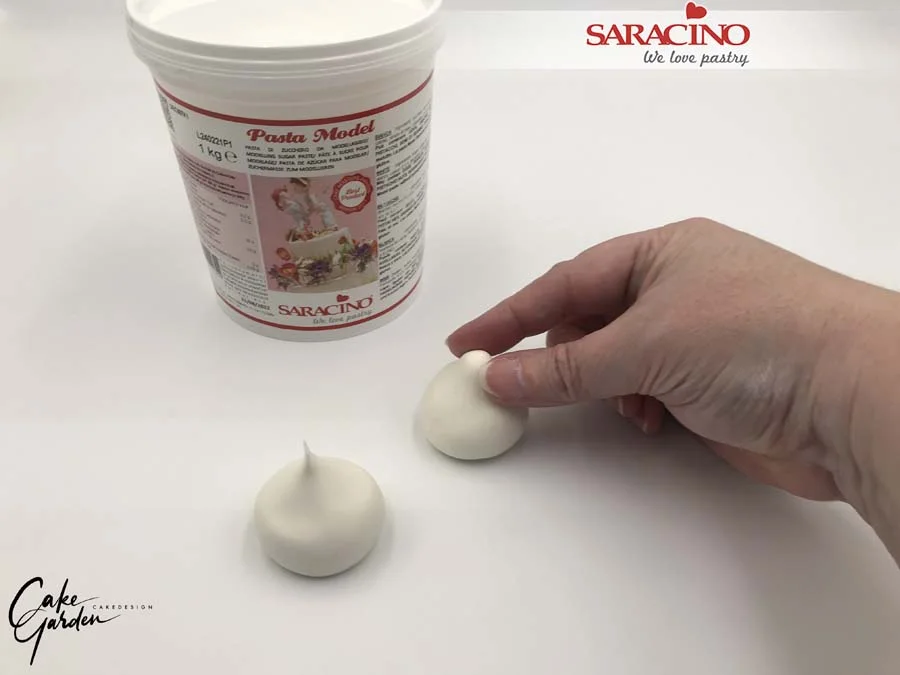
For the garlic you will need approximately 35g of white Pasta Model. Knead the modelling paste well and roll to a ball shape. Create a small tip at one side of the ball.

Step 13

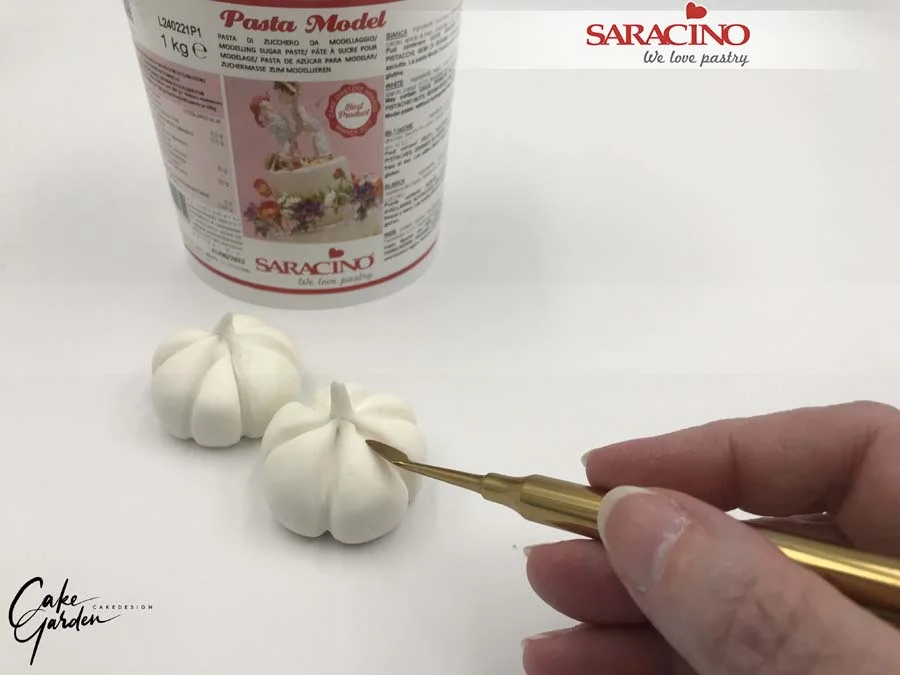
Use your modelling tool to create the garlic gloves. It doesn’t have to be very neat because we cover later with wafer paper.

Step 14

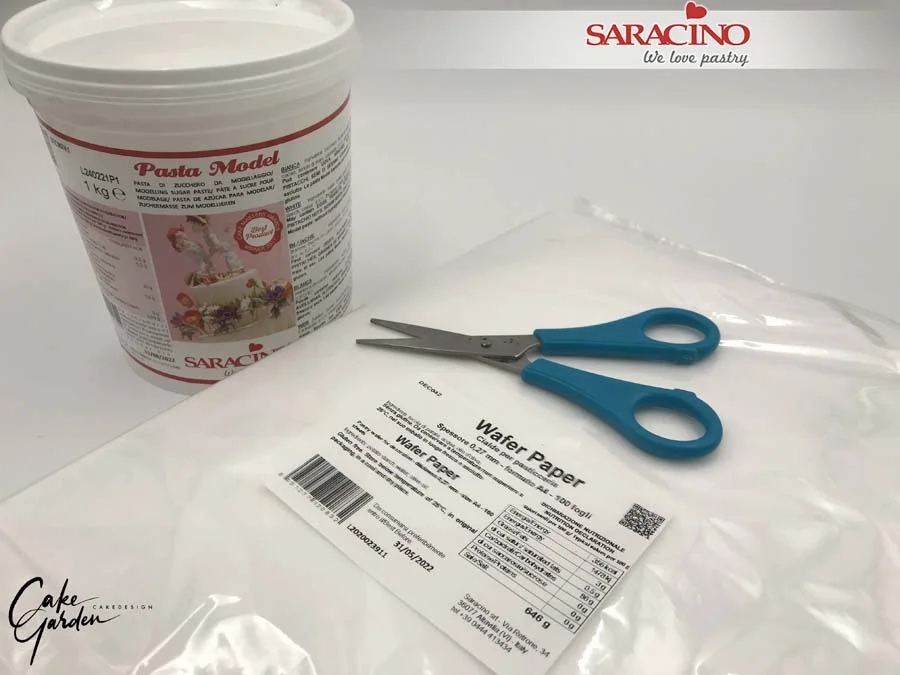
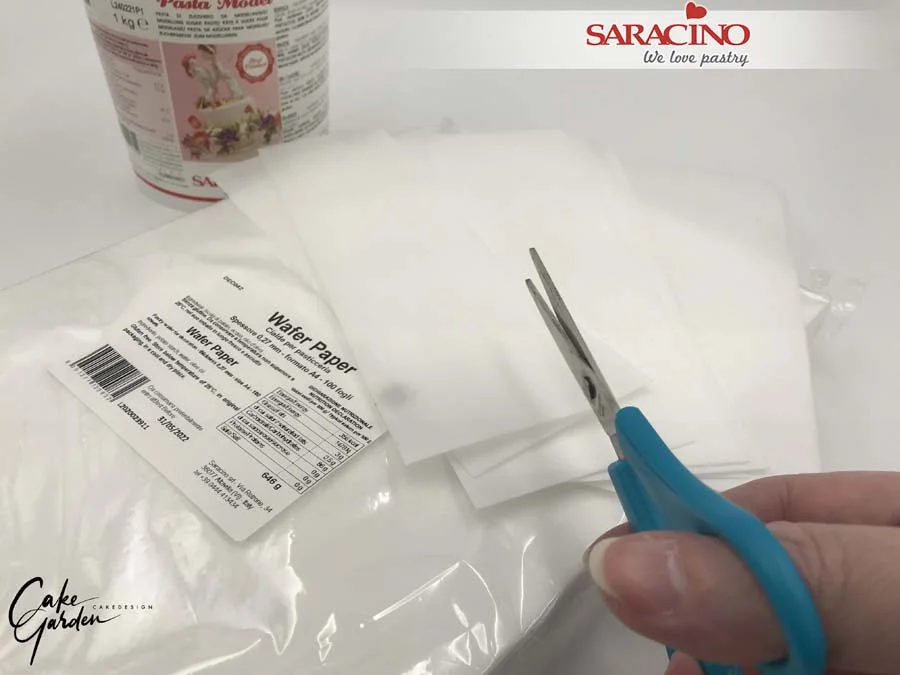
You will need Saracino wafer paper 0.27mm and scissors.

Step 15

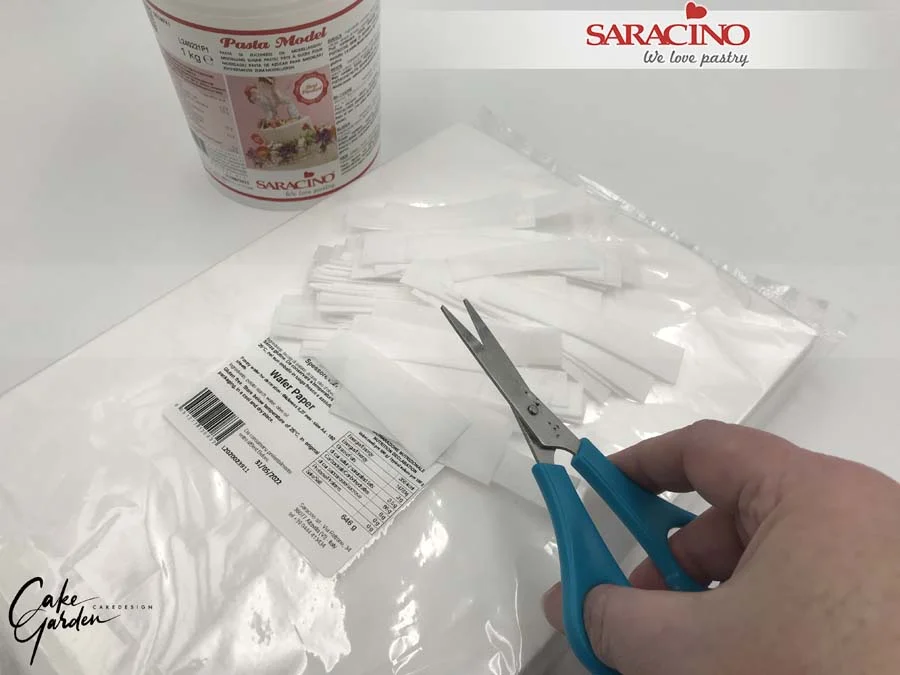
Cut the wafer paper in 4 pieces across the width.

Step 16

Cut the strips narrower. They dont have to be the same size. Cut some narrow and some wider strips. The strips dont have to be cut neatly.

Step 17

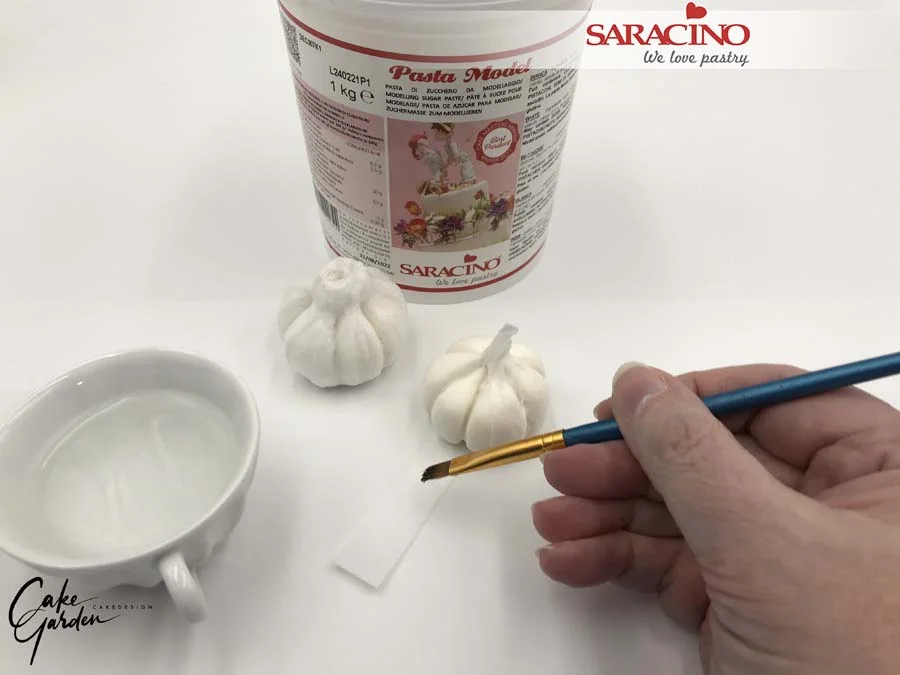
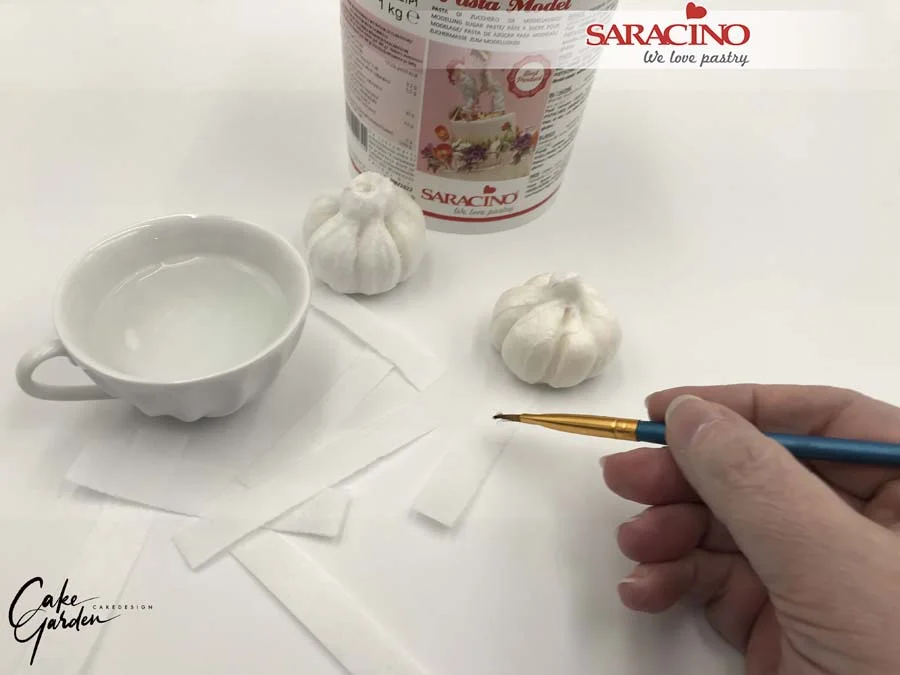
Use a brush to add some water to the strips and attach them to your garlic. Start from the bottom of the garlic and attach them up to the top. Don’t wait too long to attach the wafer paper strips.

Attach the wafer paper strips all around the garlic bulb. If your strips are too long you can trim using scissors. I cut around the top of the garlic with small scissors so it looks like real thin skins on top of each other. You can repeat around the bottom to create some small roots. I have left the tops of the garlic quite short but you can leave them longer if you want to. Leave your garlic to dry on a drying rack so the water can evaporate.

Step 18

Repeat step 17 to attach a second layer and leave it to dry for 24 hours until completely dry.

Step 19

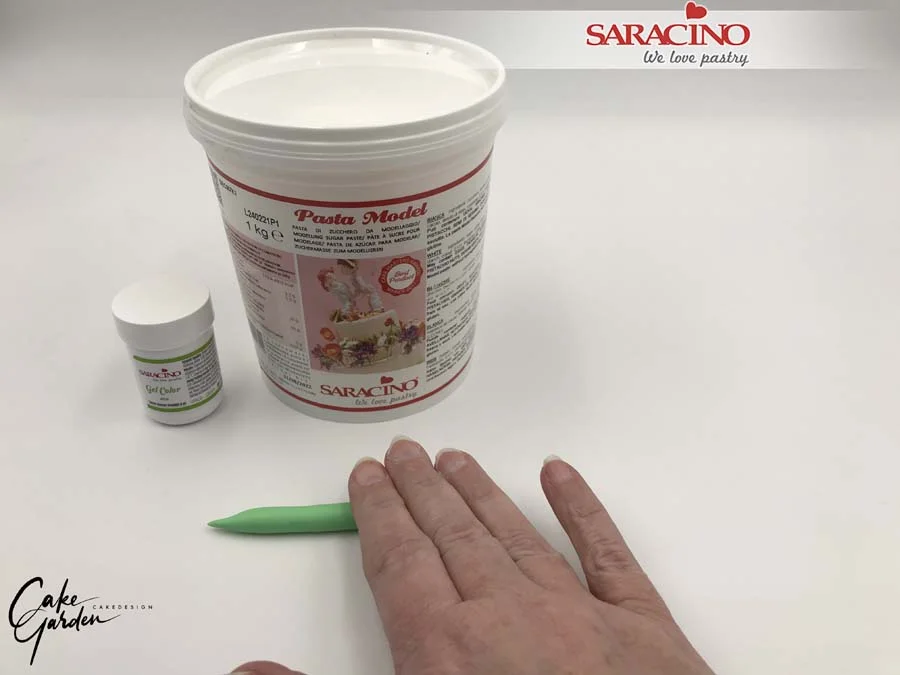
For the green beans you will need about 8-9g of modelling paste for one bean.

Add green gel colour to your modelling paste and knead it well. Roll to a ball.

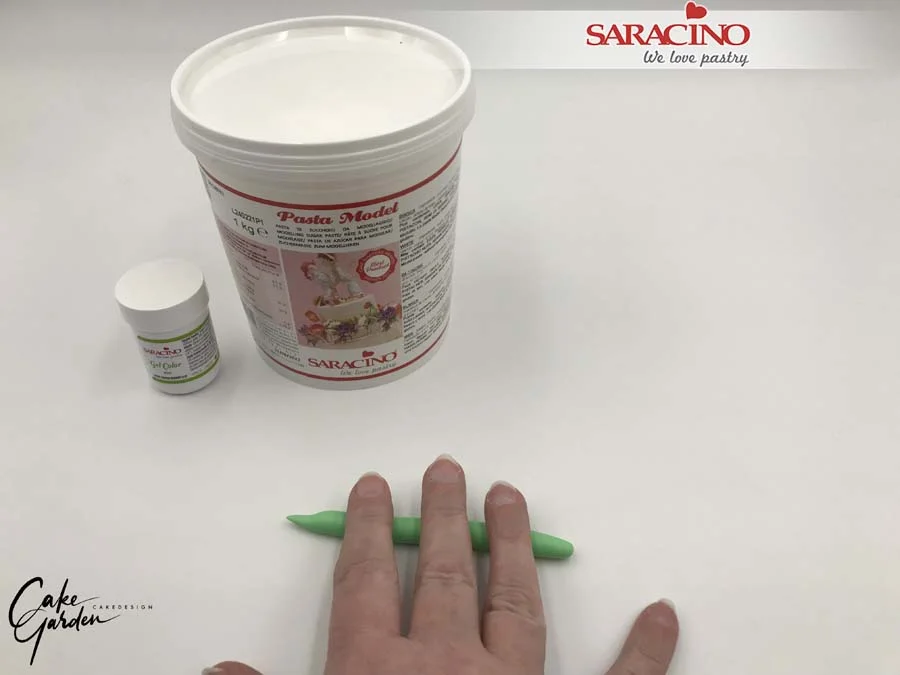
Step 20

Use about 8-10g of modelling paste and create a 16-18cm long sausage shape. Make sure the ends of the bean are rolled to a point.

Step 21

Use your fingers to create a lightly lumpy surface so it looks like it has seeds inside.

Step 22

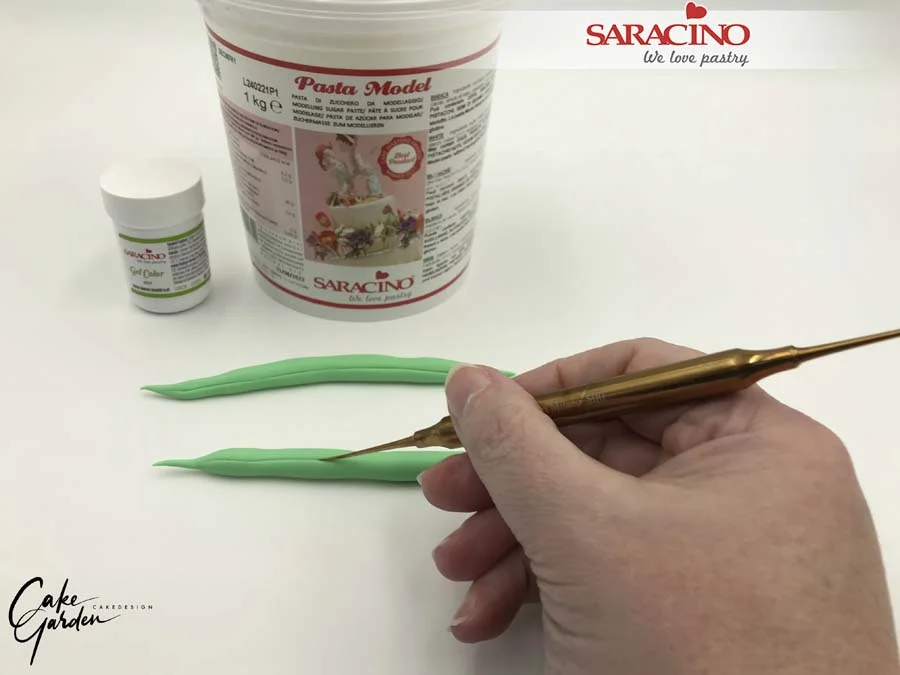
Use a sharp modelling tool to create two thin grooves at the top and bottom of the bean.

Step 23

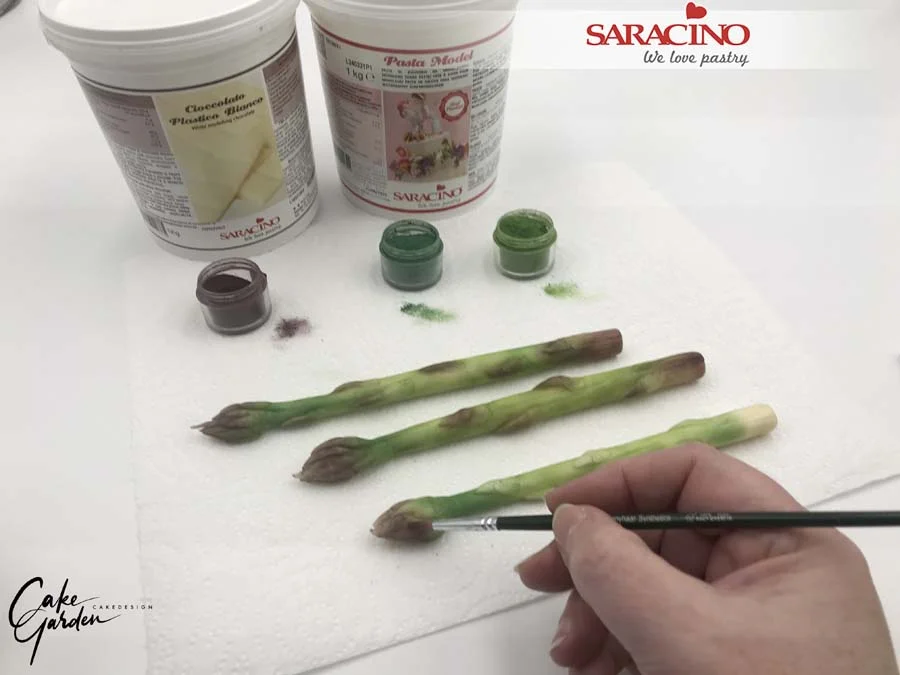
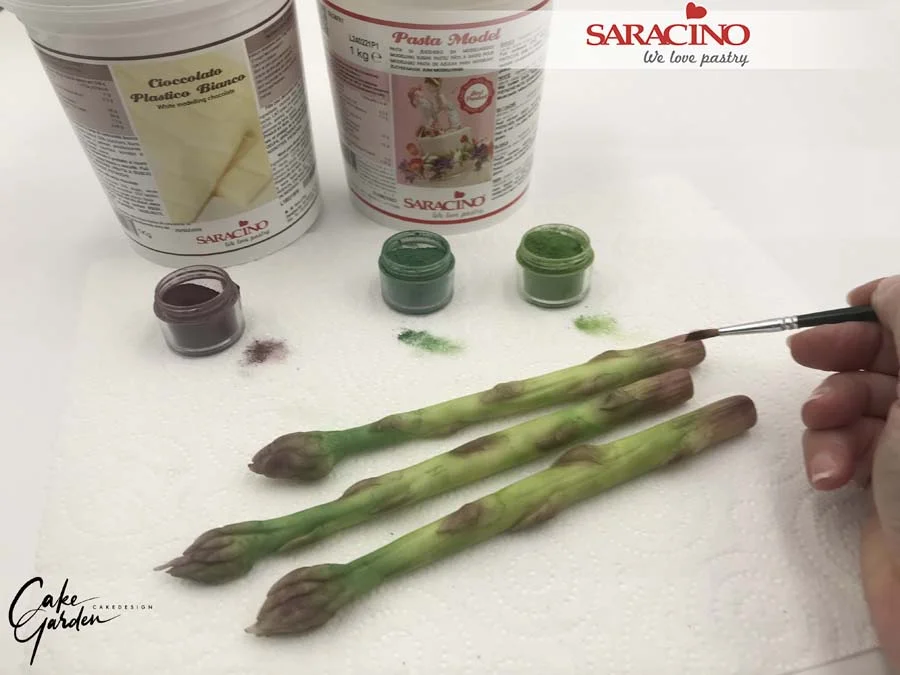
Once the asparagus are dried we are going to dust them to give a realistic appearance. You will need Alpine green, Spring green, aubergine and claret powders. Start by dusting the asparagus stem with the spring green. Don’t use too much dust at once and knock off the excess dust from your brush every time.

Step 24

Using the alpine green dust below the top of the asparagus and add highlights to the stem.

Step 25

Use the aubergine powder to dust the leaves at the top of the asparagus and the leaves on the stem.

Step 26

Also dust the bottom of the stem with the aubergine powder.

Step 27

Use a little claret dust on top of the aubergine to create a warmer look. I used dry kitchen paper to remove excess dust.

Step 28

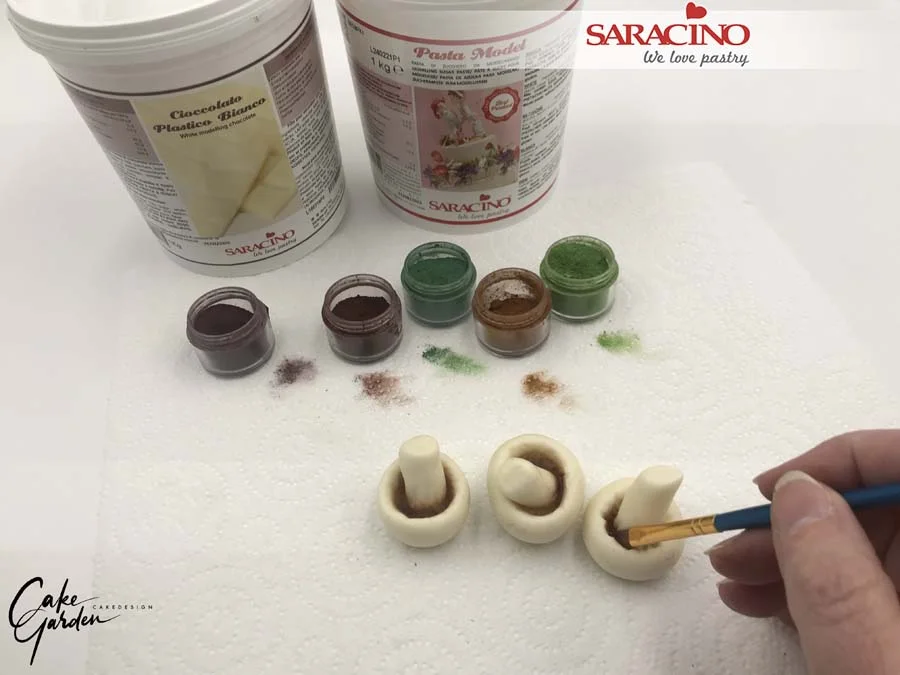
Use the dark brown colour powder to dust the gills of the mushroom.

Step 29

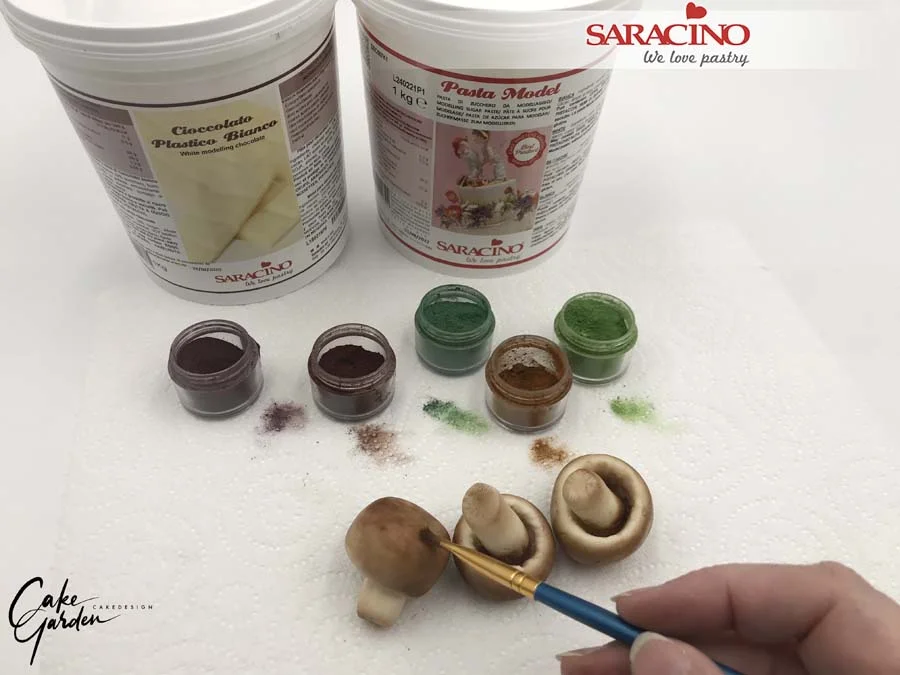
Mix the light and dark brown colours, don’t mix the colours too much as you still have to see the two seperate colours. Use a thin brush to apply the dust onto the cap of the mushroom. Make sure you remove the excess dust on your brush each time. Dust the mushroom all around the cap. And dust the bottom of the stem to give definition to the shallow notches.

Step 30

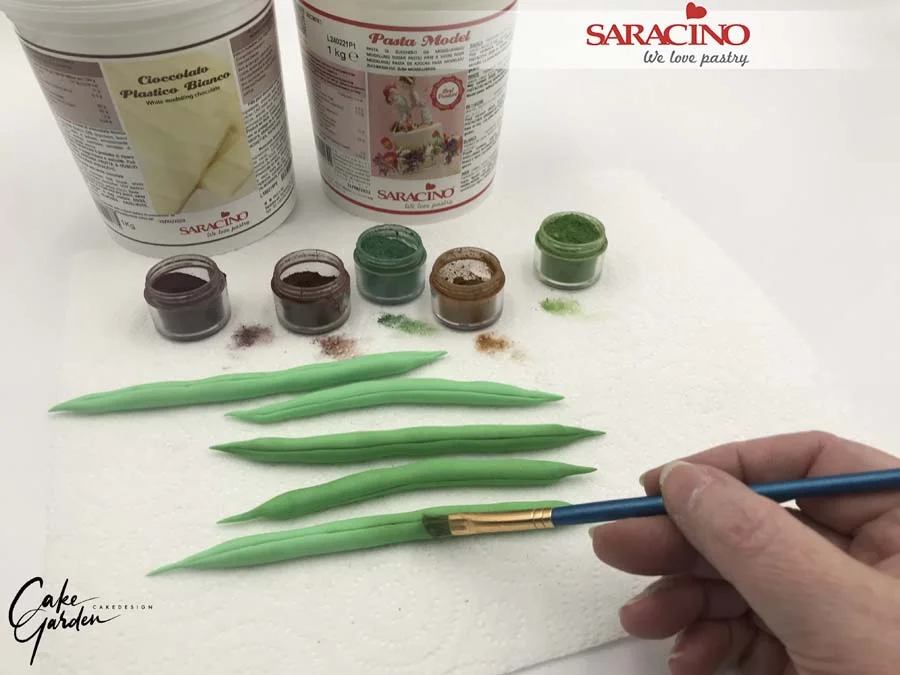
Mix some alpine green and spring green powders to dust the green beans. Dont over mix and make sure you still see both colours. Dust the beans with a soft brush.

Step 31

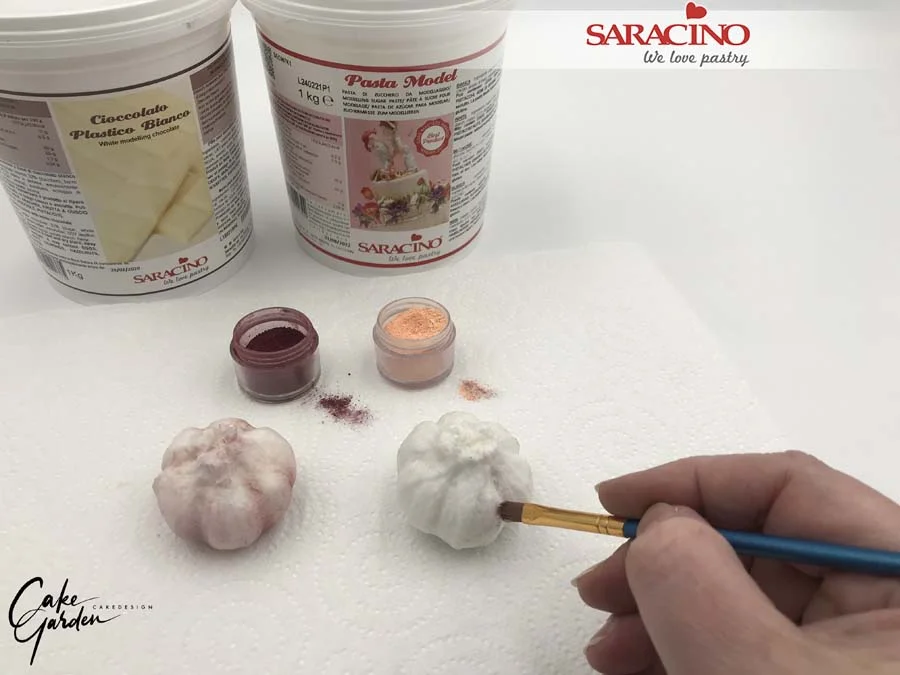
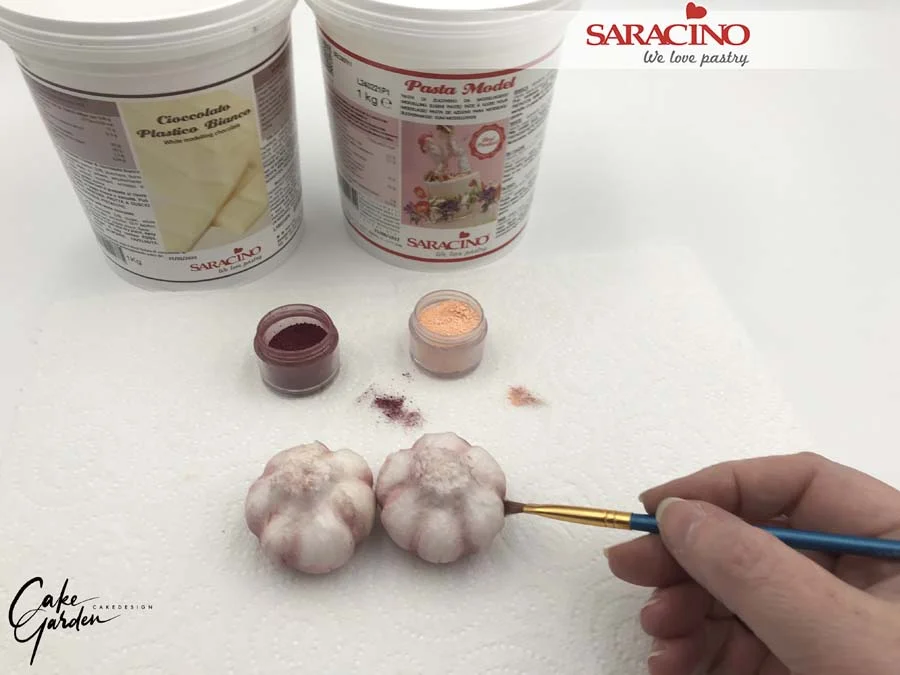
When the garlic is completely dry use the aubergine and peach powder to dust the garlic.

Start with the peach and use the aubergine to highlight the deeper parts between the cloves. If you like you can also use some claret dust to add warmth to the colours.

Step 32

Keep adding shade until you achieve the required look.

Step 33

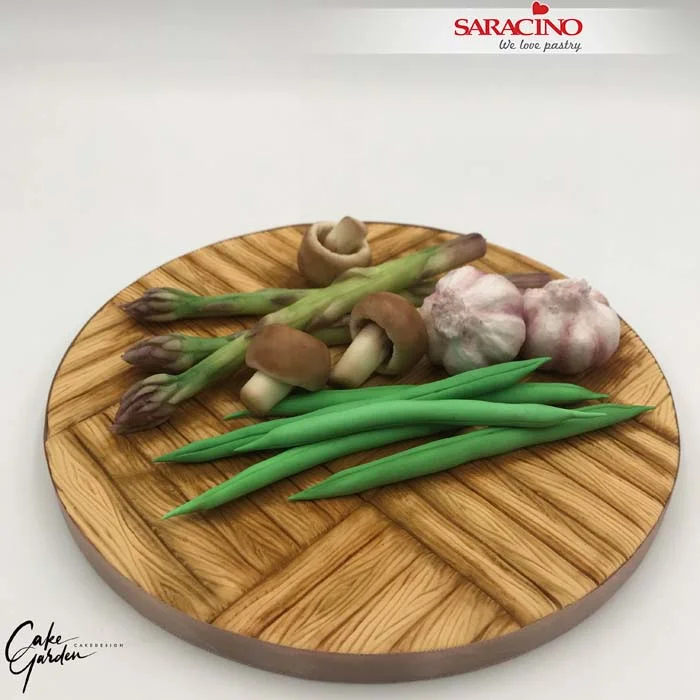
Now you are ready to decorate your cake! Have fun!     

MICE HAVE FUN CAKE TUTORIAL

MICE HAVE FUN CAKE TUTORIAL

Skill level: BEGINNERS

You will need:

  • Ingredients:
    • Saracino Pasta Top white and black
    • Saracino Pasta Model white and black
    • Saracino white modelling chocolate
    • Gel colours orange, light skin and black
    • Powder colours black, pink and brown
    • Cake gel
    • Rejuvenator spirit alcohol
    • Boiled cooled water
    • Wafer paper 0.6 or 0.27
    • Pump powder silver glitter
  • Equipment:
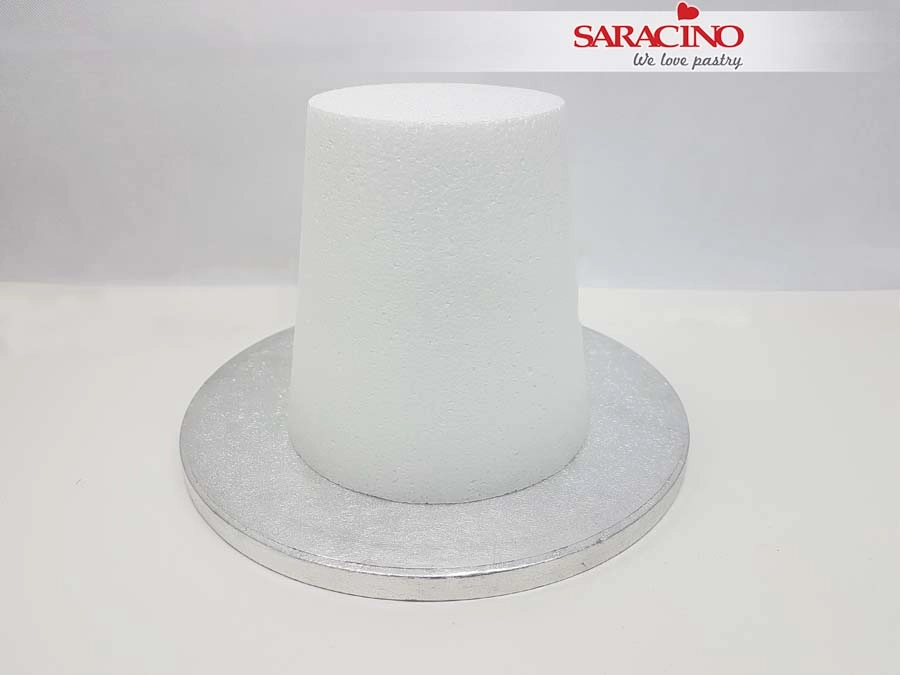
    • Conical dummy or cake diameter 15cm by 10cm
    • Drum 25 cm (10 inch)
    • Rolling pin
    • Sharp knife
    • Dresden tool
    • Ruler
    • Modelling tools
    • Cake smoother
    • Brushes
    • Wood cocktail sticks
    • Food processor
    • Ribbon

Step 1

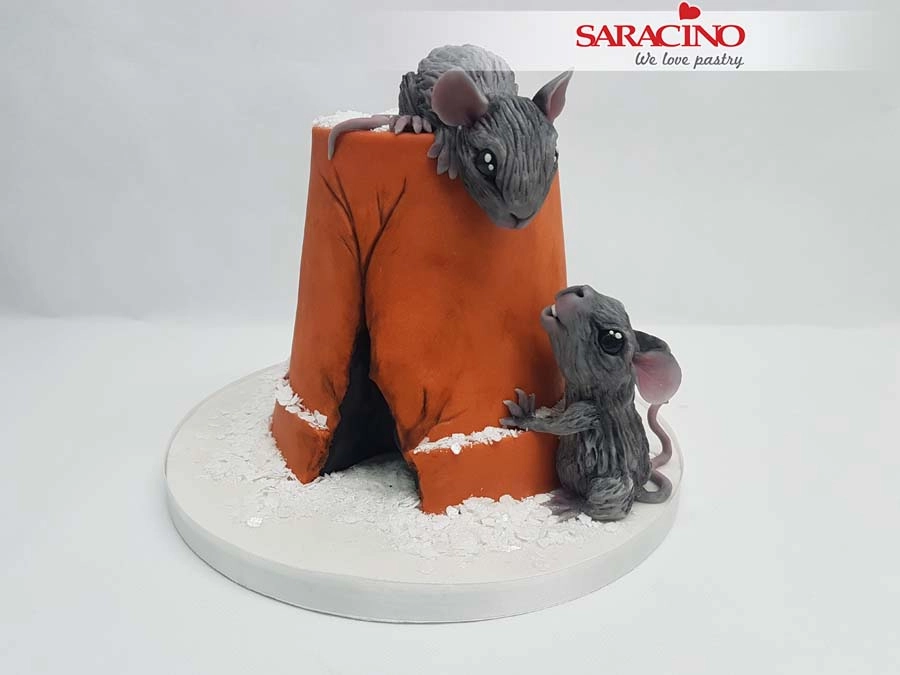
Use a conical dummy (or cake) with a lower diameter of 15cm and 10cm at the top and a 25cm diameter drum. If you use a cake, trim so that it is a conical shape.

Step 2

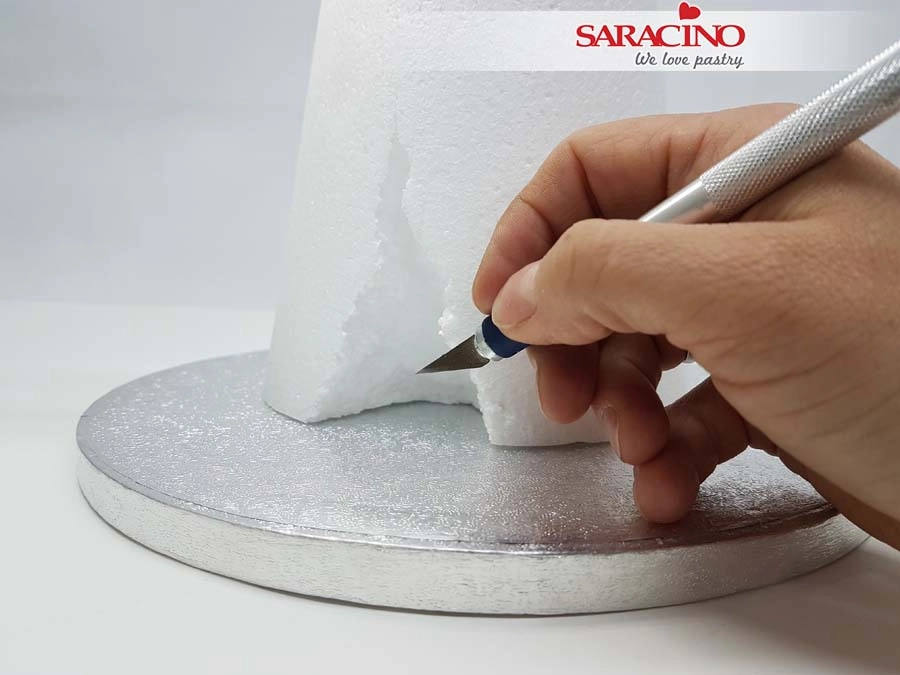
Form a triangular cut out in your cake or dummy so it looks like it has a hole in it.

If you use a real cake cover the cake with ganache.

Step 3

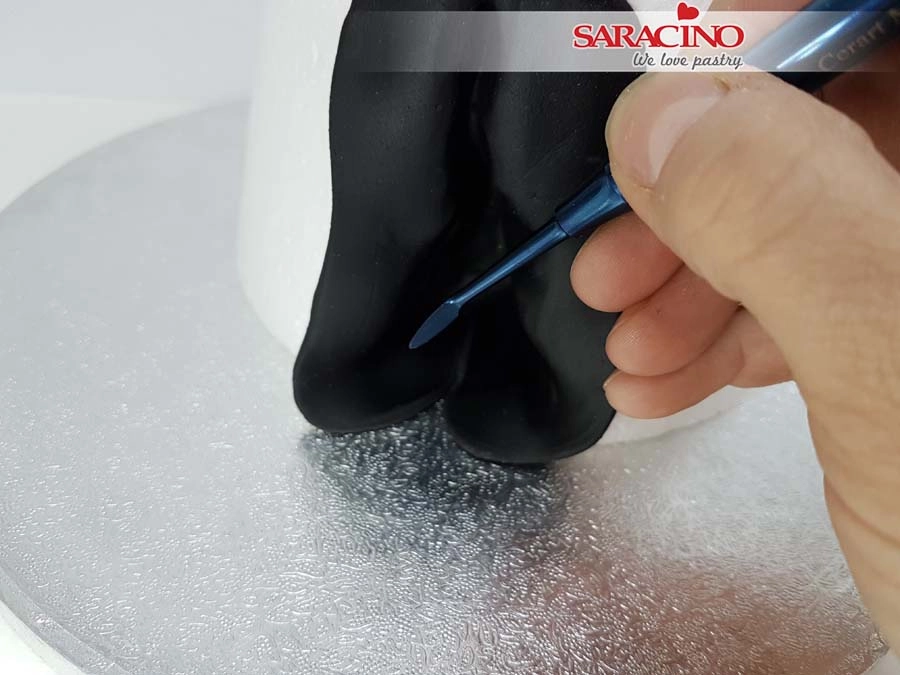
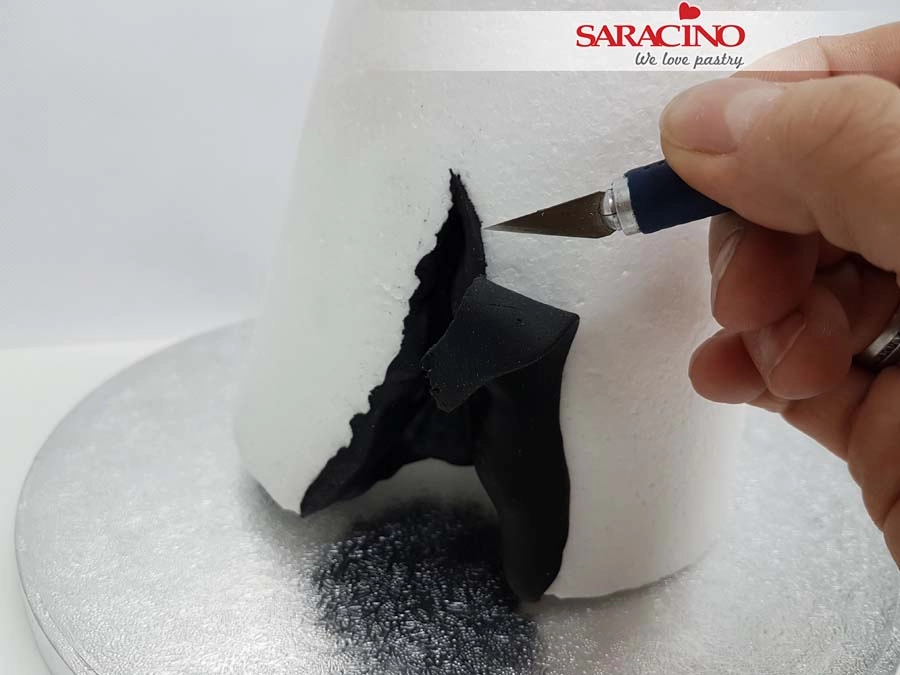
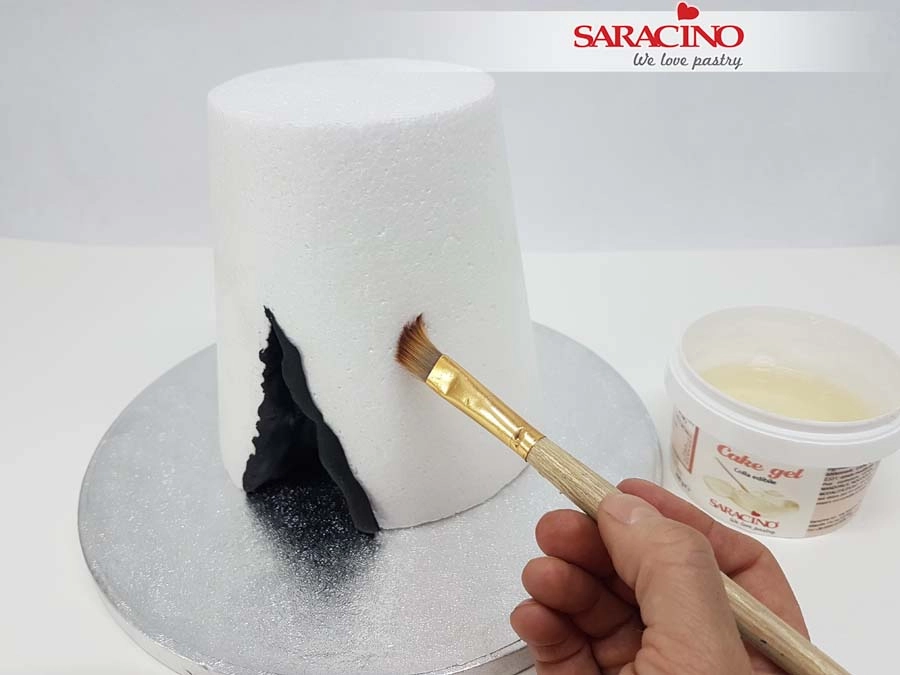
Prepare a small piece of black Pasta Top until smooth and pliable. Roll to your preferred thickness. Add a little cake gel inside the hole and press in the black fondant to line the hole. Use a Dresden tool to press the fondant to the sides and to add shape.

Step 4

Remove the excess paste with a sharp knife.

Step 5

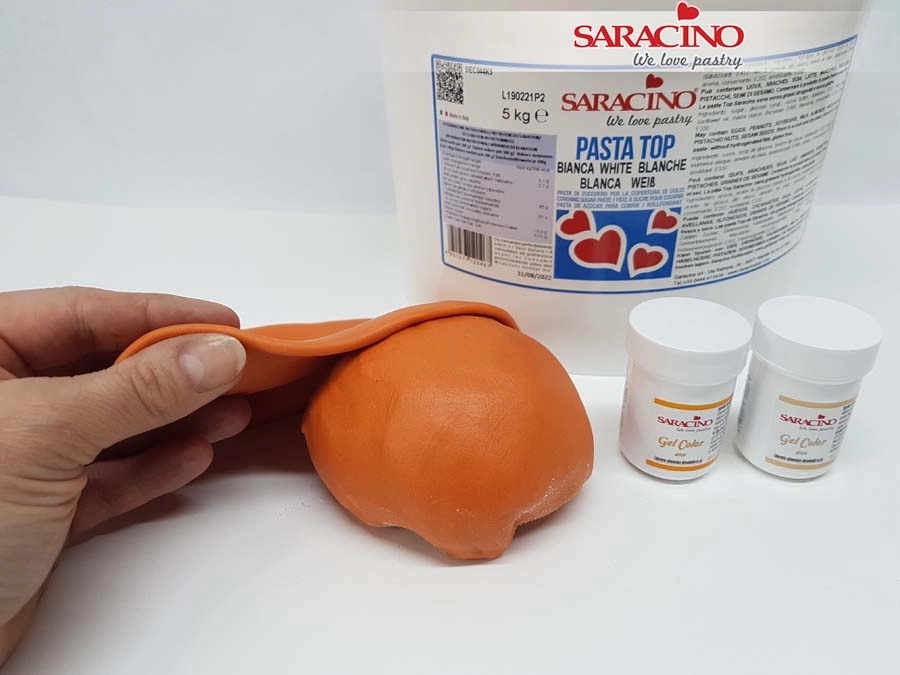
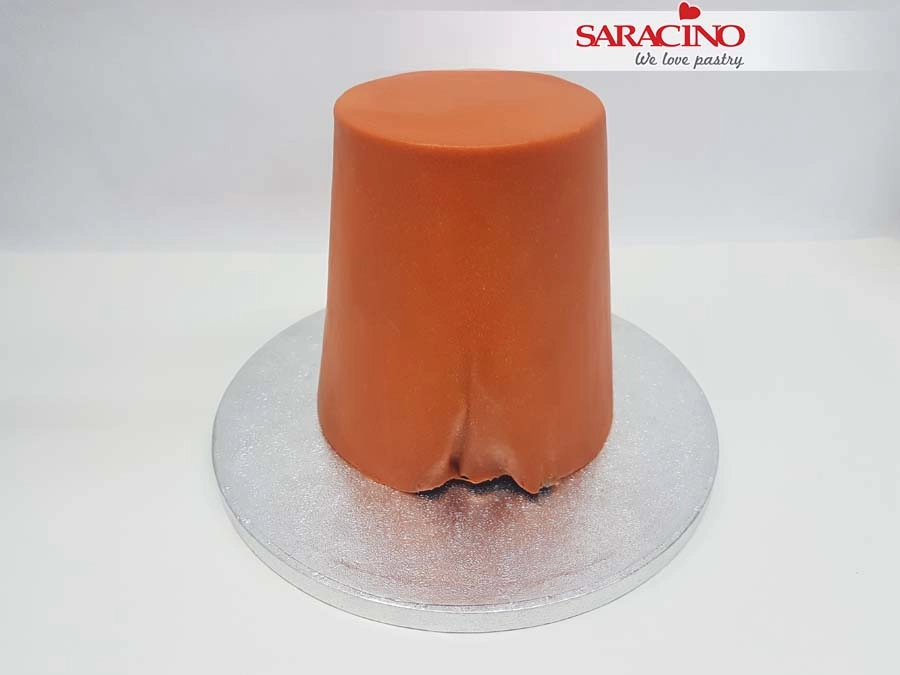
Using 350g of white Pasta Top make a dark orange colour by mixing the orange and light skin tone gel colours.  Add as much of the light skin colour as you want to achieve the desired colour of the flower pot. You can also use a different base colour for your flower pot. Knead the paste until smooth and pliable. Roll to your preferred thickness (Saracino Pasta Top can be rolled very thinly and is very stretchy. Perfect for covering large or unusual shaped cakes).

Step 6

Cover your real cake with ganache or the dummy with boiled, cool water or cake gel to help the fondant stick. Place the dummy (or cake) on the cake board.

Step 7

Place the fondant gently over your dummy (or cake). Smooth the top and edges with your hand.  Sharp edges are not necessary as it is a rustic flower pot. Gently pull out the folds and smooth down with your hand pressing the paste to the dummy (or cake) until all folds are gone. Trim off the excess fondant with a sharp knife. Keep the cuttings in a sealed bag for later use.

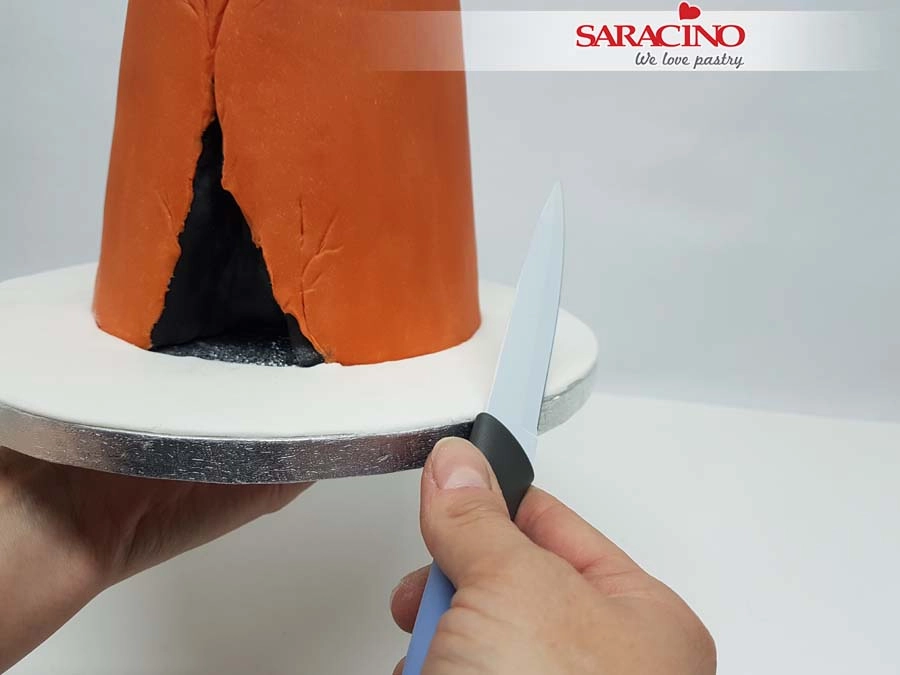
Step 8

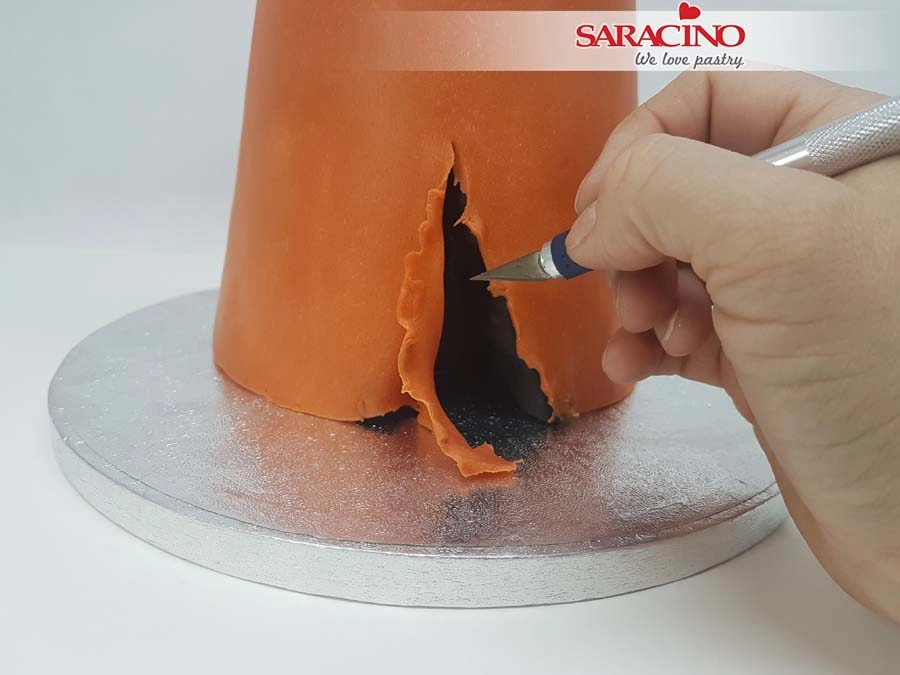
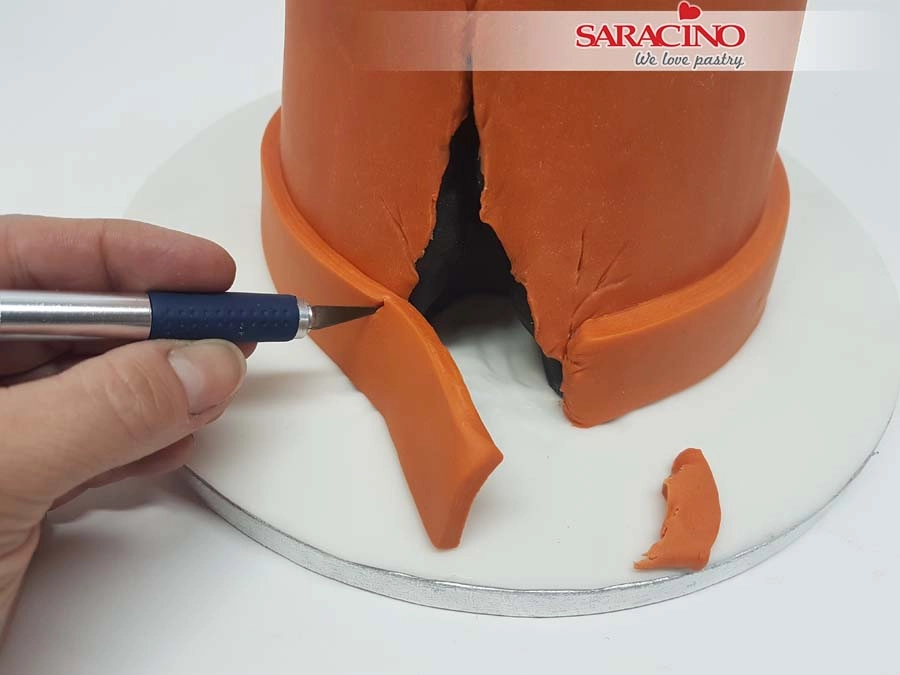
Carefully cut out the paste that is covering the hole at the bottom of the dummy with a sharp knife. It can be cut a little roughly.

Step 9

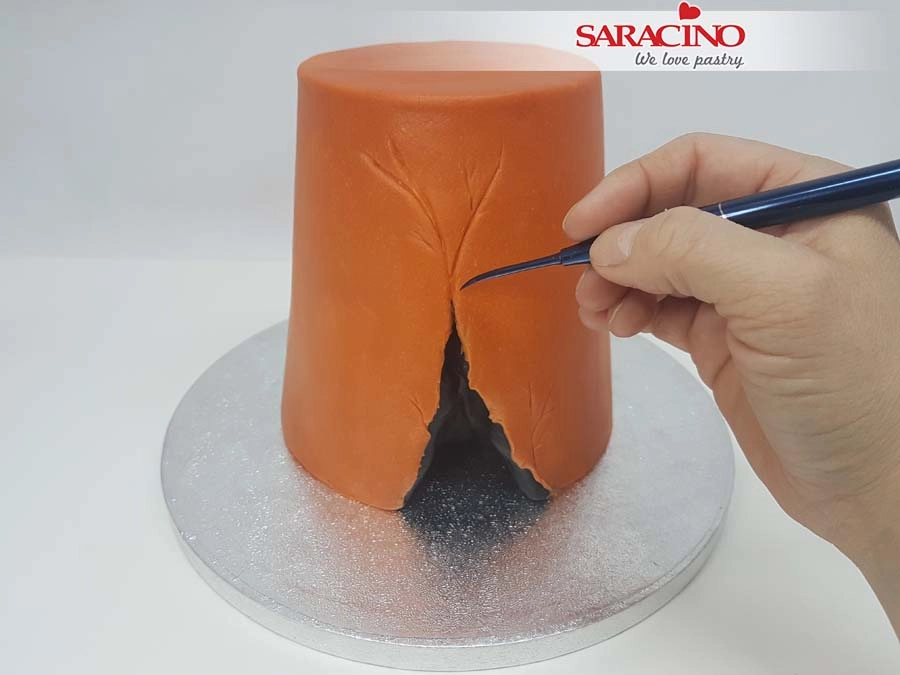
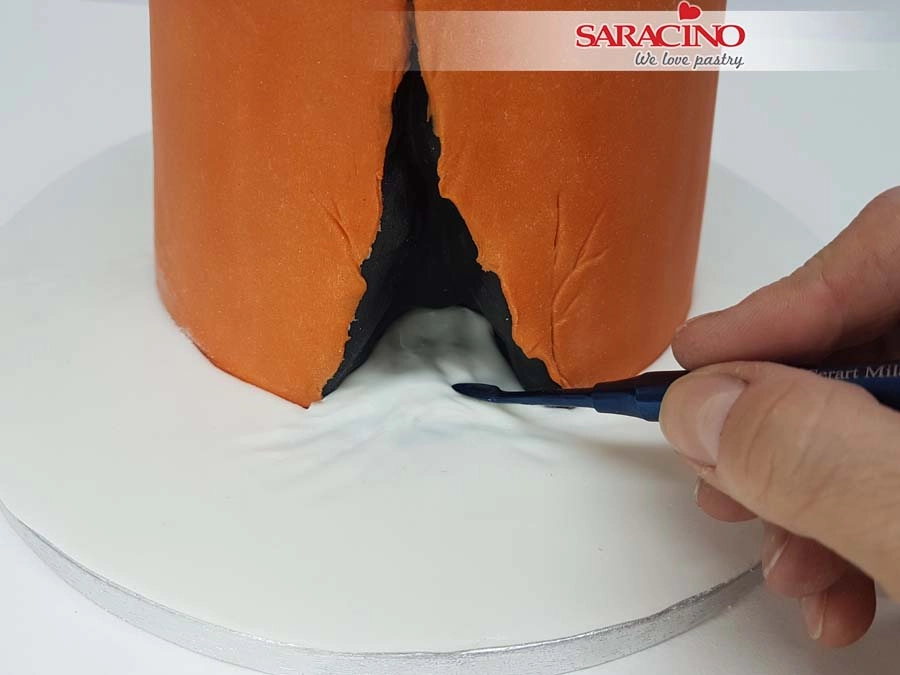
Draw lines with a Dresden tool that start from the edges of the hole. Make the lines random and vary the depth of the lines.

Step 10

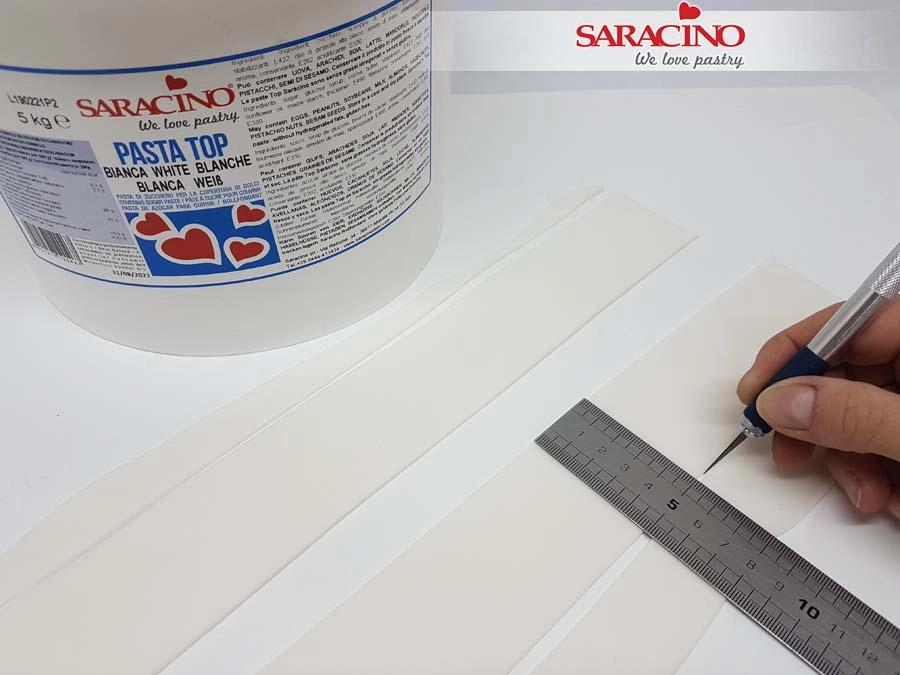
To cover the cake drum use a small amount of white Pasta Top and knead it well. Roll out to a thickness of 0.2mm. Cut 5cm wide strips (width is to suit the size of drum you used).

Step 11

Add a little cake gel to the drum. Cover the drum with the white Pasta Top strips. Start at the back and gently pull it around the cake placing it onto the drum. Due to the high elasticity the fondant does not tear. Cut away the excess paste.

Step 12

Using a small amount of white Pasta Top cover the visible part of the drum in the hole of the cake. Add texture with the Dresden tool.

Step 13

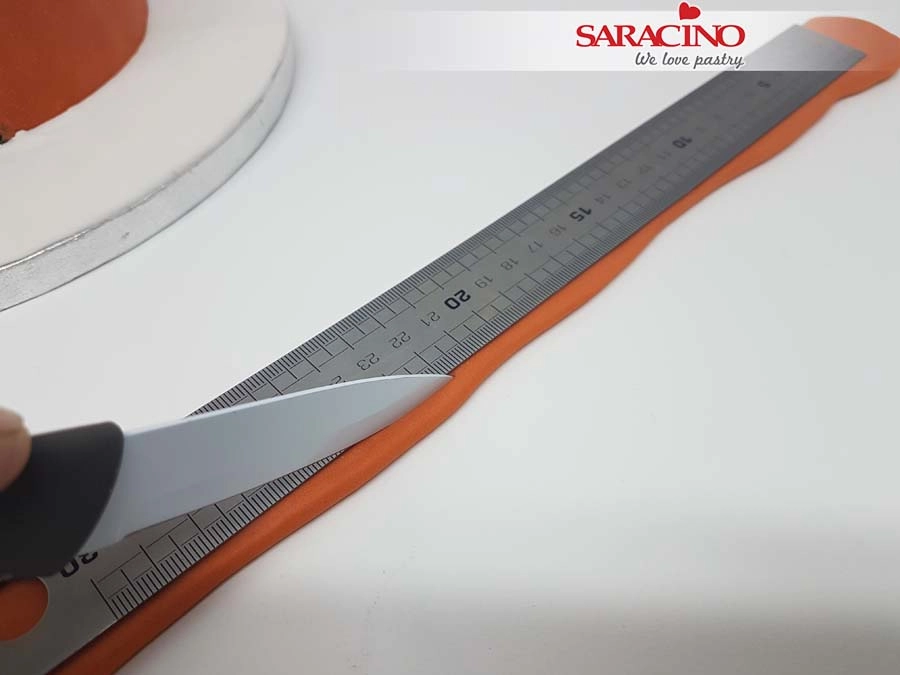
For the thick rim of the plant pot use 170g of the dark orange Pasta Top and roll into a thick strip. Roll out the strip to 5mm thick. Don’t roll it out too thin! Cut out a strip of 3cm wide and approximately 50cm long.

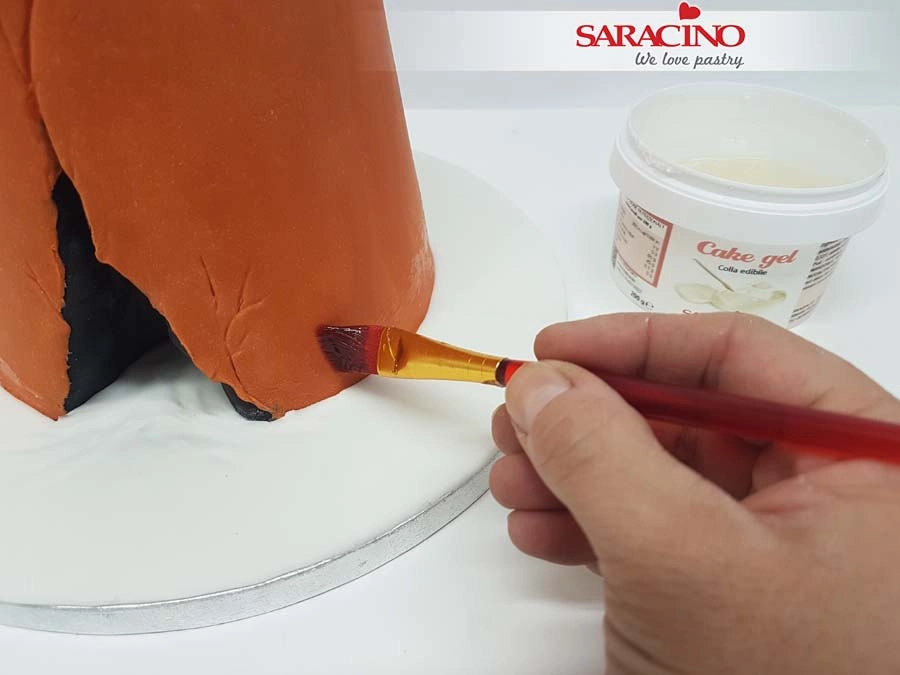
Step 14

Apply a little cake gel around the bottom of the cake.

Step 15

Fix the 3cm strip around the bottom of the cake and cut off the excess. This does not have to be super neat as we want it to have a ‘broken’ look.

Step 16

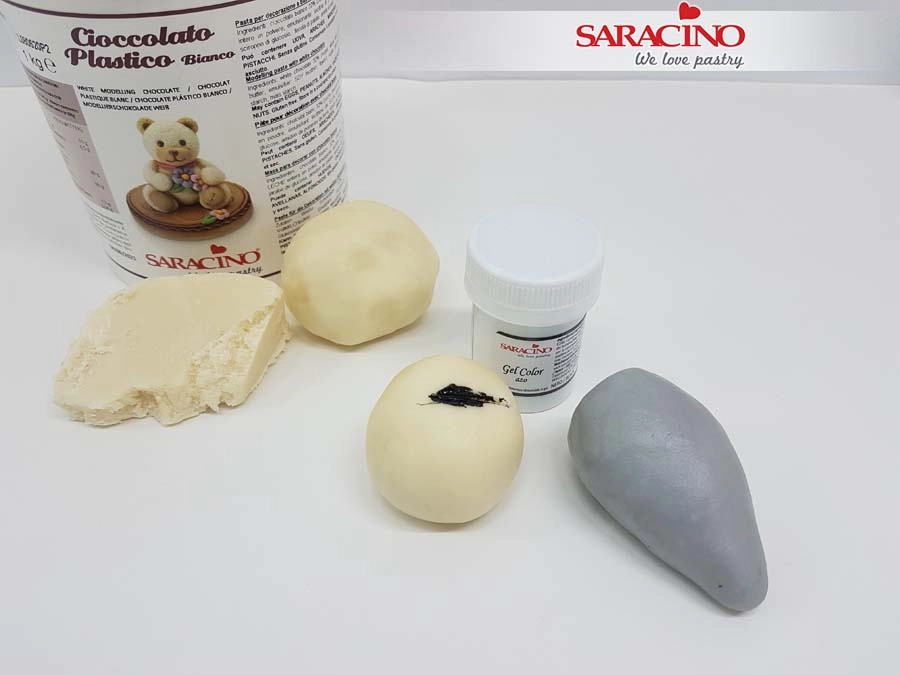
For the mouses body use 250g of white modelling chocolate. Knead until soft. Do not knead for too long as it may become too soft for modelling. Add a little black gel colour while kneading. Weigh 60g and roll to a tear drop shape.

Tip: If the modelling chocolate has become too soft allow it to rest for a while to cool down.

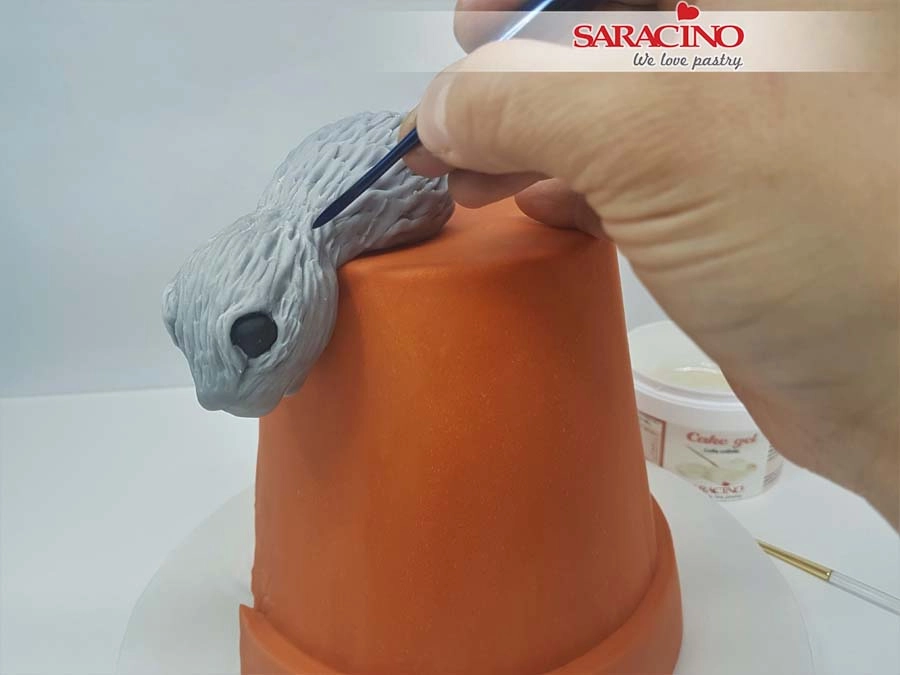
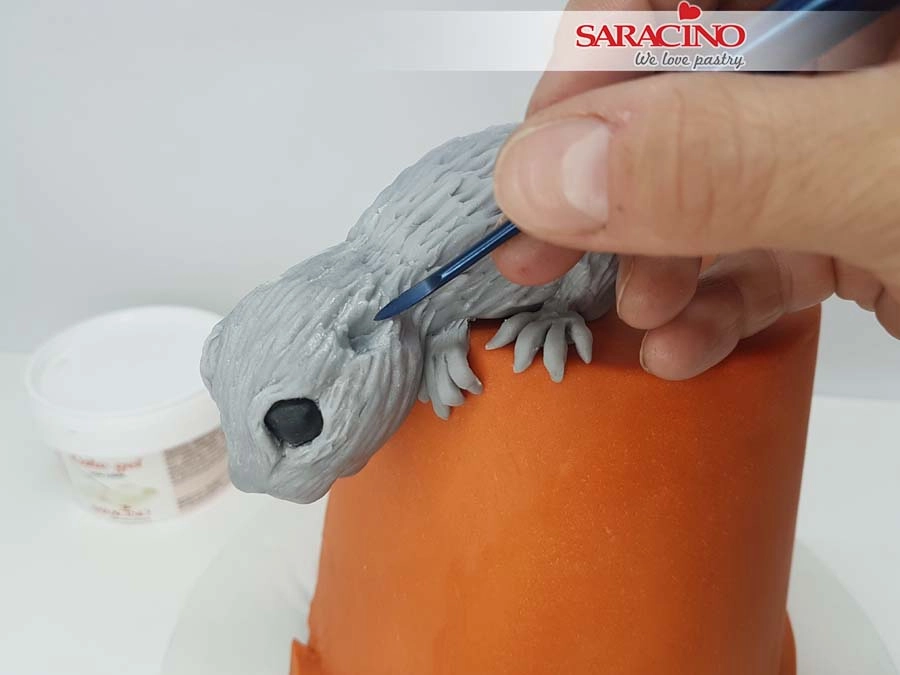
Step 17

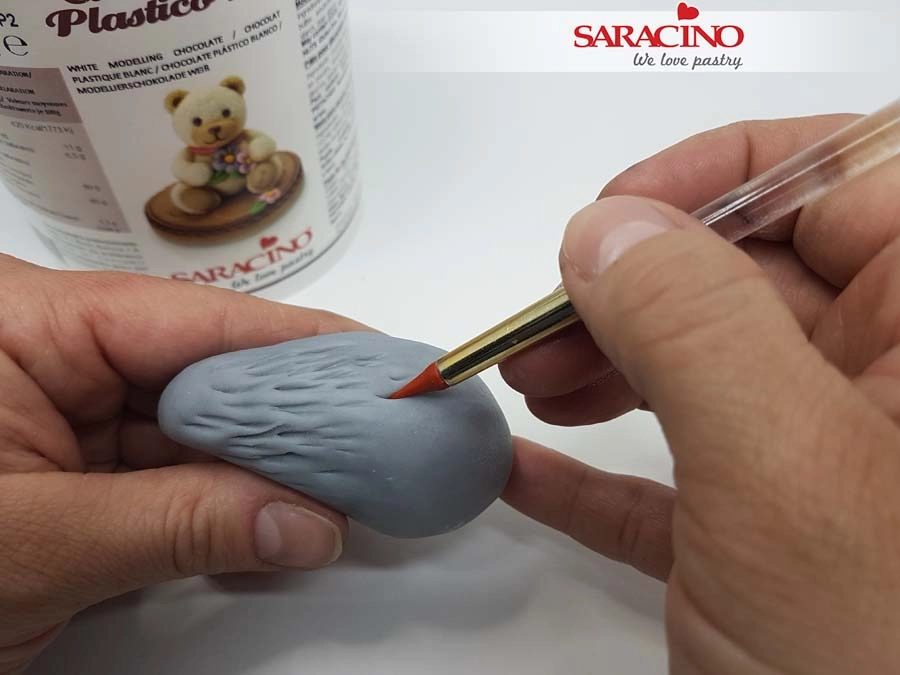
Add fur texture with a modelling tool. Mark the paste in various directions to get a random effect. Make sure you work in one direction as this will give the hair structure look.

Step 18

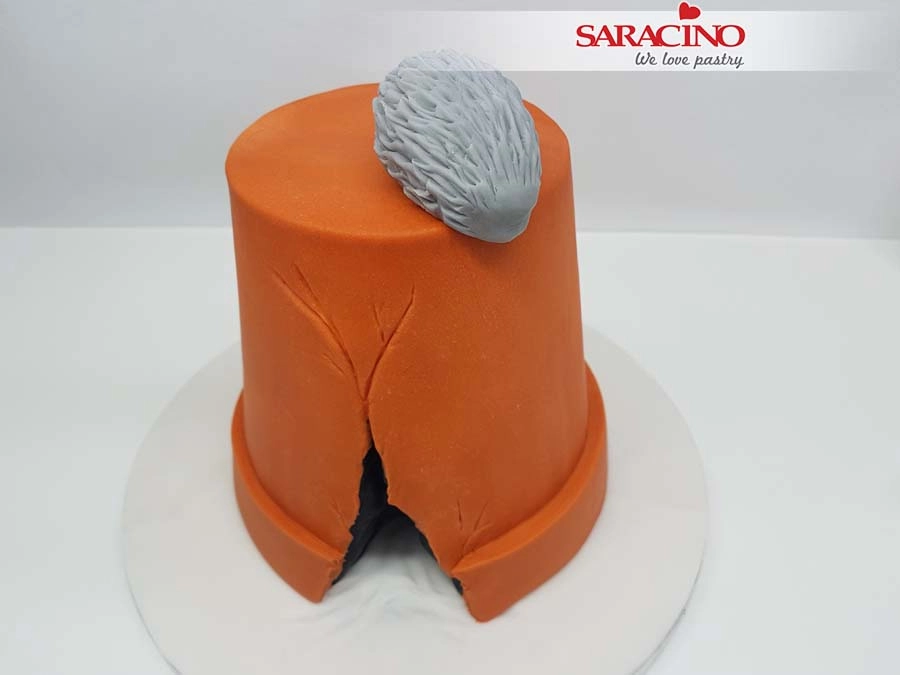
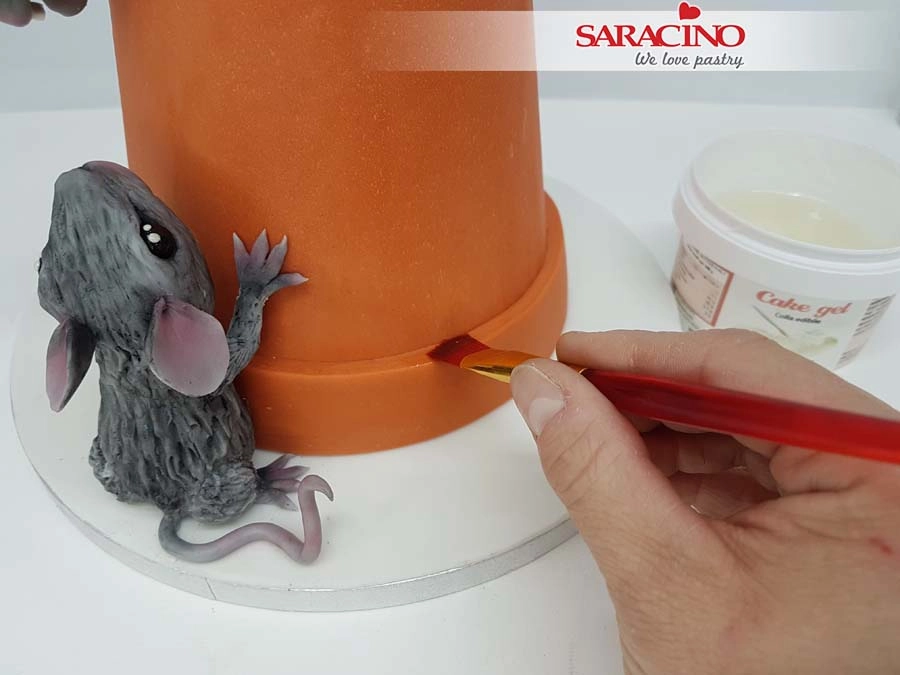
Use a little cake gel to fix the body on top of the cake.

Step 19

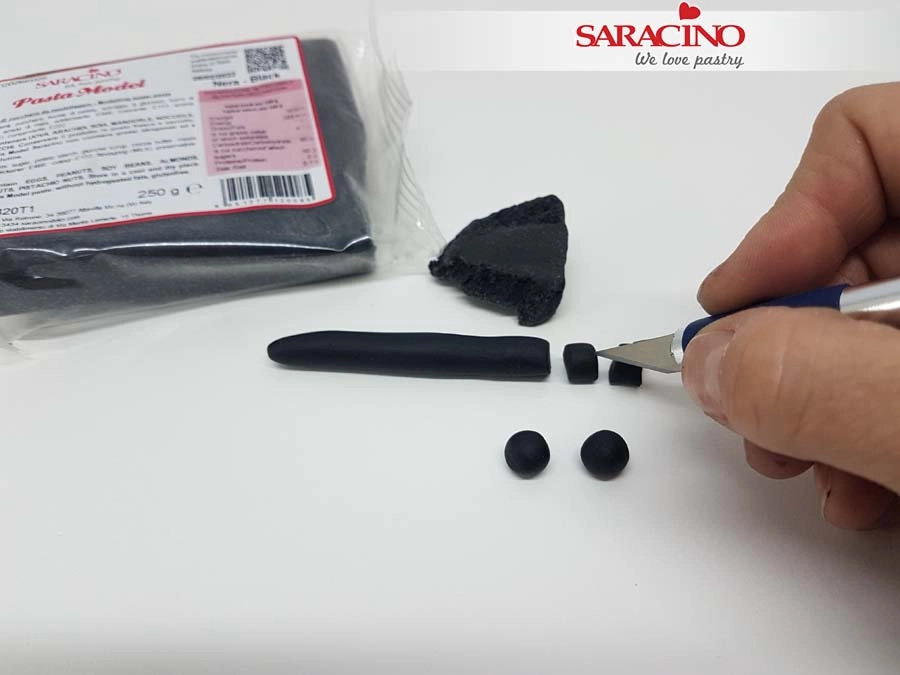
Using 5g of black Pasta Model roll into a 5mm thick string. Cut 4 pieces with a weight of 0.5g and roll to a ball shape for the eyes. Allow them to harden.

Step 20

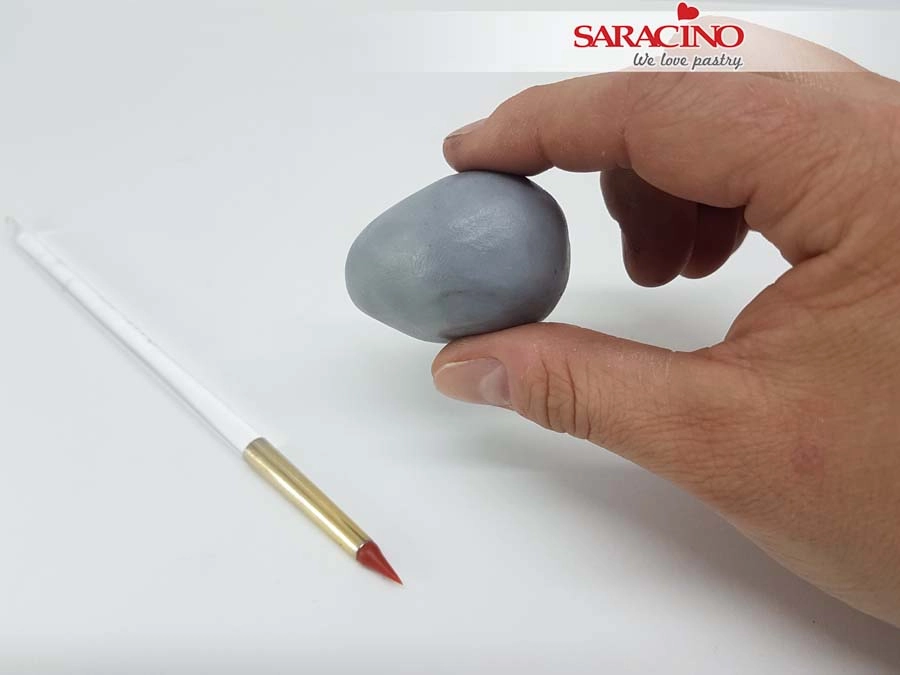
For the head use 40g of grey modelling chocolate and roll to a tear drop shape. Do not hold the modelling chocolate in your hands for too long as it may become too warm and it will be less easy to work with.

Step 21

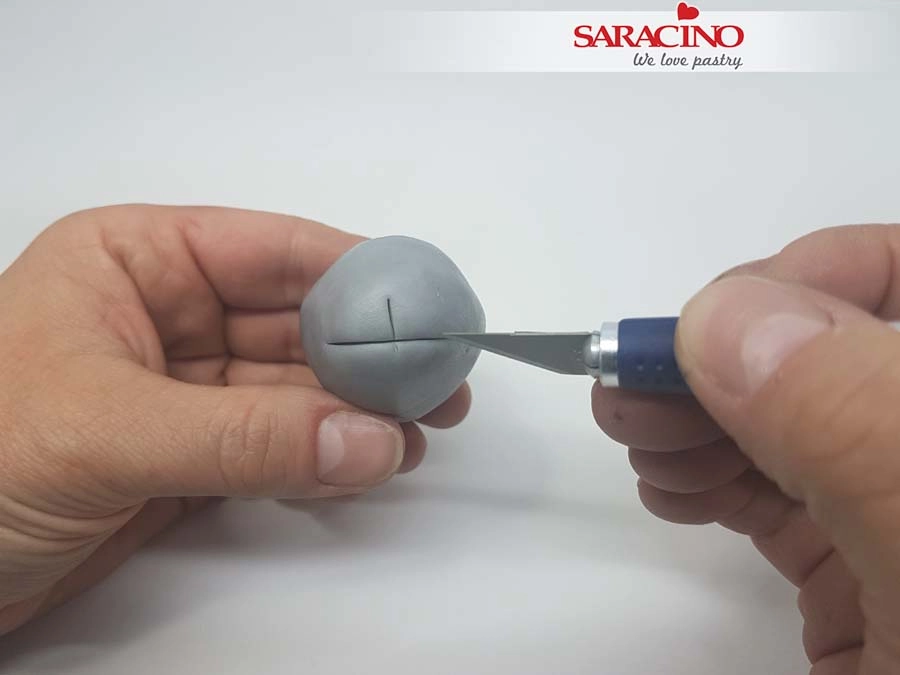
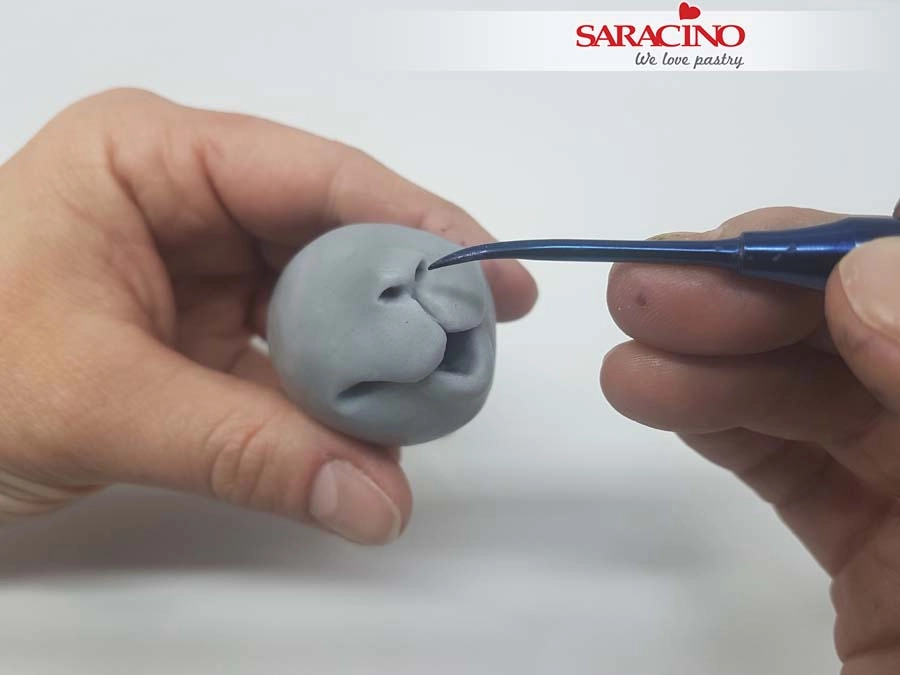
Make a horizontal cut on the thin end of the teardrop. This will be the mouse’s mouth. Make a 0.5cm vertical cut above this for the nose area.

Step 22

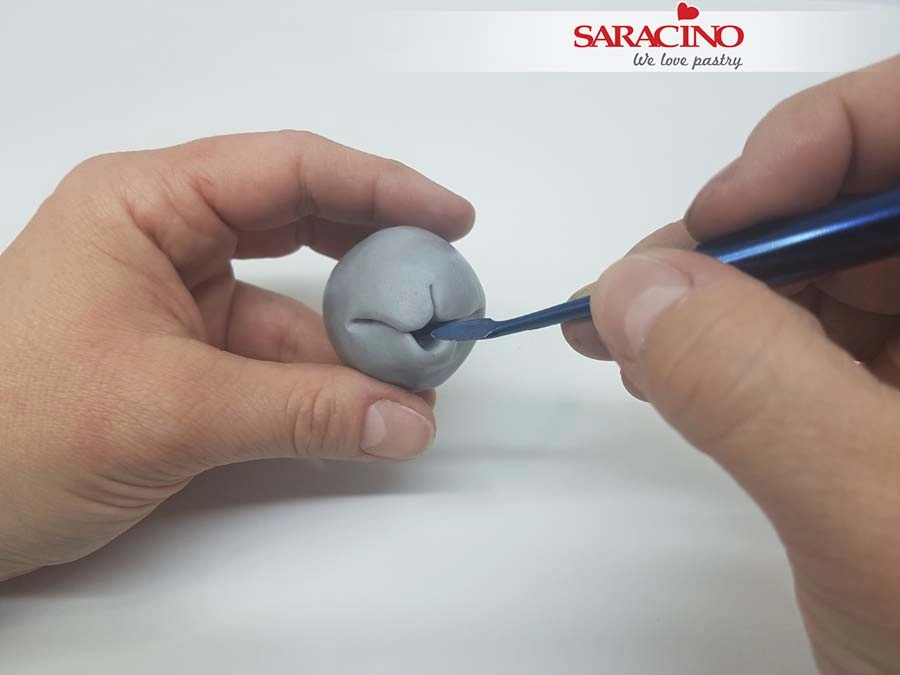
Model the mouth with the Dresden tool. Press the chocolate down in the middle and press out to the sides. Press the bottom of the mouth in a little bit. Shape the front of the muzzle.

Step 23

Shape the nose with the narrow end of the Dresden tool. Insert the tool either side of the vertical cut and gently pull up slightly. This gives volume to the nose.

Step 24

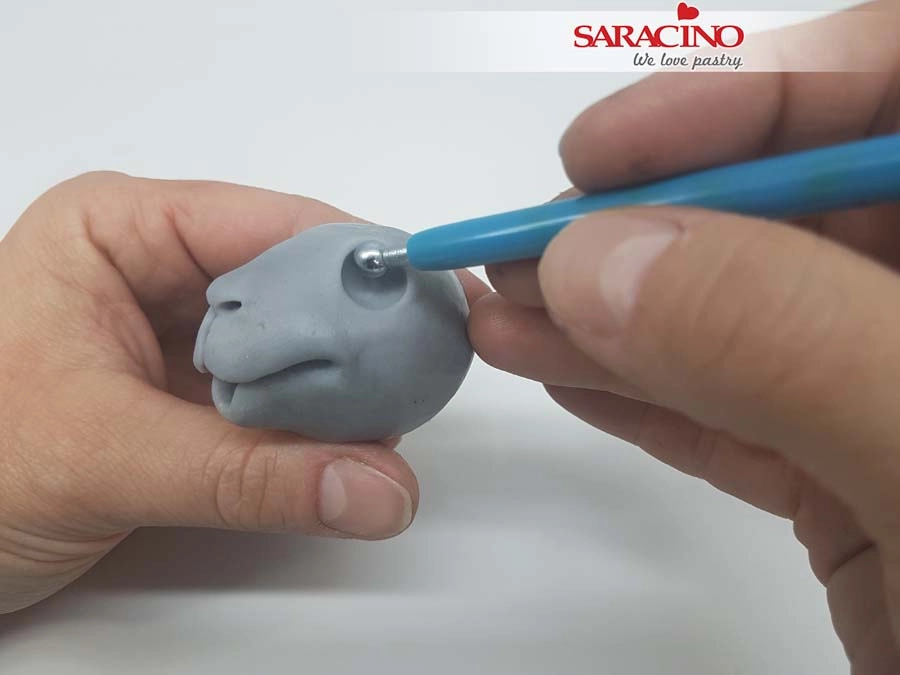
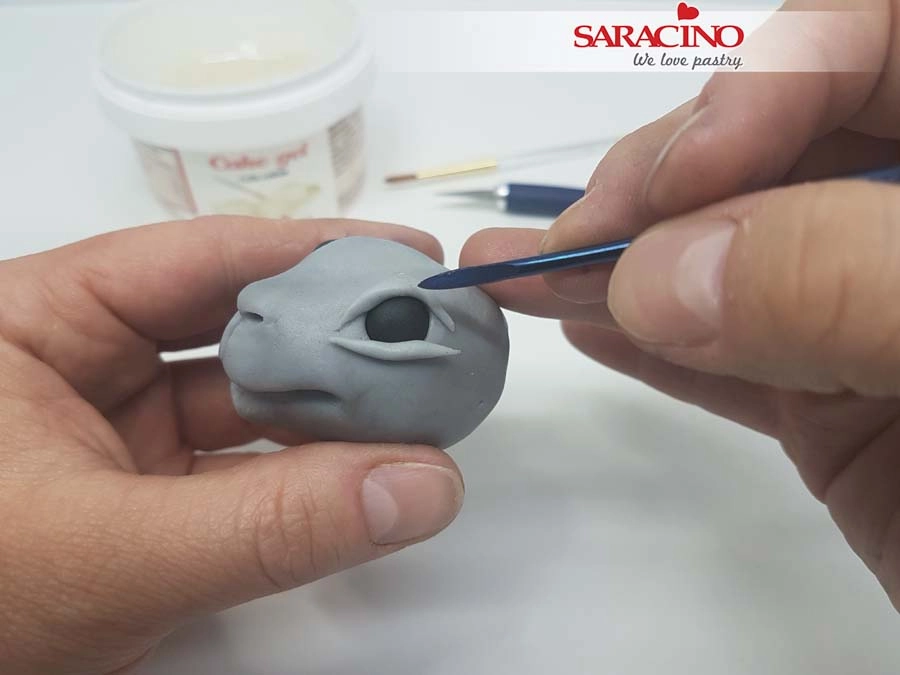
Form a socket of 5mm diameter for the eyes on either side of the head with the ball tool.

Step 25

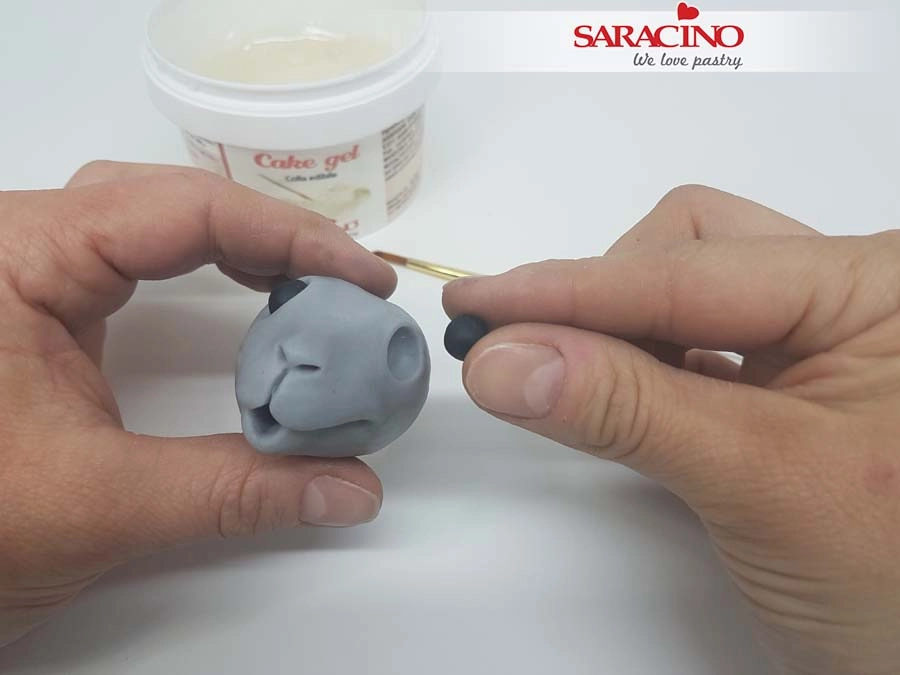
Use a little cake gel to fix the eyes into each socket.

Step 26

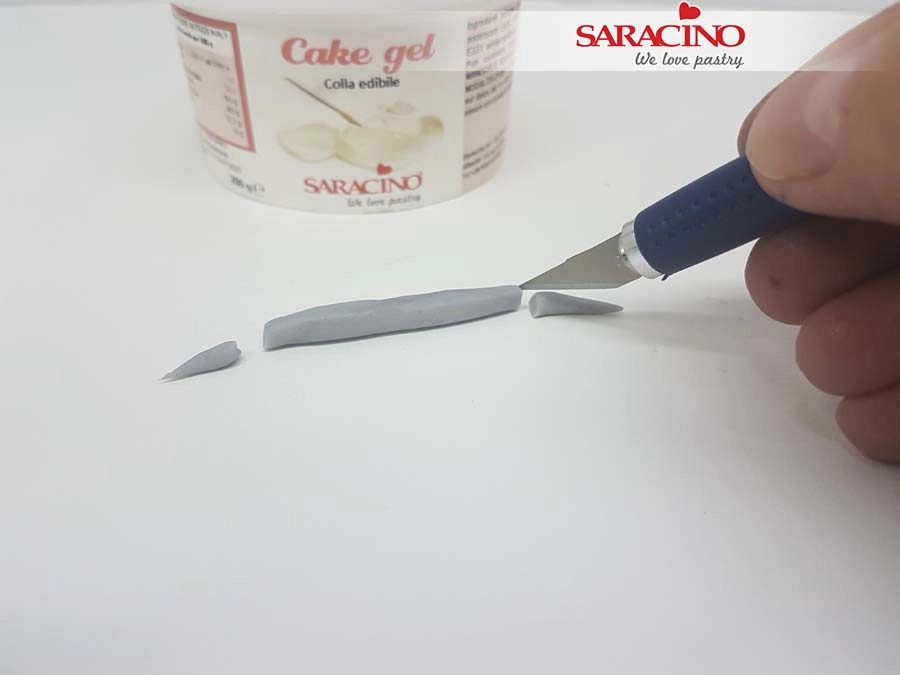
Roll a thin strip with pointed ends out of grey modelling chocolate. Cut a length of 1cm from each end for the eyelids.

Step 27

Make sure that both ends are pointed. Fix the eyelids below and above each eye.

Step 28

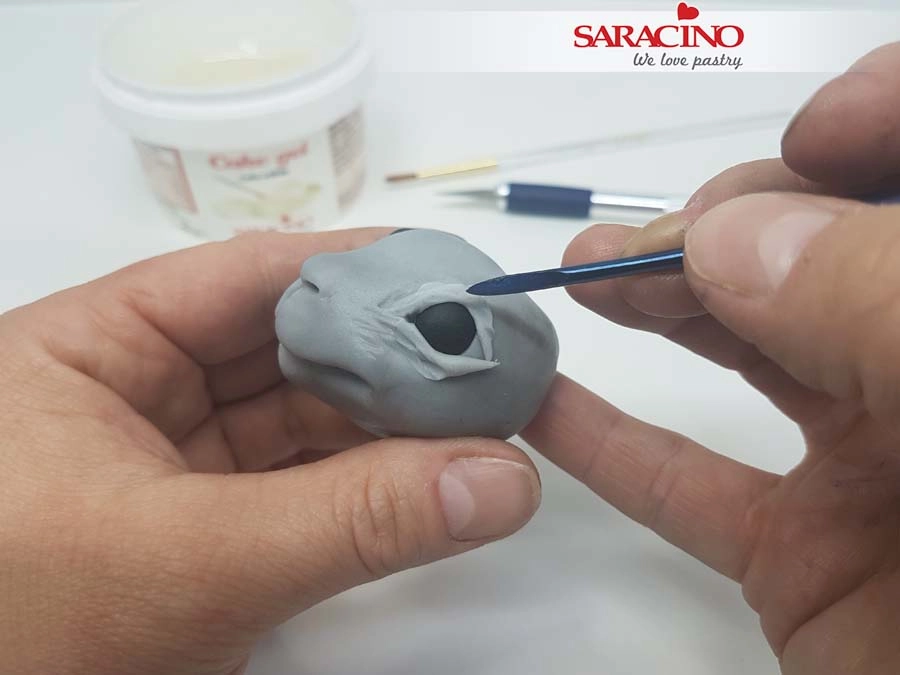
Using your Dresden tool blend and shape the face and eyelids.

Step 29

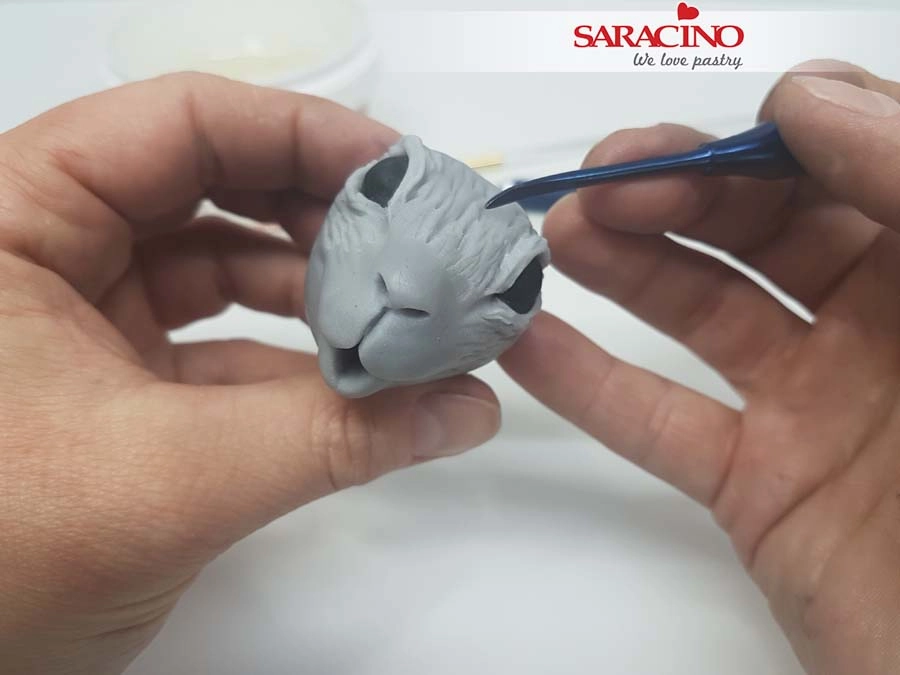
Add the fur texture to the head. Make sure to work back from the front of the muzzle. Again, do not hold for too long otherwise it may become too warm and deform. If it is too soft to work with place aside to allow to cool.

Step 30

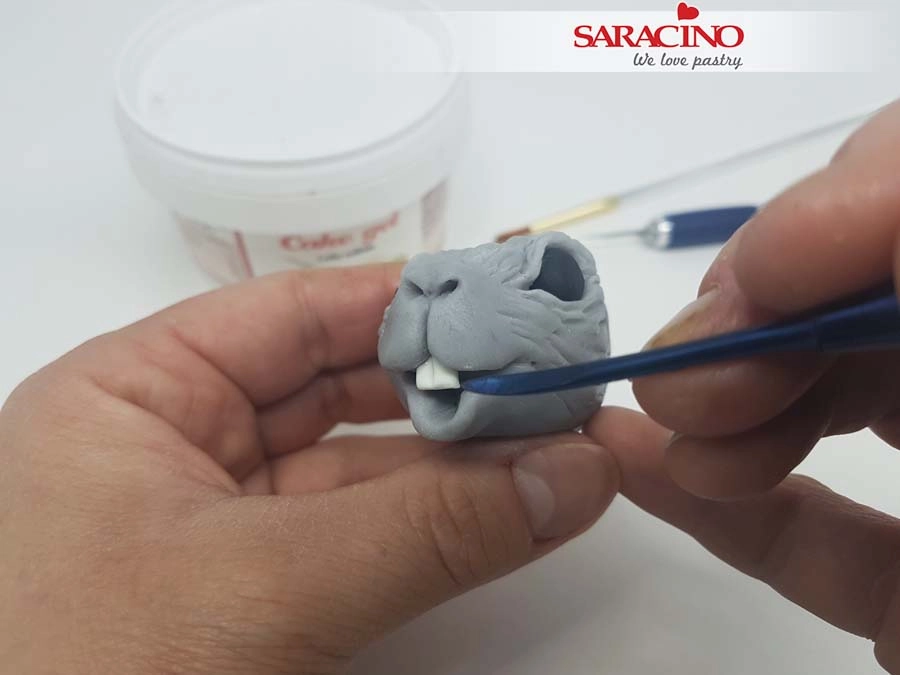
For the teeth cut a 3 x 3mm square of white Pasta Model. Cut off the corners and press a line in the middle with your knife. Fix the teeth using a little cake gel.

Step 31

Attach the head to the body looking down. To fix you can use cake gel with a cocktail stick.

Step 32

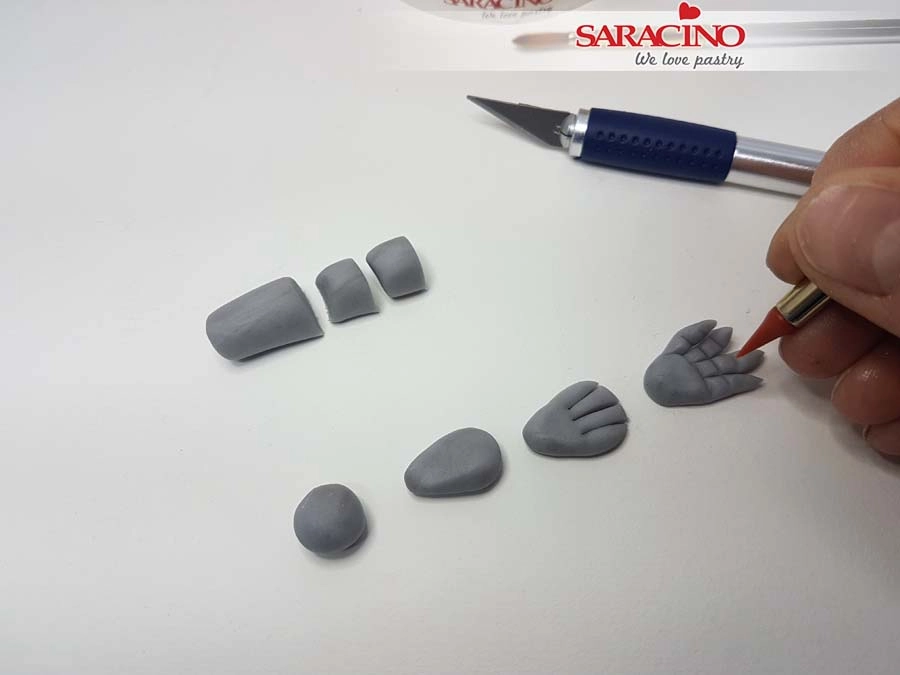
For the feet take 4g of grey modelling chocolate and divide into 4 equal pieces. Roll one piece into a ball and press flat with your finger. Cut 4 notches on the front of the flat circle with a sharp knife. Shape the toes. Press two horizontal lines into the toes with the back of your knife. This allows you to shape them more naturally. Repeat these steps until you have four feet.

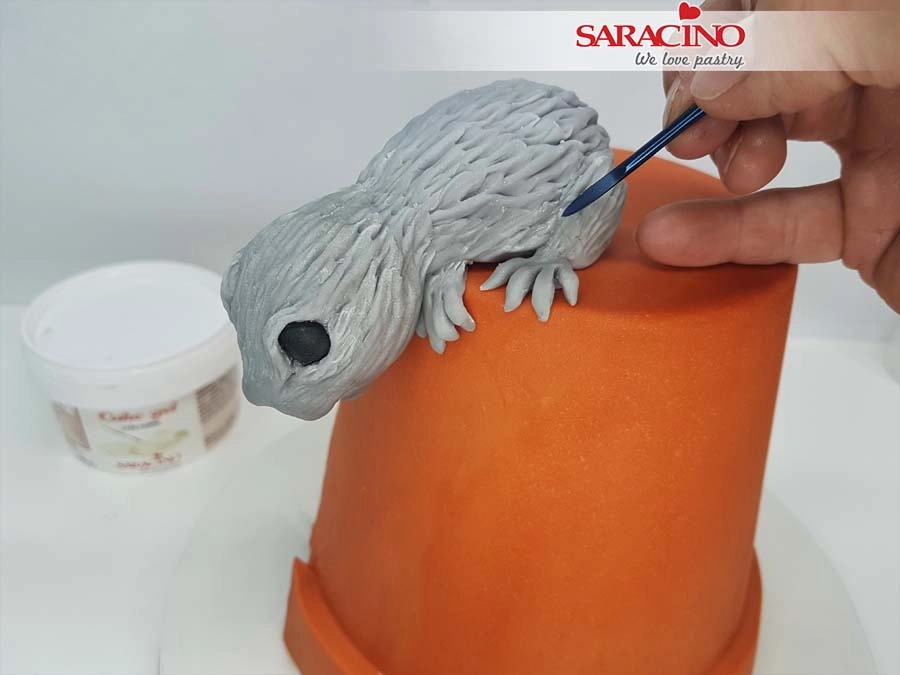
Step 33

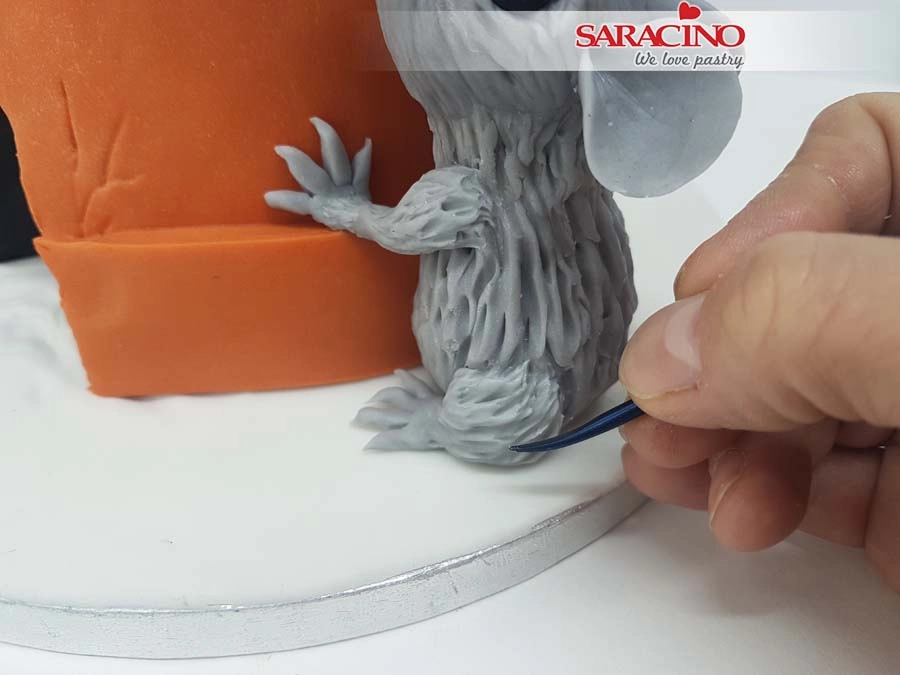
Fix a foot to the body either side of the head. Blend to the body with a modelling tool. For the left back leg use 2.5g of grey modelling chocolate and roll to a long oval shape. Fix to the left back of the body. Fix the paw to the leg and add fur texture. Make sure that the leg is well blended into the body and foot. Repeat for the right back leg.

Step 34

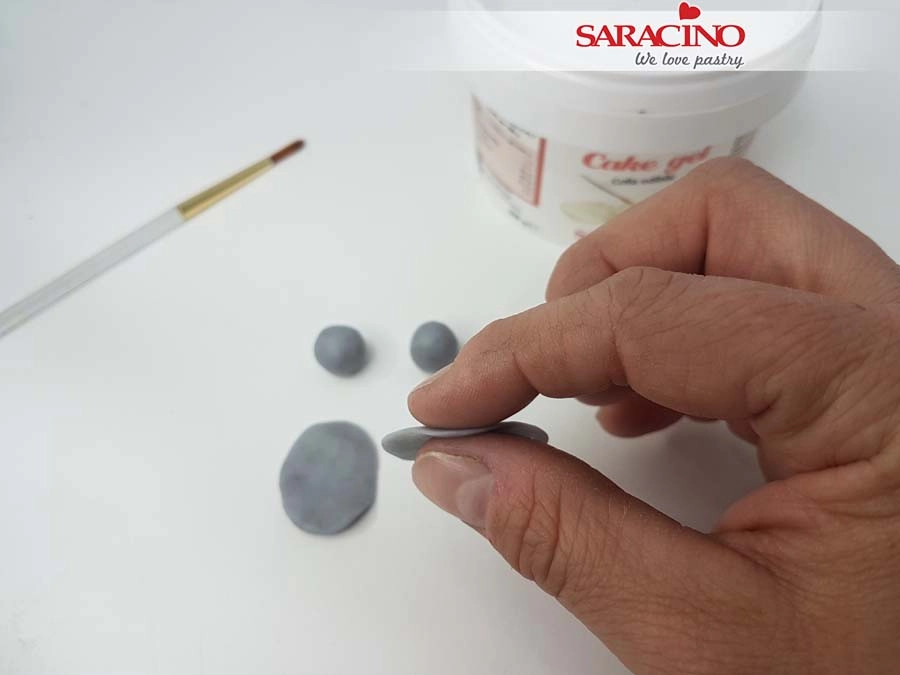
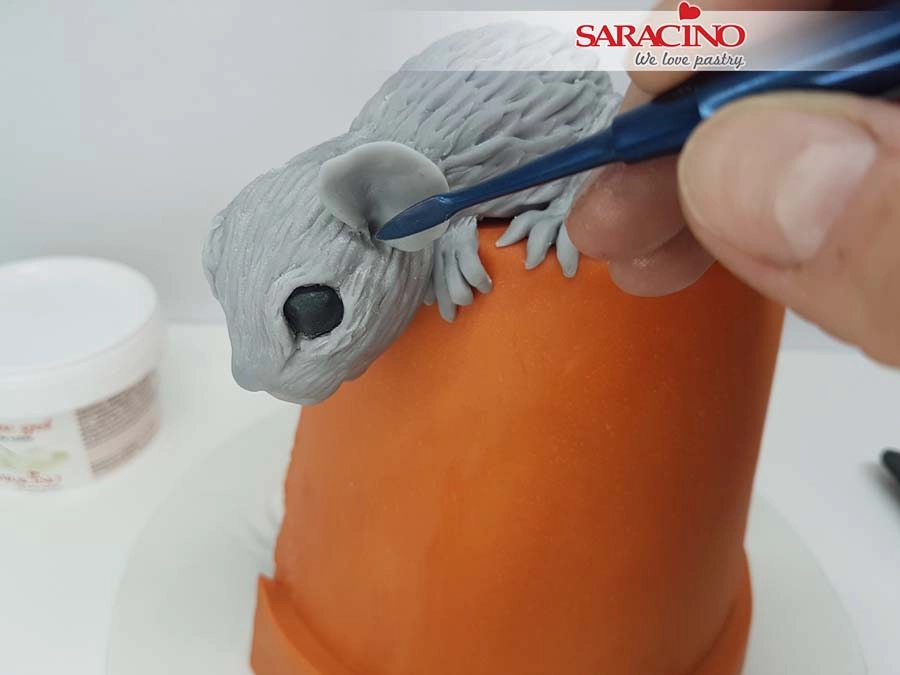
For the ears use 3g of grey modelling chocolate. Divide into two equal pieces and flatten with your finger into a circle with a diameter of 2cm. The circles should be a little thicker in the centre and thin around the outside.

Step 35

Using your Dresden tool make a small hole in the head of the mouse.

Step 36

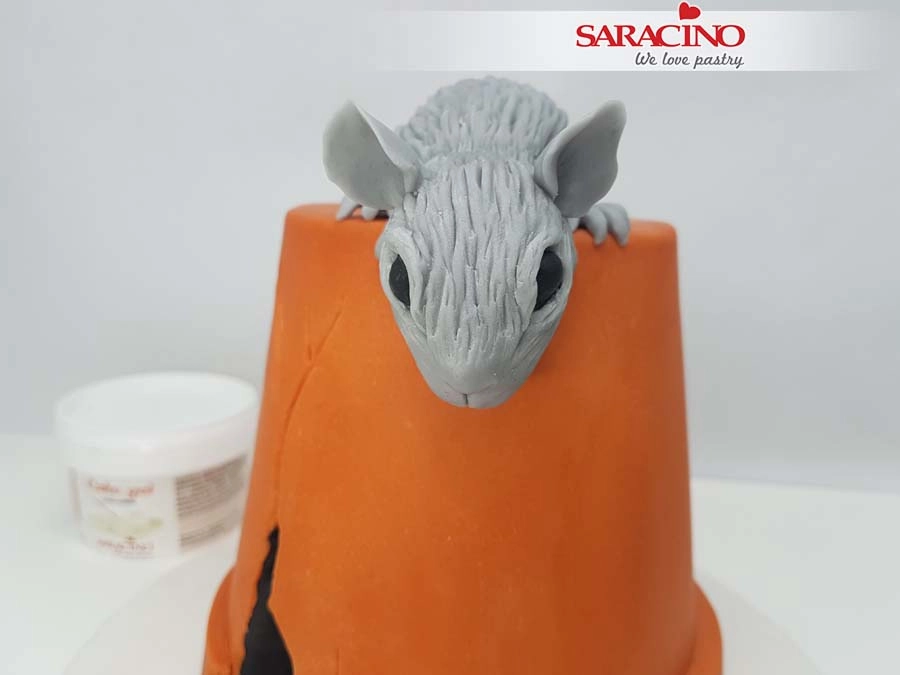
Fix the ear into the hole. Press with the Dresden tool to blend the ear to the head.

Step 37

Fix the other ear. Your first mouse is now ready.

Step 38

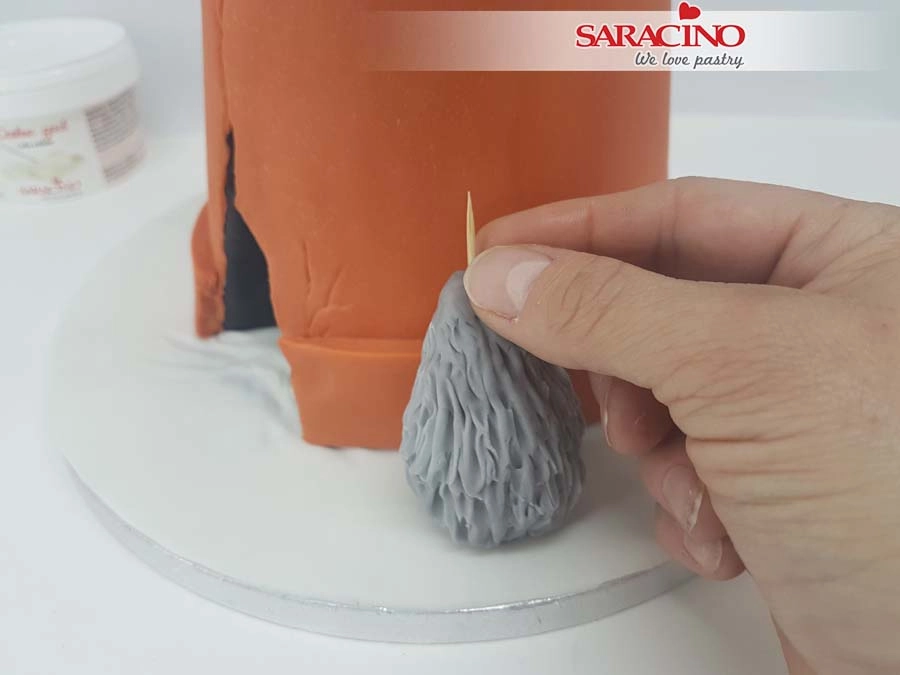
For the second mouse, repeat step 20 and place the body upright on the drum. Add a cocktail stick for fixing the head.

TIP: If you want the models to be fully edible you can use uncooked spaghetti or no skewer at all.


Step 39

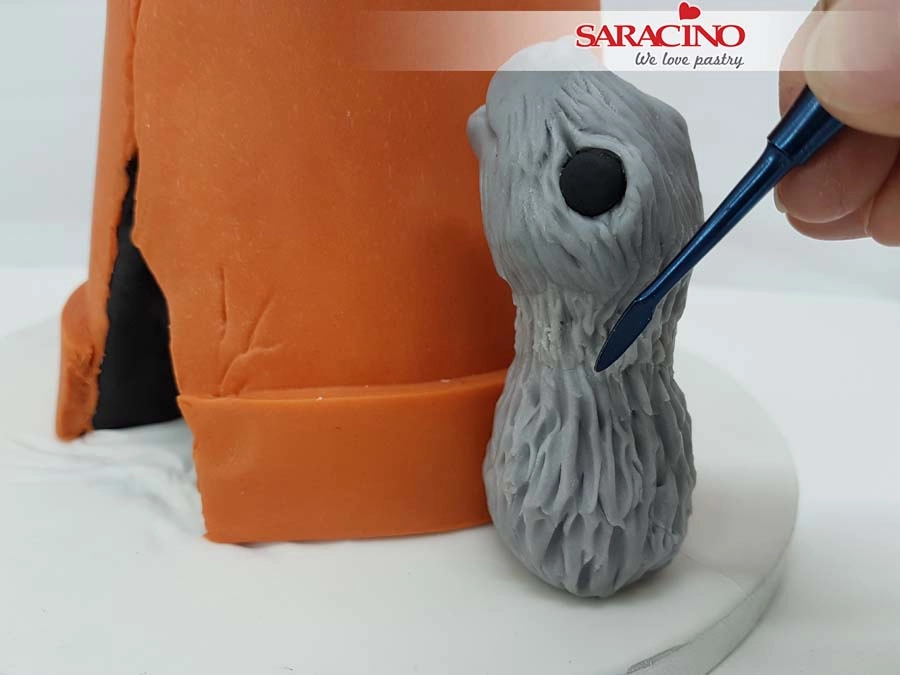
Make a head following the steps from the first mouse. Attach the head looking upwards. You can add a little modelling chocolate to the neck for extra reinforcement and blend. Add the fur texture.

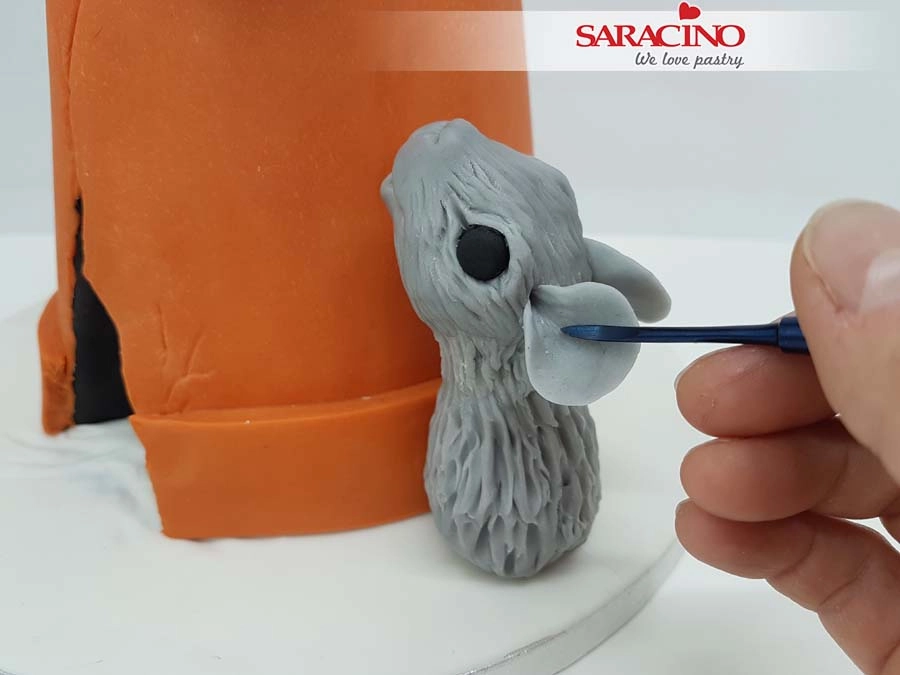
Step 40

Add ears as we did for the first mouse.

Step 41

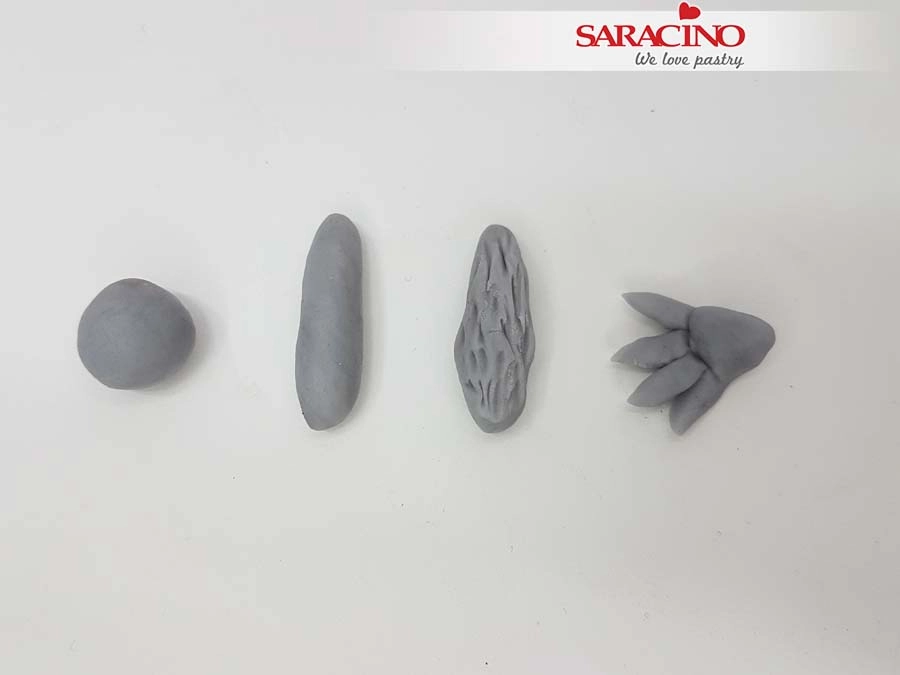
For a front leg use 1.75g of grey modelling chocolate. Roll to a 2cm long sausage shape. Make a foot as we did for mouse 1. Add fur texture.

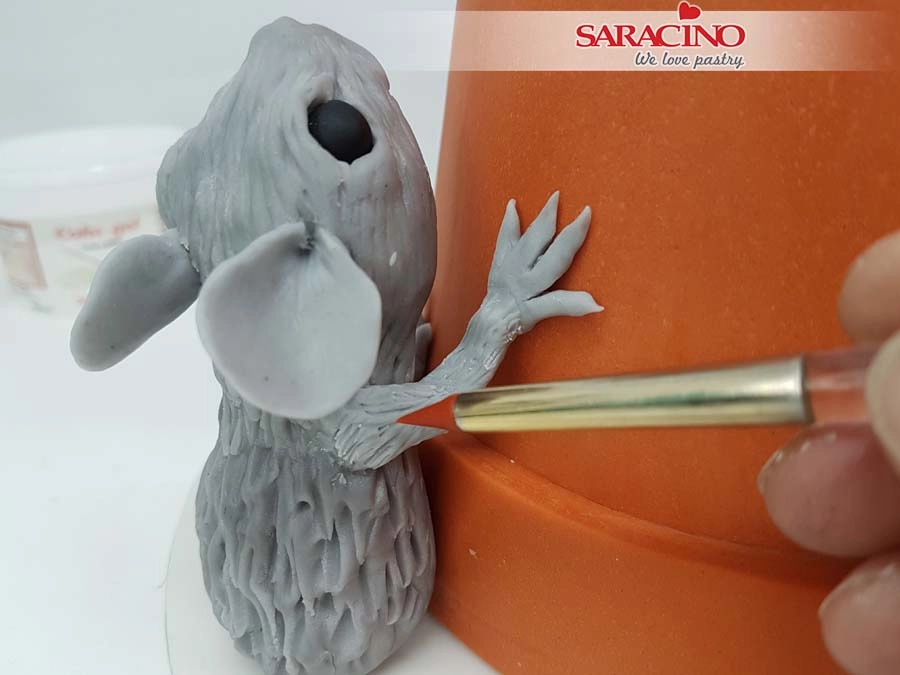
Step 42

Fix the foot to the leg. Fix the paw to the flower pot and fix the arm to the body of the mouse. Use a small amount of cake gel to fix. Repeat for the second front leg.

Step 43

For the back legs use 2.5g of grey modelling chocolate and shape to a long oval shape. Fix to the side of the body and fix a foot. Add fur texture and blend all joints. Repeat for the other back leg.

Step 44

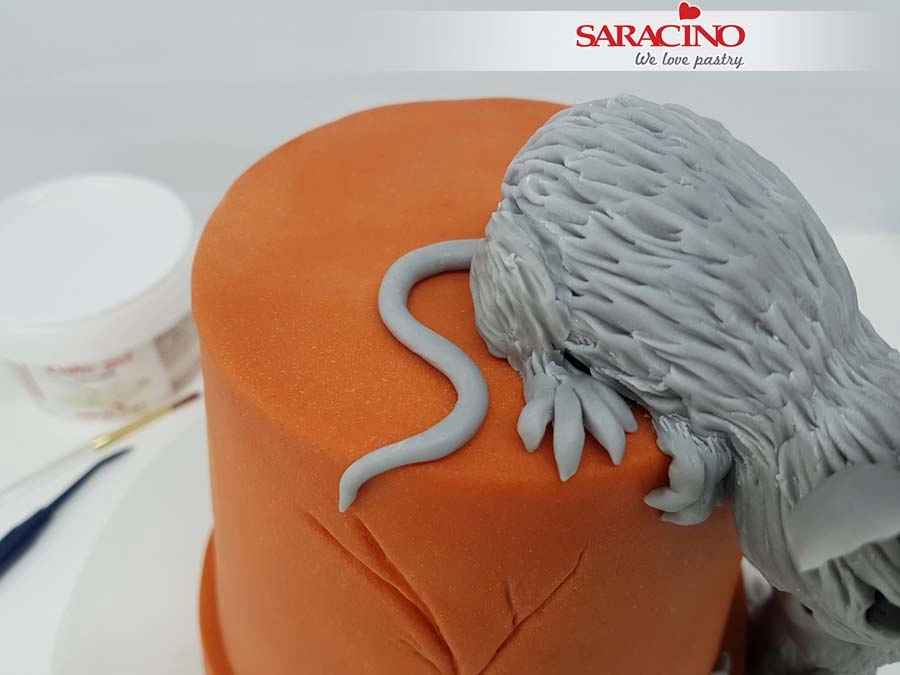
For the tail roll 2g of grey modelling chocolate thinly to a length of 10cm. Give the tail an “S” shape and set aside to harden. Fix to the mouse. 

TIP: You can also put the tail up in the air. As modelling chocolate is hard when cold, you can model the tail upright. Let your own creativity run free.

Step 45

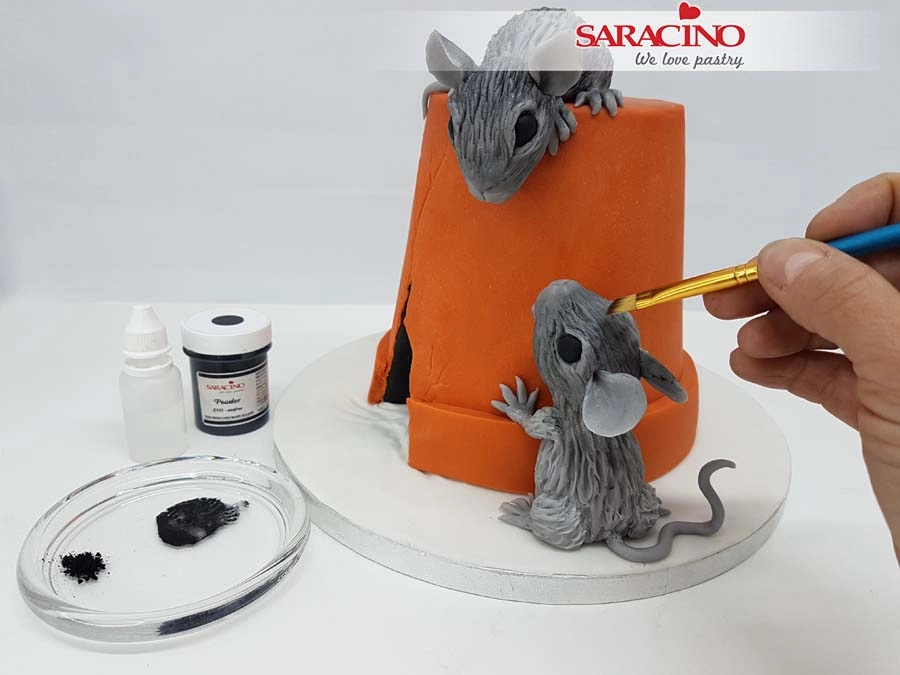
Mix a small amount of black powder colour with clear alcohol to create a weak watered paint. Use a brush to paint the mouse fur. We want the paint to run into the grooves of the fur as this creates nice colour and shades.

Step 46

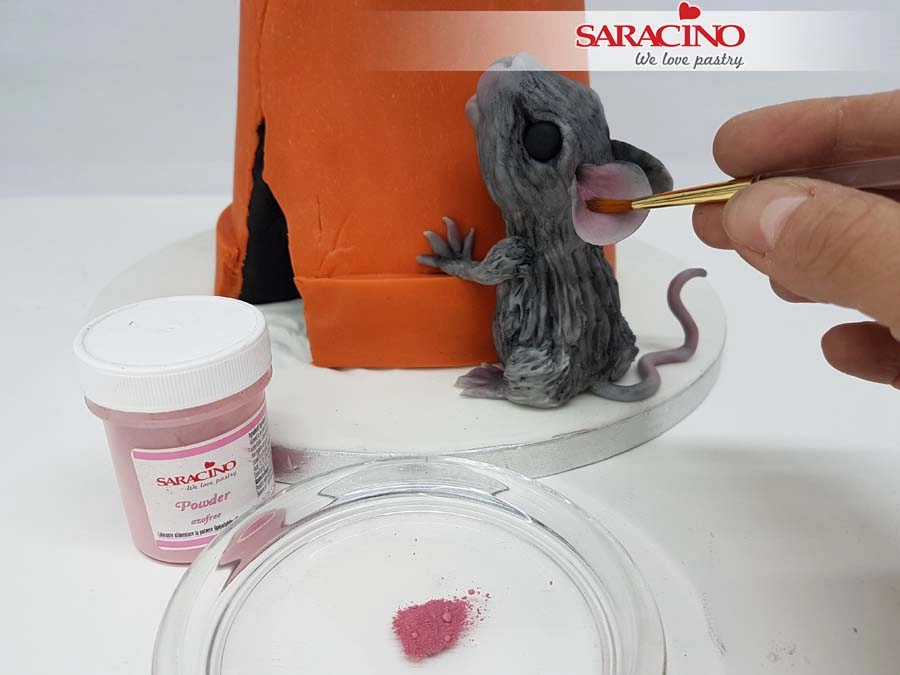
Using a soft brush and pink powder colour dust the toes, tail, ears and cheeks.

TIP: Cover the area around the part to be dusted with a tissue. This way you prevent other parts of your model being coloured incorrectly.

Step 47

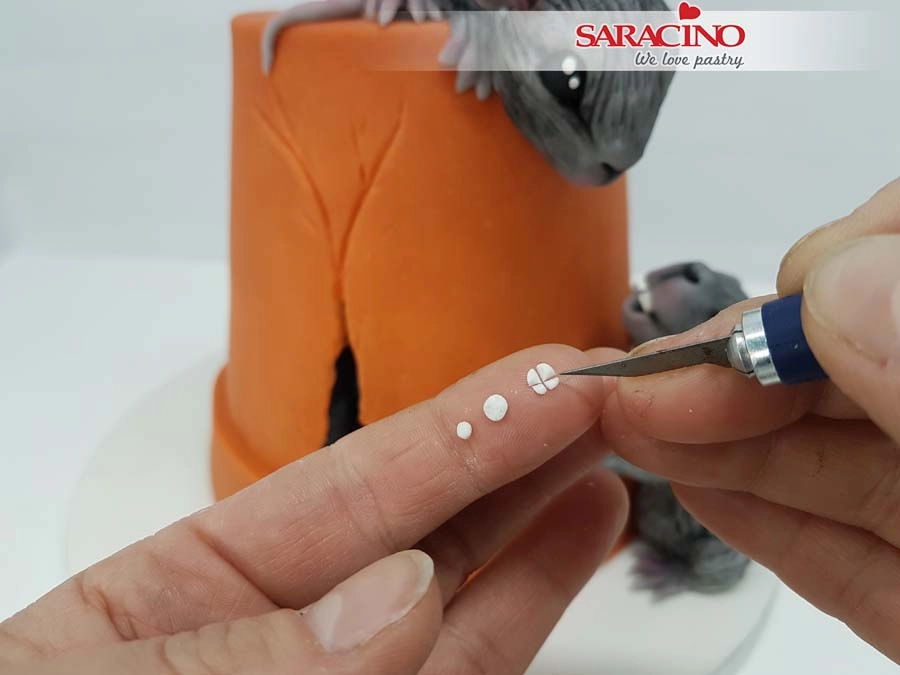
For the eyes roll a small ball of white Pasta Model and press flat on your fingertip. Cut into four. Roll small balls and fix to the eyes.

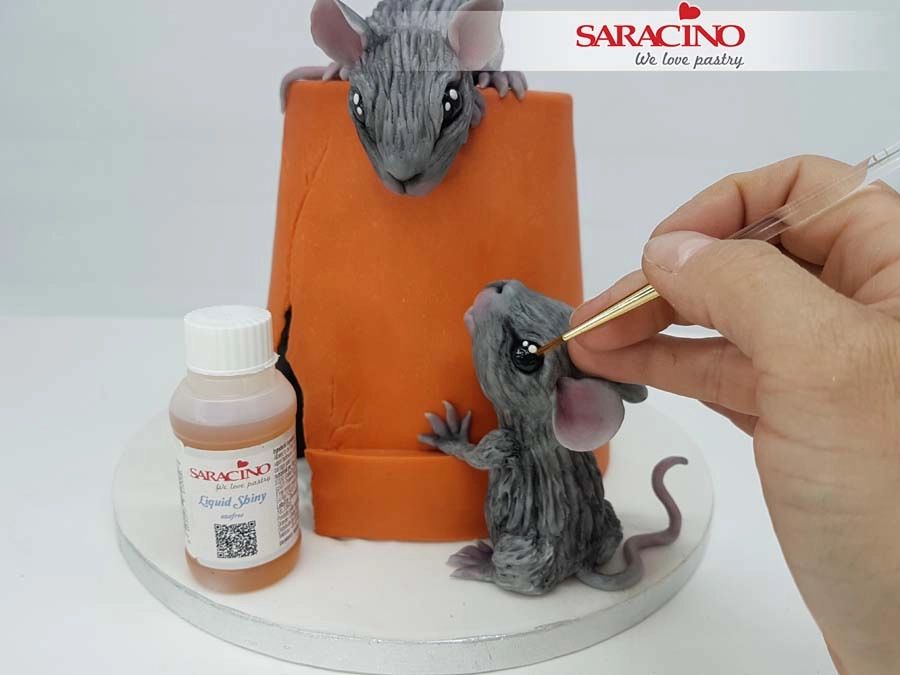
Step 48

Paint the eyes with Liquid Shiny.

TIP: Clean the brush with clear alcohol.

Step 49

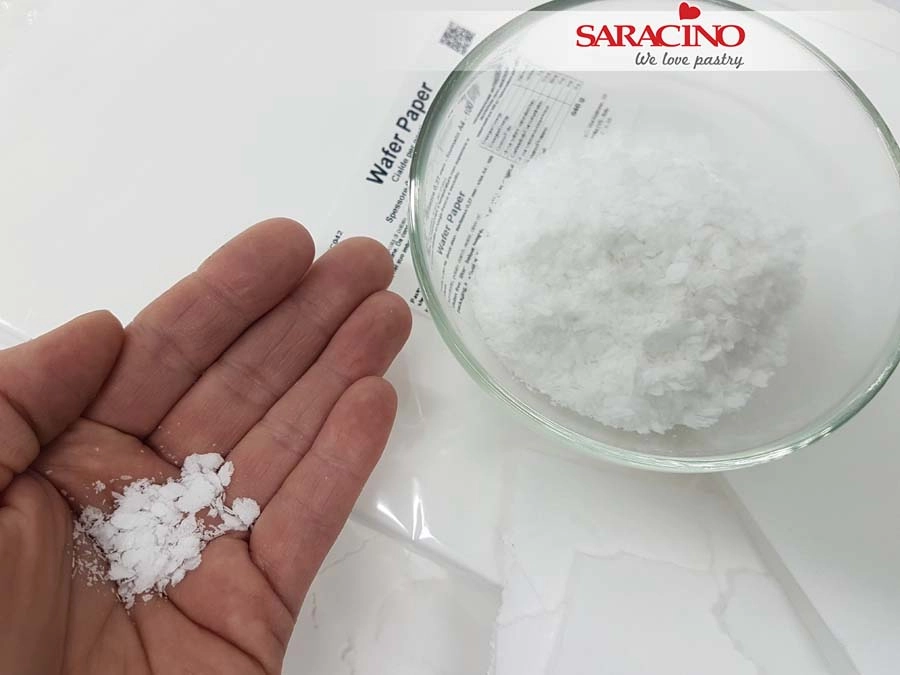
Take one sheet of 0.60mm wafer paper (or two sheets of 0.27mm) and tear into small pieces. Place the pieces in a food processor or blender. Blend until it is in very small pieces.

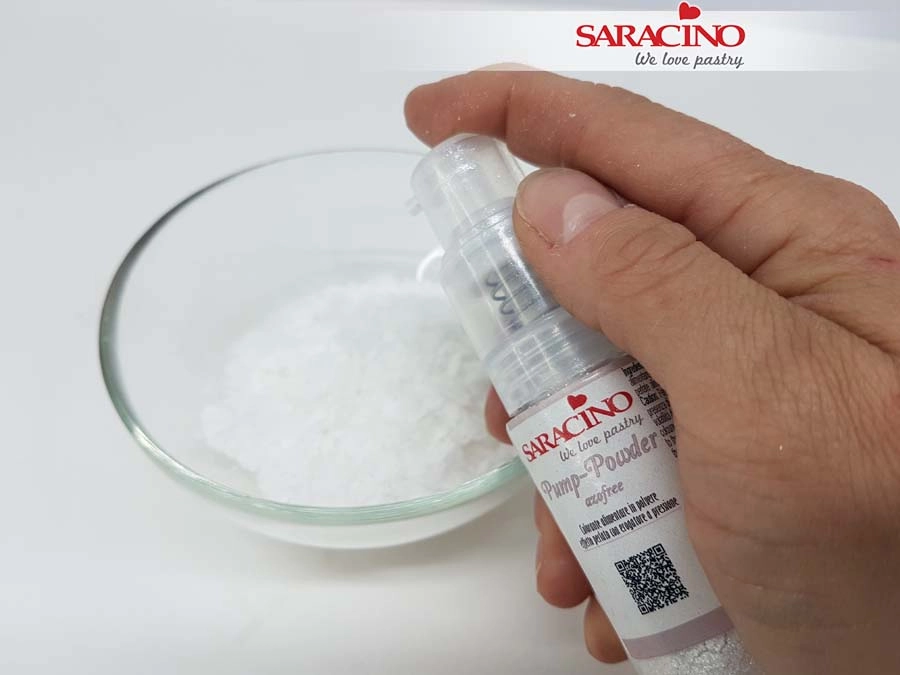
Step 50

Add Pump Powder silver glitter to give a sparkling effect.

Step 51

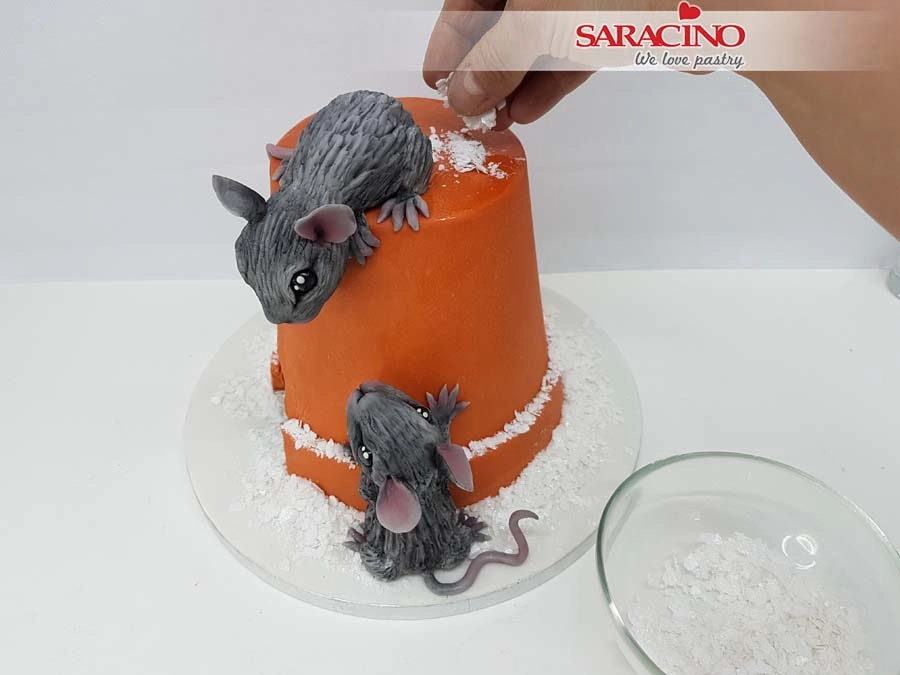
Add a thin layer of cake gel to the top of the flower pot, the top of the rim and the cake drum.

Step 52

For the snow effect sprinkle the chopped wafer paper over the parts that are covered with cake gel.


Step 53

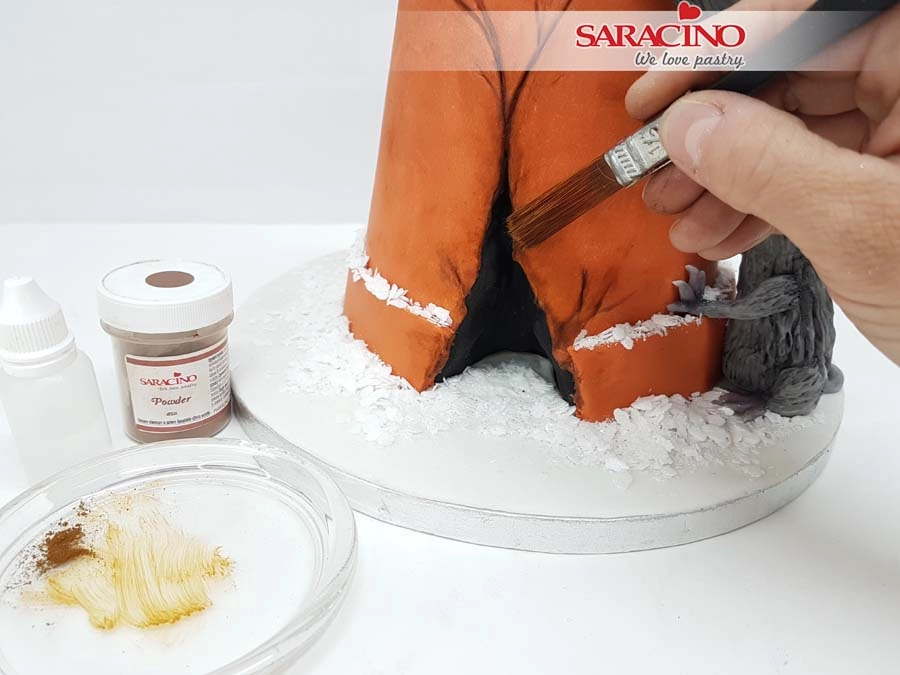
To highlight the hole mix brown powder colour with a small amount of clear alcohol. Make sure your brush semi dry and paint the shadow and shading.

TIP: Are the dust highlights too harsh or too clear? Gently wipe with a damp tissue over the part that you want to blend.

Step 54

Finally, finish your drum with a ribbon of your choice.

FOREST FRIENDS CAKE TUTORIAL

FOREST FRIENDS CAKE TUTORIAL

Skill level: BEGINNERS

You will need:

  • Saracino Pasta Model (light skin tone, white, black, brown, orange and red)
  • Saracino Pasta Top (white)
  • Saracino dust colours (yellow, orange, black, brown and light gold)
  • Saracino gel colours (light green and green)
  • Saracino cake gel
  • Saracino Liquid Shiny glaze
  • Dummy or cake (20cm/15cm)
  • Mat
  • Cake board (30 cm dia.)
  • Rolling pin
  • Smoother
  • Scalpel
  • Knife
  • Scissors
  • Dresden tool
  • Ball tool
  • Aluminium foil
  • Cling film
  • Brushes
  • Clear alcohol
  • Paper towel
  • Baby wipes
  • Cornflour
  • Cocktail sticks
  • Wire cutter
  • Whisk
  • Bowls

    Step 1

    For the body of the fox we will need 55g of orange Pasta Model, knead it well and roll a ball. With the palms of the hands roll the paste into a cone shape. Insert a cocktail stick and cut to length.

    Step 2

    Roll out white Pasta Model and cut out a teardrop shape with a cutter.

    Step 3

    Using your fingers lengthen it a little and glue it onto the body.

    Step 4

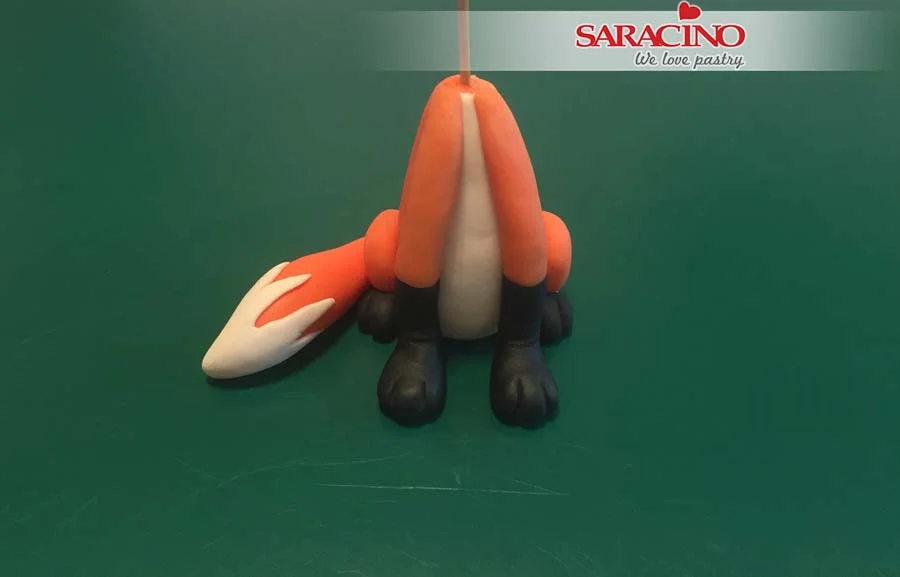
    For the back legs we need 2 x 5g orange Pasta Model. Roll into two balls, flatten them and with your Dresden tool give them the shape shown. For the back leg paws use 2 x 1.5g black Pasta Model rolled into two small balls. For the front legs we need 2 x 4g of orange Pasta Model. Roll it into two sausage shapes of the same length with one end thinner. For the front leg paws use 2 x 4.8g of black Pasta Model rolled into two balls.

    Step 5

    For the front leg paws roll the black Pasta Model into a sausage shape then bend to form the feet. Fix each foot to the orange legs.

    Step 6

    Attach the back legs and feet onto the body. Use your Dresden tool to add grooves for the toes.

    Step 7

    Attach the front legs. Make toes as previous.

    Step 8

    For the tail we need 16g orange Pasta Model. Roll it into a sausage shape with one end thinner. Roll white Pasta Model. Using a scalpel cut a small piece of paste and cut one edge with a zig-zag outline as shown.

    Step 9

    Glue the white patch to the tail. Attach the tail to the body.

    Step 10

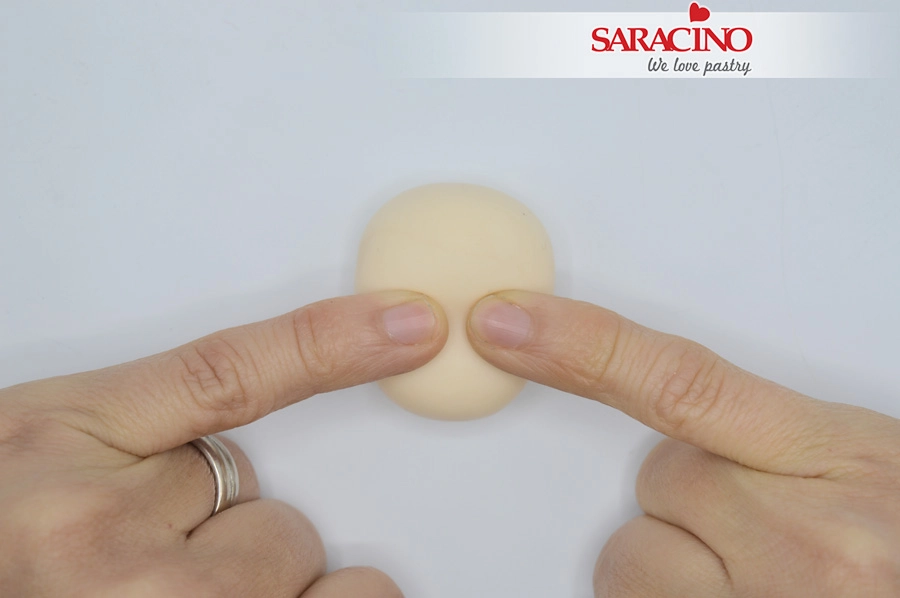
    For the head roll a 60g ball of orange Pasta Model. Using your thumb press across the face where the eyes will be to form the forehead.

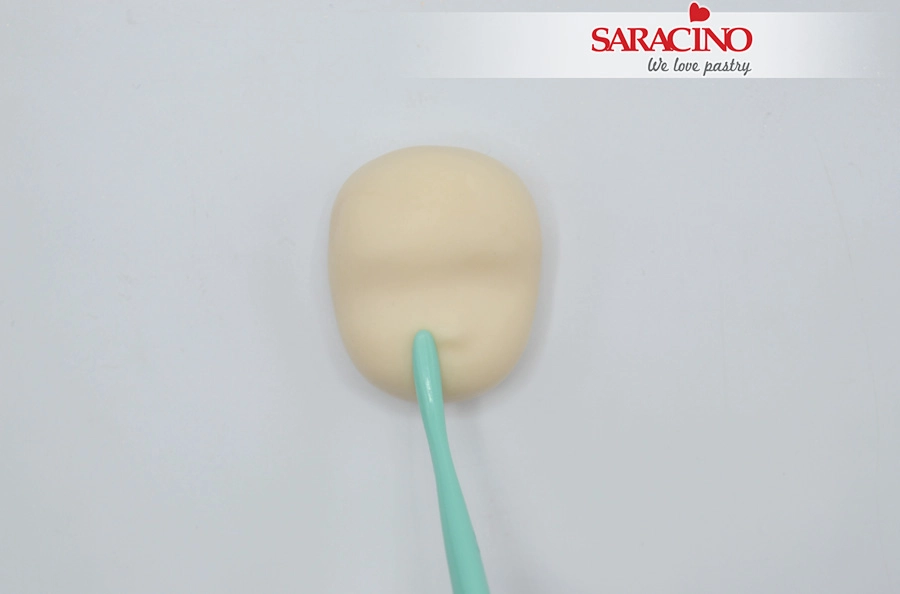
    Step 11

    The head shape should look like this.

    Step 12

    Use your fingers to shape the cheeks and chin.

    Step 13

    Roll a piece of white Pasta Model. Using a scalpel cut the shape shown.

    Step 14

    Glue the face onto the head. Do not add glue to the end of the cheeks as we want these to protrude.

    Step 15

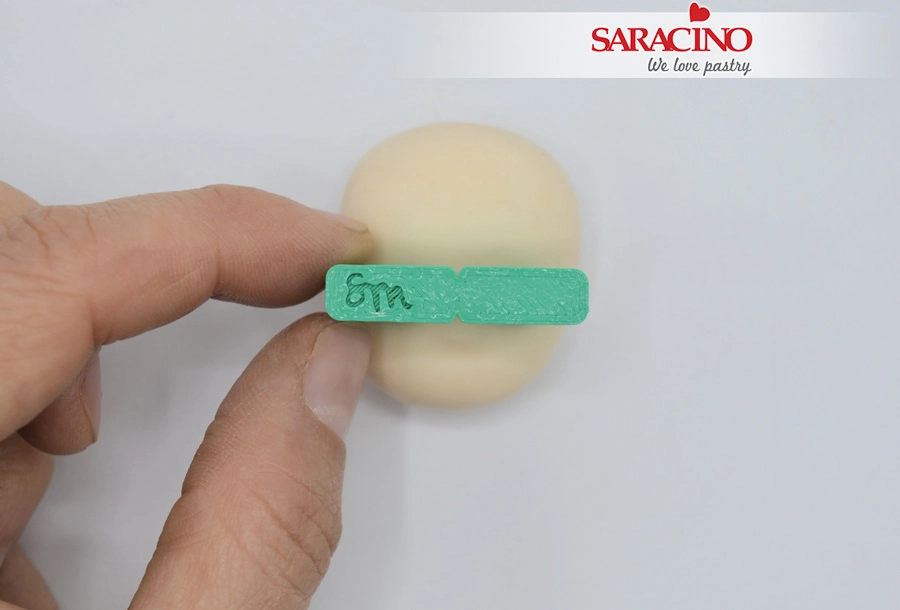
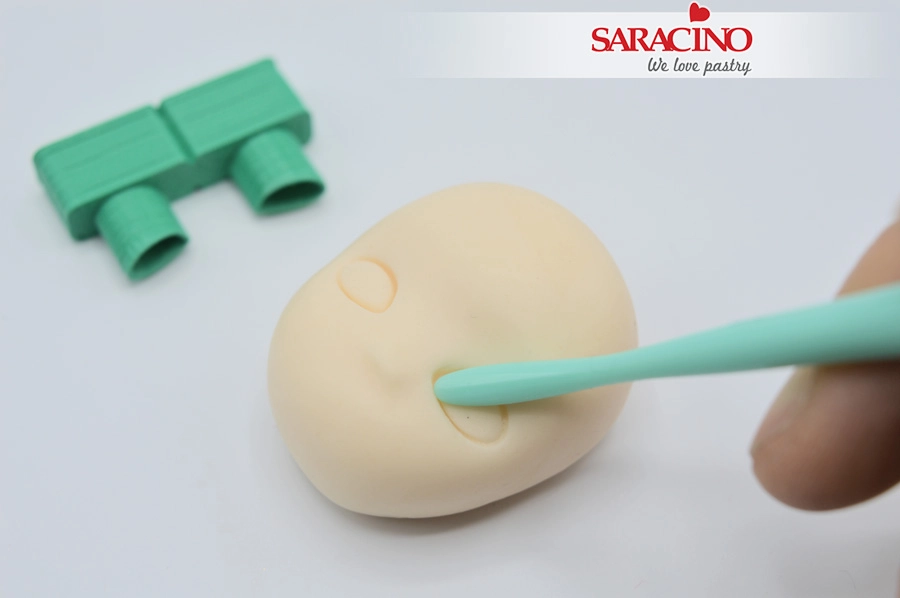
    Using a ball tool create the eye sockets.

    Step 16

    For the nose and eyes roll three small balls of black Pasta Model. Using a modelling tool flatten the eyes. Fix to the face as shown.

    Step 17

    Roll a thin piece of black Pasta Model then cut in half to form the eyebrows. Glue them onto the forehead.

    Step 18

    Using a Dresden tool, form the mouth.

    Step 19

    Shape the mouth to give a cute look. Add the line between mouth and nose.

    Step 20

    Using a pair of scissors cut the cheek fur.

    Step 21

    Roll two white small balls and add them to the eyes.

    Step 22

    For the ears we need 2 x 2g black Pasta Model and 2 x 1g orange Pasta Model. Form teardrop shapes and flatten. Glue them together. Cut them to the size needed.

    Step 23

    Fix them to the top of the head.

    Step 24

    Roll four thin strands of orange paste. Glue them together to form a tuft of hair.

    Step 25

    Use a little cake gel to fix to the top of the head.

    Step 26

    Use a small piece of orange paste to form the tongue. Insert into the mouth and with the Dresden tool give it the right shape.

    Step 27

    Dust the head with a soft brush and orange powder colour.

    Step 28

    Dust the face, tail and body with orange powder colour.

    Step 29

    For the body of the racoon we need 40g grey Pasta Model. Knead it well and form a ball. With the palms of our hands roll into a cone shape. Insert a cocktail stick and cut to length if required.
    Step 30

    Roll white Pasta Model and cut a teardrop shape with a cutter. Use your fingers to lengthen a little and glue it onto the body.

    Step 31

    For the back legs we need 2 x 4.5g of grey Pasta Model. Roll into two balls, flatten them and bend to form the feet.

    Step 32

    Using a modelling tool shape the paw.

    Step 33

    For the arms we need 2 x 2g grey Pasta Model. Roll into two sausage shapes of the same length and with a scalpel cut the paste to form the fingers. Add shape to the fingers.

    Step 34

    Fix the legs and arms to the body.

    Step 35

    For the head roll a 50g ball of grey Pasta Model. Using your thumb press across the face where the eyes will be to form the forehead shape. With your fingers shape the cheeks and chin.

    Step 36

    For the eyes roll white and black Pasta Model thinly. Using a scalpel, cut the shapes shown. We need two mirrored pieces for the two eyes.

    Step 37

    Fix the black part onto the white. Fix to the head but leave the outside cheek edges without glue and protruding as we did for the fox.

    Step 38

    Using scissors cut the cheek fur as shown.


    Step 39

    For the nose area use 4g white Pasta Model and with your fingers shape it and fix to the face. Roll a small piece of black paste to a ball and fix for the nose. 

    Step 40

    Using a Dresden tool press and shape the mouth.

    Step 41

    Using a ball tool create the eye sockets. For the eyes roll two small balls of black paste and fix them into the eye sockets. Flatten them and add two small white balls.

    Step 42

    For the ears we need 2 x 1.5g grey paste and 2 x 1g black paste. Form to teardrop shapes.

    Step 43

    Fix the black to the grey. Cut them to the size that is needed for the ears.

    Step 44

    Fix to the top of the head.

    Step 45

    Using grey paste add a tuft of hair to the head as we did with the fox.

    Step 46

    Fix the head to the body. Add four balls of black paste to each foot to look like a paw.

    Step 47

    For the tail we need 14g grey Pasta Model. Roll to a sausage shape with one end thinner. Roll some black paste thinly and cut into thin strips.

    Step 48

    Fix the strips around the tail. Fix the tail to the body.

    Step 49

    Add a pink tongue. Roll a thin strand of white paste and add it to the ears as shown. Using a thin brush and white gel colour paint a thin line around the eyes.

    Step 50

    Dust the face and body with black powder colour.

    Step 51

    For the hedgehog’s body we need 85g light skin tone Pasta Model. Knead it well and roll a ball. With a little finger shape the body as shown.

    Step 52

    Using your thumb shape the head and form the snout. Press an indent where the eyes will be.


    Step 53

    Use a ball tool to form the eye sockets. For the eyes and nose roll black paste to form three small balls. Fix to the face. Use a Dresden tool to form and shape the mouth.

    Step 54

    Add eyebrows. For the arms we need 2 x 2.2g of light skin tone Pasta Model. For the feet we need 2 x 2.5g light skin tone paste.

    Step 55

    Using a scalpel cut the paste to form the hand and fingers to the arms. Use a modelling tool to form the toes on the legs.

    Step 56

    Fix the arms and legs to the body. Add white dots to the eyes. Add a black tongue. Roll brown Pasta Model into small cone shapes to form the needles.

    Step 57

    Start adding them from the top to the bottom. You will need patience with this step.

    Step 58

    For the ears we need 0.3g light skin tone paste. Roll into two small balls, flatten slightly and fix to the head. Use a small ball tool to press and form the ears.

    Step 59

    Roll eight small brown balls and fix to the feet to look like paws. If required add more needles to the forehead. Dust the face and body with brown powder colour.

    Step 60

    For the largest mushroom we need 12g of white Pasta Model. Knead well and form a ball. Roll out to shape the stalk. For the mushroom cap we need 9g white paste and 9.6g red paste. Knead and use your fingers to flatten and form one red circle and one white circle.

    Step 61

    Place the white circle on the red to form the cap. Press the center with a ball tool.

    Step 62

    Use a knife to add a mushroom texture on the underside of the cap.

    Step 63

    Turn the cap over and shape to look like this. Fix the cap onto the stalk.

    Step 64

    Roll white Pasta Model thinly. Cut out different sized circles. Use a little water to fix randomly to the cap.

    Step 65

    Make as many mushrooms as you want in different sizes. Dust the mushrooms with brown powder colour.

    Step 66

    For a shiny look glaze the cap using Liquid Shiny.

    Step 67

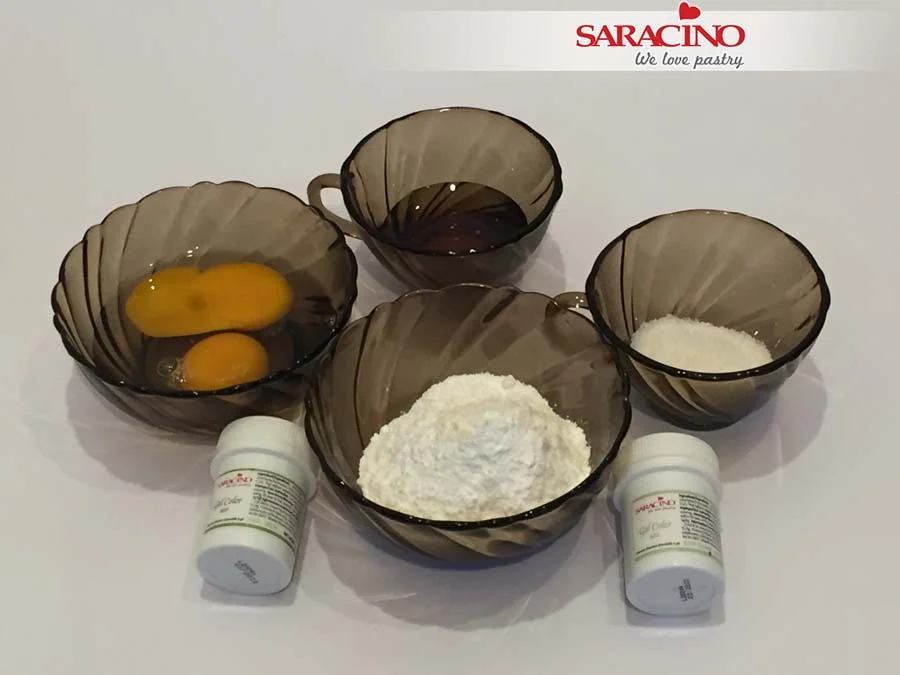
    Prepare the ingredients for the moss: 1 egg at room temperature, 25g flour, 5g baking powder, 12g sugar, 30g honey.

    Step 68

    In a mixing bowl combine the egg and sugar. Whisk until light and fluffy, add honey and whisk again.

    Step 69

    Add green gel colour and whisk again.

    Step 70

    Use a sieve to add the flour and baking powder and gently mix it with a spatula. Fill the silicon cups to about 1/3 full. Microwave the cups for approximately 55 seconds and it should look as shown. Allow to cool completely then remove from the mould.

    Step 71

    Cover the top of your cake top using white Pasta Top that has been coloured with a little brown gel colour. Although Pasta Top can be rolled very thinly we dont want that in this case. Do not roll the paste too thin as we need to add texture and pattern. With a Dresden tool create circles on top of the cake.

    Step 72

    Use a small piece of scrunched up aluminium foil to add texture.

    Step 73

    Use the Dresden tool to add lines so it looks like the tree was recently cut. Start from the centre and work outwards.

    Step 74

    Using Pasta Top roll long, thin sausage shapes. Fix each one to the side of the cake using cake gel. The pieces should be touching each other to leave no gaps.

    Step 75

    Use the Dresden tool to add pattern and texture. With the flat end of the Dresden tool shape a realistic “hole” as you would see in tree bark. Continue around the cake adding random pattern.

    Step 76

    Use the silver foil to add more texture.

    Step 77

    Once the side of the dummy is fully covered we add some deeper lines on top as shown.

    Step 78

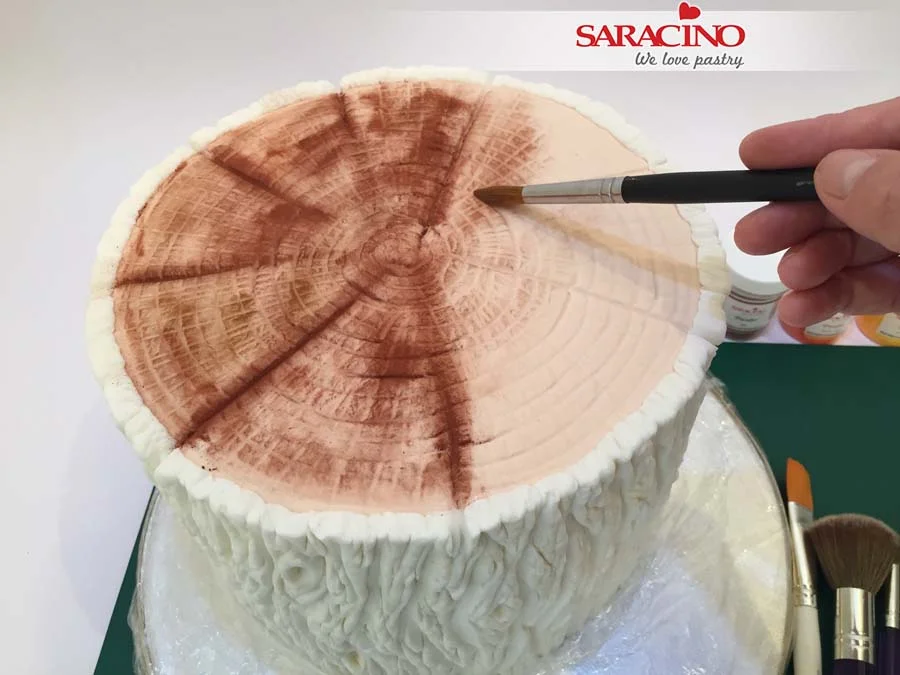
    Cover the cake board with cling film to keep it clean as this part can be messy. Using a soft brush dust the top of the cake with brown, orange and yellow powder colours. Also add some black powder in areas.

    Step 79

    Using a bigger brush and clear alcohol paint the top of the cake using a circular movement.

    Step 80

    Using a soft brush dust the side of the cake using green, black, orange and brown powder colours. As with the top use a bigger brush and clear alcohol to paint the side of the cake.

    Step 81

    When finished dusting remove the cling film. Clean the cake board and allow all to dry. If yours is a real cake use kitchen towel and clear alcohol to clean excess powder. If the cake is a dummy we can use baby wipes. We want the top of the cake to be a lighter colour than the bark. Clean the excess powder from the side of the cake.

    Step 82

    Using a soft brush and Saracino light gold colour powder dust the top and side of the cake.

    Step 83

    Crumble the moss sponge into random pieces. Using a flat brush apply cake gel to the cake board and add the edible moss. Continue to add more edible moss until the cake board is fully covered.

    Step 84

    The cake is ready. Now we can add the mushrooms and the cute animals we modelled previously.

    PIRATES GOLD

    PIRATES GOLD

    Skill level: INTERMEDIATE

    You will need:

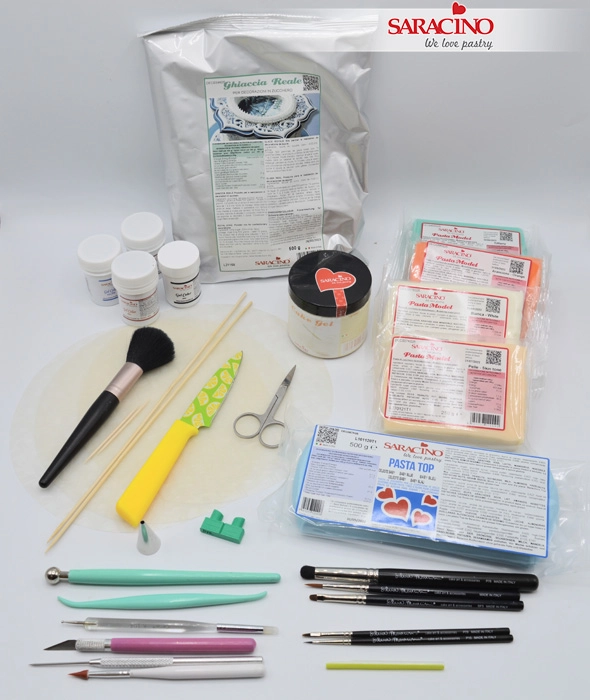
    • Download templates HERE
    • Saracino gel colours : red, black, brown, light blue,white
    • Powder colours: gold, pink
    • Cake gel
    • Pasta Top : baby blue and white (for the board colour it with brown and yellow gel colour and a little black)
    • Pasta Model : white, orange, brown, tiffany, red, black, yellow
    • Royal icing
    • Rice paper sheets
    • Cakes : 15cm dia x 19cm high and 10cm dia x 10cm high
    • Clear alcohol
    • Dresden tool
    • Ball tools (small and 10mm size)
    • Scalpel
    • Pointed hard brush
    • Sharp pointed tool
    • Small scissors
    • Straw
    • Piping tube nr 5
    • Easy Eyes green pack
    • Knife
    • Cocktail stick and toothpicks
    • Big brush
    • Fine paint brushes
    • Cake board 25cm diam
    • Rolling pin

    Step 1

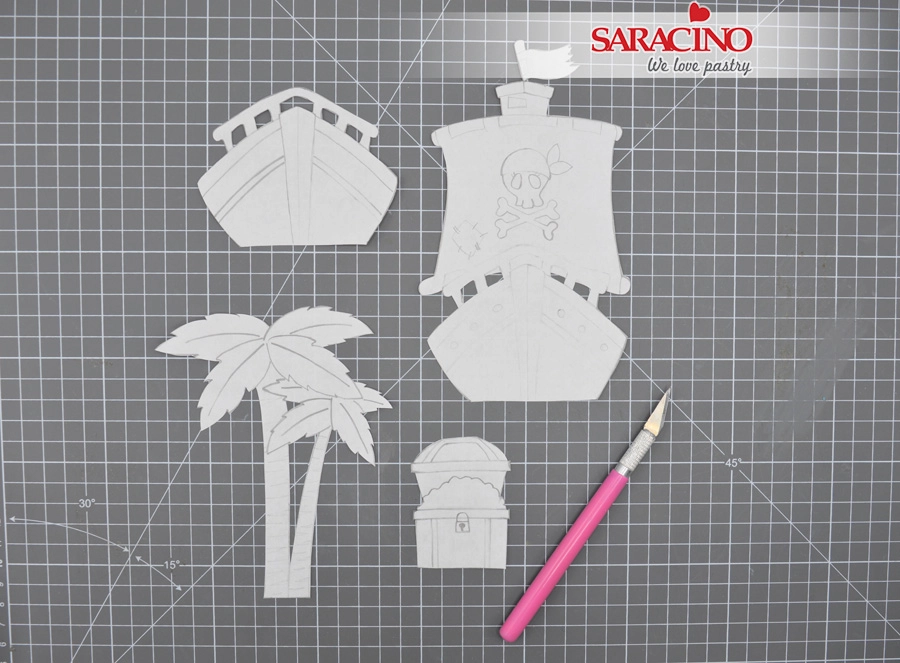
    Cut out all the templates.

    Step 2

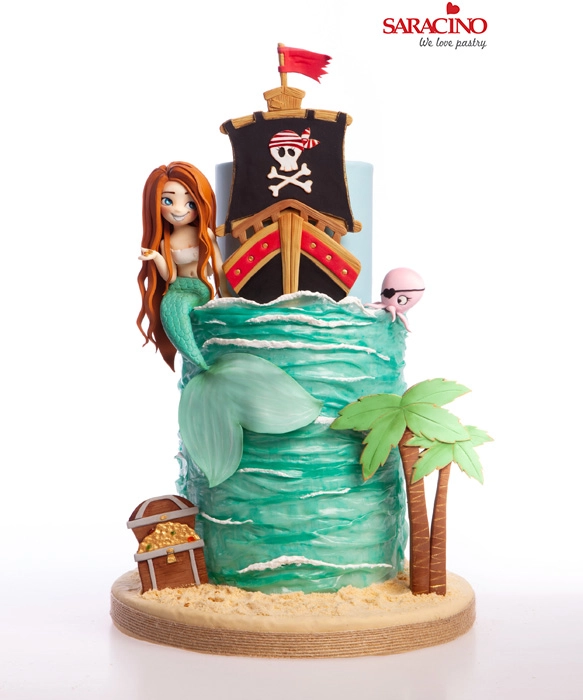
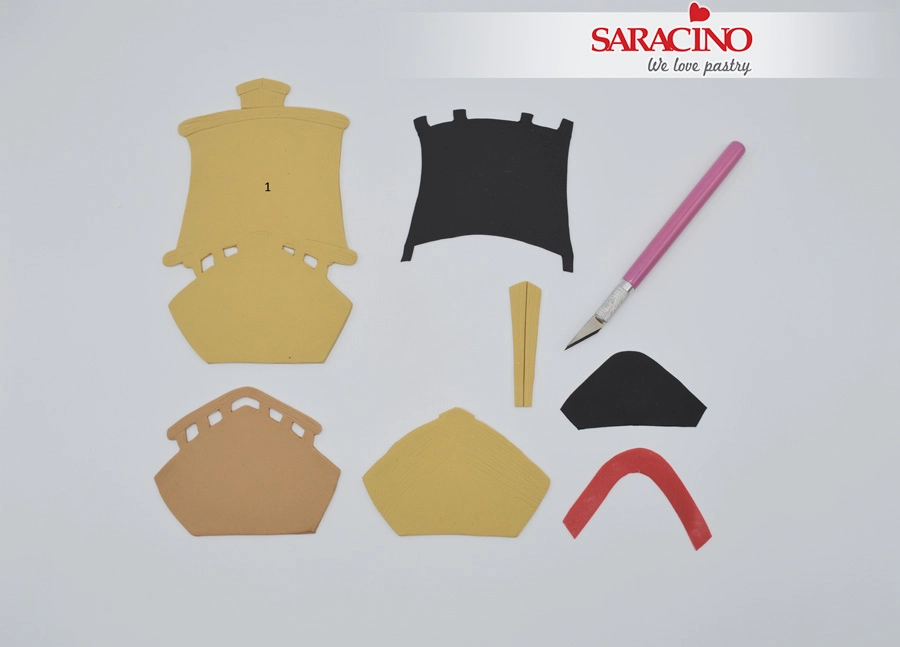
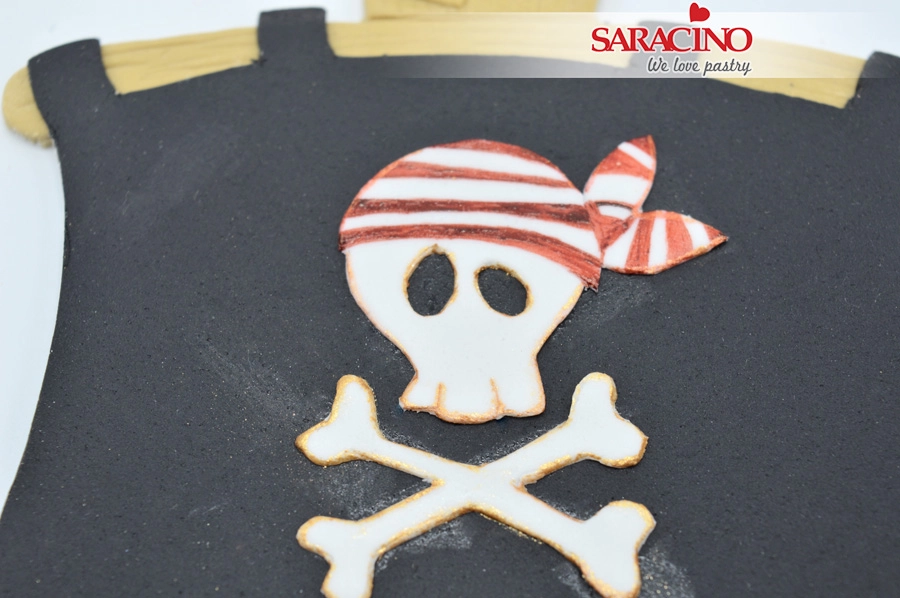
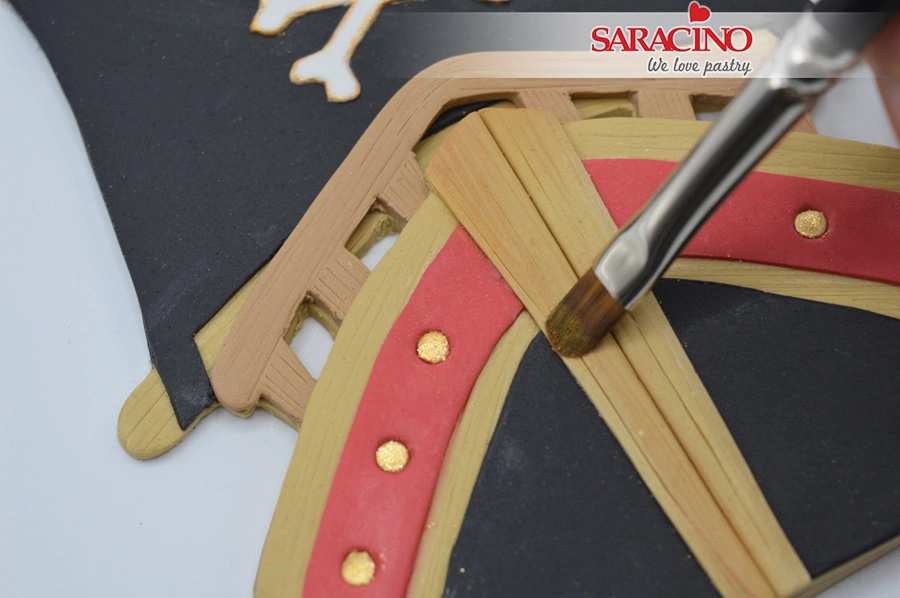
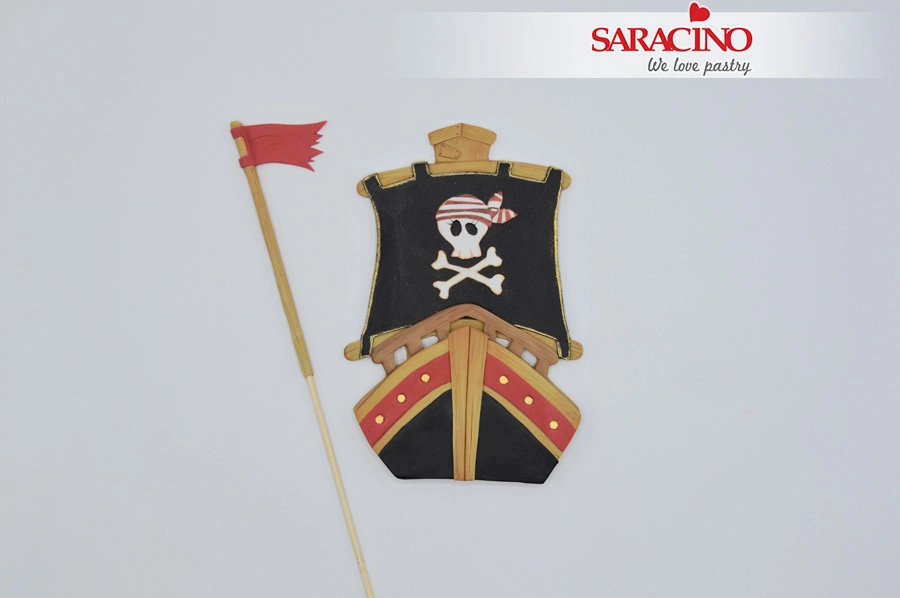
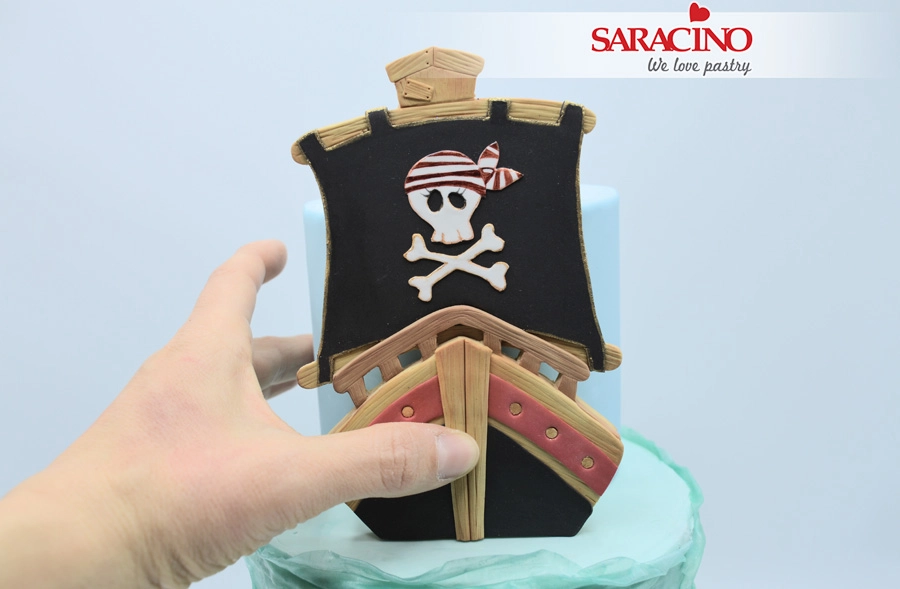
    Roll out different colours of Pasta Model and cut out each part of the boat using the templates. Fix them together using a little edible glue, one on top of the other starting from the largest (shape 1). Use a scalpel to add the wood effect.

    Step 3

    Using red gel colour and gold powder colour (thinned with clear alcohol) paint the details.

    Step 4

    Using a soft brush and brown powder colour dust the wood sections.

    Step 5

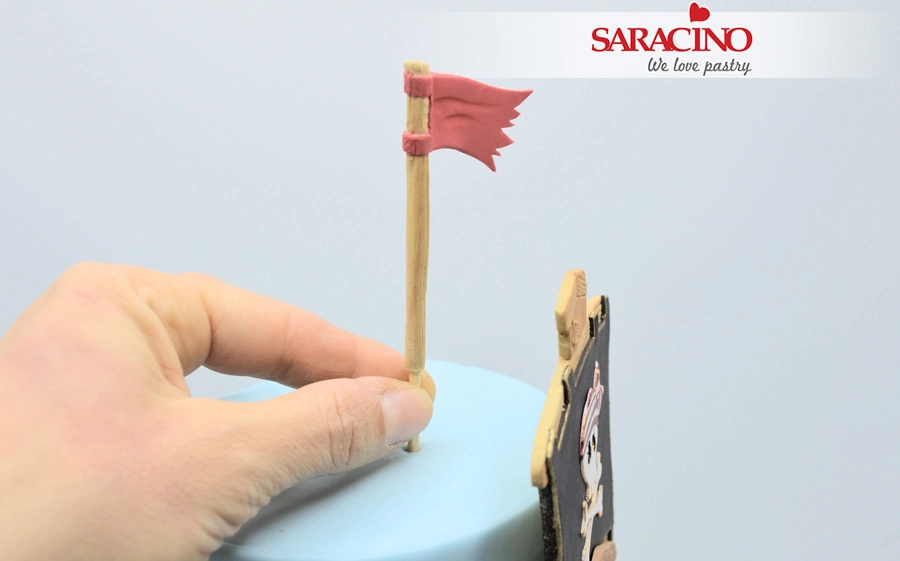
     Wrap a cocktail stick with a thin piece of brown paste and attach the flag to the top.                                                                          

    Step 6

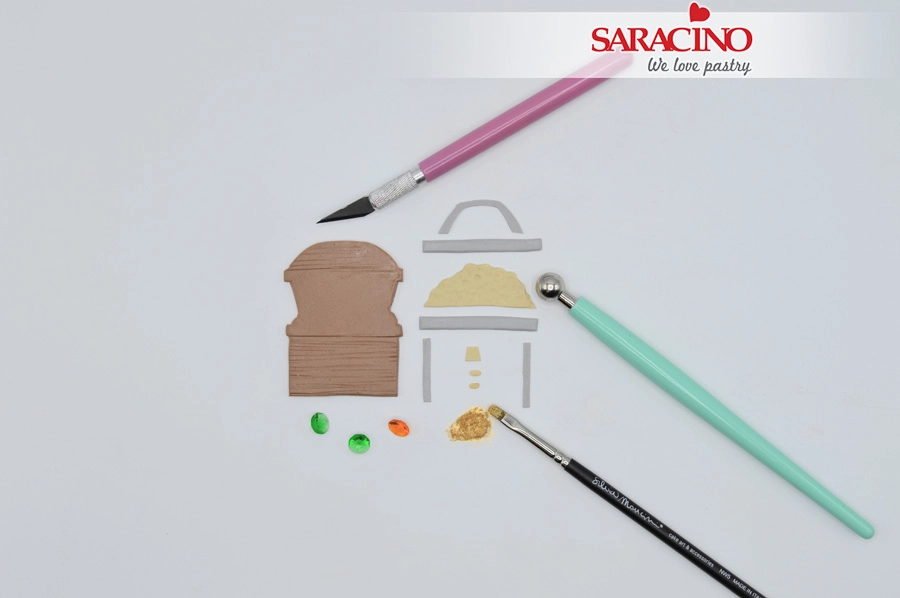
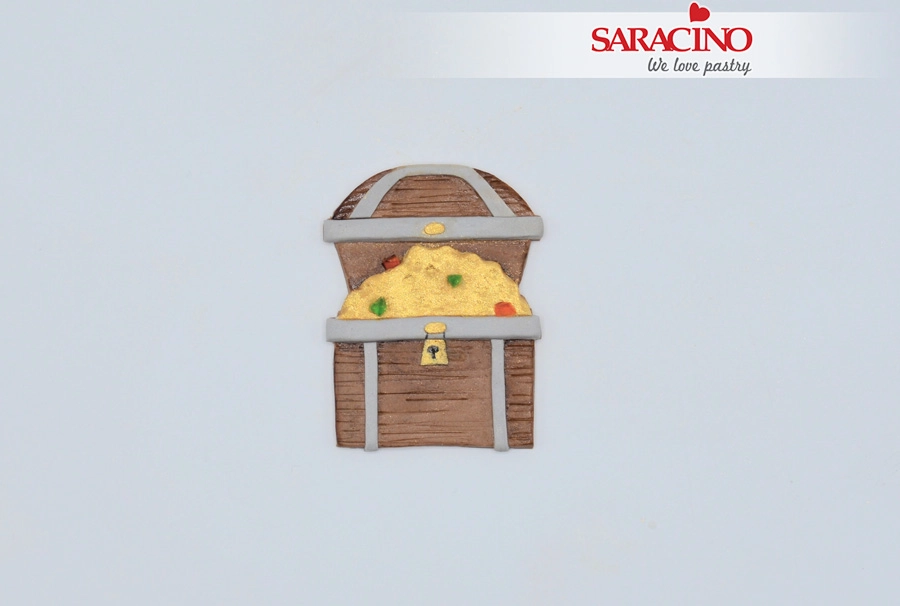
    Create the treasure chest in the same way you created the boat. Paint the treasure with the gold powder paint made earlier, cut the edible jewels into small pieces and attach them to the treasure chest using a little water.

    Step 7

    We want it to look like this.

    Step 8

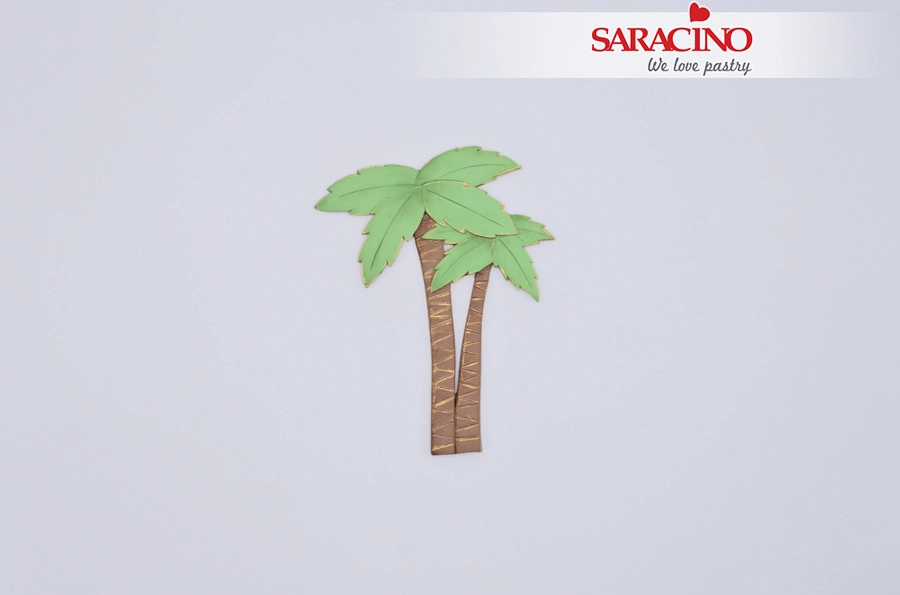
    Using the template make the palm tree using the same techniques. Using the gold paint we made previously paint stripes on the tree and to the edges of the leaves. Dust the leaves using green powder colour.

    Step 9

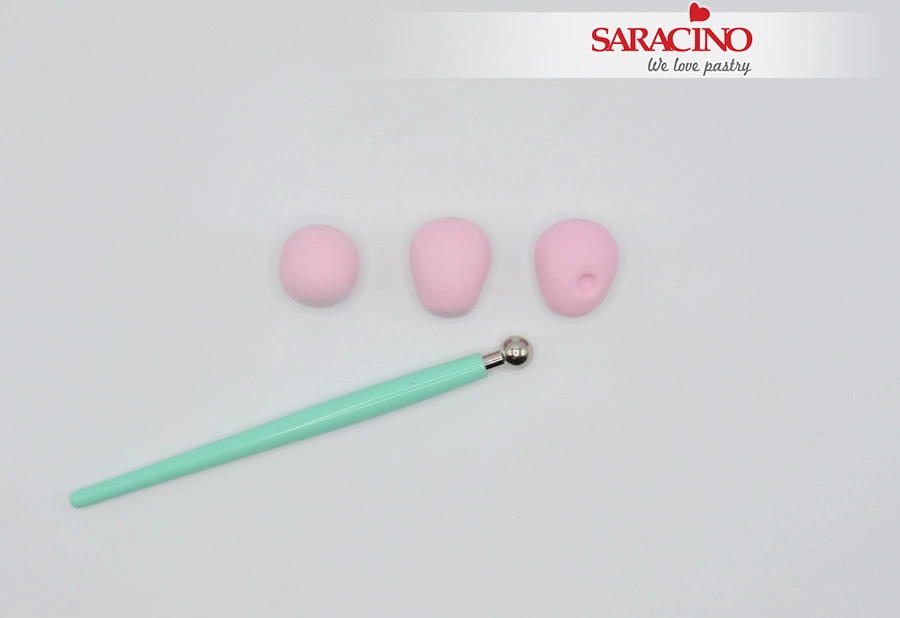
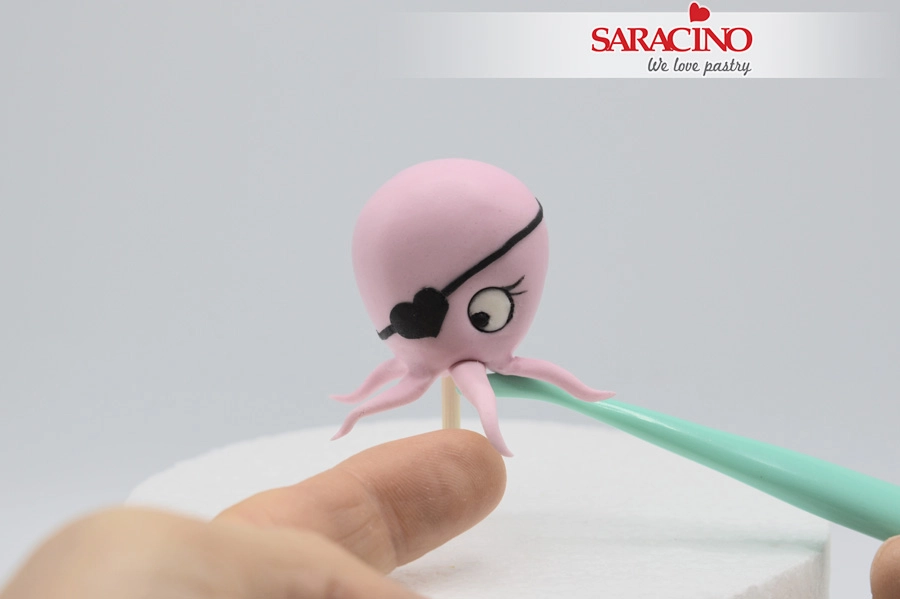
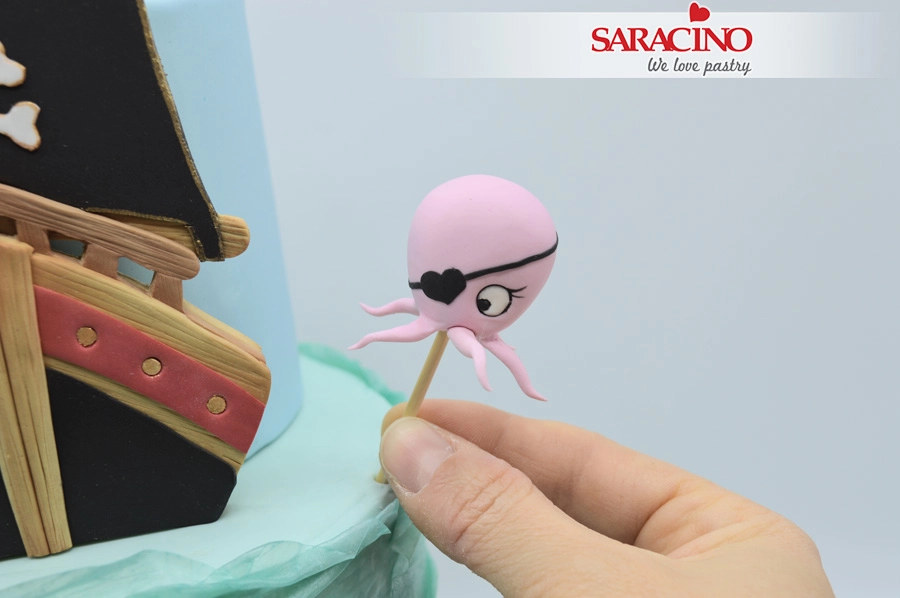
    For the Octopus take 15g of pink Pasta Model and roll into a teardrop shape. Use a ball tool to press an eye socket.

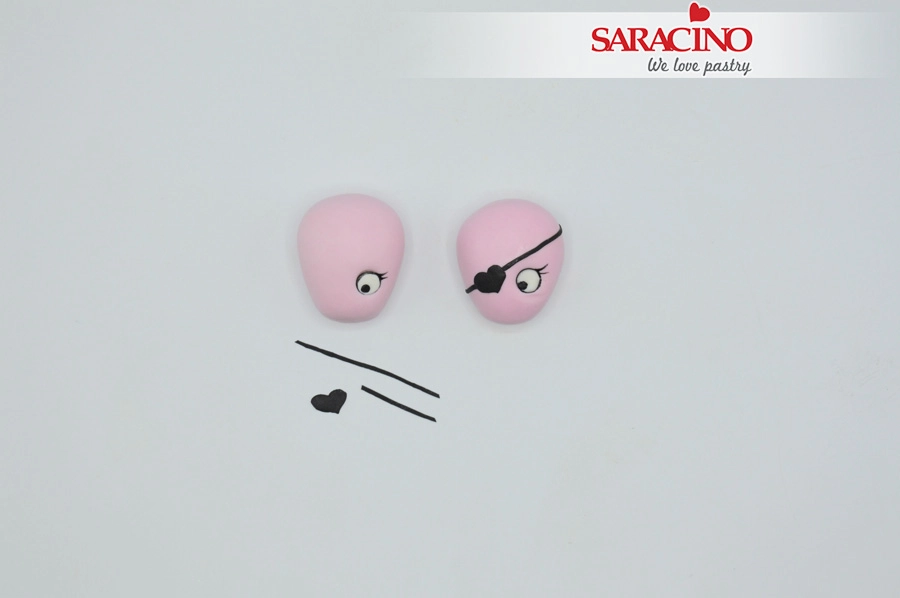
    Step 10

    Using white paste roll a small ball for the eye. Add the eye details. Use black Pasta Model to make a small eye patch for the other eye. Fix to the Octopus head. 

    Step 11

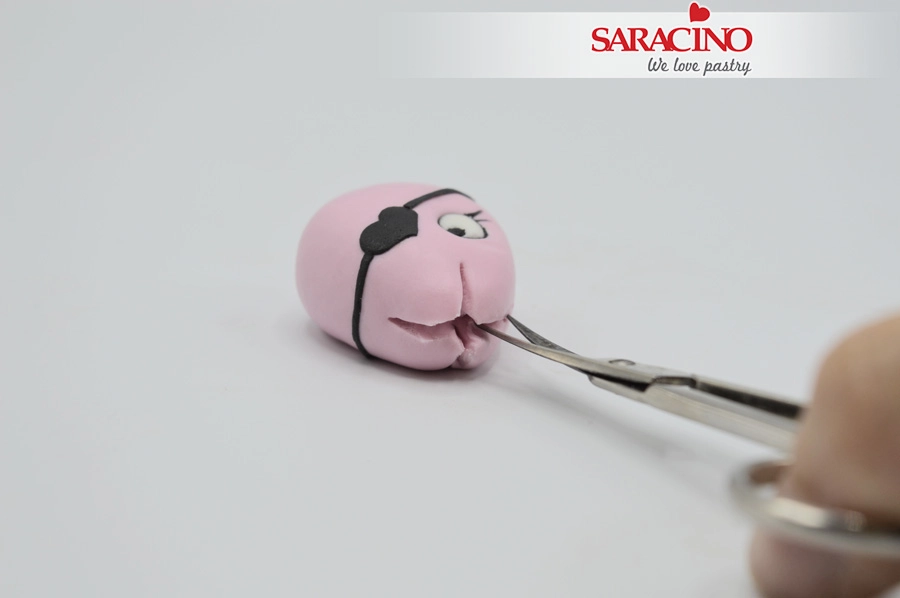
    Cut a cross shape on the bottom side using a pair of small sharp scissors.

    Step 12

    Stretch and roll out each of the 4 parts to create the tentacles. Add more tentacles to give 8 in total.

    Step 13

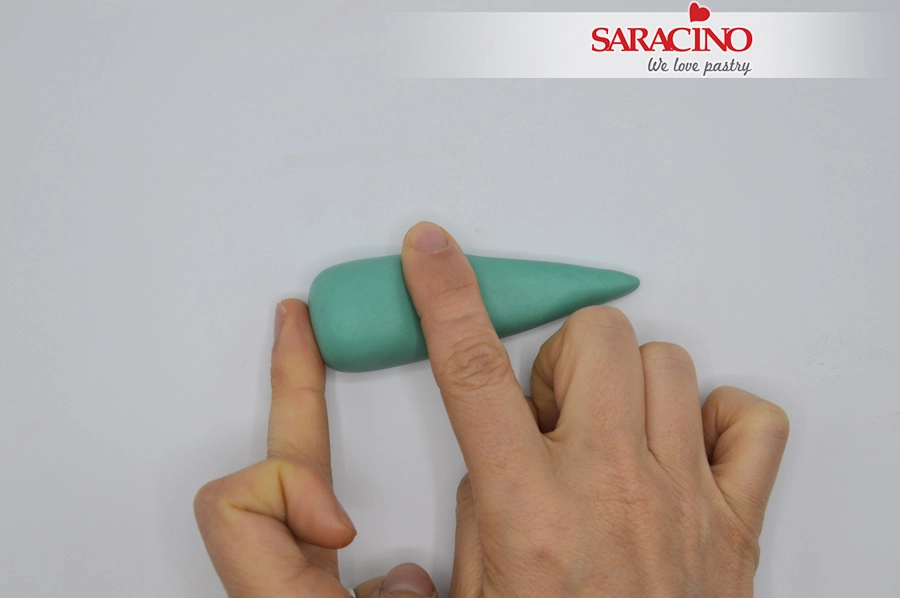
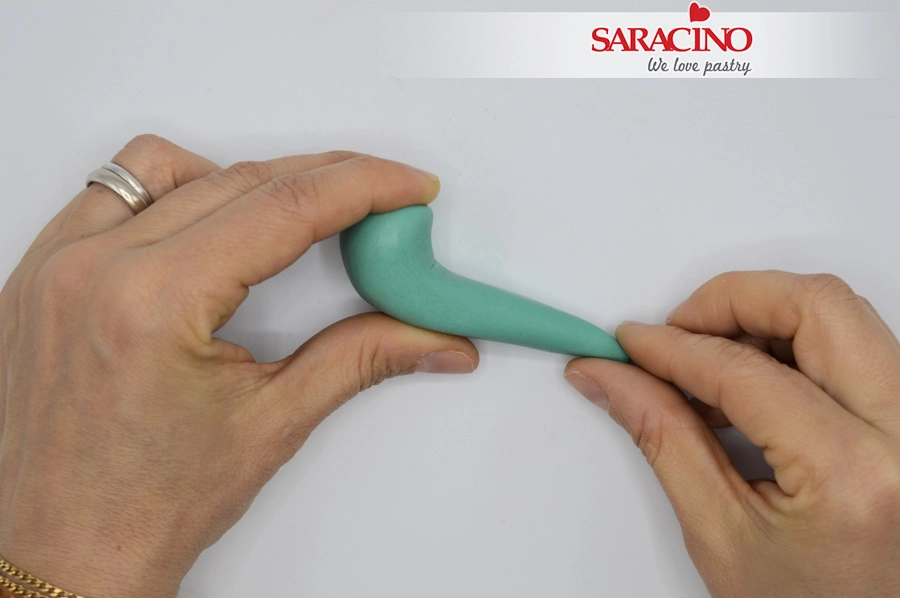
    For the mermaids tail use 30g of pre-coloured tiffany Pasta Model (as an alternative mix 2/3 light blue + 1/3 green) and roll a long tear drop shape. Use your finger to push the paste to create the back side of the tail .

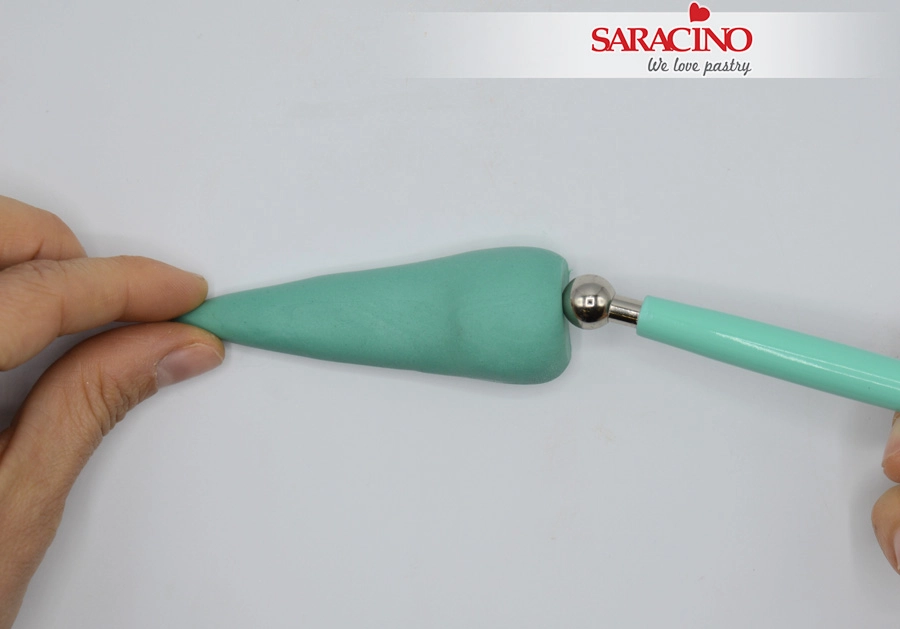
    Step 14

    Use a ball tool to form a dent on the top of the wider end.

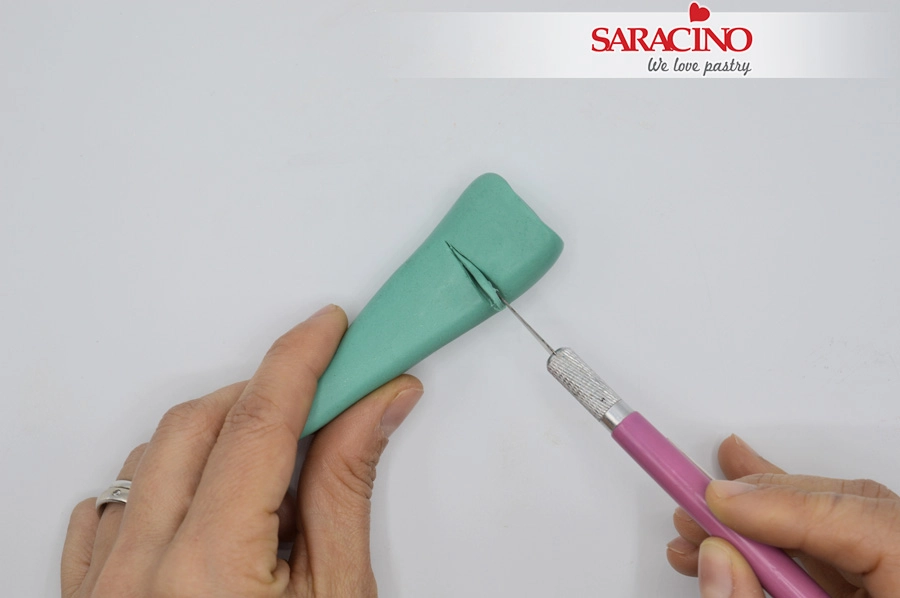
    Step 15

    Use a scalpel to remove a small piece of paste on the front side. This will help when we bend.

    Step 16

    Bend the tail as shown.

    Step 17

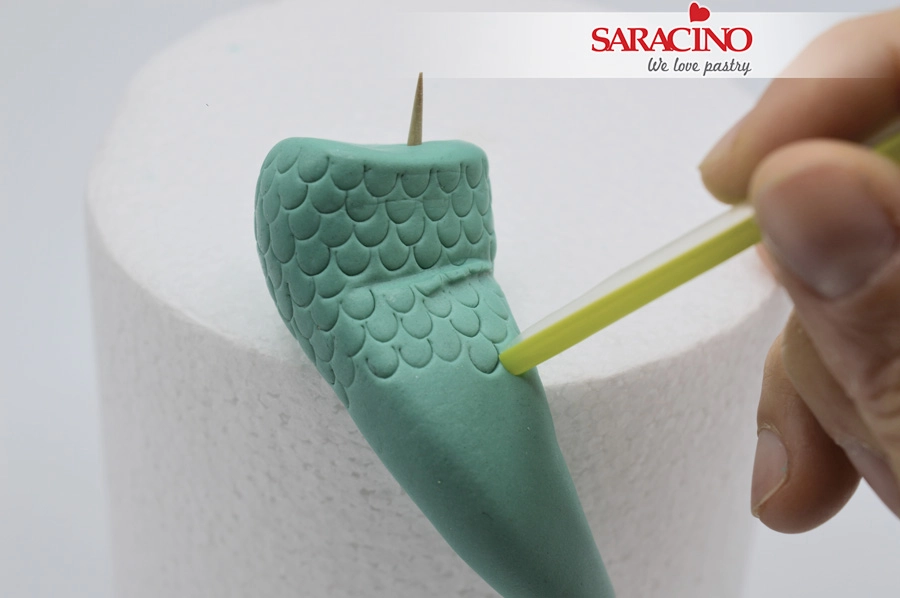
    Secure the tail to a dummy using a cocktail stick. Use a Dresden tool to create two folds. Mark the scales using a straw which has been cut in half lengthways.  

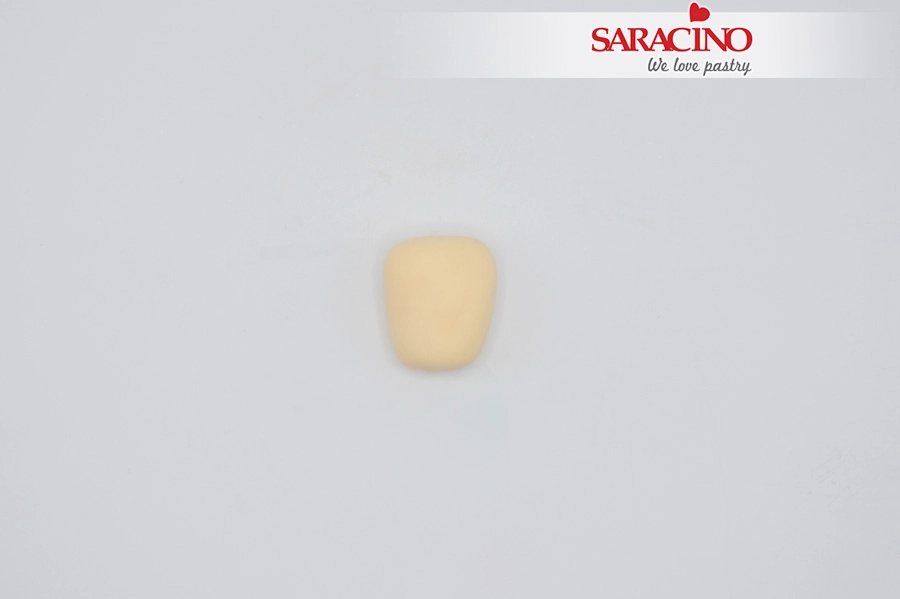
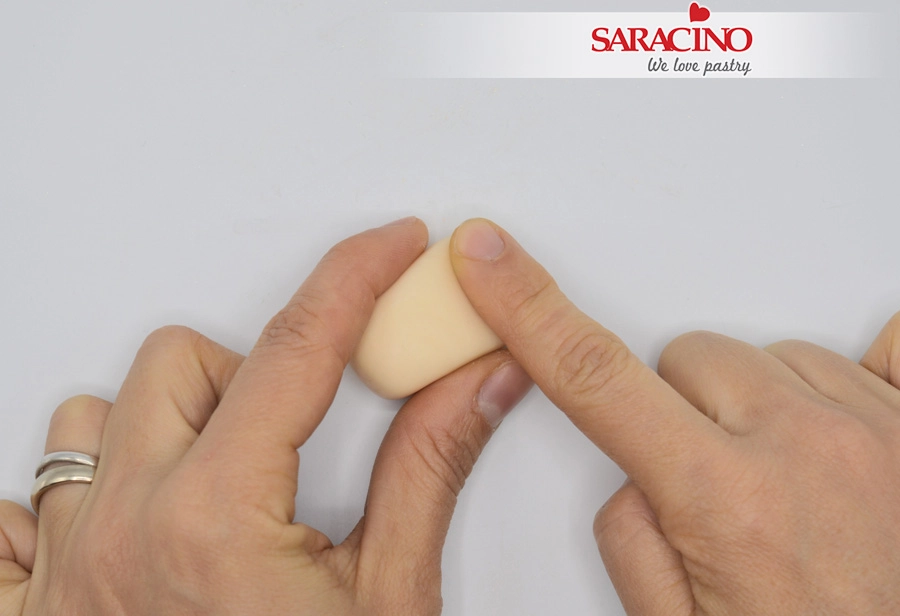
    Step 18

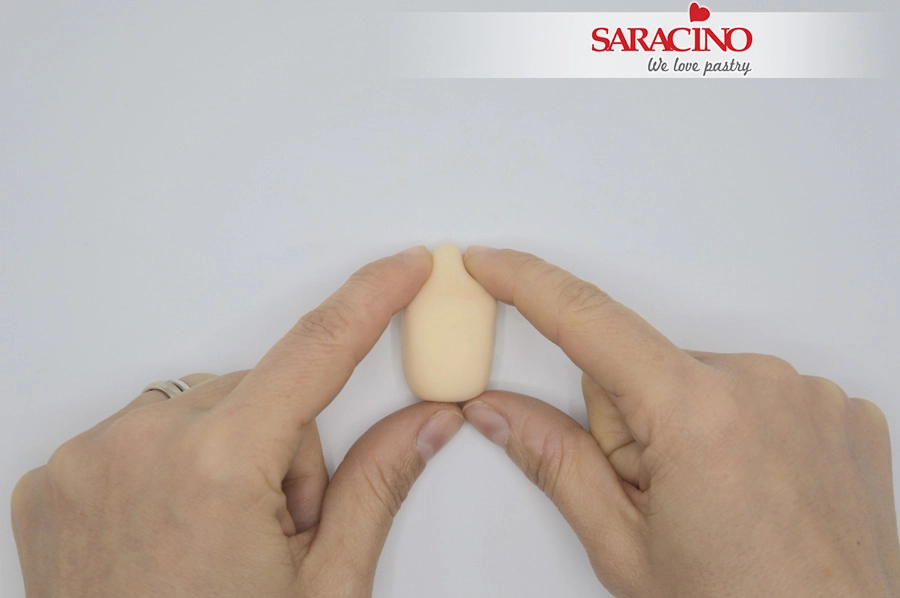
    For the body use 15g of light skin tone Pasta Model and roll to a shape with one end a little bit smaller than the other.

    Step 19

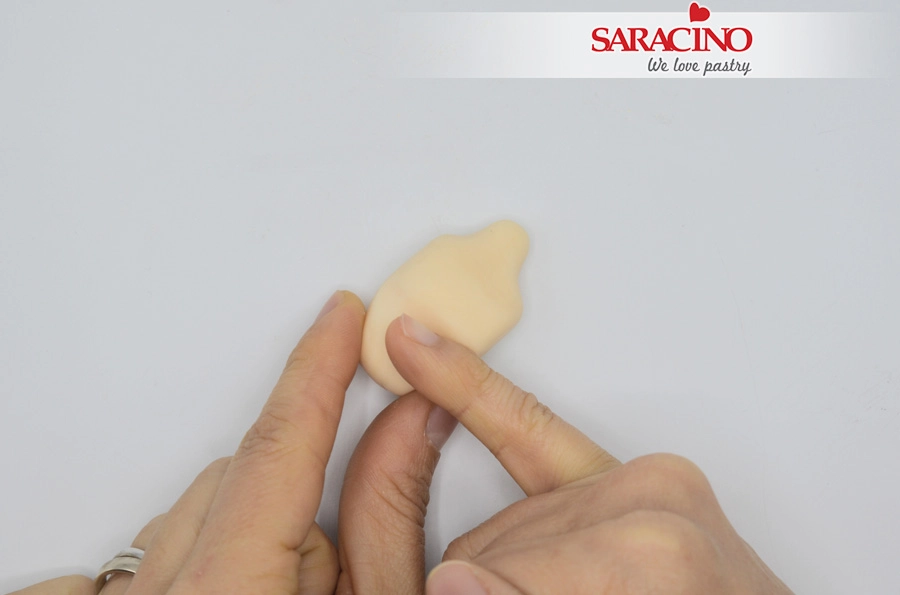
    Use your finger to press down across the wider shoulder area.

    Step 20

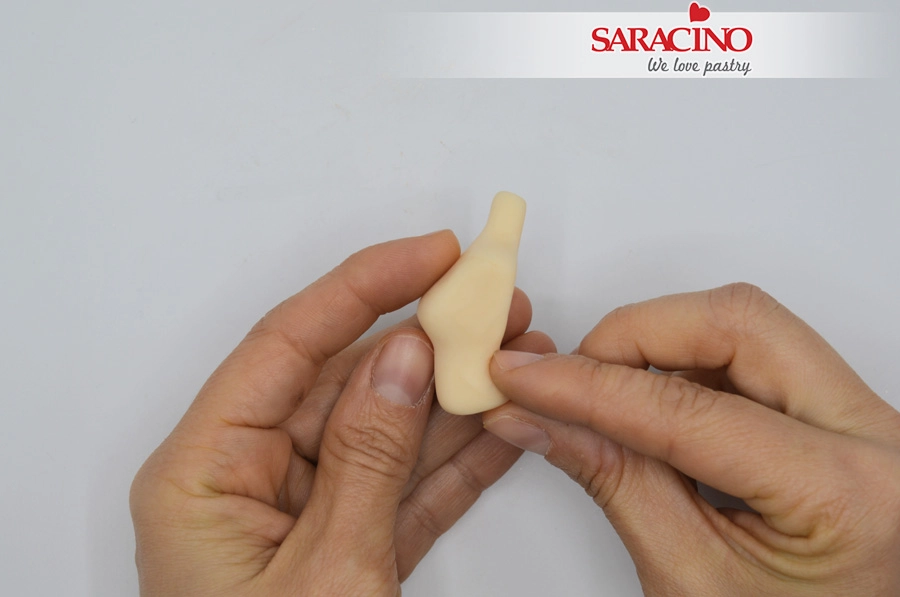
    Use your fingers to shape the neck area.

    Step 21

    Again use your fingers to press in and create the waist, tummy and breast.

    Step 22

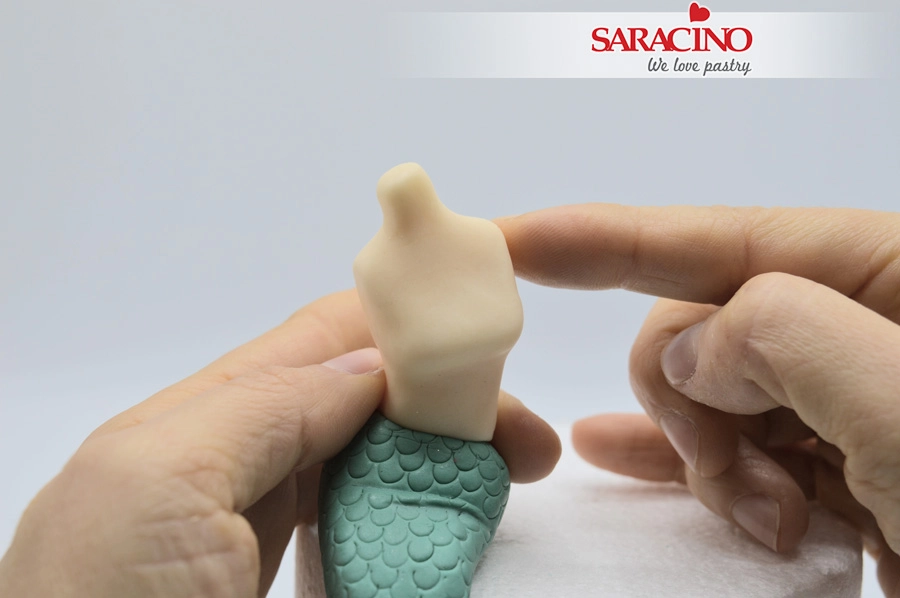
    Bend the back.

    Step 23

    Fix the torso to the tail.

    Step 24

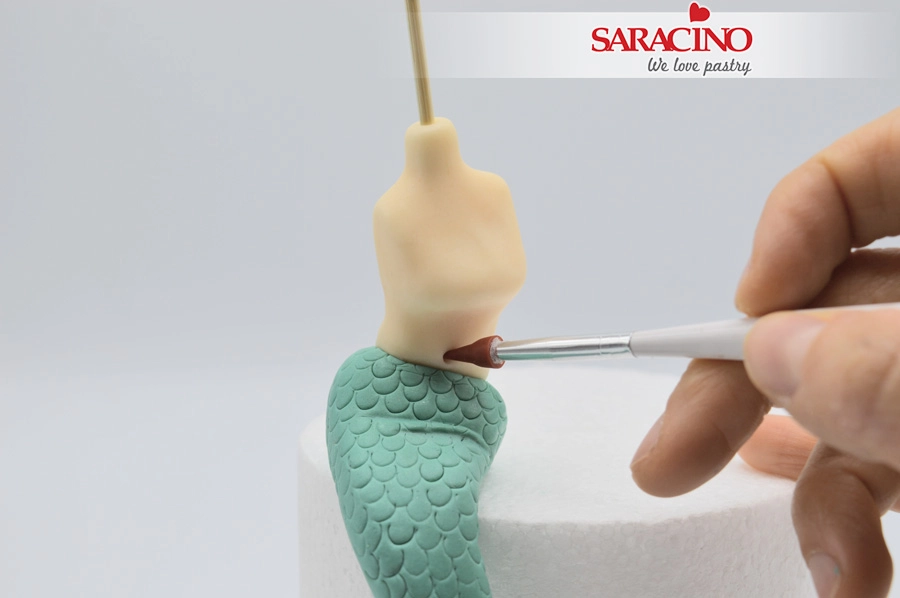
    Insert a cocktail stick or wooden skewer through the body and the tail into the dummy. This will be used to secure the mermaid to the cake. Leave enough at the neck to secure the head. Create the navel with a pointed tool.

    Step 25

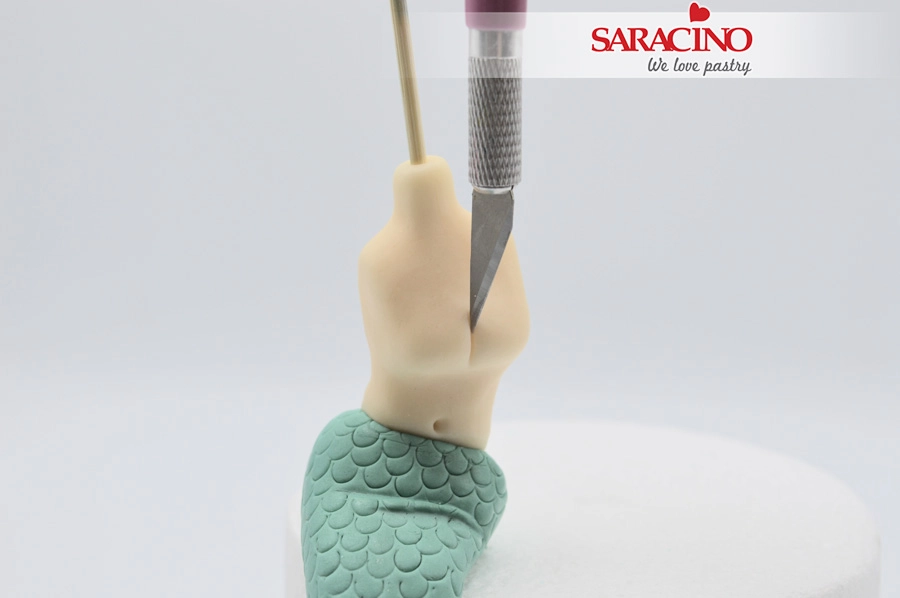
    Use a scalpel to mark the cleavage.

    Step 26

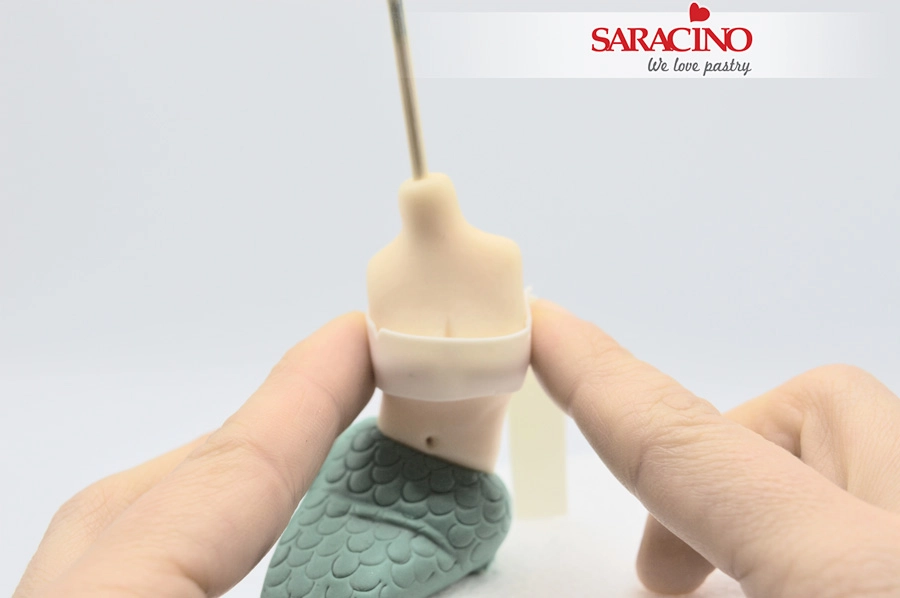
    Cut out a small strip of white Pasta Model and wrap around the chest. Twist at the back and fix.

    Step 27

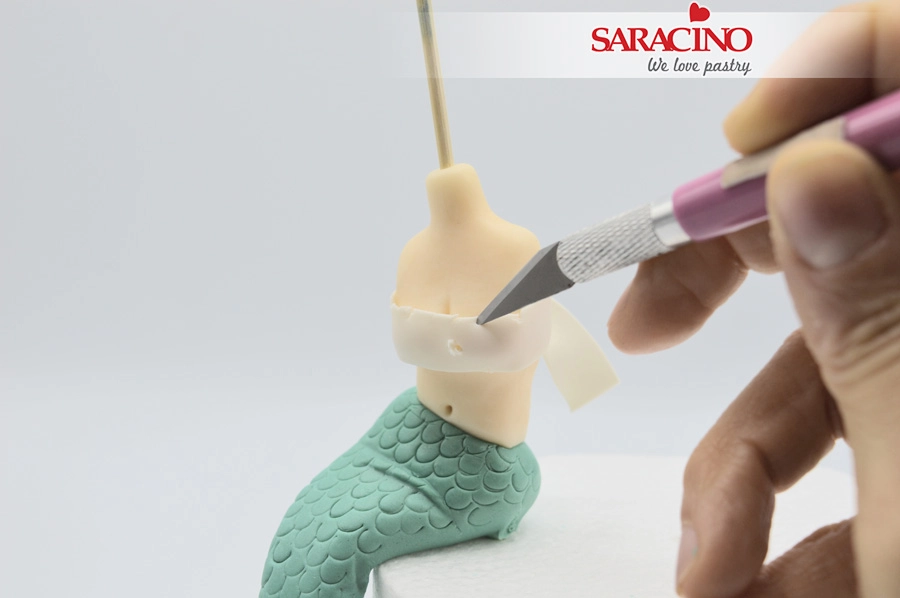
    Create some random cuts.

    Step 28

    For the head use 20g of light skin tone Pasta Model. roll to a teardrop shape then flatten with the palm of your hand. Create the eye area by pressing gently with fingers.

    Step 29

    Shape the nose using the Dresden tool.

    Step 30

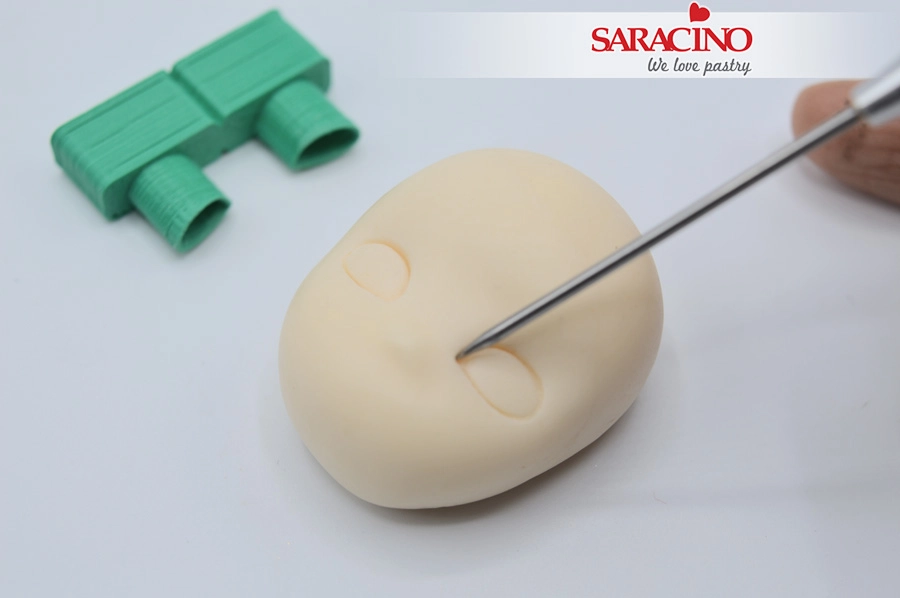
    Place the Easy Eyes tool (small size of the green pack) centrally above the nose and push gently.

    Step 31

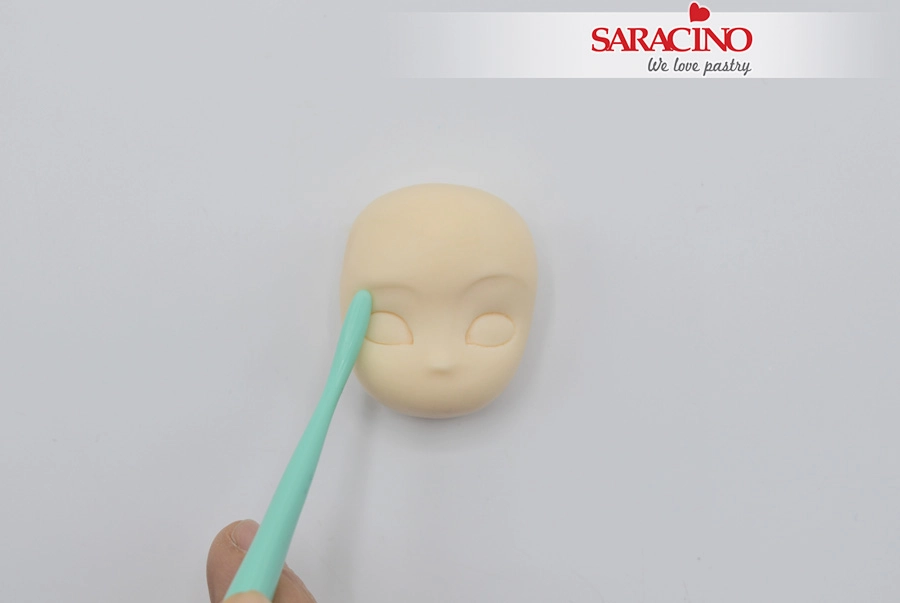
    Use the Dresden tool to press the eye sockets in away from the edge.

    Step 32

    Use a sharp pointed tool to define the outline of the eyes.

    Step 33

    Use a Drseden tool to shape the eyebrows (for added expression make one of them higher than the other).

    Step 34

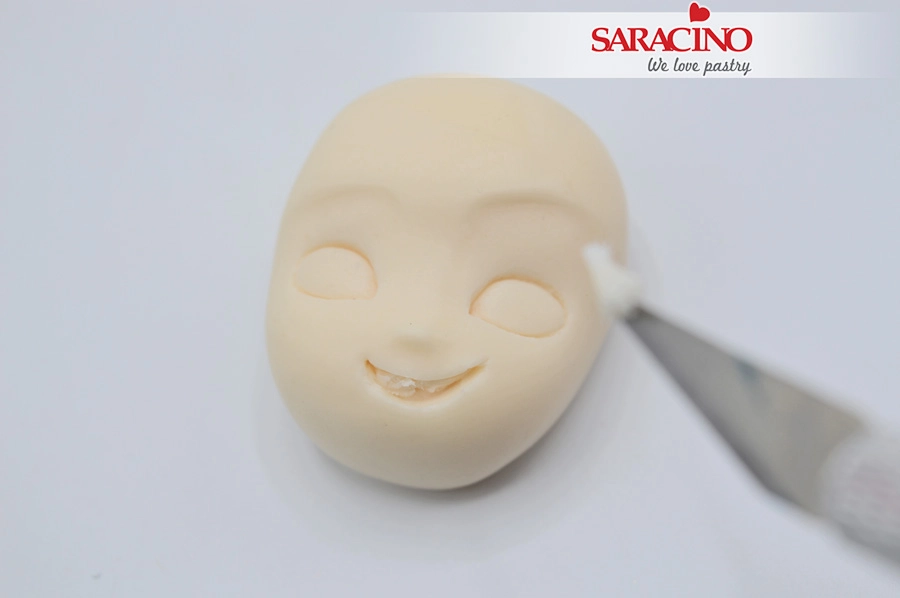
    Use a scalpel to cut a smile and carefully remove the paste from inside the mouth.

    Step 35

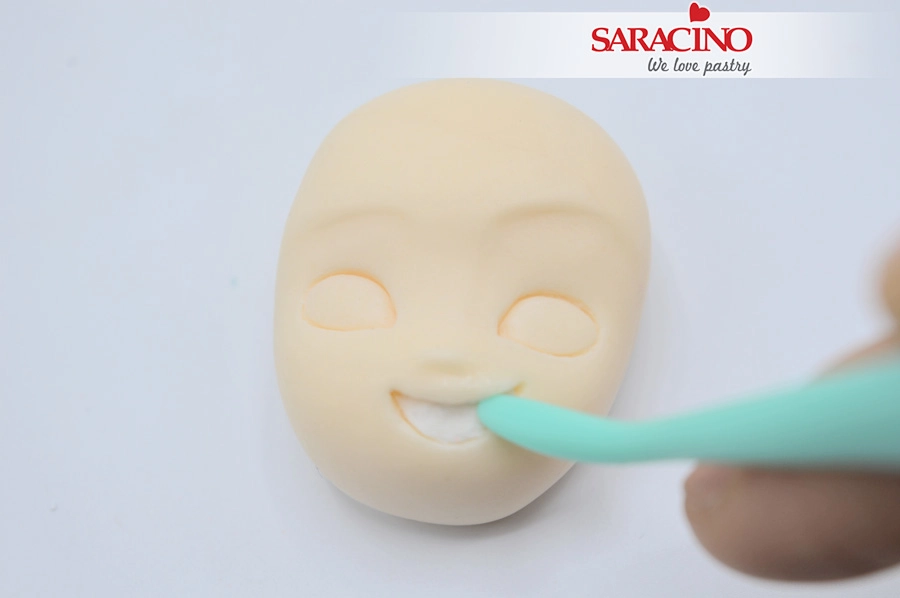
    Flatten the surface using a very small ball tool. Replace with a piece of white Pasta Model.

    Step 36

    Use the Dresden tool to add lines and character to the smile.

    Step 37

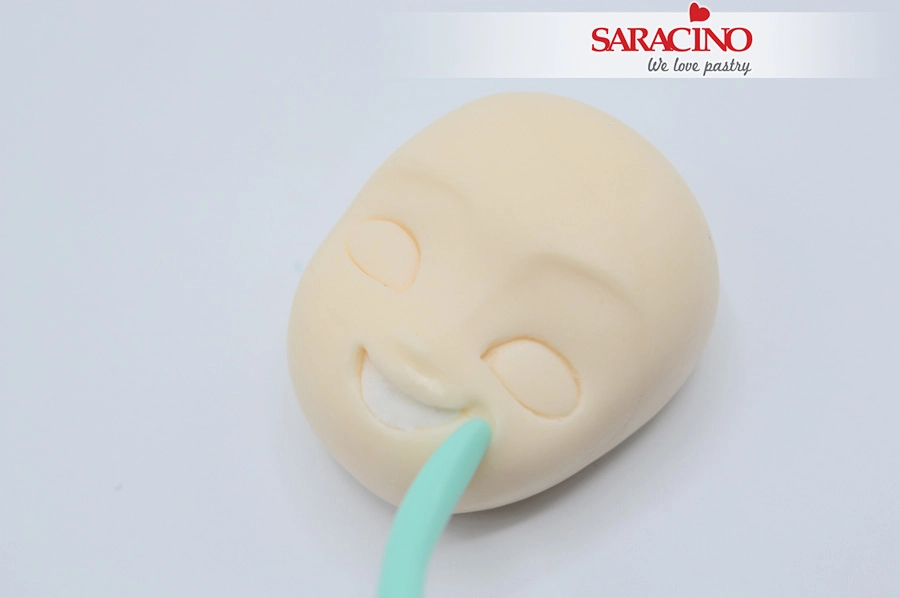
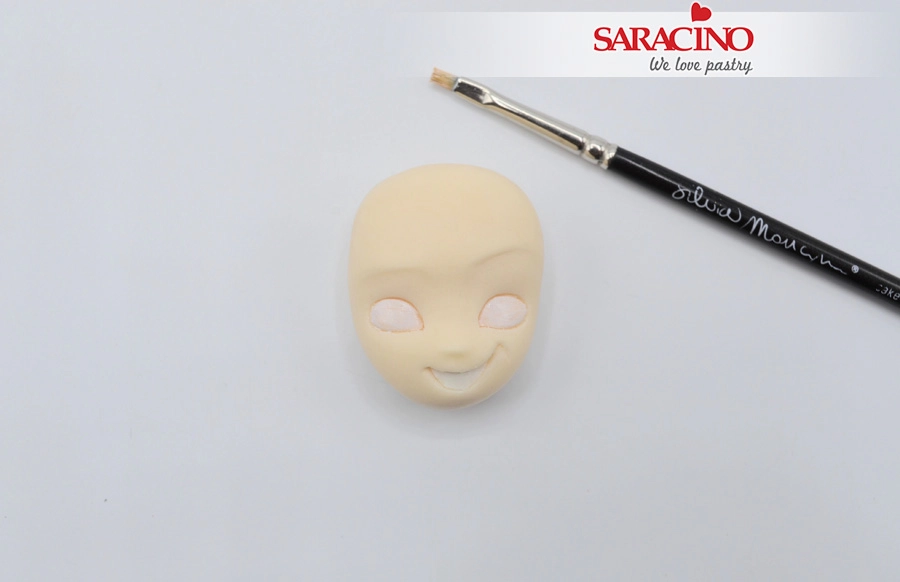
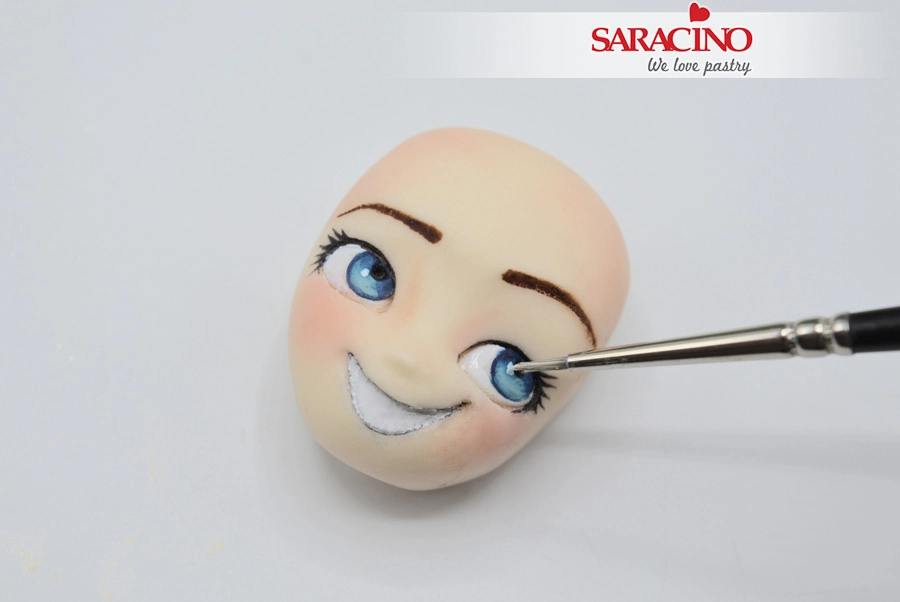
    Using a small brush paint the eyes with white gel colour.

    Step 38

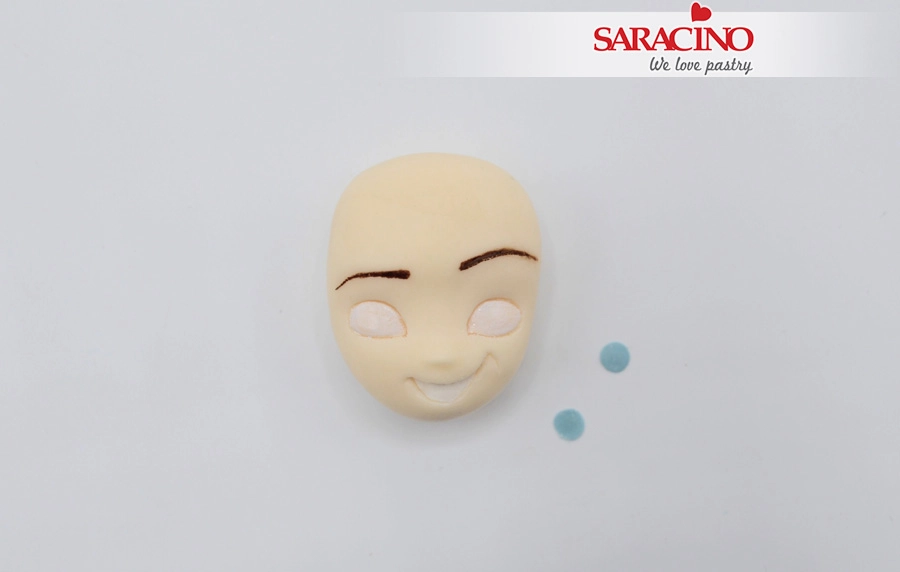
    Using a fine brush paint the eyebrows. Roll out the light blue paste very thin and cut out two circles using a straw or small circle cutter.

    Step 39

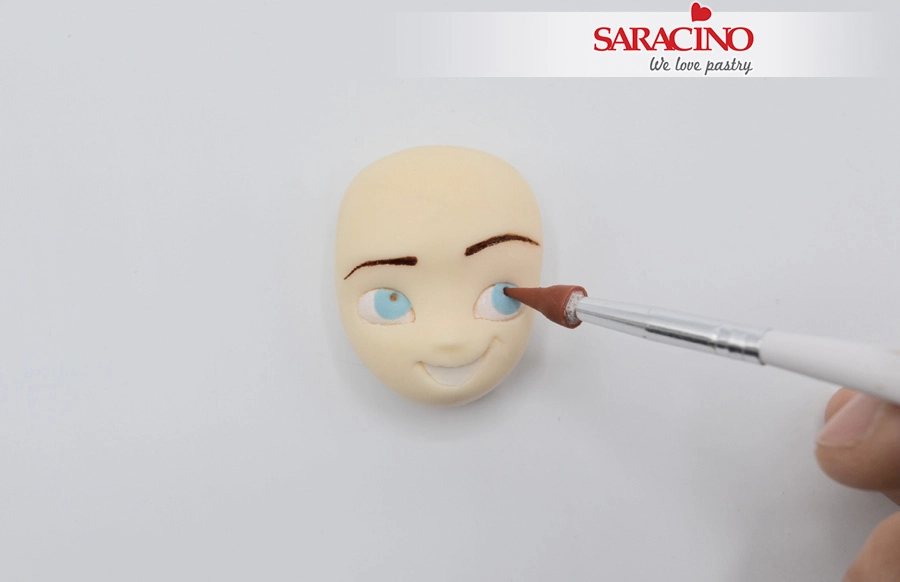
    Fix the blue circles to the eyes as shown. Press two holes for the pupils and paint them with the black gel colour.

    Step 40

    Blend the iris with a dark blue gel colour. Paint the eyes contour, the eyelashes and the outline of the smile using the black gel colour. Dust the cheeks with a bit of light pink powder colour. Add the light point to the eyes with white undiluted gel colour.

    Step 41

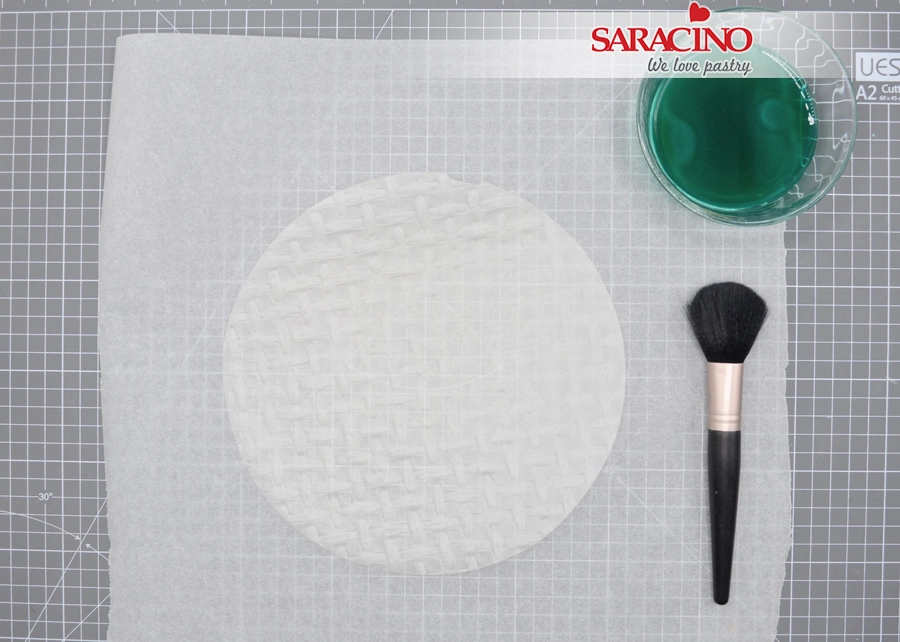
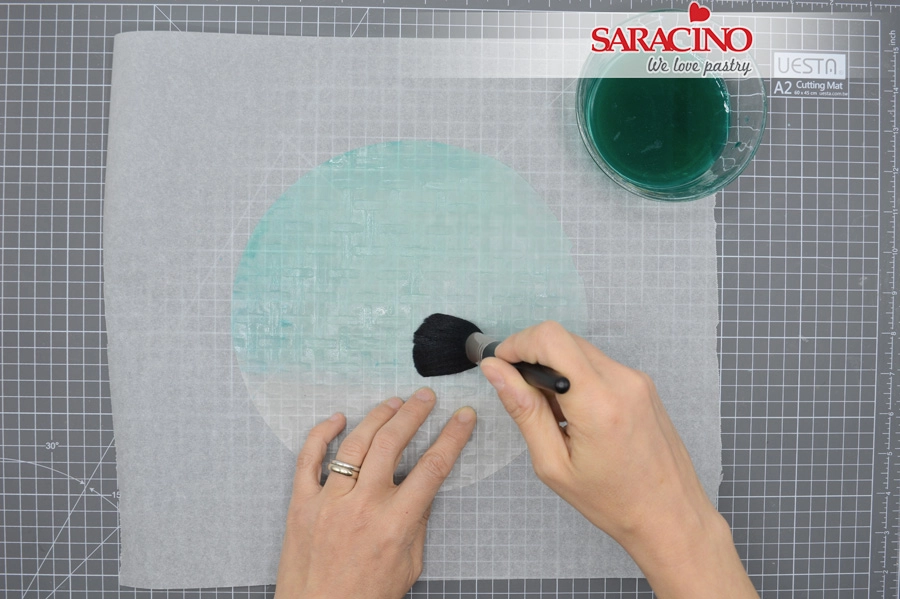
    Cover the cake using baby blue Pasta Top. For the sea I found that the rice paper sheets were very versatile and easy to use with a very nice result. Dilute some powder colours in water. Remember that the tone of the colour you see in the bowl is different to when applied so you may want to practice on another piece of paper before you start.

    Step 42

    Paint the sheet with the colour using a large brush.

    TIP Pay attention not to soak the paper too much.

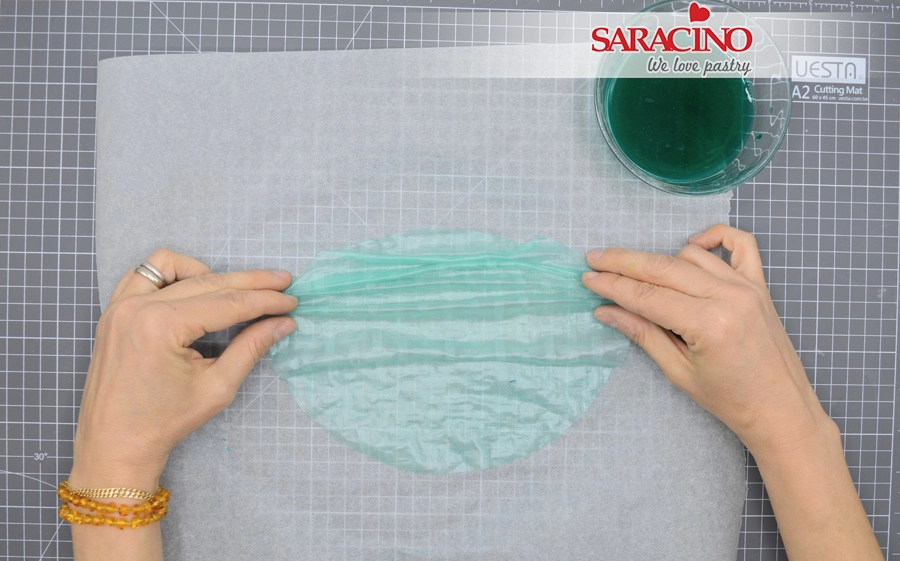
    Step 43

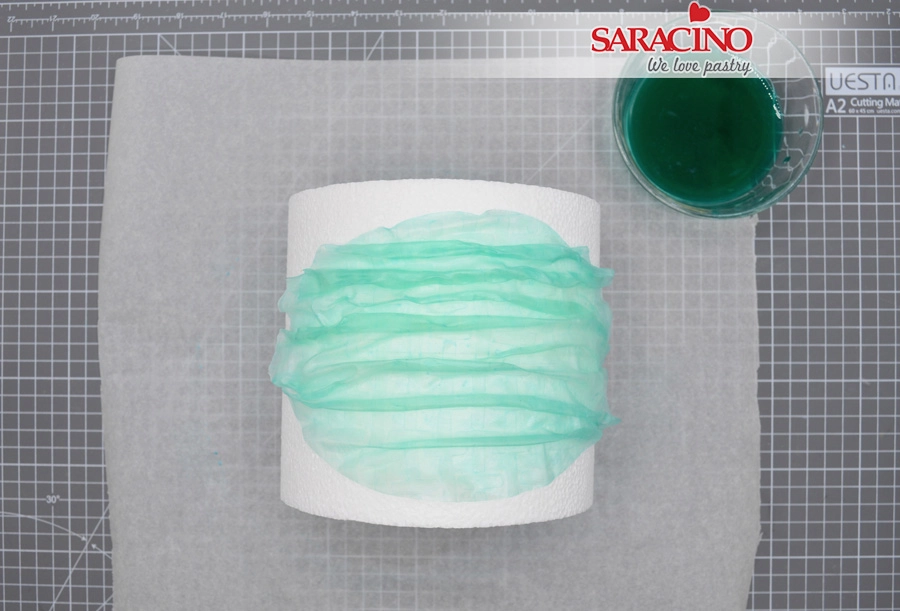
    Wait about 5 minutes (touch the paper to check if it is ready or not) then shape the ruffles with the fingers.

    Step 44

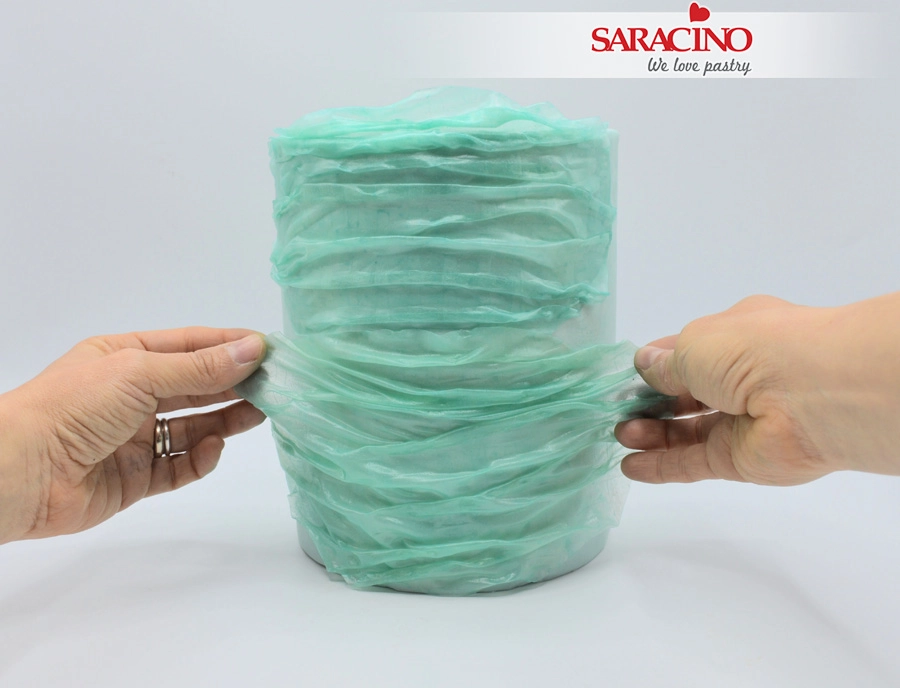
    Place it on a dummy (preferably of the same size of the cake) and continue to make another. Don’t let them dry completely so after making three or four pieces start attaching them to the cake using a little water.

    Step 45

    Overlap each paper but avoid to overlap them too much. The sheets will now be flexible and stretchy so it is not difficult to place and shape them to the right position.

    Step 46

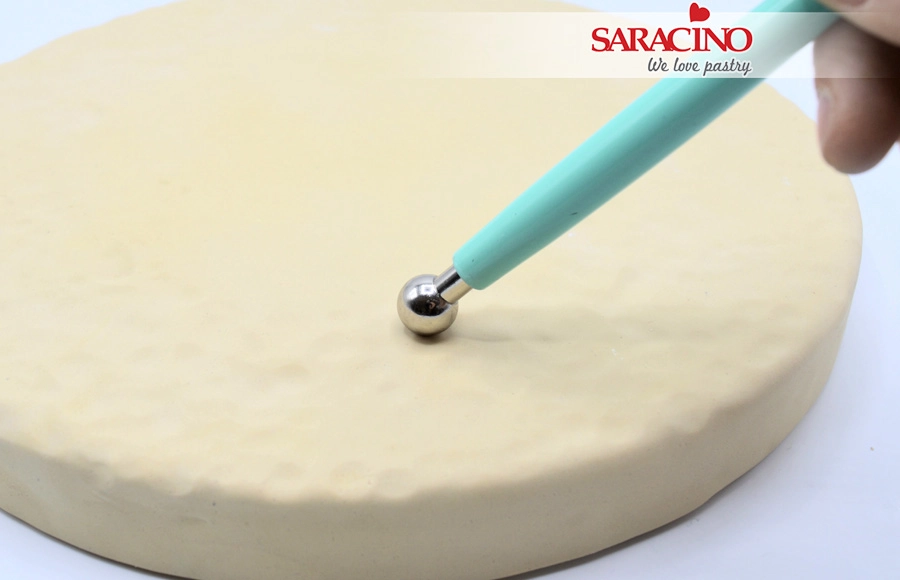
    Cover the board with a sand coloured paste and add all the grooves using a large ball tool.

    Step 47

    Transfer the lower tier cake to the prepared board. Add the smaller top tier. Use dowels to support if required.

    Use a little edible glue to fix the boat to the top tier.

    Step 48

    Insert the flag so that it is visible from the front. If the cake is edible you may want to use a posy pick.

    Step 49

    Attach the Octopus on the right hand side and the mermaid’s body on the left.

    Step 50

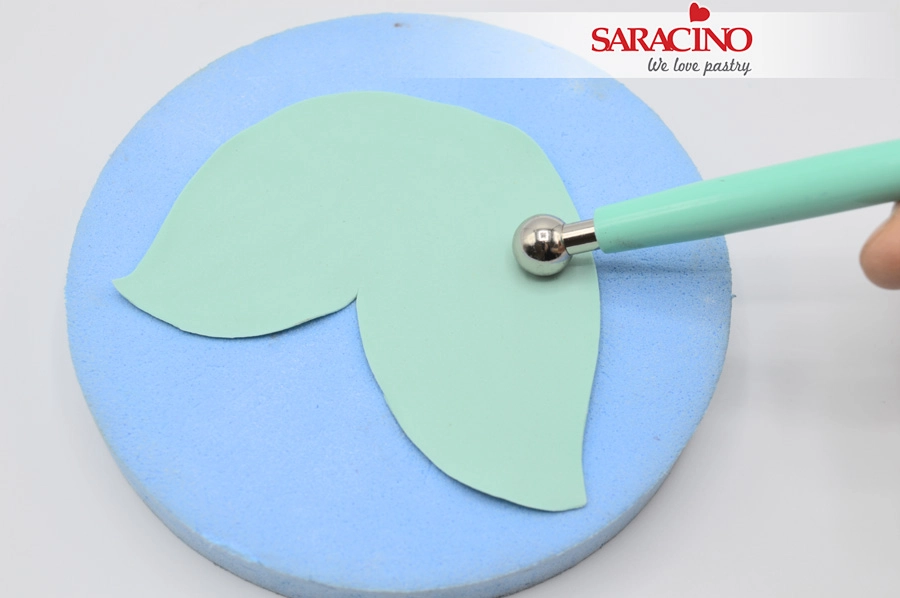
    Add a little white paste to the paste you used for the tail and roll it out very thin. Cut out a large tail fin and place on a foam pad. Add texture with a ball tool.
    Step 51

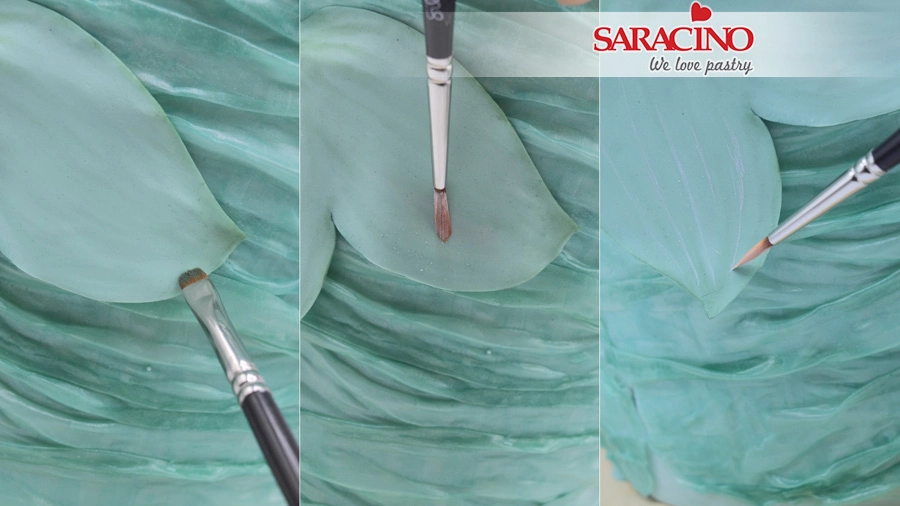
    Fix to the end of the tail using a little water. Dust the edges using  green powder colour and the grooves with a white powder colour. Finish the tail by painting white lines.

    Step 52

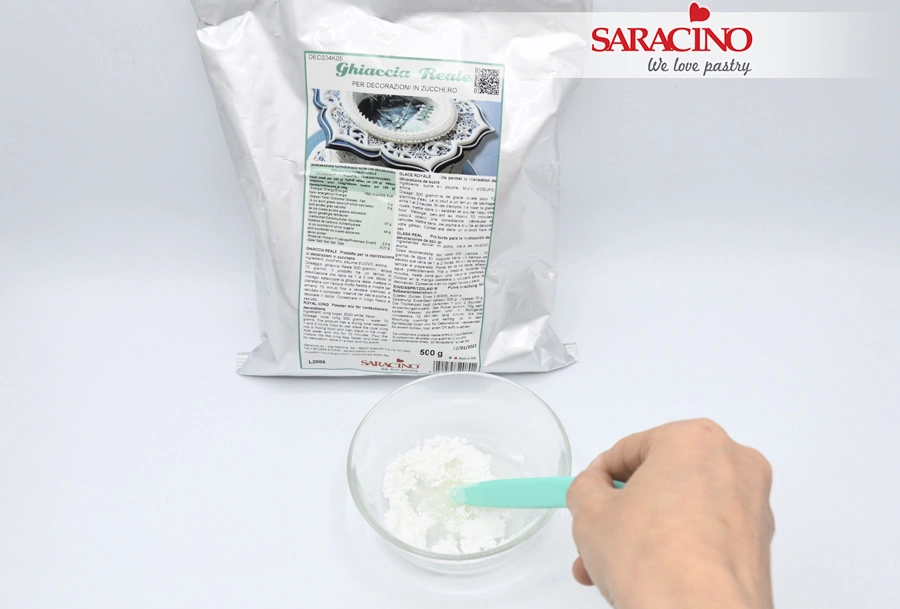
    For the waves mix the royal icing as per the instructions on the packet (just add water). We need a medium consistency so be careful not to add too much water.

    TIP You can prepare the whole packet of royal icing if you will soon need it for other decorations. The mixed result is likely to be better.

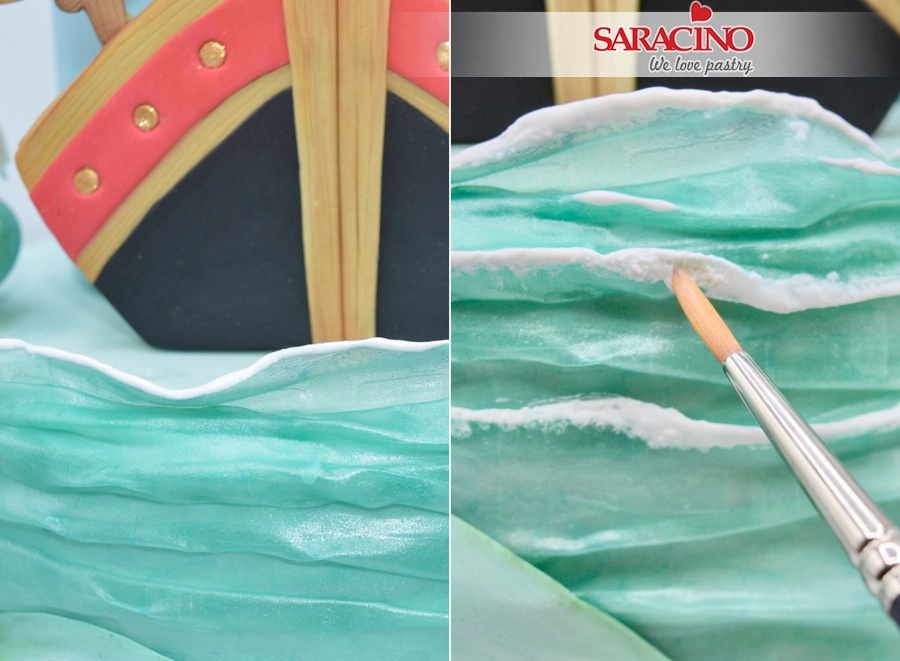
    Step 53

    Pipe the royal icing along the edges of the waves and use a wet brush to blend and create the crests.

    Step 54

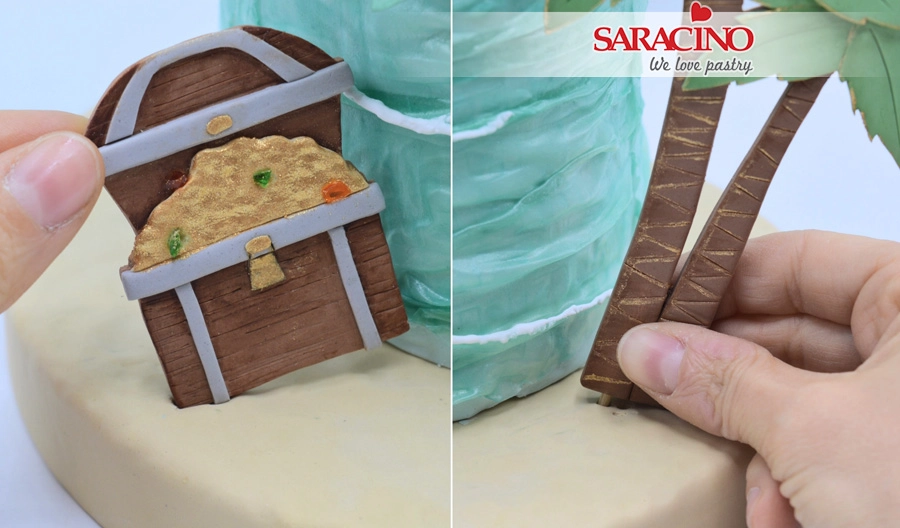
    Fix the palm tree and the treasure chest on the board to the sides of the cake.

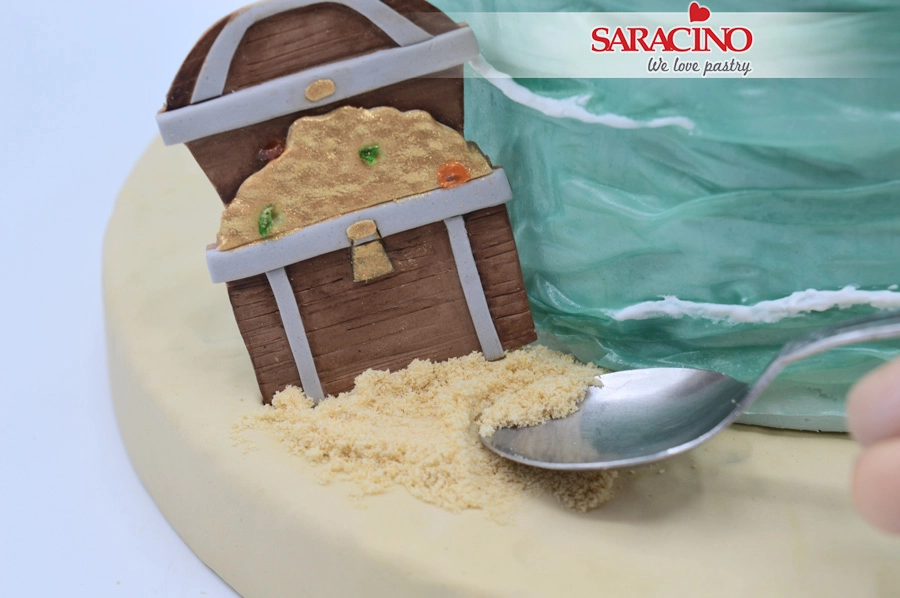
    Step 55

    For a sand effect crumble some biscuits and spread around the cake.

    Step 56

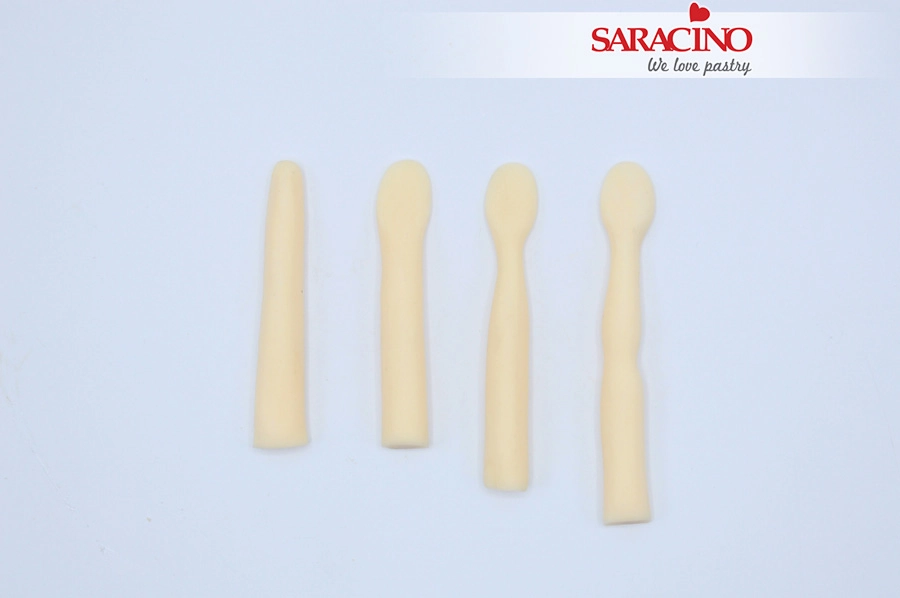
    Using  5 – 6g of light skin tone Pasta Model roll a sausage shape with each end narrower. Cut it in half and flatten the hand ends to create the palms. Roll to thin the wrist and the elbow area.

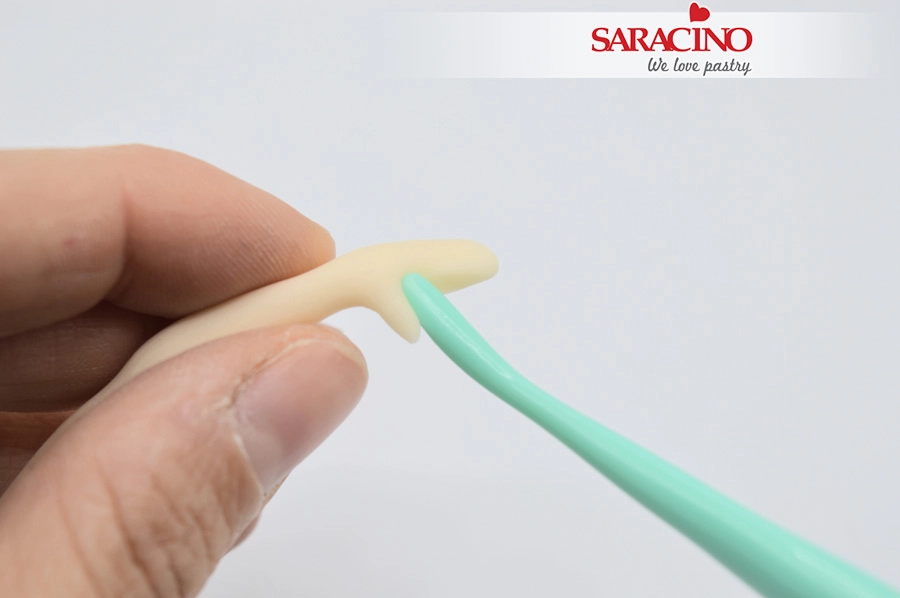
    Step 57

    Cut out the thumb making a V shaped cut with the scalpel. Push the thumb forward and smooth the edges. Bend the right arm.

    Step 58

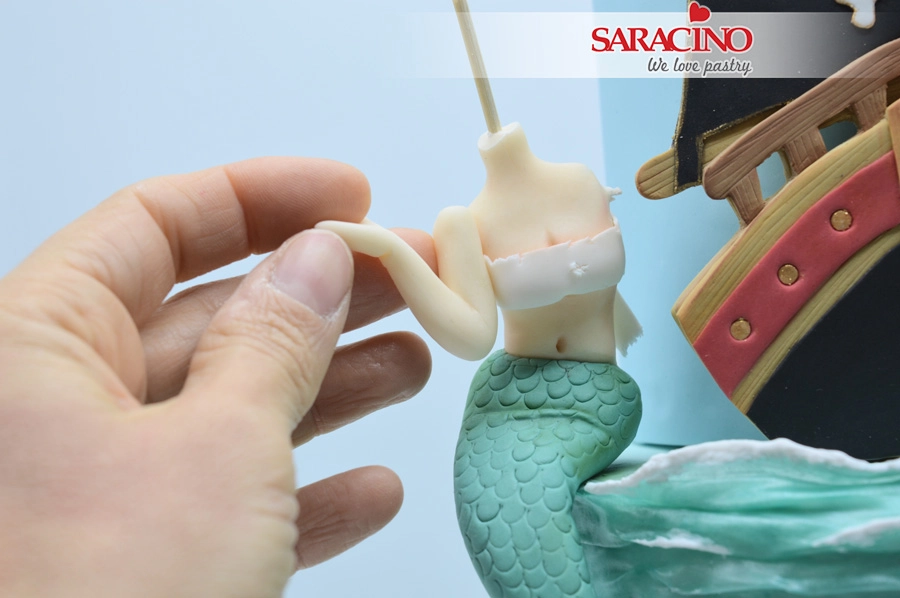
    Fix the arms to the torso using a toothpick and a little water.

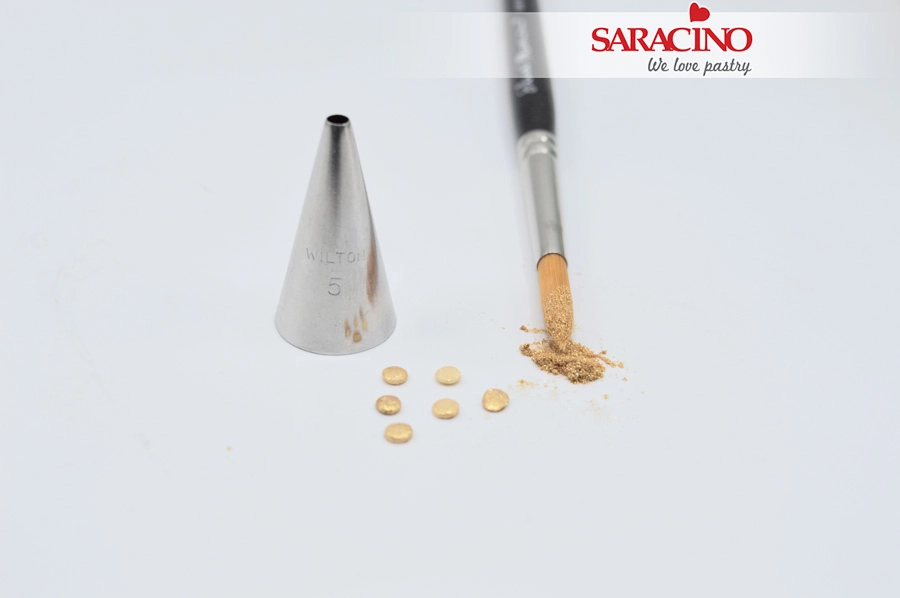
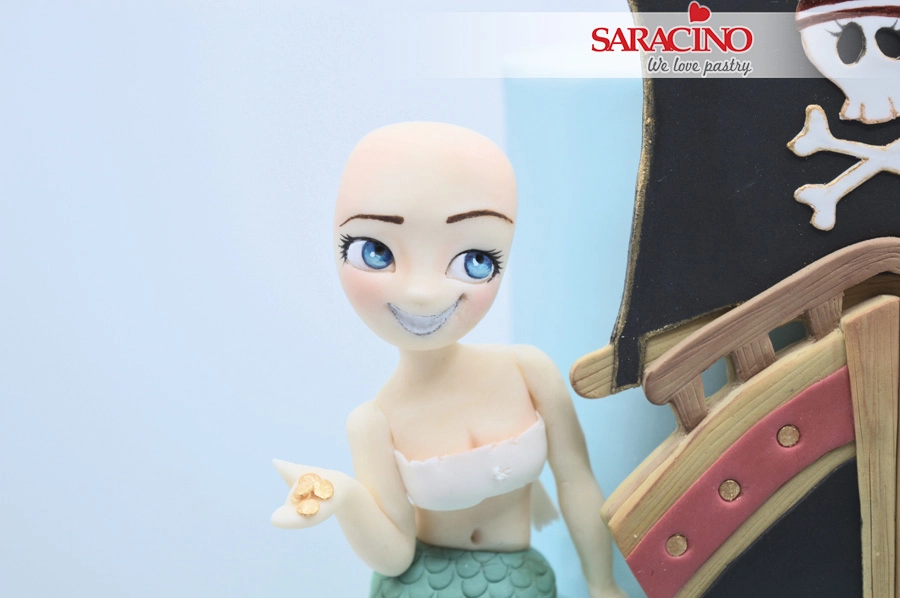
    Step 59

    Use the end of the piping nozzle to cut out some small circles for the coins. Paint with the gold paint we made previously (if it has dried add more clear alcohol).

    Step 60

    Fix the coins on the hand of the mermaid. Make another arm and attach to the body.

    Step 61

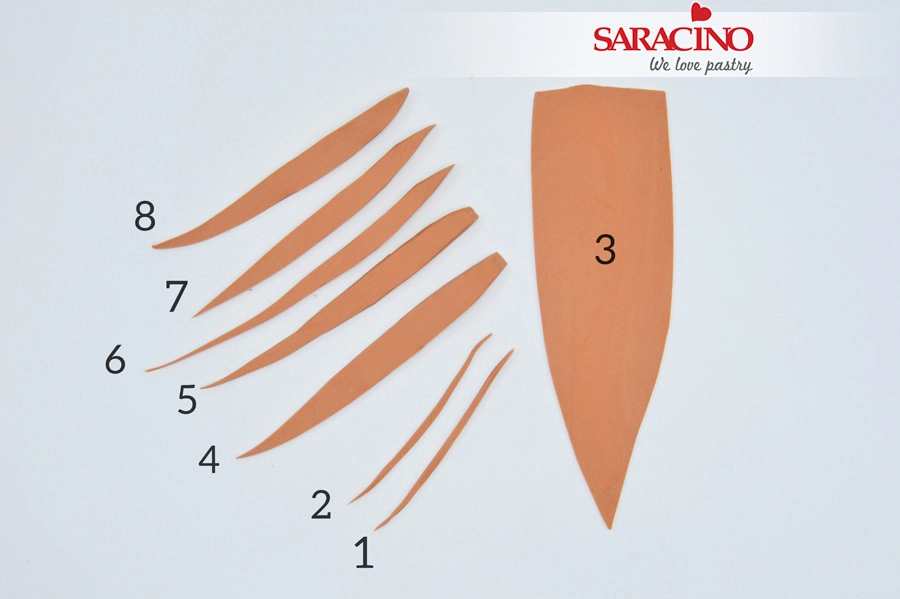
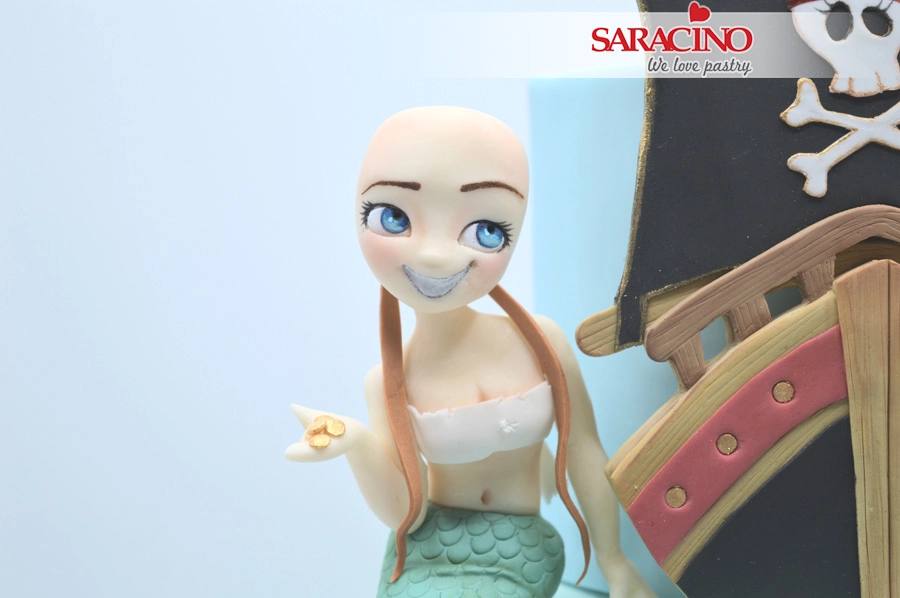
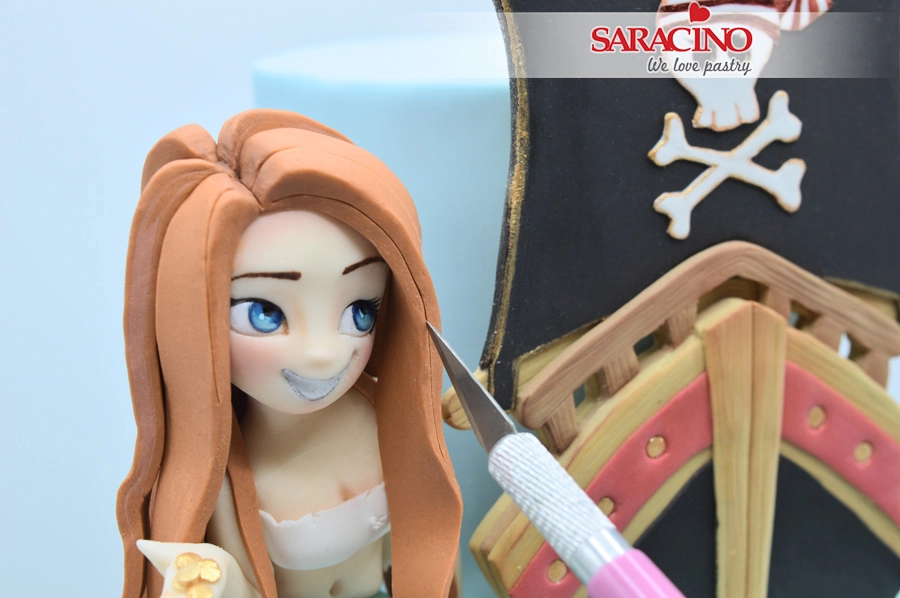
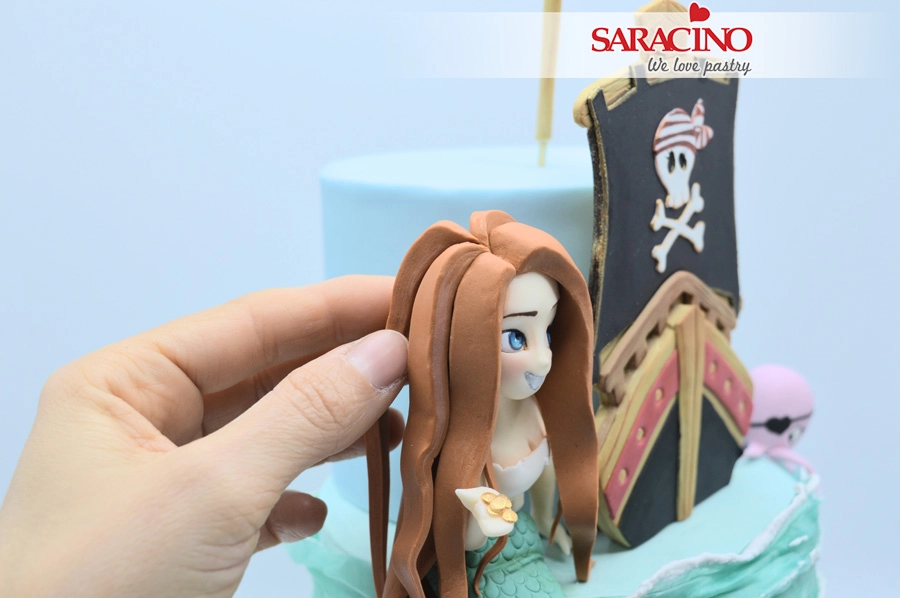
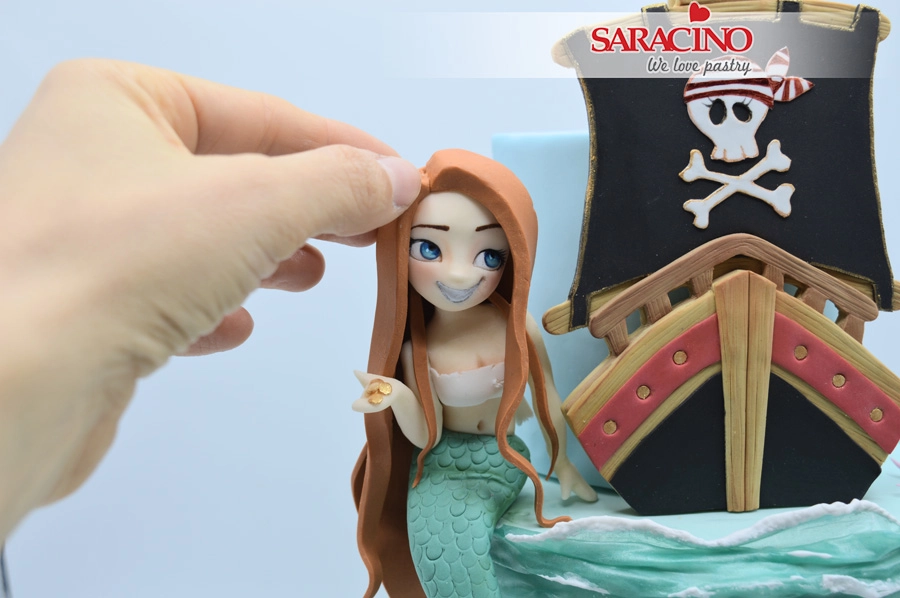
    Using about 50g of orange Pasta Model cut out strands of hair as shown.

    Step 62

    Start by attaching the smaller strands to the back of the head.

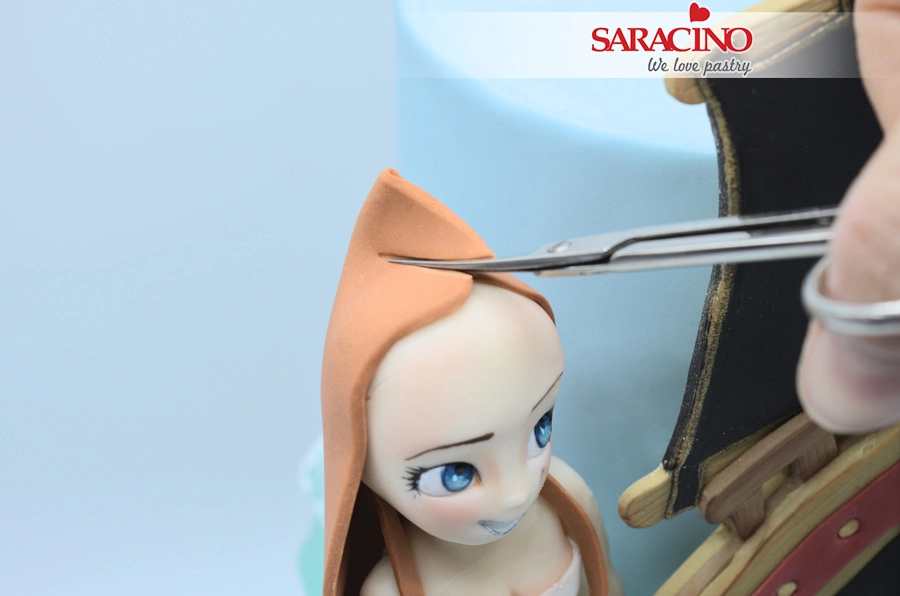
    Step 63

    Fix the the largest piece to the back and pinch the excess together on the top of the head. Cut away the excess paste.

    Step 64

    Continue attaching the other strands.

    Step 65

    Continue attaching all the other strands until the last one is fixed at the back of the head.

    Step 66

    Add random marks using the scalpel to add character.  Add some very small strands between the larger ones.