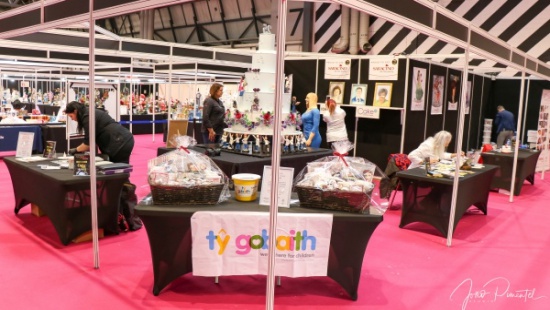
Cake International 2019 Show Saracino Stand

Cake International 2019 Show Saracino Stand

Cake international 2019 After the phenomenal success of our Saracino feature at Cake International 2018, we knew that this year was going to have to be bigger and better, but how? How do you top a gigantic birthday cake and life sized Melanie Underwood of 2018?

How? There’s only one way to match the Queen of cake shows and that’s with the Queen Elizabeth herself! Early in the year Saracino dreamt up the wildest of ideas, let’s get the royal family on board! Now I know what you’re thinking, that’s crazy, there’s no way will they be interested, but you’re wrong! Saracino set about writing to the Palace informing them of her plans, and they loved it! You can view the letter from Her Majesty HERE.

So with the royal seal of approval, they enlisted their phenomenal team of Ambassadors, and entrusted each one with the task of making something spectacular for the stand, of course using only the finest Saracino products in the land. After all if you’re planning on replicating the whole royal family then you really only can use the very best products! Modelling paste, modelling chocolate, covering paste and products galore were sent out far and wide in a variety of colours and quantities.

For months the ambassadors worked away in secret on their designs, all the while Saracino was working on the bigger plan. The most important part of the plan. Hope House Ty Gobaith. A beautiful and vitally important hospice for children who are affected by conditions so serious they aren’t expected to live longer than early adulthood. You see for the last three years Saracino has been honoured to raise money each year at Cake International, by holding our annual raffle and auction over the course of the show. Last year we raised a total of £1820.65 and we were blown away by people’s generosity. This year we all raised £2284.49!

The hospice is a truly beautiful place, where although poorly, children still get to be children and take part in lots of fun and happy activities. Hope house ensures they get to spend time making treasured memories with their siblings and families, whilst receiving the best care. During the summer I was there with Saracino decorating cupcakes with the children. Having witnessed first hand myself how incredibly special and important it is to the families who depend on it, believe me when I say, I know how much they all value and appreciate every penny raised.

This year as always Saracino put out the call for sponsors for our raffle prize, and boy did they get a response. There was not a single company or brand who said no. Not only did they not say no, they were so kind and generous that they sent their products by the box load. So many products in fact that this year we had three hampers, each containing products to the value of £1500 from this amazing TEAM. For this thank you will never be enough.

So show time! Ambassadors travelled from all corners of the world, to deliver their pieces safely to the stand. The Royal family proudly lined up one by one under the watchful eyes of the Queen, even the corgis knew to behave! Then the rest of the stand came to life, adorned with the most beautiful of creations, from flowers and cakes, to figures great and small. Every table covered with divine creations from our world class ambassadors. Throughout the weekend we had an array of astounding demos and spectacular classes, where people not only learnt about the best products from the best team, but about the best mission. Hope House Ty Gobaith fundraiser. Money poured in from all around, raffle tickets were sold and folded by the book full, right up until the last minute before the raffle was drawn.

Then came the real fun, auctioning off everything on the stand! That’s right, EVERY piece made by our ambassadors was sold to raise even more money for the hospice. Boxes were filled with dogs and cats, people and cakes. By the end of Sunday all that was left was a whole heap of special memories and a bucket full of cash… This year we are proud to announce that the grand total raised for Hope House Ty Gobaith is… To everyone who donated prizes, bought tickets and took time to create their incredible pieces. Thank you so VERY MUCH!

Roll on Cake international 2020 you won’t believe what we have planned!

Enjoy the photo slide below. Click on the picture to see more.


Text by Lynsey Wilton – Eddleston

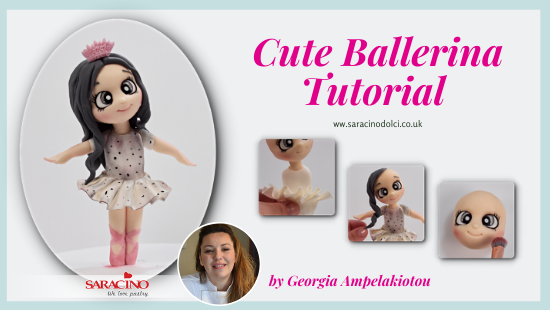
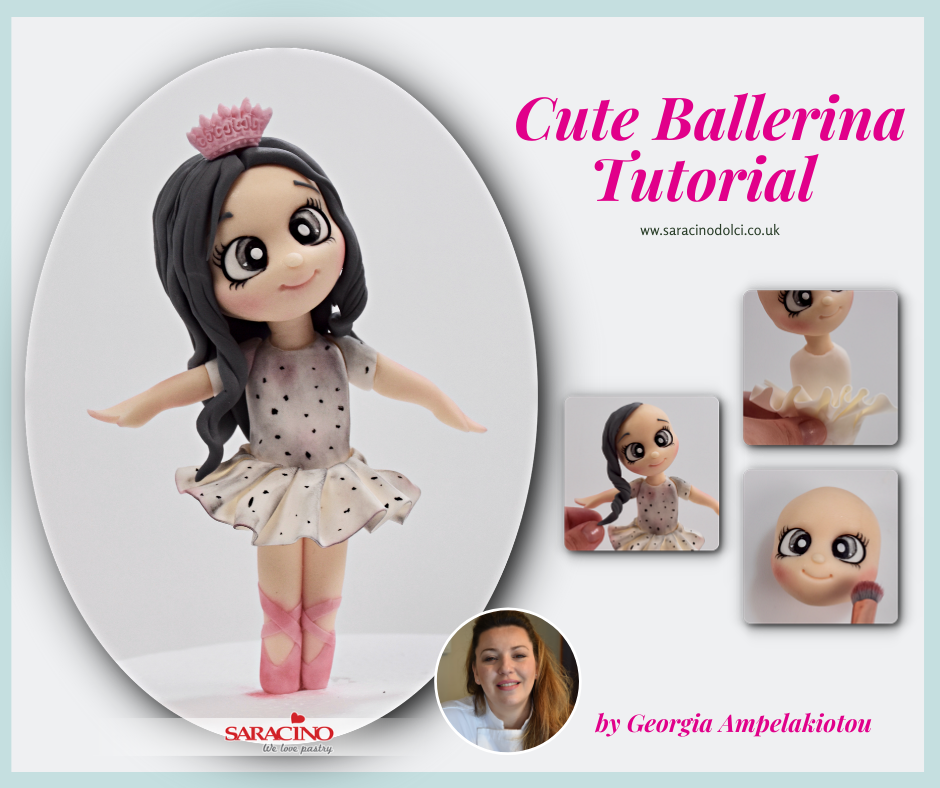
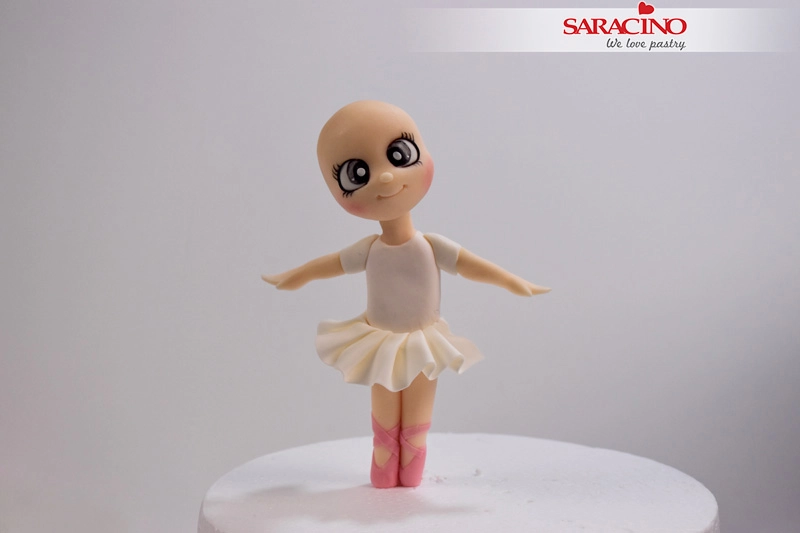
LITTLE BALLERINA

LITTLE BALLERINA

You will need:

  • Dresden tool
  • Ball tool medium size
  • Silicone brush 0 size
  • A fine brush
  • A large brush
  • Exacto knife
  • Rolling pin
  • Saracino modelling paste skin colour
  • Saracino modelling paste pink colour
  • Saracino modelling paste (coloured grey)
  • Saracino modelling paste white colour
  • Saracino modelling paste black colour
  • Edible glue
  • 2 wooden skewers
  • Dust colours pink and black
  • Clear alcohol

Step 1

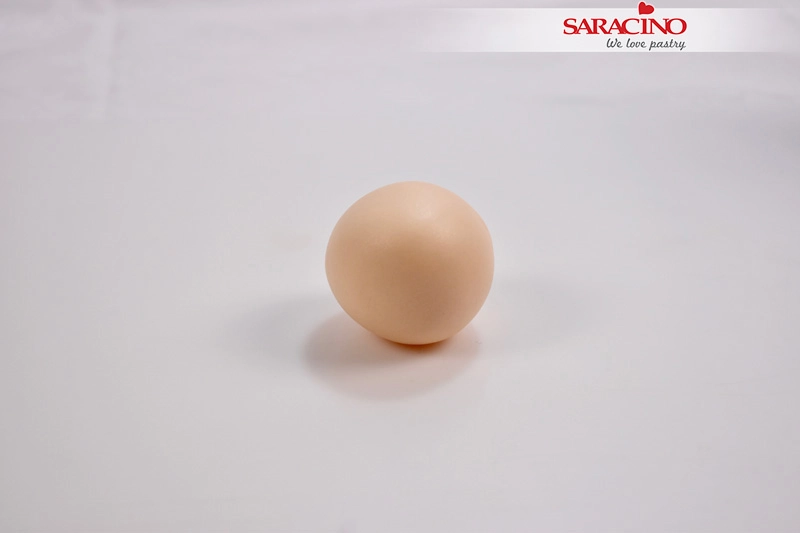
Take 35g of Saracino skin coloured modelling paste and roll it to a nice even ball shape

Step 2

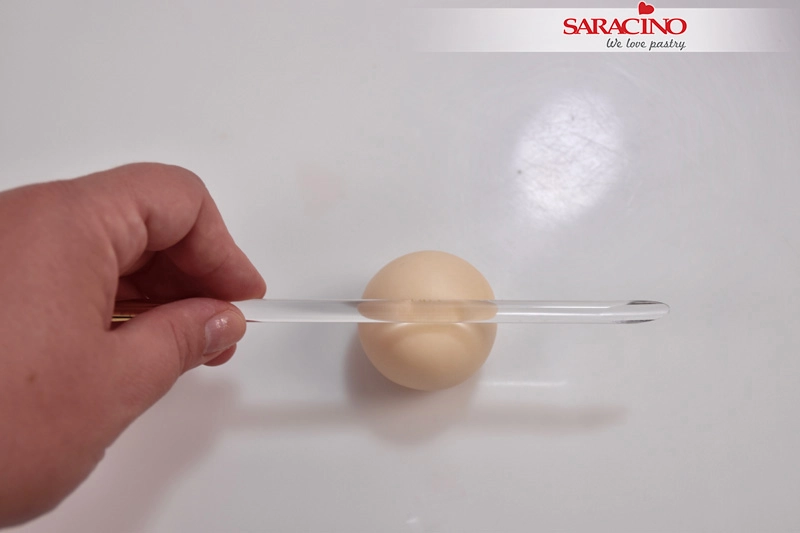
Use your brush to create a dent in the middle of the ball

Step 3

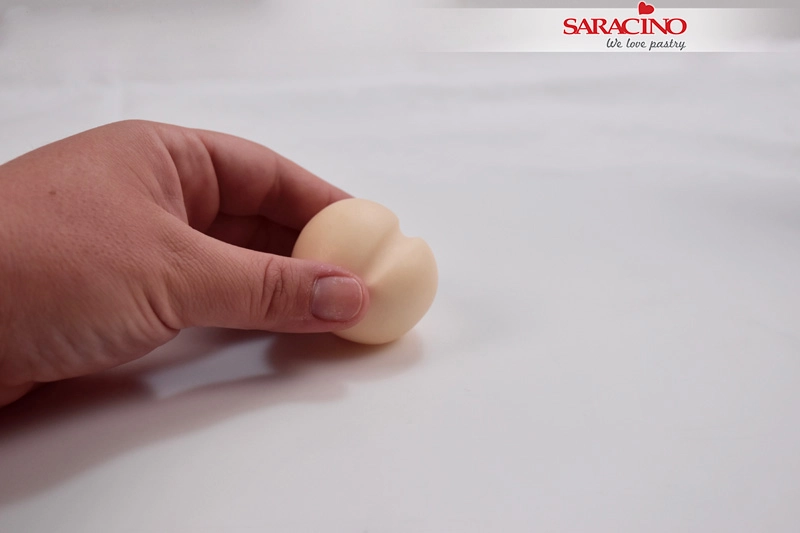
Don’t push too much or too little. You must end up with a result like seen in the picture

Step 4

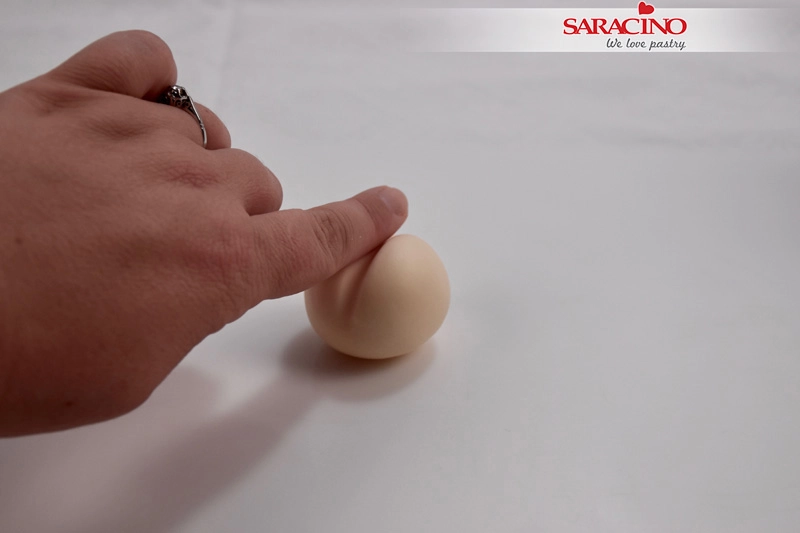
Use your finger to flatten the upper part of the ball (head)

Step 5

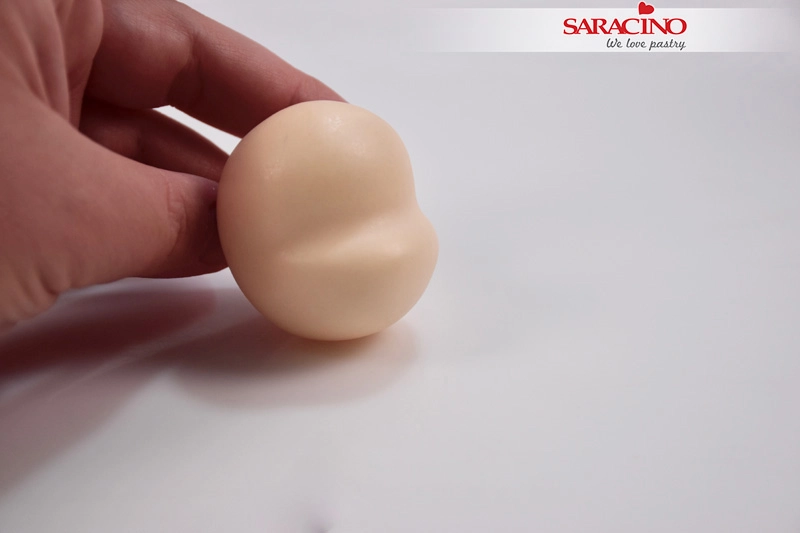
You must end up with a result like seen in the picture

Step 6

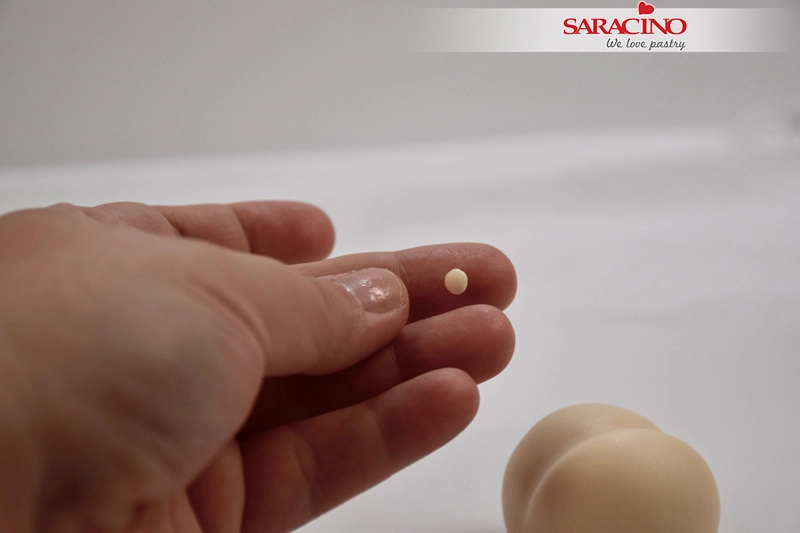
Take a tiny piece of sugar paste and roll it to a small ball

Step 7

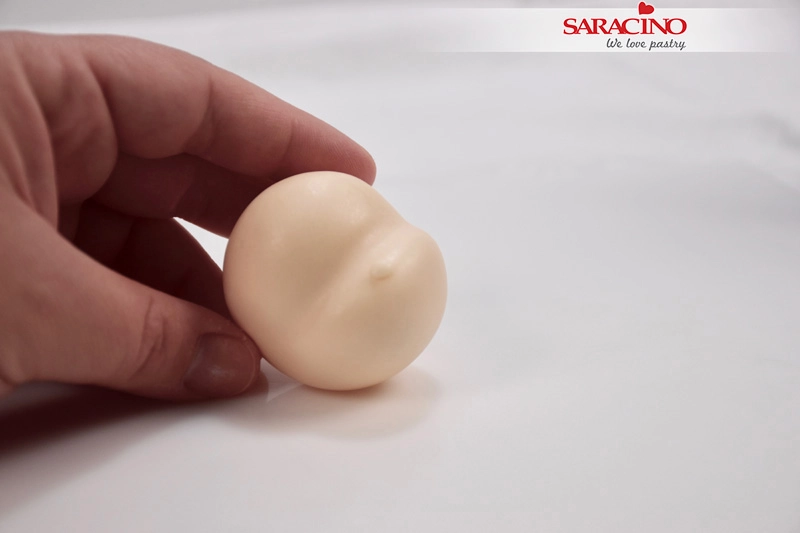
Place that ball in the middle of the face to make the nose

Step 8

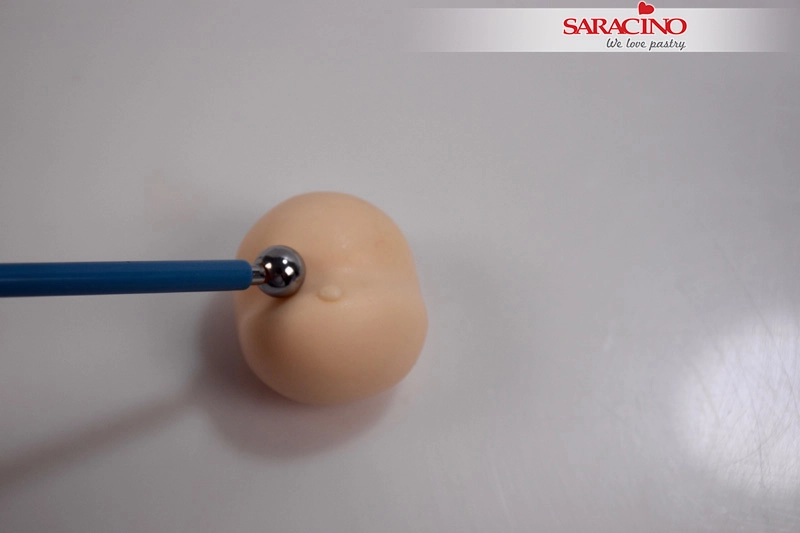
Use a ball tool to shape the eyes

Step 9

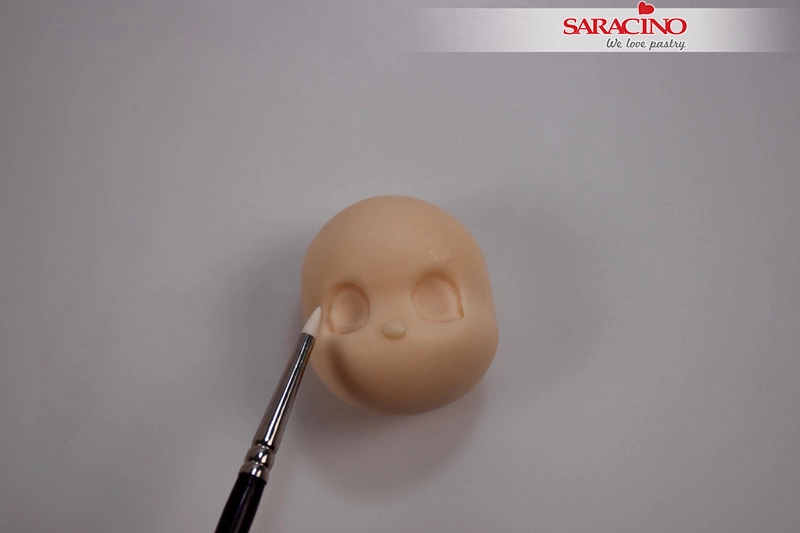
Use a small silicone tool to shape eyes

Step 10

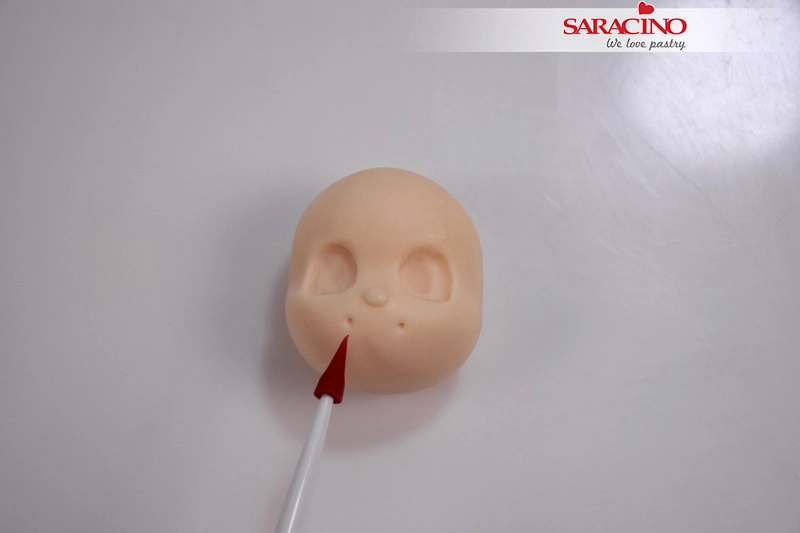
Make 2 dots to mark the corners of the mouth

Step 11

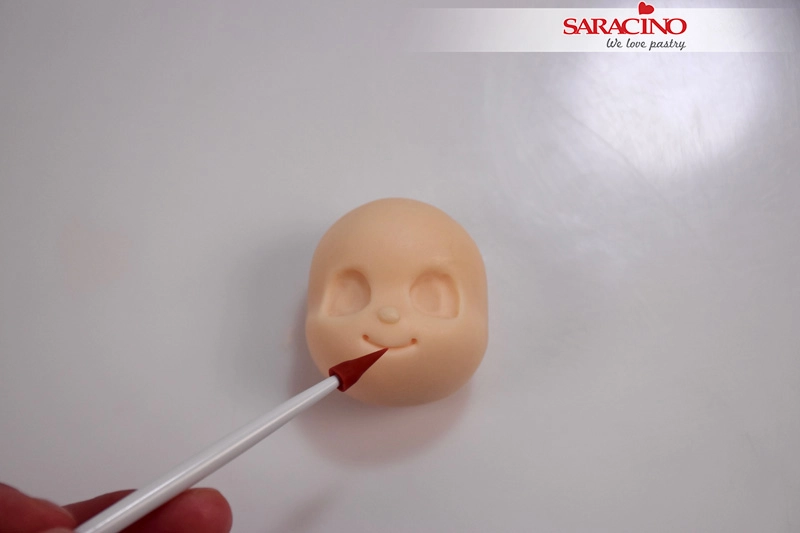
Draw a line with a silicone tool to make mouth

Step 12

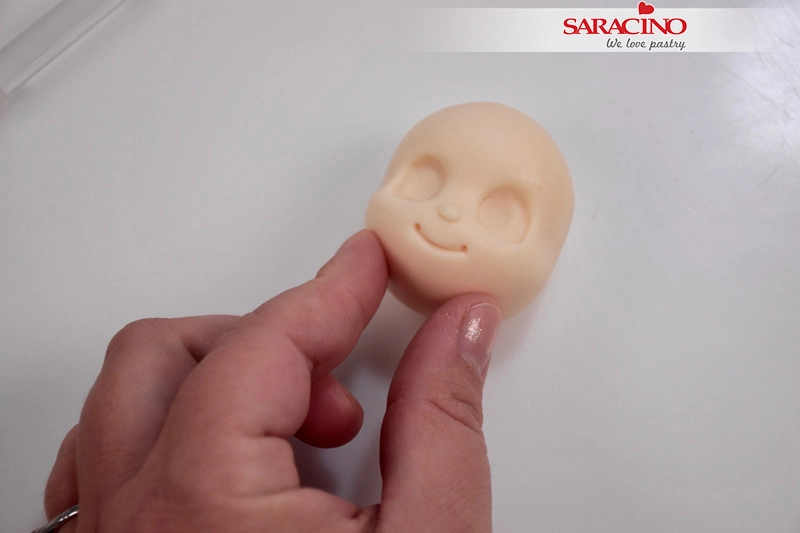
Use your fingers to shape the chin

Step 13

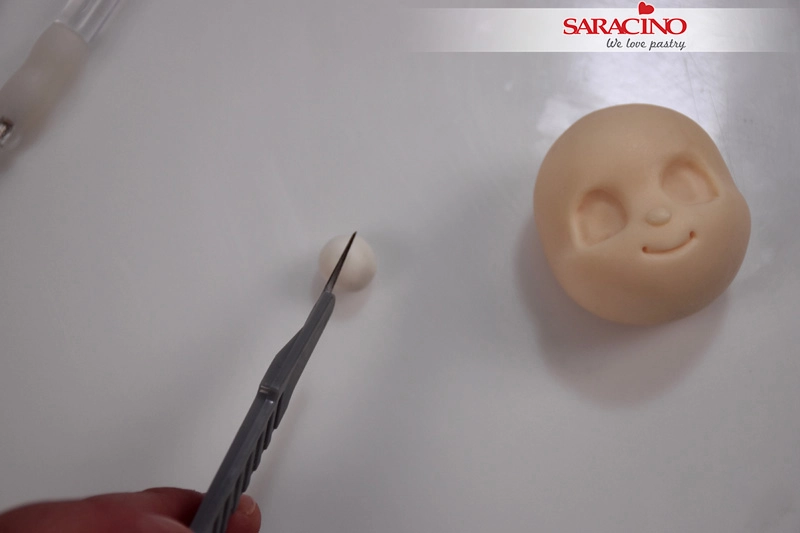
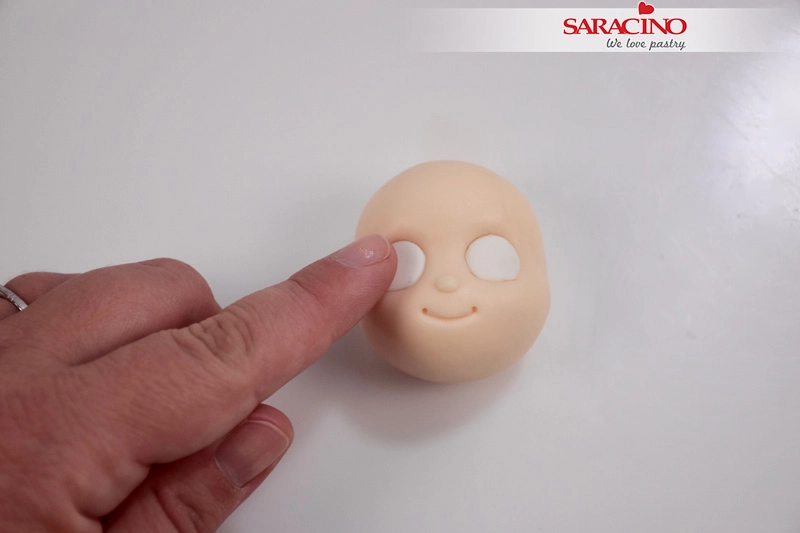
Roll white sugar paste into a small ball and cut it in half to create two eyes

Step 14

Place the white sugar paste in the sockets made for the eyes

Step 15

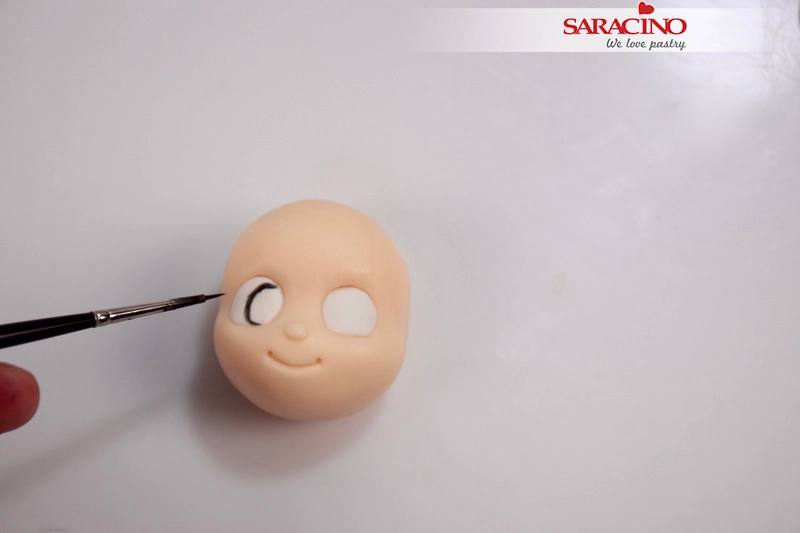
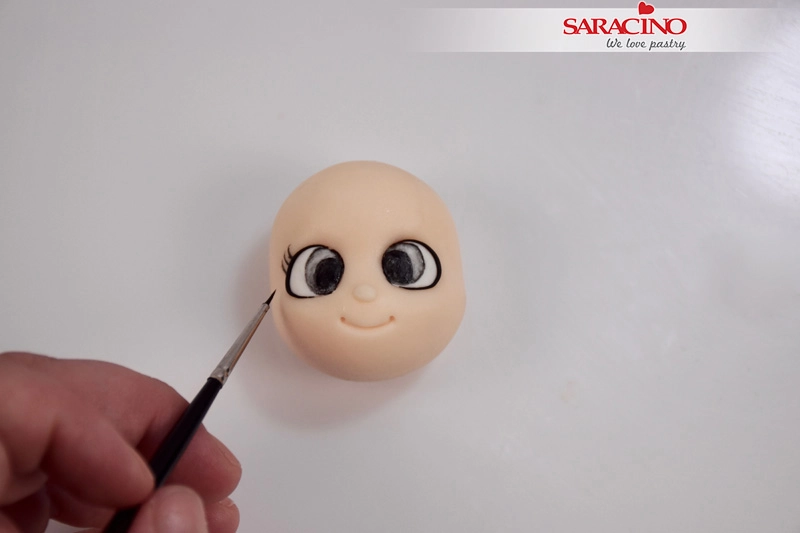
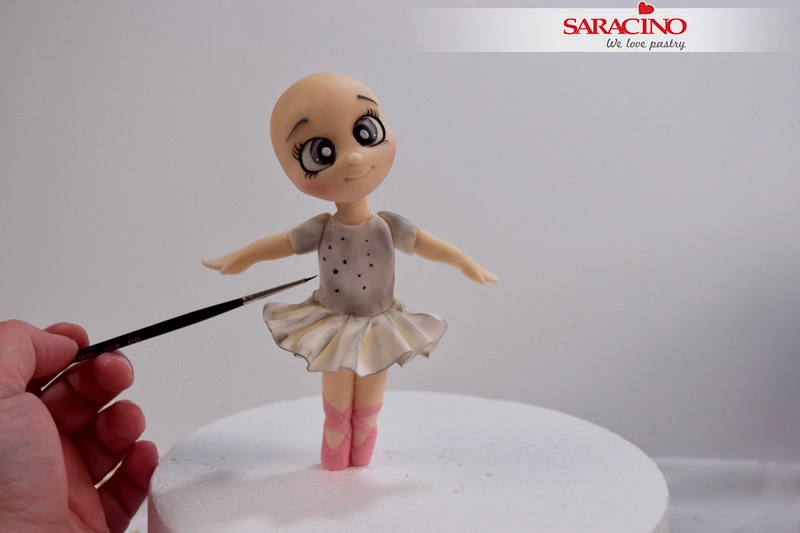
Mix black powder colour with clear alcohol and using your fine paintbrush paint outlines for the eyes

Step 16

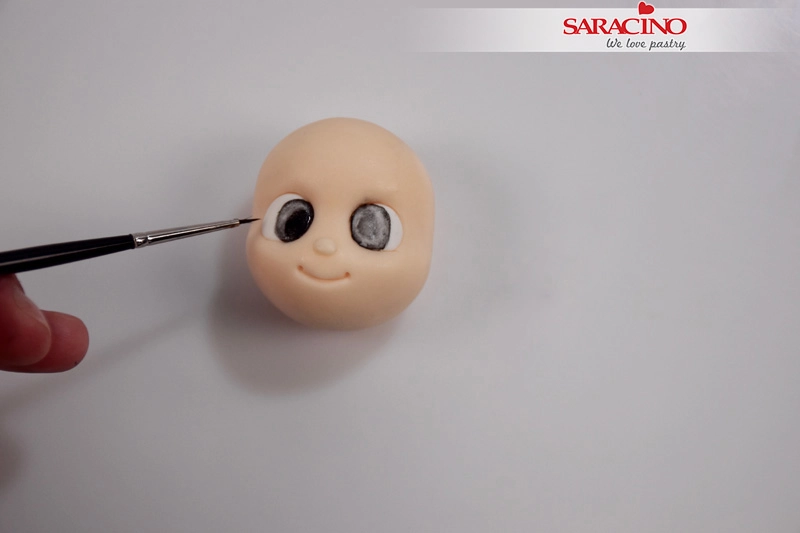
Paint the rest of the eye with grey colour and paint the pupil

Step 17

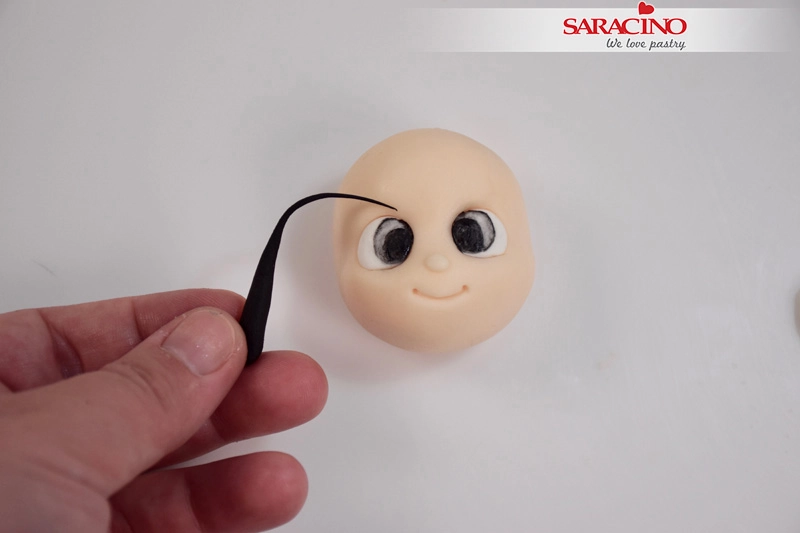
Take a small amount of black sugar paste and roll out thinly, fix it around the eyes


Step 18

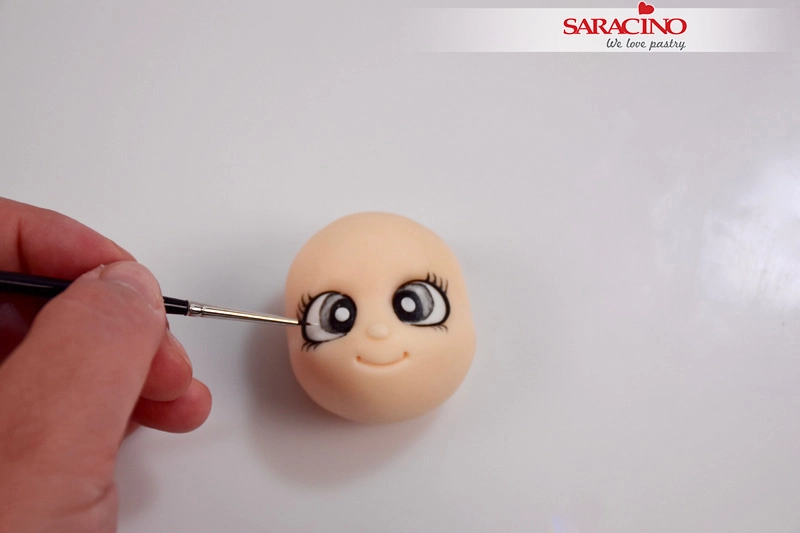
Paint the eyelashes with your fine brush

Step 19

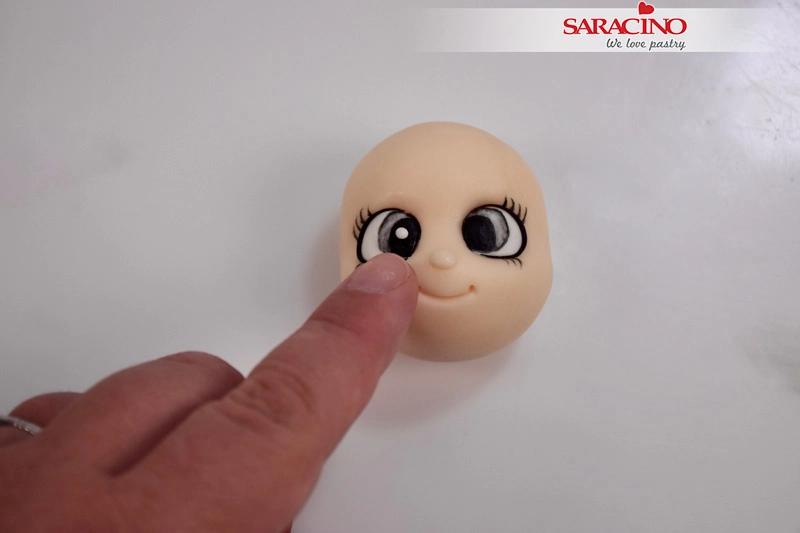
Add a small piece of white sugar paste in the centre of the eye

Step 20

Make a small dot with white colour

Step 21

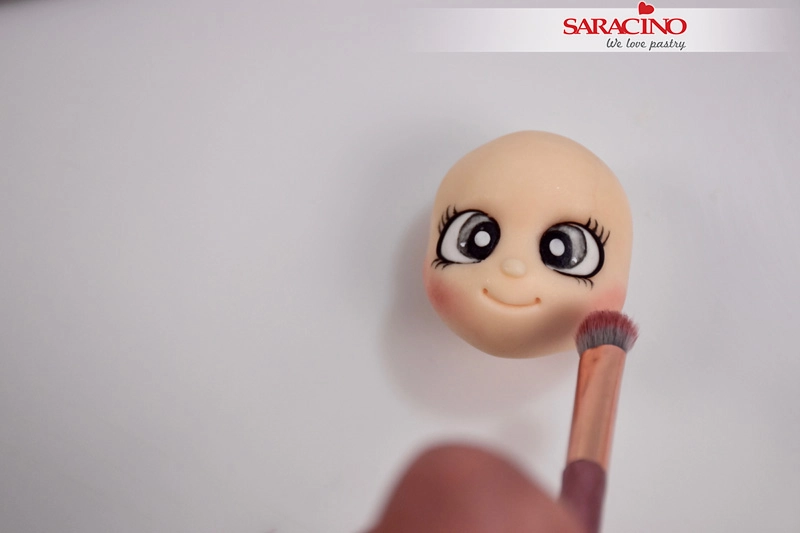
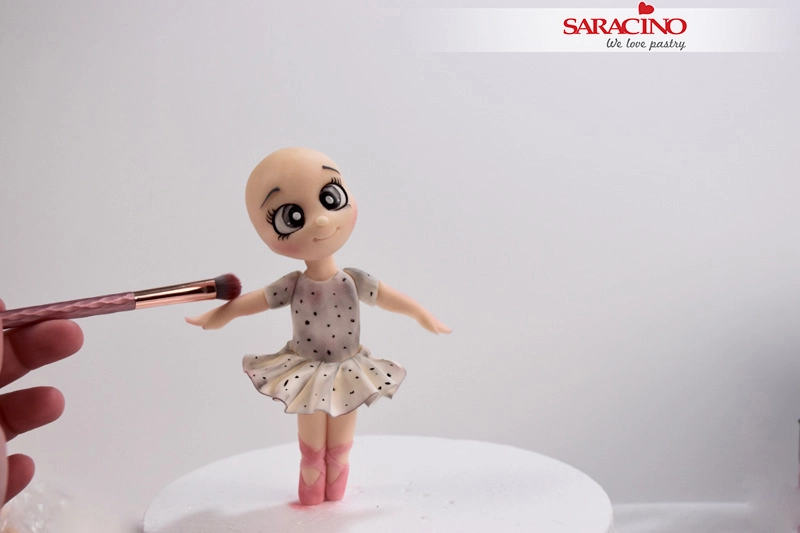
Use a soft brush and pink colour dust to blush the cheeks

Step 22

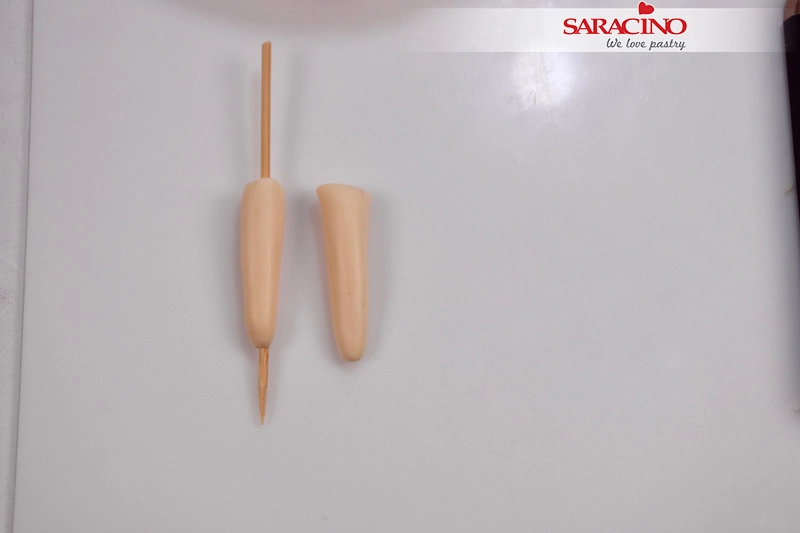
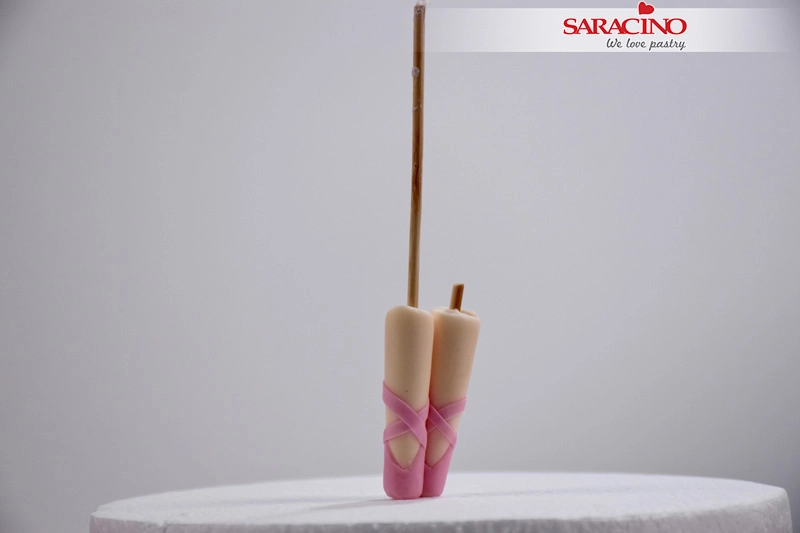
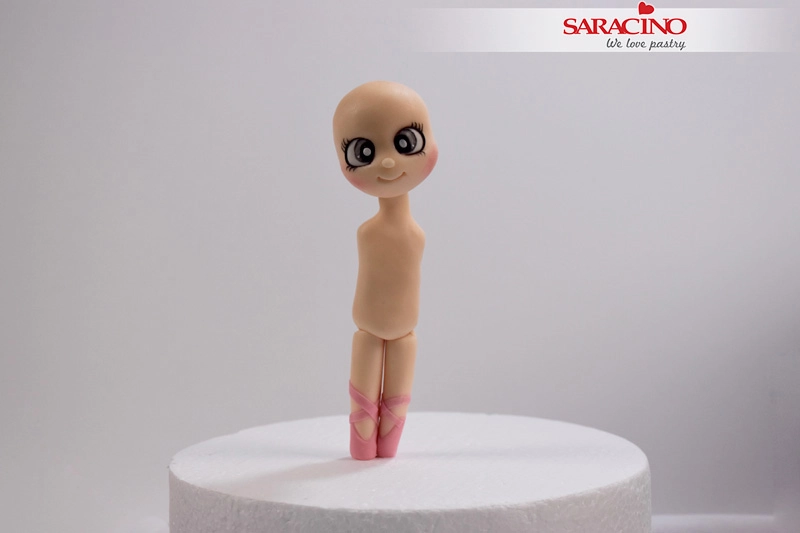
Roll skin colour sugar paste into a carrot shape for the legs and insert a wooden skewer through

Step 23

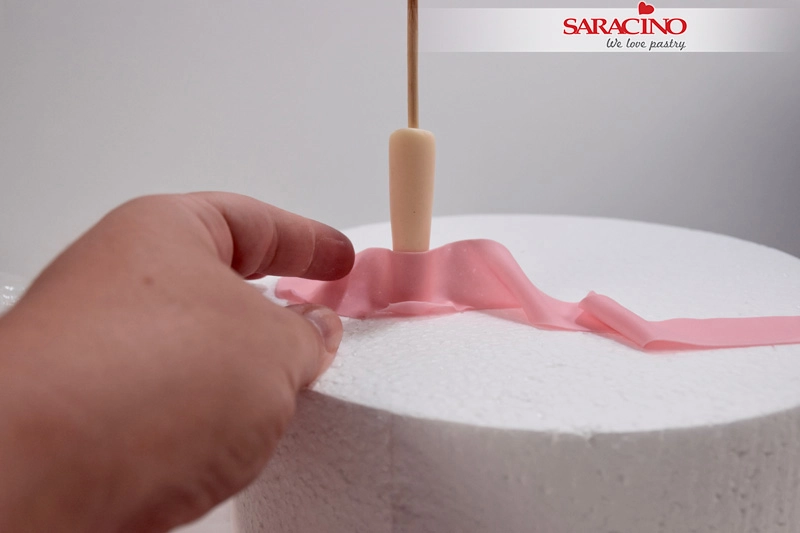
Roll a piece of rose sugar paste, cut a strip, and wrap the foot to make shoes

Step 24

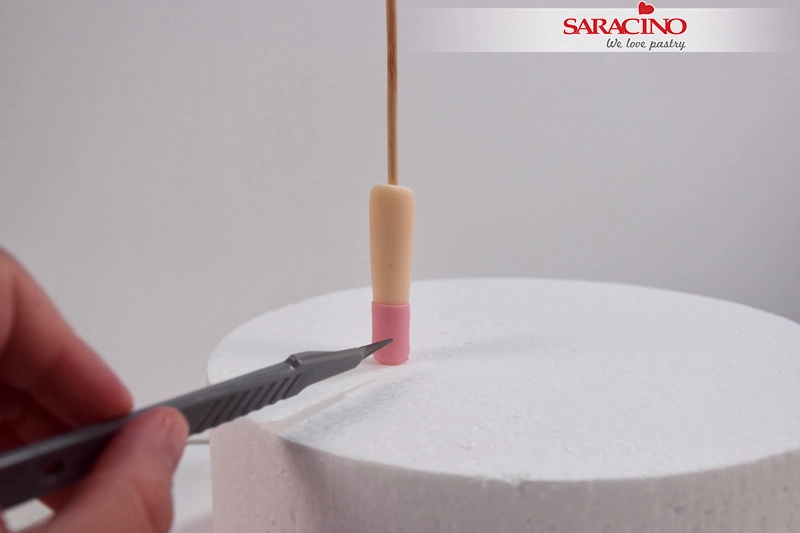
Using your exacto knife cut a v shape in front of the shoe

Step 25

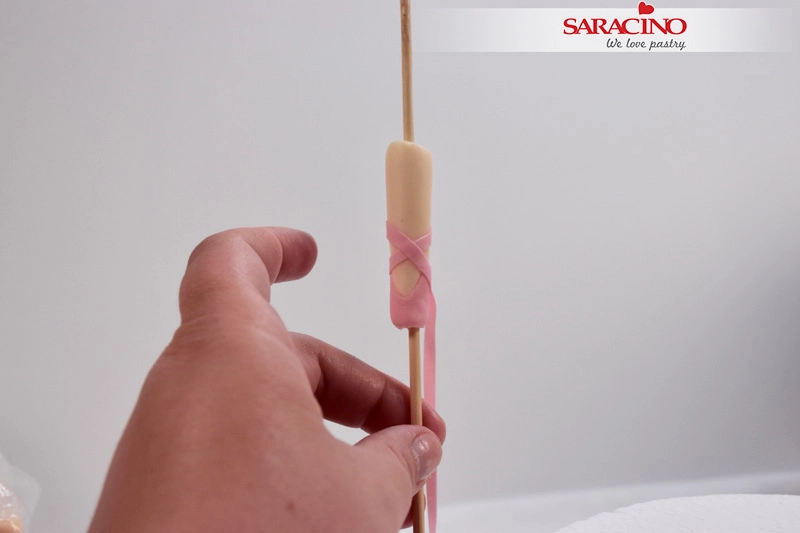
Cut thinner strips and make the ribbons to wrap around the ankle

Step 26

Place the legs close to each other and cut one of the skewers

Step 27

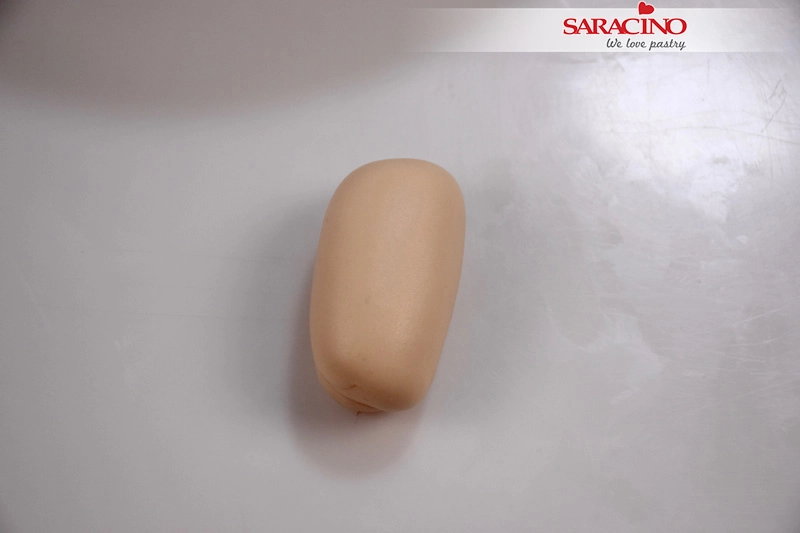
Roll skin colour sugar paste into a sausage shape

Step 28

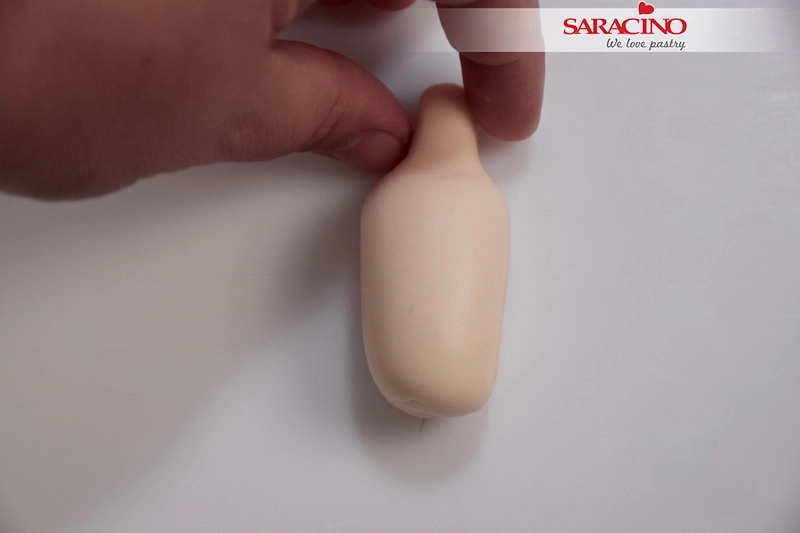
Use your finger to press the sugar paste to create the neck


Step 29

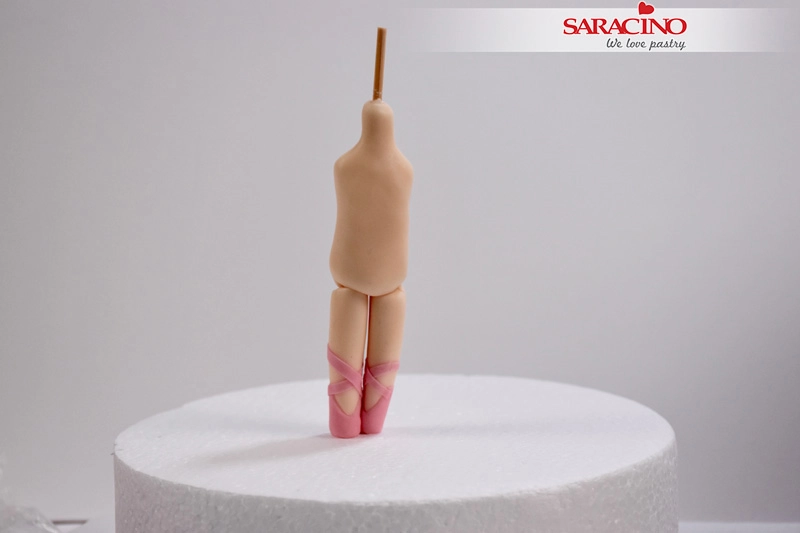
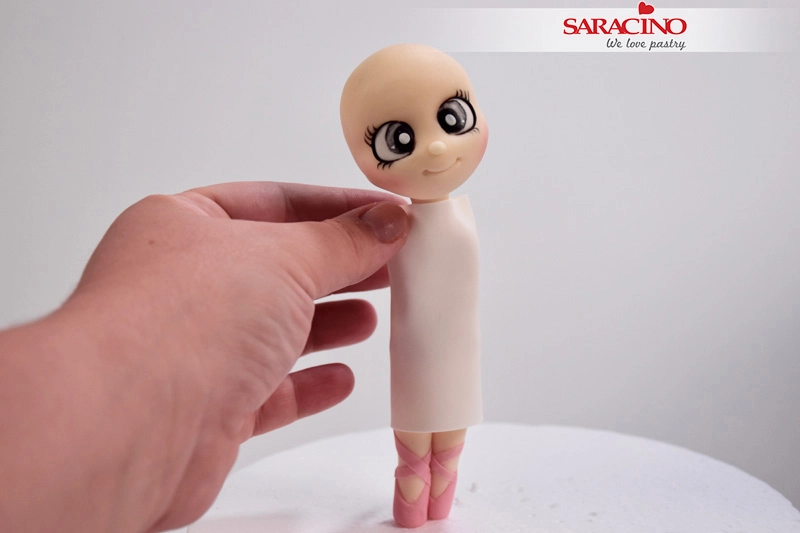
Place the body on top of the legs over the longer skewer

Step 30

Place the head on top


Step 31

Roll a thin piece of white sugar paste and surround the body to make the T-shirt

Step 32

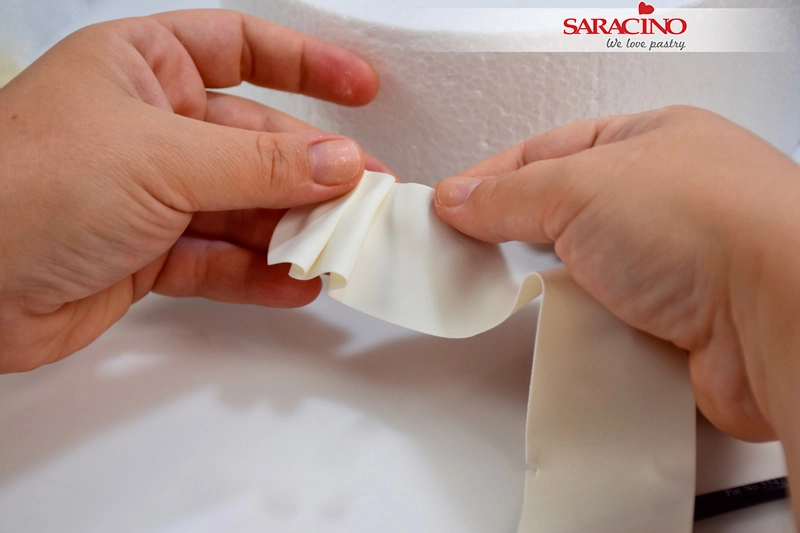
Take another piece of rolled white sugar paste and cut another wider strip. Fold to start making the Tutu skirt


Step 33

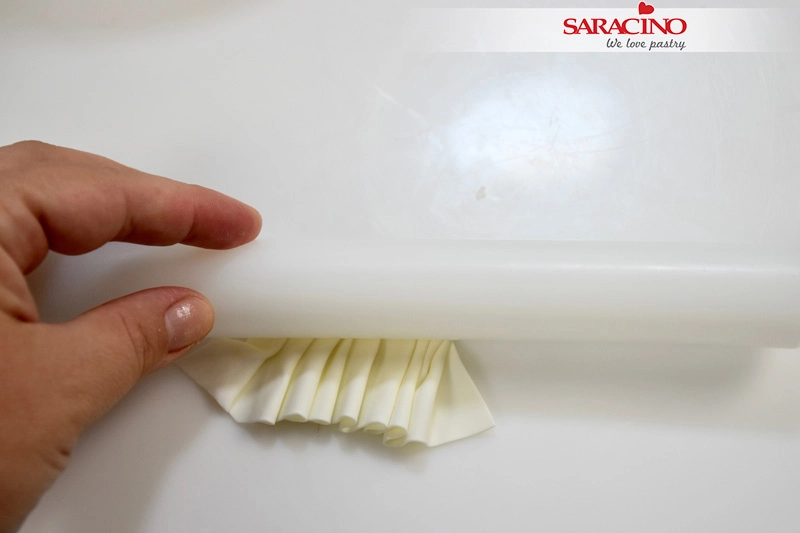
Use your rolling pin to flatten the upper part

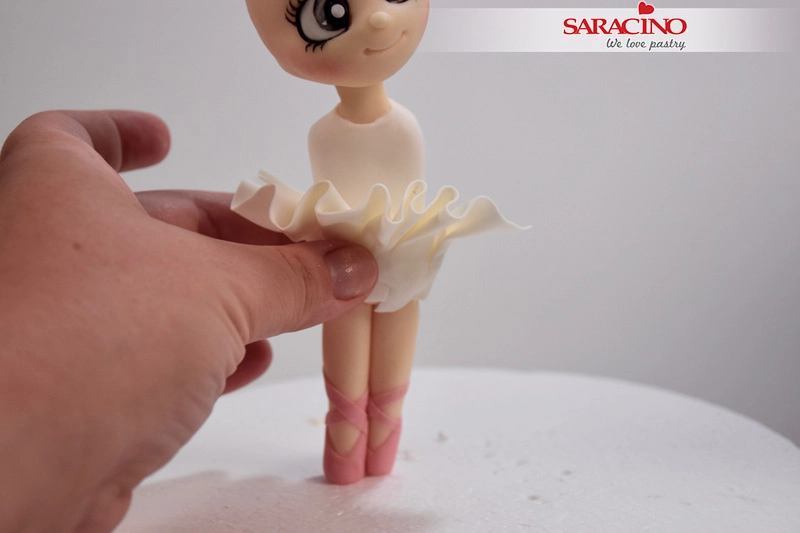
Step 34

Glue the skirt on the body as seen in the picture


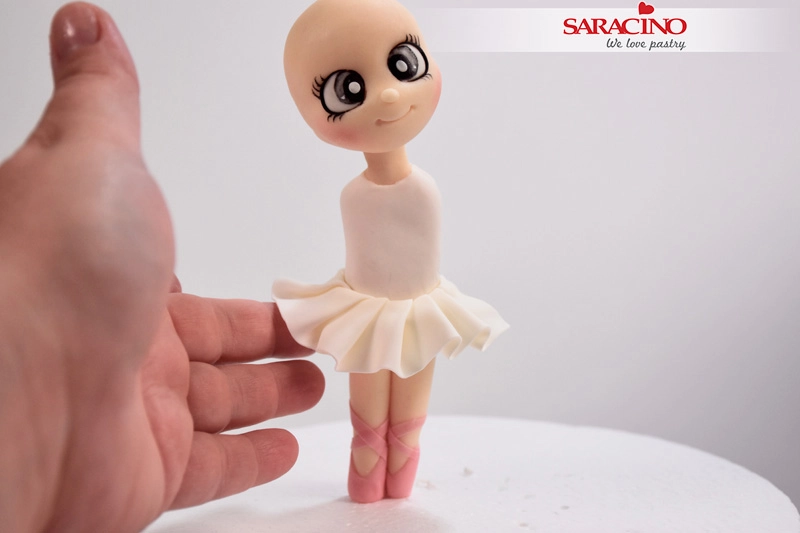
Step 35

Form and bend the skirt so you have a result like this

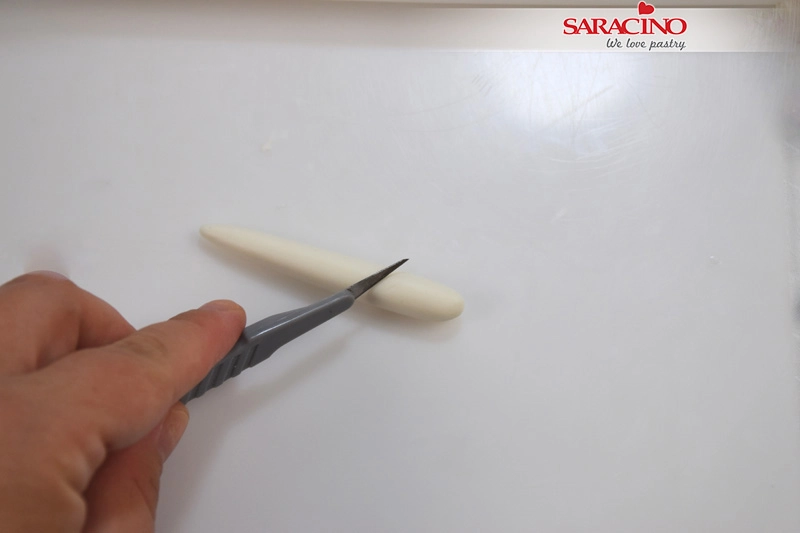
Step 36

Roll a piece of white sugar paste into a sausage shape and cut with a angle


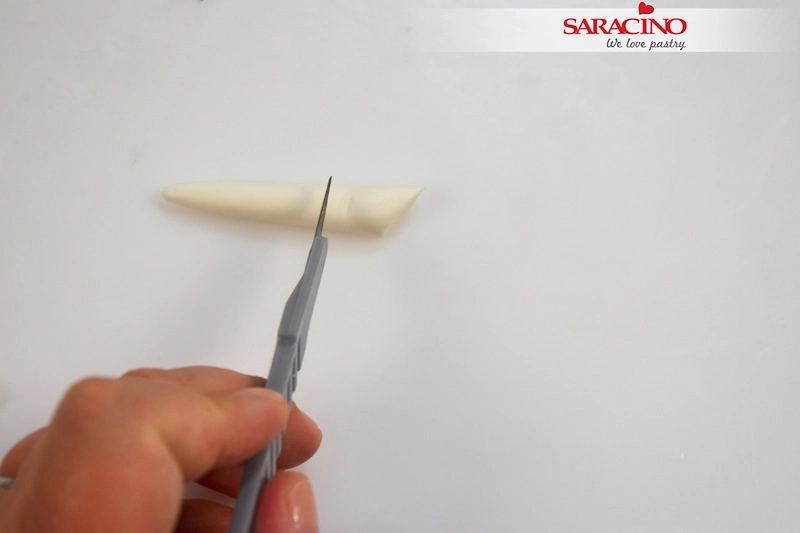
Step 37

Then cut straight to make the sleeve.

Step 38

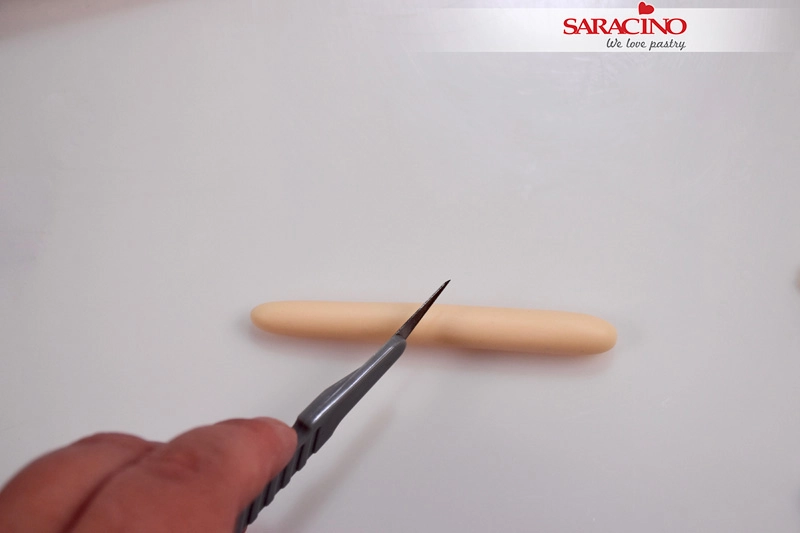
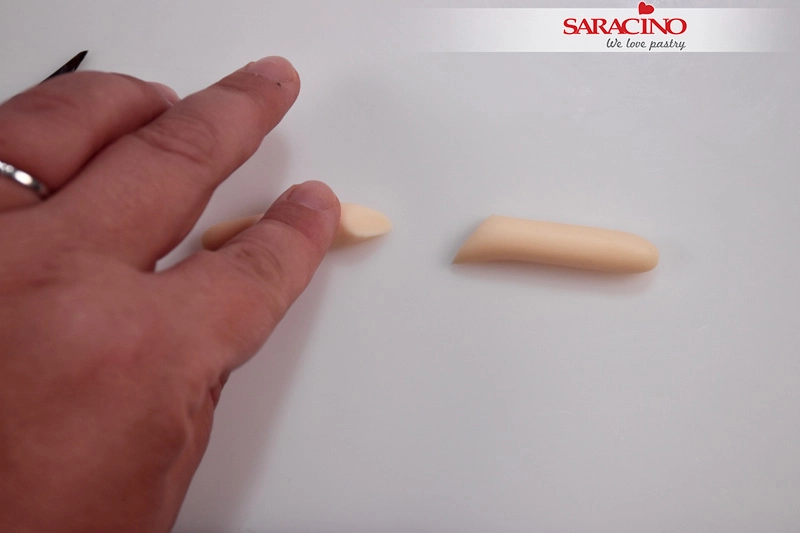
Roll skin colour sugar paste to a sausage shape and cut at an angle in the middle to form two arms


Step 39

Use your finger to shape the wrist

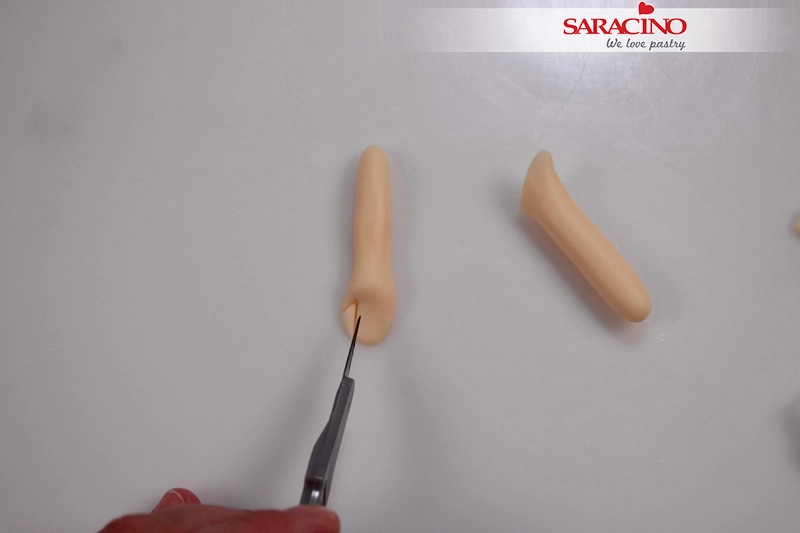
Step 40

Use the exacto knife to cut the thumb as seen in the picture


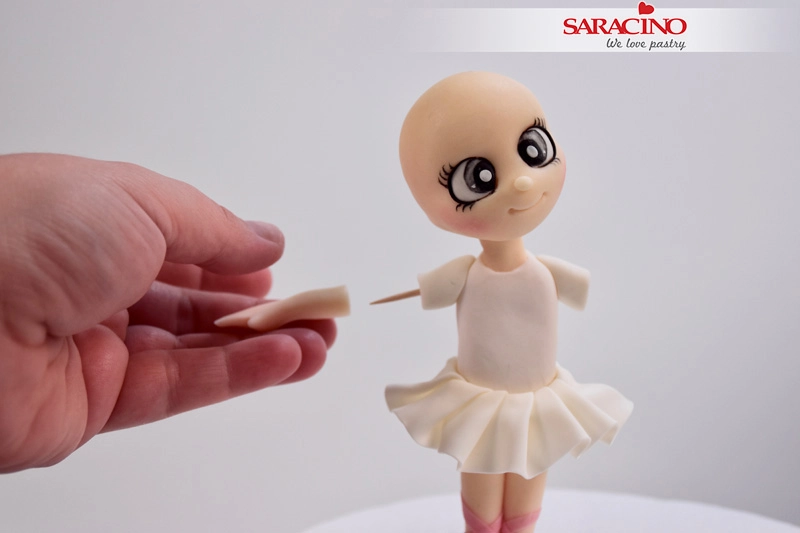
Step 41

Use a toothpick to attach the sleeve and the arm to the body

Step 42

Repeat the same with the other arm


Step 43

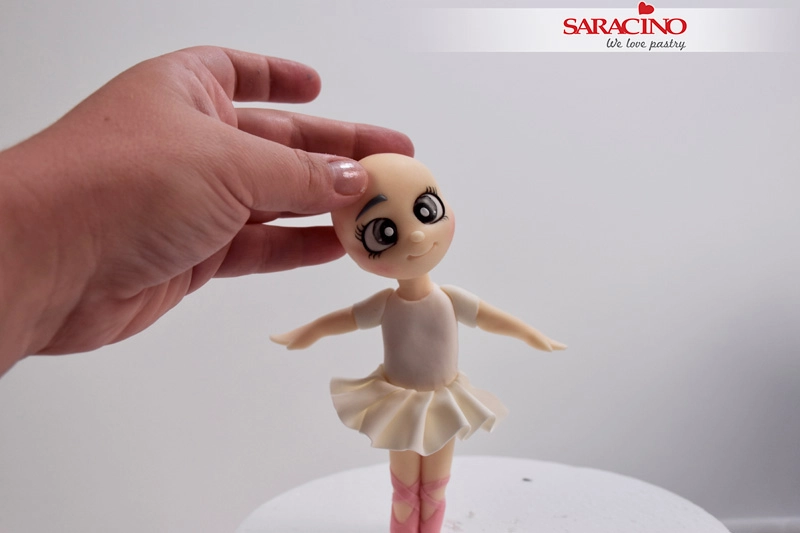
Roll a tiny piece of grey sugar paste in the shape as seen in the picture to make the eyebrows

Step 44

Place the eyebrow on the face


Step 45

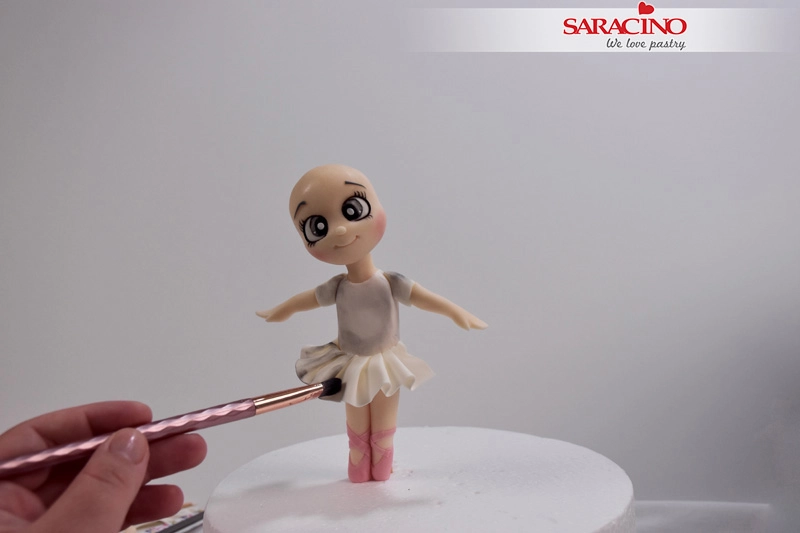
Use black powder colour to dust the dress

Step 46

Mix powder black colour with clear alcohol and paint some dots


Step 47

Use a bigger brush to dust the body and the dress with pink dust colour


Step 48

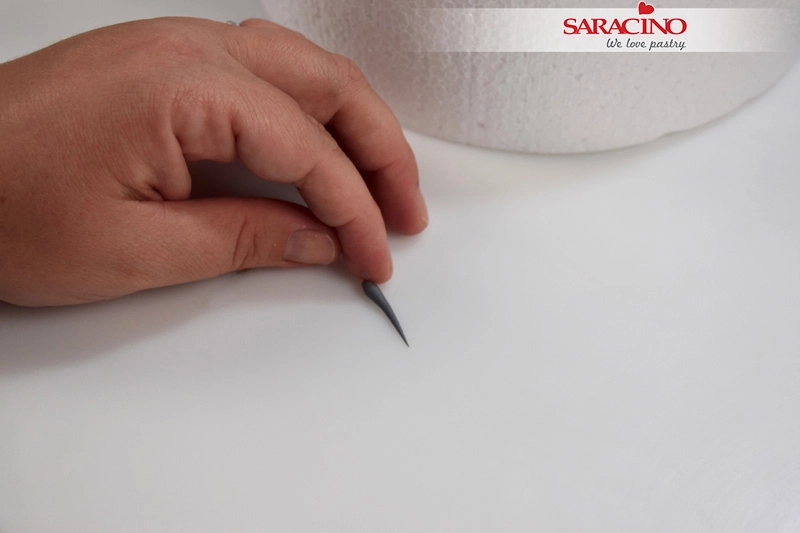
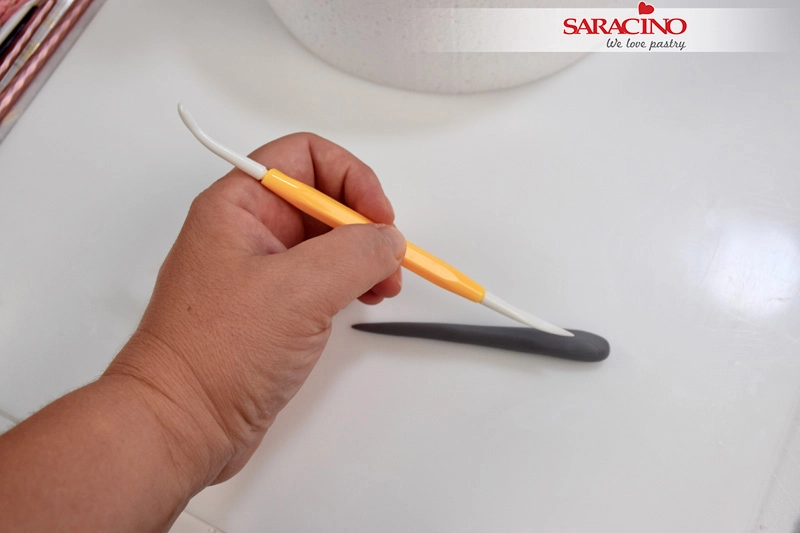
Roll grey sugar paste into a carrot shape and mark lines with your Dresden tool


Step 49

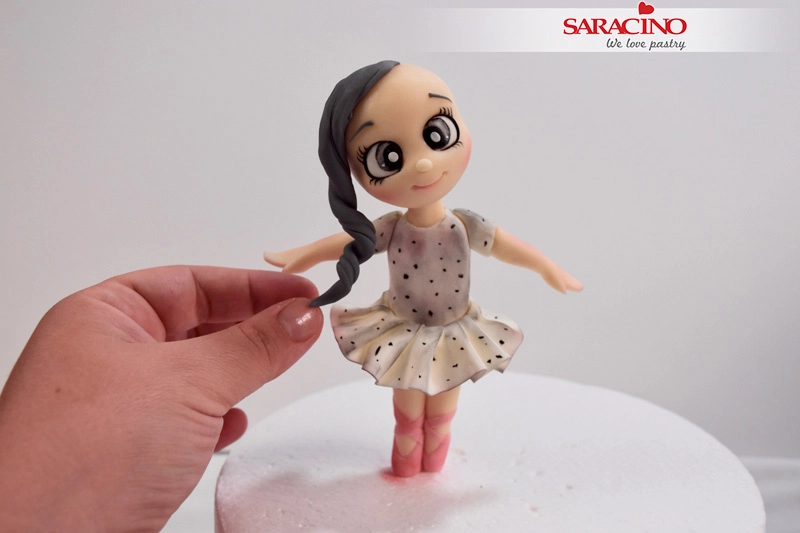
Twist the sugar paste and place on the head to make hair. Repeat many times until the whole head is covered

Step 50

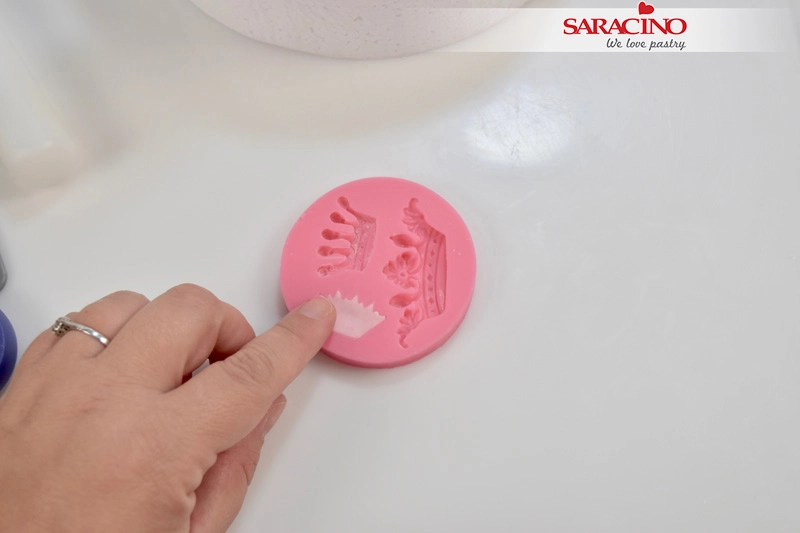
You can use a mould to make the crown


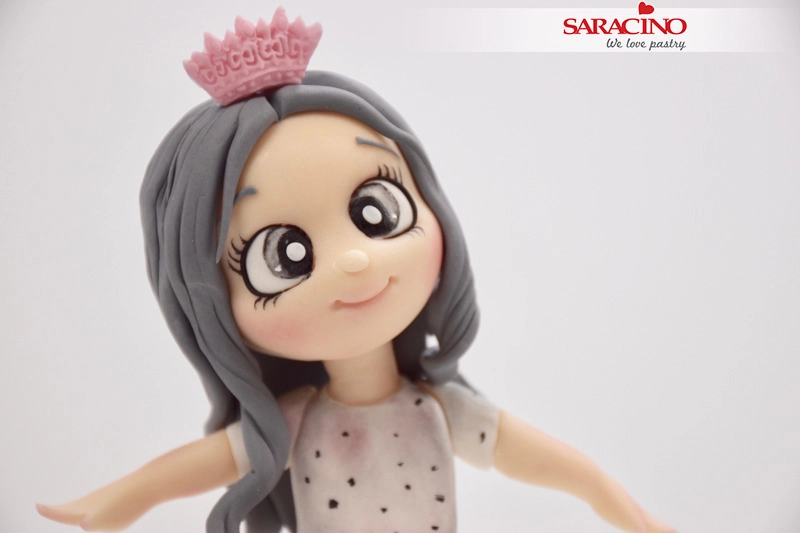
Step 51

Place the crown on the top of the head

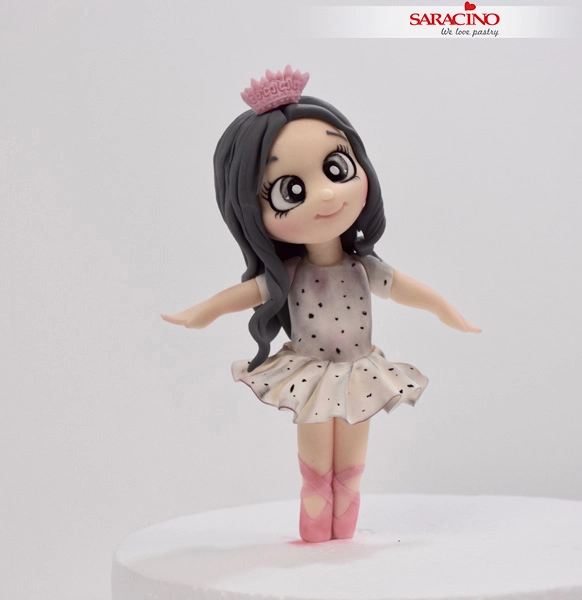
Step 52

Ta Da! Your Ballerina is finished


COVERING A CAKE TUTORIAL

COVERING A CAKE TUTORIAL

Skill level: BEGINNERS

You will need:

  • Saracino white Top Paste
  • Dekofee silicone working mat extra large
  • Large rolling pin
  • Sharp knife
  • Pizza cutter
  • Tape measure
  • Soft brush
  • Water
  • Cornflour
  • Microwave
  • Smoothers

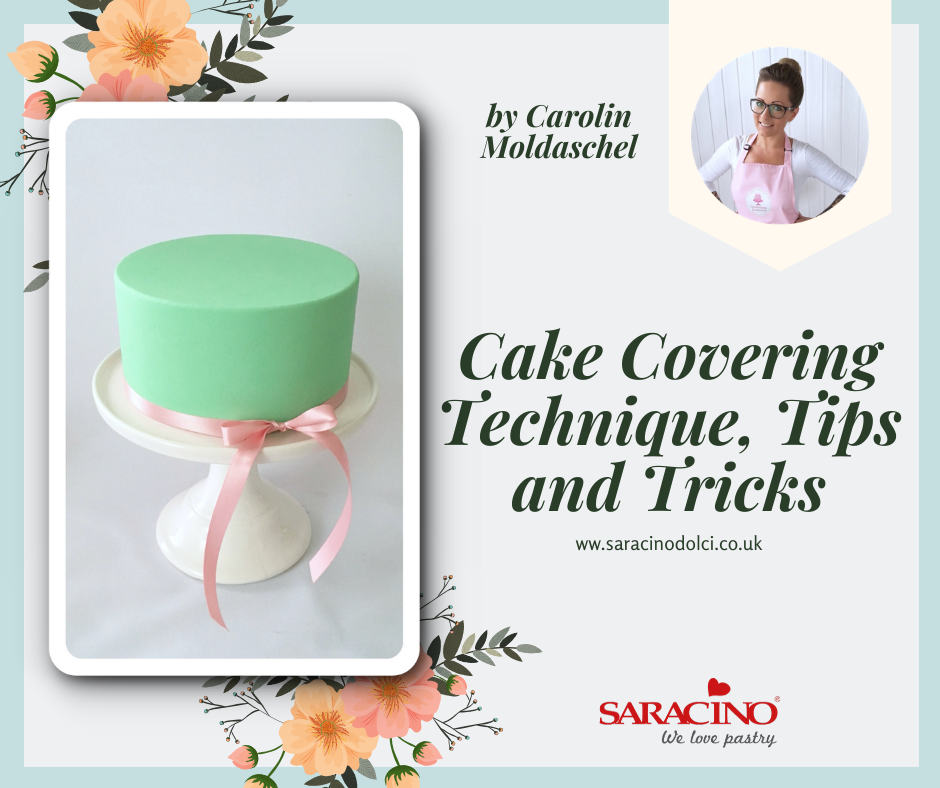
Step 1

You need 300 – 500 grams Saracino Pasta Top. The amount always depends on the size of your cake and how thick or thin you roll out the sugarpaste.

Step 2

Before you start to work on the Pasta Top, Using a little water moisten the ganache on your cake (in this tutorial I am using a dummy). DO NOT moisten the top! Moistening helps to fix the Pasta Top to the cake when it is covered.

Step 3

Use a sharp knife to cut the amount of fondant you need. You will find the Pasta Top firm at first and this is totally normal as it becomes soft when it is worked.

Step 4

In order to be able to knead the sugarpaste better, I always recommend to heat the fondant for 10 seconds in the microwave (700 watts)

Step 5

After you have warmed up the fondant a little, you will be able to work with it easily. It can now be kneaded without being too firm.

Step 6

It is really important to knead it really well. The kneading will pay off when you come to cover the cake.

Step 7

The kneading and the warmth from your hands will make the fondant soft and very supple.

Step 8

Now you can colour the Pasta Top using your Gel Colour.

Step 9

Work the gel colour into the paste. Blending the colour also helps to make the paste even more pliable.

Step 10

Keep blending and kneading until you get this kind of appearance and the paste is stretchy and soft.

Step 11

PERFECT!

Step 12

You can use the fondant immediately but I have found it works really well if you leave the fondant in cling film for 24 hours after colouring. TIP: I only cover my cakes after 24 hours.

Step 13

Put the tape measure over the top of your cake and down each side. This way you can see what diameter of Pasta Top you need to roll out for covering.

Step 14

If required lightly dust your work surface with cornflour to prevent possible sticking

Step 15

Place the Pasta Top on your work surface and roll the fondant out evenly.

Step 16

Keep rolling until you reach the required diameter for the cake

Step 17

Fold the rolled out paste over your rolling pin

Step 18

Place it gently over your cake using a rolling motion.

Step 19

Using a smoother press down lightly on the top to remove any air bubbles and make smooth.

Step 20

Press around the top edge first

Step 21

Gently work the fondant downwards with your hands. Do not over stretch as the paste is very pliable and will smooth out to remove any creases.

Step 22

Use a pizza cutter or a sharp knife remove the excess paste

Step 23

Lift the excess away from the cake carefully

Step 24

Using your smoother start to work around the outside removing any bumps and air bubbles.

Step 25

Using flexible acetate smoothers work the top surface to give a smooth finish.

Step 26

You are now finished to decorate your cake as required

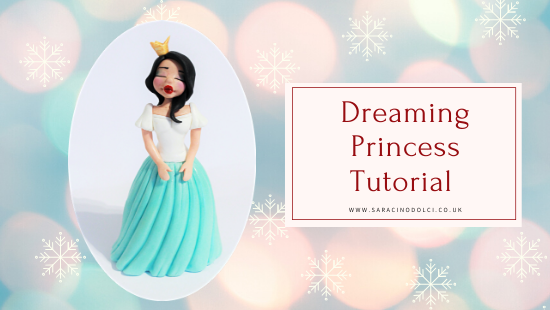
DREAMING PRINCESS TUTORIAL

DREAMING PRINCESS TUTORIAL

Author: Domy Dobek 

Skill level: BEGINNERS

You will need:

  • 10cm polystyrene egg
  • Dresden Tool
  • Small rolling pin
  • Sharp knife
  • Small sharp scissors
  • Paintbrushes
  • Cool boiled water / edible glue
  • Food safe skewer / flower wire
  • Circle cutter
  • Large cone tool
  • Small rubber brush tool
  • Face mould
  • Saracino modelling paste white
  • Saracino modelling paste skin tone
  • Saracino modelling paste bronze
  • Saracino modelling paste Tiffany
  • Saracino modelling paste black
  • Pink powder colour
  • Red powder colour
  • Gold powder colour

Step 1

Prepare the 10cm polystyrene egg and the tiffany colour Saracino modelling paste

Step 2

Roll out the Tiffany modelling paste to a thickness as shown

Step 3

Cover the egg with the paste. A small amount of water can be used to stick the paste to the egg.

Step 4

Cut the excess paste from around the bottom using the scissors

Step 5

With a plastic knife or Dresden modelling tool create some lines for folds on the dress

Step 6

With a large cone tool enlarge the creases and smooth them out to give more natural look

Step 7

Mix some brown Saracino modelling paste with skin tone paste to get a darker shade for the skin tone.
Roll out two cylinder shapes the same size using white paste for the dress and darker skin tone for the top of the body

Step 8

Using the large circular cutter cut the top off the cylinder shape to form the torso

Step 9

Using your fingers form a neck on the top of the skin coloured cylinder.

Step 10

Using the large circular cutter cut the ‘shoulders’ away from the skin coloured cylinder.

Step 11

Stick the shoulders to the torso. Then stick the upper body to the skirt. Using a rubber brush and cone tool make details.

Step 12

Using the rubber brush tool form the shape of the chest area

Step 13

Using the end of your modelling tool shape detail to the throat area

Step 14

Using your modelling tool form further detail to the neck area

Step 15

Using the skin toned Saracino paste form a head / face using a face mould.

Step 16

Attach the head to the neck. Insert a wooden skewer into the body.

Step 17

Take white modelling paste and roll two balls for the sleeves.

Step 18

Form the two balls into cone shapes as shown.

Step 19

Fix the sleeves to the shoulders. Using a modelling tool or plastic knife form creases around each sleeve.

Step 20

Using a modelling tool or plastic knife form a line around the top of the dress.

Step 21

Using skin tone Saracino paste roll a sausage shape for the arms and hands. Cut the sausage in half as shown to give two arms.

Step 22

Using your finger flatten the pointed end to form a hand.

Step 23

Using a blade or sharp knife cut the thumb.

Step 24

Using finger pressure roll to form the narrower wrist

Step 25

Fix the two arms into the sleeves.

Step 26

Roll out a piece of white paste and using a sharp knife cut out a crown.

Step 27

Using a little water on the edge form the circular crown shape. 

Step 28

Roll out some black paste very thinly and fix to the face for eyebrows and eye lashes.

Step 29

Mix red powder colour with clear alcohol and paint the lips with a small paintbrush

Step 30

Roll out black paste to form the hair

Step 31

Fix the hair to the head using a small amount of water if required. Fix the crown to the top of the head.

Step 32

Using Saracino gold powder mixed with clear alcohol paint the crown gold using a small paintbrush. Using a soft brush and pink dust give colour to the cheeks.

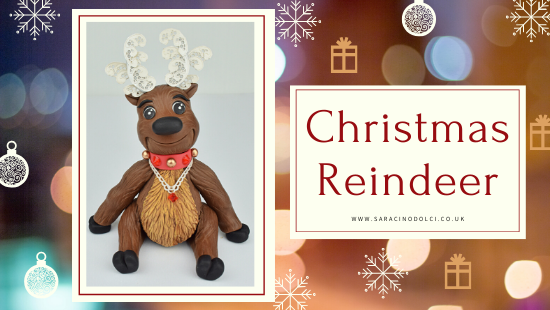
CHRISTMAS REINDEER

CHRISTMAS REINDEER

Skill level: BEGINNERS

FROM LYNSEY:

Christmas is just around the corner, to celebrate the launch of our new products Sugarwhizz has created this fun tutorial to show you an alternative way to use or fabulous new range of edible lace and edible diamonds!

Every Christmas cake needs a reindeer!


You will need:

  • Balling Tool
  • Dresden Tool
  • Small Rolling pin
  • Sharp Knife
  • Small Sharp scissors
  • Paintbrushes
  • Cool boiled water / edible glue
  • Food safe skewers
  • Small circle cutter
  • 2 x RKT bars
  • Saracino Sweet lace pearl ready to use
  • Saracino edible soft jelly diamonds
  • Saracino Liquid Shiny
  • 392g Brown modelling paste
  • 30g White modelling paste
  • 27g Black modelling paste
  • 5g Red modelling paste
  • 5g Grey modelling paste
  • Saracino Gel colour – Flesh, black, brown, yellow
  • Saracino powder colour – Brown
  • Saracino lustre – Silver and bronze

Step 1

Take two RKT bars and lay them on top of each other in a cross.

Step 2

Fold them around each other and shape into a tear drop shape, gently squeezing the bars together to create a firm body.

Step 3

Roll out 100g of brown modelling paste to around 3 mm in thickness, gently lift the paste and drape across the top of the body.

Step 4

Smooth the paste down the body pressing gently but firmly as you go.

Step 5

Gather the excess paste at the bottom of the body.

Step 6

Fold the paste over to completely cover the bottom. Smooth the paste with your fingertips to blend the joins.

Step 7

Re shape the body if needed.

Step 8

Take 25g of white modelling paste and colour to a golden brown using some Saracino yellow gel colour and a small amount of Saracino brown gel colour. Shape the paste into a tear drop and roll out thinly with a small rolling pin.

Step 9

Apply a small amount of water to the back of the paste and stick into place on the front of the body.

Step 10

Using the veining end of the Dresden tool begin to texture the fur, start at the bottom and work your way up the body in rings.

Step 11

Keep going overlapping each layer until you get to the top of the body.

Step 12

Texture the front fur in the same way.

Step 13

Use a small soft brush to shade the front of the fur with some brown dust.

Step 14

Roll 120g of brown modeling paste into a ball, narrow the top of the head slightly and use your finger to create a small ridge across the front of the face.

Step 15

Use the veining end of the Dresden tool to mark a smile across the face. Use the smoothing end of the Dresden tool to gently indent the corners of the mouth.

Step 16

Using the smoothing end of the Dresden tool, gently smooth across the bottom of the mouth to create a lip.

Step 17

Indent two eye sockets with the large end of the balling tool.

Step 18

Take 2g of white modelling paste, divide into two and roll into balls. Stick the balls into the eye sockets and flatten. Take 2g of black modelling paste roll out thinly and cut out two circles using a small circle cutter, stick the pupils into place on the eyes. Finish the eyes by sticking two small balls of white paste onto each pupil as shown.

Step 19

Use the veining end of the Dresden tool and begin to texture the fur on the front of the face as shown.

Step 20

Texture the fur on the top and back of the head.

Step 21

Take 10g of brown modelling paste, roll into a ball and flatten slightly. Apply a small amount of water to the top of the neck and stick the paste into place. Insert a food safe skewer down through the center of the neck and into the body.

Step 22

Apply a small amount of water to the top of the neck. Gently slide the head down the skewer until it comes to rest on the neck.

Step 23

Take 80g of brown modelling paste, divide equally in two. Roll each piece into an elongated tear drop. Pinch out the edge around the fat end of the teardrop to shape the leg.

Step 24

Stick the legs into place on each side of the body.

Step 25

Use the veining end of the Dresden tool to texture the fur on each leg.

Step 26

Take 20g of black modelling paste, divide into 4. Roll each piece into a ball, flatten the ball and shape as shown. Use the veining end of the Dresden tool, mark a groove across the top and down on to the front of the hooves.

Step 27

Use the large end of the balling tool to widen the end of each leg. Apply a small amount of water to the end of the legs and stick the hooves into place.

Step 28

Take 80g of brown modelling paste, divide equally into two and roll each into a sausage shape. Pinch in and narrow the paste to shape the knees as shown.

Step 29

Stick the hooves to the bottom of each leg, stick the legs into place and texture the fur using the Dresden tool as before.

Step 30

Take a packet of Saracino sweet lace pearl, using a pair of small sharp scissors, cut out the section shown. Carefully cut out each of the swirls.

Step 31

Take 5g of grey modelling paste, divide into two and roll each piece into a sausage tapered to a point. Stick the largest swirl to the bottom of the sausage and then stick the small swirl to the top of the sausage as shown (left is the back view; right is the front view) repeat for both antlers.

Step 32

Cut another section of lace and remove the right swirl and then remove the same left swirl.

Step 33

Stick the swirls into place on the back of the antlers as shown. The paste should be sticky enough for the lace to stick to straight away, if not use a small amount of water

Step 34

Dust the grey paste with silver lustre dust to match the antlers.

Step 35

 Stick two small cocktail sticks into the top of the head, gently slide the left antler down into place.

Step 36

Stick the other antler into place and gently bend the tops of the antlers over to shape.

Step 37

Again, using scissors cut out the small right-hand swirls shown and the matching left-hand swirls from the lace.

Step 38

Stick the small swirls to the back of the antlers as shown.

Step 39

Take 2g of brown modelling paste, divide into two. Roll each piece into a teardrop shape. Flatten slightly. Use the veining end of the Dresden tool to mark a groove in the centre of each ear. Cut off the bottom of each ear with a sharp knife as shown.

Step 40

Stick the ears into place. Roll 3g of black modelling paste into the shape of a nose and stick into place.

Step 41

Roll two small sausages of black paste tapered at both ends and stick into place across the top of each eye. Roll two more slightly bigger sausages of black paste, tapered at both ends and stick into place for the eyebrows.

Step 42

Roll 5g of red modelling paste into a strip and stick into place for the collar as shown. Trim the piece shown from the sweet lace pearl and stick into place as shown.

Step 43

Take 3g of white modelling paste, colour with Saracino flesh gel colour and divide into three pieces. Roll each piece into a ball and dust with Saracino bronze dust. Stick the balls into place on the collar as shown.

Step 44

Choose your favourite colour from Saracino Soft diamonds range. They are vegetarian jelly diamonds.

Step 45

Stick two onto the collar as shown. Stick two together to create a diamond shape and stick into place as shown. The paste should still be tacky enough that the diamonds will stick without the need for glue. If not use a small amount of glue to stick them into place.

Step 46

Finally paint Saracino liquid shiny onto to the nose and eyes to varnish.