MOON CAKE TUTORIAL

MOON CAKE TUTORIAL

Author: Patricia Alonso

Skill level: BEGINNERS

TIP:

This can be made as a cake instead of a topper. All you have to do is cover the sponge with chocolate ganache and chill well in the fridge. Then you can decorate your cake as shown in the tutorial.

You will need:

  • 50g Saracino green modelling paste
  • 20g Saracino black modelling paste
  • 20g Saracino white modelling pasteĀ 
  • 300g Saracino White Pasta TopĀ 
  • Saracino gel colours: black and whiteĀ 
  • Saracino powder colours: black and green
  • Saracino lustre dust: silver
  • Saracino cake gel
  • Dresden tool
  • Large and small ball tool
  • Fine brushes
  • 15cm styrofoam ball (cut flat at the base)
  • Cocktail sticks
  • Knife
  • Rolling pin
  • Small scissors
  • Piping nozzleĀ NĀŗ 5
  • Round plunger cutters: medium and small
  • Round cutters: 2.5cm, 4cm and 6cm
  • Wire brush
  • Tool to make curved smile

Step 1

Colour 300g of Saracino white pasta top with Black gel colour. I recommend you use a toothpick to do this as you can control the amount of gel you add.

Step 2

Mix evenly to form the grey colour you require.

Step 3

With a small ball roll a sausage shape. Form it into an ā€œOā€ shape.

Step 4

Apply cake gel to the surface for fixing to the cake.

Step 5

Make as many ‘O”s as you need and fix them to the dummy.

Step 6

The quantity of craters will depend on the size of your project.

Step 7

Roll the remaining grey paste to 5mm thick.

Step 8

Sometimes when mixing paste air bubbles are formed. If you see any when rolled out you can pop them with a sharp pin or needle.

Step 9

Paint the surface with Cake Gel.

Step 10

Cover with the rolled fondant.

Step 11

Use your fingers to form the craters.

Step 12

Use your fingers to give the edges of the craters shape and definition.

Step 13

Cut off the excess pasta top.

Step 14

Form smaller craters with a large ball tool.

Step 15

Form smaller craters with a medium ball tool.

Step 16

Using your Dresden tool give definition to the edges of the craters.

Step 17

Using your wire brush use gently to give a textured finish to the planet surface.

Step 18

Using a thick brush highlight areas of the planet with black powder colour. Remove any excess powder from your brush using a paper towel.

Step 19

Blend the powder colour to give shades.

Step 20

Repeat this over the whole of the planet surface.

Step 21

Using your green modelling paste form small balls and create tear shapes using finger pressure.

Step 22

Mark the smile with the smile tool.

Step 23

Mark the corners of the mouth with a small ball tool.

Step 24

Form a bigger tear shape.

Step 25

Cut the thin end into 3 parts with scissors.

Step 26

Using a section of the 2.5cm round cutter form a mouth.

Step 27

Mark the corners of the mouth with a small ball tool.

Step 28

Apply Cake Gel on the ends that will have ball-shaped eyes.

Step 29

Form and glue little balls to the ends. Make the eyes the size you would like to see.

Step 30

Roll some white modelling paste and cut circles with the medium plunger cutter.

Step 31

Roll some black modelling paste and cut circles with the small plunger cutter.

Step 32

Using the piping nozzle cut some small circles for the smallest pupils.

Step 33

Paint a small dot on the pupils with a fine brush and white gel colour.

Step 34

Fix the heaviest aliens into the craters with a toothpick and Cake Gel.

Step 35

Apply a small amount of Cake Gel to the base of the smallest aliens.

Step 36

Fix them into the craters.

Step 37

Using green dust colour highlight the aliens to give them shade and definition.

Step 38

Mix white modelling paste with black gel to achieve a grey colour. Roll to 4mm thick and cut out a 6cm circle.

Step 39

Pinch the edge with your thumb and index finger to give it a narrow edge.

Step 40

Using your circle cutter, knife and small ball tool mark the detail onto the disk.

Step 41

Using a dry brush dust with silver lustre colour.

Step 42

Roll white modelling paste to 1cm thick. Place a layer of cling film on top. Cut a 4cm circle over the cling film so it stretches and forms a nice dome shape.

Step 43

Glue the top dome to the bottom space ship disk.

Step 44

Fix the UFO onto the planet.

Baby Butterfly

Baby Butterfly

Author:Ā Mary Presicci

Skill level: BEGINNERSĀ 

You will need:

  • Skin tone Saracino modelling paste
  • White Saracino modelling paste
  • Black Saracino modelling paste
  • Skin tone Saracino dust powder
  • Red Saracino airbrush colour
  • Blue Saracino airbrush colour
  • Brushes
  • Modelling tools including wire cutters / pliers
  • 0.50 Saracino wafer paper
  • White flower wire different thickness
  • Wooden cocktail stick
  • Water

Step 1

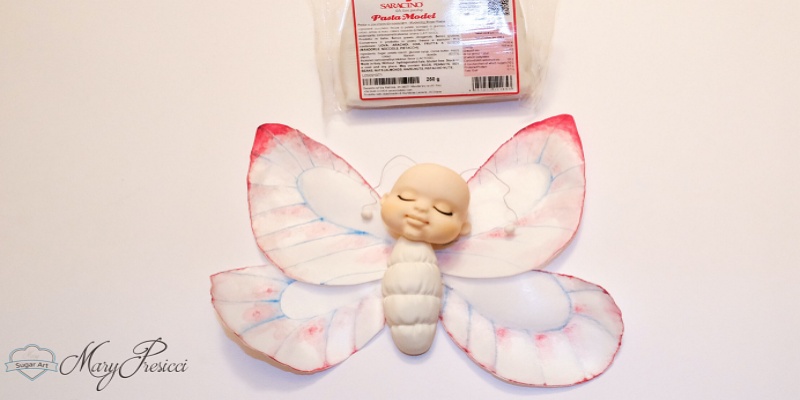
This is everything you will need to create this baby butterfly

Step 2

Cut out the wings to your preferred shape using the wafer paper

Step 3

Paint the edges of the wings with the hot pink airbrush dye and the internal parts with the blue

Step 4

Prepare the four wings in the same way

Step 5

Prepare the head using the skin coloured modelling paste. Roll an oval shape and form a groove in the centre

Step 6

Using finger pressure make an indent for the mouth area. Pushing some paste gently up to help form a nose

Step 7

With your Dresden tool mark the sides of the nose and continue the lines down to the chin

Step 8

Form the nose using a silicone tipped toolĀ 

Step 9

Using finger pressure give the cheeks a rounded look.

Step 10

With a ball tool define the eye area

Step 11

With your silicone tool or a Dresden tool create grooves as shown

Step 12

Using your Dresden tool define the eyelids

Step 13

With a small ball tool define the nostrils

Step 14

Mark the ends of the mouth using a ball tool

Step 15

Using your silicone tool press to form two small indents

Step 16

Using your Dresden tool join the two ends of the mouth and form the upper lip

Step 17

Using your silicone tool form the lower lip


Step 18

Using your fingers form the neck and push the chin forward

Step 19

Use two small balls of modelling paste to create the ears

Step 20

The face is ready to be coloured

Step 21

Using a soft brush and the skin coloured Saracino dust lightly brush the cheeks

Step 22

Roll a small piece of black modelling paste very thinly to make the eyelashes

Step 23

Cut off a small piece and attach to the eyelid

Step 24

Using the white modelling paste roll a ball shape

Step 25

Roll the ball in your hands to form an elongated egg shape

Step 26

Using your Dresden tool form markings on the body as shown

Step 27

Using a little water attach your flower wire to the wafer paper wings

Step 28

Repeat this for all four wings


Step 29

Roll two small balls of white modelling paste. Cut two small lengths of thin flower wire and feed each into the small balls.

Step 30

Using your cocktail stick attach the head to the body. Feed the end of the wing flower wire into the body.


Step 31

Repeat this for all four wings. Attach each antenna to the head. Your cute baby butterfly is now ready!

SCHOOL GIRL TUTORIAL

SCHOOL GIRL TUTORIAL

Author:Ā Claire Ds

Skill level: ADVANCEDĀ 

You will need:

  • 50g of Light Blue pasta model

  • 95g of Pink pasta model

  • 90g of Yellow pasta model

  • 5g of Red pasta model

  • 2g of Black pasta model

  • 2g of White pasta model

  • 55g of dark blue pasta model

  • 15g of brown pasta model

  • Black powder colouring

  • White powder colouring

  • Dark blue powder colouring

  • Pink powder colouring

  • Skin powder colouring

  • Brown powder colouring

  • Silver powder dust

  • White colouring gel

  • Cake gel

  • Liquid shiny

  • Ā 2 skewers

  • 1 flower wire 20 gauge
  • 1 flower wire 18 gauge
  • 1 polystyrene ball 4cm in diameter
  • 1 Dresden tool
  • 1 toothbrush
  • Paint brushes
  • Ball tools
  • Knife
  • Smoother
  • Clear alcohol
  • Rolling pin
  • Stitching tool

Step 1

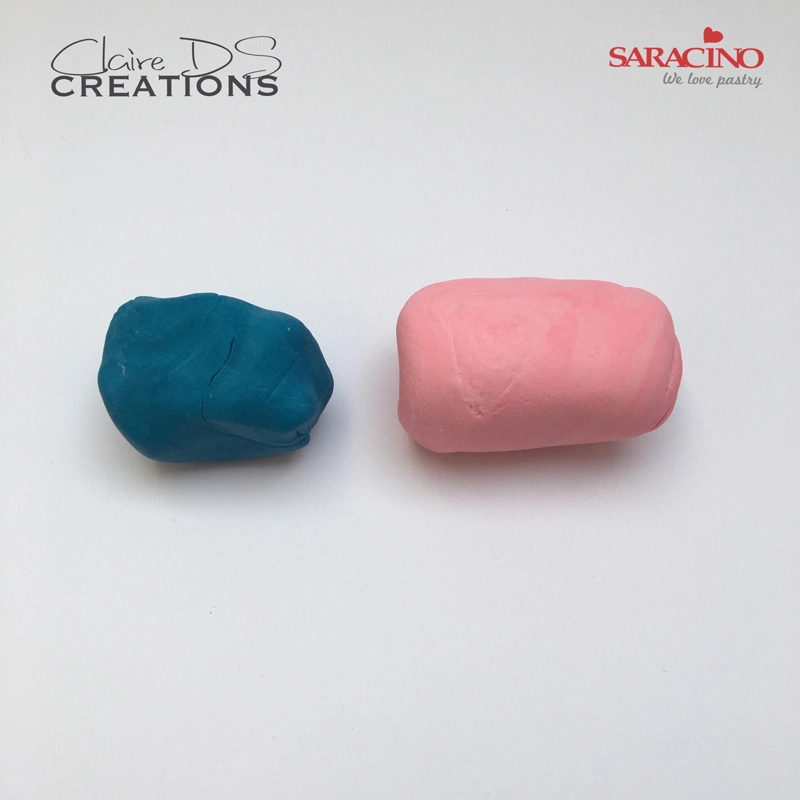
Prepare 50g of light blue modelling paste and 75g of pink modelling paste

Step 2

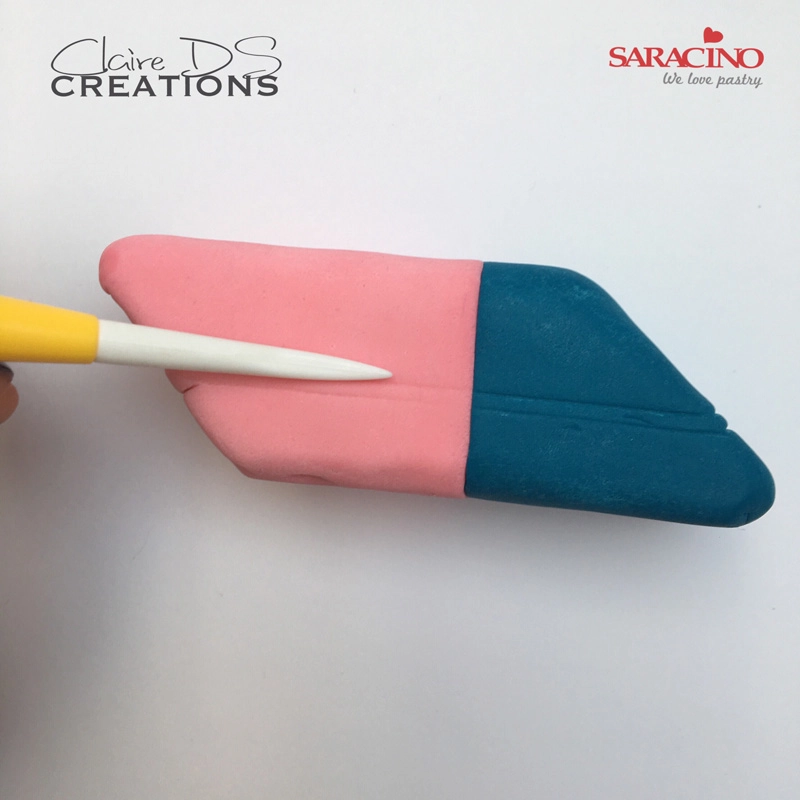
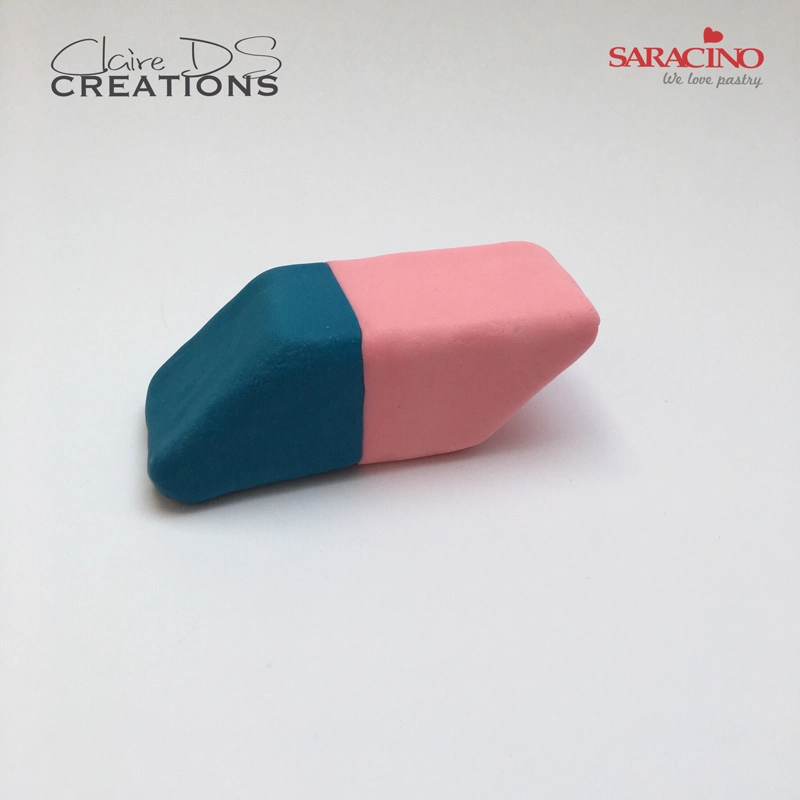
Attach 2 colours together and make the shape of an eraser

Step 3

Using Dresden tool, make two horizontal lines, then paint the gap between with the white gel colour

Step 4

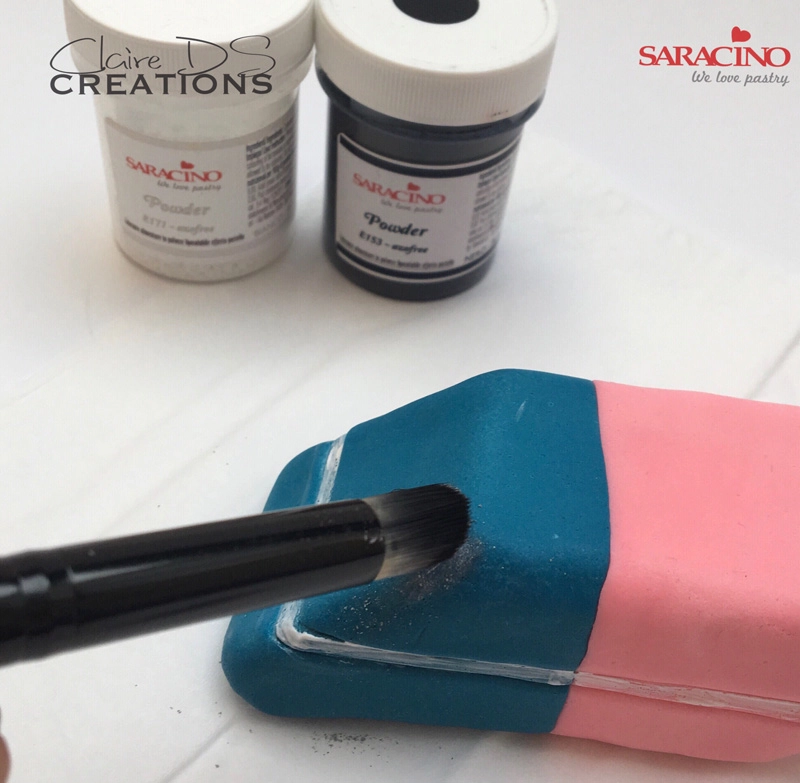
Apply black and white powder with a painting brush

Step 5

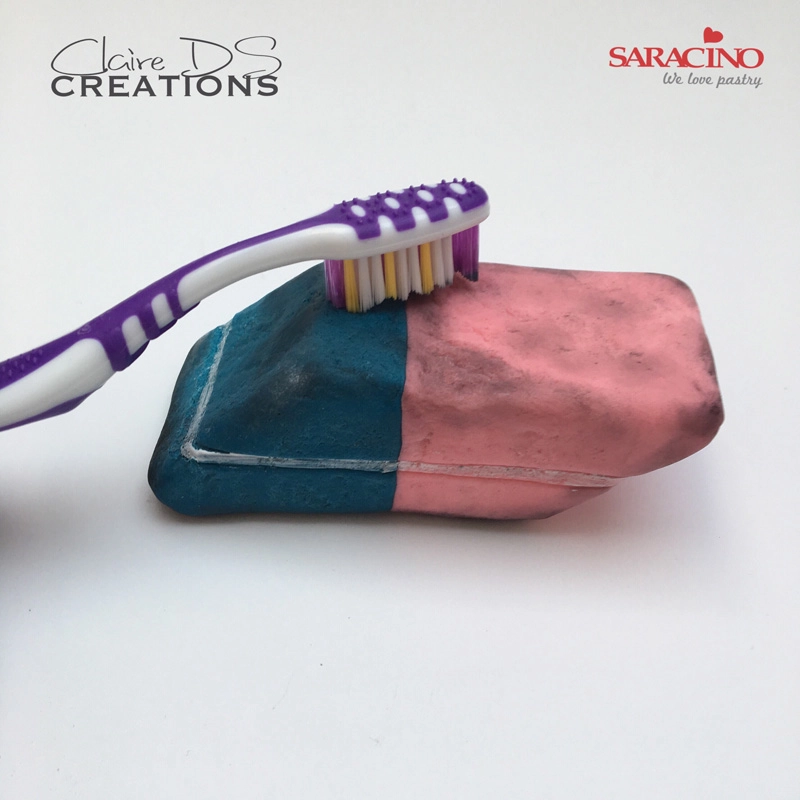
Using toothbrush, pat on the eraser to give texture

Step 6

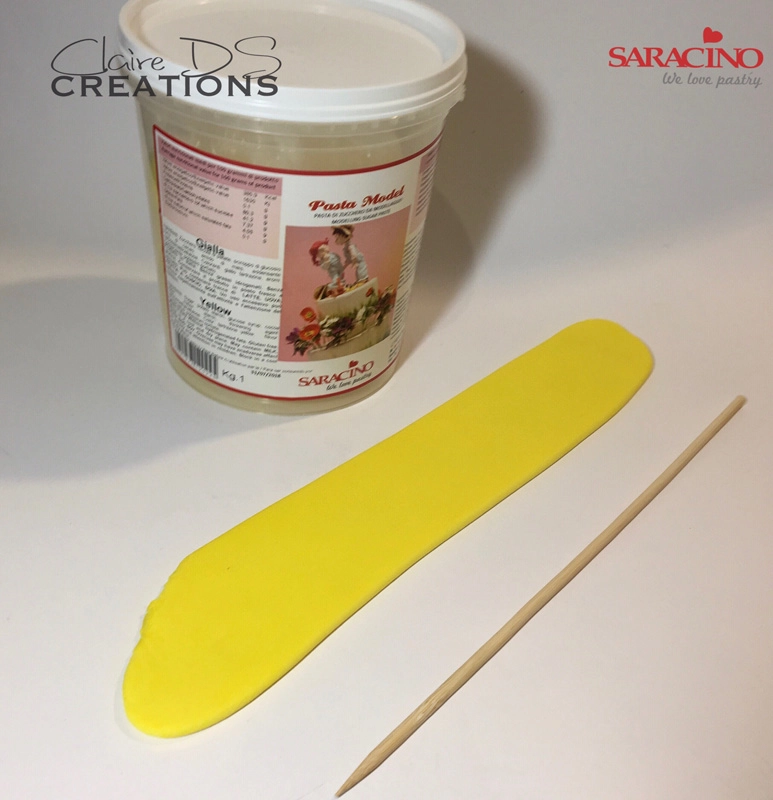
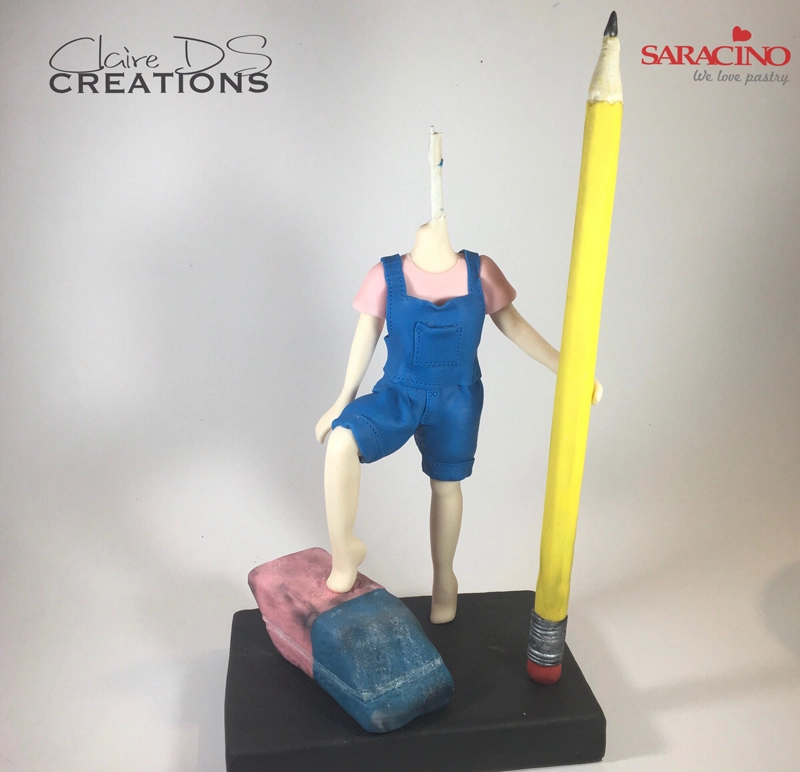
Roll 75g of yellow modelling paste and wrap a skewer to create a giant pencil.

Step 7

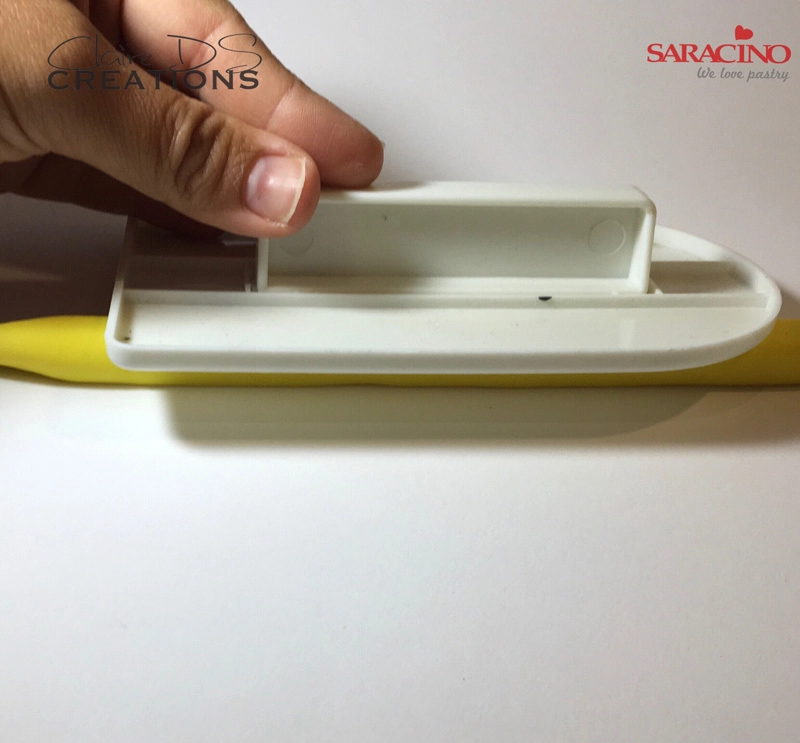
With a smoother, flatten the angles to give the hexagonal sides to the pencil and sharpen one end.

Step 8

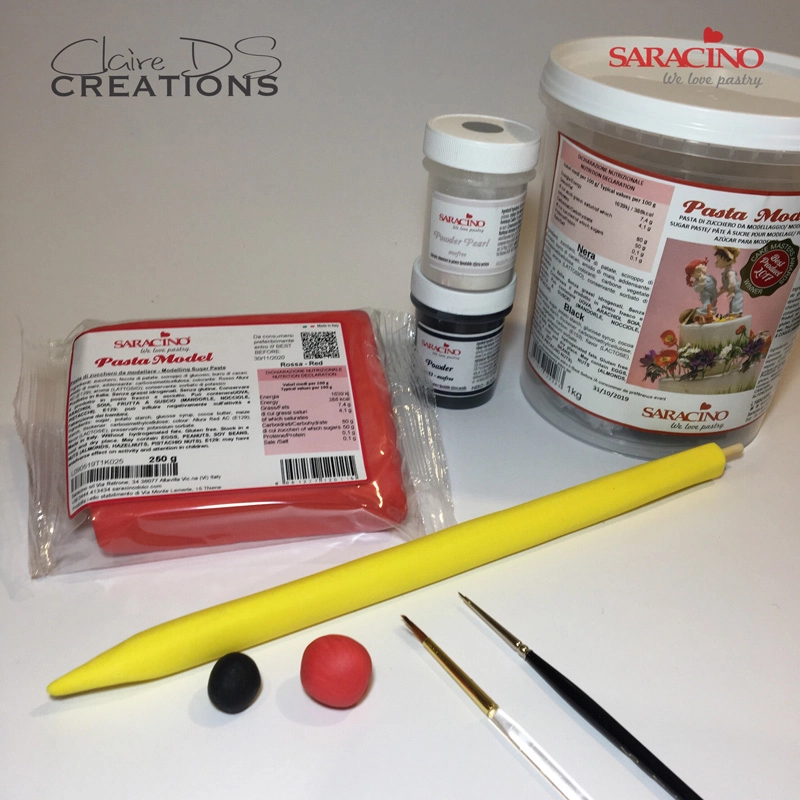
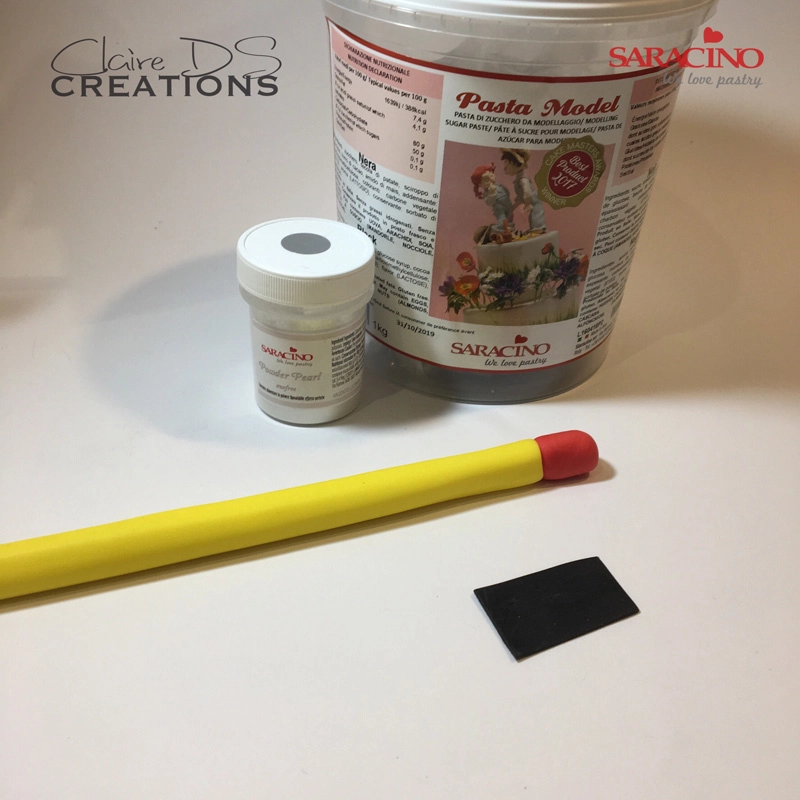
You will need these shown in the picture to finish your pencil

Step 9

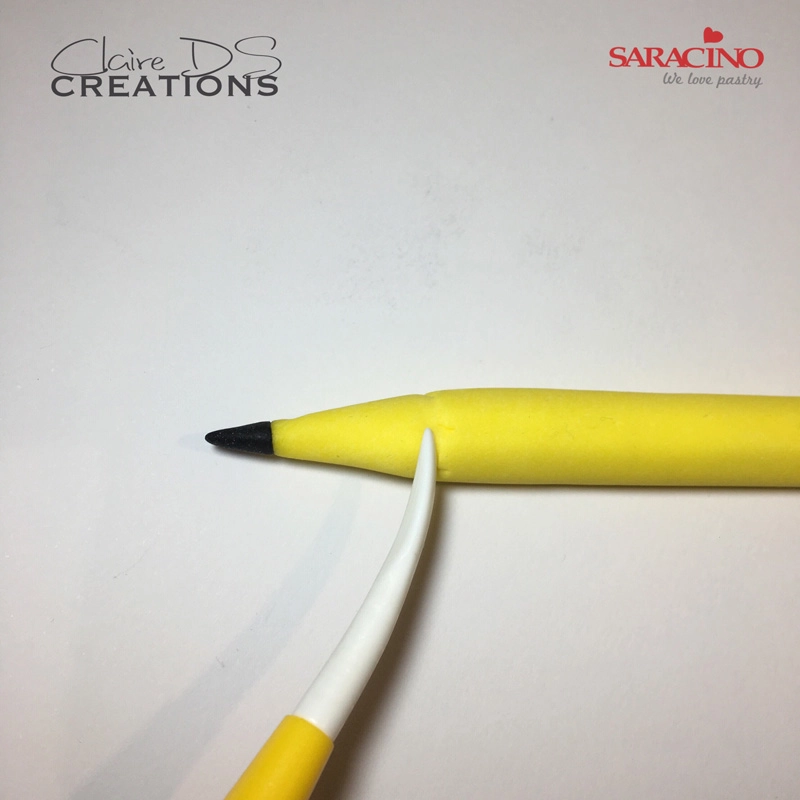
Using black paste, create the pointed tip and with the Dresden make a line around so it looks like a sharpened pencil

Step 10

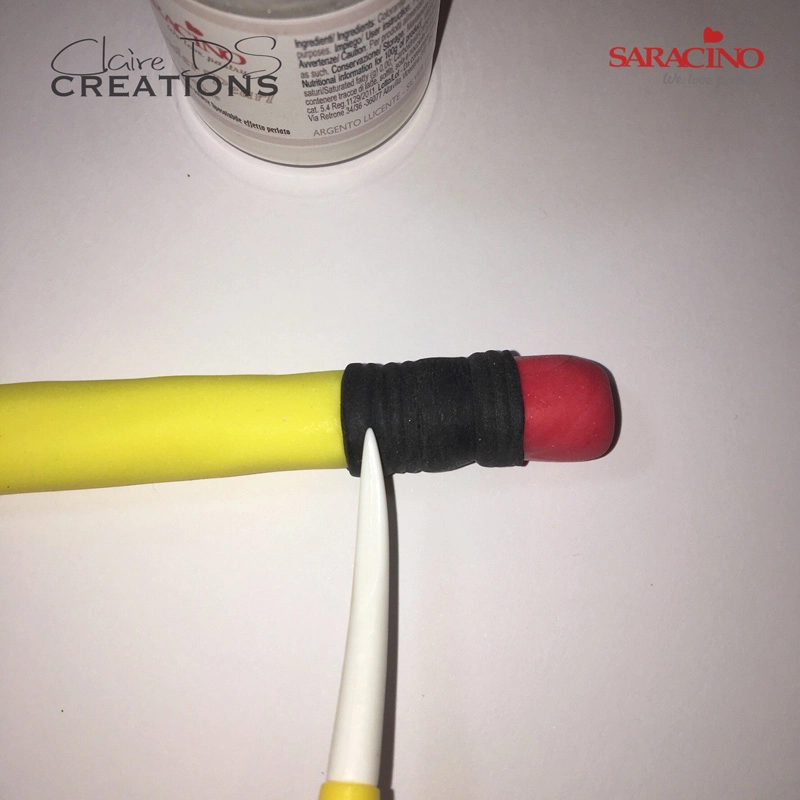
Using the red paste make the eraser and glue on to the end of the pencil. Roll 2g of black paste and surround the top of the pencil (below the eraser).

Step 11

With Dresden tool create grooves as shown

Step 12

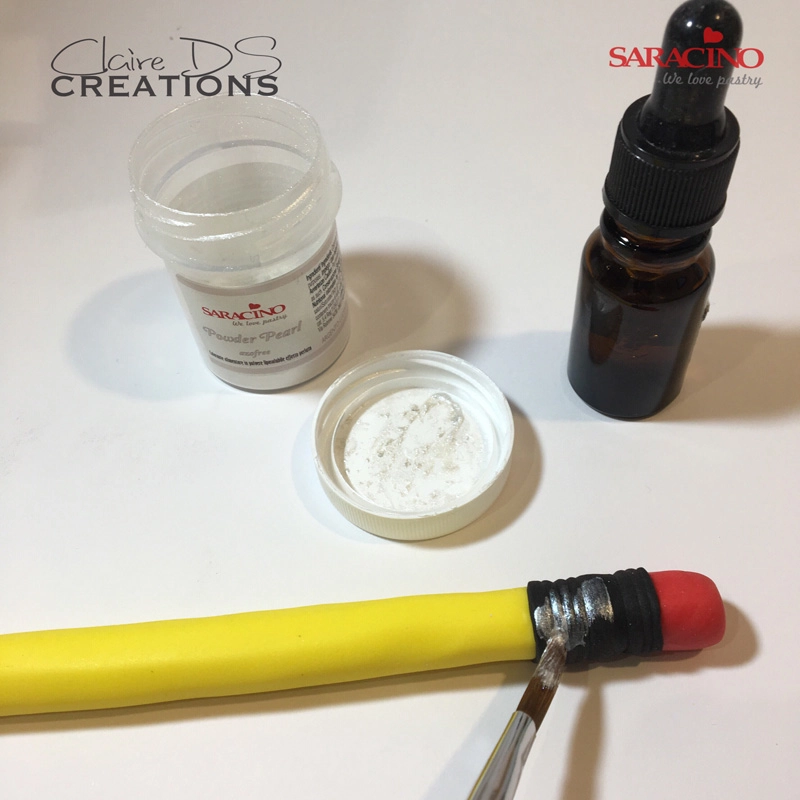
Dilute silver powder in a small amount of clear alcohol and paint the black band.

Step 13

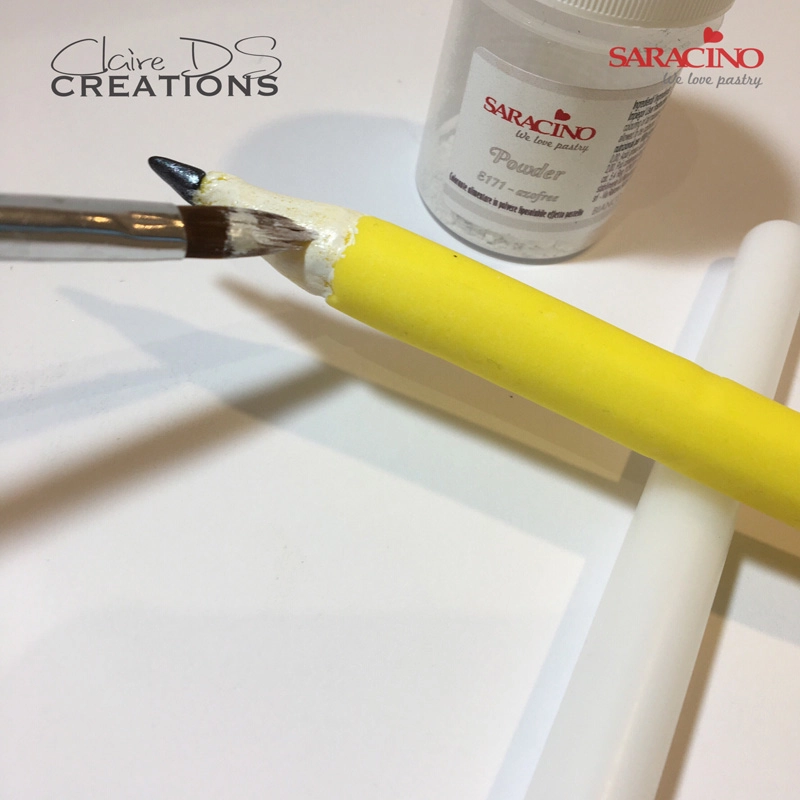
Dilute white powder in clear alcohol and paint the pencil between the tip and the yellow.

Step 14

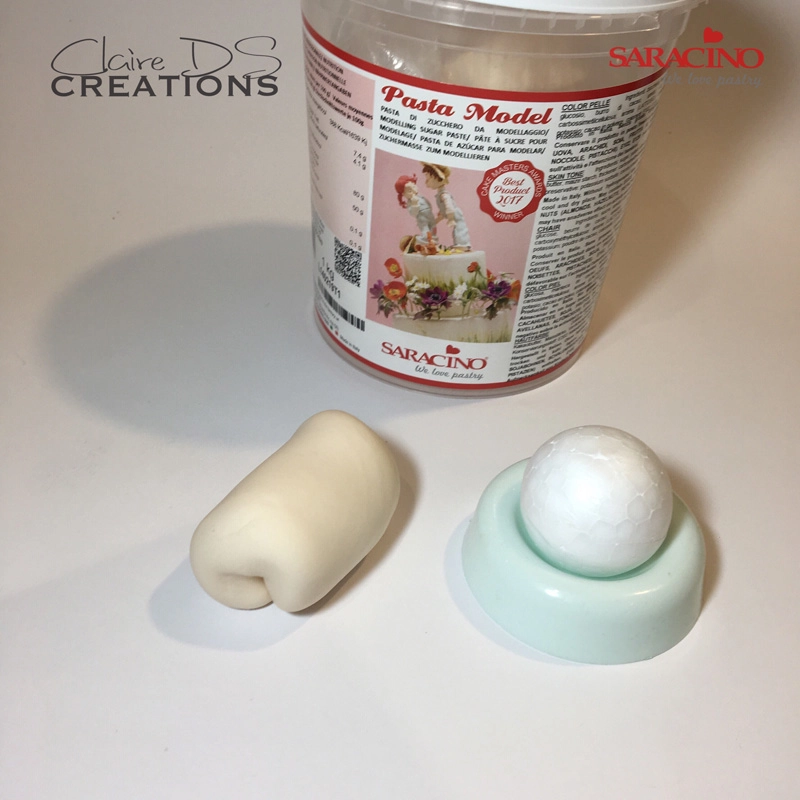
To create head take 55g of skin modelling paste and a 4cm diameter polystyrene ball. Cover the ball with the paste and smooth to blend all joints.

Step 15

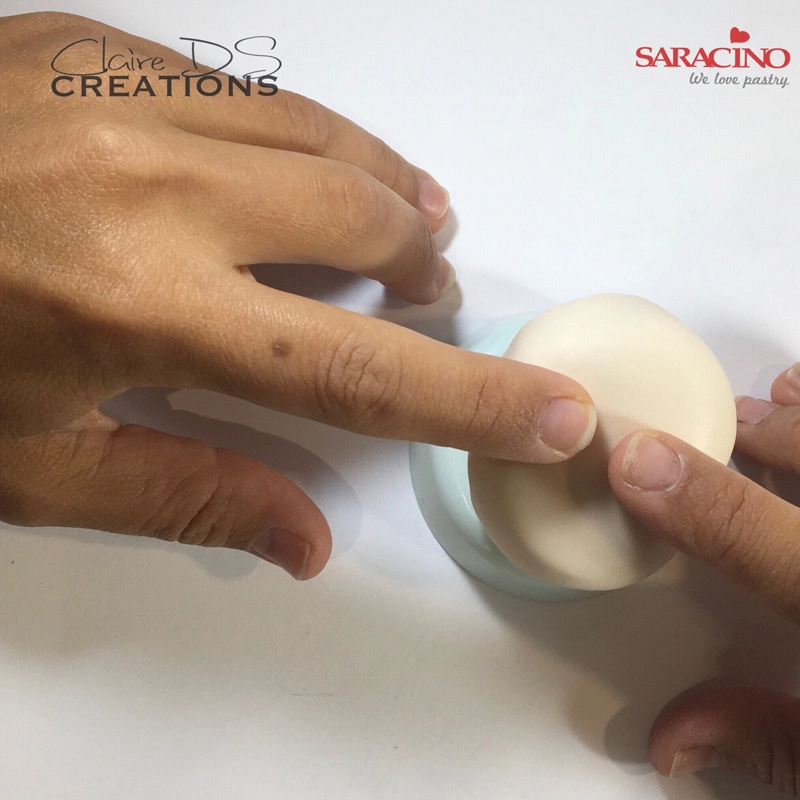
Use the ends of your fingers to form the eye sockets.

Step 16

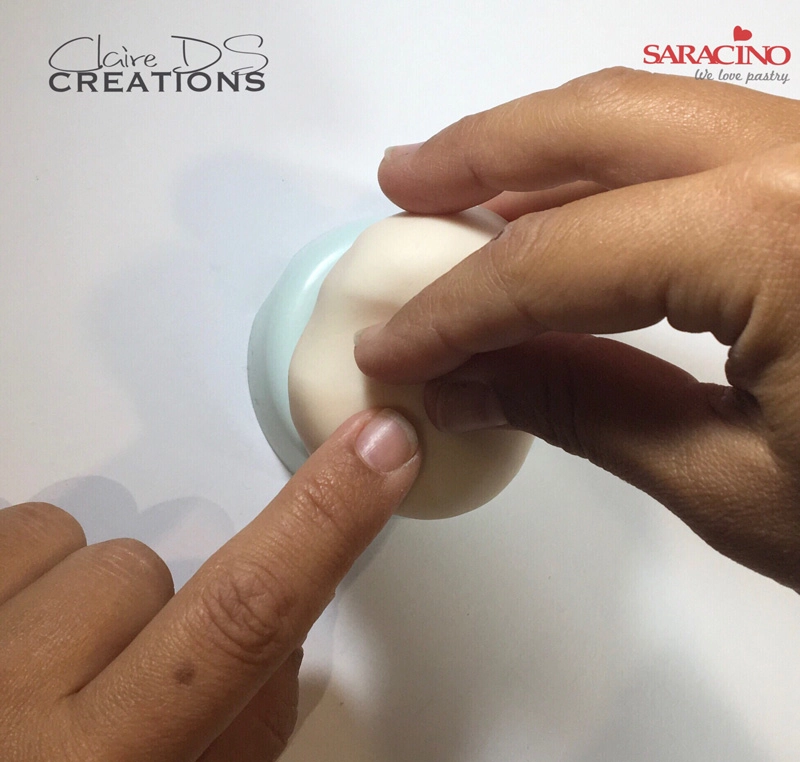
Use your fingers in a triangle shape to form the nose shape.

Step 17

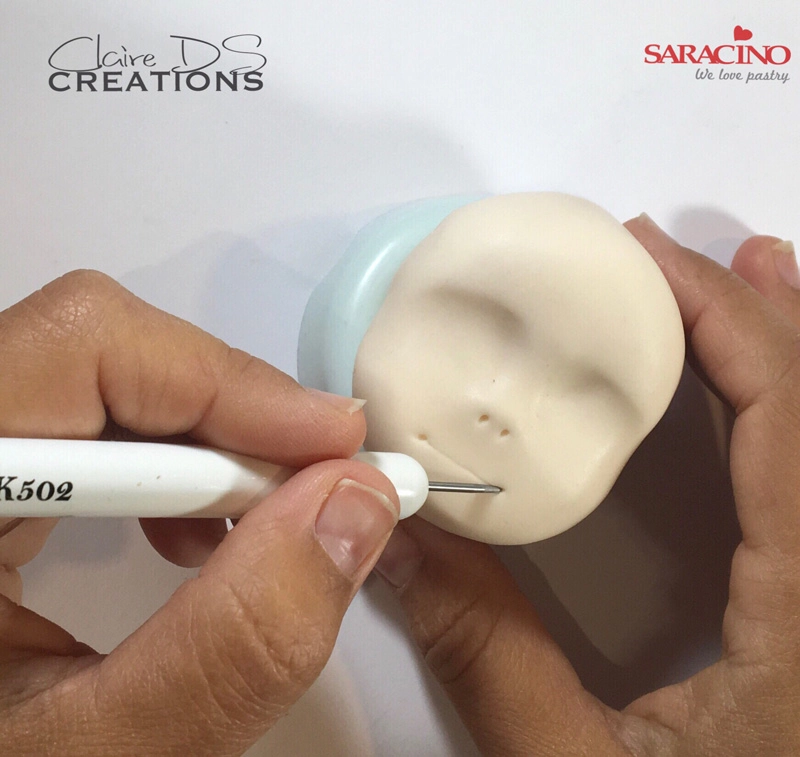
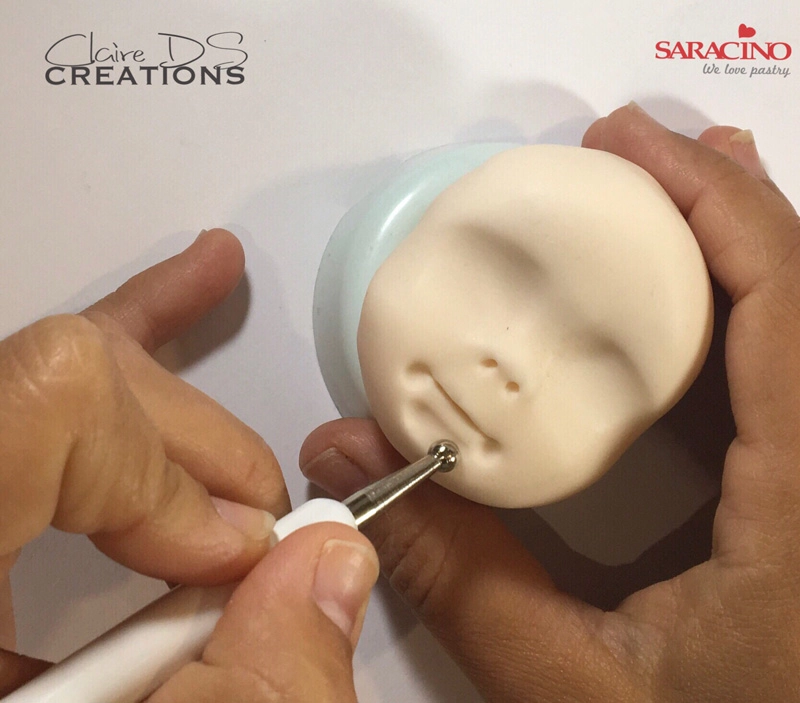
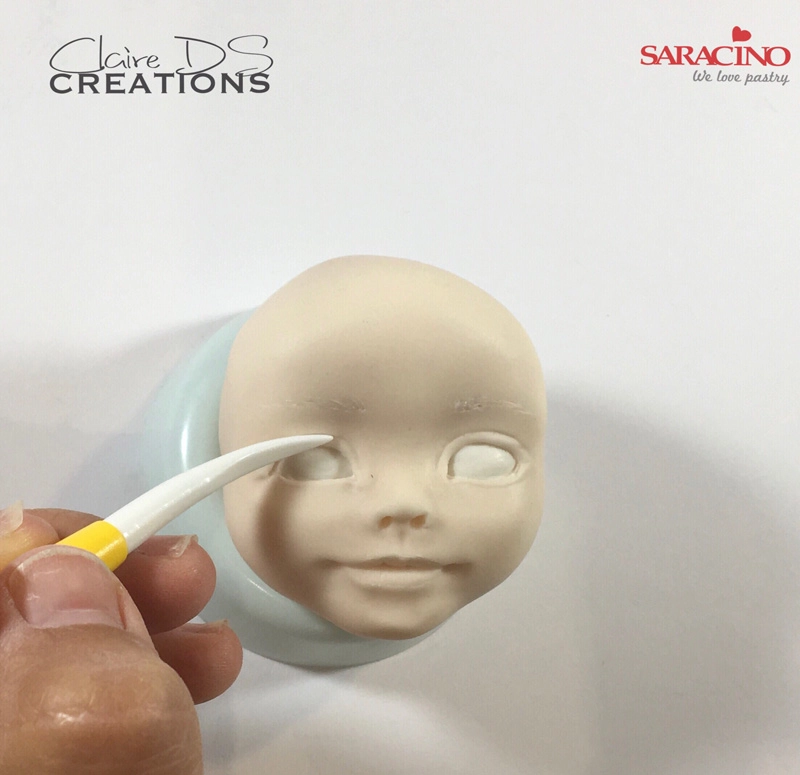
With a sharp tool, make the holes for the nostrils and mark the corners of the lips


Step 18

Use a sharp tool to open the mouth. Use a small ball tool to add definition as shown.

Step 19

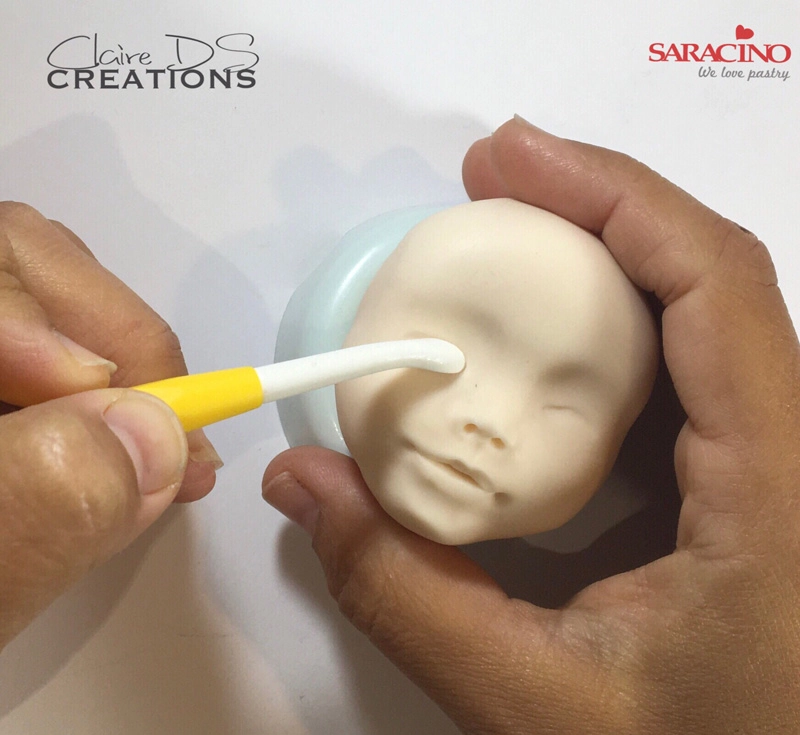
Using the wide end of the Dresden tool form the dents in the eyes as shown.

Step 20

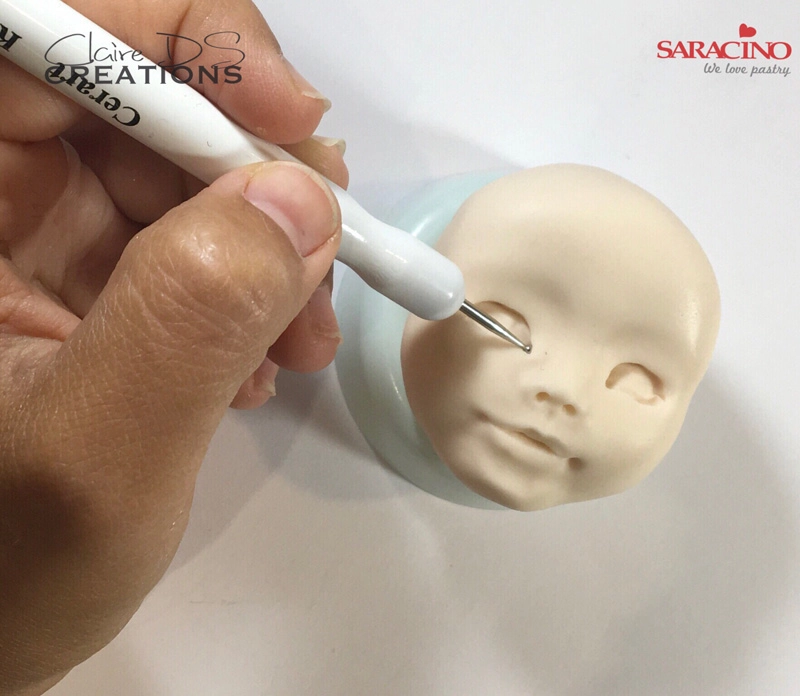
With the small ball tool, dig and smooth to form the eyes

Step 21

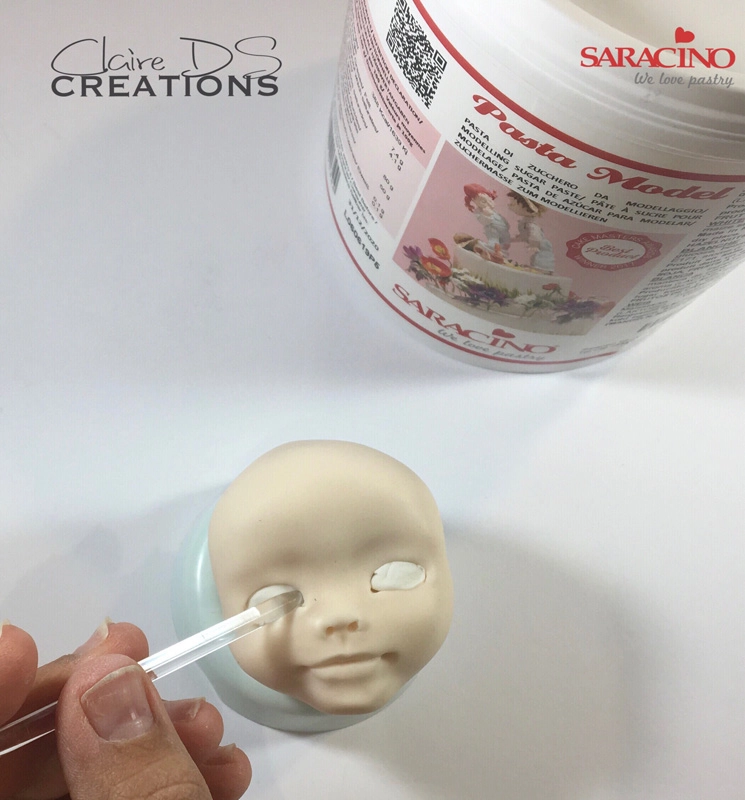
Place 2 small balls of white modelling paste onto the eyes and smooth.

Step 22

Draw eyelids with the Dresden tool and mark eyebrows with the scalpel

Step 23

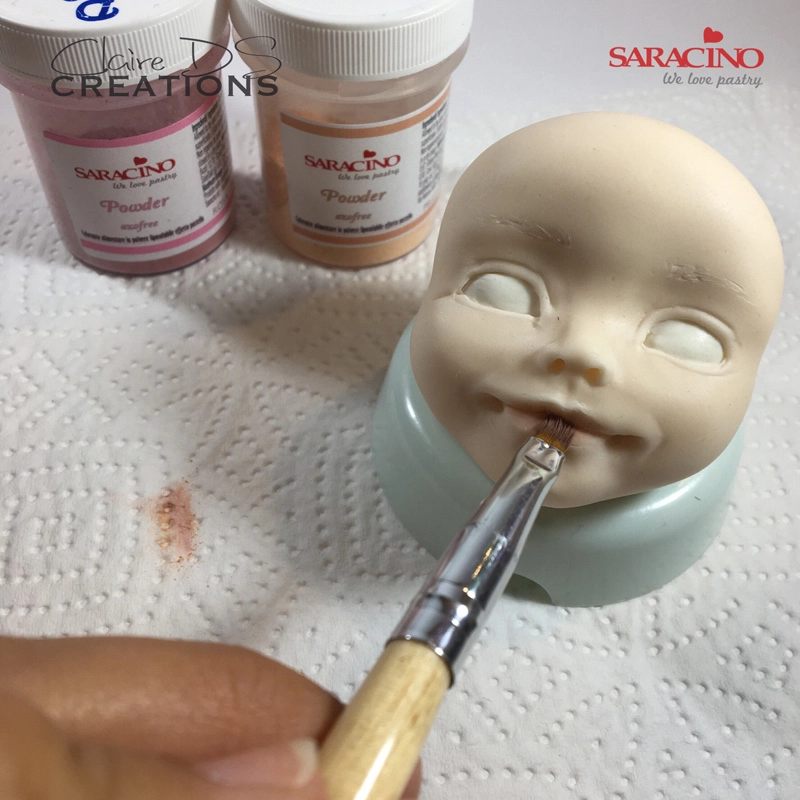
Apply pink and flesh powder on the lips and eyelids

Step 24

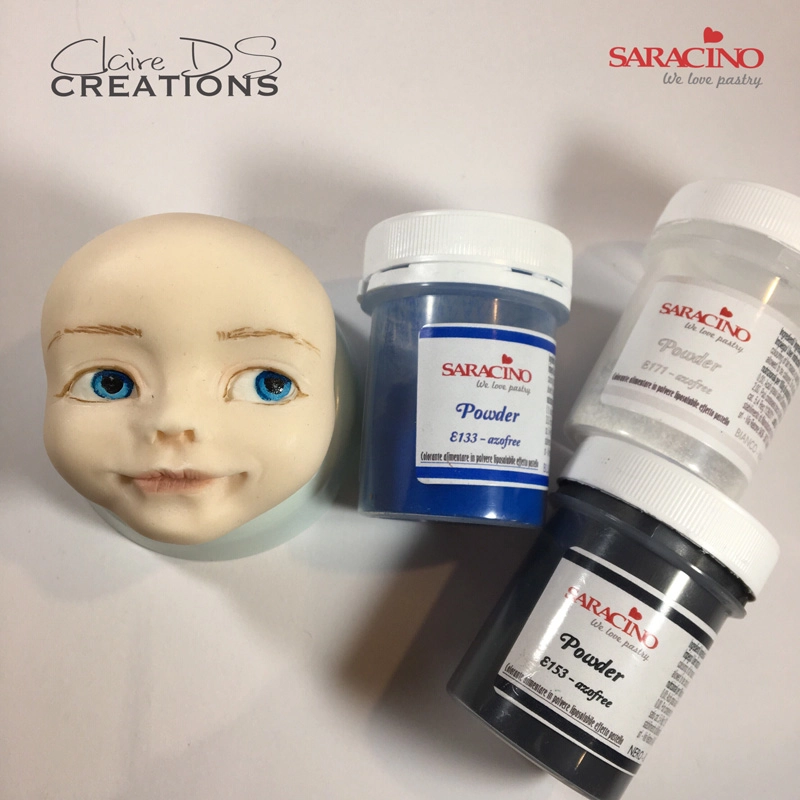
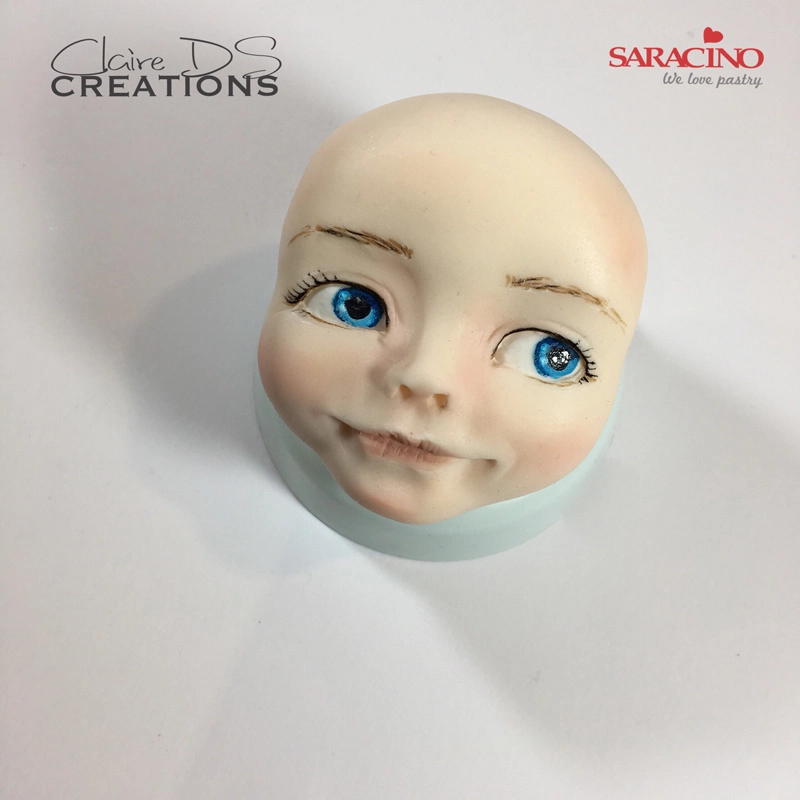
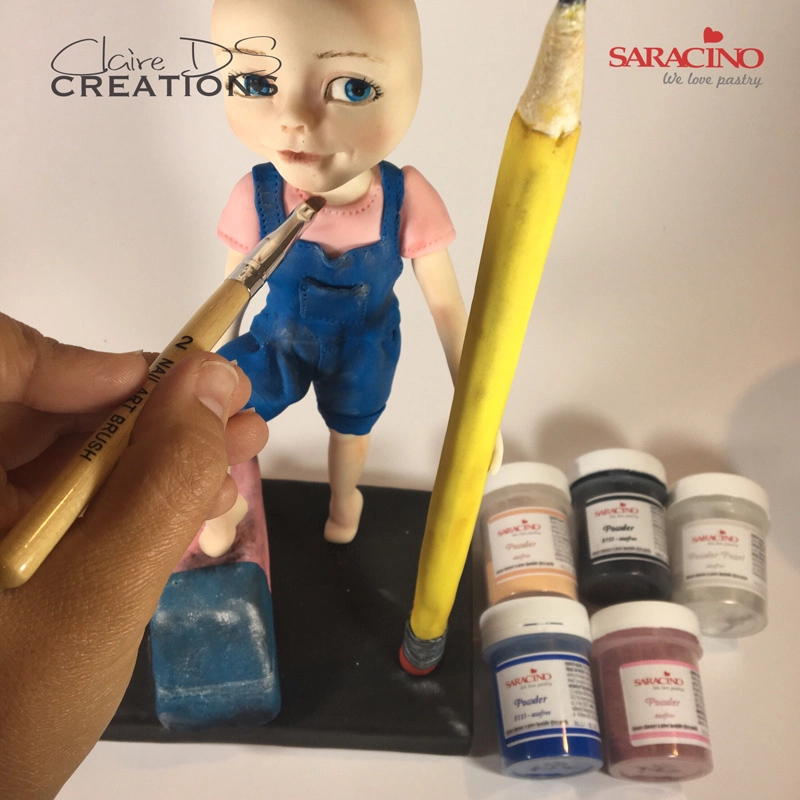
Paint the eyes, the iris in blue, the pupil in black, the eyelashes and eyebrows in brown.

Step 25

Add 2 dots of white gel colour to bring the light point to the eyes

Step 26

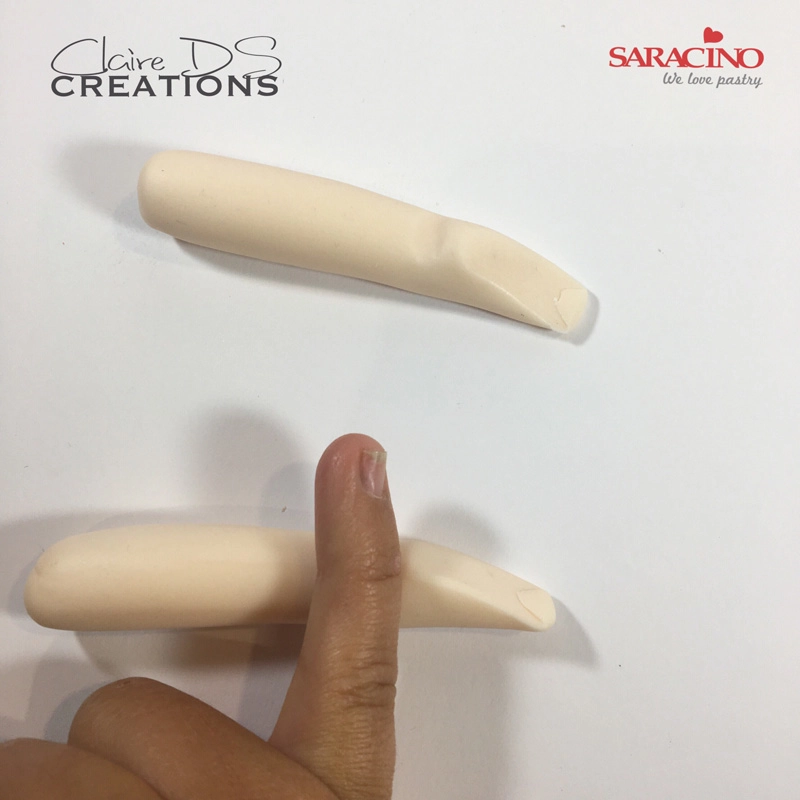
Using 30g of skin coloured modelling paste, form into sausage shape and cut halfway to a 45 degree angle, roll with your finger to create the foot and ankle.

Step 27

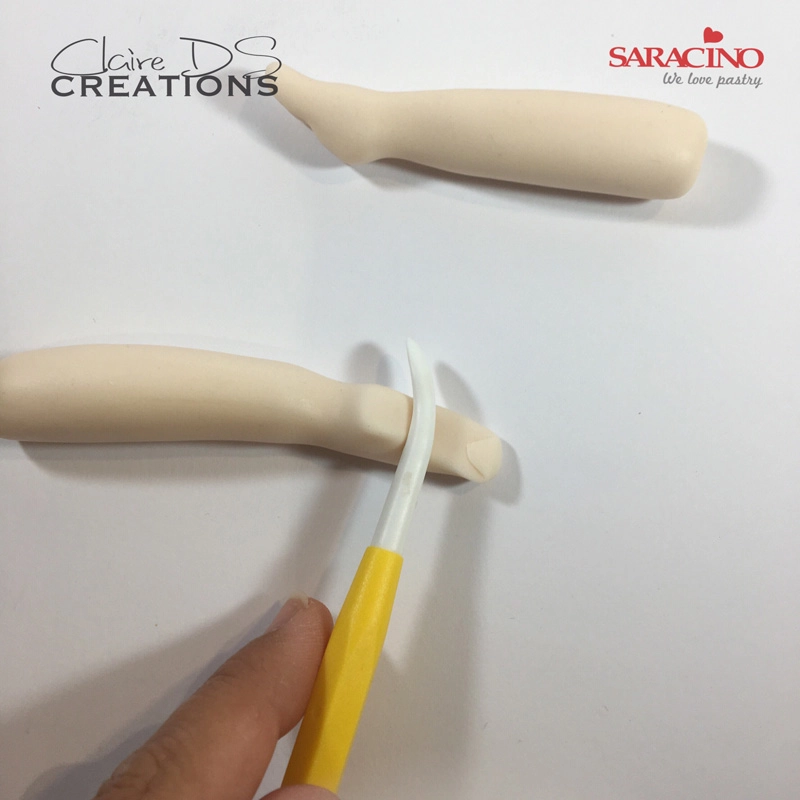
Mark the arch of the foot with the Dresden tool

Step 28

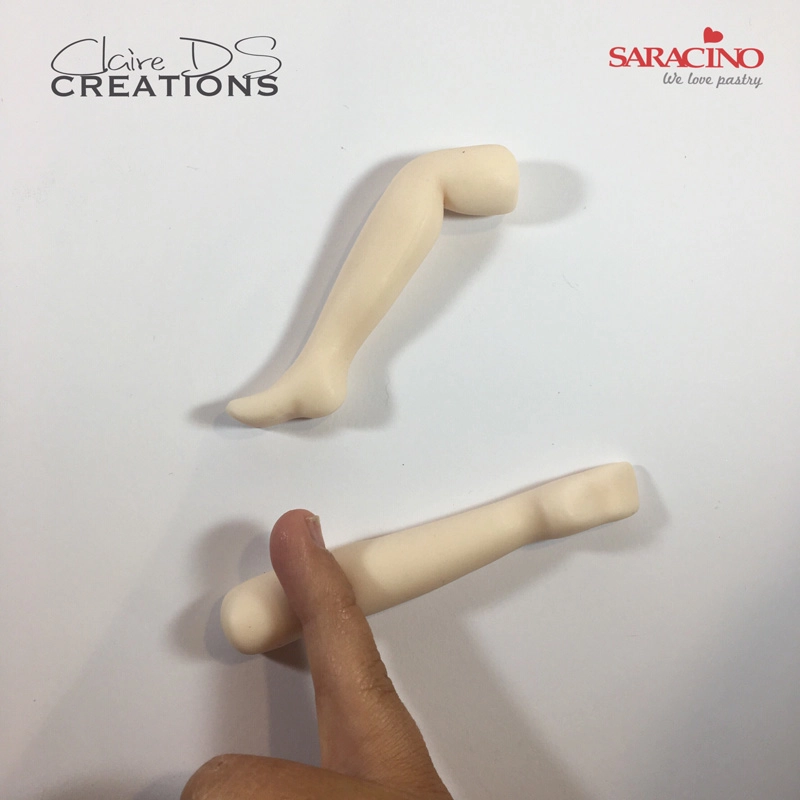
Using your finger press to form the back of the knee


Step 29

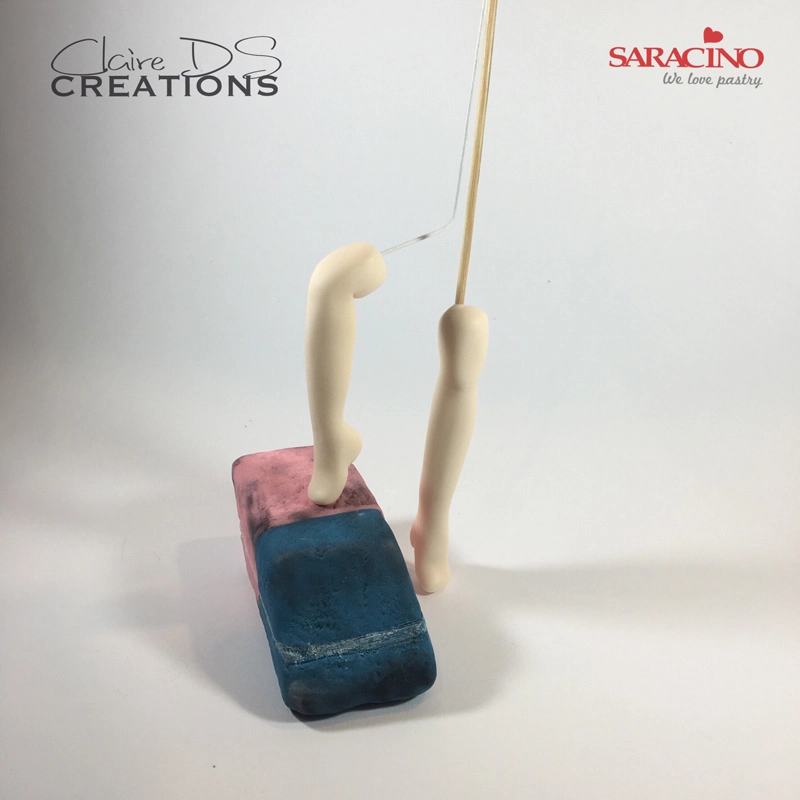
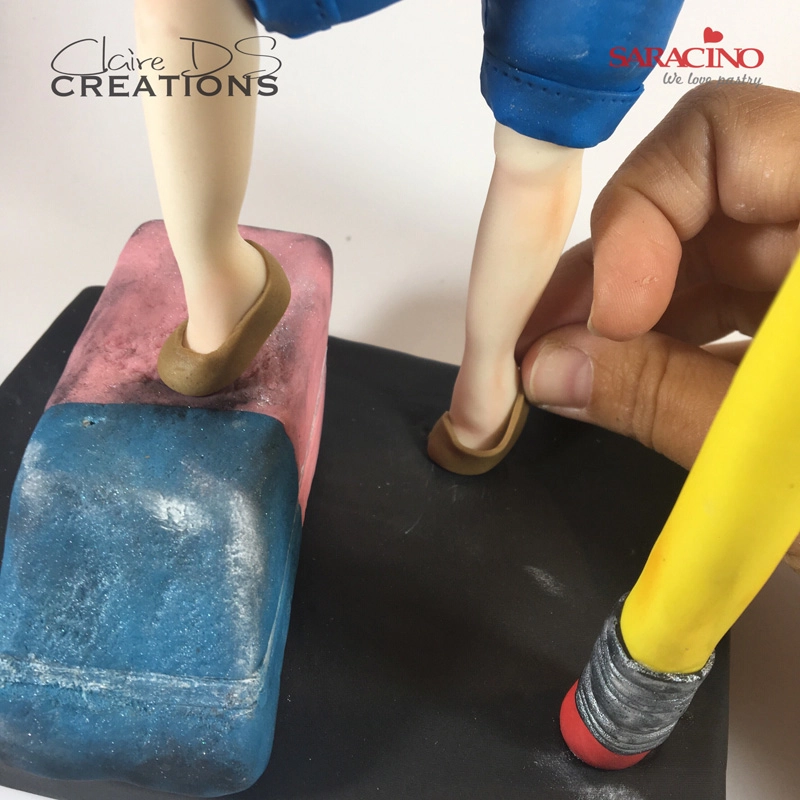
Using wire in one leg stick it to the top of the eraser. Insert a skewer into the other leg.

Step 30

With 40g of skin coloured modelling paste, roll to form the torso.


Step 31

Using a small rolling pin press down at the top to form the taper for the chest.

Step 32

Refine the top to form the neck


Step 33

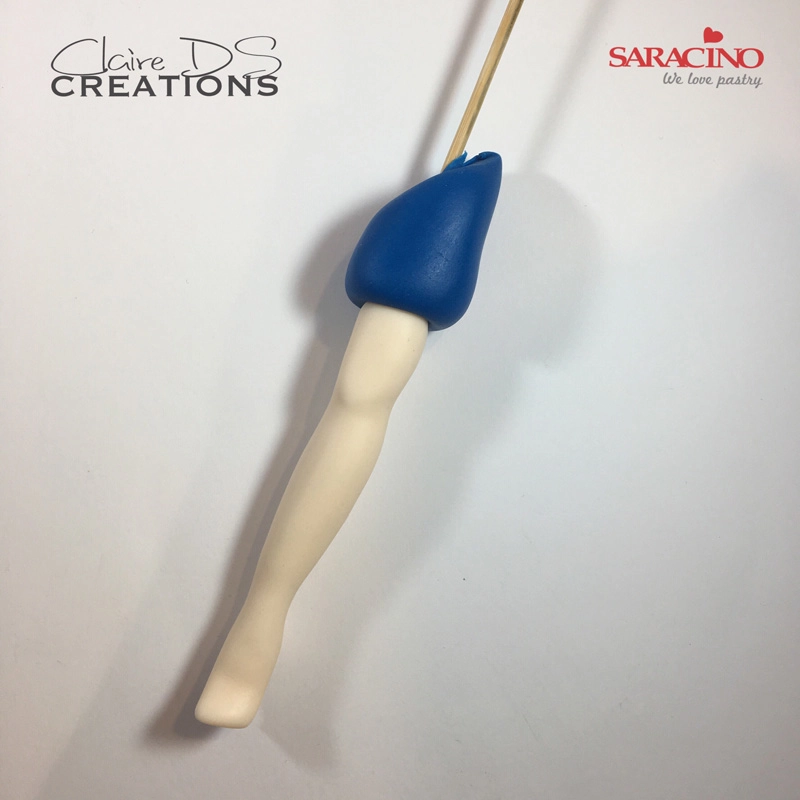
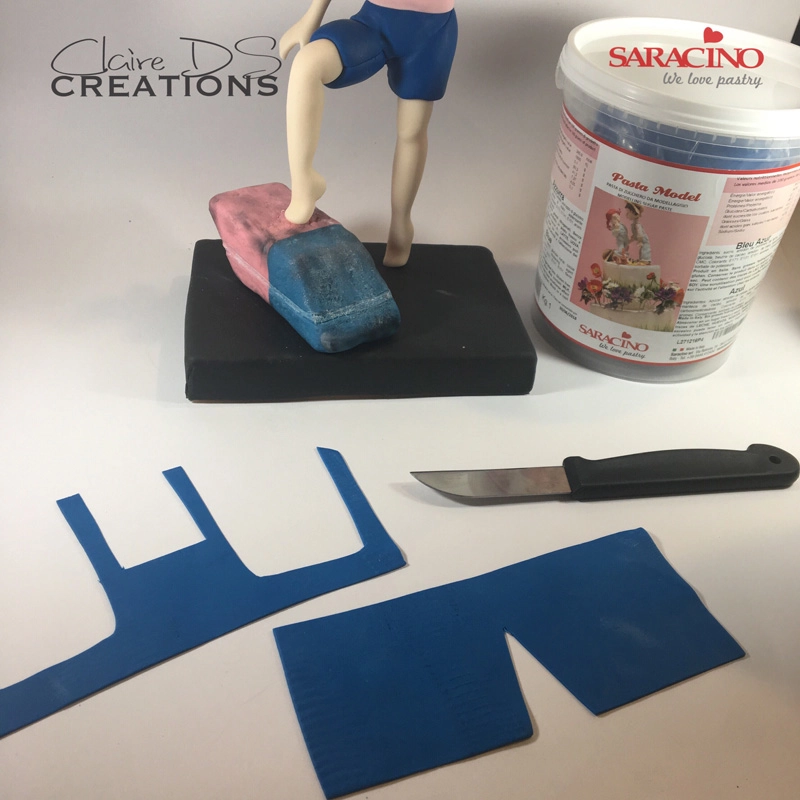
With 30g dark blue modelling paste, roll a sausage shape and cut halfway to a 45 degree angle to create the shorts.

Step 34

Place on the legs.


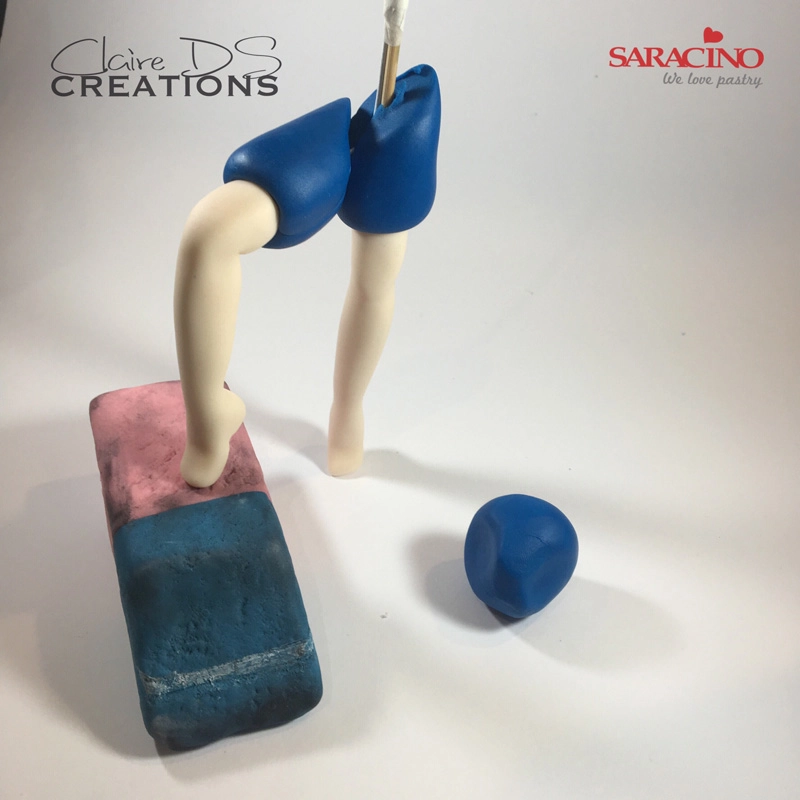
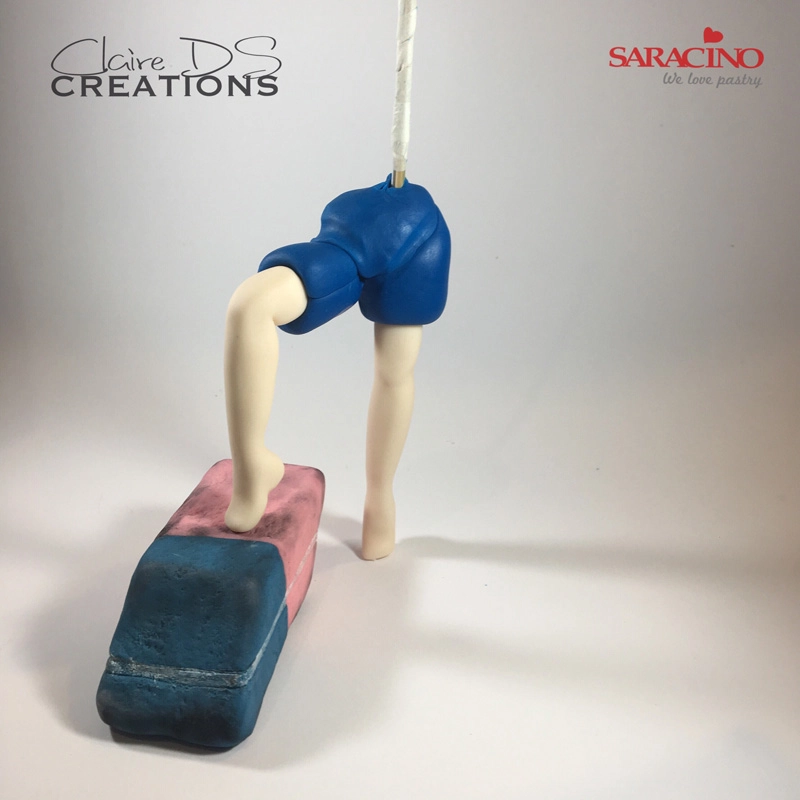
Step 35

Make sure the legs for the shorts meet at the top as shown. Using florist tape wrap the wire to the skewer. Using 10g of dark blue modelling paste, make a ball and form a dent either side to fit onto the shorts.

Step 36

Place the ball onto the skewer and join to the two short legs.


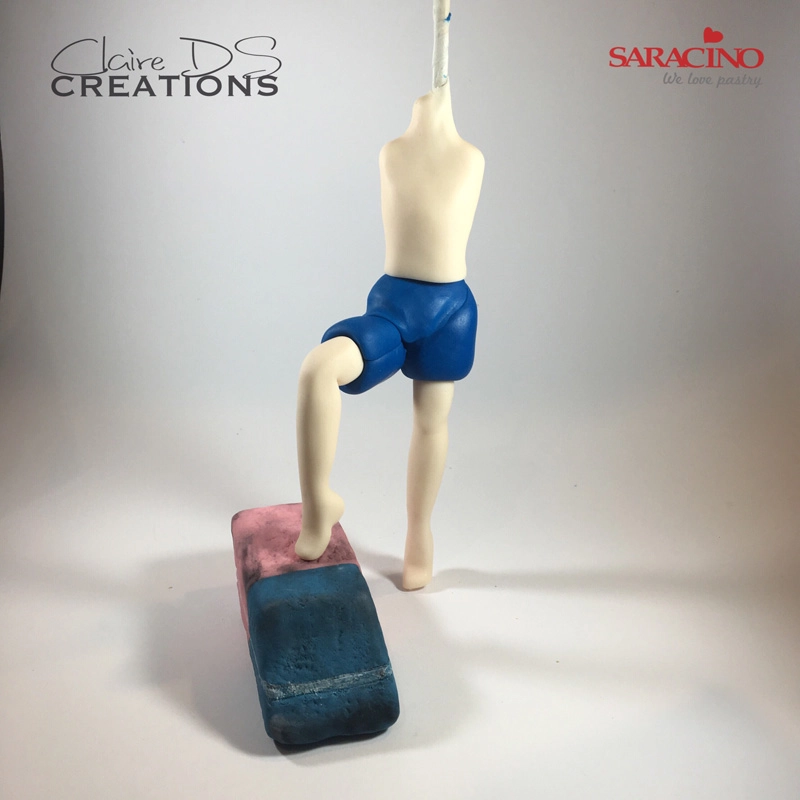
Step 37

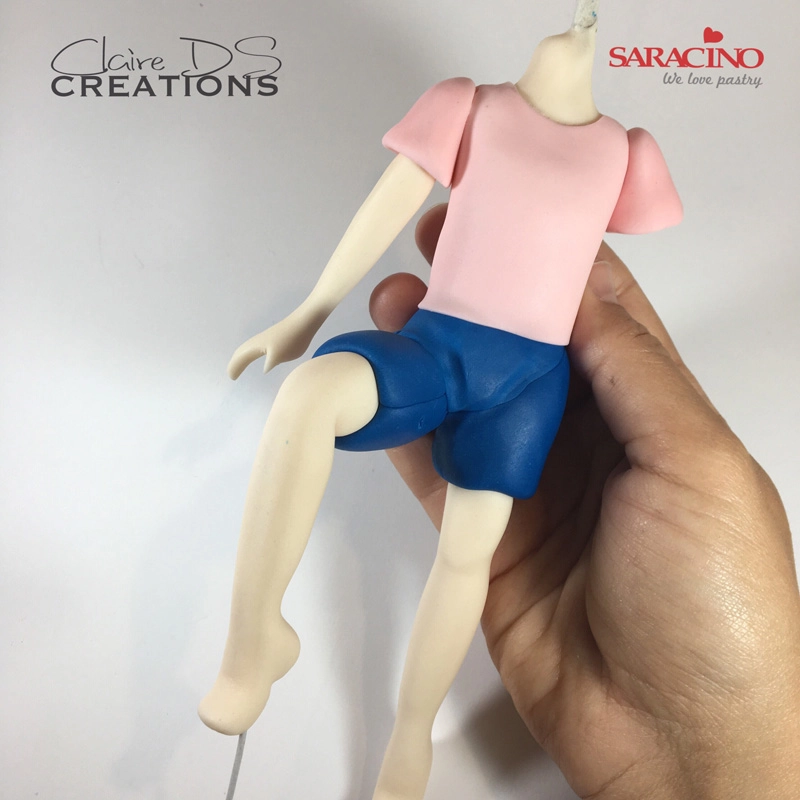
Place the torso on to the skewer.

Step 38

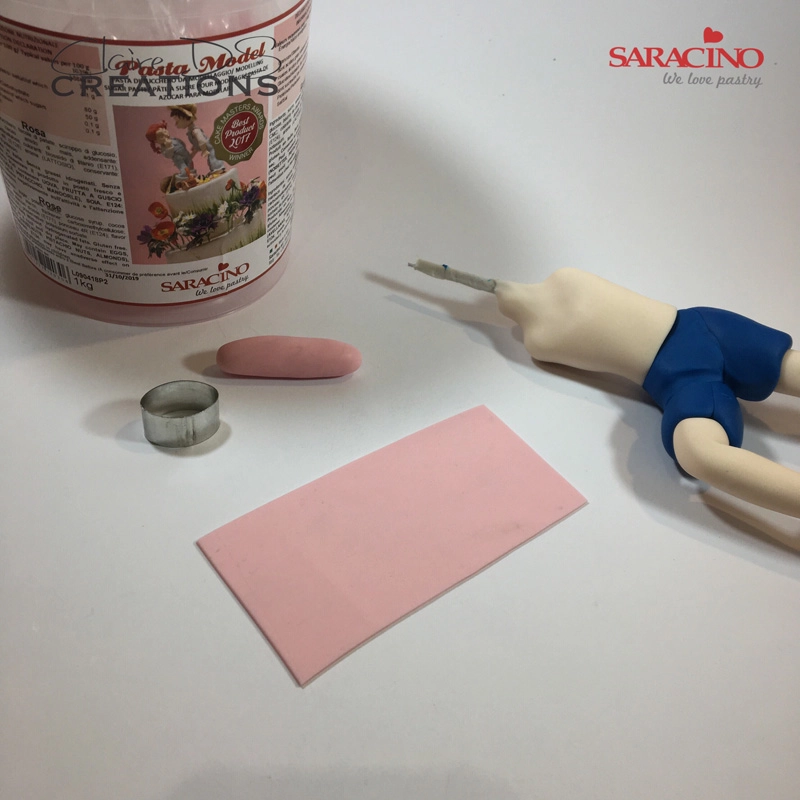
Using 20g of pink modelling paste, roll a strip for the T shirt and make a sausage shape for the sleeves.


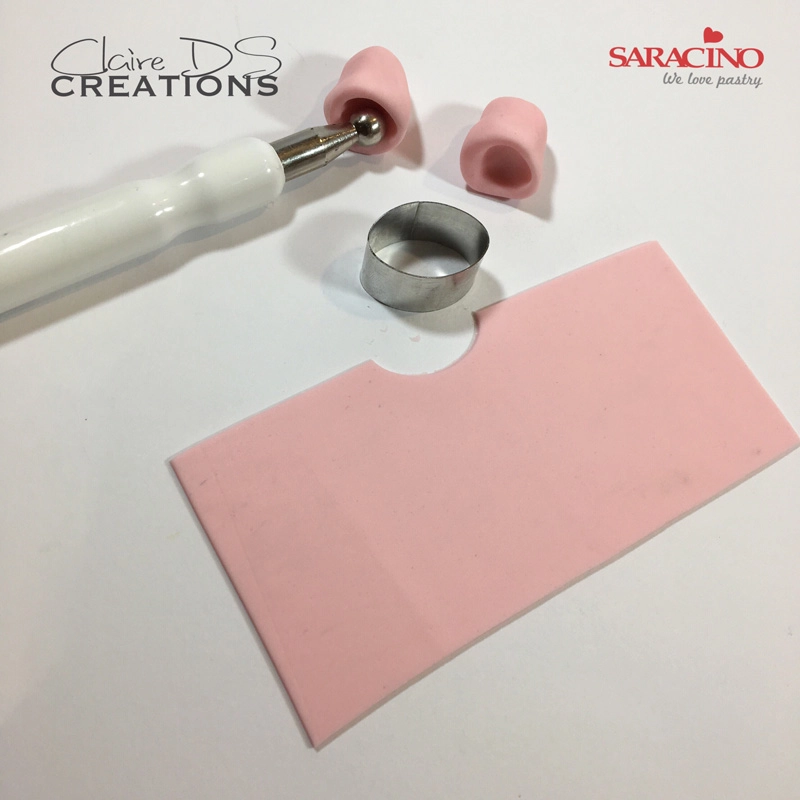
Step 39

With a small oval cutter, form the neckline of the T shirt. Cut the sausage in 2 and hollow with a ball tool

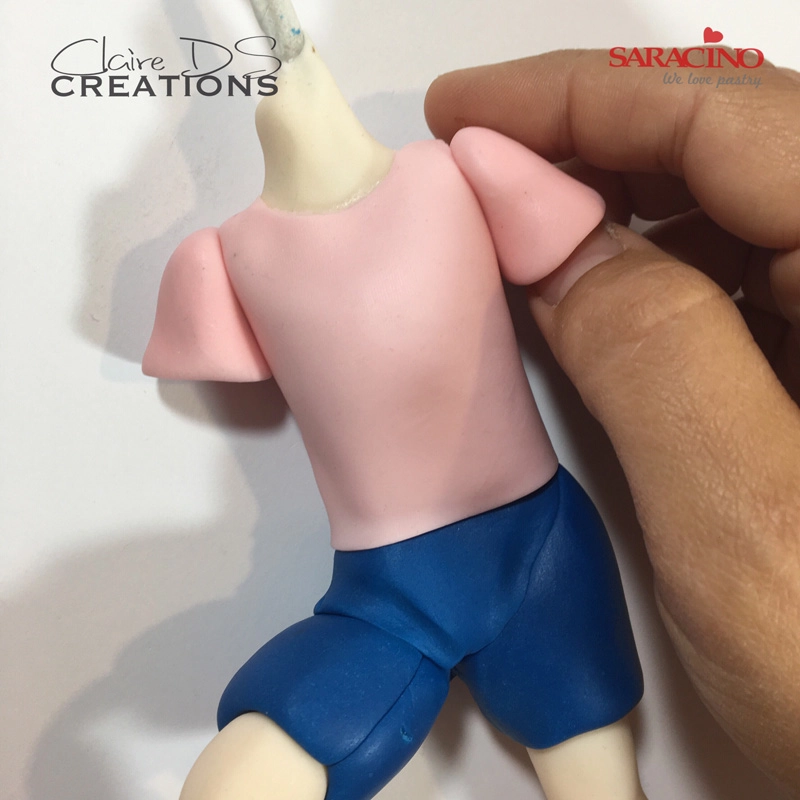
Step 40

Place the rolled sheet on to the torso to create the t-shirt and stick the rolls to the shoulders to make the sleeves.


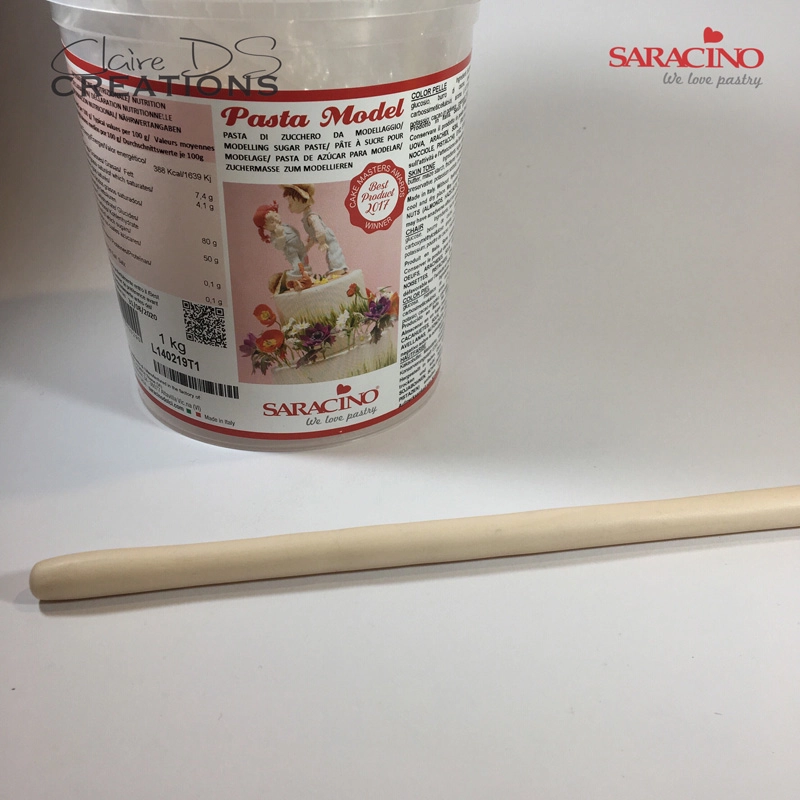
Step 41

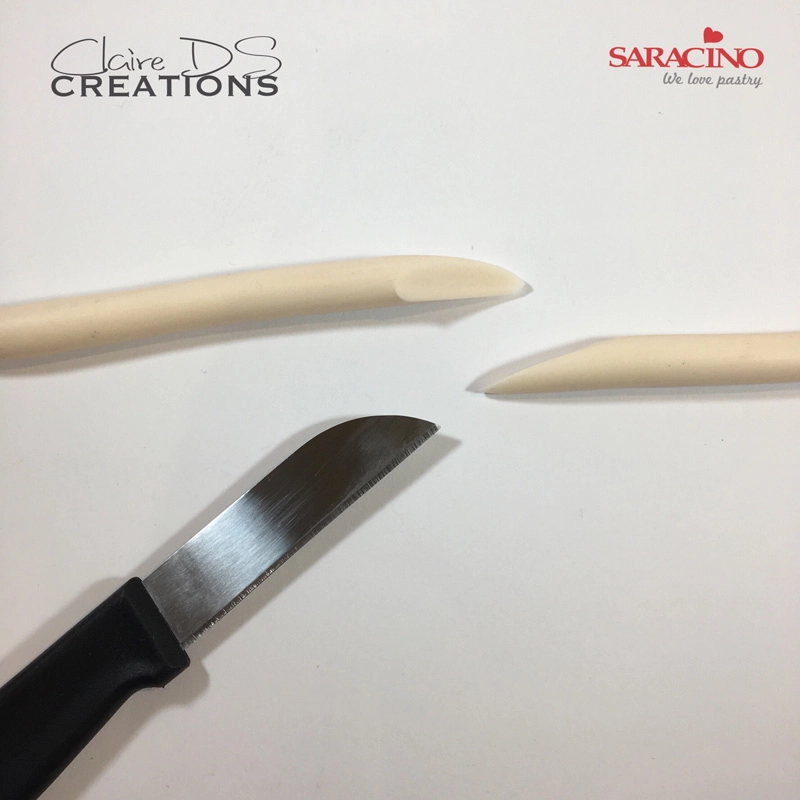
With 20g of skin modelling paste, roll a thin sausage shape.

Step 42

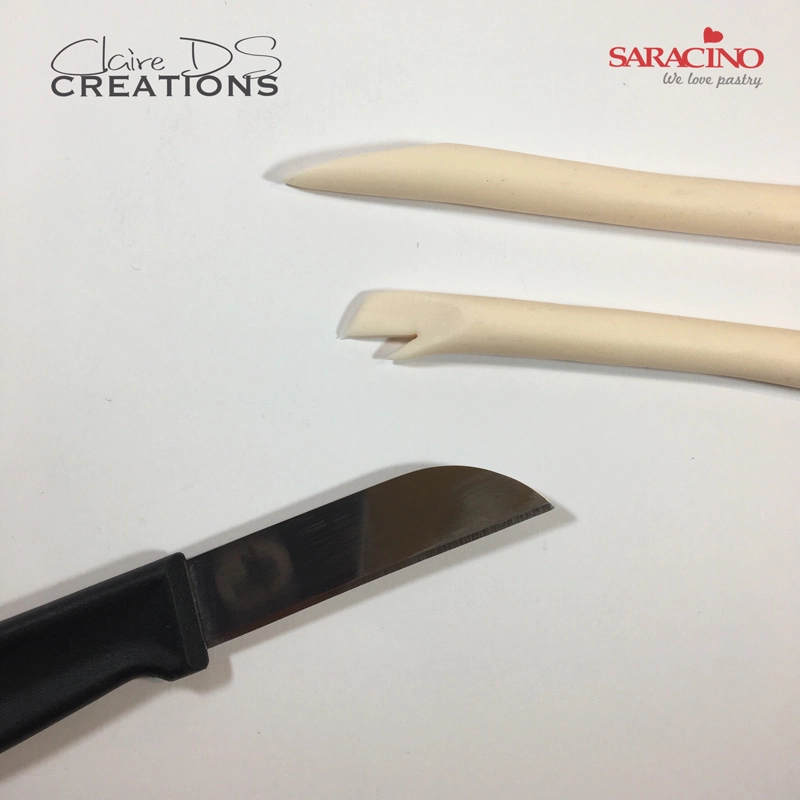
Cut to 45 degree.


Step 43

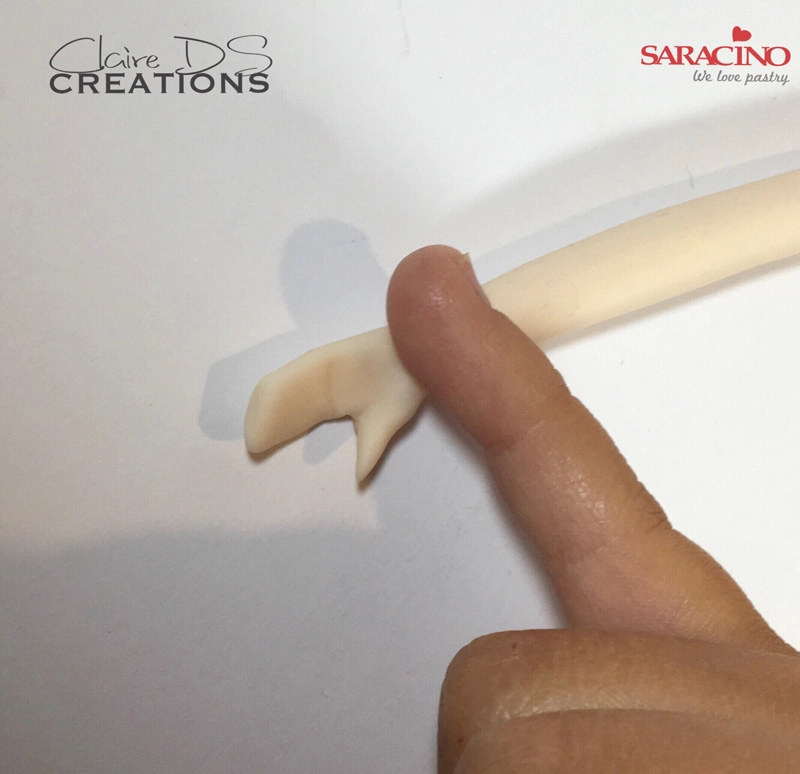
Cut to form the thumb of the hands

Step 44

Using your fingers roll to form the wrist


Step 45

Stick the arm into the sleeve.

Step 46

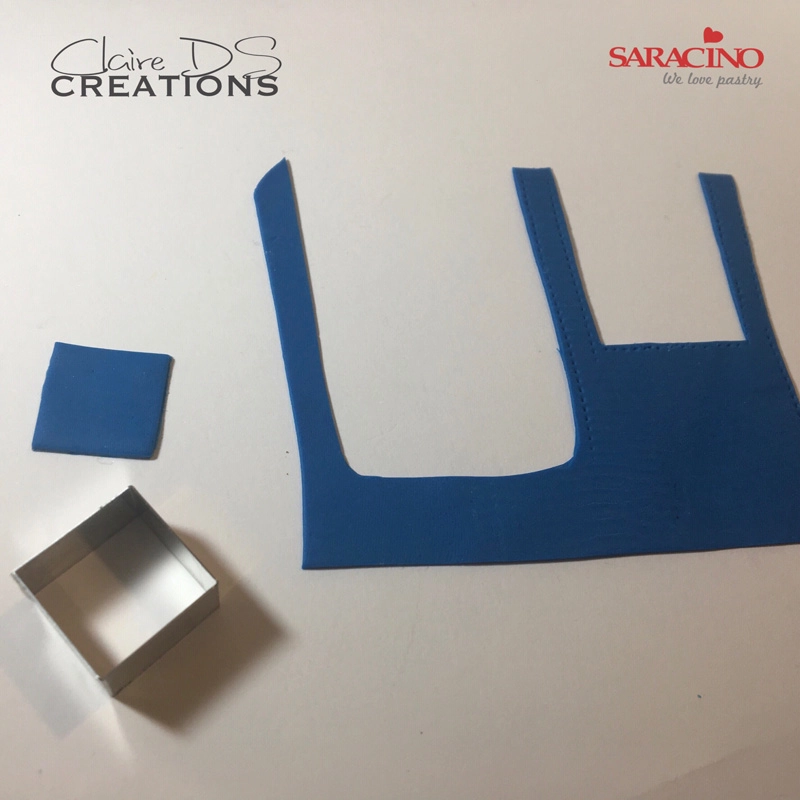
Roll 15g of dark blue modelling paste and cut out to create the top of the dungarees.


Step 47

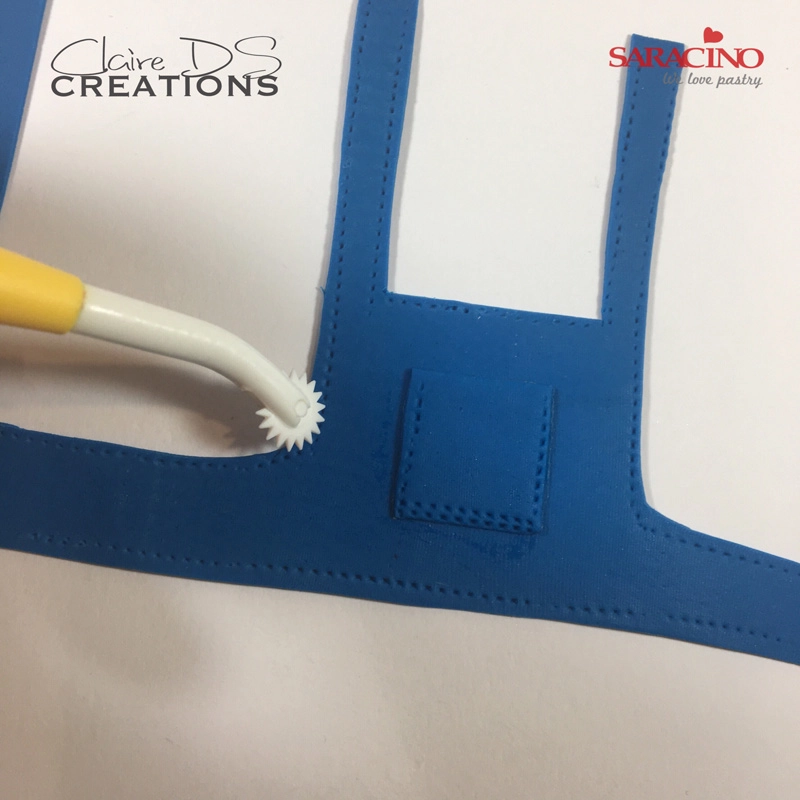
With a square cutter, make a pocket to the front of the dungarees.


Step 48

Using the stitching roller tool, create the topstitching of the dungarees


Step 49

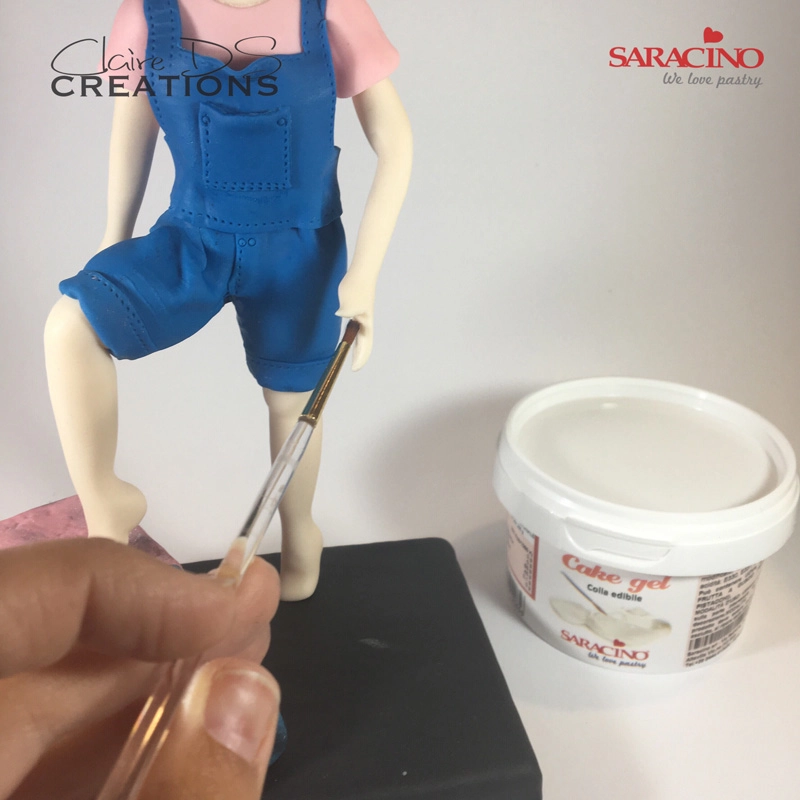
Put a 20 gauge flower wire into the 2nd arm and form a bend. Put some cake gel on the hand.

Step 50

Place the pencil into the hand with the cake gel and secure.


Step 51

Place the head on the skewer. Dust the dungarees with dark blue and black powder colours. Dust the body and T shirt with pink powder colour.

Step 52

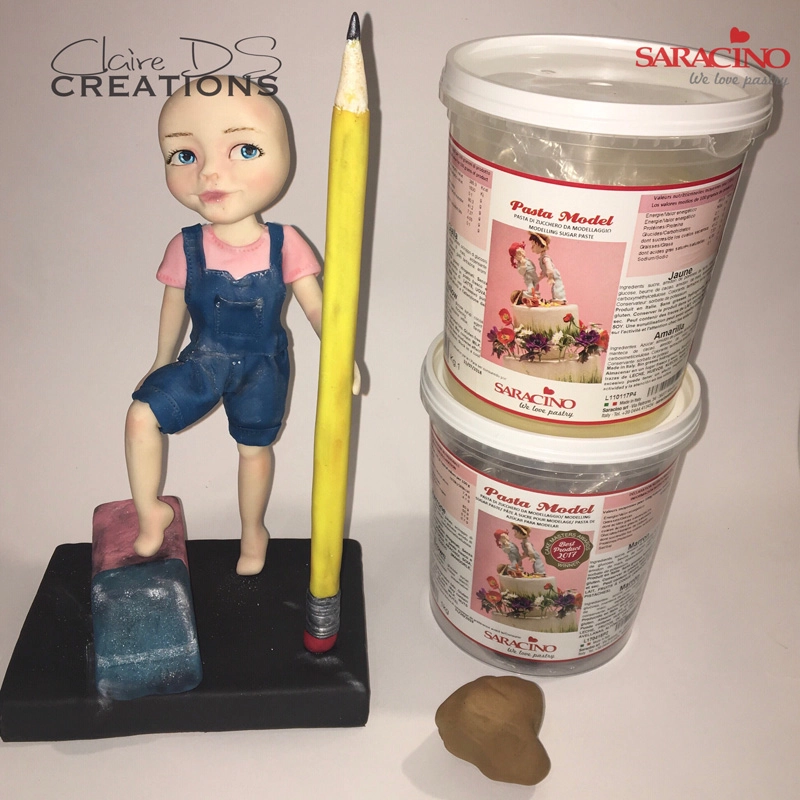
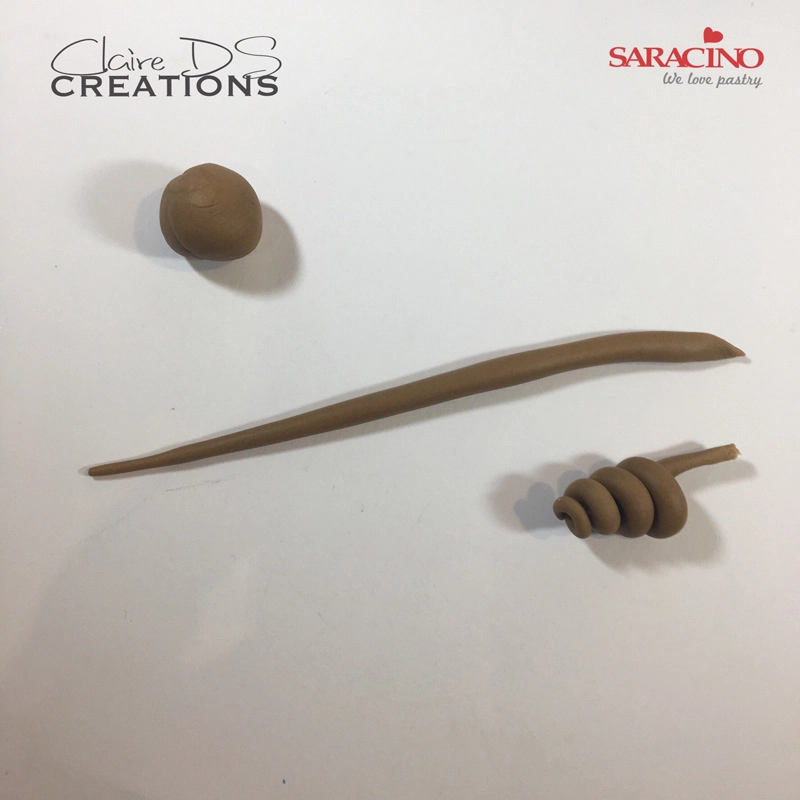
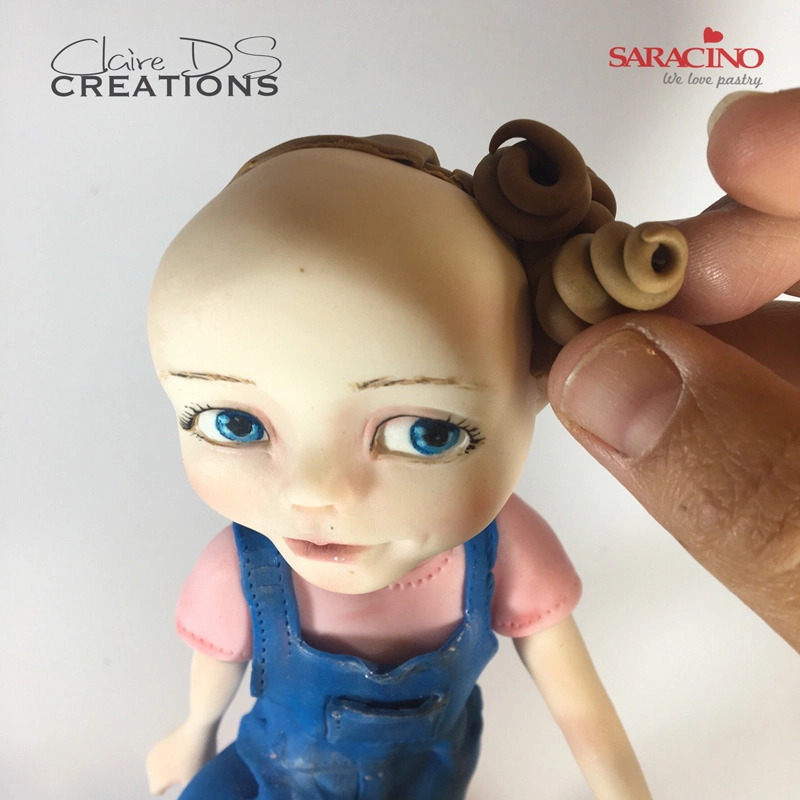
Mix 15g of yellow paste and 15g of brown paste together to make the hair


Step 53

Ā Roll out thin strands of the coloured paste and roll them up

Step 54

Fix to the head to make curls


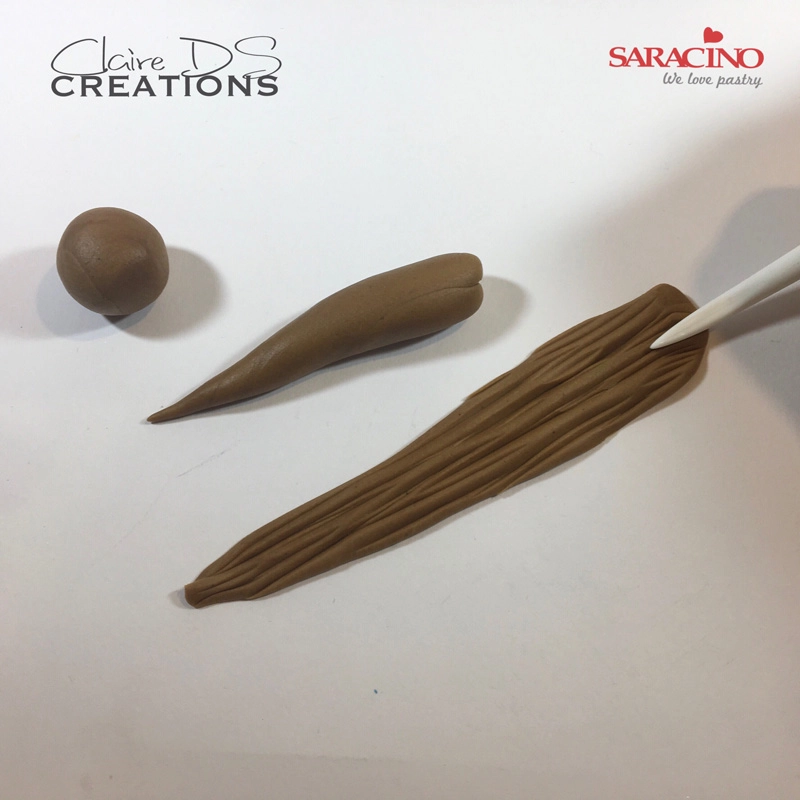
Step 55

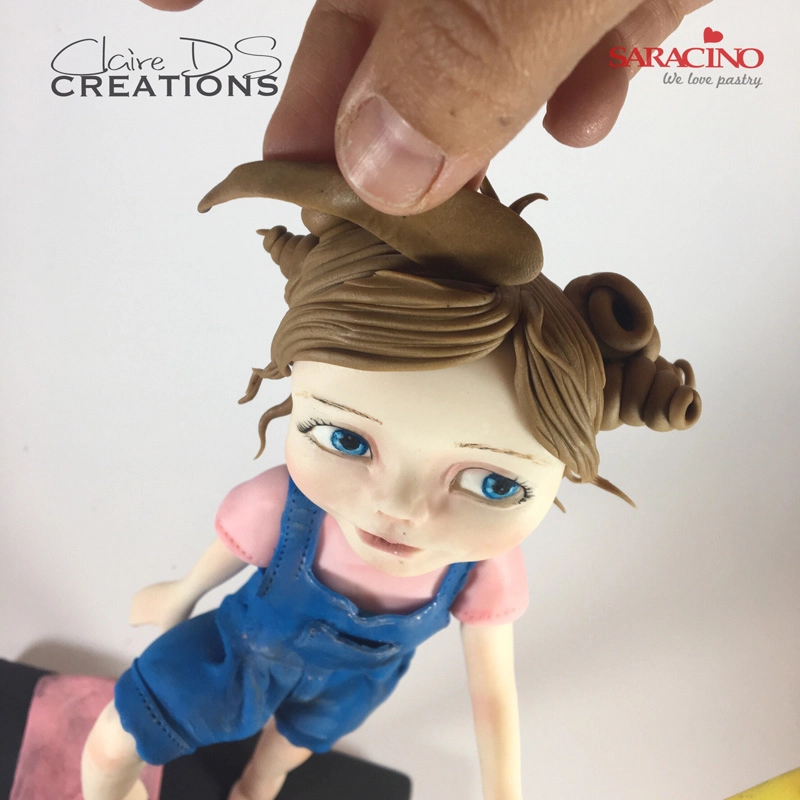
Roll out carrot shapes and flatten them. Mark lines with the Dresden tool

Step 56

Fix onto the head to make the fringe


Step 57

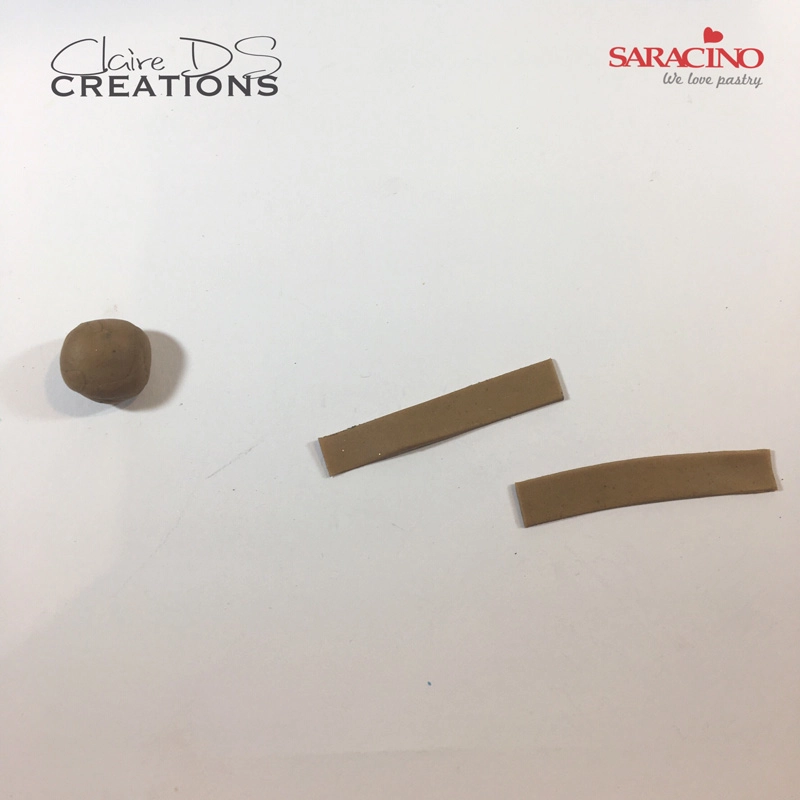
Using the left over paste from the hair roll out and cut 2 strips for the shoes

Step 58

Wrap around the feet and fix to create shoes


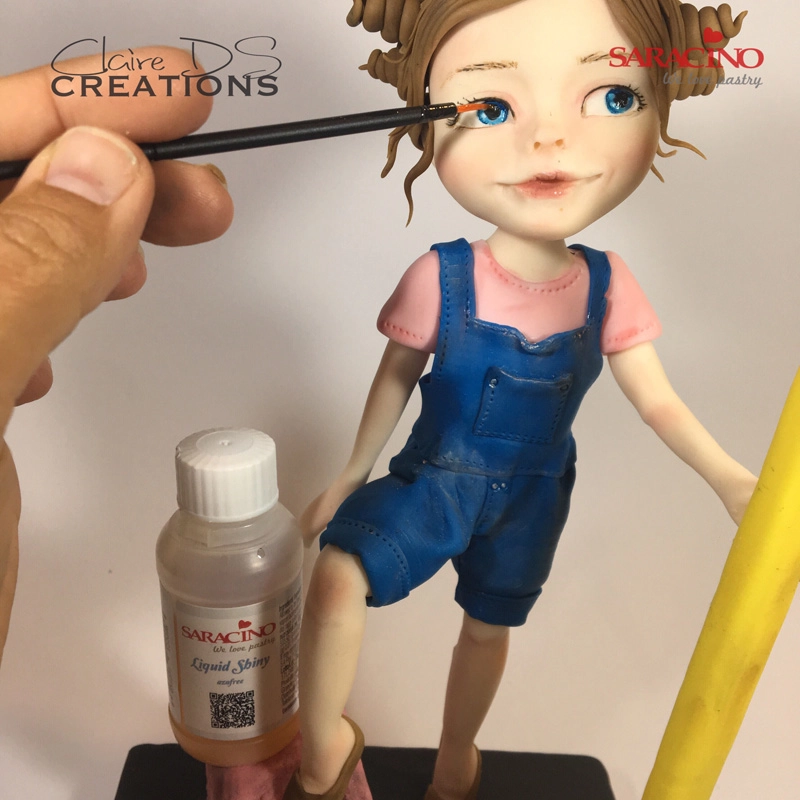
Step 59

Using shiny liquid, varnish the eyes with a small brush

Step 60

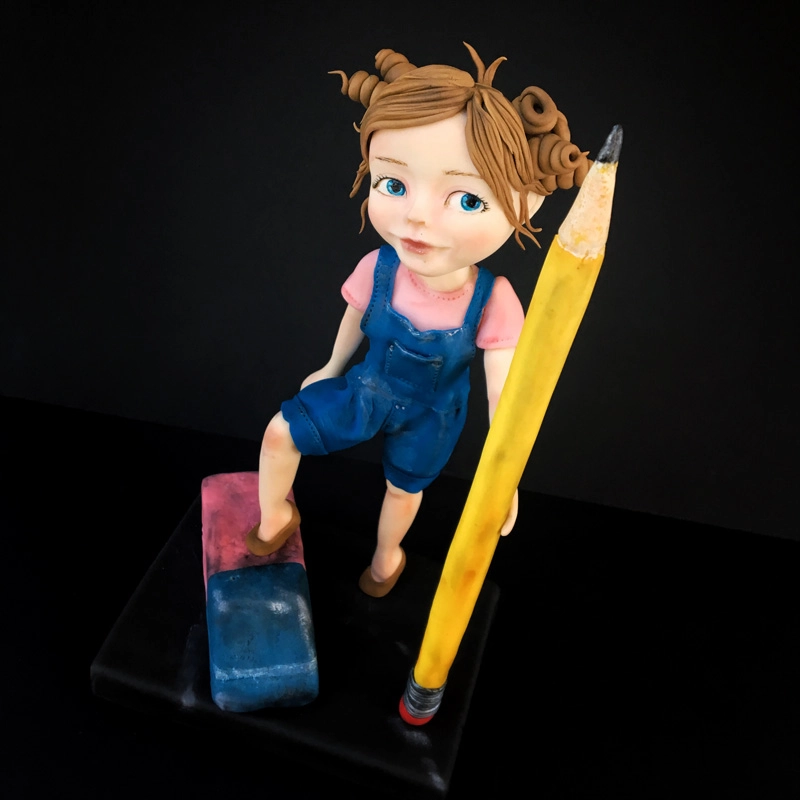
The school girl is ready for her busy day……….


BOHO RABBIT AND BEAVER

BOHO RABBIT AND BEAVER

Author: SARAH BRAY

Skill level: BEGINNERS

You will need:

  • 60g Grey modelling paste (Saracino white modelling paste with a touch of black)
  • 15g Light grey modelling pate (Grey paste above with more white modelling paste added)
  • 60g Biscuit brown modelling paste (Saracino white modelling paste coloured with saracino orange, yellow and brown gel colours)
  • 30g Light biscuit brown modelling paste (biscuit brown modelling paste with more white added)
  • 25g Dark brown modelling paste (Saracino white paste coloured with Saracino brown gel colour)
  • Small pieces of Saracino black, Saracino azure blue, Saracino tiffany (light blue) Saracino pink and Saracino white modelling paste
  • Sugar glue
  • Black sugar pearls
  • Saracino edible pink dust
  • Workboard
  • Craft knife
  • Small ball tool
  • Very small ball tool
  • Paintbrush
  • Soft brush
  • Veining tool
  • Blossom plunger cutter (small)
  • Diamond plunger cutter
  • Blade tool
  • Rolling pin

Step 1

Roll 25g of grey paste into an egg shape in the palm of your hands.

Step 2

Push paste into work board to flatten base and use the tip of a craft knife to add texture to the front of the rabbits tummy.

Step 3

For the head take a 20g piece of grey paste and roll into a ball in the palm of your hands. Use the side of your hand to roll the ball backwards and forwards to make a kind of pear shape. Smooth off any edges with your fingers.

Step 4

Use your thumb and index finger to shape the top of the body so that the head will sit nicely on the front.

Step 5

Use some sugar glue to attach the head to the body at a slight angle.

Step 6

Take two small petit pois sized balls of the light grey paste and flatten onto the face.

Step 7

Use a very small ball tool to lightly indent little dots.

Step 8

Shape a small piece of pink paste into a triangle with your fingers and push between the top of the two circles.

Step 9

Make two holes for eyes using the end of the paintbrush

Step 10

Make two further holes on the top of the head for the ears to sit in.

Step 11

For the back legs roll a small cherry tomato sized ball of grey paste into a sausage with your fingers but do not roll it to the end. This larger part will become his back foot.

Step 12

Press the foot onto the board to flatten and rotate with fingers to create a foot shape.

Step 13

Pinch the top of the leg with the thumb and fingers to shape so it will sit neatly against the rabbits body.

Step 14

Push against the side of the rabbit and use fingers to shape the foot if necessary. Do not stick on at this stage so that you can move the legs slightly if needed when the front legs are added. Repeat to make the second back leg.

Step 15

To make the front legs roll a large marble sized ball of grey paste with your fingers in the palm of your hand, leaving the end bigger for the foot (in the same way as for the back legs) Don’t worry if it looks too long you can always remove the excess.

Step 16

Press the wider part into the board with your finger to create a foot.

Step 17

Shape the top of the leg and press onto the rabbit securing with sugar glue if necessary. Repeat to make a second leg.

Step 18

Use the narrow end of a veining tool to make two indents onto each paw.

Step 19

Take small balls of light grey paste and flatten in the palm of your hand for the pads on the rabbits feet.

Step 20

Put a small spot of sugar glue into each hole for the eyes and add black sugar pearl. Widen the hole if necessary with the end of a paintbrush.

Step 21

For the ears roll a marble sized piece of paste into a teardrop shape (approx. 1ā€ in length) and flatten. Secure into hole on head with sugar glue. Support whilst drying if necessary. Repeat for the second ear bending the tip over slightly after sticking in.

Step 22

To make the feathers roll a small teardrop piece of purple paste and flatten. Add little v’s of blue paste and cut slits along both sides with a craft knife.

Step 23

Repeat in pale blue and dark blue to make a second feather and stick both to the rabbits head. Roll a thin white band of paste and stick onto the rabbits head using sugar glue if necessary.

Step 24

Add a couple of little blossom flowers and small rolled roses.

Step 25

For the teeth shape a small piece of white paste into a triangle and push between the bottom of the circles on the face.

Step 26

Roll 25g of biscuit coloured paste into an egg shape in the palm of your hands.

Step 27

Push onto the work board to flatten the base and use your fingers to accentuate the tummy.

Step 28

For the beavers head take a 20g piece of biscuit paste. Roll into a ball in the palm of your hands. Use the side of your hand to roll the ball backwards and forwards to make a kind of pear shape. Smooth off any edges with your fingers and square off the base of the head.

Step 29

Use your thumb and index finger to shape the top of the body so that the head will sit nicely on the front.
Step 30

Use some sugar glue to attach the head to the body at a slight angle.
Step 31

Take two small petit pois sized balls of the light biscuit paste, flatten onto hand and press onto face (as with the rabbit).

Step 32

Shape a small piece of black paste into a triangle and push in between the top of the two circles.

Step 33

Make two holes for eyes using the end of the paintbrush.

Step 34

To make the ears roll a pea sized piece of biscuit paste into a ball and use a ball tool to indent the centre. Cut in half and attach to either side of the beavers head.

Step 35

For the beaver’s teeth take a small piece of white paste and use fingers or a craft knife to make into a small house shape.

Step 36

Push in between the bottom of the two circles (using sugar glue if necessary) and gently mark teeth with a craft knife.

Step 37

To make the feet take a small marble sized piece of dark brown paste and shape into a teardrop. Flatten slightly and use the thin end of a veining tool in a rocking motion to mark two lines. Repeat for the other foot. Set aside to firm up a bit.

Tip: Setting paste aside, particularly the darker colours, can make it much easier to handle.

Step 38

Roll a large marble sized piece of biscuit paste into a teardrop shape and place on your index finger. Use your other hand to pull the paste down gently onto your finger to flatten the base. Repeat for the other leg.

Step 39

Place the foot just next to the beavers body (but not actually stuck to it) With the wider part at the front, push the leg onto the body and foot securing with sugar glue if necessary. Repeat for the other leg.

Step 40

For the front legs roll a small marble sized ball of biscuit paste with your finger in the palm of your hand leaving the end bigger for the foot.

Step 41

Press the wider part onto the board with your finger to make a foot and mark on two lines with the narrow end of a veining tool. Repeat for the other leg.

Step 42

Pinch the top of the leg with your thumb and fingers to shape it so it will sit neatly against the beavers body. Secure both legs to the body with sugar glue if needed.

Step 43

To make the tail shape a large marble sized piece of dark brown paste into a teardrop shape and flatten slightly with the palm of your hand. Use a Dresden tool to mark a diagonal criss cross pattern.

Step 44

Attach to the back of the beaver securing with sugar glue if necessary.

Step 45

Add a spot of sugar glue to each of the eye holes and put a black sugar pearl in each.

Step 46

To make the feathers roll a small teardrop piece of light blue paste and flatten. Add little v’s of purple paste and cut slits down either side as before. Repeat to make a second feather using dark blue and purple paste.

Step 47

Secure both feathers to the head with sugar glue.

Step 48

To make the band cut out a narrow strip of white paste. Use a diamond plunger cutter to cut out small diamonds then cut them in half and attach the triangles to the band.

Step 49

Use sugar glue to attach the band to the beavers head and trim off the excess with a craft knife.

Step 50

For the finishing touch dust the cheeks of both the beaver and the rabbit using a soft brush and edible pink dust.

HAPPY FROG TUTORIAL

HAPPY FROG TUTORIAL

Skill level: BEGINNERS

You will need:

  • Saracino model paste white and a little black
  • Saracino gel colors blue, green, pink, purple, white
  • Dust pink and green
  • Edible glue
  • Black pearls
  • Rolling pin
  • Glue brushĀ 
  • Dusting brush
  • Modelling tools
  • Knife
  • Cake board

Step 1

Prepare the Saracino Modelling Paste required for the frog. Mix the modelling paste with the green gel colour. Using your fingers form a pear shape. Make the top of the pear flat to put the head on later.

Step 2

Make two long sausages of the green paste and leave the middle a bit thicker.

Step 3

Bend the sausages in the middle.

Step 4

Use your fingers to make a knee. Push your fingers towards each other with paste inbetween. Make a pointy knee.

Step 5

Push the paste flat at the other end.

Step 6

Prepare the Saracino Modelling Paste required for the belly. Mix white model paste together with the pink gel colour. Roll thinly.

Step 7

First cut a circle with a round cutter that fits the front of the frog’s belly. Then cut a pear shape out of the circle.

Step 8

Glue the legs under the body of the frog.

Step 9

We are going to make the front legs. Make a long sausage of the green paste and leave the middle a bit thicker, and cut the sausage in the middle. The length of the leg has to be the same length of the frog’s body.

Step 10

Make the toes with your sharp blade then form using your modelling tool.

Step 11

Cut off the front of the toes and make them slightly flat.

Step 12

Make little peas out of the green model paste.

Step 13

Attach the pink belly onto the body of the frog

Step 14

Glue the legs of the frog against the body and using your modelling tool form lines for the elbow joint.

Step 15

Glue the green peas on the front of the toes.

Step 16

We are going to make the back feet. Make three small balls (slightly larger than the peas)
Step 17

Roll out to make a long toe shape with the end a round ball. Glue three of the toes together to form the foot.

Step 18

Flatten the end as shown on the picture.

Step 19

Glue the feet under the back legs.

For the head roll a green ball. For the mouth area roll a little sausage that fits the face. Leave thicker in the middle so we can form the mouth.

Step 20

Attach the rolled paste to the bottom half of the face. Use the modelling tool to blend the joints to the face. Make a rotatory movement with the colour shaper to do so.

Step 21

Use the modelling tool to make a little hole for the mouth ends.

Step 22

Use your Dresden tool to create the lips and mouth

Step 23

Use a ball tool to form the eye sockets, make the eye socket larger by moving the ball tool up and down. This will also create an upper eyelid when doing this.

Step 24

Roll two little sausage shapes to place above the eyelid. The sausages are to be smaller at both ends.

Step 25

Fix them above each eye socket.Ā 

Step 26

Roll two small balls of white paste and press into the eye socket to form the eyes. Roll out two small black sausage shapes to form the eye lids.

Step 27

For the pupil colour the Saracino Modelling Paste with blue gel colour. For the iris use a little black modelling paste. Flatten them with your finger.

Step 28

Put a little dot of white gel colour onto the black. Make sure you put the dots at the same spot in the eyes.

Step 29

Colour your white modelling paste with green and blue gel colours ready for the dots on the frog. Make sure your green is darker than the frogs body.

Step 30

Using small balls of the coloured paste, flatten them and glue them to the frogs body randomly. Blend them into the body using your fingers.

Step 31

Use pink dust to give more expression to the frog. Highlight the end of the mouth and between the toes.

Step 32

Use green dust for the legs and the upper eyelid and above his mouth. Give more expression to the face.


Step 33

Prepare the Saracino Modelling Paste with pink, purple and blue gel color required for the snail and worm.

Step 34

For the worm make 5 little blue balls in 5 different sizes. The biggest ball will be used for the head.

Step 35

Use the back of a brush to create more depth in the face. Smoothen the lines with your finger.

Step 36

Form two holes for the eyes and insert two black pearls. Make the nose with a small ball of pink paste. Fix the worm onto the frogs head as shown.

Step 37

Now for the snail. Using pink paste form a ball and a sausage shape. Use a modelling tool to make lines in the pink sausage. This will be the snails body. Form a curve to the body. Make another sausage shape (this will need to be thinner to the end). We will coil this up for the snails shell.

Step 38

The three pieces of your snail are to look like the picture.

Step 39

Fix the head and the shell to the body. Form two eye sockets and a mouth in the face. Insert two black pearls for the eyes.

Step 40

Form a small ball for the nose and attach to the face. Make two small purple teardrop shapes for the antenna and fix them on top of the snail’s head.

Step 41

Dust the cheeks of the worm and snail with pink powderĀ colour. And you are finished!