VALENTINE’S CAKE POPS TUTORIAL

VALENTINE’S CAKE POPS TUTORIAL

Skill level: INTERMEDIATE

Chocolate tempering:

White Chocolate:

Heating to 40-45 degrees, cooling to 24-25 degrees, final temperature 27-28 degrees.

Milk chocolate:

Heating to: 40-45 degrees, cooling to 27-28 degrees, final temperature 30-31 degrees.

Dark chocolate:

Heating to: 45-50 degrees, cooling to 28-29 degrees, final temperature 31-32 degrees.

You will need:

INGREDIENTS:

  • Saracino Chocolate drops white 250g
  • Saracino Food Flavouring Pistachio
  • Saracino Pasta Model Pink
  • Saracino Pasta Model White
  • Saracino Dust powder Pink
  • Saracino Gel color Pink
  • Saracino Gel color Black
  • Saracino Cakegel
  • Plain cupcake mix, butter and eggs
  • Sprinkles

EQUIPMENT:

  • Silicone popsicle mini ice cream mould (Silikomart)
  • Popsicle sticks
  • Food thermometer
  • Pan with a thick base
  • Heatproof glass bowl
  • Marble or natural stone slab for chocolate temperingĀ 
  • Spoon
  • Pallet knife
  • Brush
  • Pastry bag
  • Rolling pin
  • Dresden tool
  • Knife
  • Ball tool
  • Round cutter diameter 45mm
  • Leaf cutter 20 x 25mm
    • Ā 

Step 1

Using the Bain Marie technique melt the Saracino chocolate drops. Make sure everything is melted and has a temperature between 40 and 45 degrees. Check the temperature of the chocolate with a food thermometer. Pay attention! The temperature rises quickly. The bottom of the bowl should not touch the hot water. Make sure that no water gets into the chocolate.

Step 2

Now temper the melted chocolate. In this case, you are going to reduce the temperature of the melted white chocolate to 24 to 25 degrees. Do this by working with a pallet knife on a marble or natural stone surface. Use a food thermometer to check the temperature. When you have reached the temperature of 24 to 25 degrees, you heat the chocolate again to 27 to 28 degrees back in the bowl over the water. Pay attention! Tablating or tempering is a cooking technique in which melted chocolate is cooled back, so that crystals are formed in a certain way, which gives the chocolate a structure. This structure is obtained by heating the chocolate above 30°C, causing three of the four crystals to melt. Work meticulously with the temperatures for the best end result. This tutorial includes an overview of the temperatures for tempering white, milk and dark chocolate.

Step 3

Take your silicone ice pop mould and pour a heaped tablespoon of melted chocolate into it. Turn the mould around in a controlled manner so that the chocolate runs along the edges of the mould.

Step 4

Make sure all sides of the mould are covered with chocolate to the edges.

Step 5

Repeat steps 3 and 4 for each section of the mould. For a nicer end result it is better to fill each part separately with chocolate. If you want the chocolate base to be a bit thicker, repeat steps 3 and 4 again for all 4 ice pop shapes.

Step 6

Remove excess chocolate with a pallet knife. Make sure the top edge is nice and smooth.

Step 7

Let the chocolate set in the mould at room temperature.

Step 8

Bake pistachio cupcakes. Make cupcake batter according to the recipe. Add the Saracino pistachio flavouring in proportion to the batter. Bake the cupcakes. Let them cool and crumble 3 cupcakes into a bowl. For 4 cake pop ice creams, take 3 cupcakes made of 35g batter each.

Finely chop pistachio nuts as desired and mix with the crumbs.

Tip:Ā You can play with the flavours. Saracino have 15 to choose from!

Step 9

To achieve a nice workable filling, add 1 tablespoon of Italian Meringue Buttercream or white ganache to the pistachio crumbs. Knead everything well together and divide into 4 equal portions.

Step 10

Using a spoon, gently press the cake mixture into the mould.

Step 11

Carefully slide the sticks into the cake pop through the hole in the mould.

Step 12

Make sure the cake is not above the top surface of the mould and that the top of the cake pop is as smooth as possible.

Step 13

Temper a small amount of white chocolate and cover the top. Smooth with a palette knife and remove any excess chocolate.

Step 14

Let the chocolate set at room temperature.

Step 15

When everything is set, remove the cake pop ice creams from the silicone mould.

TIP: You can put the mould in the freezer for 5 minutes before removing the cake pops.

Step 16

Take a 20 x 25 mm leaf cutter and cut out the shape for the forehead. Use a sharp knife to form the side hair. Keep these cut-out parts.Ā 

Step 17

Shorten the area for the nose by a few millimetres. Take 30g of white Pasta Model. Roll out to 2mm thick and cut out a circle with the cutter and stick the pink part on top with cake gel.

Step 18

Use the pink drop shapes previously cut out to make ears. Roll out a small amount of white Pasta Model thinly and cut out two drop shapes with the leaf cutter. Stick them on the pink part and round off the bottom. Also use the leaf cutter for this. Using your ball tool make two indents in the head where the eyes will be

Step 19

Colour a small amount of white Pasta Model with the black gel colour. Roll two oval balls of 3mm in size for the eyes and one oval ball of 5mm for the nose. Place on the face. Use cake gel to fix.

TIP:Ā You can also use the pre-coloured Pasta Model Black.

Step 20

Dust the tips of the ears and the top of the head with the pink dust powder.

Step 21

For the tail take 10g of pink Pasta Model and roll into a sausage shape. Cut into 2 equal parts. Repeat this step with 10g of white Pasta Model. Stick a pink and white part together with cake gel to form a tail. Leave the white end part a little bit thicker. Use the Dresden tool to add texture to the tail.

Step 22

Dust the middle part of the cake pop ice cream with pink dust powder. Dust so darker in the middle getting lighter outwards.

Step 23

Attach the head and tail to the cake pop ice cream with cake gel. Do not use too much cake gel! You can also attach the parts with melted chocolate.

Step 24

For the heart you will need a small ball of pink Pasta Model. Flatten with your finger and form a notch on one side with a Dresden tool. With your fingers make a point on the other side. Dust the top with pink dust powder.

Step 25

To decorate your cake pop ice cream with chocolate, melt a small amount of white chocolate. While heating, add pink dust powder until you reach the desired colour. Temper the chocolate as shown previously.

Put the chocolate into a piping bag with a small piping nozzle. Pipe lines over the bottom part of the cake pops. Decorate immediately with sprinkles.

Step 26

Vary with different looks. Use your imagination!

Use colours you want to achieve the look you love.

CHRISTMAS TREE TUTORIAL

CHRISTMAS TREE TUTORIAL

Skill level: BEGINNERS

You will need:

  • Threaded bar 8mm diameter x 12cm long. You will need two.

  • Hex nut 8mm x 8Ā 

  • Drums 6ā€ x 2

  • Drum 8ā€Ā 

  • Drill with 8mm bit

  • Wrench 8mm

  • Saracino Pasta Top

  • Saracino modelling paste red

  • Saracino modelling paste white

  • Saracino gel colour green, white and brown

  • Strip cutter

  • Round cutter 6 cm

  • Calyx cutter

  • Rolling pin

  • Palet knife

  • Ribbon green

  • Winter wreath mould Karen Davies

  • Ball tool

  • Cake/Ganache or dummy

  • Paper towel

  • Foam pad

  • Cut off hard brush

  • Cone bud

  • Bendable wire

  • Bamboo / wooden skewerĀ 

  • Sprinkles metallic (silver rods)

  • Sprinkles red and white balls

  • Edible glue

  • Brush

Step 1

On one of the small drums mark the position where you want fix the two legs. Put the three drums on top of each other and drill two 8mm holes through the three drums at the same time (so the holes will be at the same position on all three boards). Lay one small drum aside. Put the two threaded rods through the 6ā€ and 8ā€ drums and put hex nuts at the bottom of each rod beneath the 8ā€ drum. Fix two other hex nuts on top of the 6ā€ drum to create a firm base. Use the spanner to tighten the hex nuts to form a firm base structure.

Step 2

Cover the top of the 6ā€ drum with fondant Pasta Top. Use a cut off stiff brush to give the fondant texture.

Step 3

Cover the two threaded bar legs with modelling paste. Do not cover the top of the threaded bar (as we need to fix the third drum). Thread a hex nut on the top of each bar.

Step 4

Roll red modelling paste and use the strip cutter to create strips

Step 5

Cut the strips into long pieces

Step 6

Glue the strips to the legs to form the stripes on the leggings.

Step 7

For the shoes colour some white modelling paste with the green gel colour, as dark as you want to

Step 8

Create two big tear drop shapes for the shoes.

Step 9

Use a ball tool to form a hole for the legs

Step 10

Cut the end of the shoe (to put around the legs)

Step 11

Glue both shoes around the two legs, and bend the pointy end so you create an elf shoe, glue the cut ends at the back together.

Step 12

Put the second 6ā€drum on top of the two legs and thread the hex nuts on top. Use the spanner to tighten them.

Step 13

Put your cake on top of the drum in a cone shape (13 cm base) and cover it with ganache. I used a dummie instead. If you’re using cake make sure you cover the drum and hex nuts with fondant before placing your cake on the drum.

Step 14

Colour some white Pasta Top fondant with the green gel colour. Use the KD mould to create pine needles. Before putting the paste into the mould apply some Trex to the piece of fondant. Flatten it into the mould with a rolling pin. Trim off the access fondant.

Step 15

Take the fondant out of the mould and glue it on your cake with Trex or a little water. you may want to start at the rear of the cake to practice the look you would like to achieve.

Step 16

Repeat until your cake/dummy is fully covered. Fix a green ribbon around the drum.

Step 17

Roll out red modelling paste to create a bow. Cut out two rectangles of 14cm x 7cm and one rectangle of 10cm x 4cm.

Step 18

Apply a little glue to the ends of the two rectangles and fold the other end over. Place some rolled up paper towel in the bow so that the bow dries forming a round shape. Pinch the ends of the glued side together.

Step 19

Fold the long sides of the small rectangle to the inside and glue the end to the two bows.

Step 20

Glue the rectangle all around and leave it to dry.

Step 21

Roll out some white Pasta Top fondant and cut out circles

Step 22

Use a ball tool to flatten the edges of the fondant on the foam pad. Make sure your tool is half on the foam pad and half on the fondant. That will create a ruffle effect.

Step 23

Fold the circle in half.

Step 24

Fold into three.

Step 25

Remove the access fondant from the base of each ruffle.

Step 26

Fix the bow to the front of the cake. Fix the ruffles around the base of your cake

Step 27

Use a small ball tool to push the ruffles on to the cake. Create three layers of ruffles around the bottom of the cake.

Step 28

Make balls of red modelling paste to glue in your ruffles. As many as you want to.

Step 29

Roll out red modelling paste to a long sausage shape and cover the bottom drum. Use the cut off stiff brush to create texture on the paste. Cut aeay the access fondant. Fix the green ribbon on the side of the drums

Step 30

You will now need the long bamboo skewer and the bendable wire.

Step 31

Twist the wire around the top of the skewer. Form the wire to a circular shape using the 1kg Saracino tub as a modelling tool. Insert the skewer in the cake, leaving the wire out of the top of the cake.


Step 32

Insert a skewer into the bottom of the flower bud.

Step 33

Cut out three circles of Pasta Top fondant and use the ball tool to ruffle the edges.


Step 34

Fix the three ruffled circles one by one around the flower bud. Roll out red modelling paste and cut out a large calyx.

Step 35

Use a ball tool to ruffle the edges of the calyx and glue the calyx on to the flowerbud


Step 36

Using green fondant in the small needle mould cover the top of the skewer and the wire at the top of the tree.

Step 37

We need about 4 moulded small needles. Put some edible glue at the back of the fondant and glue the fondant onto the wired part of the skewer.


Step 38

Glue the flowerbud on the end of the wire. This can be any decoration of your choice. Cover the end of the bud with a small amount of green paste.

Step 39

Use some sprinkles to decorate the Christmas tree cake


Step 40

Use the metallic sprinkles to create a garland look on the cake.

Step 41

Make some red bows using modelling paste or use a bow mould. Use the bows to decorate the cake. Glue some red and white sprinkles on the cake.


Step 42

Colour some modelling paste with the brown gel colour for the pine cones. Use the mould to create the pinecones. Make different sizes of pine cones.

Step 43

Glue the pine cones on to the cake above the red bow and paint the tips with white to give a frosty look


Step 44

Fix pine cones at the base of the bow (or you can glue ruffles). You decorate it the way you would like it to look.

Step 45

Fix pine cones and needles on the drum if you wish.


Step 46

Your Christmas cake is ready to party!

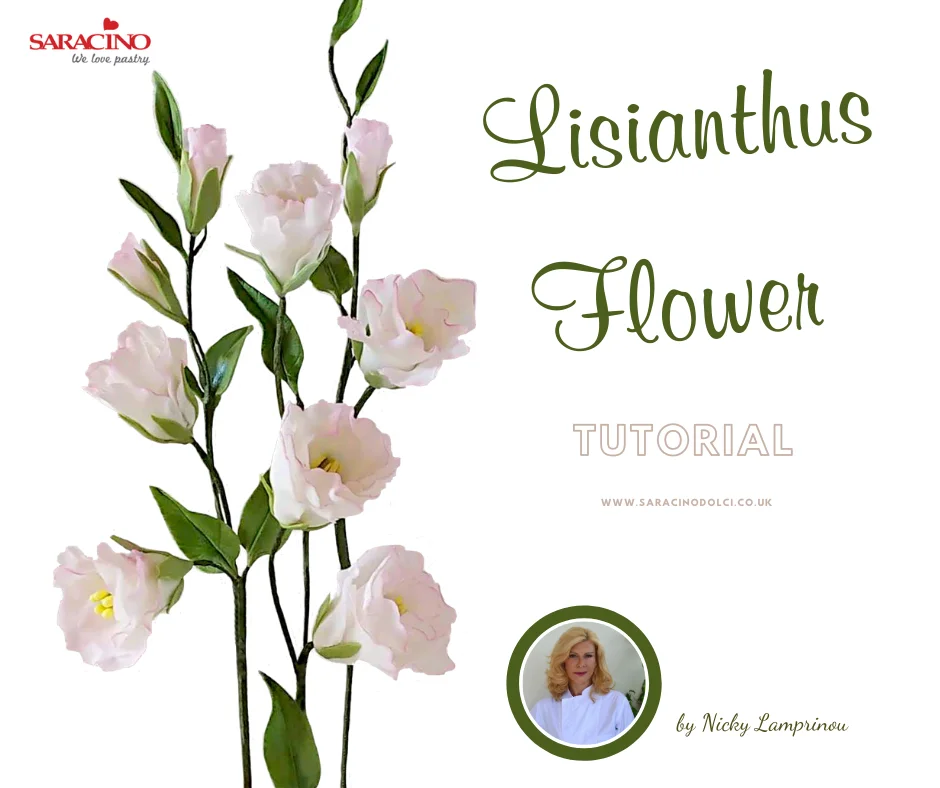
LISIANTHUS FLOWER TUTORIAL

LISIANTHUS FLOWER TUTORIAL

Author:Ā Nicky Lamprinou

Skill level: BEGINNERS

You will need:

  • Flower paste Saracino – Pasta Bouquet
  • Non stick board
  • Small rolling pin
  • Ball tool
  • Foam pad
  • Groove board
  • Corn flour for dusting
  • Green and yellow Saracino gel colours
  • Green and Pink Saracino powder colours
  • Peony petal cutter
  • Leaf cutter and veiner
  • Flower wire gauge 20, 22 andĀ  26
  • Flower tape green
  • Saracino edible glue
  • Wire cutter
  • Paint brushes
  • Kitchen paper

Step 1

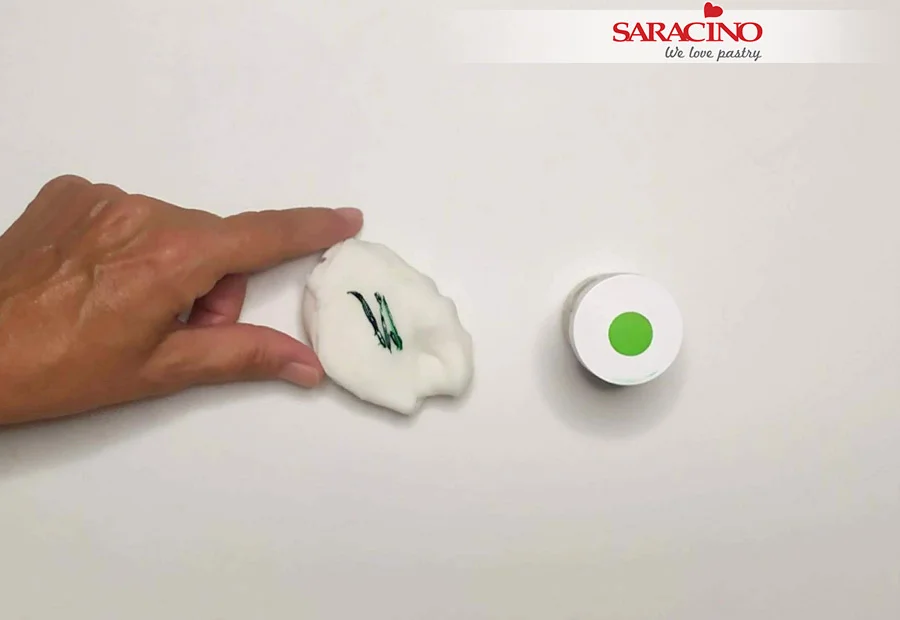
To make the centre of the flower, knead some flower paste with a small amount of Saracino green gel colour

Step 2

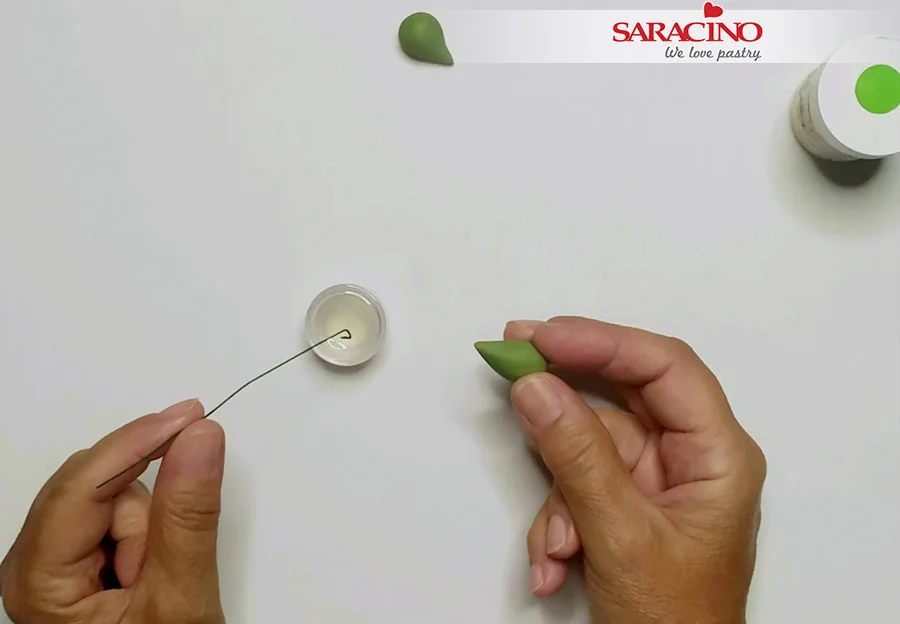
Make a small ball of paste and form it into a cone shape to create the bud. Take a 22 gauge wire and make a hook at the end of the wire

Step 3

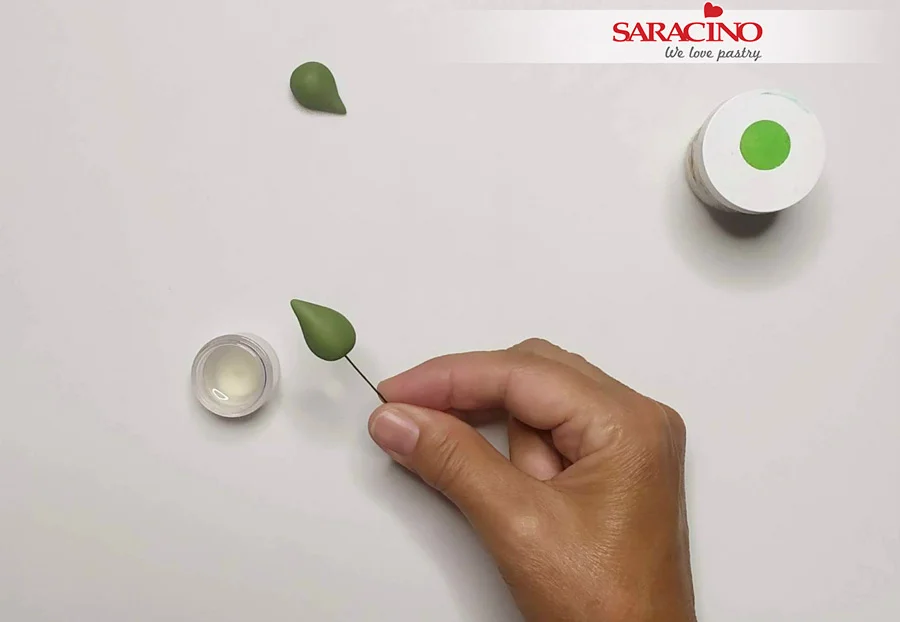
Put some glue on the hook and insert into the cone. Pinch the bottom of the cone to secure it to the wire. Let it dry overnight.

Step 4

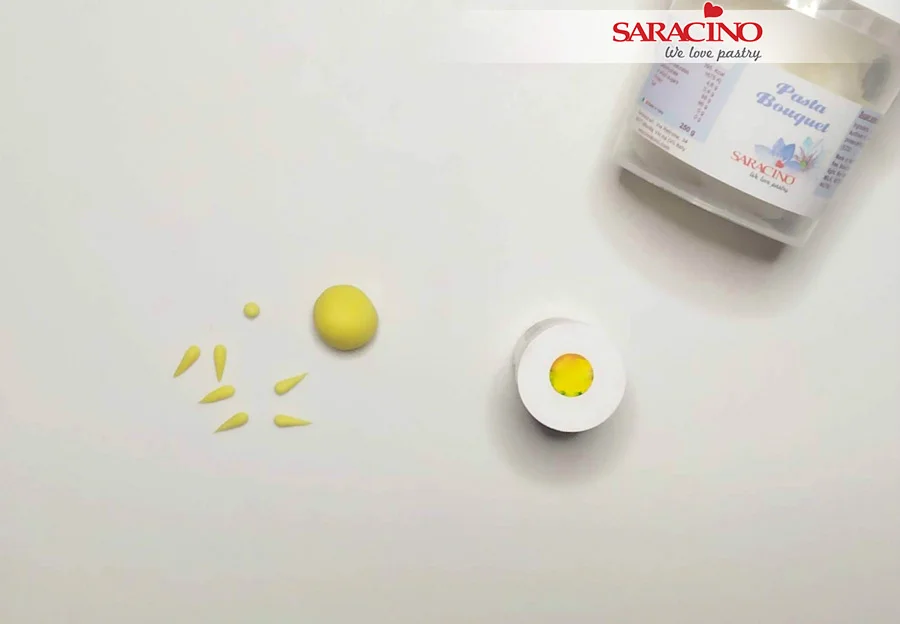
Take some yellow flower paste and make 5 tiny stamens for each flower.

Step 5

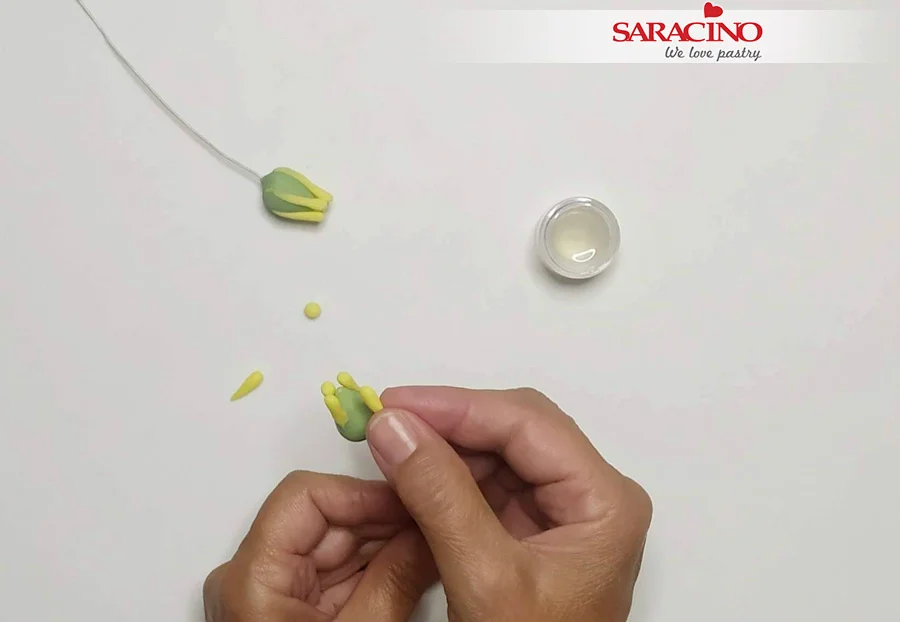
Fix the stamens around the green bud using edible glue. Let them dry.

Step 6

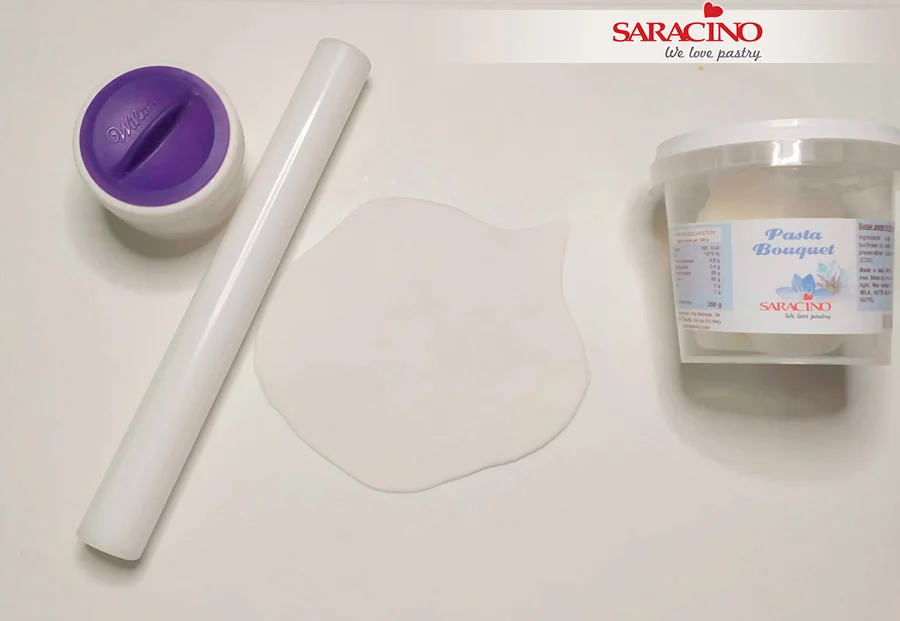
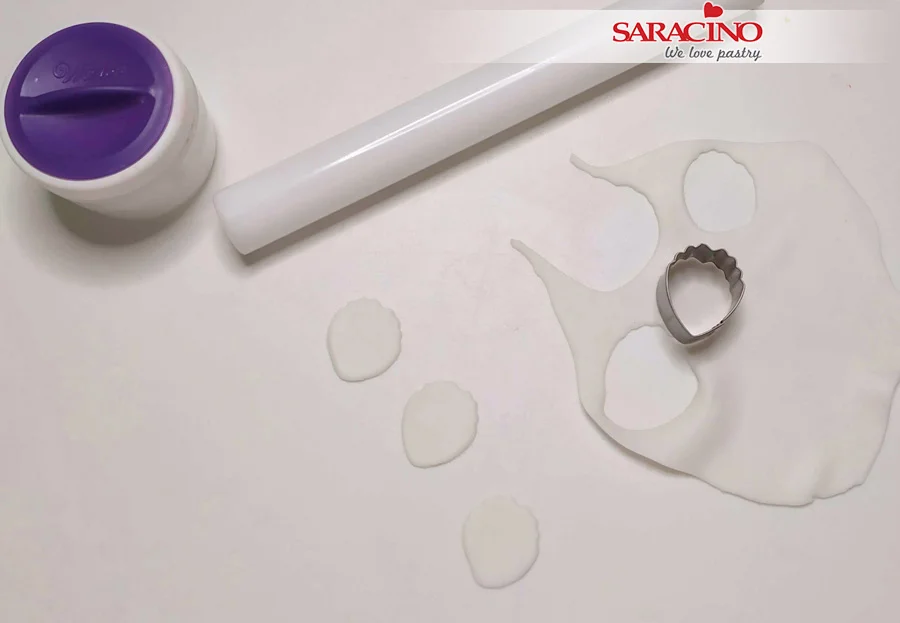
To make the petals. Dust your board with some cornflour and roll out the paste with a small rolling pin.

Step 7

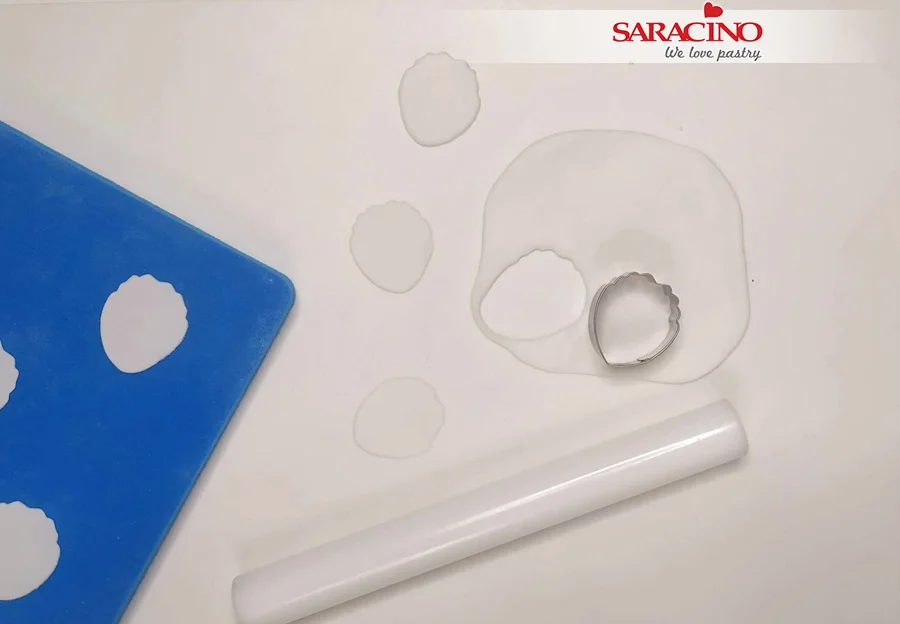
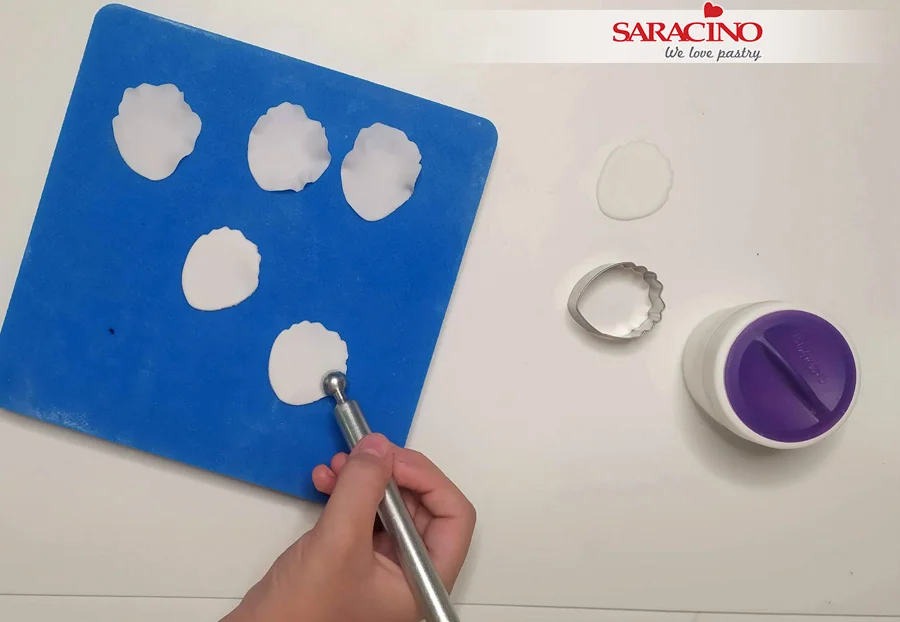
Cut out 5-6 petals for each flower with a medium sizeĀ  peony cutter.

Step 8

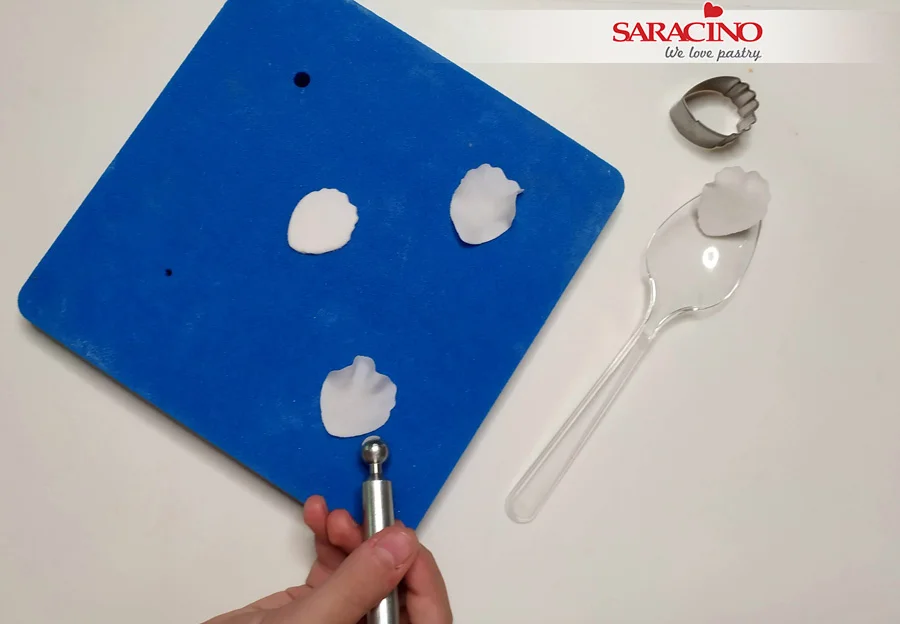
Move the petals onto a foam pad and thin the edges of the petals with a balling tool.

Step 9

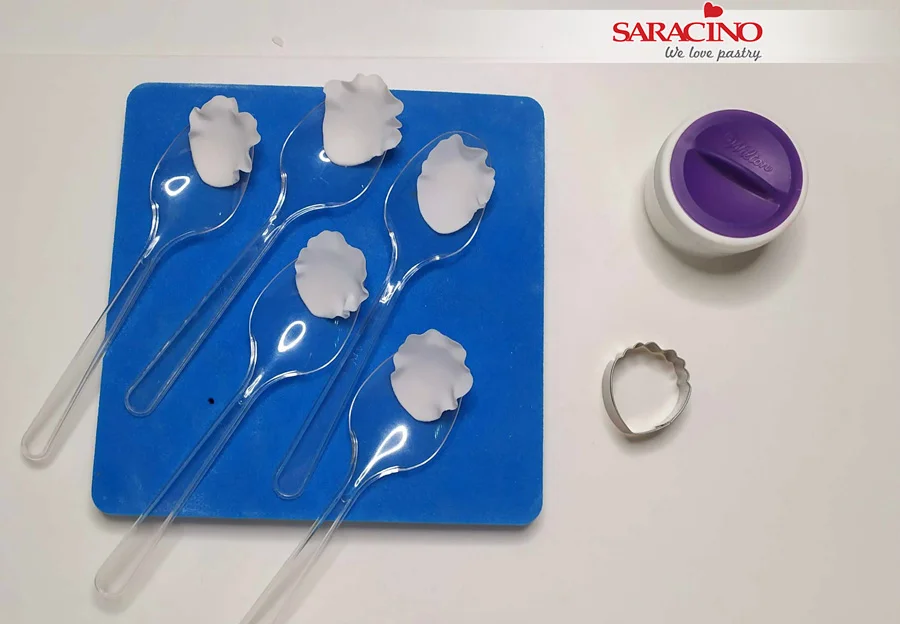
Place the petals into spoons to let them dry and form for 10-15 minutes

Step 10

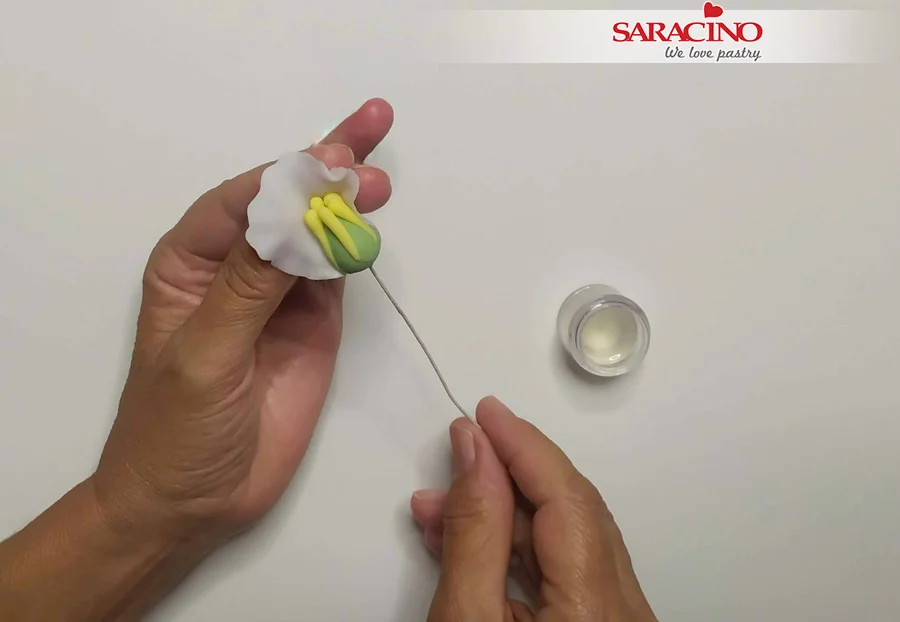
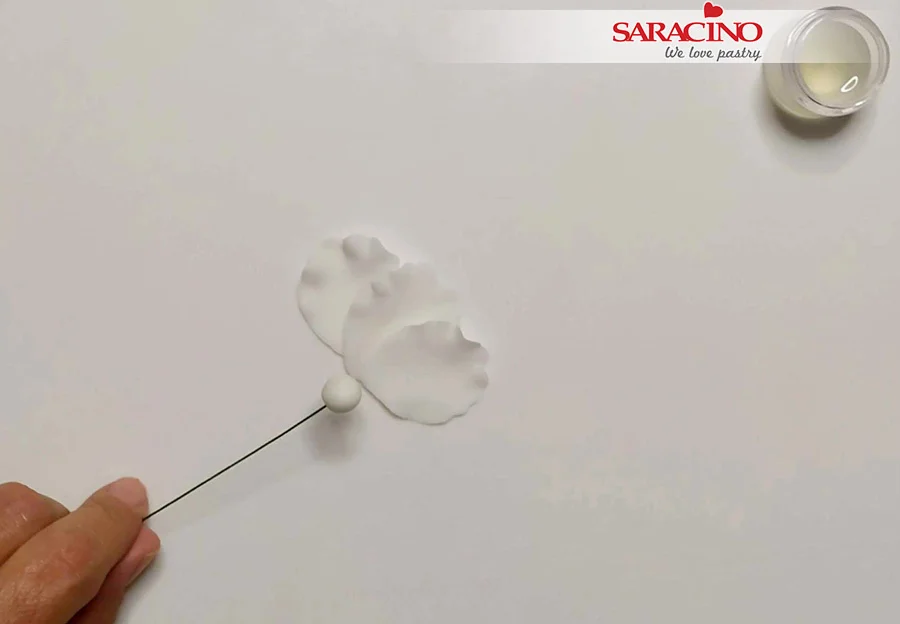
Put some glue at the bottom of the petal and add the first petal on the bud

Step 11

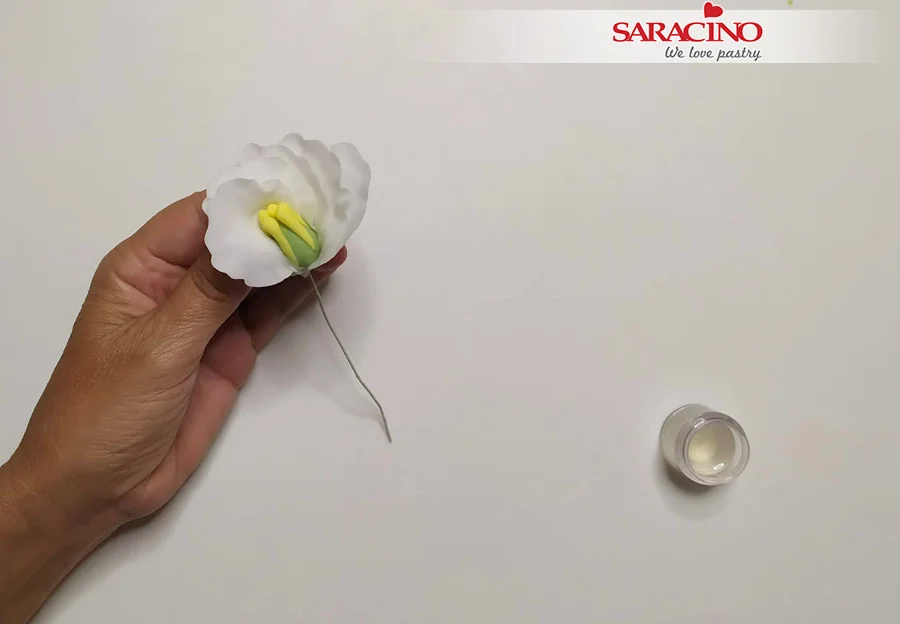
Attach the second petal just behind the first. Continue the same way with the rest of the petals.

Step 12

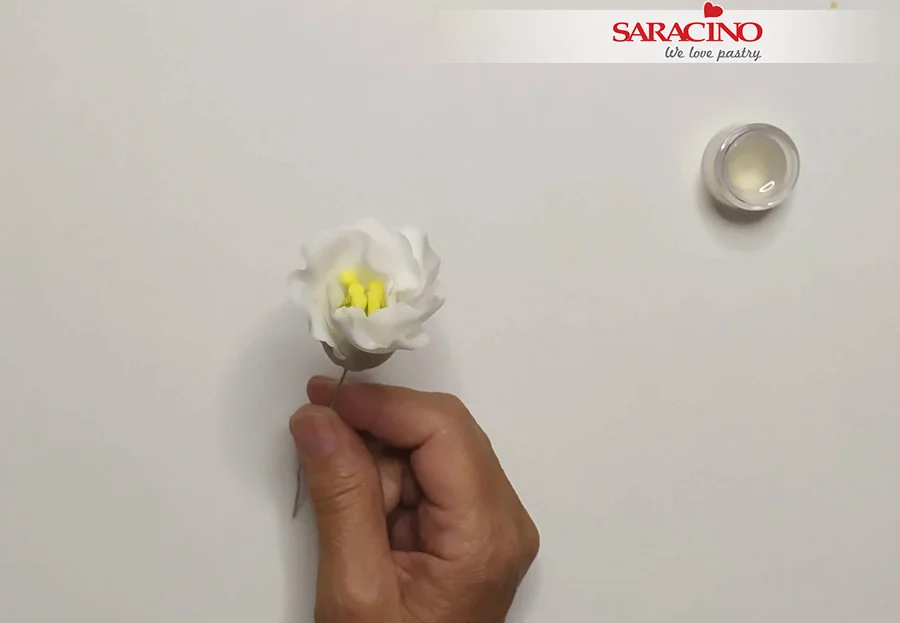
To close the flower insert the last petal into the first.

Step 13

To make the small flower. Use your small peony cutter to cut out 3 petals for each flower.

Step 14

Move the petals onto the foam pad. Thin the edges and let them dry on the spoons for a while.

Step 15

To make the center. Make a small ball with white flower paste. Insert a 22 gauge wire and let it dry

Step 16

Add the 3 petals around the bud as before and close.

Step 17

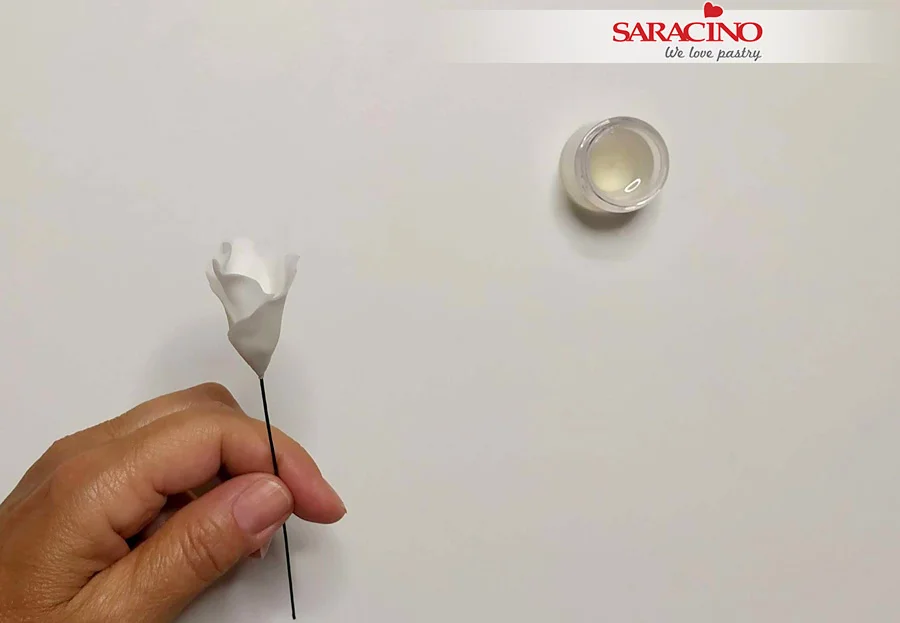
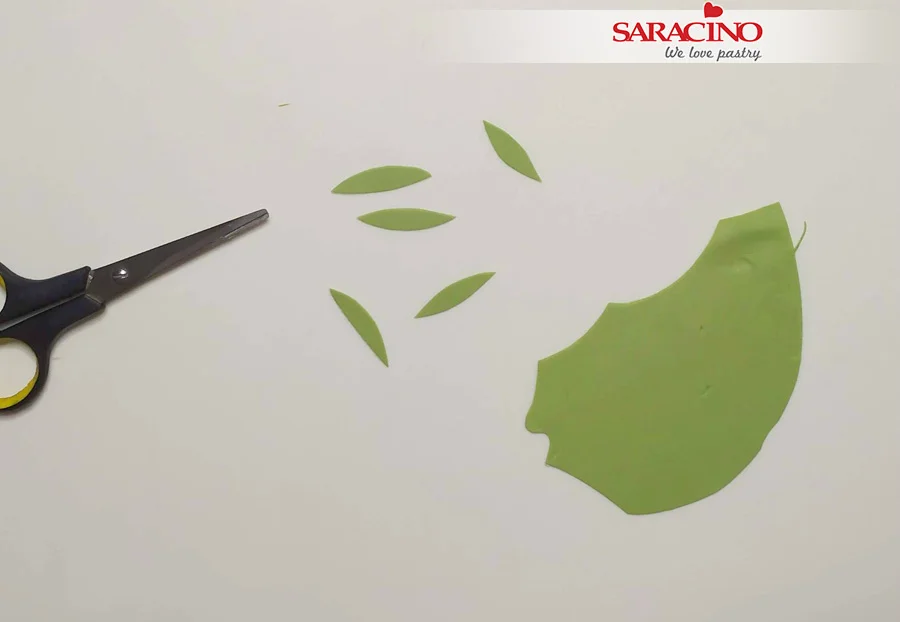
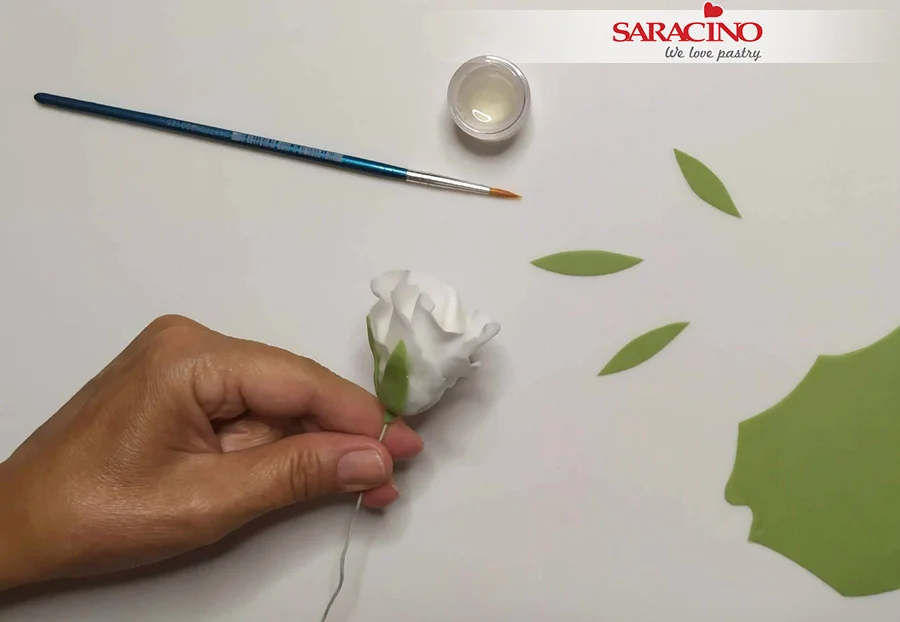
To make the calyx. Roll out green flower paste and cut out small leaves with scissors

Step 18

Put some glue and add 4-5 leaves onto the base of the flower.

Step 19

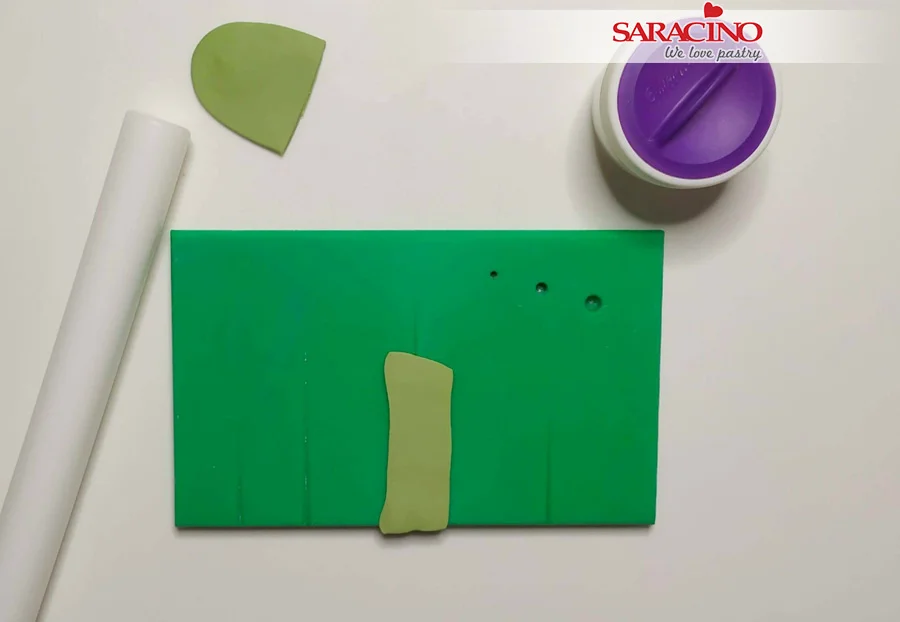
To make the leaves. Roll out a small amount of green flower paste over the groove board.

Ā 

Step 20

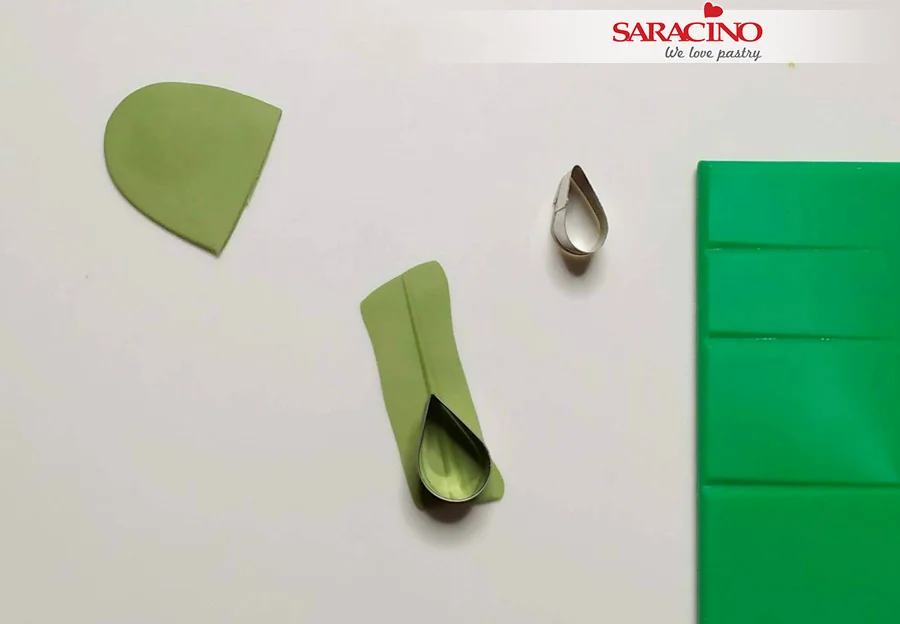
Cut out leaves using a leaf cutter in two different sizes.

Step 21

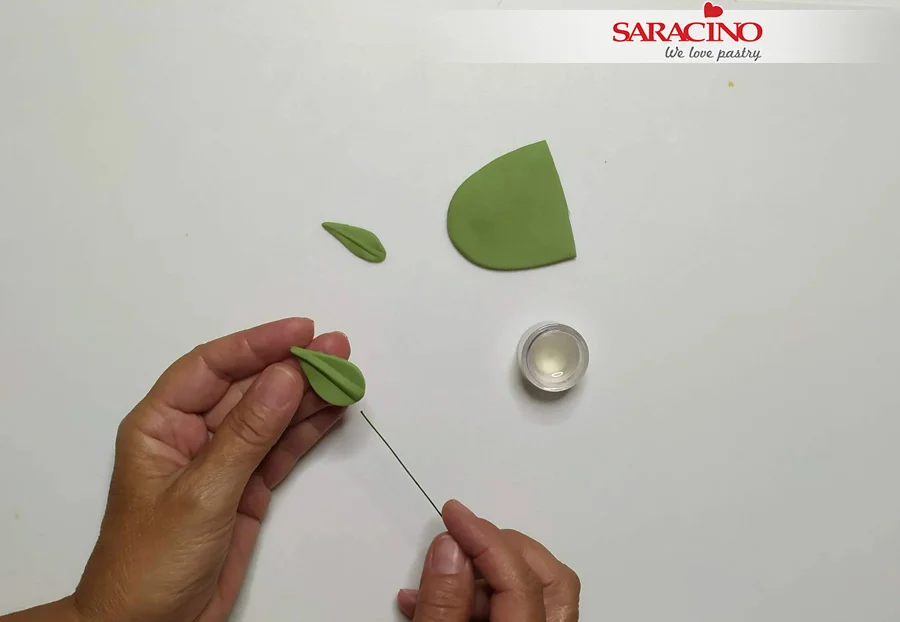
Add some glue at the end of a 26 gauge wire and insert into the ridge of the leaf

Ā 

Step 22

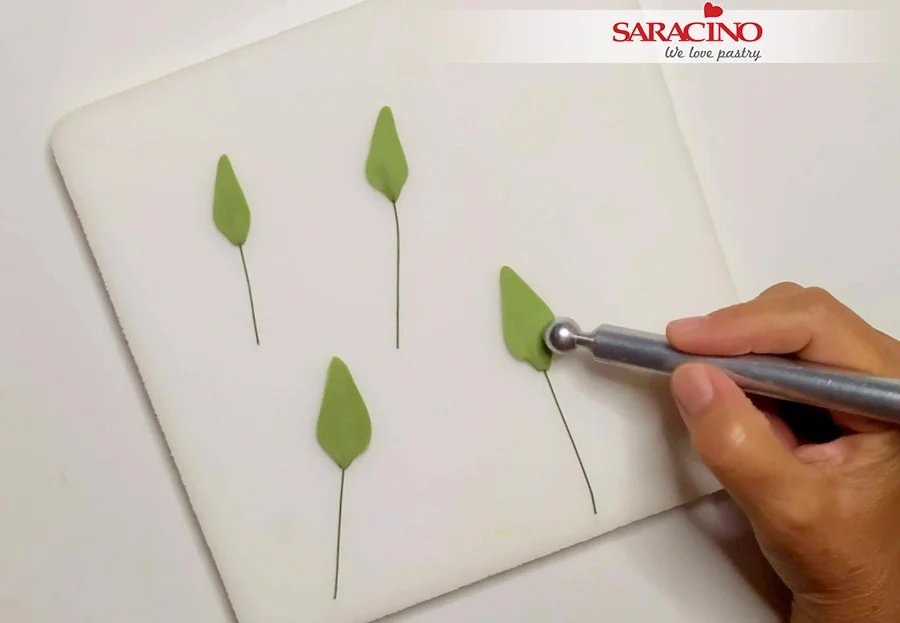
Move the leaves onto a foam pad and thin the edges with the ball tool.

Step 23

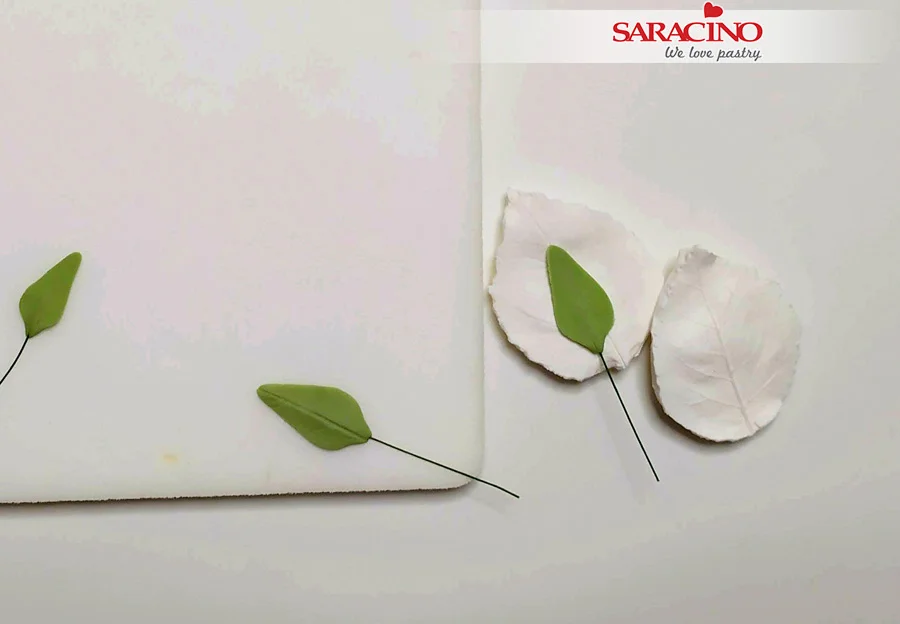
Move onto the veiner and press firmly to shape the pattern. Let them dry on a foam.

Ā 

Step 24

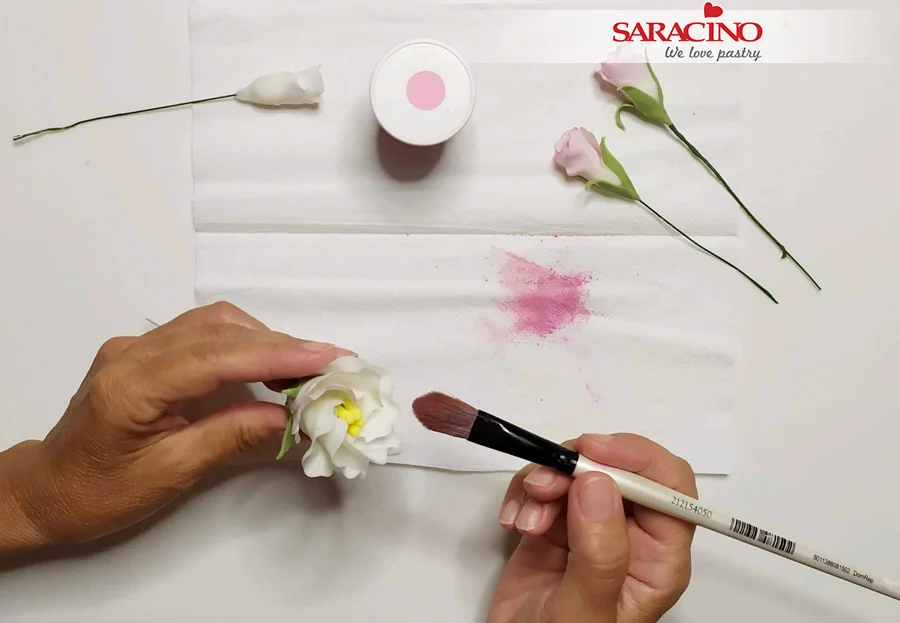
To dust the flowers use pink Saracino powder colour. Dust the edges of the petals using a soft brush.

Step 25

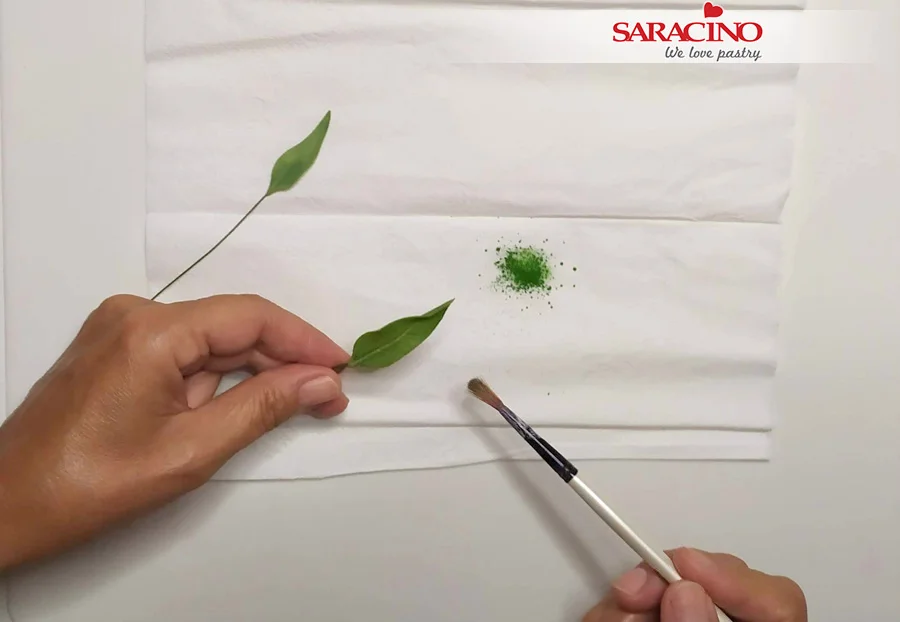
To colour the leaves dust with Saracino green powder colour. You can also use confectioner glaze to shine the leaves.

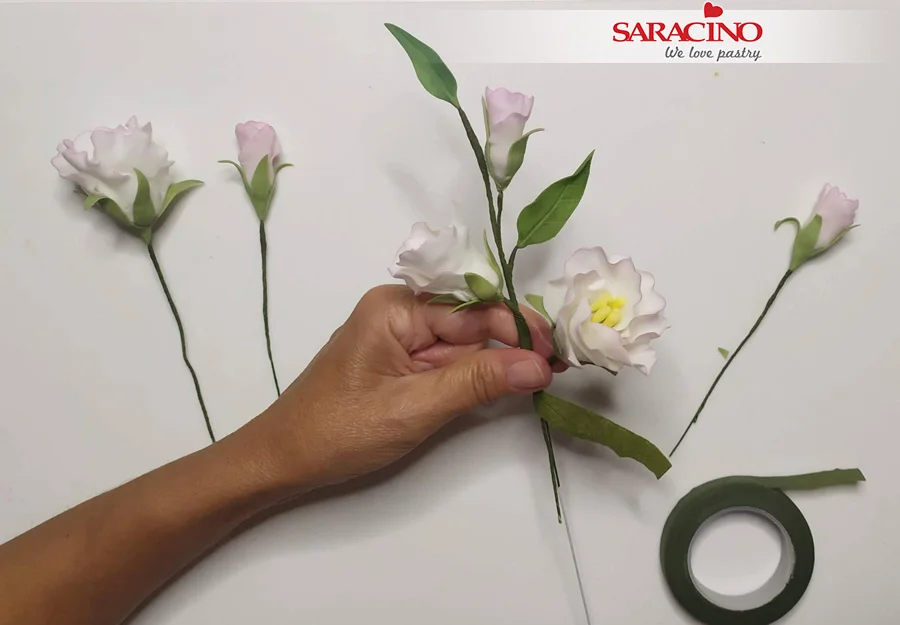
Ā 

Step 26

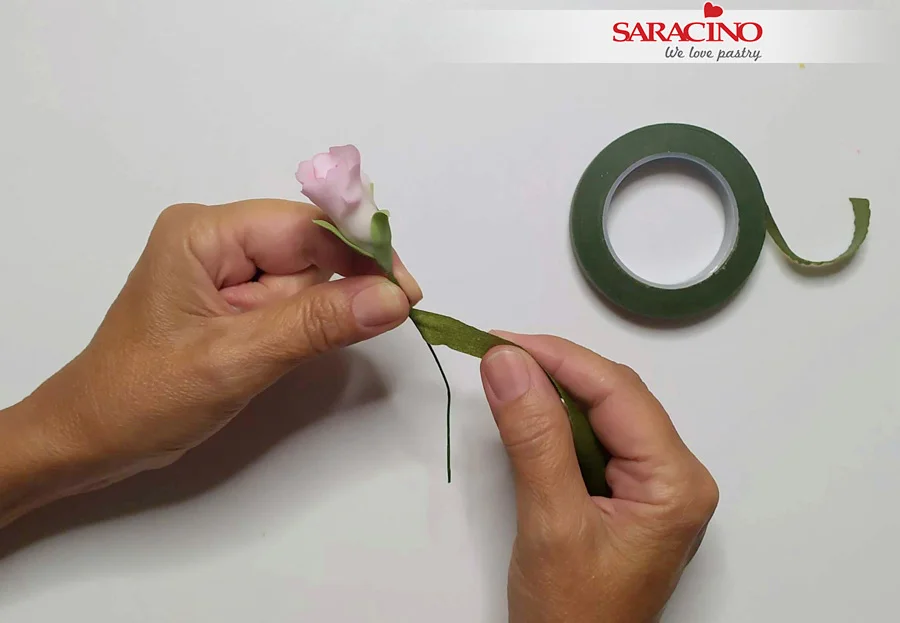
Tape the leaves and the flowers using green florist tape

Step 27

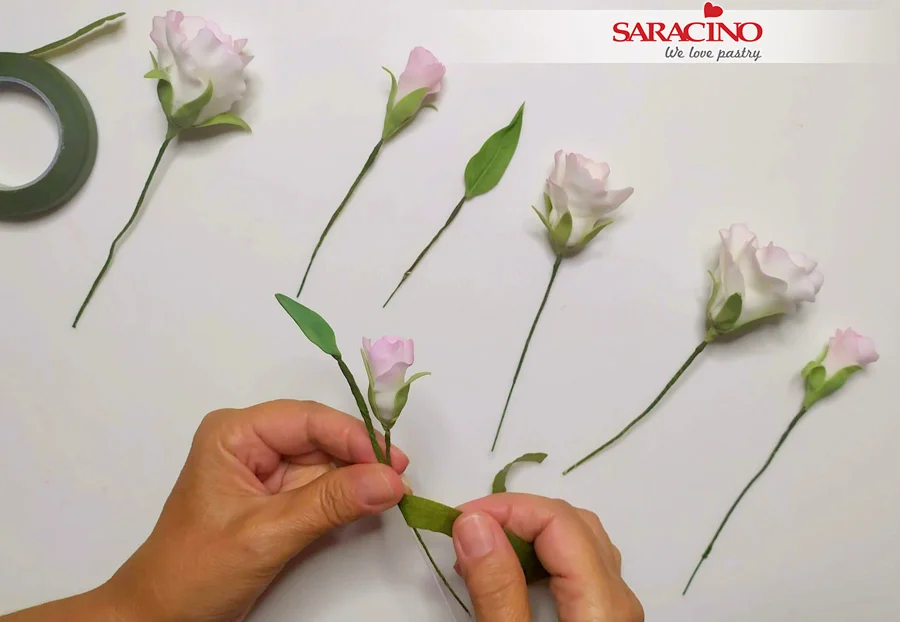
Using a 20 gauge wire and green florist tape start arranging the branch

Ā 

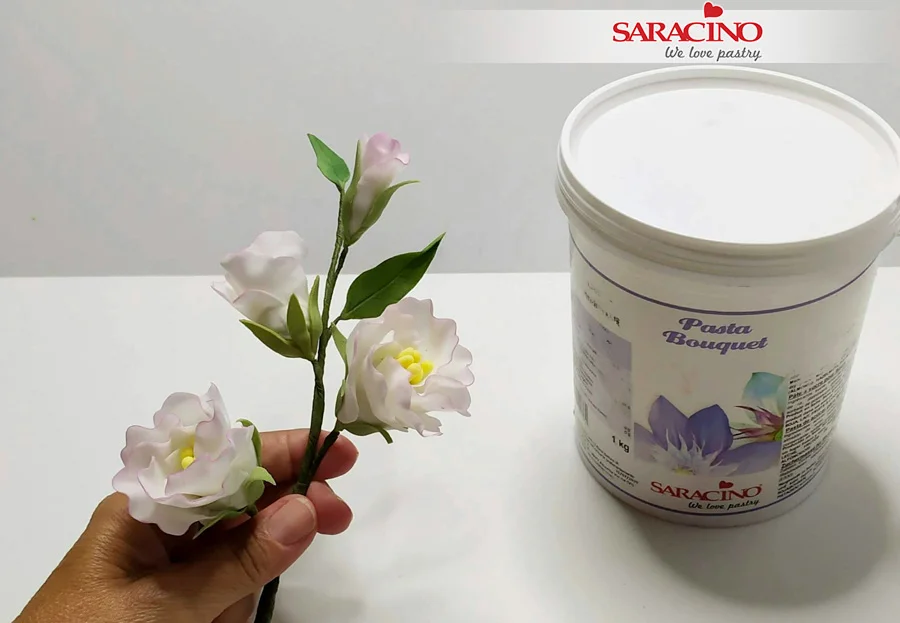
Step 28

Start with a small leaf and a small flower

Step 29

Continue adding flowers and leaves along the branch

Ā 

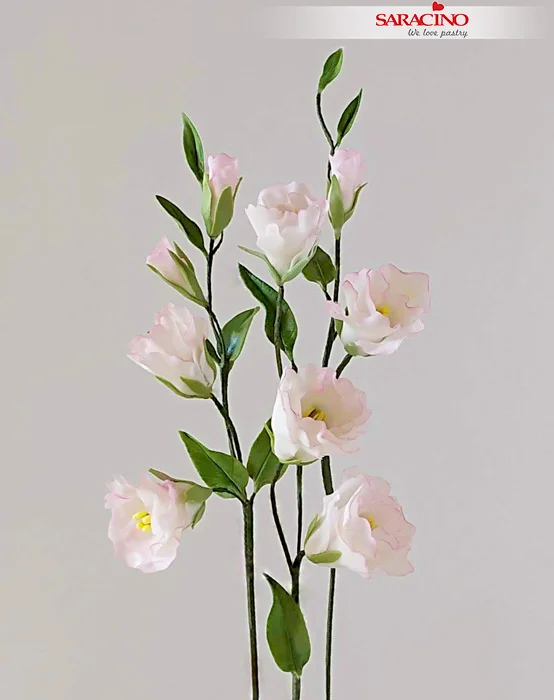
Step 30

This is the bouquet I created. Feel free to be creative with your composition.

FONDANT TREE BARK TEXTURE

FONDANT TREE BARK TEXTURE

Skill level: BEGINNERS

You will need:

  • Saracino Pasta Top

  • Saracino Liquid airbrush food colour brown

  • Saracino Liquid airbrush food colour orange

  • Saracino Liquid airbrush food colour red

  • Saracino concentrated gel food colour green

  • Saracino concentrated gel food colour black

  • Aluminum foil

  • Rolling pin

  • Airbrush

  • Grated coconut

  • Steel spatula

  • Modelling tools

  • Set of round cutters

  • Small brush

  • Edible glue

  • Cake drum

  • Scissors

Step 1

Place the white Pasta Top on your work surface and roll the fondant out evenly.

TIP: Pasta Top is VEGAN friendly, GLUTEN FREE and has NO HYDROGENATED FATS.Ā 

Step 2

For the top of the tree place the fondant gently over the top of your cake (or dummy)

Step 3

Remove the excess paste with a knife around the edge of the cake.

Step 4

Save the removed paste for later.

Step 5

Use different sizes of round cutters to press into the paste on top of the cake. You can use a modelling tool also to create circles on top of the cake.

Step 6

Create strips with your modelling tool at two opposite sides of the cake, so it looks like the tree has been cut.

Step 7

To cover the side of your cake roll out a piece of fondant evenly into a rectangular shape. We are going to cover the side of the cake with Pasta Top. This can be done in panels if needed.

Step 8

Take a piece of aluminum foil and scrunch into a ball. Then un-fold so you create a textured pattern in the foil. Place the foil on top of your paste and use your rolling pin to roll the foil into the paste.

Step 9

Repeat step 8 to make sure the texture is all over your paste. Remove the foil and cut a rectangle. Take the height of your cake into account.

Step 10

Create long teardrop-shaped pieces of fondant to create tree roots. Create different lengths and thicknesses. Use a little edible glue and push the teardrop-shaped pieces against your cake at different places. Decide for yourself how many roots you are going to make.

Step 11

Take the rectangle fondant and place it against the side of your cake, use Saracino gel or water to stick the fondant to your cake.

Step 12

Use scissors to remove the excess fondant that rises above the edge of your cake. You don’t have to cut it neatly.

Step 13

Repeat steps 8 up to 11 for covering the side of the cake if you cannot achieve it in one piece.

Step 14

Where the side panels meet press them together to join. It does not have to be too neat as a real tree is never smooth and perfect

Step 15

You can work the seams of fondant with a piece of aluminum foil.

Step 16

Just press the foil onto the paste so you don’t see the seams anymore.

Step 17

Press the foil at the top of the cake so you won’t see the cuts you made removing the excess fondant at the top.

Step 18

Press gently from top to the bottom of the seam. Repeat this step for each seam of fondant

Step 19

If you want to give your bark more dept, push a piece of foil deeper into the fondant. Repeat this for your whole cake.

Step 20

Use a modelling tool to create a dent in your fondant tree.

Step 22

Repeat step 20 as many times as you like

Step 23

Get your airbursh ready to use.

Step 24

Always start with the lightest airbrush colour orange.

Step 25

Cover the whole cake with a light orange airbrush colour. Turn you cake while brushing. Use a turntable if you want to.

Step 26

The next airbrush colour is red. Airbrush the rifts and dents in the cake. Don’t airbrush the whole cake, just the dents, sides of the roots and some dents in the cake.

Step 27

The next airbursh colour is brown. Airbrush the whole cake with the brown airbrush colour. Make sure you airbrush some parts darker than other parts.

Step 28

Place a clean natural sponge in water. Squeeze the sponge well until there is no more water in the sponge (very important!)

Step 29

Run the sponge along the cake very gently, don’t press too much. Remove just a little airbrush colour

Step 30

Put some grated coconut on a dish and use little bit of the green gel colour. You can use a drop of water to spread the gel colour (it’s better to colour the grated coconut one day before you make your cake!) if you want a darker green, you can add a drop of black gel colour

Step 31

Use a brush and a little edible glue to fix the grated coconut to your cake, place anywhere you would like.

Step 32

Use a spatula to place the coconut on top of the glue.


Step 33

Your tree cake is ready. Decorate your tree cake anyway you want to! Have fun! I made some mushrooms for my cake.

BEACH BUNNY CARVED CAKE TUTORIAL

BEACH BUNNY CARVED CAKE TUTORIAL

Skill level: INTERMEDIATE

How to make a perfect ganache:

Place 750g Saracino chocodrops and 250ml whipping cream. Bring whipping cream to a boil. Pour on the chocolate drops and let stand for a minute. Stir well until all drops are dissolved. Pour into a sealable container and let stand for 24 hours. Heat the required amount in the microwave. Be careful not to make it too thin. Chocolate spread is the ideal consistency.Ā 

You will need:

For Stainless Steel armature construction

  • 8mm threaded rod 20cm long.
  • 5 x 8mm stainless steel washers
  • 5 x M8 stainless steel nuts
  • 2 x spanner size 13
  • MDF or Wooden Board 25 x 20cm
  • Cake boards diameter 15cm and 10cm and 3mm thick
  • 2 x cake diameter 15cm and height 10cm
  • Ganache 1kg
  • Sturdy filling as desired

For the Cake you will needĀ 

  • Pasta Top white 1400g
  • Model chocolate white 1050g
  • Pasta Model white 35g
  • Pasta Model red 250g
  • Pasta Model black 10g
  • Gel colours: yellow, blue and skin
  • Dust powder colours: white, black and blue
  • Airbrush colours white and black
  • Saracino Cakegel
  • Rice krispies 150g
  • Marshmallows 150g
  • Butter 30g
  • 2 x tea biscuit
  • Uncooked spaghetti
  • ModellingĀ tools Cerart
  • Precision knife
  • Rolling pin
  • Ball tool
  • Brushes
  • Pallet knife
  • Two wooden skewers
    • Ā 

Step 1

Take a 20 x 25 centimetre wooden board or MDF board. Ideally use a stainless steel baseplate in the middle of the board. This will alleviate the need to drill etc.Ā 

If you are unable to purchase a baseplate type fixing you can drill a 9mm hole in the middle of the board. Attach an 8mm stainless steel threaded rod. Make a recess on the bottom of the board so the nut is not proud of the underside of the board. Use stainless steel washers under the nuts. Tighten everything firmly.

Place a piece of felt at the bottom of the board at each corner.

Step 2

Using your 15cm cake board drill a 8mm hole in the centre.

Heat 150g of marshmallows and 30g of butter in the microwave or pan, add 150g of rice Krispies and make a dish shape 5cm high. Make a hole in the center through which the threaded rod will pass.

Now place a nut on the threaded rod at a height of 5cm.

Step 3

Slide the rice krispies down over the threaded rod. If necessary, trim the rice krispies around with a sharp knife. Now place a stainless steel washer on the nut and on top of the cake board. As we have a rice krispie base, the cake board does not need to be secured.

Step 4

Line the threaded rod with a small amount of modelling chocolate to about 10cm height.

Cut a hole of 1 cm diameter in the middle of each cake layer. Stack the cake layers over the threaded rod and put a nice filling of your choice between the layers.

TIP: Use a firm filling otherwise you may get settlement and bulges in your bunny. Swiss meringue buttercream, ganache, jam or normal buttercream are ideal.

Step 5

Take a cake board with a diameter of 10cm and make a 8mm hole in the middle. Place a stainless steel washer and then nut on the threaded rod from the top. Tighten well and coat the exposed portion of the threaded rod and nut with a small amount of modelling chocolate.

Step 6

Place the next cake layers over the board with your chosen filling. Chill the cake in the refrigerator for at least an hour. Cut the cake into the desired shape as shown.

Step 7

Using the carved leftovers raise the cake as shown. Then cover with ganache.

Step 8

Also cover the rice krispies with the ganache.

Step 9

Make sure to form the eye sockets and the snout into the desired shape. Put the cake into the refrigerator and let it stand for at least three hours to go firm ready for the next step.

Step 10

Take 750g of white Pasta Top and knead it until pliable and ready to work. Roll out thinly and cover the rabbit. Start at the front of the rabbit and finish at the back. Smooth seams neatly away with your cake smoothers or fingers.

TIP: Due to the great elasticity of the paste, you can stretch and blend the paste at the back until it closes so you see no joint.Ā All excess paste can easily be cut away with scissors.

Step 11

Use a ball tool to form the eyebrows. Use your Dresden tool to shape the lines of the snout. Using your ball tool shape the mouth.

Step 12

Smooth the eye sockets with the ball tool.

Step 13

Before we start dressing your rabbit it should look like this.

Step 14

Take 150g of red Pasta Model and roll out thinly. Cut a half oval at the top. This is the neck of the swimsuit. Cut out the shapes for the arms on the sides.

Step 15

Place the paste on the front of the rabbit to cover the whole of the front to make the swimsuit. Cut away excess paste at the base with a sharp knife.

Step 16

Now for the back cut out a rectangular piece of red Pasta Model about 16cm wide and 8cm high. Cut the top slightly into a curve.

Step 17

Attach to the back of the rabbit and cut away excess Paste.

Step 18

Cut two strips of red Pasta Model about 12cm long and 1.5cm wide.

Step 19

Attach the straps to the back of your bunny. Connect it to the swimsuit at the front.

TIP: You can use a little water to attach them if needed.Ā 

Step 20

Finish neatly with a knife.

Step 21

Now for the tongue. Take 7g of red Pasta Model and model a teardrop shape. Using your knife make a line on the center. Place the tongue in the mouth again using a little water if needed.Ā 

Step 22

For your polka dots roll out white Pasta Top thinly and cut out your desired amount of round shapes of 1cm diameter.

Step 23

Place the white circles randomly on the bathing suit.

Step 24

For the board covering. Colour 100g white Pasta Top with blue gel colour, colour 90g white Pasta Top with yellow gel colour and take 60g white Pasta Top.

Step 25

Roll the blue and white into sausage shapes. Lay side by side.

Step 26

Twist the white and blue strands together to create a marble effect. Don’t twist too much! A few twists is sufficient.

TIP: If you twist too much you will lose the marble effect you are looking for.

Step 27

Roll out your marble paste and yellow paste into rectangular shapes. The marble needs to be big enough to cover your board. Cut out circles from the side so they can wrap around your bunny.

Step 28

Cover the board with the blue paste applying a little water to the board first to help it stick.Then fix the yellow paste. Make sure it fits well around the base of the rabbit. Finish neatly by blending and smoothing the paste so you see no joints.

Step 29

For the rabbit’s legs. Take two pieces of 150g of modelling chocolate. Form two flat oval shapes. Cover each leg with 20g thinly rolled white Pasta Top.

Step 30

Attach to the sides of the rabbit and press down firmly. Now using white Pasta Model fill the eye sockets. Using your Dresden tool form lines around the eyes to give character.

Step 31

For the feet take two 150g pieces of white modelling chocolate. Make two blunted triangles and cover each foot with 30g of thinly rolled white Pasta Top.

Step 32

For the toes of one foot. Use 40g of Pasta Top and divide it into two pieces of 12g (smaller toes) and one of 16g (big toe). Make round balls and press a little flat. Insert a piece of uncooked spaghetti into each toe. Repeat this step for the toes on the other foot.


Step 33

Colour 20g of your white Pasta Top with skin gel colour. Cut in two halves. You will need 1.5g for each toe and 5.5g for each sole. Roll out thinly and attach to the toes and foot using water or cake gel.

Step 34

Attach the feet to the rabbit’s legs using a little cake gel. Using your Dresden tool form some detail as required.

Step 35

For the arms take 300g of white modelling chocolate and divide into two equal pieces of 150g. Roll each into sausage shape approximately 16cm long. Press down to make slightly flat and then using your fingers roll the wrist shape.

Step 36

Cover each arm with 40g of white Pasta Top. For the thumbs take 5g each and roll to a thumb shape with your fingers. Attach to the hand using cake gel or water.Ā 

TIP: Remember there is a left and right hand when fixing the thumbs.

Step 37

Shape the hands with finger pressure. Using your Dresden tool form the finger lines. Use a sharp knife to cut the top of the arms diagonally for attaching to the shoulder. Be careful with your cutting as it effects how the arms look on your bunny. Attach them as required using cake gel or water.

Step 38

For the teeth take 5g white Pasta Model and cut into a small rectangle. Cut both sides diagonally to form a point. Make a line in the middle with a knife. Fix the teeth in the mouth.Ā 

Step 39

Roll 3g Pasta Top into a small sausage and attach to the top of the eye. Repeat for the other eye.

Take 5g black Pasta Model and using your fingers form a triangular nose. Fix with a little cake gel.

Step 40

For the hair on the chest take 20g white Pasta Top. Roll elongated strands and press down on one side. Attach under the chin with cake gel and using your Dresden tool shape and give texture.

Step 41

Roll out thinly black Pasta Model. Using a sharp knife cut out the eye brows and eye lashes. Fix to the face using a little cake gel. Ā 

Step 42

Now for te eyes use two small balls of blue Pasta Top. Mix your black powder colour with the clear alcohol. Paint a black pupil using a small paint brush. Now mix your blue powder with clear alcohol and paint the remainder of the eyes.Ā 

Step 43

Fix them to the eye balls in the position required. Add detail and highlights using white powder and a fine brush.

TIP: How you position the eyes effects how the rabbit’s mood is! Happy, serious, confused, moody, crazy! You choose.

Step 44

For the ears, take two pieces of 70g white modelling chocolate. Roll two sausage shapes of approximately 10 cm long and press flat. Colour 5g Pasta Top with skin gel colour for the inside of the ears. Insert a wooden skewer into each ear.

Step 45

Place the pink insert on the ear. Smooth the edges of the ear insert using a ball tool. Add detail and texture using a Dresden tool or Cerart silicone modelling tool.Ā 

Step 46

For the bow. Take 70g of Red Pasta Model and roll thinly to a rectangle shape of approximately 16cm x 4cm. Fold the ends into the middle and pinch to form the ruffled effect at the centre. Use a little cake gel to fix in place as required. Now roll a rectangle 5cm x 2cm and wrap around the centre of the bow. Cut out some small white dots and decorate as you wish.

Step 47

Insert the ears to the head and attach the bow directly in front of it. Use a little cake gel if required.Ā 

Step 48

To give shade and character you can use an airbrush or dust lightly with Saracino dust colours.Ā 

TIP: If using an airbrush mix Saracino white and black to give a grey colour. If dusting use a soft fine brush. Remember to be subtle with your colouring.Ā 

Step 48

For the sand, crumble two tea biscuits and sprinkle them around the base of the rabbit. Finish the board with a matching ribbon.