COVERING A CAKE TUTORIAL

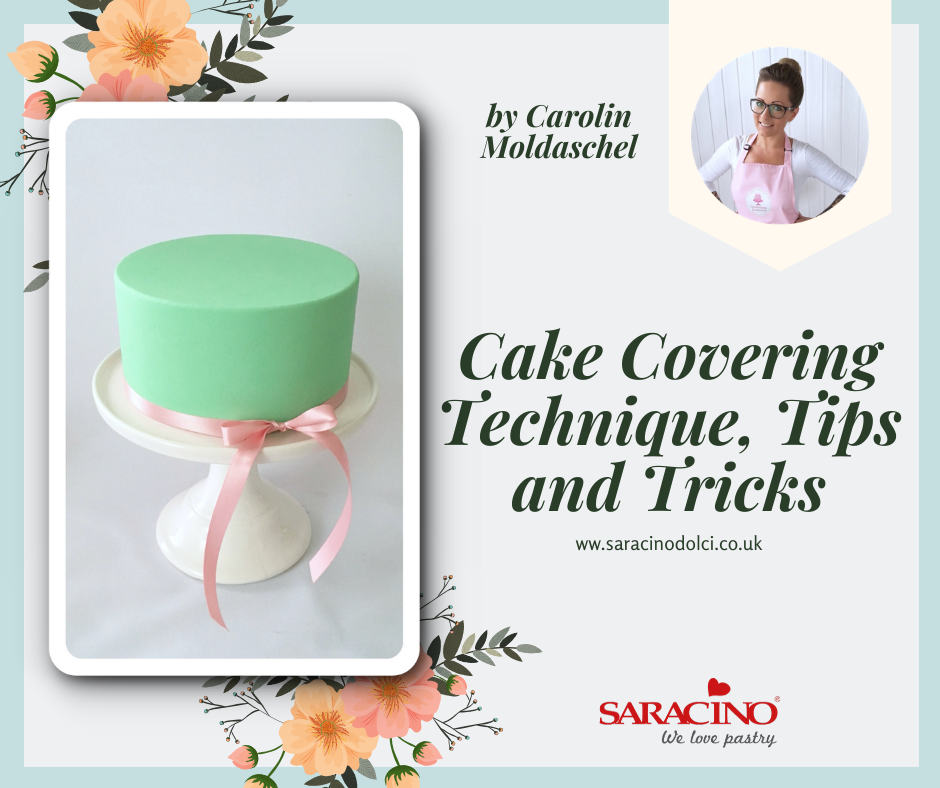
COVERING A CAKE TUTORIAL
Skill level: BEGINNERS

You will need:

  • Saracino white Top Paste
  • Dekofee silicone working mat extra large
  • Large rolling pin
  • Sharp knife
  • Pizza cutter
  • Tape measure
  • Soft brush
  • Water
  • Cornflour
  • Microwave
  • Smoothers

Step 1

You need 300 – 500 grams Saracino Pasta Top. The amount always depends on the size of your cake and how thick or thin you roll out the sugarpaste.

Step 2

Before you start to work on the Pasta Top, Using a little water moisten the ganache on your cake (in this tutorial I am using a dummy). DO NOT moisten the top! Moistening helps to fix the Pasta Top to the cake when it is covered.

Step 3

Use a sharp knife to cut the amount of fondant you need. You will find the Pasta Top firm at first and this is totally normal as it becomes soft when it is worked.

Step 4

In order to be able to knead the sugarpaste better, I always recommend to heat the fondant for 10 seconds in the microwave (700 watts)

Step 5

After you have warmed up the fondant a little, you will be able to work with it easily. It can now be kneaded without being too firm.

Step 6

It is really important to knead it really well. The kneading will pay off when you come to cover the cake.

Step 7

The kneading and the warmth from your hands will make the fondant soft and very supple.

Step 8

Now you can colour the Pasta Top using your Gel Colour.

Step 9

Work the gel colour into the paste. Blending the colour also helps to make the paste even more pliable.

Step 10

Keep blending and kneading until you get this kind of appearance and the paste is stretchy and soft.

Step 11

PERFECT!

Step 12

You can use the fondant immediately but I have found it works really well if you leave the fondant in cling film for 24 hours after colouring. TIP: I only cover my cakes after 24 hours.

Step 13

Put the tape measure over the top of your cake and down each side. This way you can see what diameter of Pasta Top you need to roll out for covering.

Step 14

If required lightly dust your work surface with cornflour to prevent possible sticking

Step 15

Place the Pasta Top on your work surface and roll the fondant out evenly.

Step 16

Keep rolling until you reach the required diameter for the cake

Step 17

Fold the rolled out paste over your rolling pin

Step 18

Place it gently over your cake using a rolling motion.

Step 19

Using a smoother press down lightly on the top to remove any air bubbles and make smooth.

Step 20

Press around the top edge first

Step 21

Gently work the fondant downwards with your hands. Do not over stretch as the paste is very pliable and will smooth out to remove any creases.

Step 22

Use a pizza cutter or a sharp knife remove the excess paste

Step 23

Lift the excess away from the cake carefully

Step 24

Using your smoother start to work around the outside removing any bumps and air bubbles.

Step 25

Using flexible acetate smoothers work the top surface to give a smooth finish.

Step 26

You are now finished to decorate your cake as required
DREAMING PRINCESS TUTORIAL

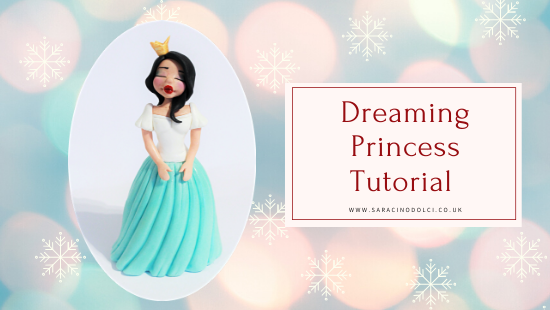
DREAMING PRINCESS TUTORIAL

Skill level: BEGINNERS

You will need:

  • 10cm polystyrene egg
  • Dresden Tool
  • Small rolling pin
  • Sharp knife
  • Small sharp scissors
  • Paintbrushes
  • Cool boiled water / edible glue
  • Food safe skewer / flower wire
  • Circle cutter
  • Large cone tool
  • Small rubber brush tool
  • Face mould
  • Saracino modelling paste white
  • Saracino modelling paste skin tone
  • Saracino modelling paste bronze
  • Saracino modelling paste Tiffany
  • Saracino modelling paste black
  • Pink powder colour
  • Red powder colour
  • Gold powder colour

Step 1

Prepare the 10cm polystyrene egg and the tiffany colour Saracino modelling paste

Step 2

Roll out the Tiffany modelling paste to a thickness as shown

Step 3

Cover the egg with the paste. A small amount of water can be used to stick the paste to the egg.

Step 4

Cut the excess paste from around the bottom using the scissors

Step 5

With a plastic knife or Dresden modelling tool create some lines for folds on the dress

Step 6

With a large cone tool enlarge the creases and smooth them out to give more natural look

Step 7

Mix some brown Saracino modelling paste with skin tone paste to get a darker shade for the skin tone.
Roll out two cylinder shapes the same size using white paste for the dress and darker skin tone for the top of the body

Step 8

Using the large circular cutter cut the top off the cylinder shape to form the torso

Step 9

Using your fingers form a neck on the top of the skin coloured cylinder.

Step 10

Using the large circular cutter cut the ‘shoulders’ away from the skin coloured cylinder.

Step 11

Stick the shoulders to the torso. Then stick the upper body to the skirt. Using a rubber brush and cone tool make details.

Step 12

Using the rubber brush tool form the shape of the chest area

Step 13

Using the end of your modelling tool shape detail to the throat area

Step 14

Using your modelling tool form further detail to the neck area

Step 15

Using the skin toned Saracino paste form a head / face using a face mould.

Step 16

Attach the head to the neck. Insert a wooden skewer into the body.

Step 17

Take white modelling paste and roll two balls for the sleeves.

Step 18

Form the two balls into cone shapes as shown.

Step 19

Fix the sleeves to the shoulders. Using a modelling tool or plastic knife form creases around each sleeve.

Step 20

Using a modelling tool or plastic knife form a line around the top of the dress.

Step 21

Using skin tone Saracino paste roll a sausage shape for the arms and hands. Cut the sausage in half as shown to give two arms.

Step 22

Using your finger flatten the pointed end to form a hand.

Step 23

Using a blade or sharp knife cut the thumb.

Step 24

Using finger pressure roll to form the narrower wrist

Step 25

Fix the two arms into the sleeves.

Step 26

Roll out a piece of white paste and using a sharp knife cut out a crown.

Step 27

Using a little water on the edge form the circular crown shape. 

Step 28

Roll out some black paste very thinly and fix to the face for eyebrows and eye lashes.

Step 29

Mix red powder colour with clear alcohol and paint the lips with a small paintbrush

Step 30

Roll out black paste to form the hair

Step 31

Fix the hair to the head using a small amount of water if required. Fix the crown to the top of the head.

Step 32

Using Saracino gold powder mixed with clear alcohol paint the crown gold using a small paintbrush. Using a soft brush and pink dust give colour to the cheeks.

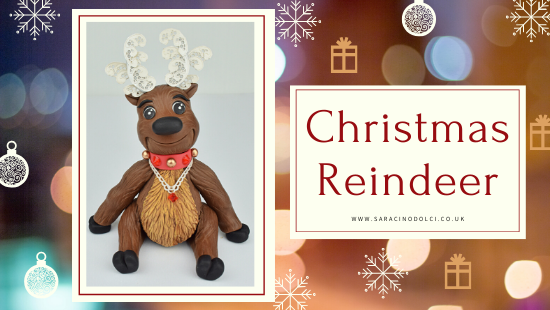
CHRISTMAS REINDEER

CHRISTMAS REINDEER

Skill level: BEGINNERS

FROM LYNSEY:

Christmas is just around the corner, to celebrate the launch of our new products Sugarwhizz has created this fun tutorial to show you an alternative way to use or fabulous new range of edible lace and edible diamonds!

Every Christmas cake needs a reindeer!


You will need:

  • Balling Tool
  • Dresden Tool
  • Small Rolling pin
  • Sharp Knife
  • Small Sharp scissors
  • Paintbrushes
  • Cool boiled water / edible glue
  • Food safe skewers
  • Small circle cutter
  • 2 x RKT bars
  • Saracino Sweet lace pearl ready to use
  • Saracino edible soft jelly diamonds
  • Saracino Liquid Shiny
  • 392g Brown modelling paste
  • 30g White modelling paste
  • 27g Black modelling paste
  • 5g Red modelling paste
  • 5g Grey modelling paste
  • Saracino Gel colour – Flesh, black, brown, yellow
  • Saracino powder colour – Brown
  • Saracino lustre – Silver and bronze

Step 1

Take two RKT bars and lay them on top of each other in a cross.

Step 2

Fold them around each other and shape into a tear drop shape, gently squeezing the bars together to create a firm body.

Step 3

Roll out 100g of brown modelling paste to around 3 mm in thickness, gently lift the paste and drape across the top of the body.

Step 4

Smooth the paste down the body pressing gently but firmly as you go.

Step 5

Gather the excess paste at the bottom of the body.

Step 6

Fold the paste over to completely cover the bottom. Smooth the paste with your fingertips to blend the joins.

Step 7

Re shape the body if needed.

Step 8

Take 25g of white modelling paste and colour to a golden brown using some Saracino yellow gel colour and a small amount of Saracino brown gel colour. Shape the paste into a tear drop and roll out thinly with a small rolling pin.

Step 9

Apply a small amount of water to the back of the paste and stick into place on the front of the body.

Step 10

Using the veining end of the Dresden tool begin to texture the fur, start at the bottom and work your way up the body in rings.

Step 11

Keep going overlapping each layer until you get to the top of the body.

Step 12

Texture the front fur in the same way.

Step 13

Use a small soft brush to shade the front of the fur with some brown dust.

Step 14

Roll 120g of brown modeling paste into a ball, narrow the top of the head slightly and use your finger to create a small ridge across the front of the face.

Step 15

Use the veining end of the Dresden tool to mark a smile across the face. Use the smoothing end of the Dresden tool to gently indent the corners of the mouth.

Step 16

Using the smoothing end of the Dresden tool, gently smooth across the bottom of the mouth to create a lip.

Step 17

Indent two eye sockets with the large end of the balling tool.

Step 18

Take 2g of white modelling paste, divide into two and roll into balls. Stick the balls into the eye sockets and flatten. Take 2g of black modelling paste roll out thinly and cut out two circles using a small circle cutter, stick the pupils into place on the eyes. Finish the eyes by sticking two small balls of white paste onto each pupil as shown.

Step 19

Use the veining end of the Dresden tool and begin to texture the fur on the front of the face as shown.

Step 20

Texture the fur on the top and back of the head.

Step 21

Take 10g of brown modelling paste, roll into a ball and flatten slightly. Apply a small amount of water to the top of the neck and stick the paste into place. Insert a food safe skewer down through the center of the neck and into the body.

Step 22

Apply a small amount of water to the top of the neck. Gently slide the head down the skewer until it comes to rest on the neck.

Step 23

Take 80g of brown modelling paste, divide equally in two. Roll each piece into an elongated tear drop. Pinch out the edge around the fat end of the teardrop to shape the leg.

Step 24

Stick the legs into place on each side of the body.

Step 25

Use the veining end of the Dresden tool to texture the fur on each leg.

Step 26

Take 20g of black modelling paste, divide into 4. Roll each piece into a ball, flatten the ball and shape as shown. Use the veining end of the Dresden tool, mark a groove across the top and down on to the front of the hooves.

Step 27

Use the large end of the balling tool to widen the end of each leg. Apply a small amount of water to the end of the legs and stick the hooves into place.

Step 28

Take 80g of brown modelling paste, divide equally into two and roll each into a sausage shape. Pinch in and narrow the paste to shape the knees as shown.

Step 29

Stick the hooves to the bottom of each leg, stick the legs into place and texture the fur using the Dresden tool as before.

Step 30

Take a packet of Saracino sweet lace pearl, using a pair of small sharp scissors, cut out the section shown. Carefully cut out each of the swirls.

Step 31

Take 5g of grey modelling paste, divide into two and roll each piece into a sausage tapered to a point. Stick the largest swirl to the bottom of the sausage and then stick the small swirl to the top of the sausage as shown (left is the back view; right is the front view) repeat for both antlers.

Step 32

Cut another section of lace and remove the right swirl and then remove the same left swirl.

Step 33

Stick the swirls into place on the back of the antlers as shown. The paste should be sticky enough for the lace to stick to straight away, if not use a small amount of water

Step 34

Dust the grey paste with silver lustre dust to match the antlers.

Step 35

 Stick two small cocktail sticks into the top of the head, gently slide the left antler down into place.

Step 36

Stick the other antler into place and gently bend the tops of the antlers over to shape.

Step 37

Again, using scissors cut out the small right-hand swirls shown and the matching left-hand swirls from the lace.

Step 38

Stick the small swirls to the back of the antlers as shown.

Step 39

Take 2g of brown modelling paste, divide into two. Roll each piece into a teardrop shape. Flatten slightly. Use the veining end of the Dresden tool to mark a groove in the centre of each ear. Cut off the bottom of each ear with a sharp knife as shown.

Step 40

Stick the ears into place. Roll 3g of black modelling paste into the shape of a nose and stick into place.

Step 41

Roll two small sausages of black paste tapered at both ends and stick into place across the top of each eye. Roll two more slightly bigger sausages of black paste, tapered at both ends and stick into place for the eyebrows.

Step 42

Roll 5g of red modelling paste into a strip and stick into place for the collar as shown. Trim the piece shown from the sweet lace pearl and stick into place as shown.

Step 43

Take 3g of white modelling paste, colour with Saracino flesh gel colour and divide into three pieces. Roll each piece into a ball and dust with Saracino bronze dust. Stick the balls into place on the collar as shown.

Step 44

Choose your favourite colour from Saracino Soft diamonds range. They are vegetarian jelly diamonds.

Step 45

Stick two onto the collar as shown. Stick two together to create a diamond shape and stick into place as shown. The paste should still be tacky enough that the diamonds will stick without the need for glue. If not use a small amount of glue to stick them into place.

Step 46

Finally paint Saracino liquid shiny onto to the nose and eyes to varnish.

CHRISTMAS NUTCRACKER

CHRISTMAS NUTCRACKER

Author: Zoe Smith

Skill level: BEGINNERS

You will need:

  • Tiffany modelling paste
  • White modelling paste
  • Skin modelling paste
  • Pink liquid colour
  • Black liquid colour
  • Craft knife
  • Small rolling pin
  • Flower tool
  • Snowflake plunge cutter
  • Edible glue
  • Work mat
  • Wooden skewer

Step 1

Roll 50g of skin modelling paste into a ball, flatten the base against your mat to make the head.

Step 2

Take a pea sized piece and pinch it into a triangle shape. Trim one side so it will sit flush against the head.

Step 3

Stick the nose to the centre of the face.

Step 4

Colour a tiny amount of paste pink and roll into to balls. Flatten and glue either side of the nose.

Step 5

Roll a pea sized amount into a ball and pinch to create a cone shape.

Step 6

Flatten and pull pointed end to make a finer tip. Curl around and wait a minute to firm.

Step 7

Glue under the nose and repeat on the other side.

Step 8

Take tiny bits of white modelling paste and roll into sausages and flatten slightly. Glue to the head as shown.

Step 9

Take 60g of Tiffany modelling paste and shape into a rectangle for the torso and pinch slightly at the base. Set aside to firm.

Step 10

With 16g of a Tiffany/white modelling paste mix make a similar shape as you made for the torso to create the legs. But make sure the top surface is nice and flat.

Step 11

With your flower tool draw a line down the center, repeat on the other side.

Step 12

To make the feet take approx 1g of the same mix and roll into an oblong shape then cut into two.

Step 13

Glue the feet to the legs.

Step 14

Roll 30g of Tiffany modelling paste to make the hat. Make one side flat. 

Step 15

Pinch the other side as shown.

Step 16

Push a wooden skewer through the legs, torso, head and hat leaving enough at the base to stick into your cake or dummy.

Step 17

For the arms roll out 7g of Tiffany and trim either end and cut into two.


Step 18

Glue to the sides of the torso as shown.

Step 19

Take small ball of Tiffany/white mix and cut into two.

Step 20

Glue to the tops of the arms. Add four tiny balls of white modelling paste flattened to create buttons.

Step 21

Colour a tiny bit of paste with a little Black to create a light grey. Roll into two shut eyes and glue above the cheeks.  

Step 22

Take 1g of white modelling paste for the beard, make an oblong shape, flatten and pinch at one end.

Step 23

Glue to the torso and push up the pinched end slightly.

Step 24

Separate 20g of white modelling paste into 8 balls. Make each ball into a teardrop shape that is flat at on end.

Step 25

Glue each of these pieces to the head ,the flat end under the hat and the pinched end to the neck.

Step 26

Roll out 2g of Tiffany /white mix into a strip long enough to wrap around the hat. With your craft knife cut out small triangles.

Step 27

Wrap around the hat and glue in place. Gently push the tips of the triangles away from the hat.

Step 28

Roll out a strip of Tiffany/white mix and glue around for a belt.


Step 29

With a small snowflake plunger cutter make a snowflake from white modelling paste. Then trim off the tips on each section.

Step 30

Glue to the hat.

Step 31

Make a teardrop from Tiffany/white mix and using the flower tool make a feather. Trim the rounded end.

Step 32

Glue to the hat and back of the snowflake. Ta da !


ComicStrip Cakers Collaboration

ComicStrip Cakers Collaboration

by Fee Kakes & Kathy Cooper

MARVELOUS CAKERS PRESENTS – COMICSTRIP CAKERS COLLABORATION

Collaboration Facebook Page – https://www.facebook.com/ComicStripCakers

The Comicstrip Cakers Collaboration came about as an idea for Marvel comic fans within the cake community to pay tribute in celebration of Marvel Comics 80th birthday this year.
It was put together by Fee Kakes (of sCrumbtious Kakes) and Kathy Cooper (of Kathy Cooper A Slice of Art) as part of The Cake Collective (a collective cake group set up by Vicki Du Plessis that encourages cake artists of at all levels to challenge themselves by participating in various collaborations).

The idea was to do our own interpretation of our own favourite Marvel comic characters and to have fun with it.

We were inspired to celebrate Marvel Comics 80th birthday because Fee and a number of other Cake Collective artists are HUGE Marvel comic fans and Kathy is a SUPER Deadpool fan and there was a huge response from the Cake Collective members to take part. It seemed feasible that we could create a brilliant tribute as we initially had 80 plus cake artists wanting to take part. It also followed on from our Cameod Stan Lee collaboration that featured at London’s Cake International on Tour Group competition achieving a Gold award earlier this year.
The Cake Collective already has a number of collaborations that they are currently working on and also developing ideas for future themes. The Cake Collective welcomes all cake artists of all skill levels and currently has 1.6K members from all over the world. If anyone wishes to join the Facebook group they can by going tohttps://www.facebook.com/groups/thecakecollective/

Sarah Carr

Paul Williams

Congratulations On Your Amazing Creations!

Take Your Time And Enjoy Looking At These Amazing Cakes And Creations.

To Watch Click HERE

Join Our Newsletter

We’d love to send you the latest news, discounts & exclusive offers via email! By signing up below you are confirming you are happy for Saracino to send you marketing emails. We will always treat your personal details with the upmost respect & will never sell your details to other companies for marketing purposes.

• All the latest industry news   • FREE video tutorials   • Exclusive product offers

Products         Tutorials          Ambassadors           Events           Blog           Showcase         Contact