Cute Christmas Penguin’s

Cute Christmas Penguin’s

Skill level: BEGINNERS

TIPS:

Tip 1: You can make a snow man and his family using the same tutorial with a few little tweaks like instead of flippers and feet add some twigs made with wires and modelling chocolate

Tip 2: If you have some left over white Saracino that wasn’t used for a while and is a bit hard then how about crushing it in food processor and using it as snow?

You will need:
  • Saracino Fuschia sugar paste mixed with white to form light pink
  • Saracino Azure modelling paste
  • Saracino Light Blue modelling paste
  • Saracino Green modelling paste
  • Saracino Yellow modelling paste
  • Saracino Red modelling paste
  • Saracino Black modelling paste
  • Saracino White modelling paste
  • Rolling pin
  • Cutting wheel
  • Heart shape cutter
  • Dresden tool
  • Scallop tool
  • Shell tool 
  • Knit impression mat

Step 1

Roll pink Saracino modelling paste into a round ball, roughly 2 inches in diameter.

Step 2

Roll a small amount of white modelling paste into a thin sheet

Step 3

Using a metal heart shape cutter cut a heart shape on the bottom of the sheet to have a flat base instead of a pointy one

Step 4

Now give a deeper “V” cut to the heart using the cutter as shown in the picture

Step 5

It should look like the photo above

Step 6

Place this heart on the pink ball

Step 7

Gently roll and blend the edges of the heart well with the pink ball

Step 8

Using a ball tool mark the position of the eyes

Step 9

Make a lovely smile with the PME scallop tool

Step 10

Add tiny black eye balls made with Saracino black modelling paste

Step 11

To make lashes roll a very small amount of black modelling paste and taper it from one end

Step 12

Gently place two lashes on each eye using the pointy end of the dresden tool

Step 13

Add some blush on the cheeks using Saracino pink dust

Step 14

For the beak roll a tiny ball of orange modelling paste

Step 15

Flatten it and pinch from one end to form a beak and then glue it in position like shown in the picture

Step 16

Gently blend it onto the head

Step 17

For the body roll an oval shape ball out of pink modelling paste

Step 18

Roll out some white sugar paste and cut a small circle (roughly 4cm in diameter)

Step 19

Place it on the upper part of the body (oval shape)

Step 20

Blend it well by gently rolling

Step 21

Secure the head onto the body, use a tooth pick if required and some edible glue

Step 22

For the flippers, roll a small pink ball

Step 23

Taper this ball to form a drop shape and flatten

Step 24

Glue the flippers in position as in the picture

Step 25

Position the flippers at this stage before they dry

Step 26

To make penguins feet, take a small bit of orange modelling paste and form a drop shape

Step 27

Flatten the drop shape

Step 28

Using the pointy end of Dresden tool mark the toes on the feet

Step 29

Glue the body onto the feet

Step 30

Repeat the same for the male penguin. Use a slightly darker colour if you would like them to look different.

Step 31

Make tiny eyebrows for both the penguins using black modelling paste

Step 32

Fix the head of the male penguin and glue both of them together in a cuddling position

Step 33

For the scarf – roll light blue modelling paste and use the knit impression mat to get the knitted texture

Step 34

With a cutting wheel cut a long strip

Step 35

At both the ends of the strip make some fringe

Step 36

Wrap the scarf around both the penguins neck

Step 37

With a dresden tool hold it in the centre and gently press

Step 38

To make the hat for our girl penguin roll some yellow modelling paste and texture with the knit mat and start cutting

Step 39

Cut a triangular shape out of it

Step 40

Make a cone and seal the ends using edible glue

Step 41

Roll some white modelling paste with a rolling pin and cut a thin strip for the rim of the hat

Step 42

Texture with the shell tool

Step 43

Glue the rim on the base of the hat

Step 44

Make a tiny pom pom ball out of white modelling paste and glue on top of the hat

Step 45

Glue the hat on the female penguin

Step 46

To make the hat for our male penguin cut a small light green disk

Step 47

Roll a small ball in light green and glue on top of this disk

Step 48

Glue the hat on the male penguin

Step 49

Roll a small thin black string for the string lights

Step 50

Make tiny bulbs as shown in the picture in different colours of sugar paste

Step 51

Glue the bulbs onto the string

Step 52

Let the bulbs dry for some time on the string before you lift them

Step 53

Glue one end of the string on the female penguins hand and the other on the male penguins hand

Step 54

Your cute penguin couple is now ready to chill out on your cake

Fuchsia Flower Tutorial

Fuchsia Flower Tutorial

Skill level: BEGINNERS

FROM ZLATINA

Fuchsia comes in different varieties and colours.  I’ve made a type which is one of my favourite and grows in my garden.

I’ve made the flower as near to nature as possible, although it is not 100% botanically accurate.

You will need:
  • Saracino pasta bouquet
  • Saracino Food gel colours – Pink,Green
  • Saracino Dusting colours – Pink, Green, White, Purple
  • Fuchsia cutter
  • Rose leaf cutter
  • Rose leaf veiner
  • Medium head stamens – 1 longer; 4 cut into ½
  • ¼ width white flower tape
  • Green flower tape
  • Ball tool
  • 24, 26, 28 gauge wire
  • Rolling pin
  • Board
  • Groove board
  • Dusting brushes
  • Fine scissors

Step 1

To make one blossom, you will need 4 head stamens cut in half and 1 longer one. Add a tiny amount of flower paste to the head of the long stamen.

Step 2

Cut a quarter length of 26 gauge wire and form a hook on the end. You will need the pieces shown in the picture to make each flower.

Step 3

Tape the stamens together first then hook the wire over the tape to secure the stamens and tape together with a ½ width green floristry tape. Paint the stamen heads with purple dust colour, mixed with 1-2 drops of clear alcohol. Set aside and repeat the process making 4-5 blossoms

Step 4

Thinly roll white flower paste and cut a rosette with the fuchsia rosette cutter.

Step 5

Soften the edges of each petal with a ball tool on your foam mat. Press in the middle gently, so the petals curve a little. Put a small amount of edible glue in the middle and fold over in half.

Step 6

Put a spot of glue in the middle, add the taped stamens and wire.

Step 7

Roll the rosette around the wire, as to form a ‘skirt’ around.  Repeat the process as many times as number of blossoms you are making and leave to dry for few hours.

Step 8

Colour a small amount of paste with pink gel colour.

Step 9

Take a small amount of pink paste and form a Mexican hat.

Step 10

Roll out the edges thinner and cut out the fuchsia.

Step 11

Soften each side of the petals with ball tool.

Step 12

With the ball tool roll gently backwards each petal, so it curves and turns upwards.

Step 13

Add small amount of glue to the dry centres and thread the pink petal on top of the white rosette. Tidy up the back of the flower and take off any excess of paste.

Step 14

Take a small ball of green paste and form the calix with a cone tool.

Step 15

Glue the calix back to the blossom and leave to dry.

Step 16

To make the buds of the fuchsia, you need a quarter length of 26 gauge wire with a hook at one end. Take a small ball of pink paste and form a cone, to represent the bud. Dip the hook end of the wire into edible glue, and push into the bud. Turn gently around and twist, to form a strong connection.

Step 17

Mark 3 lines on the bud, where the leaves will be. Add a small calix and leave the buds to dry. You will need to make 5-6 buds.

Step 18

To make the leaves, you will need to colour a small amount of paste with foliage green gel paste.

Step 19

Roll small amount of green paste over the grove board and cut a leaf shape with the rose leaf cutter.

Step 20

Dip the end of a quarter length of 28 gauge wire into edible glue and thread the end into the grove. Pinch the leaf end gently to secure it to the wire.

Step 21

Vein the leaf with the rose leaf veiner and thin the edges with a ball tool. Form a very slightly curve to the wire with your fingers, to add ‘movement’ to the leaf.

Step 22

Repeat the process, to make 6-10 leaves.  Leave to dry.

Step 23

Cover the wires with Nile green tape.

Step 24

Dust the outer side of the blossoms with pink dust. Be careful not to get any dust colour on the white rosette part.

Step 25

Dust the buds with same dust colour, as you add a small amount of green colour at the base of the buds.

Step 26

Dust the leaves with green at the centre and over dust at the base towards the edges with mix of green and very small amount of purple.

Step 27

Now we assemble our fuchsia. Start with a small bud and a few small leaves, taping them on to a 24 gauge wire with ½ width green florist tape.

Step 28

Using a few of the small branches, tape them on to the main wire.

Step 29

As you go along the branch, add on bigger leaves and buds and leave them to droop down, taping them together. Add blossoms in groups of 2-3 and tape them half way down the wire, so they droop down and have a natural look.

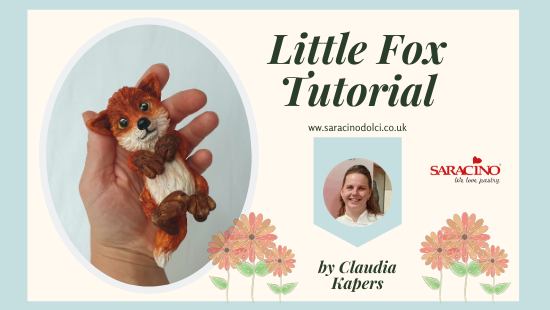
LITTLE FOX TUTORIAL

LITTLE FOX TUTORIAL

Skill level: BEGINNERS

You will need:

  • Saracino Model Paste white
  • Saracino Pasta Scultura
  • Saracino powder colors Brown, Yellow, Orange, White and Black
  • Saracino Liquid Shiny
  • Ball tool
  • Dresden tool
  • Modelling tool
  • Paintbrush
  • Exacto knife
  • Clear alcohol
  • Cocktail sticks or spaghetti

Step 1

Take a ball of Pasta Scultura  and form into the shape of the body

Step 2

Make a hair texture to the body with the Dresden tool. Work from the neck down to the bottom

Step 3

Roll a piece of Pasta Scultura into a length of 4 cm

Step 4

With your finger form a narrower section to the front leg.

Step 5

Make two notches on the foot with the Dresden tool.

Step 6

Using the Dresden tool form the hair texture on the leg.

Step 7

Attach the legs to the body

Step 8

Form a hind leg from a ball of Pasta Scultura

Step 9

Shape the hind leg with the finger and make a heel

Step 10

Make the notches for the toes with the dresden tool

Step 11

Use your Dresden tool to form a fur texture to the rear legs.

Step 12

Attach the hind legs to the body

Step 13

Form a roll of Pasta Scultura 5cm long and 1.5cm thick. This is for the tail.

Step 14

Model the roll into an elongated drop

Step 15

Apply fur texture to the tail using your Dresden tool.

Step 16

Attach the tail to the body

Step 17

Shape a ball of Pasta Scultura for the head.

Step 18

Using your finger press the ball slightly flatter on both sides and form a small snout.

Step 19

Using your ball tool form two holes for the eyes.

Step 20

Shape the mouth with the Dresden tool

Step 21

Make the nostrils with the tip of the dresden tool

Step 22

Make a border around the nose

Step 23

Using Pasta Model make two small balls of about 8mm diameter. These are for the eyes

Step 24

Fix the eyes into the eye sockets and apply fur texture to the face.

Step 25

Attach the head to the body

Step 26

Cut a ball of pasta scultura in half for the ears

Step 27

Form two triangles for the ears.

Step 28

Shape a rim to the ear and form fur structure to the ear with the Dresden tool. Attach the ears to the head.

Step 29

Mix yellow Saracino powder with alcohol and paint the eye very light yellow. Mix brown saracino powder with alcohol and make a brown edge around the eyes. Finally make the pupil with black Saracino powder

Step 30

Mix orange and brown Saracino powder with alcohol and paint the body. Avoid the belly, ends of the legs and the chin.

Step 31

Mix brown and black Saracino powder with alcohol and paint the ends of the legs dark brown

Step 32

Mix white Saracino powder with alcohol and paint the belly and the end of the tail white.

Tip: Let the edges of the colors merge slightly


Step 33

Using a small piece of Pasta Model place a white dot on both eyes

Step 34

Finish the eyes and nose with Saracino Liquid Shiny to give a glazed effect.

Tip: For extra strength in the attachment of the head, legs and tail, you can use cocktail sticks or spaghetti.

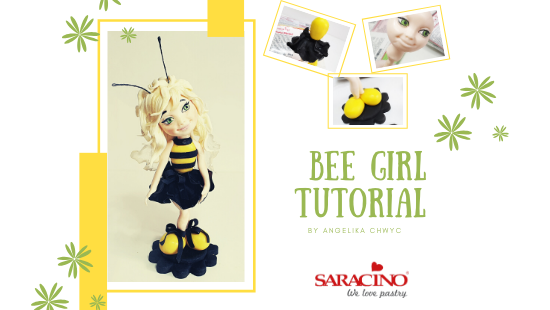
BEE GIRL TUTORIAL

BEE GIRL TUTORIAL

Skill level: INTERMEDIATE

TIP:

If you prefer to model using Saracino pasta model only use ready mixed colours. If you want to mix your own coloured pastes (Pasta model and Chocolate) use Saracino colours – I present this in the tutorial.

You will need:

  • Saracino white modelling paste
  • Saracino white modelling chocolate
  • Saracino black modelling paste
  • Saracino yellow modelling paste or yellow gel colour
  • Saracino light green modelling paste or light green gel colour
  • Saracino skin tone powder colour
  • Saracino light gold powder colour
  • Saracino purple gel colour
  • Craft knife or scalpel
  • Rolling pin
  • Large brush
  • Small brush
  • Cocktail sticks and wooden skewer
  • Florist wire
  • Tool with a sharp point

Step 1

Mix white modelling paste with modelling chocolate. Mix in a ratio of 1:1 and divide into three (the colour will be slightly beige). Then colour each piece/ Two of the balls with skin colour, one ball with yellow and a small green ball.

Step 2

Form an oval shape and with your finger form a dent across the centre

Step 3

Attach the head to the wooden stick. Using a small amount of paste, fix a piece of paste around the top of the stick to stop the head sliding down (this is not a neck and will be removed later)

To create a chin, find the centre of the bottom of the face. Press gently on both sides and try to raise the cheeks a bit. The bottom of the face should be nicely rounded

Step 4

Form the eye sockets with the ball tool.

Step 5

Then gently mark the sides of the nose.

Step 6

Form the end of the nose.

Step 7

Add two lines on the cheeks that make up the smile line

Step 8

With a slightly rounded tool, start forming lips.

Then use cocktail sticks to make holes in the mouth corners. Form holes in the nose and shape the outer edges of the nose.

Step 9

Stick pieces of white pasta model (almond shaped) to the eye sockets and then gently push them in to form and shape them.

Step 10

Add green round balls to the eyes as shown. This will give our Bee Girl the look of glancing sideways.

Step 11

Make eyelids from the skin color.

Step 12

Make a skin-colored line for the bottom eye lid. Using the black Pasta Model, add pupils and a thin line on the green part of both eyes.

Step 13

Use black paste and make thin lines around the eyes. The top line should be longer to form the last eyelash.

Step 14

Repeat on the other eye

Step 15

Add a few eyelashes on each eyelid and form the eyebrows with a small line of black paste. Use a small amount of white paste to add white dots.

Step 16

Dust using skin powder dust to give definition and highlighting to the face.

Step 17

Add a bit of red powder colour to contour the cheeks. Mix Red powder and white gel and paint the lips using your small brush.

Step 18

Remove the head from the stick and put it aside in a safe place ready for later use.

Step 19

Now we will make the stand for our Bee. Cut two shapes out of black paste – the smaller is to be a circle shape and the larger cut using a flower cutter to an overall height of 5mm each.

Step 20

Fix the smaller circle to the larger flower and stick with a small amount of water. Now form the big yellow oval shoes.

Step 21

Model two legs, narrowing downwards. Roll the leg at the knee to make even narrower.

Step 22

Gently insert a wooden stick through one leg.

Step 23

Insert the leg with the stick into one shoe. Fix the other leg to the shoe bend at the knee.

Step 24

Now make several ‘petals’ of different sizes with black paste. Roll out thinly.

Step 25

Use the ball tool to give form and shape to the edges. You can do this on a flower modelling mat.

Step 26

Attach the petals randomly to form the skirt.

Step 27

Keep a wavy edge to the hem of the skirt.

Step 28

Form the body so narrower at the waste and wider at the shoulders.

Step 29

Roll out the black paste and cut out thin strips for the black stripes.

Step 30

Fix the horizontal lines onto your body. Make bows and fix onto the skirt and shoes. We now need to add a neck. Insert a wooden stick a few centimetres into the body and form the neck around the stick.

Step 31

Fix the head onto the stick

Step 32

To make the arms roll skin colour so that it narrows slightly at the wrist. Then narrow further at the elbow and the wrist.


Step 33

Form the thumb on the hands.

Step 34

Then mark all fingers on the hand without cutting them.

Step 35

Stick them on your torso with your hands resting on the skirt.

Step 36

Now for the hair. Make strands of different sizes from the beige paste (a combination of modelling paste and chocolate). Give form and texture using a wooden stick.

Step 37

Apply light gold powder and cut the edges so that the ends are sharp

Step 38

Next apply strands of hair starting from the back of the head up. Remember to glue each element with water.

Step 39

To finish your hairstyle, add a larger element to the front and then add a few smaller ones.

Step 40

Use florists wire to make bee antenna. Colour them black and fix them into the head.

Step 41

Make your isomalt in accordance with the instructions on the packet. Pour out small circular shapes from the isomalt and then rub one edge with a wooden stick. The shape of the wings should be uneven.

Step 42

Colour the tips of the wings using dust colours and fix them to the back using a mix of paste with water.

AN INTERVIEW WITH ‘BEST IN SHOW’ WINNER

AN INTERVIEW WITH ‘BEST IN SHOW’ WINNER

AN INTERVIEW WITH THE WINNER OF ‘BEST IN SHOW’ AT CAKE INTERNATIONAL 2019 – TAFADZWA CHIGUDU

We are absolutely delightful to be given an exclusive interview by the winner of the highly prestigious ‘Best In Show’ at Cake International Show In Birmingham 2019.

Grab a coffee, meet Tafa and follow her sweet journey to the success.

Full Name: Tafadzwa Chigudu

Business Name: TafaCakes

Location: Finchley in North London

Q: How did you begin your journey as a cake/sugarcraft artist? Is this your sole career?

I was a Solicitor for 13 years until I had my daughter over 5 years ago. During my Maternity Leave I admitted to myself that I no longer wanted to go back to my legal job. I had always loved baking so I began to do that more.

Q: Do you specialise in a specific kind of cake art? E.g. Modelling, sculpted cakes, wedding etc.

I would have to say I don’t. I will do any kind of cake that allows me to explore organic elements, interesting textures and vibrant colours. I do not like white though so I probably am more to the taste of quirky brides.

Q: Is this your first time entering Cake International? 

This was not my first Entry- it was my 7th entry into Cake International and I was so superstitious about it I even put the number 7 on the main door on my piece! My first Entry was in 2016.

Q: Have you won any other awards? 

I have 4 Gold Awards from Cake International, 2 Silver Awards and a Bronze. I also have a Gold Award from Salon Culinaire from 2018 for a sugarcraft showpiece.

Q: What made you want to enter?

Whilst on Maternity Leave I had fallen in love with cake decorating and was enjoying exploring what was possible with sugar. In 2015 at Cake International at the Excel in London I met Emma Jayne who was exhibiting her amazing Avatar figure- I subjected her to a slideshow of a few of my cakes on my phone and she strongly encouraged me to enter…. I left that day knowing I HAD to enter… to see what I could do… Emma’s encouragement went a long way to convincing me and I have been addicted ever since.

Q: What category did you enter and what was your piece? What Saracino products did you use?

I entered the Decorative Exhibit Category and I did a piece I called The Bookworm Library. I used Saracino Pasta Model in fleshtone, yellow, brown, Tiffany blue, red and black.

Q: What inspired your design?

I was always the kind of child with her head stuck in a book. I loved all places you could find books, libraries, second hand shops and bookshops. I dreamt of a little space all of my own where every book I wanted existed…. I figured it had to be high up in a tree so boring grown-ups could not get to it!

Q; How long did it take you to complete?

I started planning this piece in April 2019 – straight after London Cake International on Tour. I started physically working on it in May so it took me 5 months to consider it done! (In my head its still not finished- I still want to continue with it)!!!!!

Q: How did you feel on the first morning of competition?

The first morning of Cake International is like Christmas morning; with the unveiling of hundreds and hundreds of magical works of art. The palpitations of seeing the Legendary pink carpets and black table cloths and the excitement of placing your completed work there is like nothing I have experienced. This year I arrived relieved that my piece had survived the journey there, and I was soon gaping like a fish as I saw everyone bringing their pieces in…. knowing all these people were working as hard as you and are all here to showcase their efforts is just thrilling.

Q: Tell us a little about the show, what did you enjoy most?

I cannot lie- my favourite bit is the competition area- I can wonder up and down those aisles time and time again and I always feel like I am seeing new pieces every time! And this time around I really enjoyed watching people’s faces as they explored my piece.

Q: Tell us about your award, how did you feel?

Hearing my name called out as Best in Show was surreal…. It doesn’t matter how much you fantasize about something like that happening- it in no way prepares you for the moment. I cannot remember most of it- Thank goodness for awesome friends who took video and pictures allowing me to relieve it. It was a beautiful moment.

Q: What advice would you give to anyone thinking of entering?

Do not hesitate- do it!!!! It allows you to stretch yourself- to make something purely for your own pleasure and then you get a chance to show it to everyone. And most importantly use the judges feedback to build on what you do next time- I took every single bit of criticism given to me by the judges on every piece I have done and worked on it till the next piece was a bit better…..

Q: Will you enter again?

Try keeping me away!!!!! I am a complete addict- I don’t think I could even stop myself entering again, and again, and AGAIN!!!!

JUST FOR FUN

Q: What cake tool can’t you live without?

I cannot survive without my Dresden tool….and good old foil…. Best cheap tool ever!!!!

Q: Who inspires you – who’s your favourite cake / sugarcraft artist?

I am inspired by a lot of amazing artists it is so hard to narrow them down, I love Emma Jayne for her beautiful challenging pieces- in sheer scale and ambition. I Love Liz Marek of SugarGeekShow- she is a technical Magician and wonderful teacher, I love Ana Remigo for a distinct meticulous style- you always know her work, I love Gregoire Goel- The Isomalt God. My favourite would be a Frankienstein of all of them!!!!

Q: What’s your favourite Saracino product and why?

Definitely Saracino Pasta Model. I use it for most decorative elements on all my cakes. It is so beautiful to work with and holds it shape well. The walls on my piece were made of Saracino Pasta Model because although my first concern had been that I needed them strong enough to stand on their own without any internal supports I also needed a lot of working time to cut out each individual brick and cobblestone by hand. Saracino modelling paste gave me both – hours of working time without it drying out and then a strong sturdy structure after! I also used the same Pasta model for ALL the furniture and contents of the Library itself.

Q: What movie title best describes your life?

A not so well-known film here by John Singleton- Hustle and Flow….

Q: What’s your best advice in 5 words or less?

Inspiration is all around us.

QUICK FIRE QUESTIONS

  1. Flavour – Chocolate or vanilla? Vanilla- I actually really hate chocolate cake- please don’t kill me…
  2. Plan properly or wing it? For excellence- a perfect blend of both….although my nature is WINGING IT!!!!!
  3. Whilst working – Listen to music or watch tv? Music- all the time- Hip-Hop, African beats- high energy music.
  4. Favourite product – Saracino pasta model or Saracino modelling chocolate? Pasta model.
  5. Delivery – Down a long bumpy road or during a rain storm? Rainstorm – anyday. Cakes and bumps are NOT friends.
  6. Buttercream or ganache? Ganache- ANYDAY, ALL DAY, EVERY DAY!!!!!!
  7. Do you prefer – Baking the cake or decorating the cake? I started loving the bake, now I LOVE decorating!
  8. Mould or handmade? Handmade- absolutely. Mould for convenience only.
  9. Airbrush or paint by hand? Airbrush!
  10. Apron or chef whites? Apron
  11. Straight edge or round? Straight – how sexy is a beautiful straight edge?!!!!
  12. Customer design or free reign? Free reign- too wild to be tamed- although customer can point out direction!
  13. Stay up all night to finish or get up early to finish? ALL NIGHT OWL!!!!
  14. Fruit cake – Yay or Nay? YAY
  15. Your own birthday cake – Make it yourself or have the week off?  Week off!!!!!!!!!!!!!!!!!!!!!!!

Tafa has kindly provided us with a few progress shots of the piece being created. Have a look at how the piece was structured and prepare to be amazed!