PASTA TOP
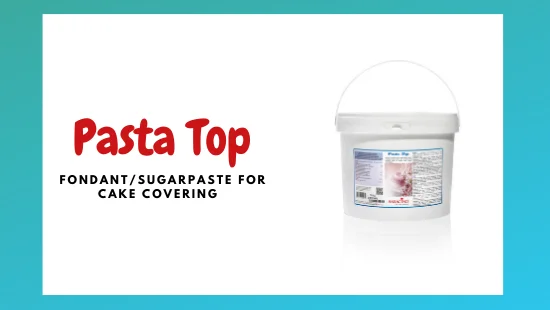
PASTA TOP – sugar paste designed for cake covering

PASTA TOP DESCRIPTION
Saracino TOP Paste (known as Pasta Top) is a ready-made fondant created by Saracino for covering cakes.
It is VEGAN FRIENDLY, GLUTEN FREE and DOES NOT CONTAIN HYDROGENATED FATS OR PALM OIL.
We recommend working the paste by hand before using it for at least two minutes in order to make it elastic and tear resistant. If this is not enough, it can be heated briefly in a microwave to soften. Just for 10 seconds (700W).
The warmth makes the cocoa butter ingredient melt and make the paste soft and easy to work. One of its other ingredients is tragacanth, a natural product that makes our Pasta TOP extremely elastic. It is easy to roll to as thin as 1mm with a rolling pin or with a sheeter. In this way, it will be perfect to cover cakes guaranteeing a great look.
It is suitable for use in hot and humid climates, it easily withstands temperatures above 35° and high humidity levels guaranteeing perfect stability on the cake.
It can easily cope with temperature changes without sweating or cracking.
Pasta TOP can also be used for decoration on cold desserts as refrigeration does not affect the Pasta Top.
It can also be coloured with powder, gel or airbrush colours.
The delicate vanilla aroma and taste is not overpowering, and it perfectly blends with the flavours of your cake.
Our white Pasta TOP is available in 5kg buckets or 1kg tubs. Our coloured Pasta TOP is available in practical 500g packages in the following colours: orange, blue, light blue, baby blue, fuchsia, yellow, lilac, black, pink, red, tiffany, light green, green and brown.
FAQ – PASTA TOP
-
- WHAT CAKE FILLING SHOULD I USE?We suggest a light butter cream or a white chocolate ganache. Darker shades of filling may be seen through the paste if it is rolled thinly. Remember that cake fillings with high moisture content (such as whipped cream) risk dissolving the sugar paste.
- HOW CAN I MAKE THE PASTA TOP STICK TO A CAKE DUMMY?Simply use Saracino Cake Gel, our edible glue, or a small amount of water.
- WHAT IS THE IDEAL THICKNESS FOR THE PASTA TOP?We suggest rolling it to a thickness between 1mm to 3mm (max). We recommend keeping to these limits so that the paste does not become invasive (if too thick) or breaks (if too thin)
- CAN IT BE USED TO COVER VERY TALL CAKES?Thanks to its elasticity, our Pasta TOP is perfect for covering tall cakes without tearing.
- CAN I USE SARACINO PASTA TOP FOR MODELLING?We recommend using the Award winning Saracino Modelling Paste for modelling. As an alternative, it is possible to add 5% of CMC to the Pasta TOP to make it firmer and more resistant.
- DOES SARACINO PASTA TOP COME IN DIFFERENT COLOURS?Yes, it does. Our Pasta TOP is available in 14 colours: Light blue – baby blue – yellow – orange – red – pink – green – light green – purple – tiffany – black – fuchsia – brown – white.
- CAN I PAINT PASTA TOP?Of course, you can use clear alcohol or oil mixed dyes that provide quick drying but need a precise design. You can also use water-mixed dyes which need longer drying times but create pleasant shades. It is also perfect for airbrushing.
- CAN I USE SARACINO PASTA TOP TO COVER CAKES THAT NEED TO BE STORED IN THE REFRIGERATOR?Yes, with the only advice being to carefully evaluate the type of cake and fillings. Our Pasta TOP is not affected by the temperature difference of inside the fridge and outside.
- IF I MAKE A MISTAKE WHILE COVERING A CAKE, CAN IT BE REPAIRED?Yes, one of the main ingredients of our Pasta TOP is cocoa butter, which makes our paste extremely elastic and perfect for smoothing / blending. So, if you make a mistake while covering your cake, you just need to add a small amount of Pasta TOP over the damaged area and gently smooth it with your hand or with a smoother. You won’t notice any imperfections or joints once blended.
- DOES IT DRY FAST?No, our Pasta TOP remains soft and perfect to cut even a few hours after use.