MAJORETTE CAKE TOPPER TUTORIAL





Combine the white, tiffany and blue Pasta Top and mix. Dont worry about mixing too well as we want a marble effect.

Cover the cake board.

To cover the dummy / cake use the coloured Pasta Top. If you need to dust the work surface with cornflour before rolling the fondant to prevent it sticking. Lightly moisten the dummy or cake using water or cake gel so that the fondant sticks.

For the shells to the side of the cake roll small balls using three different colours. Use your ball tool to create an indent and hollow out to form the curved shape.

Attach them randomly to the cake and board.
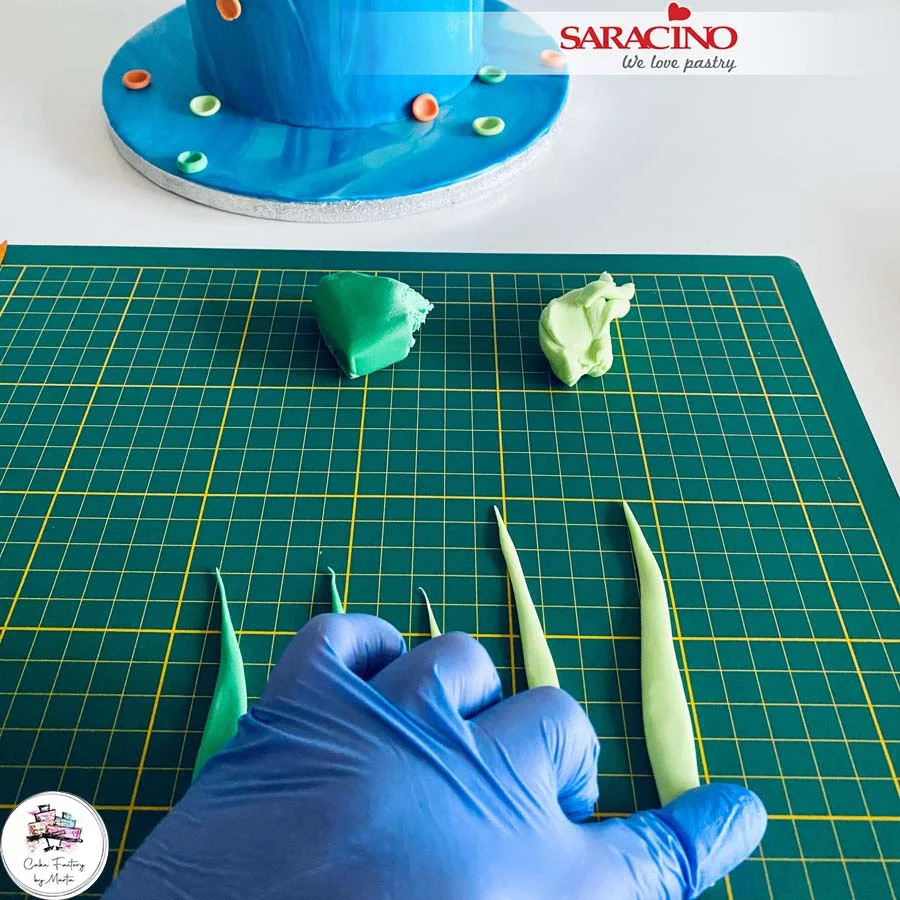
For the seaweed roll long sausage shapes from two shades of green Pasta Model. Use your fingers to flatten.

Twist them into a seaweed shape. Fix them to the cake as you wish.

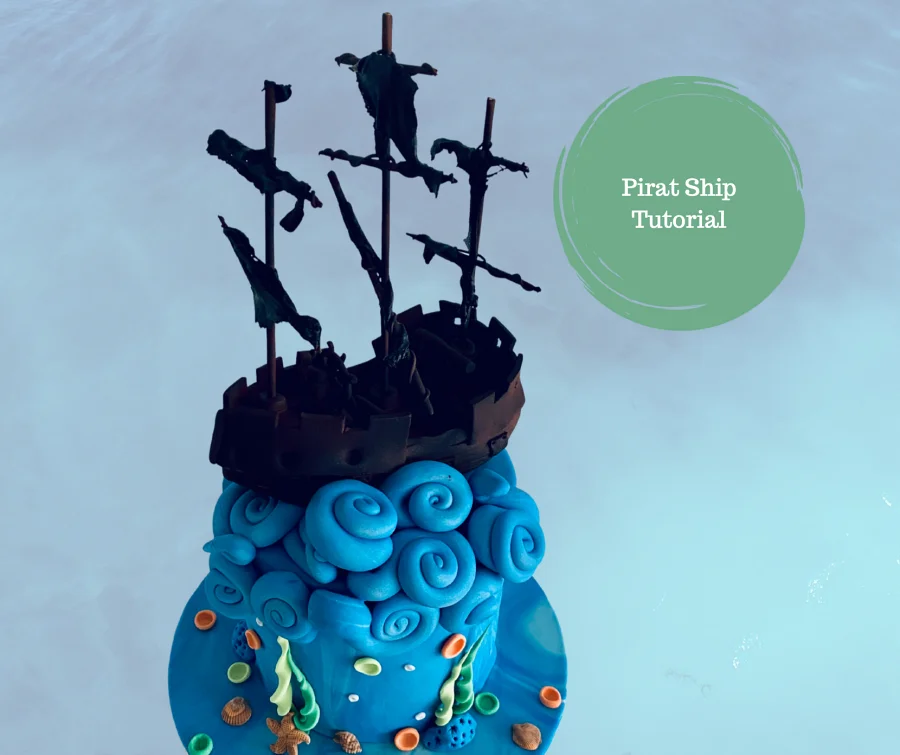
For the waves use the remaining coloured Pasta Top. Weigh out pieces of 18-30g and roll each of them to a long teardrop shape. Again this does not have to be perfect as we want to achieve a random sea look.

From the narrow end roll into a snail shell shape.

Bend and shape the waves randomly to give a flowing sea feel. Fix to the top and sides of the cake using a little water or edible glue.
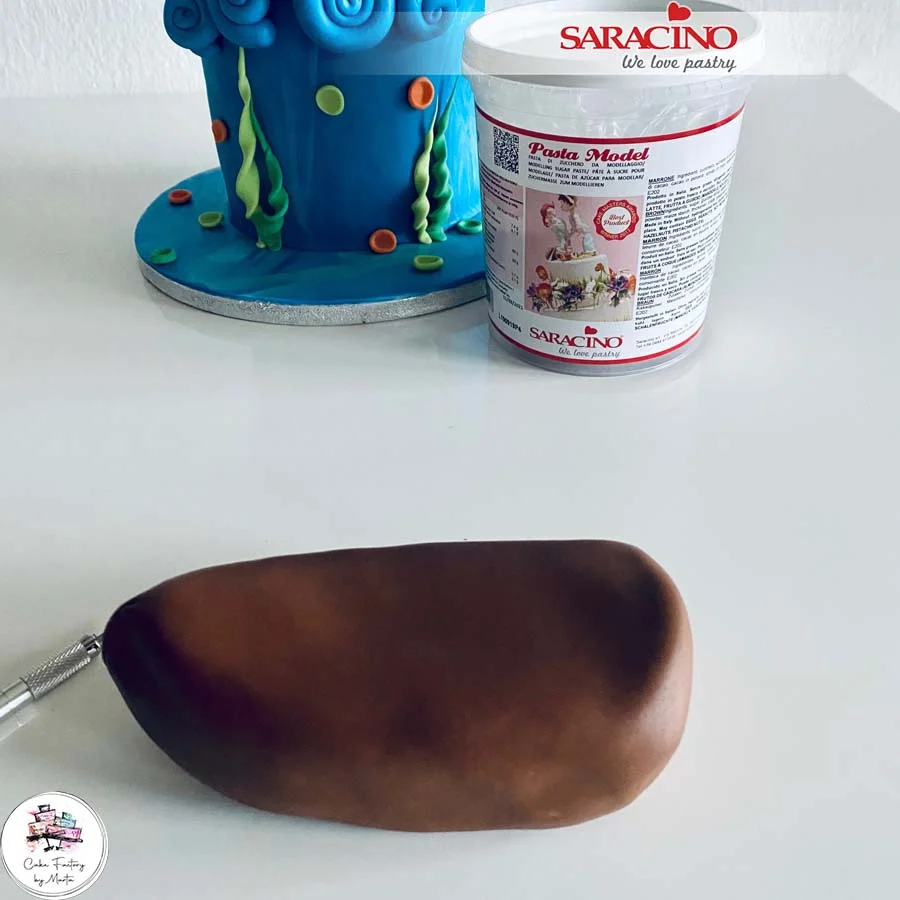
Using 500g brown Pasta Model model the shape of the boat.
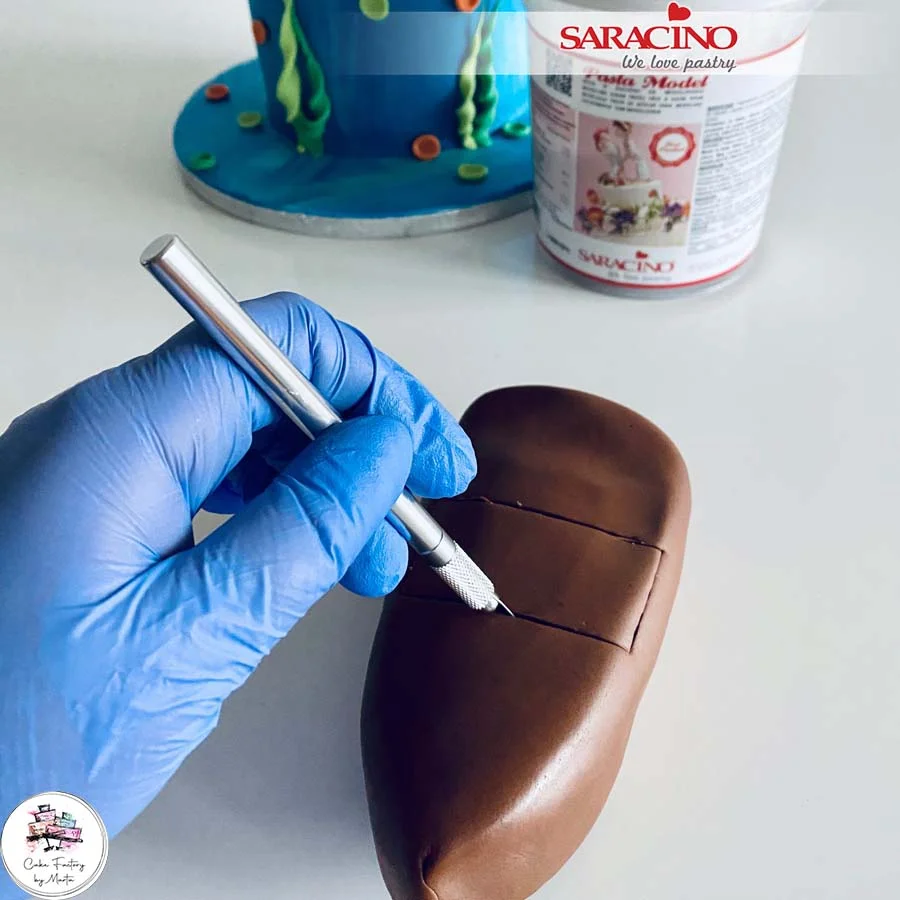
Use your scalpel to cut out a rectangle shape for the hollowed out deck area.

Roll thin strands of brown paste. Flatten gently and cut into strips to attach to the back of the deck area. We want to achieve a wooden plank effect.

Use your Dresden tool to apply a wood look texture to the ship.

Roll out a 3cm wide strip of brown Pasta Model. Use a sharp knife to form a turret shape across the top.

Using a little water fix to the bow and stern of the ship cutting the piece to the length you need. Using a ball tool make indentations in the front for the port holes.

For the cannon shutters shape 8 small squares and fix them to the sides of the ship pressing with point shapers.

Roll a 3cm long sausage shape and cut into two. Fix vertically on the back end of the ship. Roll a thinner sausage shape and fix over the two vertical pieces.
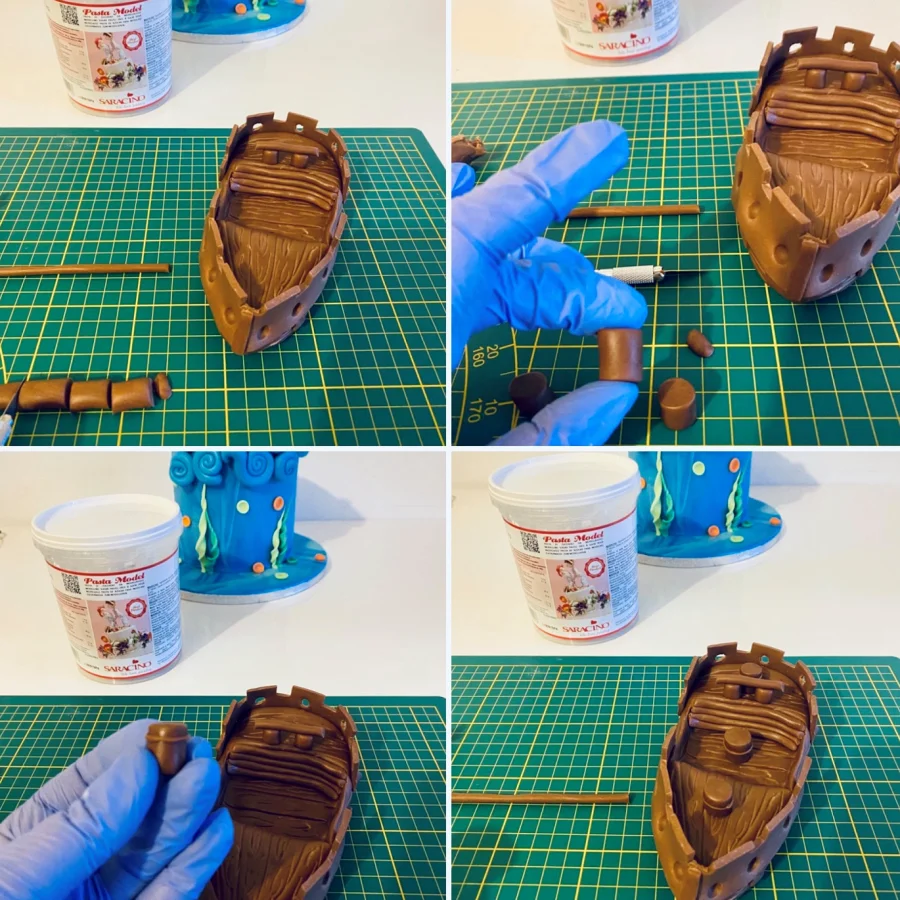
For the mast pads roll 1.5cm long sausage shape and divide into three equal parts. Roll a thin strip and fix around the top of each mast base. Fix the mast bases to the front, middle and back as shown.

For the two front handrails roll a 1cm diameter sausage shape 3cm long and cut in half fix to the deck as shown. Roll a thinner piece and divide into two and stick to the top of each post to form the handrail.
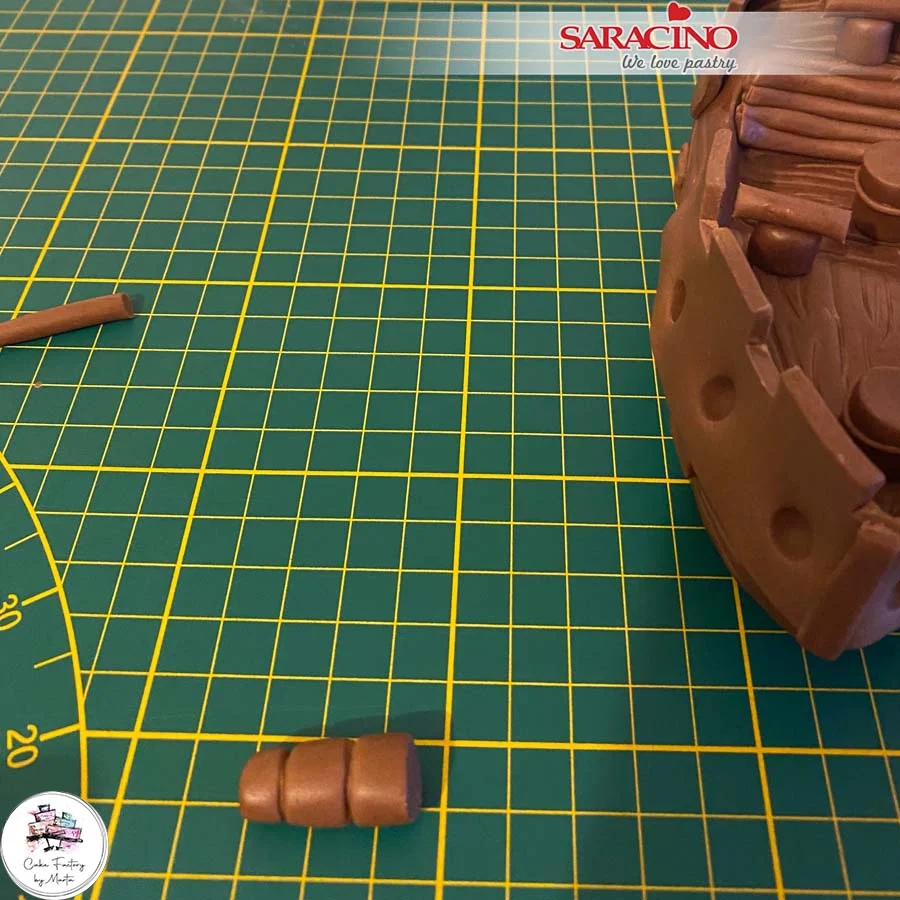
For the steering wheel support roll a 3cm long sausage shape slightly narrower at the top end. Mark 3 grooves around it. Fix between the handrails.

Using a thin line of rolled paste form a round steering wheel.

Add 8 small lengths of thin brown paste to the wheel meeting in the centre. Use a sharp modelling tool to mark small holes at the joining points.
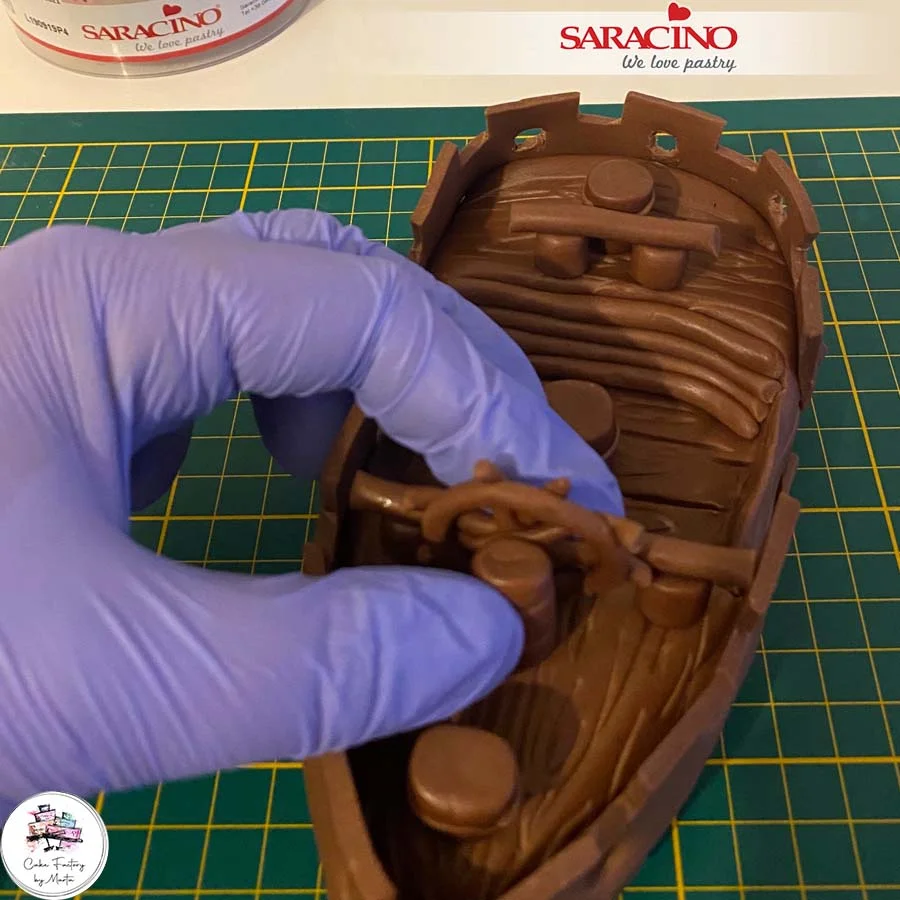
Attach the wheel to the upright column.

Work your brown paste until it is soft. Cover three wooden skewers with the paste.

Insert each mast into the three bases we fixed earlier.

Now prepare the horizontal mast pieces. Cover lengths of wooden skewer and toothpick with the soft brown paste. For this ship I have used 7 mast pieces.

Using a little water or edible glue fix each horizontal member to the vertical mast. Roll or extrude a thin line of brown paste. Twist around to give the rope look.
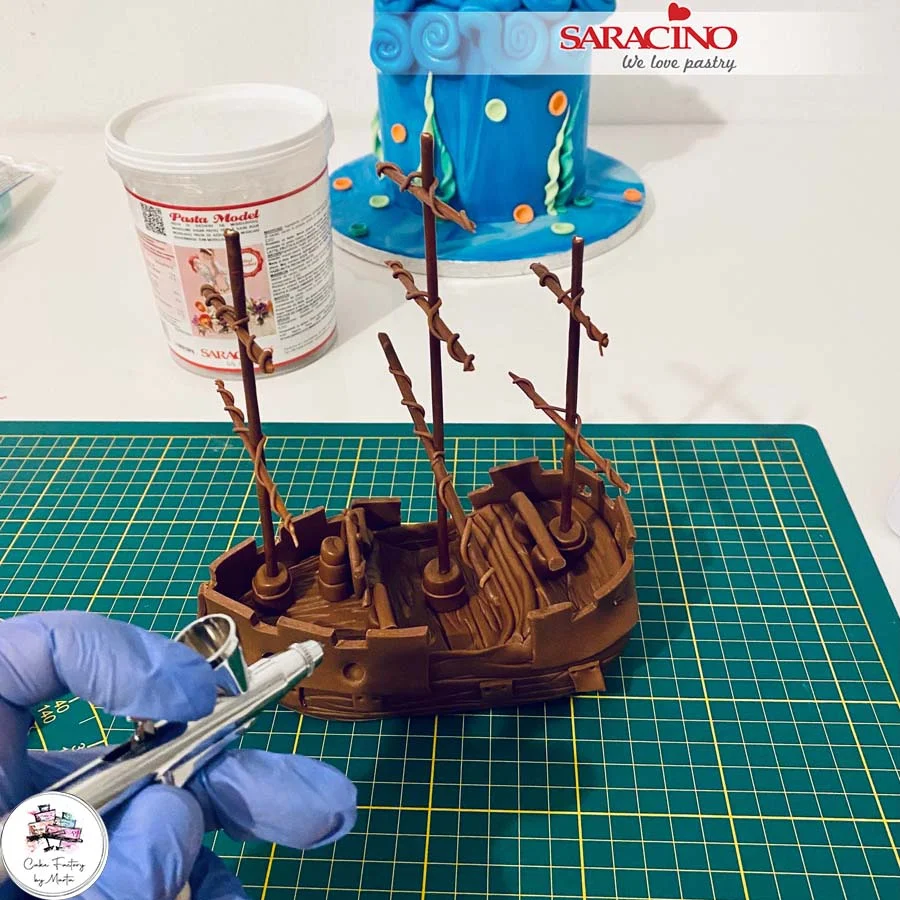
Using an airbrush spray with a dark brown. We want to achieve a shipwrecked derelict look.

For the sails we need to rip pieces of 0.27 wafer paper to give a torn rough look. Use your airbrush to spray both sides black.

Using a little water or edible gluse fix the sails to the masts randomly. We want to achieve a ripped, ghostly, random look.

Place the ship on the cake so that it sits against the waves. If the ship is not sitting well use a little spare paste underneath were it is not seen.

To give added dimension and character to the cake add shells. Mix orange and brown pasta model to give a marble effect.

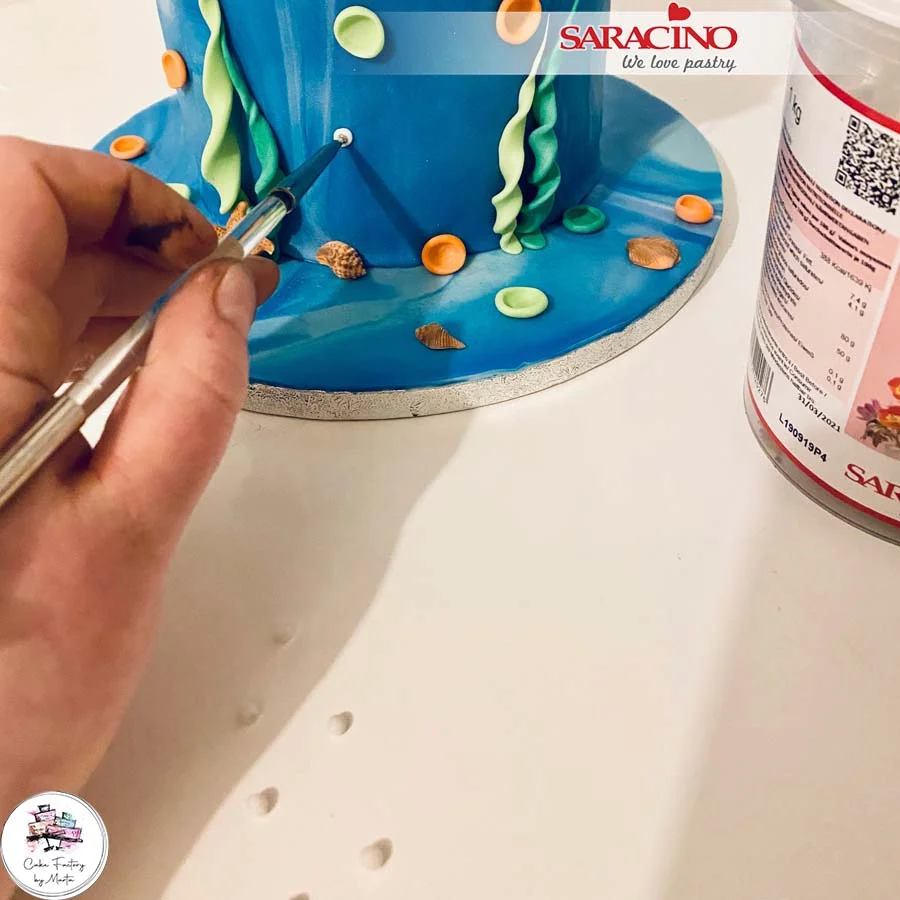
Add to the look by fixing a few random white ‘bubbles’.

AHOY!! We are ready to set sail.

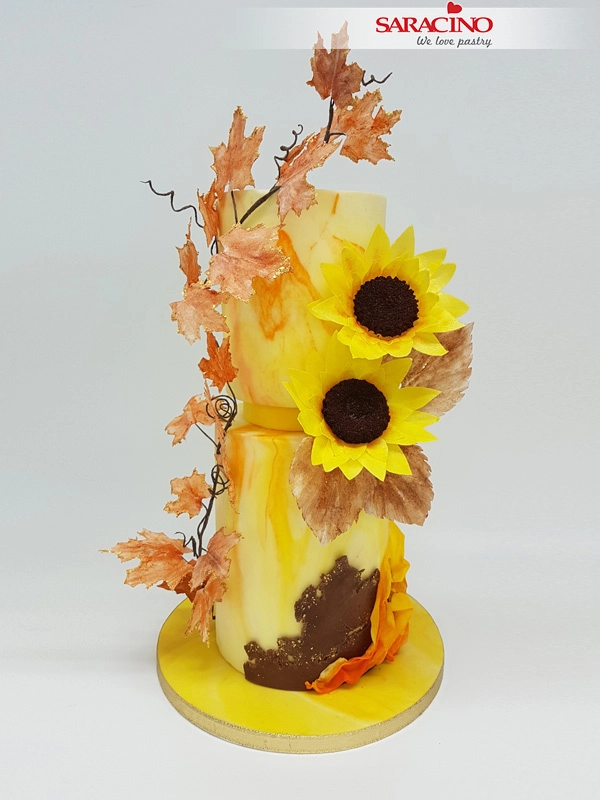
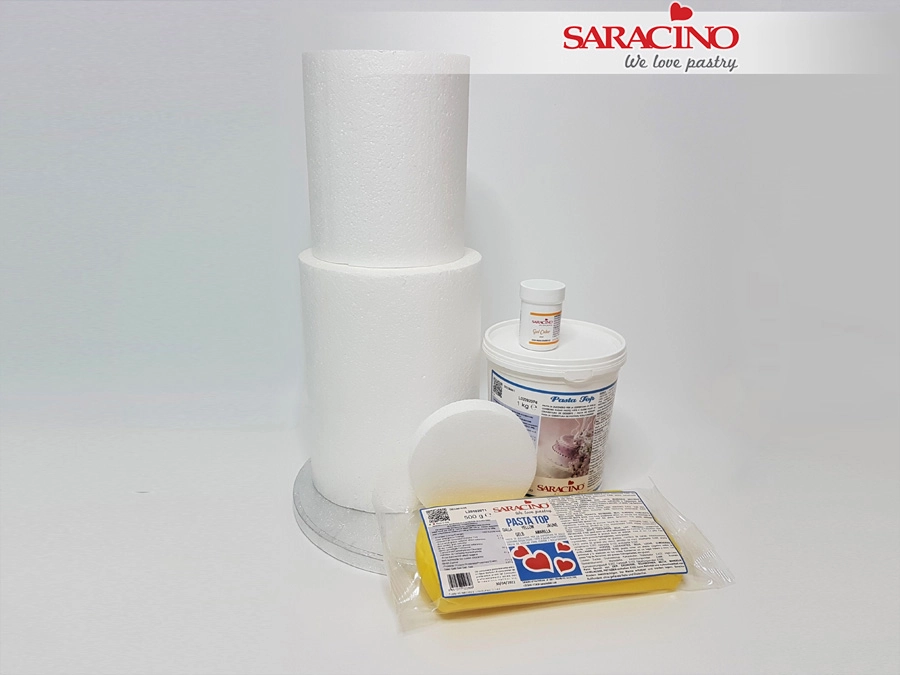
Prepare your dummies and products.
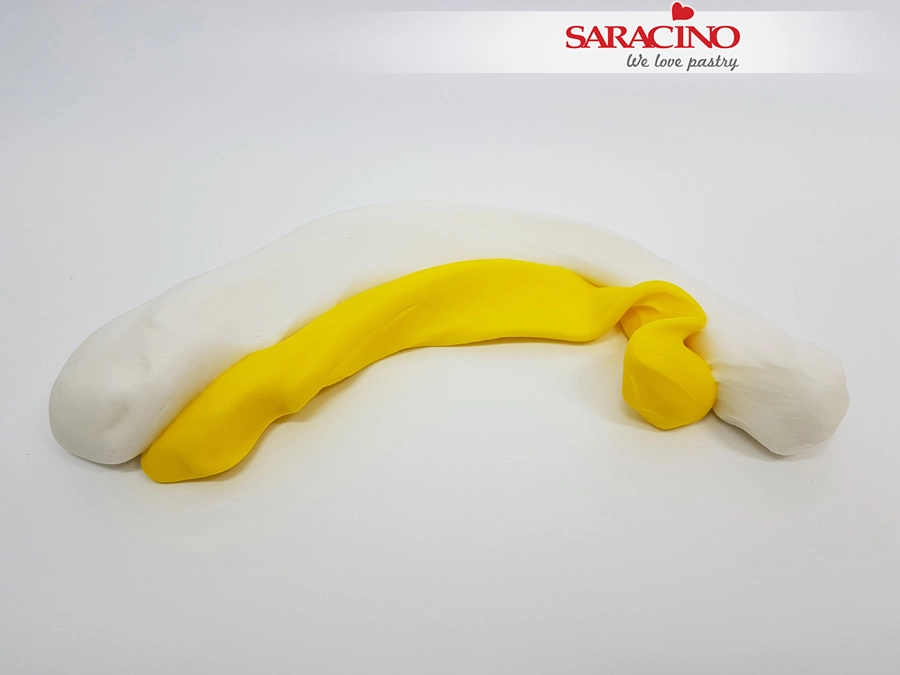
Prepare 600g white Pasta Top and 100g yellow Pasta Top (knead each until soft). I used pre-coloured yellow paste but you can also colour white Pasta Top with yellow gel colour. We want to achieve a marbled effect so roll the Pasta Top and place them against each other as shown.
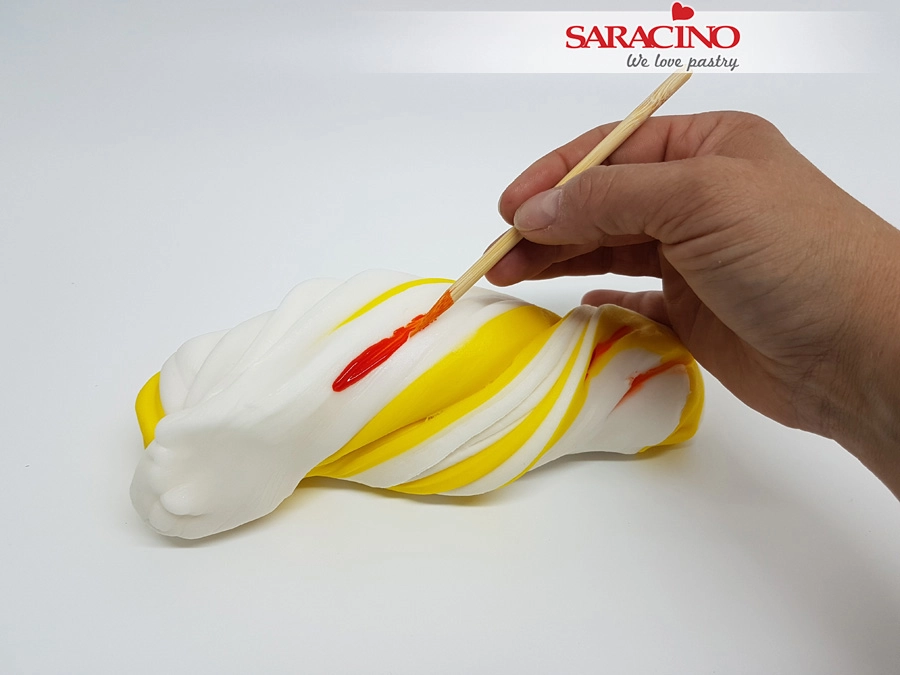
Twist the white and yellow paste together as shown in the photo. Limit the number of twists so that the paste does not mix too much. Add a little orange gel colour to a few places.
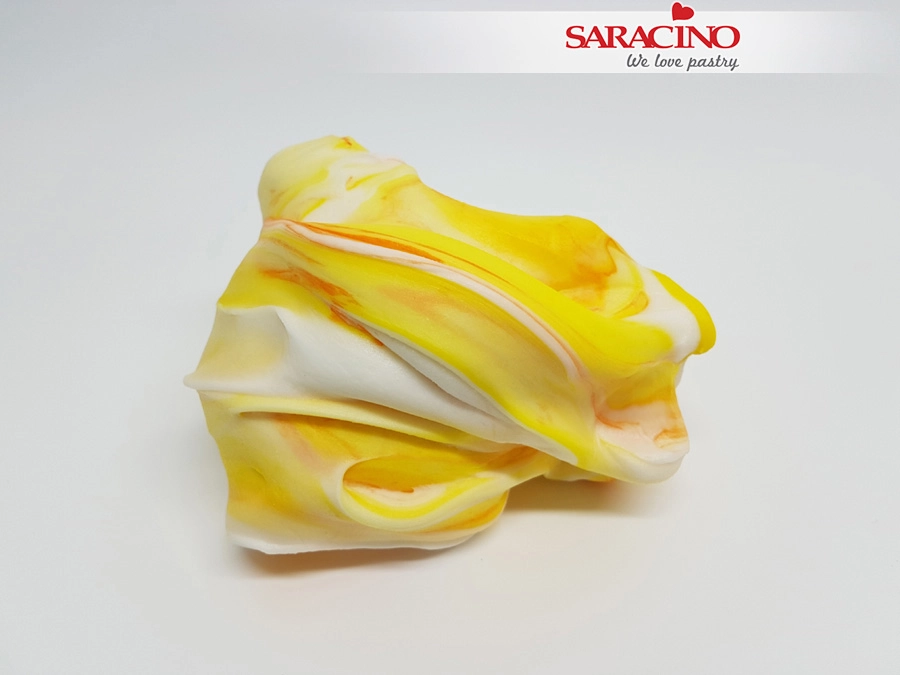
Now pull and twist the paste 3 to 5 times. Not too often otherwise the colours will mix too much.
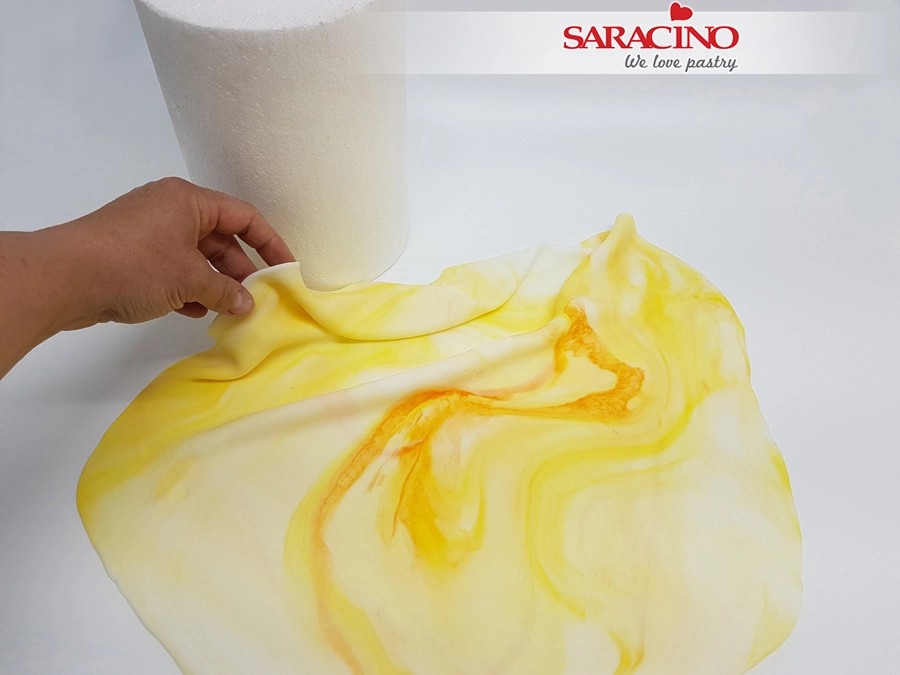
Brush your dummy with cake gel or boiled water. Roll out the marbled Pasta Top to 2 to 3mm thick and a diameter of approximately 50cm.
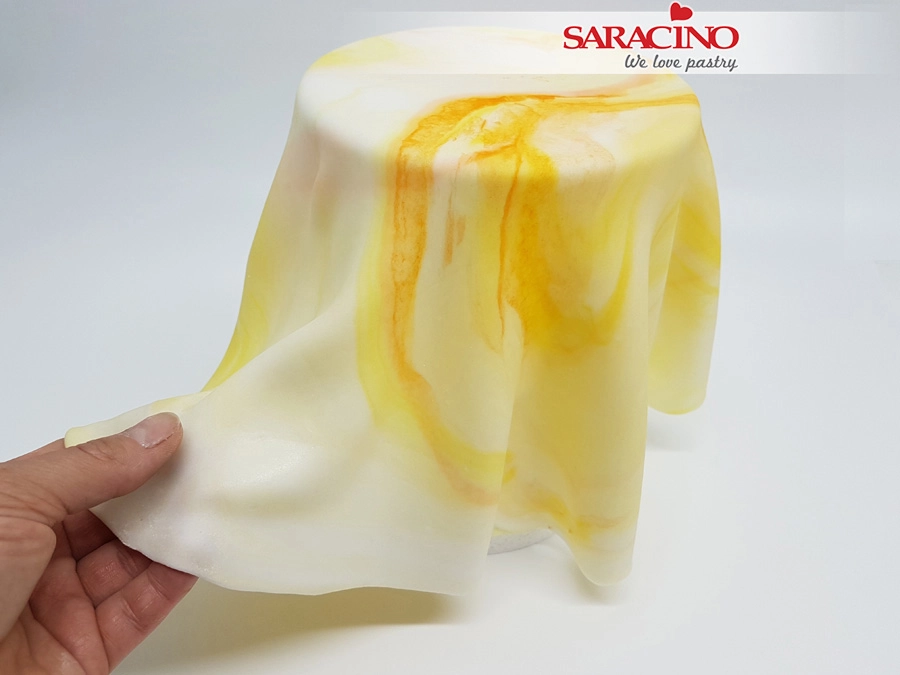
Place the Pasta Top on the dummy and smooth out to the bottom. This doesn’t have to be perfect but there should be no air bubbles between the Pasta Top and the dummy. Trim off any excess paste with a sharp knife and store in an airtight plastic bag.
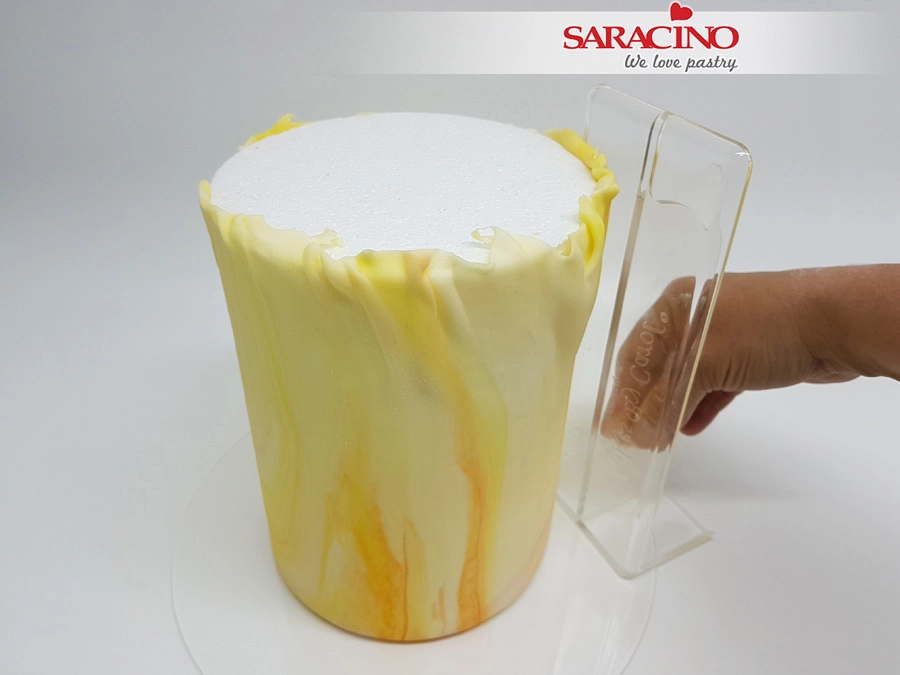
To achieve nice sharp edges take an acrylic disk with a diameter of at least 26 cm and cover with cornflour. Turn your dummy (or cake) upside down on the acrylic disk as shown. Take the Sharp Edge Smoother and work around the dummy until you get a nice smooth result. It is important that you put extra pressure where the cake touches the acrylic disk. This is where the magical sharp edge appears.
Tip: On the Instagram site: “Sharp Edge Smoother” you can find various instructional videos about using the Sharp Edge Smoother made by Carol Smith.
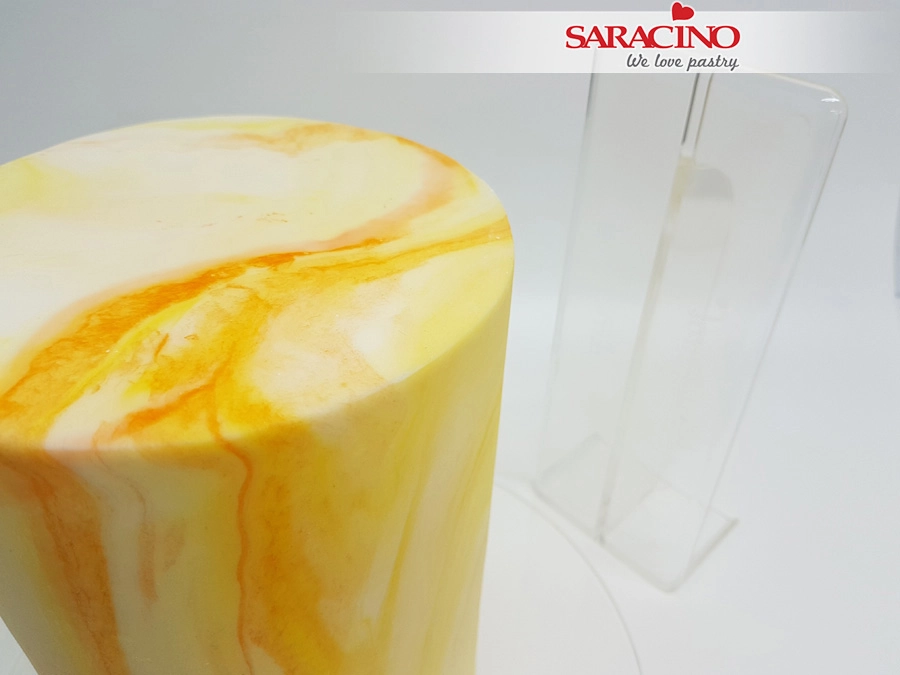
When you have finished smoothing, turn the whole thing over again. Carefully remove the acrylic disk. If necessary, you can smooth out small irregularities. You should have sharp edges.
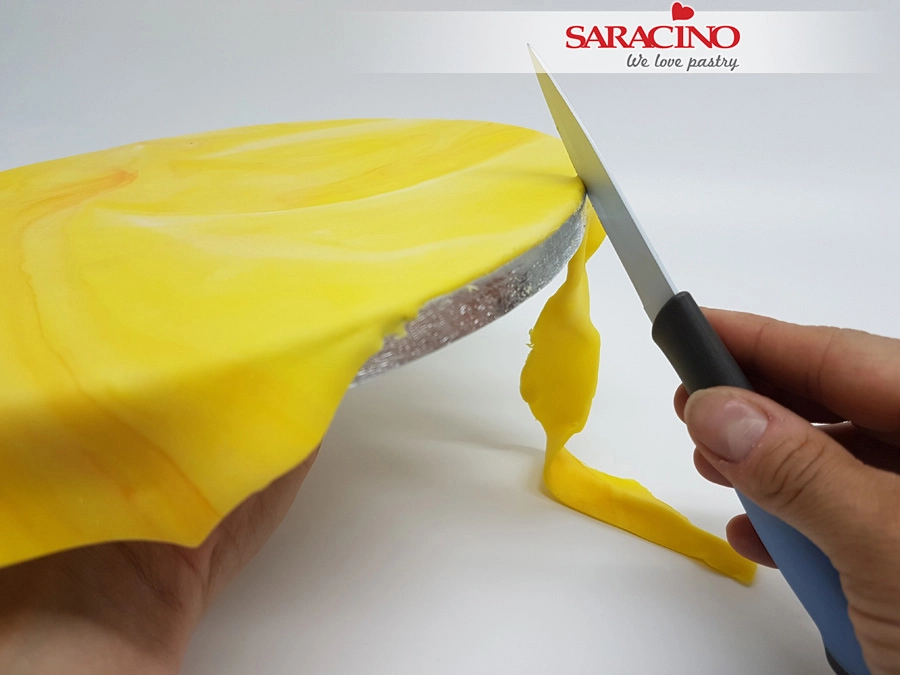
Knead the remaining Pasta Top until it becomes a solid colour and cover the 25cm diameter cake drum. Trim excess paste with a sharp knife.
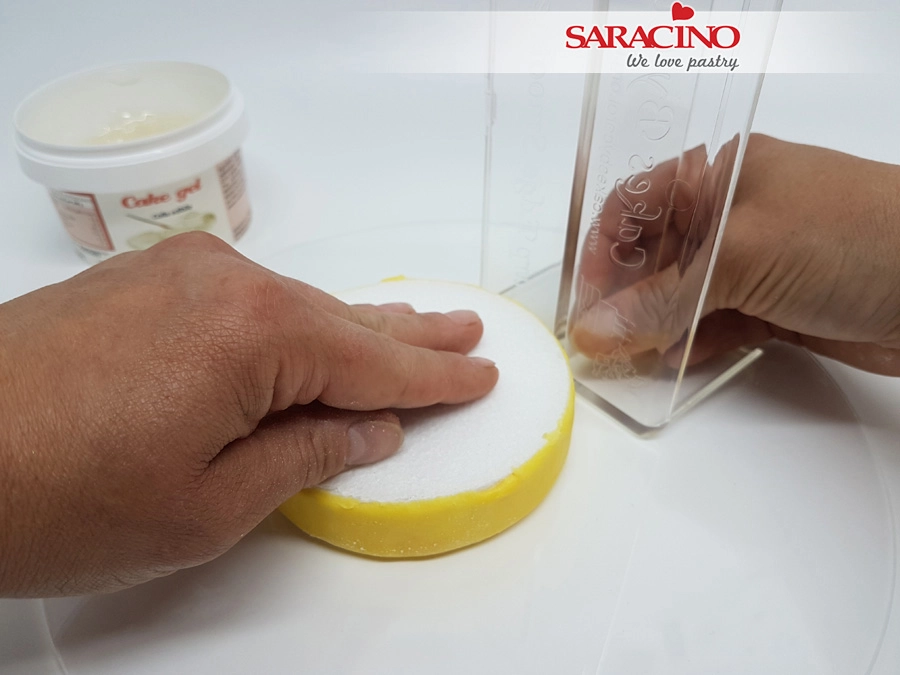
Using the solid yellow colour cover a dummy disk of 2cm high and 10cm diameter.
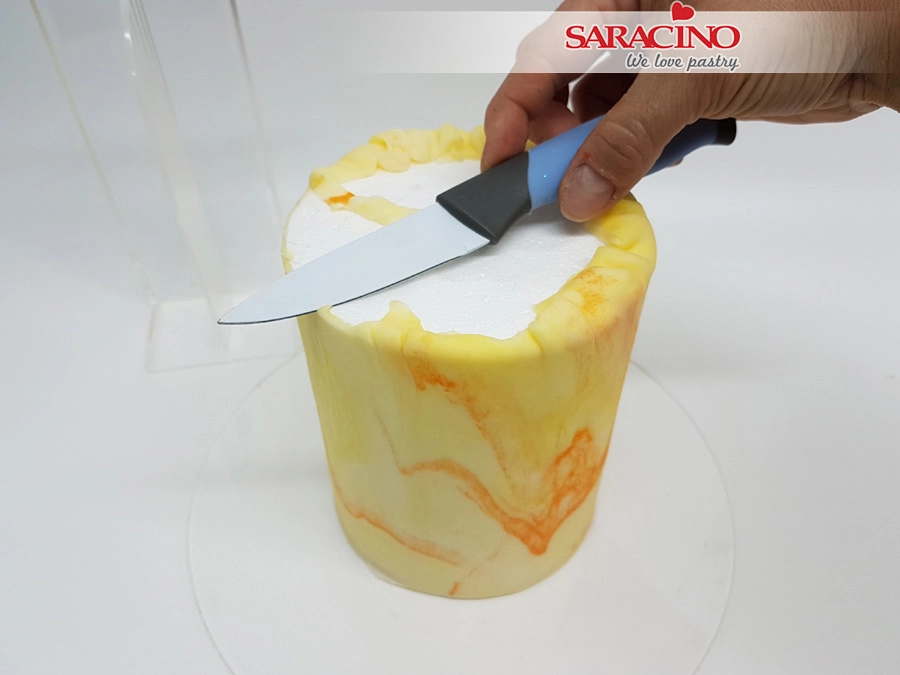
Using 450g white and 50g yellow Pasta Top repeat the marbling effect. Roll to a diameter of approximately 40cm. Cover the dummy then repeat previous steps to achieve the sharp edges.
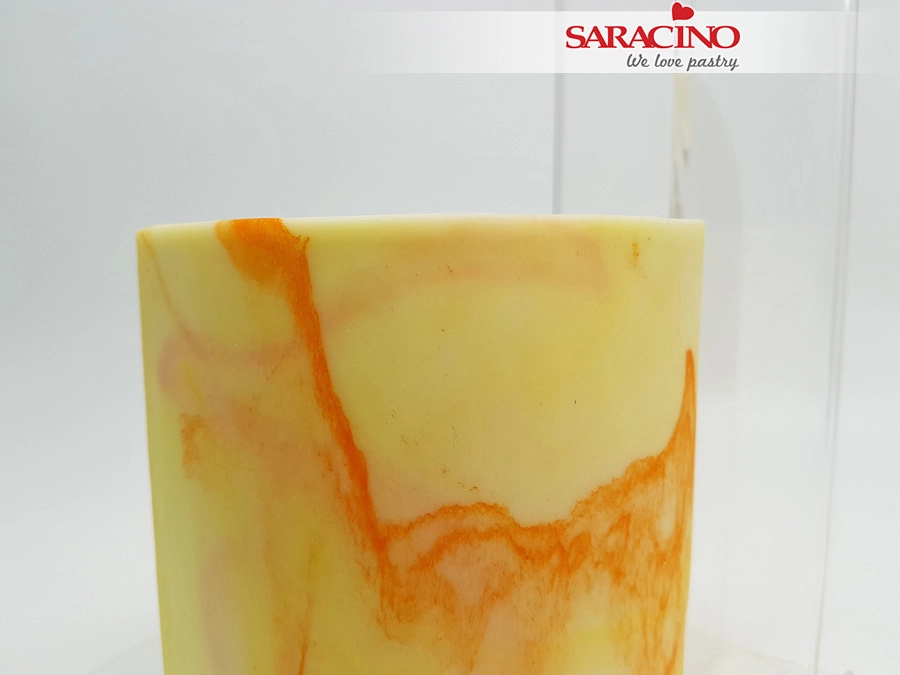
Then turn the cake over. Carefully remove the acrylic sheet. If necessary, you can smooth out small irregularities.
Tip: The more often you use the smoother, the faster and easier you can create the Sharp edge effect. So you can practice the technique well on dummies.
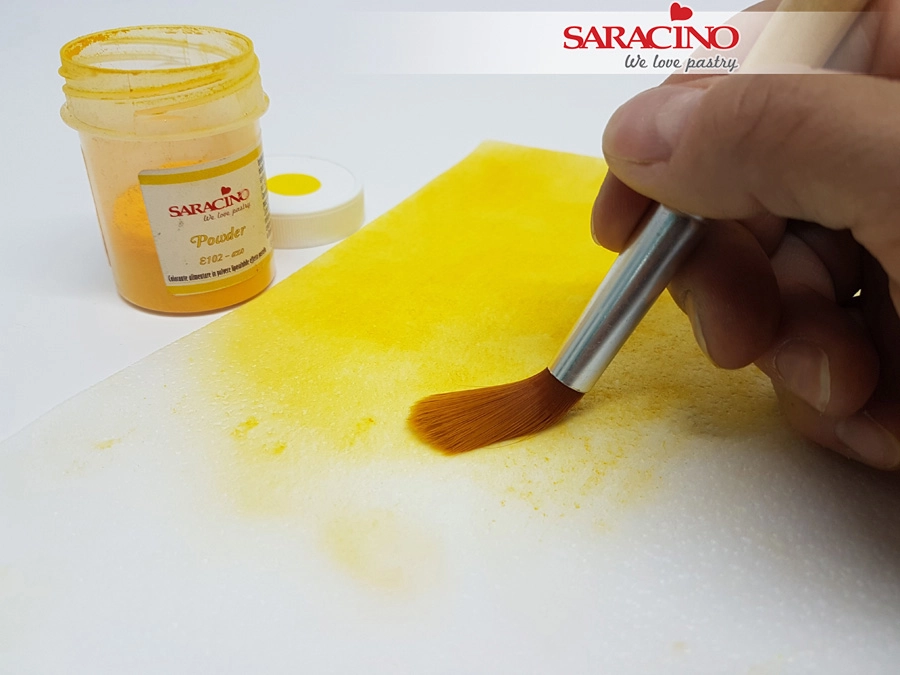
Take 2 sheets of Saracino 0.27 wafer paper. Colour the wafer paper yellow on both sides with the airbrush colour and airbrush. Work in several thin layers. Allow the airbrush colour to dry thoroughly before applying the next coat. The number of layers added determines the brightness of the colour. If you do not have an airbrush, you can also colour Saracino wafer paper with an alcohol-free conditioner coloured with yellow powder or gel colour.
RECIPE alcohol-free conditioner:
*½ tsp food grade glycerin
* 2tbsp water (distilled preferably)
Mix the two ingredients in a bowl and it is ready to use. You can colour it with Saracino dust or gel colors. You can also use the mix in the airbrush. Mix made with distilled water can be stored for a month in a dark place. It can be stored for 1 day with tap water.
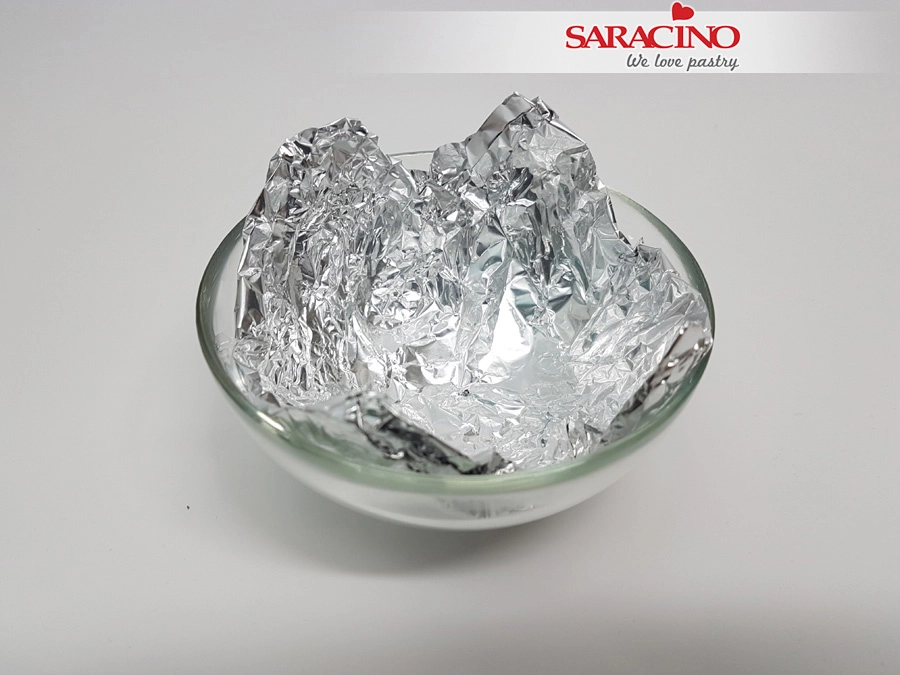
Prepare a mould to dry the sunflower later. Take a piece of aluminum foil and fold it to a 12 x 12cm square. Now press the piece of folded aluminum foil into a glass bowl with a 12cm diameter. The size and curvature of the aluminium mould can be adjusted to the size of the flower.
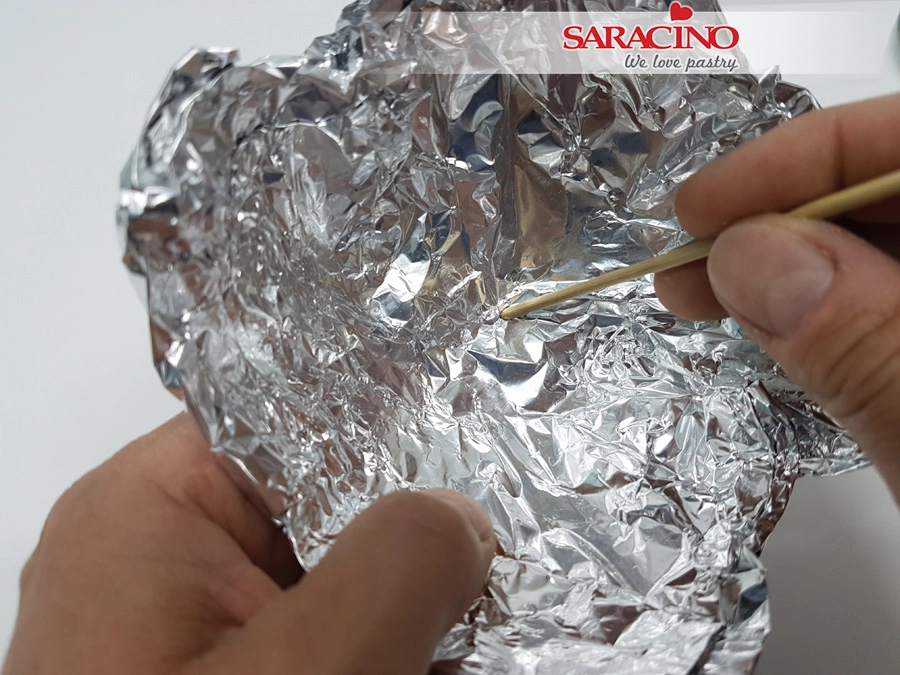
Pierce a hole in the center of the aluminium mould. Set aside until needed.
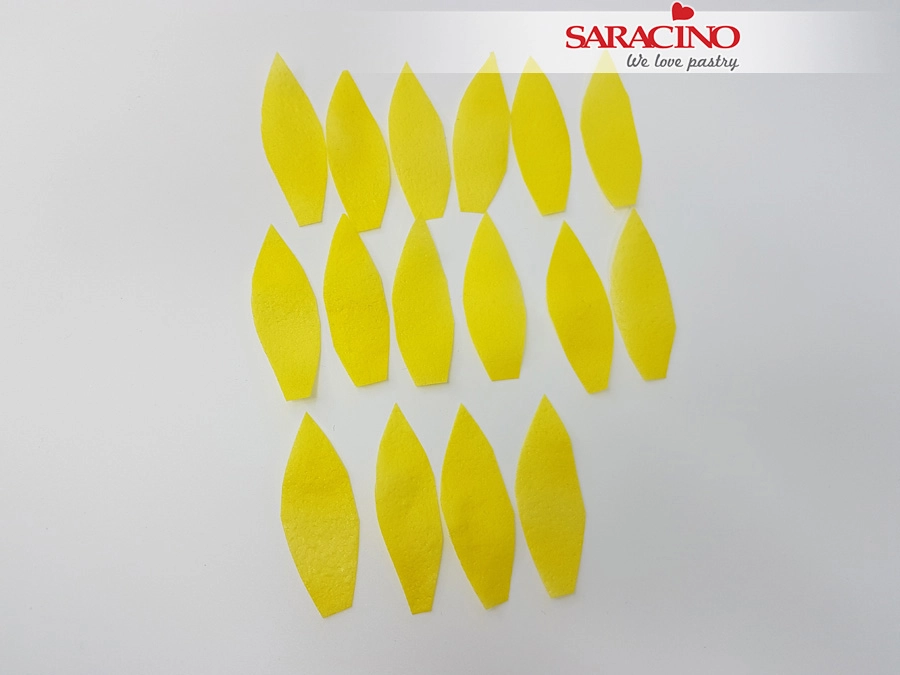
Cut 16 small strips of the coloured wafer paper with a width of 1.5cm and length of 6cm. You can cut 3 layers of wafer paper at the same time. Lay the 16 petals on your worksheet.
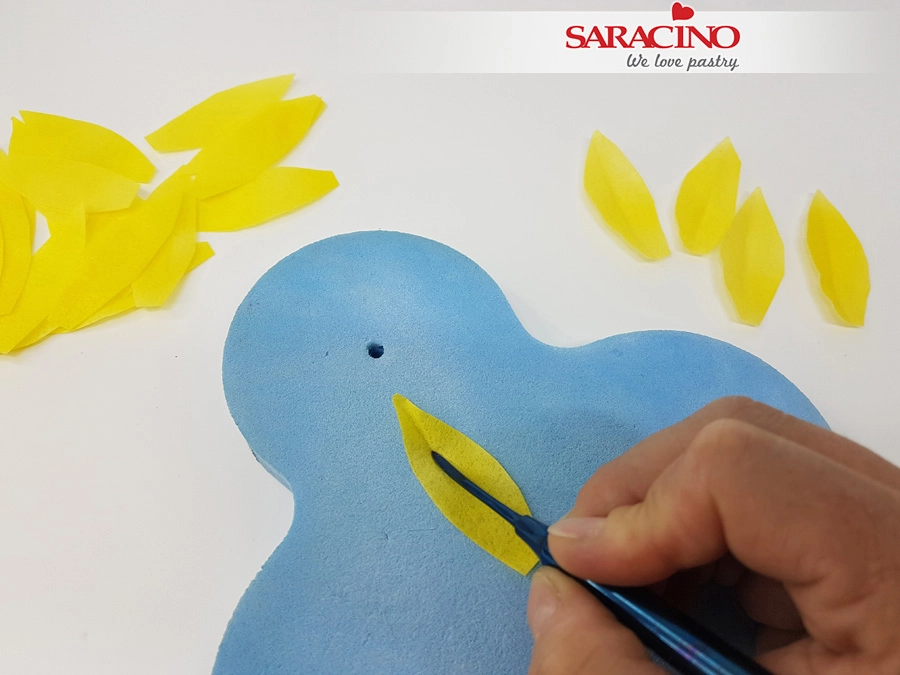
Take a foam flower pad and a Dresden tool. Place a petal on the pad and run your Dresden tool from top to bottom in a smooth motion. Apply light pressure so that the leaf gets a nice upright shape.
Tip: Wafer paper has a smooth side and a textured side. Use the textured side as the top of your leaf. This gives your leaf a more natural look.
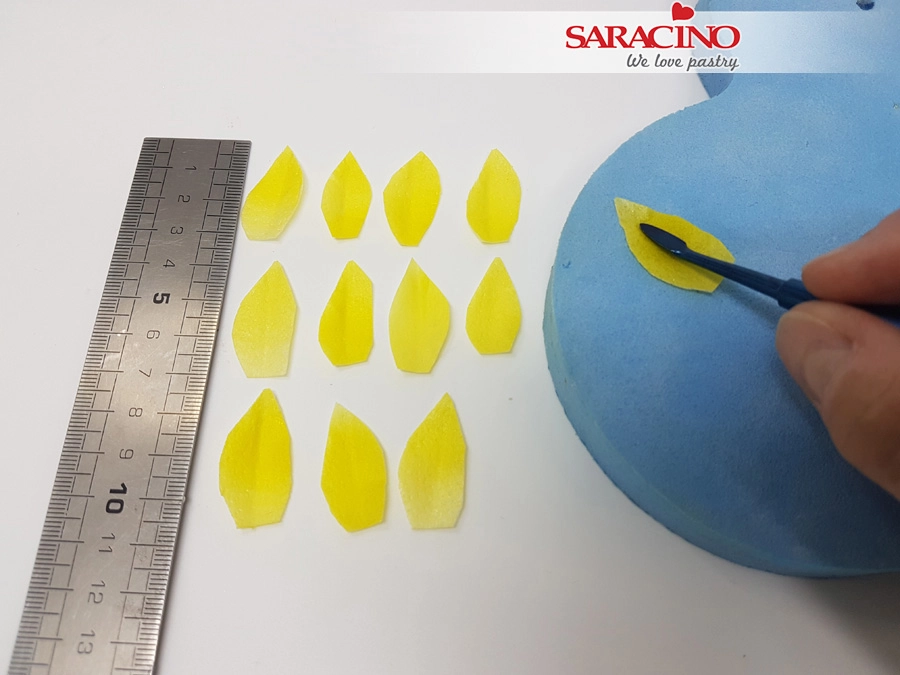
Cut a 6cm long strip in half into 2 equal 3cm lengths. Then cut strips of 1.5cm wide.
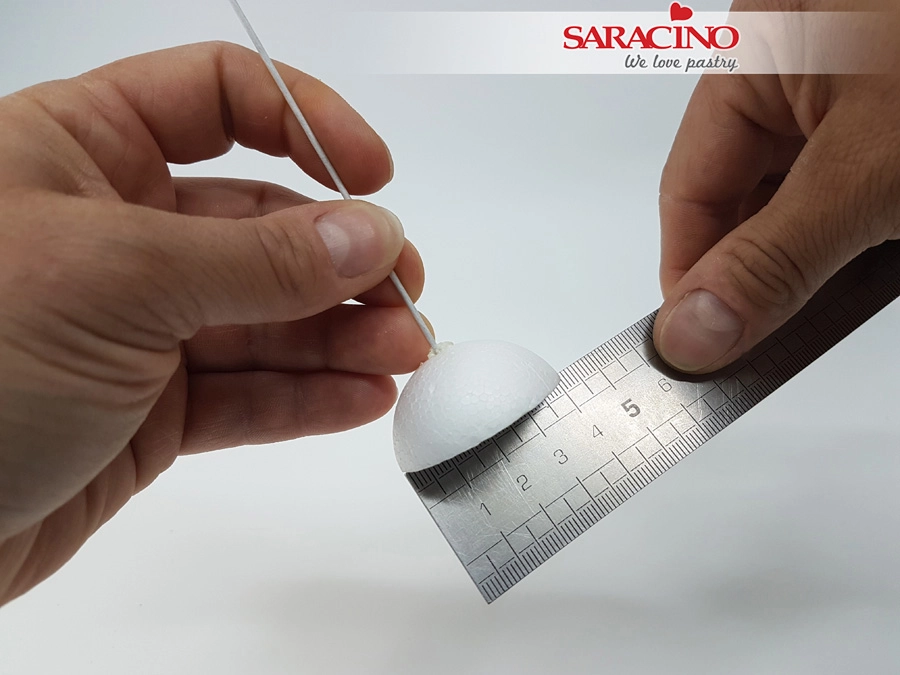
Take a 4cm diameter styrofoam hemisphere on wire (from Stryropor Products).
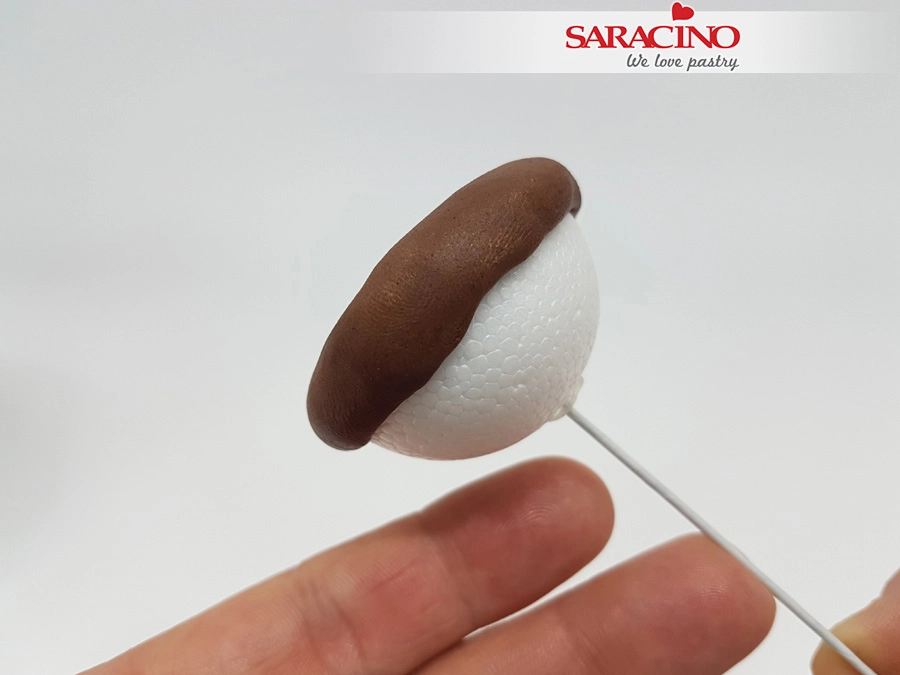
Take 8g of brown Pasta Model and knead gently. Shape the paste into a flat circle with a diameter of 5.5 cm. Place the brown Pasta Model circle on the hemisphere and fix using a small amount of cake gel. Make sure that an equal amount protrudes around the edge. Leave a bulge in the edge.
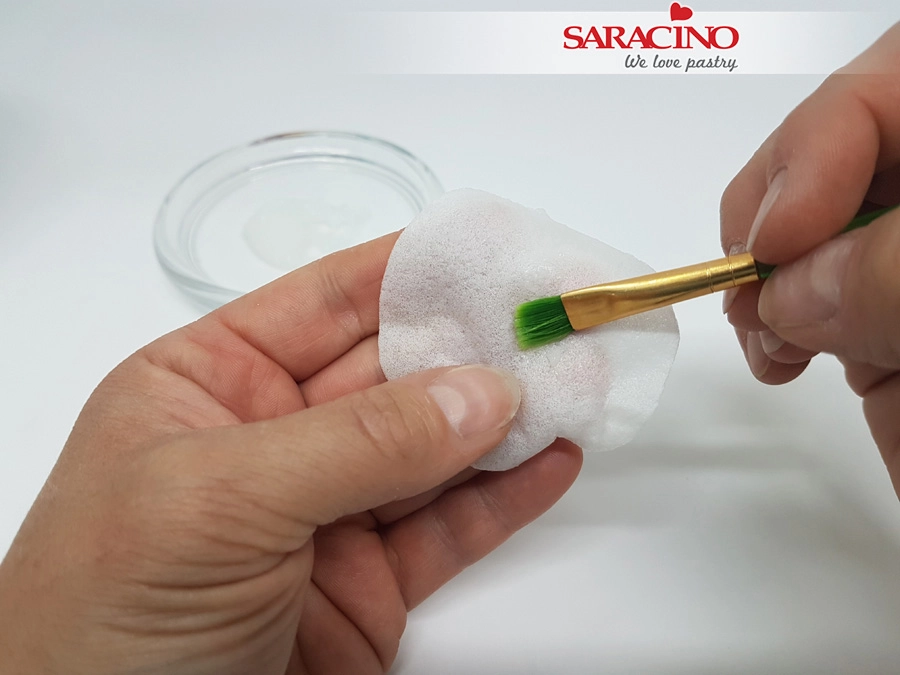
Prepare a 5cm diameter circle of 0.27 wafer paper.
RECIPE wafer paper glue:
Shred a small amount of wafer paper and put in a glass jar. Add a small amount of distilled water and let it sit overnight. Shake everything well and your wafer paper glue is ready to use. It can be stored in the refrigerator for 1 week.
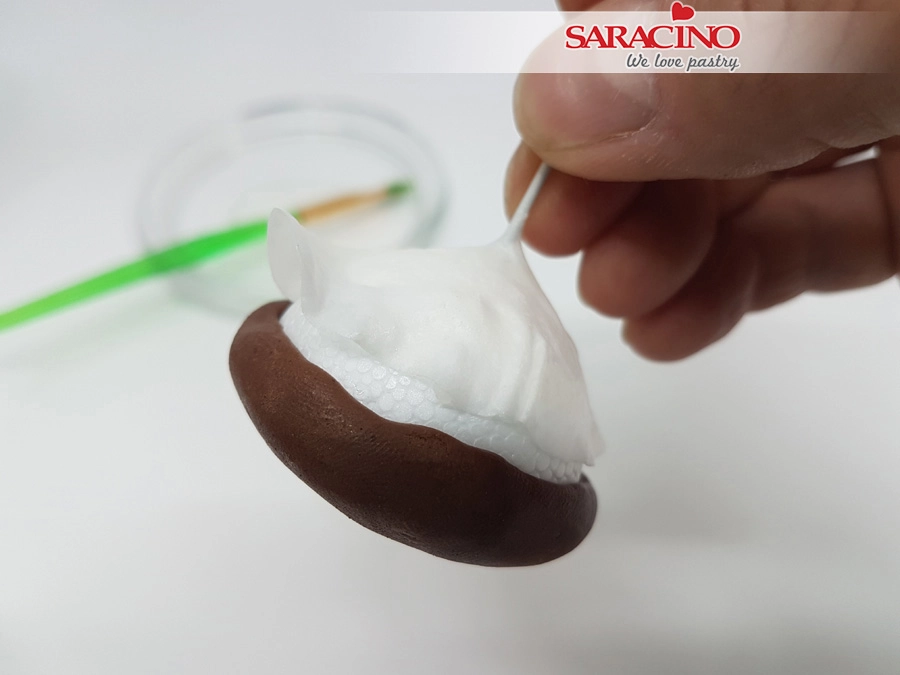
Put the flower wire through the center of the wafer paper circle and fix it to the bottom of the hemisphere. Allow to dry well.
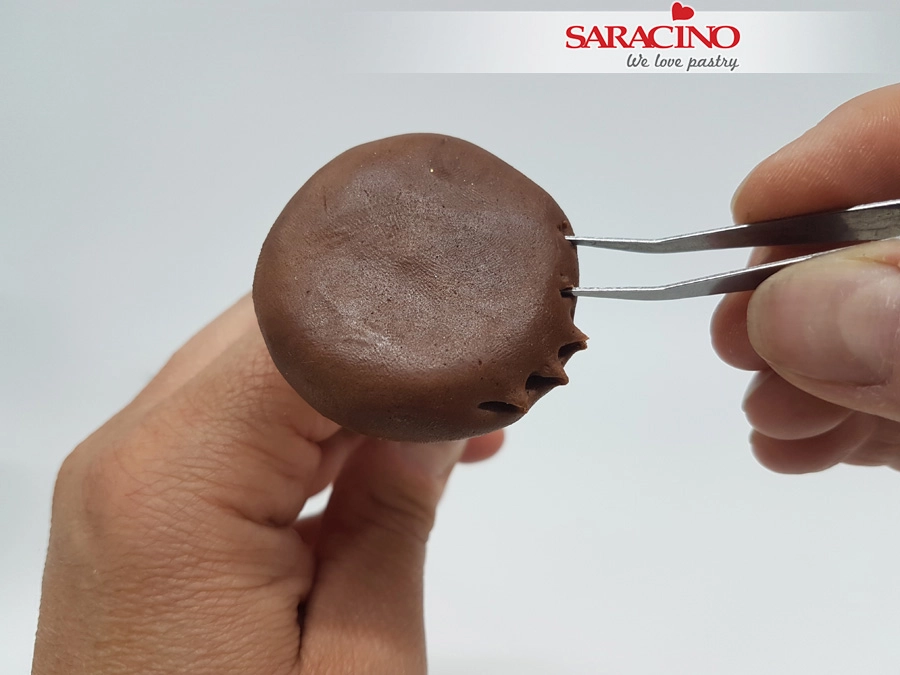
Using tweezers, pinch small points around the outer edge. Make the points random all around the outside edge.
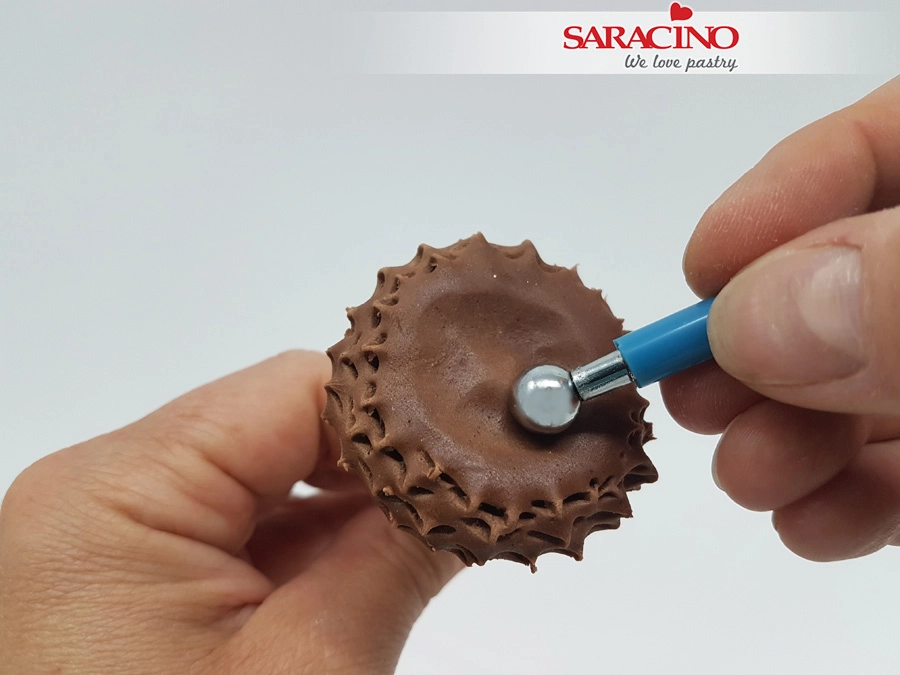
Using a ball tool gently press in the center of the brown Pasta Model. Make a circular motion and leave the paste slightly higher in the centre.
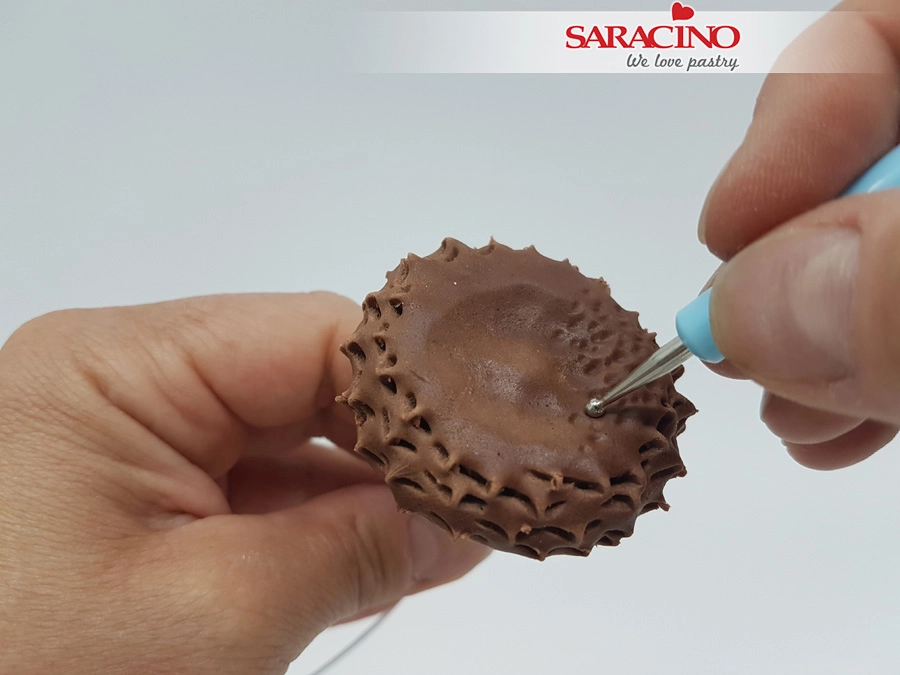
Use a small ball tool to add texture to the centre.
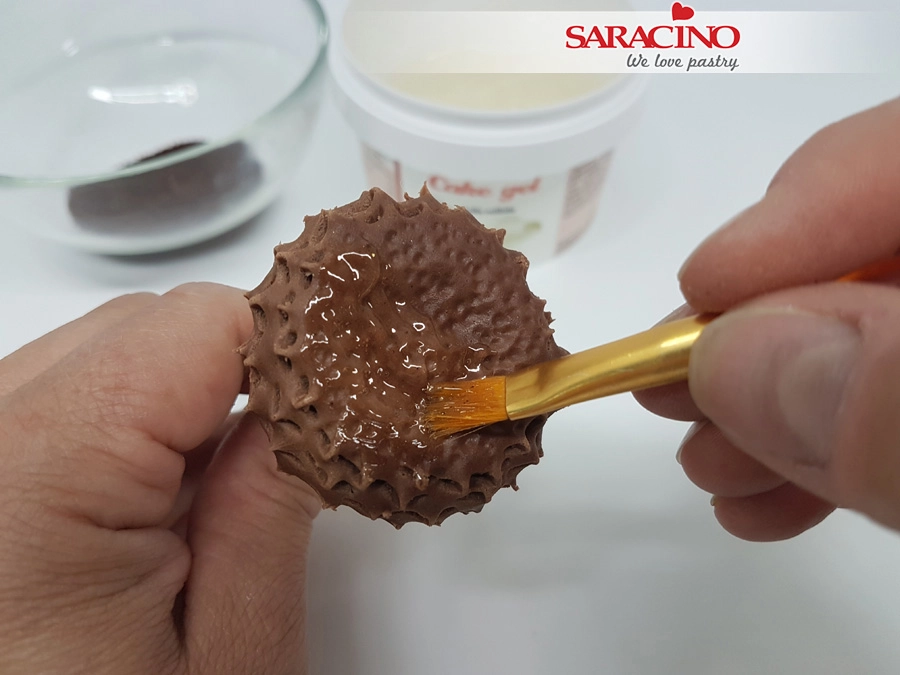
Apply cake gel over the textured brown paste.
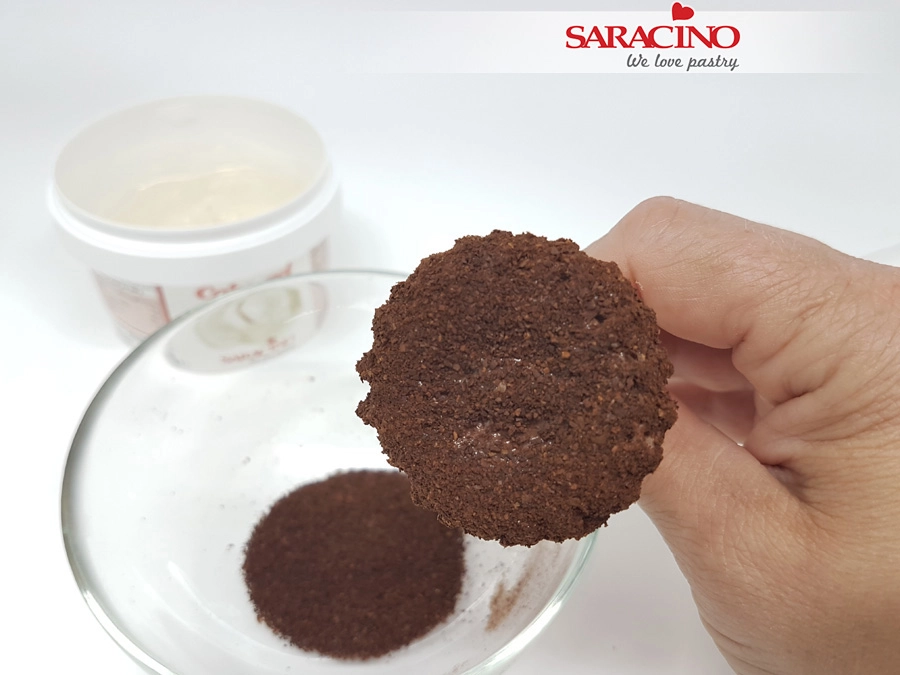
Take a small bowl of ground coffee. Dip the flower centre until it is completely covered with ground coffee. Let it dry for a few hours.
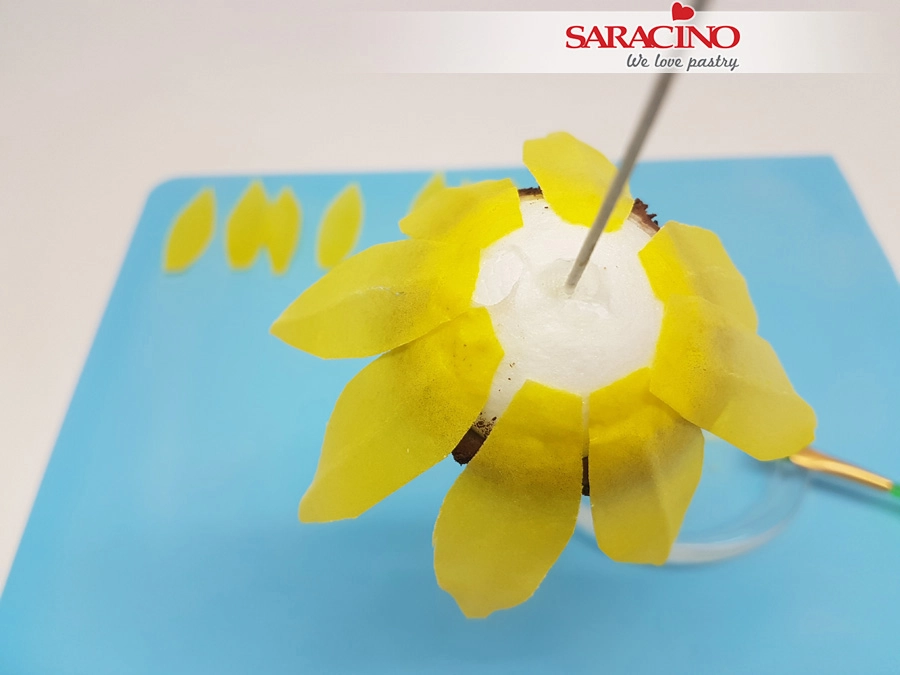
Using your 16 large yellow petals add wafer paper glue to 1cm at the base. Do not use too much glue as this will melt the wafer paper. Fix four petals at equal centres to the bottom of the flower base. Add another four petals equally.
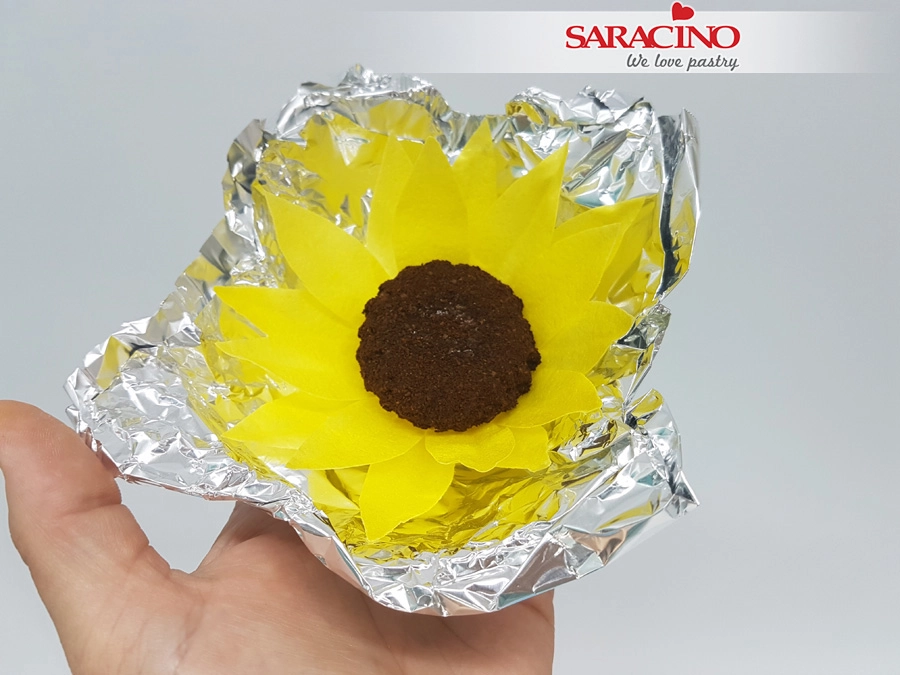
Add all the large petals. Make sure that they are nicely arranged around the flower centre. Insert the flower wire through the aluminium mould and allow to dry for a few hours. Drying time will depend on humidity.
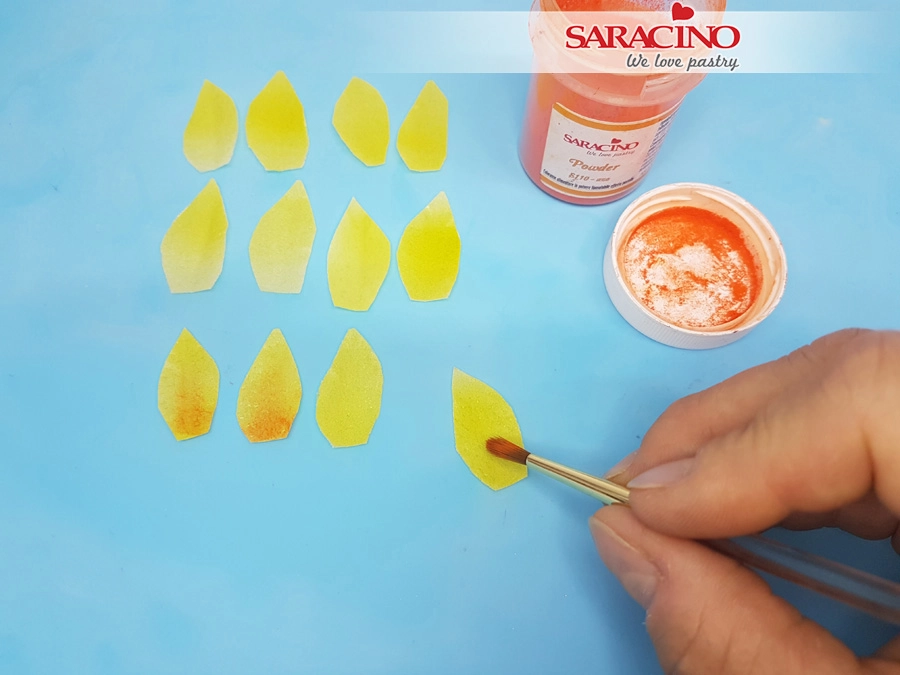
Dust the smaller petals using orange powder colour. It should be darker at the wider end.
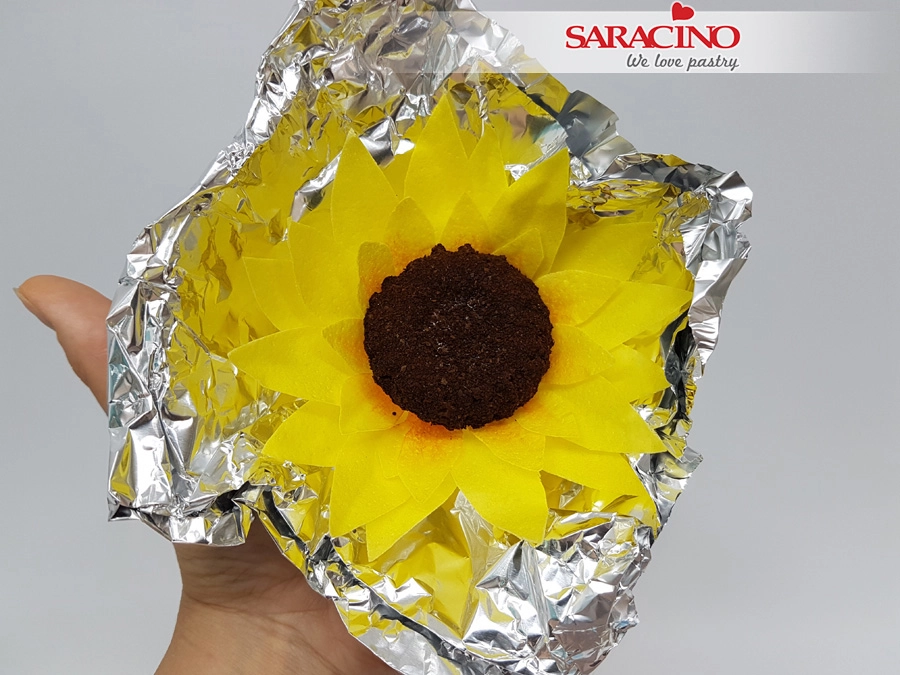
Brush the lower edge of the small petals with wafer paper glue and attach between the large petals and the centre. Arrange the petals nicely around the centre.
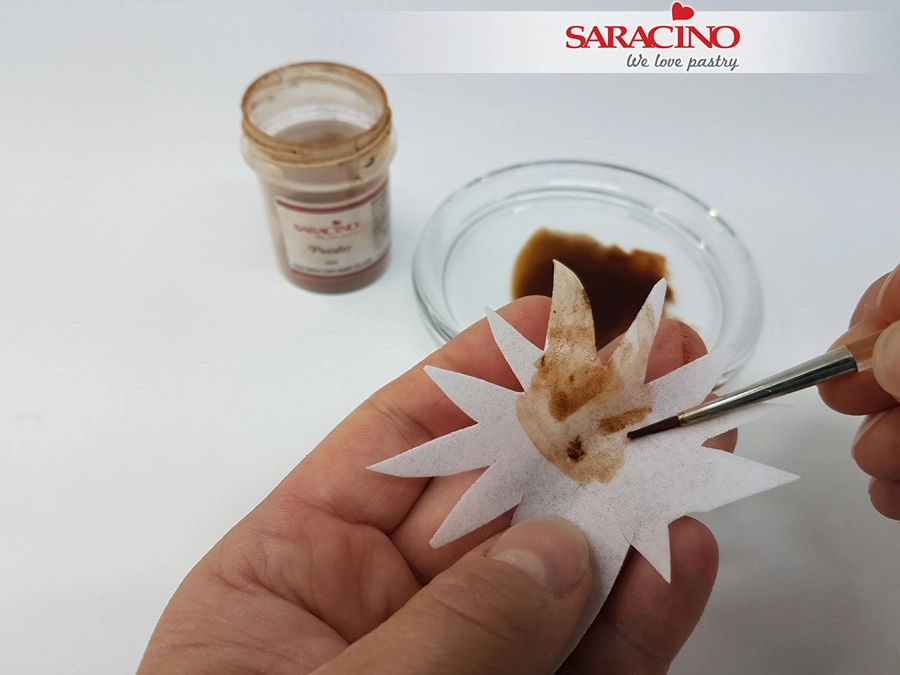
Cut out a star shape with long points from the wafer paper. Paint with the alcohol-free conditioner that has been coloured with brown powder colour.
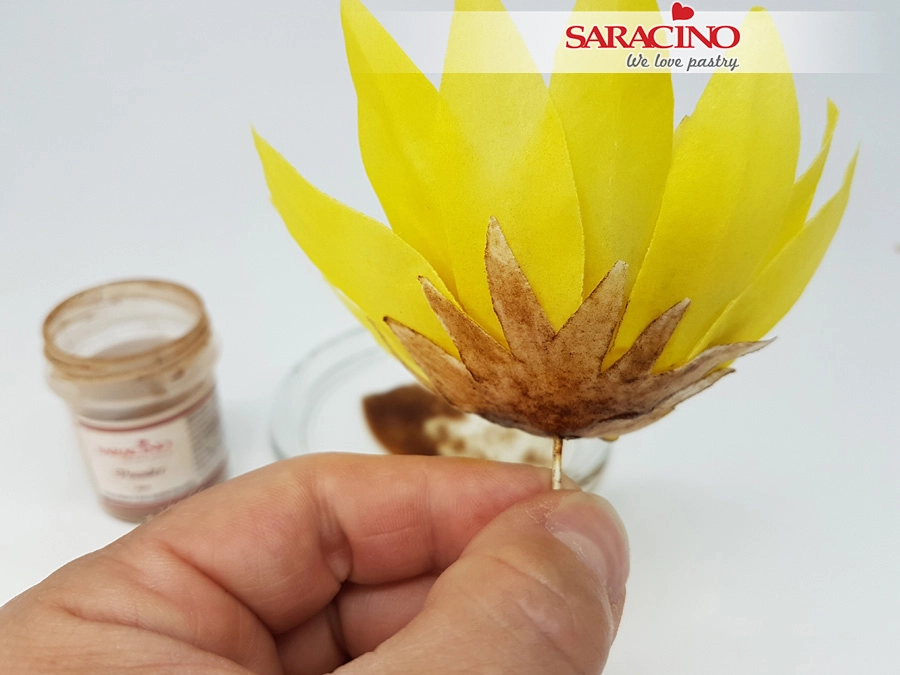
Fix to the bottom of the flower. Allow to dry.
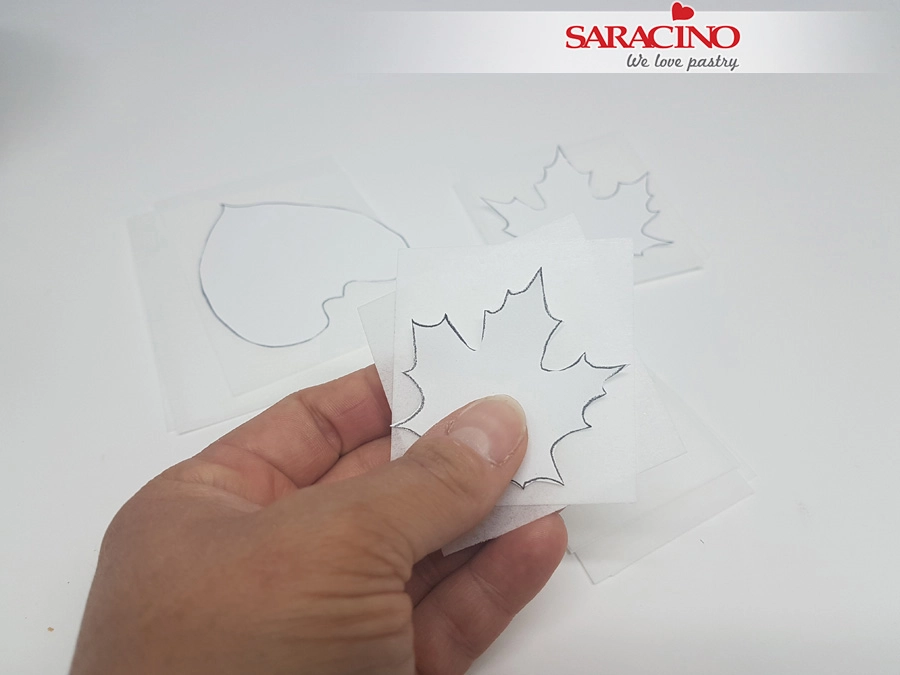
For the leaves we need two different sizes. Print the template at the end of this tutorial or choose your own leaf shape and size. Cut out a template for the leaves from a sheet of paper. Place the template on three layers of 0.27mm wafer paper. Cut out 3 leaves at a time. We need 10 large and 10 small leaves. Cut some extra leaves as spare.
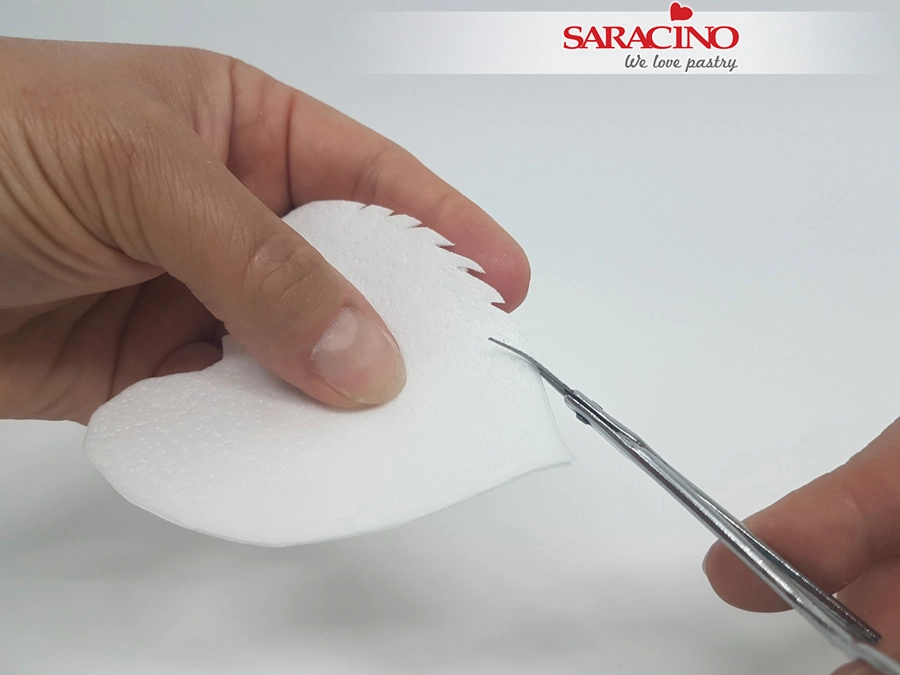
For the sunflower leaf cut serrations with small scissors. This can be random. Point the serrations slightly toward the pointed end for a more natural look. Make 3 leaves.
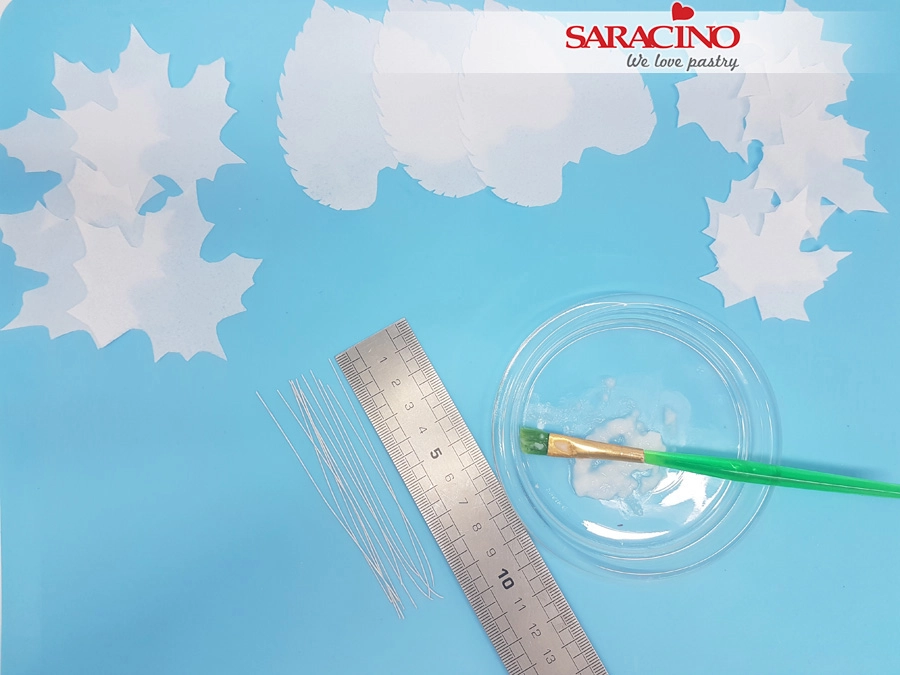
Lay out your leaves by variety with the smooth side up. Cut 23 10cm lengths of 28 gauge flower wire. Take a small amount of wafer paper glue.
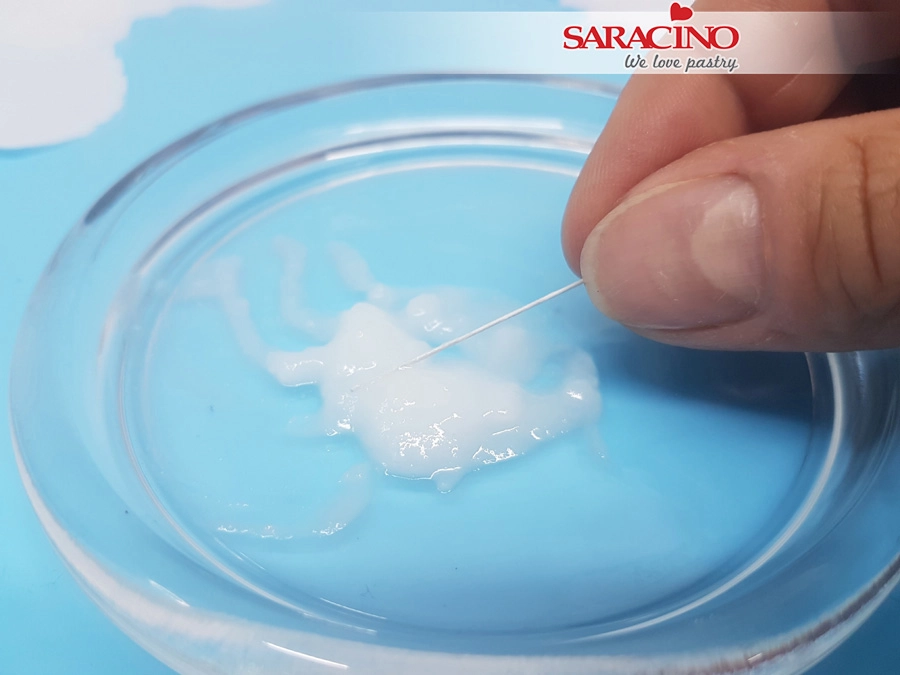
Add wafer paper glue to the end of the wire.
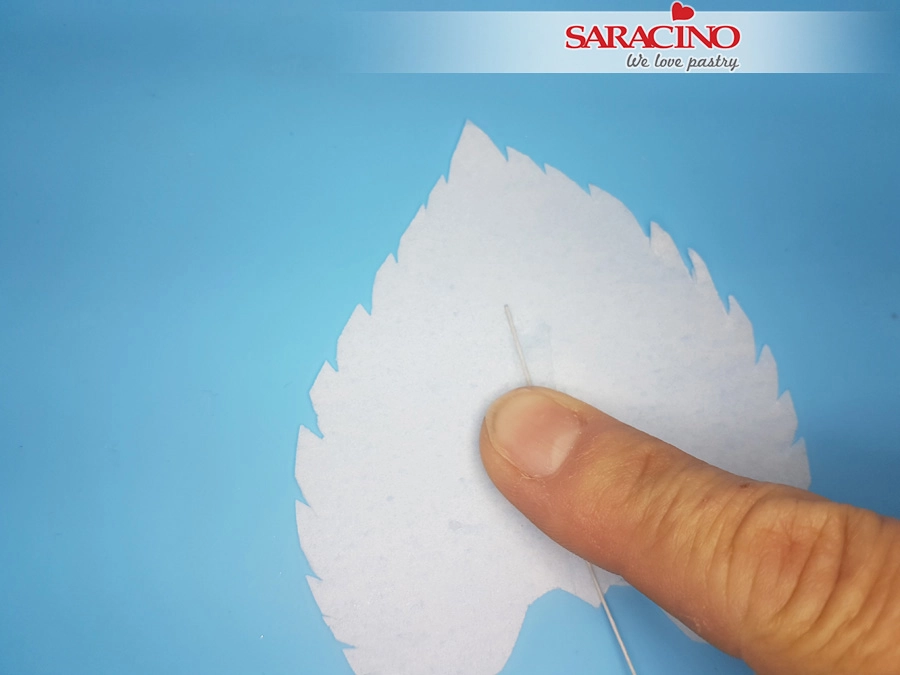
Press the flower wire to the centre of the leaf. Press firmly for a few seconds to achieve a good bond.
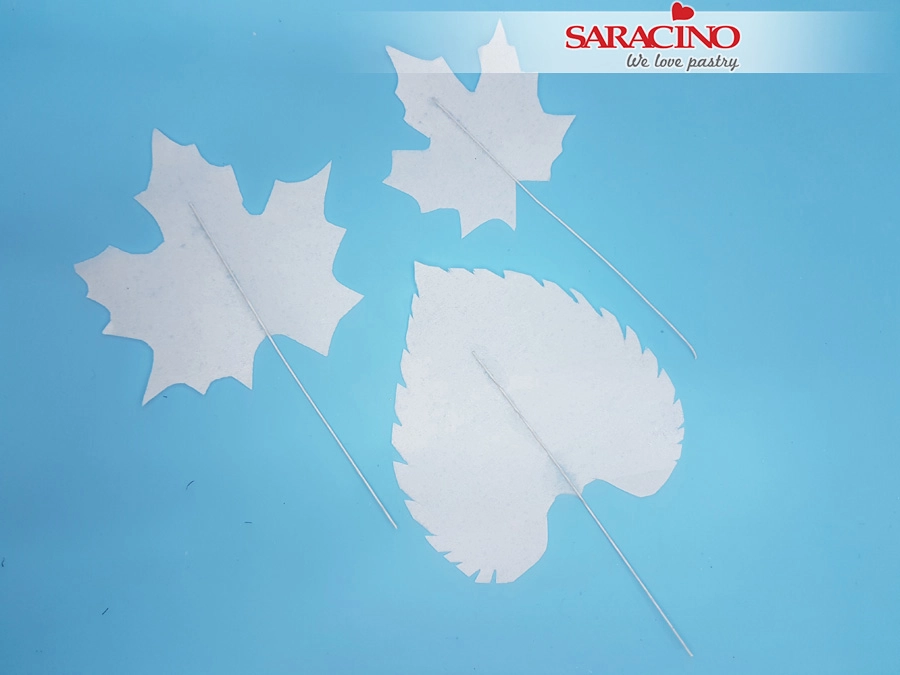
Repeat to add a wire to all of the leaves. Allow to dry for 10 minutes.
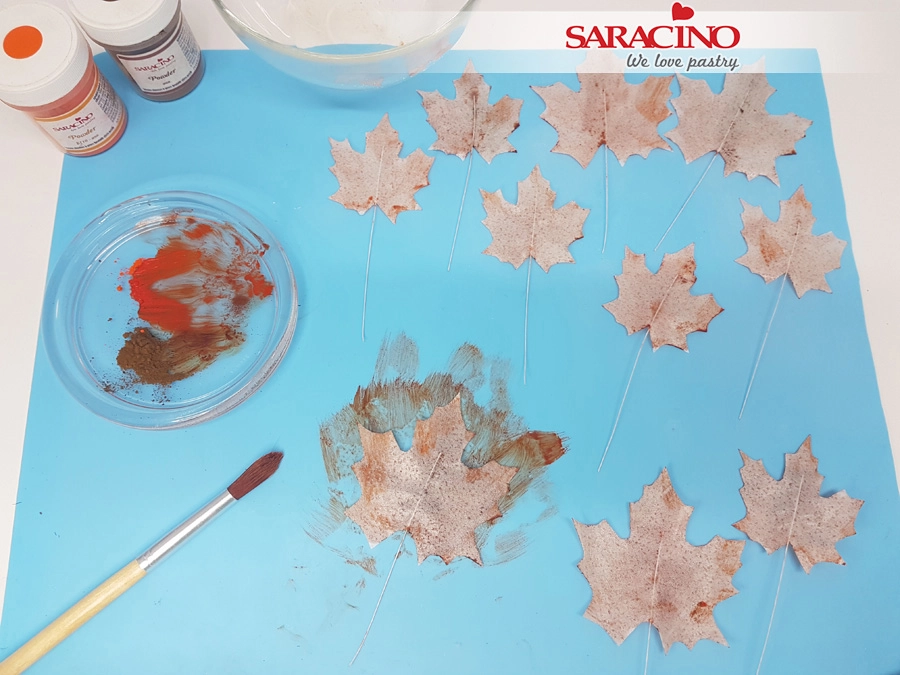
Mix orange and brown powder colour with clear alcohol to a thin paint. Paint the smooth side of the paper and place the leaf upside down on your work surface. It is best to use a silicone mat so that the leaves do not stick to the surface.
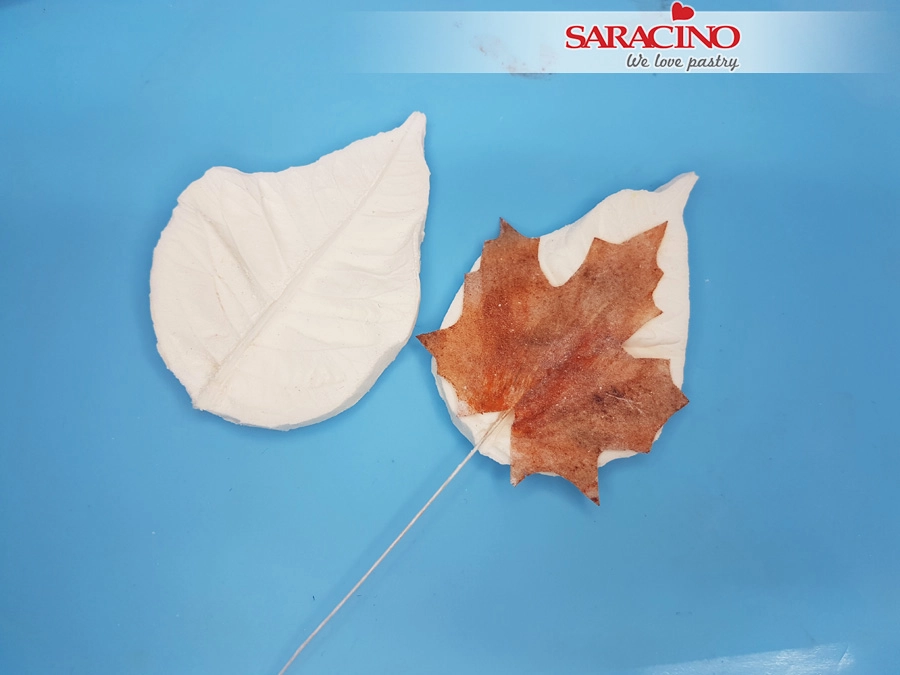
When the leaves no longer stick you can turn them over. Paint the rough side of the leaf with the brown alcohol-free conditioner and dab the leaf with a small amount of cornflower. Press the leaf in a leaf mould for 5 seconds. Open the mould and carefully remove the leaf. Make sure you do not add too much conditioner as it could stick. You should now have a grain in the leaf. Allow to dry well.
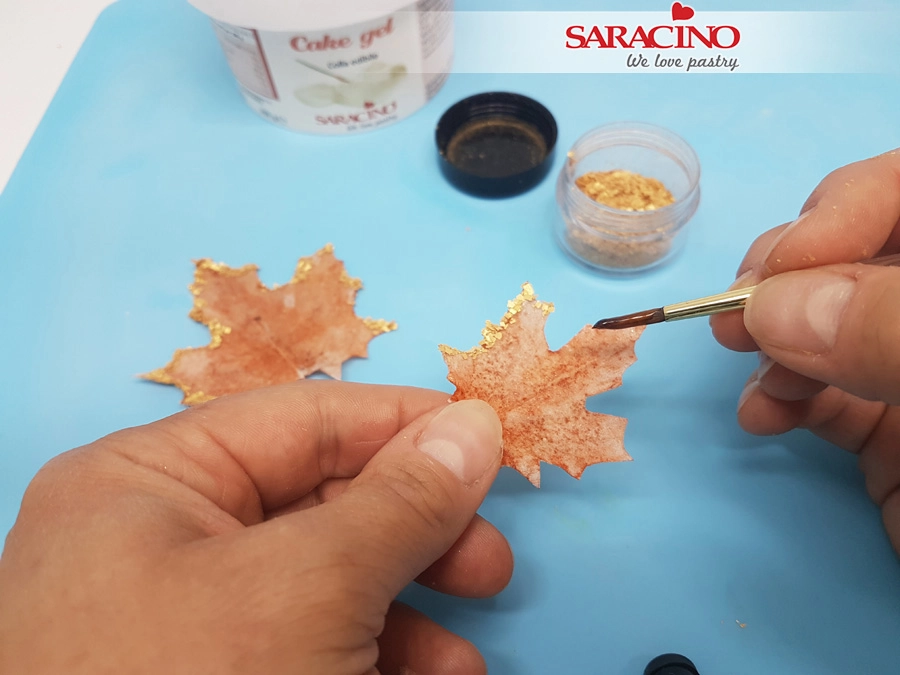
When the leaves are fully dried brush the edges with a little cake gel. Do not add too much gell or the wafer paper will melt. Dip the edges in the Saracino gold glitter flakes and allow to dry.
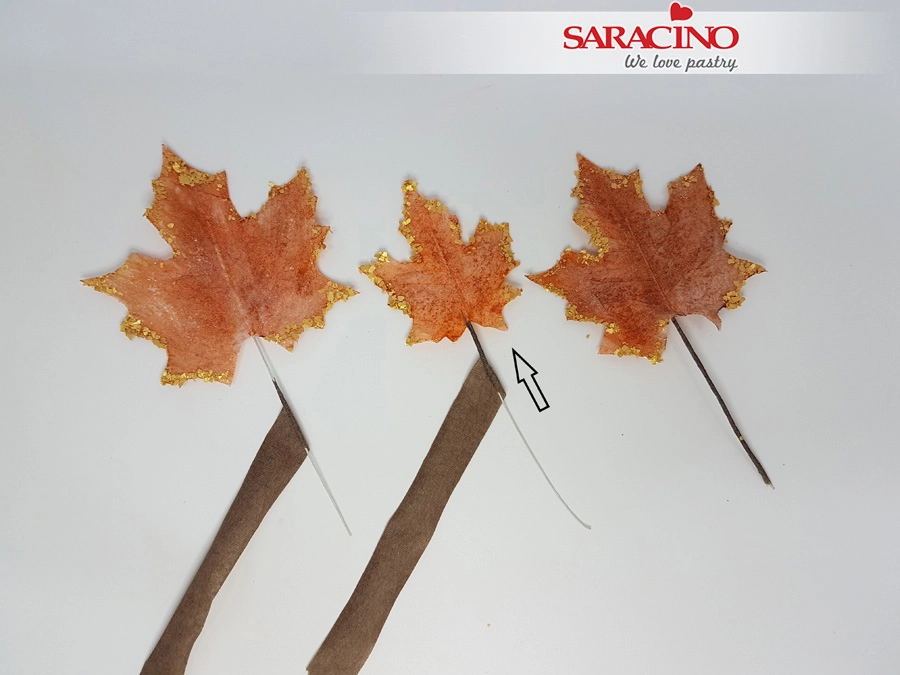
Add flower tape to all of the leaves.
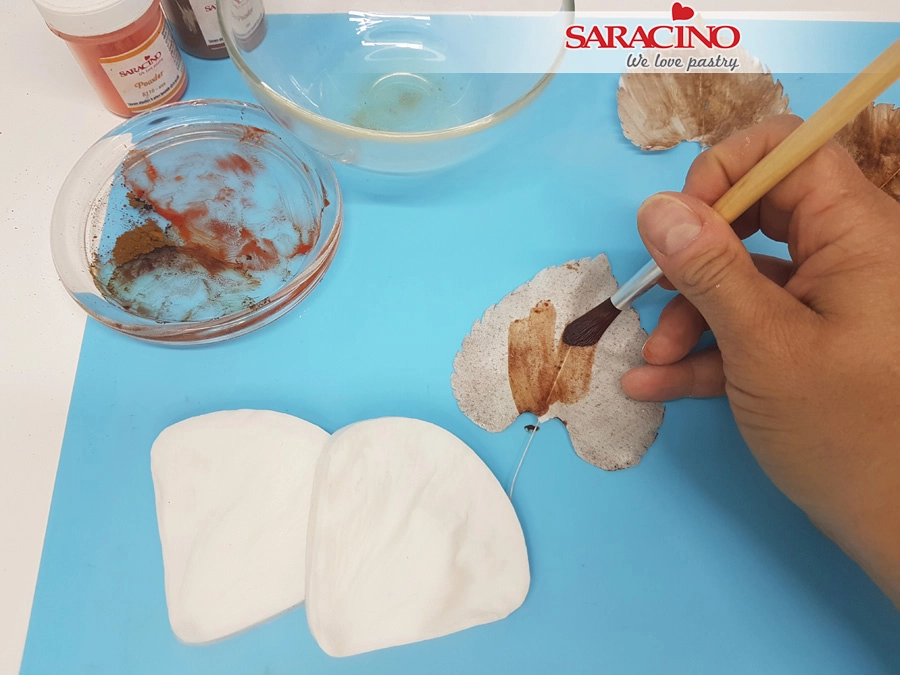
For the sunflower leaf repeat the previous steps but use a larger veiner.
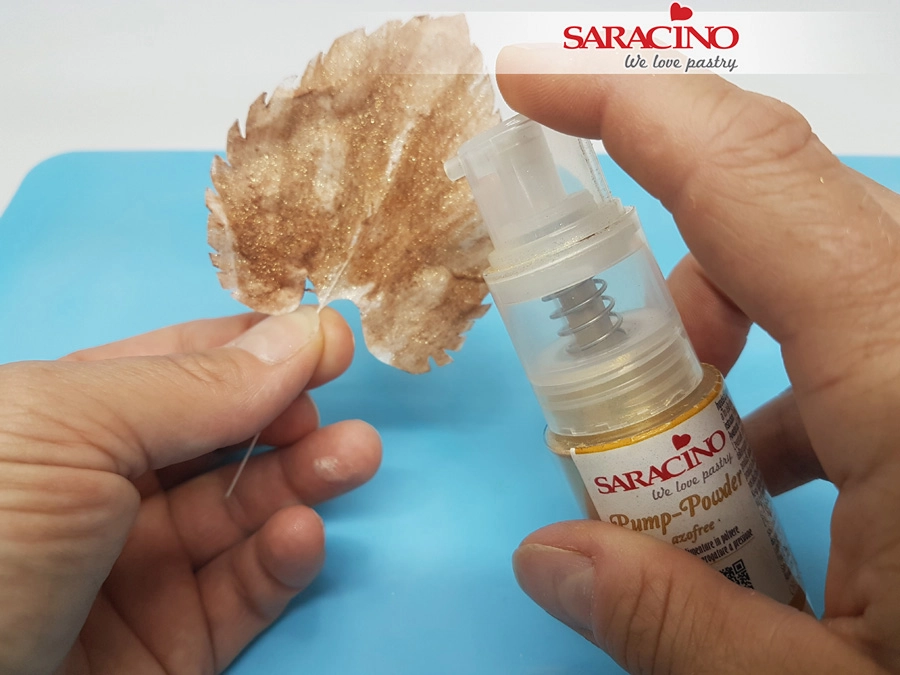
When the leaf is completely dry, apply a sparkling effect to the leaf using Saracino pump powder gold glitter.
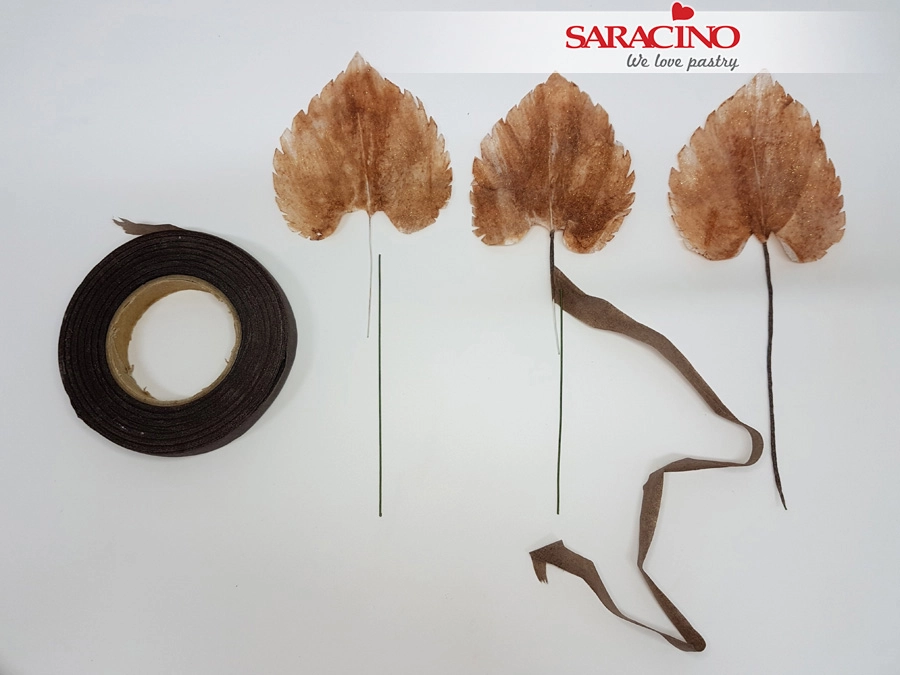
Tape using the brown flower tape.
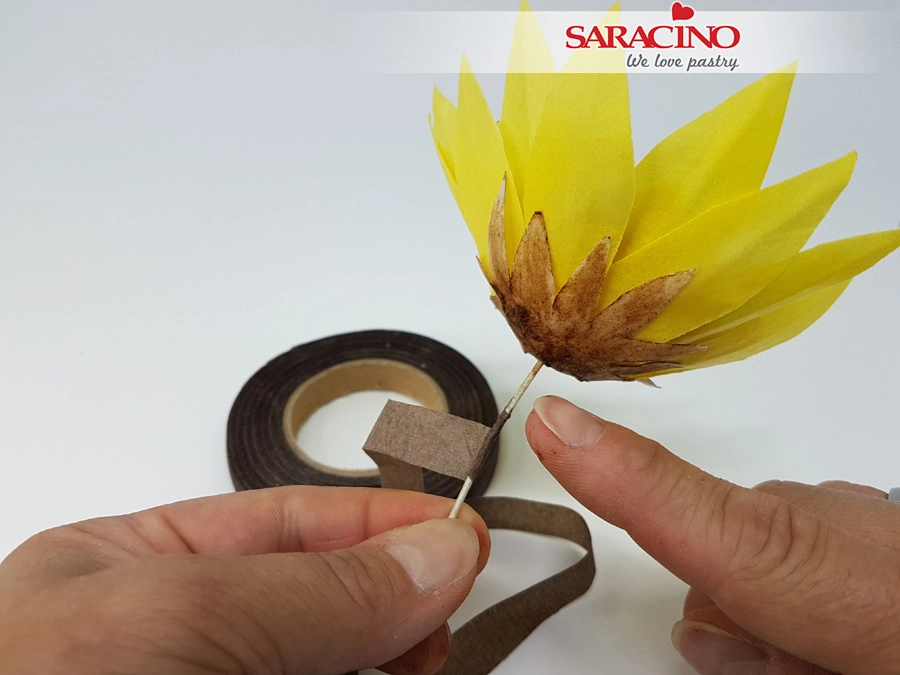
Tape the sunflower stem using the brown flower tape.
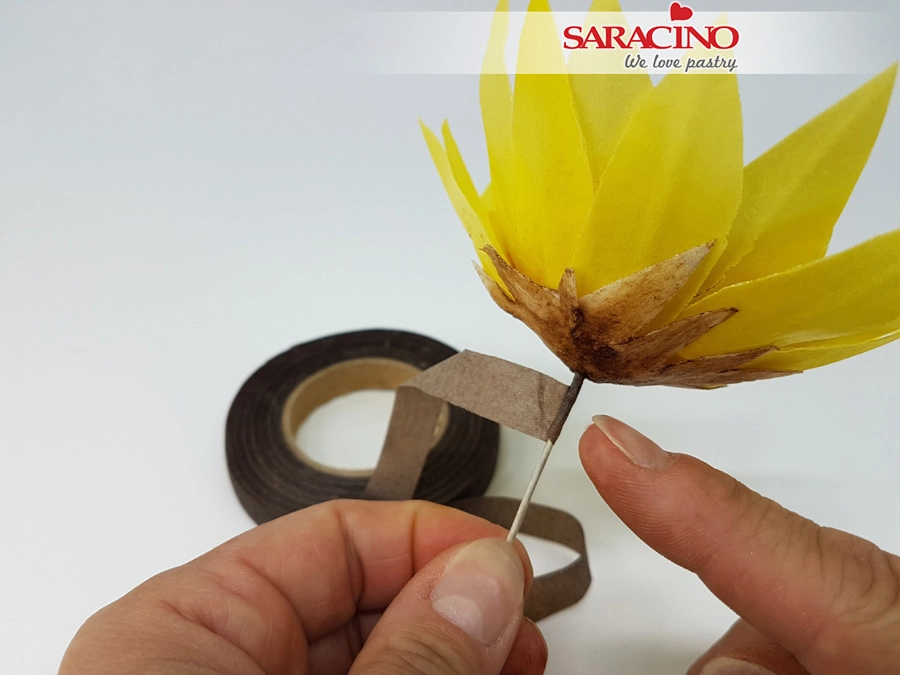
The wire should be fully taped up to the base of the flower.
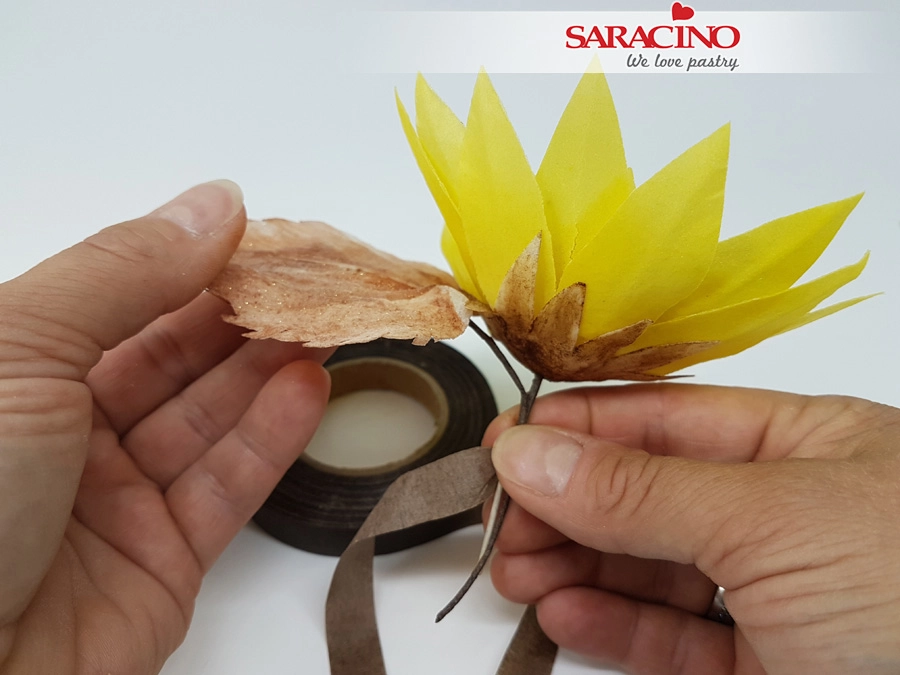
Add the first leaf to the flower stem.
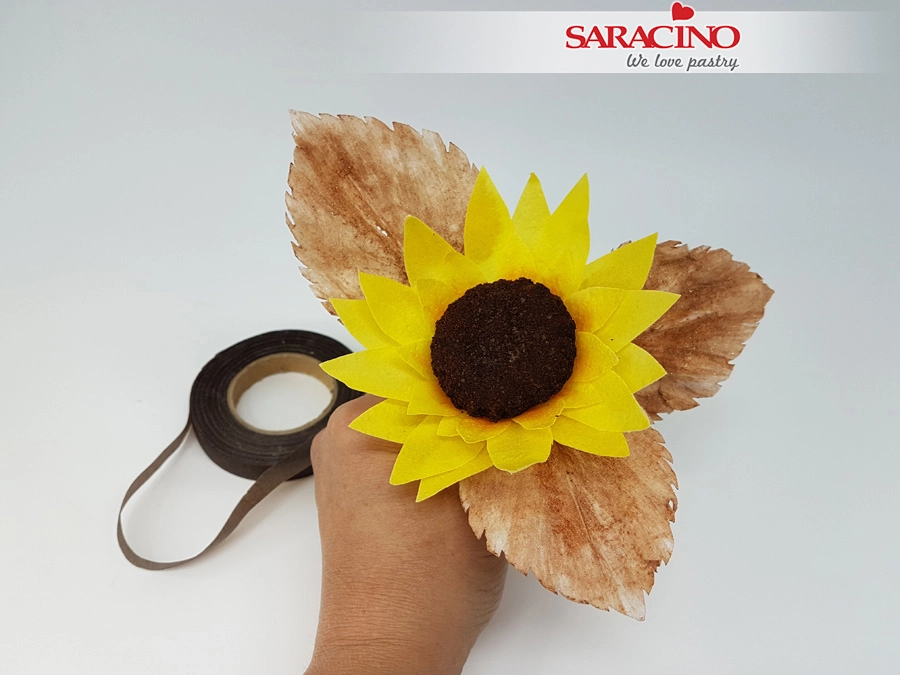
Attach the other two leaves to the flower stem and arrange them. With the other sunflower only the flower stem needs to be taped as it has no leaves.
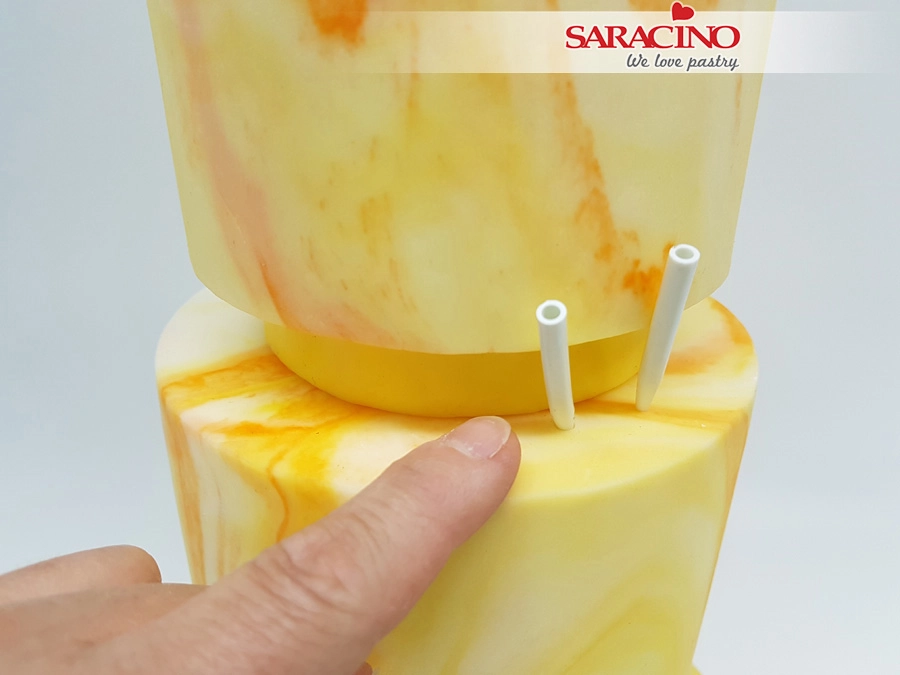
Stack your cake or dummies. Use dowels if you are using real cake.
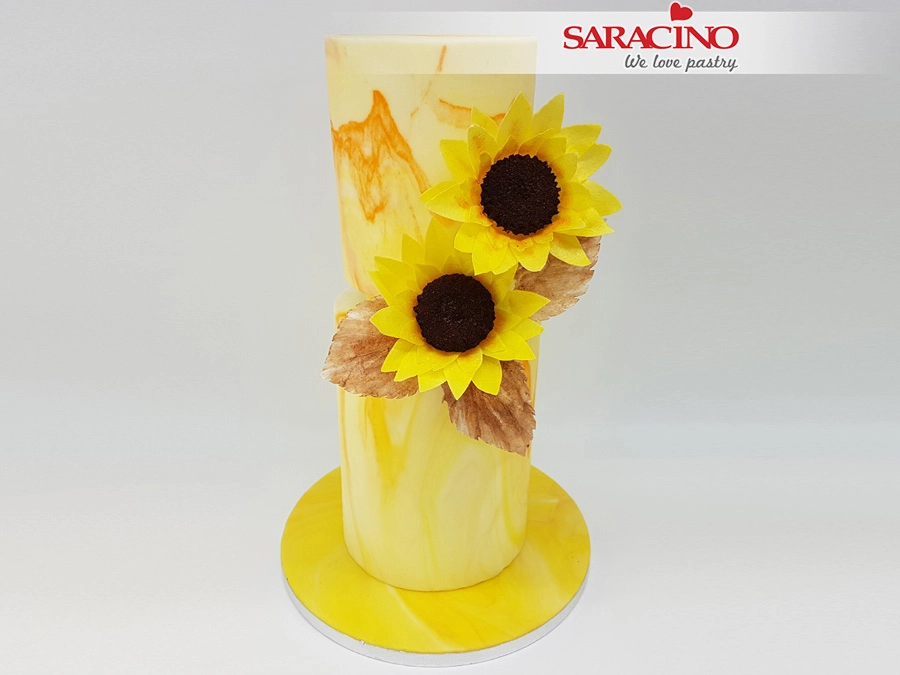
Insert the sunflower with leaves into the front flower pick. Cut the base wire to the desired length. If the hole in the flower pick is too big, you can first fill it with a small amount of white Pasta Model. Insert the flower into the flower pick. Cut the second sunflower stem to the desired length and insert into the back flower pick. Make sure that the flowers are facing forward.
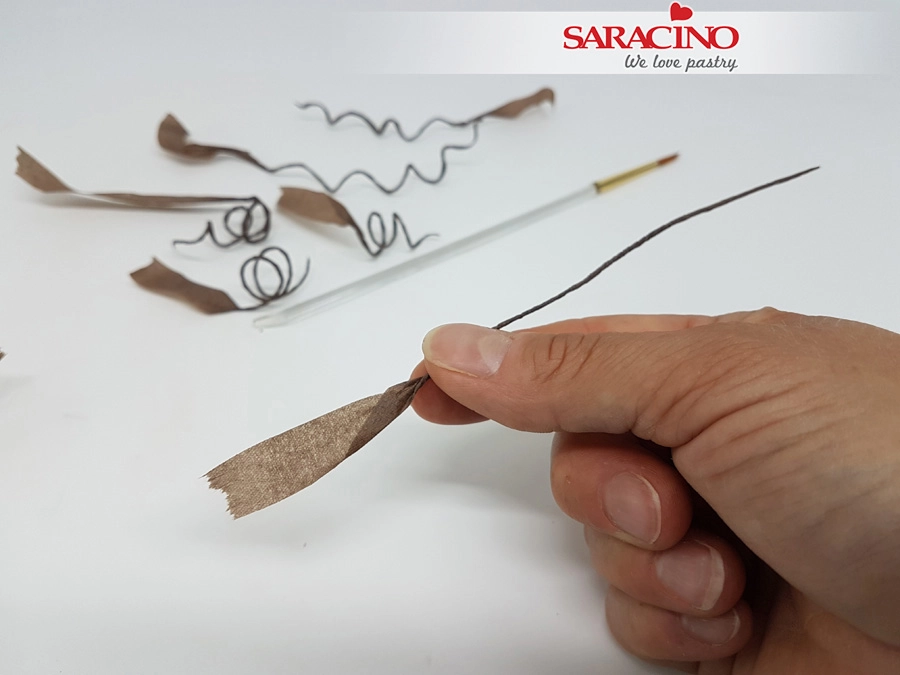
For the vines take a piece of brown flower tape and twist the tip between thumb and forefinger to a point. Continue twisting to a length of 10cm.
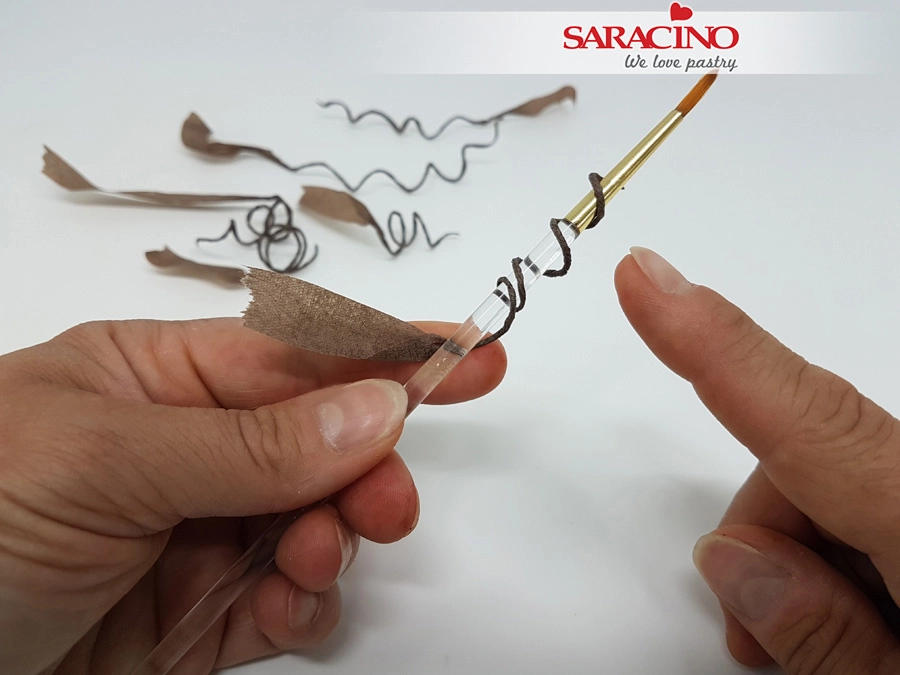
Wrap the tape around the handle of a paint brush.
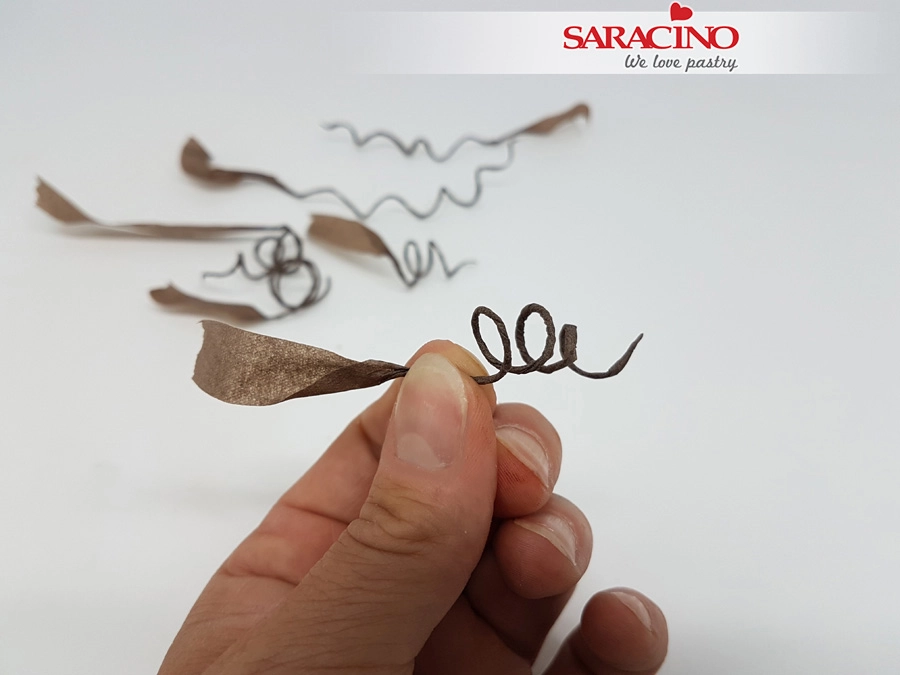
Carefully slide off the brush and set aside. Make approximately 9 vines.
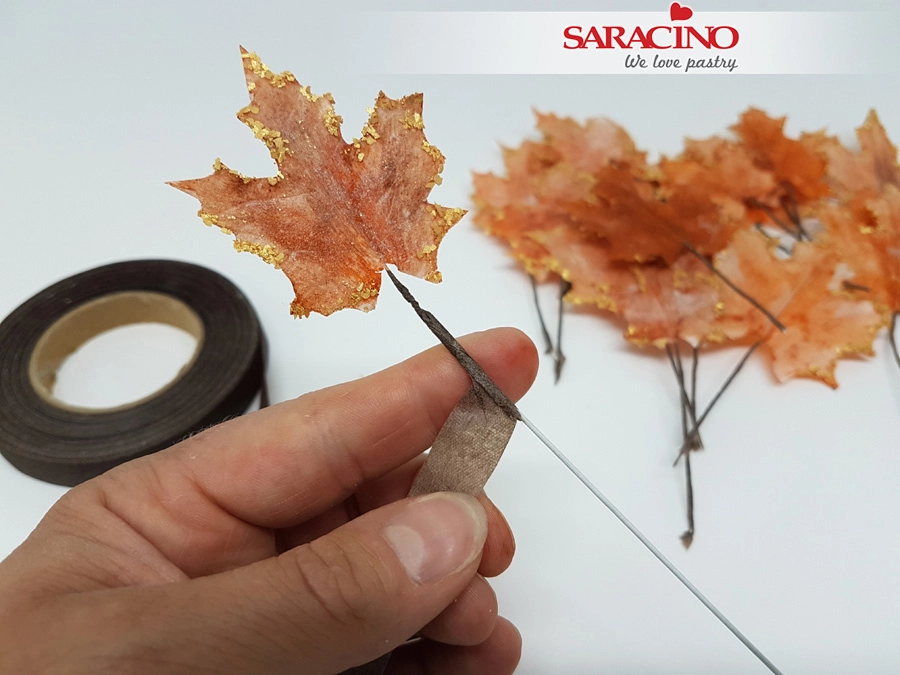
Using brown flower tape, tape the first autumn leaf to the end of a 20 gauge flower wire.
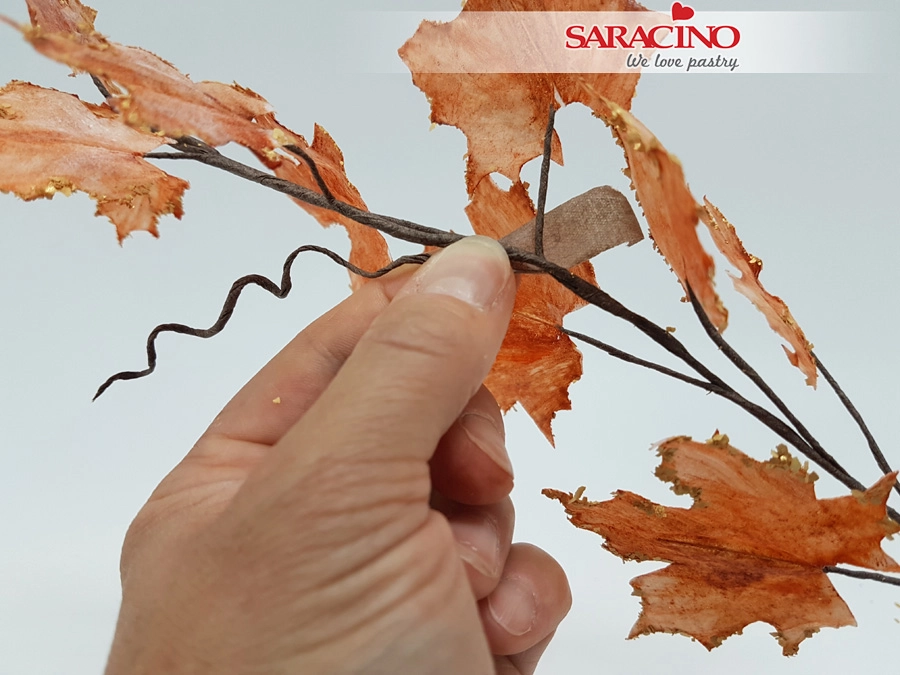
Arrange and attach the leaves to the base wire. Alternate large and small leaves and play with the distance between the leaves. This gives a natural look to your leaf vine. Tape the decorative vines between the leaves randomly. Attach 2 lengths of 20 gauge flower wire together with brown flower tape to achieve the required length for the leaf branch.
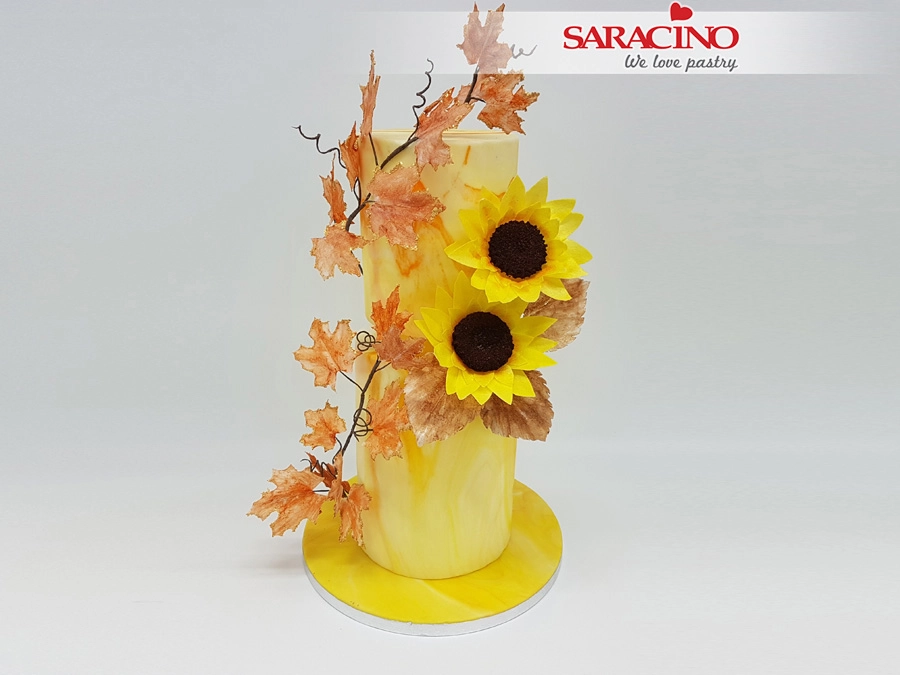
Twist the leaf branch around your cake and attach it. The leaf branch should start on the base board and finish on the top of the cake.
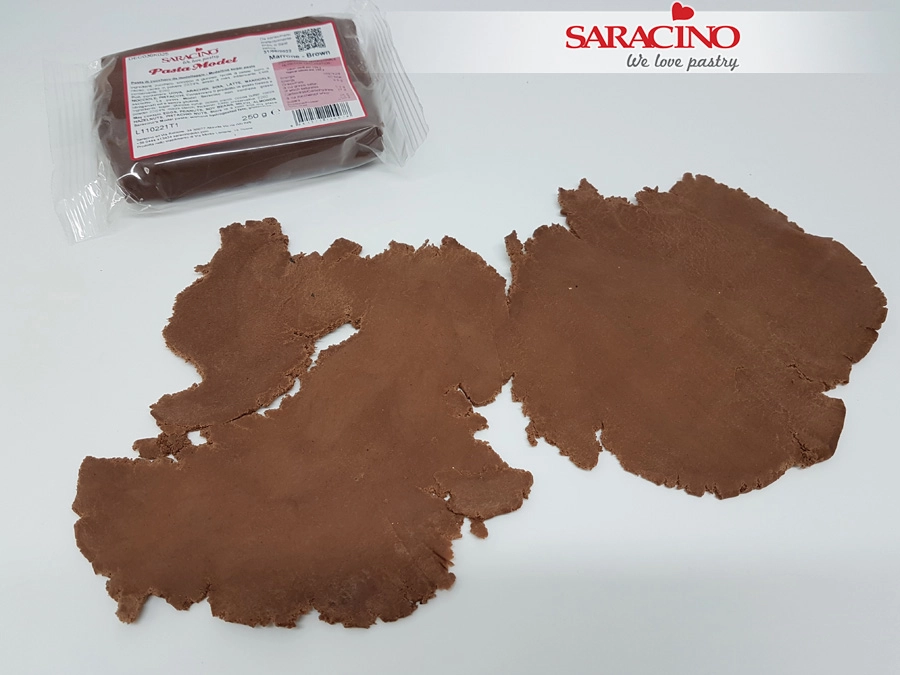
Using 200g of brown Pasta Model. Do not knead before use. Roll the un-kneaded Pasta Model with a rolling pin. Roll to about 3mm thick. We want a rough textured edge to the paste. By rolling the Pasta Model without kneading you get a rough texture at the edge.
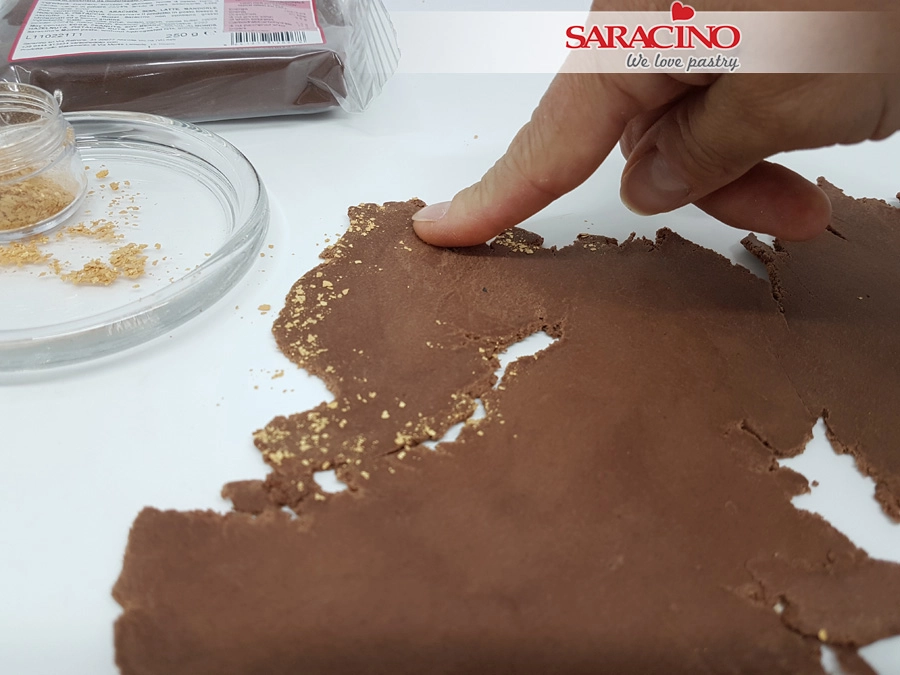
Sprinkle gold glitter flakes along the edge of the Pasta Model and press gently with your finger.
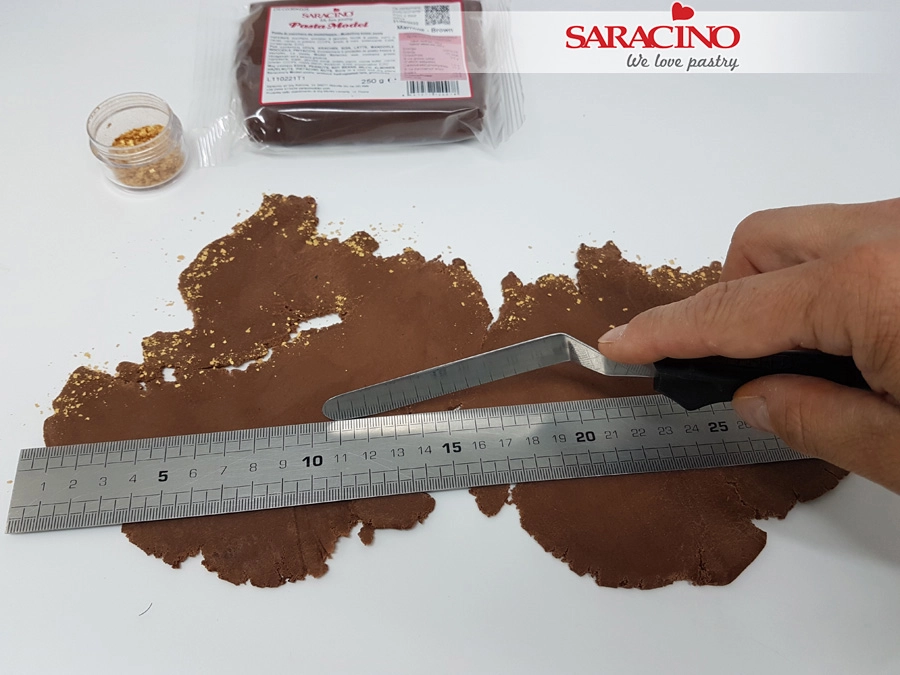
Cut a straight edge. Choose a piece that is visually the most attractive with the most feature and texture.
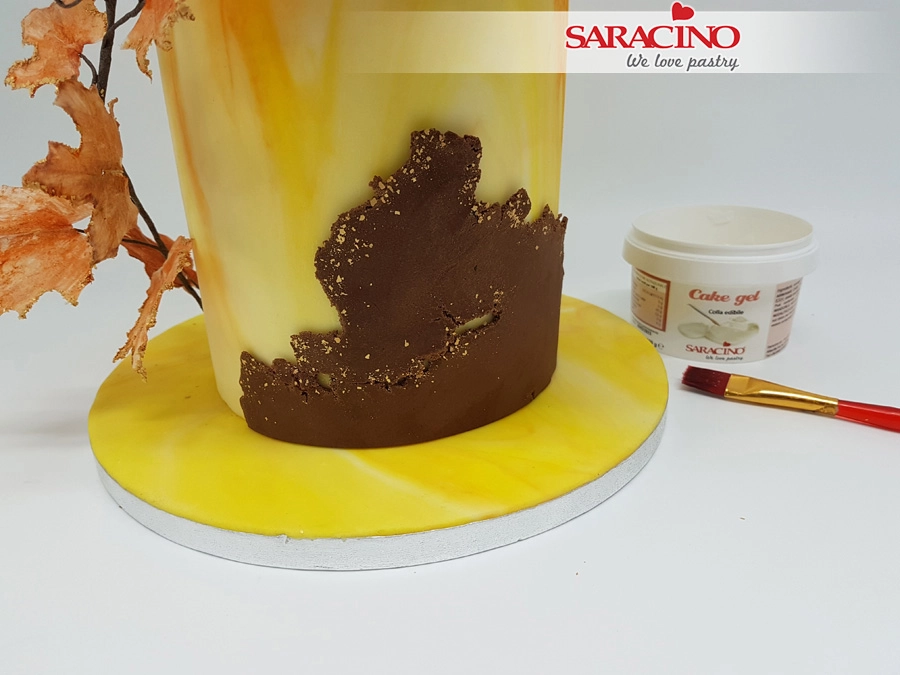
Use a little cake gel to attach to the bottom tier with the straight edge on the board.
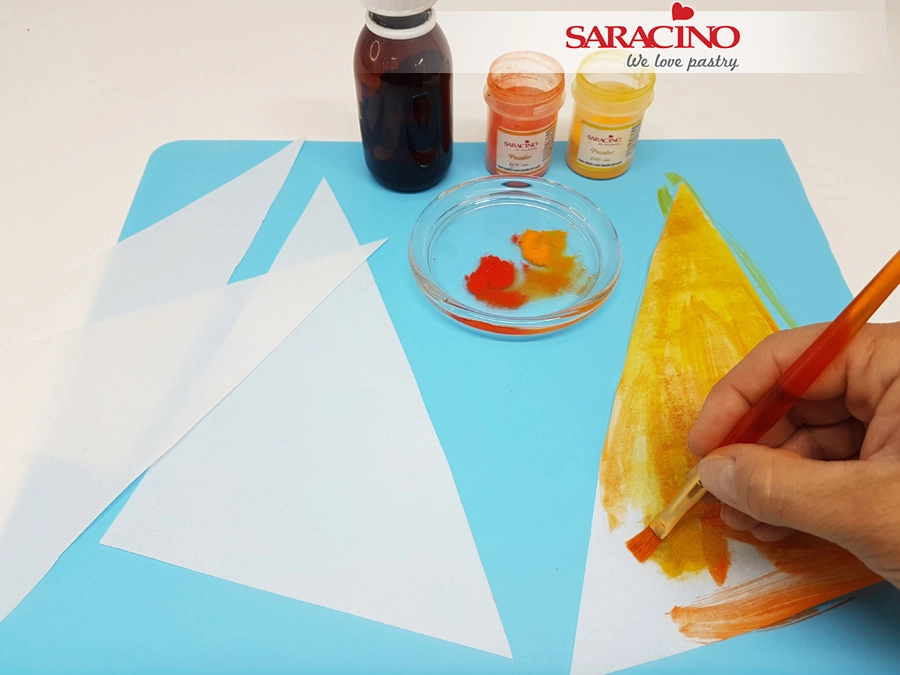
Take 2 sheets of 0.27mm wafer paper and cut diagonally in half. Add yellow and orange powder colour to clear alcohol to make a thick paint. Paint the wafer paper. Try to provide a nice colour gradient from yellow to orange. Allow to dry for 10 minutes.
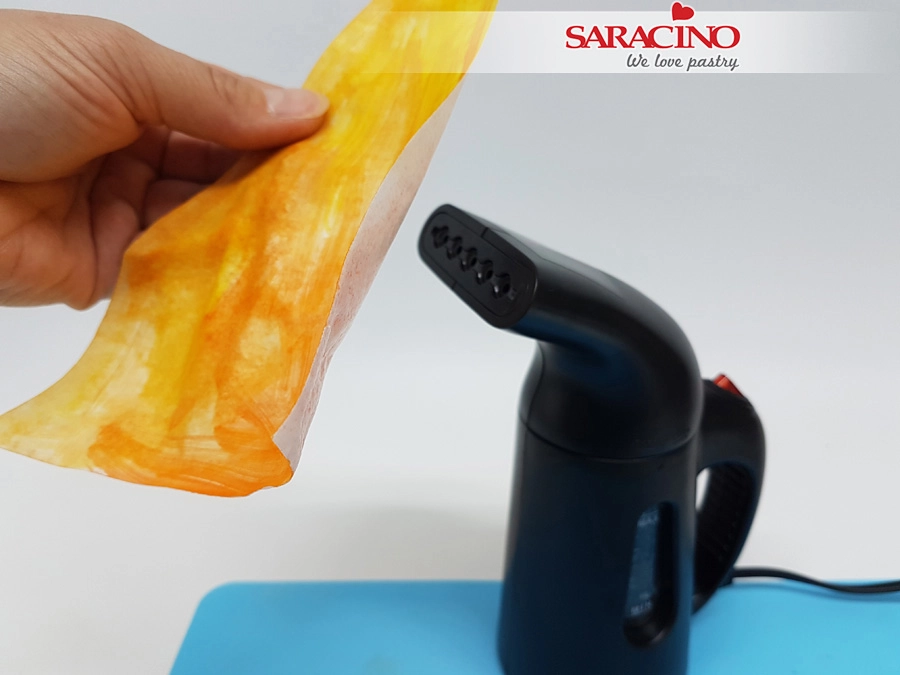
Gently steam the wafer paper so that it becomes limp and flexible.
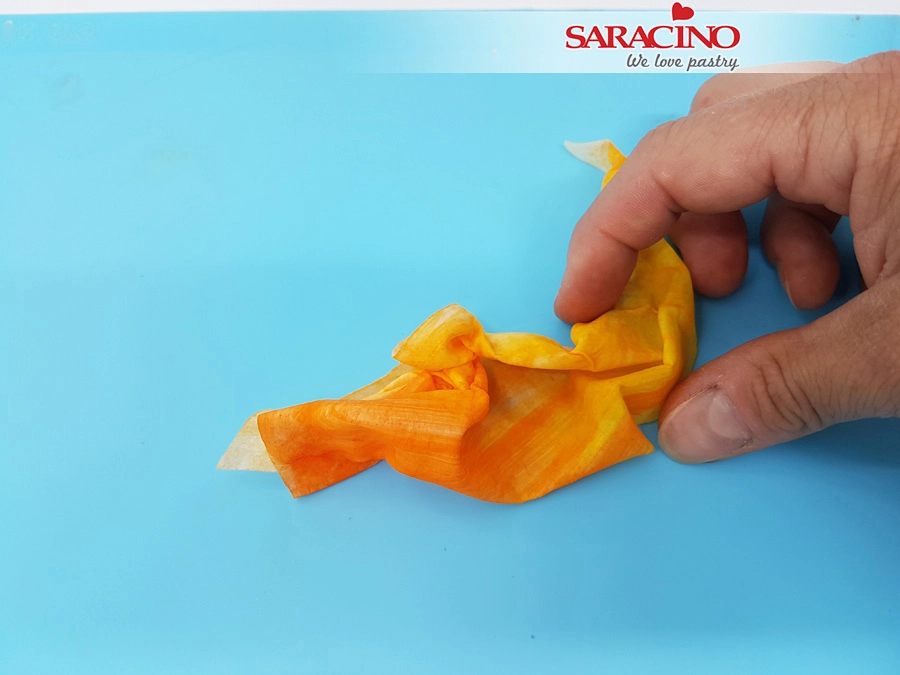
Use your fingers to give the desired shape on a silicone mat. You need to work quickly at this step. Make sure not to press the limp wafer paper too much as you cannot separate wafer paper when it has stuck together. Create multiple shapes. You should have a minimum 4 pieces but more is always possible. Experiment to get a look you want!
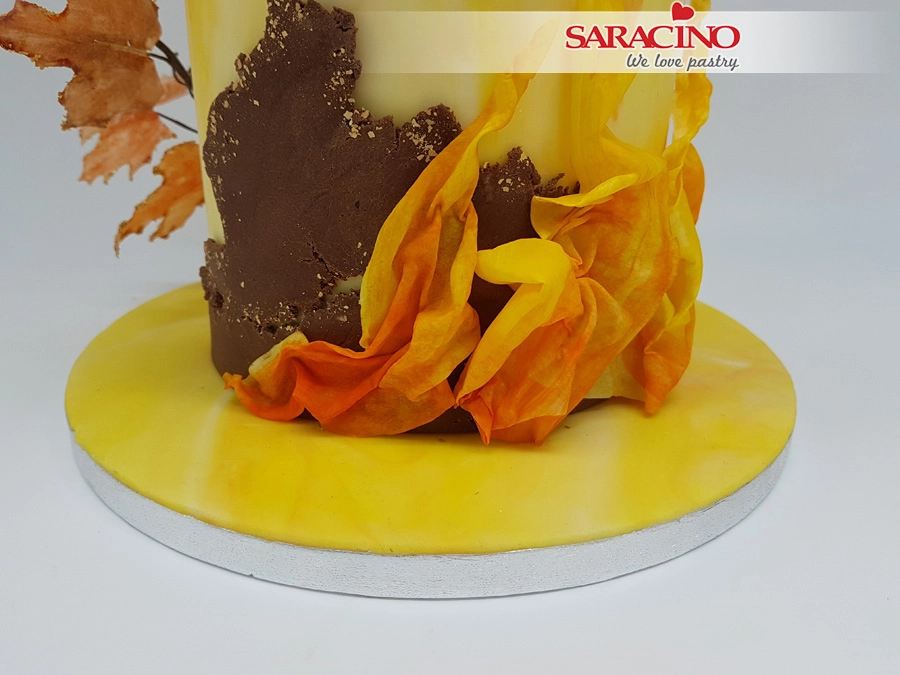
Use a little cake gel to attach the wafer paper to the brown part of the bottom layer. Finish the cake drum with a ribbon of your choice.


Measure the height of the bottom tier of your cake with a ruler or measuring tape.

Mark your measurement on a sheet of wafer paper, mine was 13cm high and I have set 3cm width for the strips – you can go wider if you want to.

Use your first piece as a guide to cut out several strips of the wafer paper.

Using a small brush apply glue to half of the rough side of the wafer paper. We will need to bend it in half lengthways with the glue side facing out.

Your first strip should look like this with the glue side ready to fix to the cake.

Fix the first strip vertically to the side of the cake.

Repeat to make another bent strip. Add a little glue and fix above the first strip so we now have two ruffles facing outwards.

Continue the process trying to keep the gap between strips equal.

Continue all the way around the cake. The last pieces will need to be narrower to close the final gap.

For the petal template draw around your flower veiners or cutters with a dark pencil as it will be easier to see the outline under the wafer paper.

Place a piece of wafer paper on top of your template and using the small ball tool or back of a brush draw around it applying light pressure, it will give you a slight indentation but wont rip your wafer paper and you will be able to use your template multiple times. Trace the outline of 3 – 5 big petals, 3 medium and 3 small depending on how full you want your anemone flower to be.

Cut out all the petals with scissors – you can double or triple layer your wafer paper sheets to cut out a few at a time. Do not go any more in layers as your petals will have rough edges and we don’t want that.

Cut all the petals from the bottom narrow end to about half the length. Cut your 32 gauge wires into three pieces equal in length.

Apply a little bit of glue – be gentle with the amount – on one side of the cut and place the wire on the glue. We need to leave the other side of the cut dry with no glue as we will lap it over the wire in the following steps.

Your wire should be positioned as shown.

Cross over the dry side and press over the wire to fix as shown.

Cut off the two small triangle shapes. Put the petals aside allowing them a few minutes to dry completely.

For the centre of the flower cut your 22 gauge wire in half. Roll the end to a small spiral shape as this will help to shape the centre. Cut a strip of wafer paper to about 10cm by 1.5cm.

Apply glue to the strip on both sides.

Put your wire with the spiral end on to the strip and start rolling the wafer paper around the wire until you have wrapped the whole strip and formed a rough ball shape.

Shape with your fingers to give the centre of your anemone flower.

Prepare gelatine, green Saracino powder colour and a small container.

Add some gelatine and green Saracino powder colour into the container and mix well to create the pollen look.

Apply a little glue to the ball center we created earlier and dip into the pollen.

Make sure that the whole ball is covered and set aside to dry.

When the petals are dry it is time to paint them. Mix a little pink Saracino gel colour with clear alcohol.

Dip the brush into the colour mix and dry the end on a paper towel to remove most of the paint. Brush the petals on both sides. Do not over wet the petals you just want them damp and catching the colour.

After painting place in the petal veiner and press firmly to make sure the veins are going to be visible.

Remove from the veiner and curl the edges of some petals slightly using the back of your brush to add a little bit of movement to the finished flower. Set aside to dry.

Prepare your mini stamens (cut them in half), the florist tape and the centre that should be completely dry.

Arrange the stamens around the center. We want plenty to give a dense look. Tape the stamens to the wire.

Mix yellow (or black if you prefer) Saracino gel colour with a little clear alcohol.

Paint the tips of your stamens to create yellow or black. Leave to dry.

When the petals are dry we can dust them using pink powder colour to bring out the veins.

Dust both sides of the petals from the bottom to the top. Leave a lighter colour on the edge to give your petals a more natural look.

To assemble our Anemone flower start by cutting the tape in half if you are using a full width tape as it will look neater. Wrap the tape around the centre from the base of the ball.

Starting with 3 of the small petals, bend the wire at the base of the petal to enable easier assembly and taping.

Attach the small petals to the centre spacing them out evenly.

Repeat the process with the medium petals, making sure they are positioned in the gaps created by the small petals.

Repeat the process with outer large petals. I used only 3 as I wanted it to be more delicate but 5 petals will give you a fuller looking anemone flower. If you want to create the leaf follow the petal steps for cutting out, wiring, painting and dusting. Place the flower into a posy pick and fix into the cake.