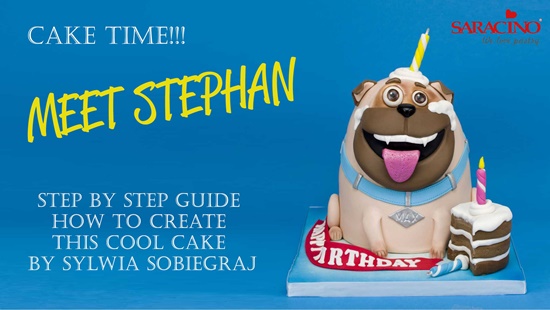
CREATE STEPHAN A PUG CAKE

CREATE STEPHAN A PUG CAKE

Skill level: BEGINNERS

You will need:

  • 2 round 6” cakes
  • 800 g chocolate ganache
  • 100 g Saracino Modelling Chocolate
  • 2 kg of Saracino White Pasta Top
  • 30 g Saracino Black Modelling Paste
  • 50 g Saracino Red Modeling Paste
  • Saracino Gel colours : brown, blue. yellow, pink, skin tone
  • Saracino Dust Colour : brown, black, silver
  • Edible glue
  • Airbrush colour : blue
  • Kitchen knife
  • Craft knife
  • Cerart ball tool
  • Cerart dresden tool
  • Cerart silicon tool
  • Paint brushes
  • Smoother
  • Rolling pin
  • 10 inch square cake drum
  • 6, 4 inches cake boards
  • Corn flour

PREPARATION:

Cover the cake drum in white Pasta Top, smooth the surface, trim the excess, airbrush the edges with blue colour and set aside to dry.

Step 1

Trim the crust from the cakes, cut into layers and sandwich back together with chocolate ganache. Trim around the top of cake to narrow it slightly.

Step 2

Insert a bubble tea straw and cut the excess.

Step 3

Place 4 inch card on the top of cake.

Step 4

Mix the cake crumbs with ganache and form a round top

Step 5

Spread a layer of ganache over the whole cake

Step 6

Out of modelling chocolate form a ball and roll out into an oval shape

Step 7

Attach to the face using water. Mark two holes for the eyes.

Step 8

Mix 800 g of white Pasta Top with skin tone gel colour. Roll out and cover the cake completely. Smooth with a cake smoother.

Step 9

Mix 150 g Pasta Top with brown colour gel, roll out into a circle and attach with an edible glue to the face.

Step 10

Using a ball tool gently mark out the nose.

Step 11

Draw a line down the centre of the muzzle with a Dresden tool

Step 12

Roll out a small piece of black modelling paste, cut out the shape of mouth using a round cutter and stick inside of mouth.

Step 13

Roll some white sugar paste into the thin sausage shape and flatten. Apply a small amount of glue and stick inside the mouth.

Step 14

Using a craft knife mark lines to create the teeth.

Step 15

Roll small amount of white sugar paste into the sausage shape, cut into half to make fangs.

Step 16

Roll a small piece of black modelling paste into a tear drop shape and stick it to the muzzle to form the nose. Open up the nostrils with a silicone tool.

Step 17

Using a brown powder, dust the eye sockets area

Step 18

Roll two balls, one slightly bigger. They must to fit into eye socket.

Step 19

Mix a bit of brown dust with an alcohol and paint the irises and pupils. Stick them in the eye indentations

Step 20

To create the ears roll out some brown sugar paste and cut out two triangles, repeat the step using a skin tone colour paste and smaller triangle cutter. Attach them to either side of the head.

Step 21

Mix some white sugar paste with pink colour gel for the tongue. Roll the paste into an oval, cut in half a mark line down the middle

Step 22

Stick it into the bottom of the mouth and fold down

Step 23

Roll skin tone coloured sugar paste into a sausage shape and split it in half. Flatten one end and bend the leg gently.

Step 24

Repeat for the second leg, then stick them to the front of the body. Mark 3 lines down each paw with the knife

Step 25

Place the cake on the cake drum. Roll a ball of skin toned paste, press and roll with your little finger. Narrow towards one end.

Step 26

Flatten top part of the leg and bend as shown on pictures. Repeat for the second leg and stick them to the body

Step 27

Colour white pasta top with a blue colour gel. Roll out to 2 mm thick. Cut a long strip. Use stitching tool to make the stitches and place the collar around the dog neck. To make a tail roll a skin tone sugar paste into thin sausage, shape curl from one side and stick the tail on

Step 28

To create the cake roll out of 50 g brown sugar paste to 1 cm thick. Cut out 3 circles. Use the wire brush to make some impression.

Step 29

Roll three white balls, flatten to the size of the cake. Pull the edges of the paste with your fingers. Layer the cake

Step 30

Using a plastic cutter, cut one side of the cake as shown on the picture.

Step 31

Mix some white sugar paste with yellow colour gel ,make a long strand. Cut two equal yellow strips and one white, pinch on both ends

Step 32

Twist to make the candles. Repeat the step for pink and blue candle, cut into 4 cm long

Step 33

Insert a 18 gauge wire and let it dry

Step 34

Place the cake on the board. Curl long white strip of white sugar paste and place on the top of the dog`s head to create a frosting effect.

Step 35

Place the candles

Step 36

Roll small balls of white sugar paste and stick to the sides of mouth, cover with flattened circle of sugar paste to create frosting effect.

Step 37

Add more details like a name tag and happy birthday ribbon

Voila!

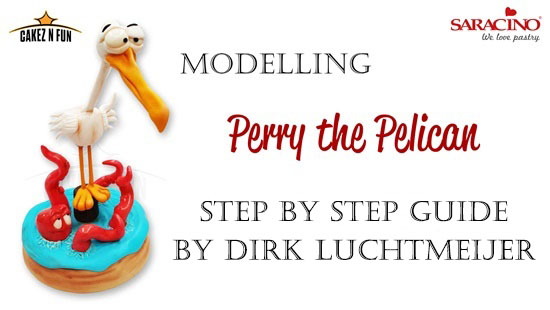
MODELLING PERRY THE PELICAN

MODELLING PERRY THE PELICAN

Skill level: BEGINNERS

You will need:


Saracino Modelling Paste

  • 100 gram white
  • 70 gram red
  • 40 gram Yellow/orange mix (10 gram yellow – 30 gram orange (1:3)  (burned yellow)
  • 25 gram brown
  • Saracino Modeling Chocolate 70 gram
  • 4 skewers
  • 1x 4cm styro ball
  • 1x 3cm styro ball
  • 1x 20cm dummy
  1. This can be a round 20cm cake. For this tutorial we used a styrofoam dummy to make a display version of Perry the Pelican
  2. 25 gram brown Saracino model paste. Mix it well and make a ball
  3. Shape it into a small cylinder shape about 4cm high.
  4. Centre the cylinder shape onto the dummy and use a tool to make some texture to make it appear like wood. You can use scissors to cut small gaps in the border
  5. Use 2 skewers (one is displayed) and 1 gram (per skewer) yellow/orange Saracino model paste. Mix it well and stick it on the skewer. Roll the skewer on your table until the paste sticks on the stick.
  6. Stick both skewers next to each other into the cylinder shape (one is displayed). Make sure your skewer stick all the way true so it connects into the dummy firm enough.
  1. 2x 6 gram pieces of yellow/orange Saracino model paste
  2. Make a cone shape and press the middle a little flat. Keep the thick side fat
  3. Use a spatula to make 2 incisions for the toes.
  4. Cut into the heel
  5. Mount the parts around the skewers
  6. Remove the joints with a silicone tool
  1. Use a 4cm Styrofoam ball and 30 gram of white Saracino model paste. Put the ball inside the paste
  2. Make a tail shape with your hands (looks a bit like a fishtail)
  3. Shorten the skewers with a plier until you have about 8cm sticking out. Make an imprint with the ball and pre drill 2 holes into the Styrofoam ball
  4. Mount the ball onto the skewers by pressing them at least 2 cm over the skewers
  5. 2 pieces of 6 gram white for the wings. Make 2 cones and press them flat (not too thin). Make a tear shape and cut some lines with a scissor.
  6. Mount them in position
  7. Make some texture on the wings
  8. Model them in position the way you like it
  1. Insert a skewer in the neck base and short it down to 10cm
  2. Use a 3cm Styrofoam ball and 30 gram white Saracino model paste
  3. Mount the ball onto the skewer. Don’t forget to pre drill the hole before mounting.
  4. 10 gram Yellow/orange Saracino model paste.
  5. Make a sausage and roll it smaller in the middle by hand. (approx. 6cm tall)
  6. Try to create the base shape with your fingers only. Don’t forget to wipe your fingerprints off. (even I forget sometimes) (it should appear around 7-8cm tall)
  7. Insert a skewer in the head to position the beak
  8. Predrill a hole into the beak. Make sure you make a flat spot so you can connect it onto the head.
  9. Position the beak
  10. 6 gram yellow/orange Saracino model paste. Make a tall cone about 4cm
  11. Position it for the lower jaw and model the shape until it fits.
  1. 2x 2 gram white Saracino model paste. Make 2 balls and position them for the eyeballs
  2. Add a small piece for the lower eyelid
  3. Blend the lower joint onto the head with a silicone tool.
  4. Try to be creative with the eyelids and play a little with them so you get the right character.
  5. 2 gram white on top on the head. Make it look like an extension of the head. Remove the joints with a silicone sharper.
  6. Position the black spots for the eyes.
  1. 4 pieces of 25 gram Saracino modeling chocolate (mixed with Saracino red model paste). Make tall cone shaped pieces 8cm tall.
  2. Add the sucking naps
  3. Position them around the centerpiece
  4. 35 gram Saracino modeling chocolate mix red
  5. Make this shape
  6. Use a ball tool to make the eye sockets.
  7. Insert 2 small pieces of white paste
  8. Add the black spots in position
  9. Add 2 eyelids so he looks annoyed.
  1. Make the Squid look upwards to Perry
  2. Marble a piece of white with blue model paste.
  3. Make small sausages and lay them around the Squid parts
  4. Use a precision tool to blend it around the squid
  5. Make detailed lines to make it look splashing
  6. This picture shows one tentacle is moved for a nicer composition. So be creative and make your own version of Perry.

SPECTACULAR PAKISTAN COLLABORATION

SPECTACULAR PAKISTAN COLLABORATION

Author: RAQUEL GARCIA MARTINEZ

Facebook : Raquel García-El País Del Fondant

Author: RHIANYDD WEBB

Facebook : Dragons & Daffodils Cakes by Rhianydd Webb

Website: https://www.dragonsanddaffodils.com/

Author: ADRIANA RIVERA

Facebook : Aroma de Azúcar

Website: https://aromadeazucar.com/

Author: FAIZA SHERJEEL

Facebook : Gateau: The Sugar Art Studio

Author: SEEMA TYAGI

Facebook :Seema’s Cake Couture

Author: ISHHA JAAGI

Facebook : Ishha’s Cakeworld

Take a time and visit all of the amazing creations from artists from whole of the world

Congratulations And Thank You For Using Saracino Products!

Join Our Newsletter

We’d love to send you the latest news, discounts & exclusive offers via email! By signing up below you are confirming you are happy for Saracino to send you marketing emails. We will always treat your personal details with the upmost respect & will never sell your details to other companies for marketing purposes.

• All the latest industry news   • FREE video tutorials   • Exclusive product offers

Products         Tutorials          Ambassadors           Events           Blog           Showcase         Contact