BATHING BETH TUTORIAL

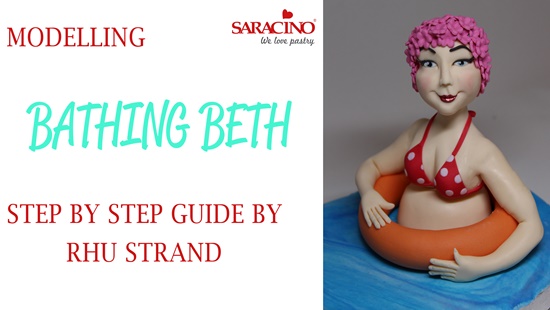
BATHING BETH TUTORIAL

Author: Rhu Strand

Skill level: BEGINNERS


Bathing Beth is a girl who’s not so sure about swimming but with a little attitude and determination she’s happy to jump right in …. Providing she has her rubber ring that is!!  With a  hand crafted face and floral swim hat she’s all set to go


You will need:

  • Saracino Top Paste White to cover the board
  • 200g Saracino skin tone
  • Small amount of Saracino Modelling Paste in red, white, pink
  • 80g orange Saracino Modelling Paste
  • Blue colouring
  • Scalpel
  • Dresden tool
  • Boning tool
  • Embossing tools
  • FMM scriber tool or similar pointed tool
  • Piping nozzles with round openings or small circle cutters
  • Paint brushes
  • Rose / pink Saracino dusting powder for cheeks
  • Dust red and blue metallic paint – lips and eyes
  • Small blossom cutter
  • Edible glue

Step 1

Colour the white paste to cover the board, by adding in streaks of the blue, mix gently to create a marble effect in the paste


Step 2

Roll the paste out and cover the board

Step 3

Roll and flatten slightly 55g of skin tone to make the tummy part of the figure

Step 4

Roll another 55g of skin tone into a ball and tease a neck from one side

Step 5

Use the Dresden tool to divide the bust.

Step 6

Pinch the bust shape in with your fingers.

.

Step 7

Use your index finger to shape in the neck and shoulders

.

Step 8

Press in to each side to make the arm joining area – think of a tailors dummy and the shape they have with no arms

.

Step 9

Roll out the red paste and add small white dots, carefully roll the dots into the paste, cut two small triangle to cover the bust. Cut a strip to go under the triangles and across the lower bust.

Step 10

Add the bust onto the tummy and add some ties to the bikini

.

Step 11

Roll 80g of orange paste and place around her tummy for the rubber ring, join at the back

Step 12

Roll two 16g pieces of paste into tapered 10cm sausages, flattened down the thinner end to make hand.  Cut ‘V’ shape for thumb.  Divide fingers, in half and half again.

.

Step 13

Use fmm scribber tool to divide ends of fingers, mark in nail bed and knuckles, Roll between thumb and finger to create wrist

Step 14

Bend at the elbow, half way along from the shoulder to the wrist. Pinch in to make the elbow

.

Step 15

Attach to the body and smooth in joins with a damp brush and dresden tool

Step 16

Head – Roll 40g of paste into an egg shape, tease thinner end forward to create chin area.

.

.

Step 17

Use smaller end of boning tool, press into head to about half the depth of the tool, making eye sockets – these are placed half-way down the face, continue the eye socket gently down the sides of the face with the boning tool to make temples

Step 18

Roll very small tear-drop in flesh, place on bridge of nose and smooth sides into eye sockets

.

Step 19

Use the side of the dresden tool to mark in the cheeks from the sides of the nose

Step 20

Use pointed tool to make the nostrils – try flaring the nostrils by gently moving the tool around

.

Step 21

Cut a slit into the paste for the mouth – be careful not to go too wide, use the cuticle stick to tease the upper lip forward slightly

Step 22

Use a card embossing tool tool to draw in the line from nose to mouth

.

Step 23

Use the same tool to draw in the upper lip in an ‘m’ shape, use a small ball tool to ‘draw’ under the lower lip, almost making another mouth shape, smooth this ‘trough’ out – leaving the lower lip.Create dimples at each side of the mouth

Step 24

Add to small dots to the outside edge of the mouth

.

Step 25

Use the tip of the veiner tool to create the eye sockets, turn head around and do the other end of the eye

Step 26

Roll two rice sized pieces of white sugarpaste and insert into eye sockets

.

Step 27

Dip the bigger embossing tool into  dust metallic paint and dot into each eye and leave to dry – use small end of the embossing tool, dip into some black food colouring and dot each eye for the pupil. Roll thin piece of black paste for eyelashes and eyebrows, use dust metallic red for lips, dust cheeks with dusky pink

.

Step 29

Insert a cocktail stick into the neck and using the blossom cutter cover the head with small flowers for the swimming cap.
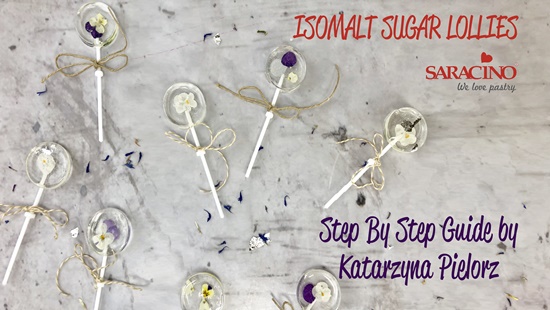
ISOMALT SUGAR LOLLIES

ISOMALT SUGAR LOLLIES

Skill level: BEGINNERS

TIPS FROM KASIA:

  • If using a dummy make holes in it using one of your lolly sticks before starting to work.
  • Working with hot sugar is dangerous, ensure you wear the correct PPE to work with hot sugar, sugar burns are very nasty. Always wear a double layer of protective gloves, appropriate foot wear that cover your toes and keep children and pets away from the kitchen and eye protection.
  • You can use food flavouring, however, if you aim for clear lollies, make sure that your flavouring is also clear in colour otherwise they may end up being cloudy or slightly tinted.
  • You can rub a small piece of edible silver/gold on top for that extra Wow factor.  Equally you can use dried fruit pieces or sugar dragees instead of flowers, but please remember to cool the Isomalt down before adding any as they may also melt under too high a temperature.Enjoy!

You will need:

  • A bag of Saracino Isomalt Sugarplus
  • Sugar thermometer
  • Glass jug (tempered)
  • Silicone spatula and brush
  • Large stainless steel saucepan
  • Lollipop silicone mould
  • Lollipop sticks
  • Edible flowers fresh or dried
  • Food flavouring of clear colour (optional)
  • Blow torch
  • Pair of cotton gloves
  • Pair of vinyl gloves
  • Protective footwear
  • A lollipop stand or polystyrene cake dummy

Step 1

  • Set your oven temp at 140 degrees Celsius
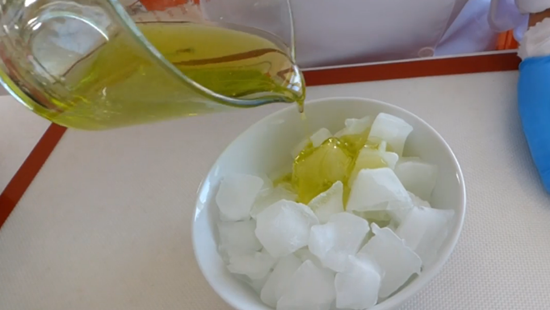
  • Put some Isomalt in a stainless steel saucepan (not more than an inch), place on a hob plate that is smaller than the bottom of your pot and melt over low/medium heat without stirring until the sugar has pretty much dissolved. Use a silicone pastry brush dipped in water and keep washing the sides of the pan down to allow all the granules to melt evenly. Keep on the hob until it reaches the temperature of 180 degrees Celsius.
  • If you need more Isomalt you can add more once the first load has melted and carry on the same way until all has dissolved.

Step 2

  • Now it’s time to add your flavouring (make sure you don’t go too crazy or your lollies may taste bit sharp), stir in gently, pour everything into a tempered glass jar and place in the oven until all the air bubbles have disappeared. The oven will keep the Isomalt at pouring consistency for roughly one hour without burning it.

Step 3

  • Once all bubbles have gone fill the moulds slowly one by one until half full then place the jug back in the oven immediately after.
  • Let the lollies cool down and firm up.
  • Use one as a tester.

Step 4

  • Check your tester lolly. It needs to feel cool to touch before you place your flowers on it otherwise too high temperature will shrink the petals and make them go yellow.
  • Place one flower in each mould, so they face down.
  • Take the jug out of the oven and leave on side for a few minutes (again to bring the temperature down so as not to burn the flowers).
  • Put the lolly sticks in the moulds and whilst holding one in place using your free hand to very slowly fill the remaining space with Isomalt.
  • Go slow as the sugar will have thickened by now and tends to flow in a larger, faster stream.
  • Leave to cool down for at least 2 hours.

Step 5

  • Take the lollies out of their moulds.
  • They should have frosty film on the front side as shown in the picture.
  • The only way to remove it is by using a blow torch, so get ready and read the next step before you begin to do so.

Step 6

  • Set the flame strength on very low and gradually move the torch closer and closer towards your lolly.
  • If you set the flame too high, it may cause the cracks.
  • The flame will remove the frosting and allow the sugar to become transparent.
  • Once all the frost has been removed, place the lolly in the stand or push into a dummy and leave to cool and harden for the last time.
  • Repeat with each lolly.
  • Leave them set for at least one hour otherwise they may stick to the wrapping bag once you’ll have placed them in it.

Step 7

  • Wrap each lolly separately, twist, tie, attach a small tag and Ta-Da! You have a beautiful, homemade gift for someone special 😉

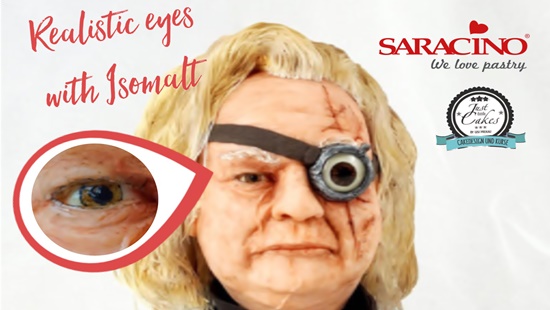
CREATE REALISTIC EYE WITH ISOMALT

CREATE REALISTIC EYE WITH ISOMALT

Author: Gisi Prekau

Skill level: INTERMEDIATE

You will need:

  • Flowerpaste
  • Saracino gel colours ( colours depends on which eye colour you would like to achieve )
  • High percentage alcohol
  • Glaze spray
  • Ready cooked Saracino Isomalt – how to cook Isomalt click HERE
  • Fine brush
  • Cupcake liner (silicone)
  • Balltool

Step 1

Prepare a base out of flowerpaste. This should have a depression in the centre, which determines the size of the iris. Let them dry over night.

Step 2

Paint the iris with a fine brush, high percentage alcohol and gel colours. Start with applying pure alcohol as a thin coat. Then add the lightest colour for your base. Draw on darker colours in spots as you go. Delude your paste colours so they do not get too strong!

I always paint with two or three differetnt colors.

Step 3

Paint the iris with a brighter zone (which will be below) and a darker zone which will point upwards. this zone is darker due to the shadow of the upper eyelid. To complete the look of an realistic iris draw a very thin line as an outline around the iris. Don’t  forget the pupil – this is painted with black foo colour.


Step 4

The painting must not exceed the depression. And should be well dried before further processing. A hair dryer can be used to speed up the drying process.

Step 5

Apply a  first layer of food-grade lacquer and let it dry.

Step 6

Warm the prepared eyeball carefully – a hair dryer can be used for this as well. Melt Isomalt using a silicone cupcake liner  in the microwave  (30 sec., then 15 sec. Intervals). Attention do not overheat, otherwise the Isomalt will go brown.

Step 7

Do not stir to avoid any further bubbles – then allow to rest a little until bubbling stops. Fill the well with a small hill. and let it cool down. Important- coat with food bag to prevent absorption of moisture that clouds the Isomalt.

LET’S DREAM TOGETHER COLLABORATION

LET’S DREAM TOGETHER COLLABORATION

We are pleased to share with you these AMAZING creations by Artists from all around the World who contributed to the collaboration organised by Rosa Guerra. You can read here what Rosa says about the work

The objective of our collaboration has been to strengthen the ties of friendship that unite the cake designers. The difficulty imposed by distance and different time zones has duplicated the efforts of our artists to work as a team. I think that all the pieces convey something that goes beyond individual work. The chosen themes, always within the context of characters with a special relationship, range from mythology, cinema, or literature, to the most current television series. For me, the best thing about the experience has been to know a little better the wonderful people that form the whole team of the collaboration.


Author: Tina Scott Parashar

Facebook : Tina Scott Parashar’s Cake Design

Author: Daniel Diéguez

Facebook : Daniel Diéguez / Cake Artist

Author: Mania Mistiloglou

Facebook : Candymaniac

Author: Floren Bastante

Facebook : Floren Bastante / Dulces el Inflón

Author: Erandeny Cuevas

Facebook : Luxury baker design

Author: Khamphet Che-Bui

Facebook : Sweet Side of Cakes

Author: Raquel Garcia

Facebook : Raquel García-El País Del Fondant

Author: Elisabete Caseiro

Facebook : Betysugarland – Cake Design by Elisabete Caseiro

Author: Angela Cassano

Facebook : Una fetta di felicità

Author: Anna Rossa Maggio

Facebook : Anna Rosa Maggio cake design

Author: Laura Daluiso

Facebook : Lovely Cakes di Daluiso Laura

Author: Elza Baldzhiyska

Facebook : The Nightwitch ‘s cakes 

Author: Tsvetelina Gerova

Facebook : Tsvetelina Gerova

Author: Bartolome Saez

Author: Teresa Gil

Author: Florence Devouge

Facebook : Florence Devouge Sugar Art

Author: Daniela Cabrera 

Facebook : Daniela Cabrera Godínez

Author: Isabela Tamargo

Facebook : Tartas Imposibles by Isabel Tamargo

Author: Angela Penta

Facebook : Angela Penta Cakes

Author: Stefania Sanna

Facebook : Torte decorate di Stefy

Author: Tatyana Nazarova

Facebook : Tatyana Nazarova

Author: Sherin Rizwan

Facebook : Cakes en Vogue

Author: Nade Jankovska

Facebook : N SUGAR ART

Take a time and visit all of the amazing creations from artists from whole of the world

Congratulations And Thank You For Using Saracino Products!

Join Our Newsletter

We’d love to send you the latest news, discounts & exclusive offers via email! By signing up below you are confirming you are happy for Saracino to send you marketing emails. We will always treat your personal details with the upmost respect & will never sell your details to other companies for marketing purposes.

• All the latest industry news   • FREE video tutorials   • Exclusive product offers

Products         Tutorials          Ambassadors           Events           Blog           Showcase         Contact