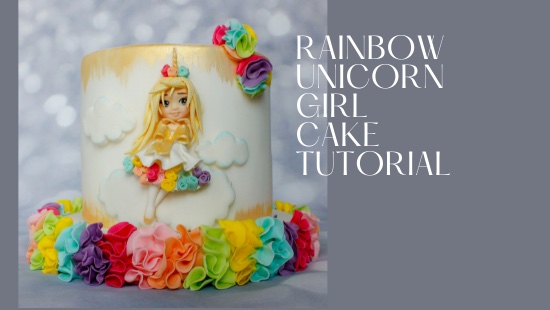
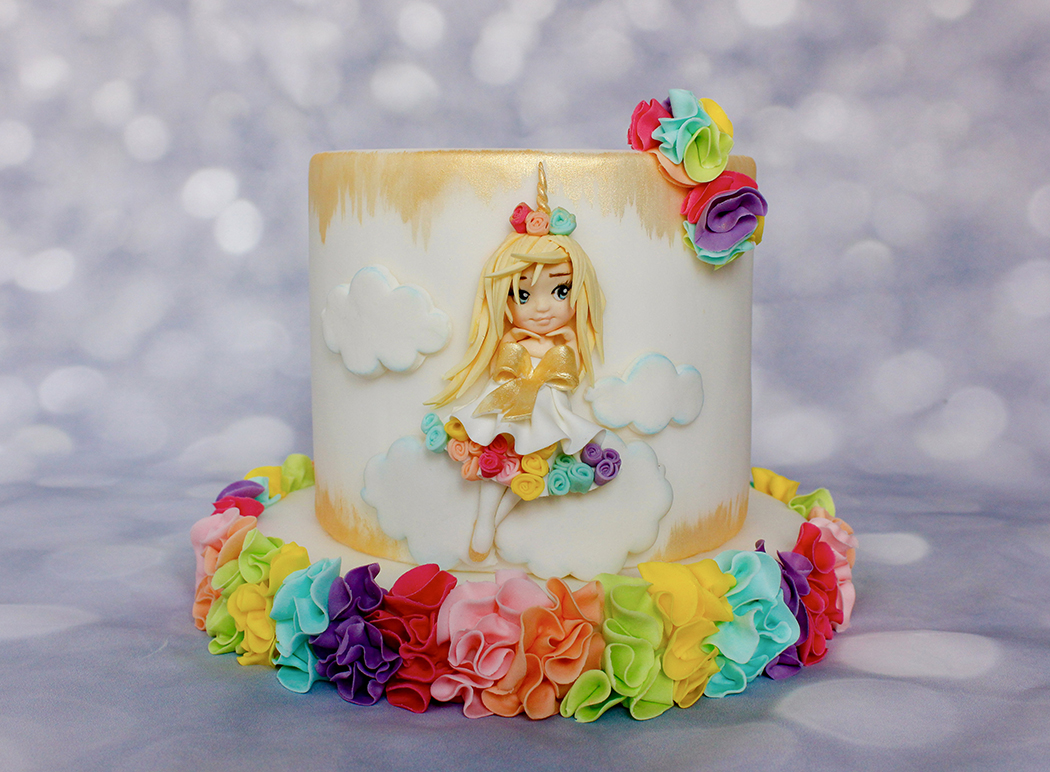
RAIBOW UNICORN GIRL

RAIBOW UNICORN GIRL

Skill level: BEGINNERS

You will need:

  • Saracino white Pasta Top 500g
  • Saracino Pasta Model:
    • white 100g
    • light green 100g
    • pink 100g
    • orange 100g
    • yellow 100g
    • tiffany 100g
    • fuschia 100g
    • violet 100g
    • black 10g
    • light skin 15g
  • Saracino gold powder
  • Cake 15cm diameter x 13cm tall
  • Cake board 20cm diameter x 2.5cm tall
  • Saracino Cake Gel
  • 3cm circle cutter
  • Ball tool
  • Modelling tools
  • Rolling pin
  • Brushes
  • Clear alcohol
  • Cloud cutter
  • Foam mat
  • Exacto knife and Dresden tool
  • Silicone brush
  • Piping nozzles #3 #2
  • Saracino dust colours: light blue, brown and pink
  • Small oval cutter
  • DOWNLOAD THE PICTURE HERE

Step 1

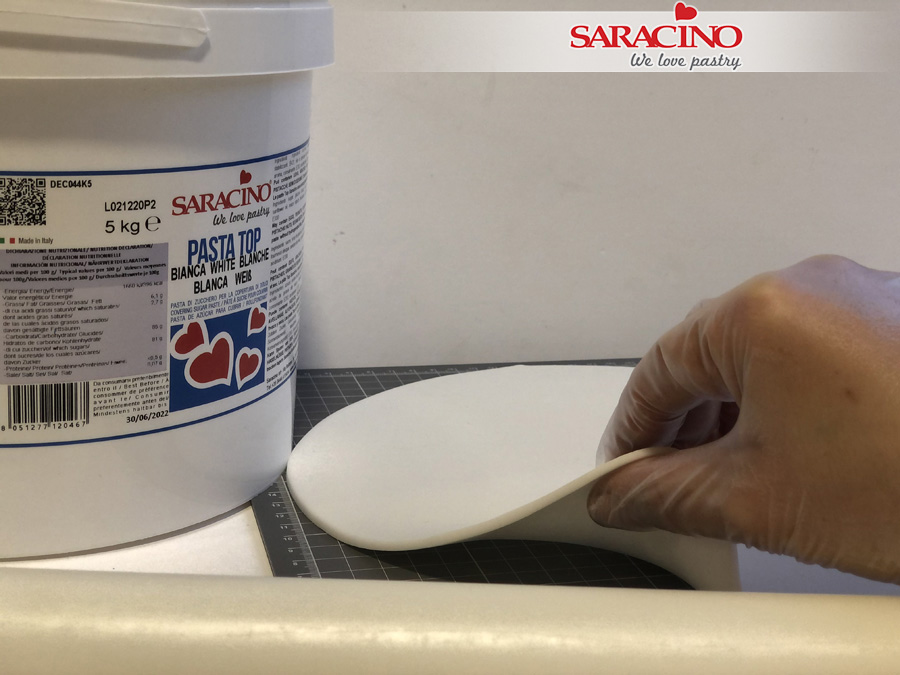
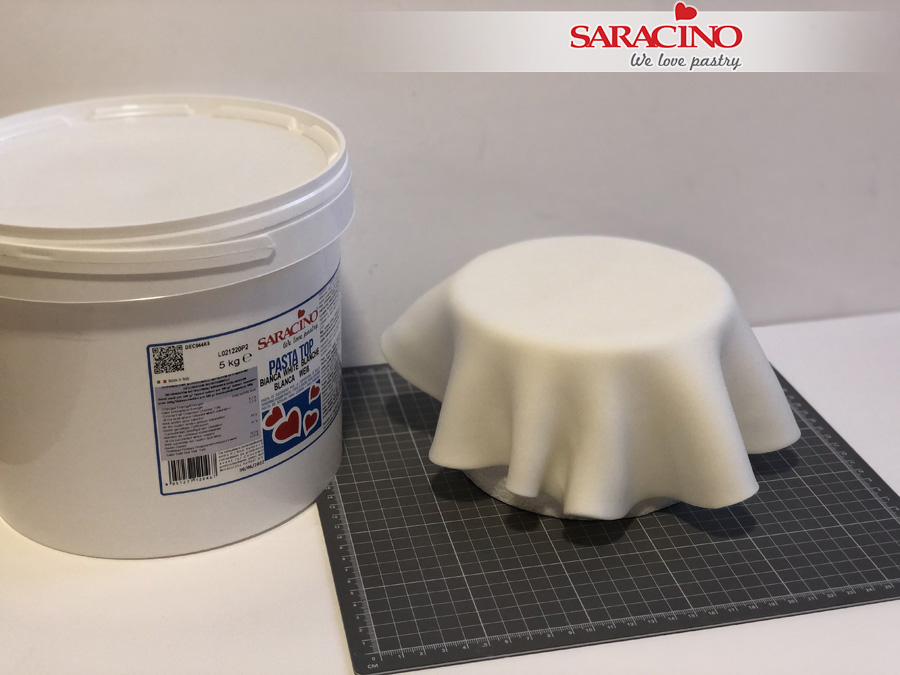
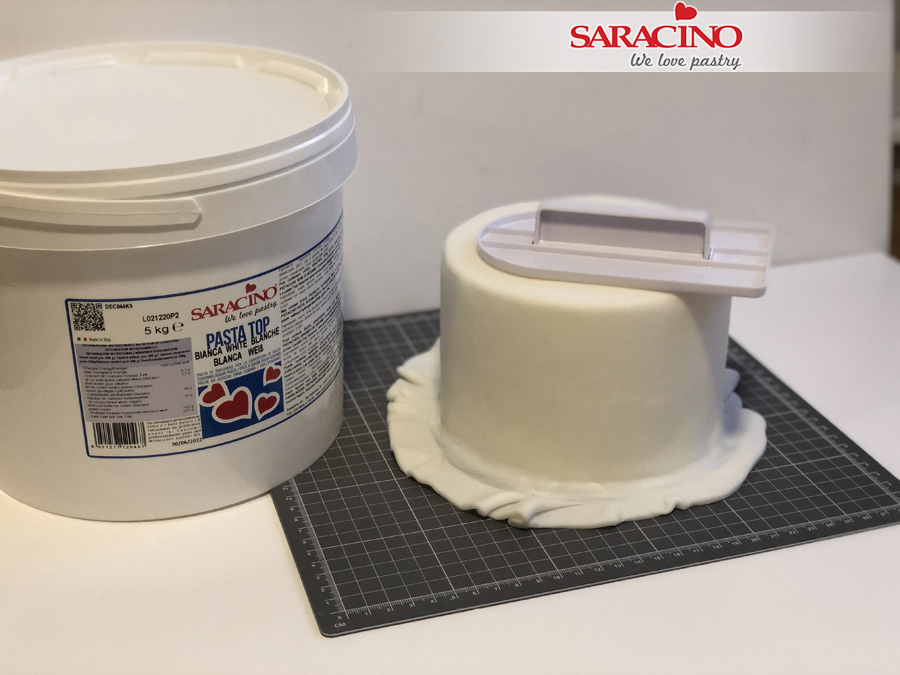
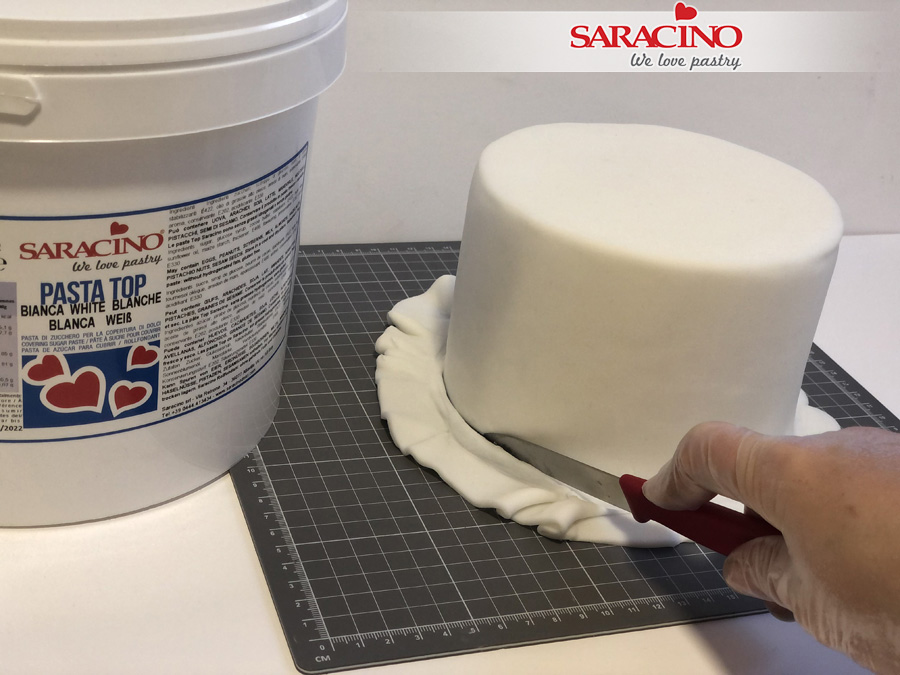
Cover the cake and the board using white fondant Pasta Top.

Step 2

Roll out some pink modelling paste quite thin. Cut some circles using the circle cutter.

Step 3

Place the circles on a foam mat and thin the edges using the ball tool, pressing half on the edge of the circle and half on the mat.

Step 4

Repeat for each circle and fold them like an “S” shape as in the picture. Leave them dry on the mat for few minutes before positioning them on the board.

Step 5

Take one “petal” ruffle and stick to the side of the board, starting from the top, placing the other above slightly to the left. I used 4 petal ruffles of each colour. Use Saracino cake gel to help it stick.

Step 6

Prepare the other petal ruffles in different colours. Fix next to the one previosly fixed.

Step 7

Repeat with all the colours keeping to the same sequence as you work around the board.

Step 8

Cover the entire side of the board as in the picture.

Step 9

Roll a 5g sausage shape of white Pasta Model. Use your fingers to shape the ankle and flatten the end for the foot.

Step 10

Download the picture HERE. Position the leg on the template to check you have the correct size. Model the other leg using the template as a guide. Use a sharp tool to mark the slipper outline.
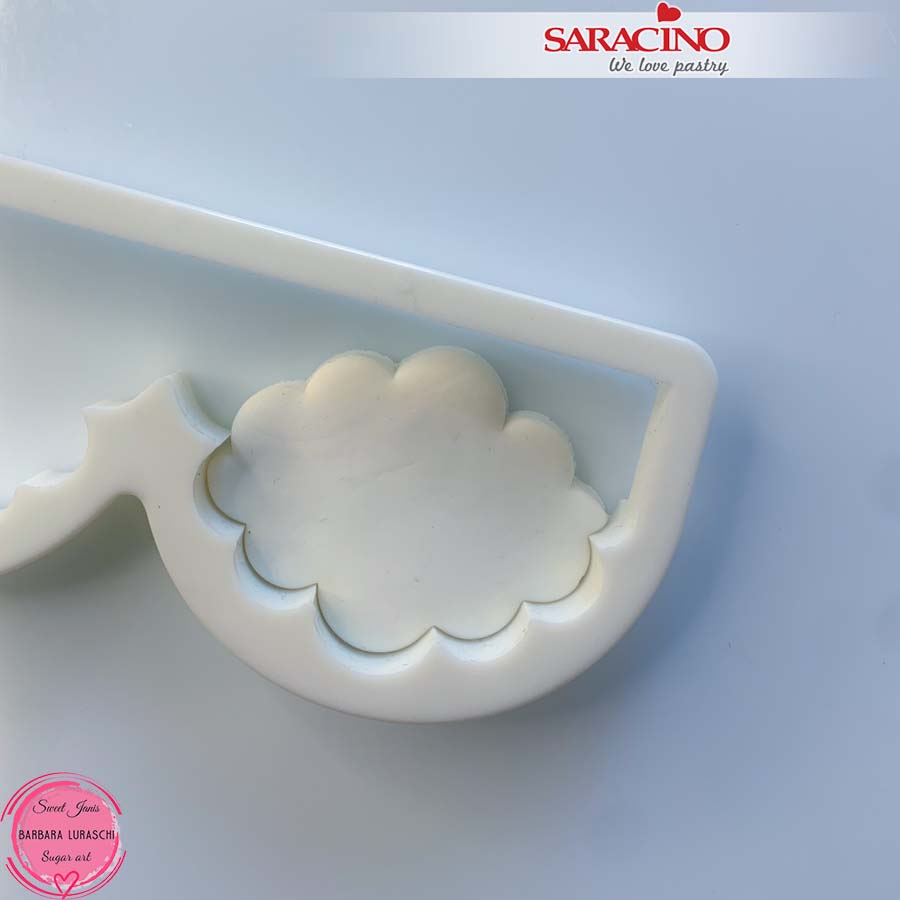
Step 11

Roll approximately 20g of white Pasta Model thickly and cut a cloud using the “cloud” cutter.
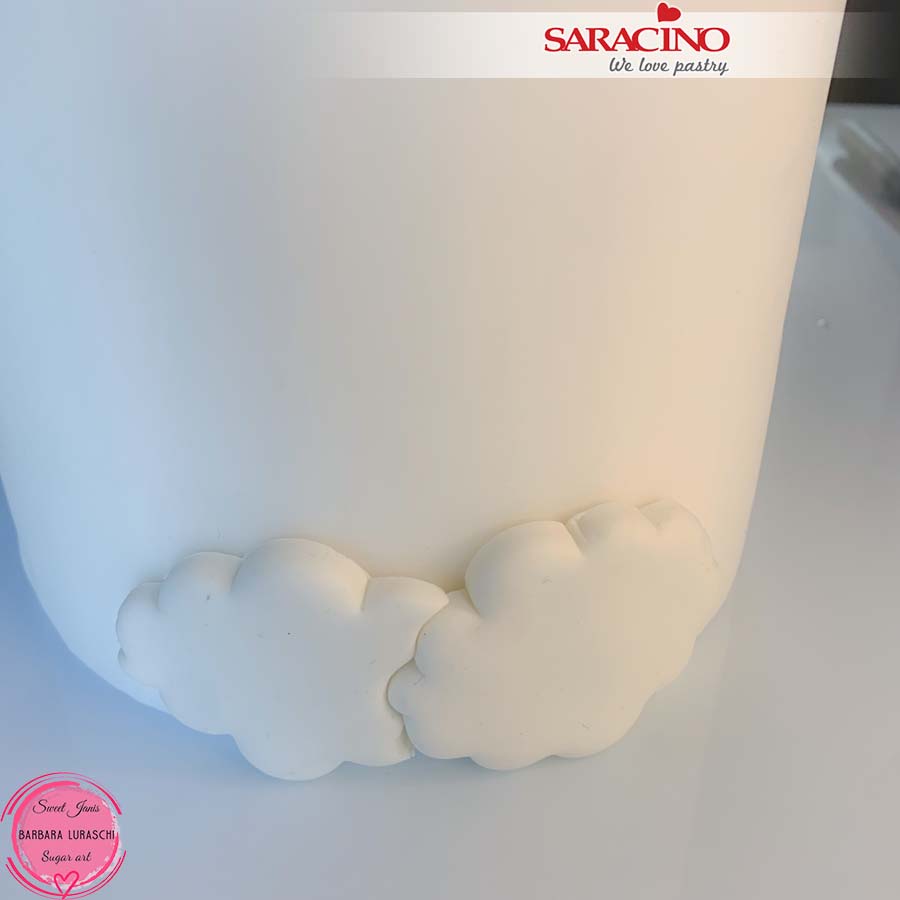
Step 12

Make another cloud and fix them on the bottom of the cake side. Use a little cake gel to help them stick.
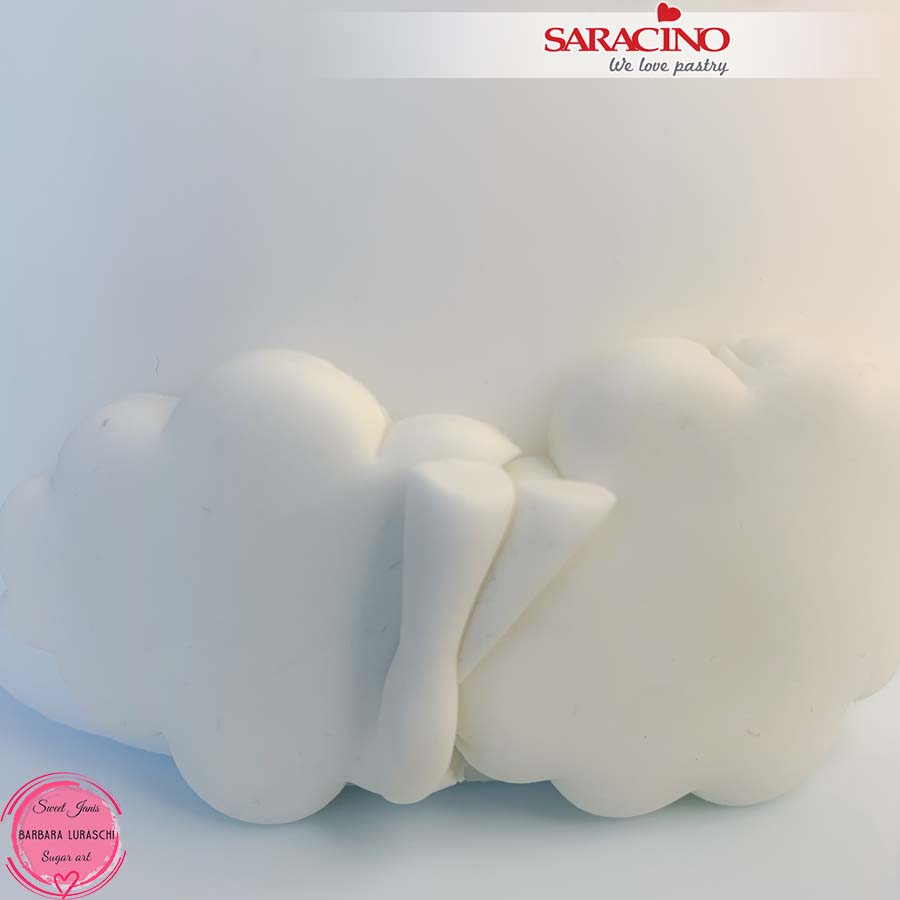
Step 13

Position the legs we made previously on the clouds as shown.
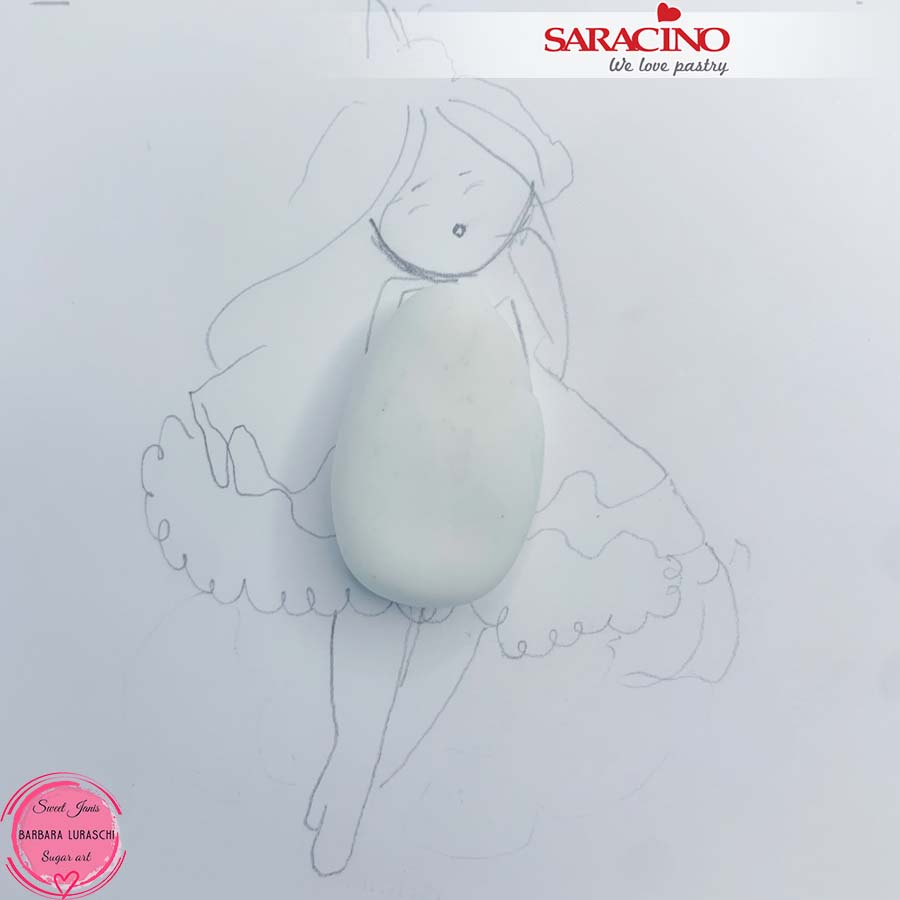
Step 14

Roll approximately 7g of white Pasta Model into a teardrop shape. Use the template as a size guide.
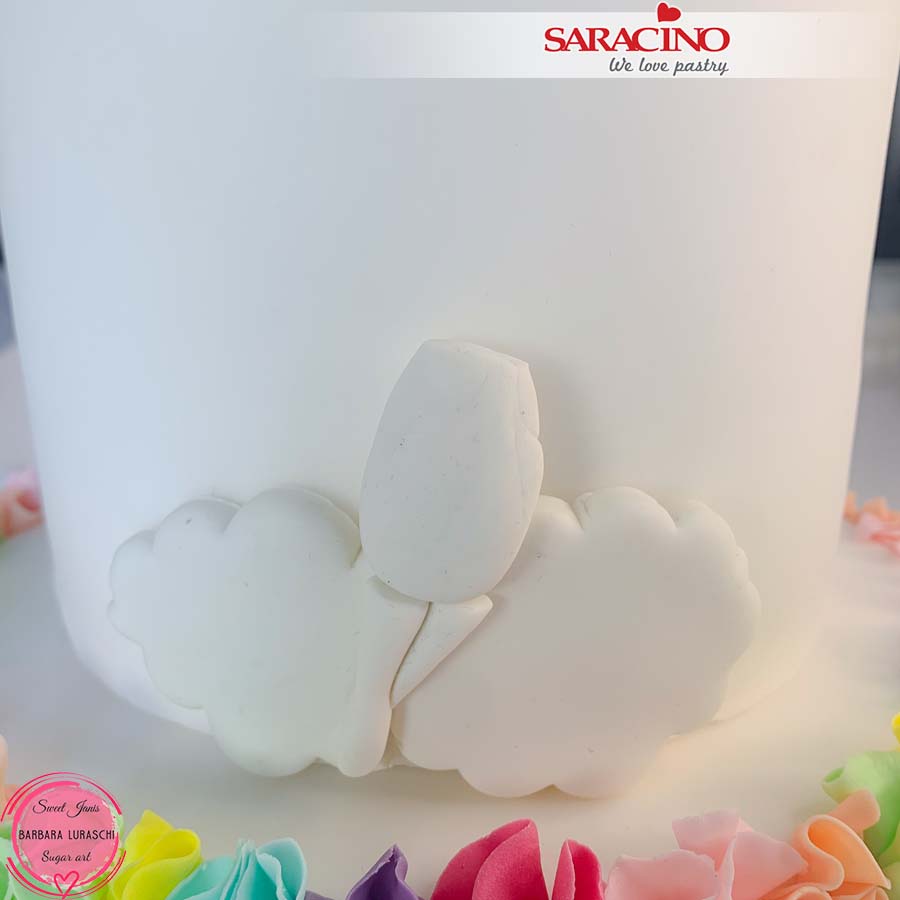
Step 15

Position and fix the body onto the cake following the design of the template.
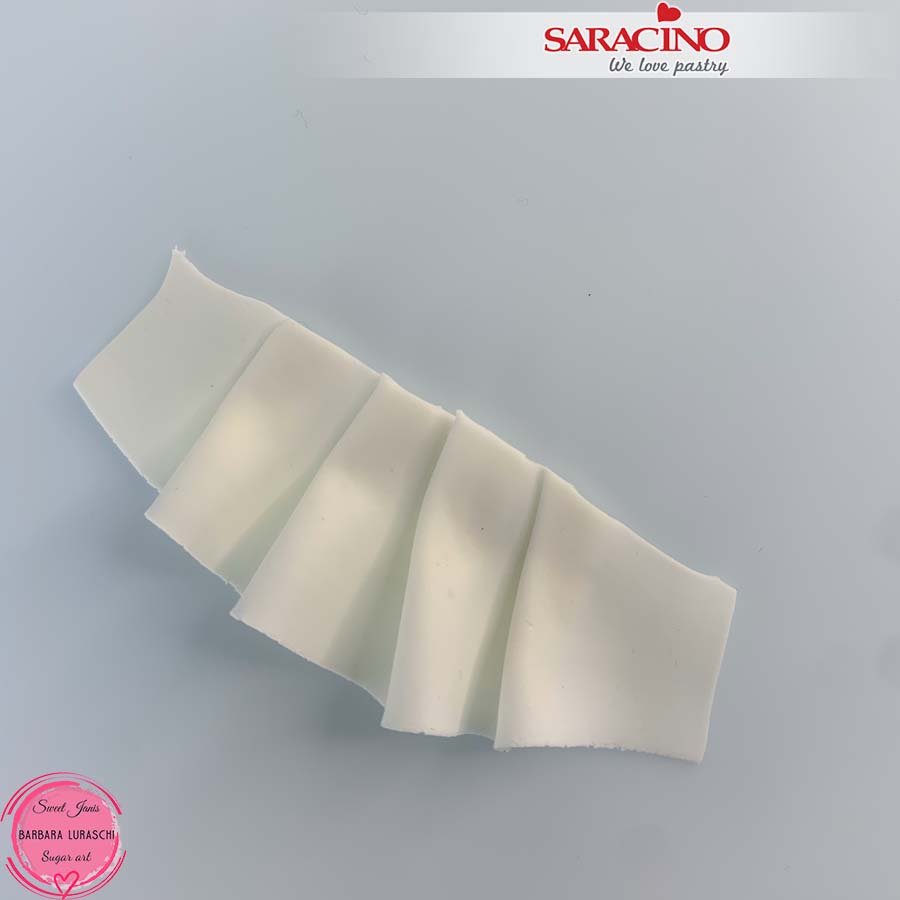
Step 16

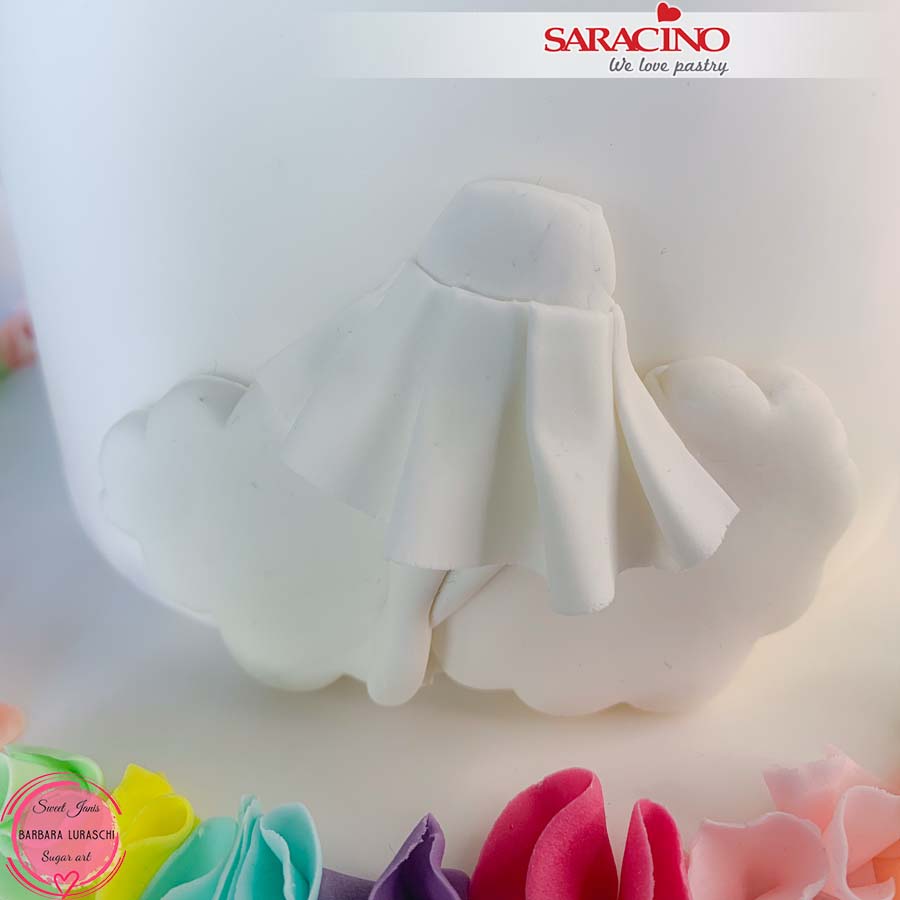
For the skirt roll approximately 5g of white Pasta Model thinly and cut a strip. Fold it as shown in the picture to make the pleats.
Step 17

Position and attach the skirt to the body.
Step 18

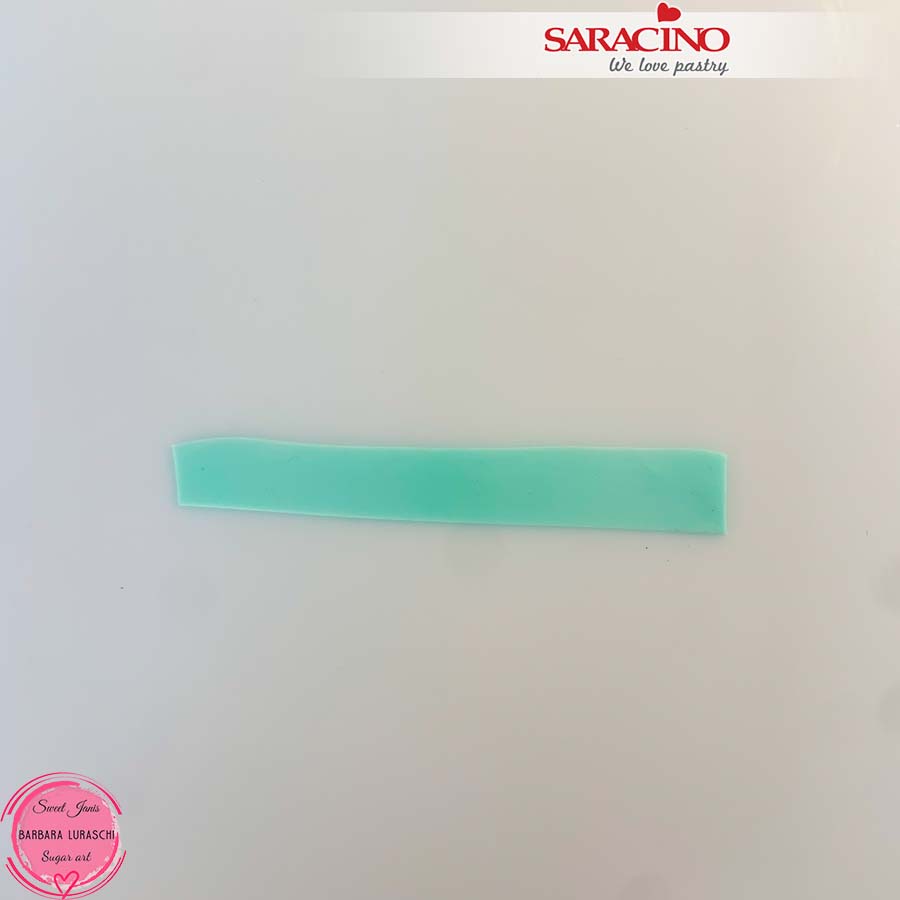
For the flowers on the dress roll a small amount of tiffany Pasta Model and cut a small strip.
Step 19

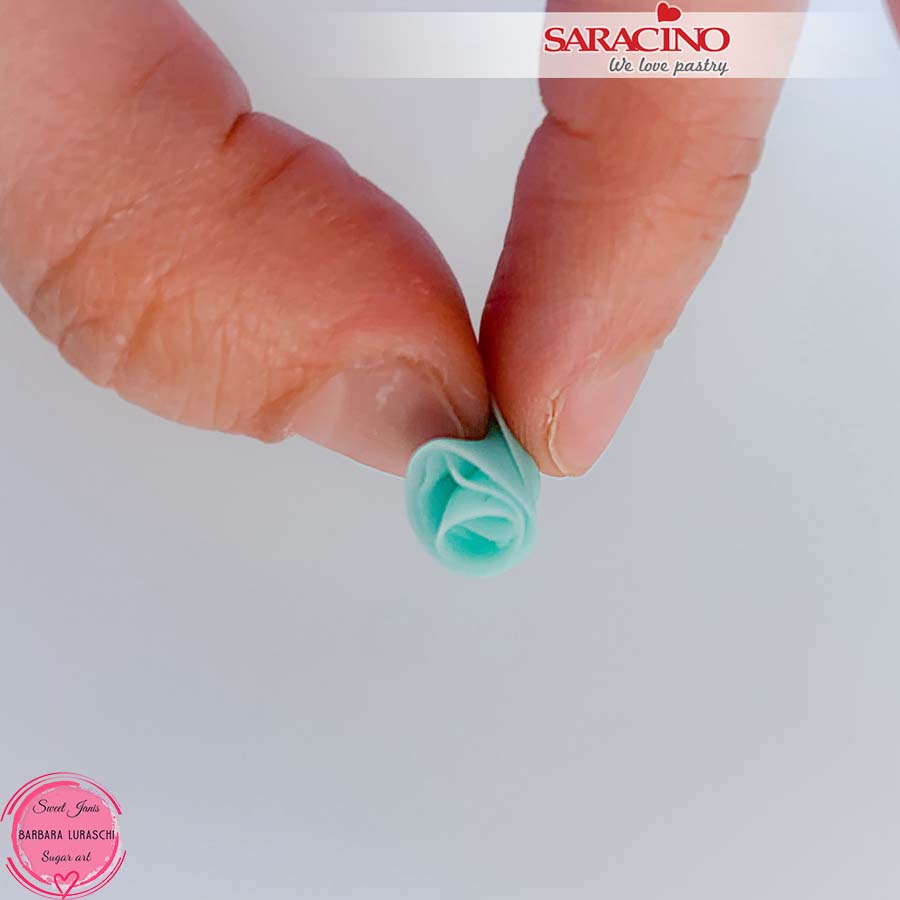
Roll and fold the strip to make a small rose.
Step 20

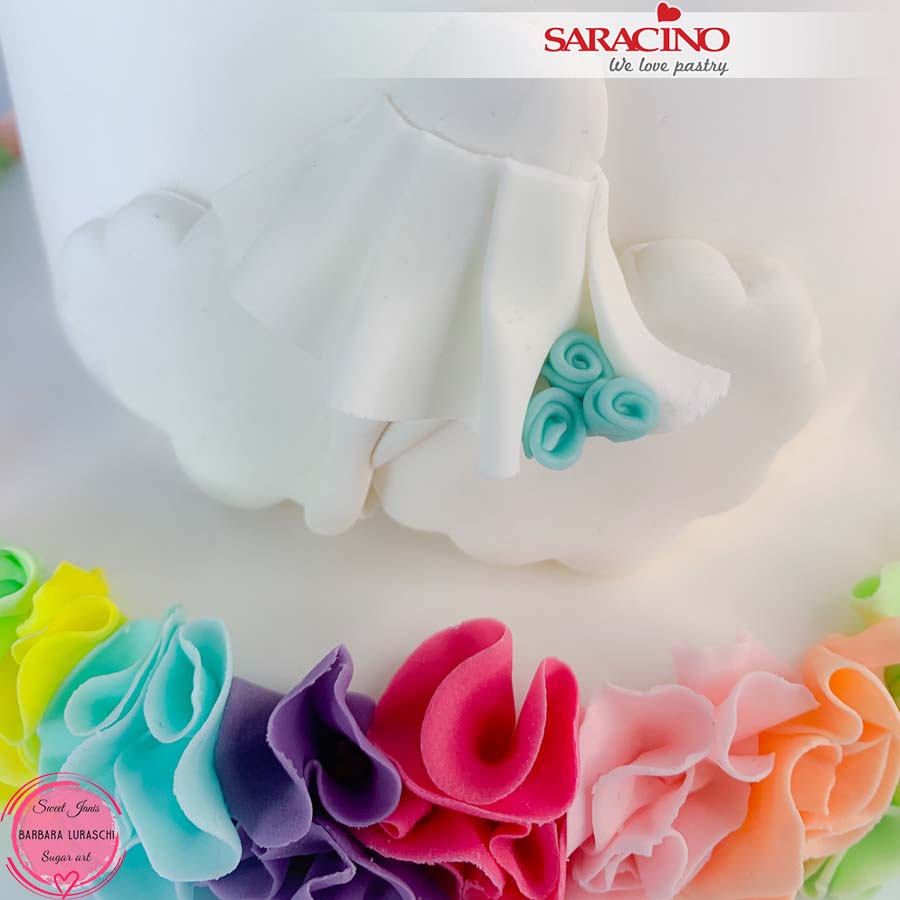
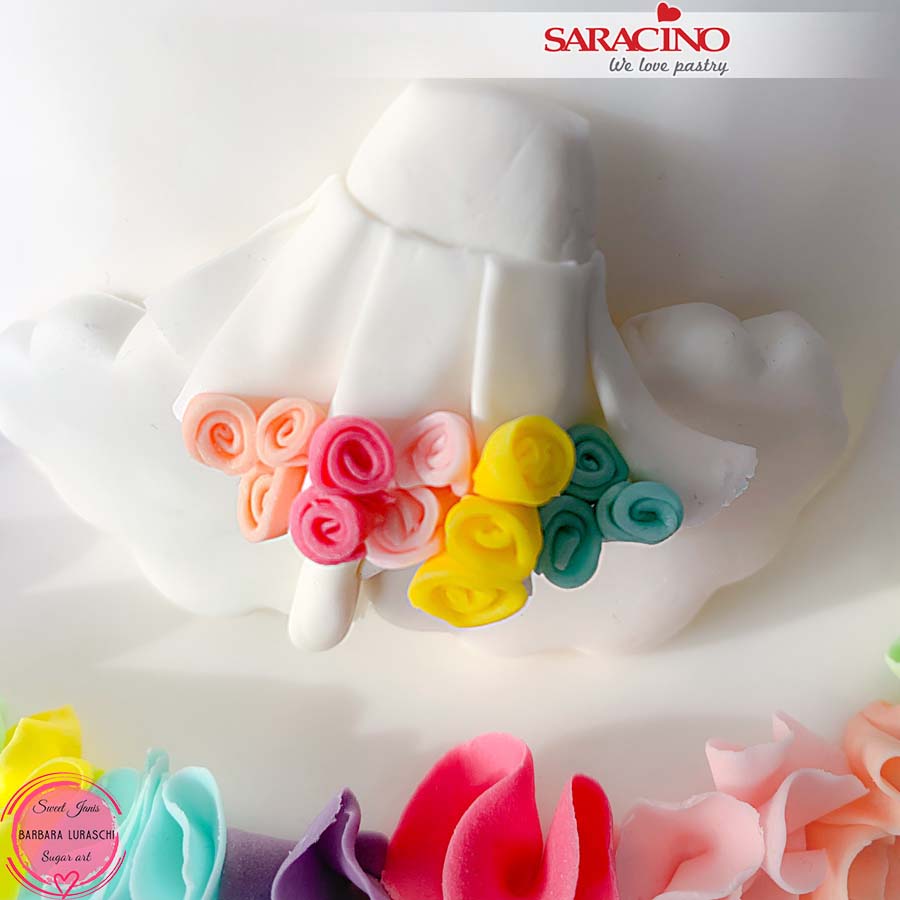
Make 3 flowers and fix them at the bottom of the skirt.
Step 21

Repeat the same with different colours and continue until you decorate the entire bottom of the skirt.
Step 22

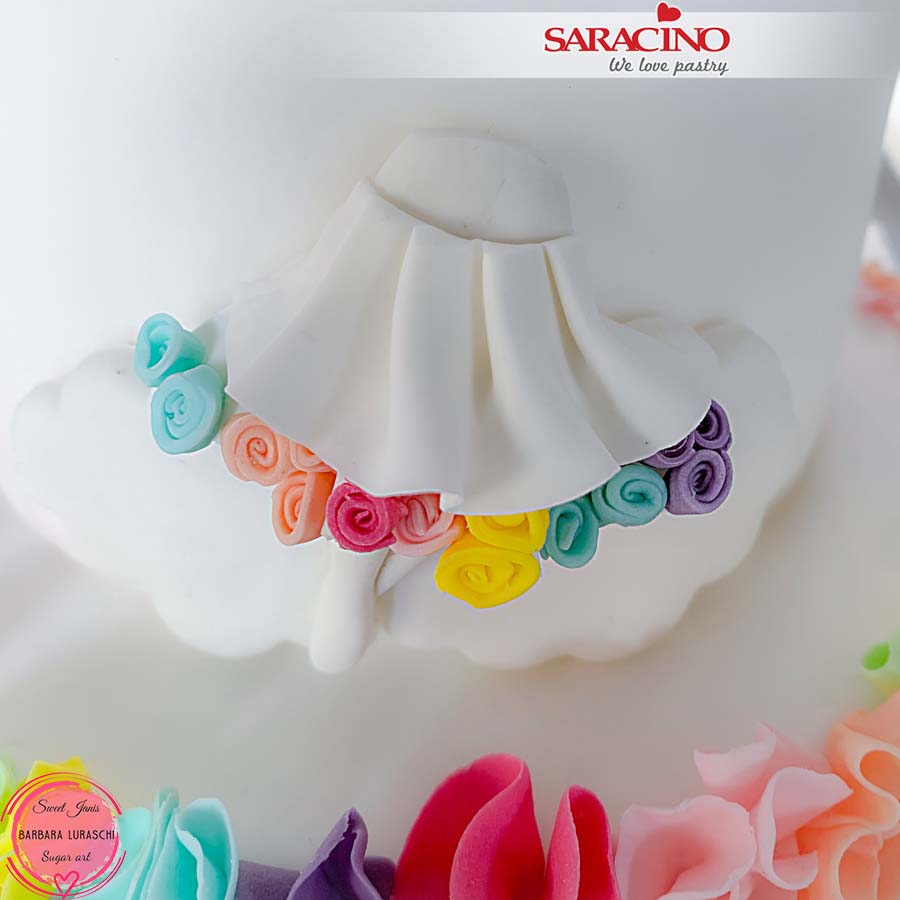
Roll 5g of white Pasta Model and cut another strip. Fold it as you did before to make pleats and position it as a “second layer” over the first one and above the roses.
Step 23

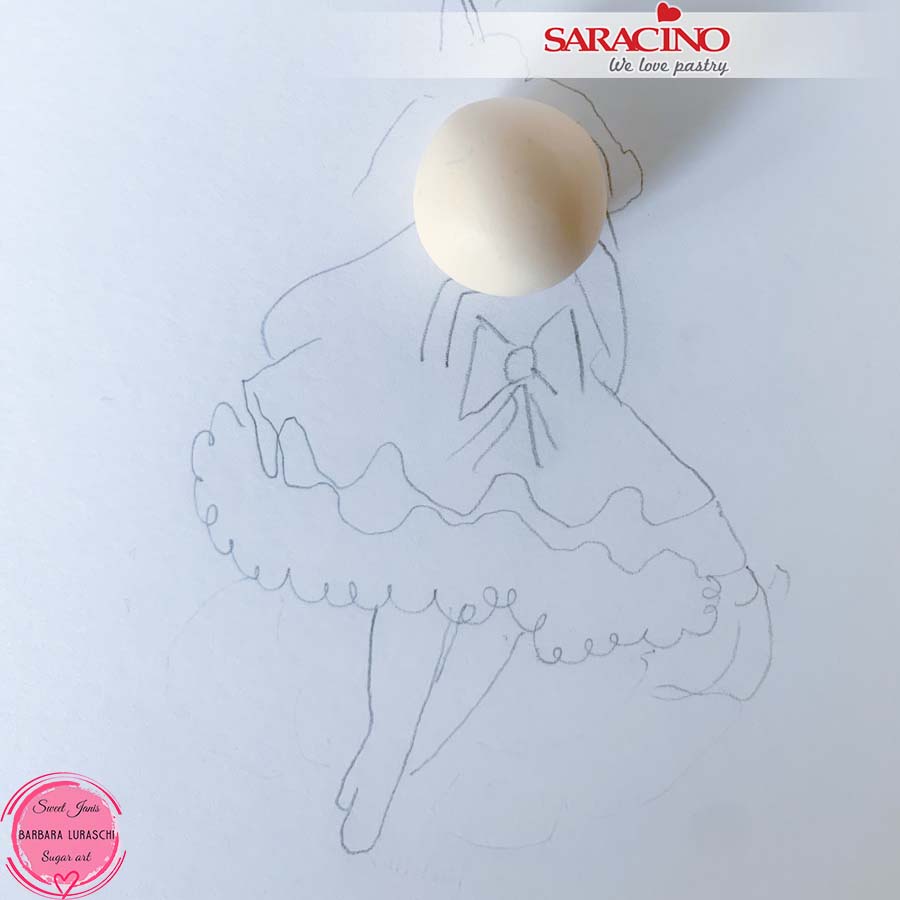
Roll a 6g ball of light skin Pasta Model using the template as a guide for the size needed.
 

Step 24

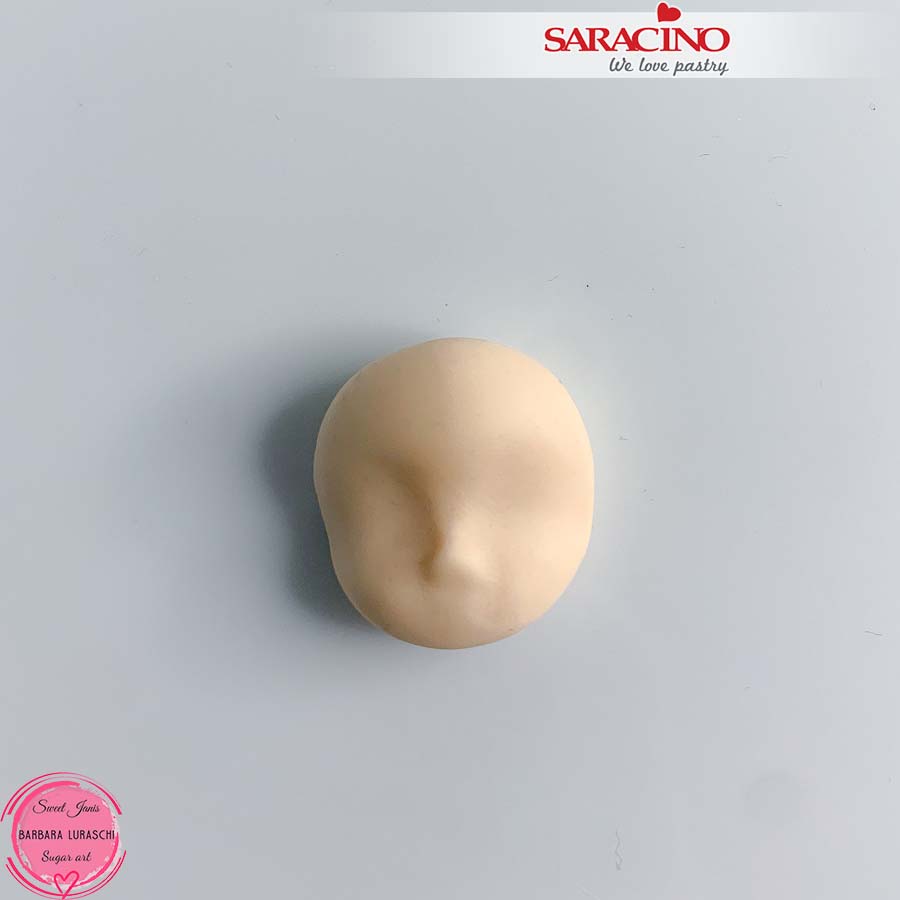
Flatten the ball slightly and using your fingers start to shape the eye sockets and the nose.
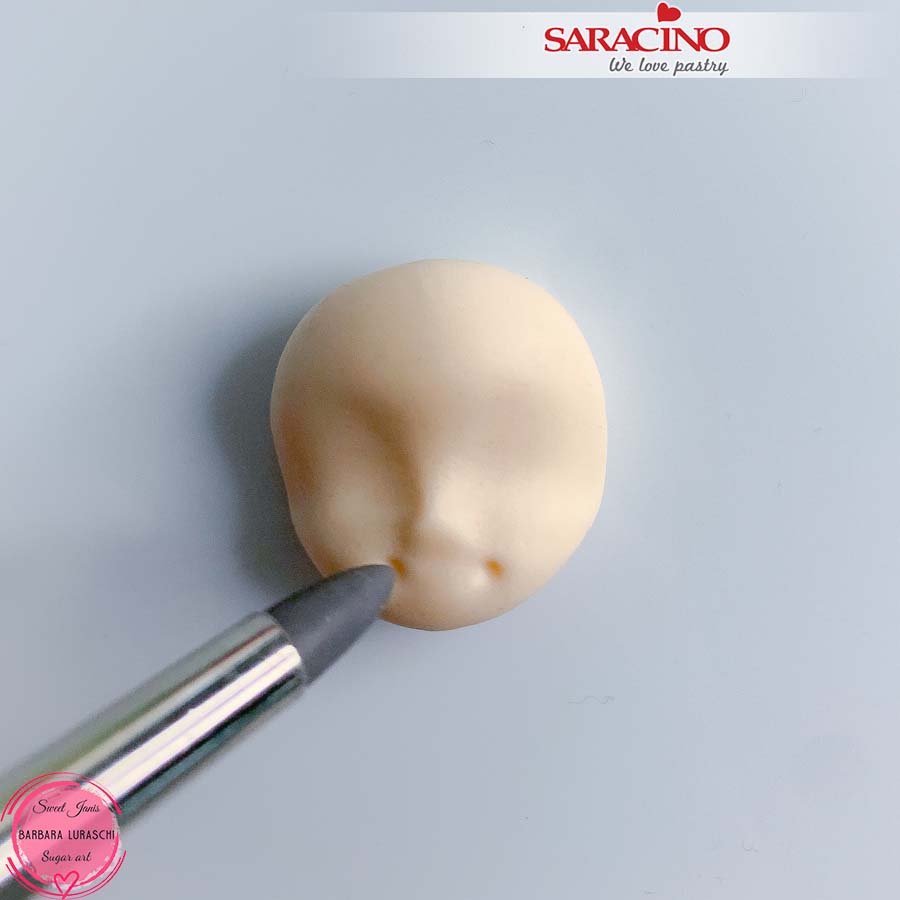
Step 25

Use a silicone tool to mark the 2 points at the end of the mouth as shown.
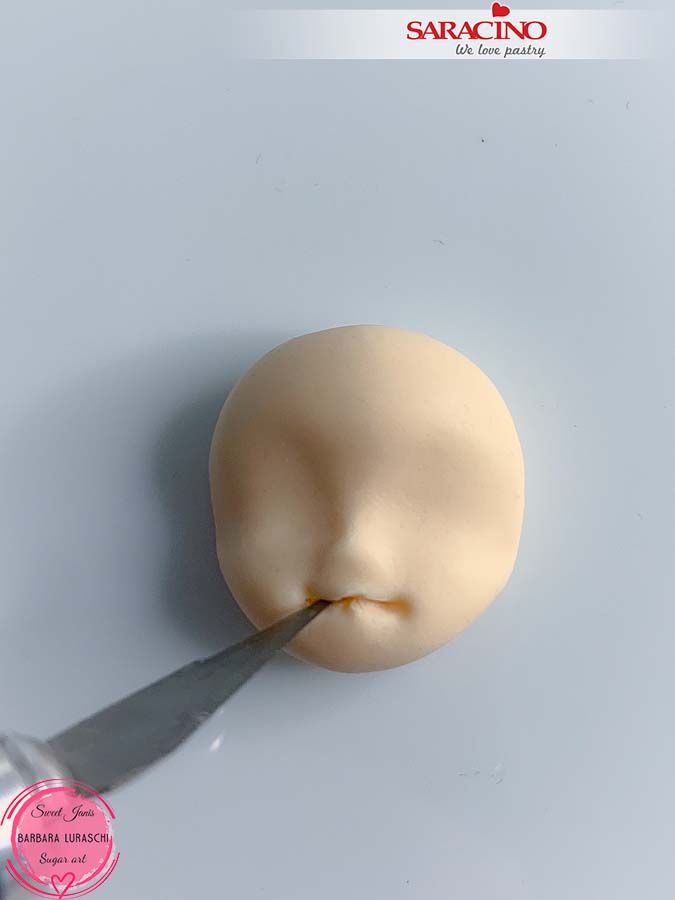
Step 26

Mark a line between the 2 points with the modelling tool and cut it using the craft knife.
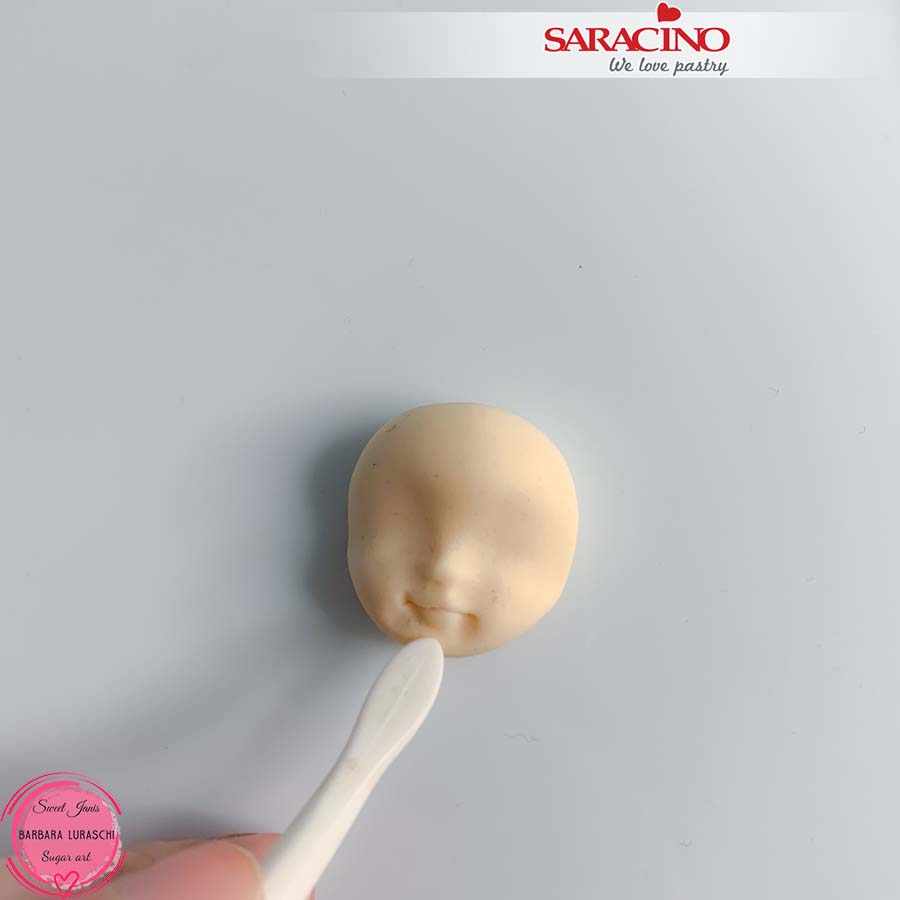
Step 27

Mark the upper and the bottom lips using the Dresden tool. Push the paste towards the mouth for the upper lip and just mark the shape of the lower lip.
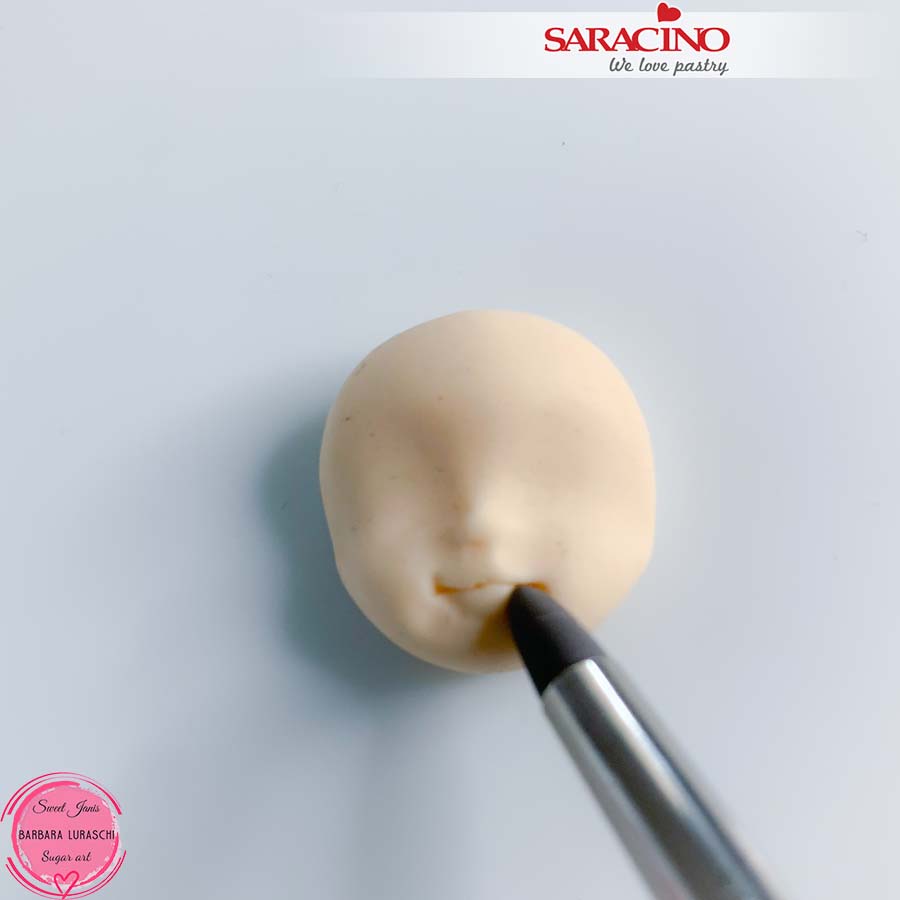
Step 28

Smooth around the lips using the silicone tool.
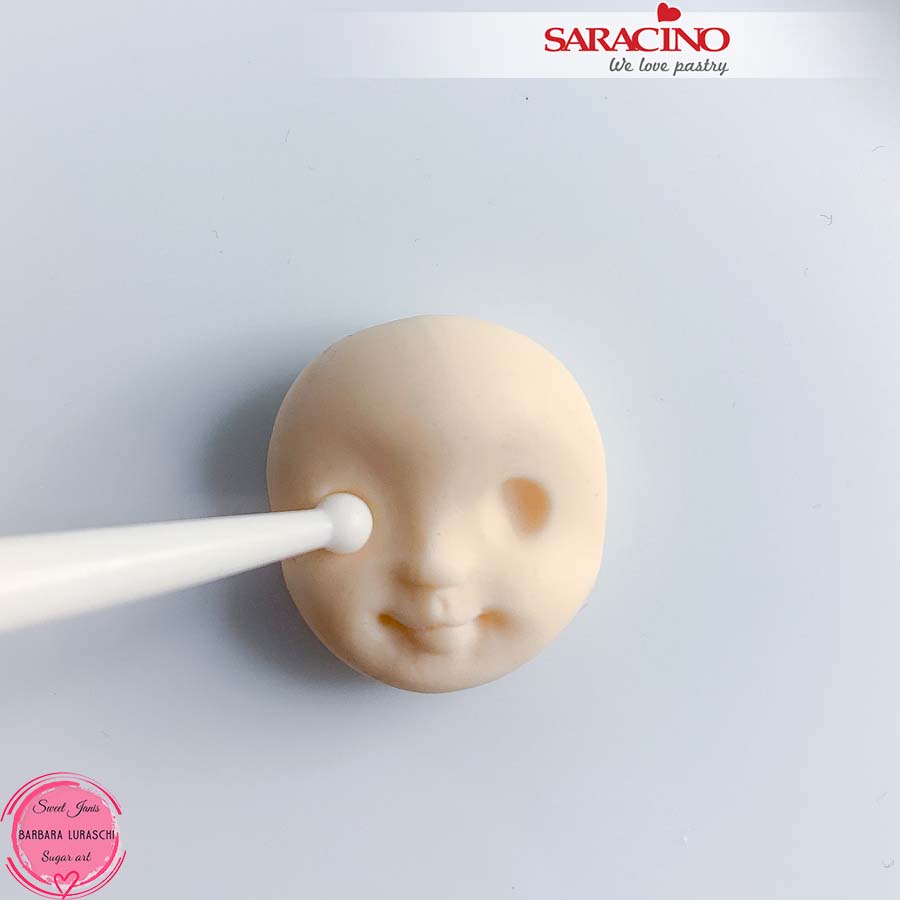
Step 29

Make the eye sockets using a small ball tool.
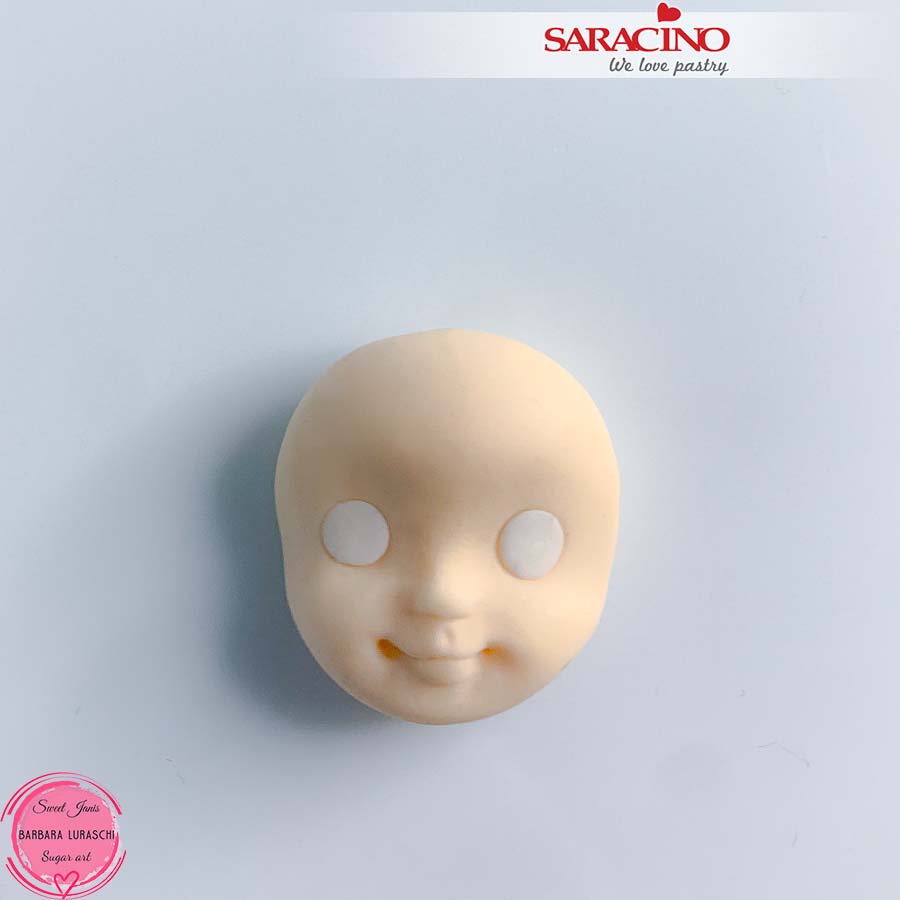
Step 30

Fill the eye sockets with 2 small balls of white Pasta Model.
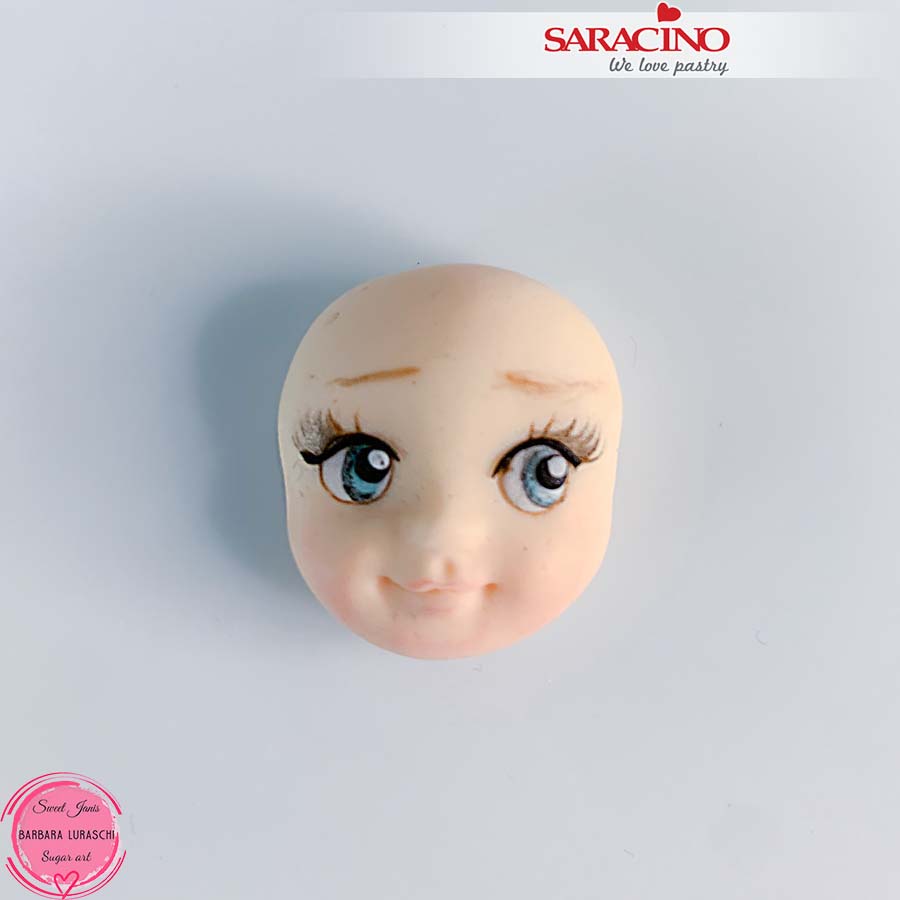
Step 31

Paint the eyes: use light blue colour for the iris. Using the end of the number 3 piping nozzle cut 2 small circles of black Pasta Model and fix them in the center. Add 2 small dots of white Pasta Model for the highlights. Roll 2 small lines of black paste for the eye liner and fix. Using brown colour paint the eyelashes and eyebrows. Dust the  cheeks and lips using pink powder.
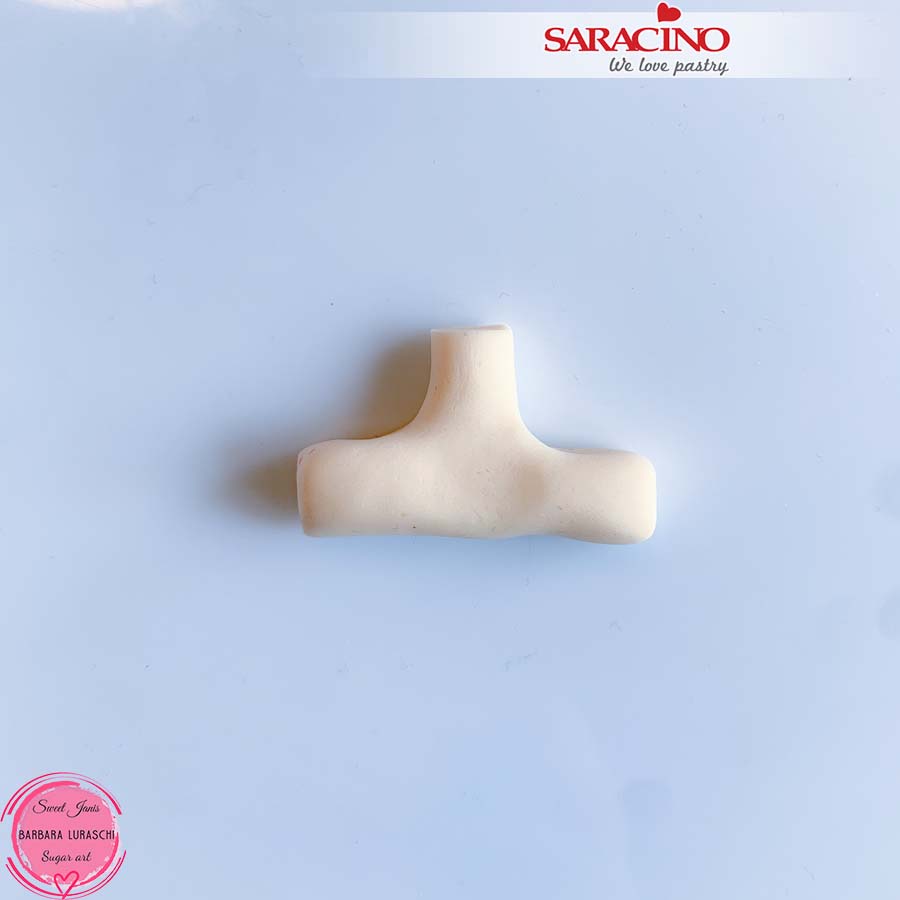
Step 32

Roll a sausage of about 5g of light skin Pasta Model and pinch in the middle to shape the neck.
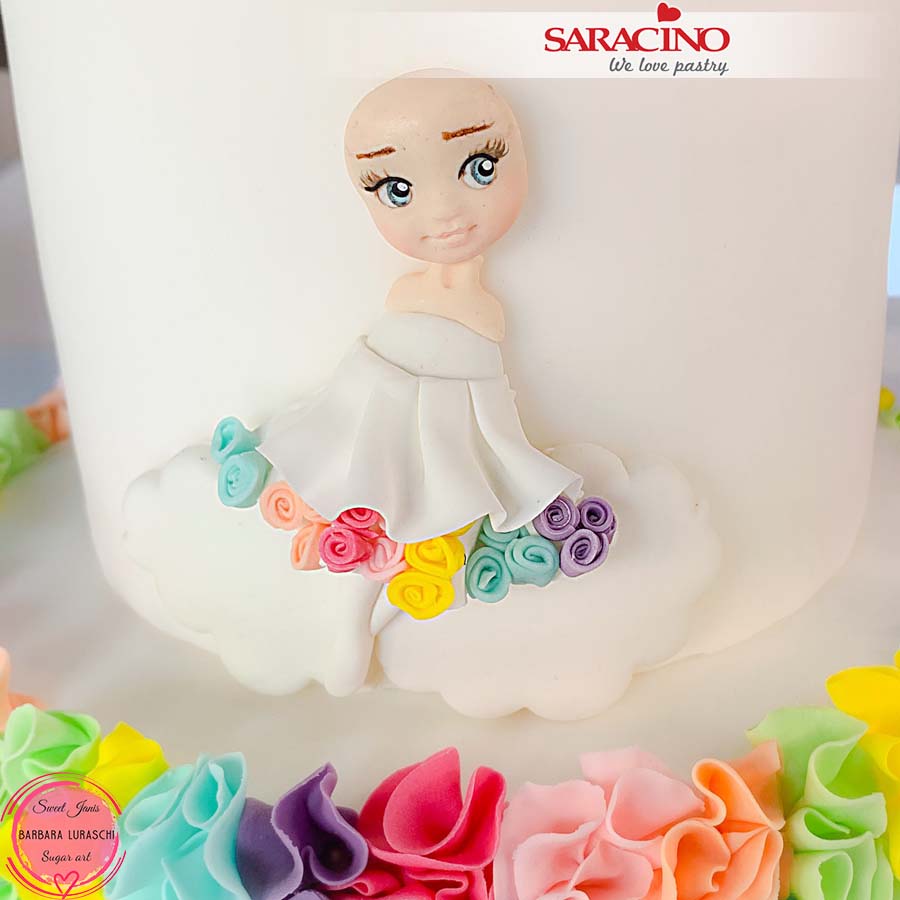
Step 33

Position the neck on the body and cut to the right shoulder width. Fix using cake gel. Use the silicone tool to shape the neck. Position the face using cake gel to help it stick.
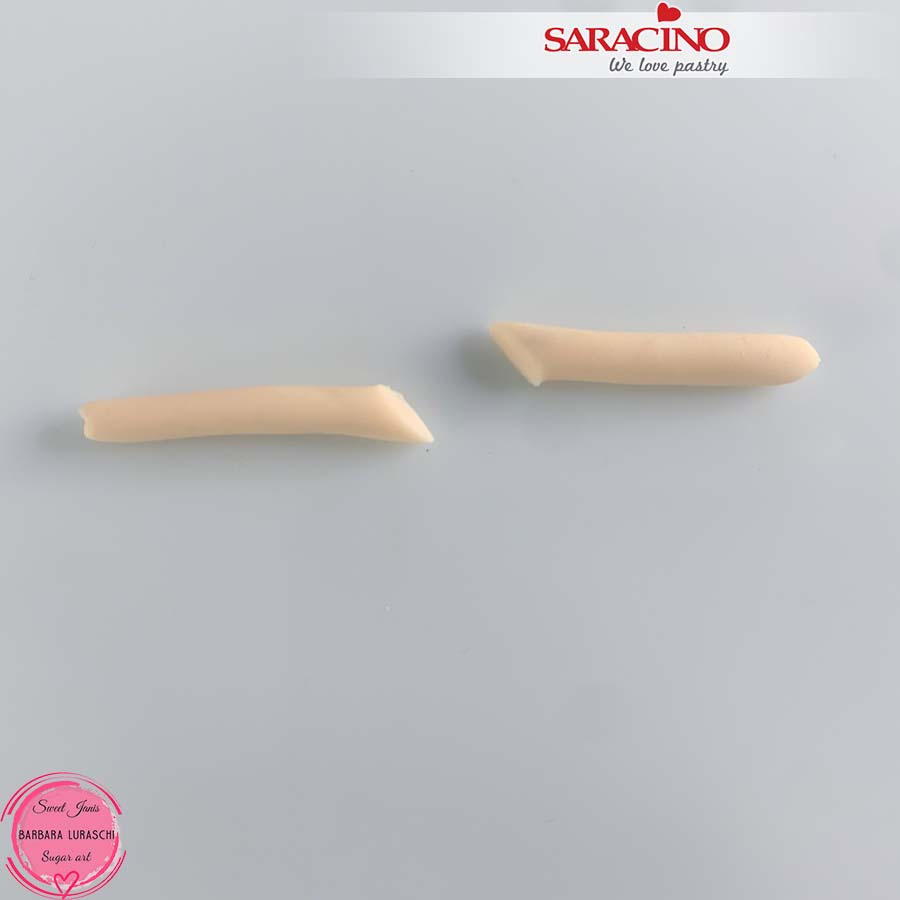
Step 34

For the arms roll a small sausage of light skin Pasta Model (about 1g) and cut in half.
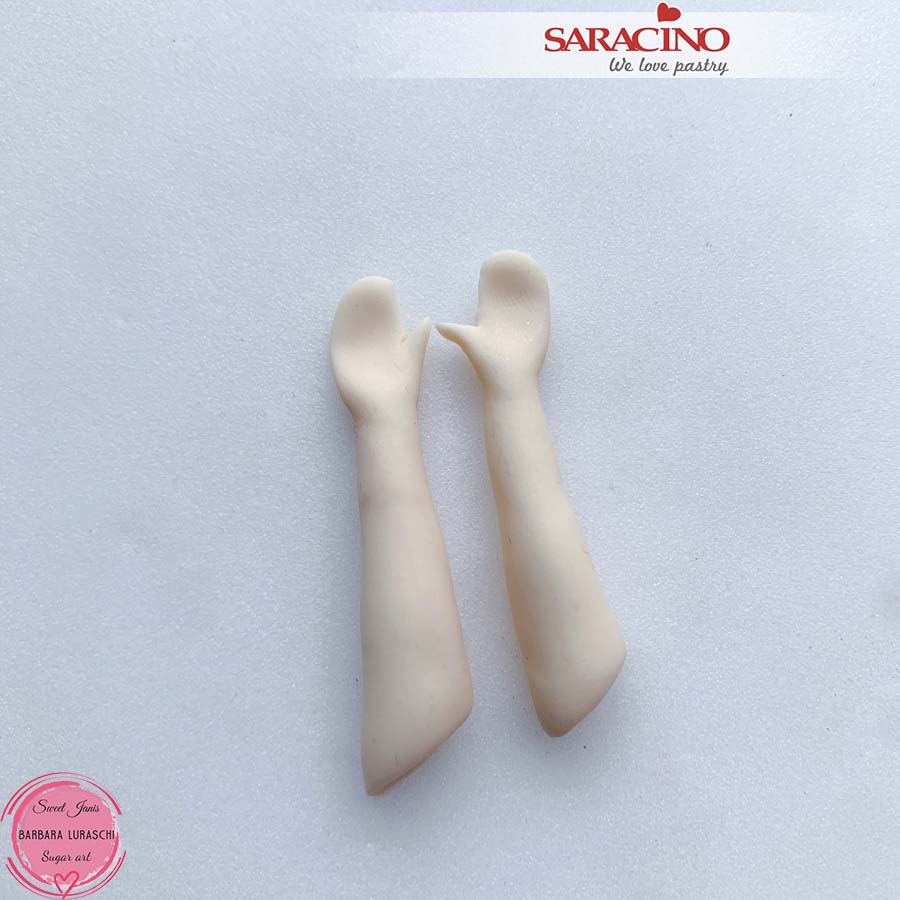
Step 35

Flatten the hand end and cut out the thumb shape.
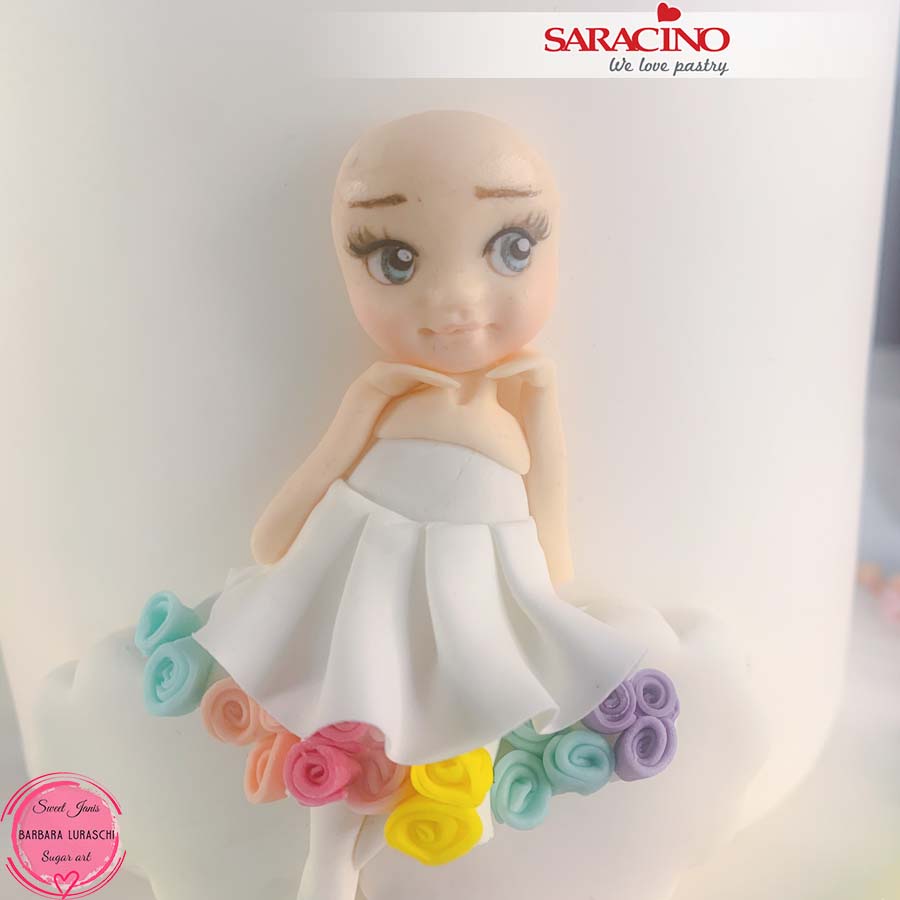
Step 36

Bend the hands and fix them in place as shown.
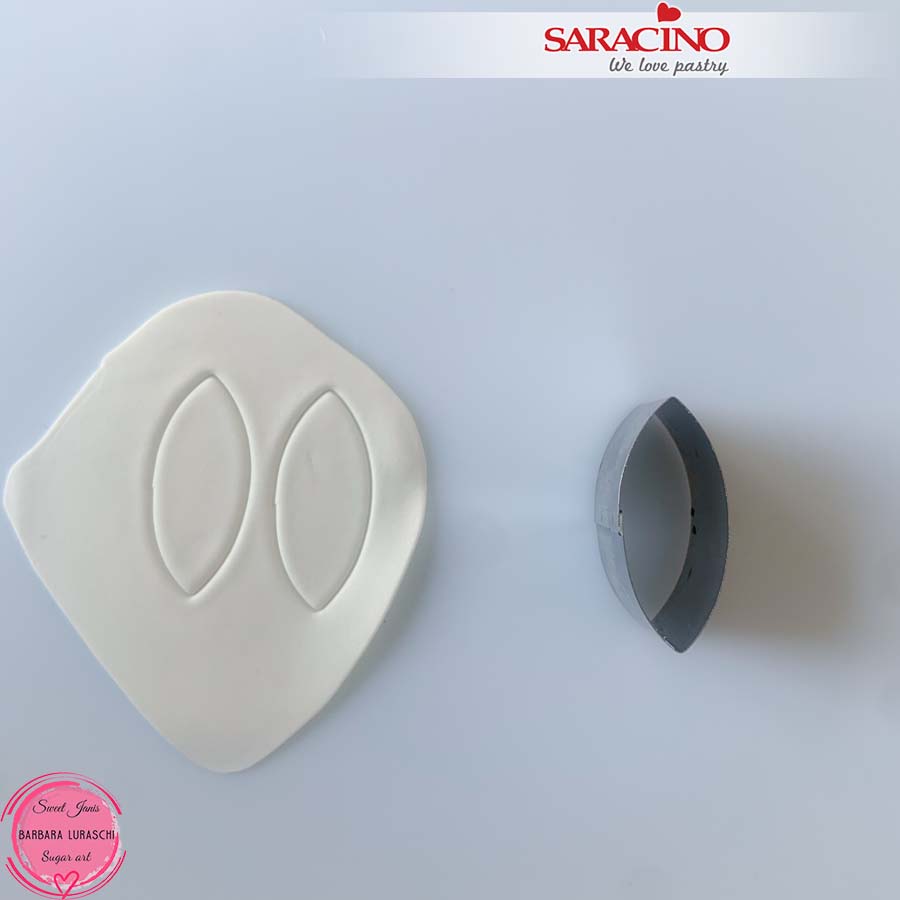
Step 37

For the bow roll a small amount of white Pasta Model and cut 2 oval shapes.
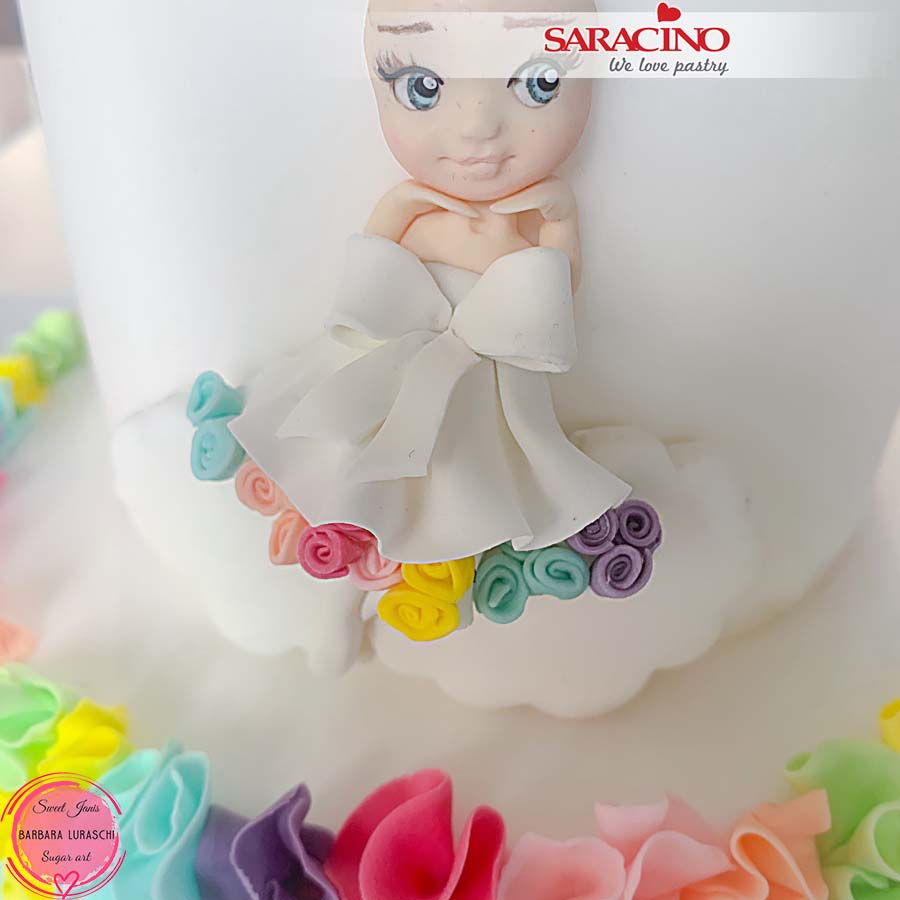
Step 38

Fold them joining the ends and position them on the dress. Add 2 strips of white paste for the ribbon.
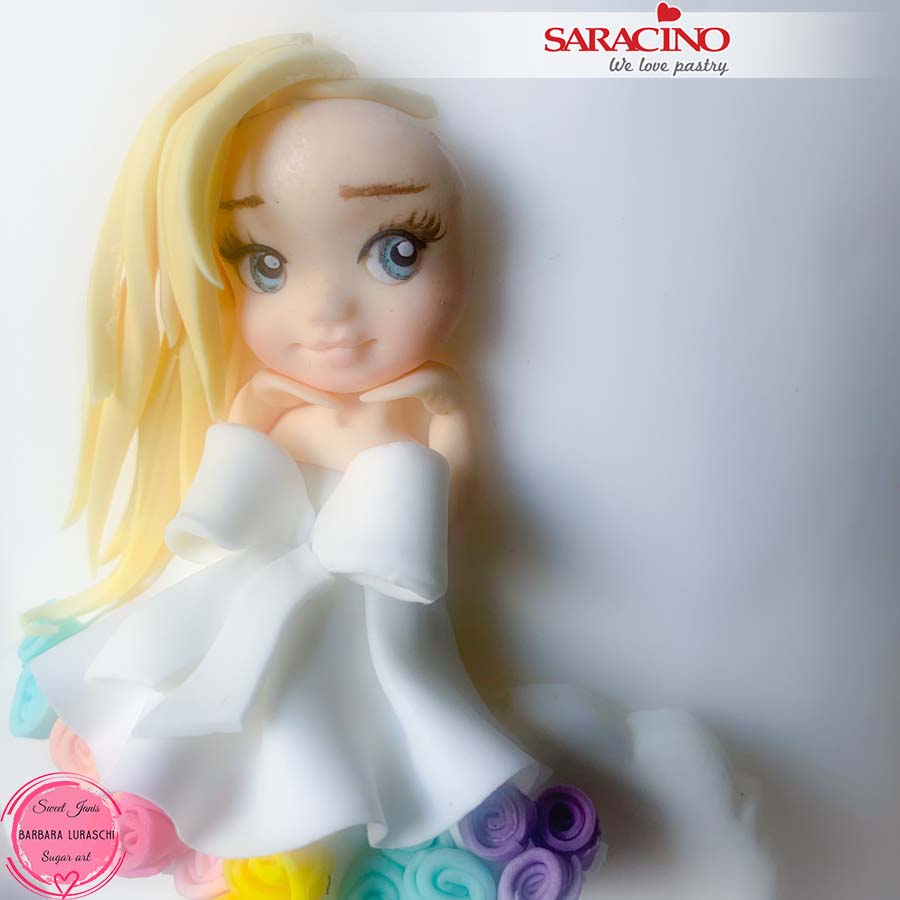
Step 39

For the hair cut strips of yellow paste. They should be different sizes and different shapes. Fix them on the head.
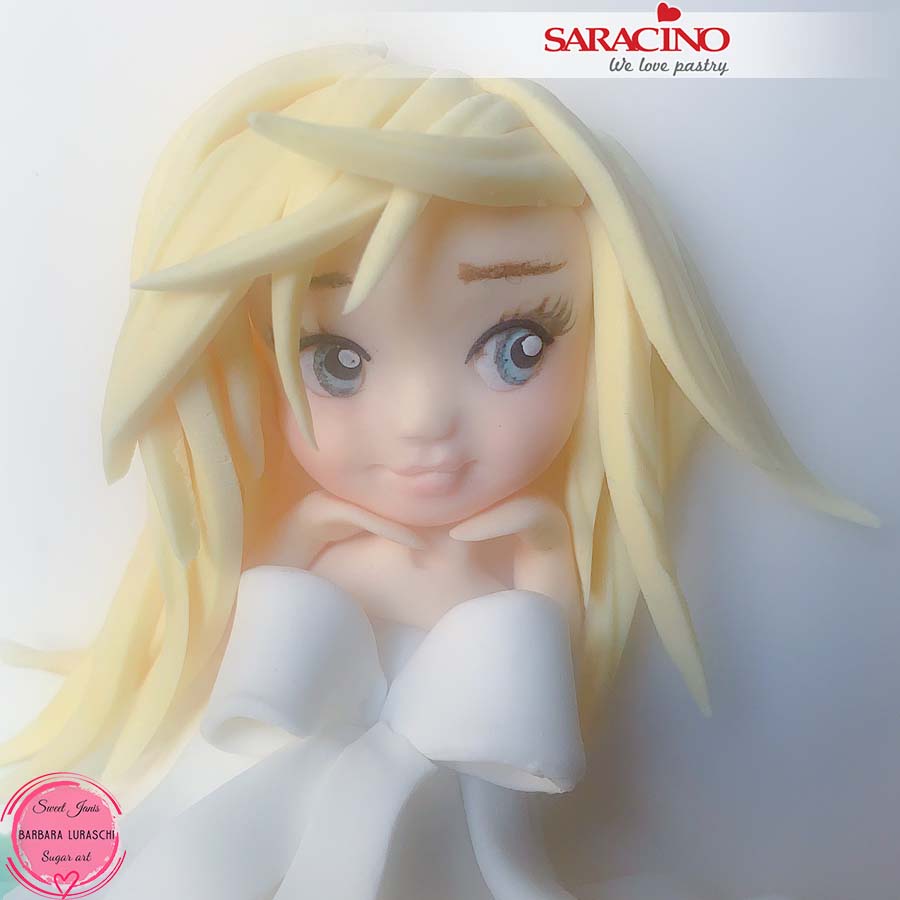
Step 40

Continue until you cover the entire head. Use smaller strips for the fringe.
Step 41

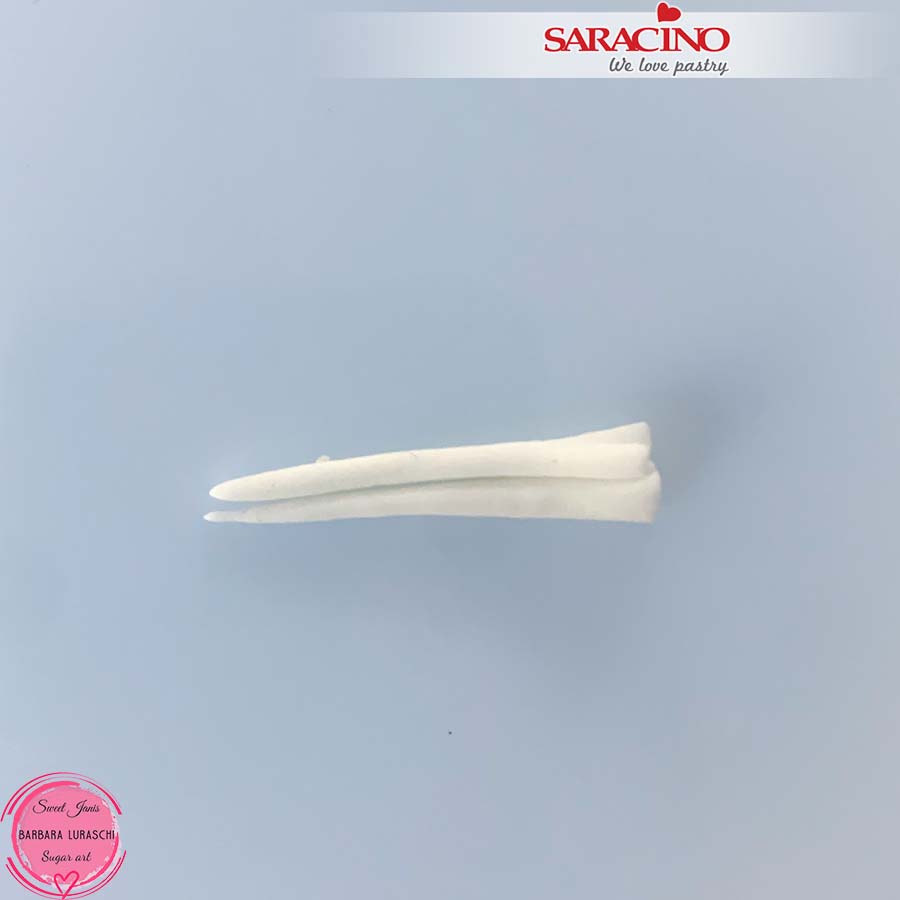
For the unicorn horn roll 2 small cylinders of white paste to a point at the end.
Step 42

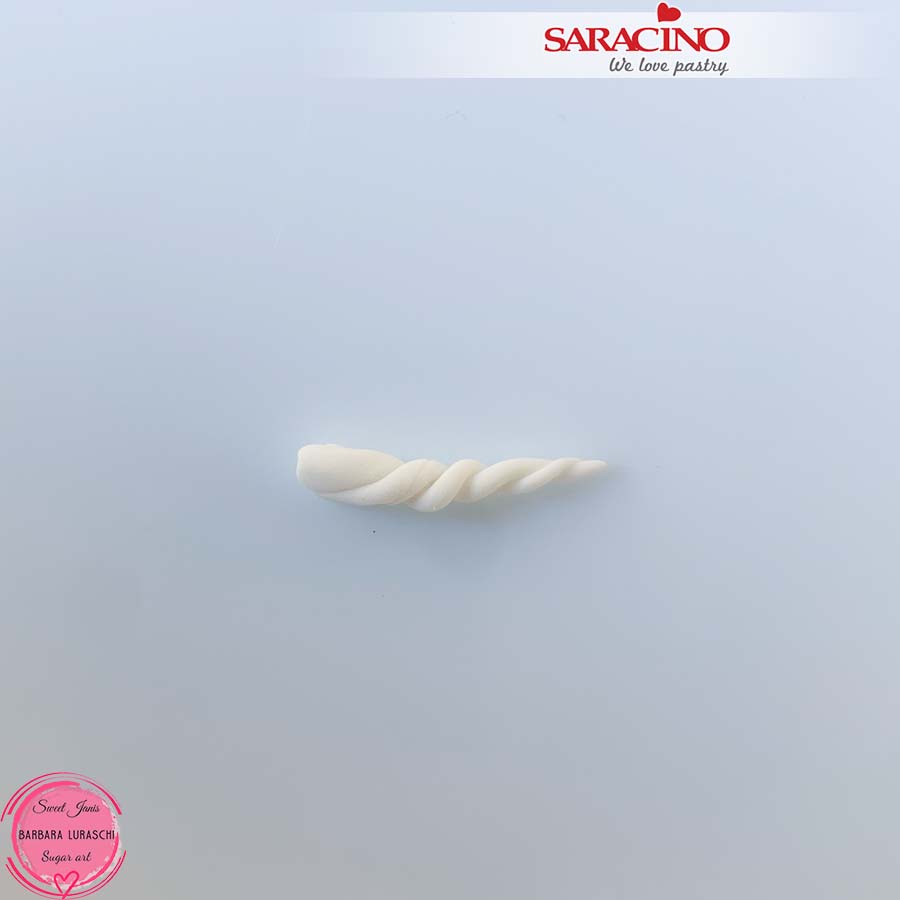
Twist them together as shown.
Step 43

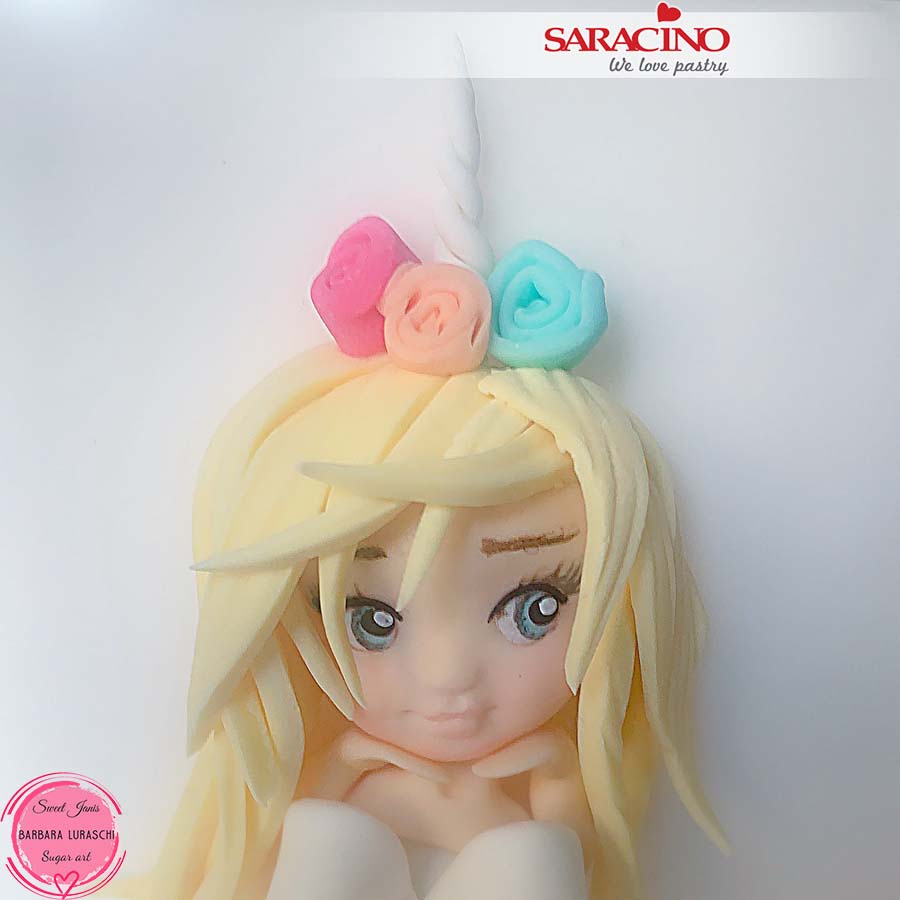
Fix the unicorn horn on the head and add 3 small flowers (made the same as the flowers on the dress).
Step 44

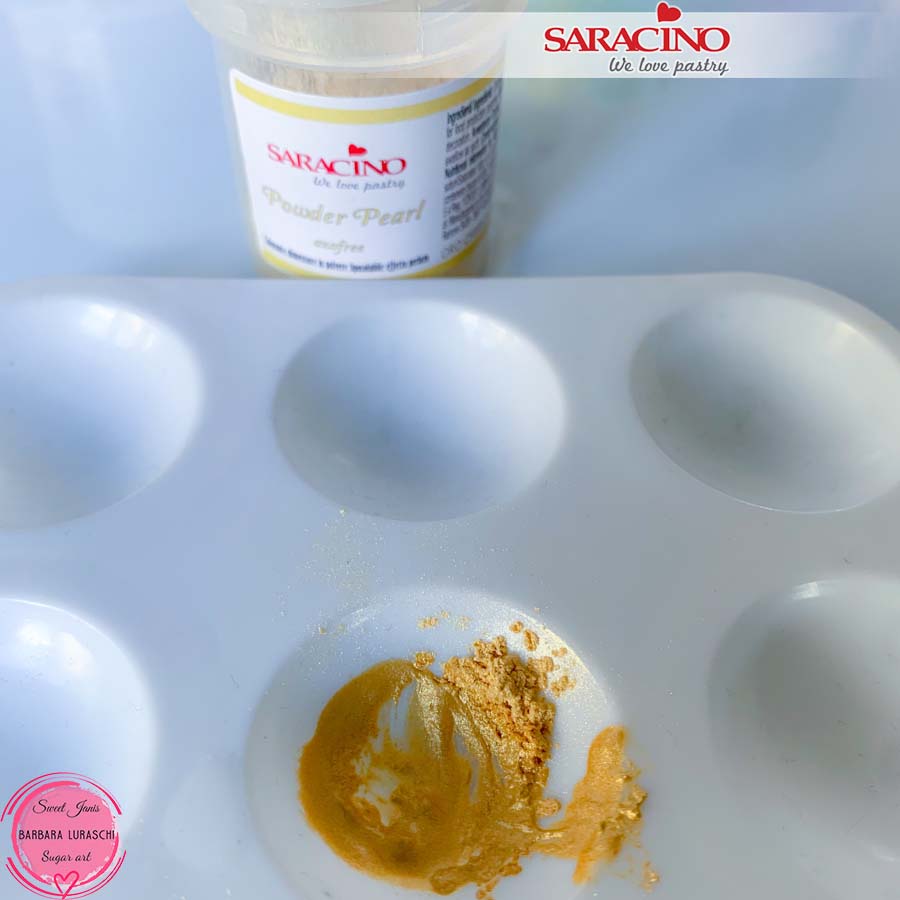
Dilute some Saracino gold powder with clear alcohol.
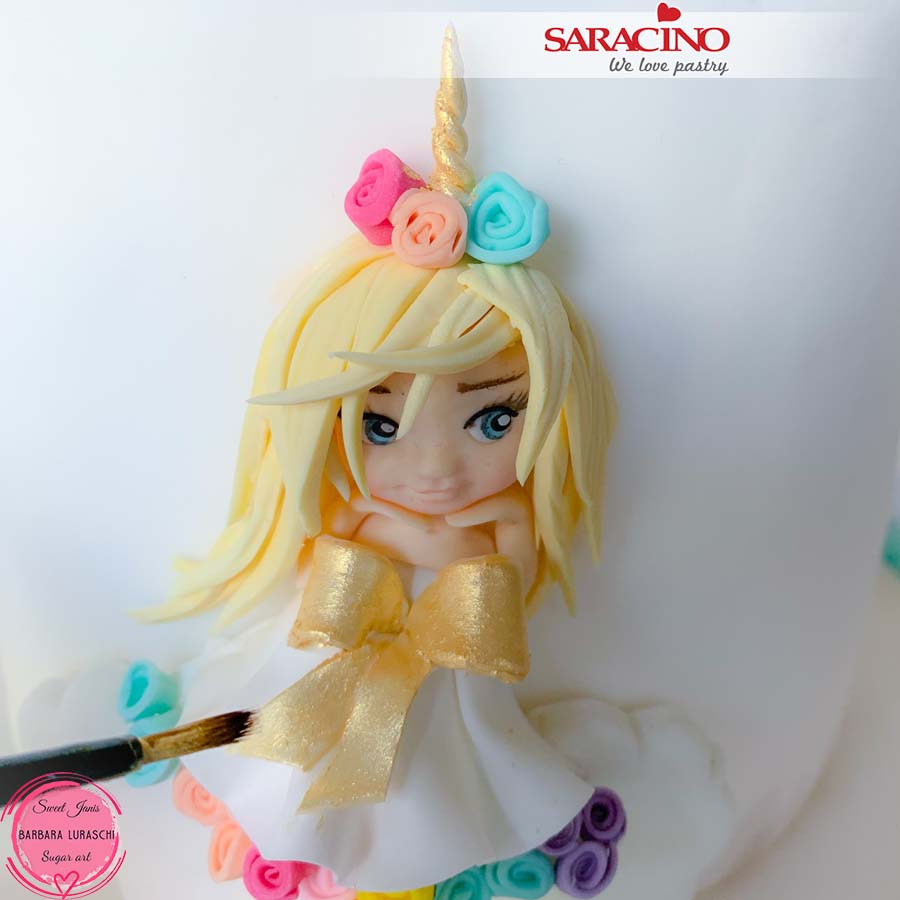
Step 45

Paint the bow, the unicorn horn and the slipper with the gold colour.
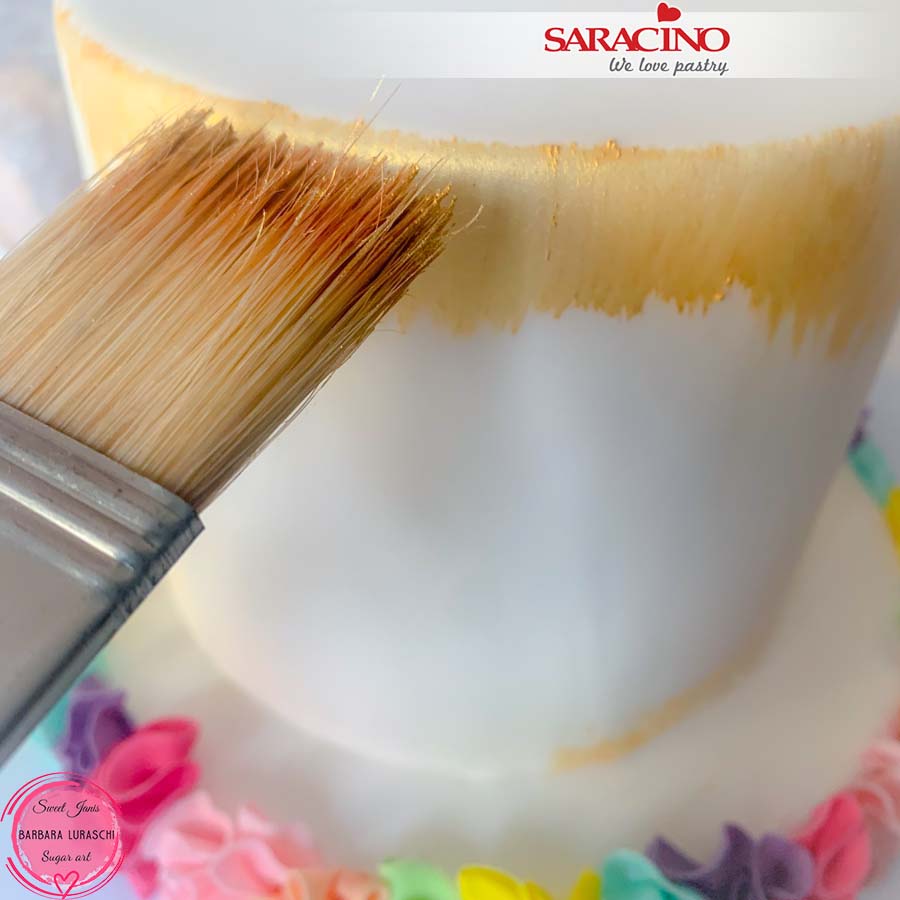
Step 46

Using a large flat brush paint the top edge and around the bottom of the cake with the gold colour.
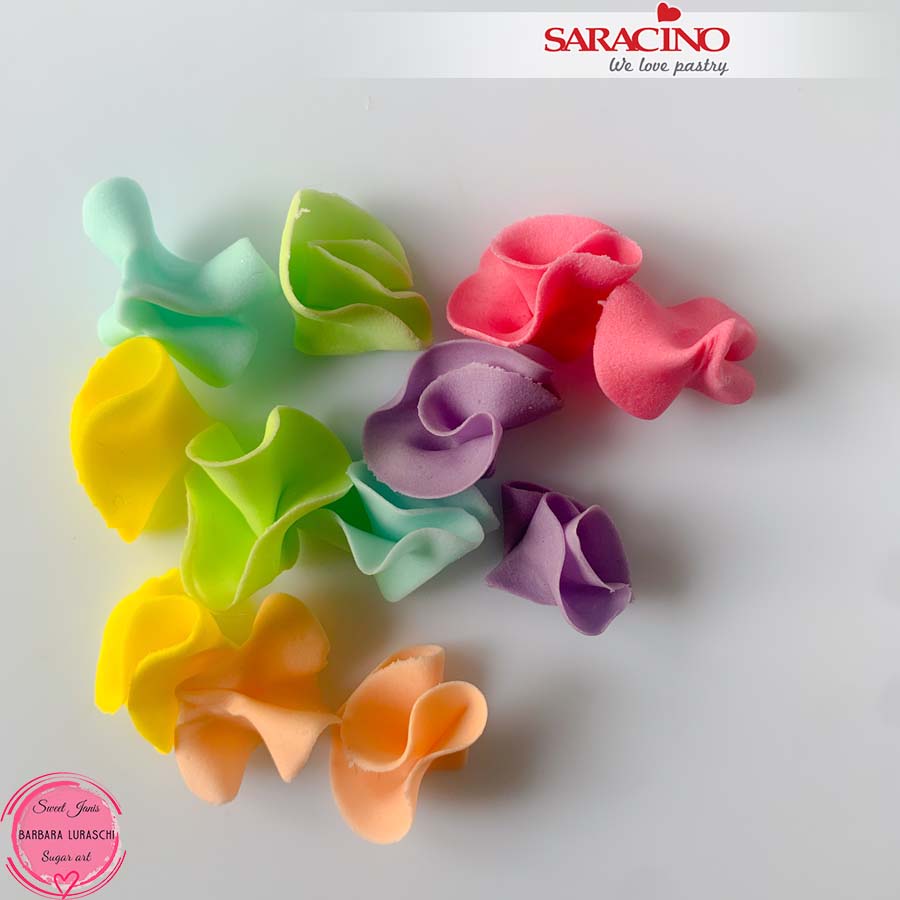
Step 47

Make some coloured petal ruffles in the same way you made the ones for decorating the board.
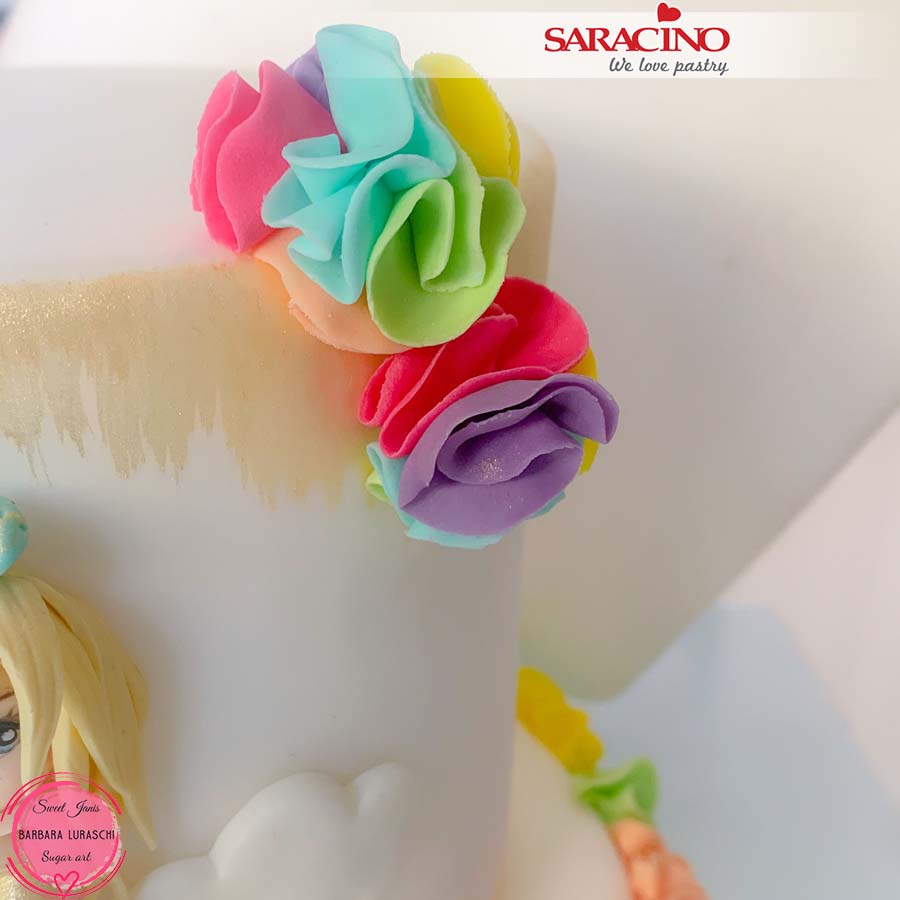
Step 48

Make 2 decorations by fixing the petal ruffles together. Fix them to the top of the cake on the right hand side. Your cake is done!

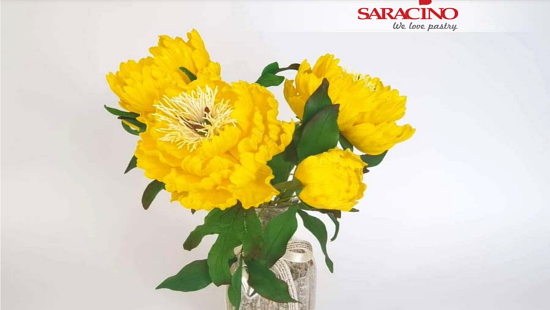
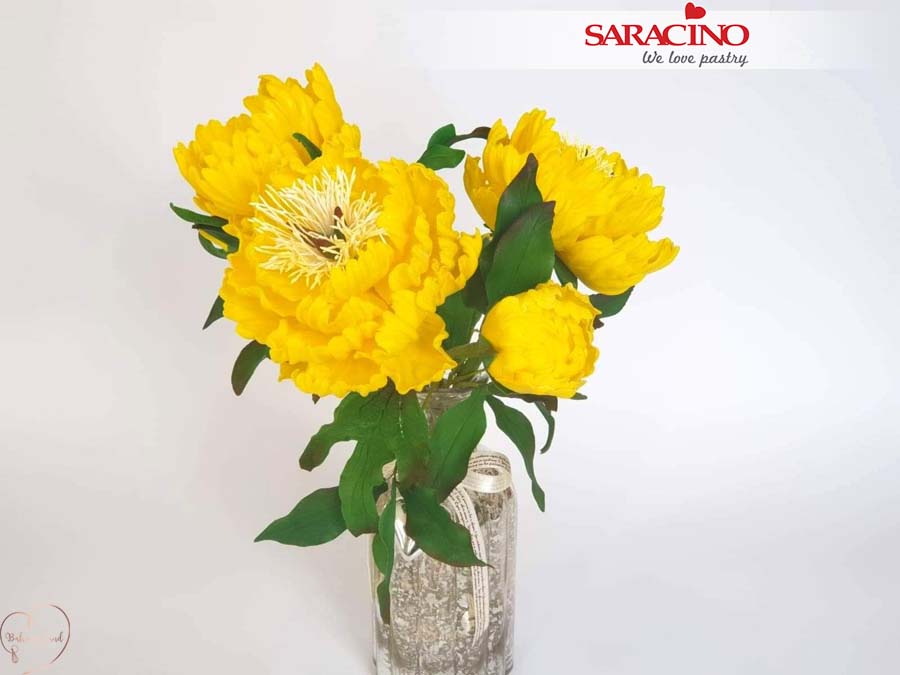
PEONY FLOWER TUTORIAL

PEONY FLOWER TUTORIAL

Skill level: BEGINNERS

TIP:

You may find the flower paste a bit sticky. Use corn flour to prevent this.

You will need:

  • Saracino flower paste Pasta Bouquet

  • Saracino colour powder yellow and green

  • Flower wires gauge 26

  • Small peony cutters by The Crafty Cutter Lady 

  • Medium and large peony veiner by Sugar Art Studio 

  • Work board

  • Deep plastic teaspoons

  • Powder coloiurs light, dark green and gold

  • Powder brush

  • White lily flower stamens

  • Florist tape

  • Dresden tool

  • Flower foam mat

  • Work board with grooves  

  • CelCakes

  • Paper towel

  • Scissors

  • Drying foam 
  • Leaf cutter
  • Ball tool 
  • Leaf veiner 

Step 1

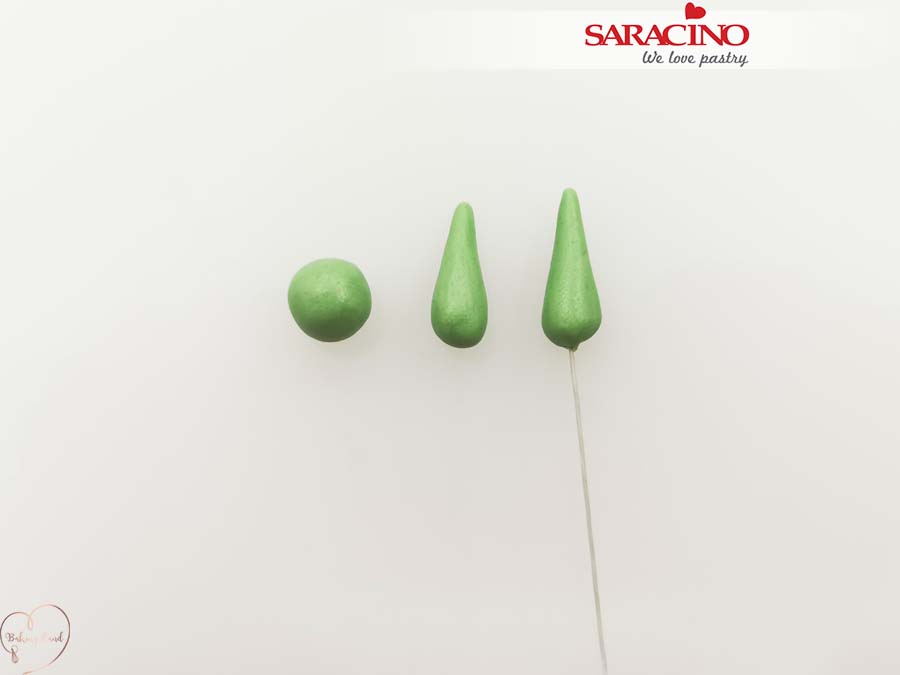
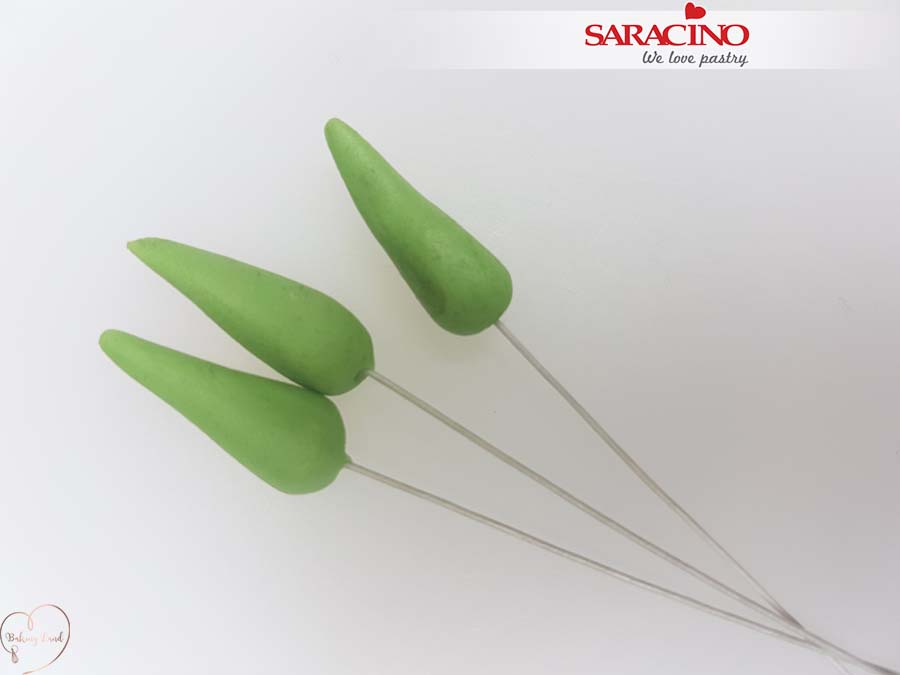
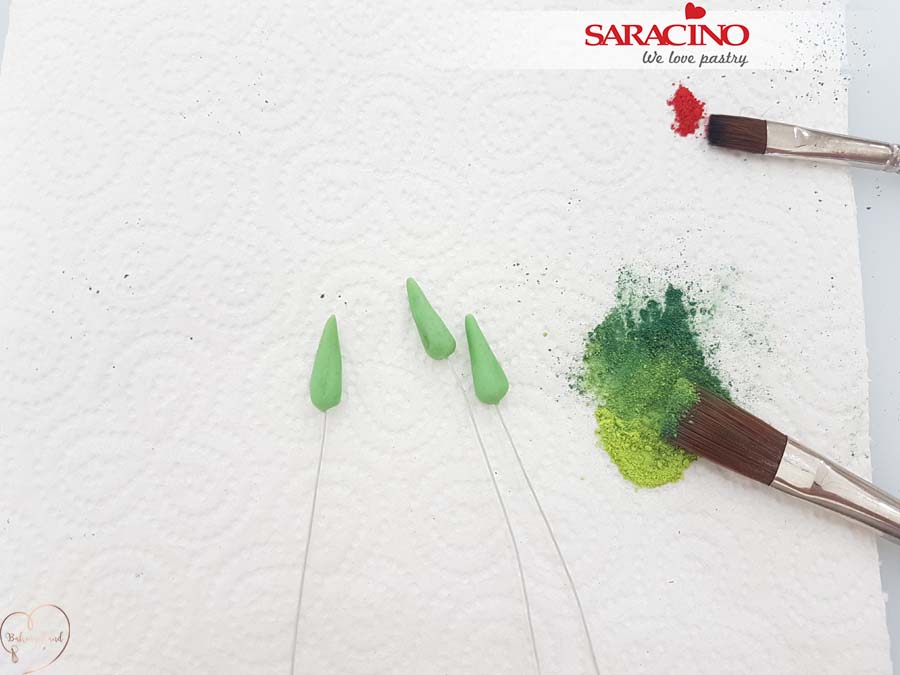
For the middle you need about 6g of green paste, divide it into 3 parts and form it into a cone.

Step 2

Add a little glue to the end of your wire and insert into the cones. Leave to dry completely (about 10 hours).

Step 3

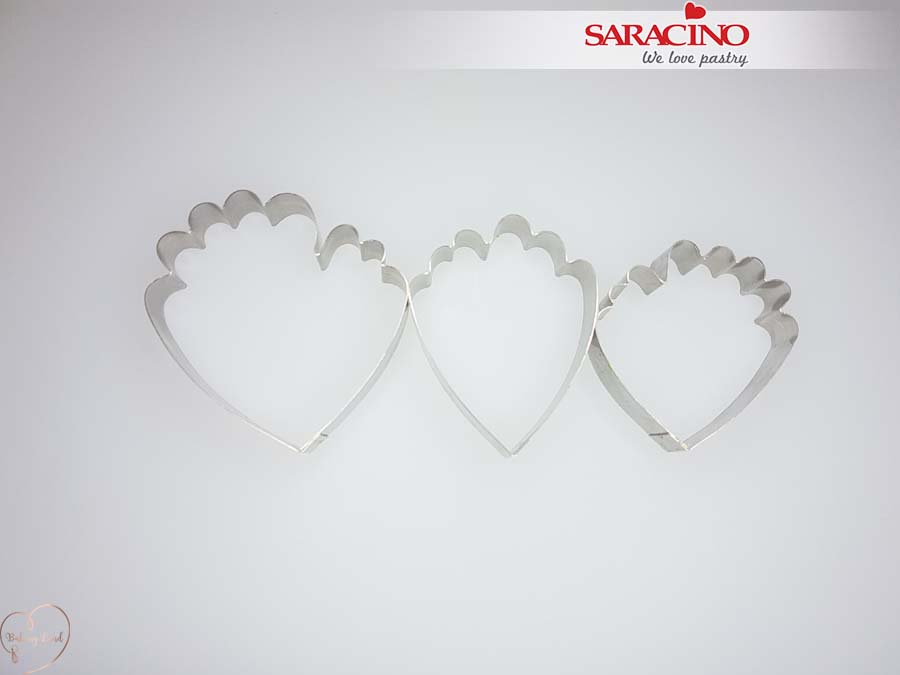
Prepare three sizes of peony cutters: small, medium and large.

Step 4

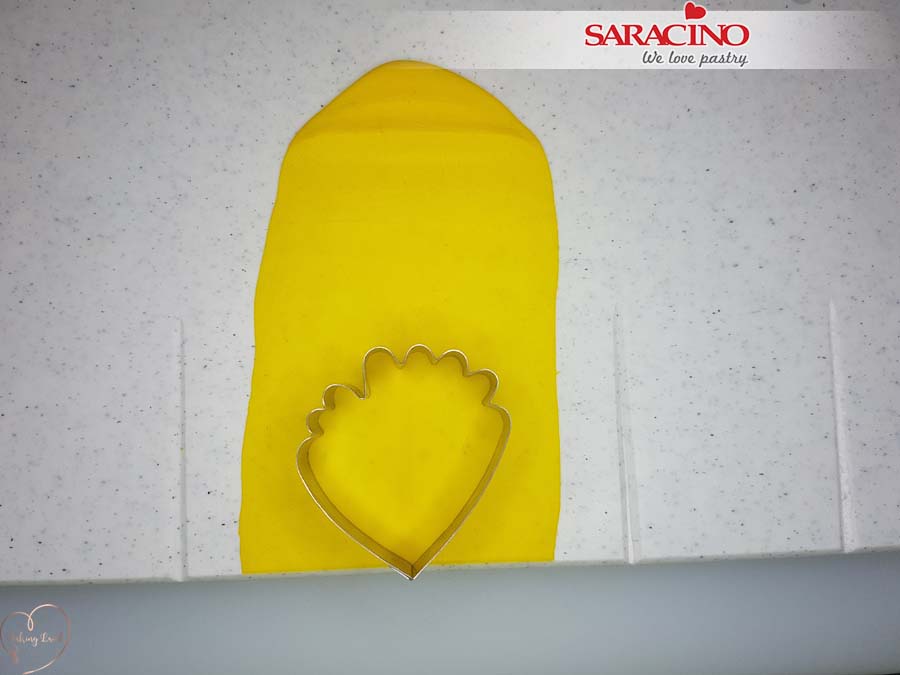
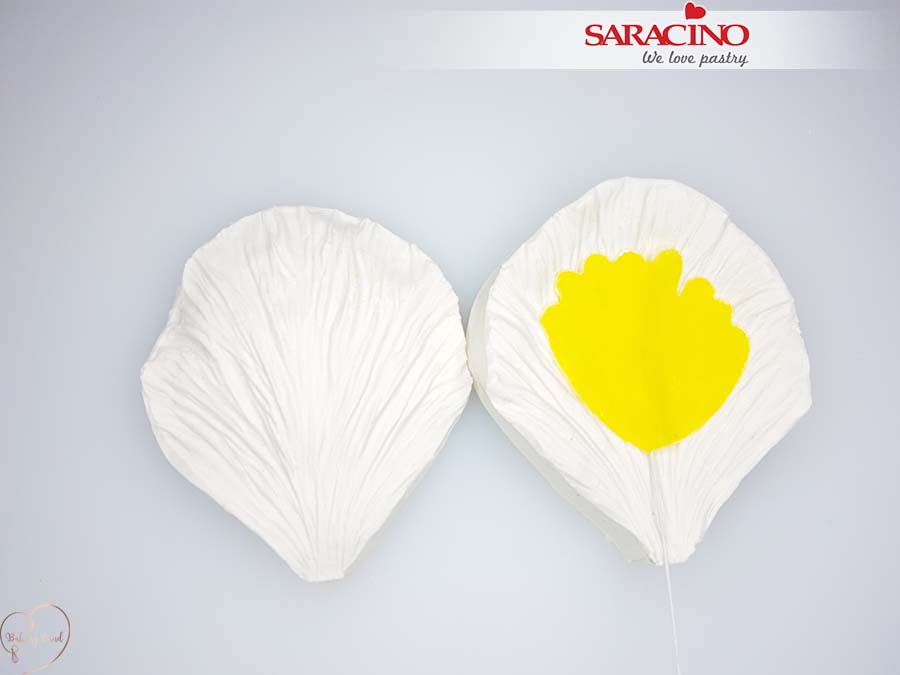
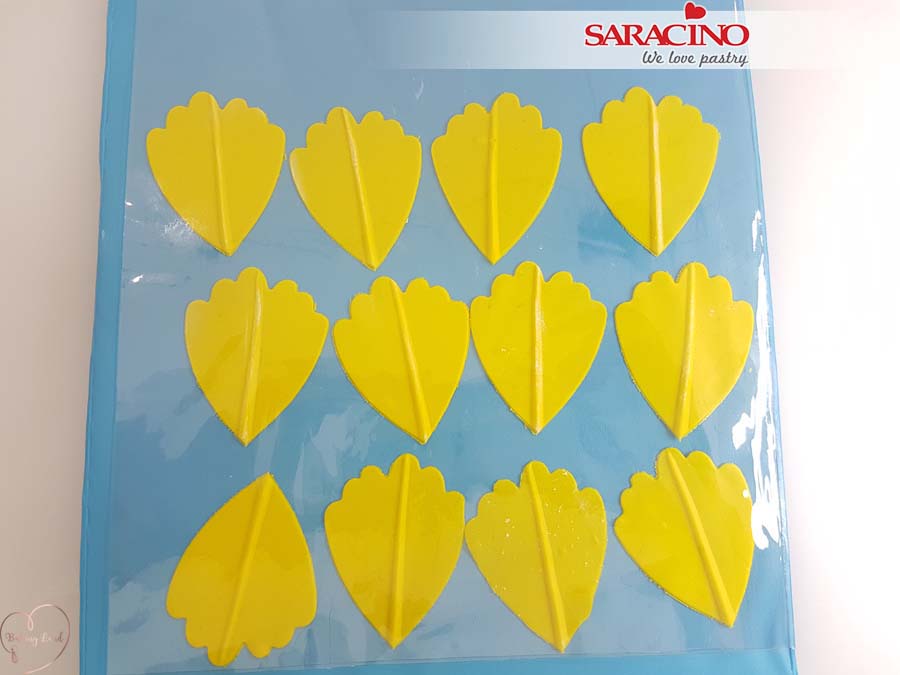
Colour your white Pasta Bouquet with yellow. Roll on your board over the groove and using the smallest cutter cut out 3 petals.

Step 5

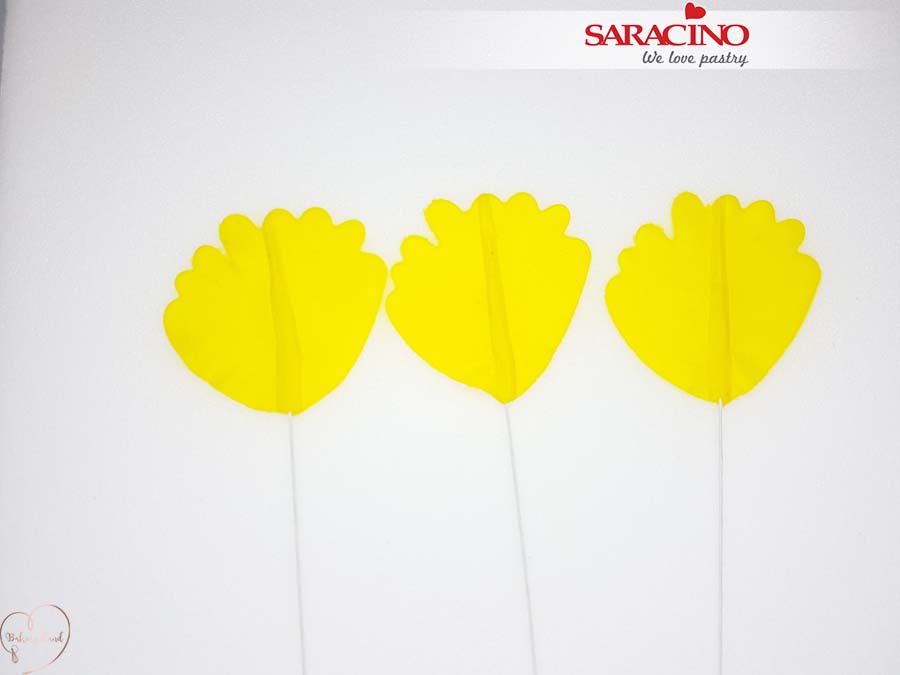
Twist the wire into the petals about 3/4 length of the petal.

Step 6

Dust your veiner with corn flour. Place your petal on the veiner and gently press to achieve the structure.

Step 7

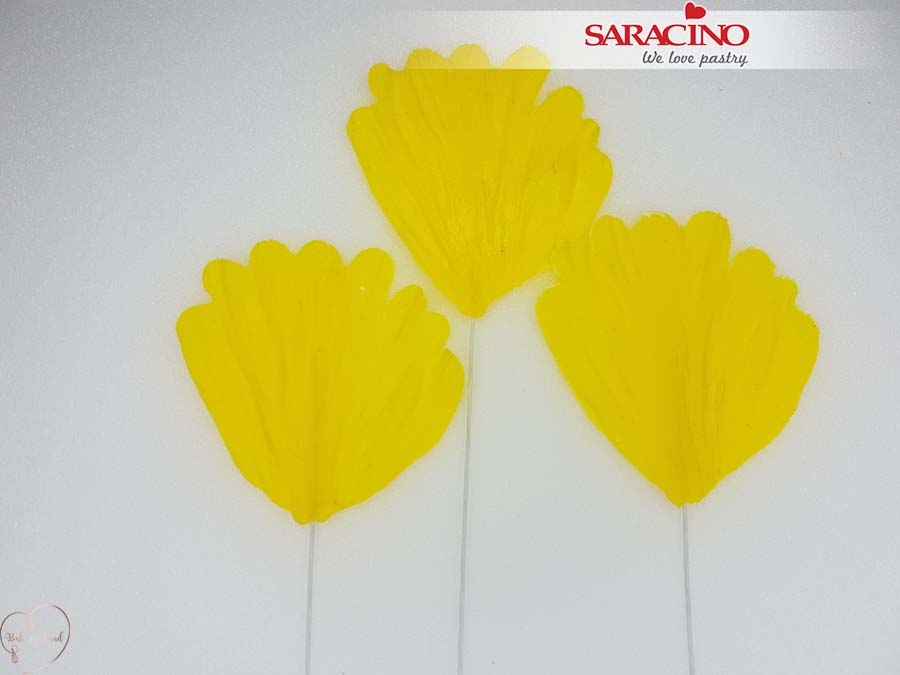
Your petals should look like this. 

Step 8

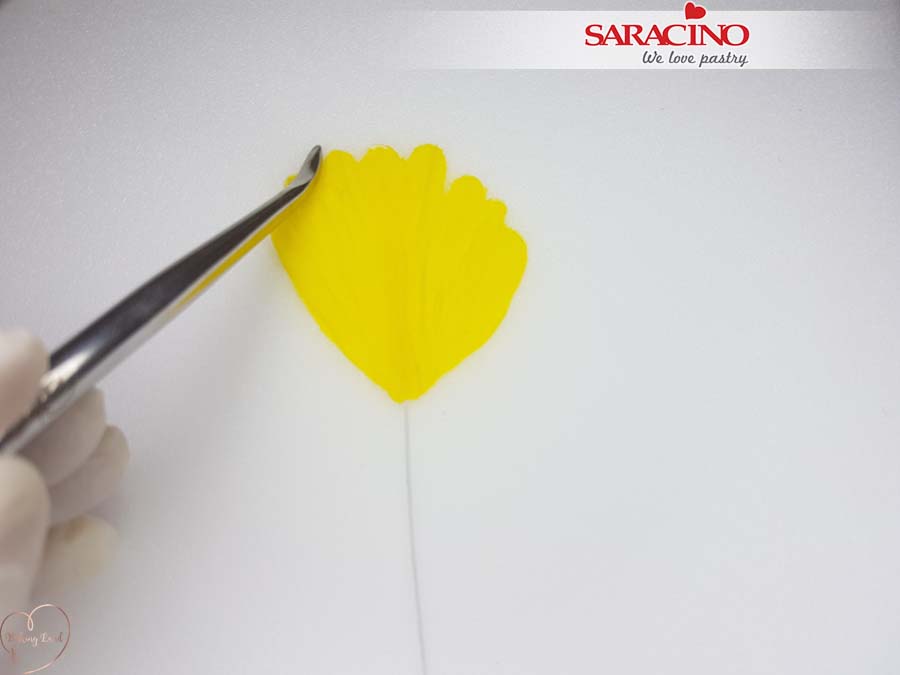
Using your Dresden tool drag it along the petal at various intervals from the top to 1/3 of the petal length. Repeat the action for the next two.

Step 9

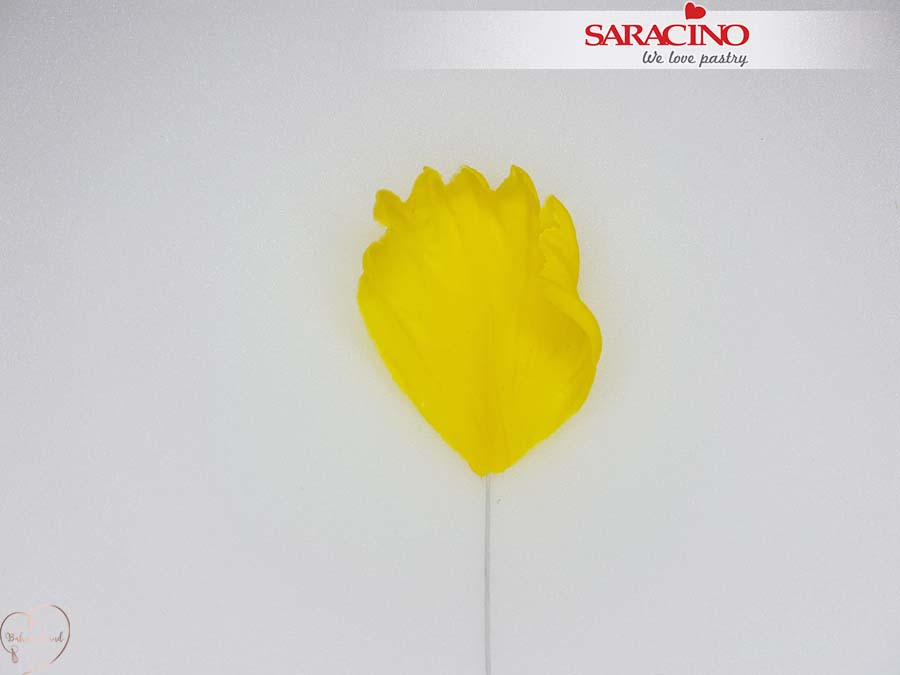
The edge of the petal should be curled and raised.

Step 10

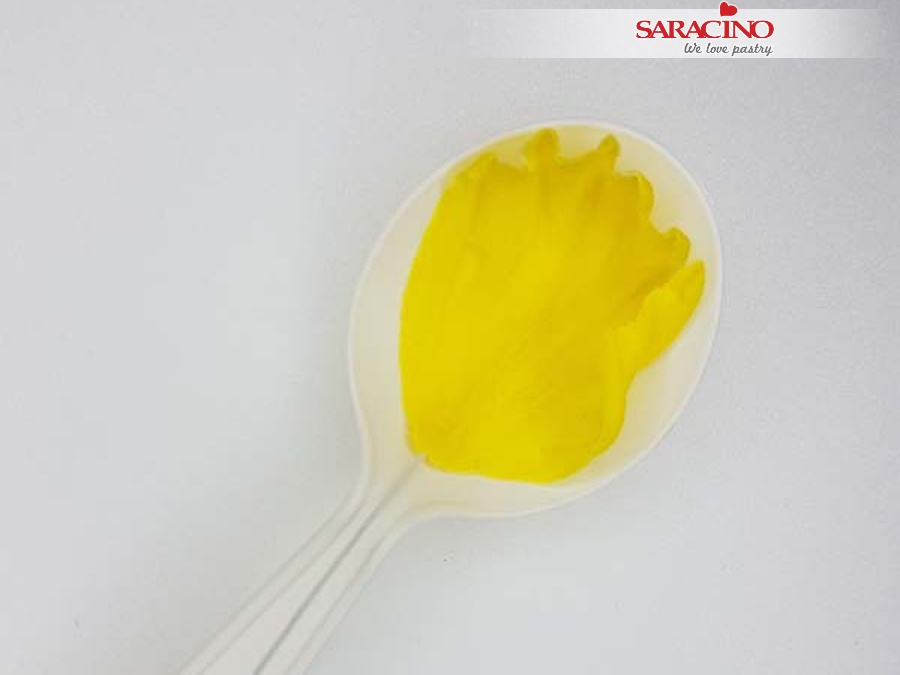
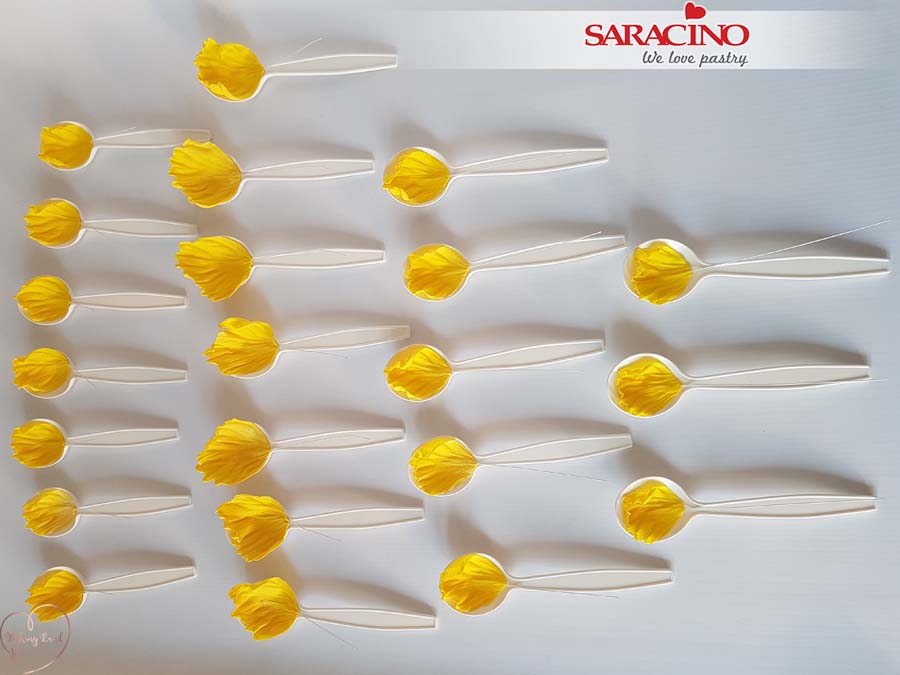
Put the petals on teaspoons and let them dry completely.

Step 11

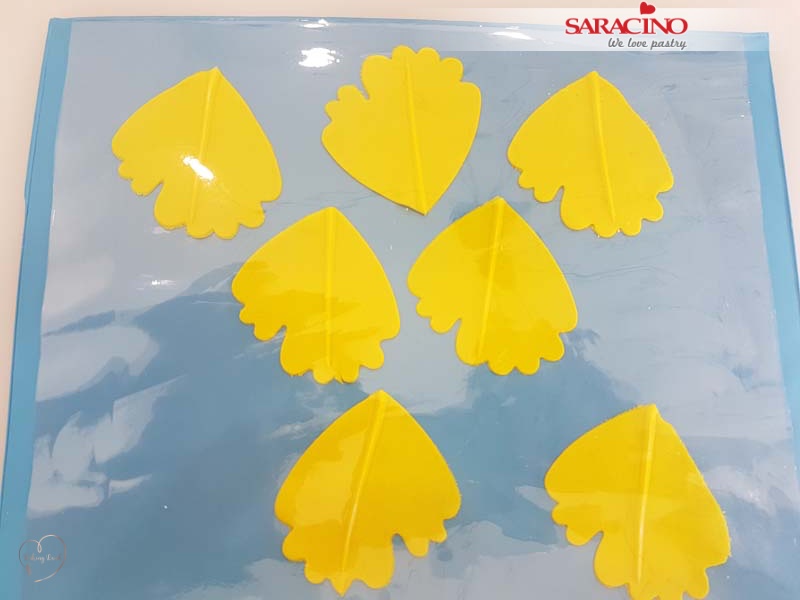
Using medium size cutter cut out 12 petals and follow the steps above with veining and adding a flower wire. Make sure you keep the petals covered with film while making each one.

Step 12

And again follow the steps to make large petals. We will need 7 of these. 

Step 13

Place the petals as follow: 3 smallest petals – 5 medium petals – 7 large petals – 7 medium petals. Let them all dry. Drying time depends on humidity.

Step 14

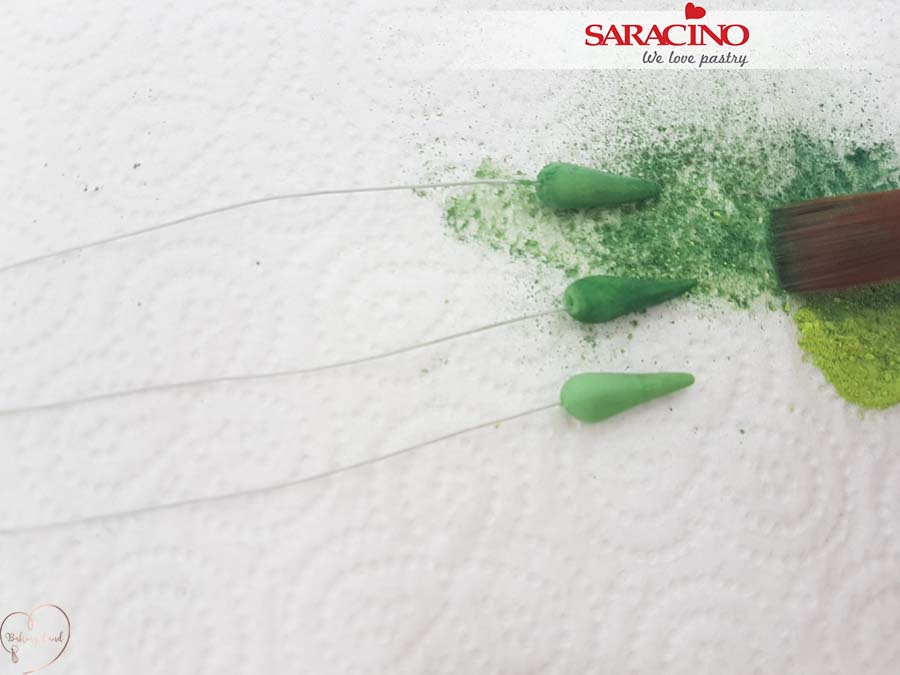
Prepare a piece of paper towel, brushes and powders and pre-prepared cones. Mix both green powder colours. 

Step 15

Starting from the bottom darken all the cones as desired. 

Step 16

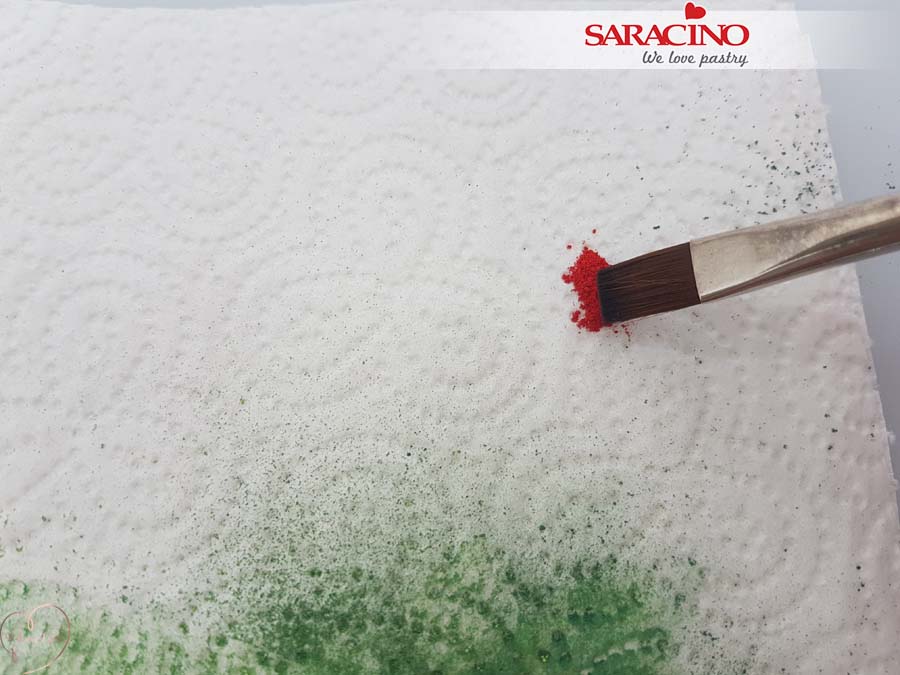
Apply a little maroon powder on the brush.

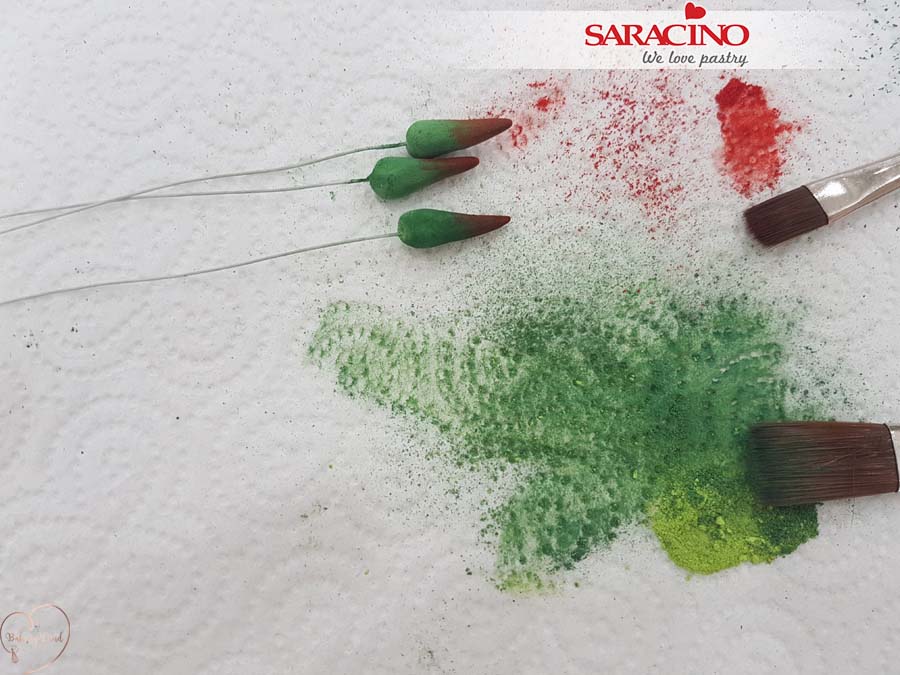
Step 17

Lightly powder the top of each cone with the maroon powder.

Step 18

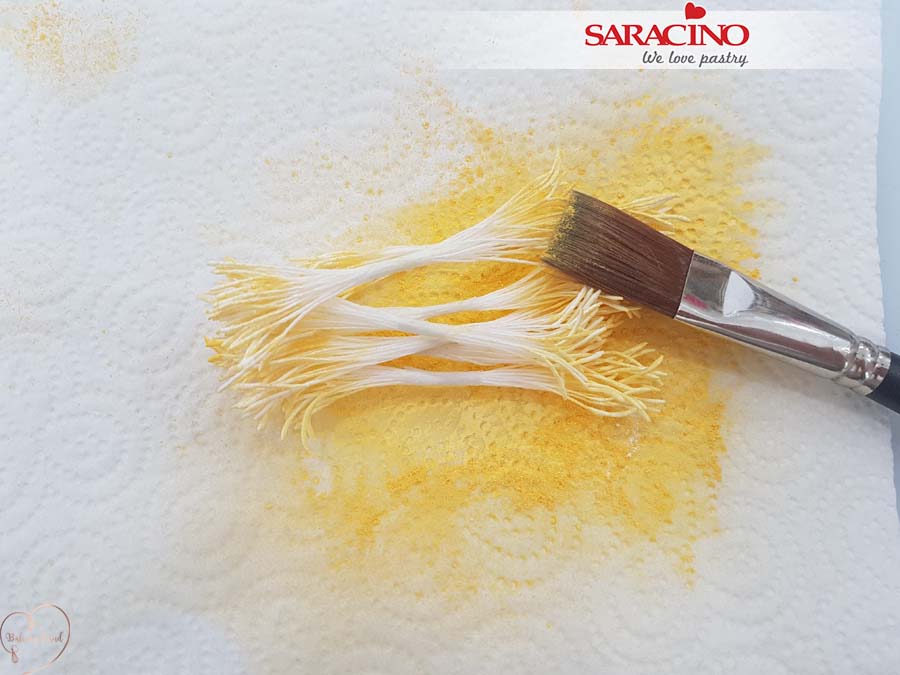
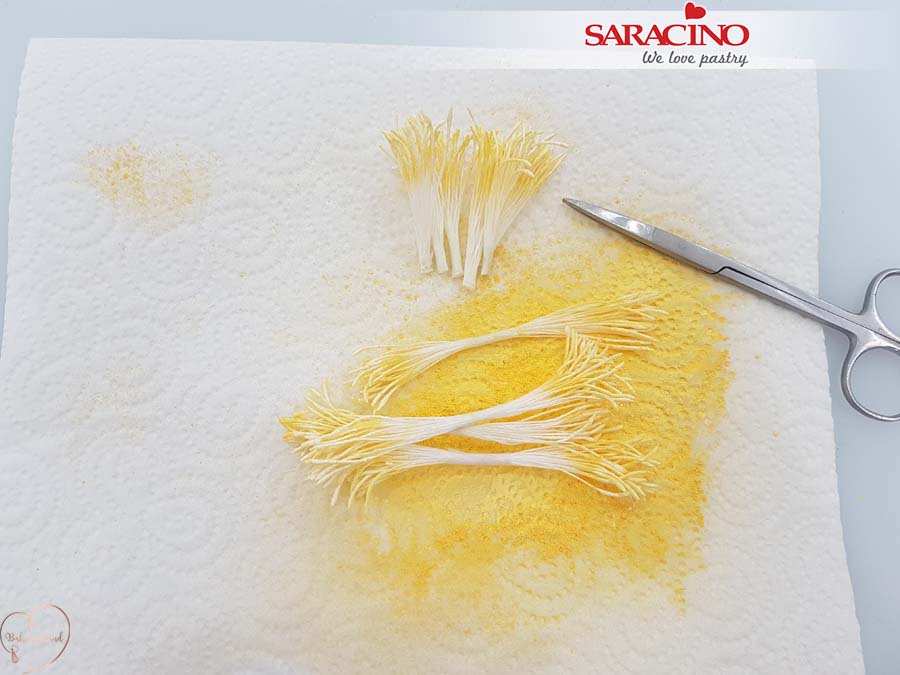
Using your yellow powder and a brush dust the tips of the stamens. Turn over and make sure you cover all sides. 

Step 19

Cut the stamens in half.

Step 20

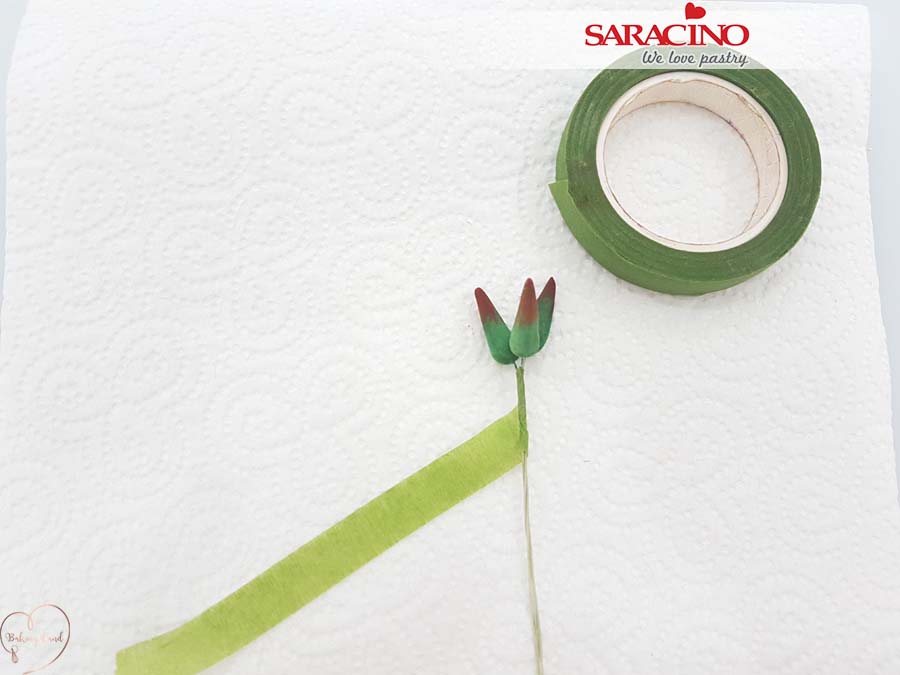
Fix the dried cones together and cover them using green floral tape. 

Step 21

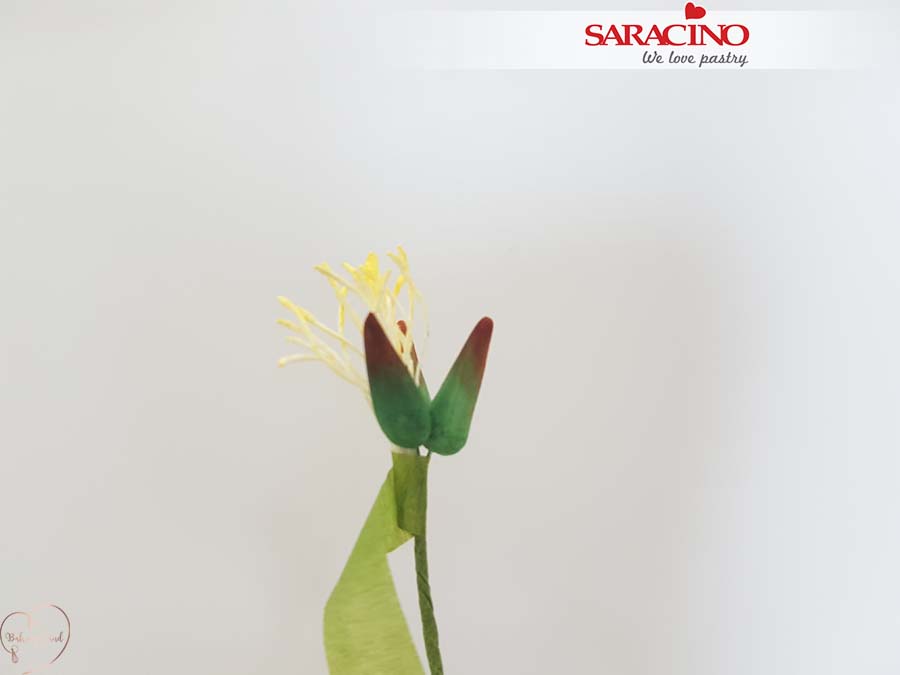
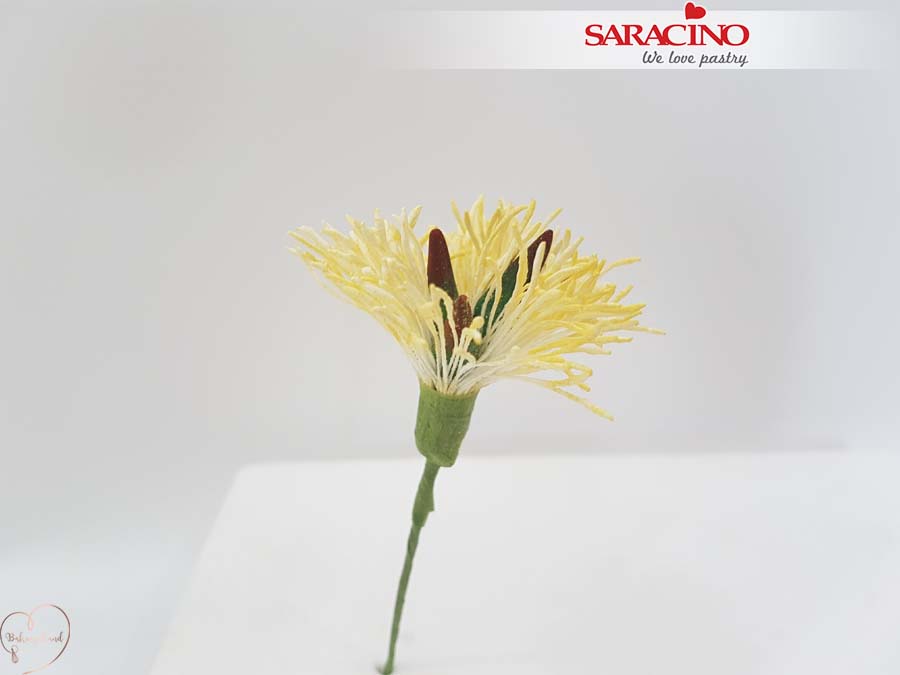
Using floral tape start adding stamens.

Step 22

Work all the way around to achieve this look.

Step 23

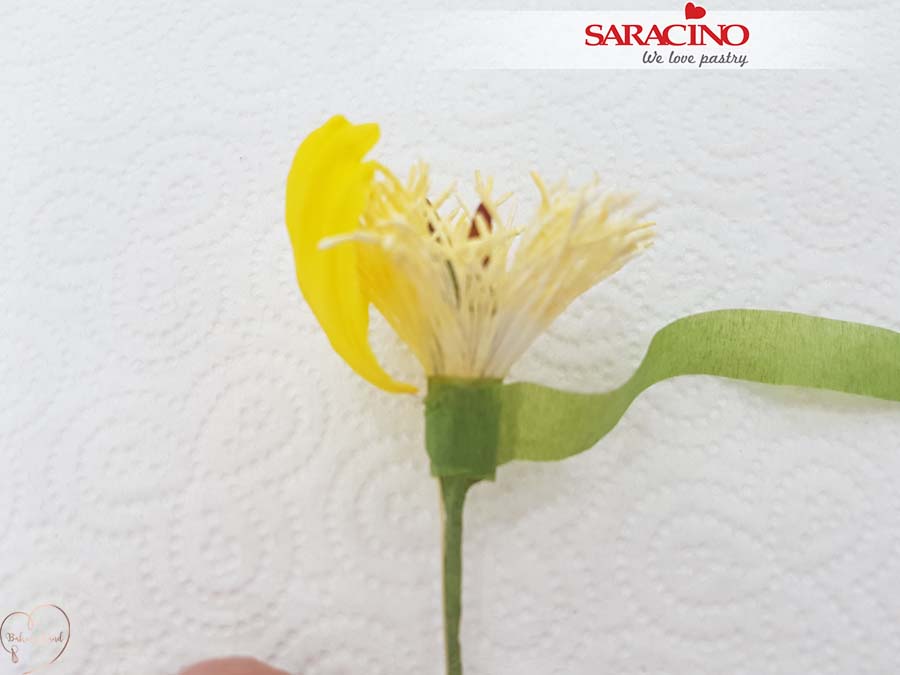
Prepare the smallest size petal and bend the wire slightly. Attach to the stem using florist tape as shown.

Step 24

Add another two smallest petals.

Step 25

Prepare five medium size petals, bend the wire a little at the petal and repeat as in step 23.

Step 26

Prepare seven largest size petals, bend the wires a little and repeat step 23.

Step 27

Prepare last seven medium size petals, bend the wires a little and repeat step 23. 

Step 28

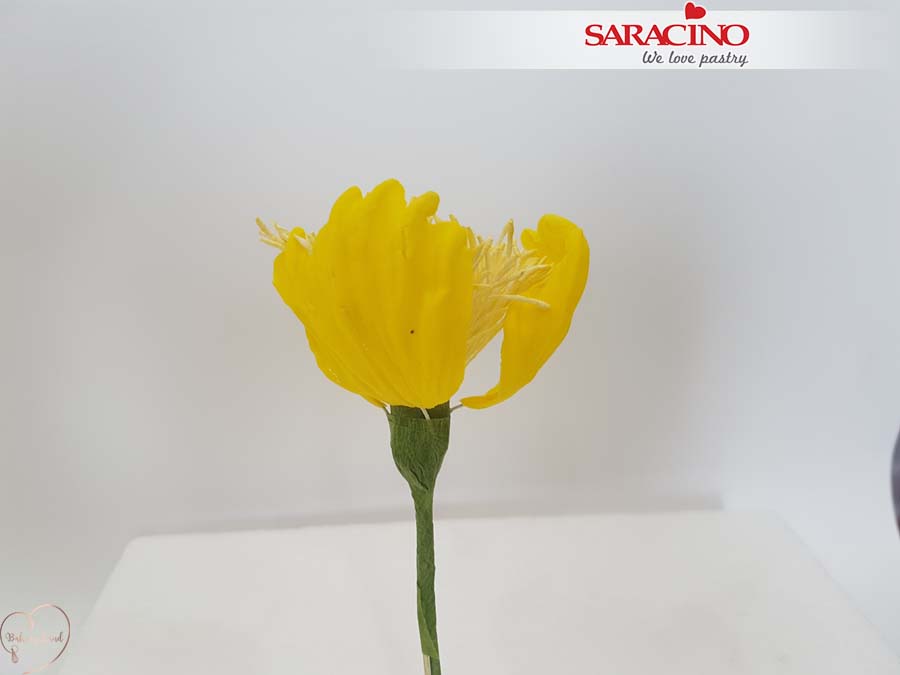
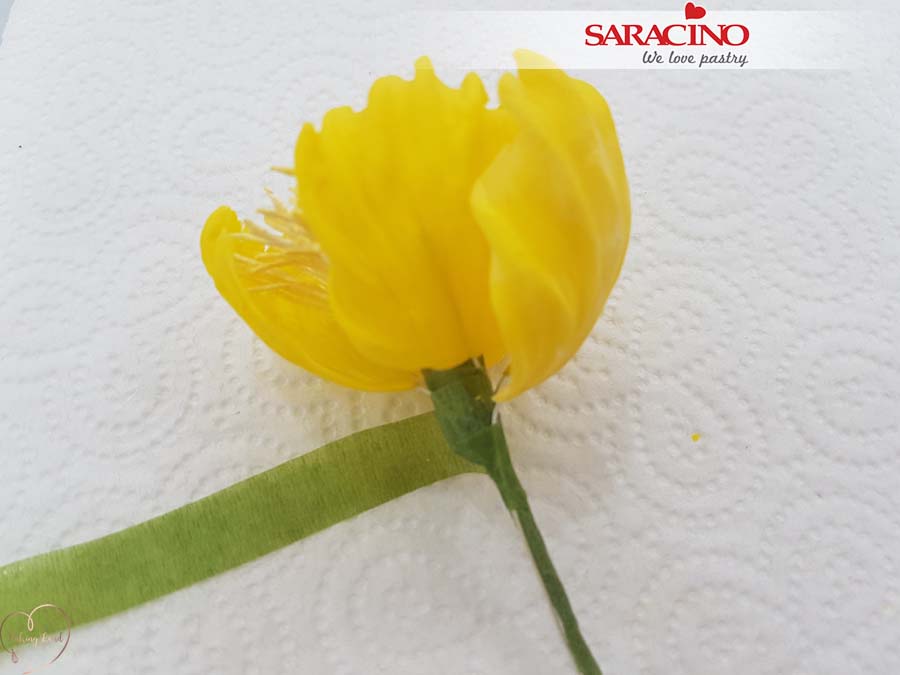
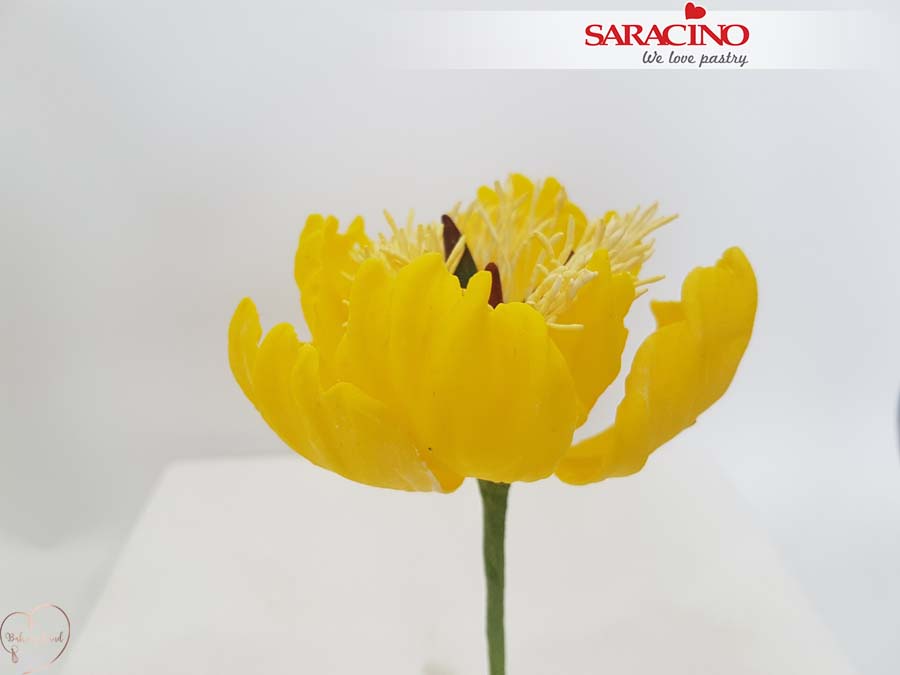
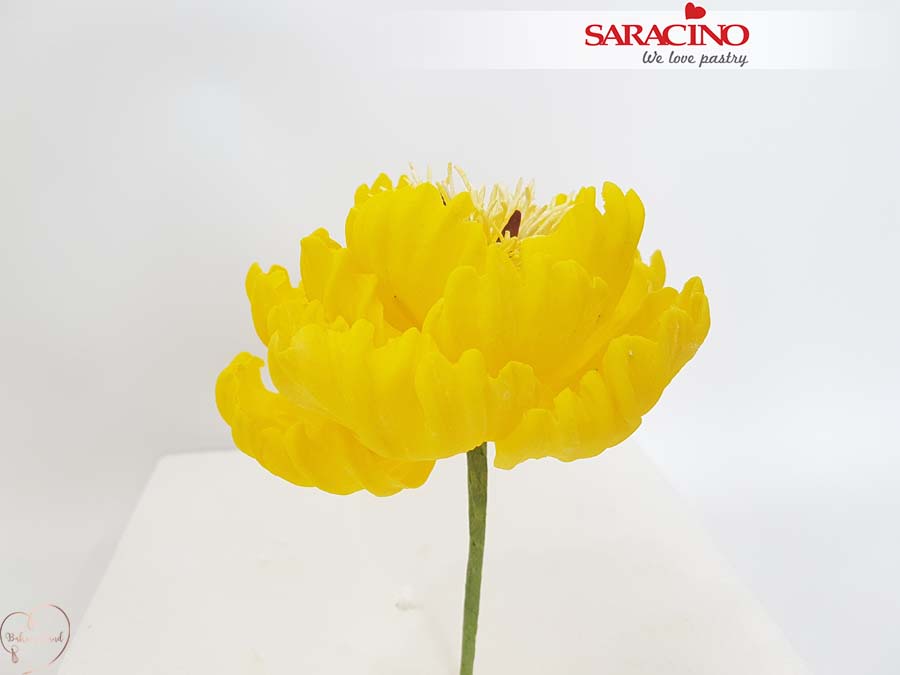
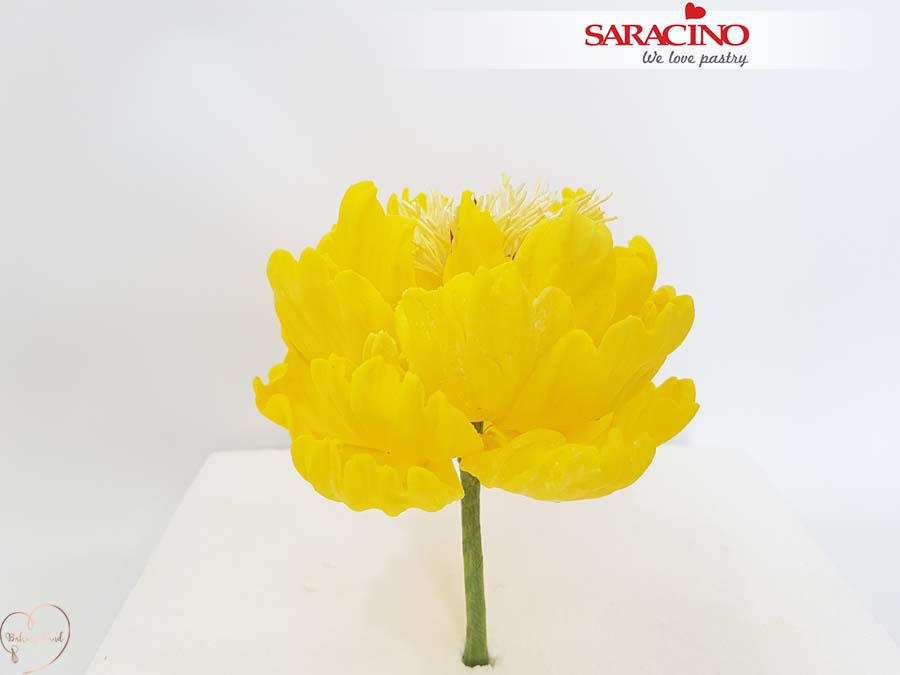
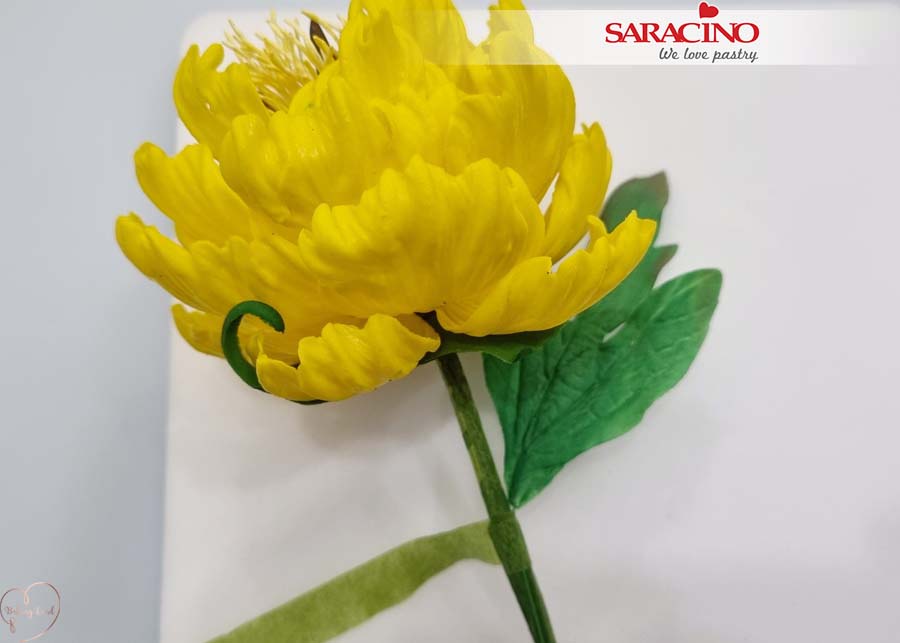
Your peony should look like this. 

Step 29

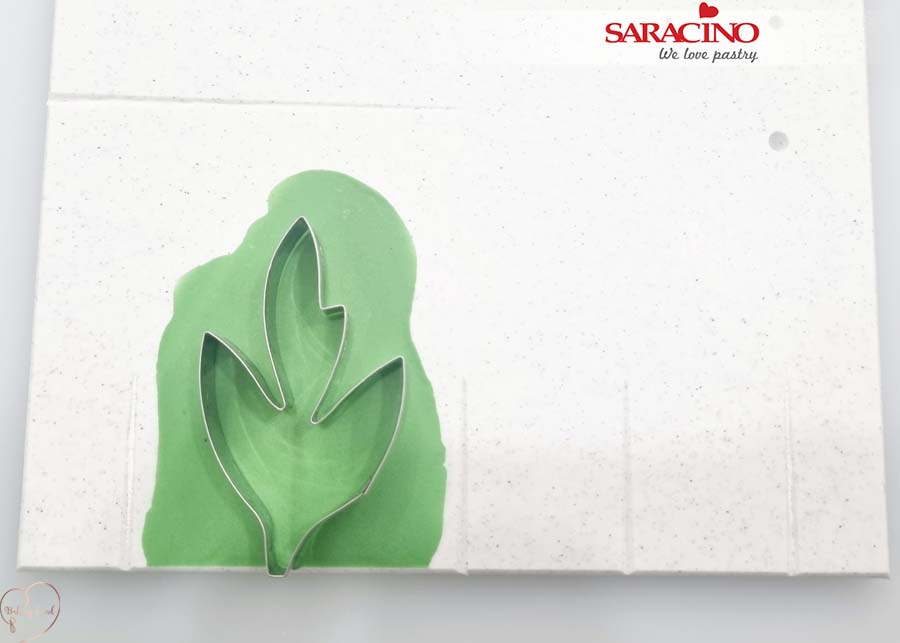
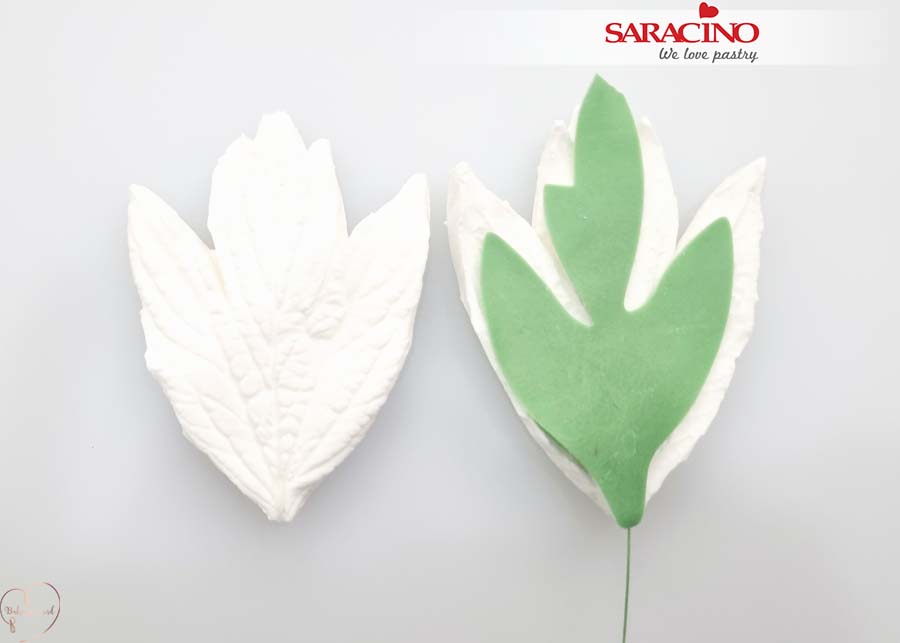
Colour your white Pasta Bouquet with green powder. Roll on your board and use a cutter to cut out a leaf.

Step 30

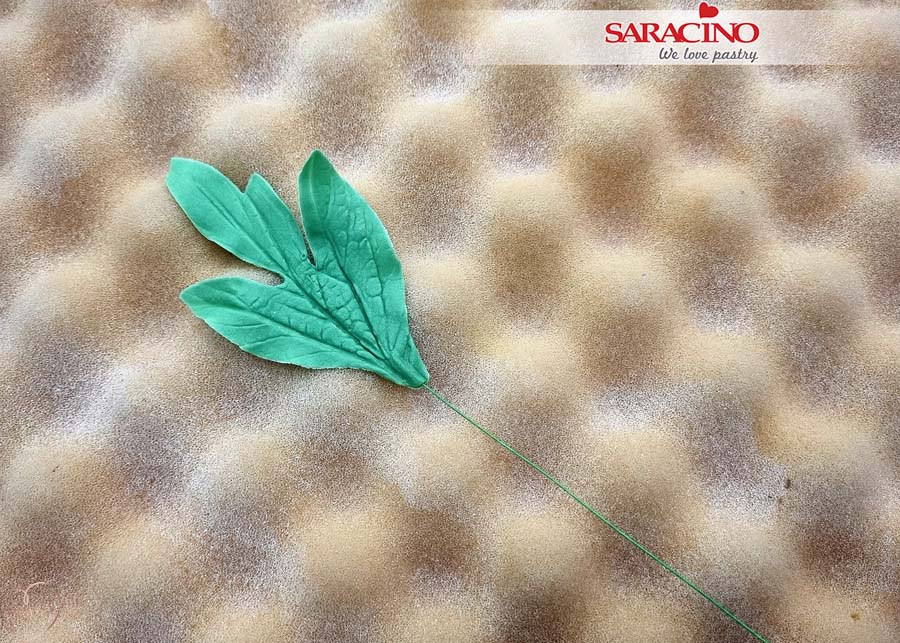
Twist the wire up to 3/4 of the leaf and place on the veiner. Press the top of the veiner to achieve the texture.

Step 31

Using ball tool smooth the edges. 

Step 32

Place on the foam and let it dry for few hours.

Step 33

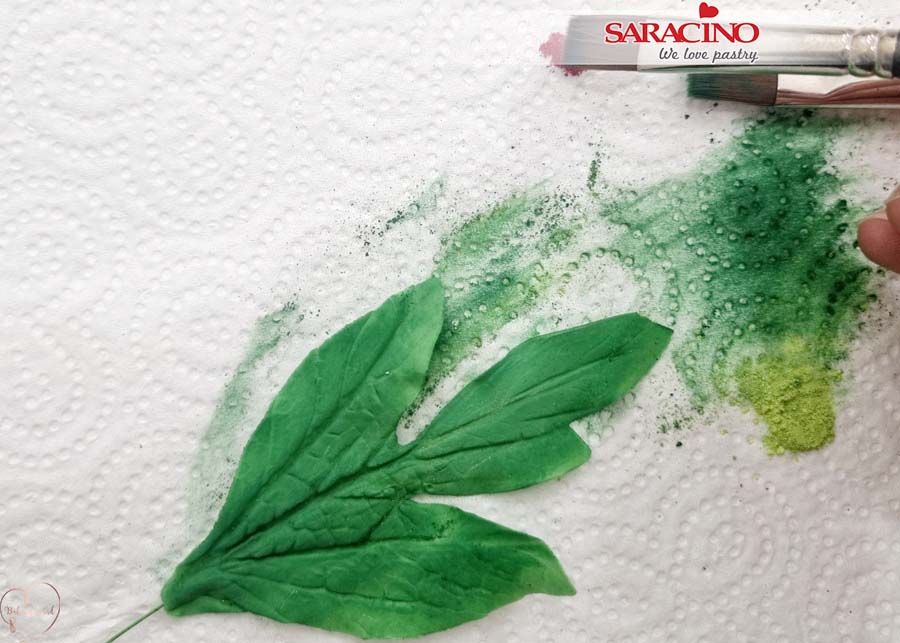
Using green colour powder dust the leaf. Also use some claret powder to dust the edge of your leaf.

Step 34

Using green floral tape fix the leaf to the flower. 

SEA THEMED WEDDING CAKE

SEA THEMED WEDDING CAKE

Skill level: BEGINNERS

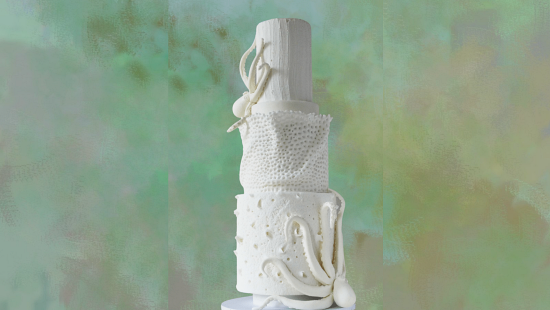
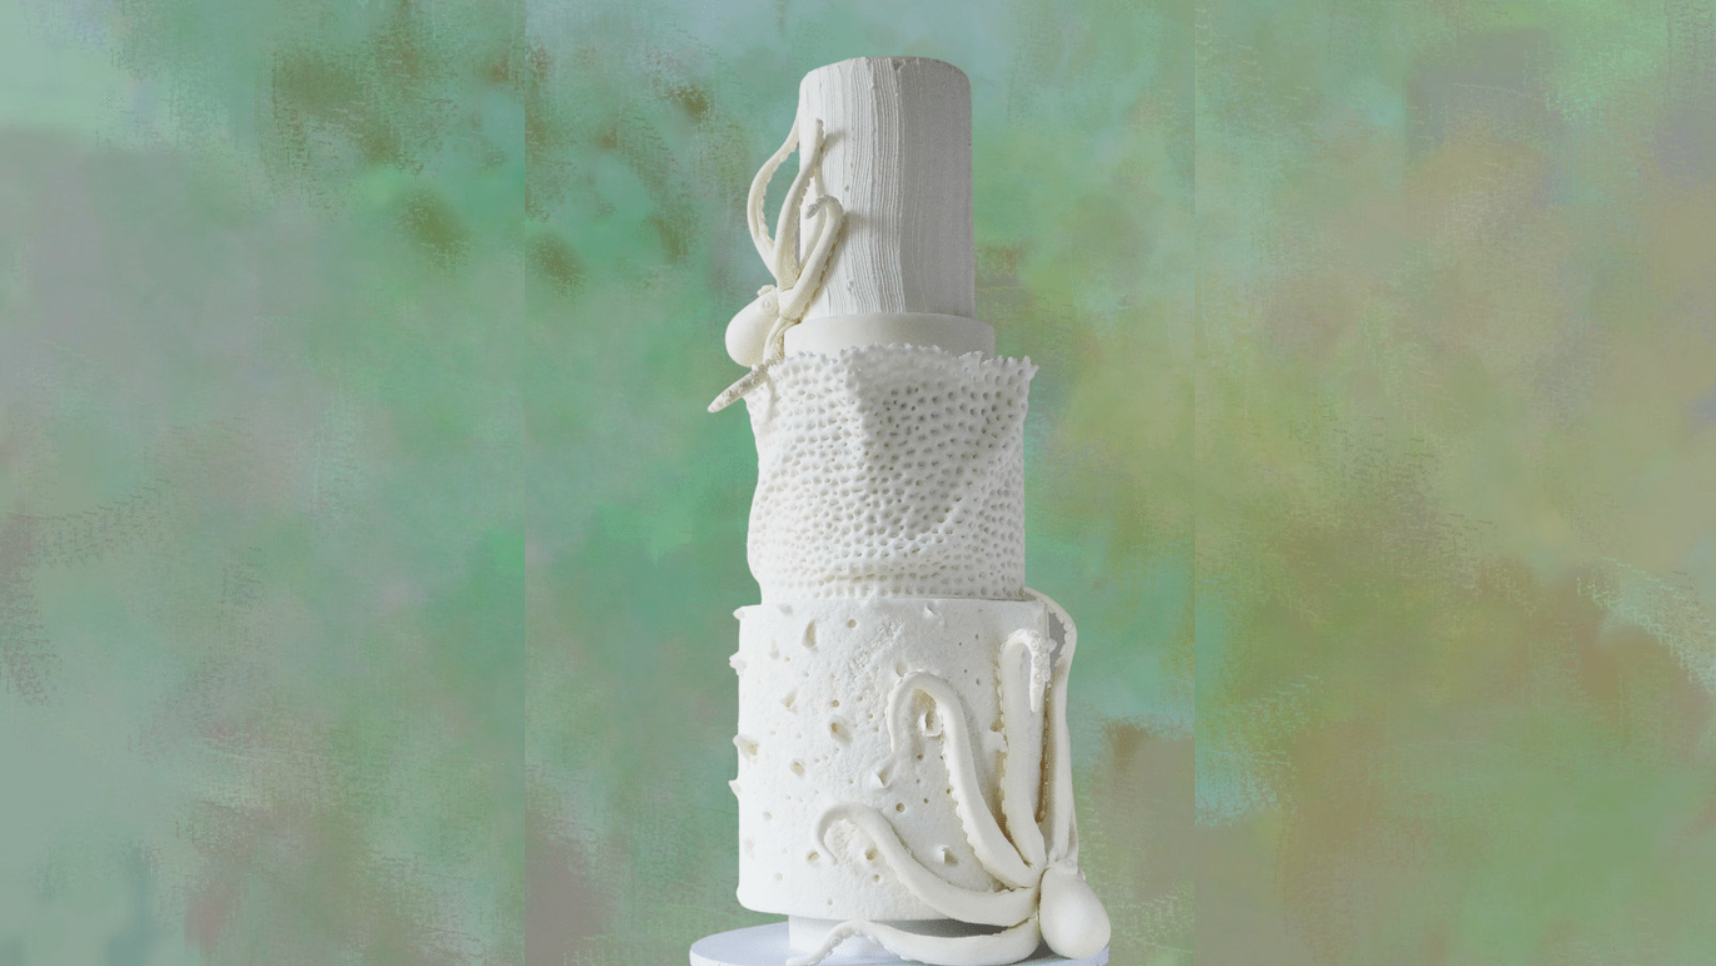
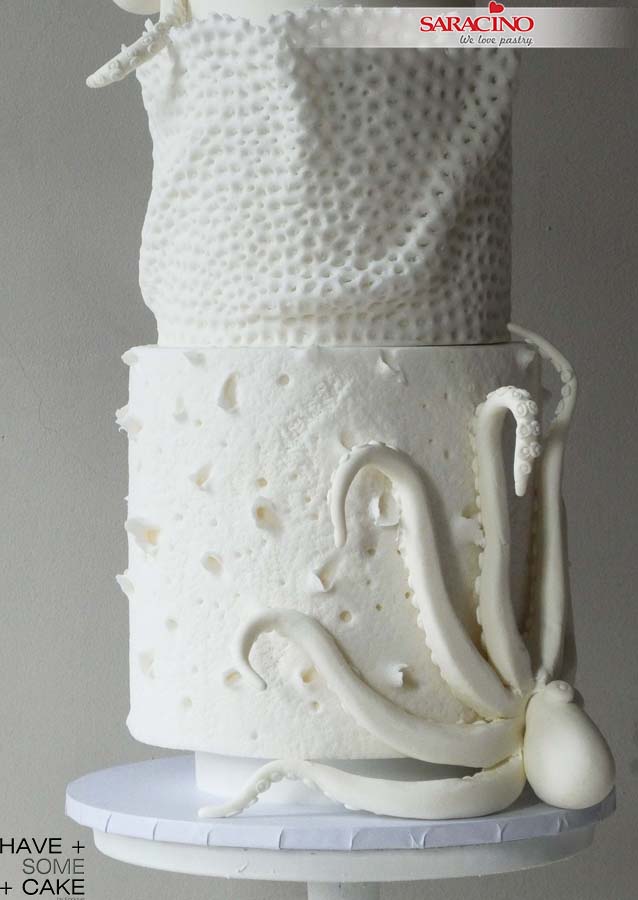
A different kind of Wedding Cake. This tutorial is about textures inspired by live coral reef and the ones washed ashore and dried. On the bottom tier we have a heavily textured tier that reminds you of pieces of coral dried and eroded by the elements. On the middle tier there is a more organic recreation of a live coral as found in reefs and at the top, the tier is textured to simulate sand at the bottom of the sea. The cake is finished by two octopus climbing around it. I went all white because it gives the design a more sculptural/ethereal feeling and because it is a thematic design.

You will need:

  • SARACINO white Pasta Top
  • SARACINO white Pasta Model
  • Rolling Pins
  • Ball Tool
  • Scriber Needle
  • Dresden tool
  • Veining Tool
  • Coarse Brush [Kemper] Tool
  • Pointed Rolling Pin
  • Zig Zag Edge Pottery Spatula
  • Sugarworks Shaper : Pointed Chisel (Light Blue)
  • Sugarworks Shaper : Bone Chisel (Orange)
  • Number 2 Round Piping Nozzle
  • White Royal Icing
  • Craft Knife
  • Pearl White Dust (OPTIONAL)
  • A Cake (Dummy) as shown : 5″ x 1″ Deep Round Separator/ 7″ x 7″ Deep Round Tier/ 6″ x 5″ deep Round Tier/ 5″ x 1.5″ Deep Round Separator /4″ x 6″ Deep Round Top Tier

Step 1

Very thinly roll enough Saracino white Pasta Top to wrap the bottom tier. Using a 9″ rolling pin roll the sugar paste around it as shown.

Step 2

Moist the dummy and roll the sugar paste around the tier as shown. With a knife cut the excess sugar paste at the top edge.

TIP: When cutting the excess sugar paste at the top use a new blade or run the blade in Trex so it cuts smoothly. Try to do the whole cut on a turntable and in one go.

Step 3

Your finished tier doesn’t have to be perfect as we will apply a texture. 

Step 4

Using the Kemper coarse brush start pressing onto the previously covered tier. Use a moderate force when pressing and occasionally press forcefully to create a variation in the texture you are creating.

Step 5

You want this kind of appearance.

Step 6

Using a pointed chisel tool at an angle start creating cavities. You can go as deep as you want and lift them as much as you like as shown.

Step 7

Using differing modelling tools complement the texture with random craters around. You will be able to work with this while the sugar paste has not dried. Be as gentle or as strong as you like. No limits to create your texture.

Step 8

Cover the middle tier as described previosuly. This also does not have to be perfect as we will be adding texture.

Step 9

Roll a piece of Saracino white Pasta Top the length and height of the second tier. Using a small ball tool start pressing onto the strip of sugar paste as shown.

Step 10

Use both ends of the ball tool to create different sizes and as close as possible. This will start deforming the previous round impression creating a more organic coral like structure. Using a veining tool you can perforate even more of the hole as shown in image.

Step 11

Lift the finished strip and wrap it around the tier. When doing this, handle the strip as if you were doing some drapes to create a wavy, organic shape as shown.

Step 12

Once the tier is fully covered use your fingers to tear the top edge randomly to create an imperfect edge.

Step 13

Using a sharp tool, perforate the hole structure where you have some draping creating some space for light to penetrate. 

Step 14

Using the same sharp tool start punching all around to make little tiny holes on it. Live coral is not completely smooth and this will give a second more detailed texture to this tier.

Step 15

Prepare some Saracino Royal Icing to the instructions on the packaging. We need a hard peak mix. Cover the top tier with it.

Step 16

Using a metal scraper remove the excess. We do not need a perfect smooth finish as we are again adding texture.

Step 17

Before the icing dries use the zig zag edge pottery tool to create wavy stripes. It is a very subtle but effective texture.

Step 18

To make the head of the octopus, roll Saracino white Pasta Model in your hands to create an egg shape.

Step 19

Make two smaller balls and flatten them to create the eye sockets and attach them to the thin end of the head as shown.

Step 20

Use a modelling tool to press two eye sockets.

Step 21

Roll a small ball of white modelling paste and place it in the previously make hole in the eye sockets. Leave to dry while you make the tentacles.

TIP: I decided to make the octopus in 2 parts, the head separated from the tentacles so I wouldn’t have to wait for it all to dry. Also as it would be easier to handle the tentacles to position over the cake without the head.

Step 22

For the tentacles roll a ball of white Pasta Model and flatten it. With a knife cut equally into 8.

Step 23

With your hands roll and thin one portion at a time until you have the 8 tentacles.

TIP: Alternatively, you can do each tentacle separately and join them when ready but as the tentacles are placed vertically you will have to join them and leave to dry in position on a dummy as there isn’t anything holding them together. Remember this is not an exact biological octopus recreation.

Step 24

Your tentacles should look like this.

Step 25

To make the tentacle suckers roll small balls of white Pasta Model and start placing them onto the tentacles.

Step 26

Using the number 2 round piping nozzle press each ball to give the sucker look. Repeat for all 8 tentacles. For this project you will make a larger octopus for the bottom tier and smaller one for the top tier.

Step 27

Do the same with the middle.

Step 28

Arrange the tentacles organically as required with the suckers facing the cake. Use a little royal icing to hold in place.

Step 29

Attach the head to the tentacle part using royal icing. You can also fill the gaps between head and body with royal. You will have to hold it in place for a little so the head does not slide off.

Step 30

Your underwater treat is ready!
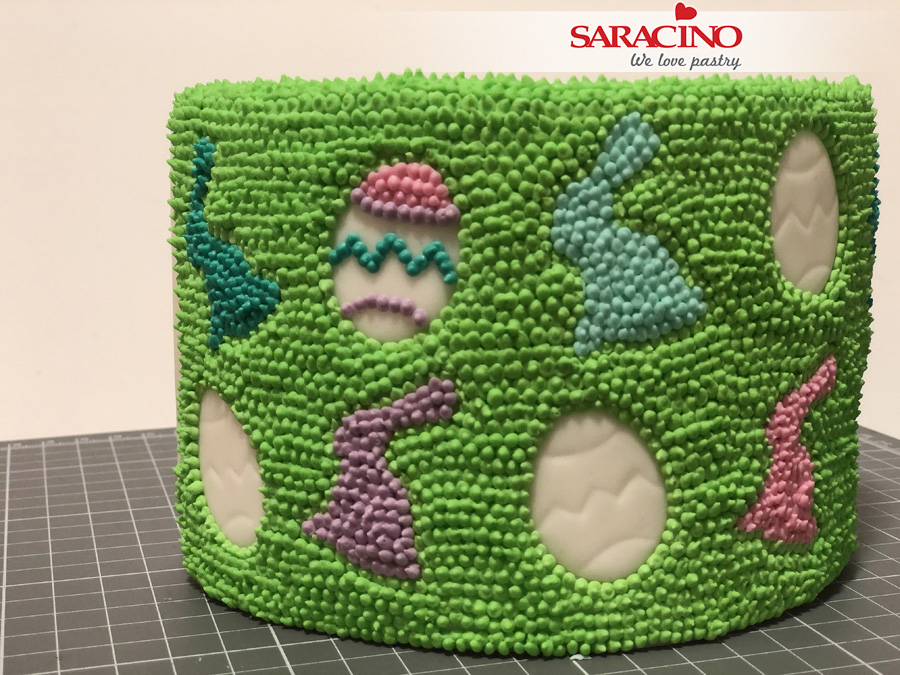
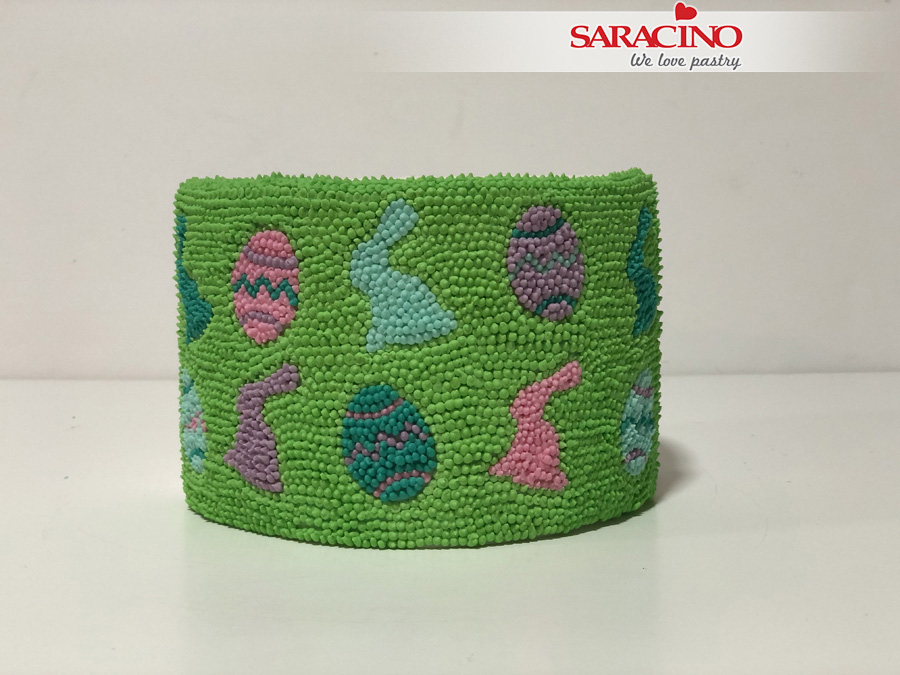
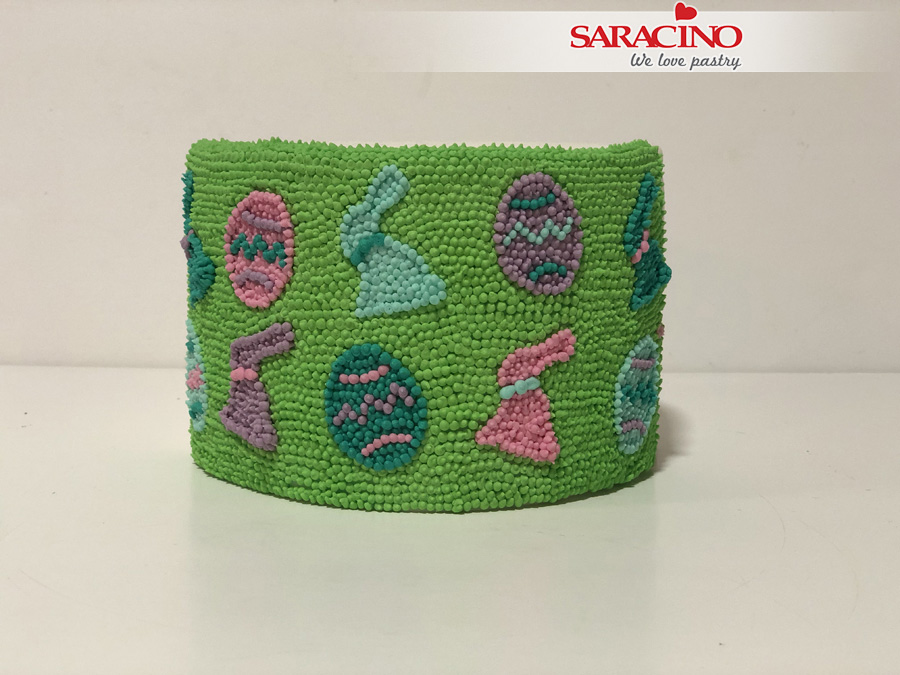
EASTER ROYAL ICING DOT CAKE

EASTER ROYAL ICING DOT CAKE

Author: Patricia Alonso

Skill level: BEGINNERS

You will need:

  • Dummy or a cake (size to your choice) 
  • Smoother
  • Large rolling pin
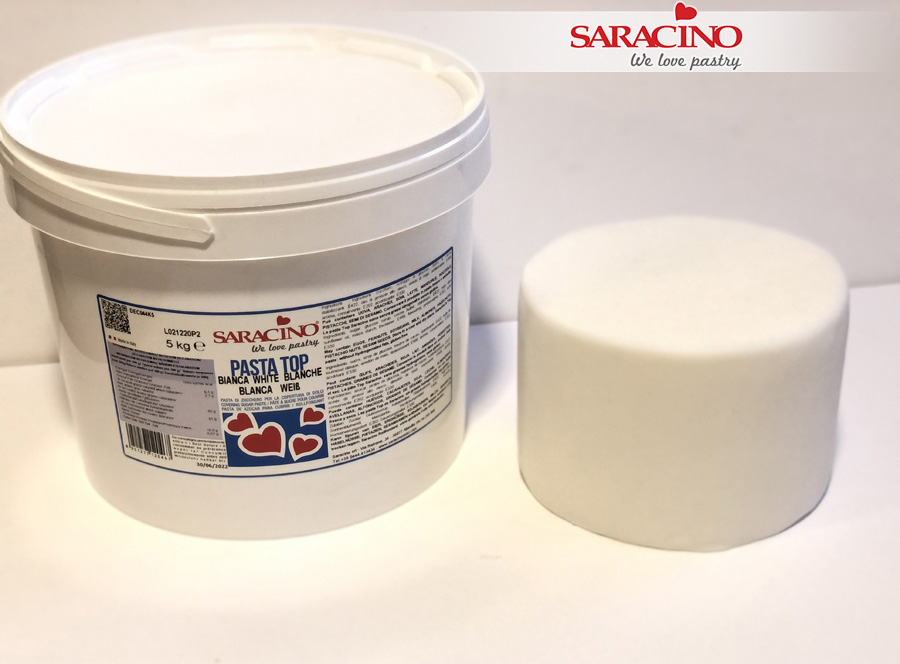
  • 500g Saracino Pasta Top white 
  • Saracino gel colours of your choice
  • Easter themed mini cutters
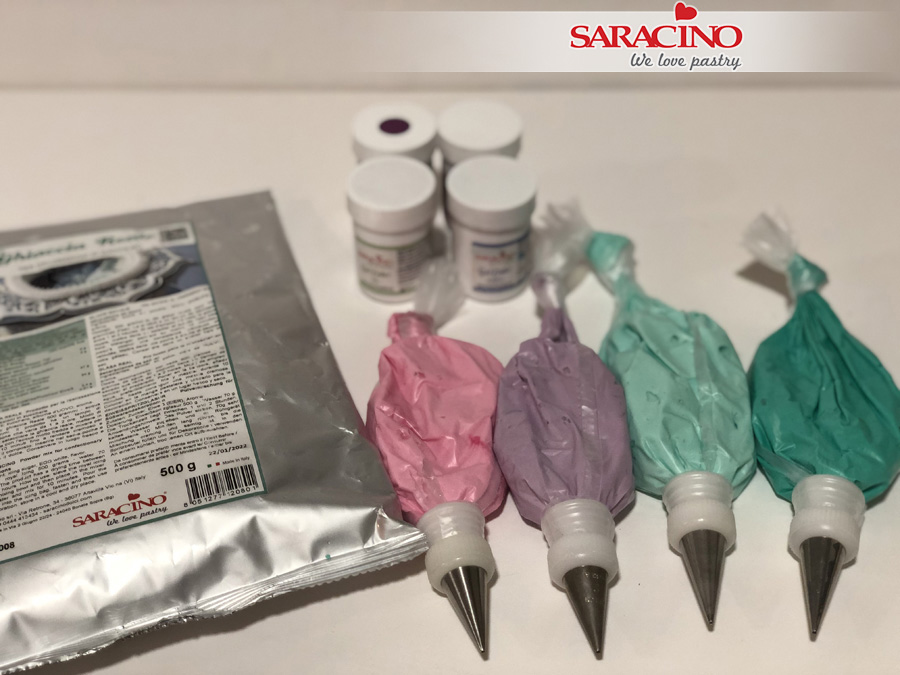
  • Piping bags
  • Piping nozzle adapters (if required)
  • Piping nozzle – number 1
  • Star piping nozzle – number 18
  • Royal icing – Saracino powder mix
  • Knife
  • Dresden tool

Step 1

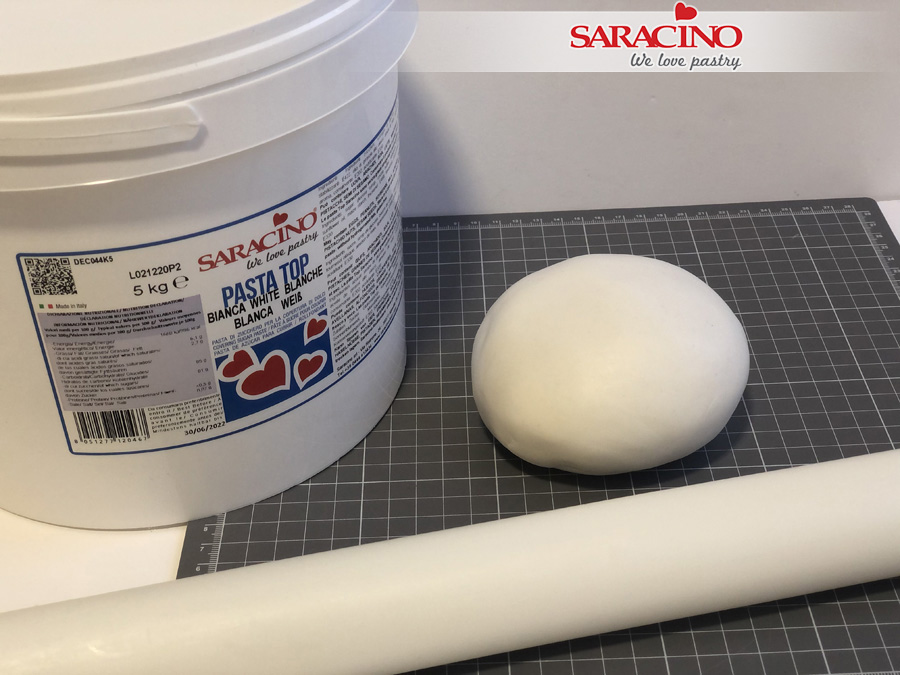
Knead the Pasta Top fondant until it becomes softer and elastic. Shape it into a ball.

Step 2

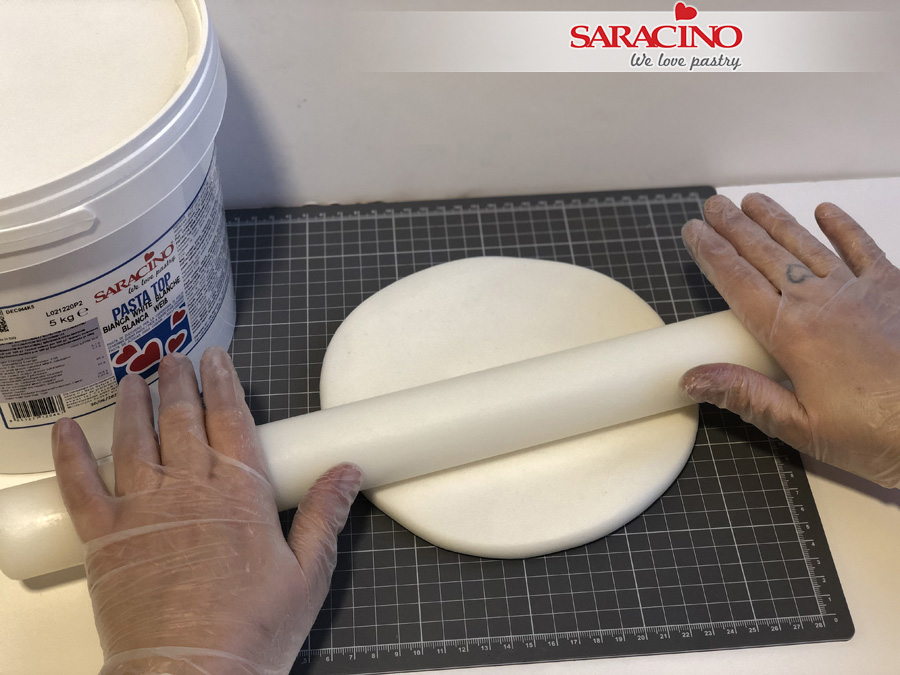
Roll out the fondant evenly using a rolling pin.

Step 3

Roll out the fondant to 3-4mm thick.

Step 4

Moisten your dummy with a little water. Now lift the Pasta Top and place over the dummy.

Step 5

Using your hands shape the Pasta Top paste over the dummy. Use your cake smoother to give a smooth finish to the sides and top.

Step 6

Remove the excess fondant with a sharp knife.

Step 7

We don’t worry if the finish is not as perfect as we would like. This cake will have the decoration that will cover the surface.

Step 8

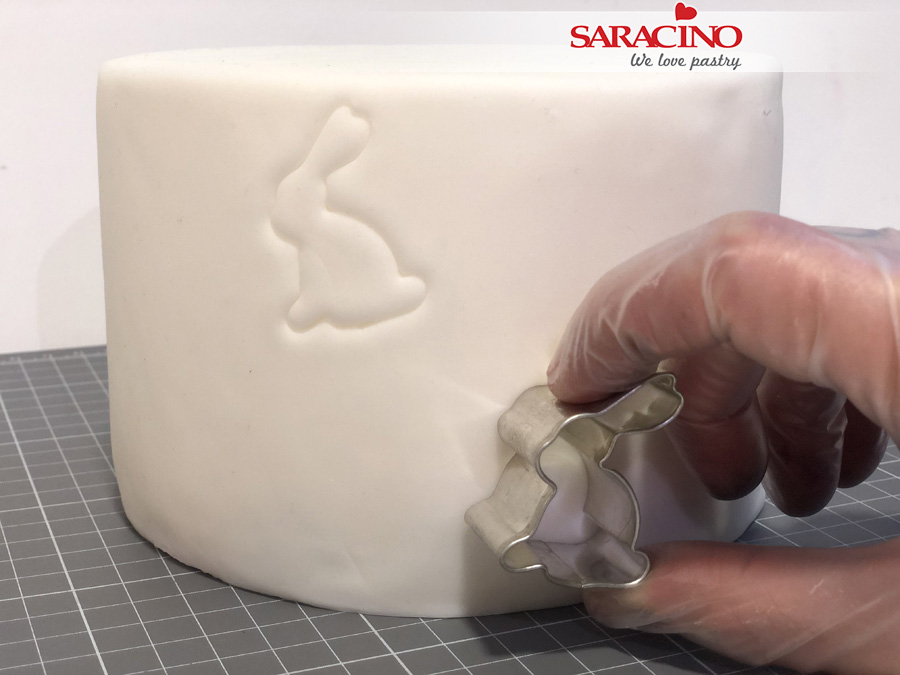
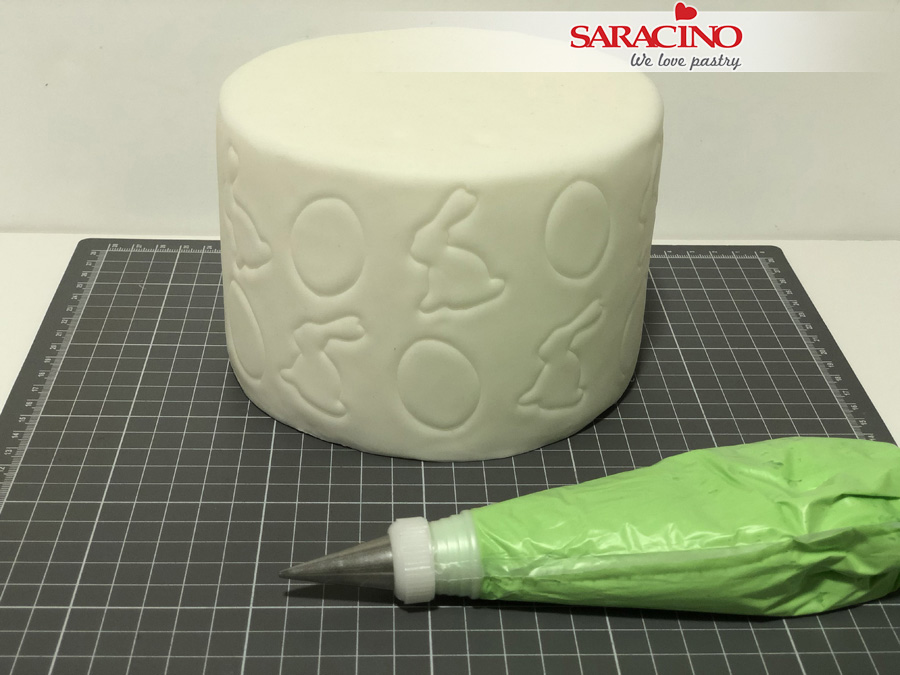
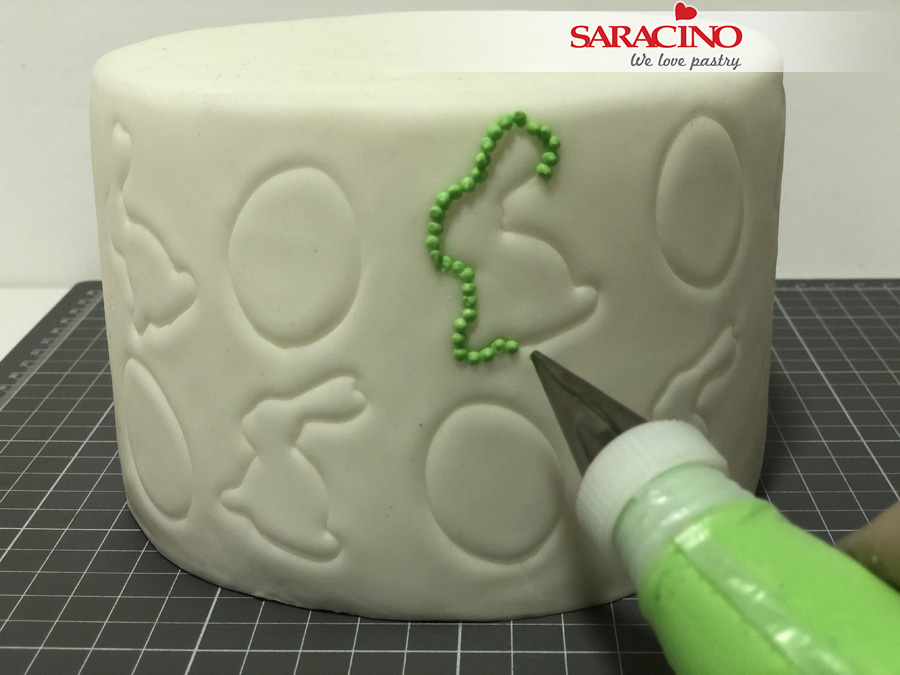
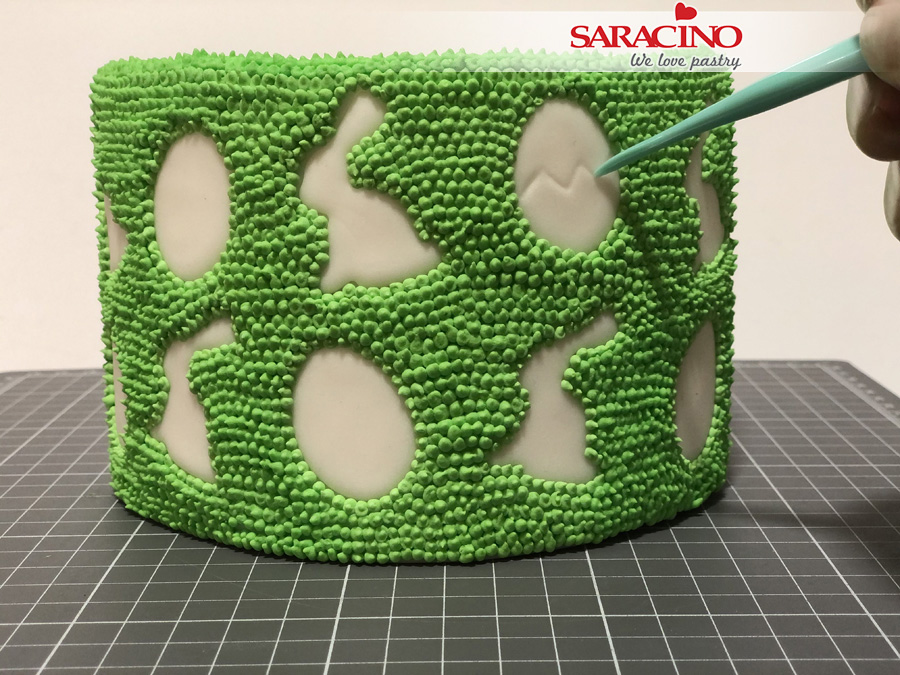
For my cake I am using two shapes (a bunny and an egg). Using the first cutter press into the surface of the Pasta Top leaving plenty of room for your other shapes.
 
TIP – Use as many shapes and patterns as you would like on your own design.

Step 9

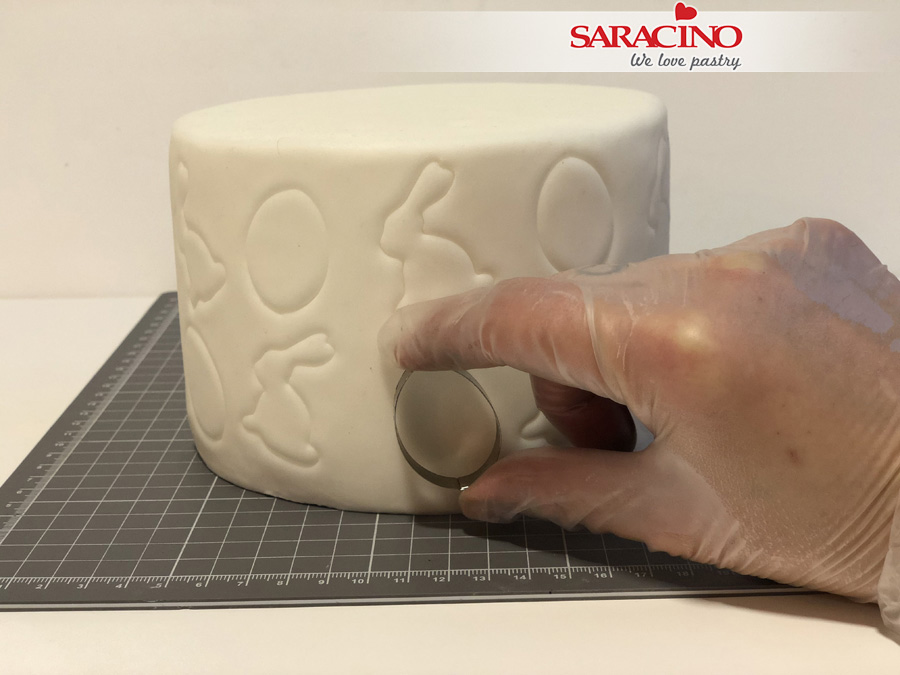
I use my egg shape cutter to fill in the gaps between the bunny.

Step 10

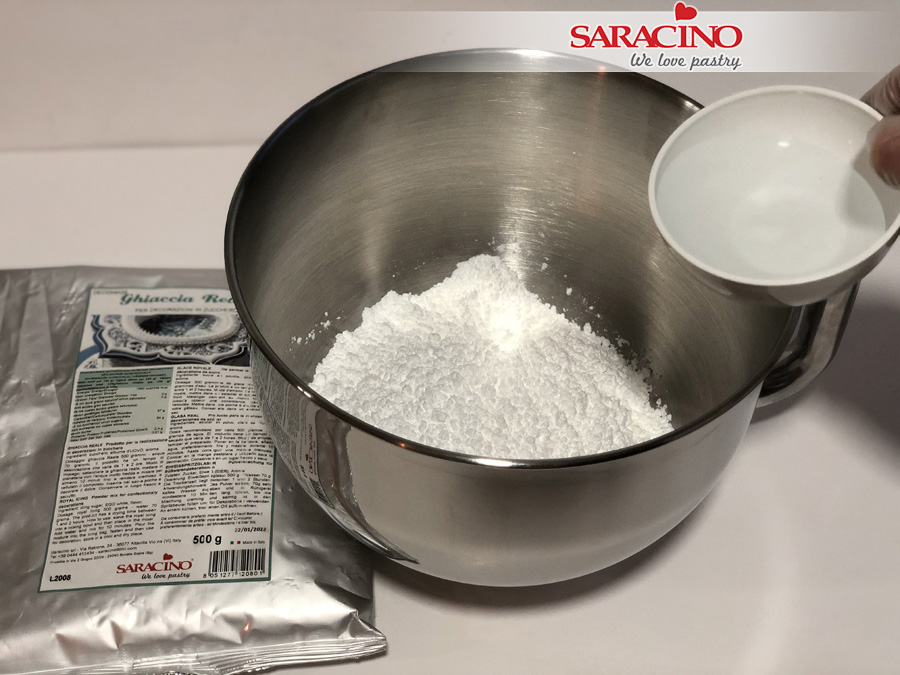
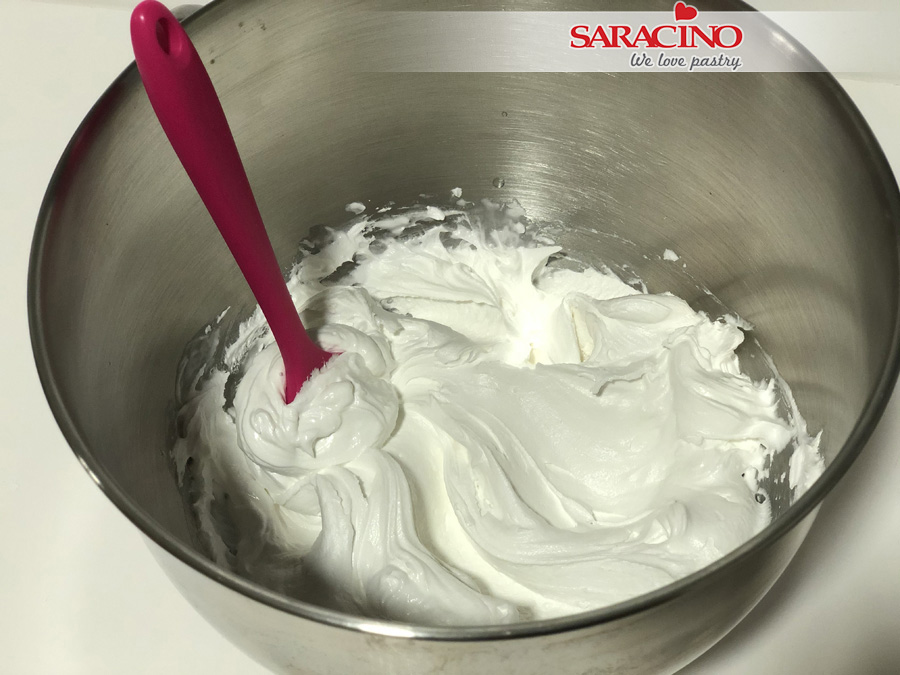
Now for the royal icing. Prepare following the instructions on the packaging and mix for the the indicated time.
 
TIP – Some people are scared to even consider making their own royal icing. Using Saracino Royal Icing Mix it is as easy as adding water and mixing. No need for fresh egg whites or egg white substitutes. 

Step 11

We need our icing to have a firm consistency so that the dots keep their shape without merging with each other.

Step 12

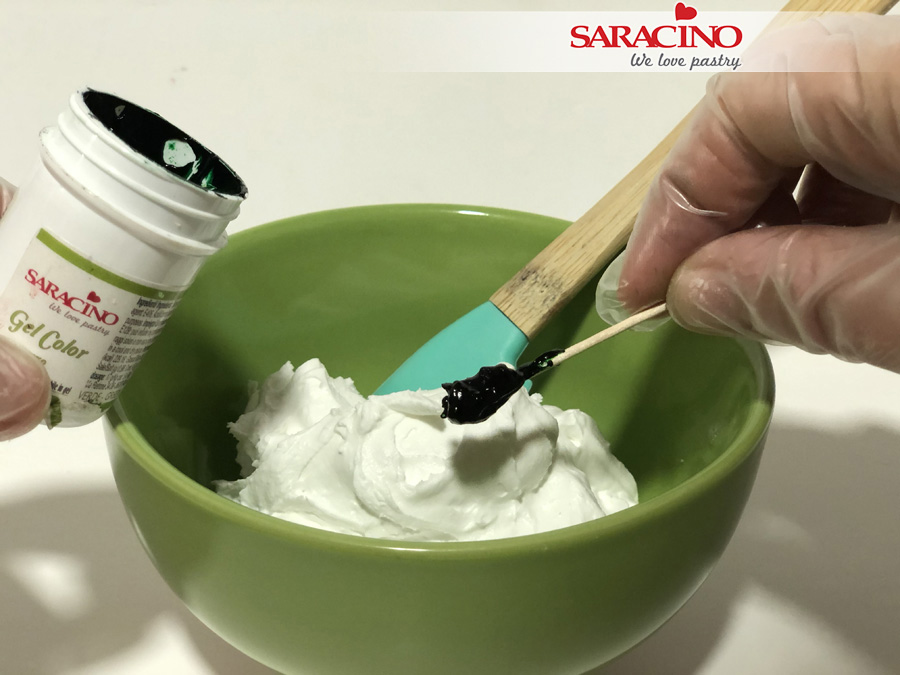
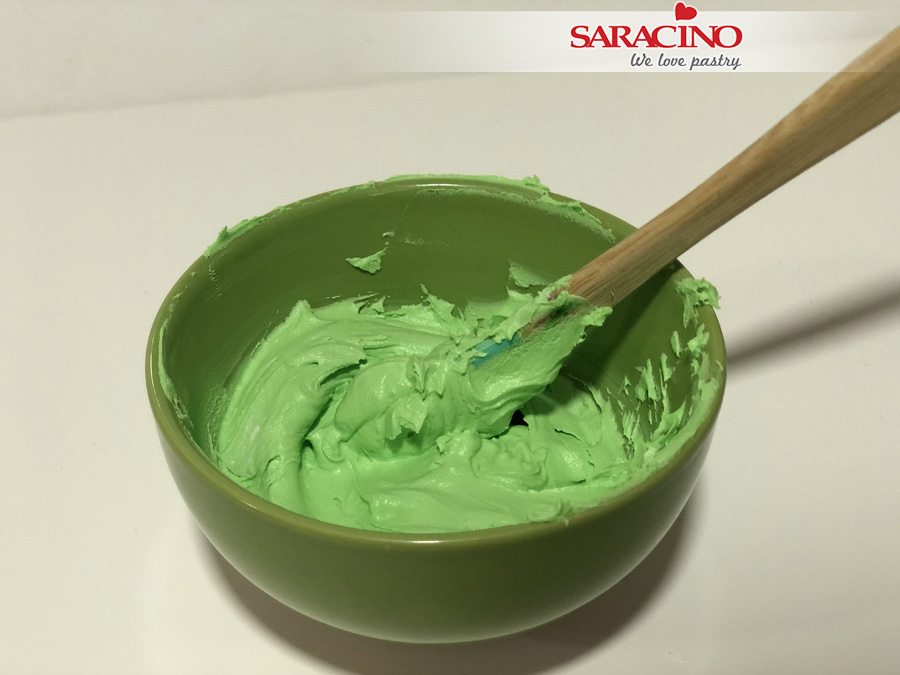
For the background piping take approximately half of your mix and colour it with green Saracino gel colour. If we do not have enough we can always mix more later. 

Step 13

Mix well by hand until a uniform color is obtained.

Step 14

Using a number one piping nozzle in your piping bag add the green icing.

Step 15

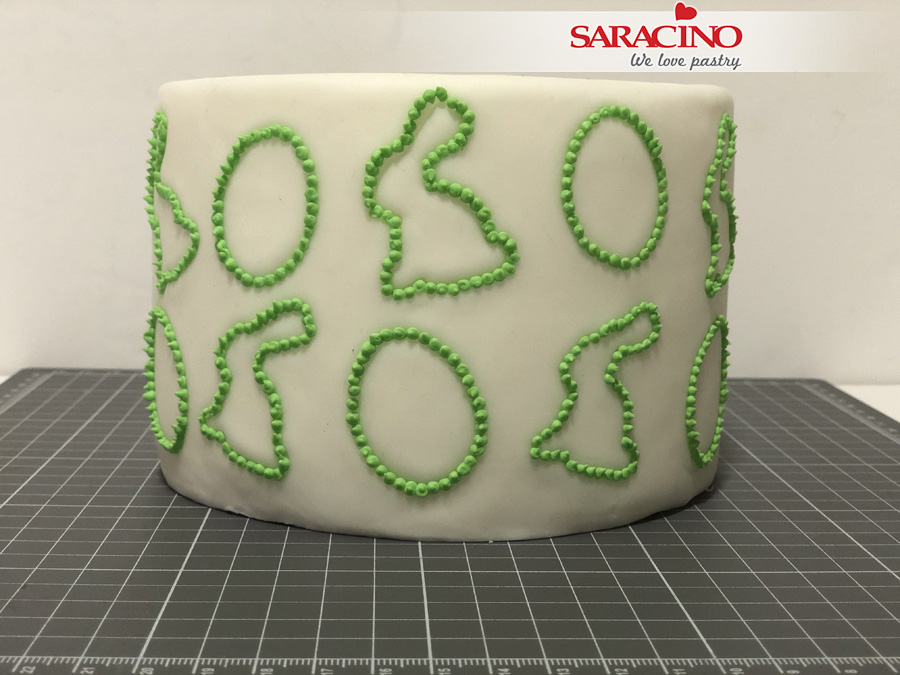
Now outline the shapes we have made on the cake. Each bead should touch gently so no gaps are left. 
 
TIP – When we pipe dots we are sometimes left with a sharp point on the top. We can smooth this using a damp artists paint brush.

Step 16

Outline all of the shapes so it looks like this.

Step 17

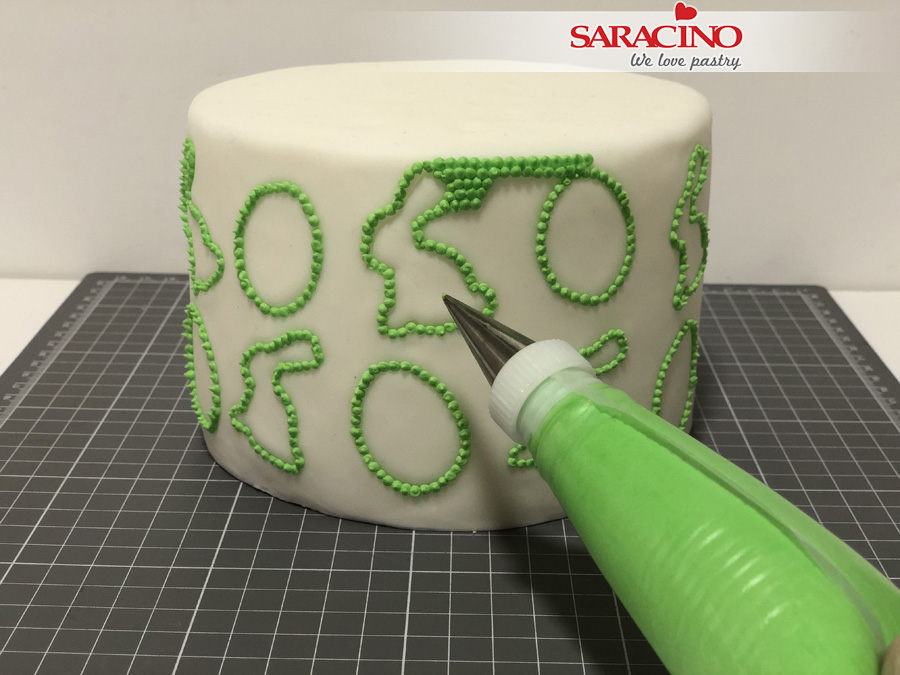
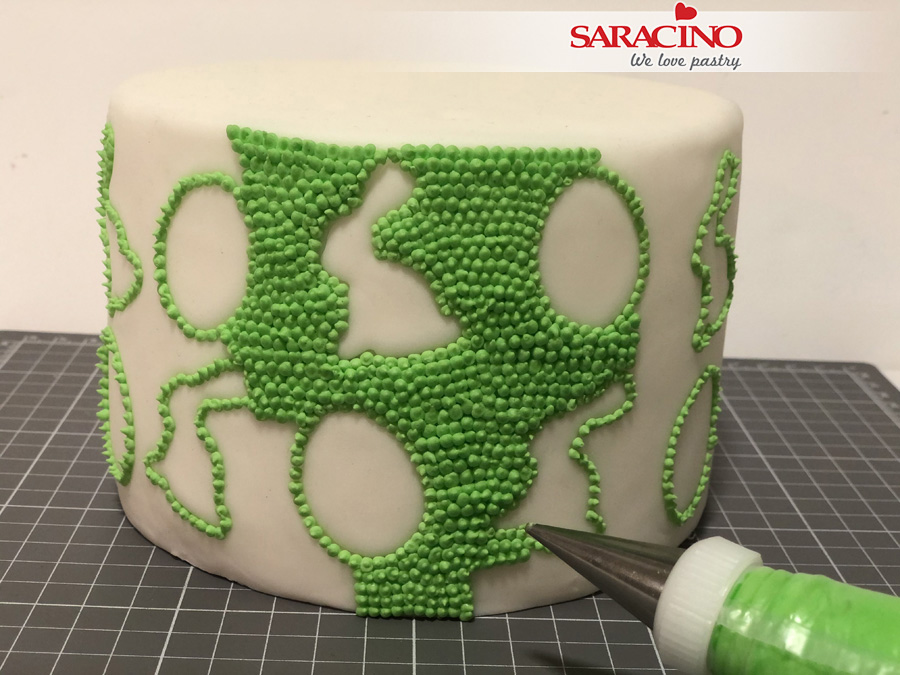
Now we need to pipe the same sized dots to fill in all the gaps between our shapes. 

Step 18

Work around the cake to fill in all the gaps between shapes.

Step 19

 Divide the remaining royal icing into seperate bowls ready to colour.

Step 20

Now you can use the colours of your choice. Play with colours to achieve what you want. Colour with the ready to use colours. We can also mix different colours to achieve unique looks!  For example we can get turquoise by mixing green and blue together.
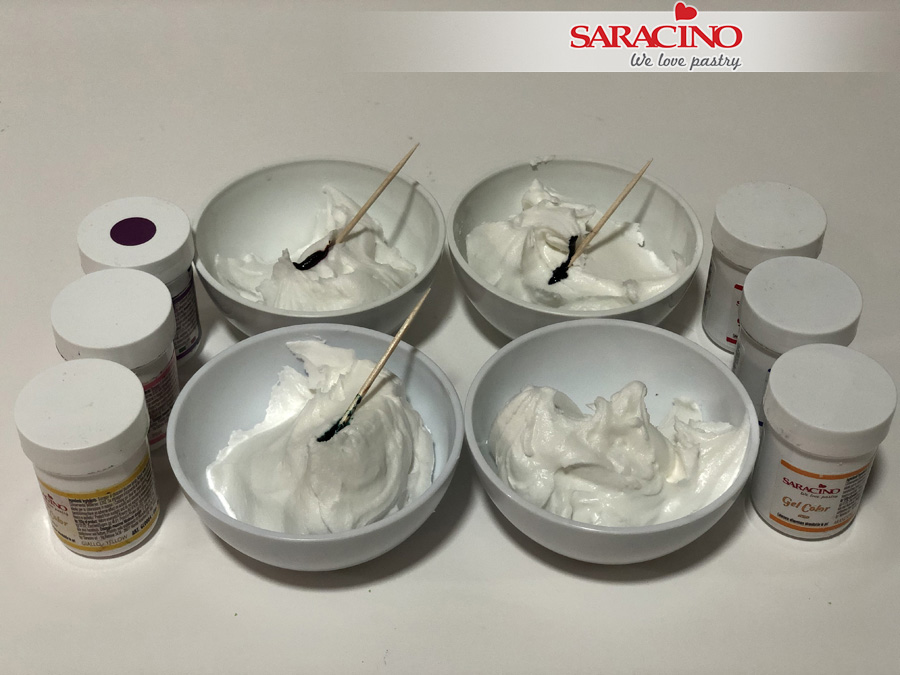
Step 21

Mix well until the gel has completely blended.

Step 22

Repeat for each colour.

Step 23

Using nozzle number 1 fill the piping bags with the different colours.

Step 24

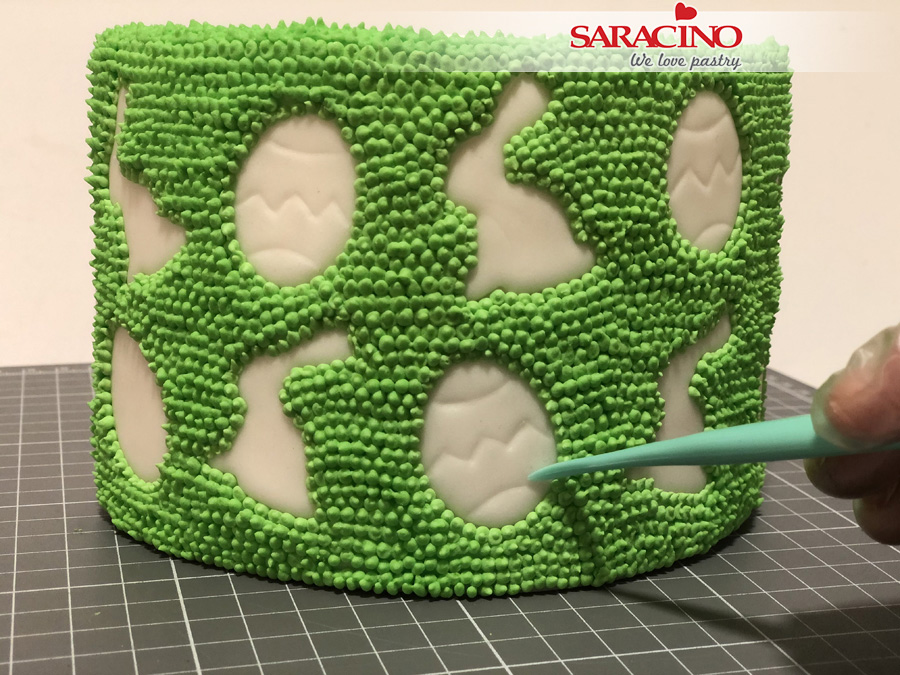
Using your Dresden tool mark lines on your shapes for the patterns you will need on each shapes. 

Step 25

These marks will be a guide to help us decorate later.

Step 26

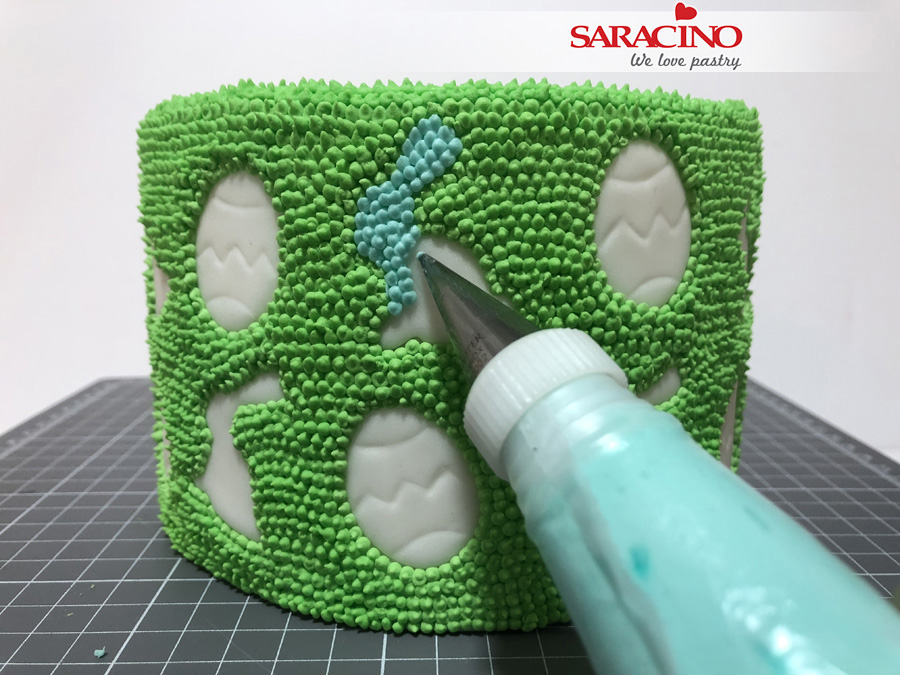
Start filling in the shapes with royal icing dots.

Step 27

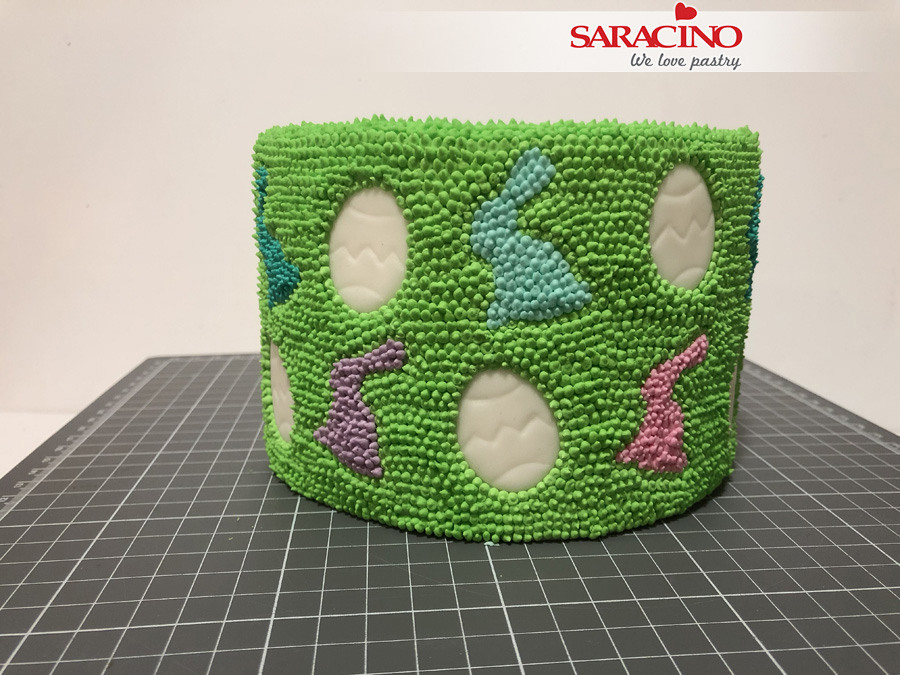
Combine the colours we have to fill in the bunnies.

Step 28

Follow the lines of the Easter eggs combining colours.

Step 29

Fill in all the empty spaces.

Step 30

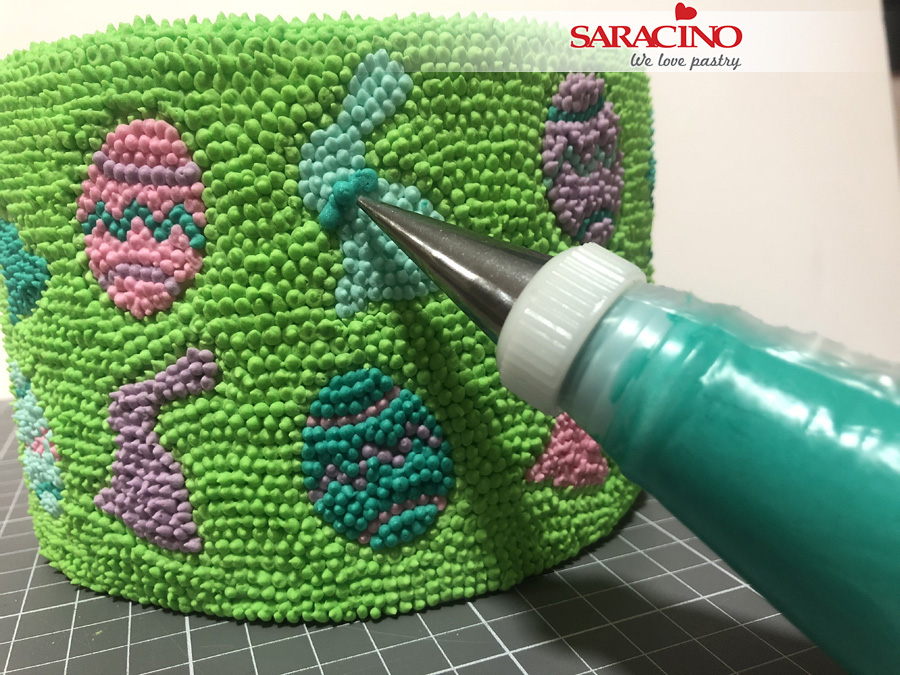
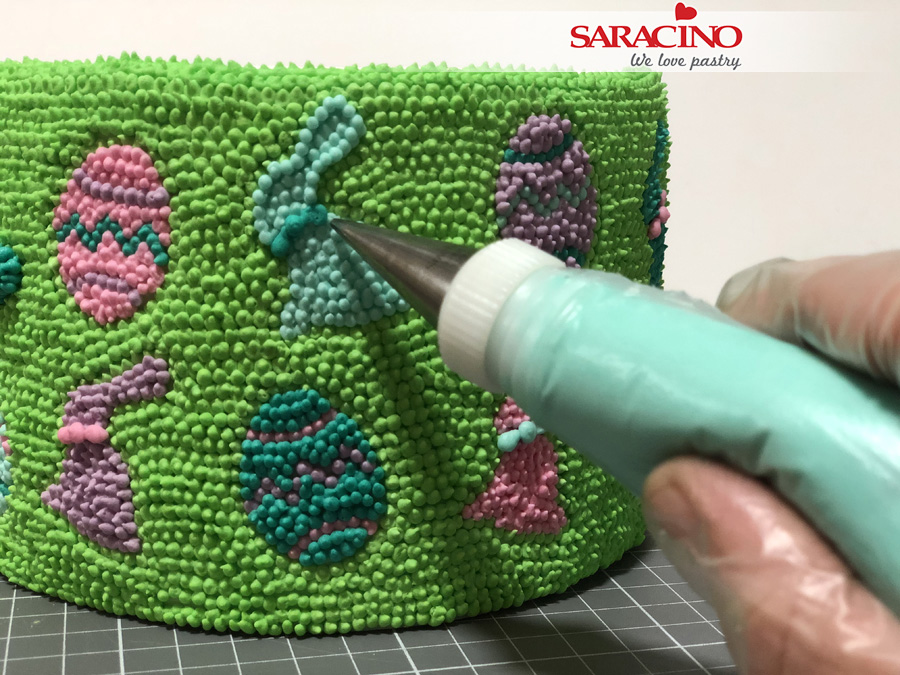
Add small decorations that give added volume to the decorations. For example little ties for rabbits.

Step 31

To give a slight 3D effect pipe around the outside of each shape. 

Step 32

Also go over some details again.  This will give definition and volume to our decoration

Step 33

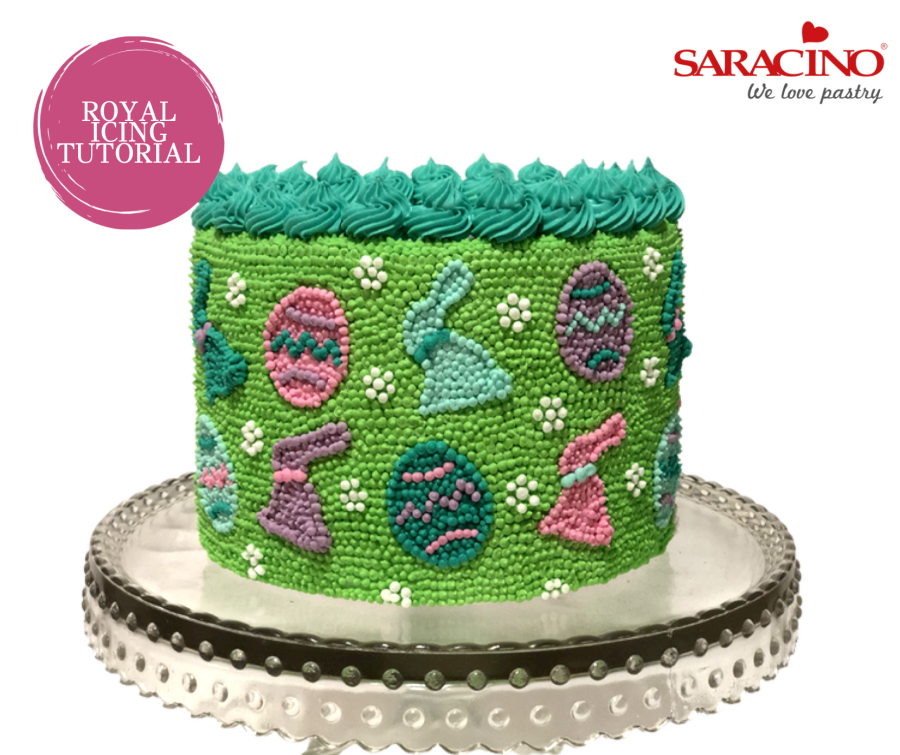
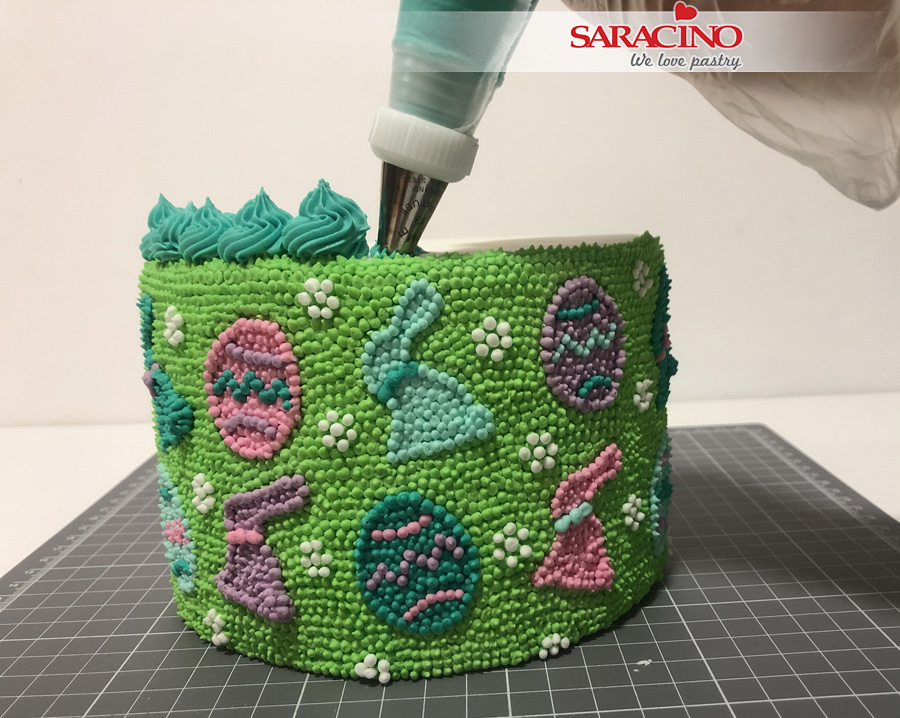
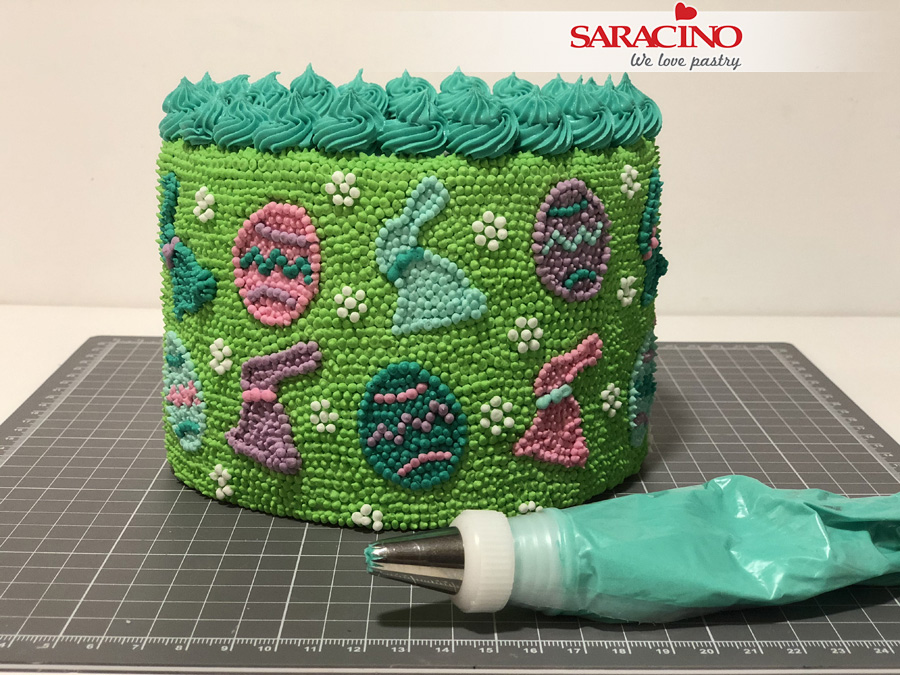
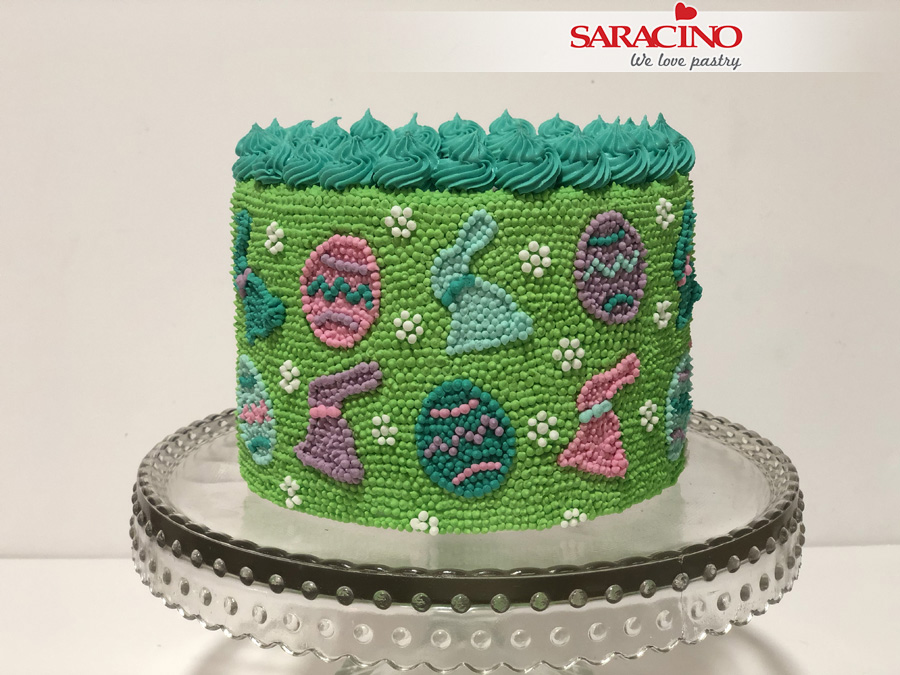
If you want you can add some small decoration to fill the spaces between your shapes, such as small flowers formed from white dots as shown. You can also pipe around the top of the cake using a No. 18 piping nozzle.

Step 34

 This decoration adds volume and combines the colours that have been used in the decoration of the cake.

Step 35

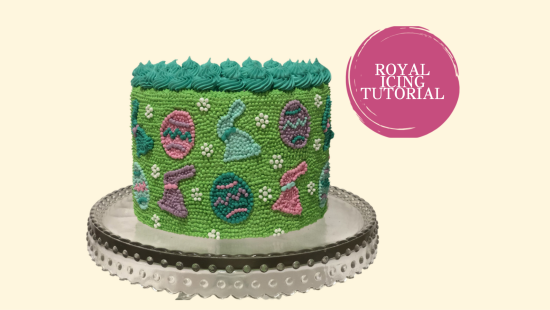
 It is a fun and colourful decoration with a WOW factor! Dare to combine colours to achieve the look you want for your Easter celebration.

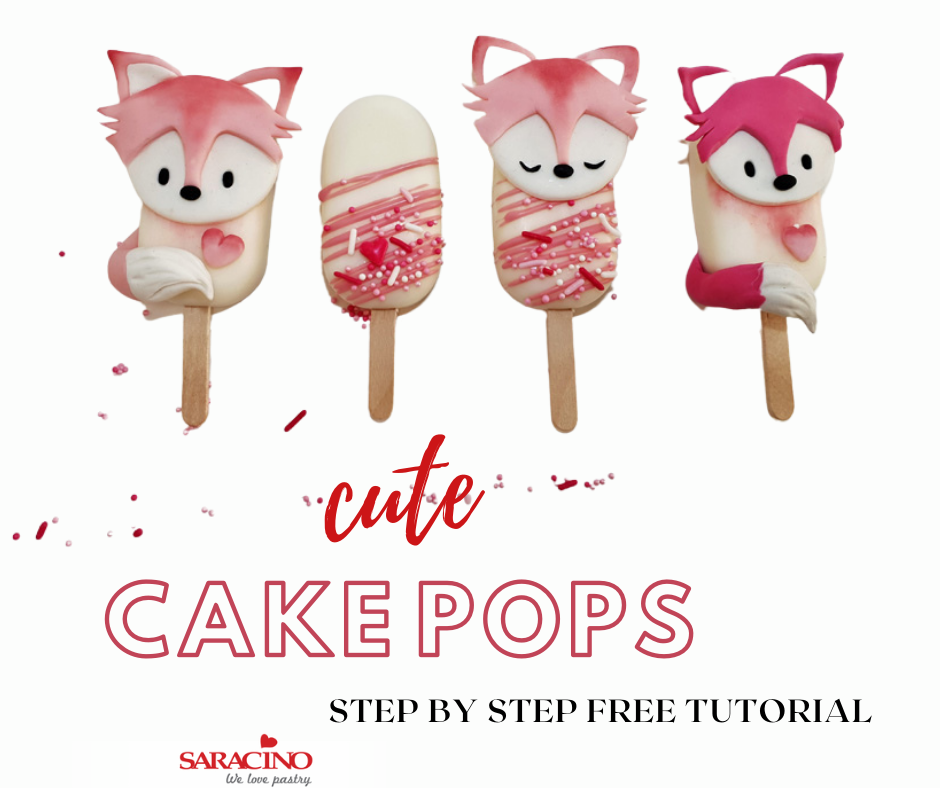
VALENTINE’S CAKE POPS TUTORIAL

VALENTINE’S CAKE POPS TUTORIAL

Skill level: INTERMEDIATE

Chocolate tempering:

White Chocolate:

Heating to 40-45 degrees, cooling to 24-25 degrees, final temperature 27-28 degrees.

Milk chocolate:

Heating to: 40-45 degrees, cooling to 27-28 degrees, final temperature 30-31 degrees.

Dark chocolate:

Heating to: 45-50 degrees, cooling to 28-29 degrees, final temperature 31-32 degrees.

You will need:

INGREDIENTS:

  • Saracino Chocolate drops white 250g
  • Saracino Food Flavouring Pistachio
  • Saracino Pasta Model Pink
  • Saracino Pasta Model White
  • Saracino Dust powder Pink
  • Saracino Gel color Pink
  • Saracino Gel color Black
  • Saracino Cakegel
  • Plain cupcake mix, butter and eggs
  • Sprinkles

EQUIPMENT:

  • Silicone popsicle mini ice cream mould (Silikomart)
  • Popsicle sticks
  • Food thermometer
  • Pan with a thick base
  • Heatproof glass bowl
  • Marble or natural stone slab for chocolate tempering 
  • Spoon
  • Pallet knife
  • Brush
  • Pastry bag
  • Rolling pin
  • Dresden tool
  • Knife
  • Ball tool
  • Round cutter diameter 45mm
  • Leaf cutter 20 x 25mm
    •  

Step 1

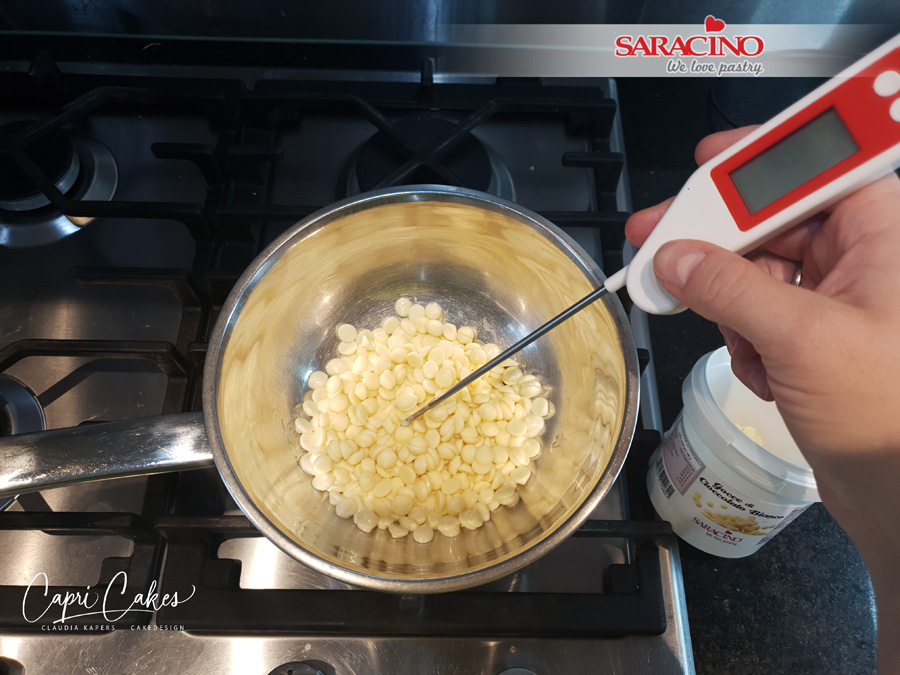
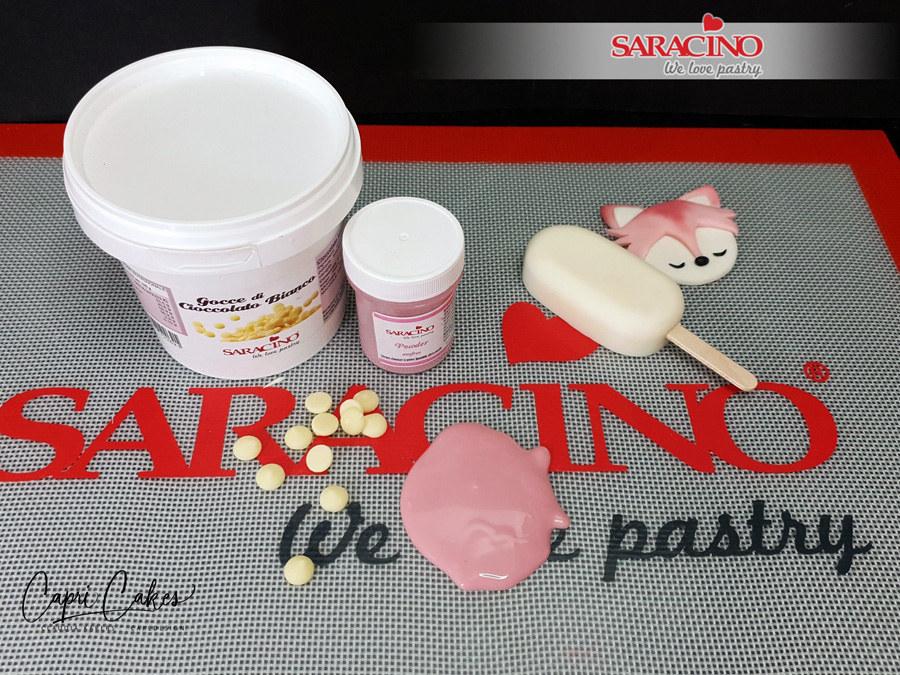
Using the Bain Marie technique melt the Saracino chocolate drops. Make sure everything is melted and has a temperature between 40 and 45 degrees. Check the temperature of the chocolate with a food thermometer. Pay attention! The temperature rises quickly. The bottom of the bowl should not touch the hot water. Make sure that no water gets into the chocolate.

Step 2

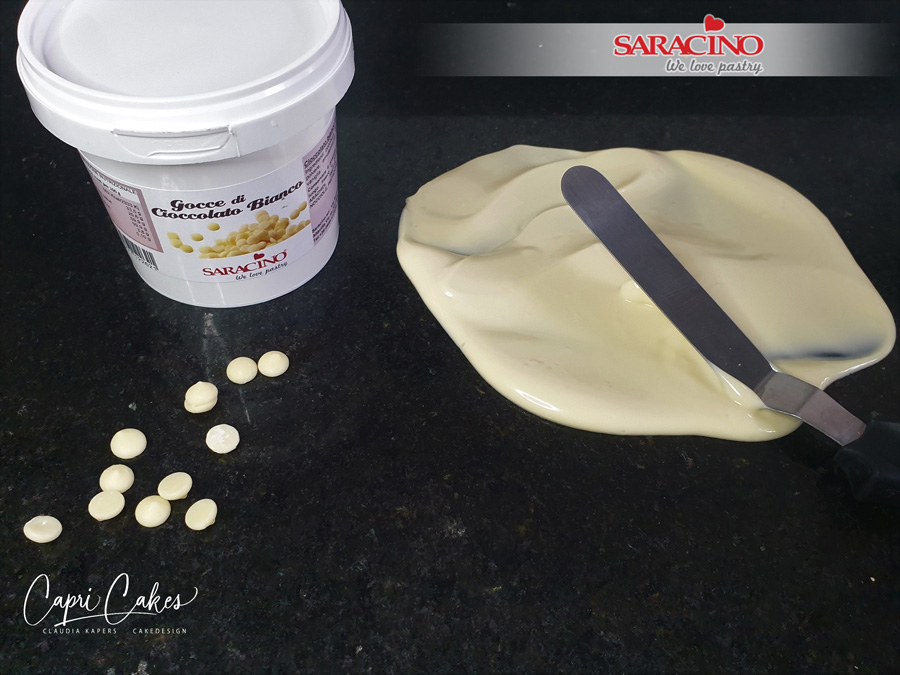
Now temper the melted chocolate. In this case, you are going to reduce the temperature of the melted white chocolate to 24 to 25 degrees. Do this by working with a pallet knife on a marble or natural stone surface. Use a food thermometer to check the temperature. When you have reached the temperature of 24 to 25 degrees, you heat the chocolate again to 27 to 28 degrees back in the bowl over the water. Pay attention! Tablating or tempering is a cooking technique in which melted chocolate is cooled back, so that crystals are formed in a certain way, which gives the chocolate a structure. This structure is obtained by heating the chocolate above 30°C, causing three of the four crystals to melt. Work meticulously with the temperatures for the best end result. This tutorial includes an overview of the temperatures for tempering white, milk and dark chocolate.

Step 3

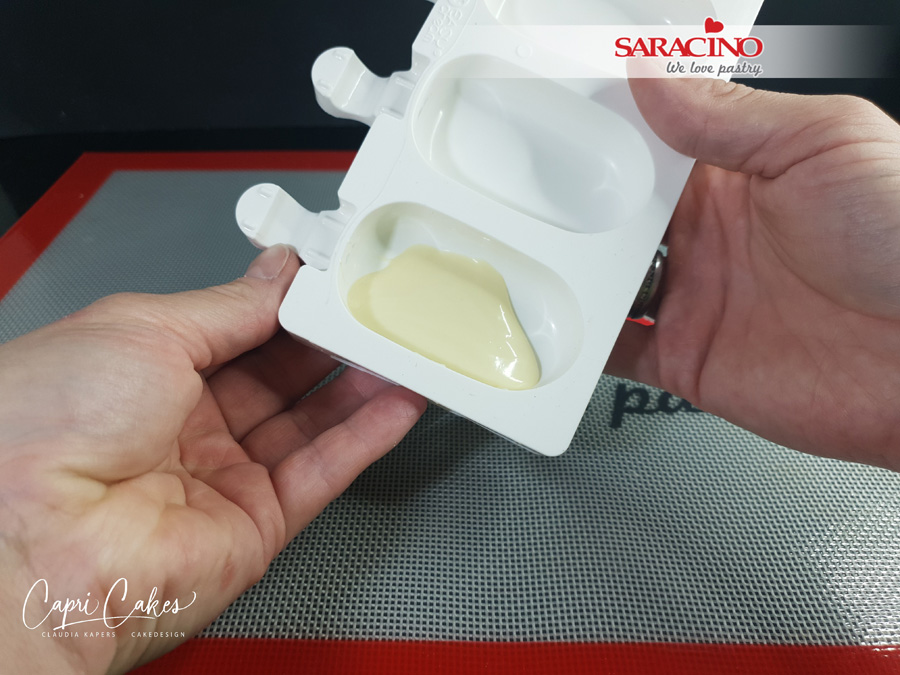
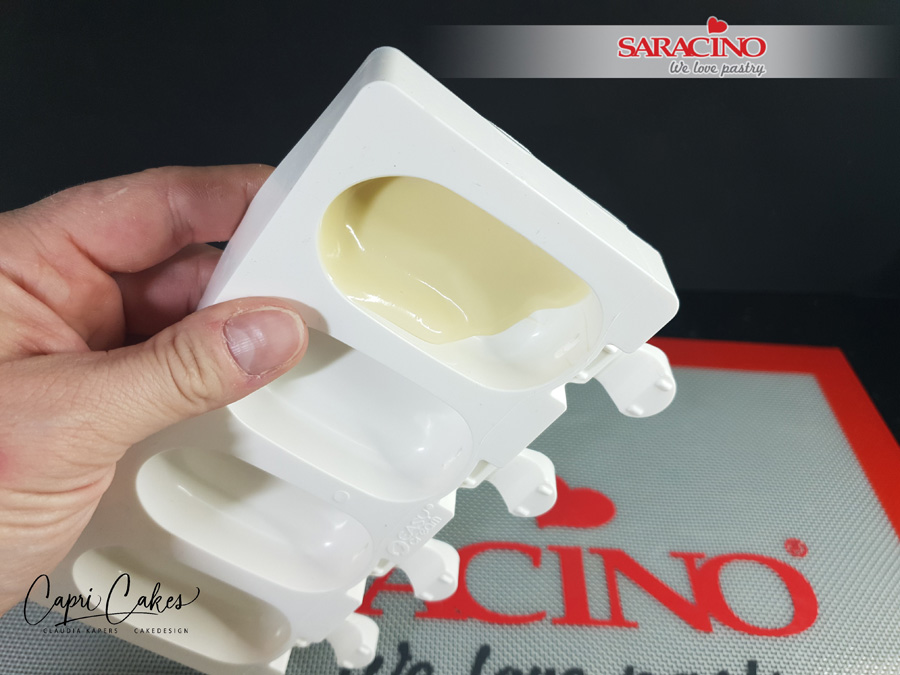
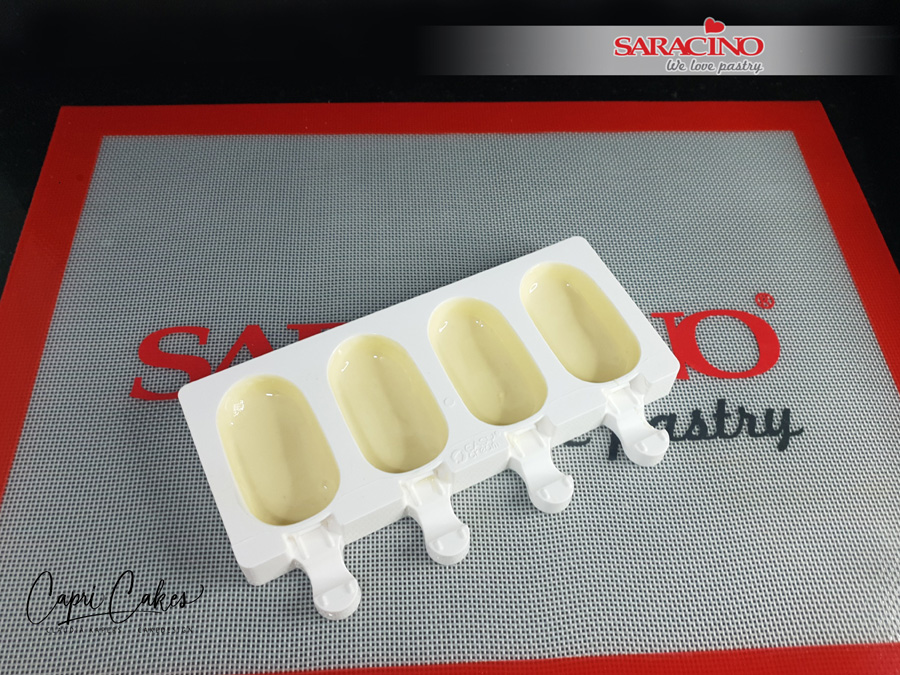
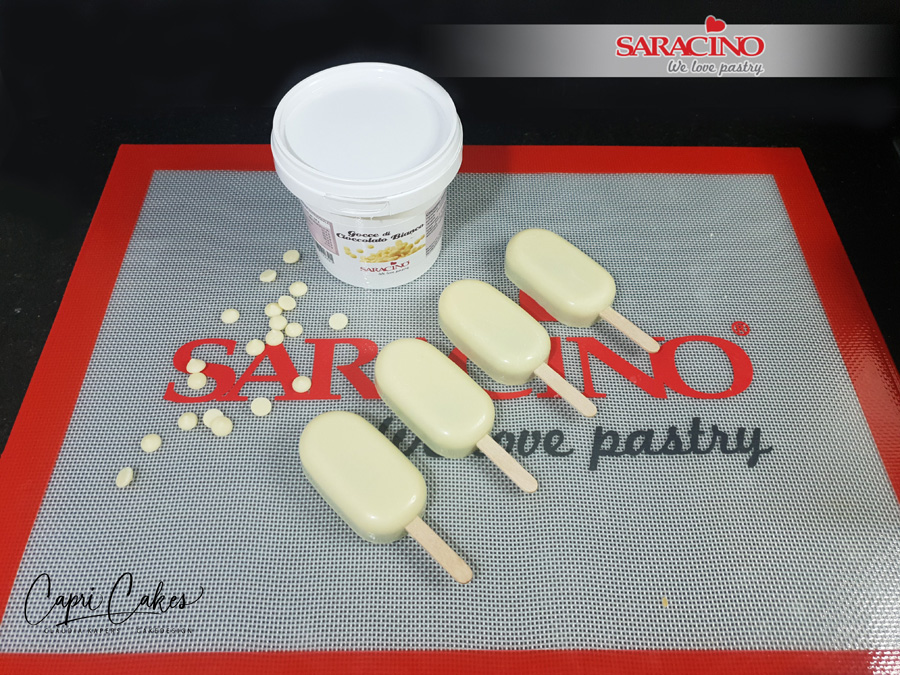
Take your silicone ice pop mould and pour a heaped tablespoon of melted chocolate into it. Turn the mould around in a controlled manner so that the chocolate runs along the edges of the mould.

Step 4

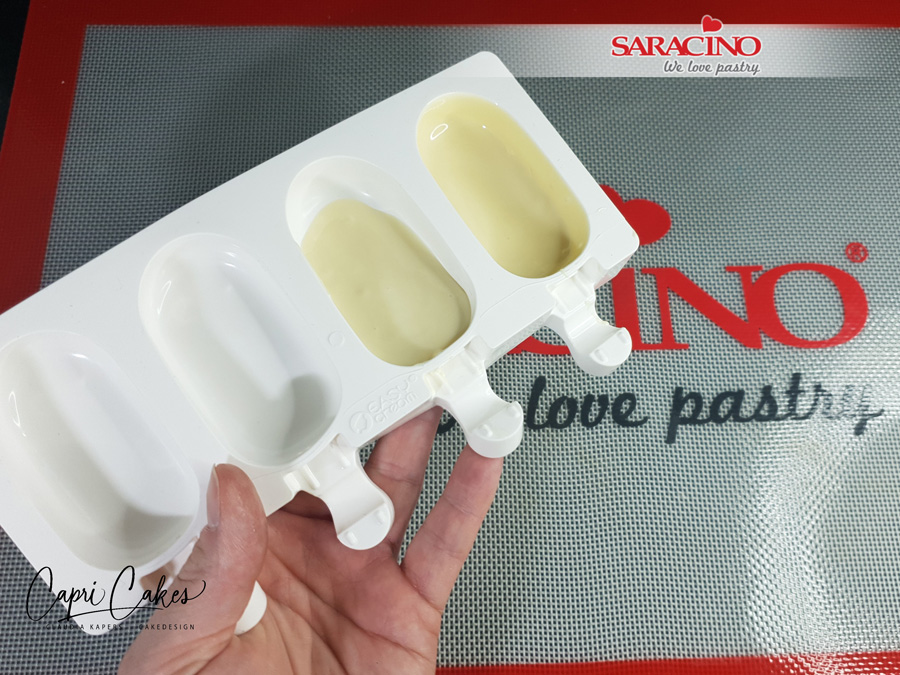
Make sure all sides of the mould are covered with chocolate to the edges.

Step 5

Repeat steps 3 and 4 for each section of the mould. For a nicer end result it is better to fill each part separately with chocolate. If you want the chocolate base to be a bit thicker, repeat steps 3 and 4 again for all 4 ice pop shapes.

Step 6

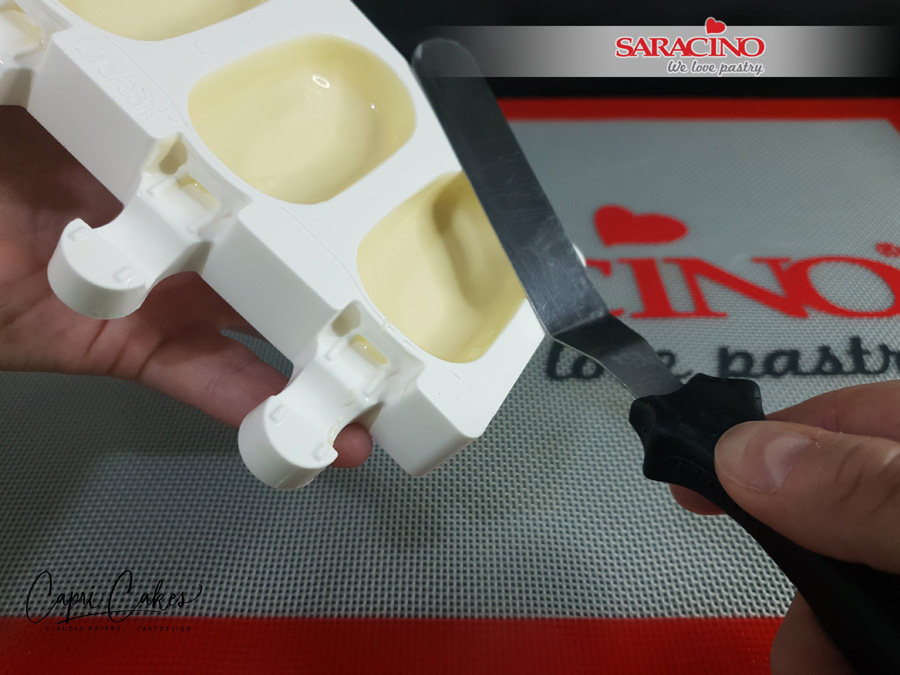
Remove excess chocolate with a pallet knife. Make sure the top edge is nice and smooth.

Step 7

Let the chocolate set in the mould at room temperature.

Step 8

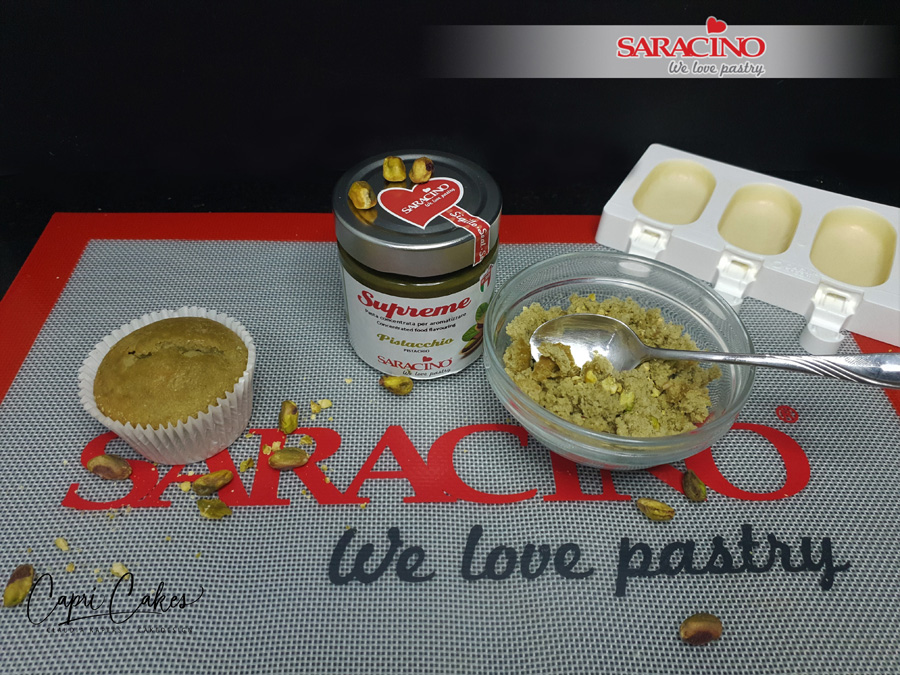
Bake pistachio cupcakes. Make cupcake batter according to the recipe. Add the Saracino pistachio flavouring in proportion to the batter. Bake the cupcakes. Let them cool and crumble 3 cupcakes into a bowl. For 4 cake pop ice creams, take 3 cupcakes made of 35g batter each.

Finely chop pistachio nuts as desired and mix with the crumbs.

Tip: You can play with the flavours. Saracino have 15 to choose from!

Step 9

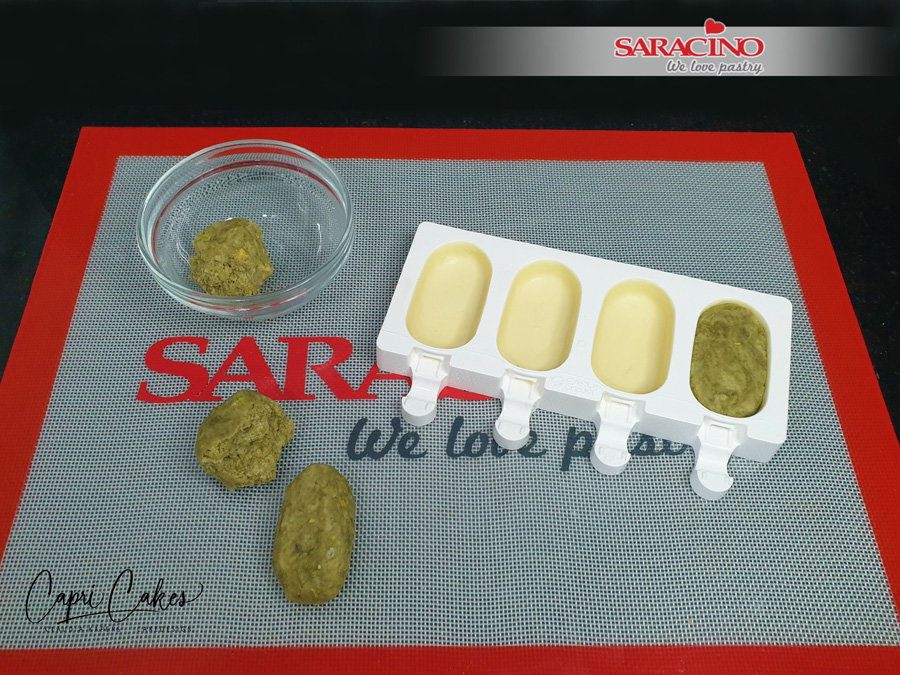
To achieve a nice workable filling, add 1 tablespoon of Italian Meringue Buttercream or white ganache to the pistachio crumbs. Knead everything well together and divide into 4 equal portions.

Step 10

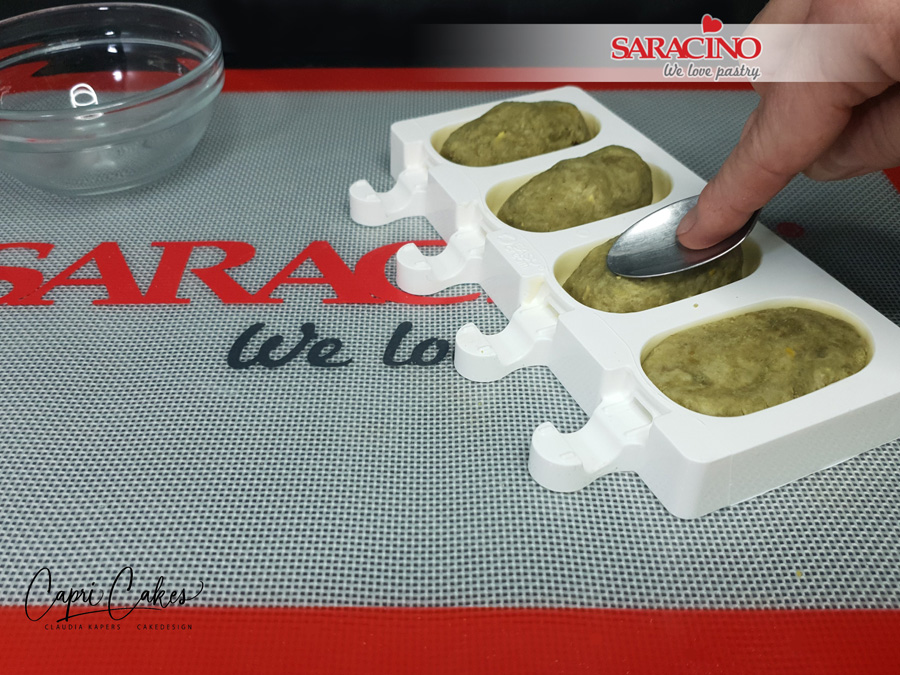
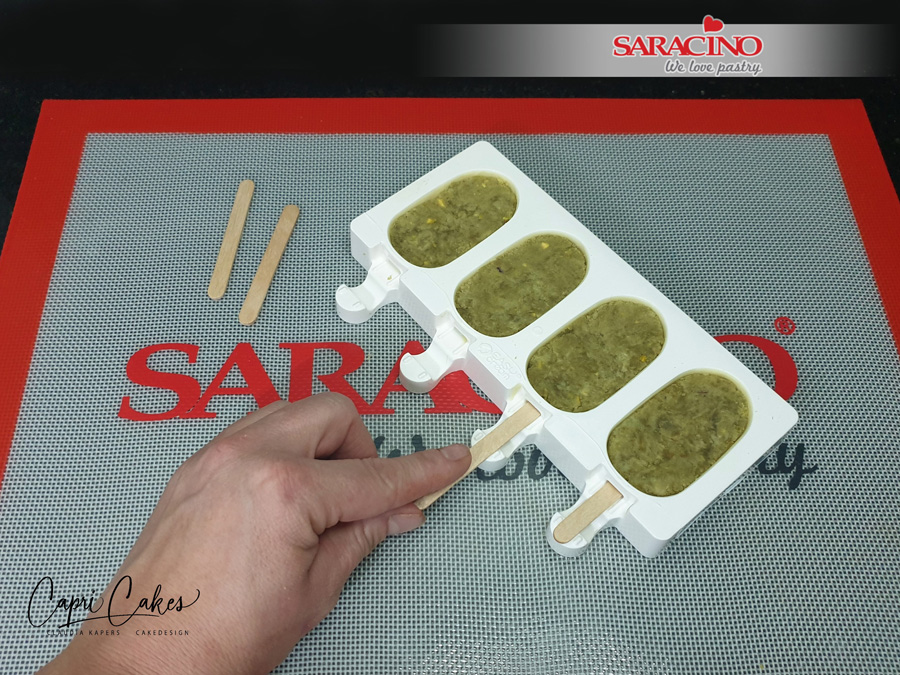
Using a spoon, gently press the cake mixture into the mould.

Step 11

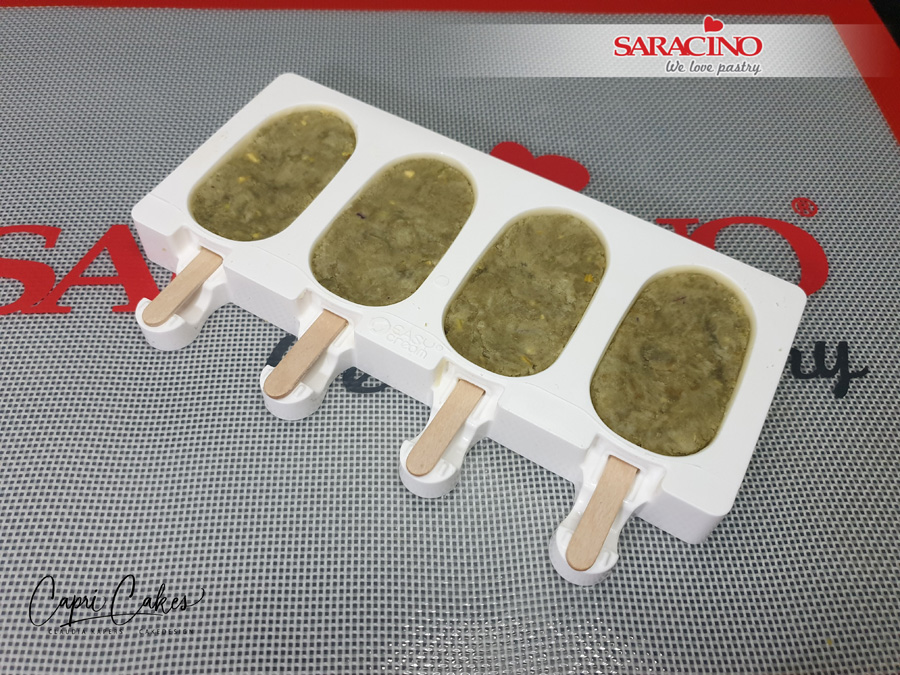
Carefully slide the sticks into the cake pop through the hole in the mould.

Step 12

Make sure the cake is not above the top surface of the mould and that the top of the cake pop is as smooth as possible.

Step 13

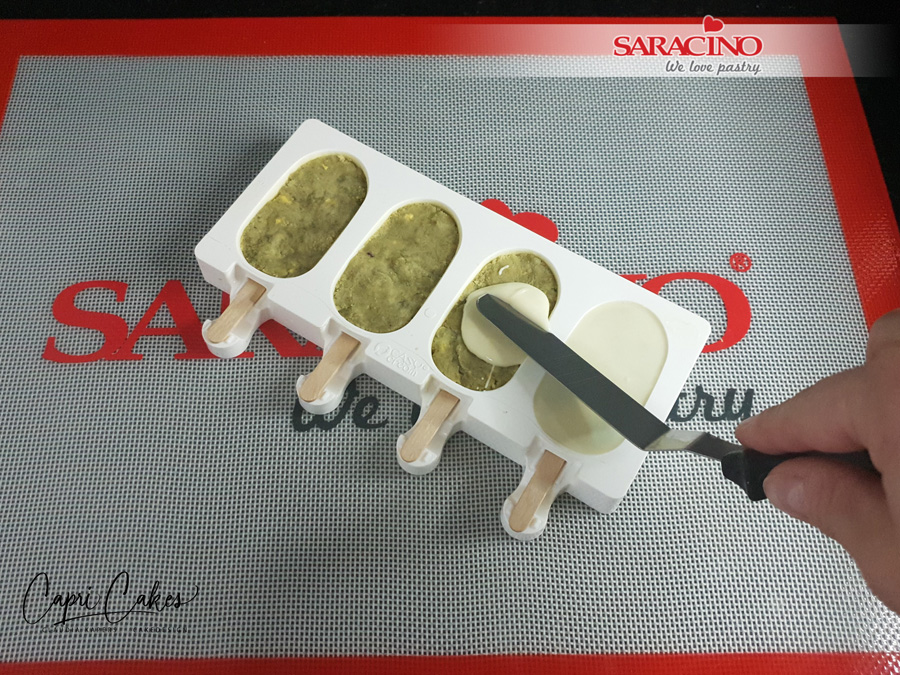
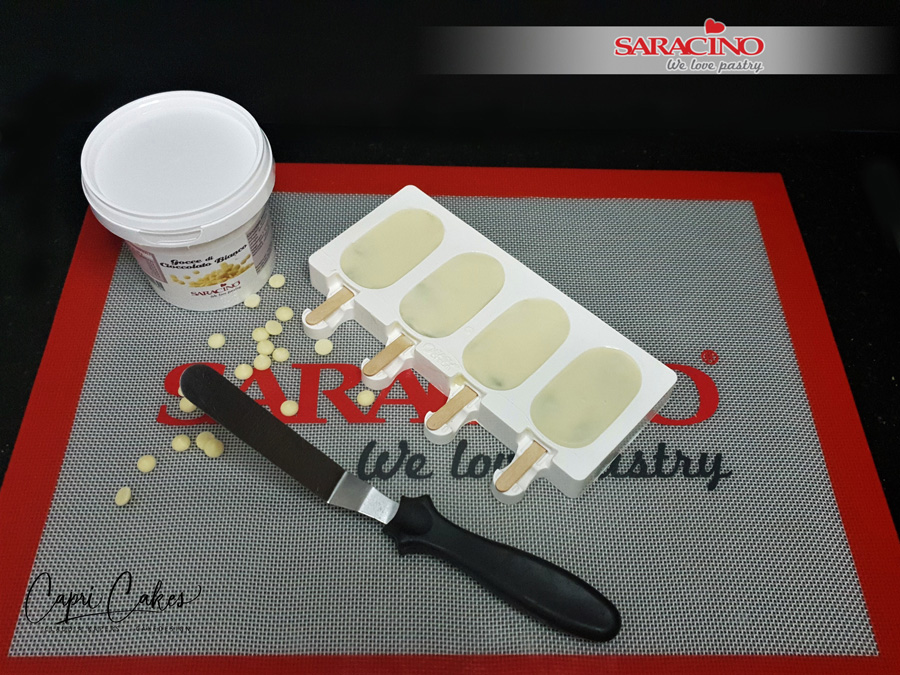
Temper a small amount of white chocolate and cover the top. Smooth with a palette knife and remove any excess chocolate.

Step 14

Let the chocolate set at room temperature.

Step 15

When everything is set, remove the cake pop ice creams from the silicone mould.

TIP: You can put the mould in the freezer for 5 minutes before removing the cake pops.

Step 16

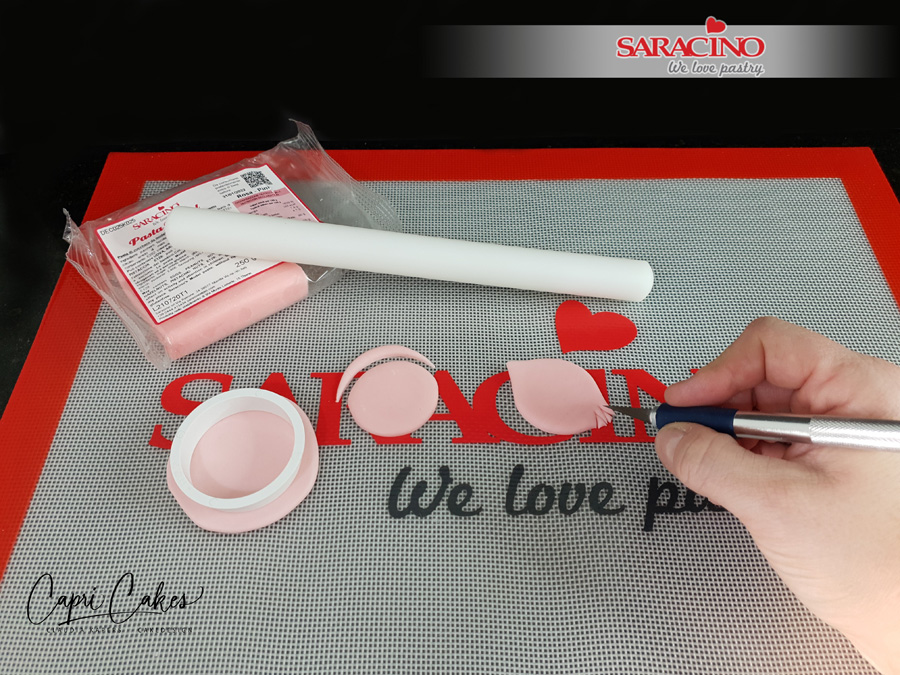
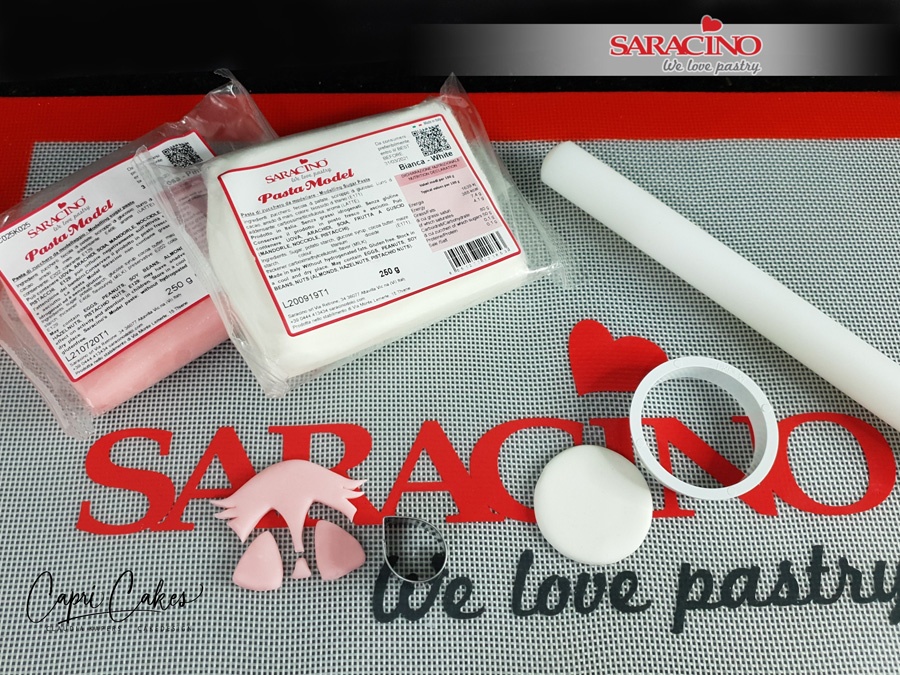
Take a 20 x 25 mm leaf cutter and cut out the shape for the forehead. Use a sharp knife to form the side hair. Keep these cut-out parts. 

Step 17

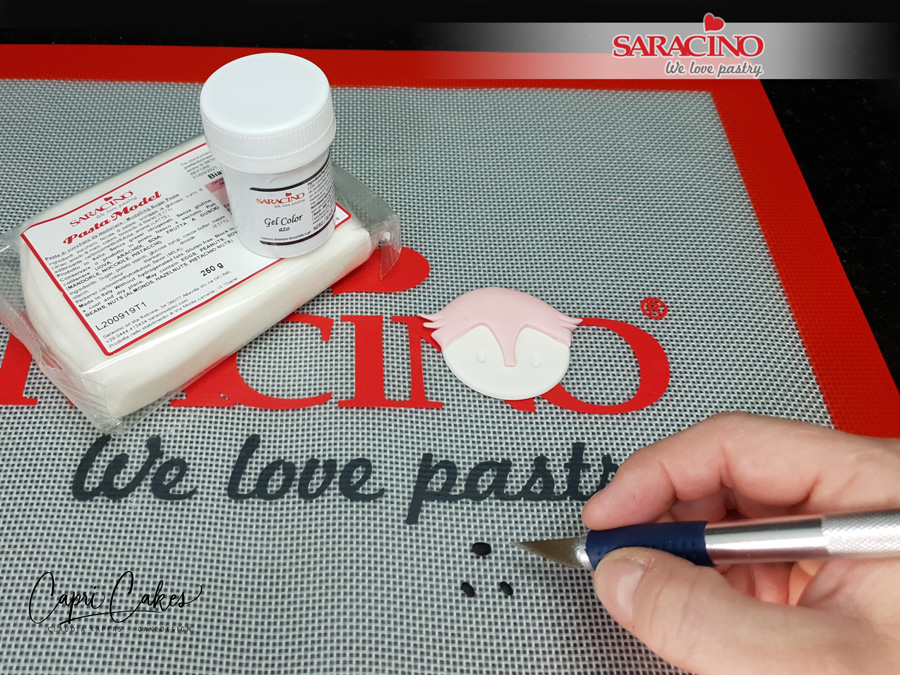
Shorten the area for the nose by a few millimetres. Take 30g of white Pasta Model. Roll out to 2mm thick and cut out a circle with the cutter and stick the pink part on top with cake gel.

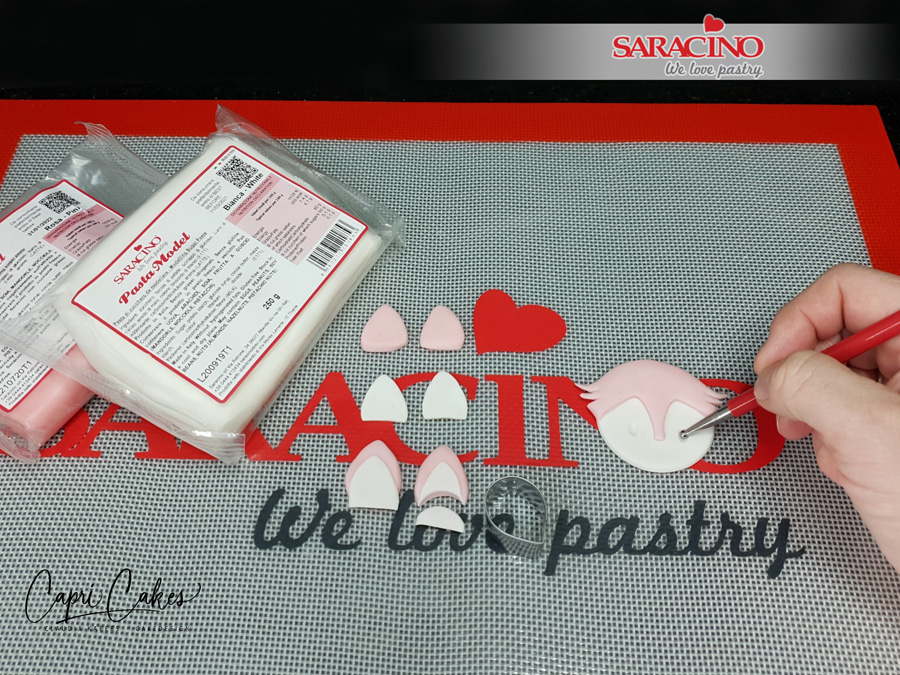
Step 18

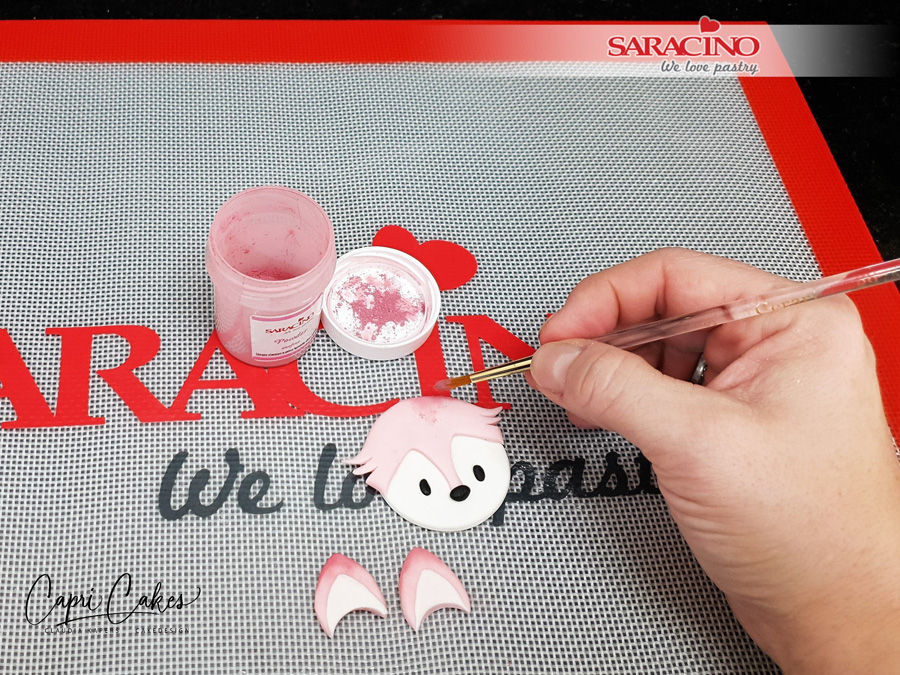
Use the pink drop shapes previously cut out to make ears. Roll out a small amount of white Pasta Model thinly and cut out two drop shapes with the leaf cutter. Stick them on the pink part and round off the bottom. Also use the leaf cutter for this. Using your ball tool make two indents in the head where the eyes will be

Step 19

Colour a small amount of white Pasta Model with the black gel colour. Roll two oval balls of 3mm in size for the eyes and one oval ball of 5mm for the nose. Place on the face. Use cake gel to fix.

TIP: You can also use the pre-coloured Pasta Model Black.

Step 20

Dust the tips of the ears and the top of the head with the pink dust powder.

Step 21

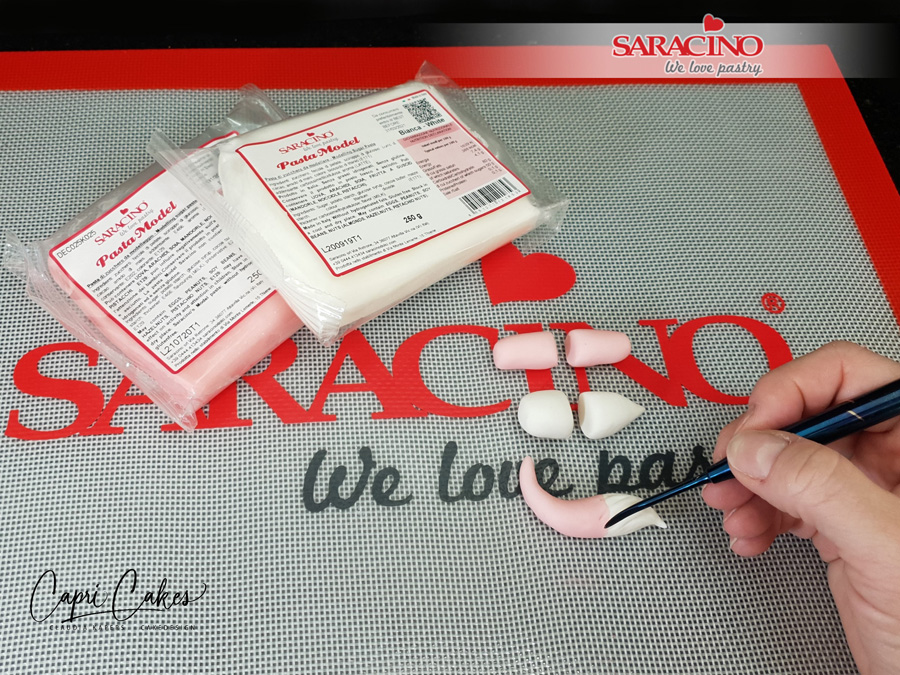
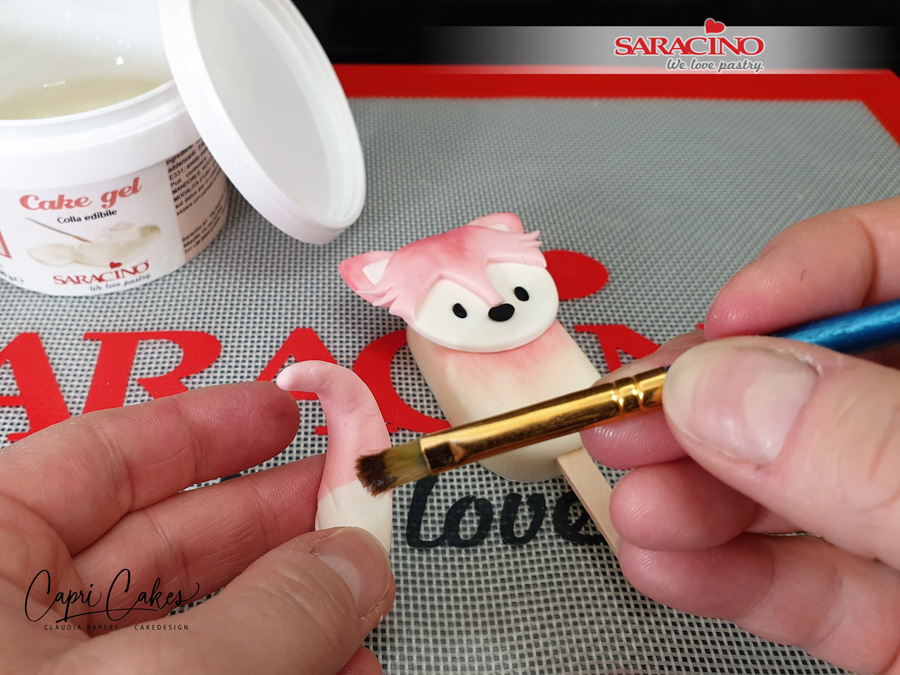
For the tail take 10g of pink Pasta Model and roll into a sausage shape. Cut into 2 equal parts. Repeat this step with 10g of white Pasta Model. Stick a pink and white part together with cake gel to form a tail. Leave the white end part a little bit thicker. Use the Dresden tool to add texture to the tail.

Step 22

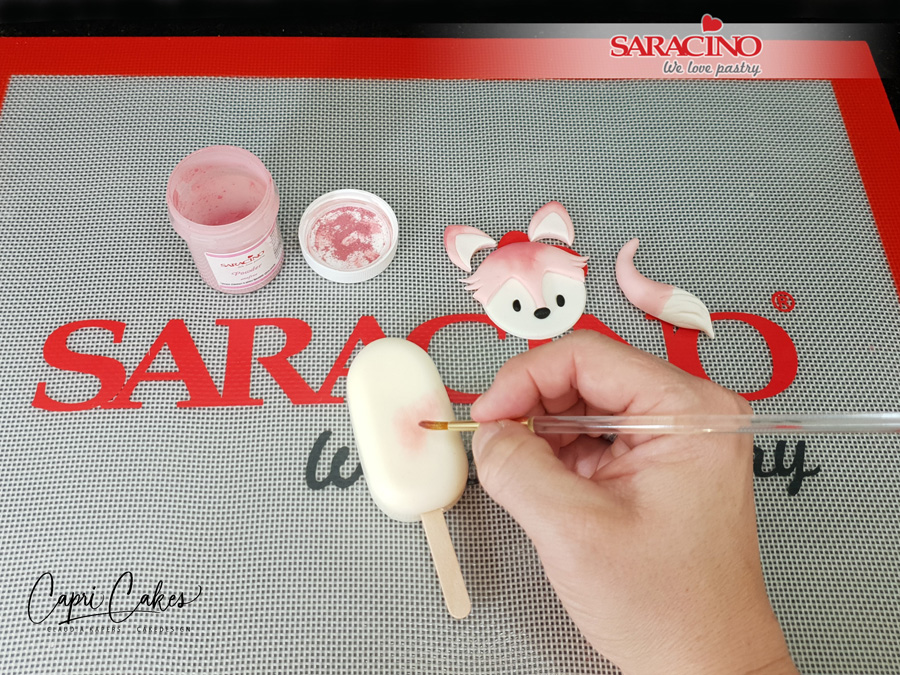
Dust the middle part of the cake pop ice cream with pink dust powder. Dust so darker in the middle getting lighter outwards.

Step 23

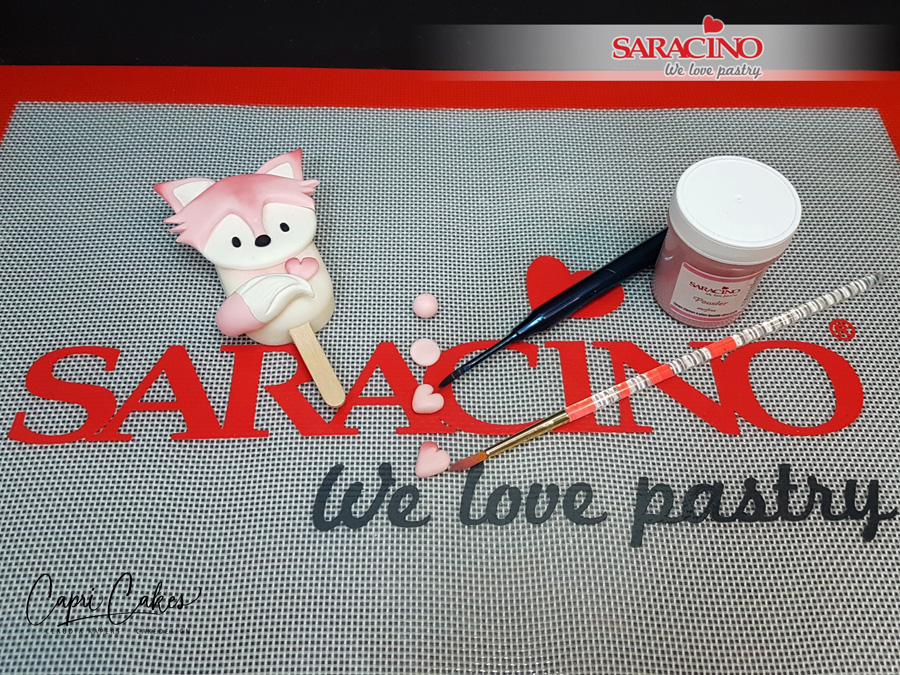
Attach the head and tail to the cake pop ice cream with cake gel. Do not use too much cake gel! You can also attach the parts with melted chocolate.

Step 24

For the heart you will need a small ball of pink Pasta Model. Flatten with your finger and form a notch on one side with a Dresden tool. With your fingers make a point on the other side. Dust the top with pink dust powder.

Step 25

To decorate your cake pop ice cream with chocolate, melt a small amount of white chocolate. While heating, add pink dust powder until you reach the desired colour. Temper the chocolate as shown previously.

Put the chocolate into a piping bag with a small piping nozzle. Pipe lines over the bottom part of the cake pops. Decorate immediately with sprinkles.

Step 26

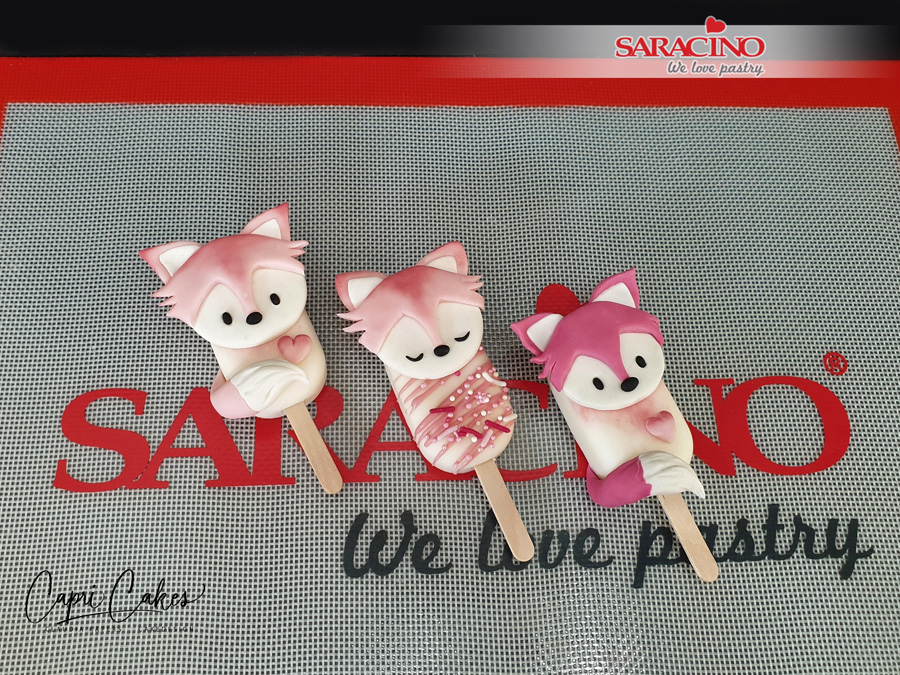
Vary with different looks. Use your imagination!

Use colours you want to achieve the look you love.