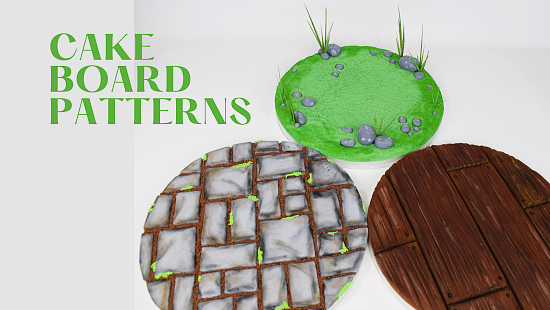
CAKE BOARD PATTERNS

CAKE BOARD PATTERNS

Skill level: BEGINNERS

You will need:

GRASS BOARD

  • 375g Pasta Top coloured green

  • 75g Pasta top coloured grey

  • Saracino gel colour – yellow, green, blue, black

  • Saracino powder colour – green, white, brown

PAVING

  • 375g Pasta Top coloured grey

  • 20g Pasta Top coloured green

  • 3 Bourbon biscuits

  • Saracino gel colours – black, green, yellow

  • Saracino powder colour – black, brown

WOOD

  • 375g Pasta Top coloured grey

  • 5g Black Pasta Model

  • Saracino powder colour – black, brown


Equipment

  • 1 sheet Saracino wafer paper 0.27g
  • 10 inch round cake drum
  • Knife
  • Cocktail sticks
  • Dresden tool
  • Flat angled paintbrushes for dusting.
  • Small paintbrush for gluing
  • Cool boiled water / edible glue
  • Balling tool (Cerart K500)
  • Star piping tip
  • Grease proof paper
  • Scissors
  • Rolling pin
  • Sieve
  • Spoon


Step 1

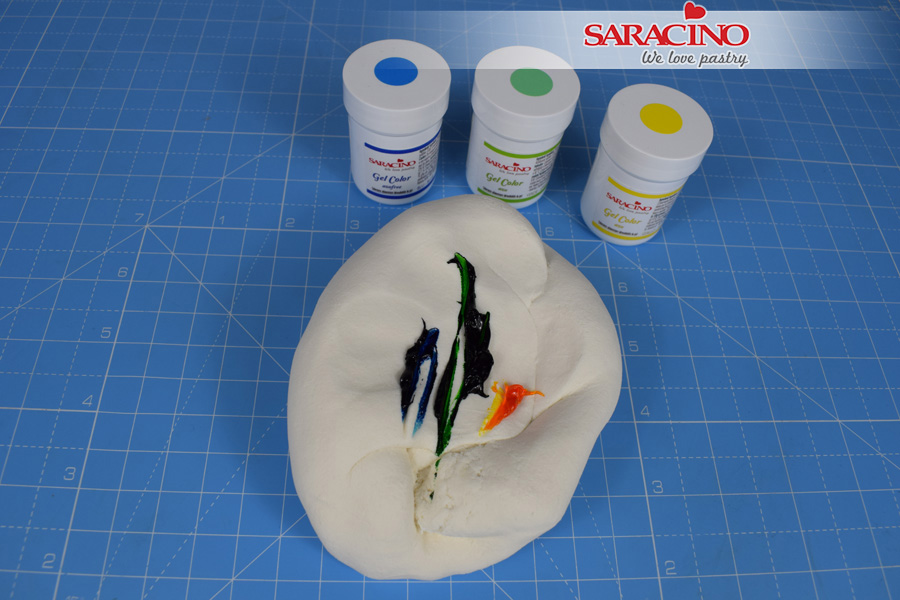
GRASS: Using a small amount of yellow, green and blue gel, colour 375g of pasta top green. Knead the paste until the colour is fairly uniform throughout.
Step 2

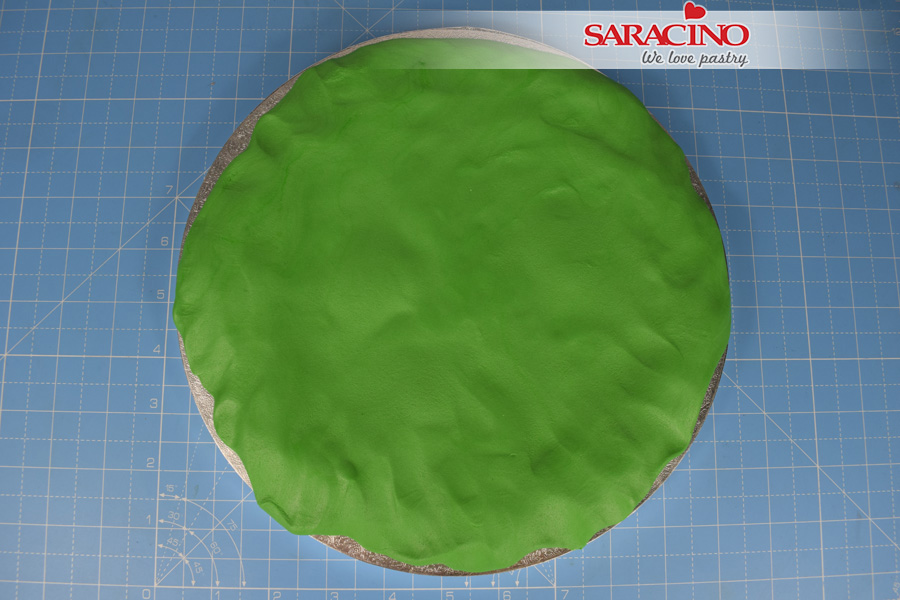
Place the paste on the centre of the board. Using your fingers, stretch and push out the paste so that it is thicker around the edge of the board and fairly flat in the centre where your cake will sit. 
Step 3

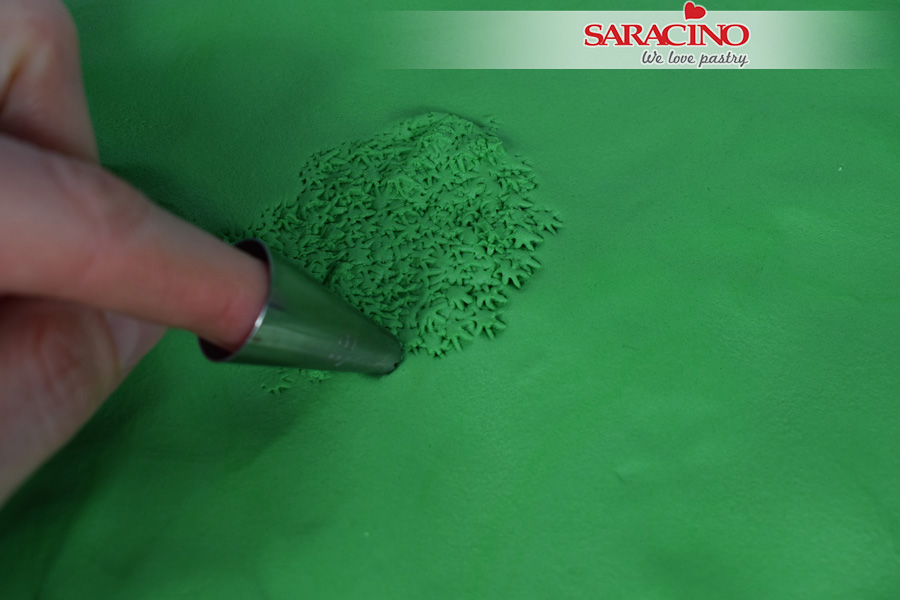
Take a star piping tip and gently begin to push into the paste repeatedly to texture the grass.
Step 4

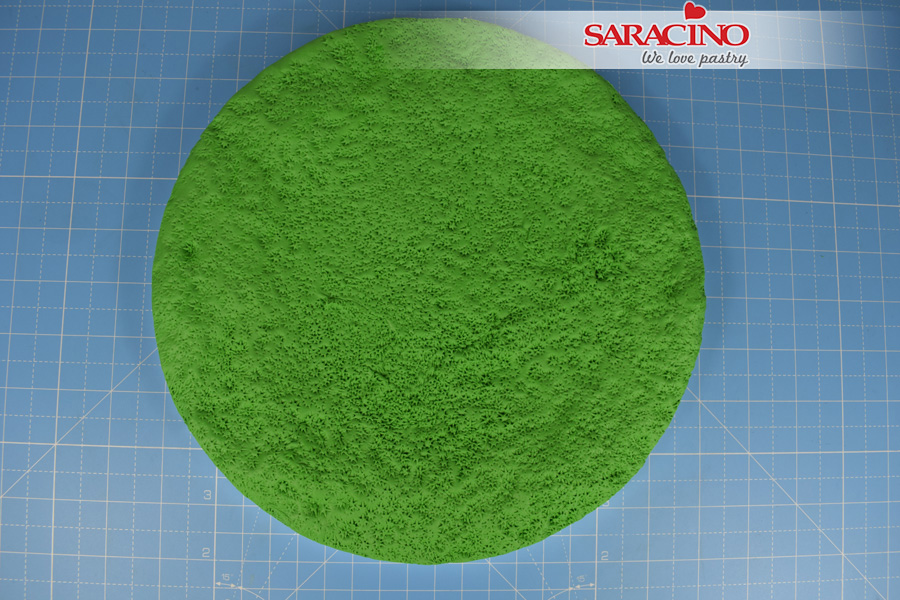
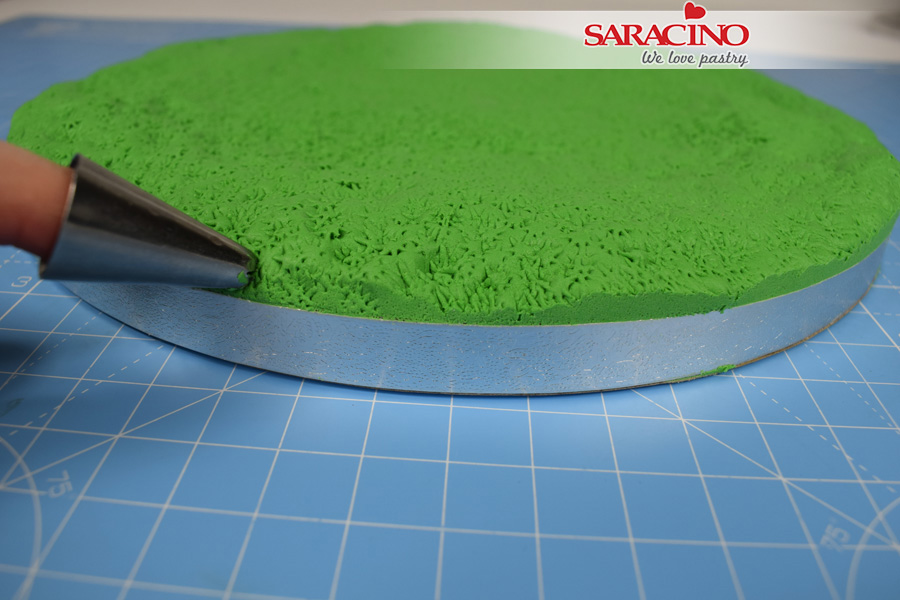
Continue until the whole board is covered. Trim the excess paste from around the edge with a sharp knife.
Step 5

Texture the cut edge with the piping tip.
Step 6

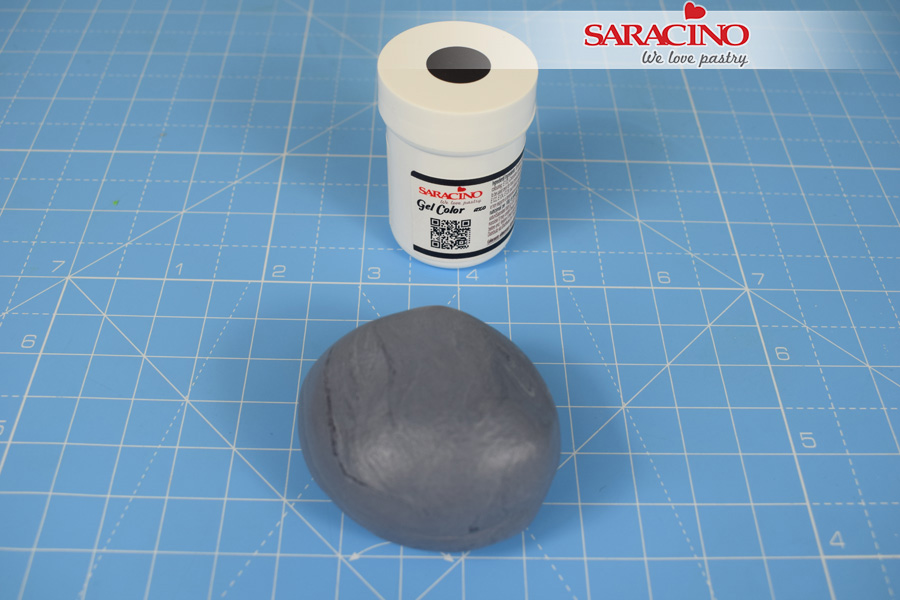
Colour 75g of pasta top with some black gel colour to create a dark grey.
Step 7

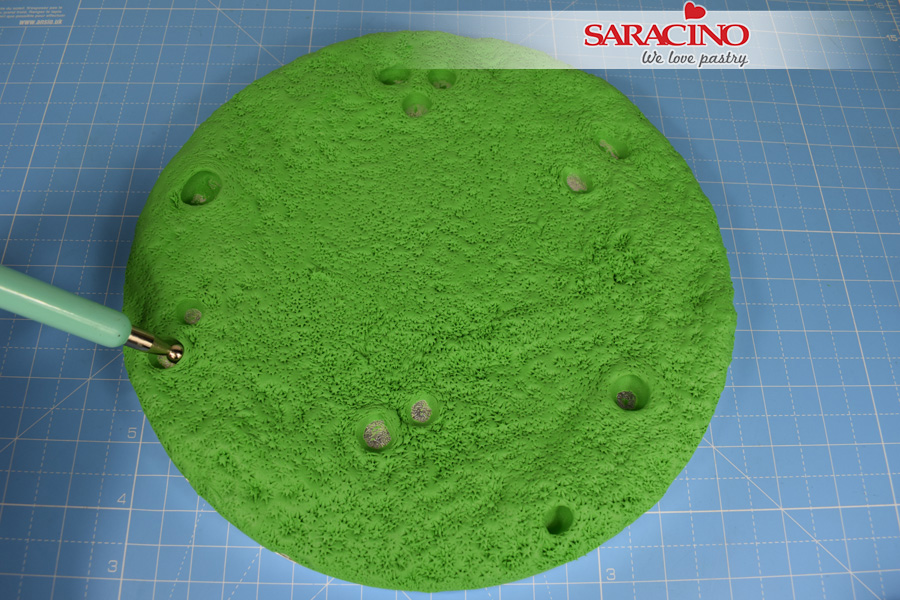
Use the end of the balling tool to create random holes in the paste around the edge of the board.
Step 8

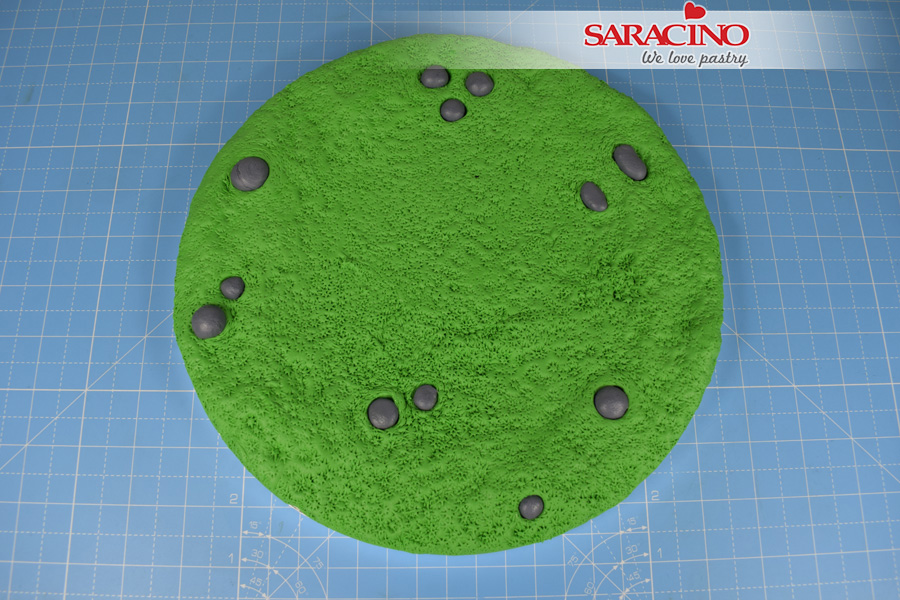
Roll small balls of grey paste and with a small amount of water stick into the holes.
Step 9

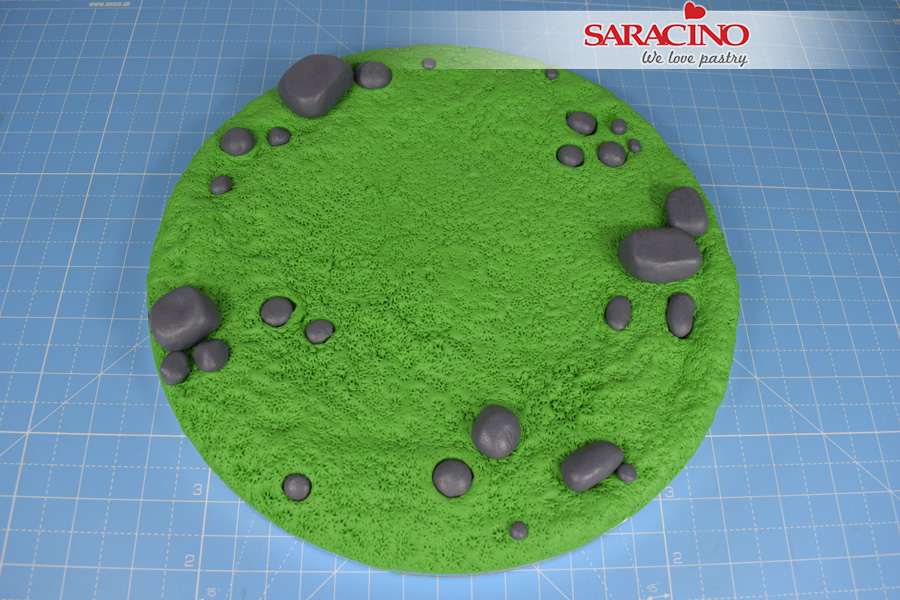
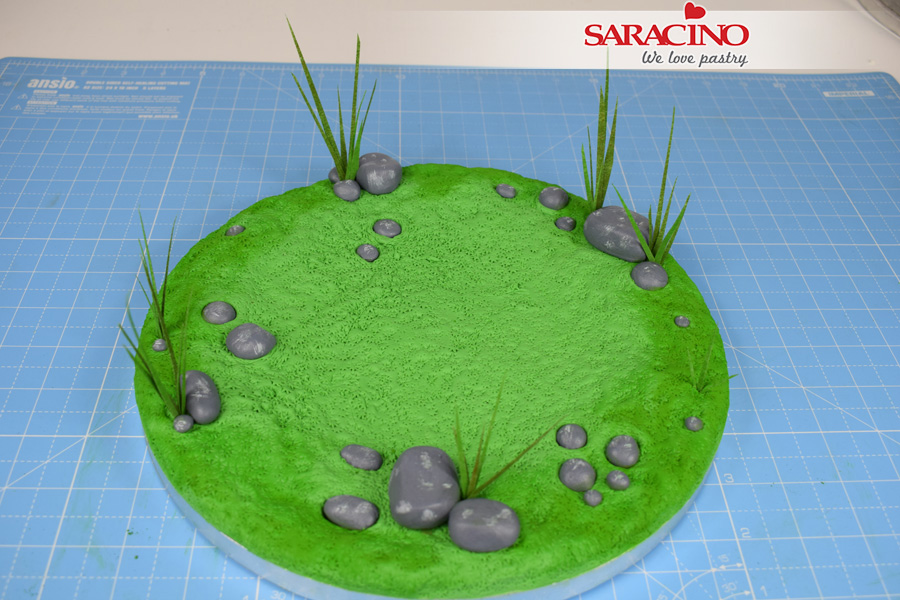
Use the remaining grey paste to make stones to sit on the surface of the board. Group the larger ones together and dot tiny ones at random places.
Step 10

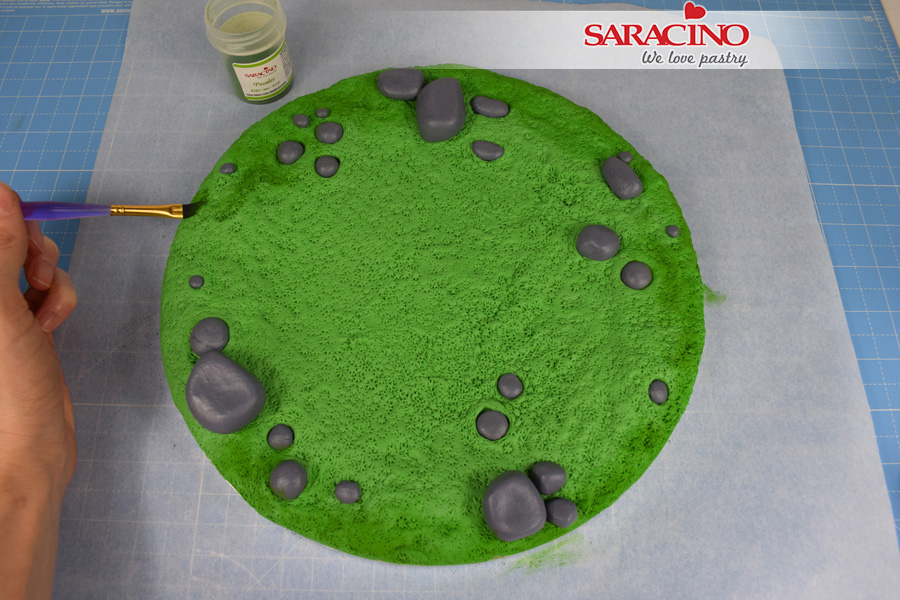
Using a flat angled paintbrush apply some green dust around the edge of the board.
Step 11

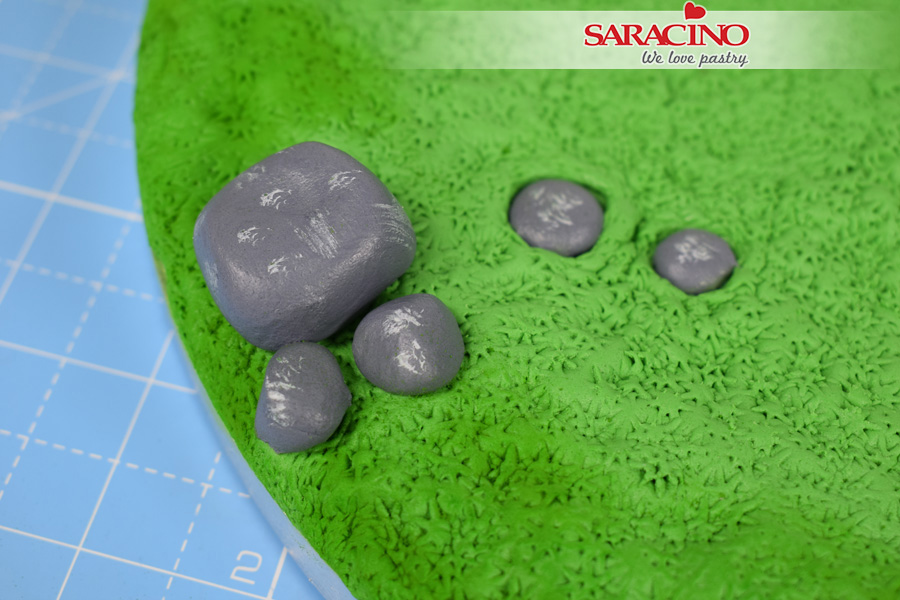
Mix a small amount of white dust with a couple of drops of water. Paint white flecks onto the surface of the stones.
Step 12

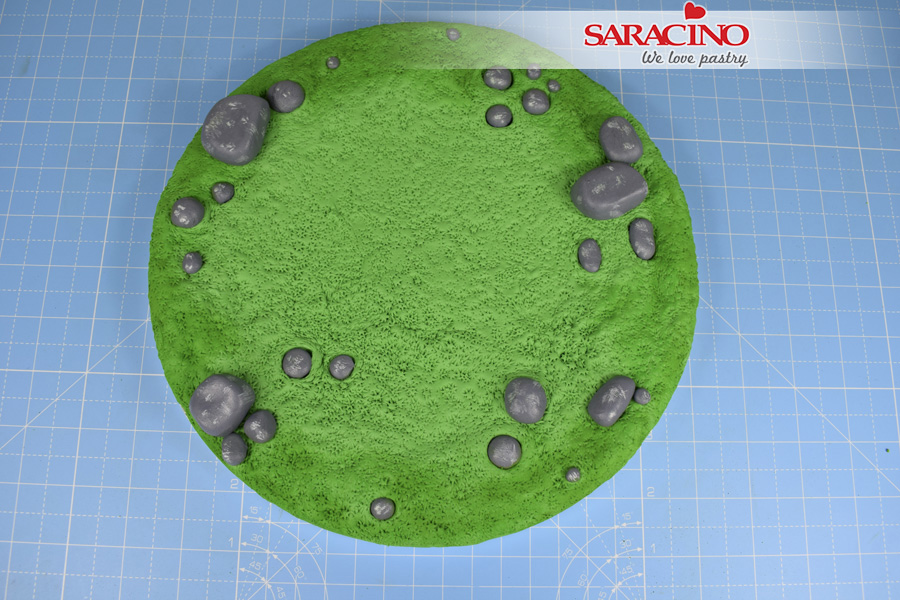
Continue until all the stones are painted.
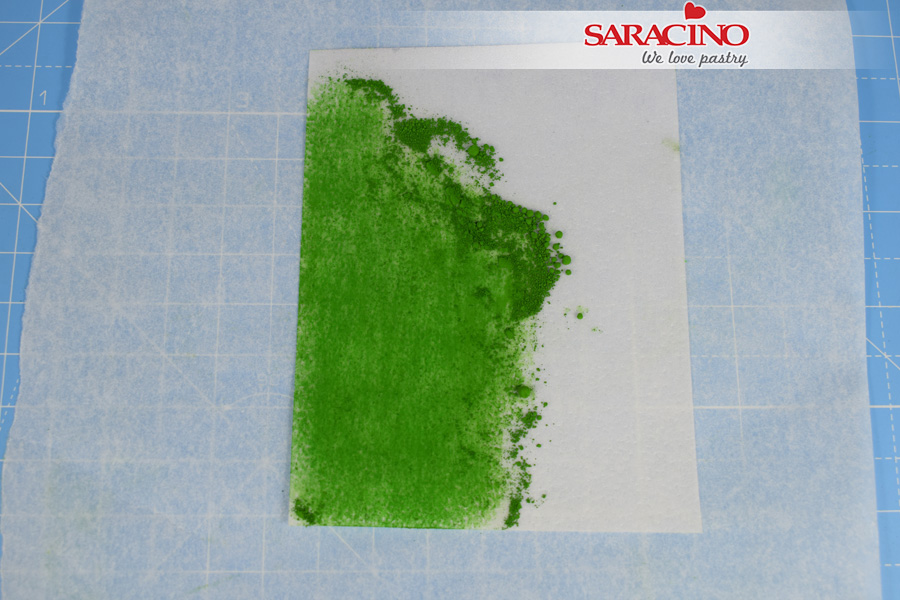
Step 13

Lay a small square of wafer paper onto a piece of greaseproof paper. Use your finger to rub green dust into the surface of the paper. Turn the paper over and repeat on both sides.
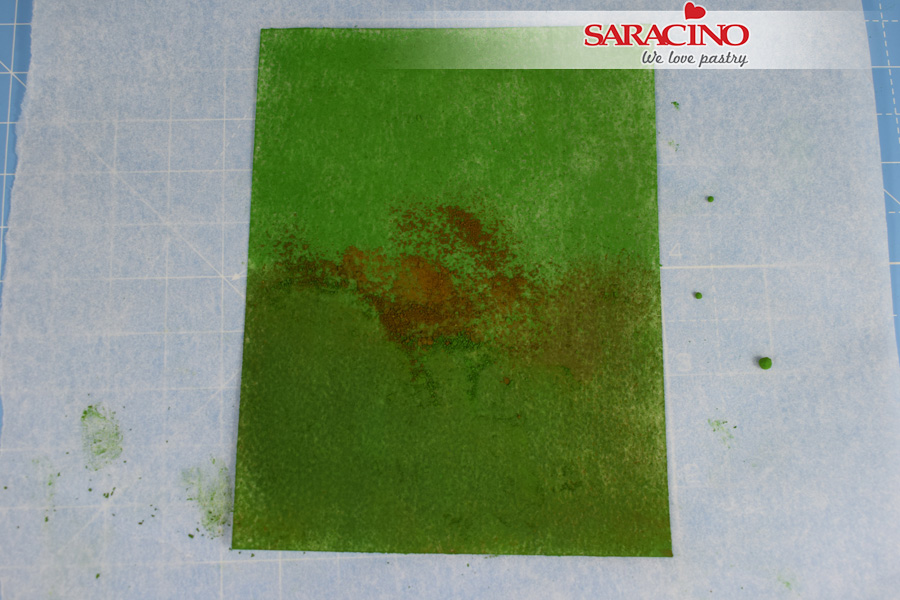
Step 14

Once the paper has been coloured green, take a small amount of brown dust and colour one side to create a darker shade of green.
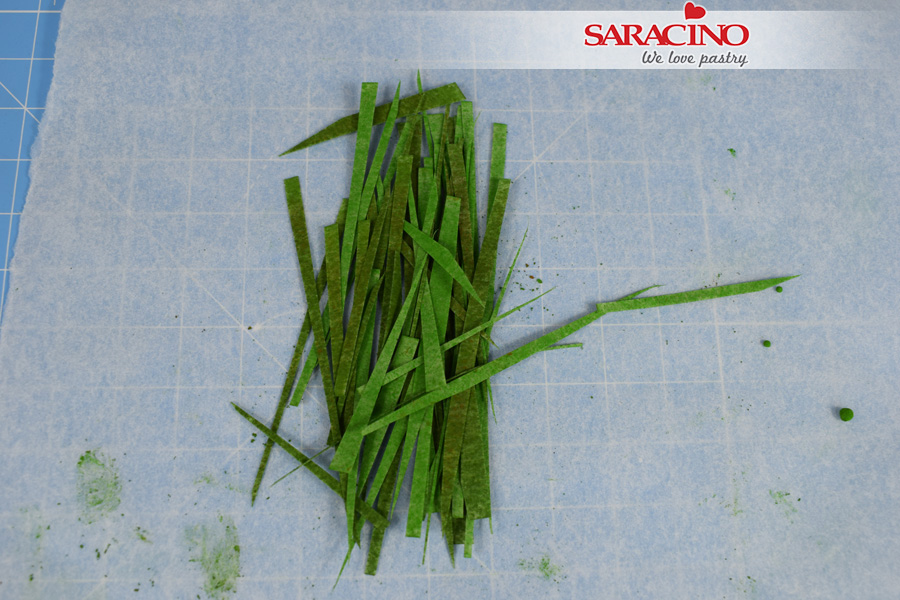
Step 15

Use a pair of scissors to snip the paper into blades of grass.
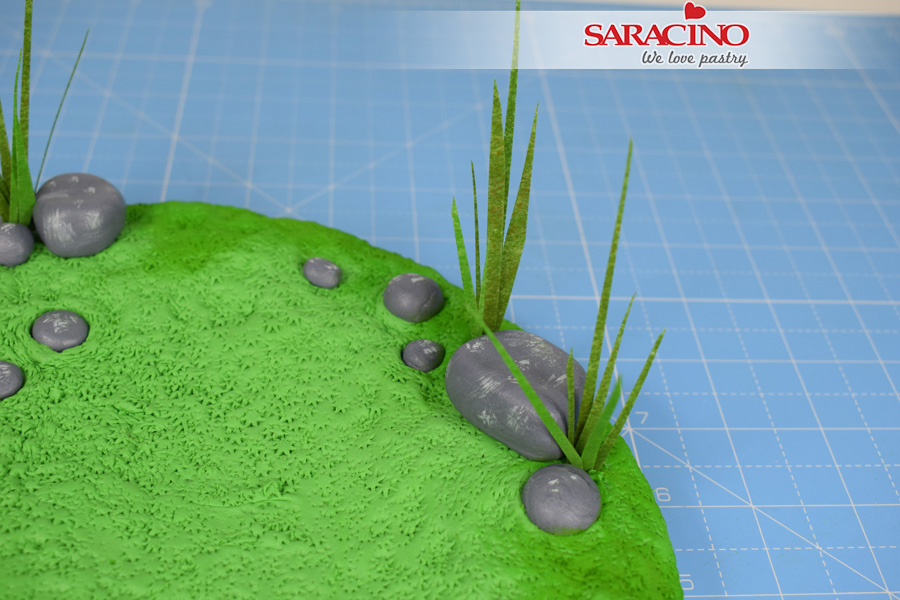
Step 16

Use the wide end of the Dresden tool to poke a hole in the paste either side of the large rocks. Apply a small amount of water to the hole. Bundle together small groups of grass and stick in the hole. Push the paste back together to hold the blades in place.
Step 17

Repeat at random places across the board until you’re happy.
Step 1

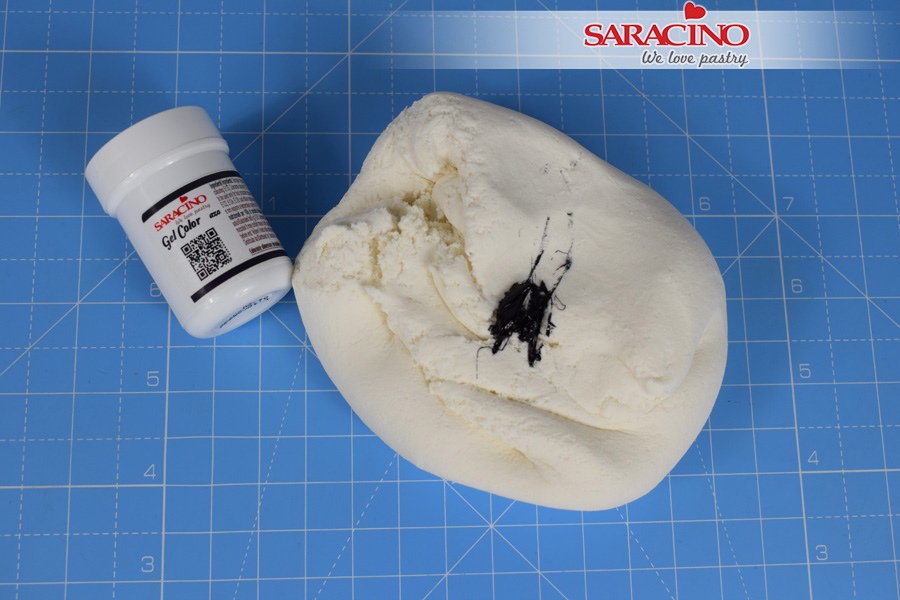
PAVING: Using a small amount of black gel, colour 375g of Pasta Top light grey. Knead the paste until the colour is fairly uniform throughout.
Step 2

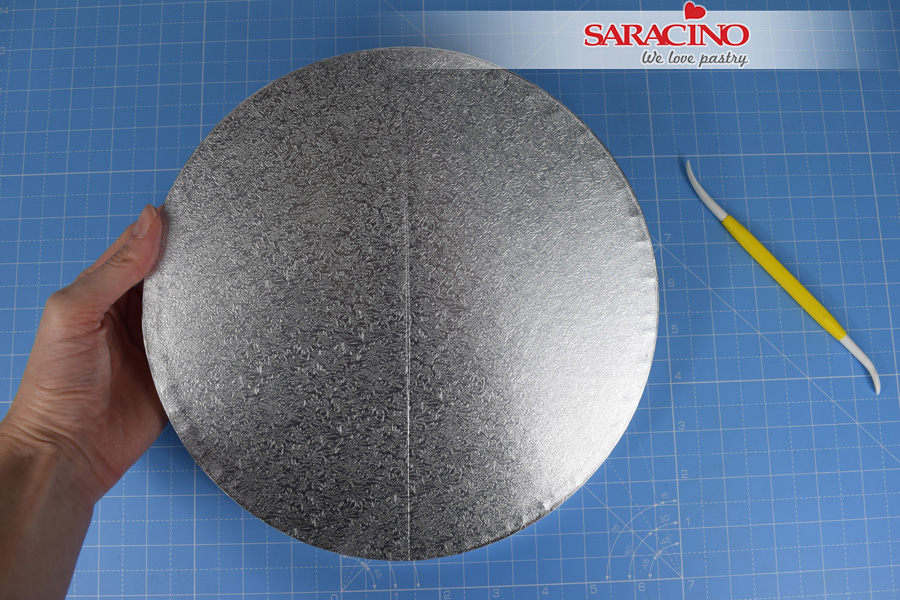
With the pointed end of the Dresden tool, gently score a line down the centre of the board.
 

Step 3

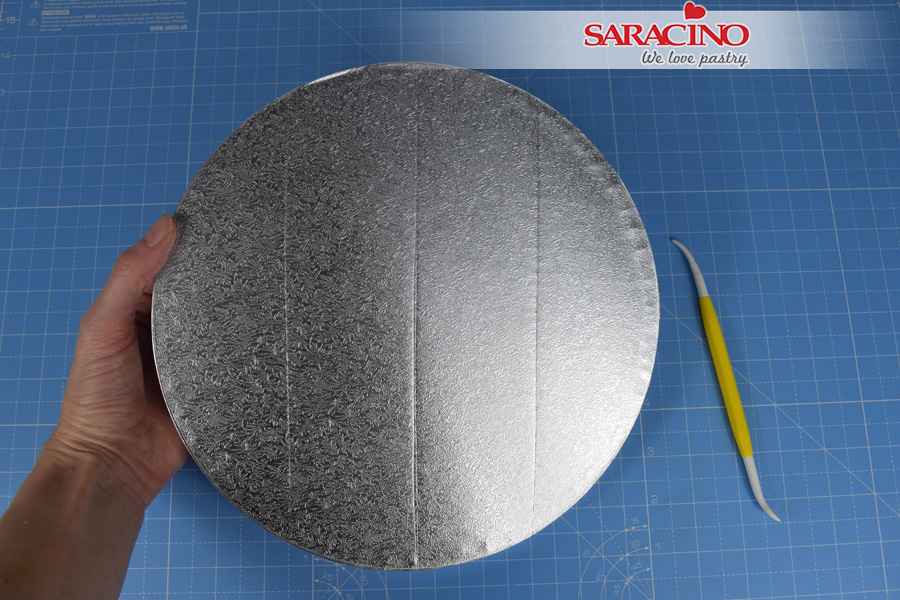
Score two more lines dividing the board roughly into quarters.
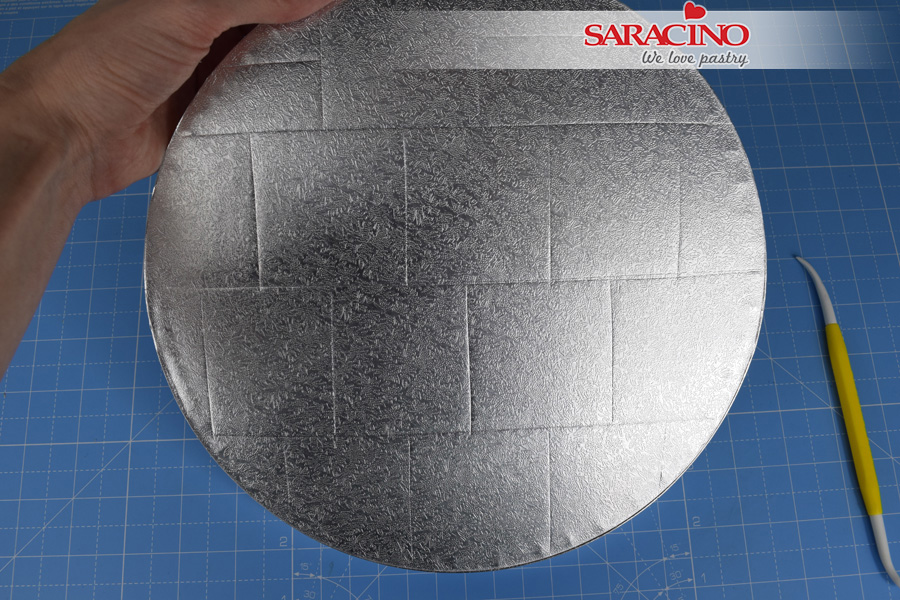
Step 4

Score lines dividing the strips into rough squares, staggered in a brick pattern.
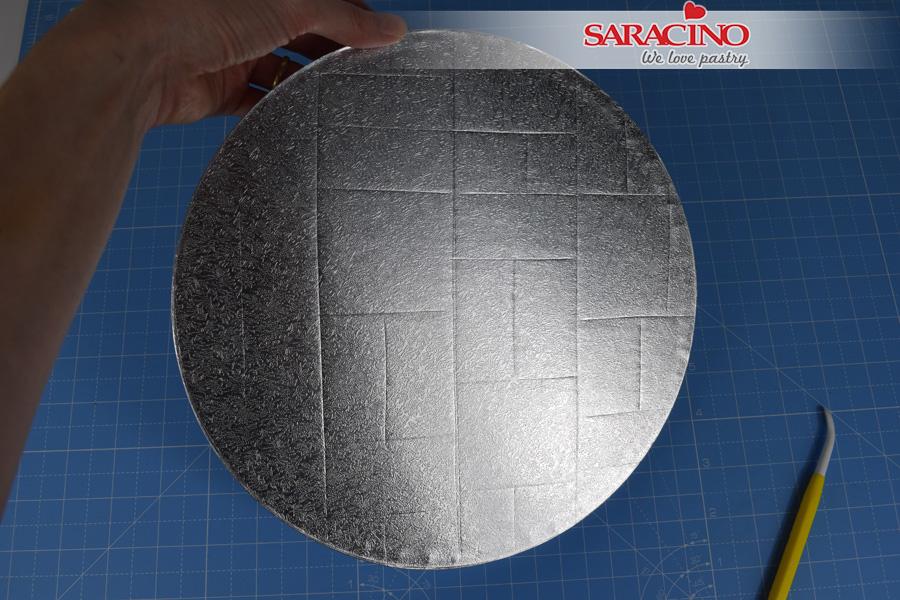
Step 5

Score lines dividing random squares into smaller rectangles and squares. Don’t worry if they’re not perfect, you can change any as you go along later on.
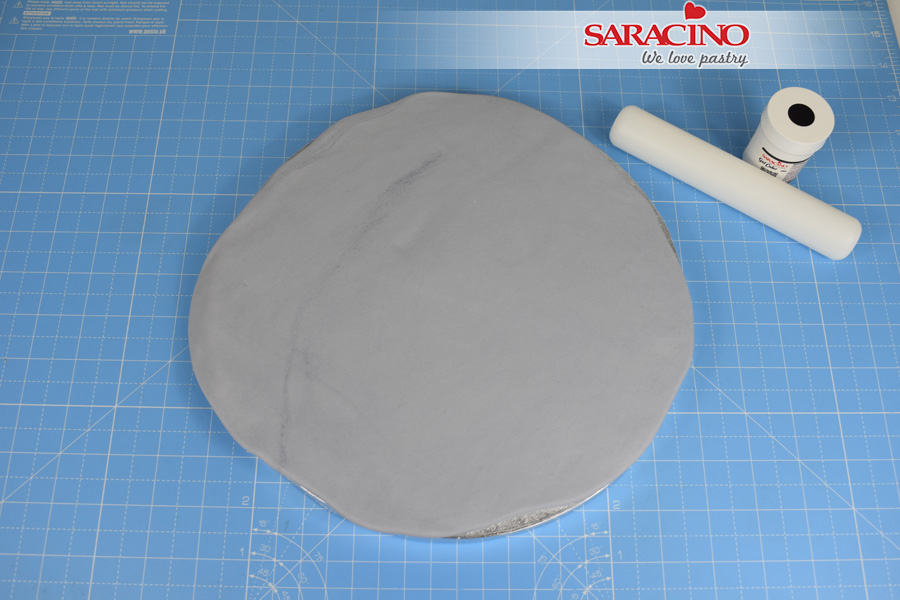
Step 6

Roll out the paste to a thickness of around 5mm until it roughly covers the board.
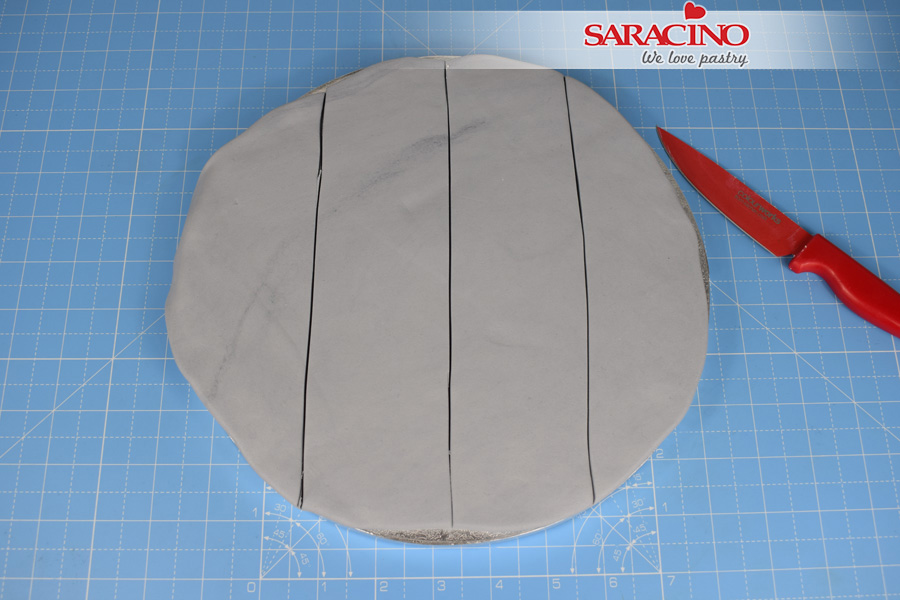
Step 7

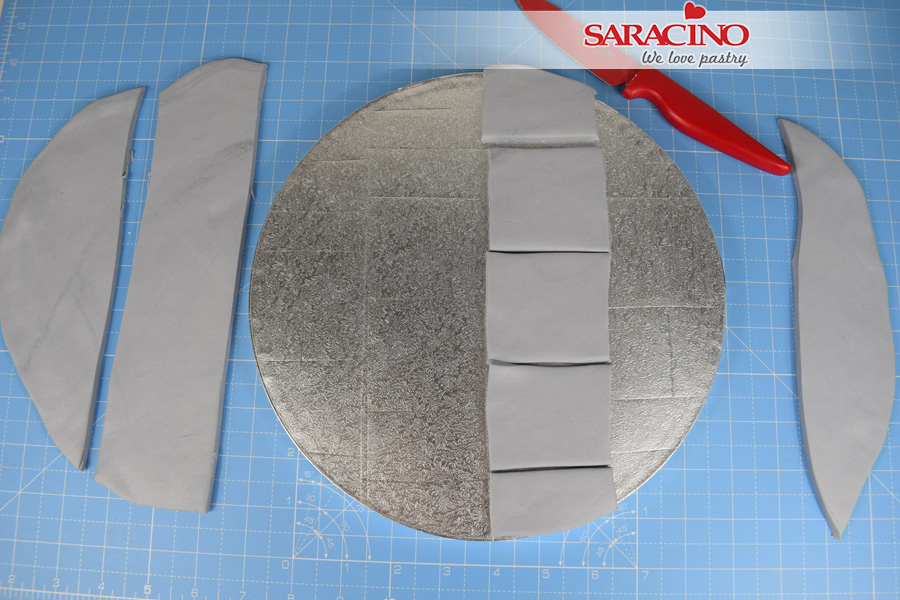
Lay the paste on the board. Using a sharp knife and the quarter lines you scored first as a guide, cut the paste.
Step 8

Take one strip and use the square lines you marked in step 4 to cut the paste again.
Step 9

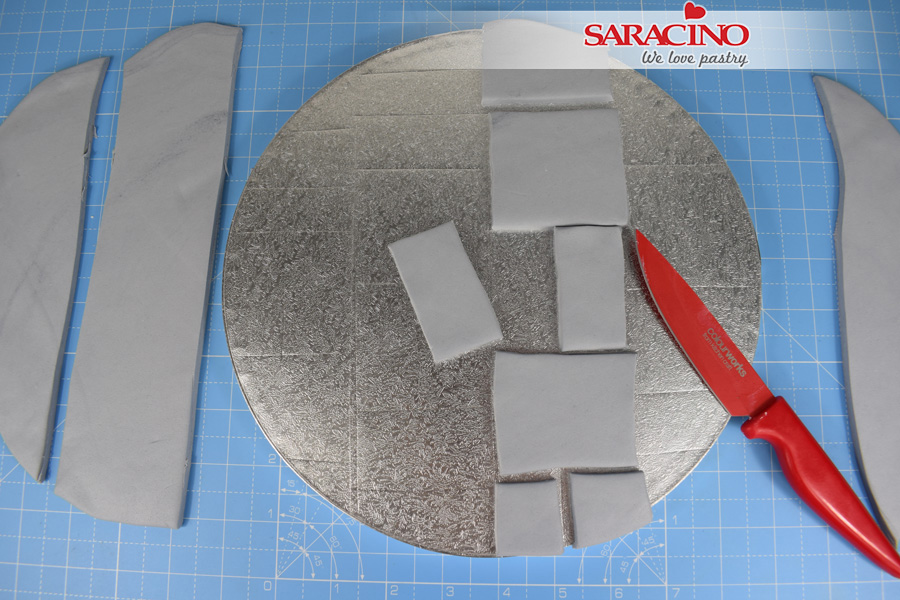
Use the marks you scored in step 5 to divide each of the squares.
Step 10

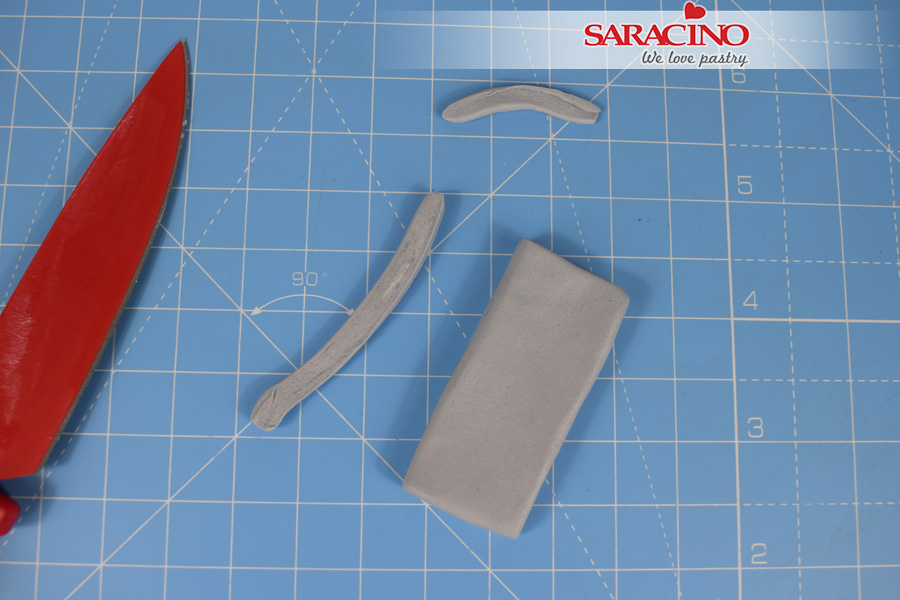
Trim a tiny amount from each of the smaller pieces so that they fit within the marked area on the board.
Step 11

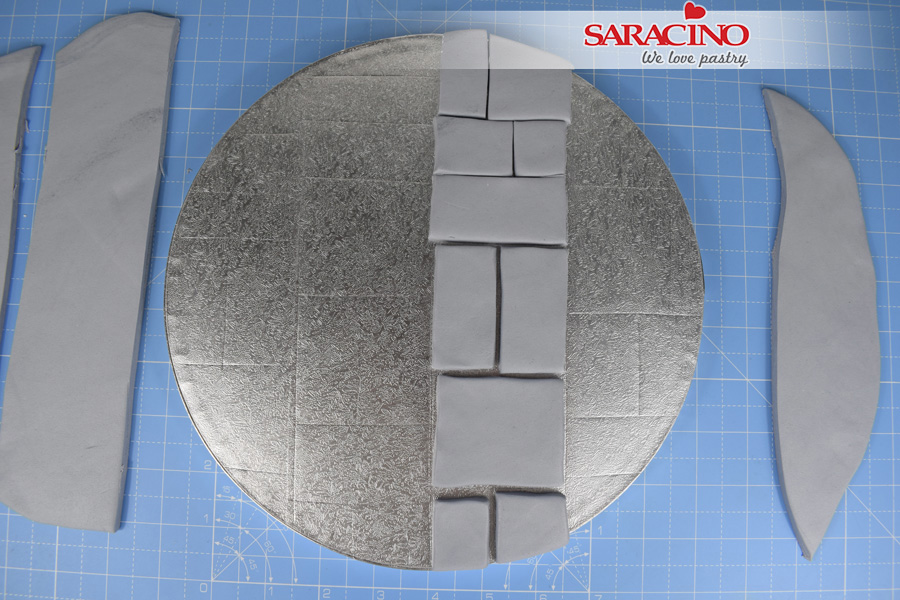
Continue to trim each piece smaller and lay on the board in position. Smooth the cut edges of the pieces with your finger tips then pinch to define.
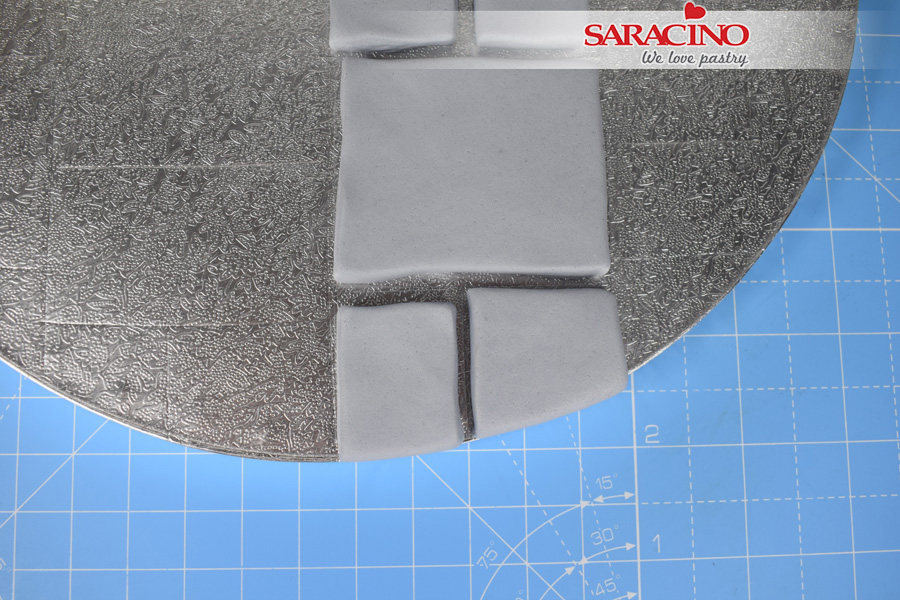
Step 12

On outer pieces only trim the inside edges so that the paste and the board line up and there are no gaps.
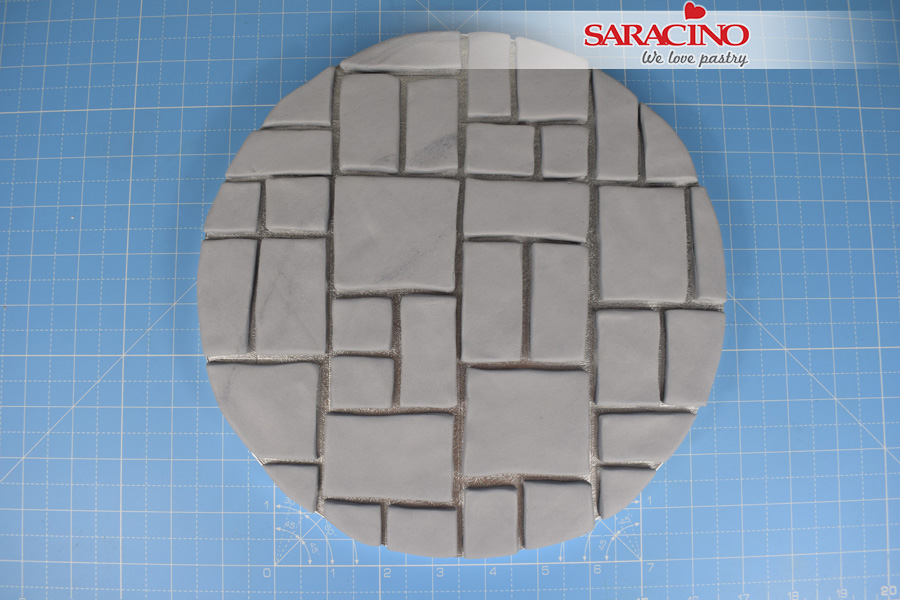
Step 13

Repeat this process for each strip until the whole board is covered. You can change the pattern within any square as you go along if you choose to.
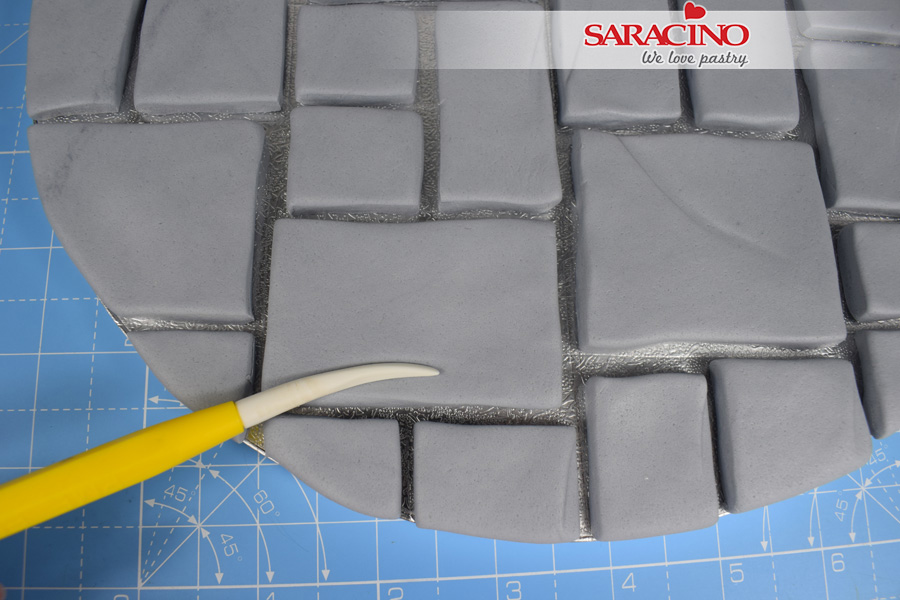
Step 14

Turn the Dresden tool on its side and use the veining end to mark lines across the tops of random tiles.
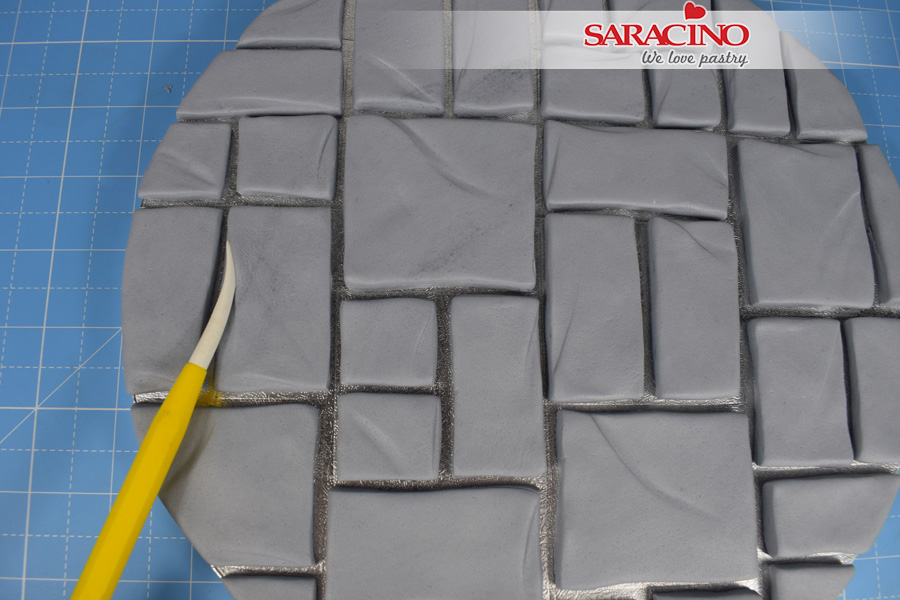
Step 15

Mark lines down the edges of tiles also.
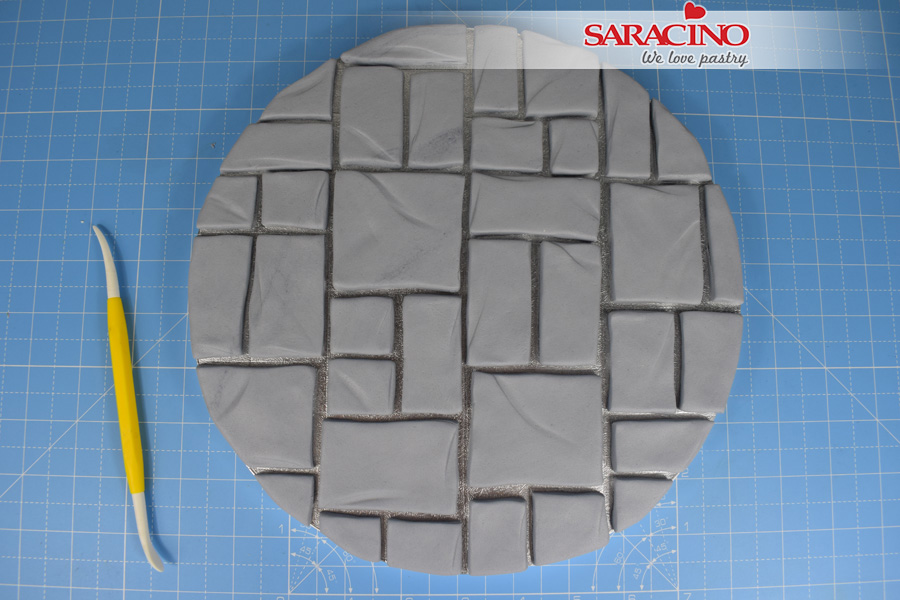
Step 16

Once all tiles are marked lift them one at a time and stick into place with water / edible glue. Be careful not to get any water on the edges of the tiles or you’ll have to wait for it to dry before continuing.
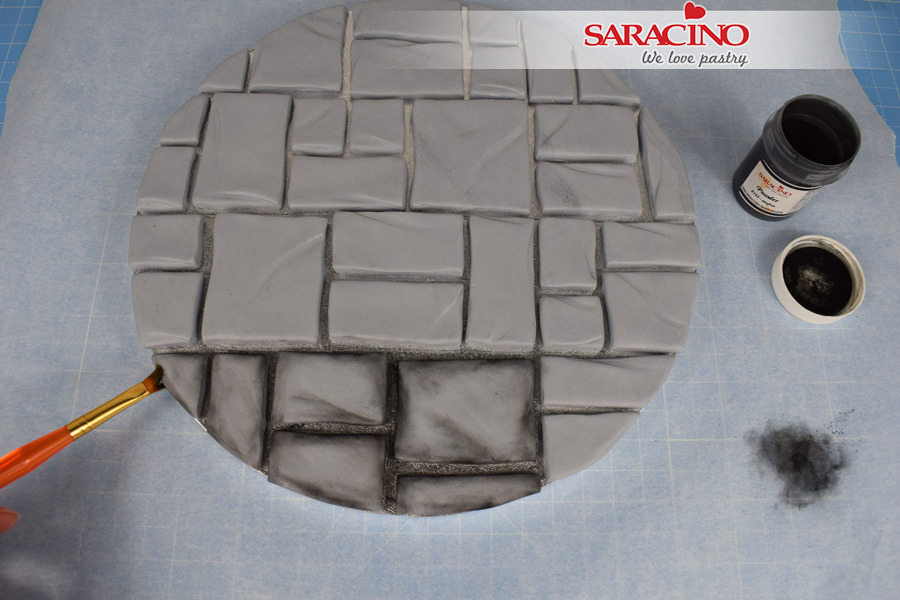
Step 17

Take a flat angled paintbrush and apply a small amount of black dust to the edges of each tile
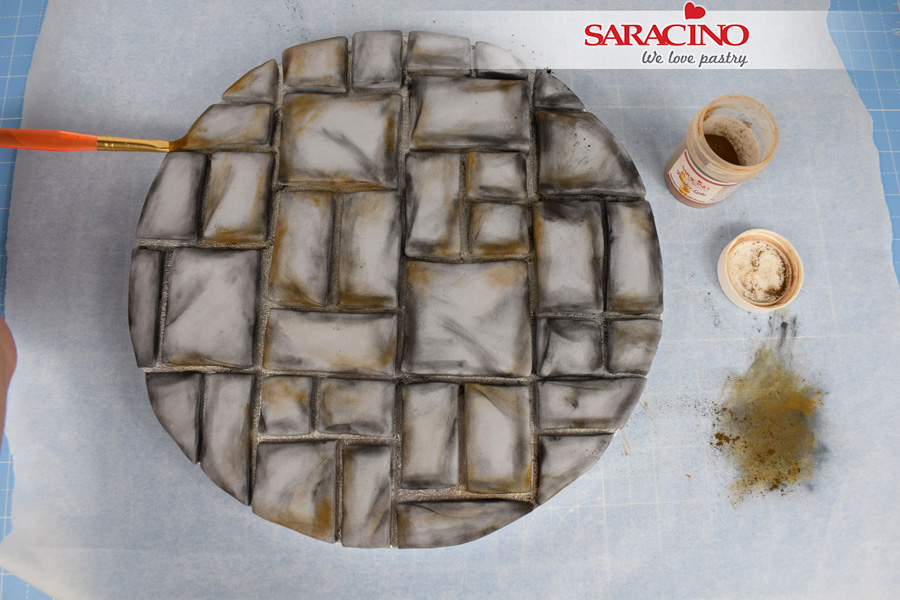
Step 18

Once all tiles are dusted with black, repeat the process with brown dust.
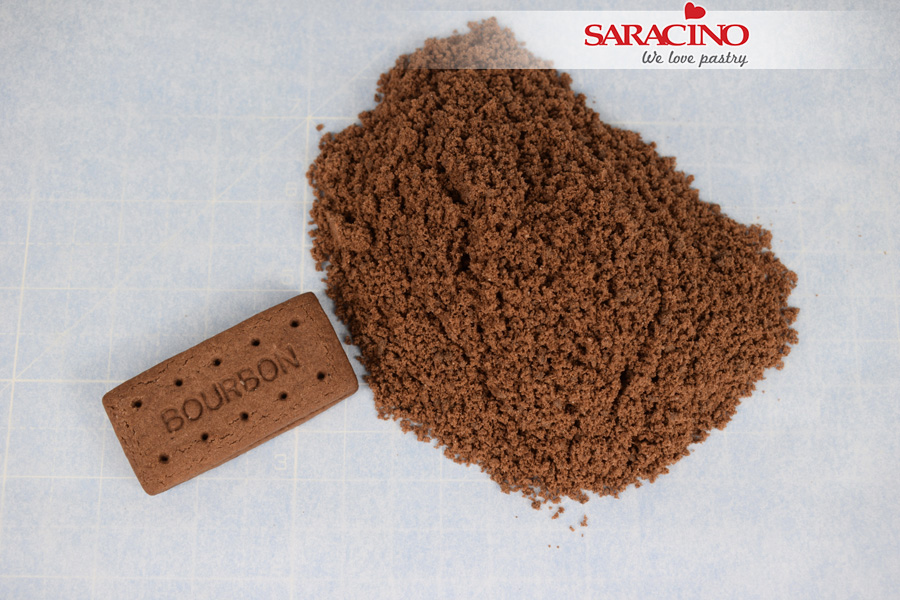
Step 19

Crush 3 Bourbon biscuits.
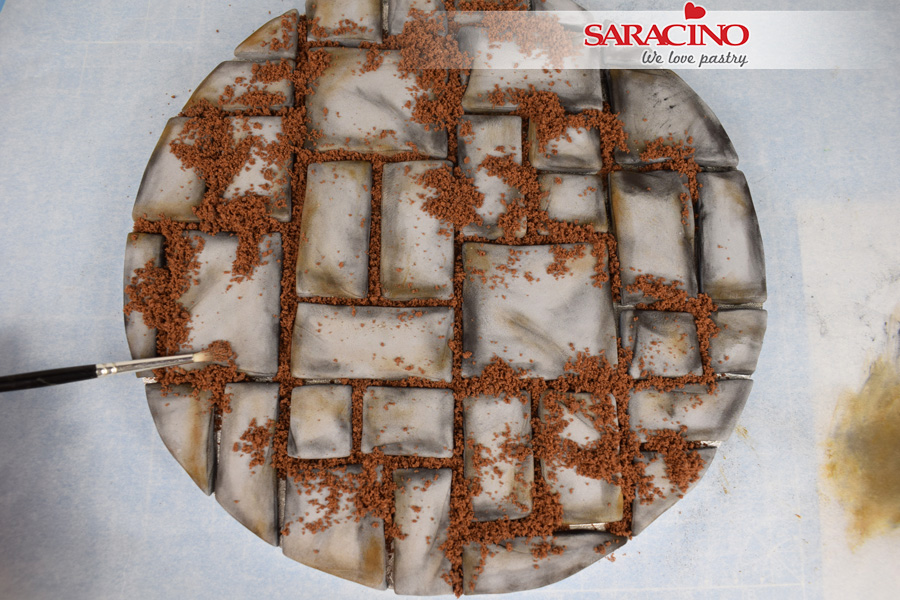
Step 20

Spoon the biscuit crumbs into small piles on the board.
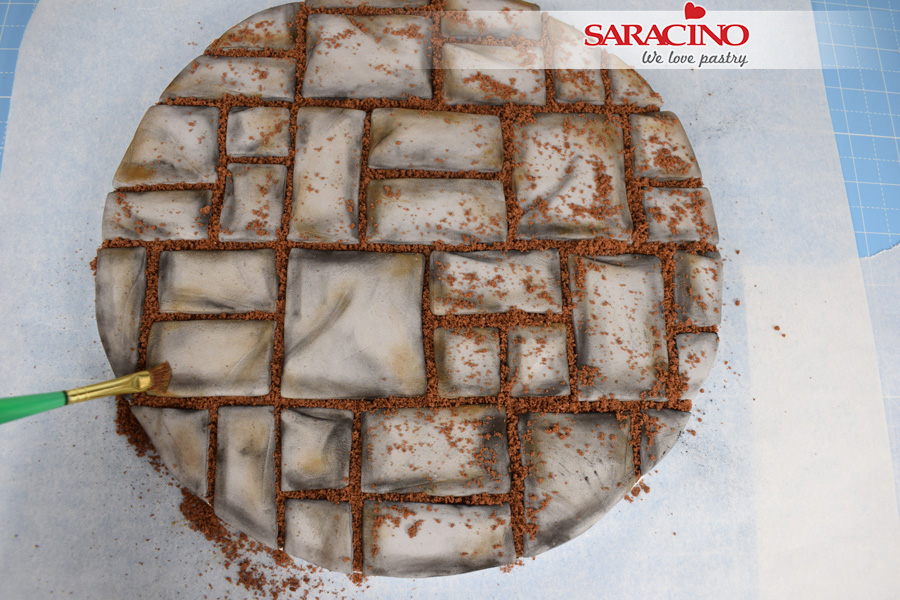
Step 21

Working from the centre of the board outwards, use a paintbrush to push the crumbs into the cracks.
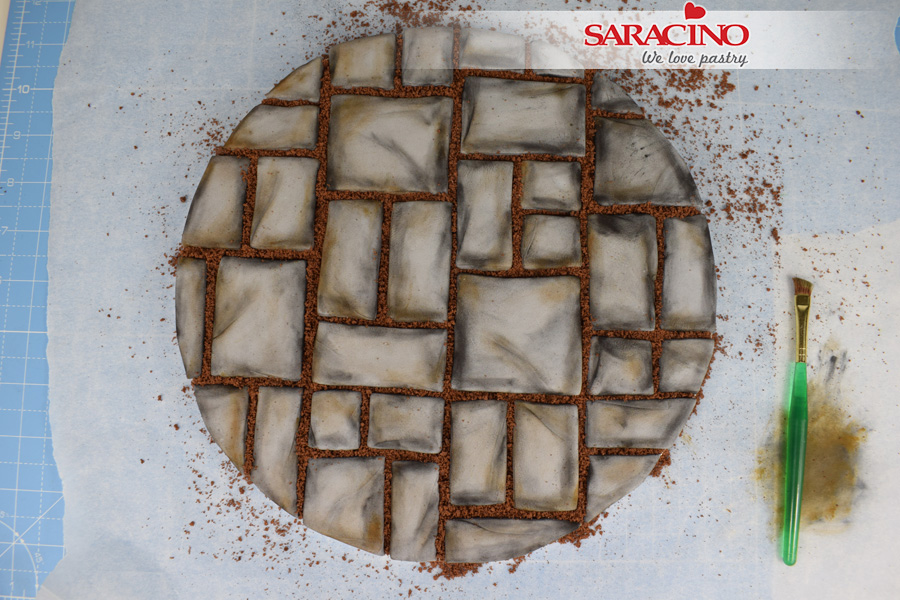
Step 22

Keep going until all the gaps are filled, brush any excess crumbs onto the paper.
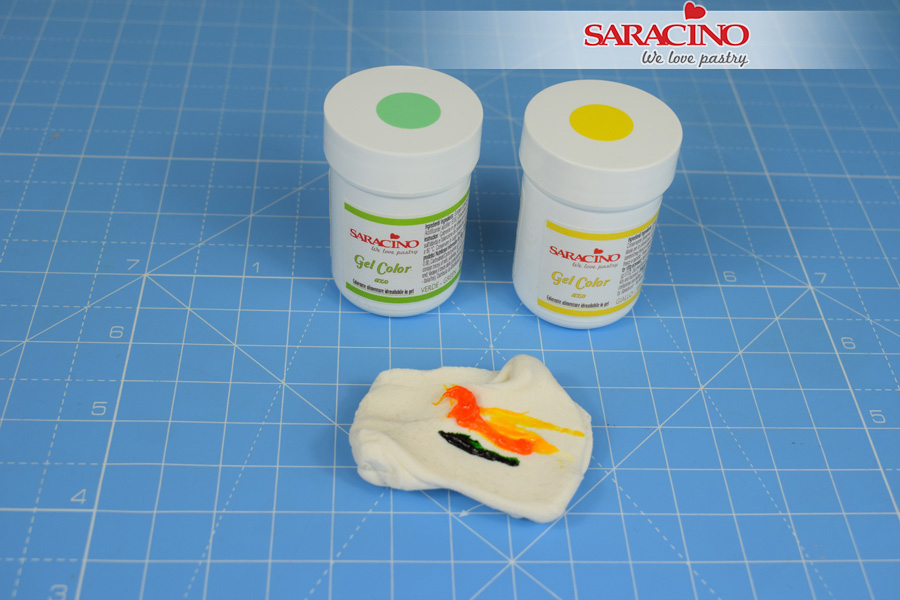
Step 23

Colour 20g of pasta top with a small amount of yellow and green gel colour, to achieve a bright green.
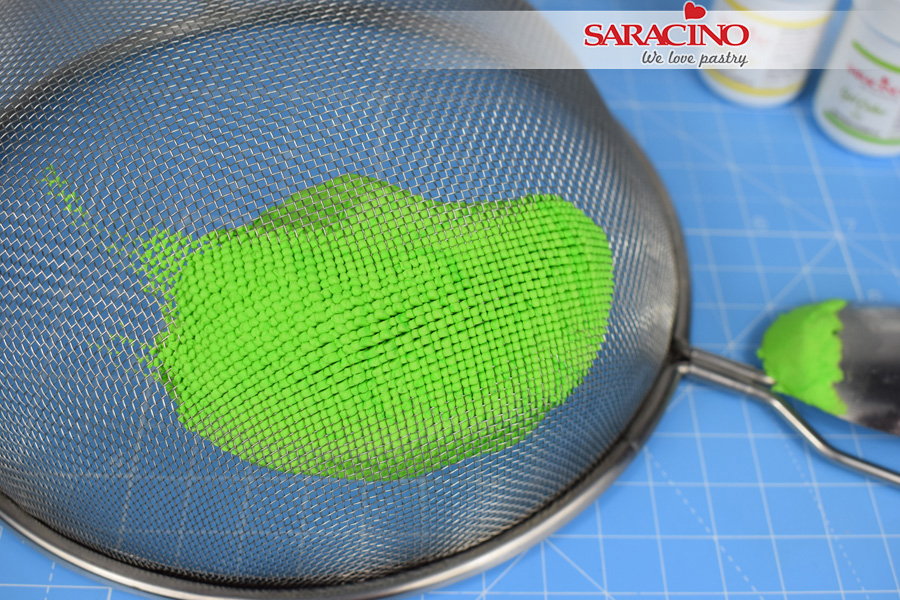
Step 24

Push the paste through a sieve using the back of a spoon.
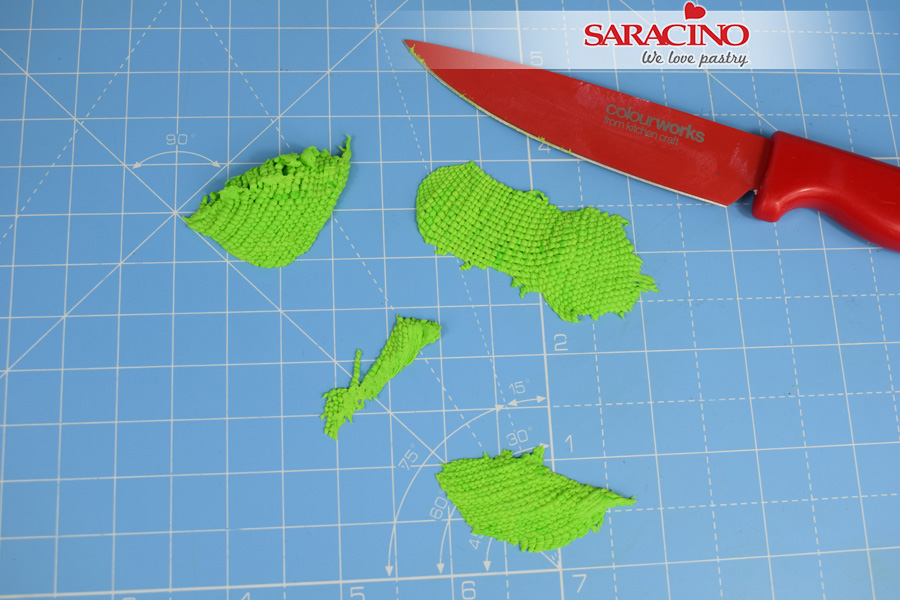
Step 25

Carefully use a sharp knife to slice off the paste.
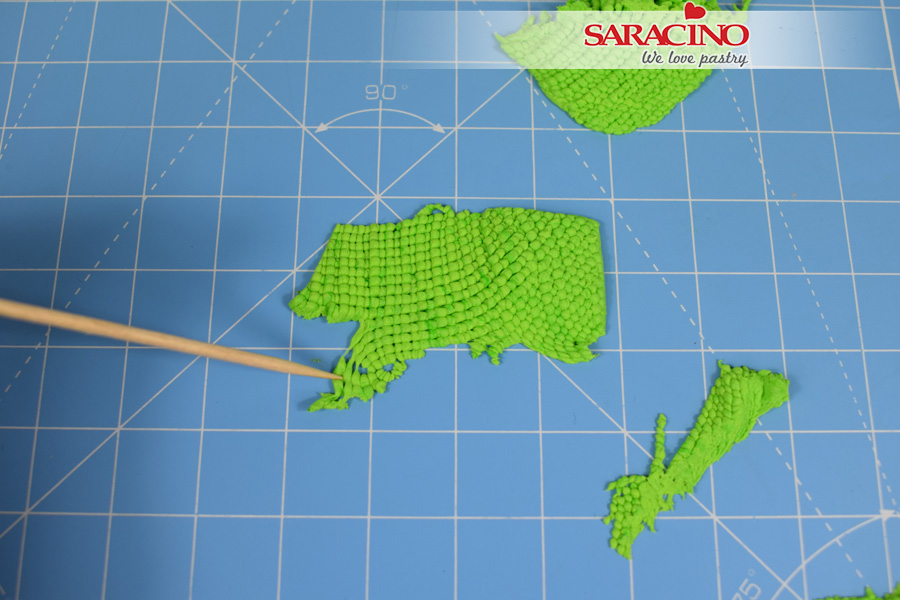
Step 26

Use a cocktail stick to pull small amounts of paste off.
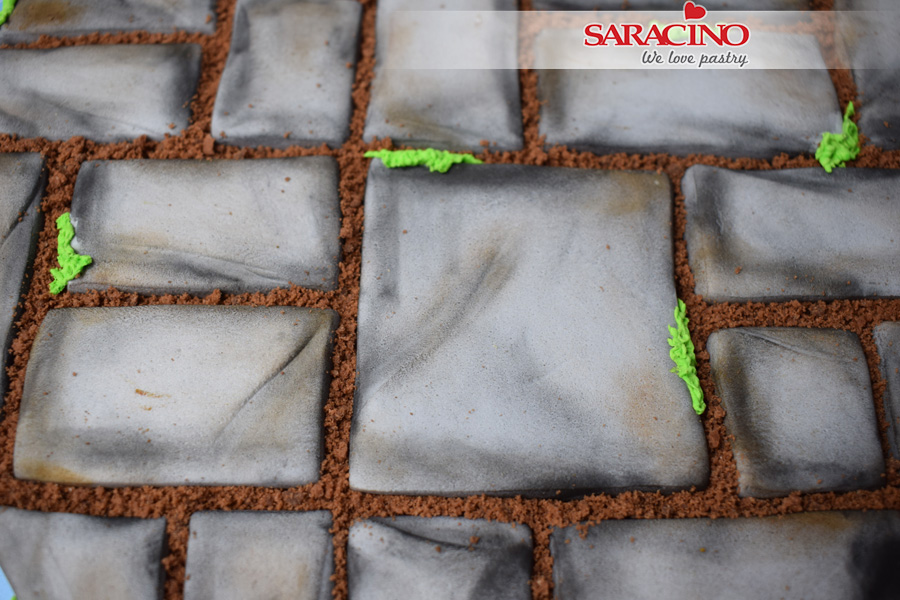
Step 27

Randomly stick small amounts of the green paste to the edges of tiles.
Step 28

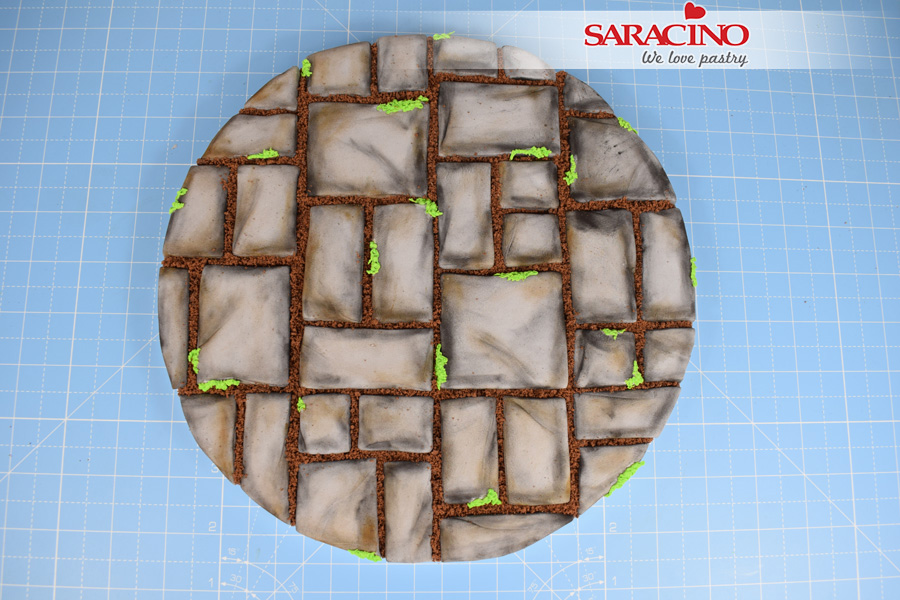
Continue across the board until you’re happy, and your board is now ready for your cake.
Step 1

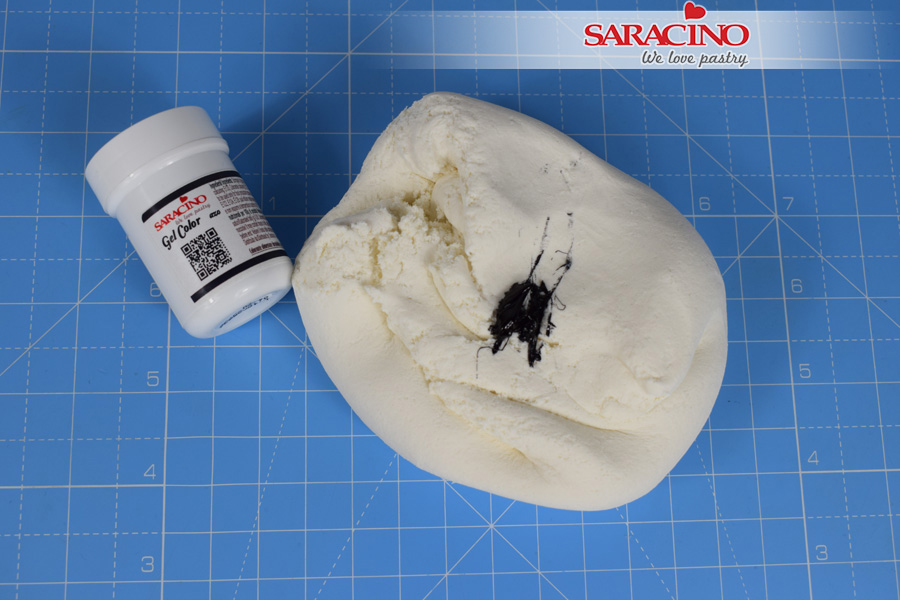
WOOD: Using a small amount of black gel colour 375g of pasta top light grey. Knead the paste until the colour is fairly uniform throughout.
Step 2

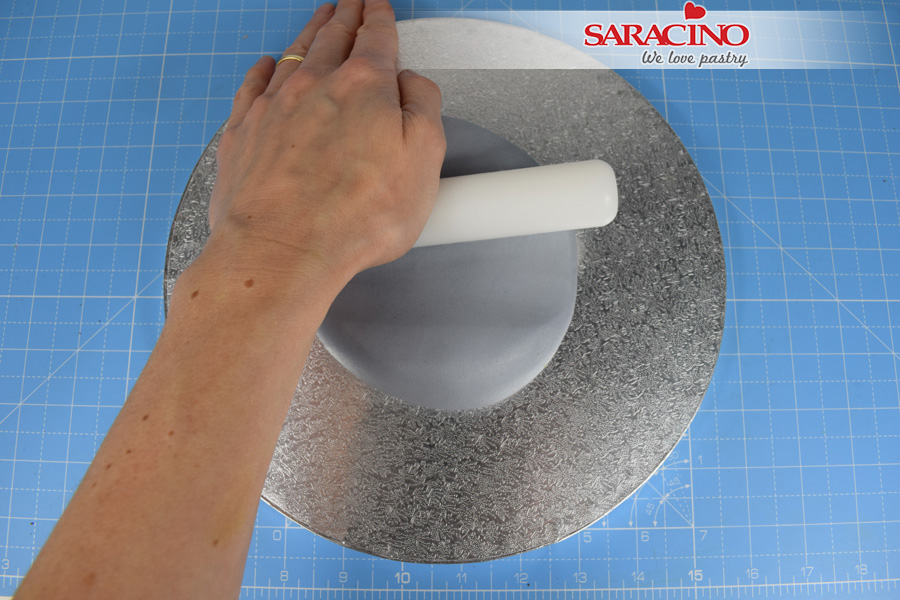
Place the paste on the centre of the board and begin to  roll out using a small rolling pin.
Step 3

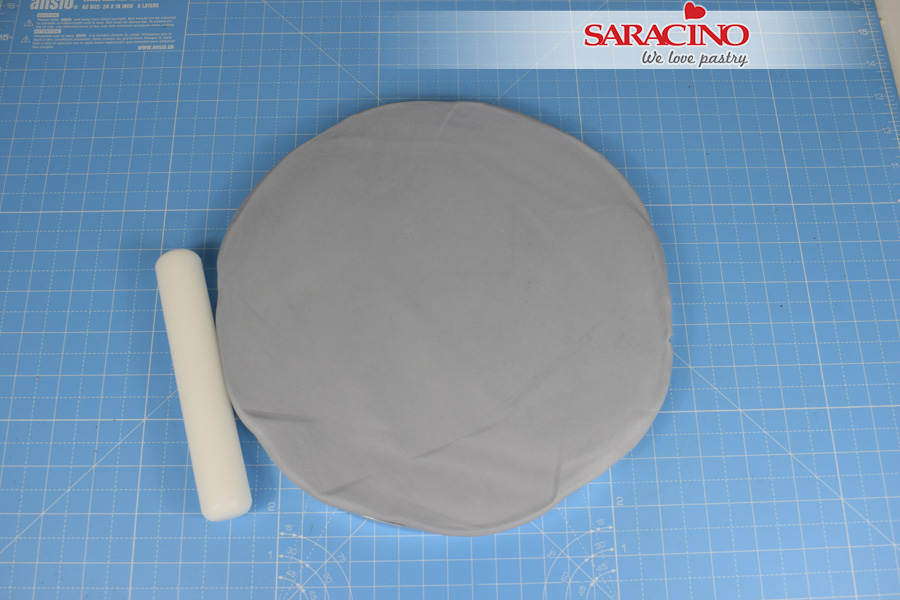
Keep rolling out the paste until the whole board is covered
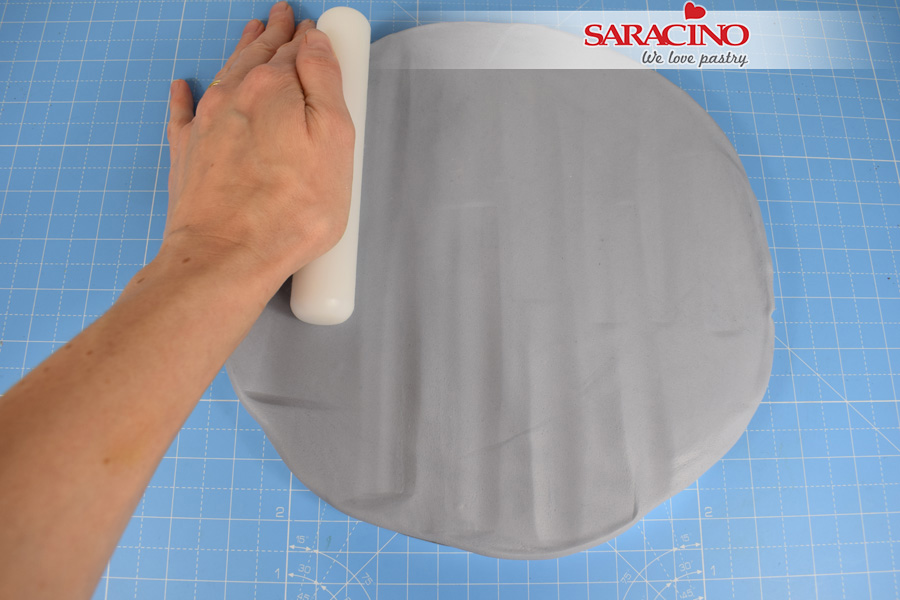
Step 4

Press the rolling pin into the paste to create grooves and ridges. Keep the lines you mark in the same direction.
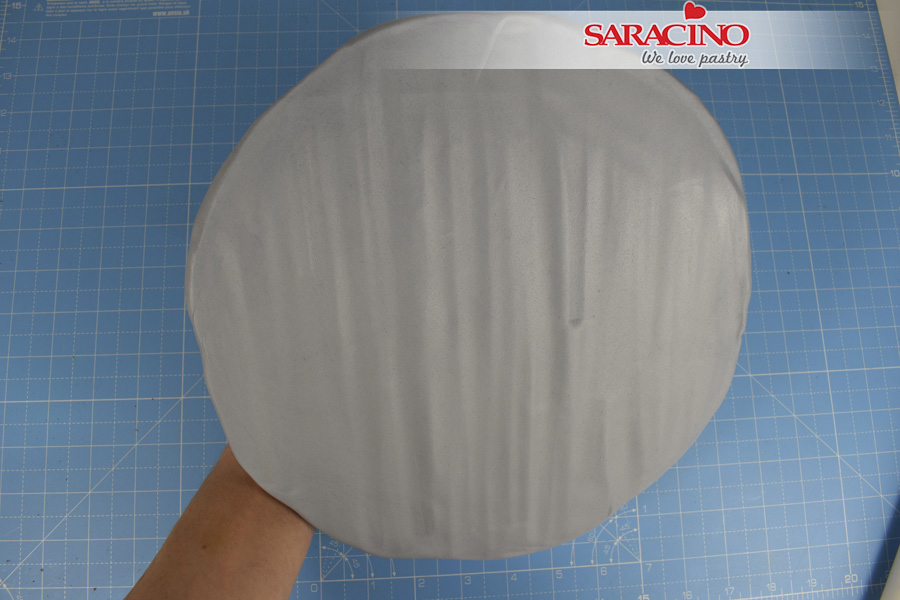
Step 5

Continue to mark the paste across the whole board.
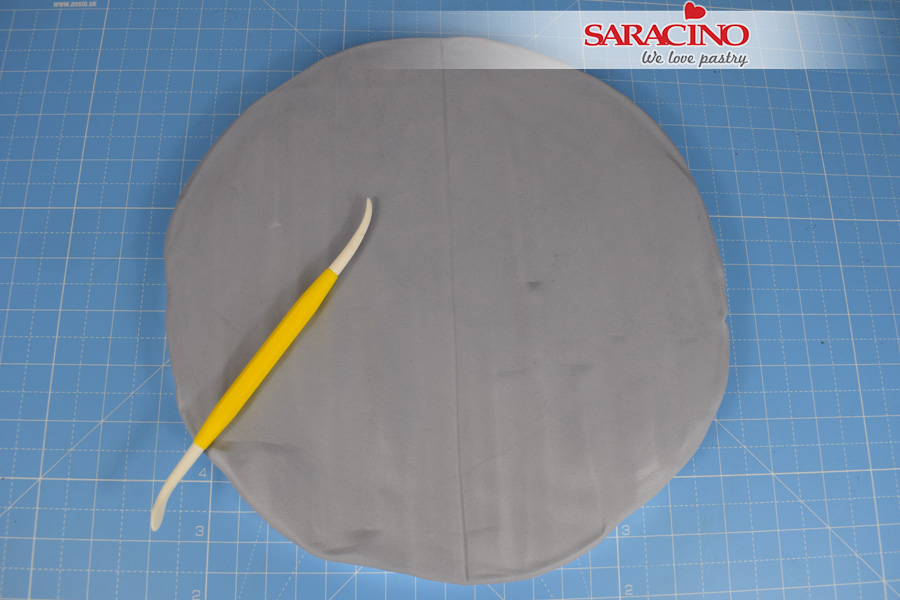
Step 6

With the pointed end of the Dresden tool, gently score a line down the centre of the board.
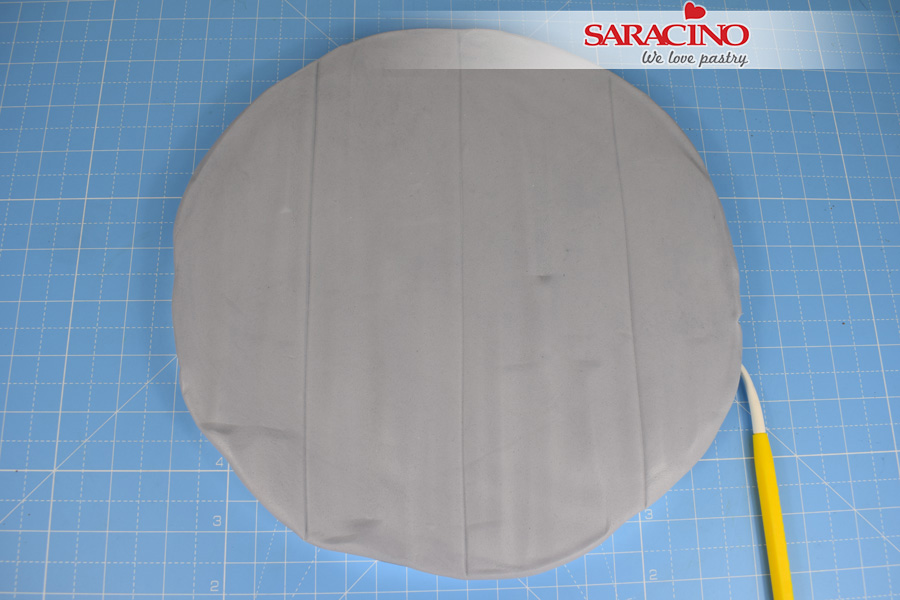
Step 7

Score two more lines dividing the board roughly into quarters
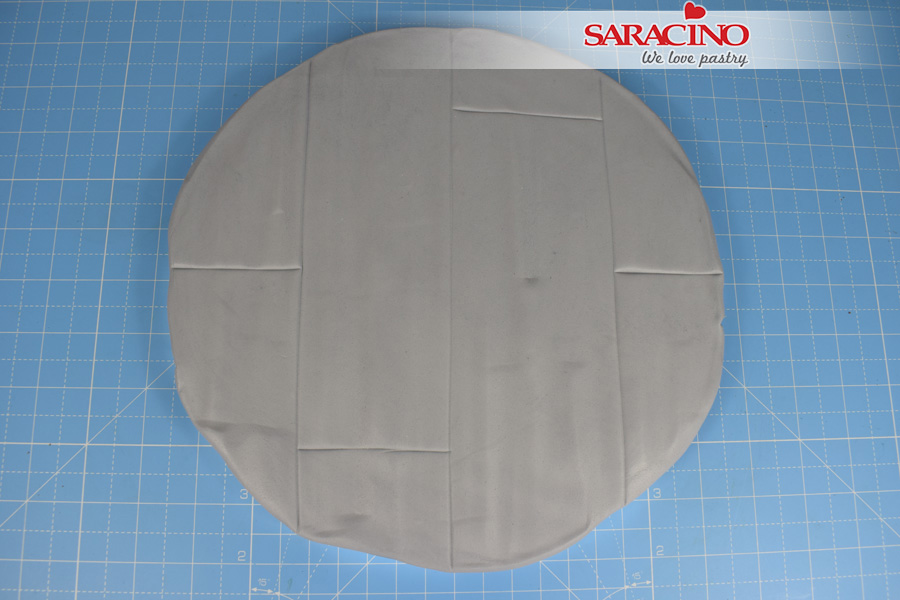
Step 8

Score 4 small lines across the strips to divide the planks as shown.
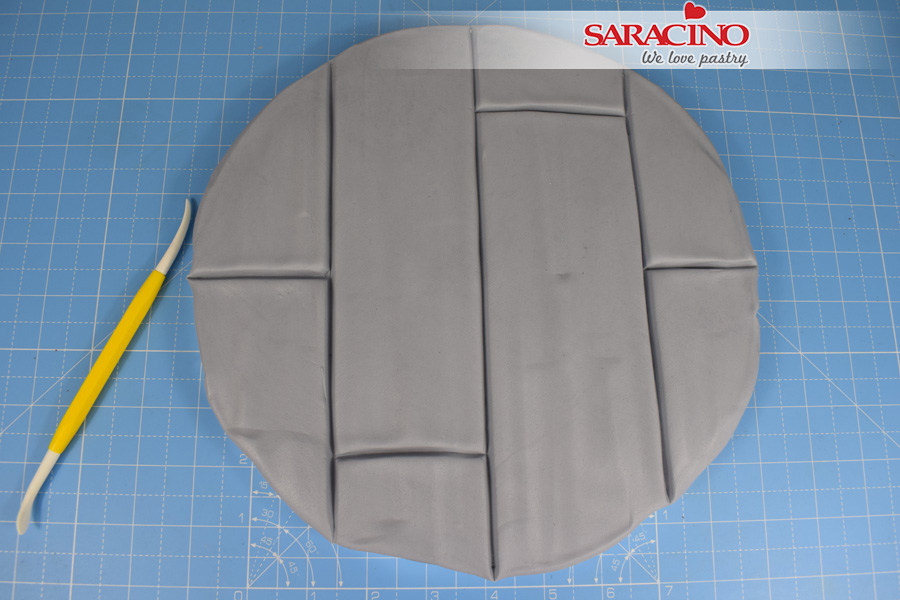
Step 9

When you are happy with the lines go over them with the Dresden tool this time applying more pressure to create deeper grooves
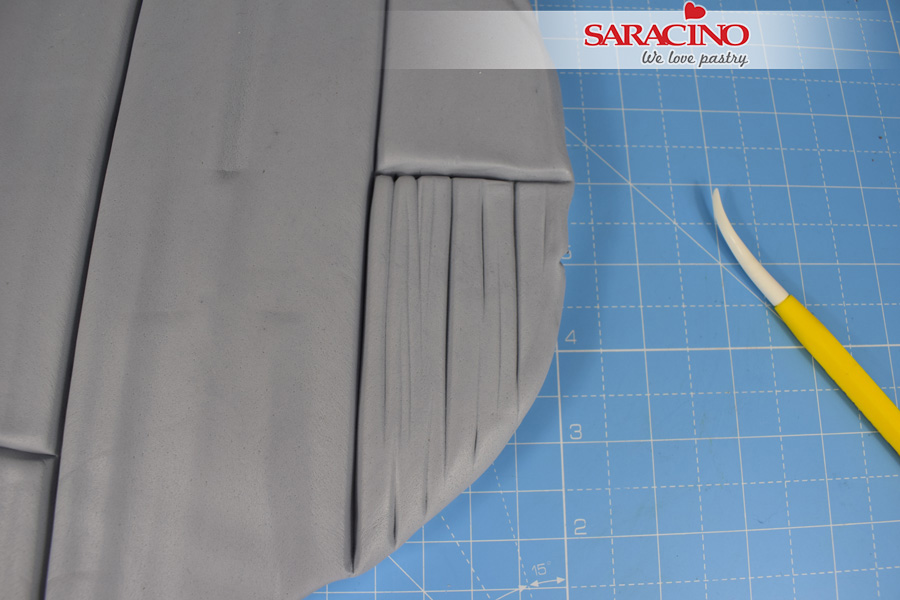
Step 10

Starting on the outside edge, mark the planks using the Dresden tool with a series of random lines and grooves. Varying the pressure will vary the depth of each line.
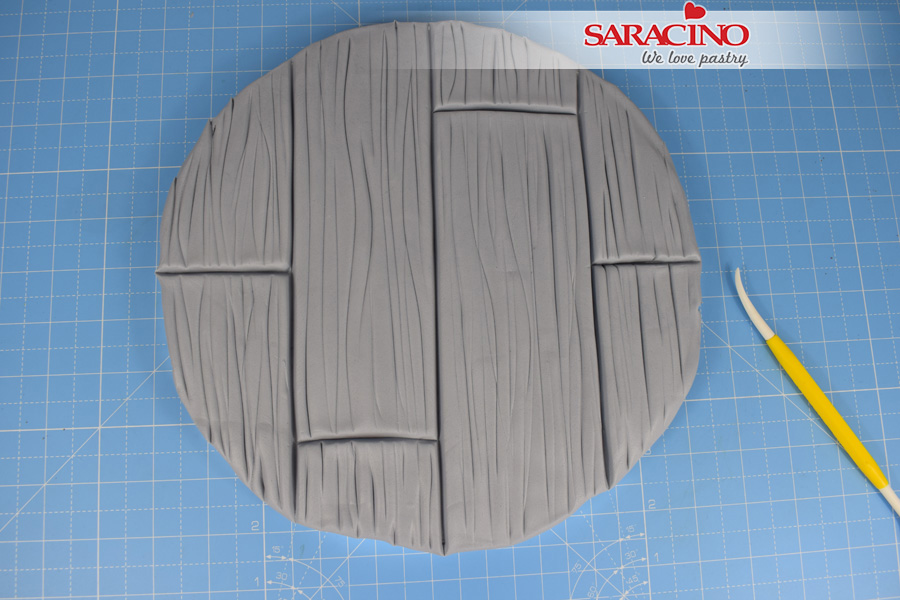
Step 11

Mark each plank separately until the whole board is done.
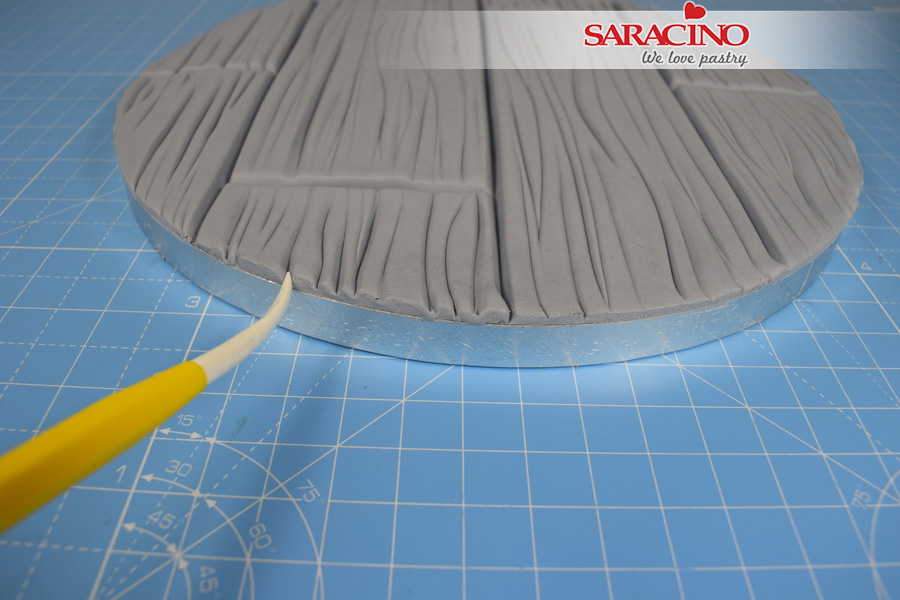
Step 12

Use the tip of the Dresden tool carry the lines over the edge of each plank around the edge of the board.
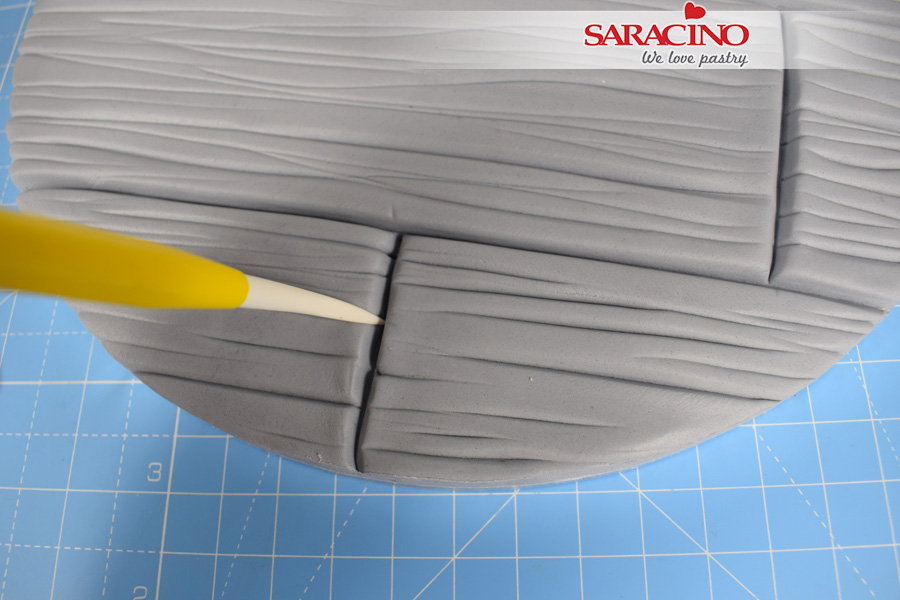
Step 13

Mark the inside edges of each plank.
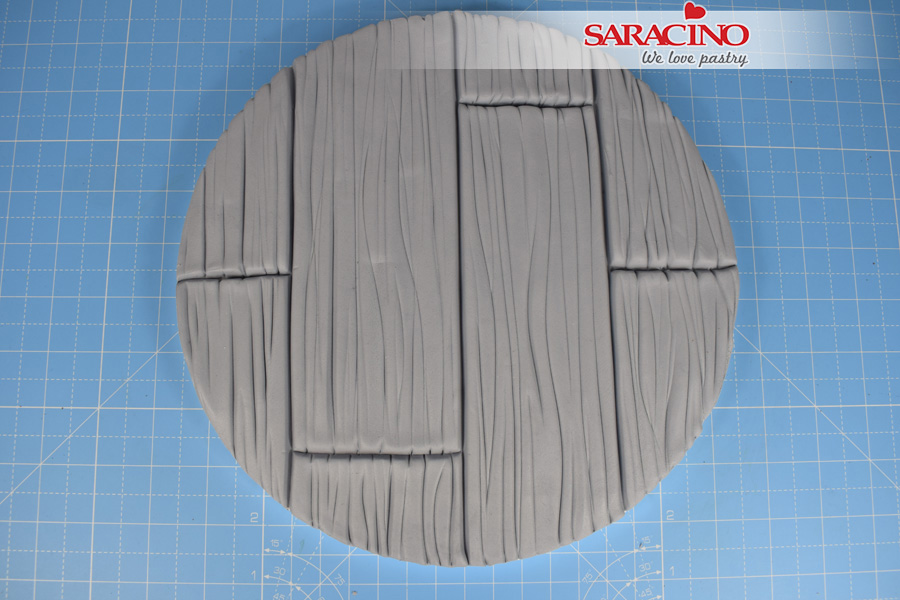
Step 14

Continue across the board.
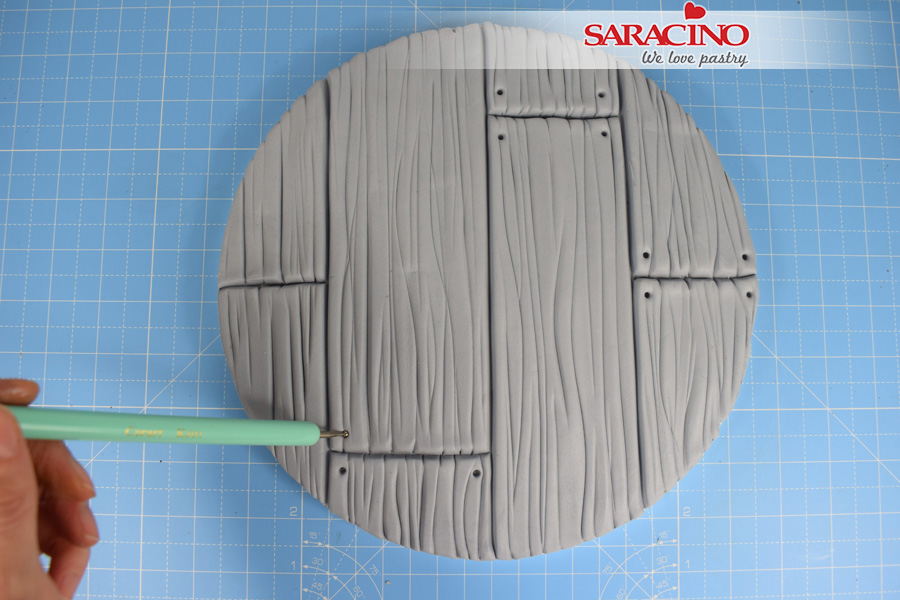
Step 15

Use a small balling tool to mark nail holes at the end of each plank.
Step 16

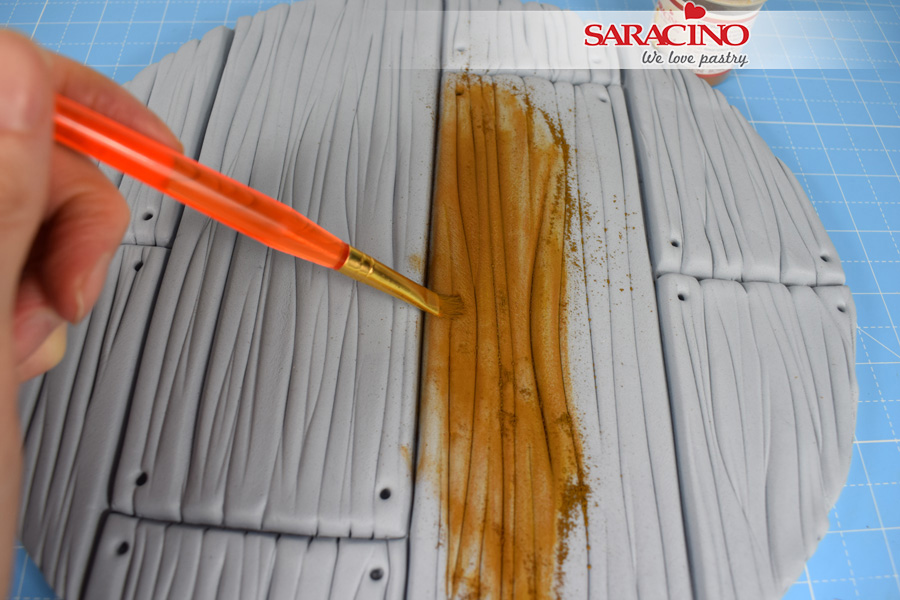
Place your board on a piece of grease proof paper. Take a flat angled paintbrush and begin to  apply brown dust to the planks. Rub the dust in circular motions to work into the paste.
Step 17

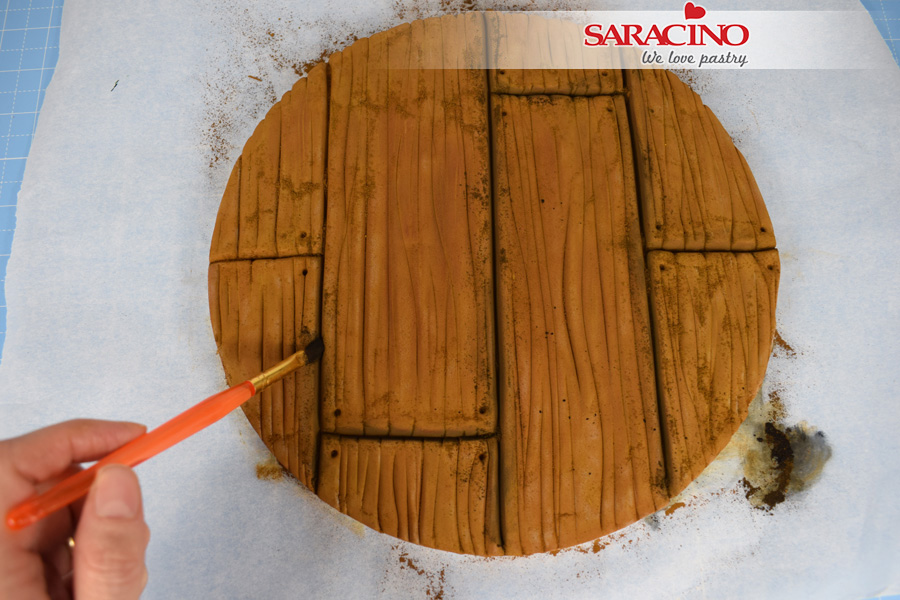
Once all planks are dusted with brown, apply a small amount of black dust to the gaps between each plank.
Step 18

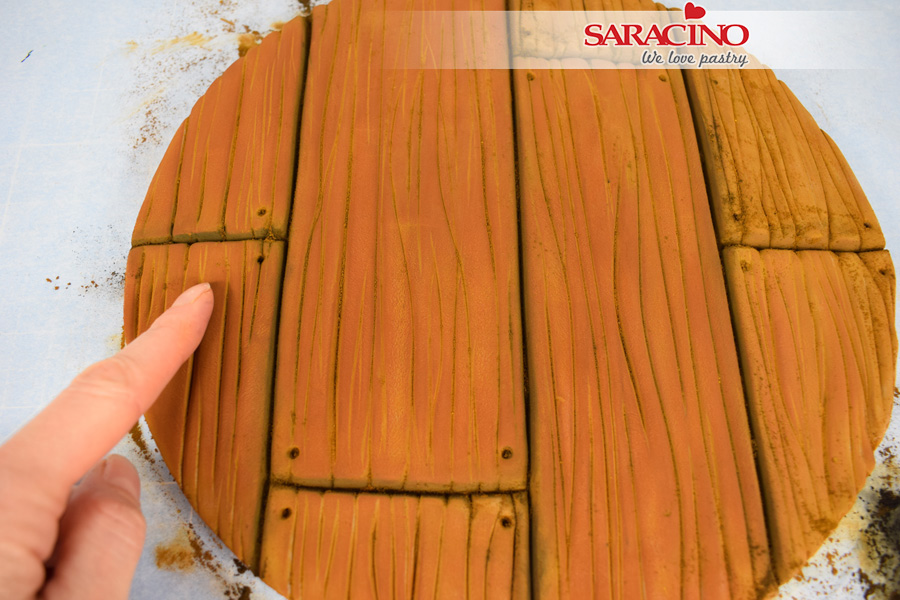
Use your finger tips to gently rub the dust into the paste. This will cause the dust to darken and create a wood like sheen.
Step 19

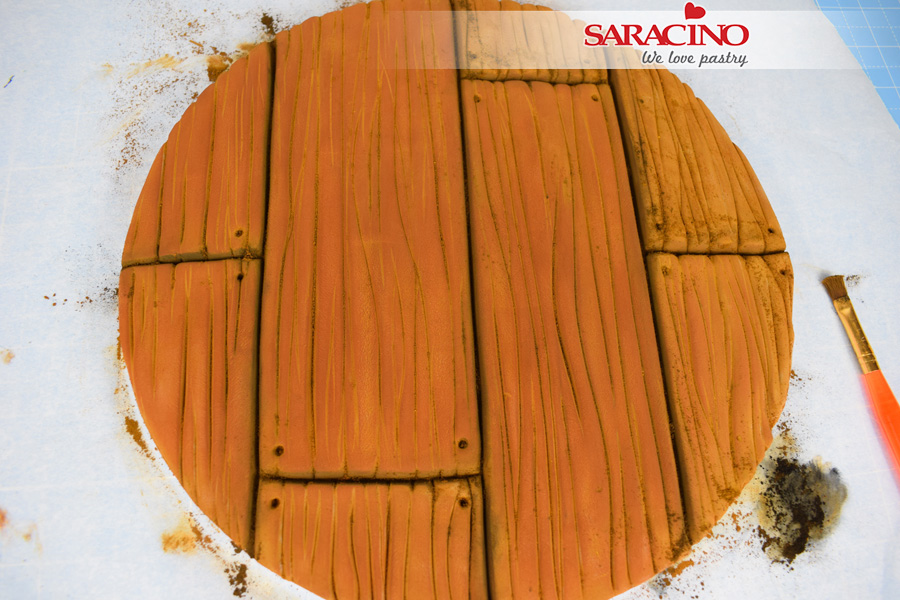
Work across the board, rub more in some spots than others to vary the depth of colour.
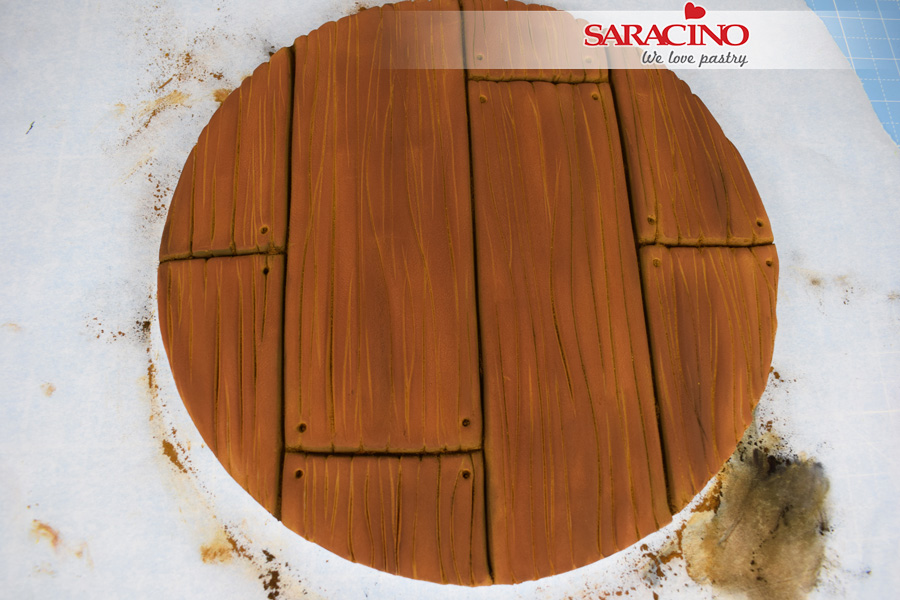
Step 20

Lightly rub your finger in the black dust on the paper and transfer it to the board in random areas to further darken the wood.
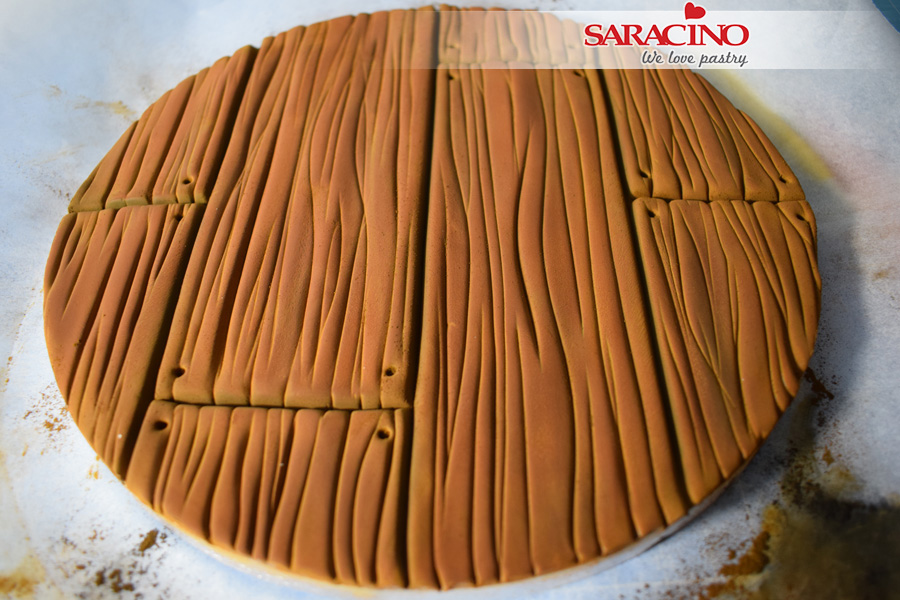
Step 21

Dusting instead of painting means that you retain all the lines you scored and marked at the start. It also means you don’t have to wait for your board to dry.
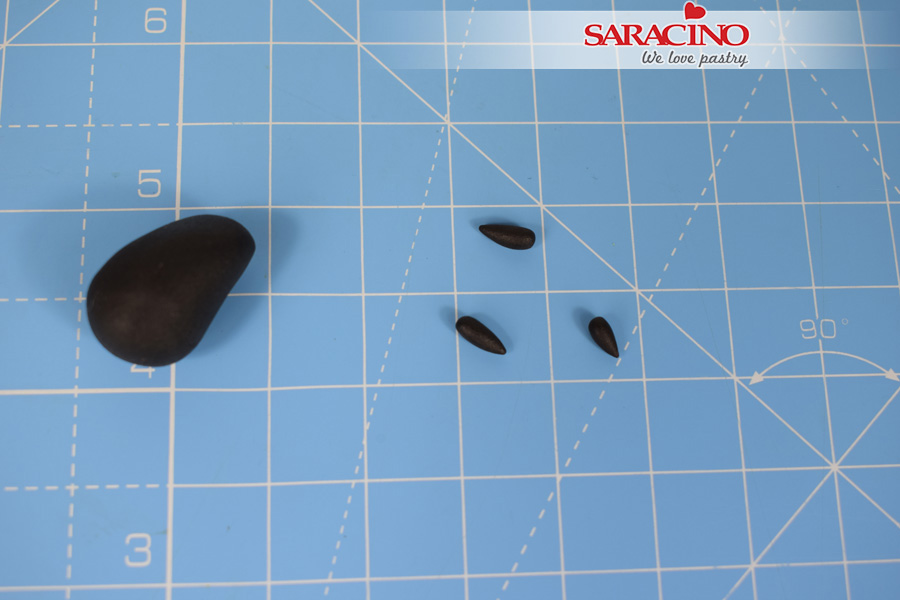
Step 22

For the nails take a small amount of black modelling paste and roll 14 small teardrops.
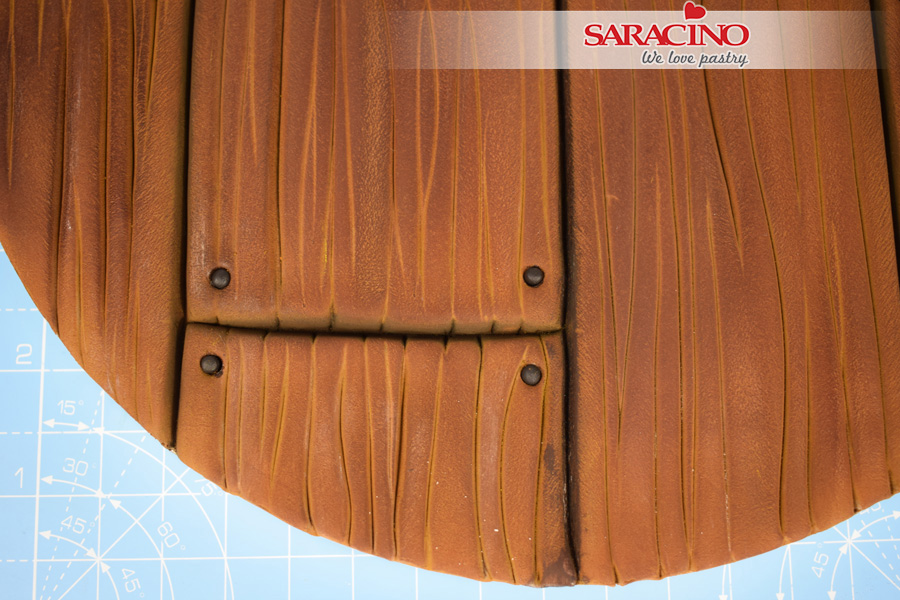
Step 23

Stick each into place with a small amount of water.
Step 24

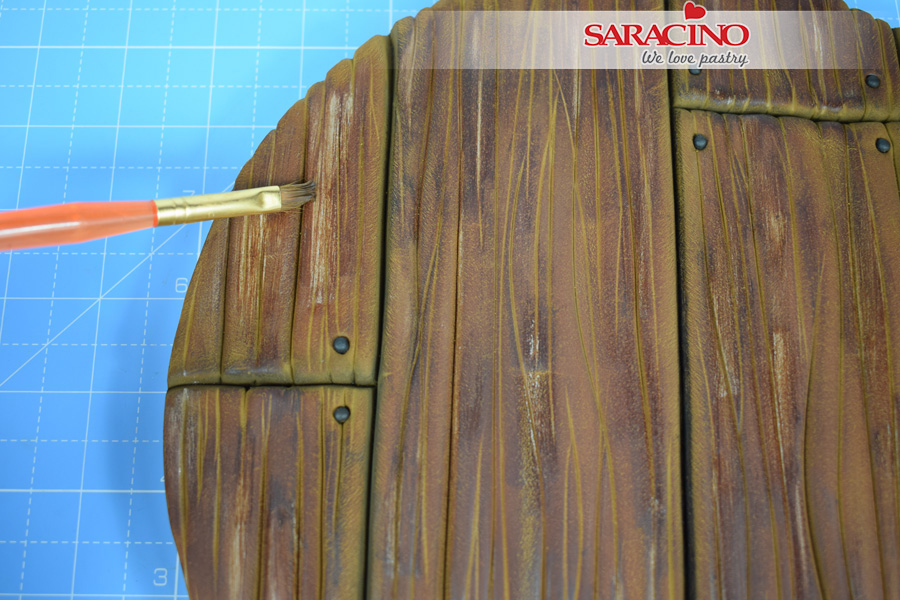
Dip the flat paintbrush into some water and remove almost all of the water from the brush. Gently brush across each plank, following the grain to remove some of the colour and create an aged look to the wood.
Step 25

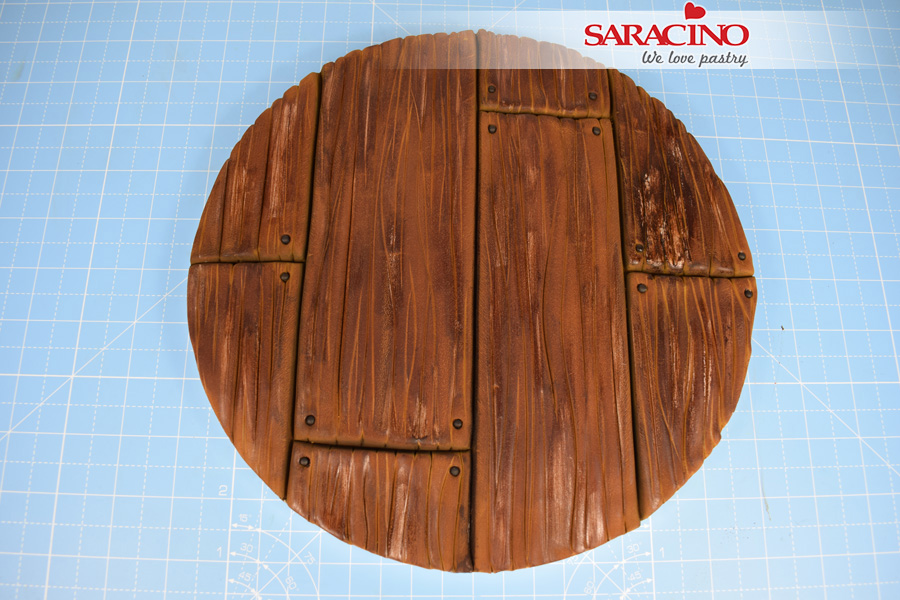
If you remove too much colour by accident (see right hand side of board) allow the paste to dry throughly and then re dust with the brown.

SEA THEMED WEDDING CAKE

SEA THEMED WEDDING CAKE

Skill level: BEGINNERS

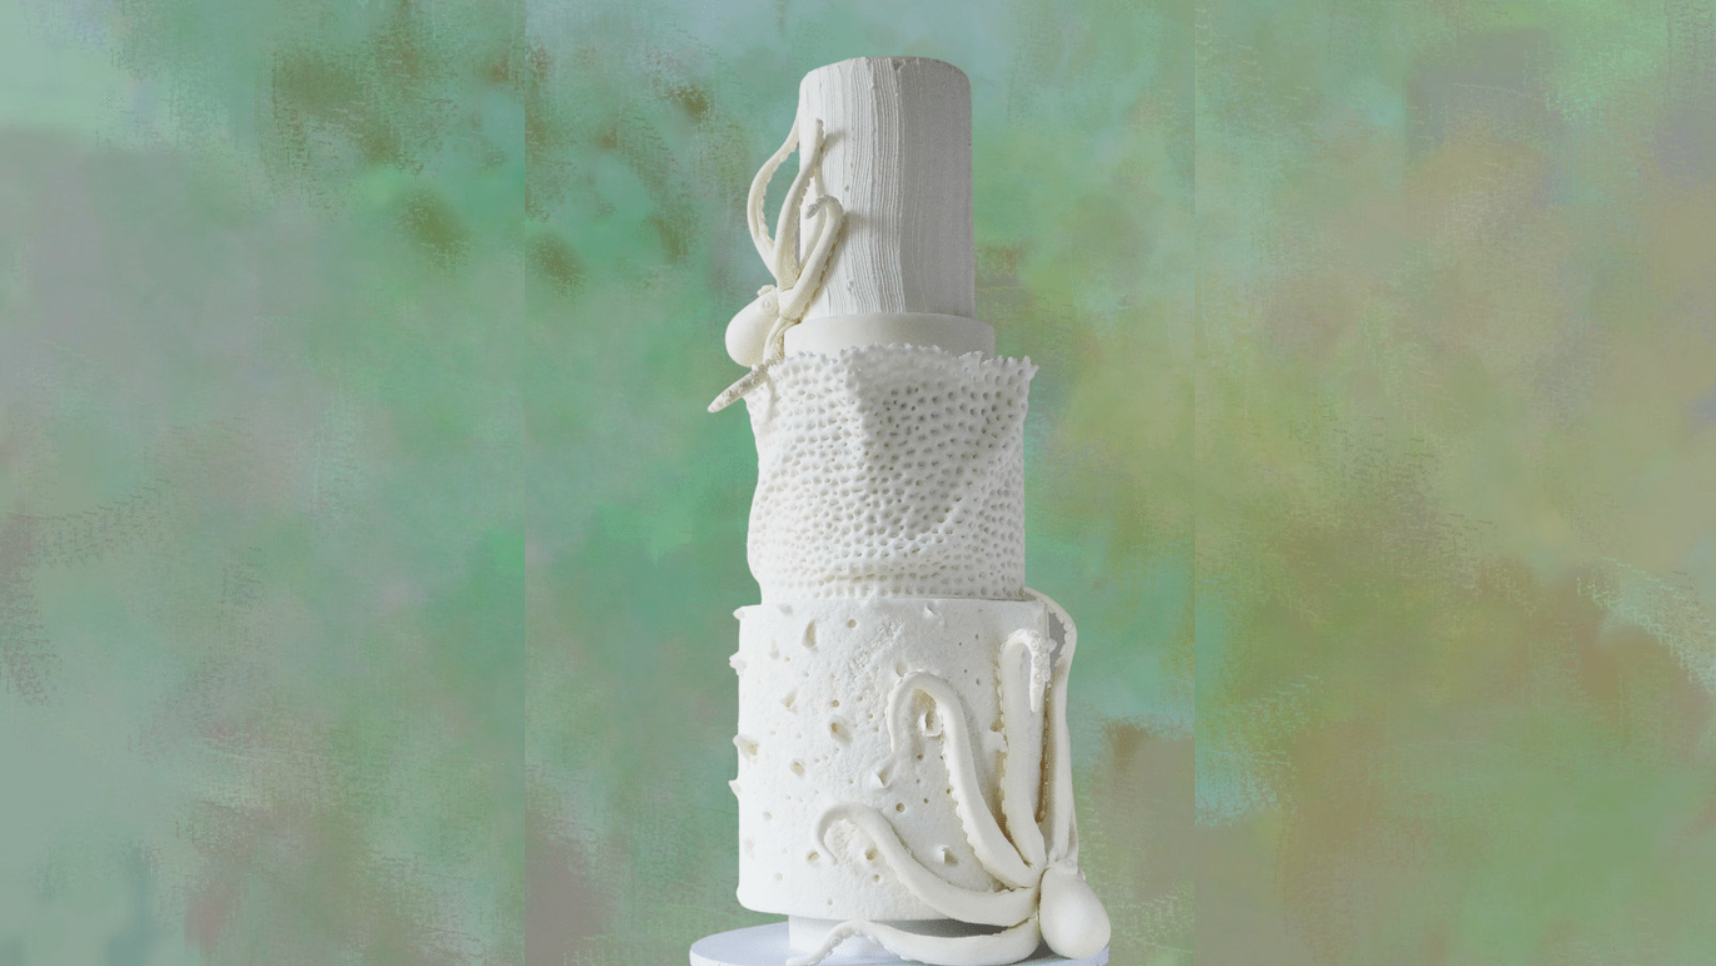
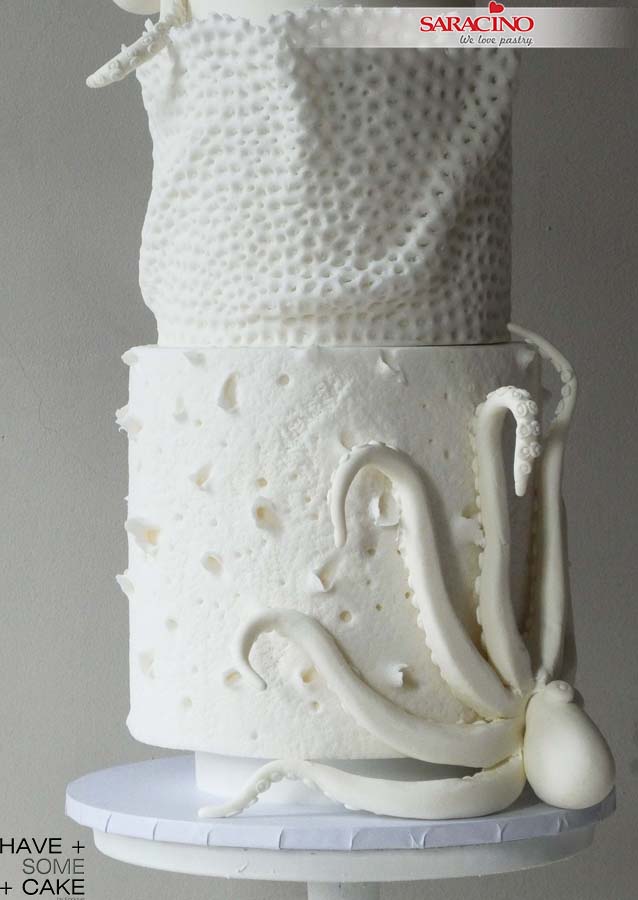
A different kind of Wedding Cake. This tutorial is about textures inspired by live coral reef and the ones washed ashore and dried. On the bottom tier we have a heavily textured tier that reminds you of pieces of coral dried and eroded by the elements. On the middle tier there is a more organic recreation of a live coral as found in reefs and at the top, the tier is textured to simulate sand at the bottom of the sea. The cake is finished by two octopus climbing around it. I went all white because it gives the design a more sculptural/ethereal feeling and because it is a thematic design.

You will need:

  • SARACINO white Pasta Top
  • SARACINO white Pasta Model
  • Rolling Pins
  • Ball Tool
  • Scriber Needle
  • Dresden tool
  • Veining Tool
  • Coarse Brush [Kemper] Tool
  • Pointed Rolling Pin
  • Zig Zag Edge Pottery Spatula
  • Sugarworks Shaper : Pointed Chisel (Light Blue)
  • Sugarworks Shaper : Bone Chisel (Orange)
  • Number 2 Round Piping Nozzle
  • White Royal Icing
  • Craft Knife
  • Pearl White Dust (OPTIONAL)
  • A Cake (Dummy) as shown : 5″ x 1″ Deep Round Separator/ 7″ x 7″ Deep Round Tier/ 6″ x 5″ deep Round Tier/ 5″ x 1.5″ Deep Round Separator /4″ x 6″ Deep Round Top Tier

Step 1

Very thinly roll enough Saracino white Pasta Top to wrap the bottom tier. Using a 9″ rolling pin roll the sugar paste around it as shown.

Step 2

Moist the dummy and roll the sugar paste around the tier as shown. With a knife cut the excess sugar paste at the top edge.

TIP: When cutting the excess sugar paste at the top use a new blade or run the blade in Trex so it cuts smoothly. Try to do the whole cut on a turntable and in one go.

Step 3

Your finished tier doesn’t have to be perfect as we will apply a texture. 

Step 4

Using the Kemper coarse brush start pressing onto the previously covered tier. Use a moderate force when pressing and occasionally press forcefully to create a variation in the texture you are creating.

Step 5

You want this kind of appearance.

Step 6

Using a pointed chisel tool at an angle start creating cavities. You can go as deep as you want and lift them as much as you like as shown.

Step 7

Using differing modelling tools complement the texture with random craters around. You will be able to work with this while the sugar paste has not dried. Be as gentle or as strong as you like. No limits to create your texture.

Step 8

Cover the middle tier as described previosuly. This also does not have to be perfect as we will be adding texture.

Step 9

Roll a piece of Saracino white Pasta Top the length and height of the second tier. Using a small ball tool start pressing onto the strip of sugar paste as shown.

Step 10

Use both ends of the ball tool to create different sizes and as close as possible. This will start deforming the previous round impression creating a more organic coral like structure. Using a veining tool you can perforate even more of the hole as shown in image.

Step 11

Lift the finished strip and wrap it around the tier. When doing this, handle the strip as if you were doing some drapes to create a wavy, organic shape as shown.

Step 12

Once the tier is fully covered use your fingers to tear the top edge randomly to create an imperfect edge.

Step 13

Using a sharp tool, perforate the hole structure where you have some draping creating some space for light to penetrate. 

Step 14

Using the same sharp tool start punching all around to make little tiny holes on it. Live coral is not completely smooth and this will give a second more detailed texture to this tier.

Step 15

Prepare some Saracino Royal Icing to the instructions on the packaging. We need a hard peak mix. Cover the top tier with it.

Step 16

Using a metal scraper remove the excess. We do not need a perfect smooth finish as we are again adding texture.

Step 17

Before the icing dries use the zig zag edge pottery tool to create wavy stripes. It is a very subtle but effective texture.

Step 18

To make the head of the octopus, roll Saracino white Pasta Model in your hands to create an egg shape.

Step 19

Make two smaller balls and flatten them to create the eye sockets and attach them to the thin end of the head as shown.

Step 20

Use a modelling tool to press two eye sockets.

Step 21

Roll a small ball of white modelling paste and place it in the previously make hole in the eye sockets. Leave to dry while you make the tentacles.

TIP: I decided to make the octopus in 2 parts, the head separated from the tentacles so I wouldn’t have to wait for it all to dry. Also as it would be easier to handle the tentacles to position over the cake without the head.

Step 22

For the tentacles roll a ball of white Pasta Model and flatten it. With a knife cut equally into 8.

Step 23

With your hands roll and thin one portion at a time until you have the 8 tentacles.

TIP: Alternatively, you can do each tentacle separately and join them when ready but as the tentacles are placed vertically you will have to join them and leave to dry in position on a dummy as there isn’t anything holding them together. Remember this is not an exact biological octopus recreation.

Step 24

Your tentacles should look like this.

Step 25

To make the tentacle suckers roll small balls of white Pasta Model and start placing them onto the tentacles.

Step 26

Using the number 2 round piping nozzle press each ball to give the sucker look. Repeat for all 8 tentacles. For this project you will make a larger octopus for the bottom tier and smaller one for the top tier.

Step 27

Do the same with the middle.

Step 28

Arrange the tentacles organically as required with the suckers facing the cake. Use a little royal icing to hold in place.

Step 29

Attach the head to the tentacle part using royal icing. You can also fill the gaps between head and body with royal. You will have to hold it in place for a little so the head does not slide off.

Step 30

Your underwater treat is ready!

FAIRY HOUSE CAKE TUTORIAL

FAIRY HOUSE CAKE TUTORIAL

Skill level: BEGINNERS

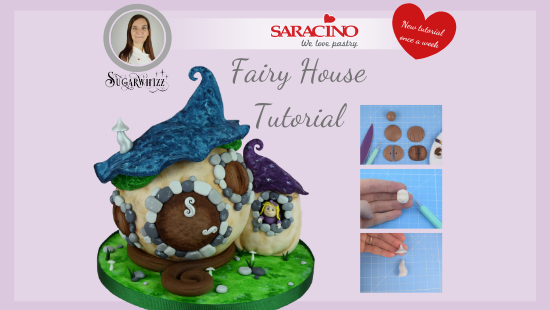
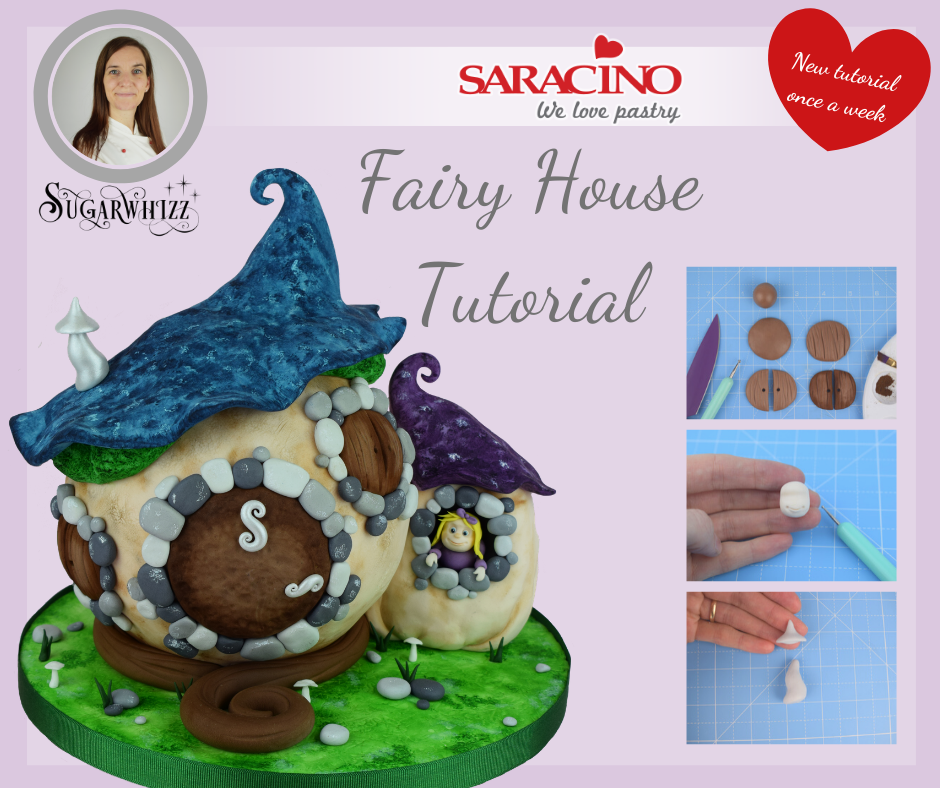
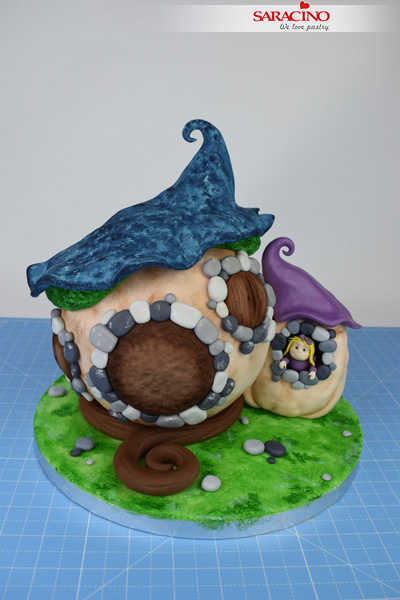
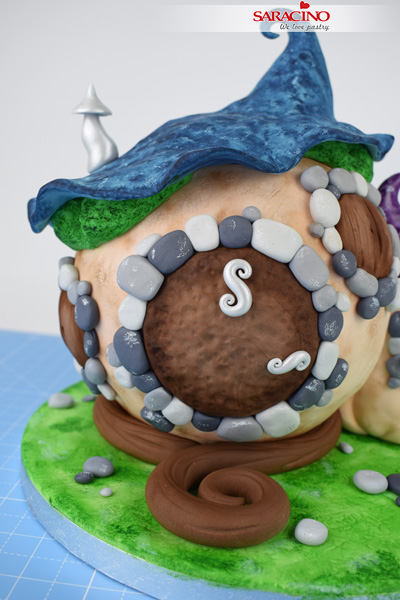
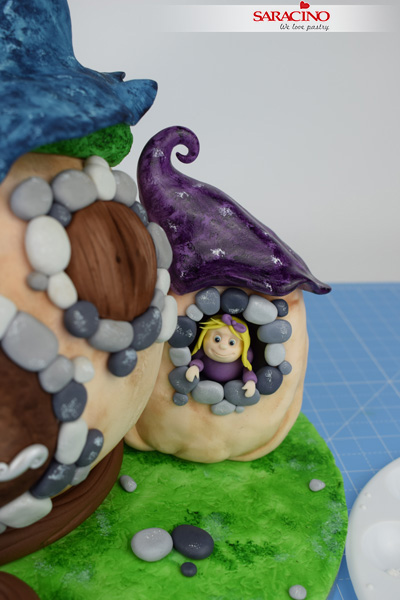
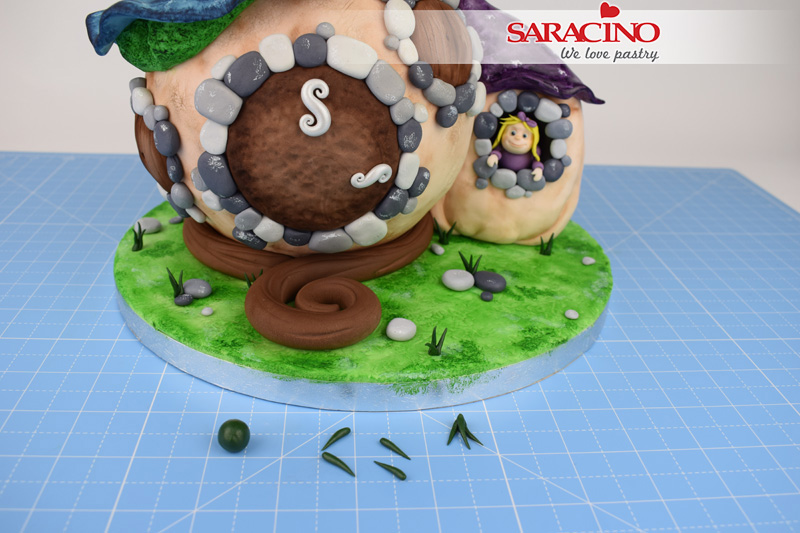
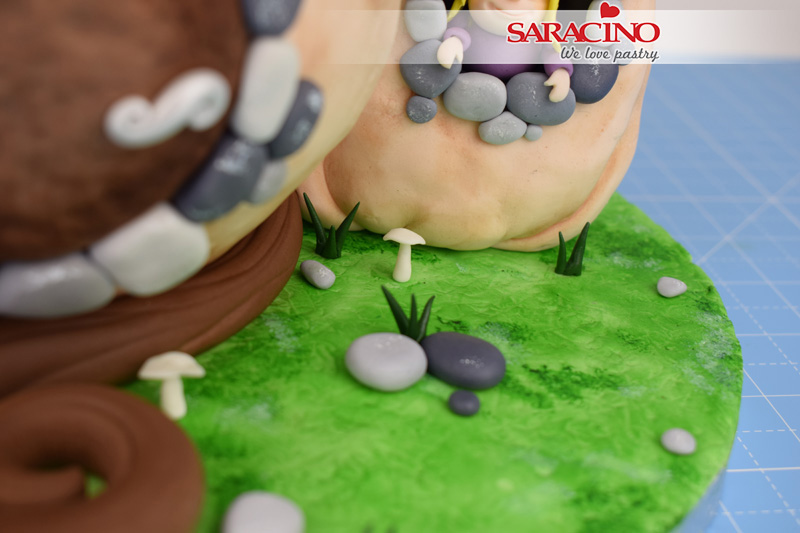
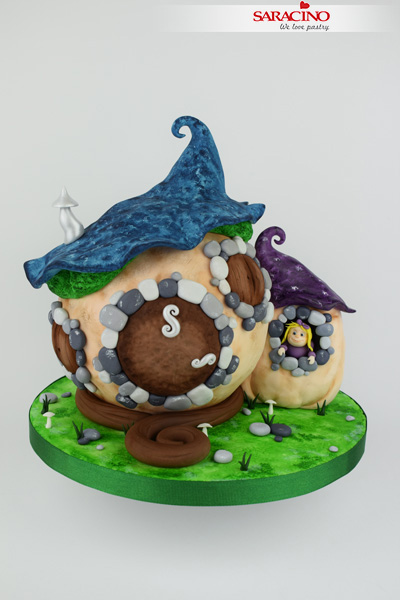
We do believe in fairies! And now you can too. Join our ambassador Lynsey from Sugarwhizz as she shows you step by step how to make this adorable magical fairy and her little house! Perfect for believers of all ages!


You will need:

  • 400g – Cream coloured Saracino top paste (Sugarpaste) To get cream add a tiny amount of Saracino skin tone gel colour to white paste.

  • 200g – Green Saracino top paste (Sugarpaste)

  • 711g – White Saracino Pasta Model (modelling paste) coloured and divided as follows

  • Saracino Colours Gel paste: Brown, Violet, Blue, Black, Green, Skin tone, Yellow. Colour and divide your paste as follows –

Brown Gel Colour – 120g – Branch around base, 25g – Door, 24g – Windows

Black Gel colour – 25g Dark grey – Stones, 25g Medium grey – Stones, 32g Light grey – Stones, chimney and door fixings, 7g Black – Window and eyes

Green Gel colour – 115g green – Moss under roof, 2g Dark green – Grass (add a touch of violet gel colour to the green paste to darken)

Blue Gel colour – 250g Pale blue for roof. (add a small amount of black to blue paste to create a pale navy colour), 1g Blue – Eyes

Violet Gel colour – 70g light purple – Small Roof, 5g dark purple – Body and arms

Yellow Gel colour – 2g Hair

Skin tone Gel colour – 5g – Girl

  • White modelling paste – 3g
  • Saracino powder – White, Brown, Green, Pearl and Silver Lustre
  • A six-inch sphere cake
  • 10in round cake drum
  • Baking parchment
  • Knife
  • Rolling pin
  • Balling tool (Cerart, K500, K501 & K502)
  • Dresden tool (Cerart 301)
  • Small Star tipped piping nozzle
  • Cool boiled water/ edible glue
  • Small paintbrush for gluing
  • Small paintbrush for painting
  • Small flat paintbrushes for dusting and painting
  • Small stiff bristled paintbrush.
  • Small amount of royal icing.
  • 60g of rice crispy treats
  • Green ribbon


Step 1

To cover cake – Roll out 250g of Cream Saracino top paste to a thickness of around 5mm. Carefully lift the paste and place it on top of your cake.

Step 2

Smooth the paste down the sides, across the top and round underneath the sphere. Trim the excess paste away with a sharp knife. Don’t worry it doesn’t have to be perfectly smooth

Step 3

Press gently with your fingertips all over the sphere to create a slightly uneven surface. Use a stiff bristled paintbrush to gently press in and texture the whole surface of the sphere. TIP: Stiff bristled paintbrush – Trim the bristles of a pastry brush to make a stiff bristled brush perfect for texturing paste.

Step 4

To cover board – Take 200g of white Saracino top paste and add a small amount of yellow Saracino gel colour along with a tiny amount of green Saracino gel colour. Knead together until the paste is evenly coloured.

Step 5

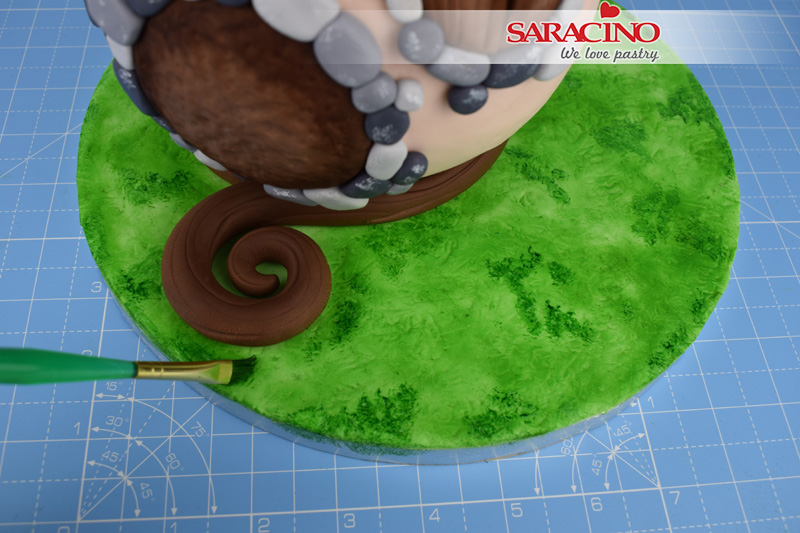
Roll out the green paste and cover the board. Trim any excess from around the edge with a sharp knife. Take a small piece of baking parchment and screw into a ball. Dab the ball gently across the board to texture the paste.

Step 6

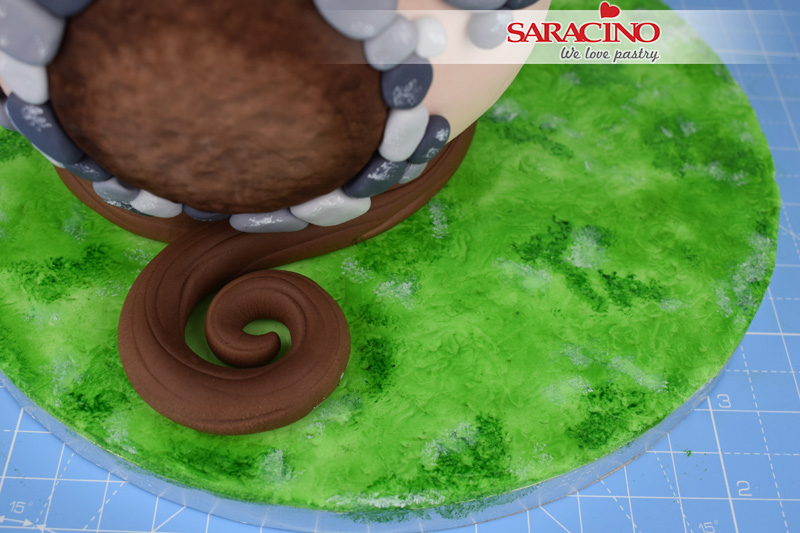
To make the branch – Take 120g of brown modelling paste, roll into a long thin sausage, tapered to a point at one end (approximately 20inches long). Use the veining end of the Dresden tool (Cerart 301) to gently score lines along the length of the paste. Gently curl the tapered end into a spiral.

Step 7

Stick the cake into place on the left side of the board with a small amount of royal icing. Wrap the branch around the base of the cake. Start at the front with the thickest end and continue around until the spiral end overlaps and is front and central to the cake. Stick into place with a small amount of cool boiled water.

Step 8

Door – Take 25g of brown modelling paste, roll into a ball and then flatten gently with the palm of your hand. Rub around the edge with your fingertips to thin the paste slightly. Use the balling tool (Cerart 500) to texture the surface of the door. Apply a small amount of Saracino Brown powder around the edge of the door to shade as shown.

Step 9

Windows – Divide 24g of brown modelling paste equally into three pieces. Roll each piece into a ball, flatten with the palm of your hand and thin the edges with your fingertip as before. Use the veining end of the Dresden tool (Cerart 301) to mark vertical lines and grooves across each piece. Using a sharp knife cut each piece equally in half. Use the small end of the balling tool (Cerart 501) to create a hole in each window shutter as shown. Lastly shade around the edge of each window shutter with brown Saracino dust as before.

Step 10

Apply a small amount of water to the back of the door and each window shutter. Stick the door into place above the spiral of the branch. Stick two windows into place on the front of the cake as shown.

Step 11

Stick the final third window into place on the back of the cake as shown.

Step 12

Apply a small amount of Saracino black gel colour to 32g of white paste to create a light grey colour. Increase the black gel colour added to 25g of white paste to create a medium grey colour, and a further 25g of white paste to create a dark grey colour as shown.

Step 13

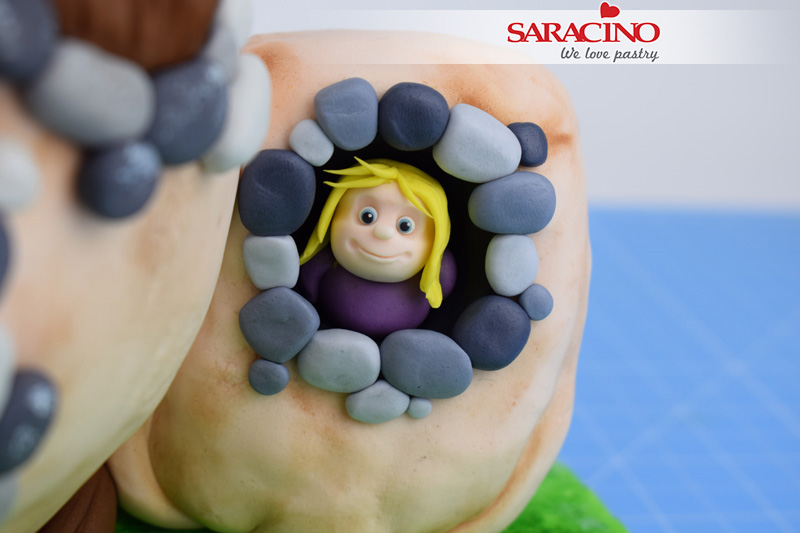
Take 20g of each of the light, medium and dark grey pastes. Roll various sizes and shapes of stones and stick around the outside of the door and all three windows to frame as shown.

Step 14

Mix a small amount of Saracino white powder with a couple of drops of water to create a paste. Dip a paintbrush into the paste and wipe off the excess, so that the paintbrush is almost dry. Dab the stones with the paintbrush to transfer a small amount of colour as shown.

Step 15

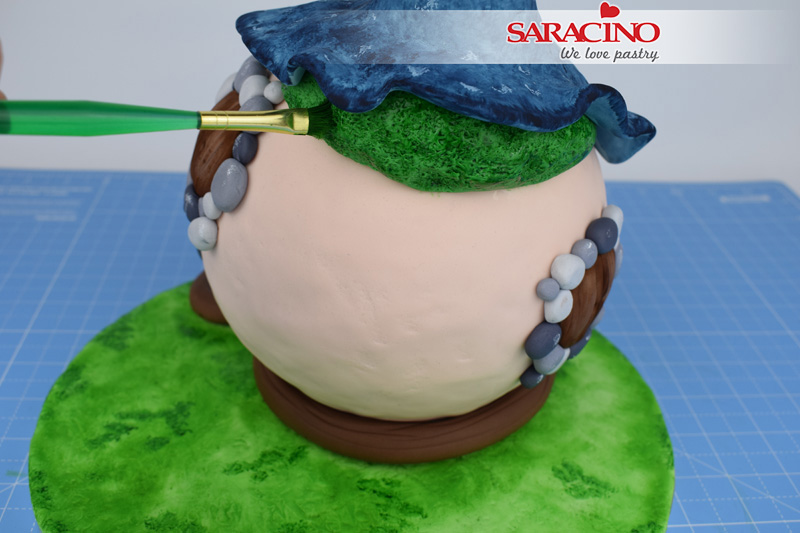
Moss – Divide the 115g of green modelling paste into two pieces. One 80g and the other 35g. Roll the 80g piece into a sausage tapered at each end, and roughly 5.5 inches long. Roll the 35g piece into the same shape roughly 3.5 inches long. Use the small star tip piping nozzle to gently press in and texture each piece to look like moss as shown.

Step 16

Gently bend each piece into a curve. Stick the largest piece to the top right of the cake, and the smallest piece lower down on the left-hand side of the cake as shown. Smooth the top of the paste level with the cake using your fingertips. Retexture the paste with the star tip if needed once attached.

Step 17

Roof – Roll 250g of light blue modelling paste into a teardrop shape as shown.

Step 18

Use your thumb and fingers to pinch out the paste at the fattest end of the teardrop.

Step 19

Keep pinching and thinning the paste until it is large enough to cover the top of the cake. Pinch around the edge of the roof to thin and smooth the paste to a point.


Step 20

Stick the roof into place with a small amount of water. Gently curl over the top of the roof as shown. Use your fingertips to gently pinch and shape around the edge of the roof as shown.

Step 21

Mix 3 drops of blue Saracino gel colour, 1 drop of black Saracino gel colour with a teaspoon of clear alcohol. Use a flat paintbrush to dab the colour unevenly across the surface of the roof as shown.

Step 22

Once the whole roof is painted unevenly (including where the roof is visible underneath) Shade around the edge of the roof with more paint to darken.

Step 23

Paint white highlights in the same way you painted the stones earlier on.

Step 24

Take a small amount of Saracino green powder and using a small flat paintbrush, carefully rub a little dust at a time around the surface of the board, creating an uneven pattern

Step 25

Repeat the process on the board, only this time add a couple of drops of water to the green dust to darken and create a paint.

Step 26

Use the dark green paint to shade each section of moss under the roof.

Step 27

Add white highlights to the grass using the paint from earlier

Step 28

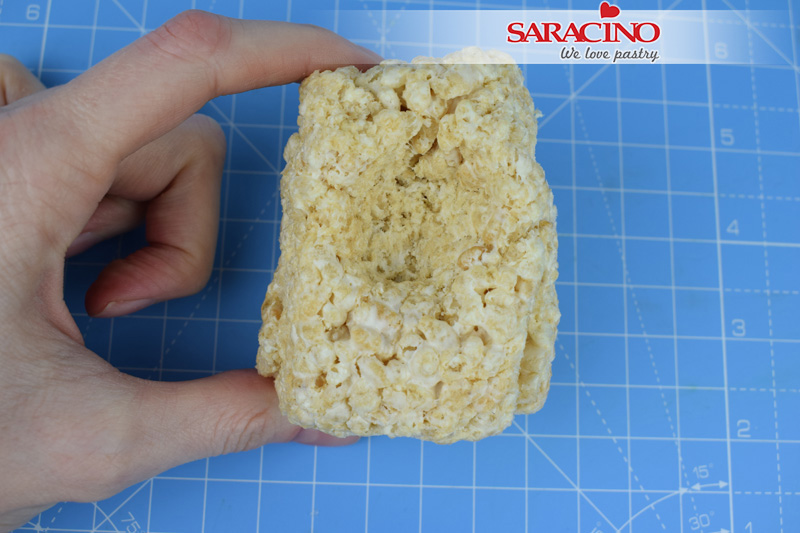
Small house – Roll 60g of rice crispy treats into a rough cylinder shape. Use your thumb and fingers to gently push in and shape the window, (where the fairy will sit later) as shown.

Step 29

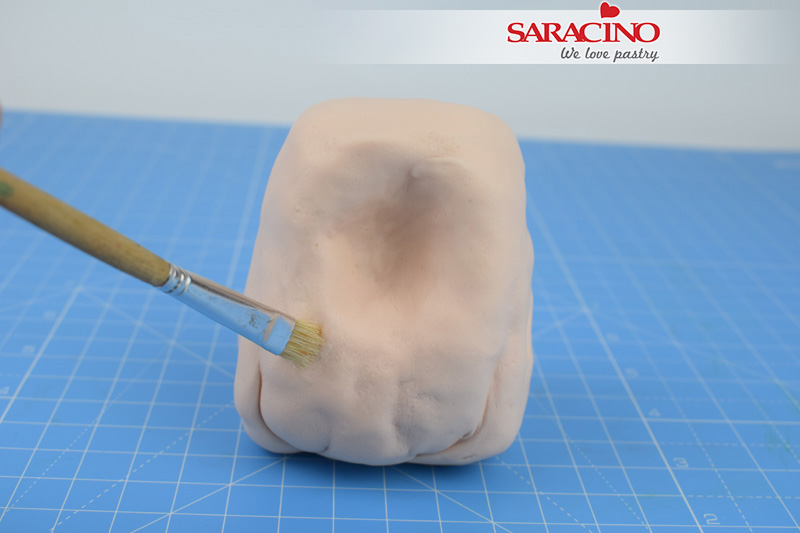
Roll out 150g of cream Saracino top paste to a thickness of around 5mm. Carefully lift the paste and cover the rice crispy house. Gather any excess paste underneath and trim off with a sharp knife. It doesn’t need to be perfect or smooth, lumps and bumps will add to the character of the house. Texture the surface in the same way you did for the first house in step 3.

Step 30

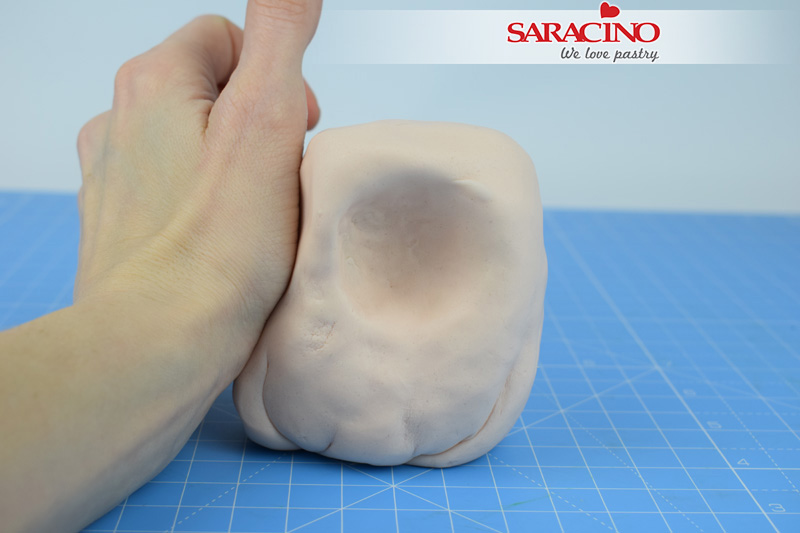
Use the side of your hand to gently press the left side of the house and shape to a curve. This will ensure it fits snuggly to the main house.

Step 31

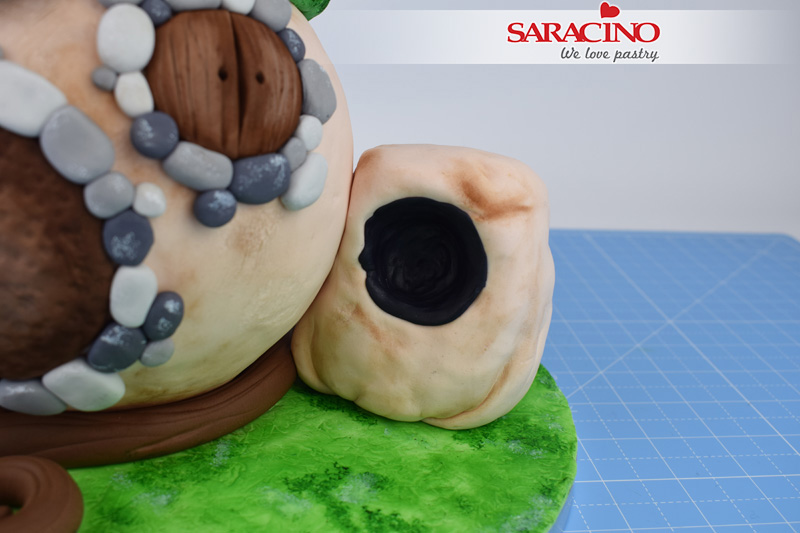
Stick the small house onto the larger house and board with a small amount of water. Shade and colour both houses using a flat paintbrush and a small amount of Saracino brown dust.

Step 32

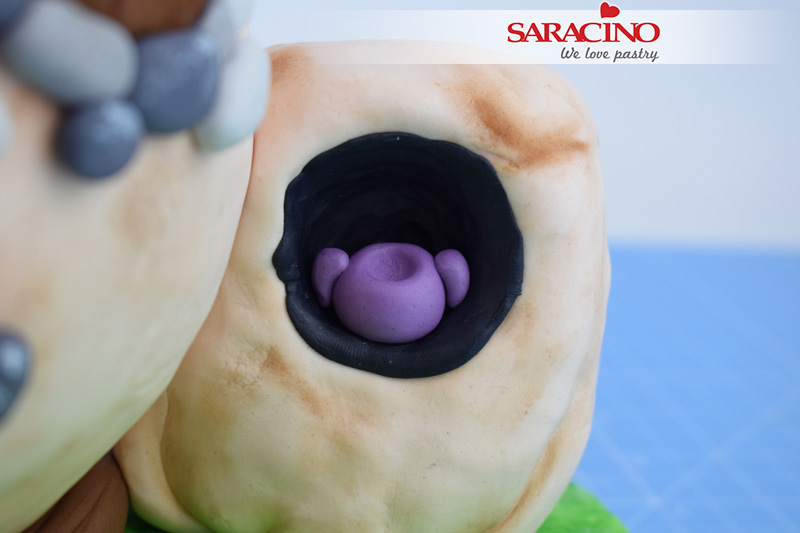
Roll out 5g of black modelling paste into a circle. Stick into place on the back of the open window on the small house as shown

Step 33

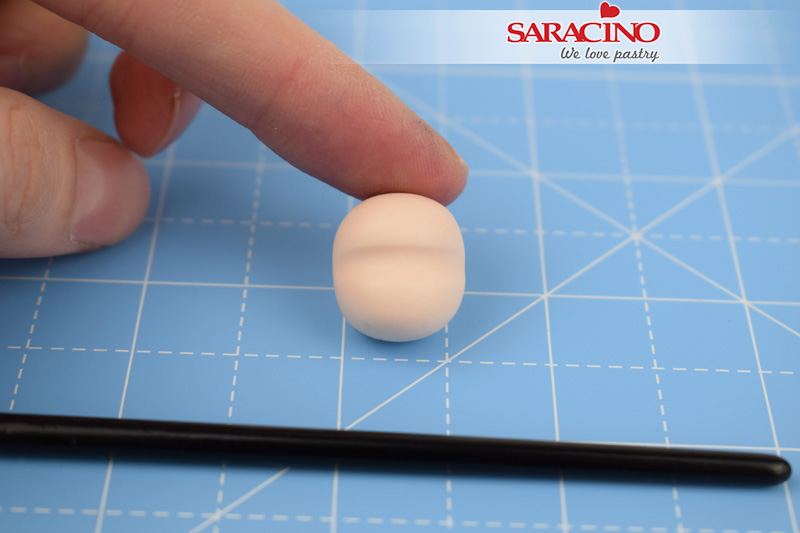
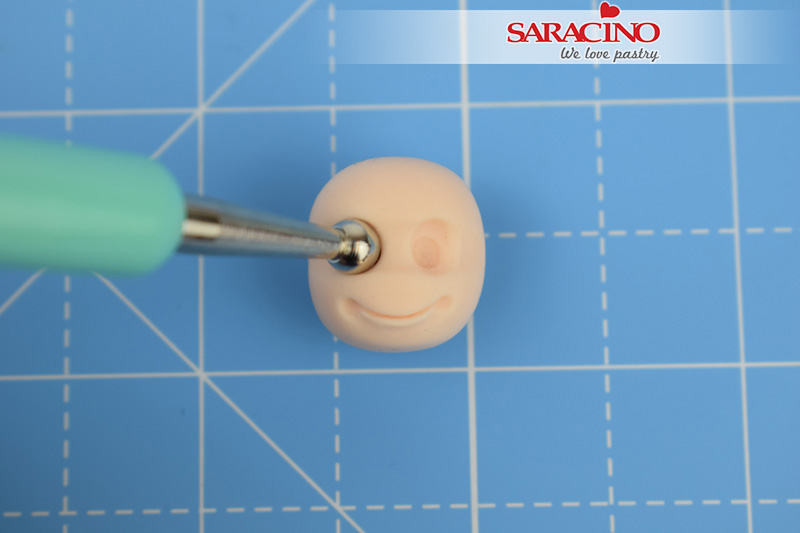
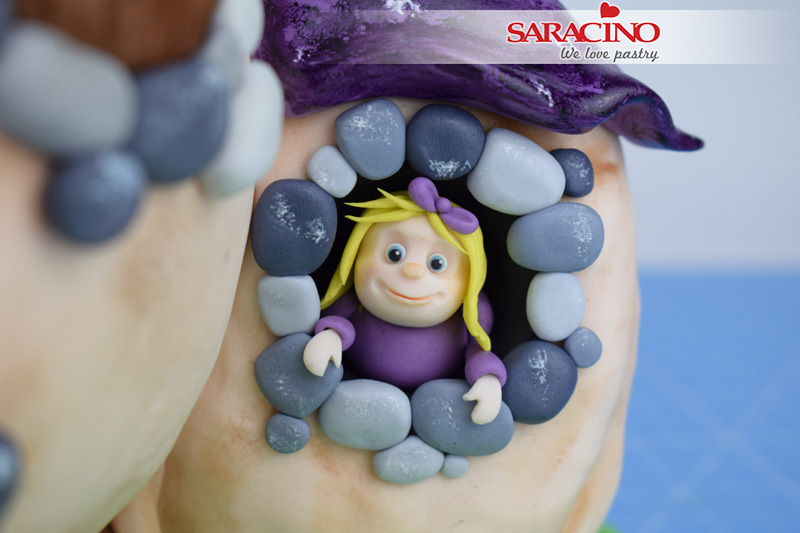
Fairy head – Take 3g of flesh coloured modelling paste, roll into a small ball. Gently press the handle of a paintbrush into the paste to create a shallow groove just above the middle of the face as shown.

Step 34

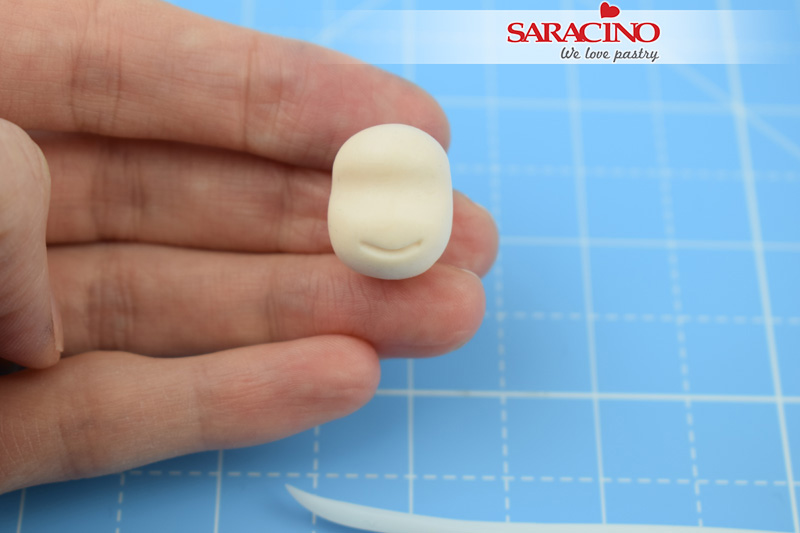
Use the veining end of the Dresden tool to carefully mark the mouth.

Step 35

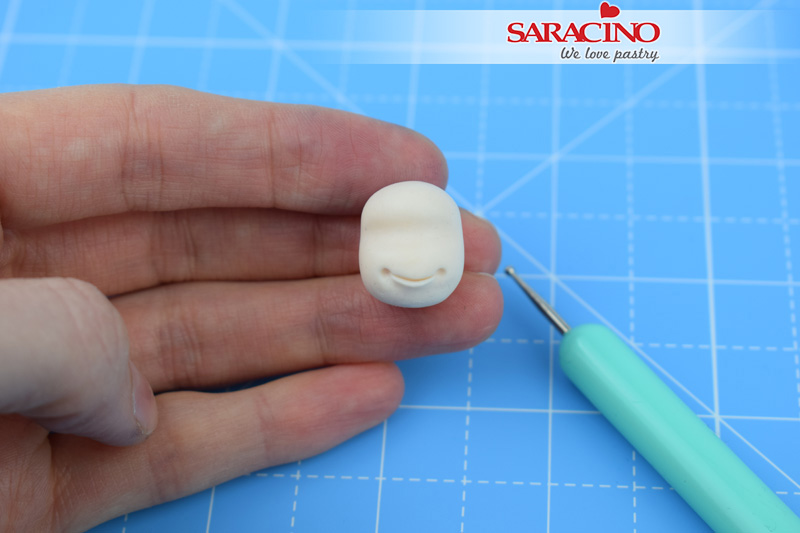
Rub the smoothing end of the Dresden tool (Cerart 301) under the mouth to shape the bottom lip. Use the small end of the balling tool (Cerart 502) to indent each corner of the mouth as shown.

Step 36

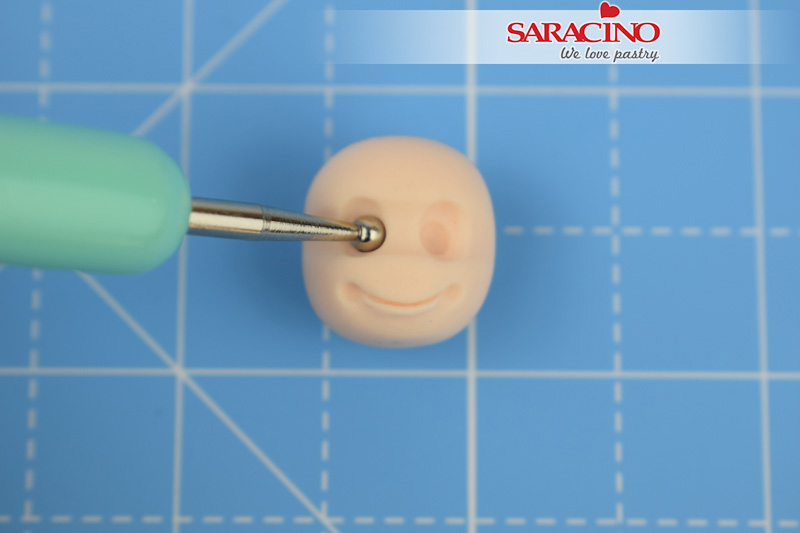
To shape the eyes – First use the largest end of the balling tool (Cerart 501) to indent the paste.

Step 37

Then using the smallest end of the balling tool (Cerart 501) create a smaller indent within the larger one you made previously. Repeat for each eye. TIP: Use a small paintbrush to make lifting and positioning small elements such as the iris and pupil into place easier.

Step 38

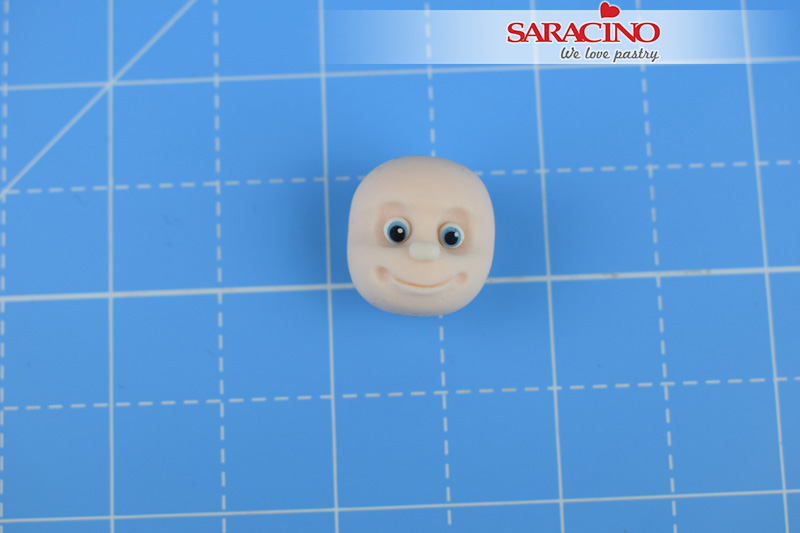
Eyes – Roll two tiny balls of white paste and stick them into place using a tiny amount of water. Roll two tiny balls of blue paste, two smaller balls of black paste and two even smaller balls of white paste. Flatten each one gently with your fingertip. Stick them into place on the whites of the eyes, blue first, followed by black and finally the white. Roll a tiny ball of flesh coloured paste for the nose and stick into place as shown.

Step 39

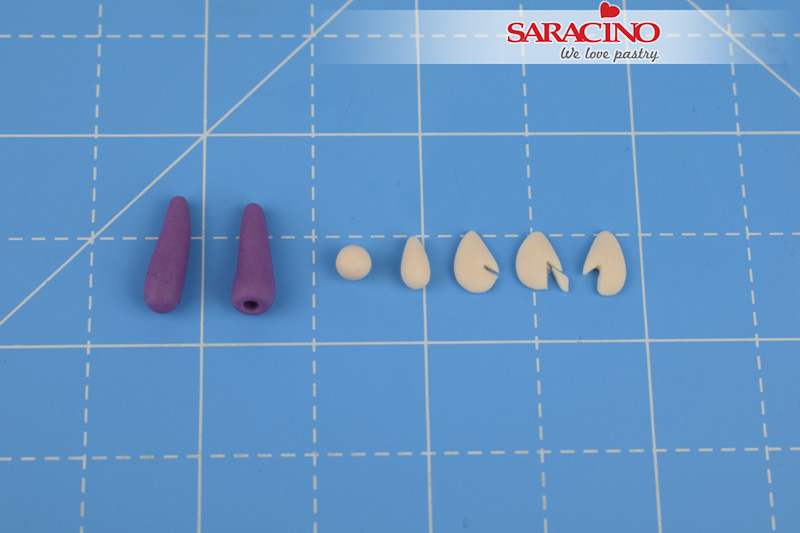
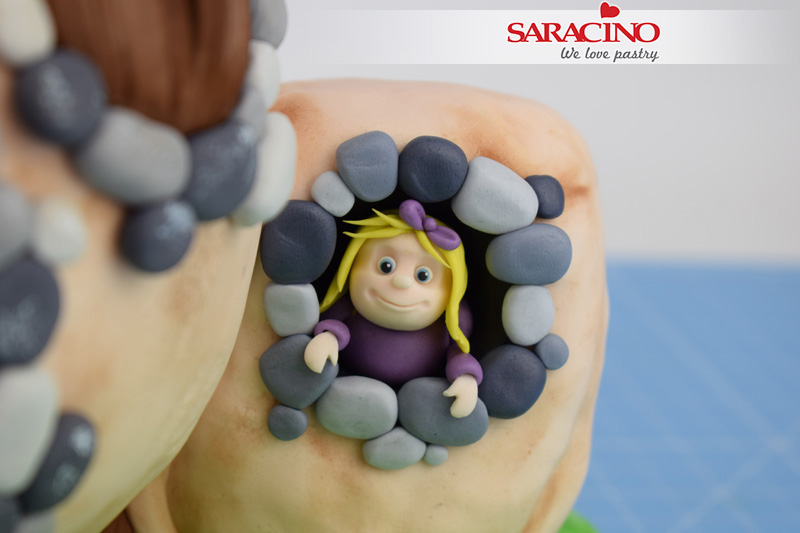
Body – Roll 2g of purple paste into a ball and stick into the open window. Use the large end of the balling tool (Cerart K500) to gently indent the top of the paste ready for the head. Take 1g of purple modelling paste and divide equally in half. Role each piece into a small teardrop and stick into place each side of the body (widest end at the top)

Step 40

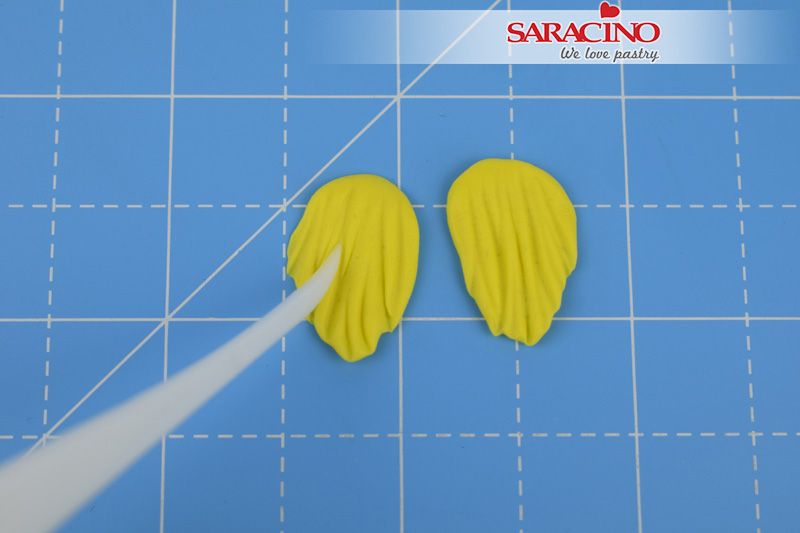
Hair – Take 1g of yellow modelling paste, divide equally in half. Roll each piece into a teardrop and flatten with your fingertip. Use the veining end of the Dresden tool (Cerart 301) to gently mark grooves and texture the hair as shown.

Step 41

Stick the head and hair into place as shown. Roll 4 tiny strands of yellow paste for the fringe and stick into place also. Make and stick into place stones around the outside edge of the window with some of the remaining grey paste. (remember to save 9g of light grey paste for later) 

Step 42

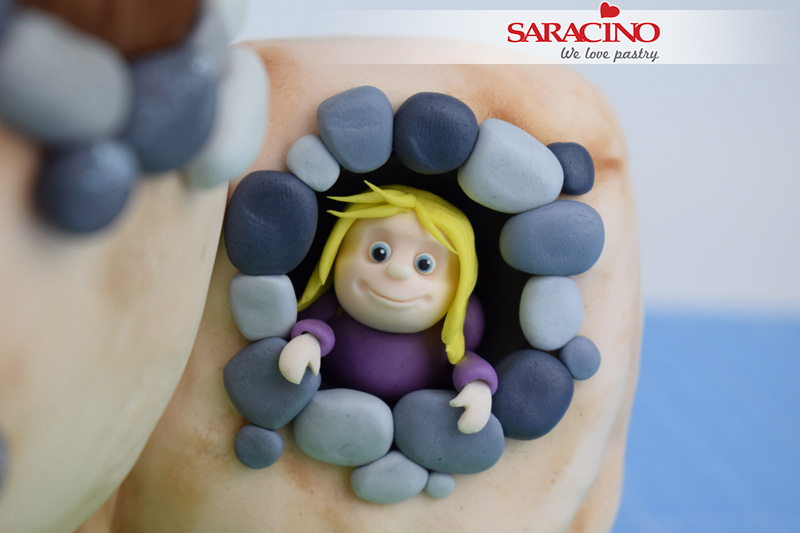
Arms – Take 2g of purple modelling paste and divide equally into two. Roll each piece into an elongated teardrop. Use the small balling tool (Cerart K502) to gently indent a hole into the widest end of each arm. Hands – Roll two tiny balls of flesh modelling paste into teardrops. Flatten each gently with your fingertip. Use a sharp knife to cut out the thumb on each hand. Smooth any knife marks with your fingertip. TIP: Remember when cutting the hands to cut thumbs on the opposite sides to ensure you end up with a left and right hand.

Step 43

Attach the arms to the side of the body. Apply a tiny amount of water to the hole at the end of each arm and attach the hands. Curl the hands over gently to ‘hold’ the window frame.

Step 44

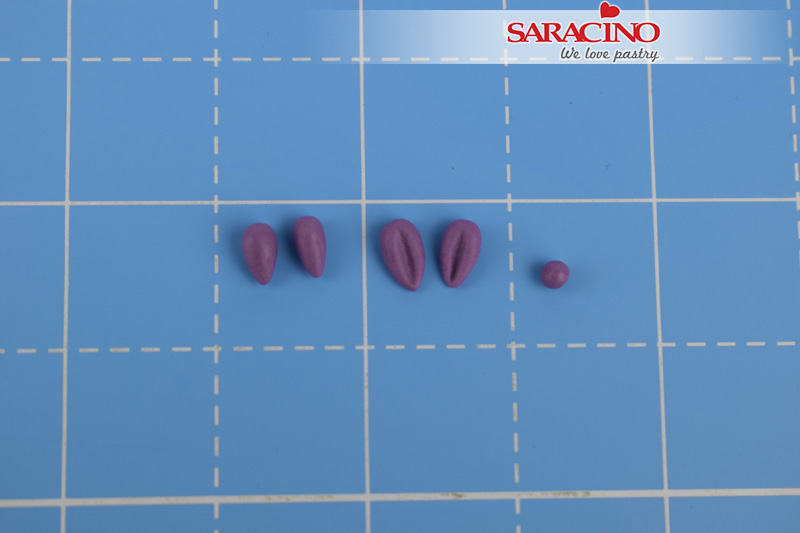
Bow – Roll two tiny teardrops of purple modelling paste and one tiny ball. Use the veining end of the Dresden tool (Cerart 301) to mark a grove in each teardrop.

Step 45

Stick two teardrops to the top of the head (pointed ends touching each other) and then stick the tiny ball in the centre to create and finish the bow.

Step 46

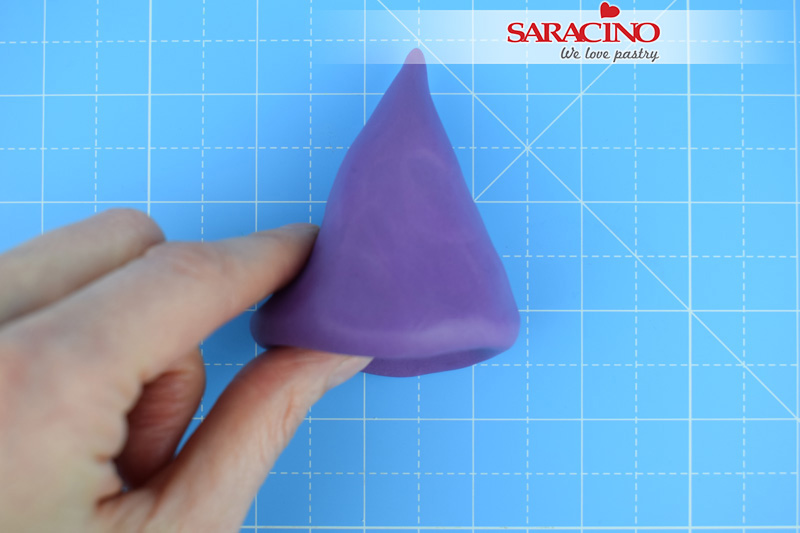
Small roof – Roll 70g of purple modelling paste into a teardrop shape and pinch around the base to widen and thin the paste.

Step 47

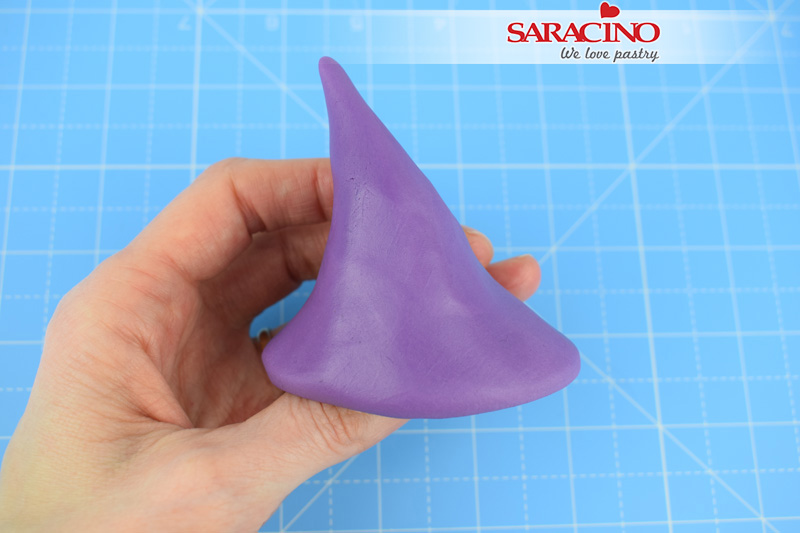
Continue to pinch and smooth until the paste is big enough to cover the roof.

Step 48

Curl the top of the roof over and stick into place. Shape and thin around the edge of the roof. Decorate the board with any additional stones.

Step 49

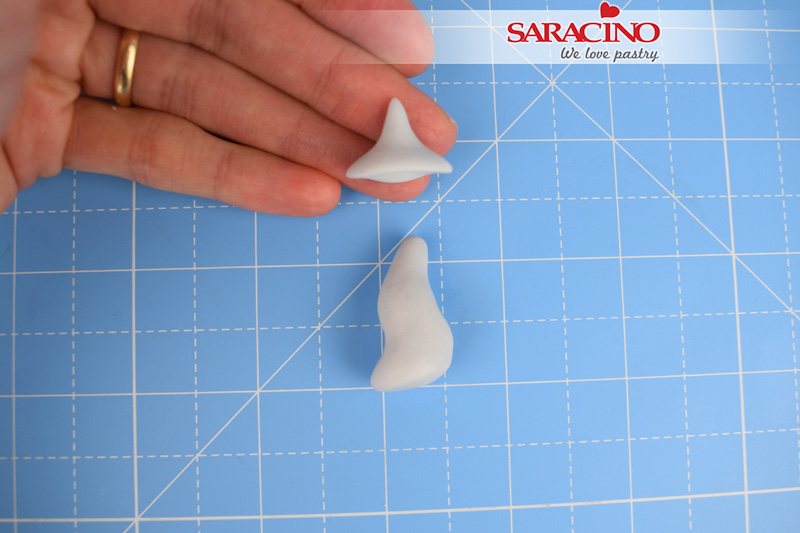
Chimney – Roll 5g of light grey modelling paste into a sausage tapered at one end, bend the paste gently into the shape shown. Roll 1g of light grey modelling paste into a teardrop. Pinch and thin the bottom of the paste, like you did for the roof to create the chimney top.

Step 50

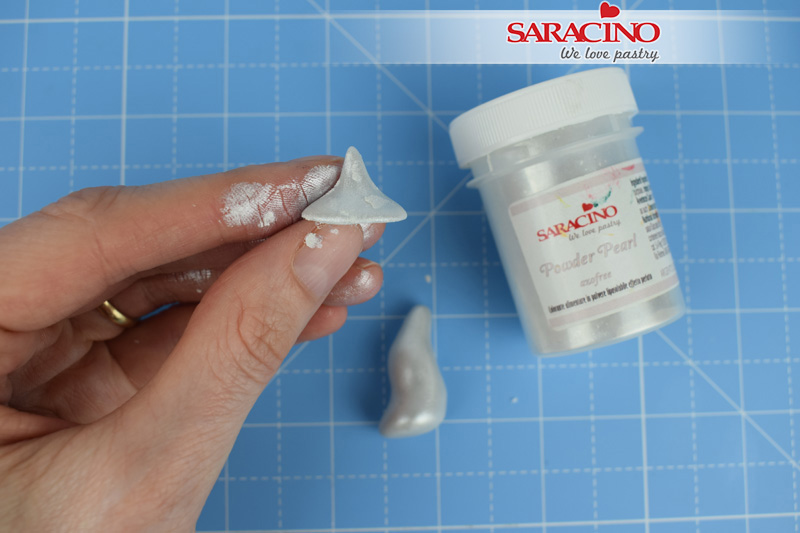
Dust the chimney pieces by rubbing a small amount of the Saracino Powder Pearl, sliver lustre, onto each piece with your fingertips.

Step 51

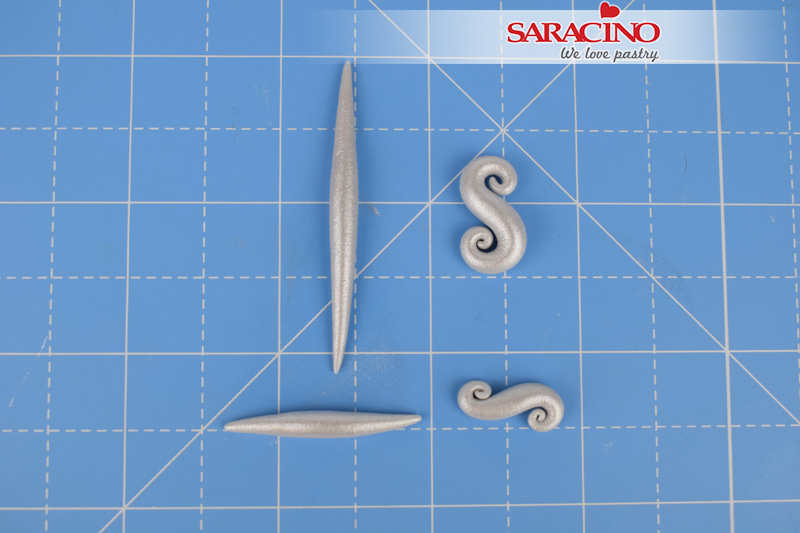
Door fixtures – Take 2g of light grey modelling paste and roll into a long sausage tapered at each end, dust with sliver lustre and curl over each end to create the large S shape. Repeat with 1g of grey modelling paste to create the smaller S shape

Step 52

Stick the chimney onto the roof as shown. Stick the large S to the top of the door and the smaller S as a handle on the right-hand edge of the door as shown.

Step 53

Mix 2 drops of Saracino purple gel colour with a small amount of clear alcohol and paint the smaller roof the same as you did in steps 21 and 22 for the larger roof. Highlight the roof and stones on the board again with white paint as before.

Step 54

Face – Mix one drop of Saracino skin gel colour with two drops of clear alcohol. Use a small paintbrush to paint the nose, bottom lip and cheeks of the fairy.

Step 55

Grass – Take 2g of dark green modelling paste and roll several tiny strands of paste. Group them together and stick randomly across the board as shown.

Step 56

Mushrooms – Use 1g of white modelling paste to create several mushrooms and stick randomly across the board as shown. The stem of each mushroom is made from a teardrop and the top of each mushroom is made from a tiny ball flattened with your fingertip.

Step 57

Finish by covering the edge of the board with a length of green ribbon.

COVERING A CAKE TUTORIAL

COVERING A CAKE TUTORIAL

Skill level: BEGINNERS

You will need:

  • Saracino white Top Paste
  • Dekofee silicone working mat extra large
  • Large rolling pin
  • Sharp knife
  • Pizza cutter
  • Tape measure
  • Soft brush
  • Water
  • Cornflour
  • Microwave
  • Smoothers

Step 1

You need 300 – 500 grams Saracino Pasta Top. The amount always depends on the size of your cake and how thick or thin you roll out the sugarpaste.

Step 2

Before you start to work on the Pasta Top, Using a little water moisten the ganache on your cake (in this tutorial I am using a dummy). DO NOT moisten the top! Moistening helps to fix the Pasta Top to the cake when it is covered.

Step 3

Use a sharp knife to cut the amount of fondant you need. You will find the Pasta Top firm at first and this is totally normal as it becomes soft when it is worked.

Step 4

In order to be able to knead the sugarpaste better, I always recommend to heat the fondant for 10 seconds in the microwave (700 watts)

Step 5

After you have warmed up the fondant a little, you will be able to work with it easily. It can now be kneaded without being too firm.

Step 6

It is really important to knead it really well. The kneading will pay off when you come to cover the cake.

Step 7

The kneading and the warmth from your hands will make the fondant soft and very supple.

Step 8

Now you can colour the Pasta Top using your Gel Colour.

Step 9

Work the gel colour into the paste. Blending the colour also helps to make the paste even more pliable.

Step 10

Keep blending and kneading until you get this kind of appearance and the paste is stretchy and soft.

Step 11

PERFECT!

Step 12

You can use the fondant immediately but I have found it works really well if you leave the fondant in cling film for 24 hours after colouring. TIP: I only cover my cakes after 24 hours.

Step 13

Put the tape measure over the top of your cake and down each side. This way you can see what diameter of Pasta Top you need to roll out for covering.

Step 14

If required lightly dust your work surface with cornflour to prevent possible sticking

Step 15

Place the Pasta Top on your work surface and roll the fondant out evenly.

Step 16

Keep rolling until you reach the required diameter for the cake

Step 17

Fold the rolled out paste over your rolling pin

Step 18

Place it gently over your cake using a rolling motion.

Step 19

Using a smoother press down lightly on the top to remove any air bubbles and make smooth.

Step 20

Press around the top edge first

Step 21

Gently work the fondant downwards with your hands. Do not over stretch as the paste is very pliable and will smooth out to remove any creases.

Step 22

Use a pizza cutter or a sharp knife remove the excess paste

Step 23

Lift the excess away from the cake carefully

Step 24

Using your smoother start to work around the outside removing any bumps and air bubbles.

Step 25

Using flexible acetate smoothers work the top surface to give a smooth finish.

Step 26

You are now finished to decorate your cake as required

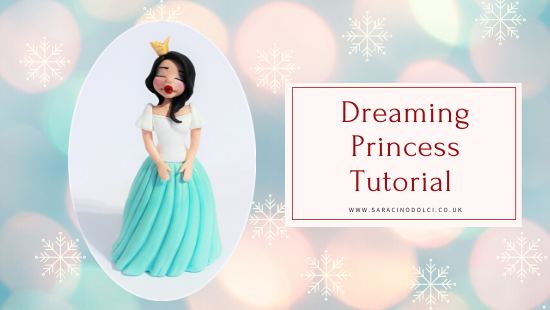
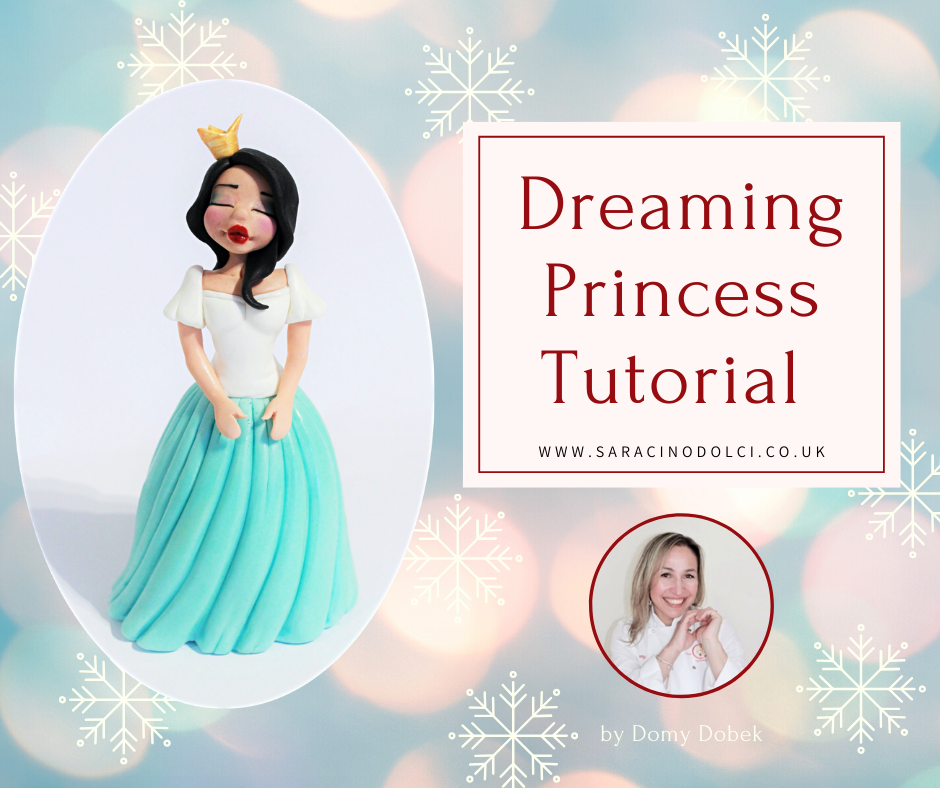
DREAMING PRINCESS TUTORIAL

DREAMING PRINCESS TUTORIAL

Author: Domy Dobek 

Skill level: BEGINNERS

You will need:

  • 10cm polystyrene egg
  • Dresden Tool
  • Small rolling pin
  • Sharp knife
  • Small sharp scissors
  • Paintbrushes
  • Cool boiled water / edible glue
  • Food safe skewer / flower wire
  • Circle cutter
  • Large cone tool
  • Small rubber brush tool
  • Face mould
  • Saracino modelling paste white
  • Saracino modelling paste skin tone
  • Saracino modelling paste bronze
  • Saracino modelling paste Tiffany
  • Saracino modelling paste black
  • Pink powder colour
  • Red powder colour
  • Gold powder colour

Step 1

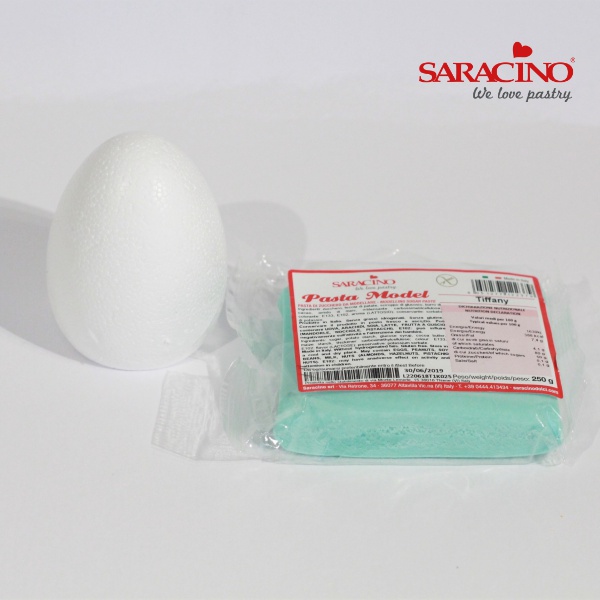
Prepare the 10cm polystyrene egg and the tiffany colour Saracino modelling paste

Step 2

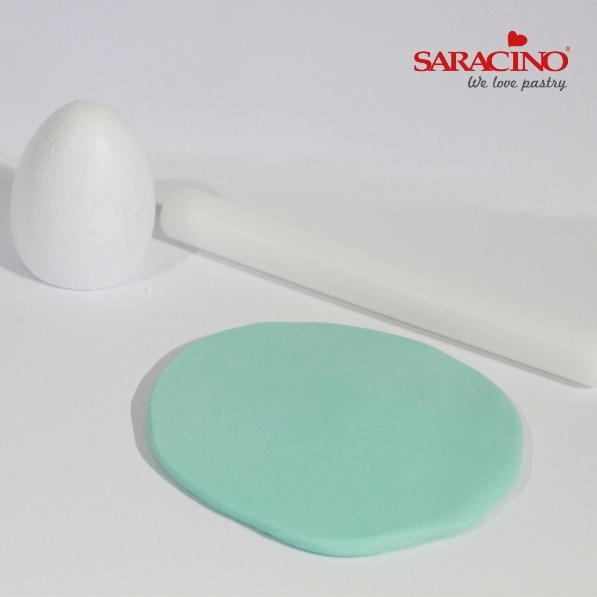
Roll out the Tiffany modelling paste to a thickness as shown

Step 3

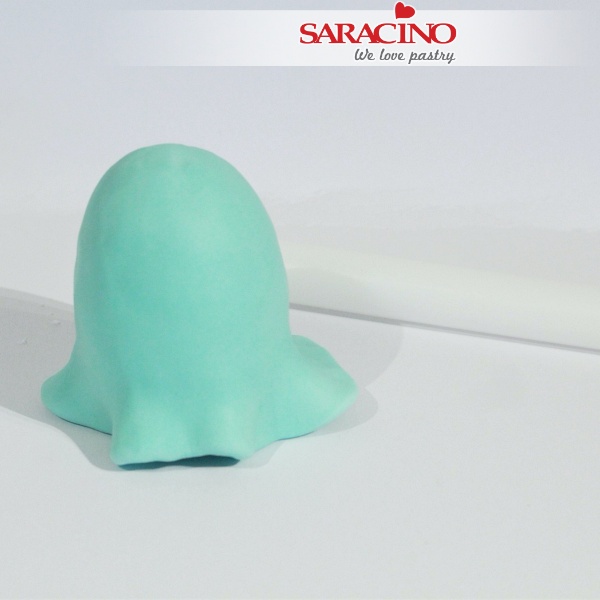
Cover the egg with the paste. A small amount of water can be used to stick the paste to the egg.

Step 4

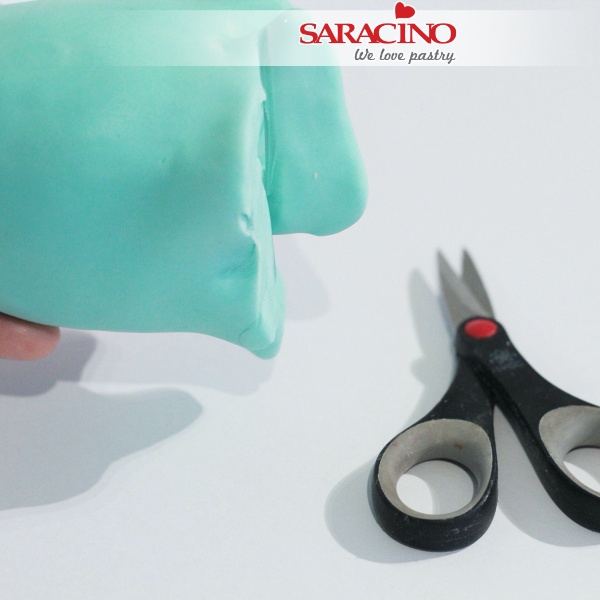
Cut the excess paste from around the bottom using the scissors

Step 5

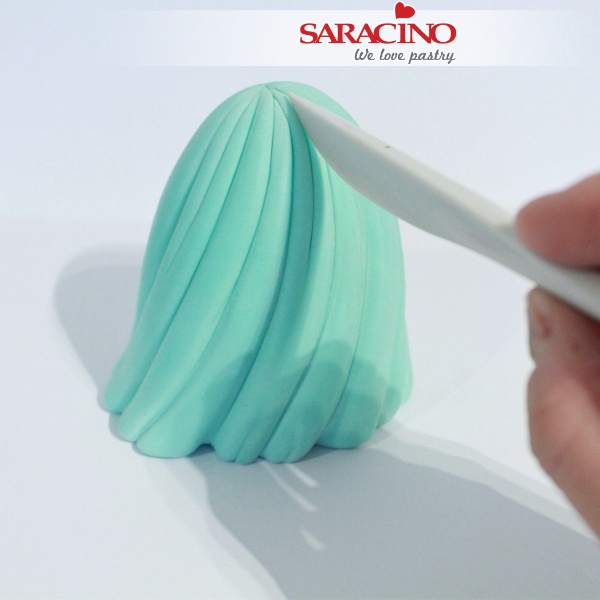
With a plastic knife or Dresden modelling tool create some lines for folds on the dress

Step 6

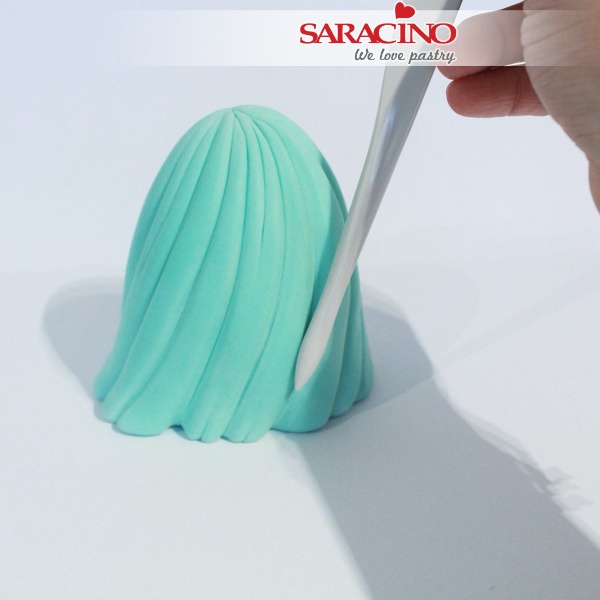
With a large cone tool enlarge the creases and smooth them out to give more natural look

Step 7

Mix some brown Saracino modelling paste with skin tone paste to get a darker shade for the skin tone.
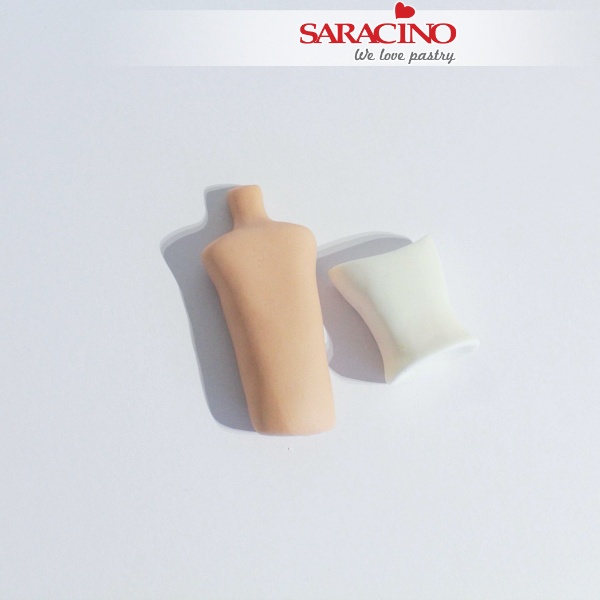
Roll out two cylinder shapes the same size using white paste for the dress and darker skin tone for the top of the body

Step 8

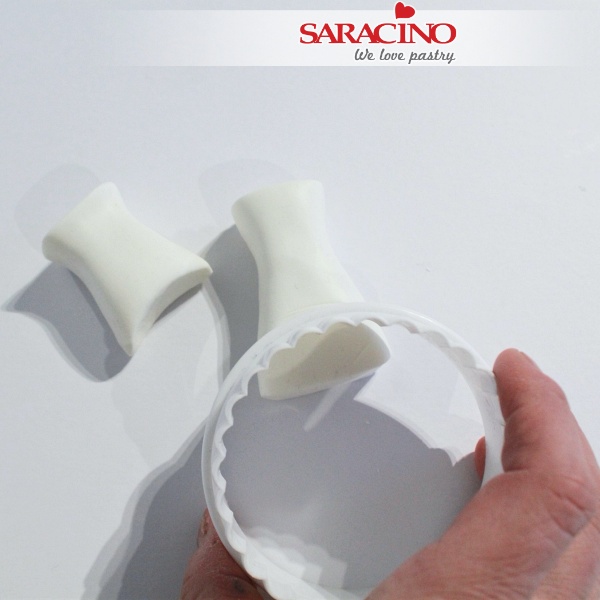
Using the large circular cutter cut the top off the cylinder shape to form the torso

Step 9

Using your fingers form a neck on the top of the skin coloured cylinder.

Step 10

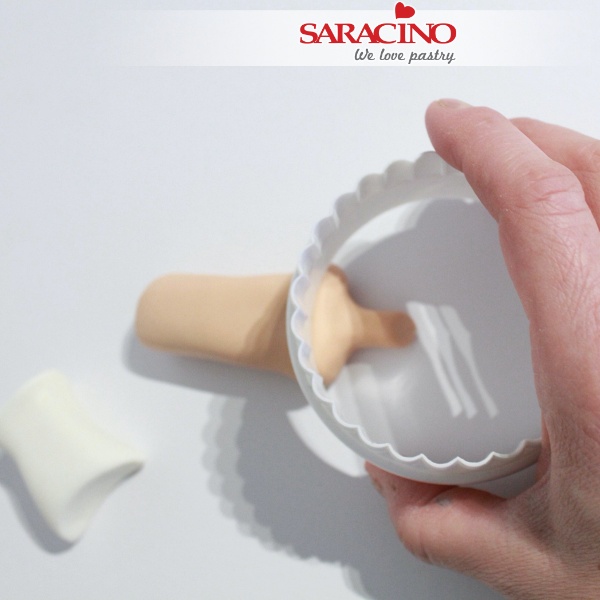
Using the large circular cutter cut the ‘shoulders’ away from the skin coloured cylinder.

Step 11

Stick the shoulders to the torso. Then stick the upper body to the skirt. Using a rubber brush and cone tool make details.

Step 12

Using the rubber brush tool form the shape of the chest area

Step 13

Using the end of your modelling tool shape detail to the throat area

Step 14

Using your modelling tool form further detail to the neck area

Step 15

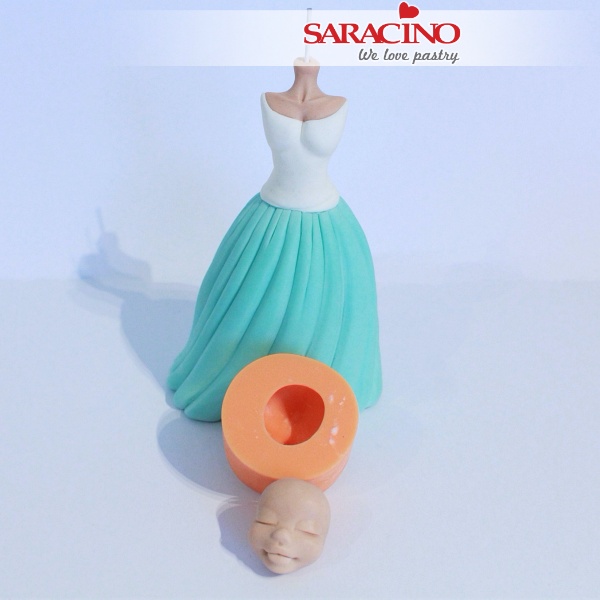
Using the skin toned Saracino paste form a head / face using a face mould.

Step 16

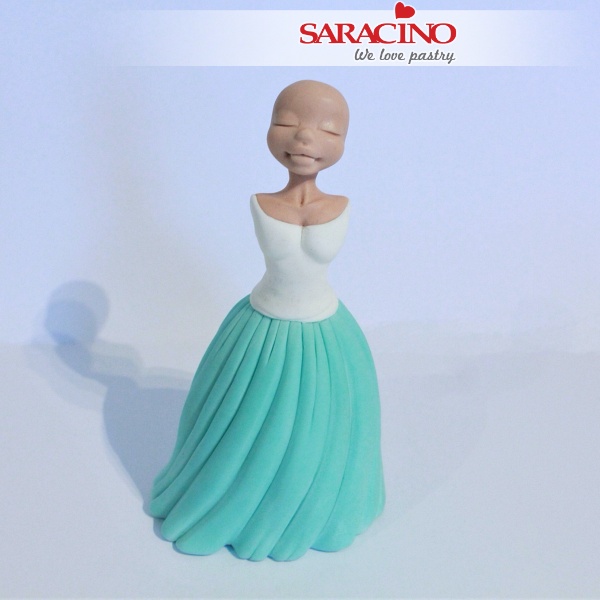
Attach the head to the neck. Insert a wooden skewer into the body.

Step 17

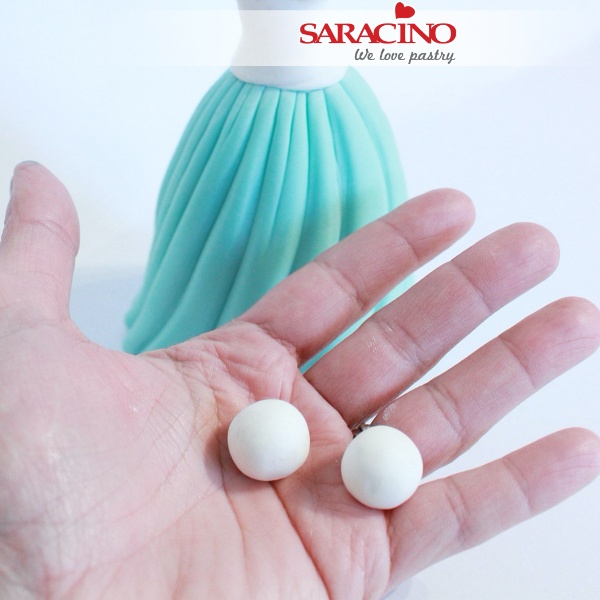
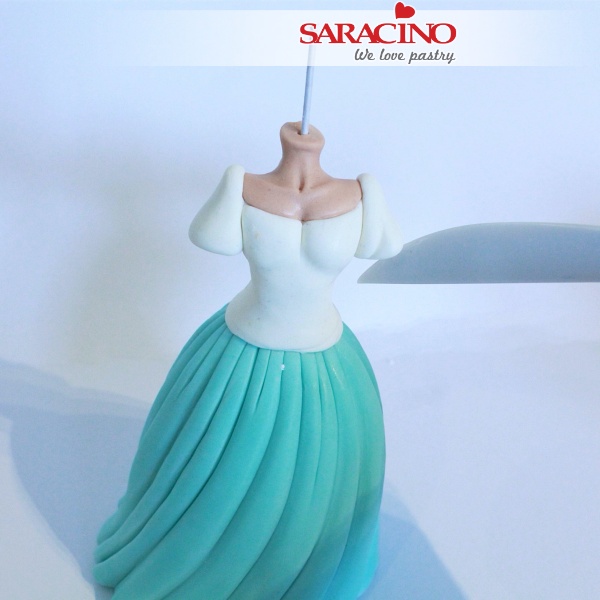
Take white modelling paste and roll two balls for the sleeves.

Step 18

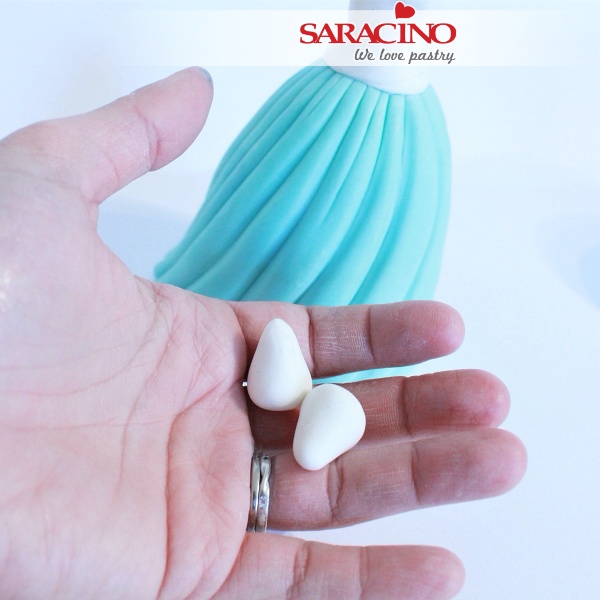
Form the two balls into cone shapes as shown.

Step 19

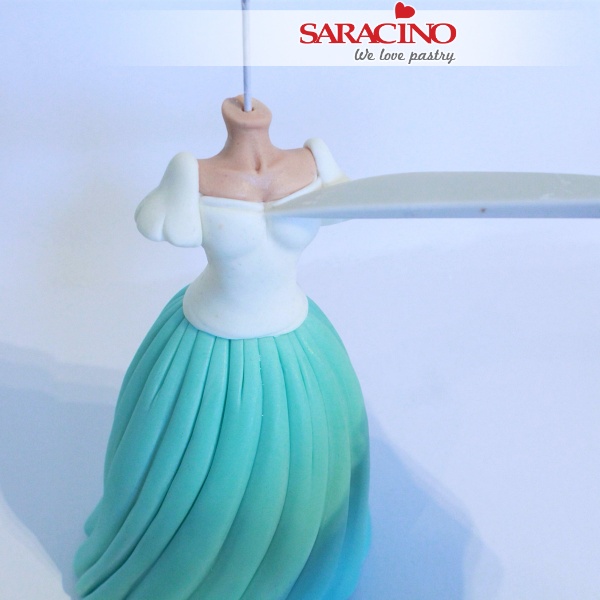
Fix the sleeves to the shoulders. Using a modelling tool or plastic knife form creases around each sleeve.

Step 20

Using a modelling tool or plastic knife form a line around the top of the dress.

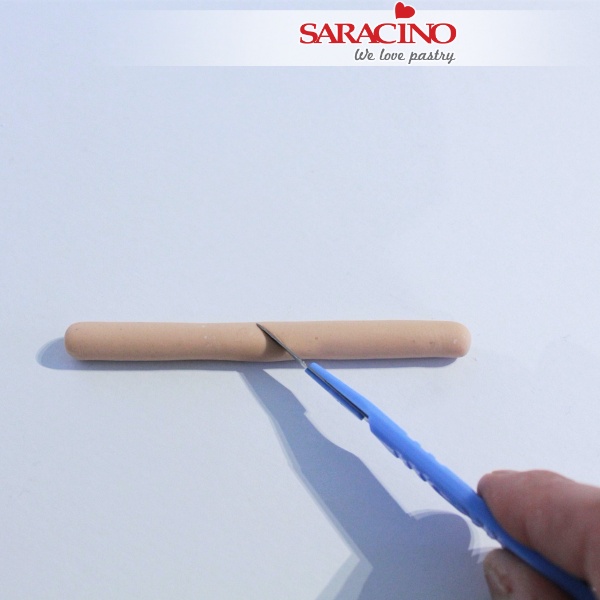
Step 21

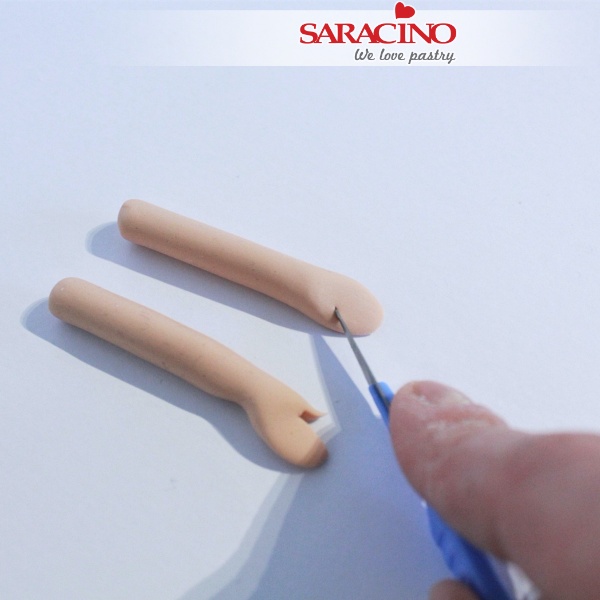
Using skin tone Saracino paste roll a sausage shape for the arms and hands. Cut the sausage in half as shown to give two arms.

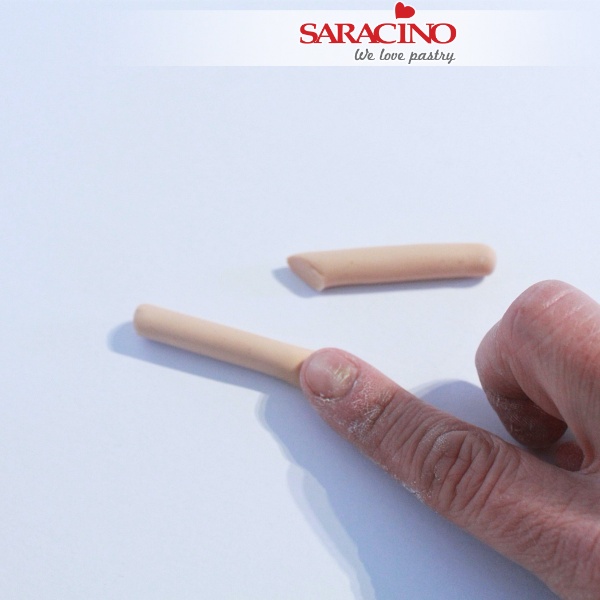
Step 22

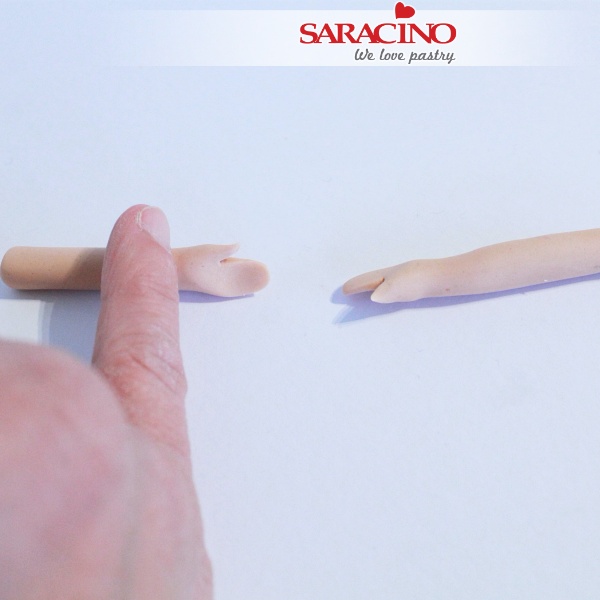
Using your finger flatten the pointed end to form a hand.

Step 23

Using a blade or sharp knife cut the thumb.

Step 24

Using finger pressure roll to form the narrower wrist

Step 25

Fix the two arms into the sleeves.

Step 26

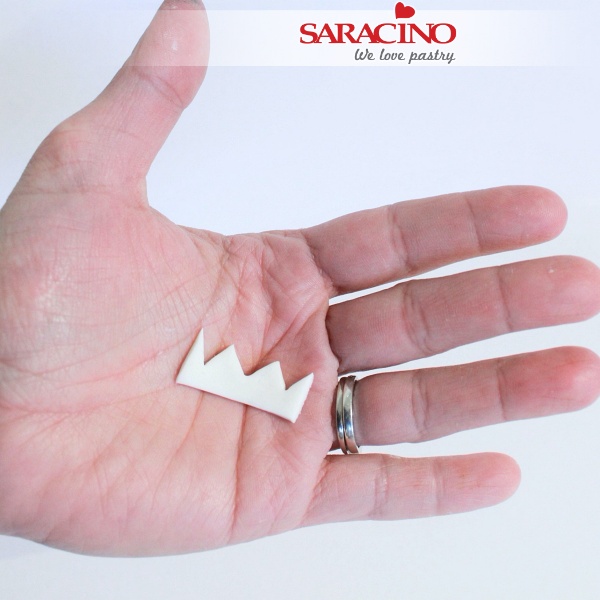
Roll out a piece of white paste and using a sharp knife cut out a crown.

Step 27

Using a little water on the edge form the circular crown shape. 
Step 28

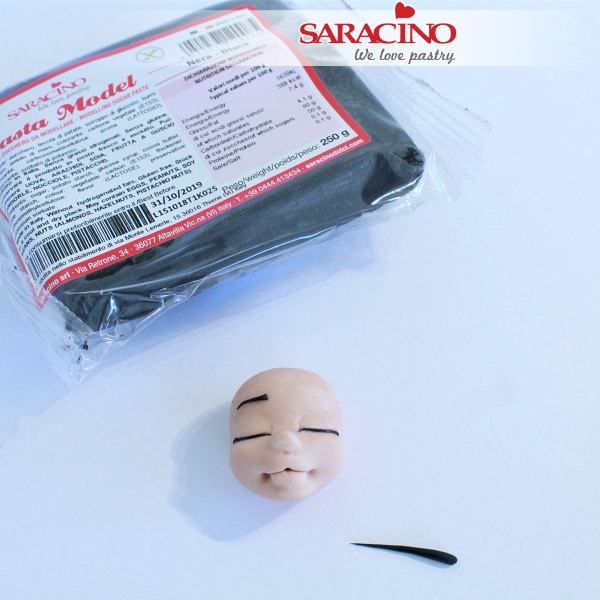
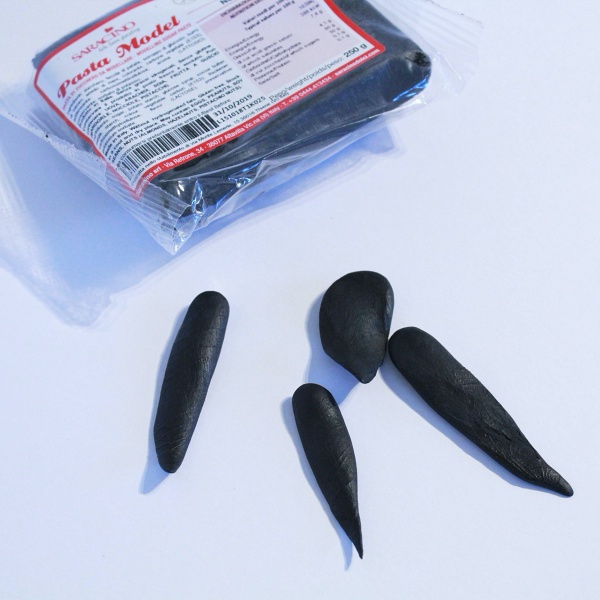
Roll out some black paste very thinly and fix to the face for eyebrows and eye lashes.
Step 29

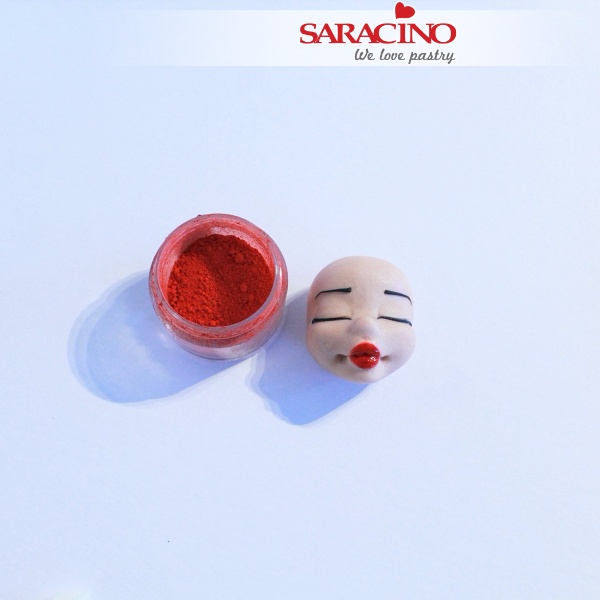
Mix red powder colour with clear alcohol and paint the lips with a small paintbrush

Step 30

Roll out black paste to form the hair

Step 31

Fix the hair to the head using a small amount of water if required. Fix the crown to the top of the head.

Step 32

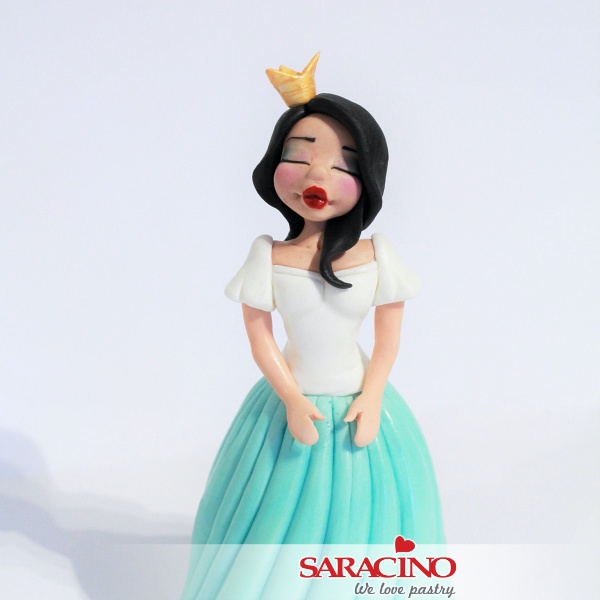
Using Saracino gold powder mixed with clear alcohol paint the crown gold using a small paintbrush. Using a soft brush and pink dust give colour to the cheeks.