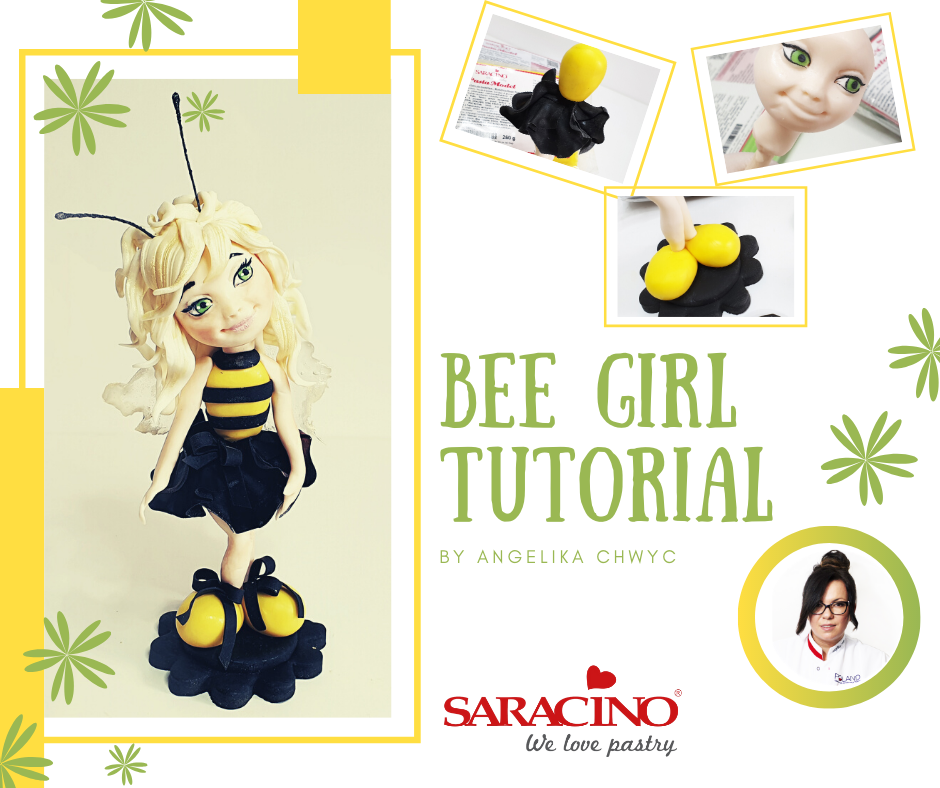
Nov 12, 2019 | News
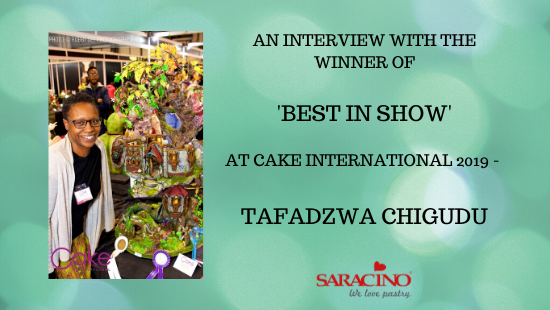
AN INTERVIEW WITH THE WINNER OF ‘BEST IN SHOW’ AT CAKE INTERNATIONAL 2019 – TAFADZWA CHIGUDU
We are absolutely delightful to be given an exclusive interview by the winner of the highly prestigious ‘Best In Show’ at Cake International Show In Birmingham 2019.
Grab a coffee, meet Tafa and follow her sweet journey to the success.
Full Name: Tafadzwa Chigudu
Business Name: TafaCakes
Location: Finchley in North London
Q: How did you begin your journey as a cake/sugarcraft artist? Is this your sole career?
I was a Solicitor for 13 years until I had my daughter over 5 years ago. During my Maternity Leave I admitted to myself that I no longer wanted to go back to my legal job. I had always loved baking so I began to do that more.
Q: Do you specialise in a specific kind of cake art? E.g. Modelling, sculpted cakes, wedding etc.
I would have to say I don’t. I will do any kind of cake that allows me to explore organic elements, interesting textures and vibrant colours. I do not like white though so I probably am more to the taste of quirky brides.
Q: Is this your first time entering Cake International?
This was not my first Entry- it was my 7th entry into Cake International and I was so superstitious about it I even put the number 7 on the main door on my piece! My first Entry was in 2016.
Q: Have you won any other awards?
I have 4 Gold Awards from Cake International, 2 Silver Awards and a Bronze. I also have a Gold Award from Salon Culinaire from 2018 for a sugarcraft showpiece.
Q: What made you want to enter?
Whilst on Maternity Leave I had fallen in love with cake decorating and was enjoying exploring what was possible with sugar. In 2015 at Cake International at the Excel in London I met Emma Jayne who was exhibiting her amazing Avatar figure- I subjected her to a slideshow of a few of my cakes on my phone and she strongly encouraged me to enter…. I left that day knowing I HAD to enter… to see what I could do… Emma’s encouragement went a long way to convincing me and I have been addicted ever since.
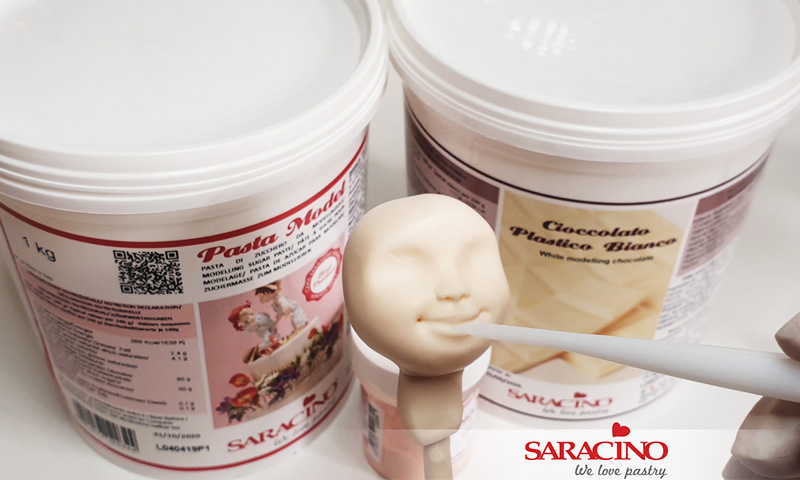
Q: What category did you enter and what was your piece? What Saracino products did you use?
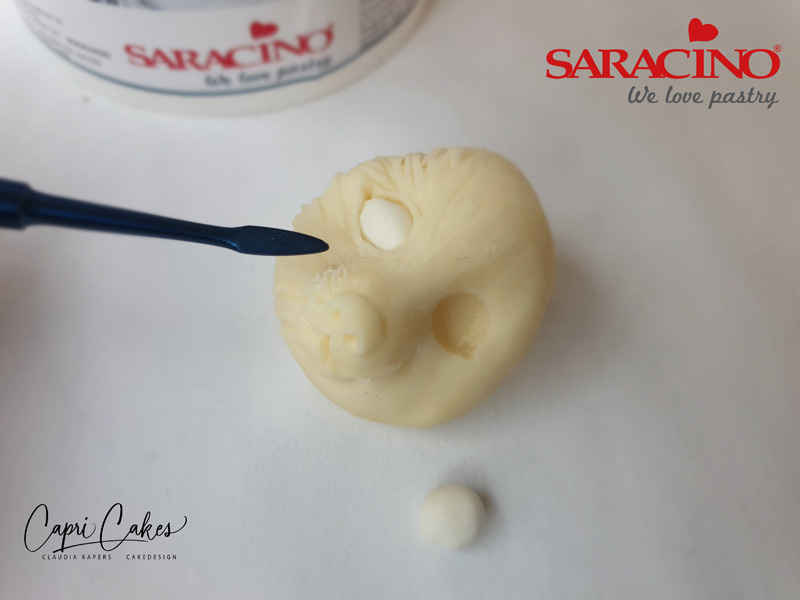
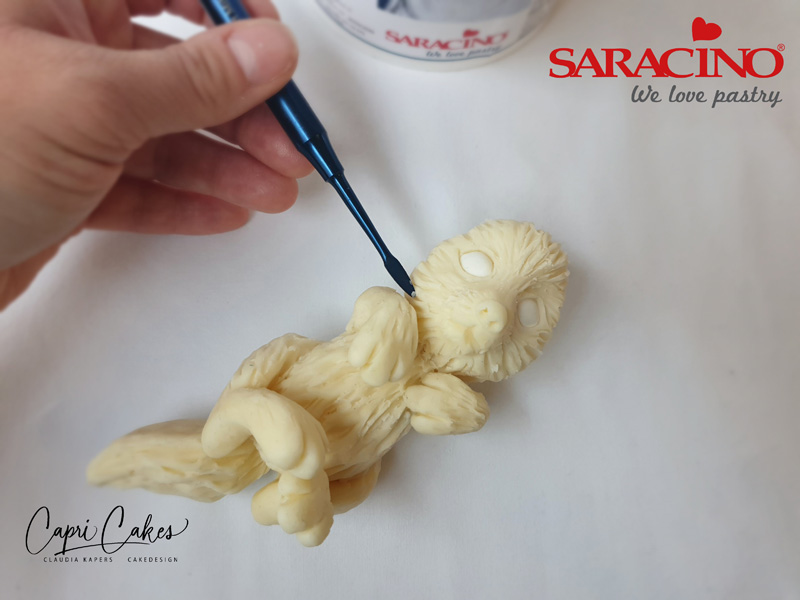
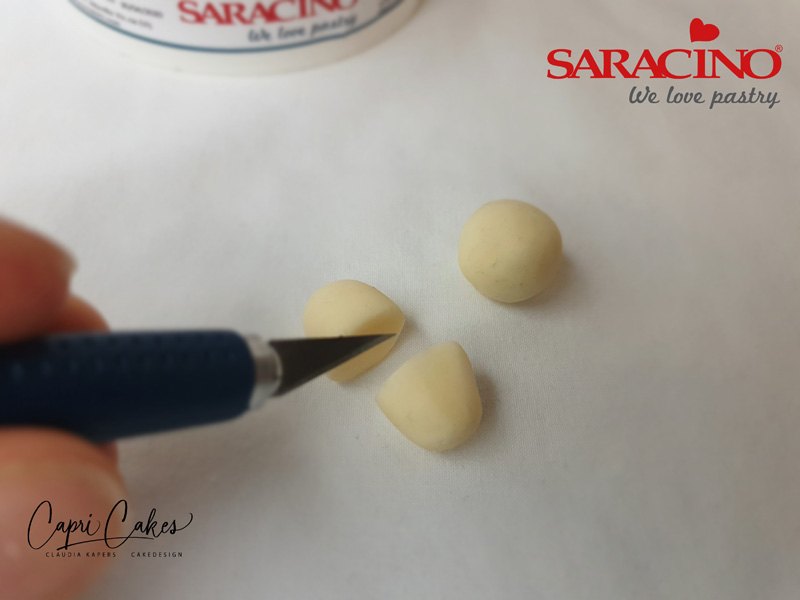
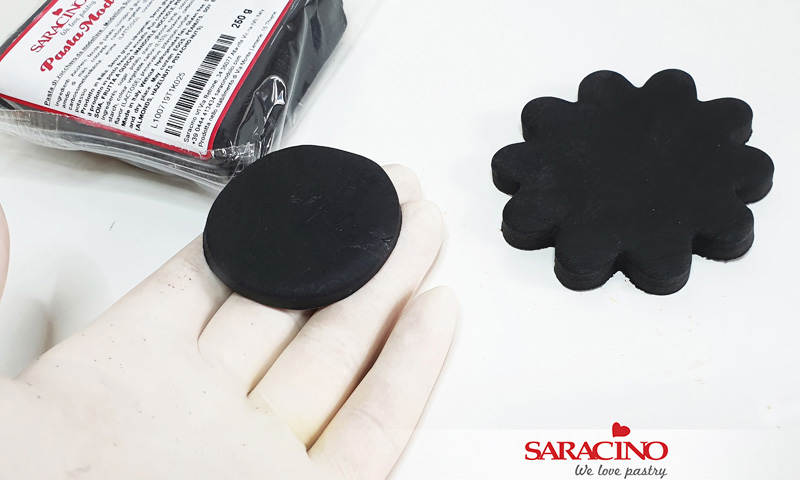
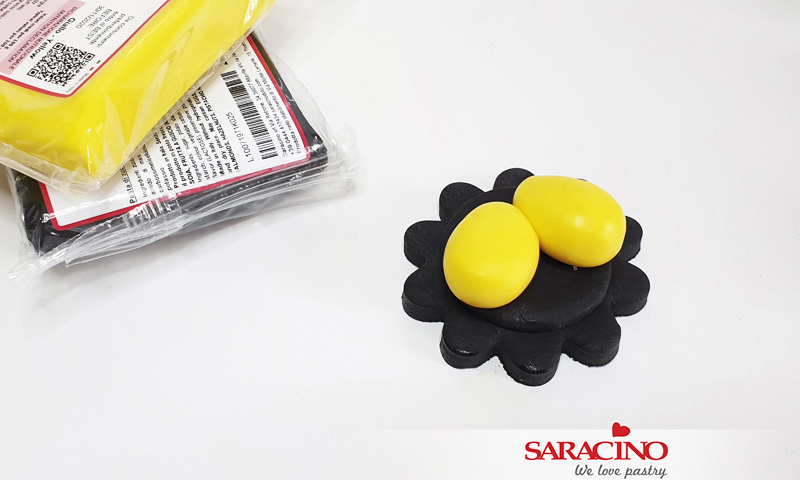
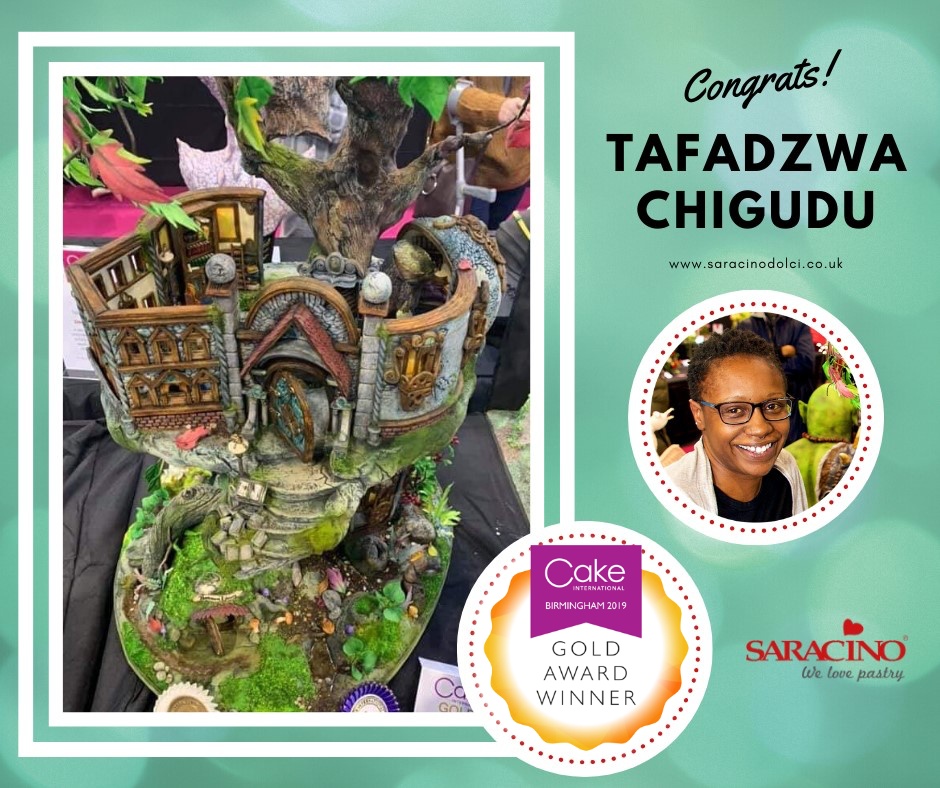
I entered the Decorative Exhibit Category and I did a piece I called The Bookworm Library. I used Saracino Pasta Model in fleshtone, yellow, brown, Tiffany blue, red and black.
Q: What inspired your design?
I was always the kind of child with her head stuck in a book. I loved all places you could find books, libraries, second hand shops and bookshops. I dreamt of a little space all of my own where every book I wanted existed…. I figured it had to be high up in a tree so boring grown-ups could not get to it!
Q; How long did it take you to complete?
I started planning this piece in April 2019 – straight after London Cake International on Tour. I started physically working on it in May so it took me 5 months to consider it done! (In my head its still not finished- I still want to continue with it)!!!!!
Q: How did you feel on the first morning of competition?
The first morning of Cake International is like Christmas morning; with the unveiling of hundreds and hundreds of magical works of art. The palpitations of seeing the Legendary pink carpets and black table cloths and the excitement of placing your completed work there is like nothing I have experienced. This year I arrived relieved that my piece had survived the journey there, and I was soon gaping like a fish as I saw everyone bringing their pieces in…. knowing all these people were working as hard as you and are all here to showcase their efforts is just thrilling.
Q: Tell us a little about the show, what did you enjoy most?
I cannot lie- my favourite bit is the competition area- I can wonder up and down those aisles time and time again and I always feel like I am seeing new pieces every time! And this time around I really enjoyed watching people’s faces as they explored my piece.
Q: Tell us about your award, how did you feel?
Hearing my name called out as Best in Show was surreal…. It doesn’t matter how much you fantasize about something like that happening- it in no way prepares you for the moment. I cannot remember most of it- Thank goodness for awesome friends who took video and pictures allowing me to relieve it. It was a beautiful moment.
Q: What advice would you give to anyone thinking of entering?
Do not hesitate- do it!!!! It allows you to stretch yourself- to make something purely for your own pleasure and then you get a chance to show it to everyone. And most importantly use the judges feedback to build on what you do next time- I took every single bit of criticism given to me by the judges on every piece I have done and worked on it till the next piece was a bit better…..
Q: Will you enter again?
Try keeping me away!!!!! I am a complete addict- I don’t think I could even stop myself entering again, and again, and AGAIN!!!!
JUST FOR FUN
Q: What cake tool can’t you live without?
I cannot survive without my Dresden tool….and good old foil…. Best cheap tool ever!!!!
Q: Who inspires you – who’s your favourite cake / sugarcraft artist?
I am inspired by a lot of amazing artists it is so hard to narrow them down, I love Emma Jayne for her beautiful challenging pieces- in sheer scale and ambition. I Love Liz Marek of SugarGeekShow- she is a technical Magician and wonderful teacher, I love Ana Remigo for a distinct meticulous style- you always know her work, I love Gregoire Goel- The Isomalt God. My favourite would be a Frankienstein of all of them!!!!
Q: What’s your favourite Saracino product and why?
Definitely Saracino Pasta Model. I use it for most decorative elements on all my cakes. It is so beautiful to work with and holds it shape well. The walls on my piece were made of Saracino Pasta Model because although my first concern had been that I needed them strong enough to stand on their own without any internal supports I also needed a lot of working time to cut out each individual brick and cobblestone by hand. Saracino modelling paste gave me both – hours of working time without it drying out and then a strong sturdy structure after! I also used the same Pasta model for ALL the furniture and contents of the Library itself.
Q: What movie title best describes your life?
A not so well-known film here by John Singleton- Hustle and Flow….
Q: What’s your best advice in 5 words or less?
Inspiration is all around us.
QUICK FIRE QUESTIONS
- Flavour – Chocolate or vanilla? Vanilla- I actually really hate chocolate cake- please don’t kill me…
- Plan properly or wing it? For excellence- a perfect blend of both….although my nature is WINGING IT!!!!!
- Whilst working – Listen to music or watch tv? Music- all the time- Hip-Hop, African beats- high energy music.
- Favourite product – Saracino pasta model or Saracino modelling chocolate? Pasta model.
- Delivery – Down a long bumpy road or during a rain storm? Rainstorm – anyday. Cakes and bumps are NOT friends.
- Buttercream or ganache? Ganache- ANYDAY, ALL DAY, EVERY DAY!!!!!!
- Do you prefer – Baking the cake or decorating the cake? I started loving the bake, now I LOVE decorating!
- Mould or handmade? Handmade- absolutely. Mould for convenience only.
- Airbrush or paint by hand? Airbrush!
- Apron or chef whites? Apron
- Straight edge or round? Straight – how sexy is a beautiful straight edge?!!!!
- Customer design or free reign? Free reign- too wild to be tamed- although customer can point out direction!
- Stay up all night to finish or get up early to finish? ALL NIGHT OWL!!!!
- Fruit cake – Yay or Nay? YAY
- Your own birthday cake – Make it yourself or have the week off? Week off!!!!!!!!!!!!!!!!!!!!!!!
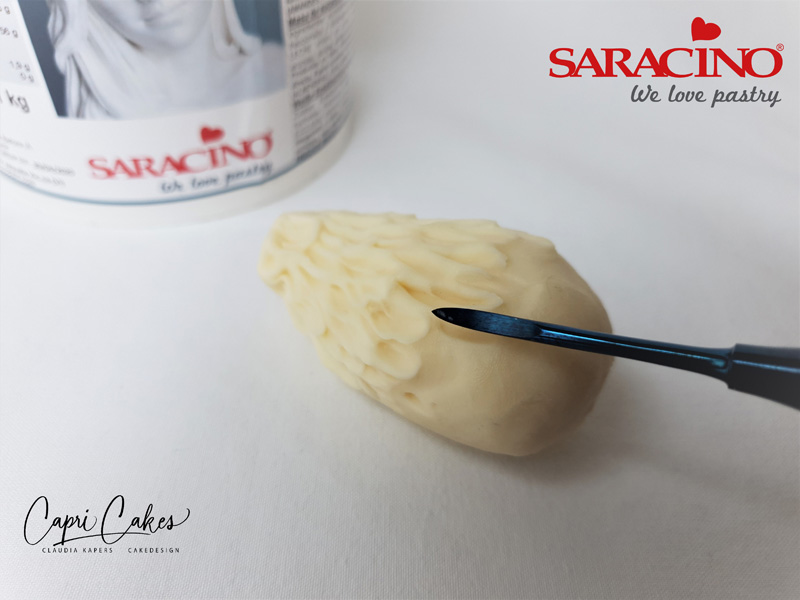
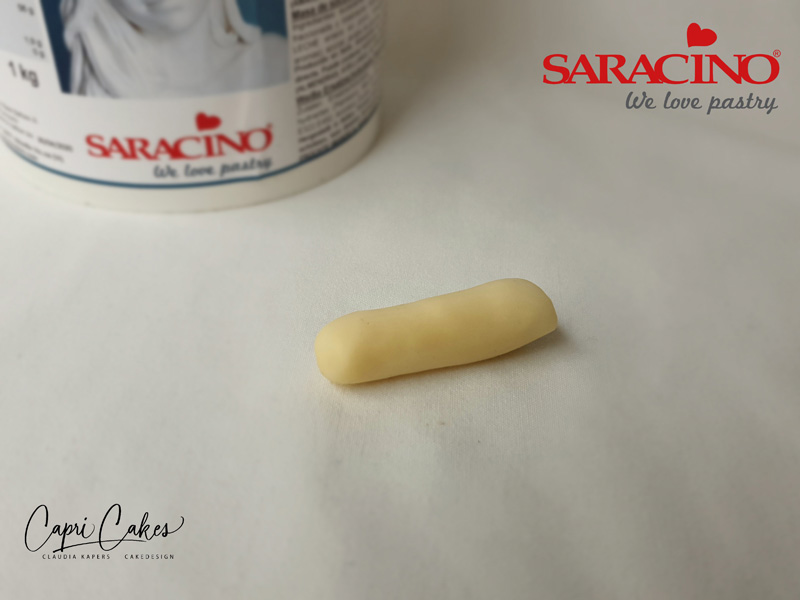
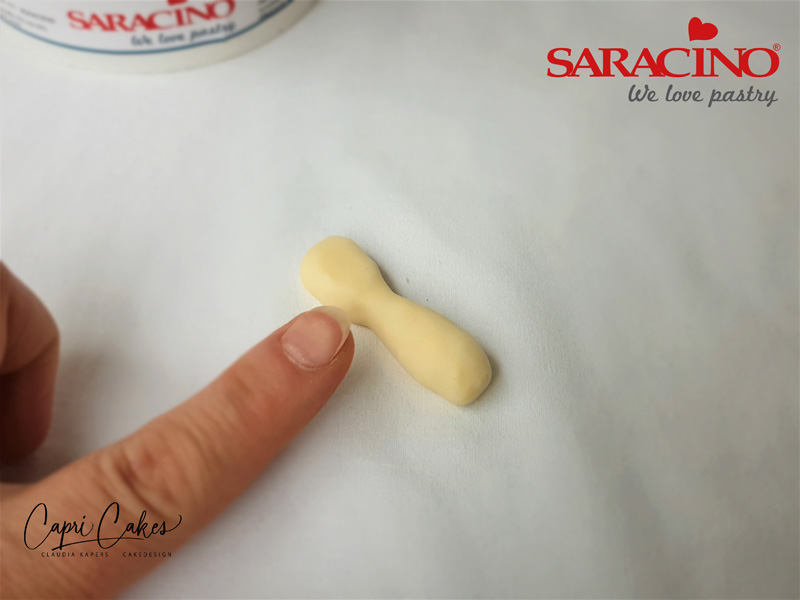
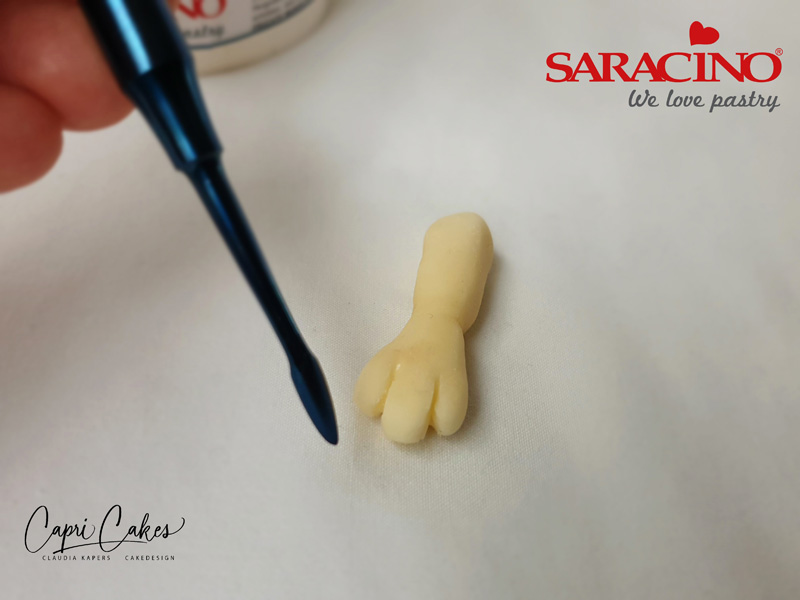
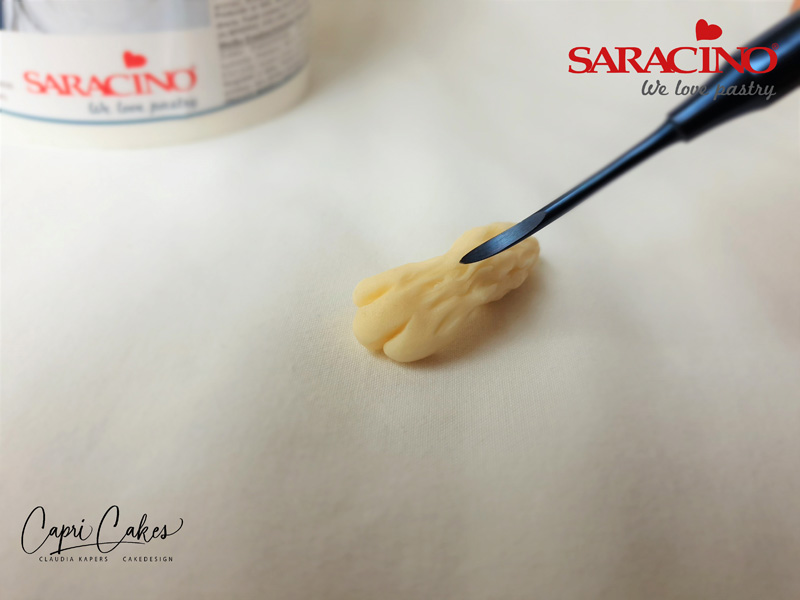
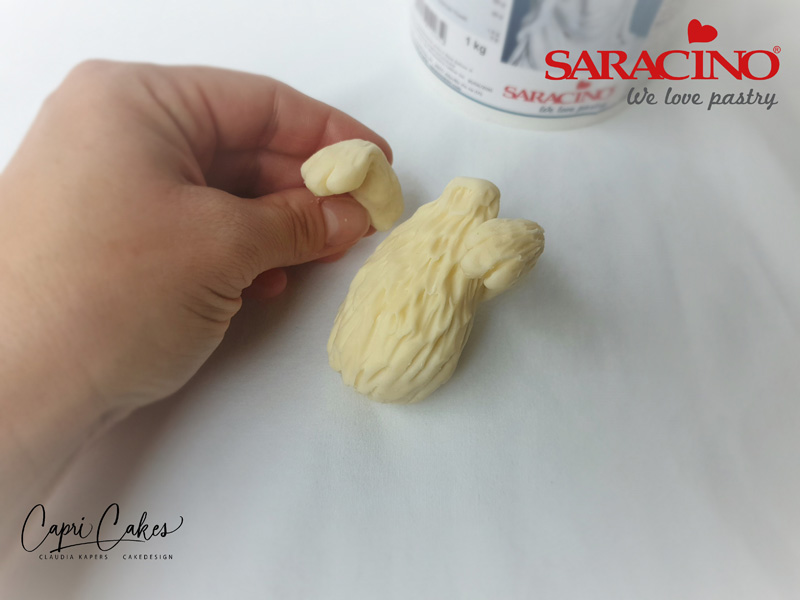
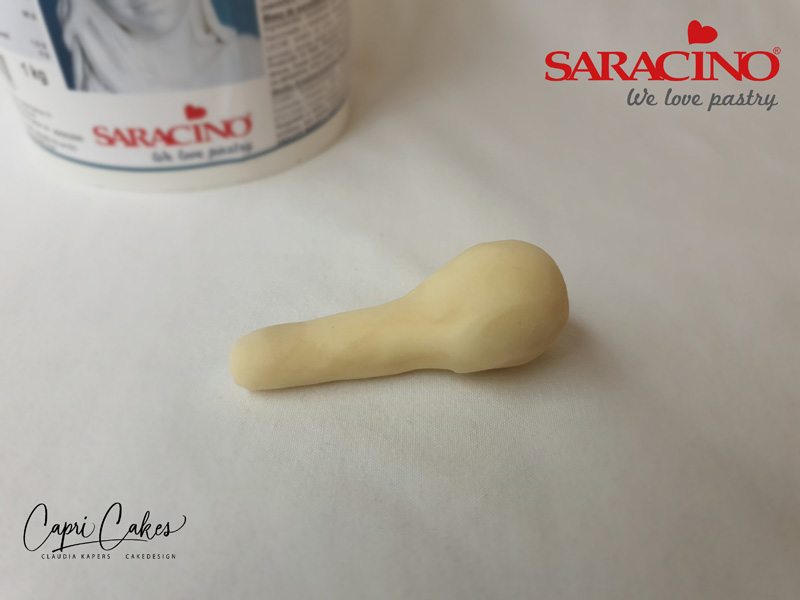
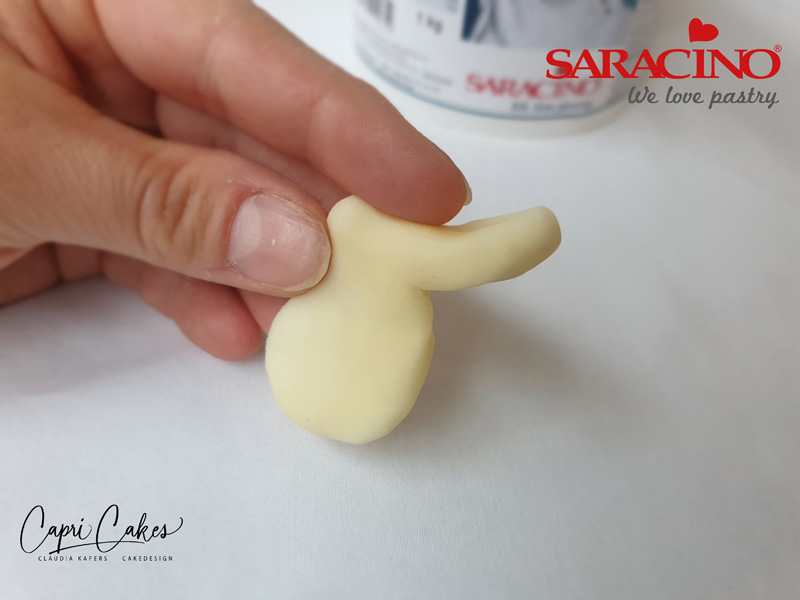
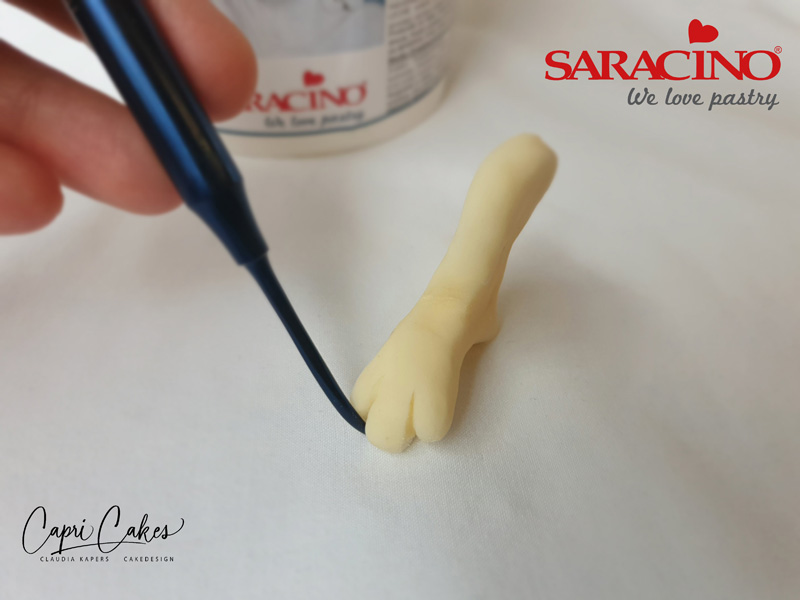
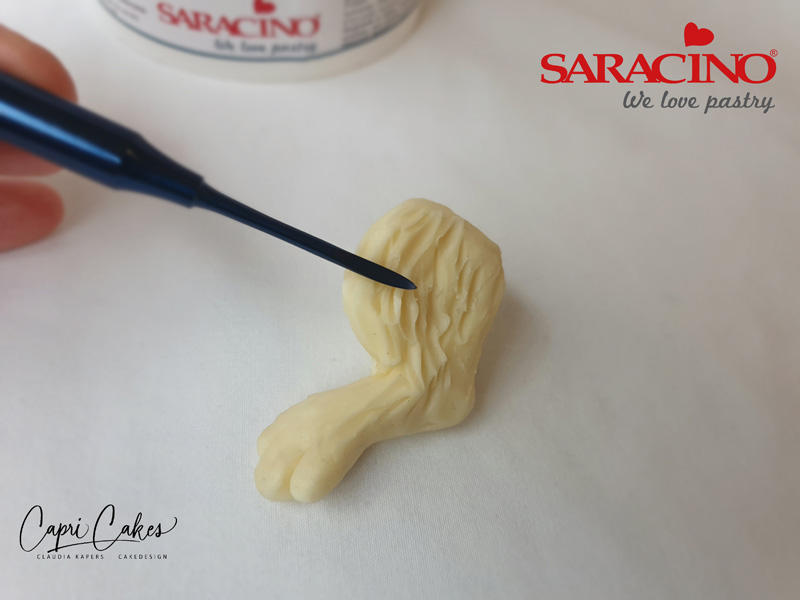
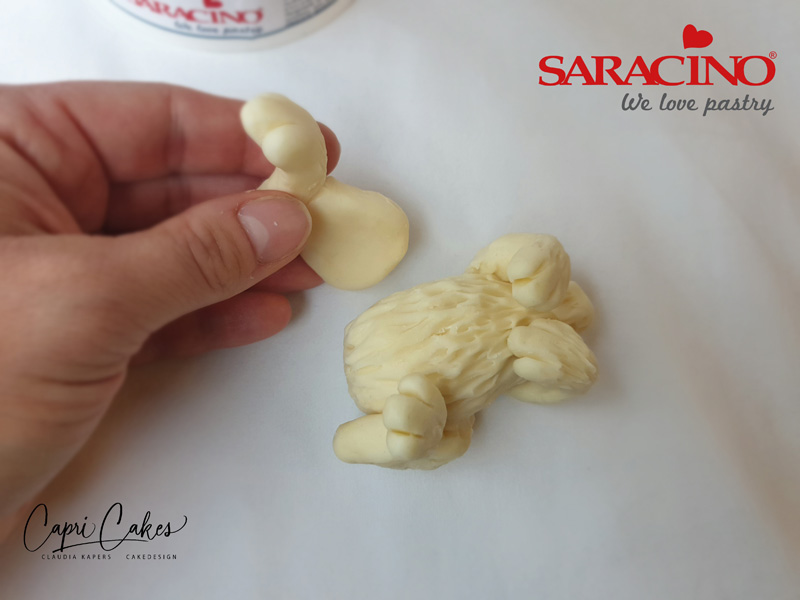
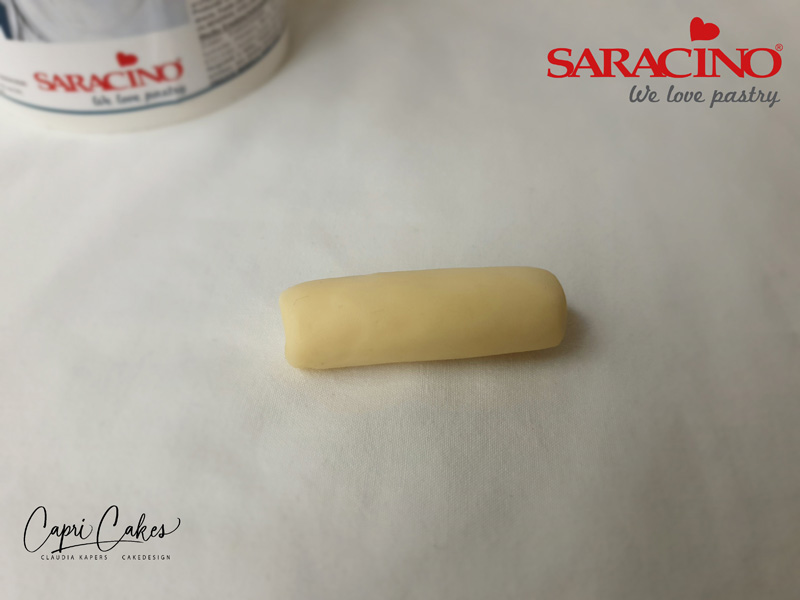
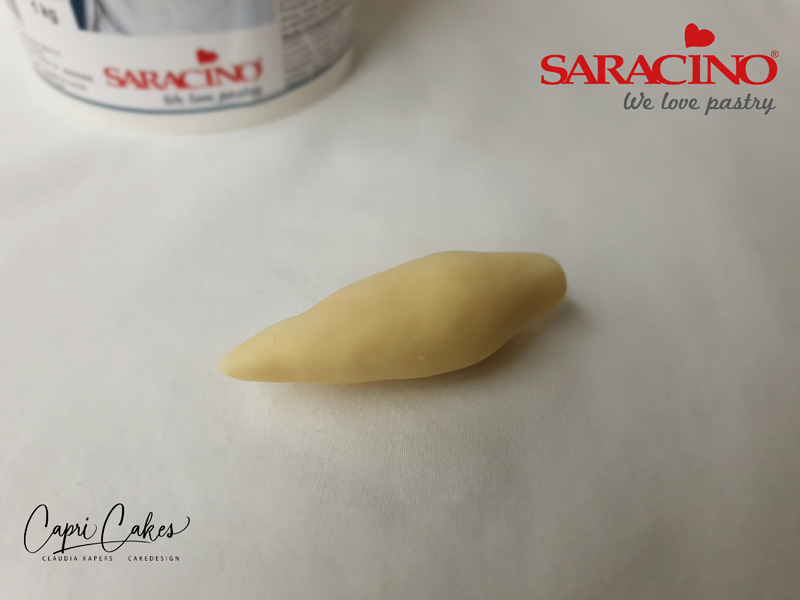
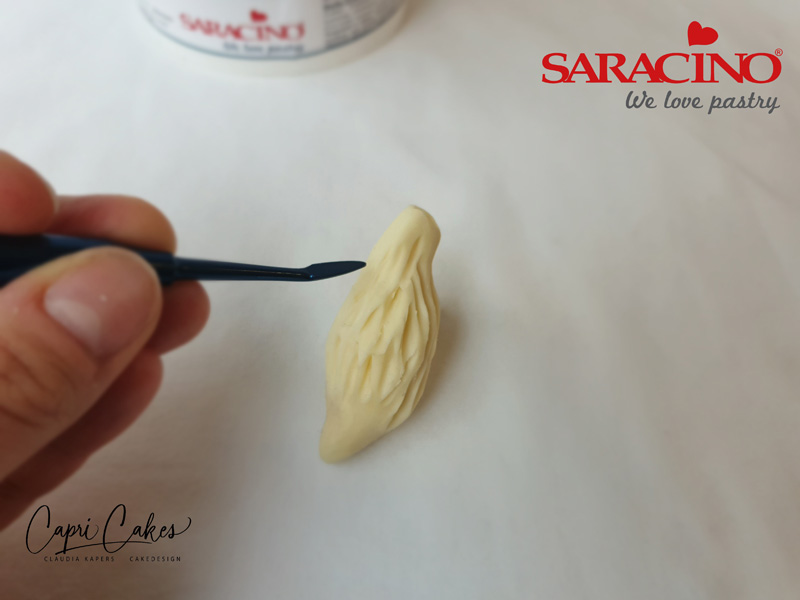
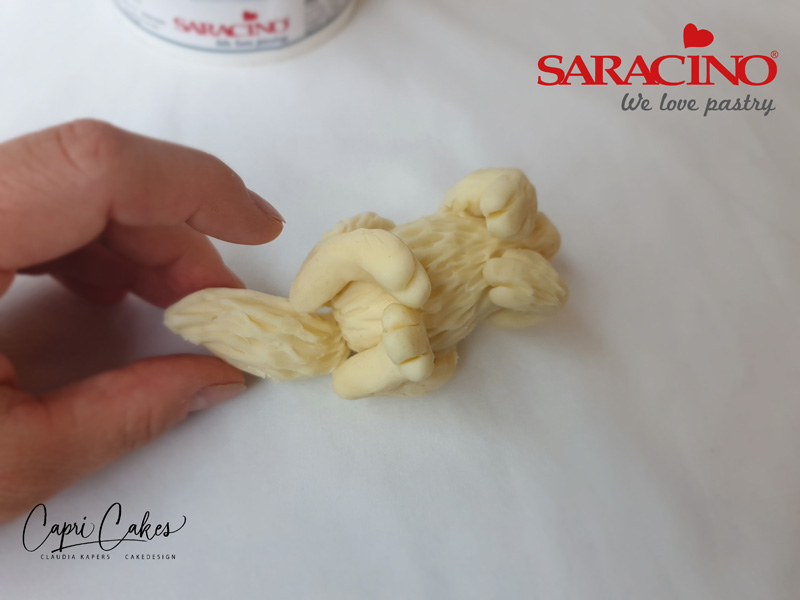
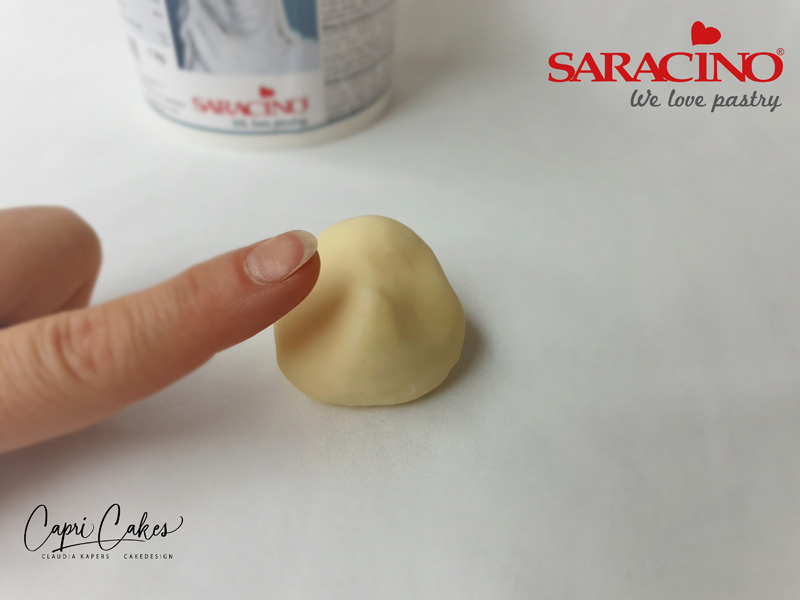
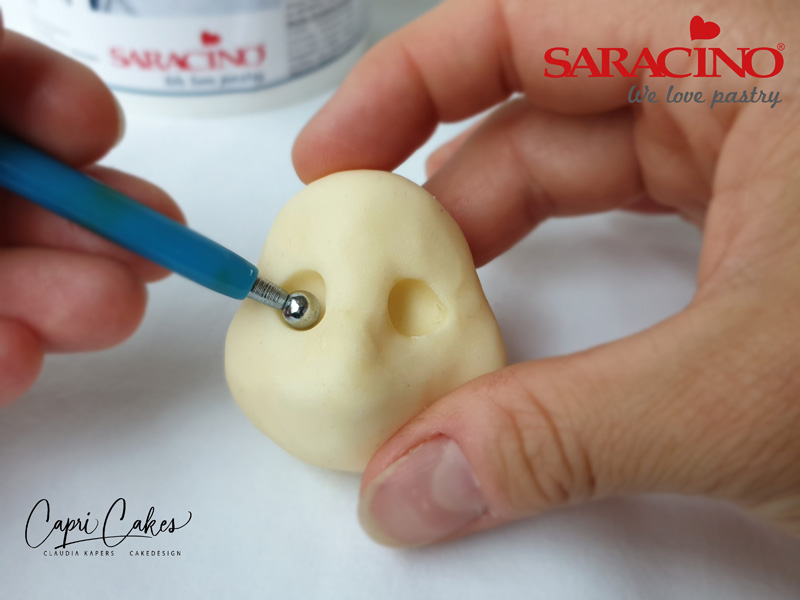
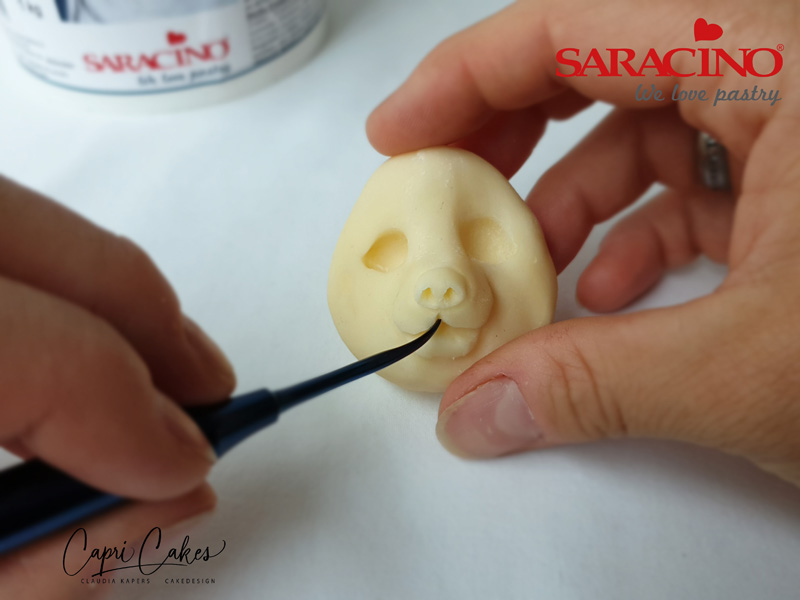
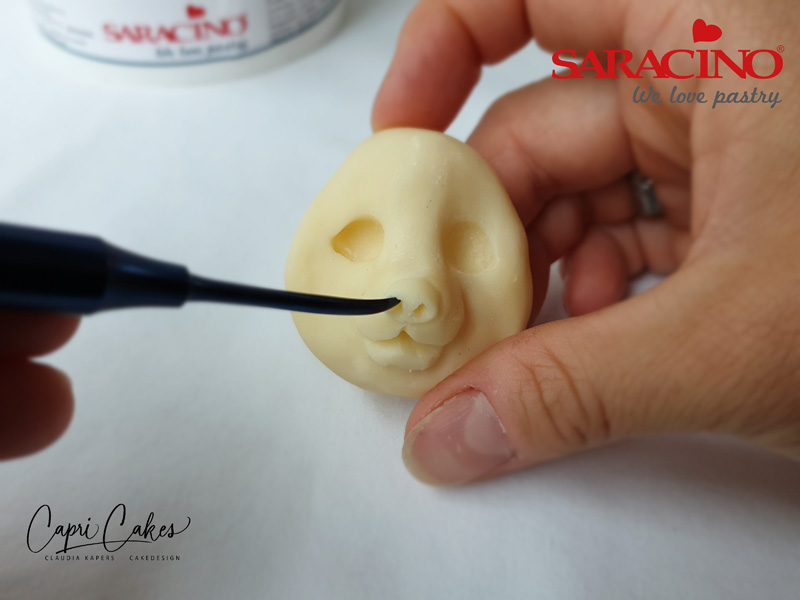
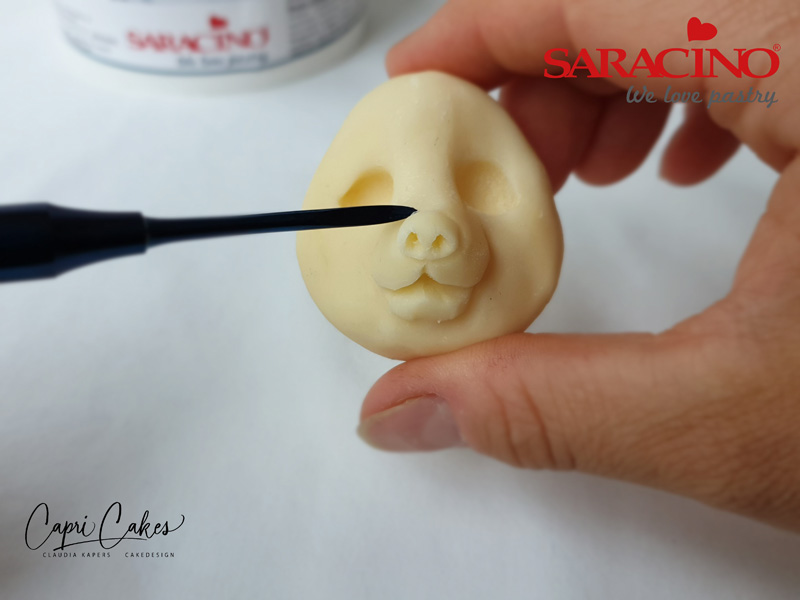
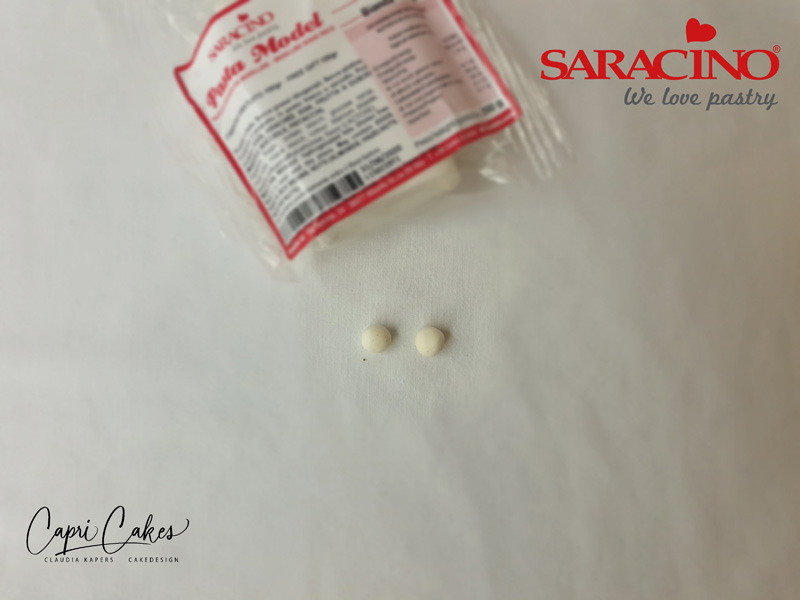
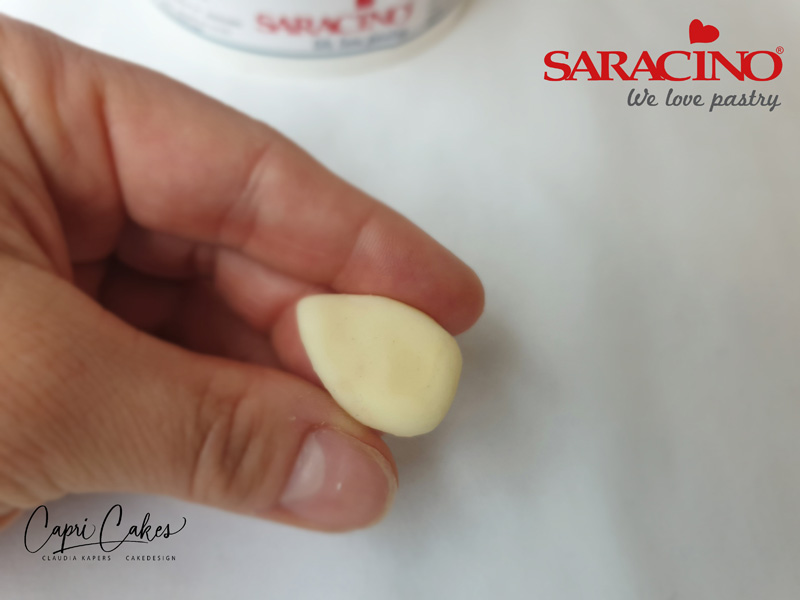
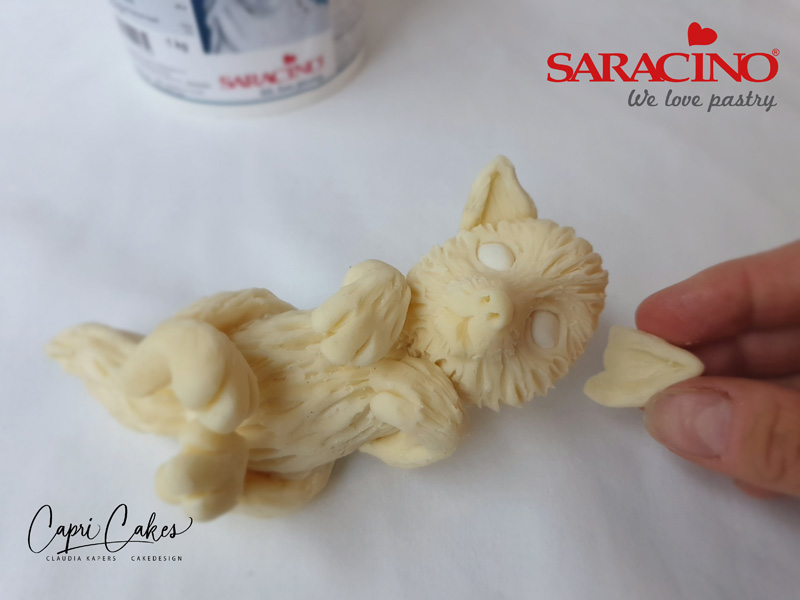
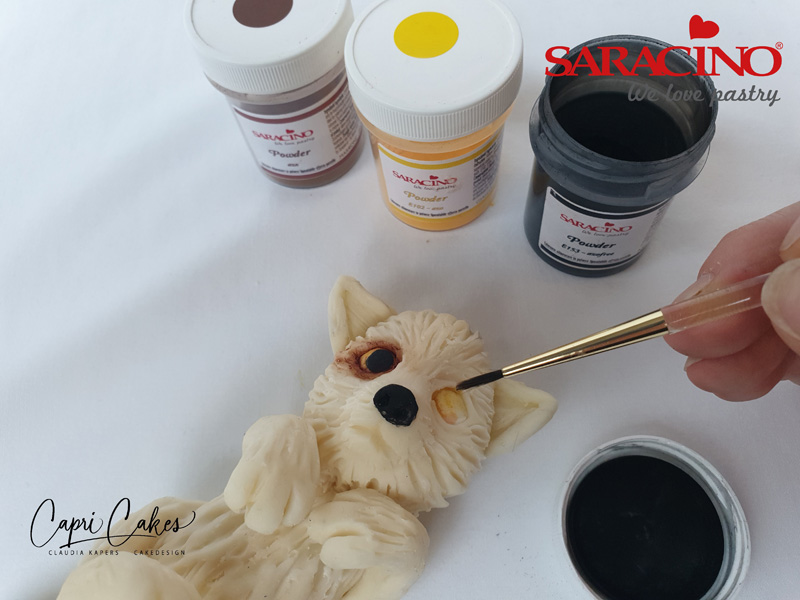
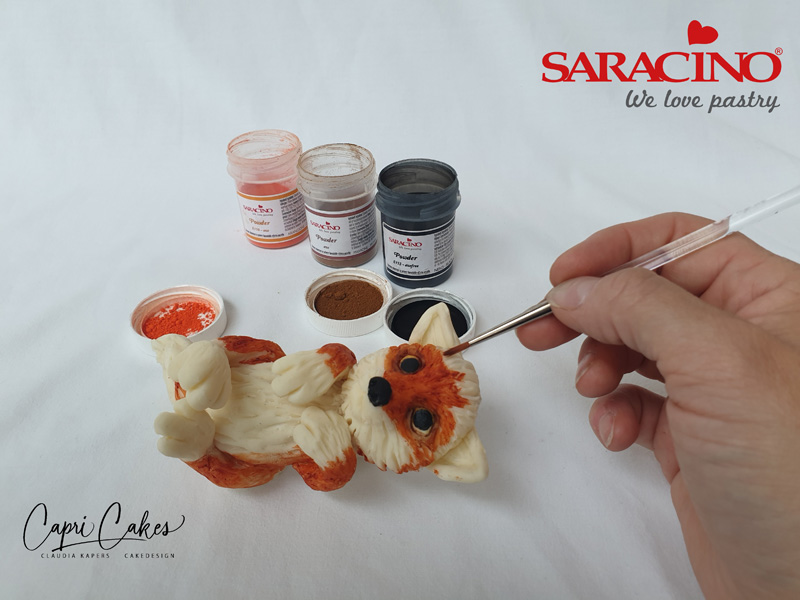
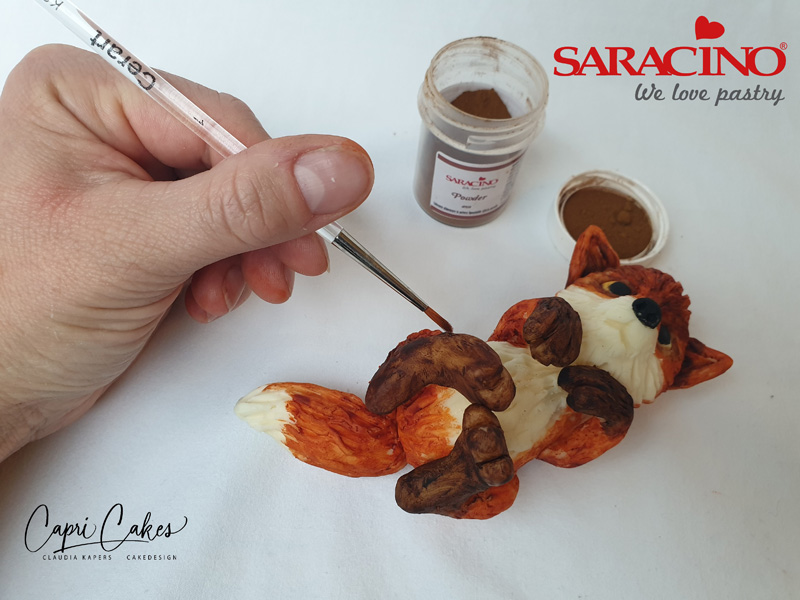
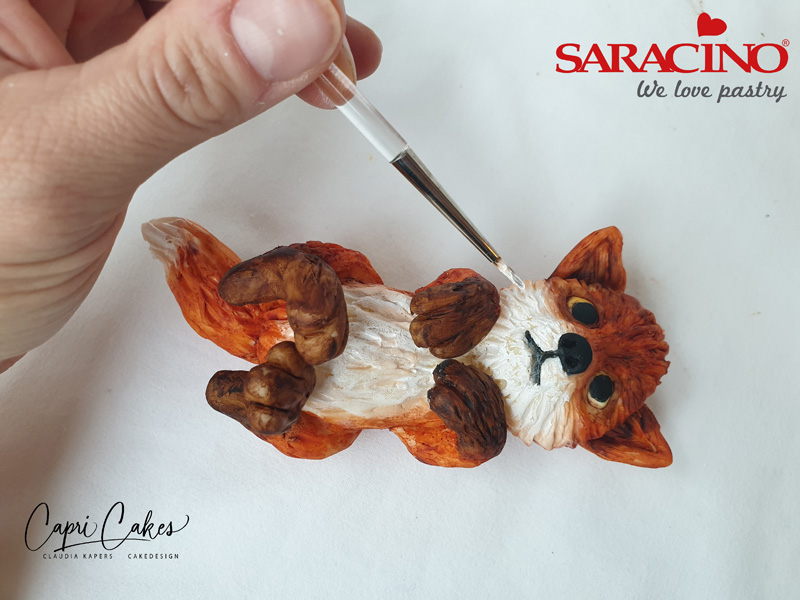
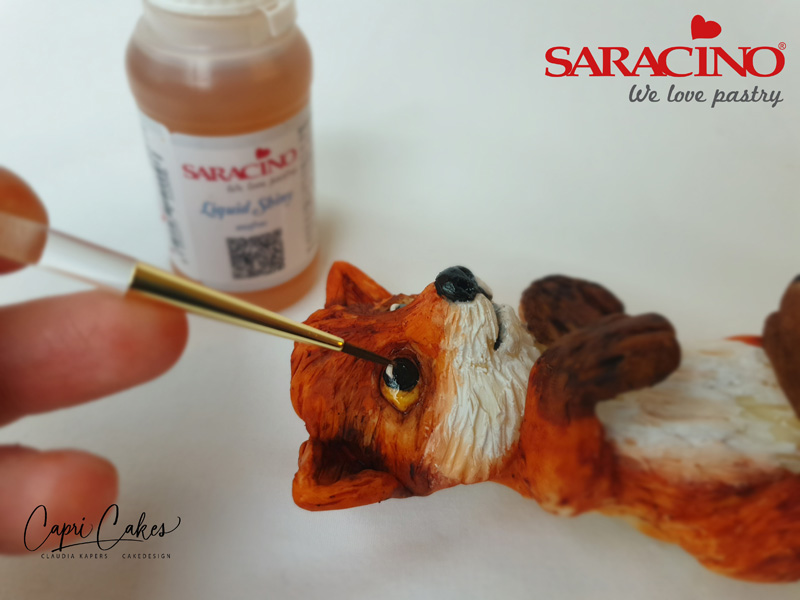
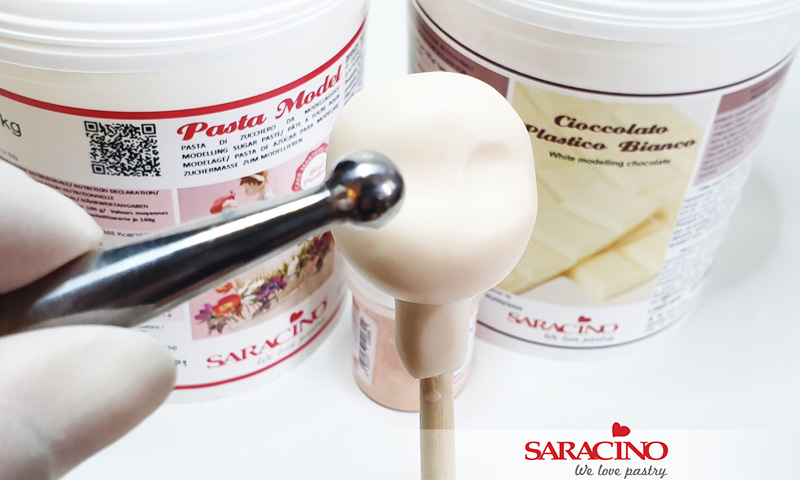
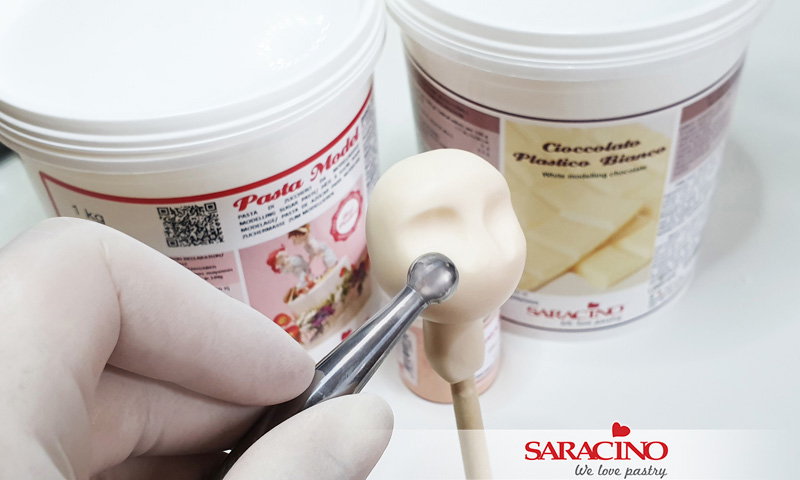
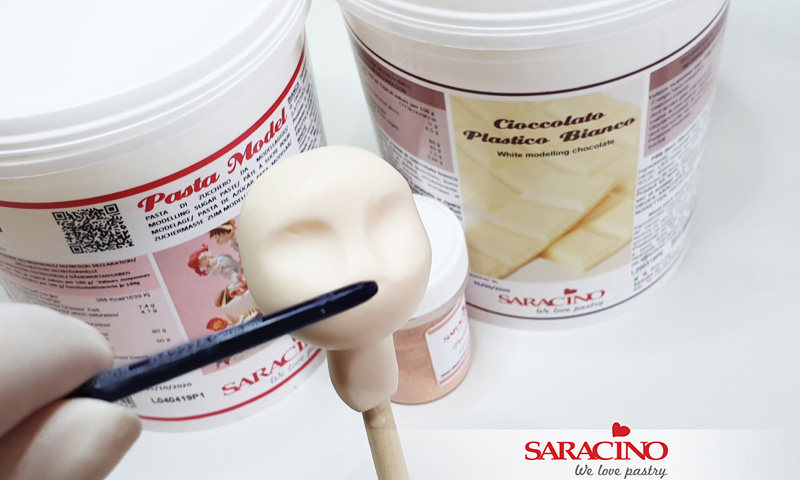
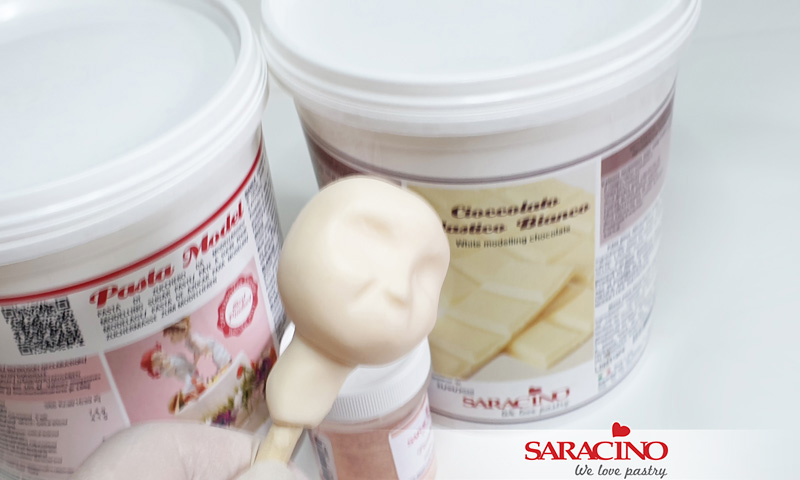
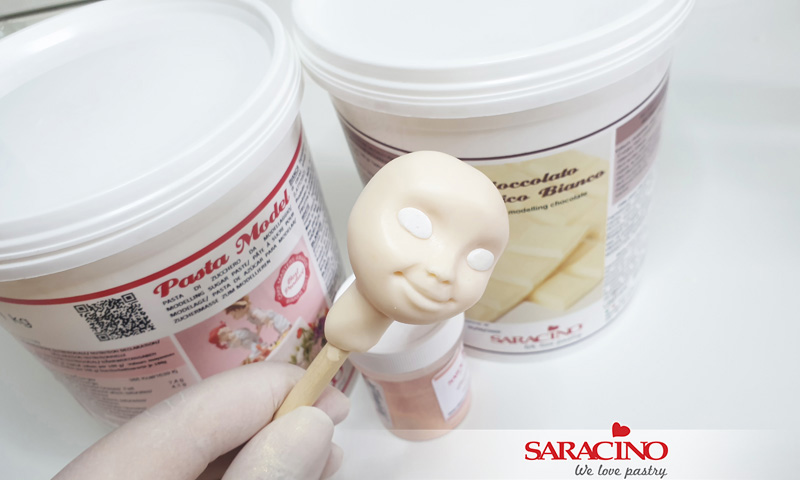
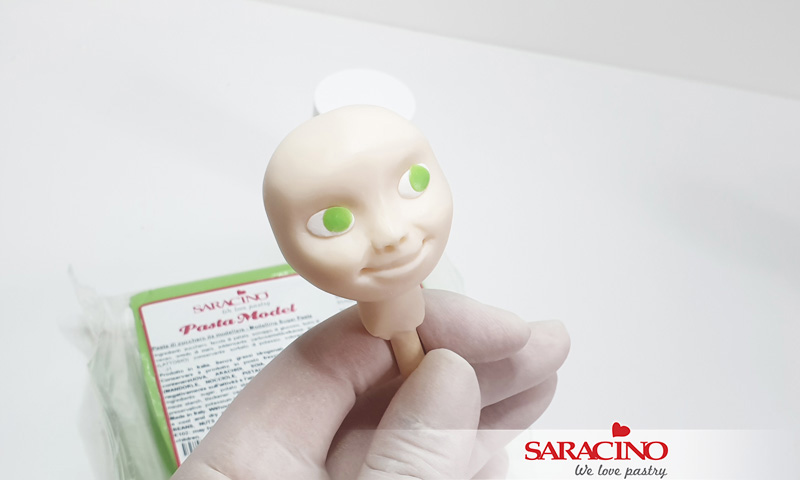
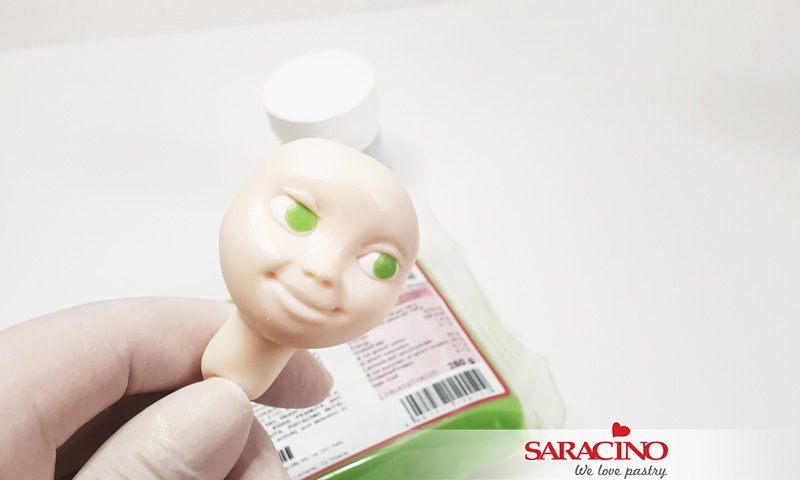
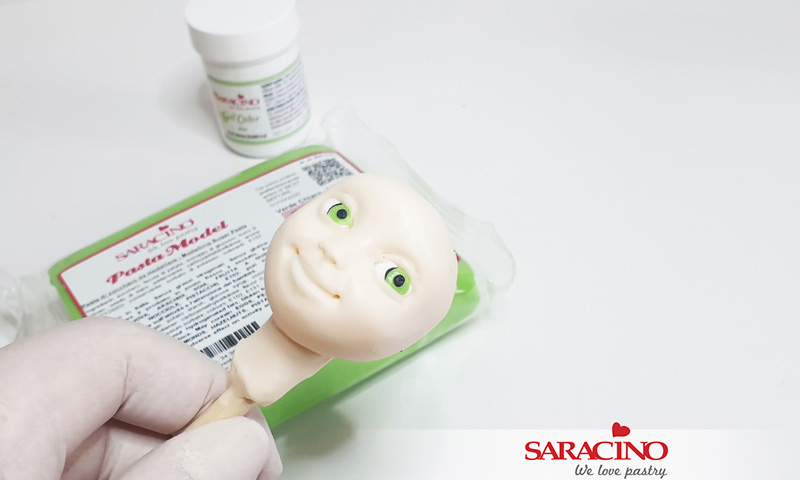
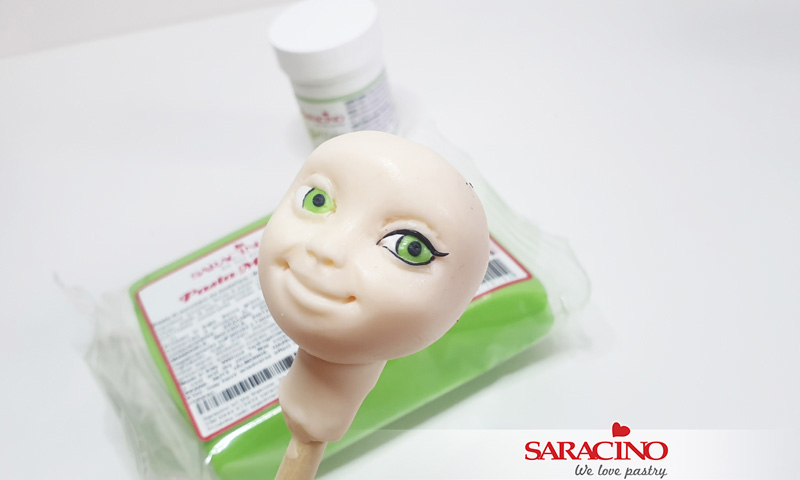
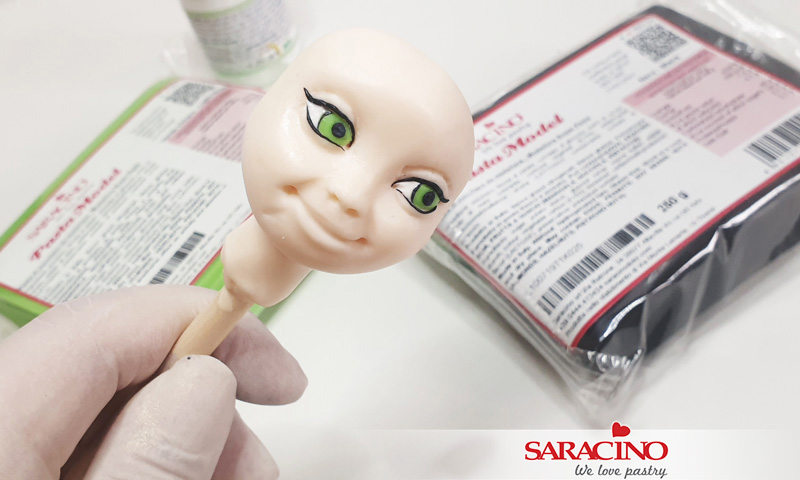
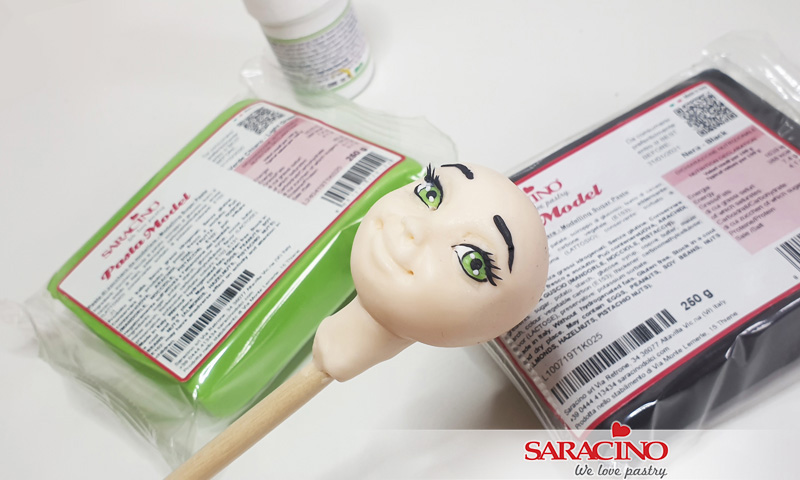
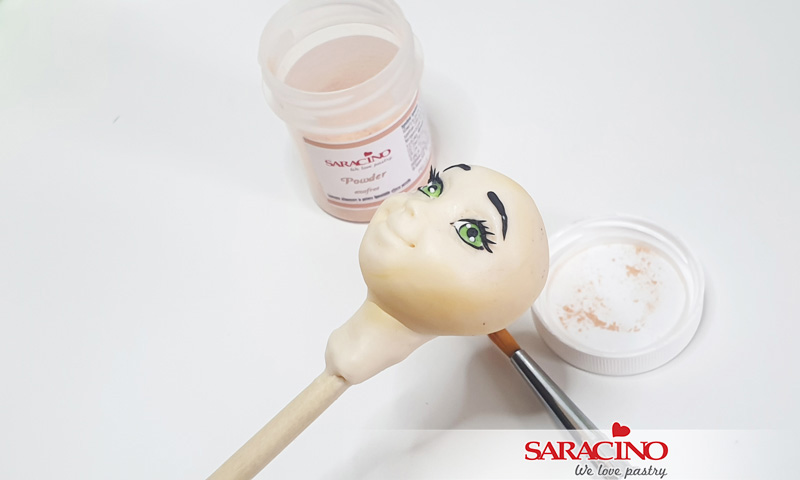
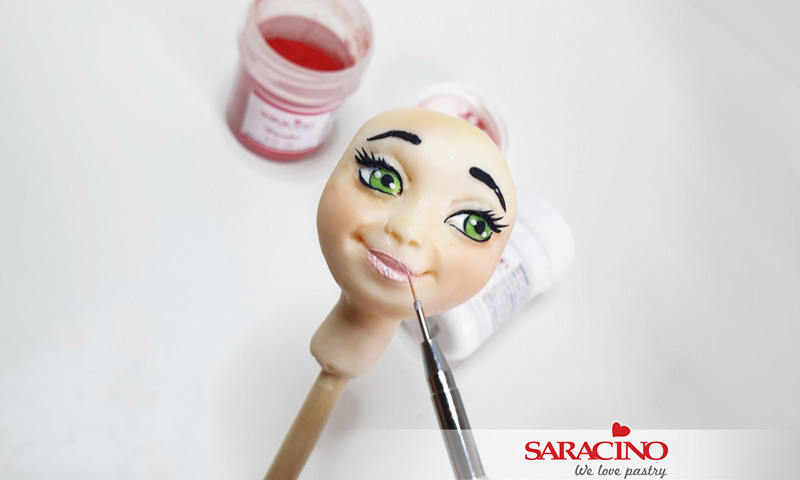
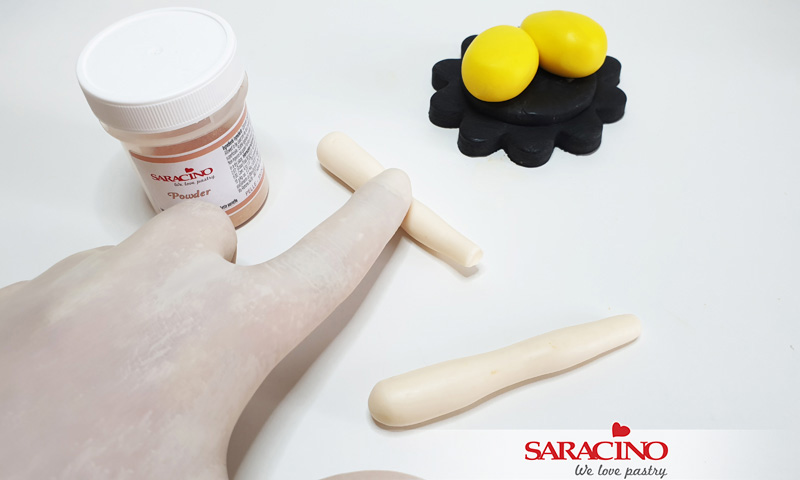
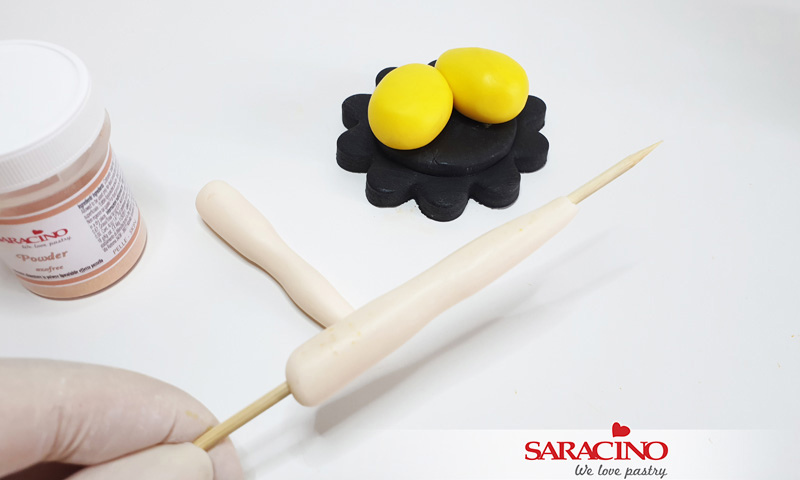
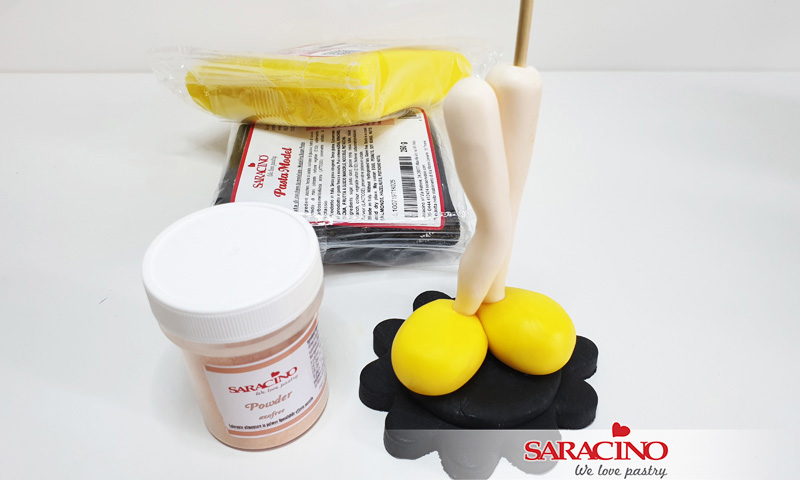
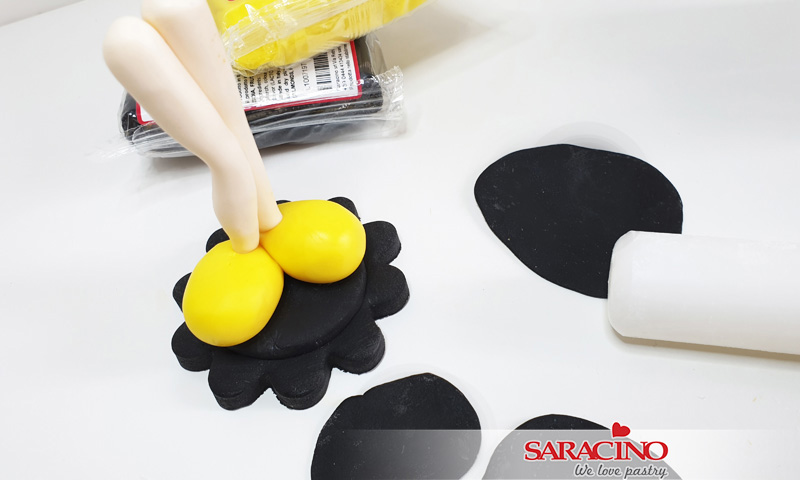
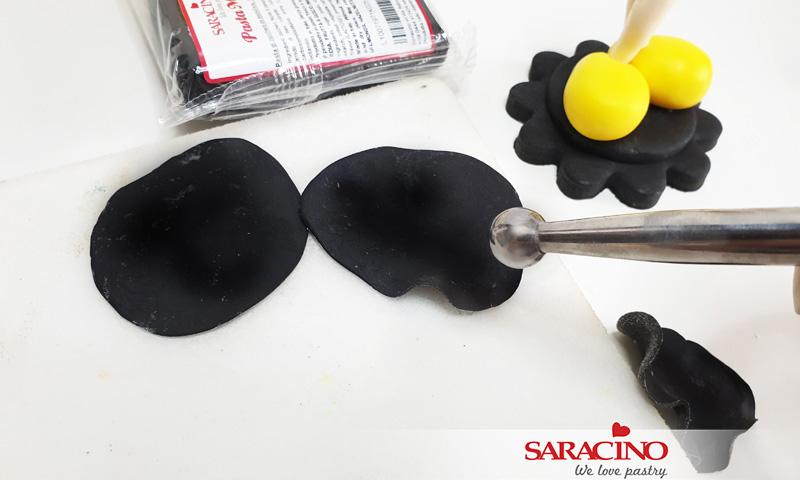
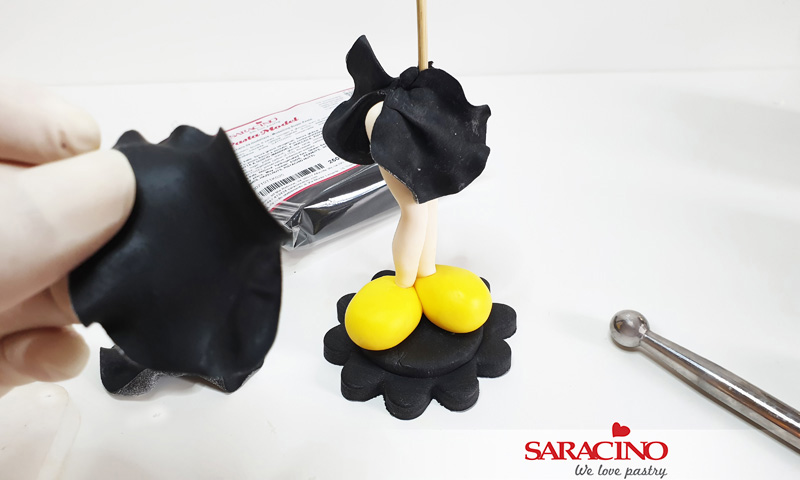
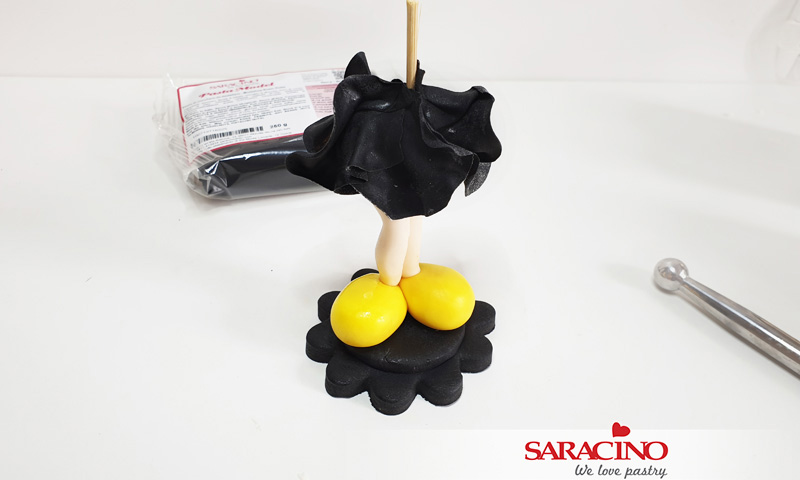
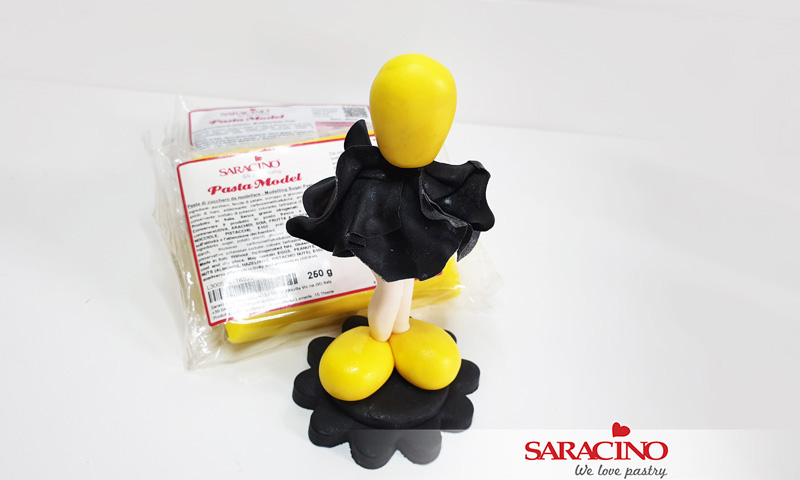
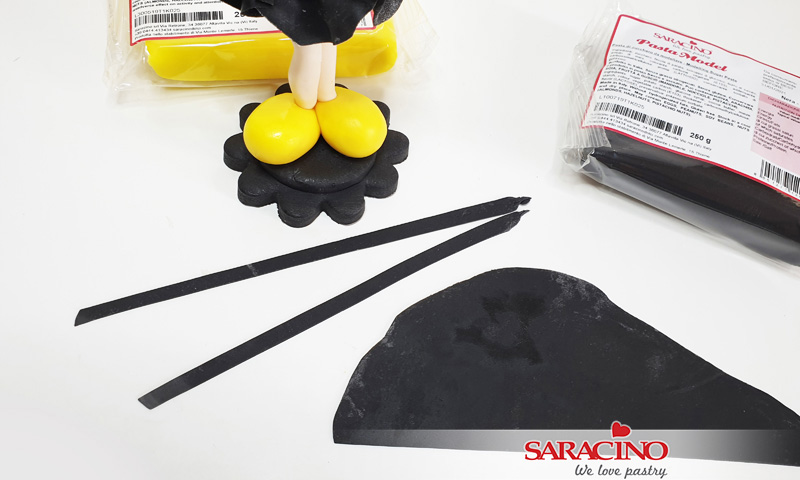
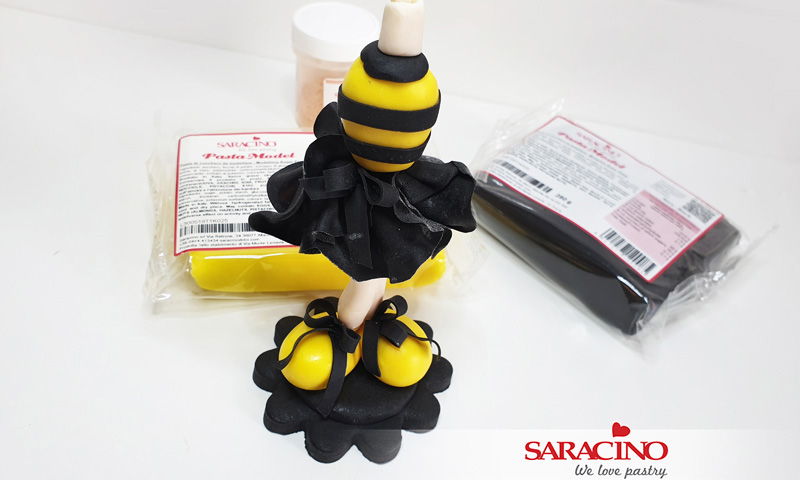
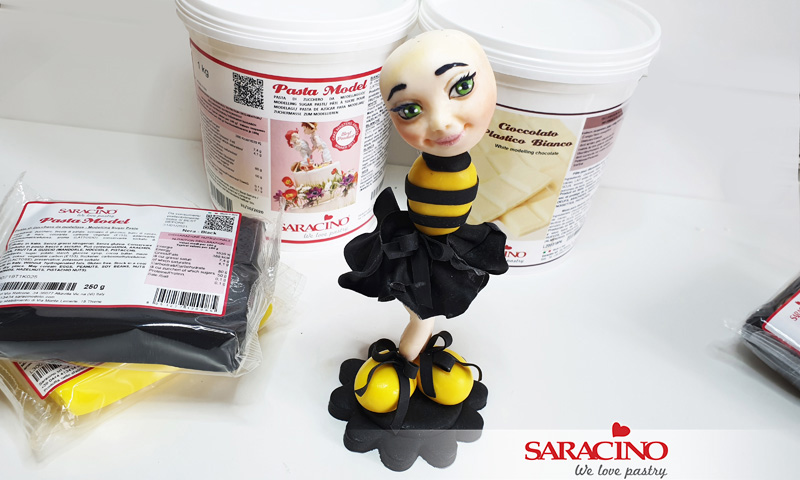
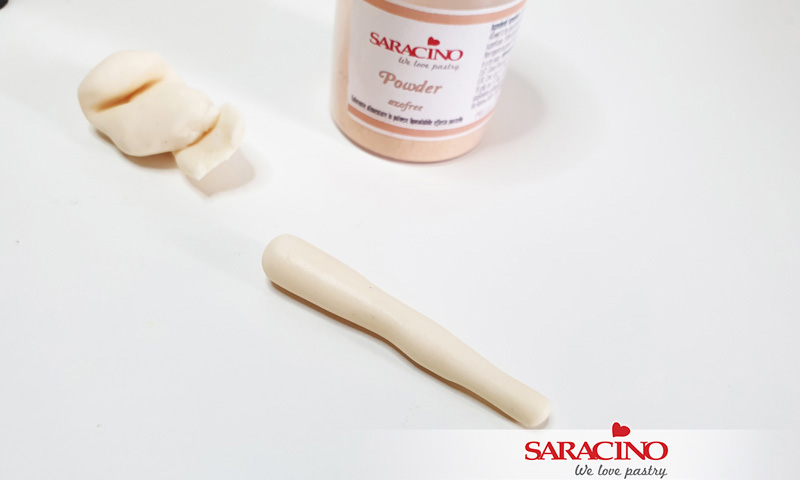
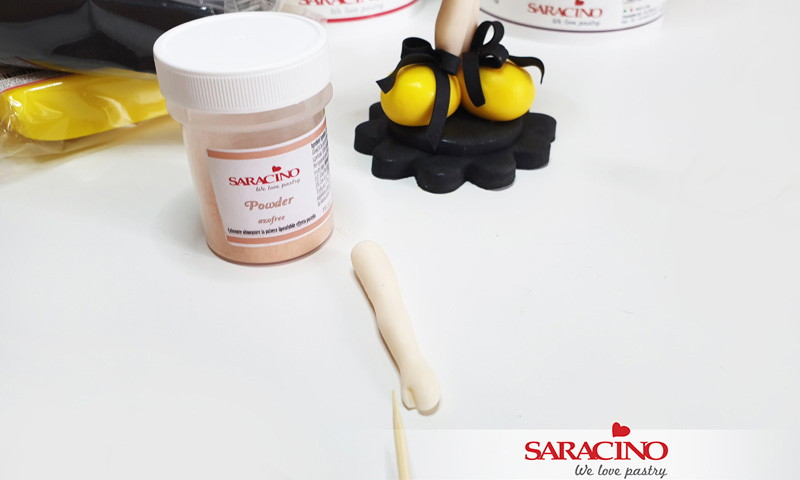
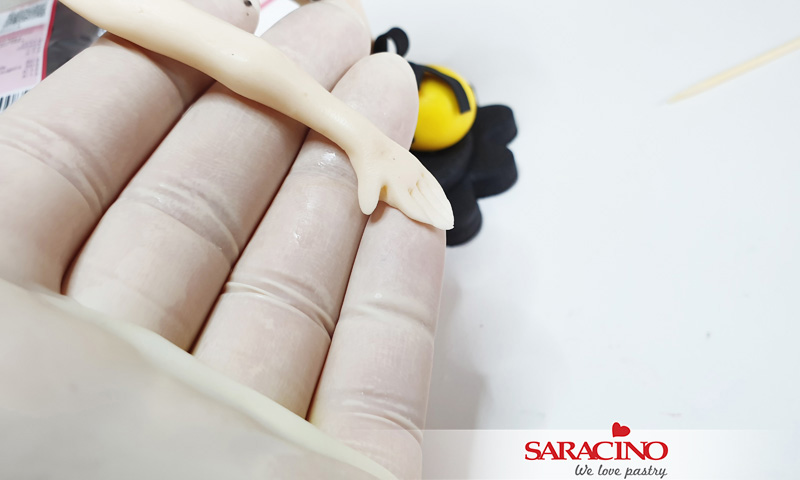
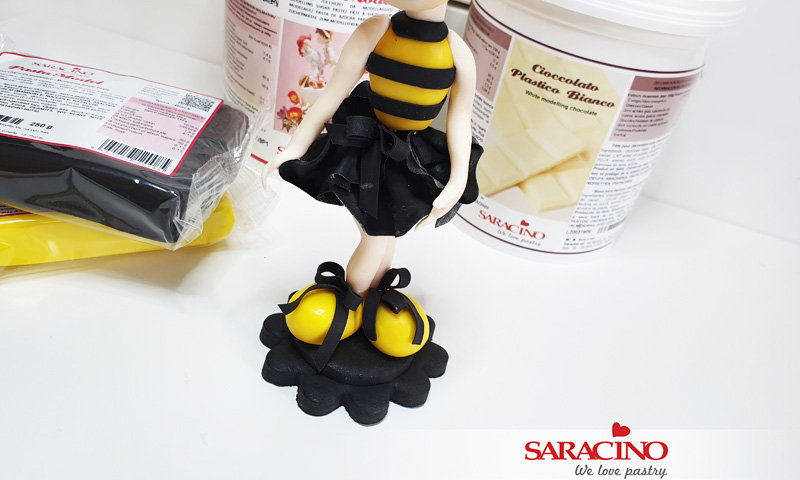
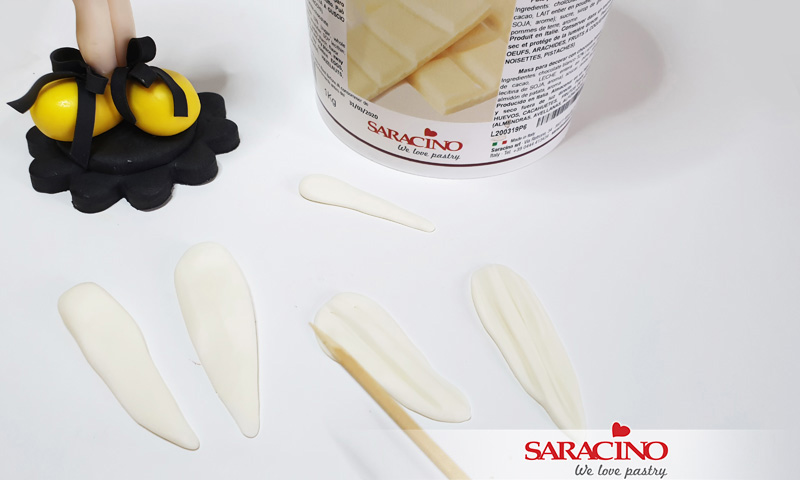
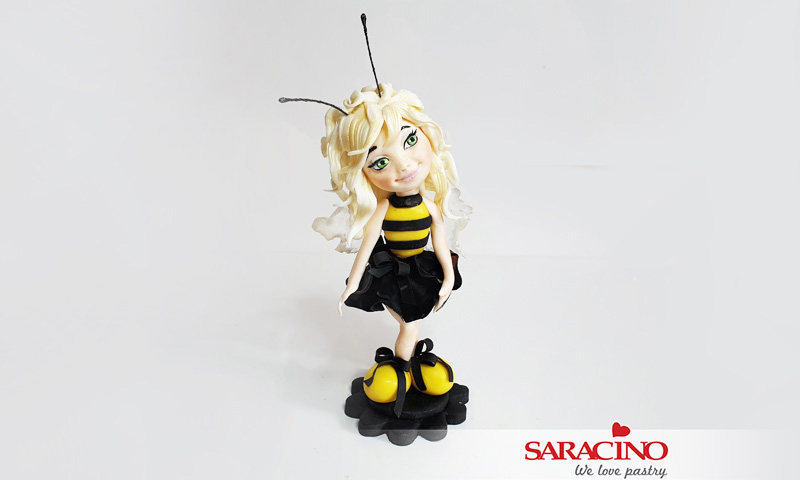
Tafa has kindly provided us with a few progress shots of the piece being created. Have a look at how the piece was structured and prepare to be amazed!
Nov 6, 2019 | News, SAFE News
And the winning ticket numbers are….
Did you buy a raffle ticket during the Cake International Show in Birmingham 2019?
Thank you to all of you who came to the stand and donated to Hope House Hospice. We will shortly announce how much we have raised. It would not be possible without our amazing Sponsors and all of you 
We are thrilled to announce the winning 3 lucky raffle ticket numbers!
If you purchased tickets through the Just Giving page, we wrote your name on the back of a ticket and entered it into the draw at the show. Unfortunately none of the winning tickets had a name written on it so the three winning tickets were purchased at the show.
Remind your friends to check their tickets as this prize cannot be missed!
Please email us to info@saracinodocli.co.uk if you match with one of the tickets