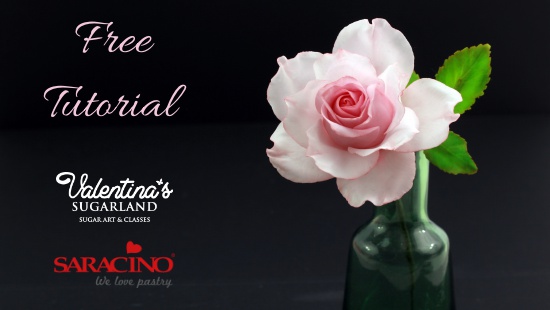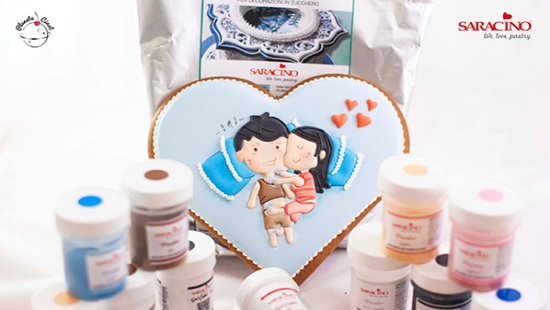
VALENTINE’S COOKIE

VALENTINE’S COOKIE

FB: PLANETA CIAST

Skill level: ADVANCED

You will need:

  • Saracino Royal Icing
  • Sharp scissors
  • Water
  • Skewer
  • Thin precise brush
  • Small soft brush
  • Icing bags
  • Saracino gel colours: skin, red, brown, black
  • Saracino powder colours: white, skin, pink, light blue, blue, brown, black
  • Ready baked gingerbread

Step 1

Measure 250 grams of Saracino Royal icing, add 50 grams of water, mix intensively with a spoon or in a food mixer. The icing you are creating will be perfect for filling backgrounds on your gingerbread.

Step 2

Put a small amount of icing into a bowl and add Saracino blue powder coloring. Add smaller amount first and add gradually to achieve the perfect shade.

Step 3

Mix the icing until the coloring completly desolves. Well-mixed frosting with a dye should be smooth and without lumps. Advice: Put leftover icing in a sealed container or put a wet cloth on top of the bowl.

Step 4

Put one of your gingerbread on a board and fill a piping bag with the coloured royal icing.

Step 5

Cut out a small hole on the sharp end of the icing bag. Pipe a line around the edge of the gingerbread.

Step 6

Run out between the piped line with coloured royal icing.

Step 7

The background will need about 2h to dry. Alternatively you can put it in the oven on 50 degrees celcius for around 10 minutes. The icing on the top will dry out, but will still be soft under the surface. While moving the gingerbread, DON’T touch the icing!

Step 8

After the icing dries out you can put other layers. You can easily draw a shape using a skewer.

Step 9

Put some white royal icing into a bowl and add one or two drops of Saracino skin tone gel colour.

Step 10

Fill an icing bag, cut out a little hole in the sharp end of the bag.  Mark on the gingerbread face, hand and the leg of the character. Important: You can add other elements when the previous dries out.

Step 11

Mark the head of the second character and pipe the outline.

Step 12

Run out the head shape with icing after the first head has dried out slightly.

Step 13

Pipe the neck and an ear.

Step 14

Put some white royal icing in a bowl and add a drop of Saracino red gel coloring. Mix with a spoon. Put half of the prepared icing in an icing bag. Add another one or two drops of the red gel coloring into the bowl, mix it and put it in another icing bag. This way you will achieve two different shades of pink.

Step 15

Repeat steps from the 14th point, but with Saracino brown gel coloring.

Step 16

Repeat steps from the 14th point, but with Saracino black gel coloring. Add more drops to the icing as we want a strong black colour.

Step 17

Draw a shirt with the pink icing, a t-shirt with dark brown and the pants with light brown. Leave it to dry.

Step 18

Draw the first trouser leg with light pink icing, hands and legs with nude color icing.

Step 19

Draw the second trouser leg with light pink icing, hands and legs with the nude color icing.

Step 20

With the nude color icing, pipe the leg and the belly.

Step 21

Pipe the hair outline with the black icing.

Step 21

Run out the hair with black royal icing.

Step 22

Pipe the hairline of the second character.

Step 23

Run out the hair with black royal icing.

Step 24

Put the light blue icing into a bowl and add a little more Saracino blue powder to achieve stronger colour. Mix it, put into the icing bag and pipe the pillows. Advice: You can also use the gel colour to colour your icing.

Step 25

Put the remaining pink icing into a bowl and add more red gel colour to get a deep red. Mix it well and put it into an icing bag and pipe hearts.

Step 26

Measure 125g of Saracino Royal icing and add 18 g of water. Mix it well. You’ll get icing perfect to make edge bead. Put it into an icing bag and pipe the beads around the gingerbread.

Step 27

The gingerbread should look like this with the decorative bead around the edge.

Step 28

Take blue powder colour and dust the hands of the characters with a brush to achieve effect of cold hands and feet. Important: Don’t put the colour direct onto the icing without  dabbing it on a paper towel first.

Step 29

Repeat step 28 with pink powder colour, dust the hoodie, the trousers and the cheeks of the characters.

Step 30

Use the brown powder colour to add shadows on the hoodie and the trousers. Important: If you have only one brush, wash it and dry it after every usage.

Step 31

Mix the brown powder colour with water or clear alcohol using a small brush. Draw around the hoodie and the trousers.

Step 32

Use the diluted brown colour to paint eyes, and use the nude color to draw around hands and the legs.

Step 33

Add one more pillow next to both sides of characters. Use the diluted white powder colour to draw lines around the characters as shown on the photograph.

Step 34

Dilute the black powder colour and draw symbols above the characters. Use the white thick icing (one you have used to pipe decorative beads around the edges of the gingerbread) to pipe a patern around the pillows.

Step 35

With pink diluted powder colour paint around the trousers, shirt and add stripes on the shirt.

Step 38

Put the rest of the white icing into a bowl and add a tiny bit of black icing, mix it and put into another bag. Pipe around the hair. Dust some shadows with blue powder colour.

Step 37

Da Da your gingerbread is ready to give to a loved one.
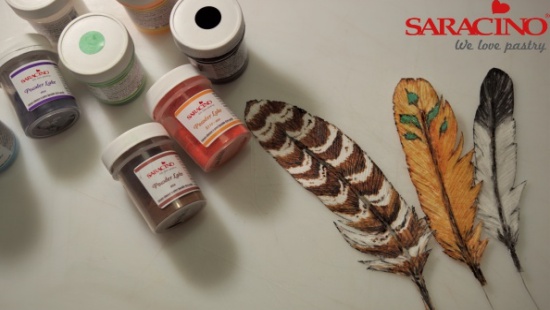
CREATE A WAFER PAPER FEATHER

CREATE A WAFER PAPER FEATHER

Author: Gisi Prekau

Skill level: BEGINNERS

You will need:

  • Wafer Paper from Saracino – 0.27 thickens
  • Saracino cocoa butter
  • Powder dust – black, brown, green, blue, yellow, orange from Saracino
  • Flower wire 24 gauge
  • Piping gel from Saracino 
  • Small scissors
  • Pencil
  • Dresden tool
  • Painters palette
  • Brush big wide
  • Fine brushes

Step 1

Choose a feather template and cut it out with scissors.

Step 2

Fold the waferpaper so that the rough side is inside. Transfer the template to the outside of the paper using a pencil.

Step 3

Prepare floral wire to a length suitable to fit the centre of the feathers and bend them slightly to give them gentle curvature.

Step 4

Coat the edible paper on the inside with piping gel using a large brush, then place the floral wire and fold. Give good pressure to glue the waferpaper well.

Step 5

Using a dresden tool push the wafer paper over the wire to form the centre of the feather. Let it dry for several hours.

Step 6

Cut out the feathers carefully with small scissors. Add texture to the feather using a Dresden tool.

Step 7

Now you are ready to paint your feathers as required.

Step 8

Melt the cocoa butter and mix with powder colours.

Step 9

Using a thicker mixture paint the darker parts of the feather. To achieve more transparent colour for the lighter sections use a thinner mix.

Step 10

I always start with a general base colour (thinner blend) and work with the details gradually. The following details are usually marked in colour and applied with a finer brush.

Step 11

The colour scheme can be made as you wish – add a fine marking outer line around the edge of the feather.

CREATE A BEAUTIFUL ROSE

CREATE A BEAUTIFUL ROSE

Skill level: BEGINNERS

You will need:

  • 50-70g Saracino Pasta Bouquet Gum Paste
  • Saracino Cake Gel or glue
  • Gel colours green and pink
  • Dust colours – pink, green, white, yellow, red
  • Floral wire green 20G and 28G
  • Floral wire white 28G
  • Styrofoam rose center 3.5cm 
  • Floral tape, green
  • Teardrop cutter 4.5cm and 5cm
  • Rose leave cutter 4cm and 3cm 
  • Veiner rose petal, large
  • Veiner rose leave
  • Calyx cutter 3.5cm
  • Cell-board with grooves
  • Foam pad
  • Ball tool, big
  • Craft knife
  • Hot Glue
  • Pliers
  • Plastic spoons

Step 1

Use a styrofoam rose center glued on the 20G green wire or make one out of 15g white Gum Paste. If you are using a gum paste center make it ahead of time and leave it to dry well.

Step 2

Colour your paste in three different shade of pink using gel colour and one shade of green. You will probably need to colour about 10-20g for each colour. 

Step 3

For the rose petals roll out the paste with the darkest colour very thin. Before rolling out apply some vegetable fat on your board, that will allow you to roll out thin. Cut out 5 petals with the 4.5cm teardrop cutter. 

Step 4

Place the petals on the foam pad and thin the edges using a large ball tool. Applying pressure roll the ball tool half on the paste and half on the pad. If needed use some cornstarch to make sure the paste will not stick to the pad or to the ball tool. 

Step 5

Place every petal in the veiner and firmly press to texture with the petal structure. Before first use of the veiner dust it with little cornstarch and dab off. Open the veiner and carefully lift the petal and place on a tablespoon to dry a bit.

Step 6

Use two petals to  cover the centre completely. Apply glue to the center and attach the first petal so it covers half of the cone. Keep one side open and slide the second petal underneath the open edge. Stick to the cone tightly.

Step 7

Apply glue to the edges of the pointed tip of the three remaining petals – like a “V”

Step 8

Add the first petal of the second row overlapping the joint of the petals of the first row. Keep the left side open. Add the second and third petal clockwise. Slide the left edge of the third petal under the open edge of the first. The petals are tight around the cone, only the upper edges are slightly open. 

Step 9

Roll out the middle colour and cut out 6 petals of 4.5cm. Thin the edges and press between the veiner as shown before. For the third row place three petals around the cone as shown in step 8. Leave the upper edges a bit more open than in row 2. 

Step 10

For the fourth row place the remaining three petal in the same way as for row 3. Curve the upper and the side edges with your finger tips. 

Step 11

Roll out very thin the lightest colour of your Pasta Bouquet and cut out 5 petals with the 5cm long teardrop cutter. Thin the edges and impress with the veiner. Place to dry on the tablespoons. Curve the upper edge with your finger tip and leave a bit longer to dry. The petals are ready to be placed on the rose when they can hold their shape and have a leathery feel.

Step 12

In the meantime prepare your last row of petals. To have more movement on those petals, you have to support them with wire and let them dry longer. Use a non stick board with grooves. Apply vegetable fat over one groove, place small amount gum paste of the brightest colour and roll out thin.

Step 13

Cut out a petal with the teardrop cutter with 5cm length.

Step 14

Cut one 28G wire in three and use one piece per petal. Place the petal with the back side up on the foam pad. Place one finger over the thicker center and insert the wire carefully with the other hand. It may help if you slightly twist the wire. Apply glue on the wire end before inserting. Now turn the petal with the right side up and using the ball tool thin the edges.

Step 15

Place the wired petal onto the veiner and press with one finger in order for the wire to bend to the curves of the veiner. Impress the petal structure as usual.  

Step 16

Carefully lift the petal out of the veiner and place it on a tablespoon.

Step 17

Curve the edges and leave at lease for 1 hour to dry. 

Step 18

If the fifth row petals are dry enough, you can assemble them around the rose. Apply “V”-like glue on the petal and place them clockwise around the cone, every one slightly under the previous one. 

Step 19

This petal row is more open and only glued to the base of the cone. Leave it for at least 30min to dry assembled like this. 


Step 20

Dust the rose centre and the edges of the petals with edible dust colours. I am using here Saracino Dust colour in pink and white, mixing the intensity depending on that which part I am dusting – darker in the center, lighter on the outer petals.

Step 21

Dust the wired petals too. Apply the dust on the edges and on the base of the petal inside and outside.


Step 22

Using flower tape put together the wired petals clockwise and always slightly one underneath the other. 

Step 23

Roll out thick green gum paste and cut out one calyx. 


Step 24

Using the ball tool go over each petal of the calyx and stretch it.

Step 25

Cut with a craft knife the top of each petal in two or three sections. Apply glue on the petals leaving the tips glue-free. 


Step 26

Attach the calyx to the rose and make sure it is sticking to the rose petals. Place small amount green gum paste behind the calyx and shape it as a half-ball.

Step 27

For the leaves roll out small amount green gum paste over the rill board and cut out one 4cm leaf. Insert a piece of 28G wire inside and thin the edges.  


Step 28

Impress with petal structure using a veiner. Make another two leaves each 3cm long and leave all three of them to dry. 

Step 29

Mix green and and yellow dust colour to achieve different shades of green. You will also need a bit of red dust. 


Step 30

Dust the rose leaves with darker and lighter green. Dust the edges with red. Dust also the calyx with these colours.

Step 31

Bind the three leaves with florist tape, the biggest leaf is in the middle, the smaller ones lower and on the sides. Bind rose and leaf branch together. 


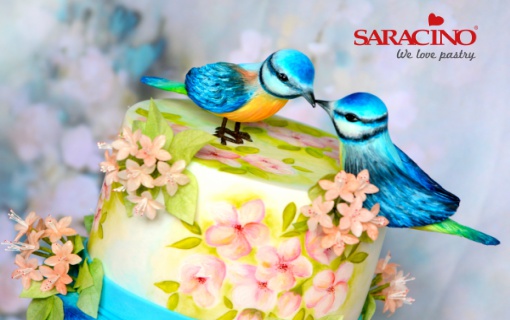
BIRDS IN LOVE – WEDDING CAKE

BIRDS IN LOVE – WEDDING CAKE

Skill level: BEGINNERS

You will need:
  • White Saracino modelling paste
  • Dark Blue Saracino modelling paste
  • Yellow Saracino modelling paste
  • Black Saracino modelling paste
  • Saracino wafer paper 0.27
  • Micro stamens
  • 24 gauge wire
  • Green tape
  • 10”, 8” and 6” round cake dummy with 4” height
  • Saracino cake covering/white
  • Cake drum/board 12” round and some covering
  • Edible paint- hot pink, white, green,red,blue and yellow
  • Round brushes various sizes from thin to thick, say number 0,2,4 and 8 or any equivalent (roughly 4 brushes)
  • Colour palette
  • Vodka (just a table spoon each) or any evaporator
  • Wipes
  • Rolling pin
  • Cake smoother
  • Contrast ribbon to cover the cake and drum and some glue or double sided tape
  • Knife, scissors
  • Some cornstarch required while rolling the cake covering
  • Any small bowl for washing brushes
  • Dresden tool
  • Ball tool
  • Shell tool

Step 1

Draw a bird shape using a ball tool on a flat rolled sheet of Saracino sugar paste.

Step 2

Cut the drawn outline with a knife tool.

Step 3

Cut all the edges well and smoothen if any rough or raw edges left.

Step 4

Roll thin strips in black and curl them to form the beak shape and eyes.

Step 5

Using the blue and light blue Saracino sugar paste form small droplets and start gluing on the bird base following a pattern and continue using some yellow, white and orange droplets.

Step 6

Make the branches with brown paste that is tapered from one end,Glue on the bird over the branches.

Step 7

Make one more bird facing the 1st bird in the same way.

Step 8

Again make some more branches in brown.

Step 9

Using a leaf tool blend them well.

Step 10

Mix some edible gel colours (blue and dark blue) with evaporators/vodka and start painting on the cake, using a flat brush dab and blend the two shades well, then add a bit of pink, red and orange and blend all the colours well.

Step 11

Make tiny wafer paper flowers

Step 12

Add few more highlights in dark blue.

Step 13

Cut a thin ribbon like strip in light blue sugar paste, approximately 2cm wide

Step 14

Brush with Saracino glue on one side.

Step 15

Glue it around the bottom of the cake.

Step 16

Trim the rest and blend the joints well.

Step 17

Using the edible marker draw some flowers and leaves on the second tier of the cake, mix some pink and orange edible paint and highlight the edges of the flowers.

Step 18

Blend the colours using white edible paint.

Step 19

Paint tiny dots in red and black in the center of the flower and blend some green around the flowers.

Step 20

Now with a pointy round brush draw the leaves in green.

Step 21

Blend using some light green and yellow/this can be achieved by mixing white or yellow in dark green.

Step 22

Brush some light blue in the empty spaces left between the flowers and leaves.

Step 23

Making the small birds is easy, start with an elongated ball of white modelling paste and taper from one end for the tail white a rounded end on other side for the head, make the eyes with a ball tool and add tiny eye balls.

Step 24

Add two tiny eyelids around the eyes.

Step 25

Blend the eyelids well.

Step 26

Make some feather texture on the tail with the knife tool or any pointy tool.

Step 27

With the shell tool texture the body.

Step 28

Roll a ball and shape it into a drop shape and flatten it to make the wings.

Step 29

Texture the edges of the wings with the knife tool.

Step 30

Texture the rest using the leaf tool.

Step 31

Join it to the body and blend with the ball tool

Step 32

Start painting the body starting with the lightest shade of blue

Step 33

Add a darker shade of blue on the top

Step 34

Using a thin brush paint standing strokes around the eyes forming a ring

Step 35

Paint a black ring just below the blue one

Step 36

Now paint the the eyes

Step 37

Paint the lower body with a light yellow edible paint

Step 38

Add some dark yellow and orange edible paint in the center of the lower body and blend well

Step 39

This is how it will look, make sure you keep the light yellow on both ends of the lower body

Step 40

Paint the tail in blue.

Step 41

Blend with the yellow and the blending will show some green on the tail too, make sure you have a bit of blue on the end of the tail and don’t carry the shading right till the end as it will result in a green tail

Step 42

Start painting the wings in shades of blue and then some black strokes

Step 43

Push a posy pick or a straw in places where you want the flowers

Step 44

Immerse the flower bunch into the straw/posy pick

Step 45

Create more wafer paper leaves around the branches and the flowers. Vein them, dust with green dust and use some Saracino wafer paper glue to glue them on.

Step 46

Make the birds legs with a wire and then tape it with brown tape, immerse it when the bird is completely dry. Place both the birds on top of the top tier of the cake

Step 47

Your bird theme cake is now ready