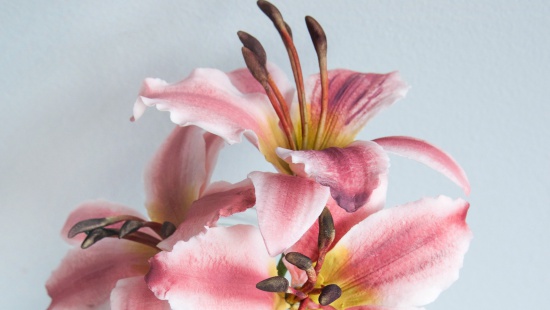
BABY IN A BUNNY OUTFIT

BABY IN A BUNNY OUTFIT

Skill level: INTERMEDIATE

You will need:

  • Non stick board
  • Small rolling pin
  • Edible glue
  • Exacto knife
  • Dresden tool
  • Point tool
  • Small flower foam base
  • Tapered point colour sharper No 0
  • Small ball tool
  • Fine brush (No 5/0)
  • Saracino dust colors (light blue, brown, black, pink)
  • Some vodka (or other clear alcohol) for mixing colours
  • Saracino modelling paste (white, skin, pink, grey, fuchsia, orange, green, brown)
  • Toothpicks

Step 1

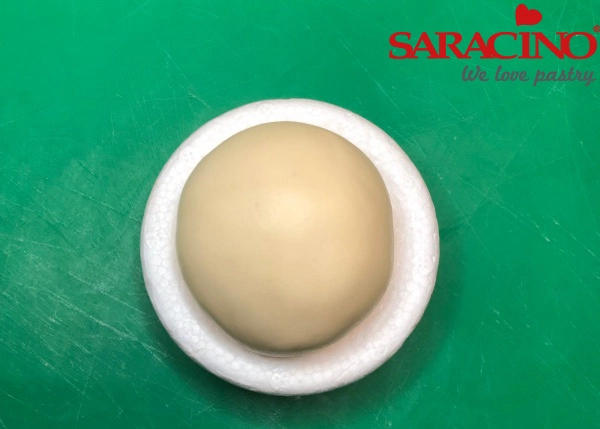
Take a piece of skin coloured modelling paste, soften it and mould it into a ball shape.
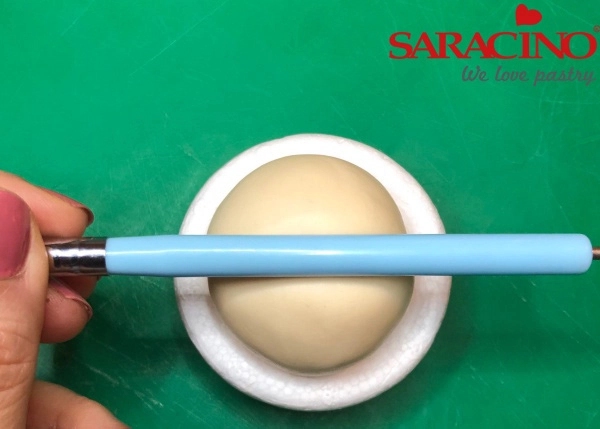
Step 2

With the side of a brush or other appropriate tool press slightly in the middle of the ball.
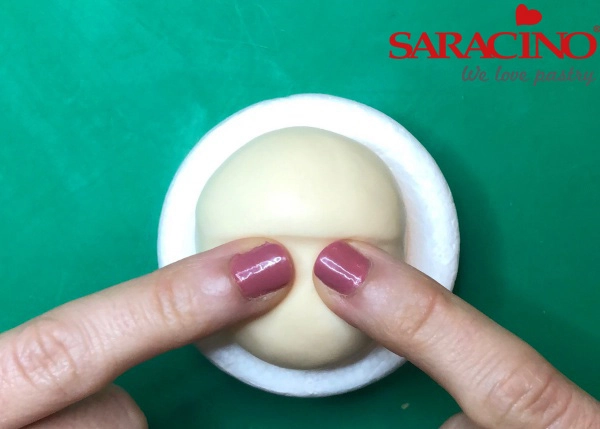
Step 3

With two small fingers press slightly left and right of the center of the dent to form the nose in the middle.
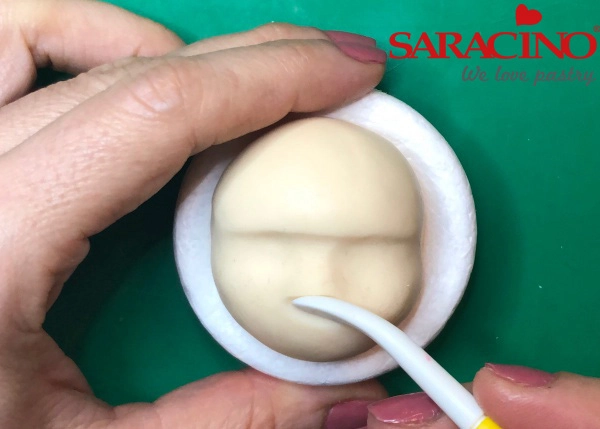
Step 4

With the dresden tool, form the sides and the end of the nose pushing it upwards
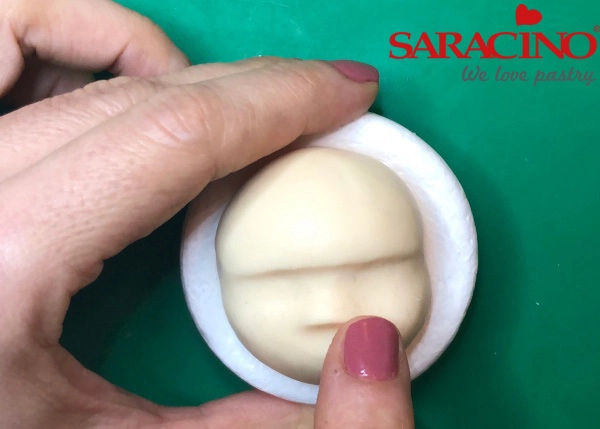
Step 5

With the end of a finger smooth the edge of the nose to make it a bit rounder.
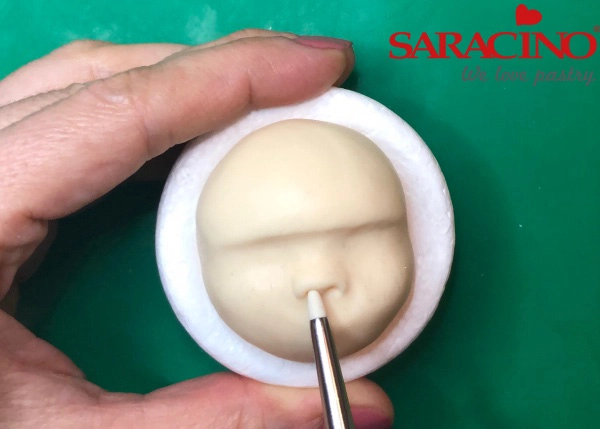
Step 6

Make the two nostrils with the silicon brush or a point tool and form a nice shape.
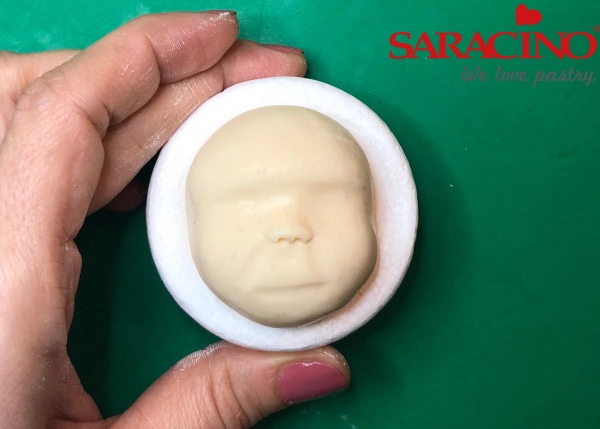
Step 7

Define the space where the mouth will be by making left-right  diagonal grooves and also horizontal (as a small triangle)
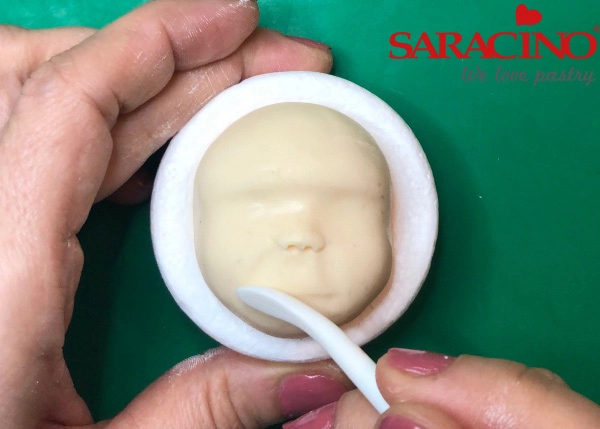
Step 8

Correct it with dresden tool
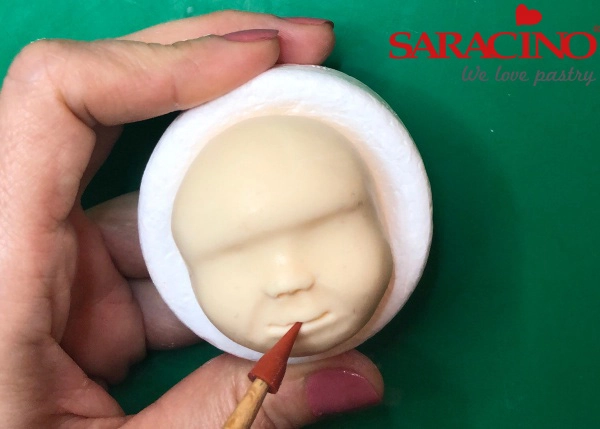
Step 9

With the point tool we divide this space to create the upper lip and the lower.
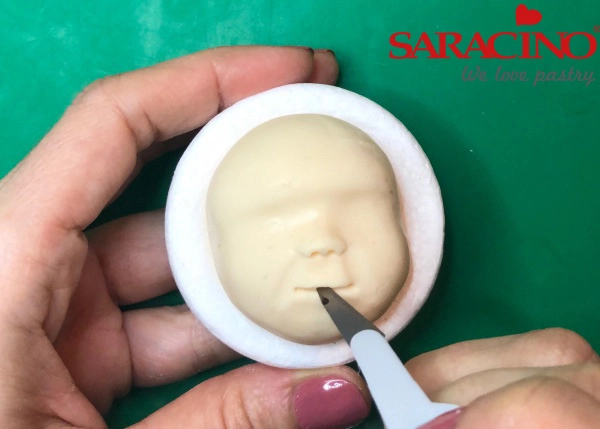
Step 10

Cut it slightly with a blade to stand out
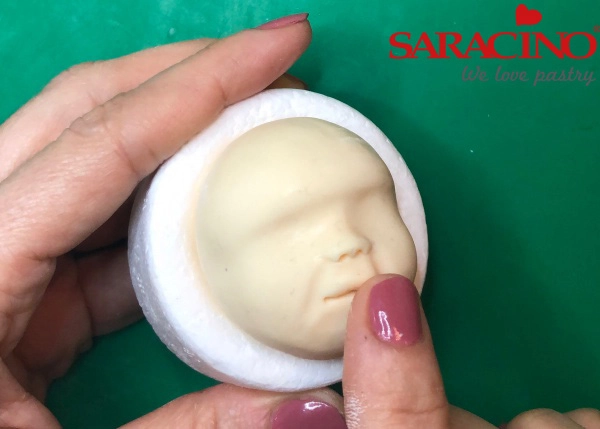
Step 11

Soften the edges of the upper lip with the tip of your finger
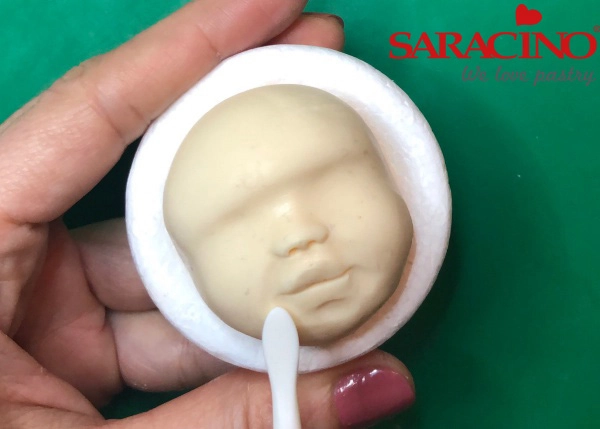
Step 12

Form the border of the lower lip and the edges of the mouth with the dresden tool
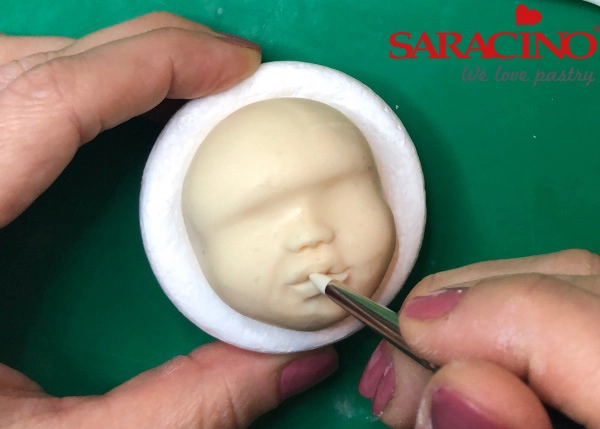
Step 13

Add details with the silicon brush on the lips
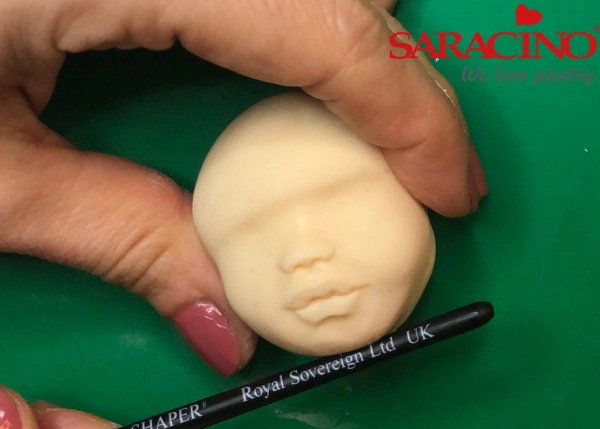
Step 14

With the back of a brush, shape the chin pushing it upwards
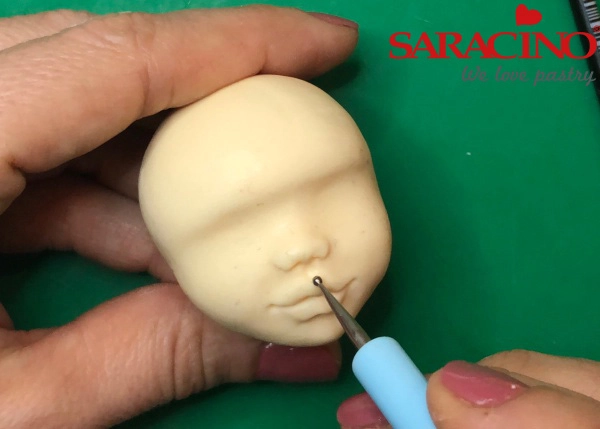
Step 15

Form a distinct philtrum above the upper lip with a small ball tool
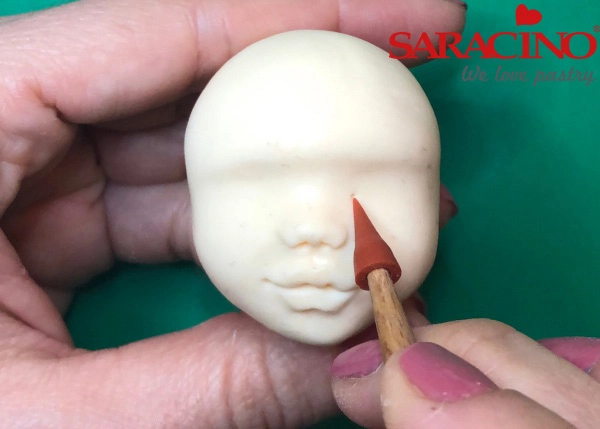
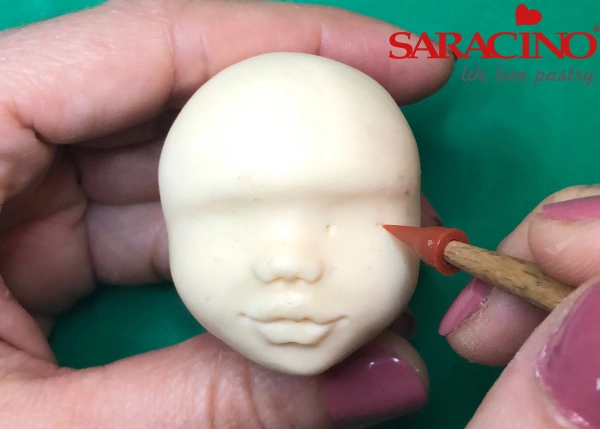
Step 16

Make a dot for the inner eye angle where the eye begins
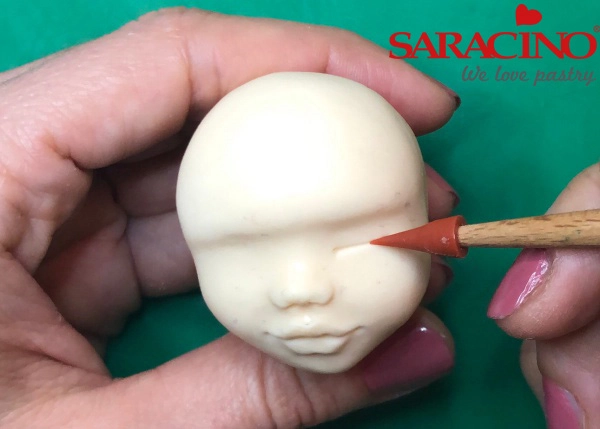
Step 17

Make a dot for the outer eye angle where the eye ends
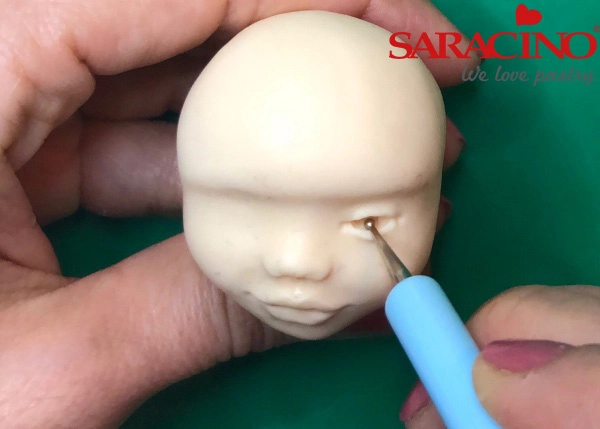
Step 18

Unite the two dots with a line
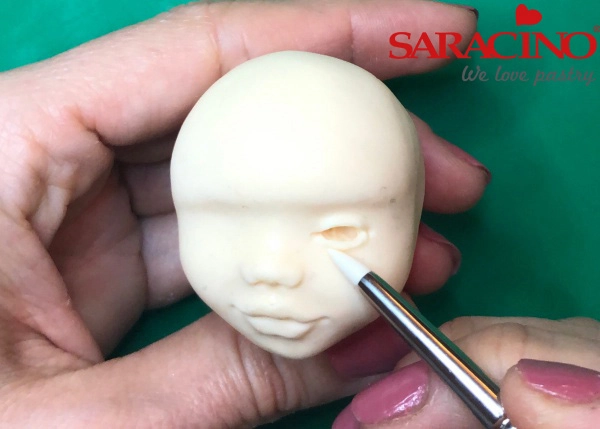
Step 19

Widen the line with the small ball tool
Step 20

Form the eyelids with the silicon brush
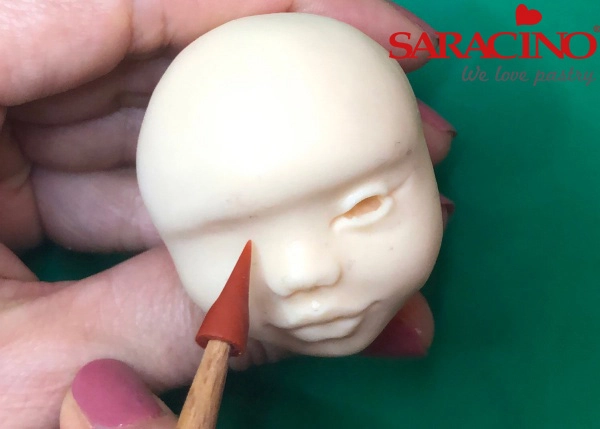
Step 21

Repeat same steps for the other eye
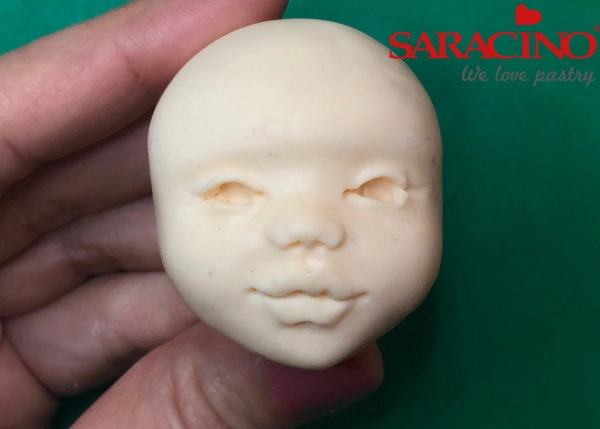
Step 22

Now you have the two eye sockets
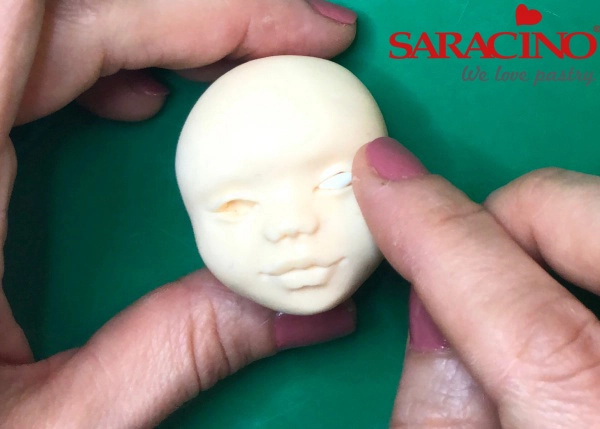
Step 23

Put some white paste in one of the sockets. 
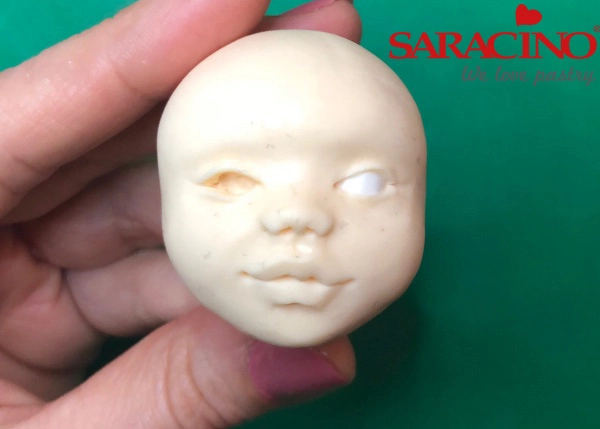
Step 24

Push it slightly and carefully to cover all space
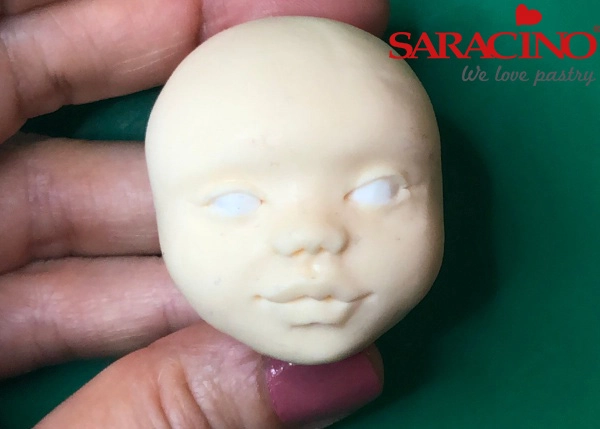
Step 25

Repeat with the other eye
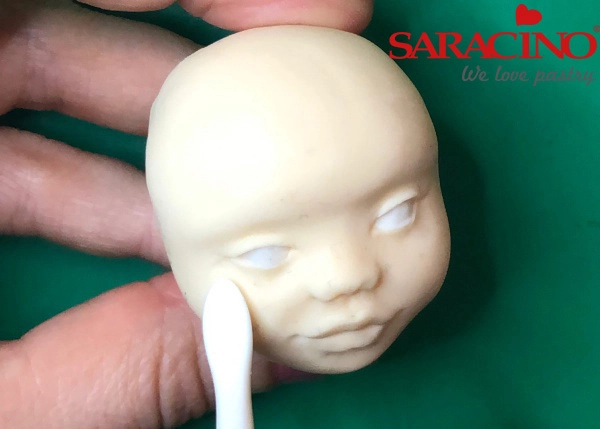
Step 26

With the back of the dresden tool make the appropriate adjustments on the details of the eyes
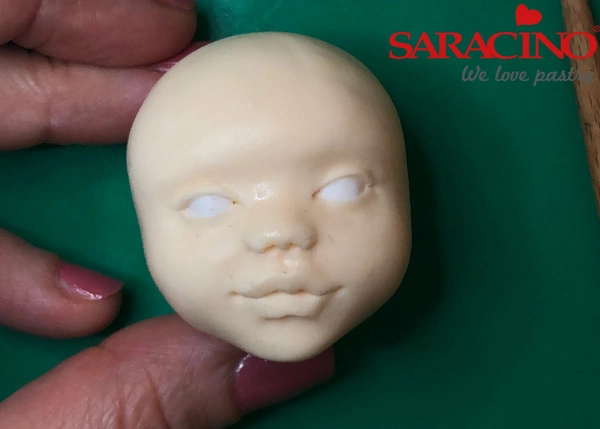
Step 27

Now the face is ready to color
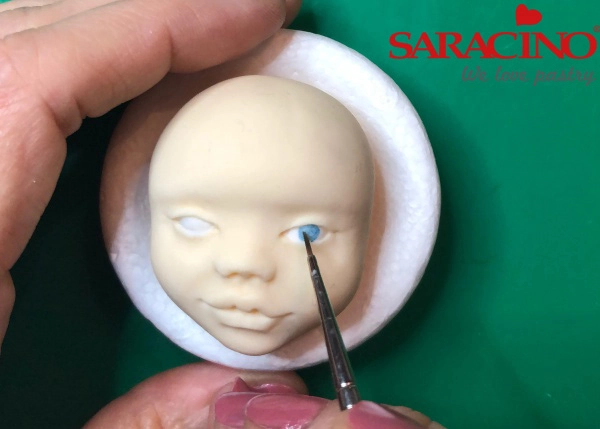
Step 28

Start by painting the main colour of the eye using powder colours mixed with clear alcohol.
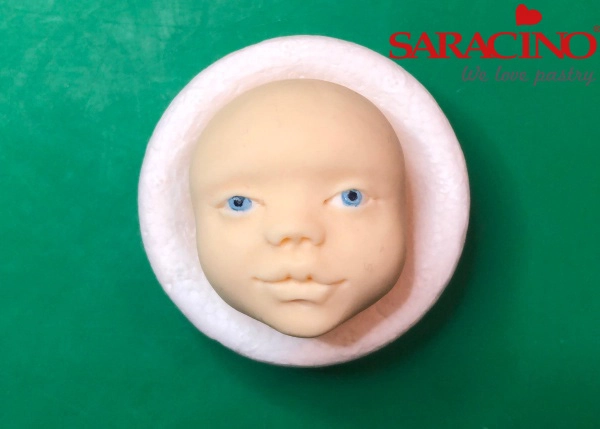
Step 29

Put some black for the pupil and some white for the light
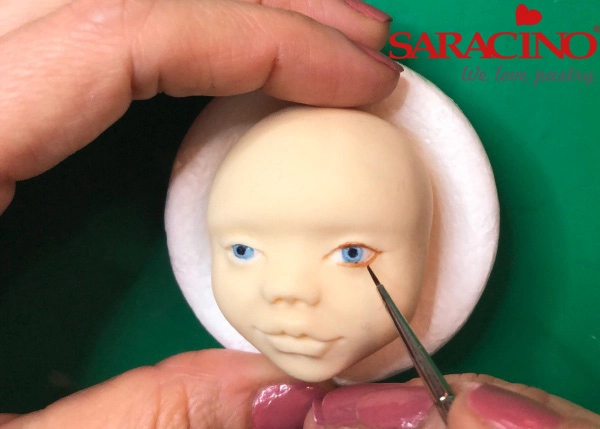
Step 30

Color the eyelids with light brown for the lashes
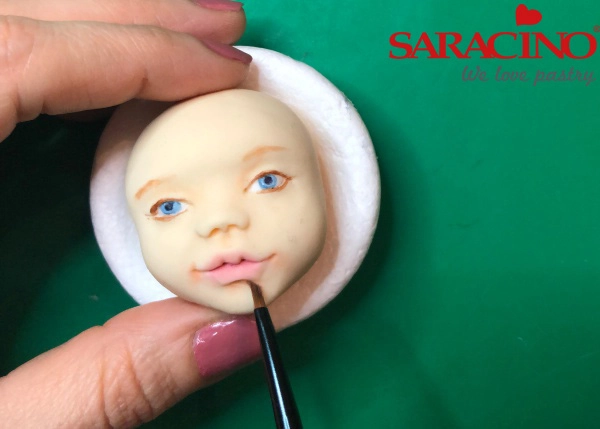
Step 31

Give some shadows on the edges of the eyes, nose and lips with light brown dust
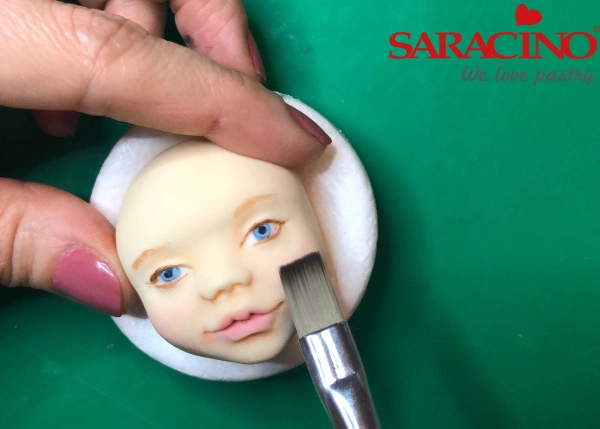
Step 32

With a bigger brush dust the cheeks with a light pink colour powder. 
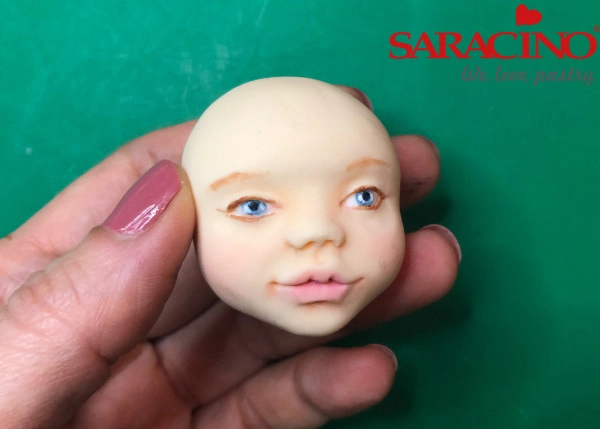
Step 33

The face is ready
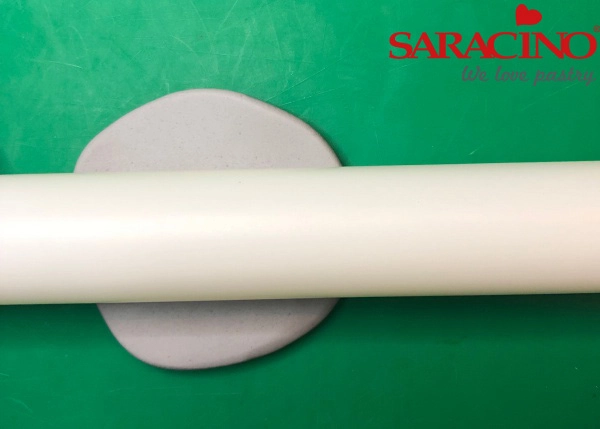
Step 34

Roll out some grey paste for the hood
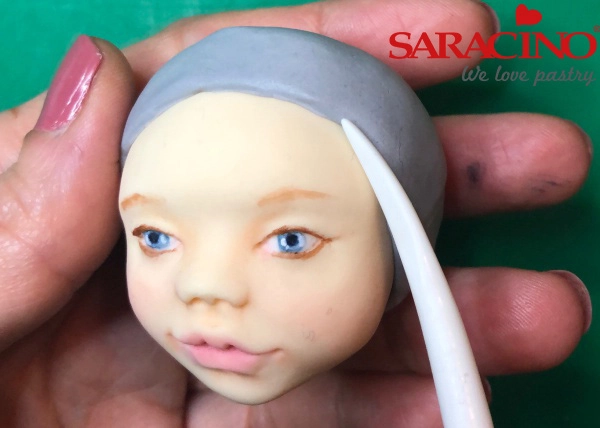
Step 35

Attach the hood to the head using edible glue
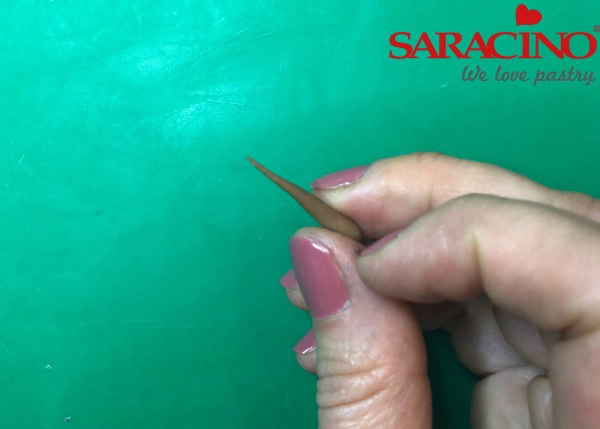
Step 36

Roll out with the tips of your fingers some brown paste pieces
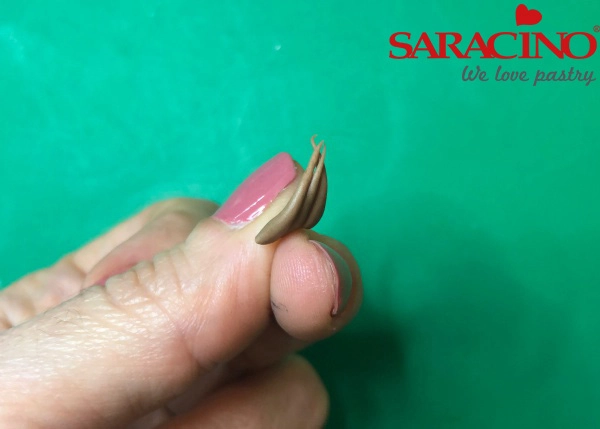
Step 37

Put them side by side to make the hair
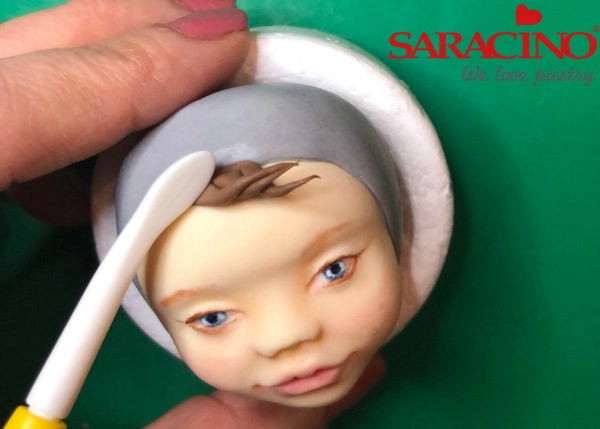
Step 38

Attach them to the top of the forehead at the edge of the hood
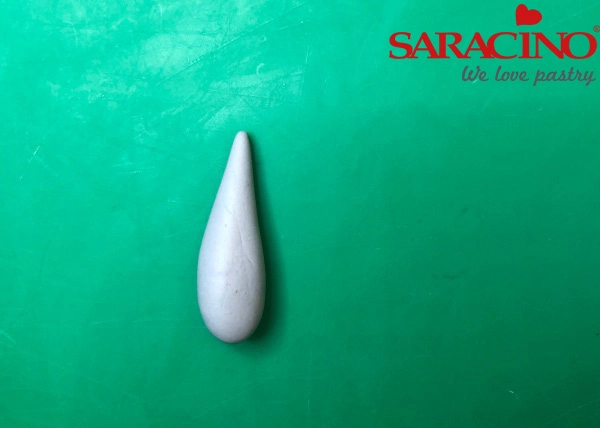
Step 39

Shape the grey paste into a teardrop
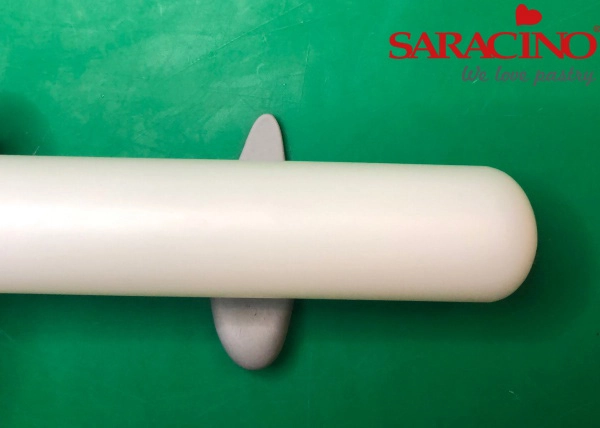
Step 40

Roll out the grey paste to form the bunny ears. 
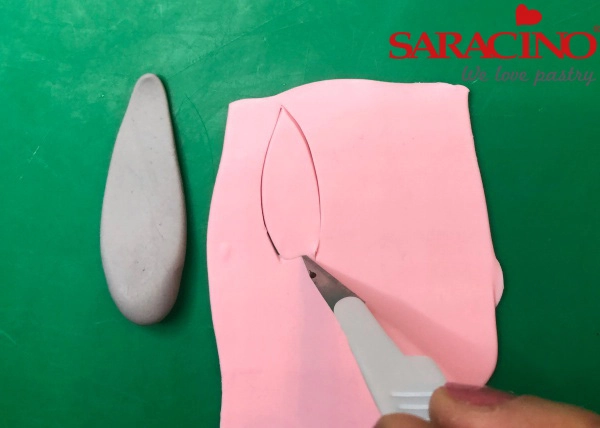
Step 41

Roll out pink modelling paste. Cut a piece of the pink paste to the same shape as the ear but a bit smaller.
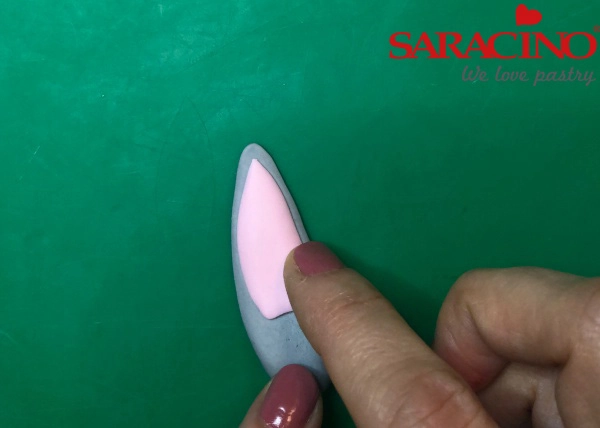
Step 42

Attach the pink over the grey with edible glue
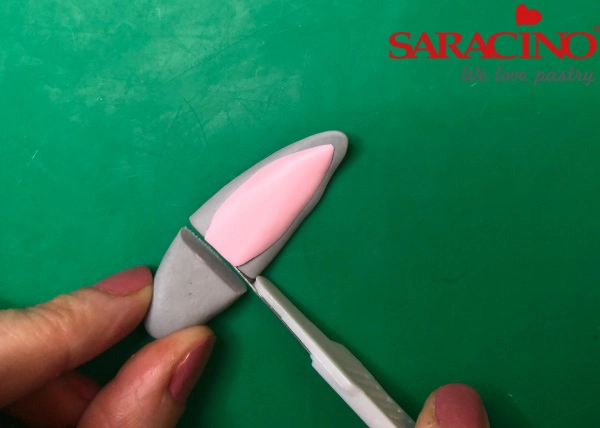
Step 43

Cut the excess to form a straight edge.
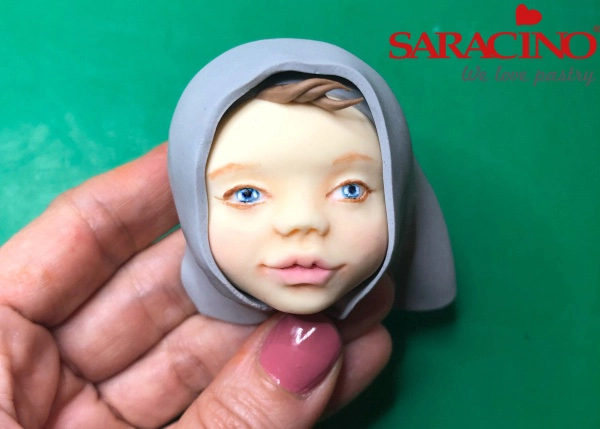
Step 44

Make a bigger hood using grey modelling paste and cover the head
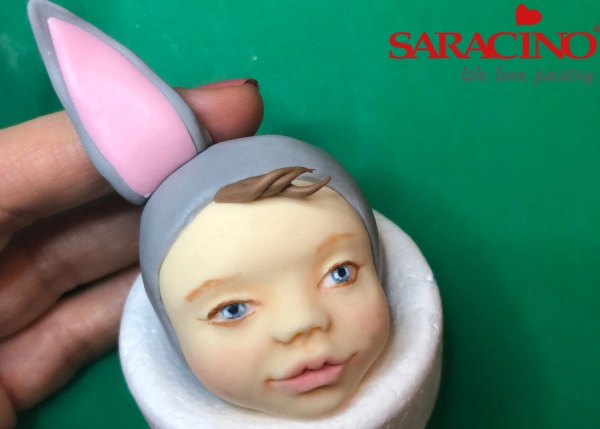
Step 45

Attach the ear to the hood with edible glue.

Step 46

Repeat with the other ear.
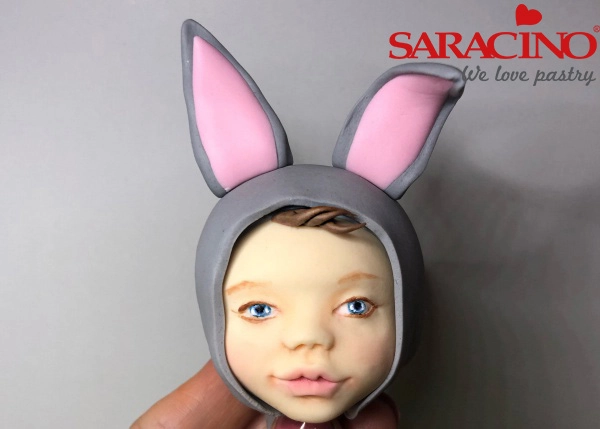
Step 47

Put the head safely on the side ready for later.
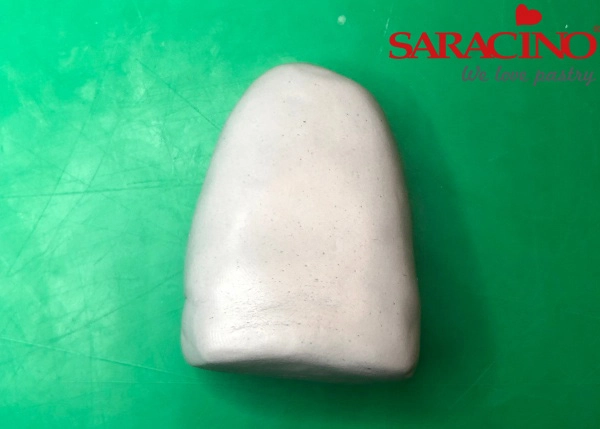
Step 48

Take a piece of grey paste and form the body as shown
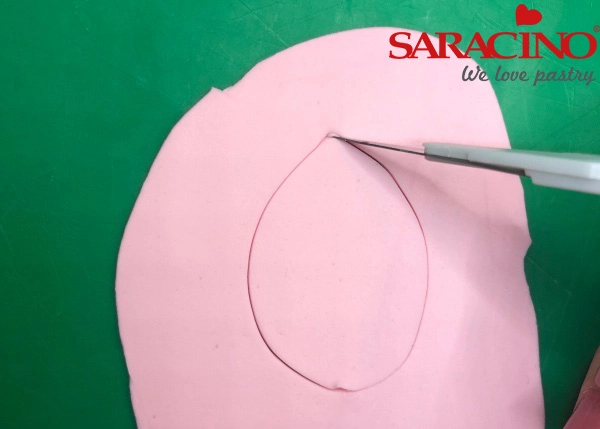
Step 49

Roll out some pink paste and cut a large petal shape for the tummy
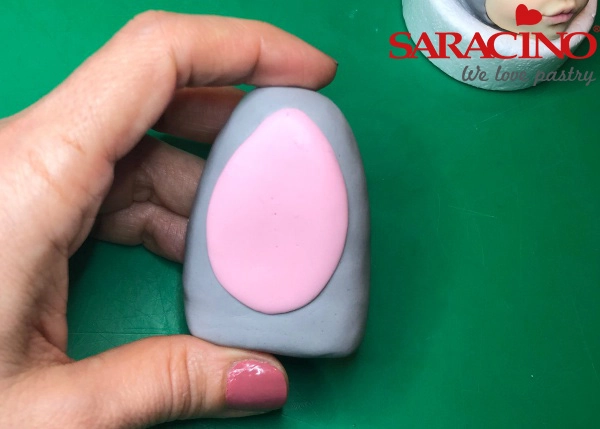
Step 50

Attach it to the body with edible glue
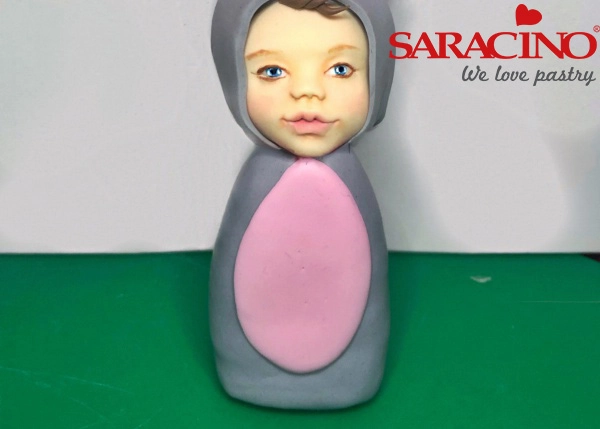
Step 51

Put a toothpick in to the top of the body and attach the head
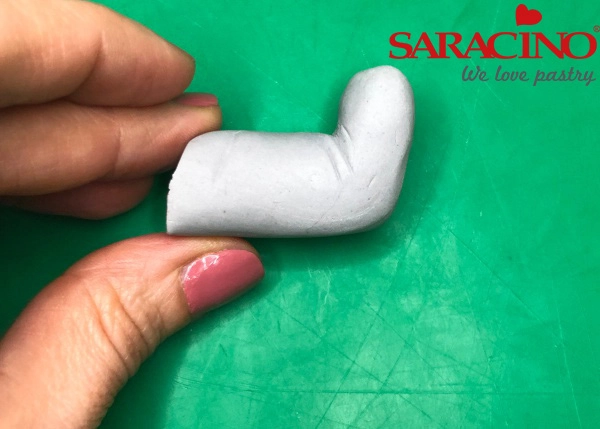
Step 52

With a piece of grey paste make an L-shaped leg as shown
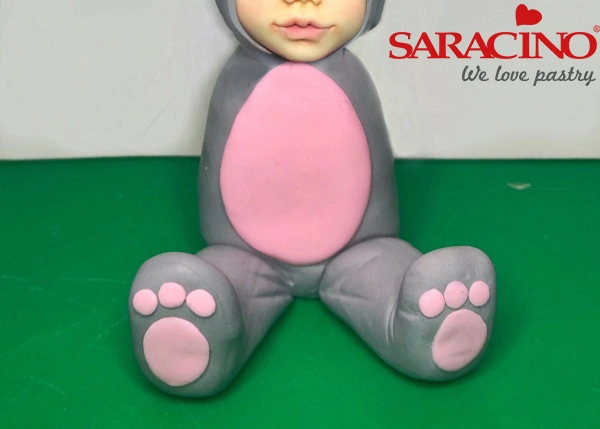
Step 53

Put some pink details on the shoe pad and do the same for the other leg. Fix them both to the base of the body
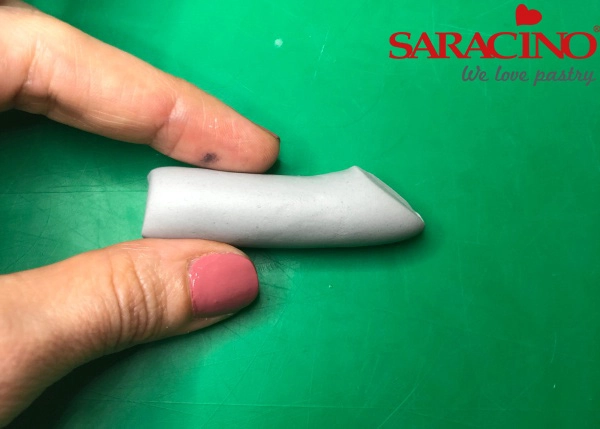
Step 54

Roll some grey paste in a sausage shape and cut off the edge diagonally for the arm
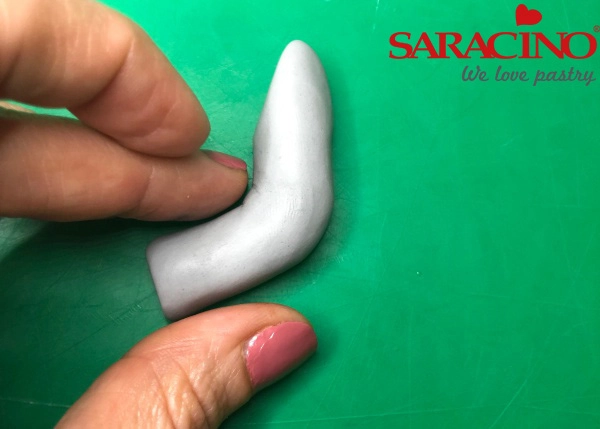
Step 55

Bend it in the middle to form an L shape
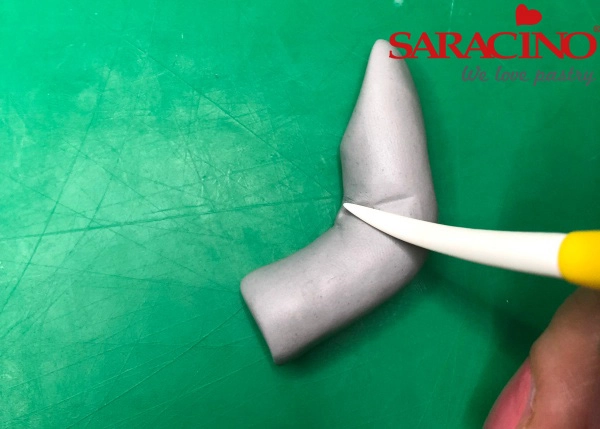
Step 56

Give some wrinkles to the inside angle with the dresden tool
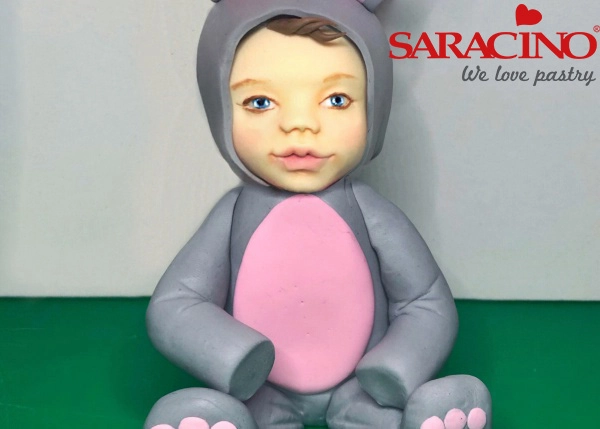
Step 57

Finish both arms and attach them to the body
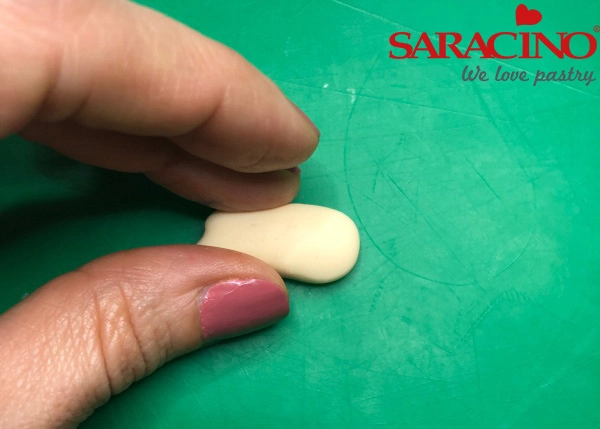
Step 58

Roll a small sausage of skin modelling paste and flatten the edge
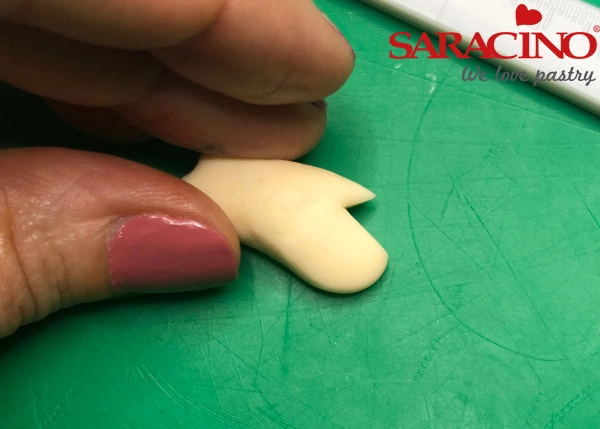
Step 59

Cut a triangle to form a thumb
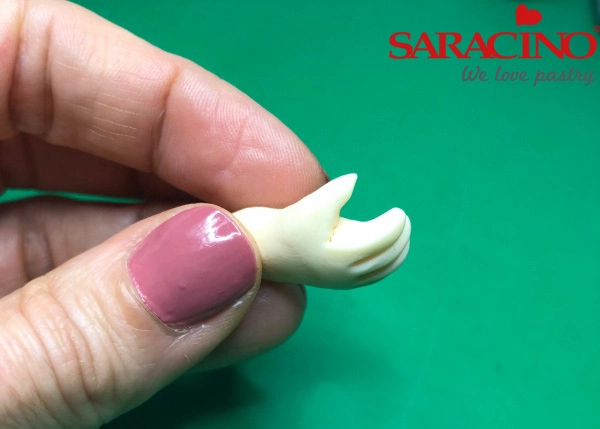
Step 60

Separate the rest of the fingers and give them a slight bend to the inside of the fist
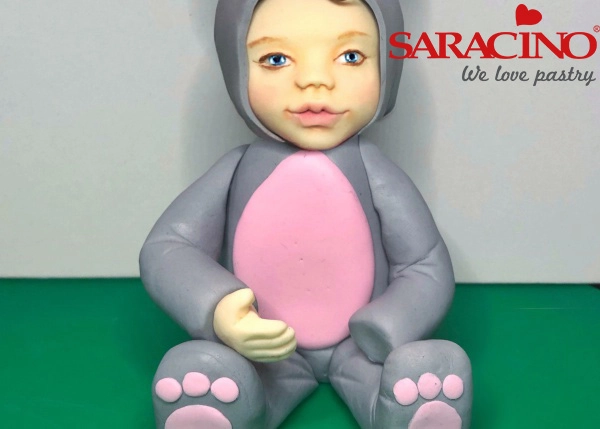
Step 61

Attach the hand at the end of the arm. Do the same steps with the other hand
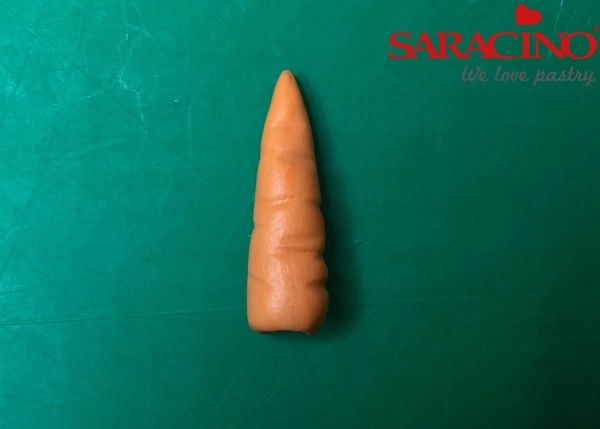
Step 62

Make a small carrot with orange paste
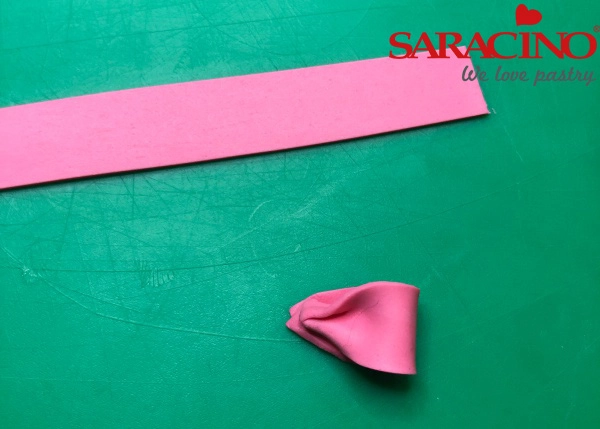
Step 63

Make a pink bow for the neck
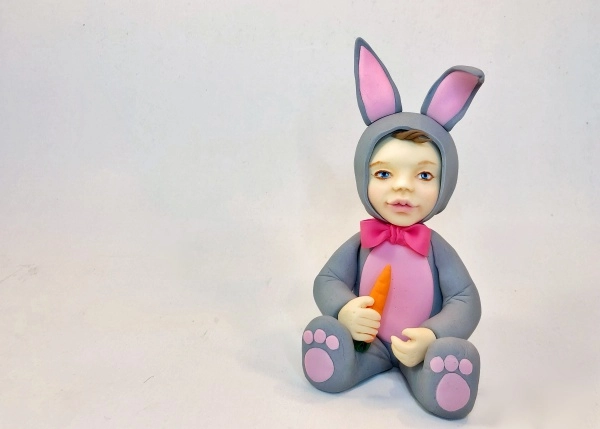
Step 64

Attach the carrot and the bow and the figure is ready!!!
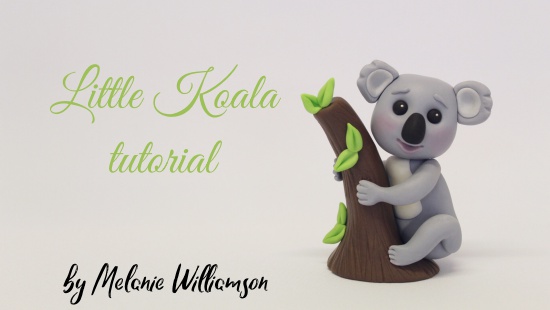
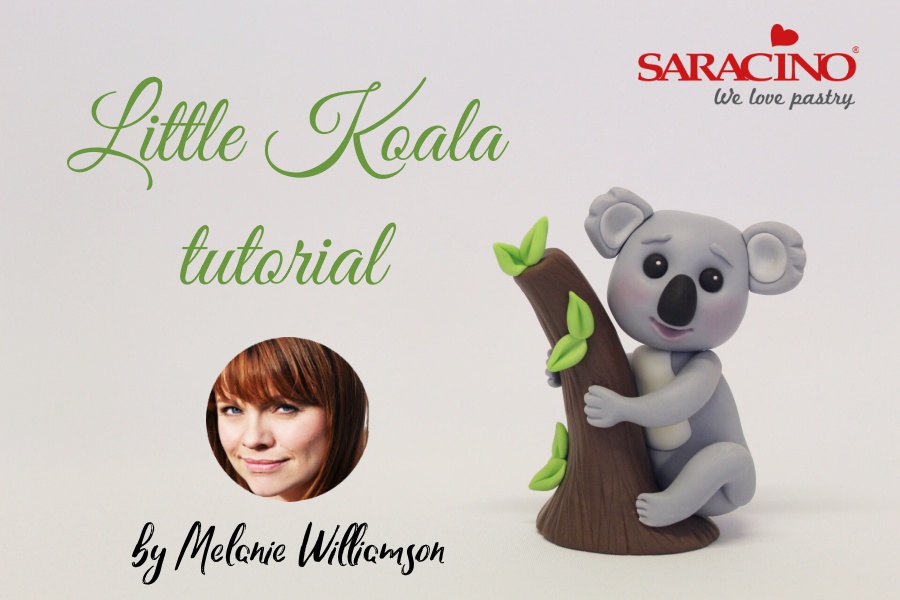
CREATE THIS LITTLE KOALA

CREATE THIS LITTLE KOALA

Skill level: BEGINNERS

You will need:

    • 60g Saracino modelling paste coloured grey
    • 40g Saracino modelling paste coloured browN
    • 2g black Saracino modelling paste
    • 2g light green Saracino modelling paste
    • 1g white Saracino modelling paste
    • Black colouring
    • Brown colouring
    • Cake gel or other edible glue
    • Pink edible dust
    • Dresden tool
    • Veiner tool
    • Paintbrush for gluing
    • Small soft brush for dusting
    • Craft knife
    • Large, medium, small and extra small ball tool

Step 1

Colour 40g of modelling paste brown

Step 2

Roll into a cone shape

Step 3

Flatten and widen the base, smoothing with your hand, and create a slight bend in the trunk

Step 4

Score the trunk with the veiner tool to create a bark effect. Set to one side

Step 5

Colour 60g of modelling paste grey. You’ll only need a little black gel. Remember you can always add more!

Step 6

Roll 25g of the grey paste into an ovoid

Step 7

Place down, slightly flattening the bottom and arching to create the koala’s body

Step 8

Take a very small ball of white modelling paste, flatten and shape in your hand to create a rough triangle

Step 9

Place this onto the koala’s body as shown (when attaching small pieces of Saracino paste together you don’t need to use any glue)

Step 10

Use a little cake gel as glue, or cool boiled water, and position the koala onto the base of

Step 11

To make the legs roll 4g of grey modelling paste into two sausages (2g each)

Step 12

Shape these into a loose ‘S’ shape

Step 13

Flatten the end of each leg with the dresden tool or your finger to create paws

Step 14

Use the veiner tool to mark claws

Step 15

Soften the edges with your finger or the dresden tool

Step 16

Add the legs to the koala’s body, placing some glue on both the trunk and the koala

Step 17

To make the arms again roll 2 sausages using 4g of grey modelling paste (2g each).

Step 18

Use your little finger to gently roll and define a paw at the end of each arm

Step 19

Flatten each paw

Step 20

Slightly bend each arm and glue into position so the koala can hug the tree!

Step 21

Roll 25g of grey modelling paste into a ball and slightly square off the top and sides to create the head shape

Step 22

Use the large ball tool to indent eyes midway up the face

Step 23

Mark a line for the mouth with the veiner tool

Step 24

Use the dresden tool to open up the mouth

Step 25

Run the medium ball tool just below the bottom of the mouth opening to create the bottom lip

Step 26

Use the small ball tool to mark the outer edges of the mouth

Step 27

Create deeper eye sockets using the medium ball tool

Step 28

Roll 3 balls of black modelling paste as shown. Put the larger to one side for the nose. The smaller two are the for the eyes. These are too small to weigh but should be about the size of petit pois!

Step 29

Drop the eyes into the sockets. If they’re too large or small simply remove and try again

Step 30

Use the very small ball tool to make tiny holes in the top right of each eye for highlights

Step 31

Roll tiny white balls and drop these into those holes, very gently smooth into position.

Step 32

Now roll the reserved black paste into an ovoid for the nose and glue into position

Step 33

For the ears use the remaining 2g of grey modelling paste to make two balls (1g each)

Step 34

Indent these with the large ball tool and roll two small balls of light grey paste, place into the ears

Step 35

Smooth and flatten them with your finger and then indent with the large ball tool

Step 36

Use the veiner tool to mark the sides of each ear as shown

Step 37

Trim each ear with the craft knife to create a flat edge and glue into position on the koala

Step 38

Roll two tiny sausages of grey, from the ear cut off, and place into position as eyebrows

Step 39

Use a soft brush to add a little pink dust to the koala’s cheeks and mouth

Step 40

Push a cocktail stick into the koala’s body (if for a customer be sure to tell them it’s there)

Step 41

Position the head onto the stick – looking cute isn’t he?!

Step 42

To make the leaves use 2g of Light Green modelling paste

Step 43

Roll into small cones and mark the centre line with the veiner tool

Step 44

Glue into position on the tree and your cute little koala is finished!

ORCHID AND SEA HOLLY

ORCHID AND SEA HOLLY

Author: Cassie Brown

Skill level: INTERMEDIATE

You will need:

  • Non stick board
  • Small rolling pin
  • #24 and #28 or 30# white wire
  • Green florist tape 1/2 width
  • Tweezers 
  • Set of moth orchid cutters medium by Cassie Brown
  • Large tea rose veiner
  • Flower paste Saracino WHITE
  • Saracino Flower paste coloured green
  • Cornflour to stop sticking 
  • Trex
  • Orange airbrush colours
  • Burgundy gel colour
  • Fine brush
  • Airbrush
  • Sea holly cutter set
  • Sea holly or leaf veiner
  • Wire cutter

This is my favourite to make, known as a thistle its very popular with brides in their bouquets (something blue), there are over 250 species of thistle and they come in so many different shapes and sizes. It’s actually very easy to make once you get the hang of it. If you make just the centre of the sea holly but go larger on a 20# wire you have created a teasel. Have a go!

Step 1

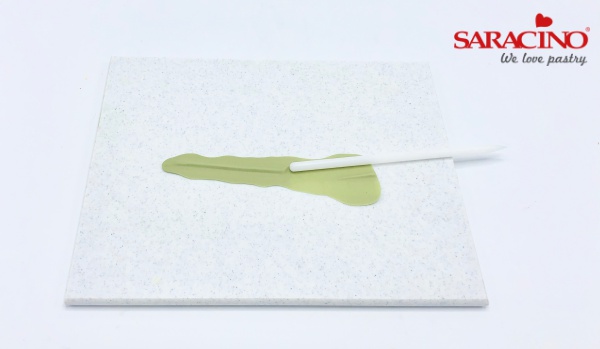
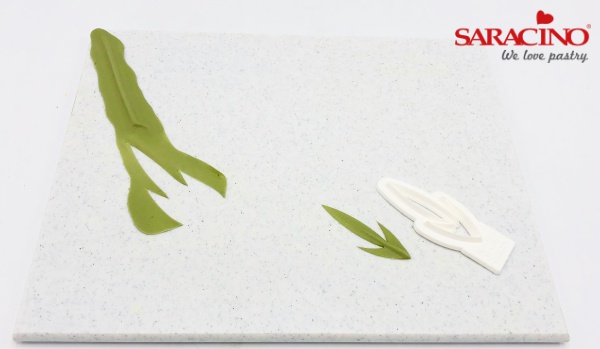
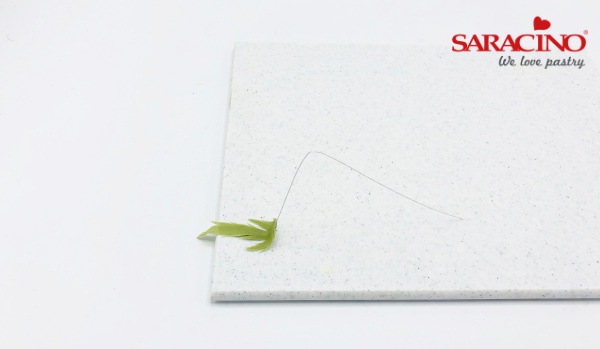
To make the bracts, take a ball of green Saracino flowerpaste and roll into a sausage shape, using a thin rolling pin, roll a small ridge up the centre of the sausage. 

Step 2

Lift the paste off the board to make sure it is not sticking then using the medium sea holly cutter, place the cutter over the ridge and press down and gently move around the board to cut out the bract shape. Use cornflour if needed. 

Step 3

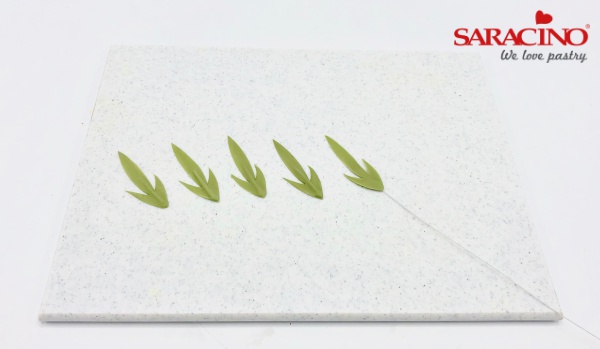
You will need 5 bracts cut out at the same time (this will stop the bracts drying at different times). Push a 30# white wire up through the ridge to just over half way.

Step 4

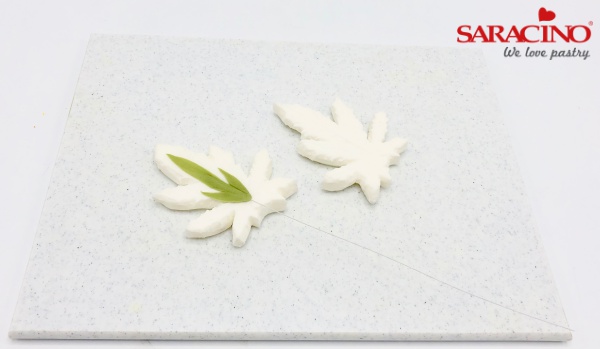
Dust the veiner with a little cornflour. Place the bract on the bottom of the veiner then place the other veiner on top and press down firmly with your hand.

Step 5

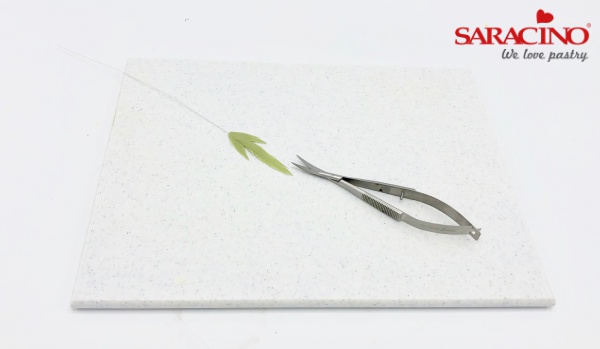
Make little cuts around the bract with small scissors so it looks like a thistle or feather.

Step 6

Where the paste is over 1/2 way up the bract bend to a 90 degree angle and place on the side of a board or piece of foam (the bract should look like a little person with no head, dangling his feet into a swimming pool).

Step 7

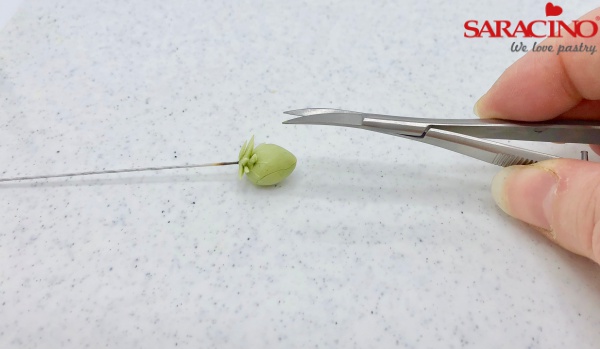
To make the centre of the Sea Holly take a 1/2 length of 24# white wire and bend a small hook in one end, using a pea size amount of green flower paste, roll into a neat ball, heat the hook of the wire with a naked flame (I use a candle) as soon as the wire is hot then push straight into the ball of green paste.

Step 8

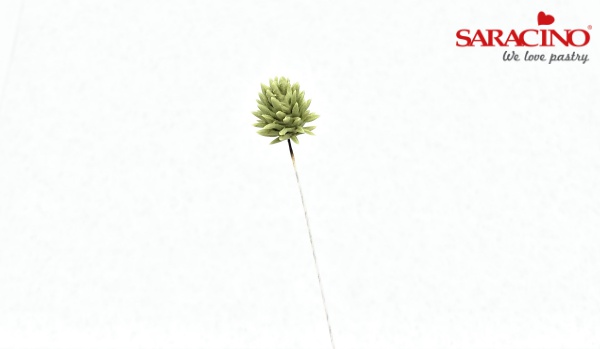
Shape the ball into a slight rose cone shape. With a small pair of scissors start at the bottom of the cone making small cuts, work your way up and around the cone until you get to the top.

Step 9

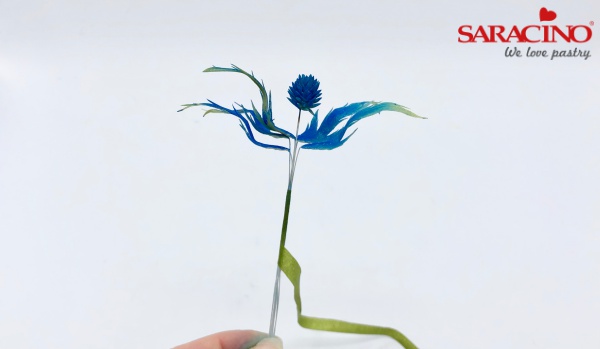
Finished sea holly centre

Step 10

Dust the Indigo blue from the base of the bract and fade before the colour gets to the end. Then dust all over with a little silver shimmer. Also dust the centre of the sea holly with the blue and silver.

Step 11

To wire, try to do this when the bracts are slightly damp. Take the five bracts and bend the wire as close as you can against the paste then place them around the the centre wire using ½ width green florist tape. Stretch the tape to release the glue and secure to the wires about ½ an inch under the bottom of the bracts, tape about one inch down the stem.

Step 12

Holding the taped wire, pull the wires one by one down through the tape so that you get a neat and tight finish to the back of the thistle, adjust the bracts if needed then pull the centre of the sea holly down. Finish taping down the wire.

Step 1

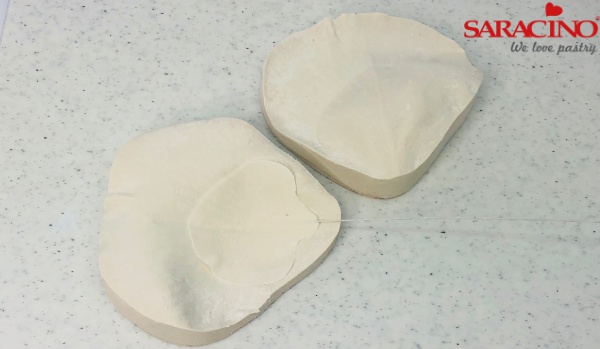
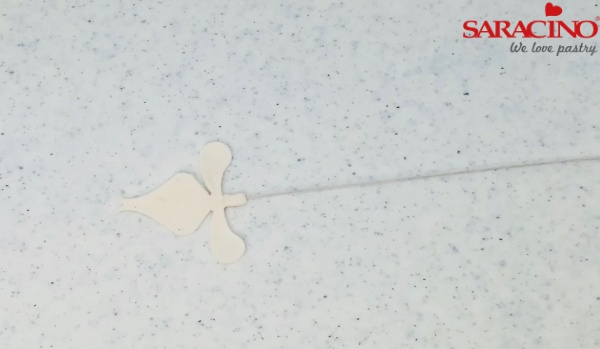
Mix the flower paste with your fingers to soften then roll into a sausage, roll either side of the sausage to create a ridge in the paste for the wire, roll the top part of the ridge flat, for the top of the petal.

Step 2

Gently release the paste from the board then place the cutter over the top of the ridge, press down and move the cutter in circular movements to cut out, lift the paste and cutter, I like to roll my finger around the top of the cutter to make a neat finish.

Step 3

Hold the ridge of the paste in-between your finger and thumb and gently push the wire into the ridge using your other hand.

Step 4

Dust cornflour onto the rose petals veiner, place the petal on it and push the top veiner down to create the veins. Place onto a foam pad and gently soften the edges of the petals with a ball tool. 

Step 5

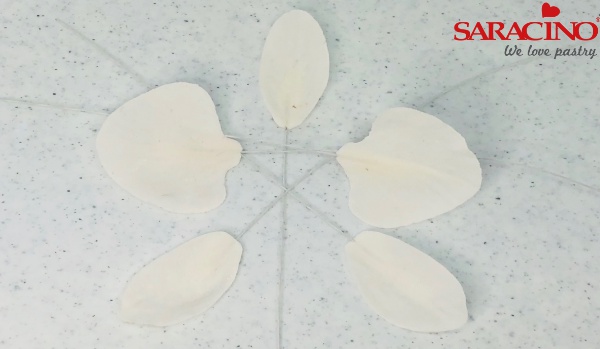
You will need to repeat this process to make 1 head, 2 arms which are the large petals and 2 legs. You will need to turn the paste over to create a left and right for the arms and legs.

Step 6

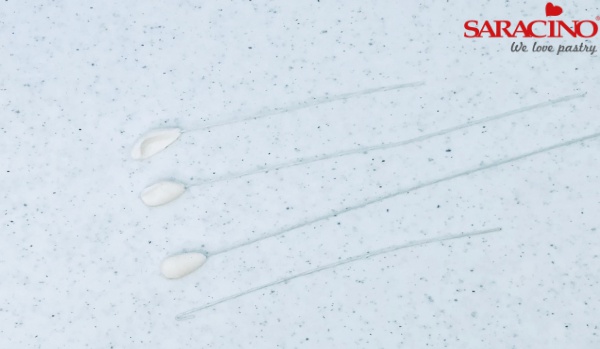
Roll a small ball of paste about the size of 1/2 a pea, into a cone shape, pinch a small node of paste on the top side of the paste to create a nose like shape, then use the rounded end of the ball tool to soften the edges of the cone shape.

Step 7

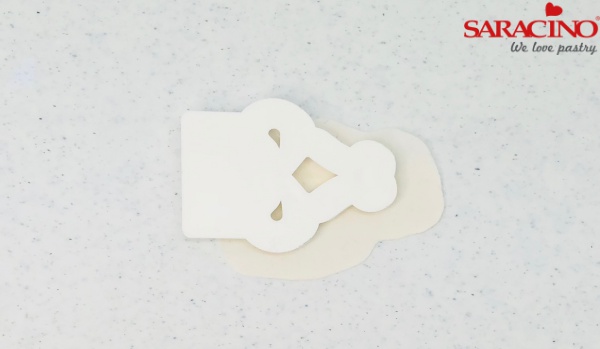
Roll a ridge into the paste then release from the board (add a little Trex to the cutter to stop sticking) align the cutter so you can see the ridge through the cutter, then cut out the paste to create the throat shape.

Step 8

Cut a length of 30# wire into 3 pieces, gently push the wire into the ridge of the throat. 

Step 9

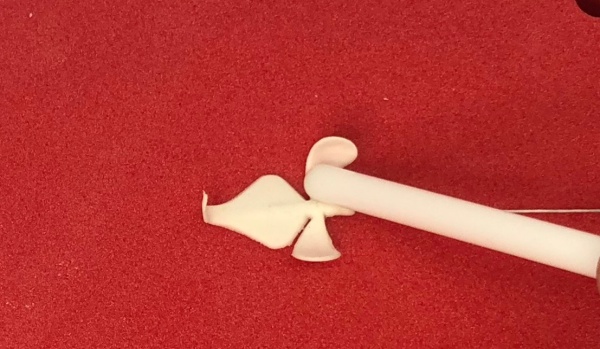
Gently use the rounded end of the rolling pin and soften the inside of the ear like parts of the throat. This will make them curl up a little.

Step 10

Bend the paste and wire back on the orchid throat and leave to dry a little. Roll a very small piece of paste into a ball then place onto the throat of the orchid, using a little water to help it stick. Push the pointed end of the rolling pin through the middle of the ball to make an indent. 

Step 11

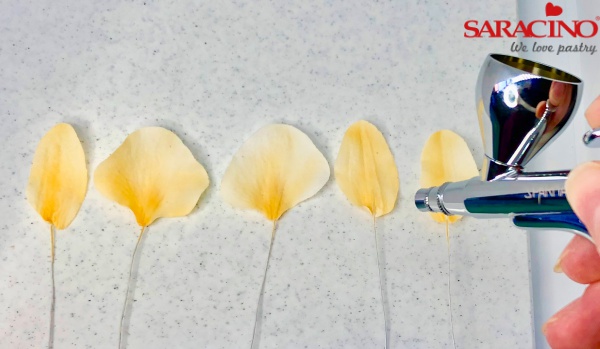
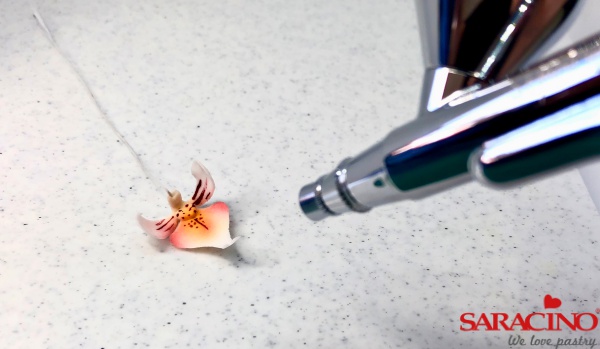
Place 2 drops of orange airbrush colour into the colour well of the airbrush, practice creating a shade of colour by pulling back on the trigger about 1/3 of the way and being about 2 inches away from the paper. Gently shade over the petals, I like to make the petals a little darker in the centre of the flower.

Step 12

Airbrush a fine mist of colour around the edge of the throat, then paint burgundy lines into the centre of the ear like parts of the throat. I then paint tiny dots onto the ball in the throat of the orchid.

Step 13

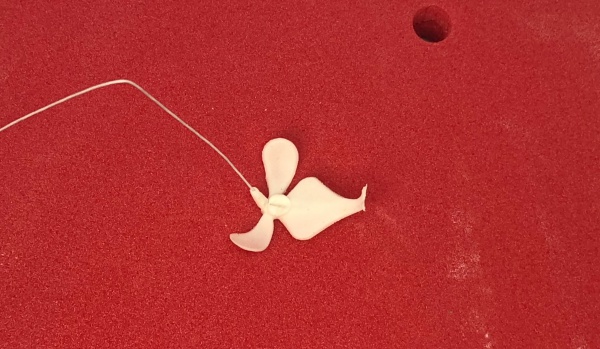
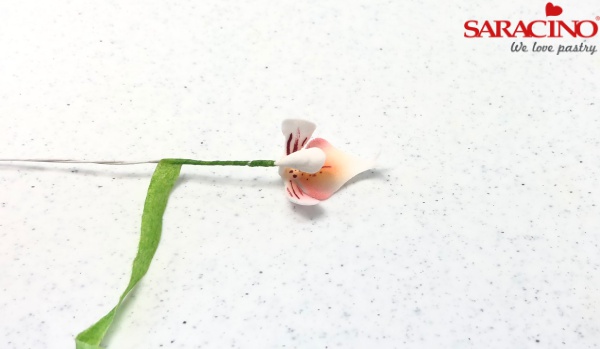
Cut green florist tape in 1/2 lengths, then using one of the lengths of tape, stretch to release the glue then tape around the back of the 2 throats. And tape all the way down the wire.

Step 14

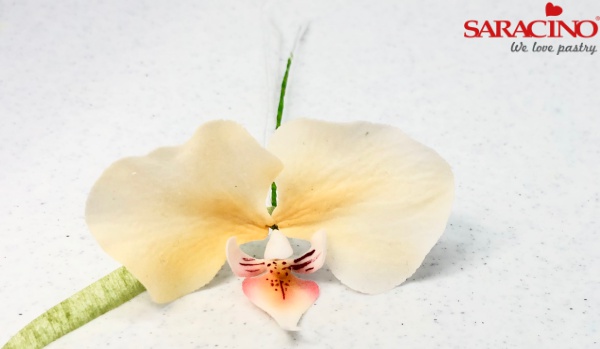
Add the 2 large arms to the back of the throat and tape together. Then add the 1 head and 2 legs to the back of the flower and tape together.

Step 15

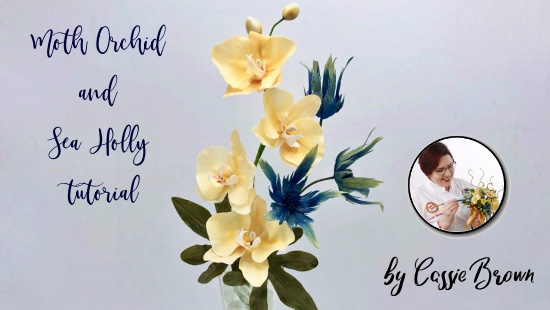
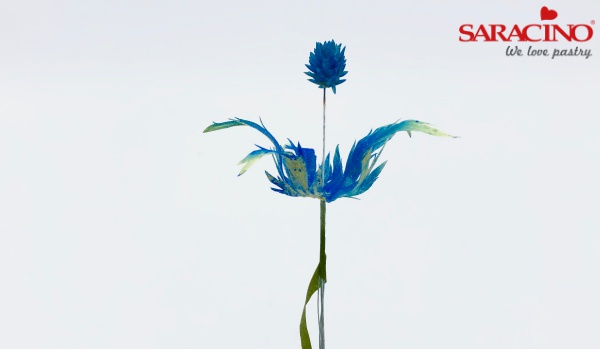
I have wired the orchids onto a single stem with 2 small buds then added the stem of sea holly and 2 Japonica leaves. This would look stunning draping from the top of a cake but also in a vase next to a plain cake. Have fun creating. 

DAHLIA FLOWER TUTORIAL

DAHLIA FLOWER TUTORIAL

Skill level: BEGINNERS

TIP:

You may find the flower paste a bit sticky. Use corn flour to prevent this.

You will need:

  • Pasta Bouquet Saracino
  • Powder colours red, orange, yellow and green
  • Gauge wires 20, 26, 28
  • Grooved board
  • Small ball tool
  • Nonstick roller
  • Dahlia cuters and veiners 5cm and 4cm
  • Universal leaf cutter and veiner
  • Flower center veiner
  • Small daisy cutter
  • Green floral tape
  • Foam drying pad

Step 1

Add a bit of yellow powder colour to the paste and mix well.

Step 2

Roll out the paste over the groove on the board. Cut out the petals and squeeze them on the 5cm veiner. Put in the 28 gauge wire. We need ten of them, then they need to dry on the spoons. Put leftover paste in a plastic bag to prevent drying out.

Step 3

You can put the wire in the petals much easier if you do it on the board or alternatively you can do it on your hand. .


Step 4

Insert the wire half way into the petal.

Step 5

Remember to dry petals with their upper half facing up.

Step 6

Alternatively you can make white petals and dust them with powder afterwards.

Step 7

Use your fingers to squeeze the top of the petal.

Step 8

Cut ten 4cm petals and squeeze them on the veiner. Put in the 28 gauge wire. Dry them on the foam mat.

Step 9

Twist five of the smaller petals at the bottom

Step 10

Do a small loop at the end of the 20 gauge wire and insert into a small ball of paste that has been shaped in flower center former.

TIP: Dip the wire into the glue OR heat it before inserting.

Step 11

Add a bit of green powder colour to a fresh piece of paste.

Step 12

Cut out the leaves and squeeze them on the veiner. Insert the 26 gauge wire. Dry them on the foam board.

Step 13

Mix the colours to add more shades to dust the leaves.

Step 14

Dust the bigger petals with powder. Start from colouring them yellow, make the edges orange and then colour the tip red.

Step 15

Paint smaller petals the same as bigger ones, except add a bit more of red on the edges.

Step 16

Dust flower center green. You can put all petals in one place to make assembling easier.

Step 17

Wrap the flower center wire with green floral tape. You need to strech the tape for it to start adhering.

Step 18

Start adding small twisted petals below the flower center.

Step 19

Put them as close to the green center as possible.

Step 20

Add the remainder of the small petals below the twisted ones.

Step 21

Add all the big petals, they too need to be placed as high as possible.

TIP: Keep your florist tape as tight as possible.

Step 22

Arrange all petals evenly.

Step 23

Cut out small daisy using the green coloured paste. This is to form the calyx. Shape it with the small ball tool. Glue it with water to the bottom of the flower.

Step 24

Wrap the leaf wires with green tape, about 2 cm down the wire.

Step 25

Attach first leaf to the flower stem.

Step 26

Add the rest of the leaves.

Step 27

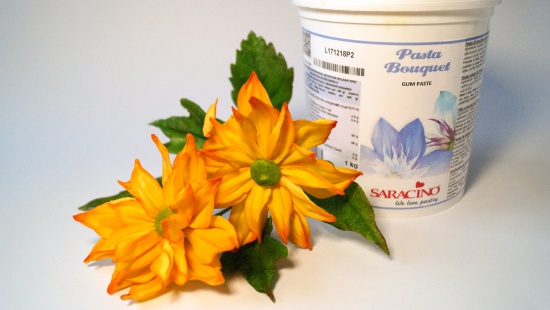
Finished dahlia made with Pasta Bouquet Saracino.

Step 28

Saracino Paste can be rolled out very thin, to the point that you can read through it. That feature is very helpful, especially when creating delicate roses.

CREATE A LILY FLOWER

CREATE A LILY FLOWER

Author: Carmen Montero

Skill level: BEGINNERS

You will need:

  • White Saracino Modelling Paste or Flower Paste
  • Edible color dusts: yellow, aubergine, rose, red, green
  • Cornflour
  • Vegetable fat
  • Edible glue
  • 26 gauge wire white
  • 24 gauge wire green
  • Small roller
  • Pliers
  • Foam base
  • Set of cutters and veiner for Lily
  • Small scissors
  • Ball tool
  • Floral ribbon
  • Brushes

Step 1

Cut 5 pieces of 24 gauge wire to make the stamens. With the pliers rotate the tip of the wire to create a larger grip surface.

Step 2

Dip the wire in edible glue

Step 3

Insert the wire into a small ball of paste

Step 4

Form and roll the paste with your fingers to cover a third of the wire. Try to make sure this is as thin as possible to look realistic.

Step 5

Colour the stem in yellow

Step 6

Cover with red and aubergine powder colours with a little brush

Step 7

Achieve your look with your dusting

Step 8

Roll the paste using vegetable fat to prevent sticking to your work surface. 

Step 9

Cut out 6 petals using your lily cutter.

Step 11

Cut 6 pieces of 26 gauge white wire and insert into the previously prepared petals.

Step 12

Now sprinkle the veiner with cornstarch so that the petal doesn’t stick and mark the texture.

Step 13

Press firmly to form the veining pattern.

Step 14

Set aside to dry.

Step 15

When the paste is dry, use a soft brush to apply the dust colours. 

Step 16

At the base of the each petal we apply yellow mixed with green. Dust the rest of the petal using the pink colour.

Step 17

Take the stems and bind 5 together using florist green tape.

Step 18

Now add 3 large petals using the green florist tape. They should form a triangle shape.

Step 19

Add the 3 smaller petals in between each larger petals. Your flower is ready to go on your cake.