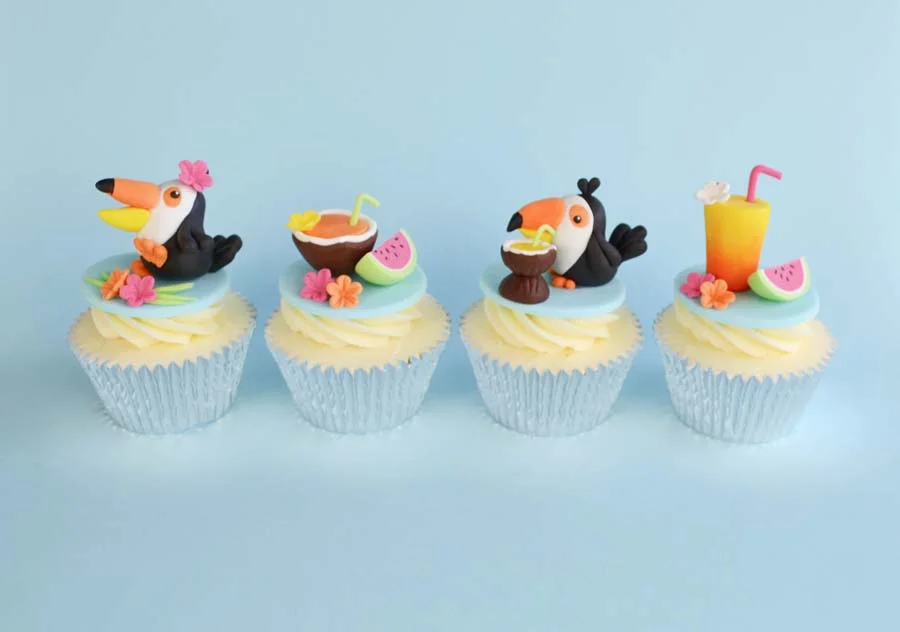
TROPICAL TOUCANS CUPCAKE TOPPERS

TROPICAL TOUCANS CUPCAKE TOPPERS
Author: SARAH BRAY

Skill level: BEGINNERS

You will need:

  • White Pasta Top Sugarpaste coloured with blue gel colour and treated with CMC

  • Saracino Pasta Model: black, yellow, orange (half yellow and half orange mixed), fuchsia, white, brown, green

  • Saracino edible dusts: orange, red, black, white

  • Saracino cocoa butter

  • Edible glue

  • Black edible pen

  • 58mm circle cutter

  • 30-32mm circle cutter

  • Small ball tool

  • Paintbrush

  • Sharp knife

  • Dresden tool

  • Small daisy plunger cutter

  • Petunia veiner (Blossom Sugar Art)

  • Smoother

  • Soft brush

Step 1

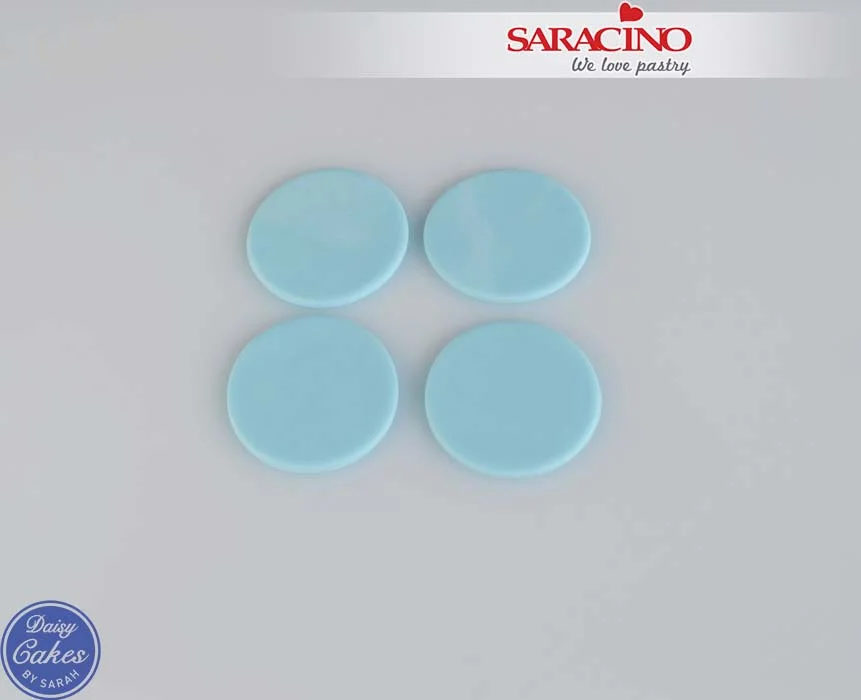
Roll out the blue Pasta Top and cut out four 58mm circles and set aside to dry completely.
Step 2

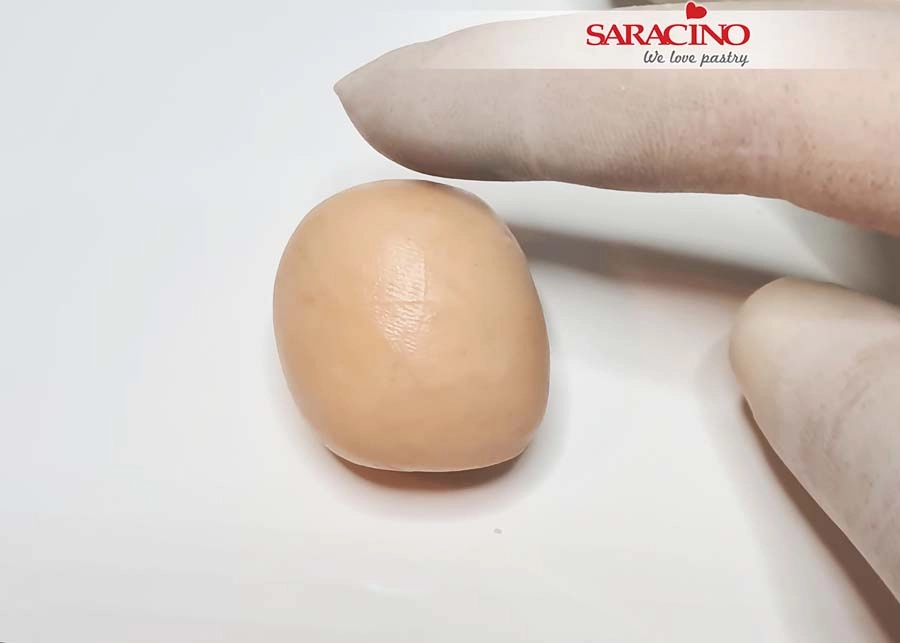
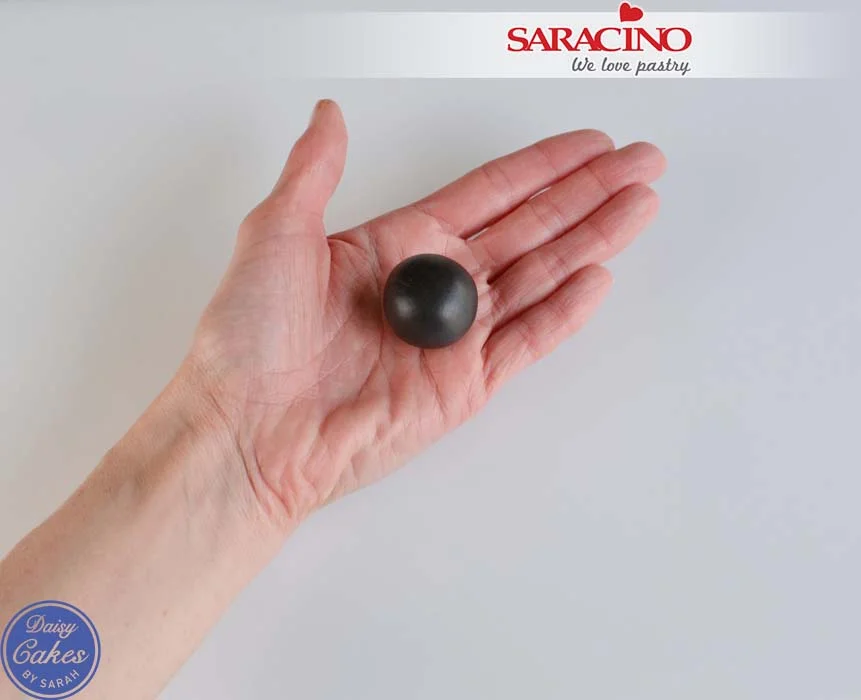
Roll a large cherry tomato sized piece of black modelling paste into a ball.
Step 3

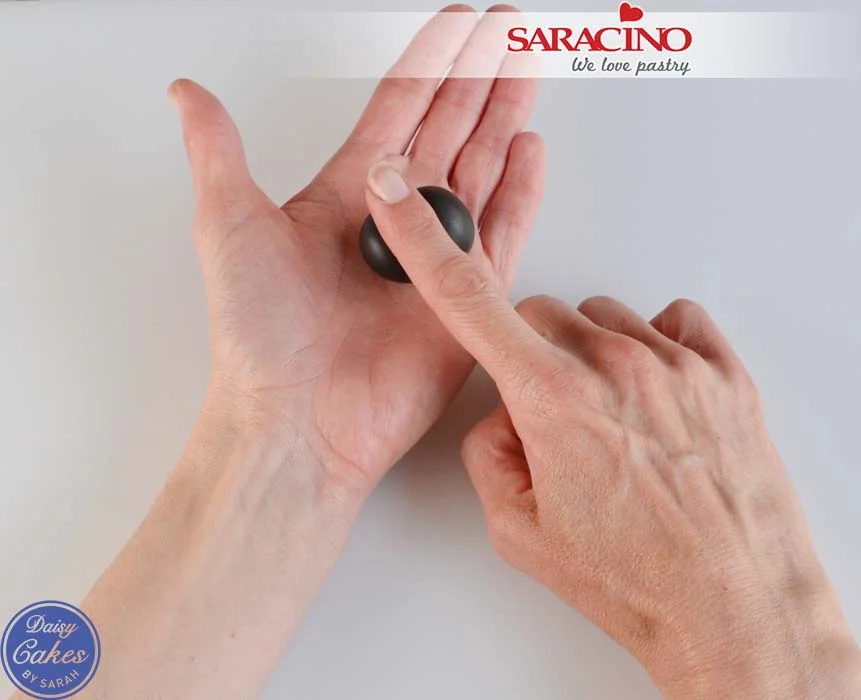
Holding the piece in your hand use your finger to roll the paste back and forth in the middle to create the body of the toucan.
Step 4

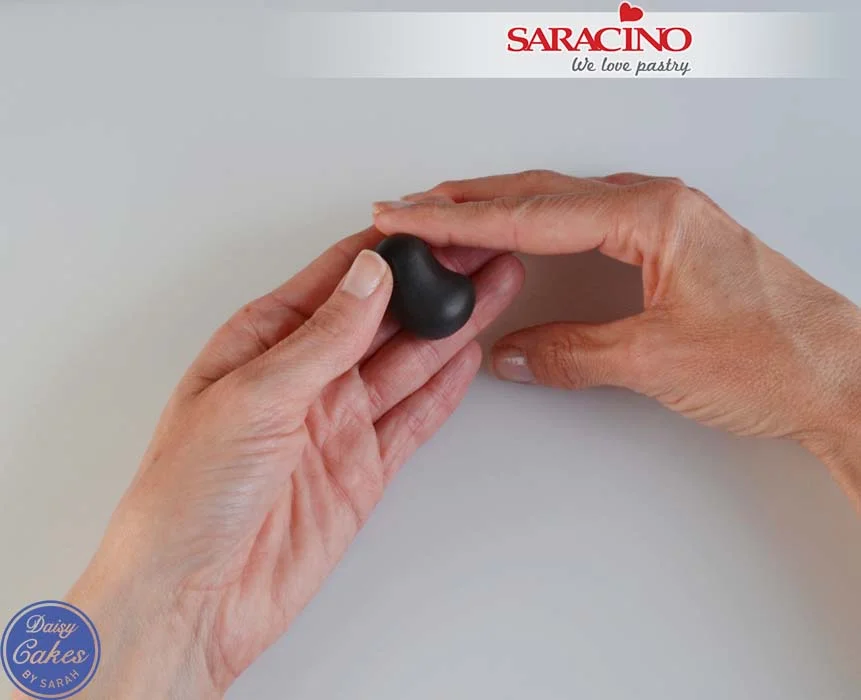
Use your fingers to smooth off the top for his head.
Step 5

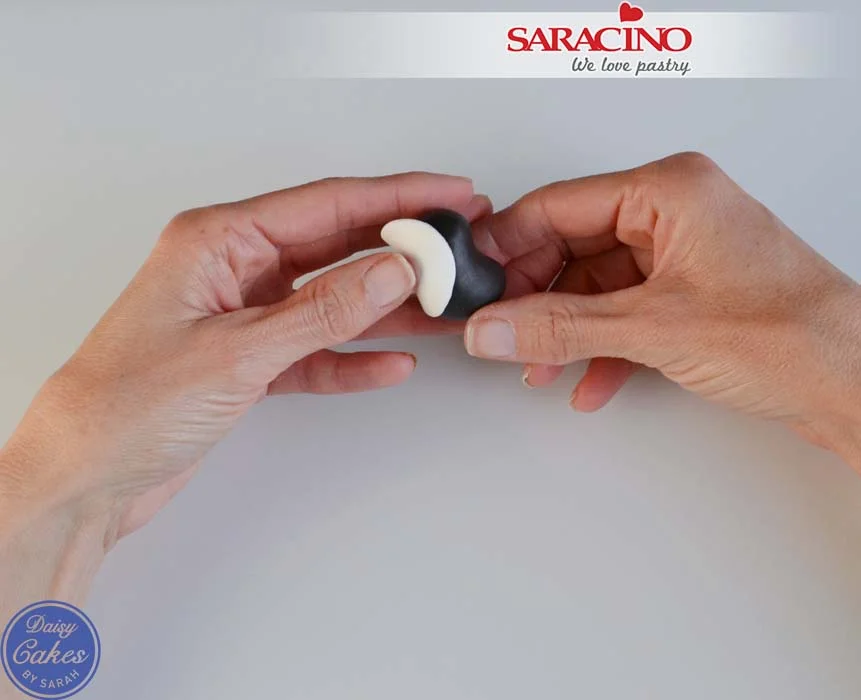
Cut a circle of white paste (approx. 30-32mm) and press onto the tummy and face of the toucan.
Step 6

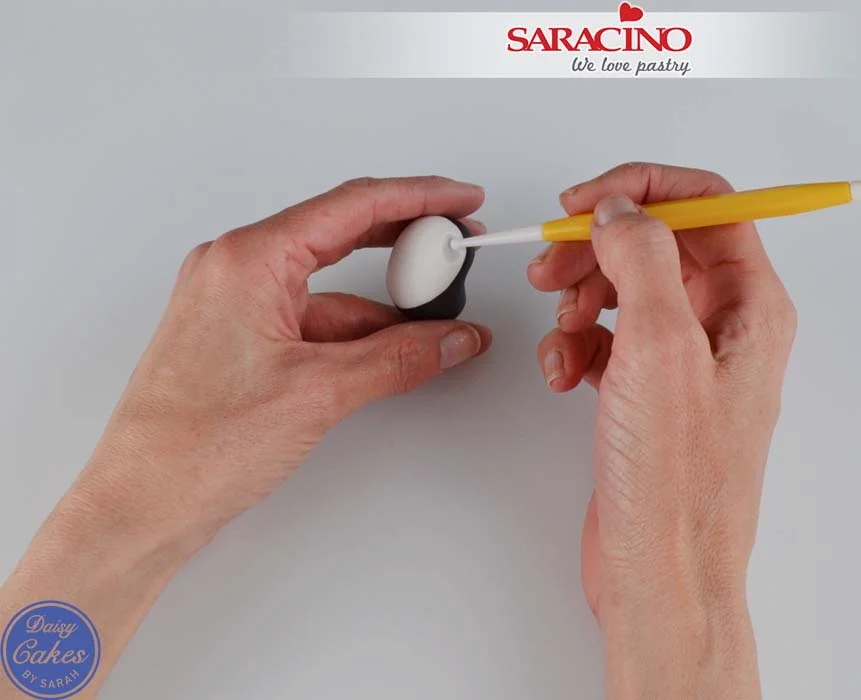
Use a small ball tool to make a small egg-shaped dent for the colour of his eye (repeat on the other side for the other eye).
Step 7

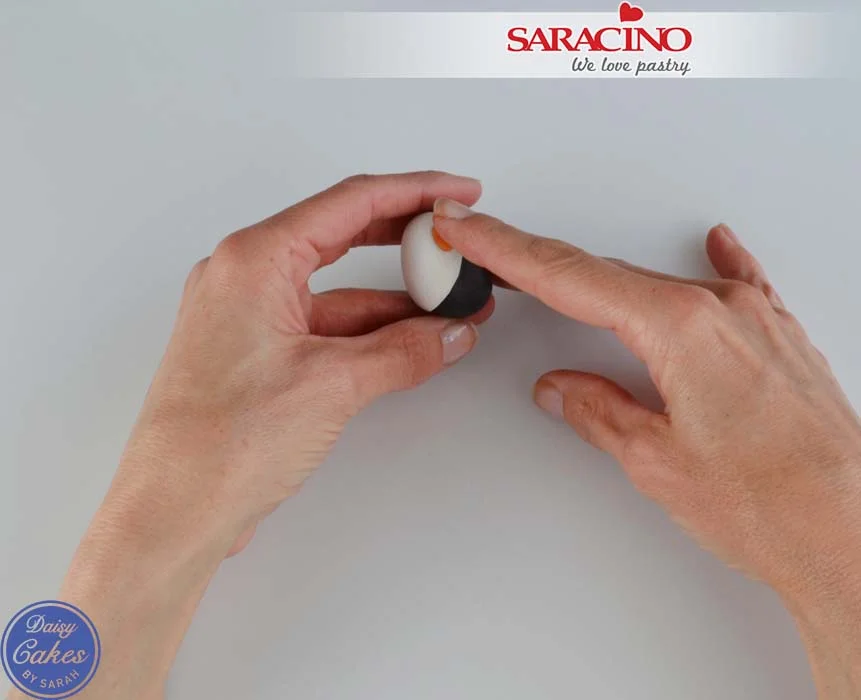
Fill the dent with a small piece of orange paste.
Step 8

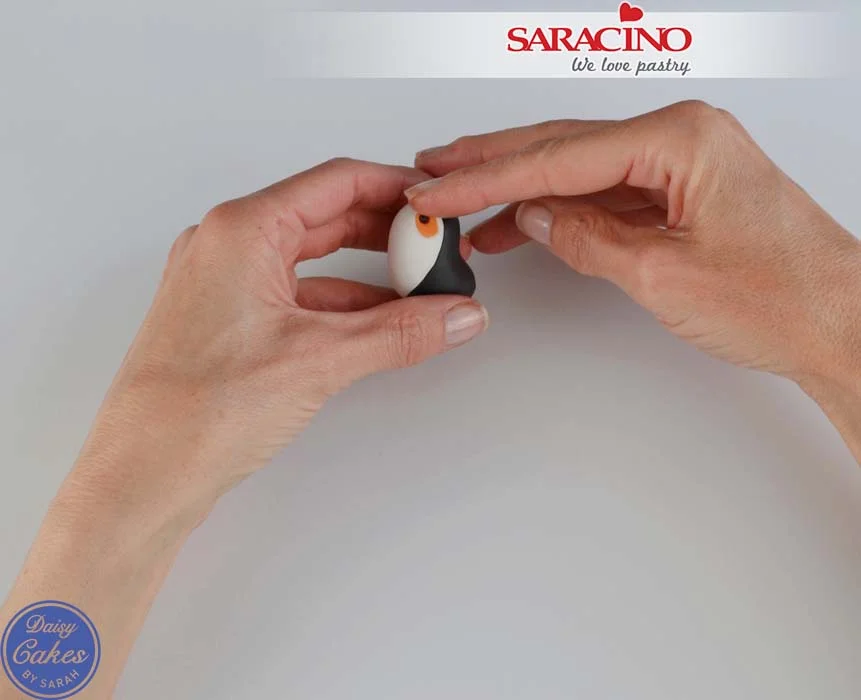
Make a little hole using the end of a paintbrush and fill with a tiny ball of black paste. Repeat for the second eye.
Step 9

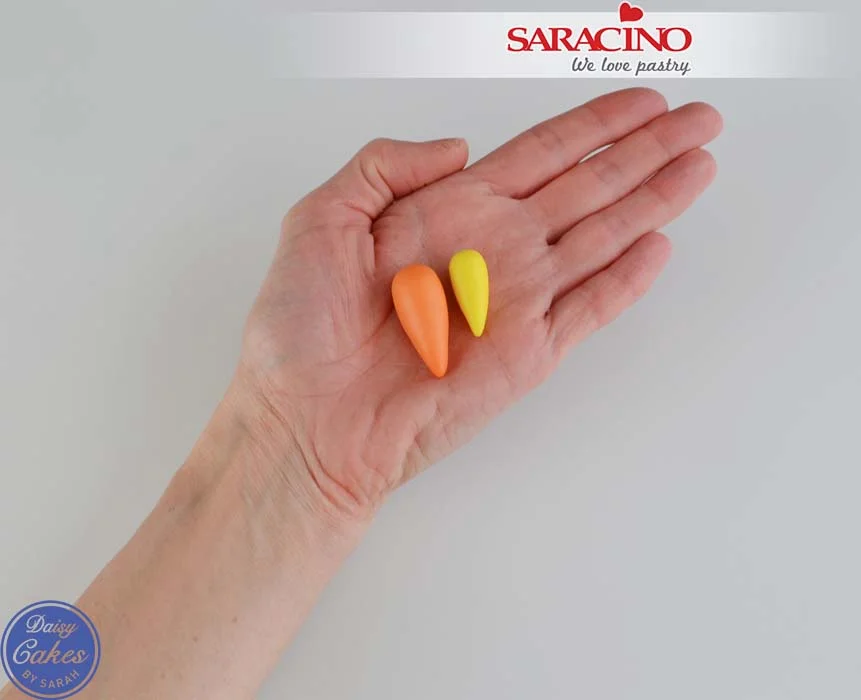
To make his beak roll a teardrop shape of orange paste and a smaller yellow teardrop.
Step 10

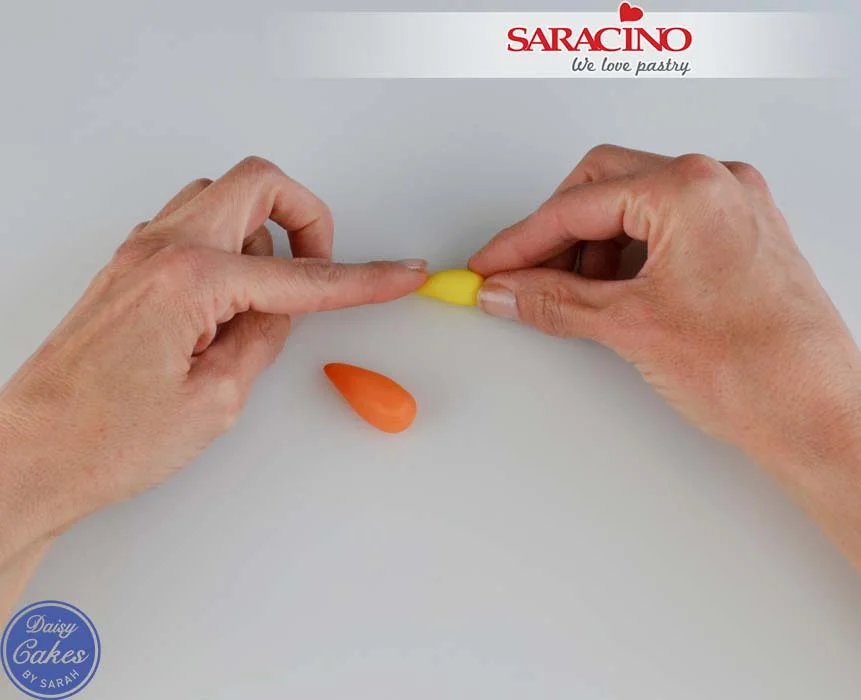
Use your fingers to press both pieces onto the board to flatten the base.
Step 11

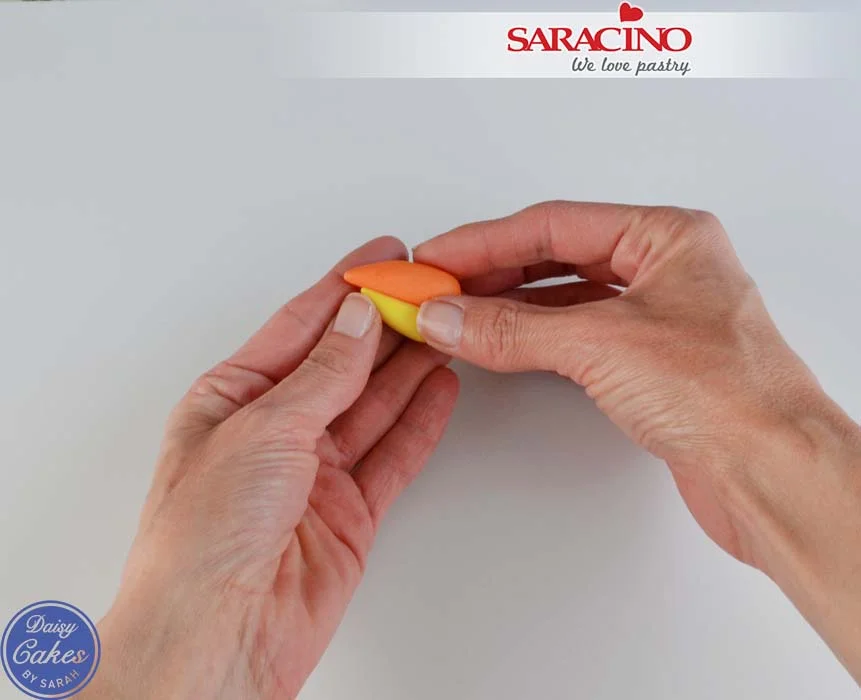
Push the two flat sides together to form the beak making sure that the larger orange piece is slightly overhanging the yellow piece.
Step 12

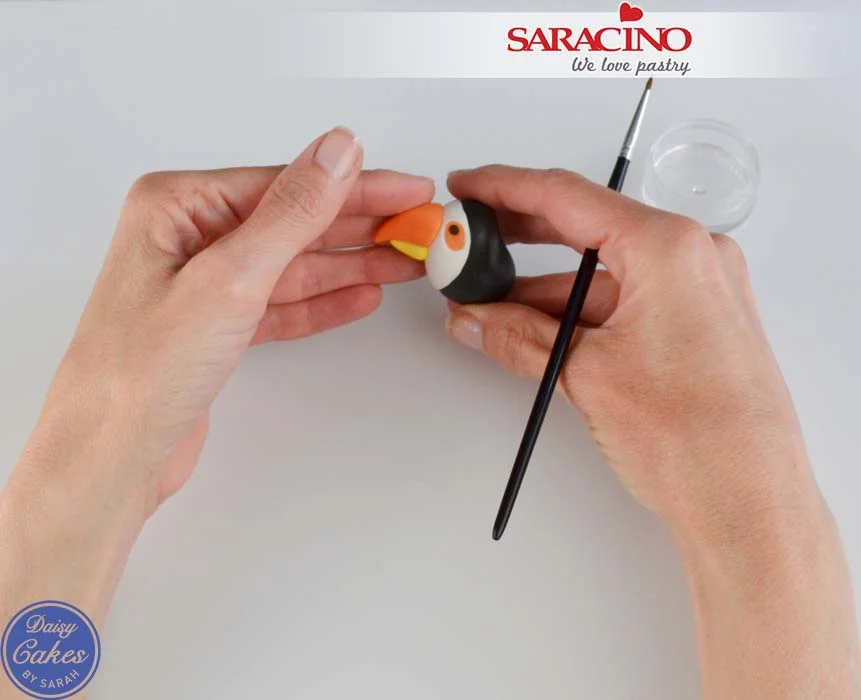
Cut the excess off with a sharp knife and stick onto the toucan’s face. Bend the tip of the top beak over the bottom slightly. At this point you may find that it won’t stand properly due to the weight of the beak, just put it aside on a piece of sponge until he’s attached to the topper.
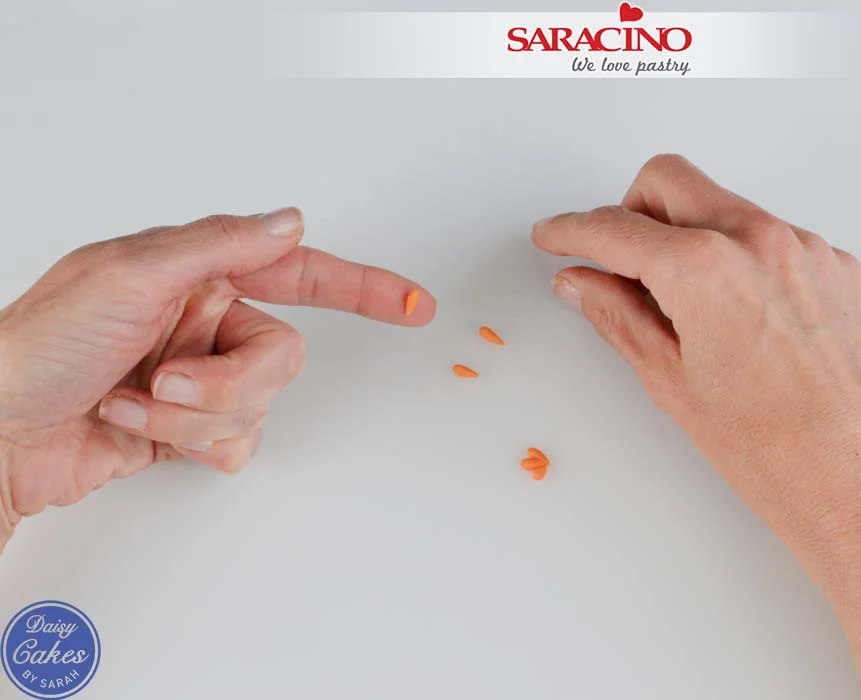
Step 13

To make the feet roll three small teardrops of orange paste and push together at the pointed end. Repeat to make second foot.
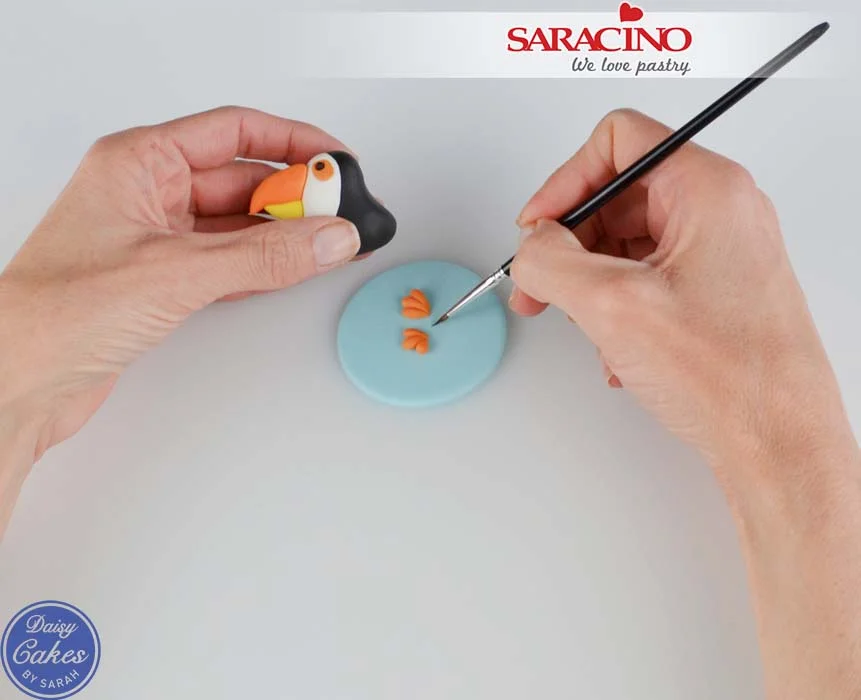
Step 14

Using the toucan as a guide, stick the two feet onto the topper and glue his body on the top.
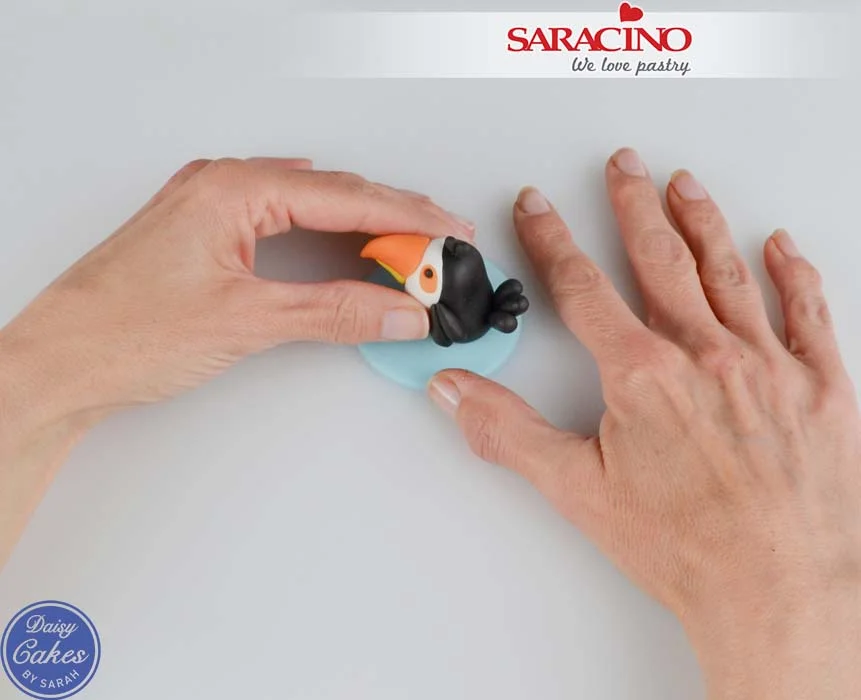
Step 15

To make the feathers on his head roll two small teardrops and push together, for his tail roll three slightly larger teardrops and push together and his wings a further two for each side. Stick all on to the toucan’s body.
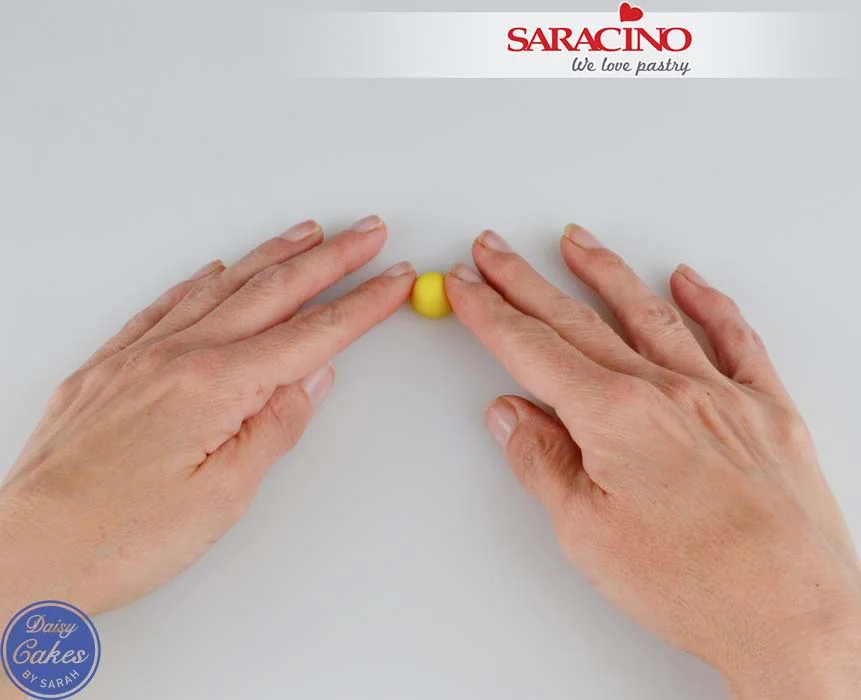
Step 16

For his cocktail drink roll a small ball of yellow paste and flatten the base on the board.
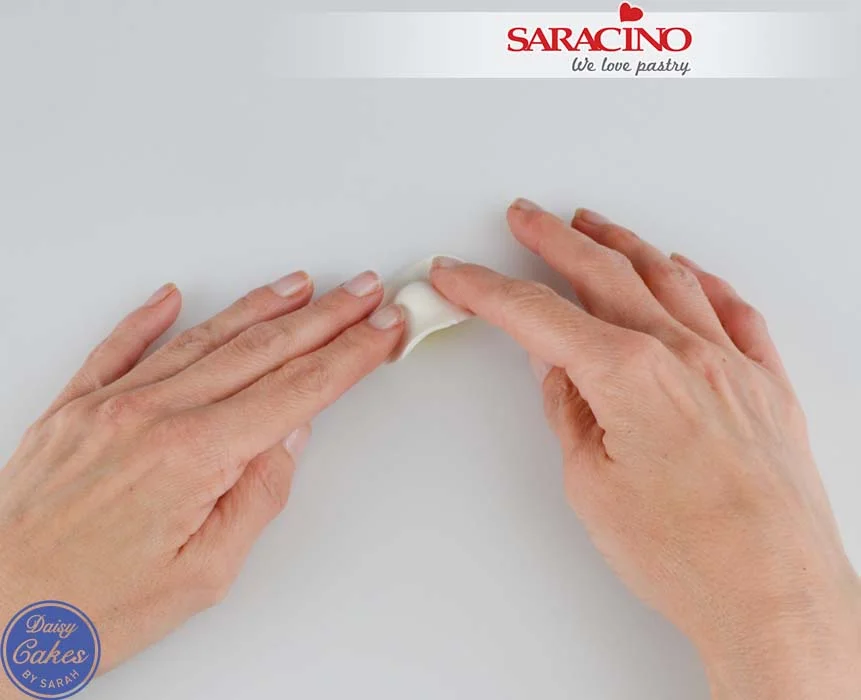
Step 17

Cover this with a thin piece of white paste.
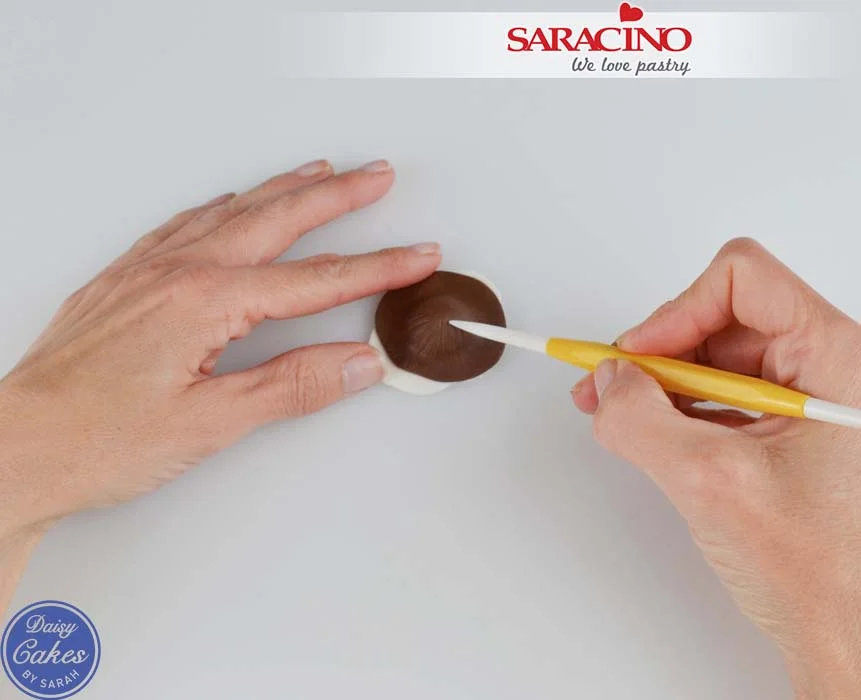
Step 18

Cover this with a thin piece of brown paste and use a Dresden tool to add lines for the coconut shell.
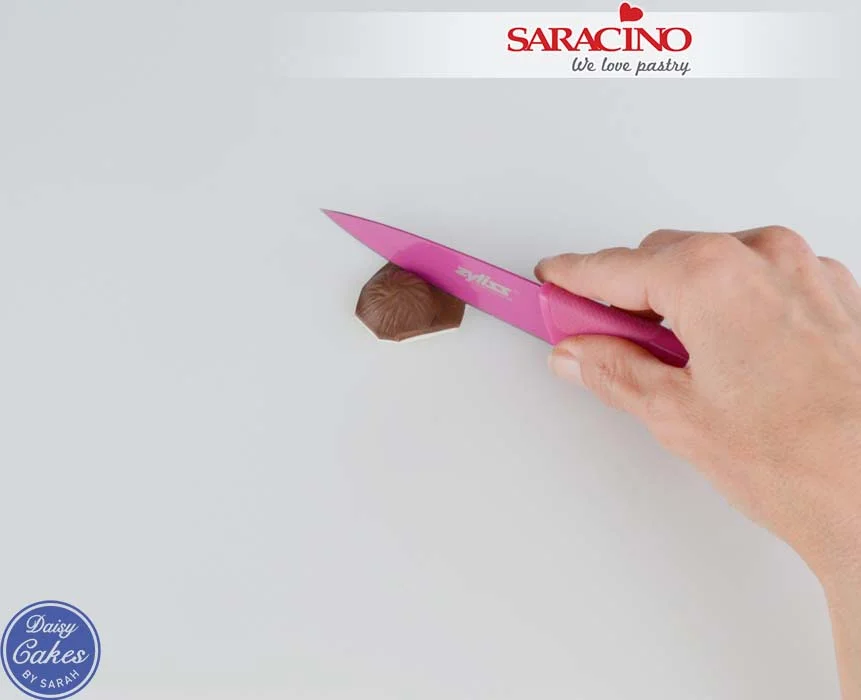
Step 19

Cut the excess paste away using a sharp knife.
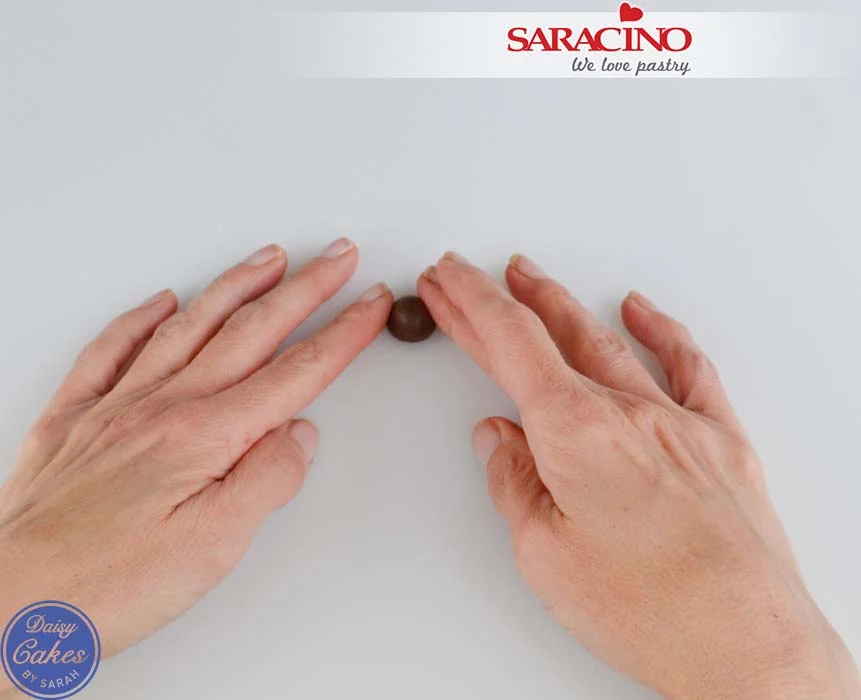
Step 20

For the cocktail base roll another small ball of brown paste and flatten the base on the board. Add texture using a Dresden tool as before.
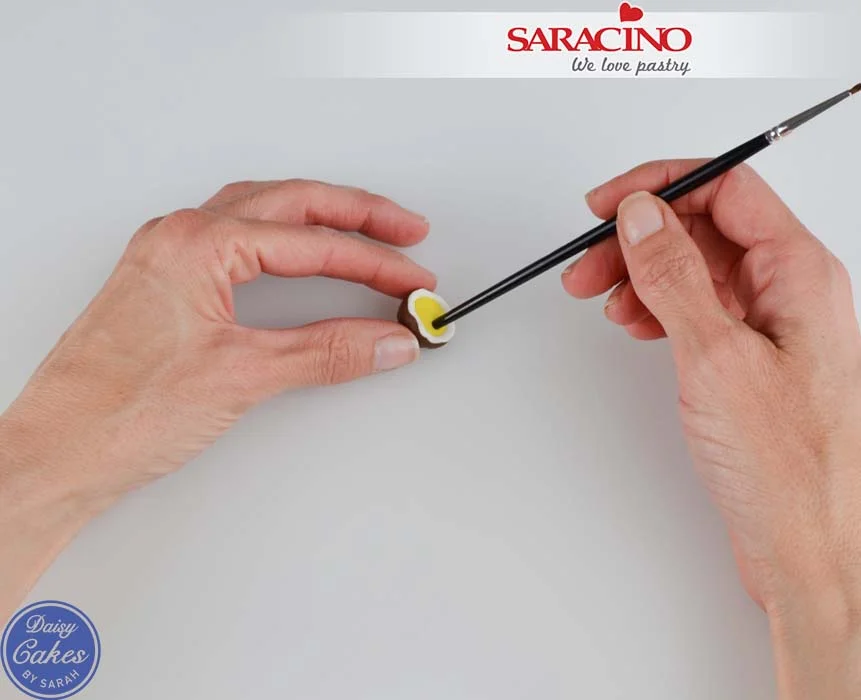
Step 21

Indent a hole in the yellow drink with the end of a paintbrush.
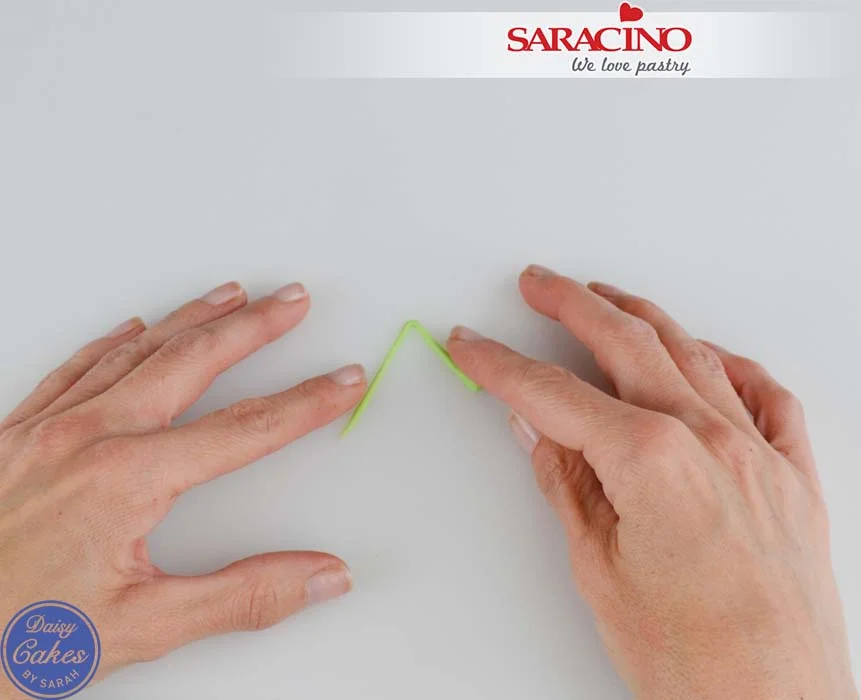
Step 22

Roll a thin piece of green paste for a straw, bend and set aside to dry.
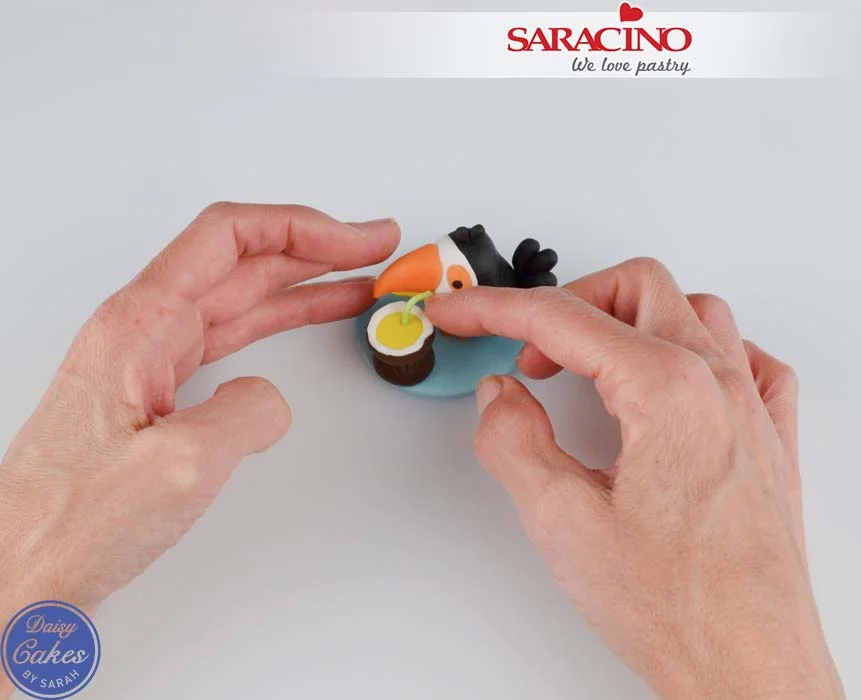
Step 23

Stack the two coconuts on top of each other and glue to the topper. When the straw is dry enough to handle, cut to size and glue into cocktail. That is your Toucan Topper finished and ready to use.
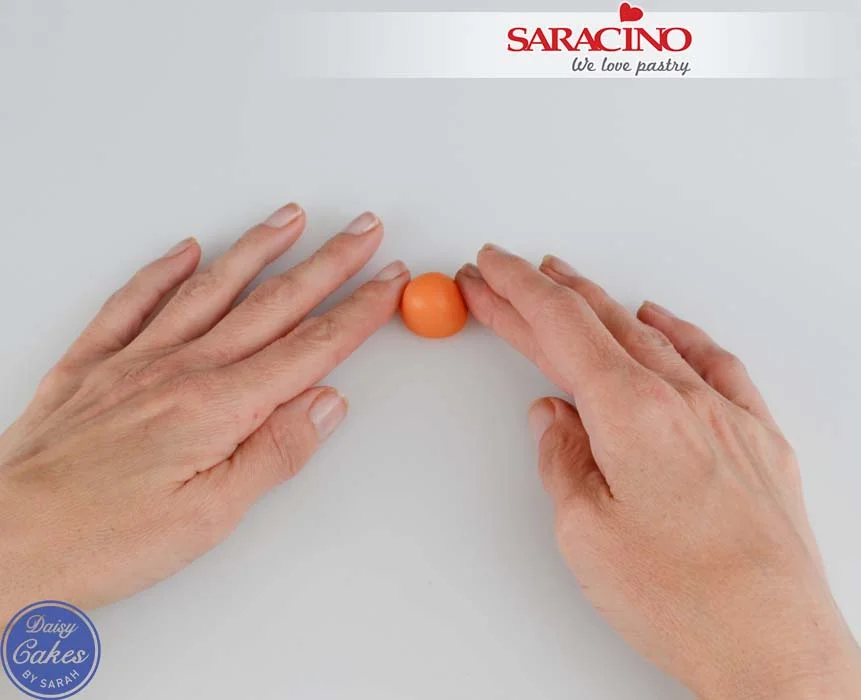
Step 24

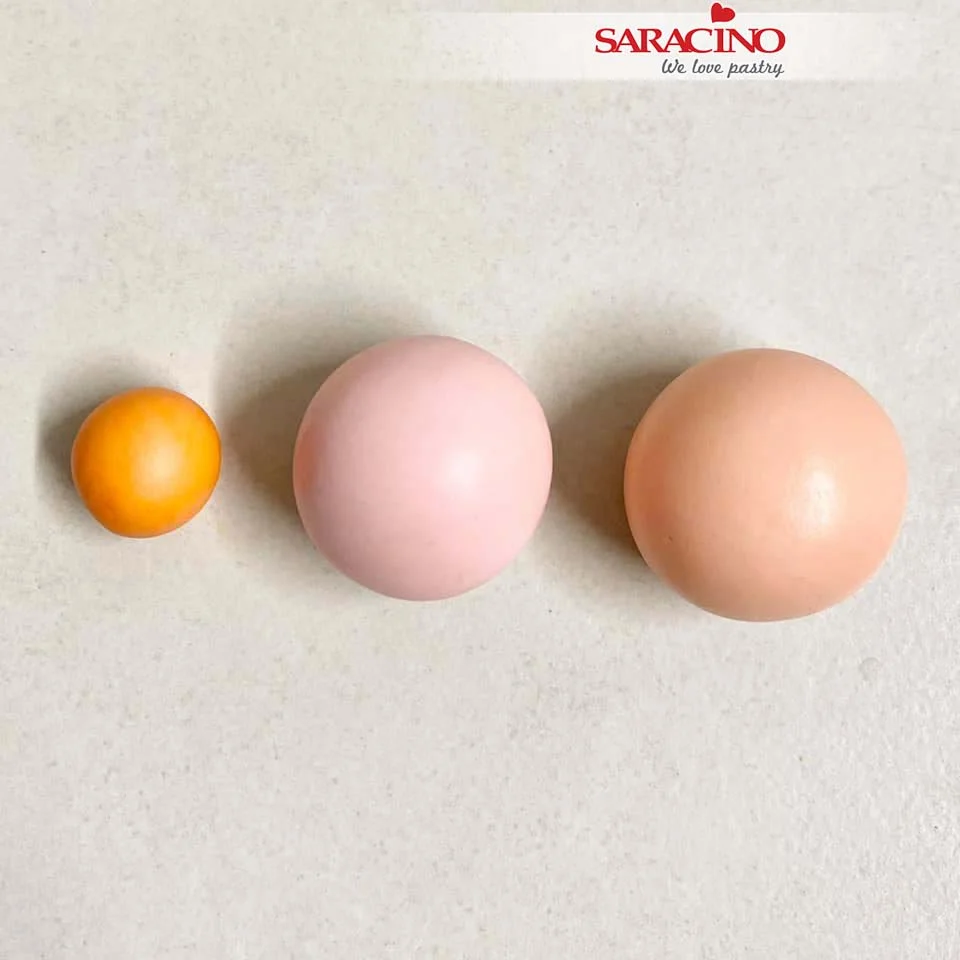
For the next topper roll a large marble size piece of orange paste into a ball and flatten the base on your board.
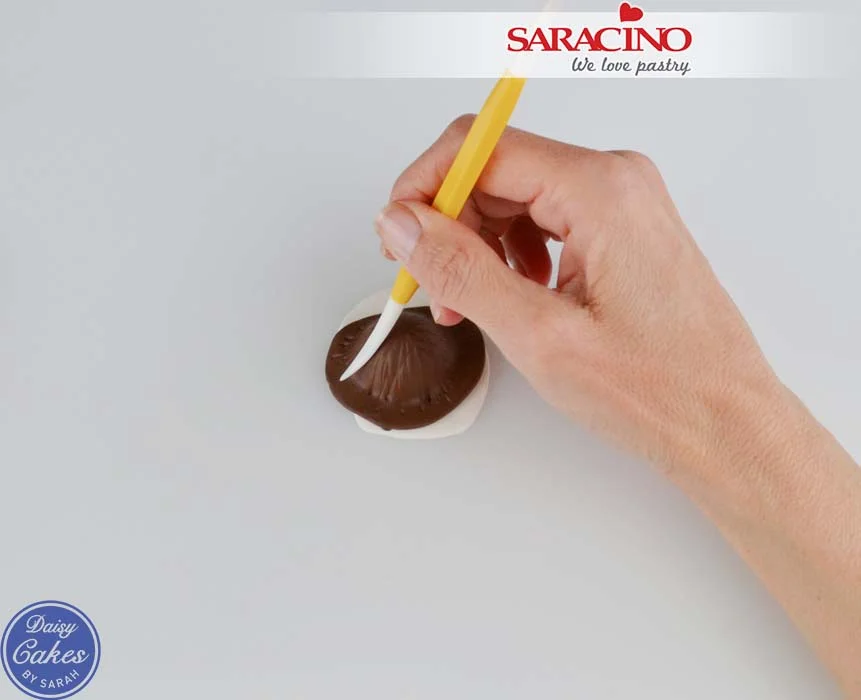
Step 25

To form the coconut look cover in a thin piece of white paste and then brown paste as before. Use a Dresden tool to mark lines of the coconut shell. Cut away the excess paste with a sharp knife as before. When cutting edges don’t do it in one smooth line as it looks less realistic. Lots of little cuts look much better.
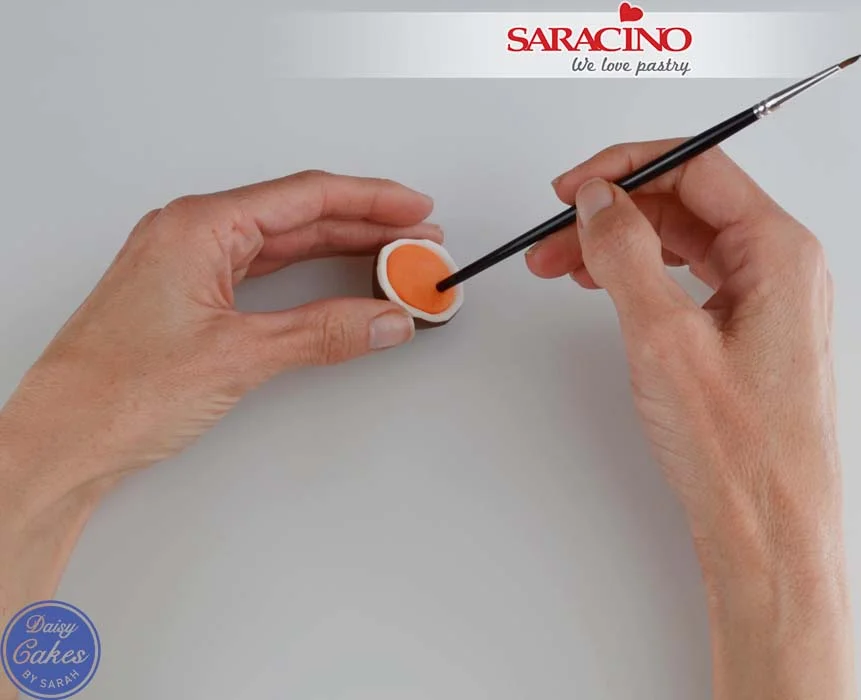
Step 26

Use the end of your paintbrush to form a small hole ready for the straw.
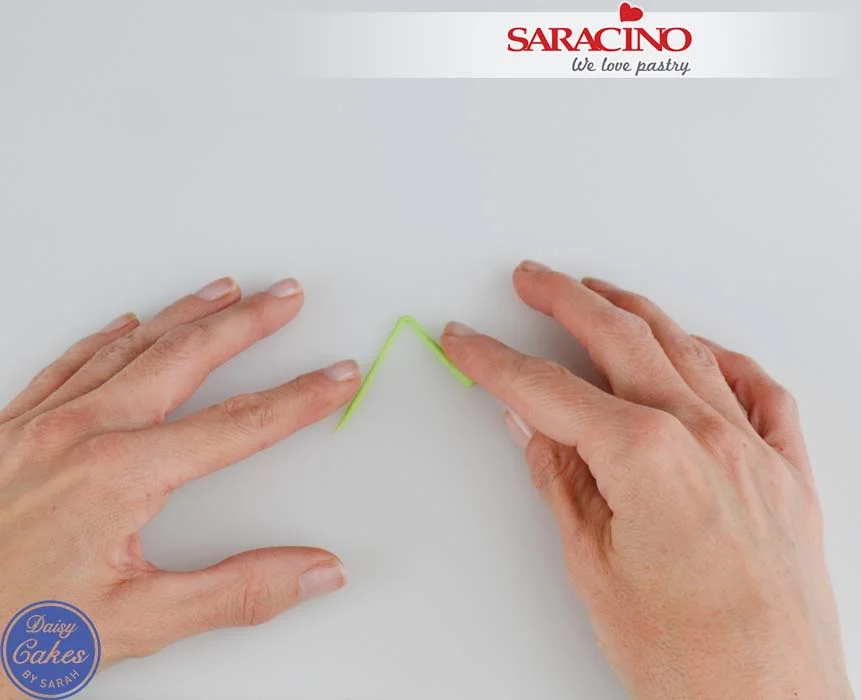
Step 27

Roll a thin piece of green paste into a straw and set aside to dry.
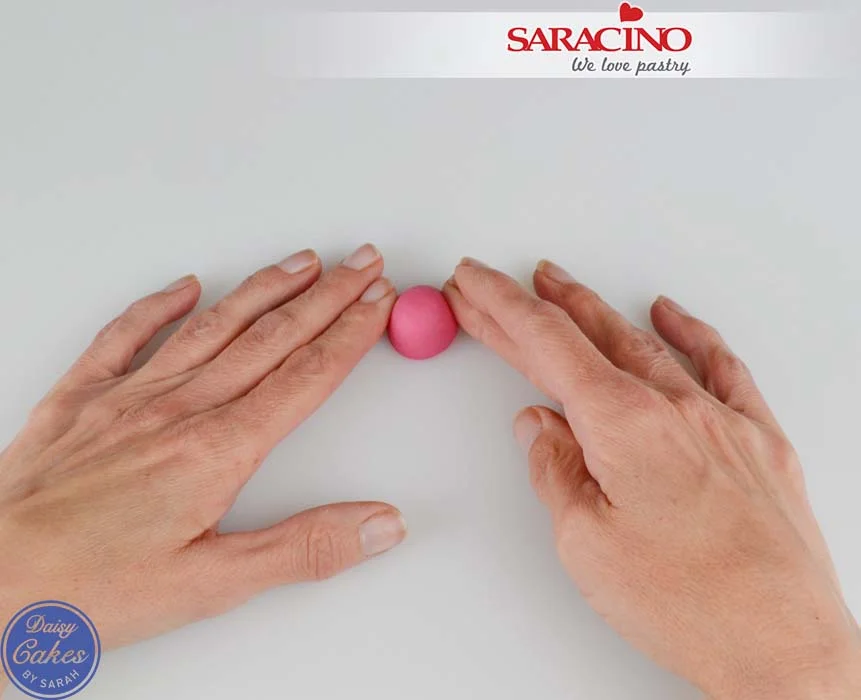
Step 28

To make the watermelon roll a large marble sized piece of fuchsia paste and flatten the base on the board.
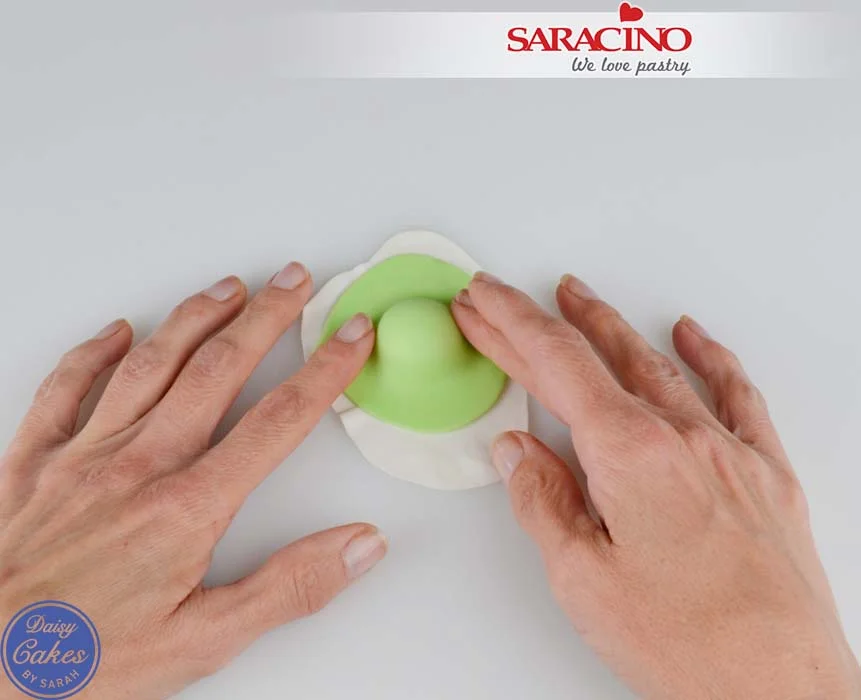
Step 29

Cover with a thin layer of white paste and then a thin layer of green paste. Cut around the edge as smoothly as possible using a sharp knife.
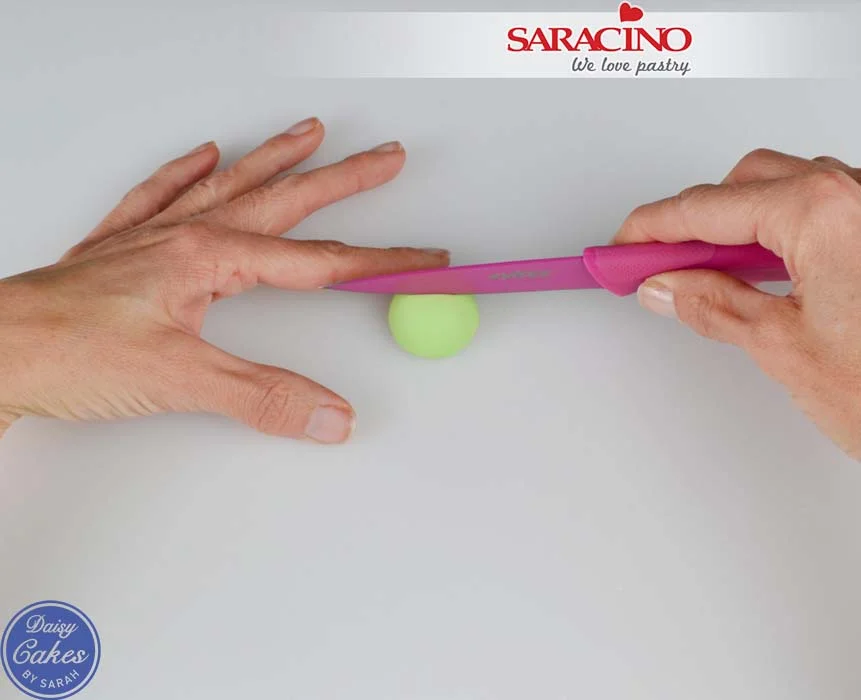
Step 30

With the flat side of the melon on the board, use a sharp knife to cut the melon in half and set aside to dry (keep the other part for later).
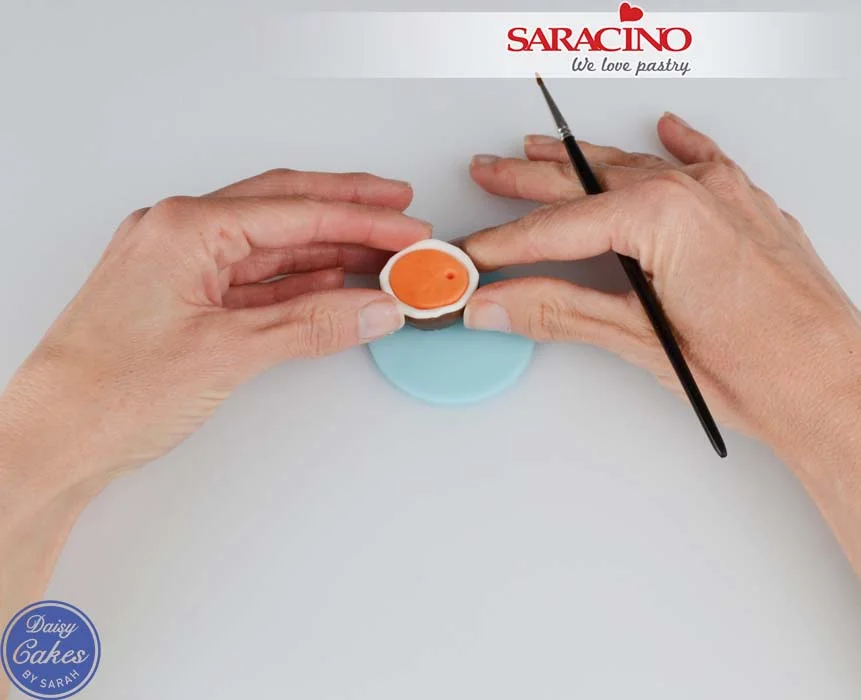
Step 31

Fix the coconut cocktail on to one of the toppers using edible glue.
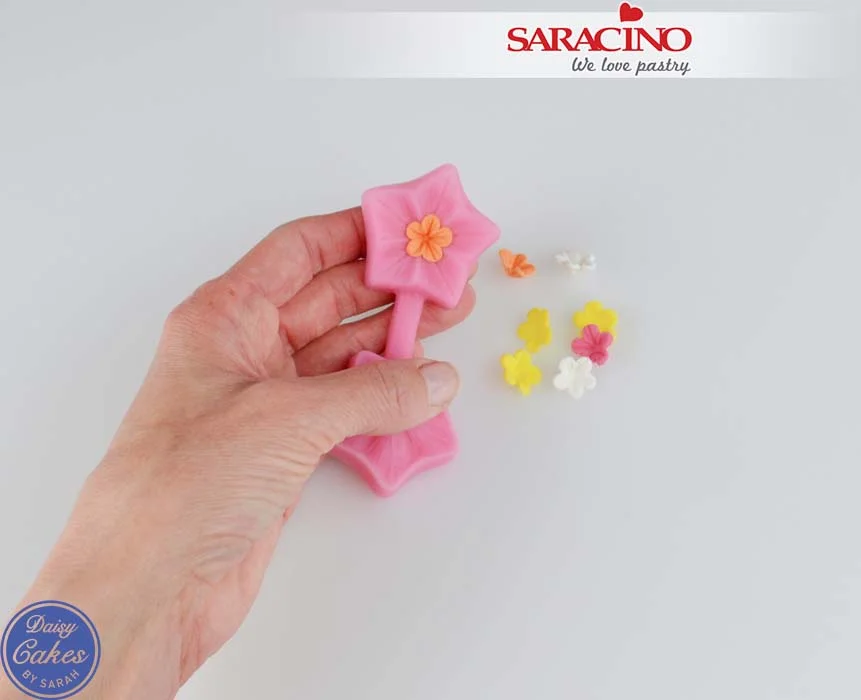
Step 32

Cut out a variety of little flowers using a small blossom cutter and vein them.
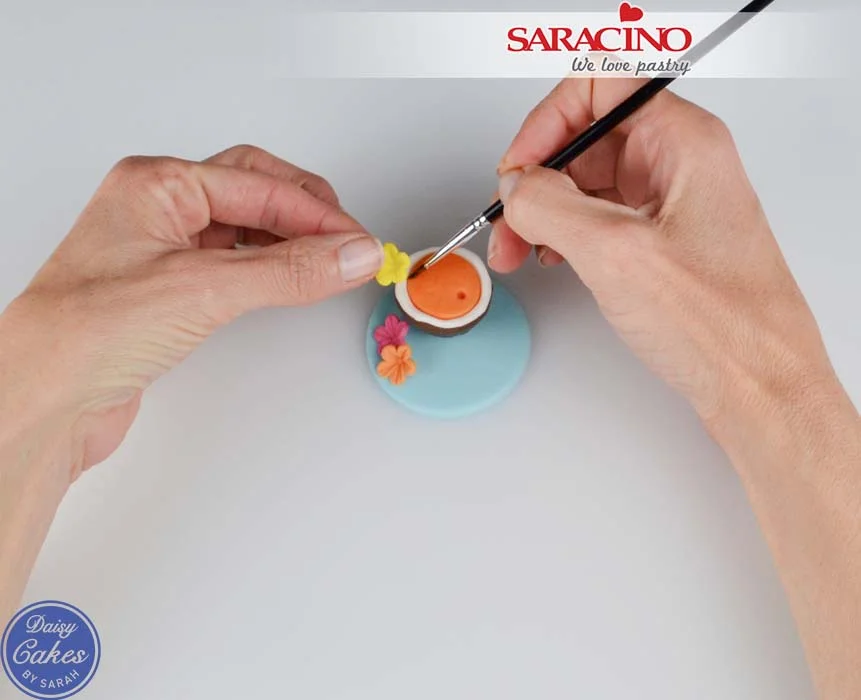
Step 33

Stick two smaller flowers onto the topper and one onto the rim of the coconut.
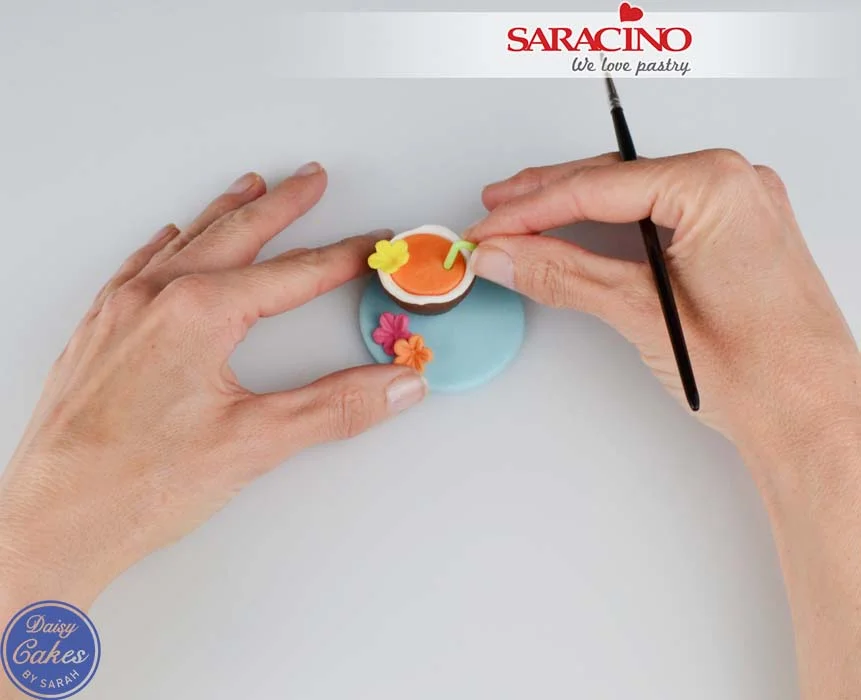
Step 34

When it is dry enough to handle cut the straw to size and glue into the hole.
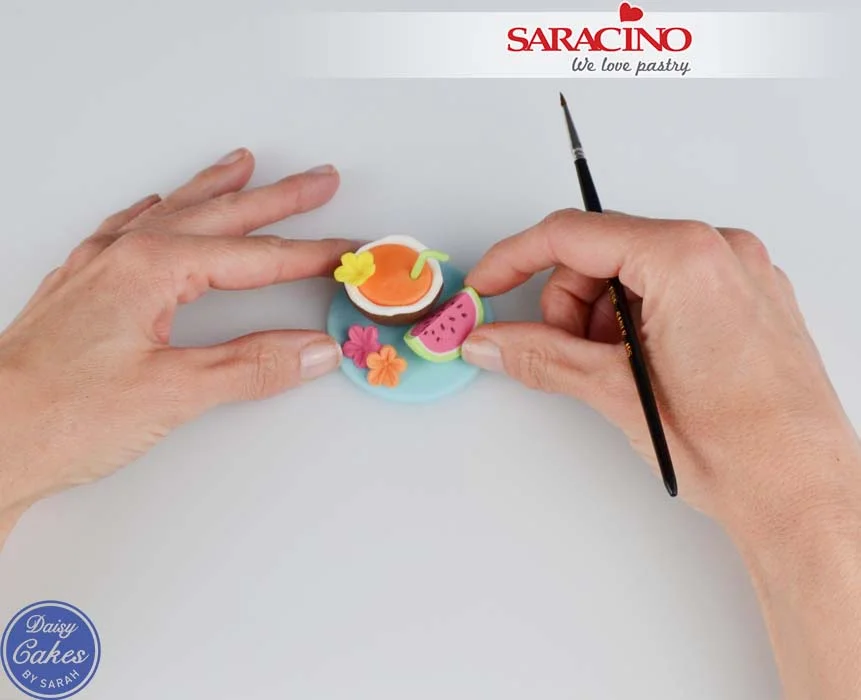
Step 35

Using an edible black pen mark seeds on the watermelon and glue this onto the topper.
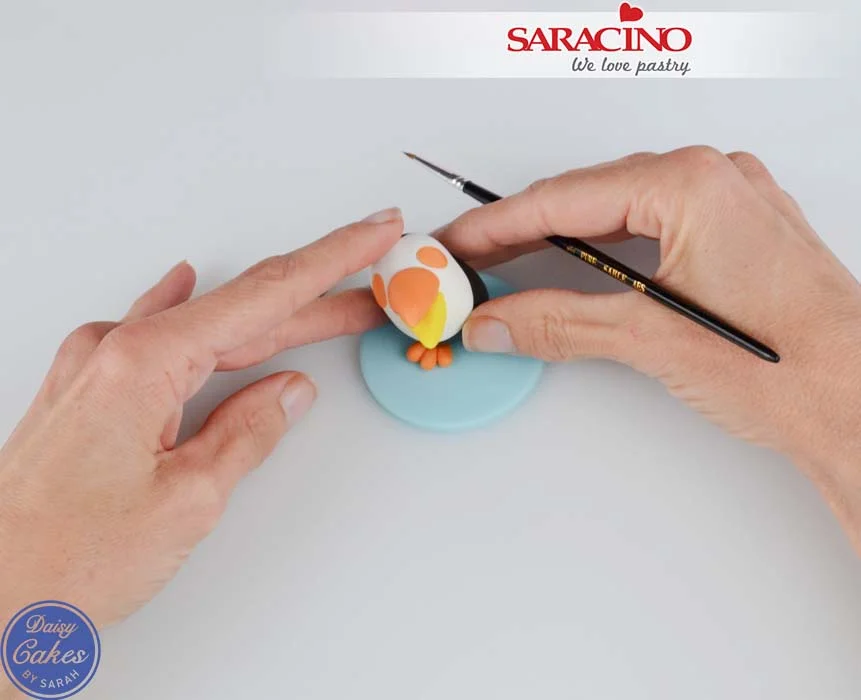
Step 36

Create another toucan following the previous steps. Stick one foot onto the topper and attach the toucan’s body on top at a slight angle.

 Tip: If you flatten the base of the body on the board slightly it makes attaching it at an angle easier.
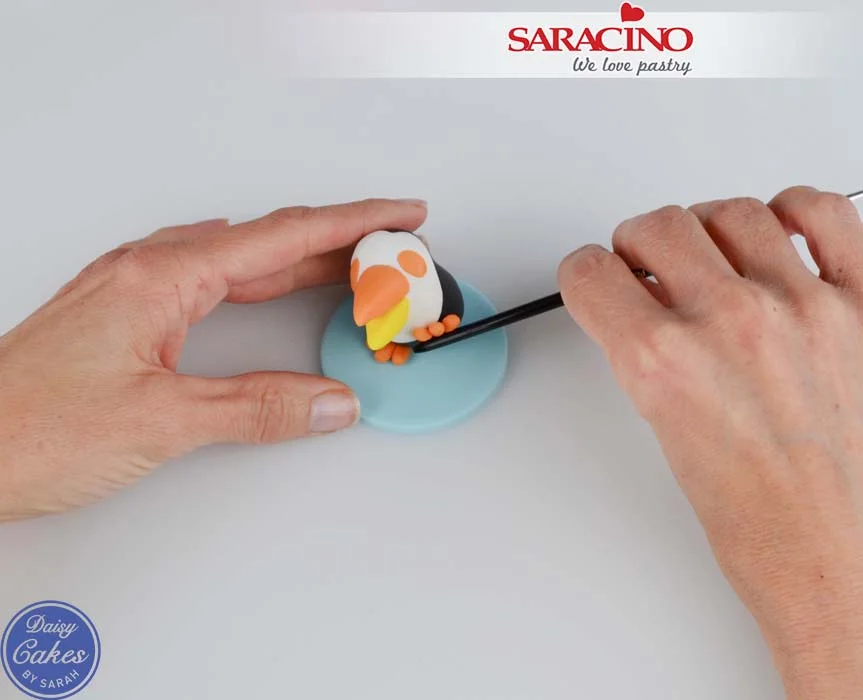
Step 37

Attach the second foot onto the body and push on using a paintbrush handle.
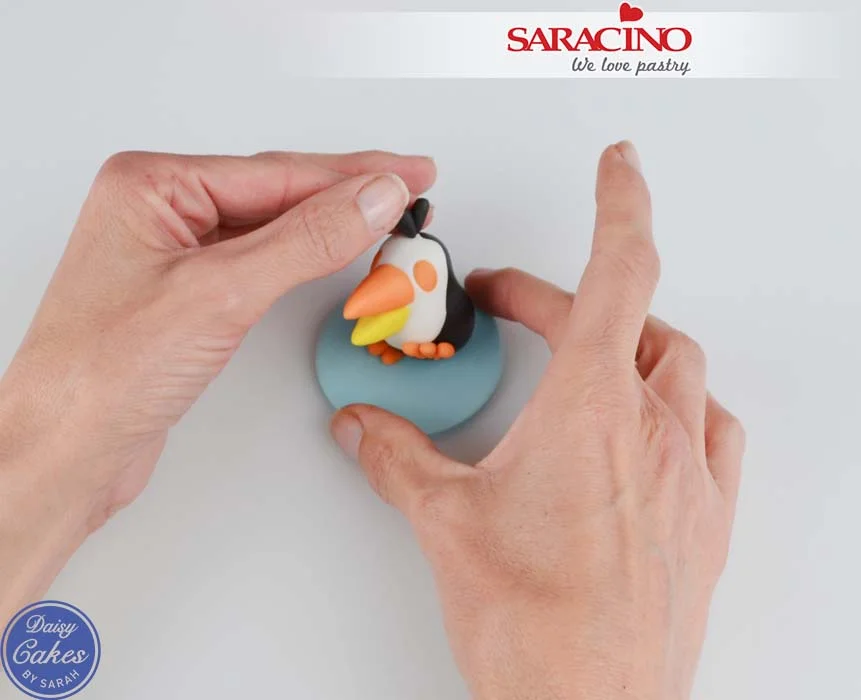
Step 38

To make the feathers on the head roll two small teardrops of black paste and push onto the top of the toucan’s head.
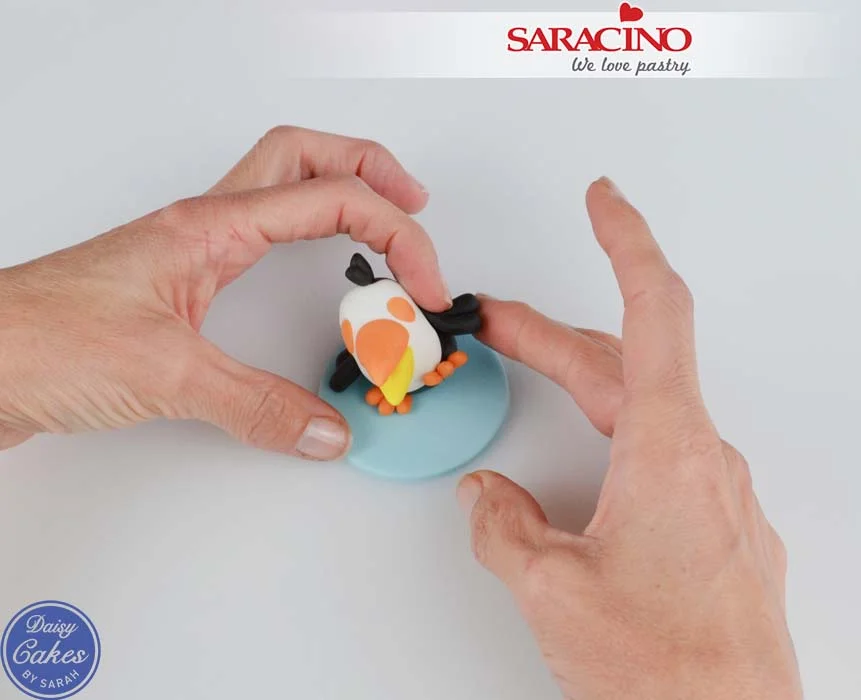
Step 39

To make the wings roll two small teardrop shapes for each and push onto the side bending them up slightly.
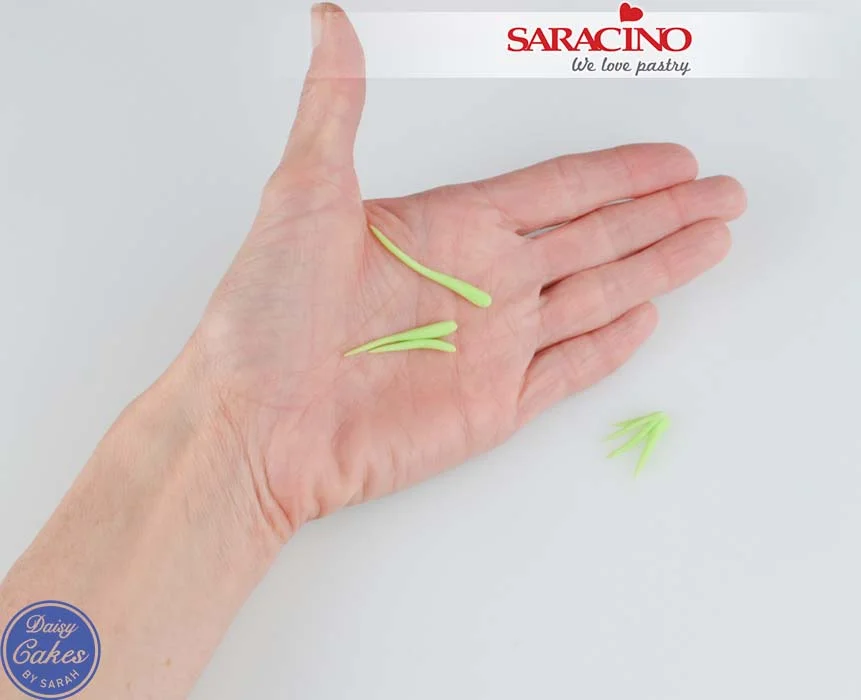
Step 40

Roll out several pieces of green paste and push them together at the thicker end. Repeat to make a second leaf.
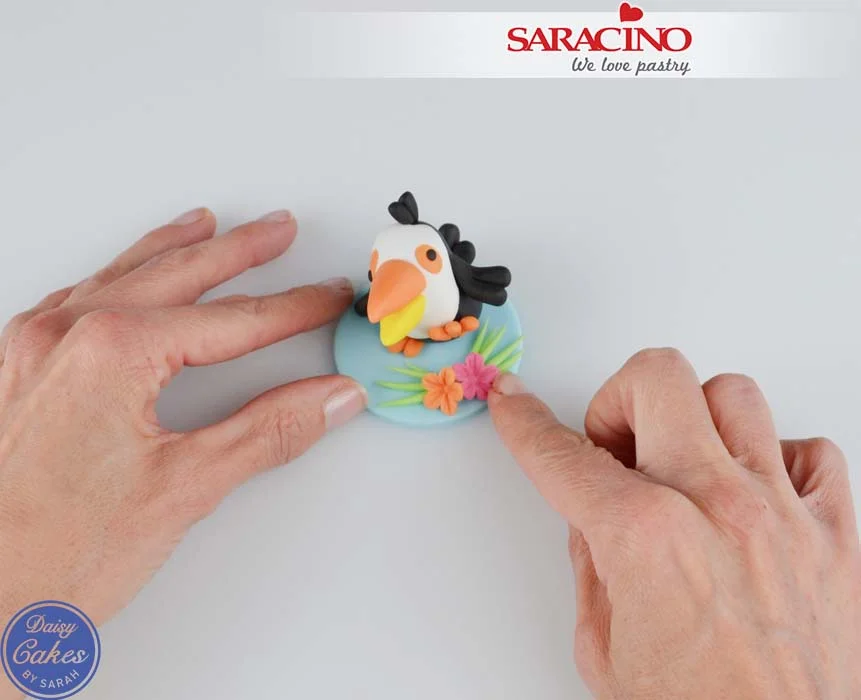
Step 41

Stick these to the topper and decorate with a couple of small flowers made earlier.
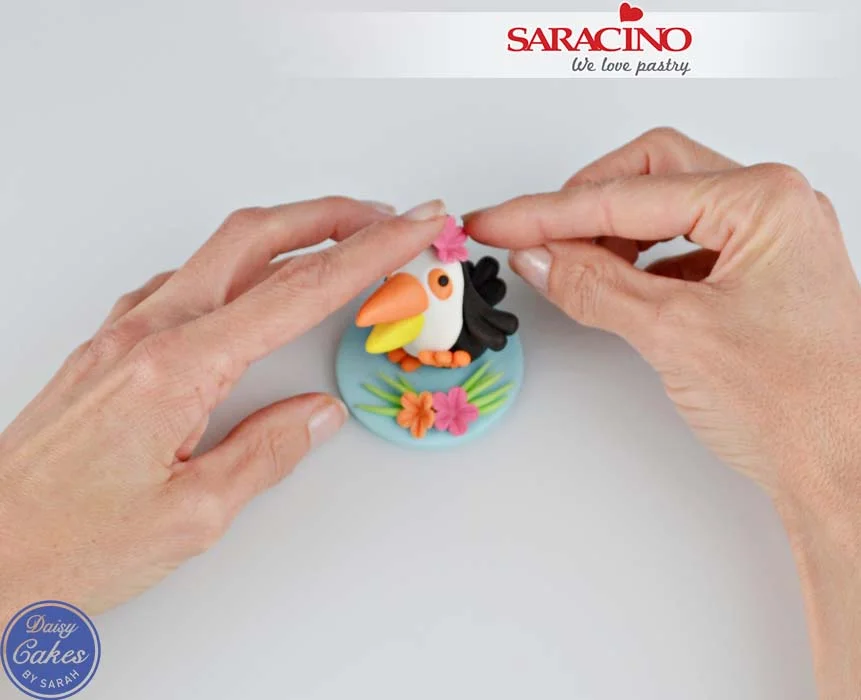
Step 42

Add one little flower to the toucan’s head
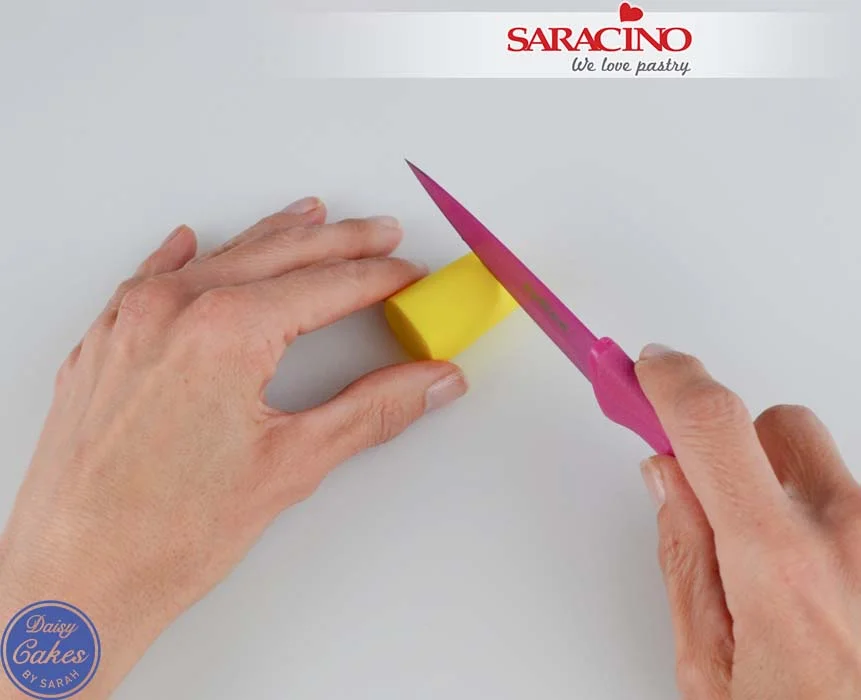
Step 43

For the second cocktail roll a piece of yellow paste using a smoother so one end is narrower than the other. Using a sharp knife cut a piece approx. 3cm in length with a sharp knife. Use a smoother to reshape it if necessary.
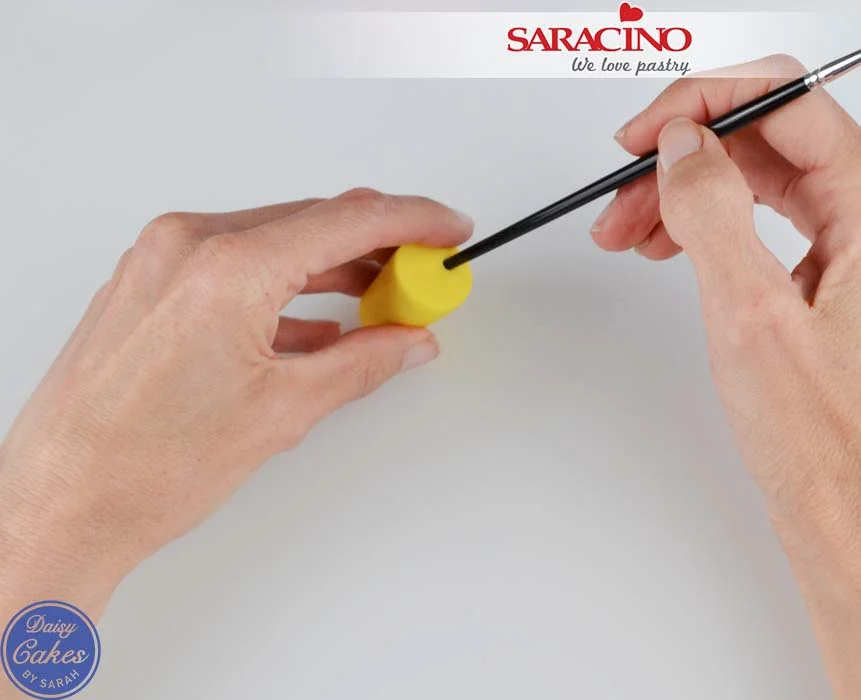
Step 44

Using the end of a paintbrush make a small hole for the straw. Set aside to dry.
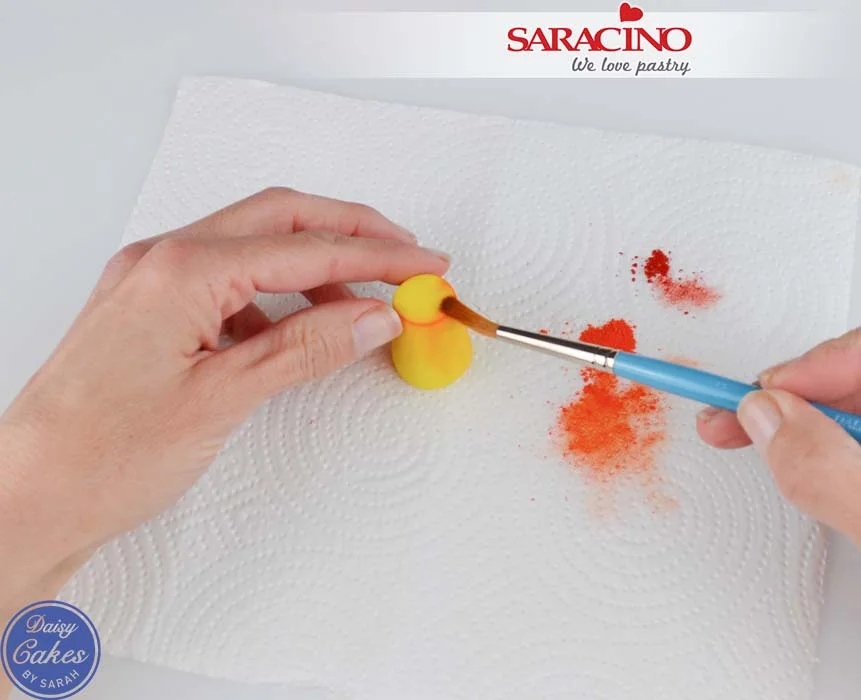
Step 45

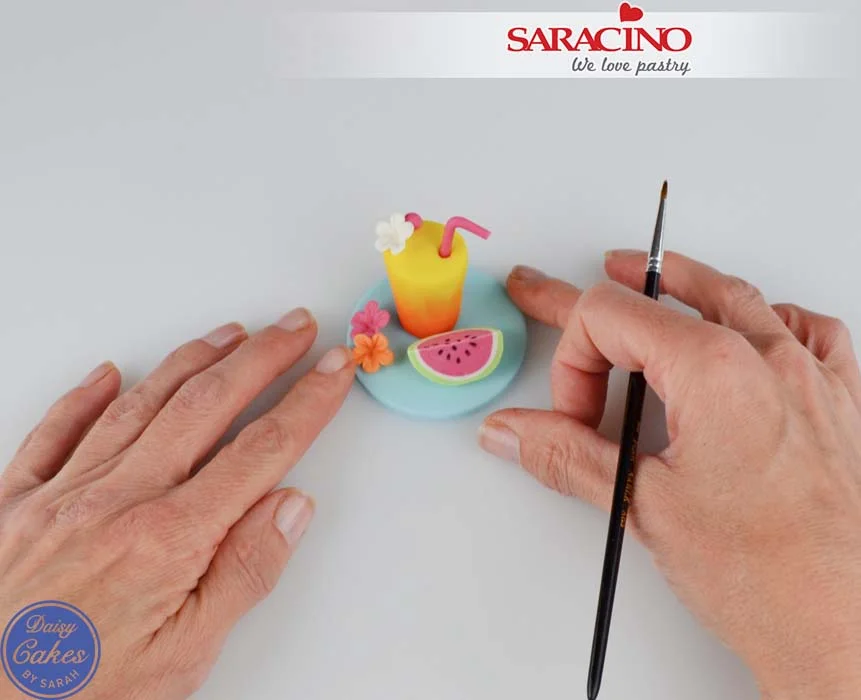
With a soft brush gradually dust the bottom of the cocktail glass with orange dust upto about half way. Then apply a small amount of red dust to the very bottom.
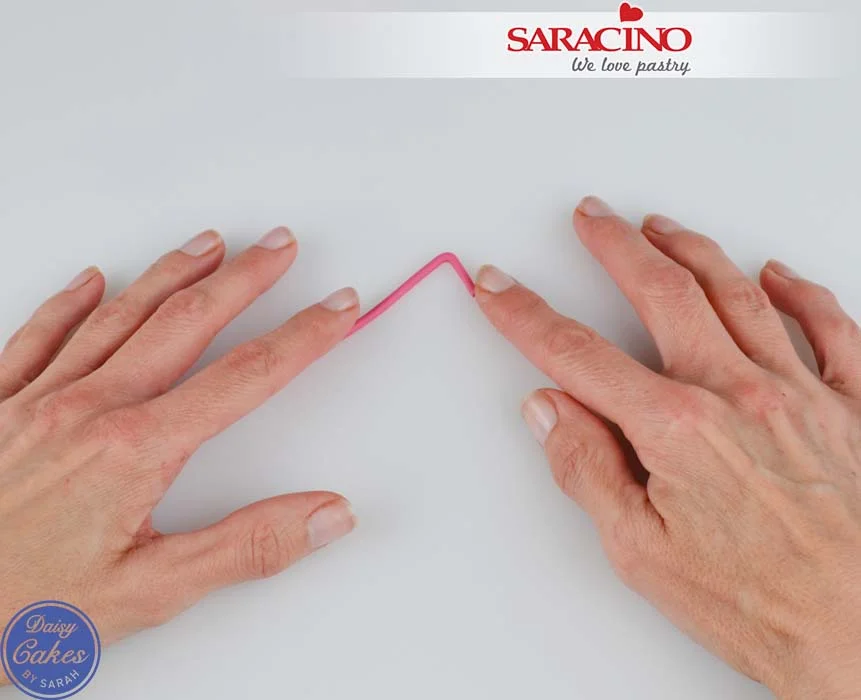
Step 46

To make the straw roll a thin piece of fuchsia paste and bend over the top. Set aside to dry.
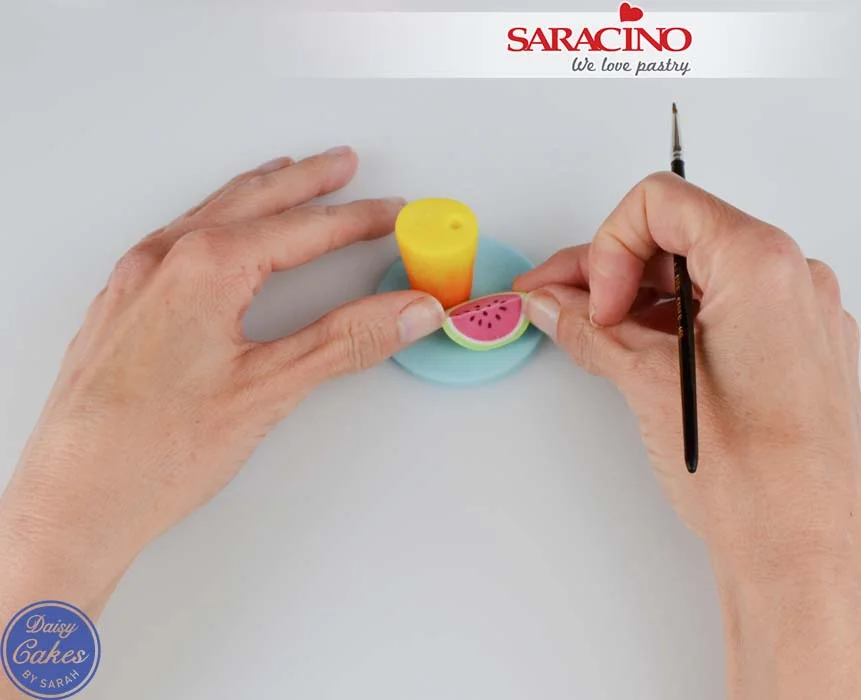
Step 47

Mark the seeds on the watermelon with a black edible pen as before. Attach the glass and melon to the topper with edible glue.
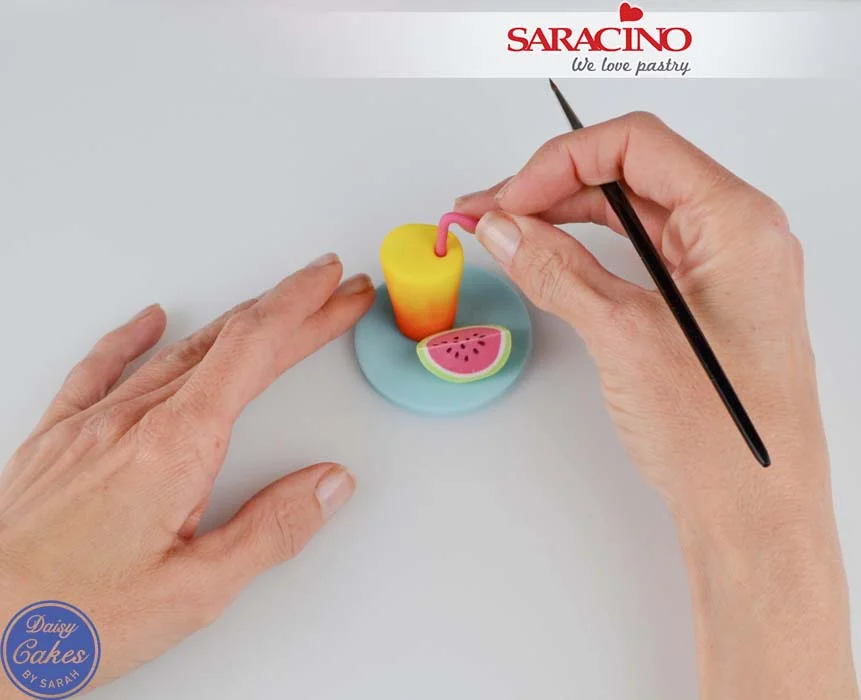
Step 48

Cut the straw to size and use a small amount of edible glue to attach it in the hole.
Step 49

Roll a small ball of fuchsia paste for a cherry and attach to the rim of the glass with a flower made earlier. Add another couple of flowers to the topper.
Step 50

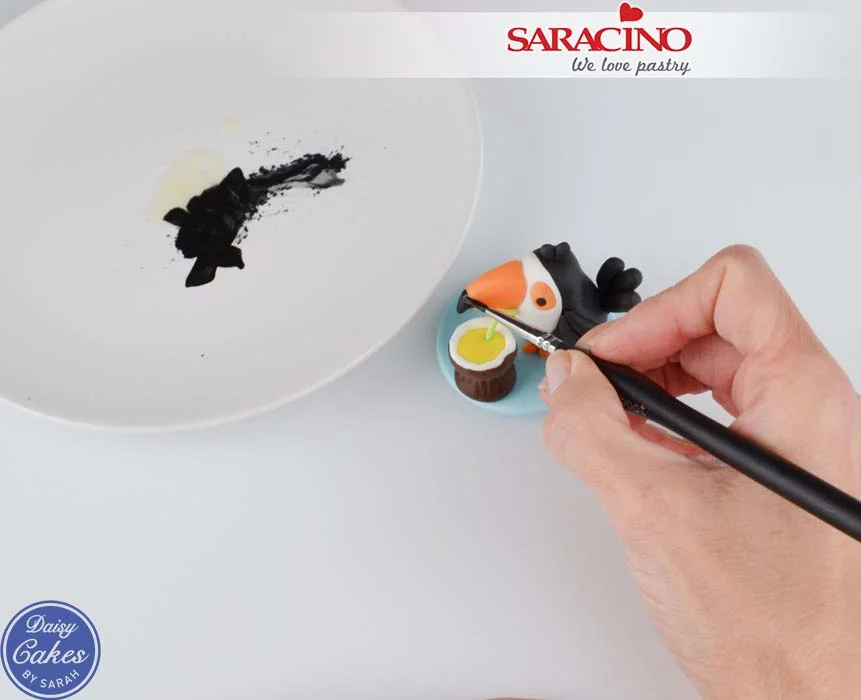
Melt a small amount of cocoa butter. With black dust added paint the tip of the toucan’s beaks. Add a small amount of white dust to the cocoa butter and add highlights to the toucan’s eyes with a fine paintbrush.

SUMMER MODELLING TUTORIAL

SUMMER MODELLING TUTORIAL

Skill level: INTERMEDIATE

TIP:

Remember!

  • When we mix colours they become a shade darker after some time / during work and drying. Take this into account especially when blending your skin tone
  • To protect the paste from drying out, pack it into a bag and take out only as much as you need each time
  • Before using the paste always knead well to make more workable and smoother to use

You will need:

  • Nude – a combination of Saracino Pasta Model and Saracino modelling white chocolate in a 1:1 ratio.

  • For colouring I used a copper Saracino powder for my chosen skin tone. You can use any colour you wish.

  • Head 20g 

  • One leg 8g 

  • Torso 15g 

  • One hand 3g

  • Red Pasta Model approx 5g

  • Brown Pasta Model approx 30g 

  • Green and black Pasta Model – a small amount for the eyes and their finish

  • Powder colours – black or brown and pink or red

  • Gold powder colour

  • Green powder colour for the eyes

  • Kitchen scale

  • Non-stick silicone mat

  • Non-stick silicone roller

  • Scalpel

  • Knife

  • Ball tool with a diameter of 10mm and 1mm

  • Brush (soft for shading) 6mm or similar

  • Contour brush

  • Toothpicks

  • Wooden skewer

  • Water

  • Corn flour

  • Latex / nitrile gloves

  • Wet wipes

  • Dry wipes

Step 1

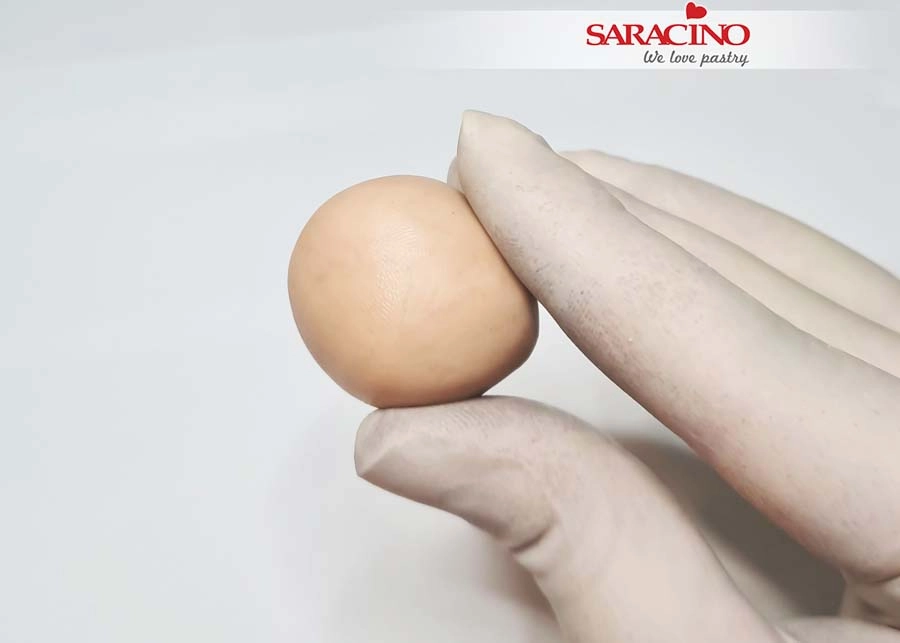
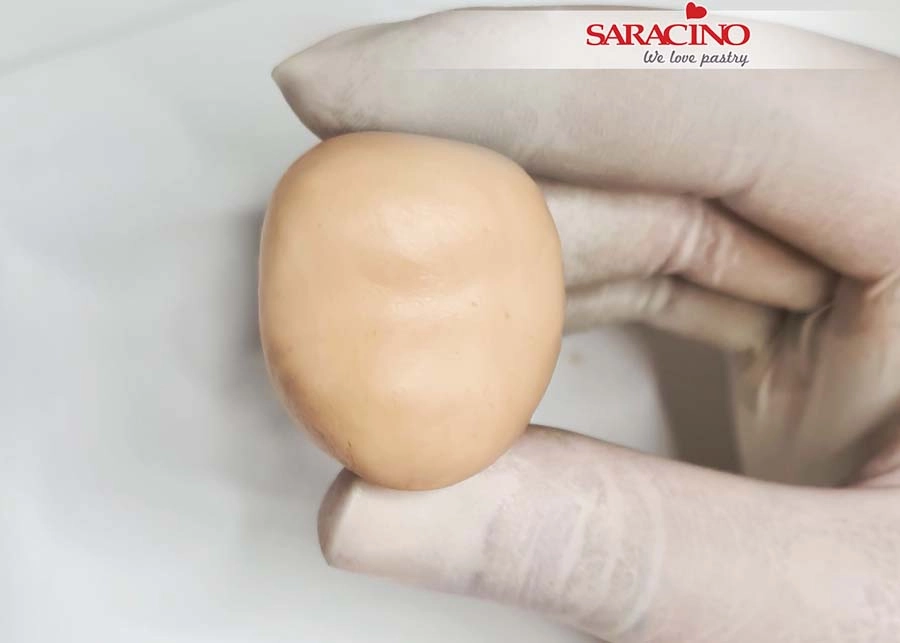
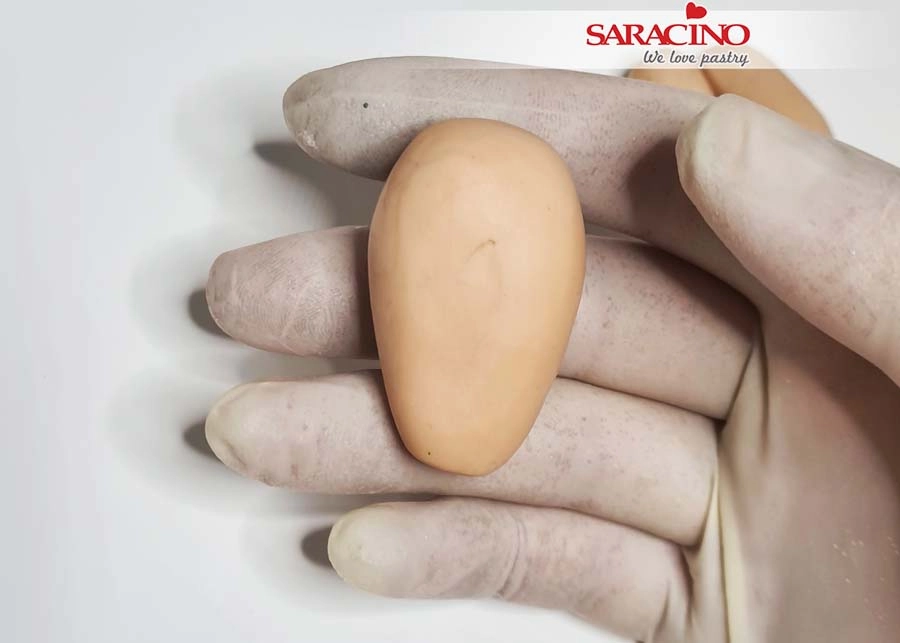
For the head roll an oval shape.

Step 2

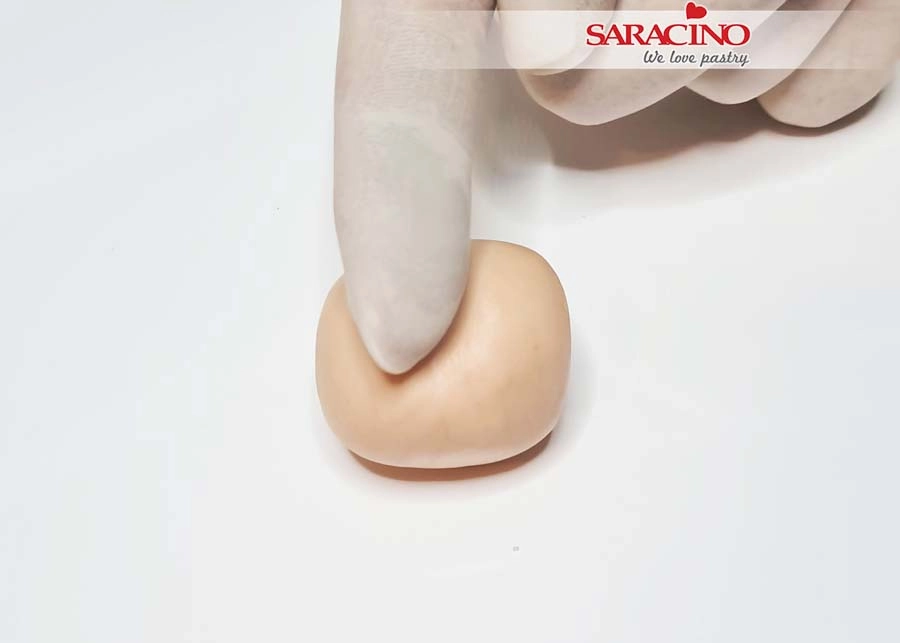
Then place your thumb on the underside at a slight angle. Use your index finger to bend and flatten / shape the top a little.

Step 3

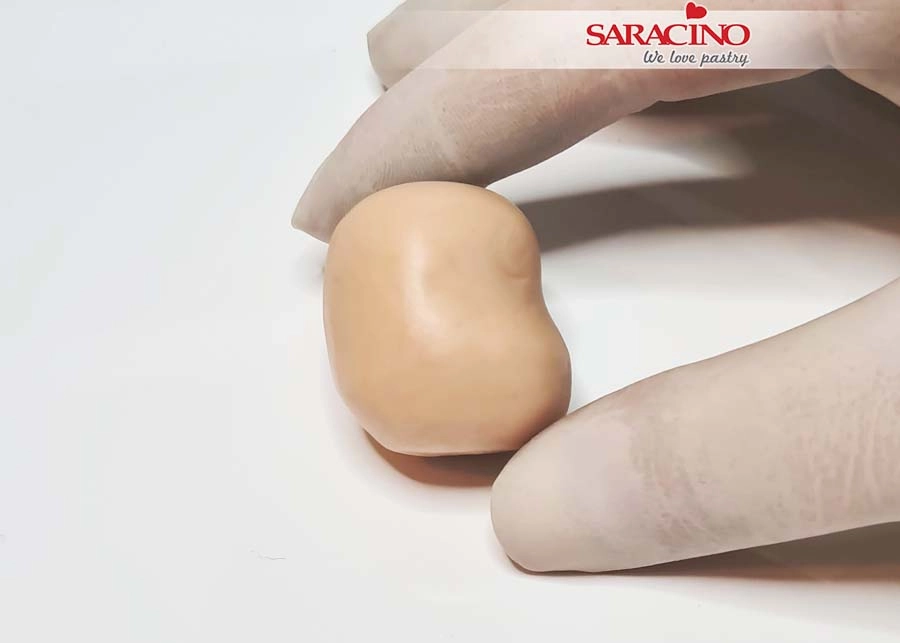
Approxiamtely 1/3 from the top, press a wide indentation with your finger for the eye area.

Step 4

Shape so the groove slightly extends over each side.

Step 5

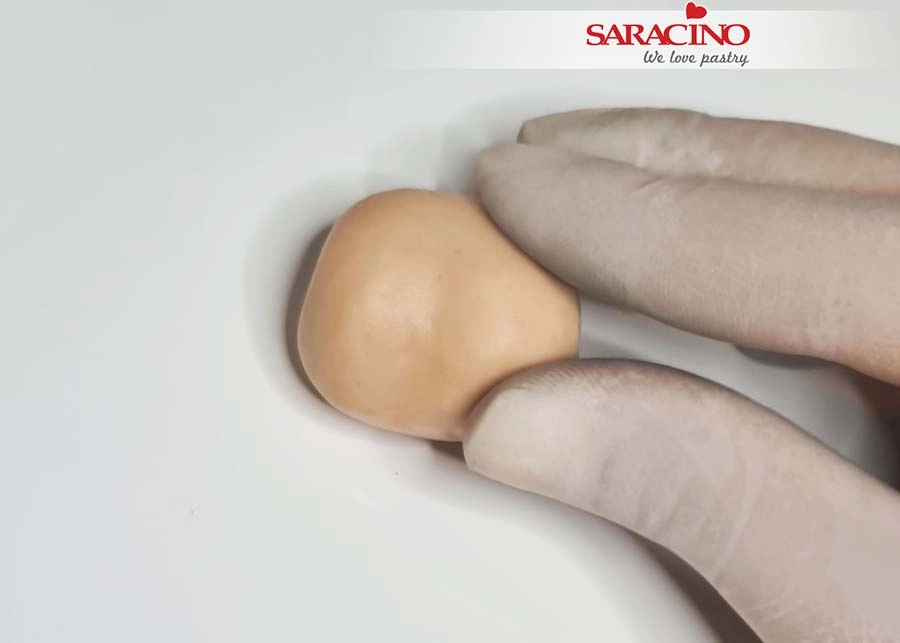
Use your fingers to shape the chin area.

Step 6

The head of the figurine should have a slightly triangular shape to the chin area.

Step 7

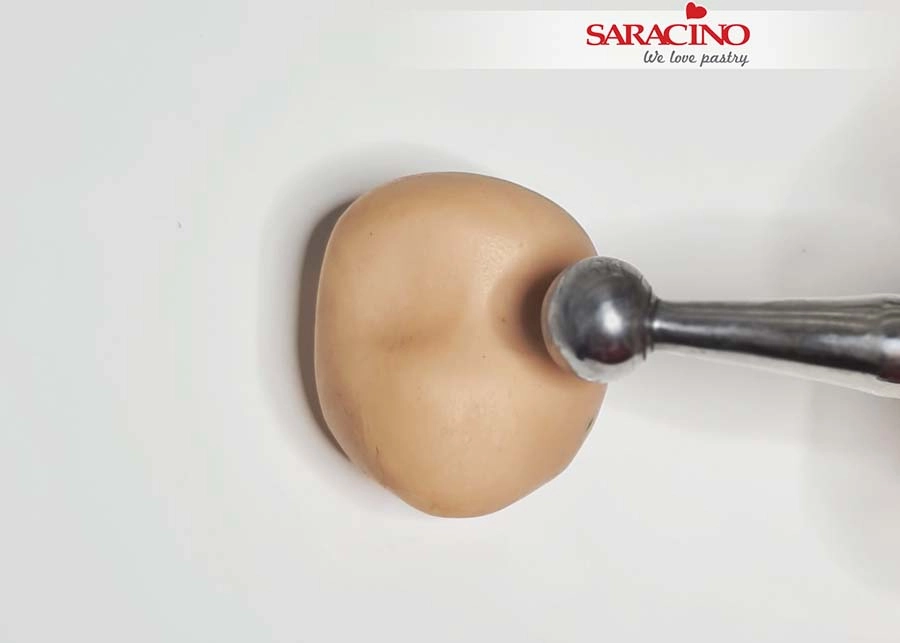
Use a ball tool to form eye sockets.

Step 8

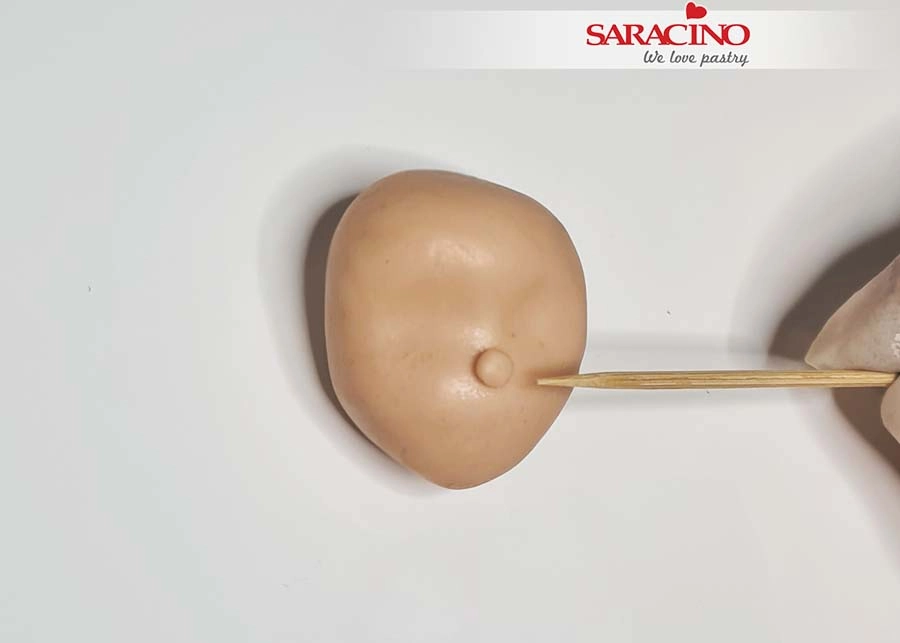
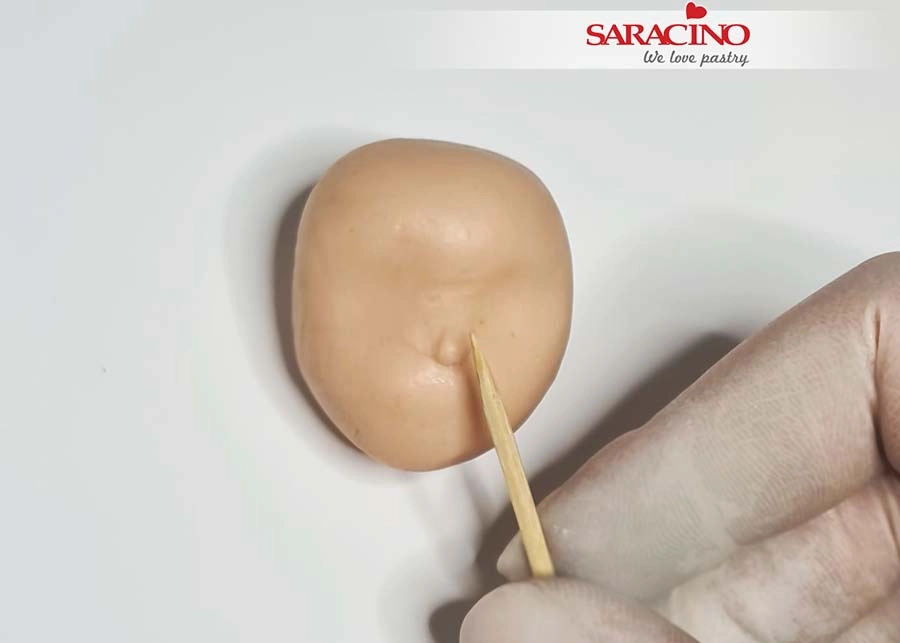
For the nose place a small ball below the eye area.

Step 9

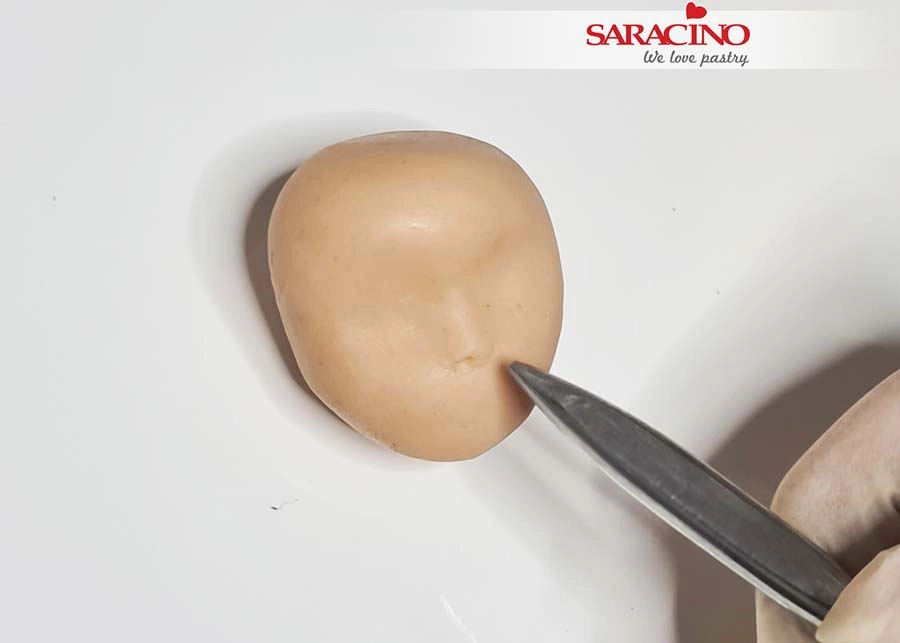
Using a cocktail stick blend a little paste upwards. You can also use a modelling tool if you prefer.

Step 10

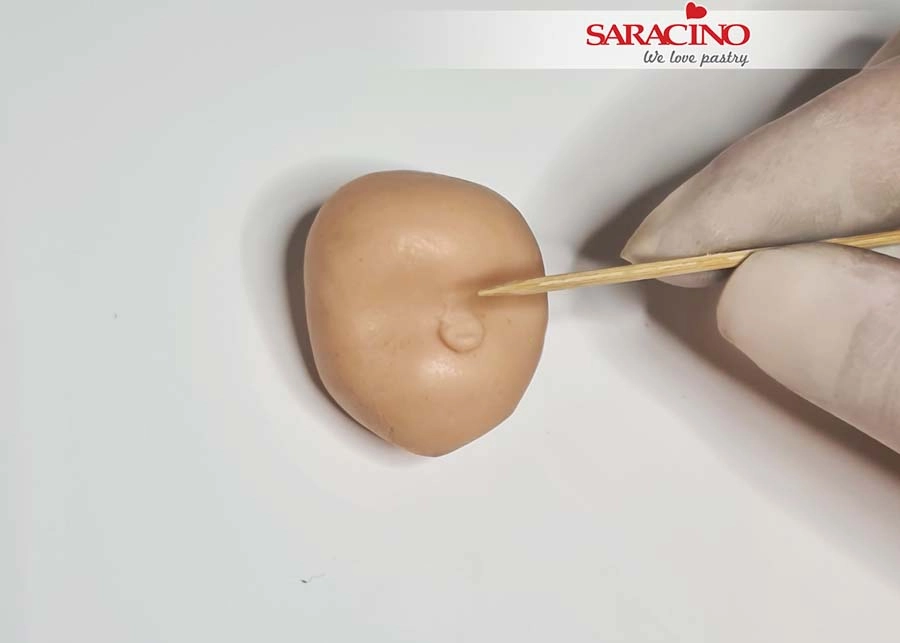
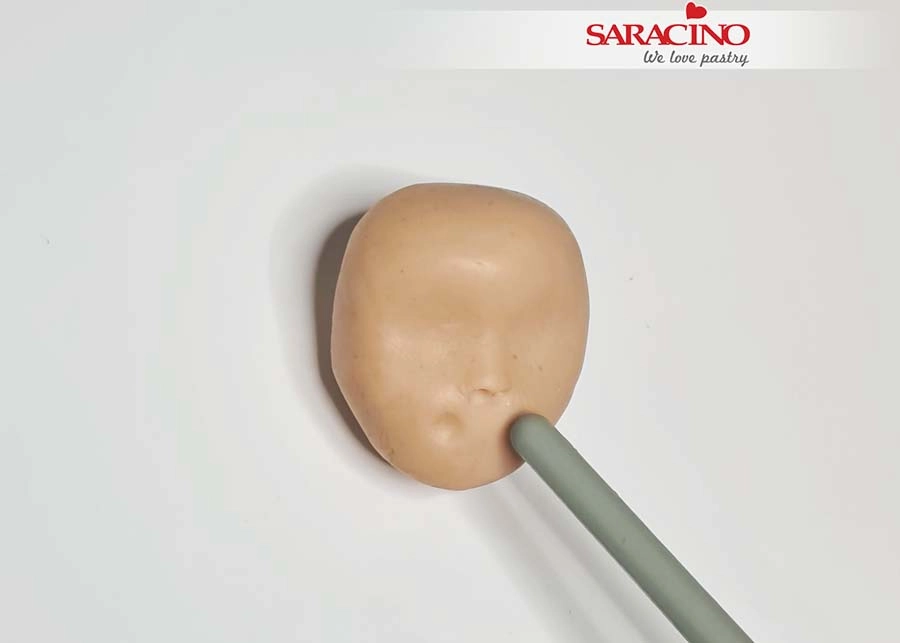
Repeat to the sides of the nose. 

Step 11

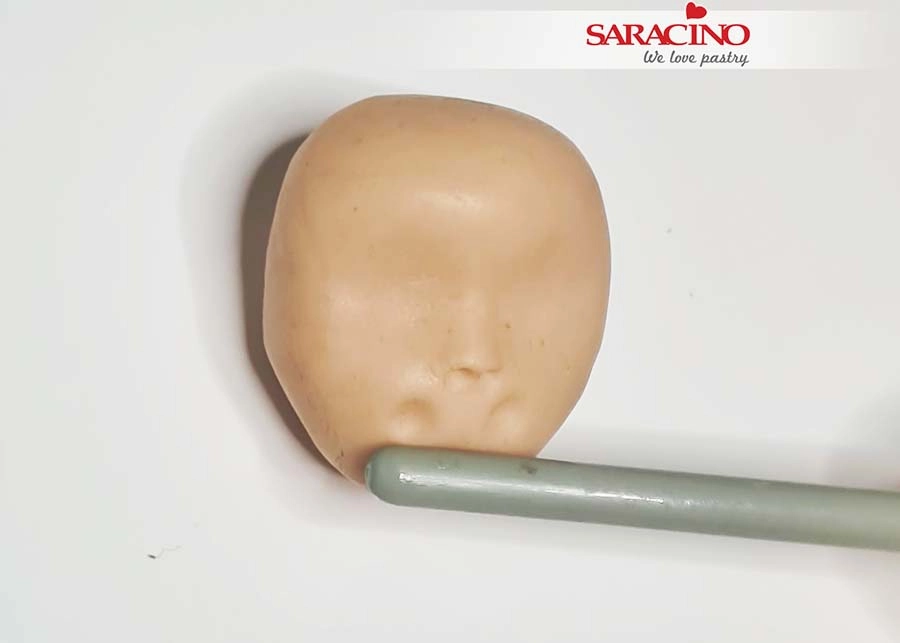
Using a modelling tool or cocktail stick form two nostils.

Step 12

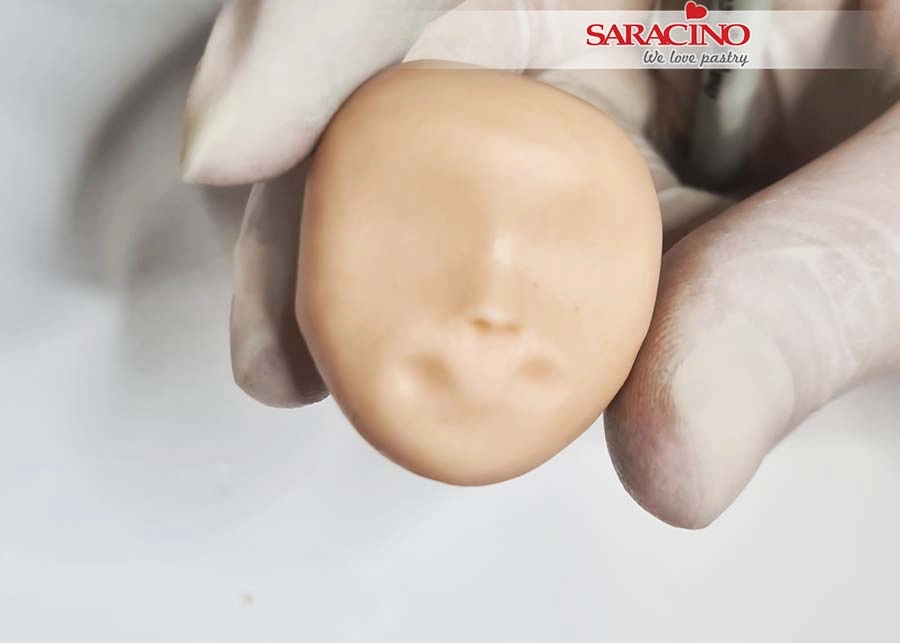
For the mouth area mark the dimples shown in the photo. Ideally these should be halfway between the nose and the base of the chin.

Step 13

Use the side of a modelling tool to add more shape to the chin below the dimples.

Step 14

Doing this will push paste upwards to add to the mouth area.

Step 15

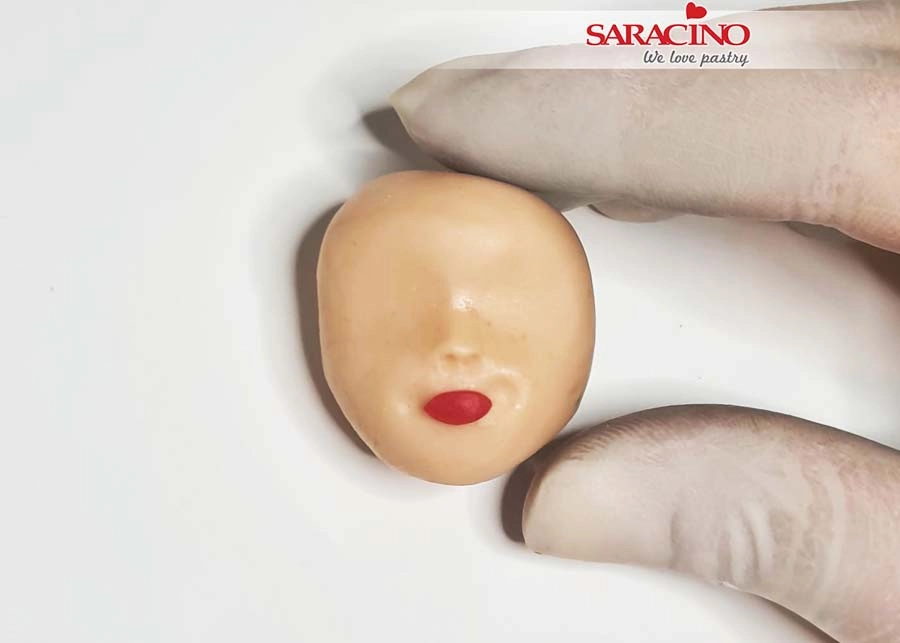
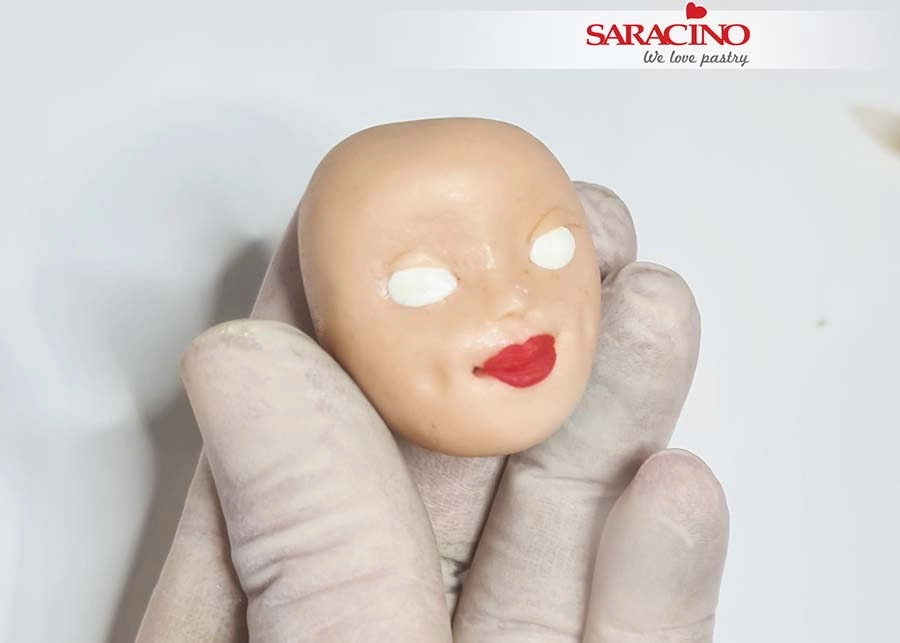
Roll a little red Pasta Top to the shape shown and add to the mouth. Be careful not to add too much paste or the lips will be too big.

Step 16

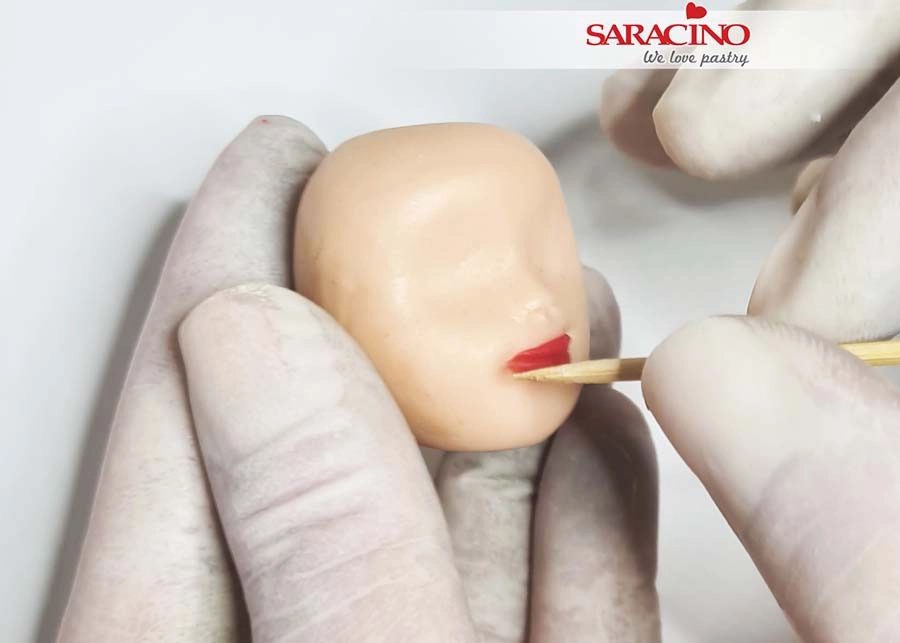
Use a cocktail stick to spread the paste to the corners of the mouth.

Step 17

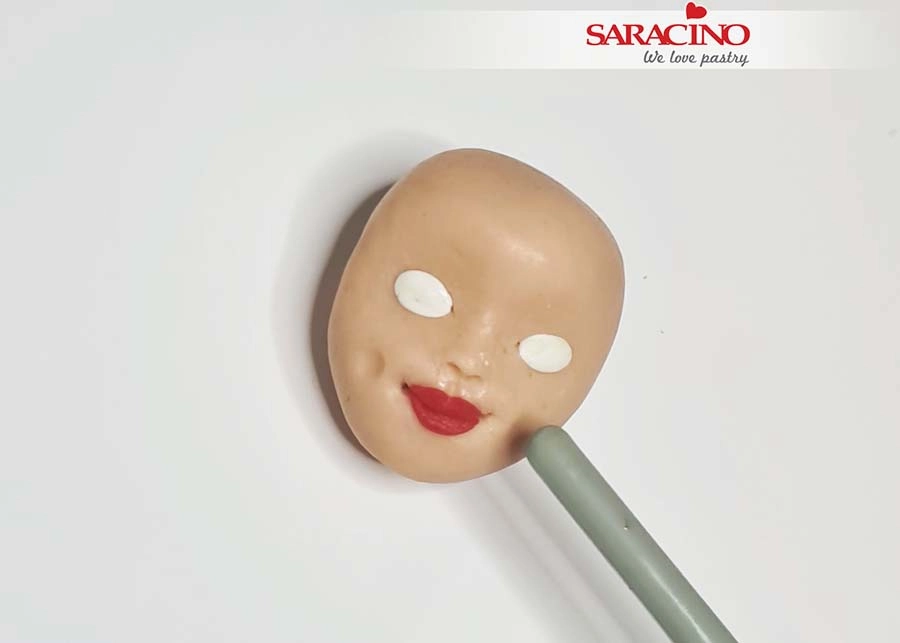
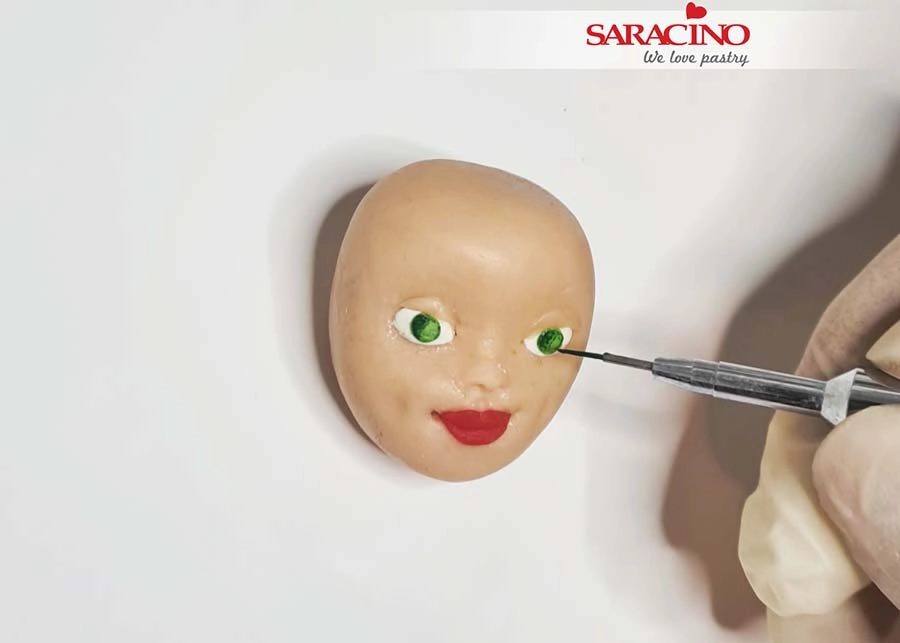
Roll two small balls of Pasta Model. Add them to the eye sockets as shown using a little glue if required. In order for the face to look attractive it is good practice to have the gap between each eye the same width as one eye. This way proportions are well balanced. Now add two dimples to the cheeks.

Step 18

Using the coloured Pasta Model fix the small upper eyelids

Step 19

Roll two balls for the eye colouring. Fix using a little glue and paint around the edge using a fine paintbrush.
Step 20

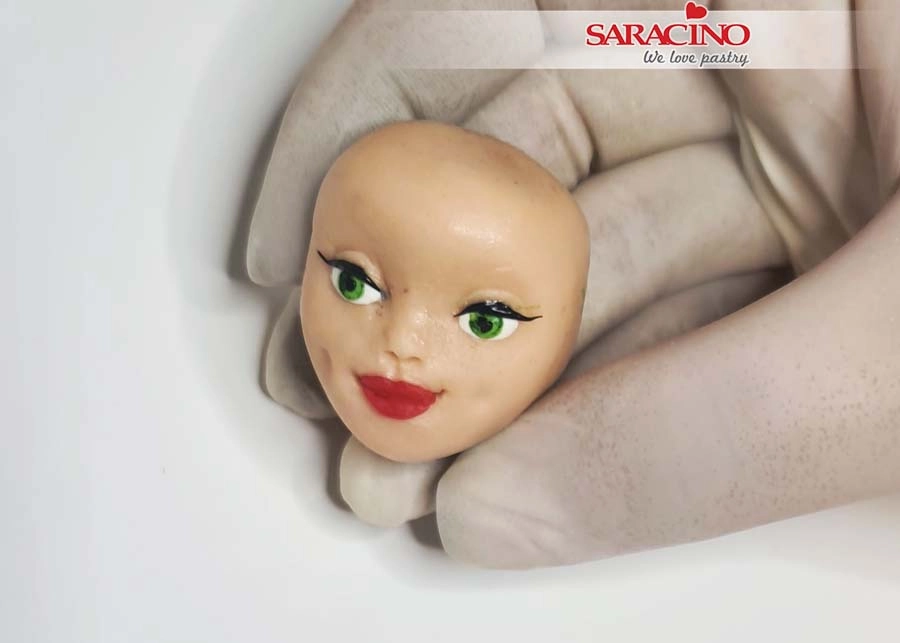
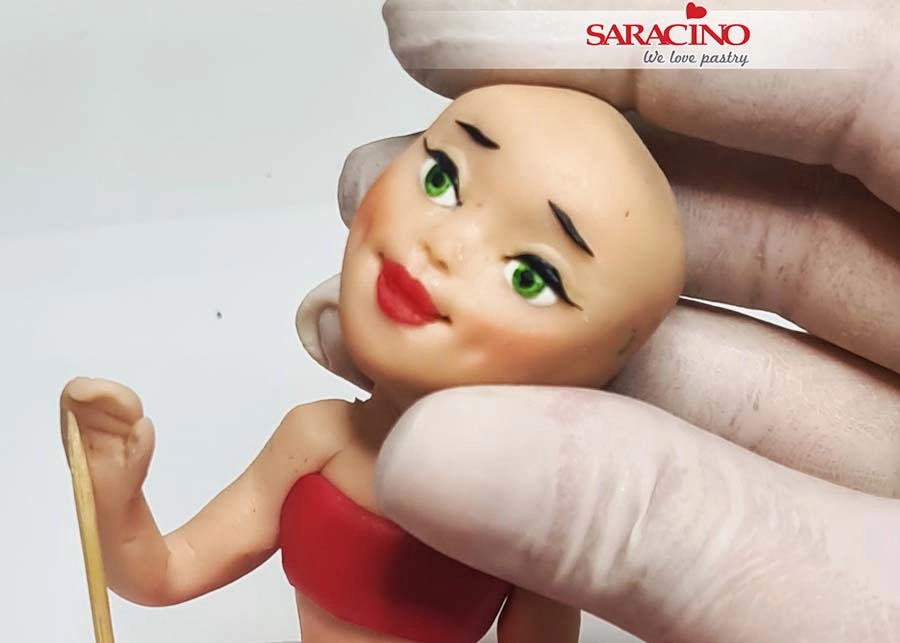
Roll two smaller balls of black paste and fix for the pupils. Roll a thin line of black Pasta Model and fix above each eye for the eyelashes.

Step 21

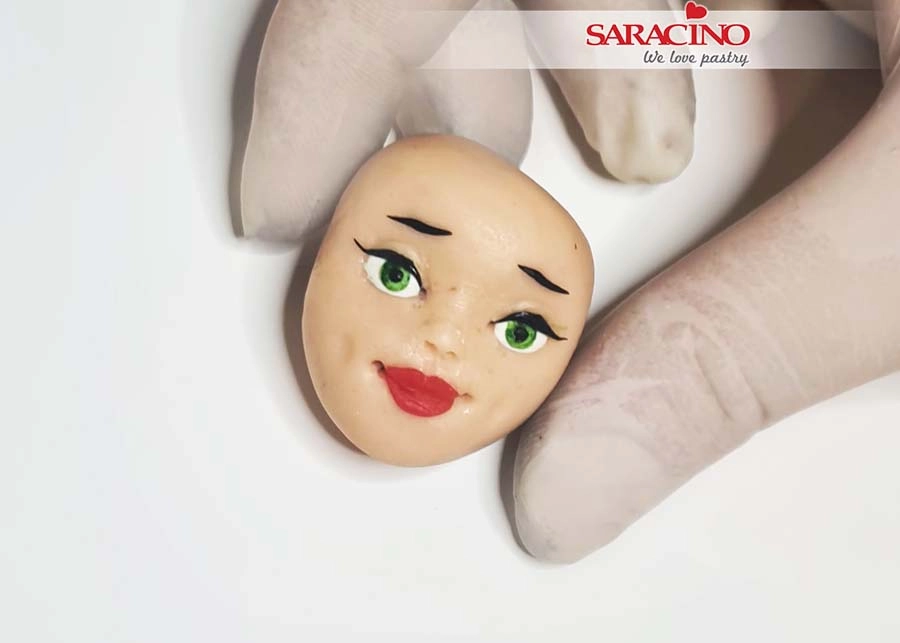
Repeat a similar procedure for the eyebrows.

Step 22

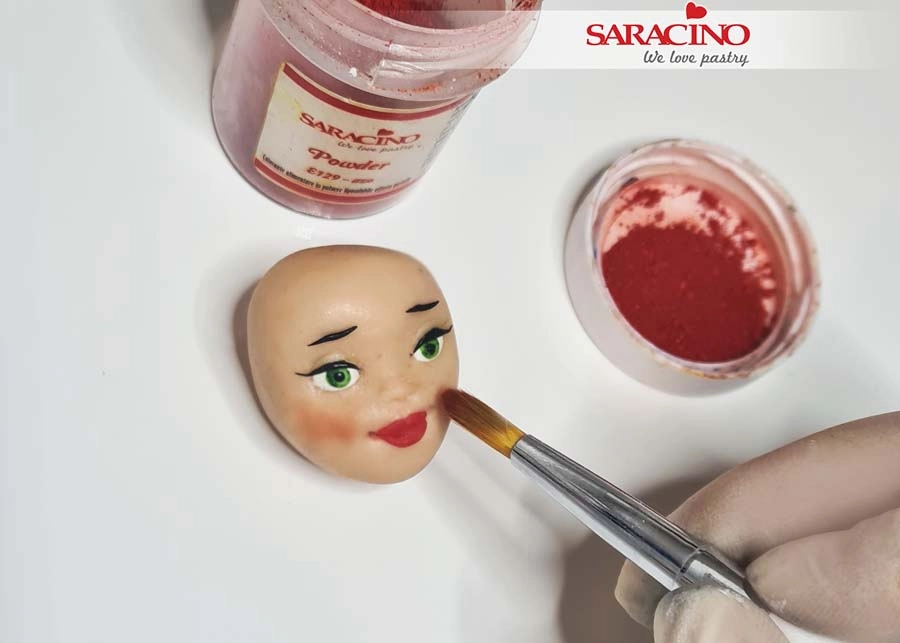
Use red or pink powder colour and a soft brush to add blush to the cheeks. Be careful not to add too much. It is easier to add more if needed than remove too much!

Step 23

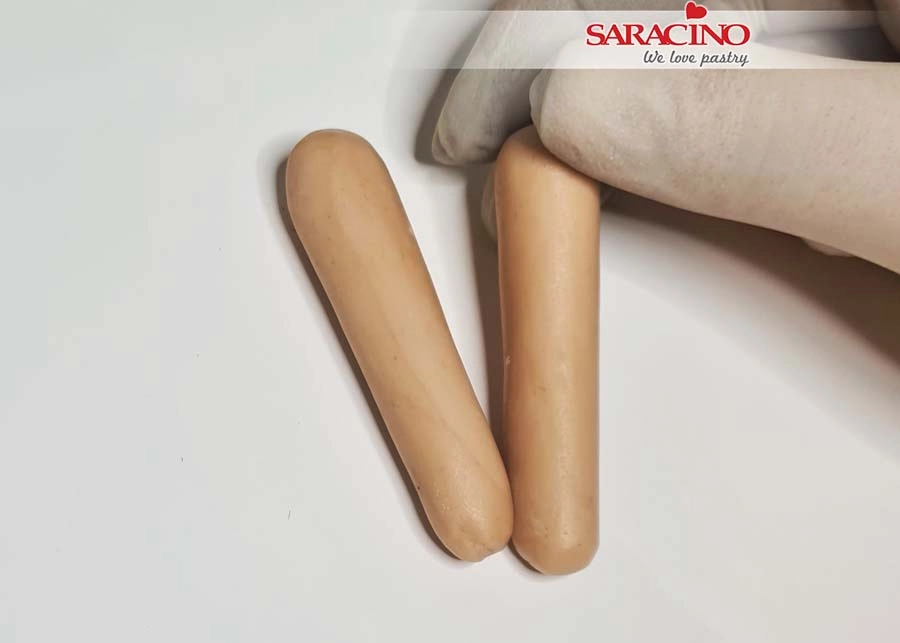
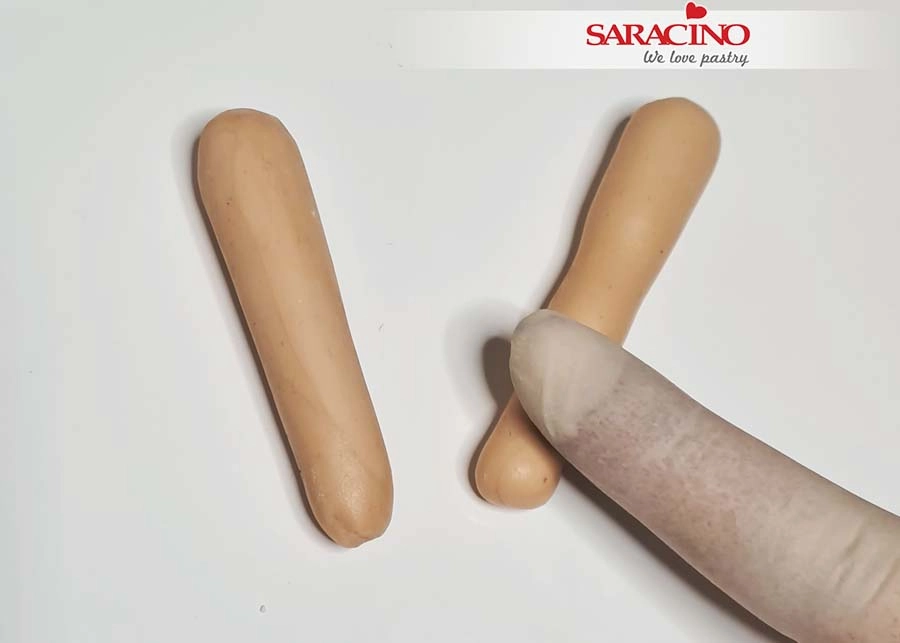
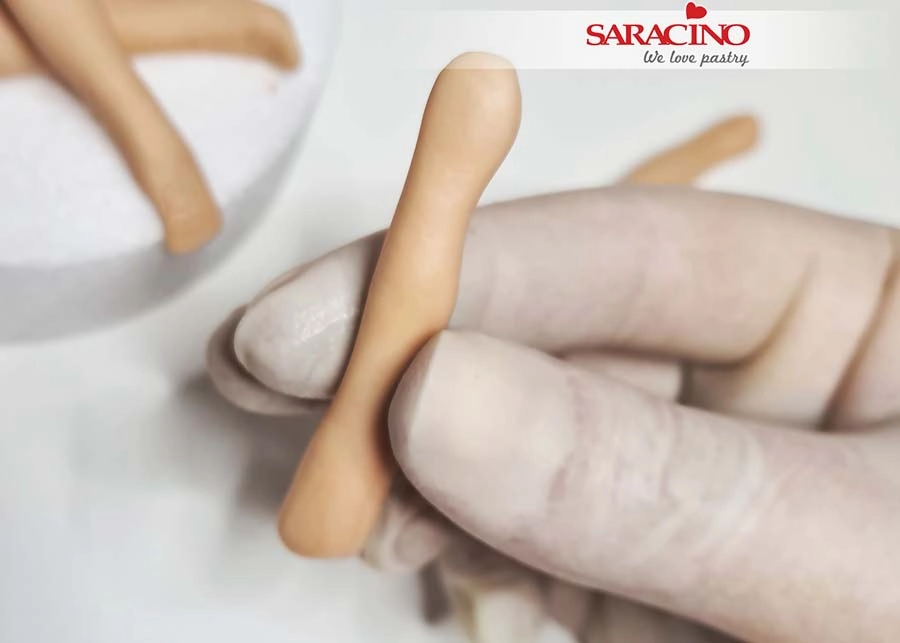
For legs roll two sausage shapes slightly wider on one end.

Step 24

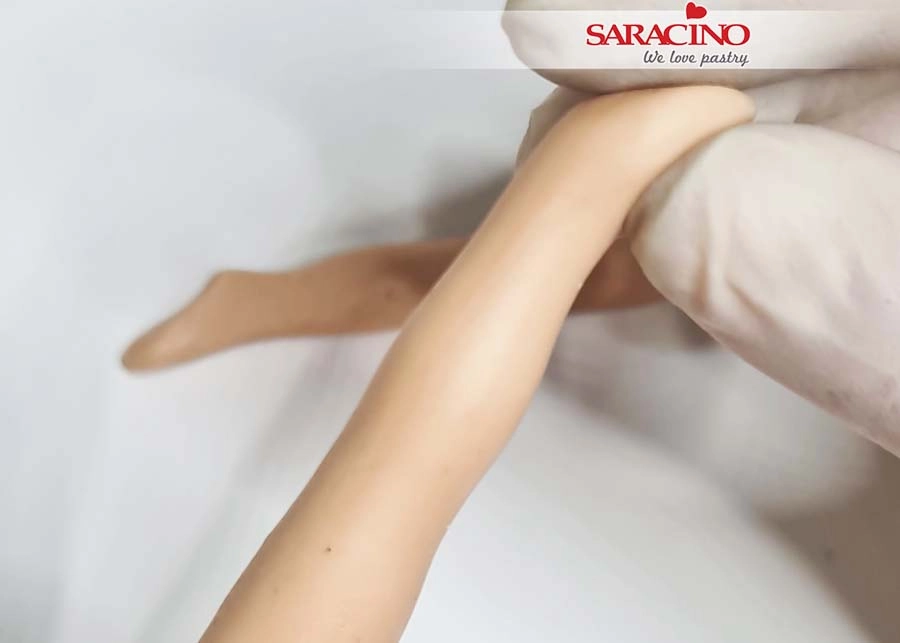
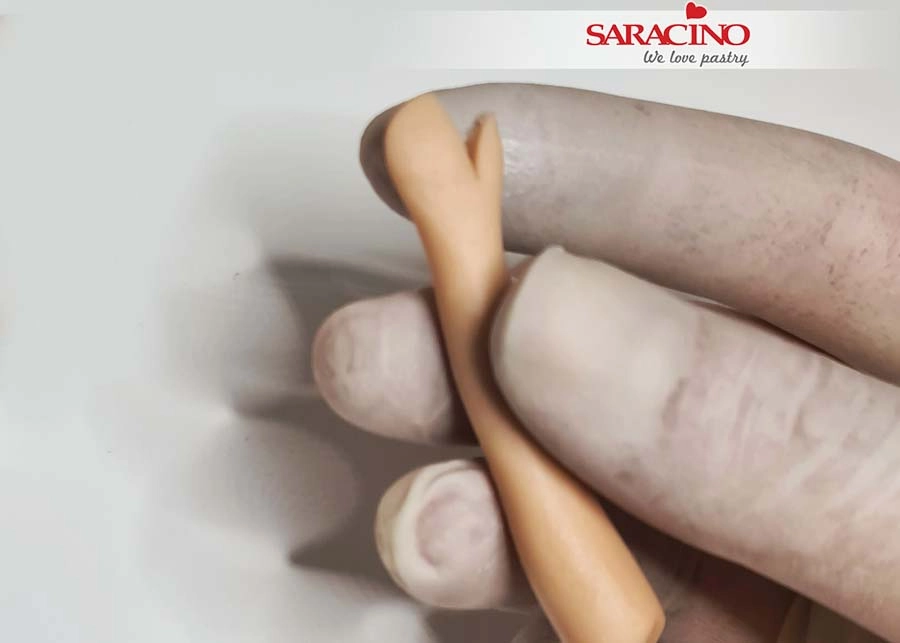
Halfway up each leg roll with your finger to form the knee area. Repeat 1/3 from the bottom for the ankle and to form the foot.

Step 25

Gently bend to form the foot.

Step 26

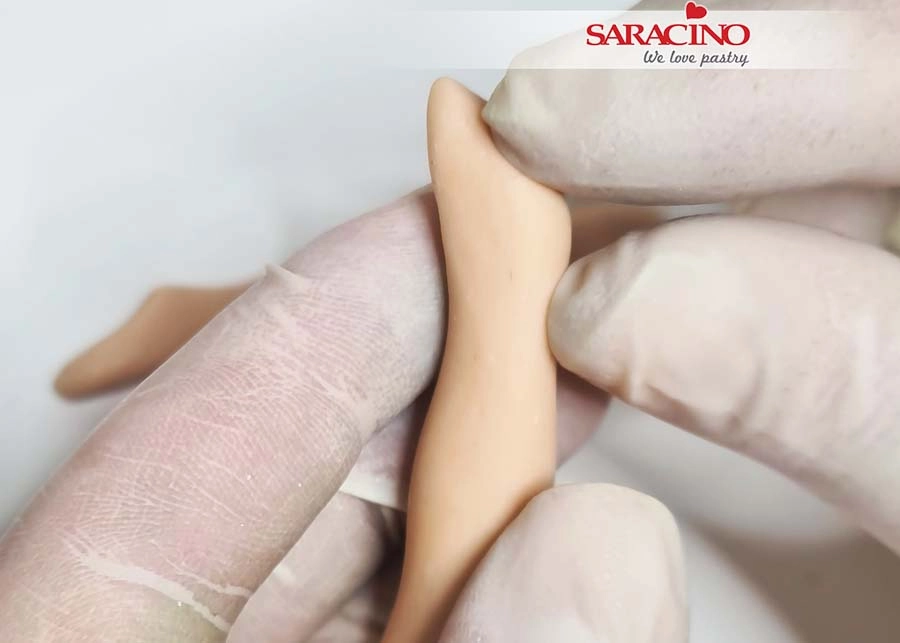
Using your thumb and forefinger model the heels.

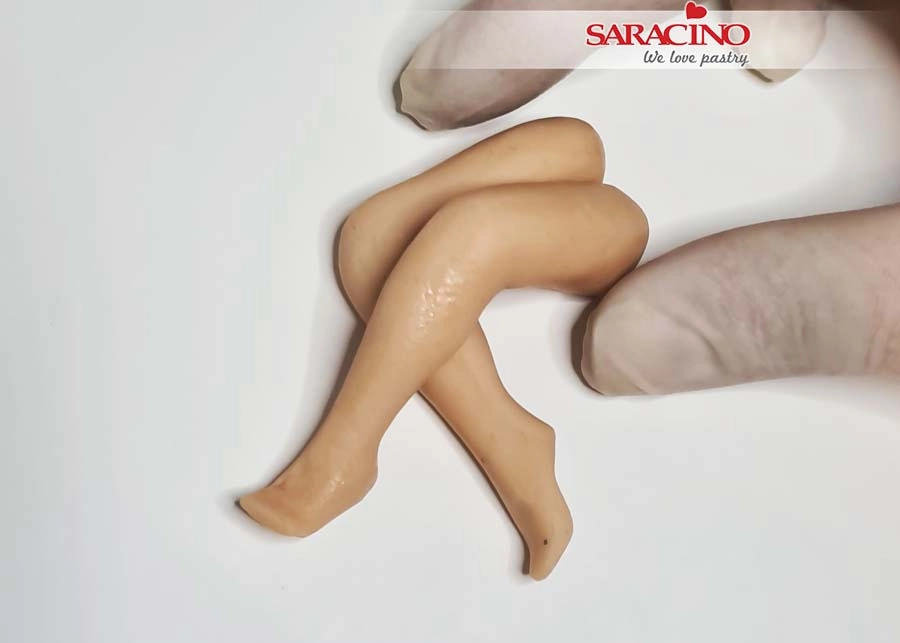
Step 27

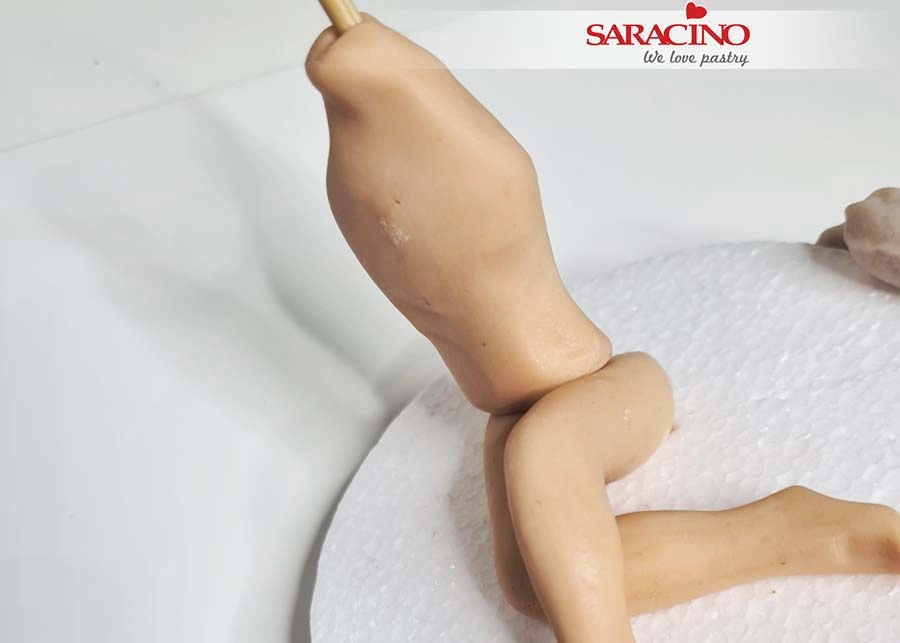
As our character is sitting with crossed legs bend the legs at the knees and place them on the board crossed as shown.

Step 28

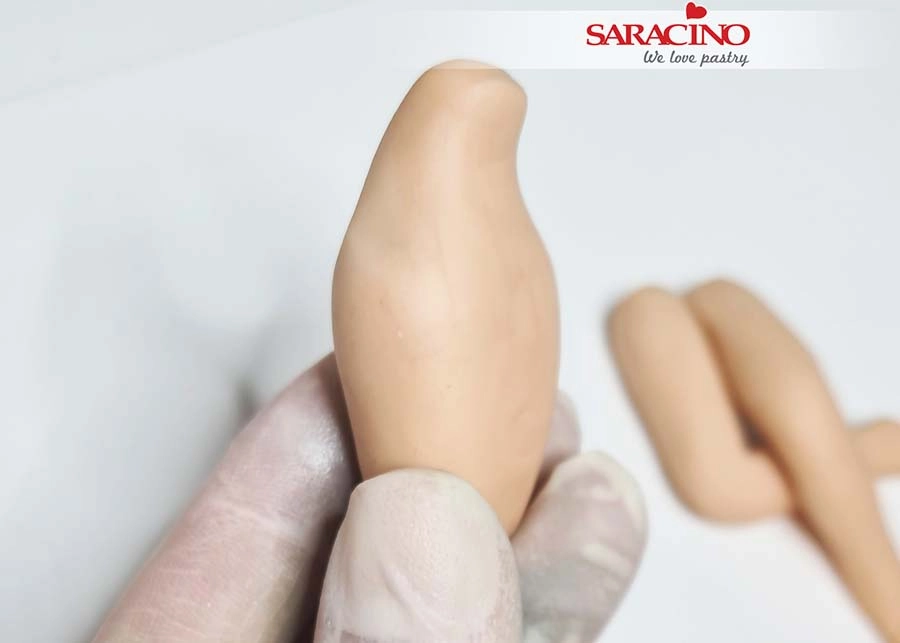
For the torso begin with this shape.

Step 29

Roll the paste in your fingers to form the neck shape to the proportions shown. Bend it forward slightly.

Step 30

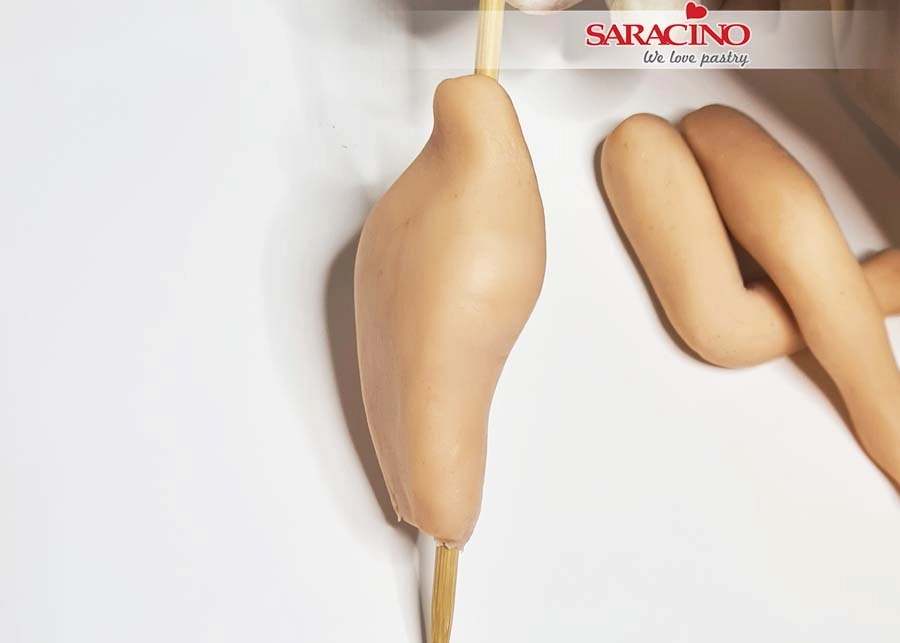
Insert the wooden skewer through the torso. When inserting gently twist the skewer and keep the shape of the torso.

Step 31

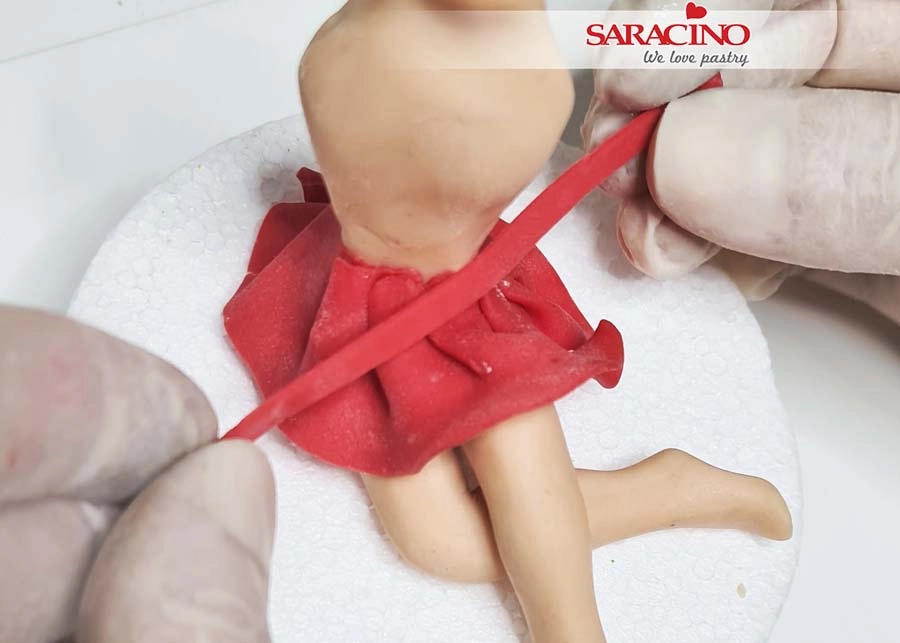
Place the torso over the top of the legs inserting the skewer into the base below. You do not need to blend the torso and legs together as the area will be covered with the skirt.

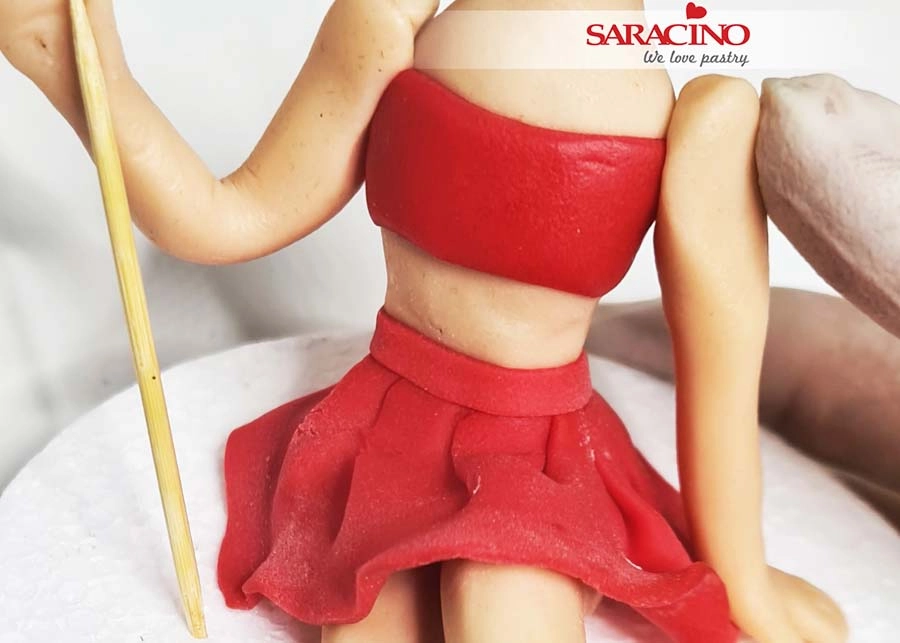
Step 32

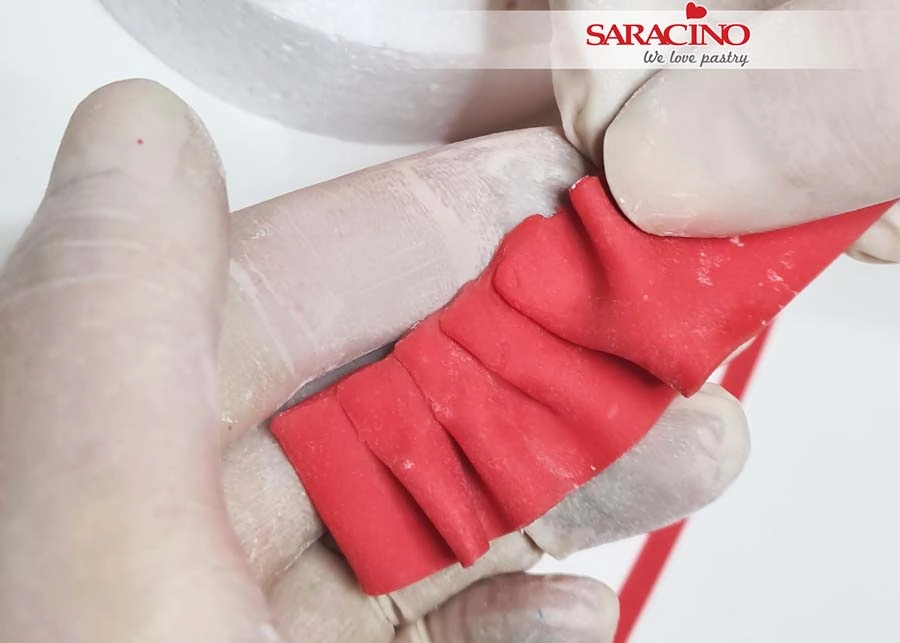
Roll out red Pasta Model thinly and cut a rectangle of 2 x 20cm. Then fold pleats to create a frill.


Step 33

Using the same paste cut a thin strip for the waist of the skirt.

Step 34

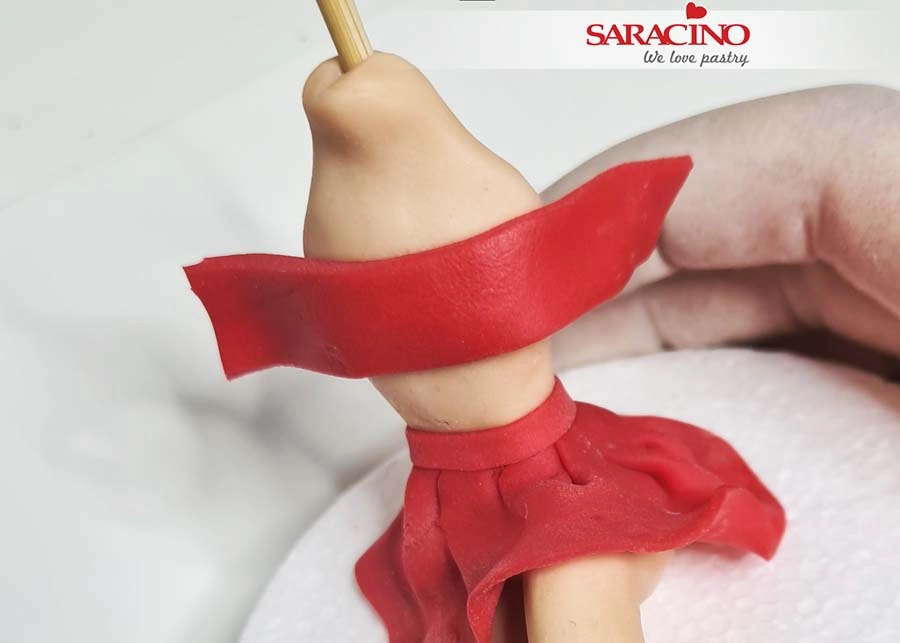
Using the same paste cut a rectangle shape for the top. Fix around the chest area. 

Step 35

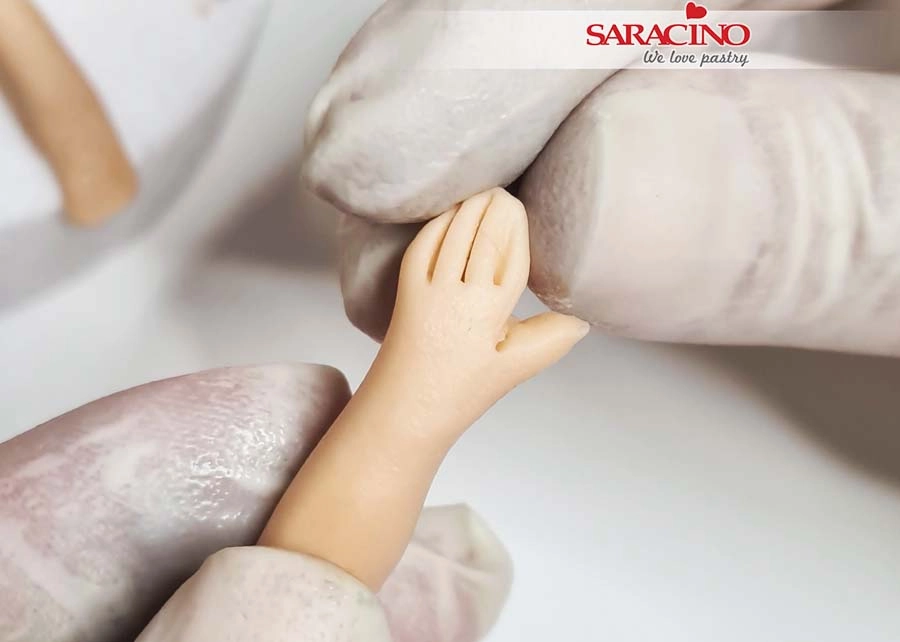
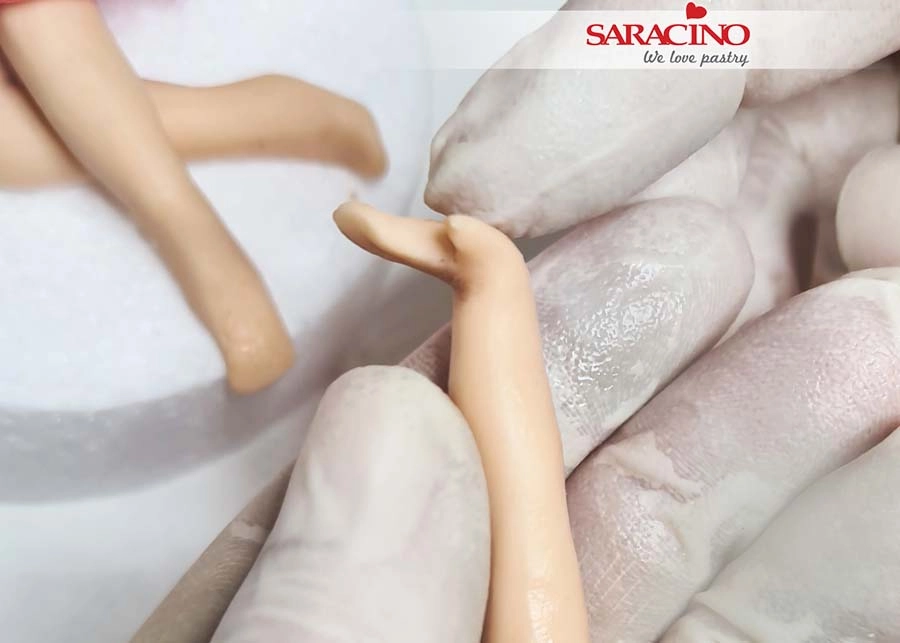
We form the arms and hands similar to the legs. Use your finger to roll the elbow and wrist area leaving paste for the hand.

Step 36

For the thumb use a scalpel or sharp knife to remove a triangle of paste from the hand. Remember to leave sufficient paste for four fingers.

Step 37

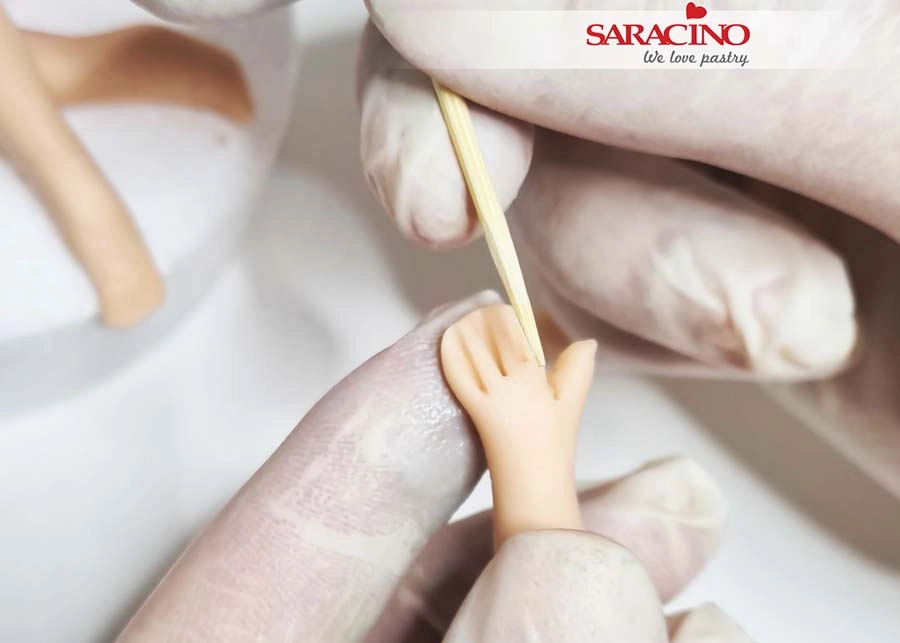
Use the back of a cocktail stick to form three grooves for the fingers. Do not cut through all the way.

Step 38

When you do this the palm will spread. Use your fingers to lengthen and thin the fingers. 

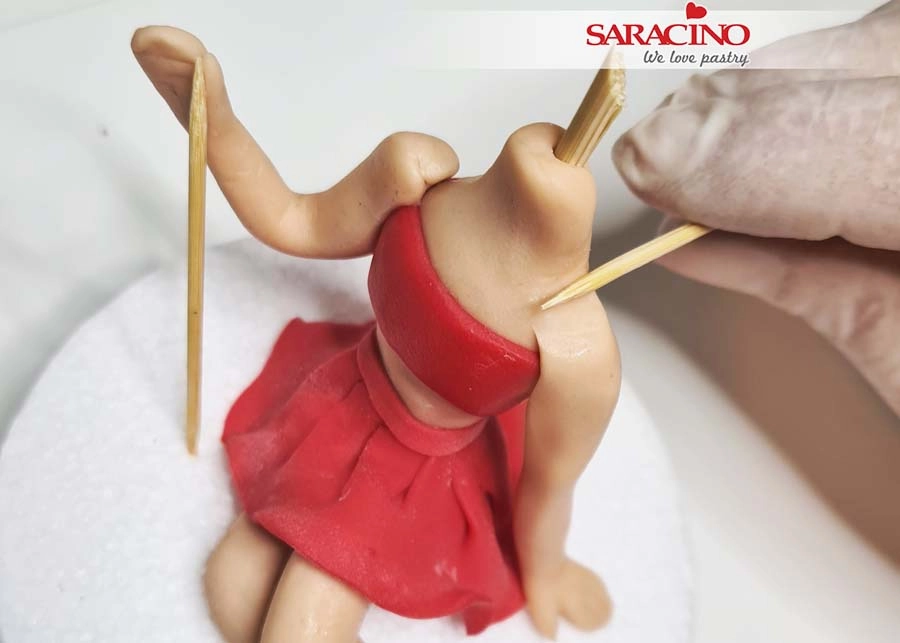
Step 39

Bend the left arm at the wrist.

Step 40

Bend the right arm at the elbow. Fix both arms to the shoulders. The right arm can be temporarily supported using a cocktail stick until dry.

Step 41

Blend each arm into the shoulders. As we have used Modelling Chocolate in our mix this will assist with flawless blending.

Step 42

Trim the timber skewer in the torso to a shorter length. Fix the head onto the neck at the required angle.

Step 43

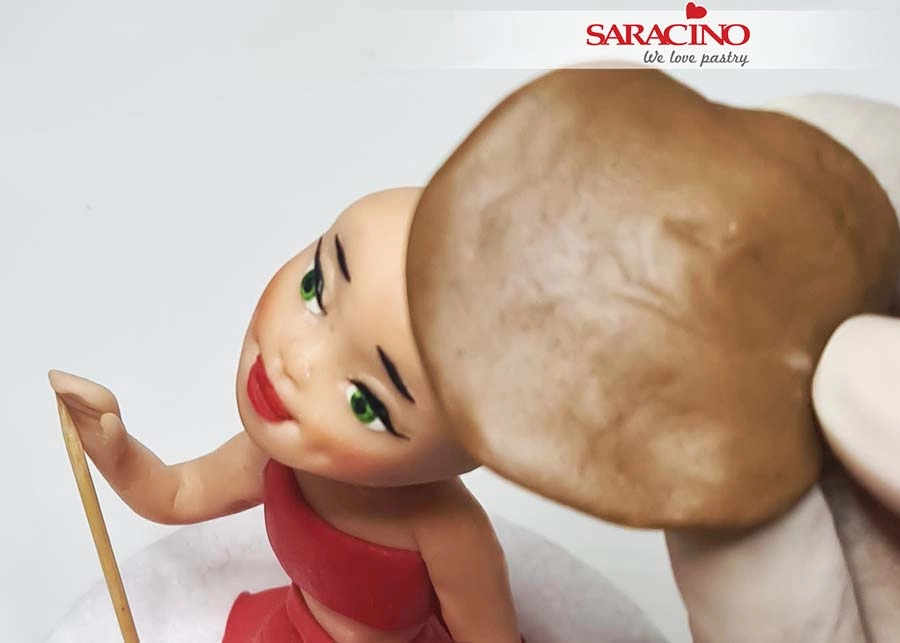
Roll a piece of flat brown paste large enough to cover the back and top of the head.

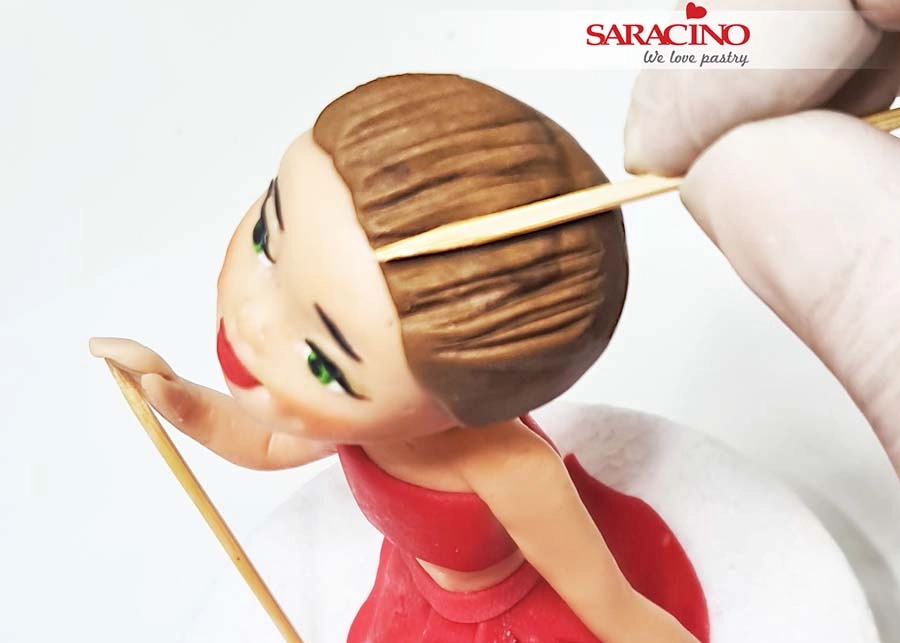
Step 44

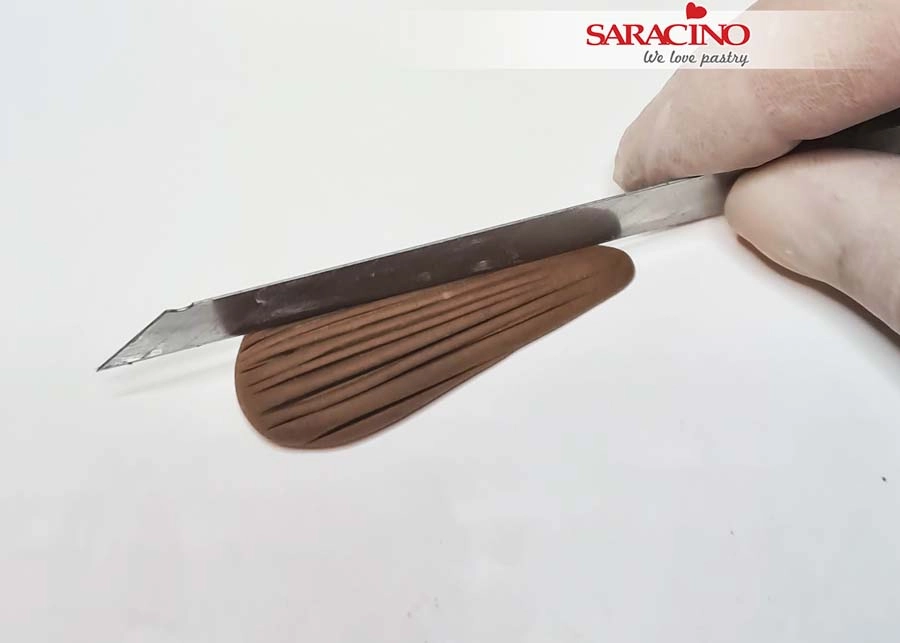
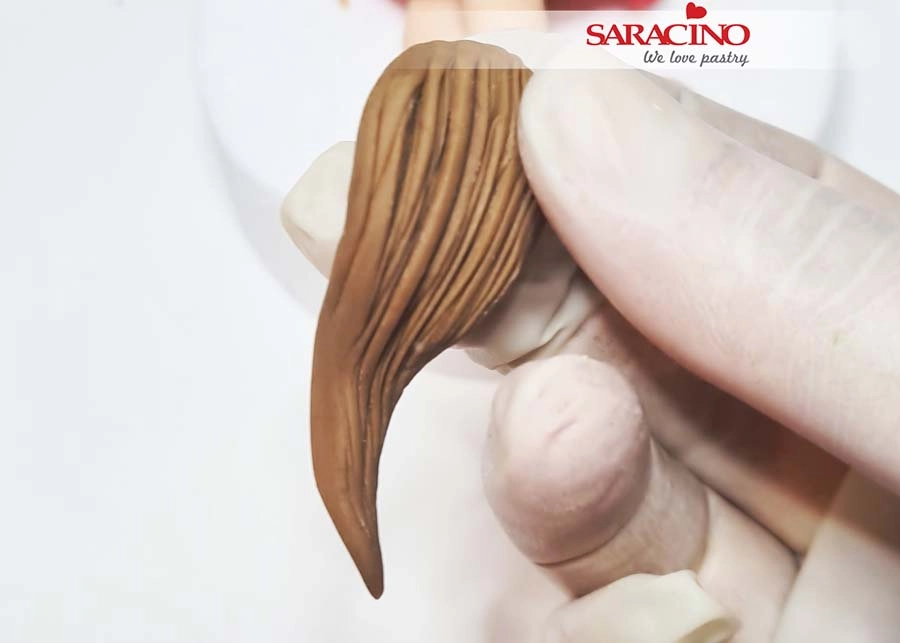
Fix to the head and add lines using a modelling tool, cocktail stick or knife.

Step 45

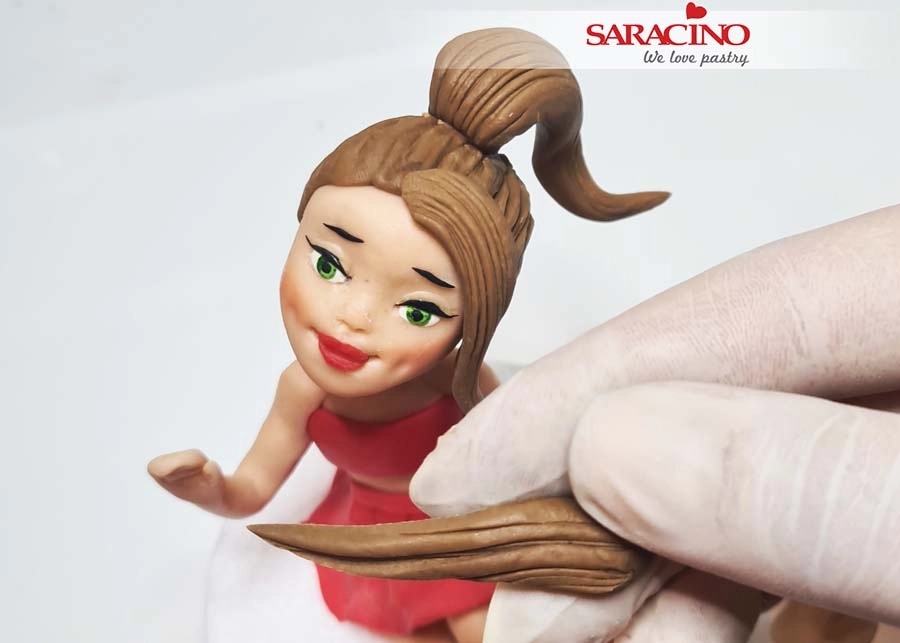
For the ponytail roll a longer piece of brown paste. Add lines. 

Step 46

Shape the ponytail as you would like.

Step 47

Repeat this for the fringe and fix them to the head.

Step 48

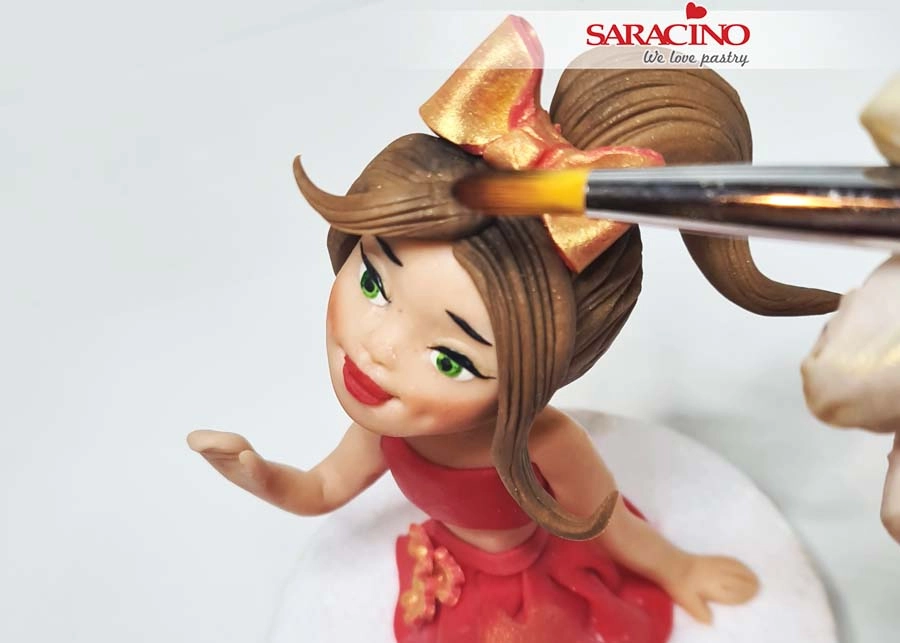
Dust the hair using brown or black powder to give shade and definition. Do the same to the arms and legs using a shade darker than your chosen skin colour. You can add accessories to the figure such as a bow to the hair or flowers to the dress. 

KAWAII BIRTHDAY CAKE

KAWAII BIRTHDAY CAKE

Skill level: BEGINNERS

You will need:

  • Saracino Pasta Model
  • Saracino white Pasta Top
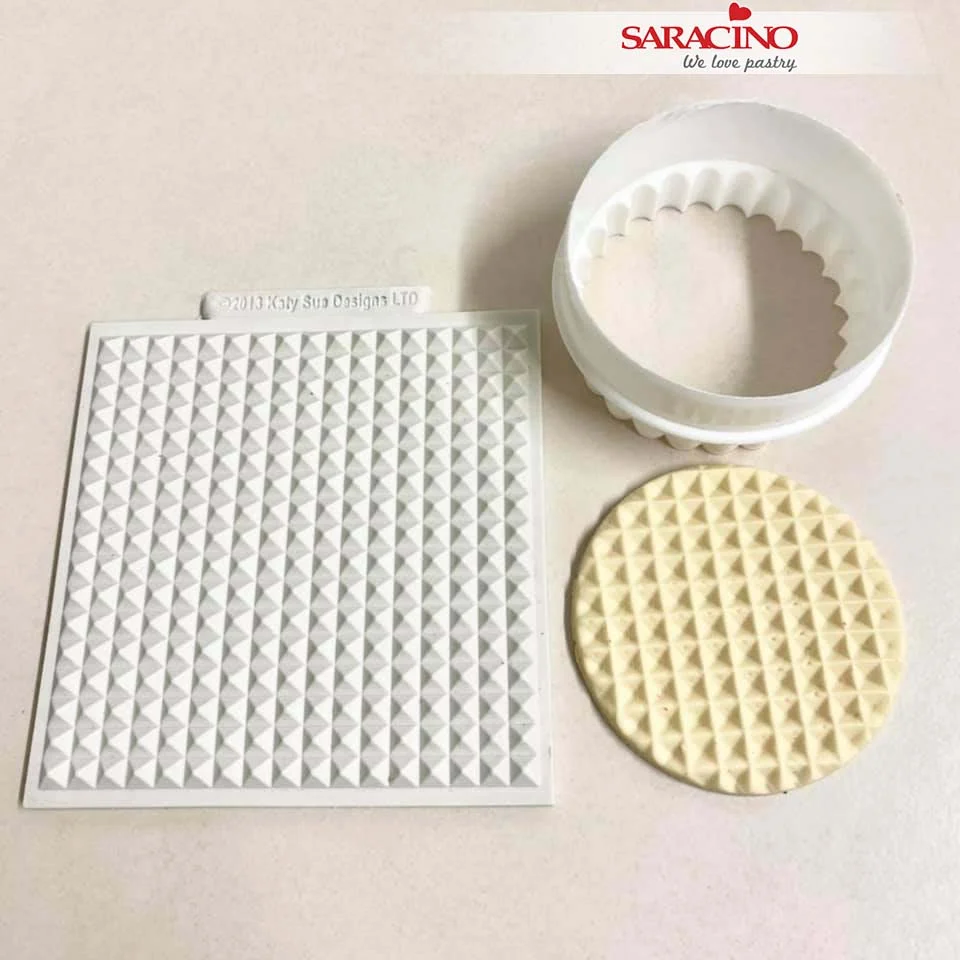
  • Waffle Texture Mat
  • Ball tools large, medium & Small
  • Scallop tool
  • Craft Knife
  • Dresden Tool
  • Small Blossom Cutter
  • Flower veiner mould
  • Ribbon Cutter
  • Serrated cone tool
  • Rose Leaf Cutter
  • Heart Cutter
  • Paint Brush
  • Lemon Extract
  • Circle Cutters
  • Sugar Glue
  • Heart cutter

Step 1

Cover your cake board with Pasta Top coloured in pale yellow and your cake with Pasta Top coloured in light shade of mint green.

Step 2

For the top part, colour Pasta Top pale pink. Roll the paste to about 4mm thick (we dont want it too thin). Place a cake board the size of your cake in the middle of the icing and cut your ‘drip’ part around the board, leaving space so it hangs down the side of the cake.

Step 3

Place the drip part on the cake after brushing the cake with some sugar glue. Apply a little glue under each ‘drop’ part and the press against the cake.

Step 4

Use the inside of your thumb to run over the edges to smooth them off and round them nicely.

Step 5

Here’s a guide on how to create some pastel colours and extra colours using ready coloured Saracino Pasta Model.

Peach – mix 2g yellow with 3g orange and 50g white, for a darker peach just add more orange.

Step 6

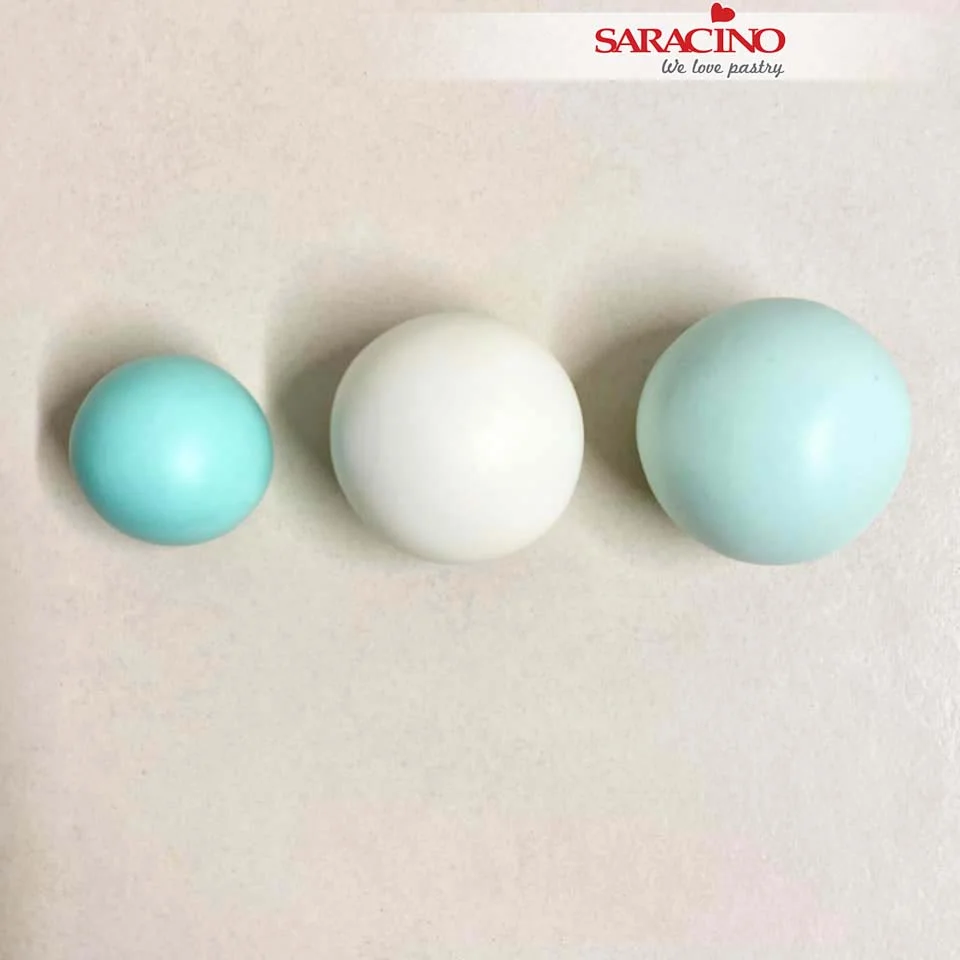
Mint green – mix 2g green with 3g yellow and 50g white, for a darker green just add more green

Step 7

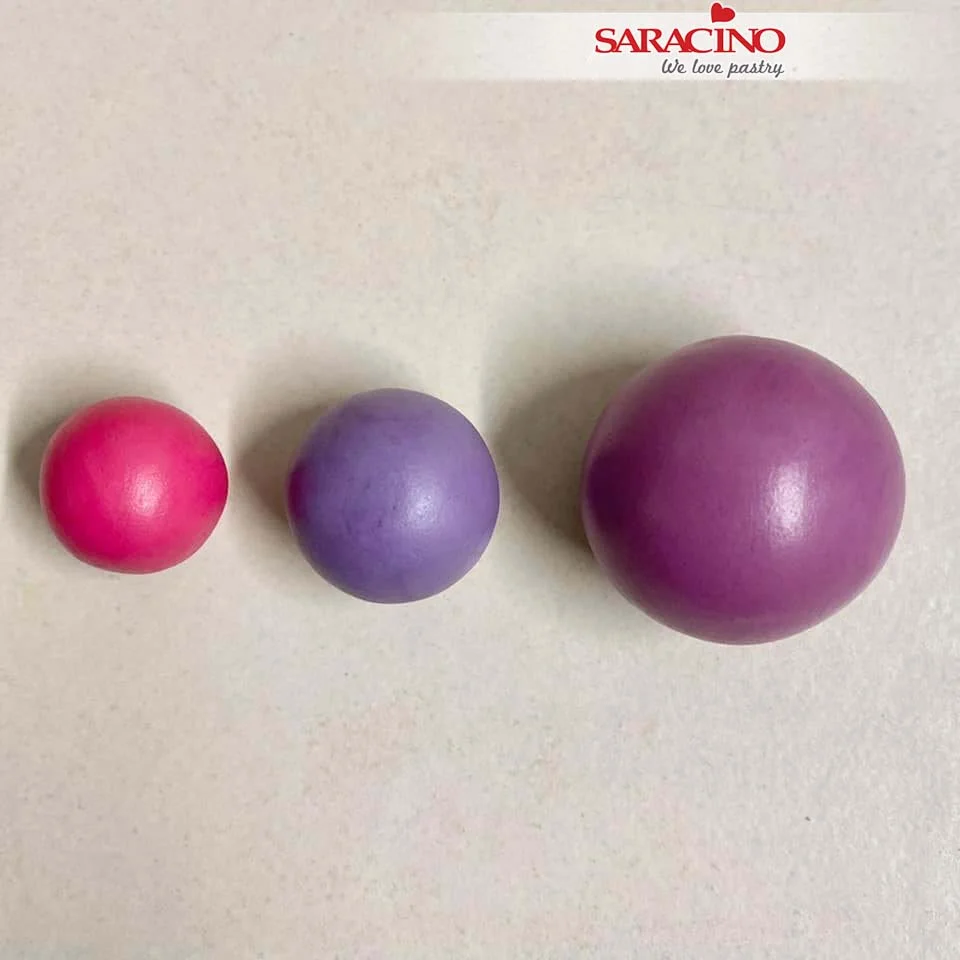
Pale purple – mix 2g dark pink with 3g purple and 50g white. I always add pink to my purple as it just lifts the colour a bit.

Step 8

Baby pink – Mix 25g light pink with 50g white. You can add more pink for a slightly darker shade or just use a dark pink mixed with white for different shades too.

Step 9

Light yellow – mix 15g yellow with 50g white. Add more yellow if you would prefer a darker yellow.

Step 10

Pale blue – mix 25g tiffany with 50g white. Add more tiffany if you’d like a darker shade

Step 11

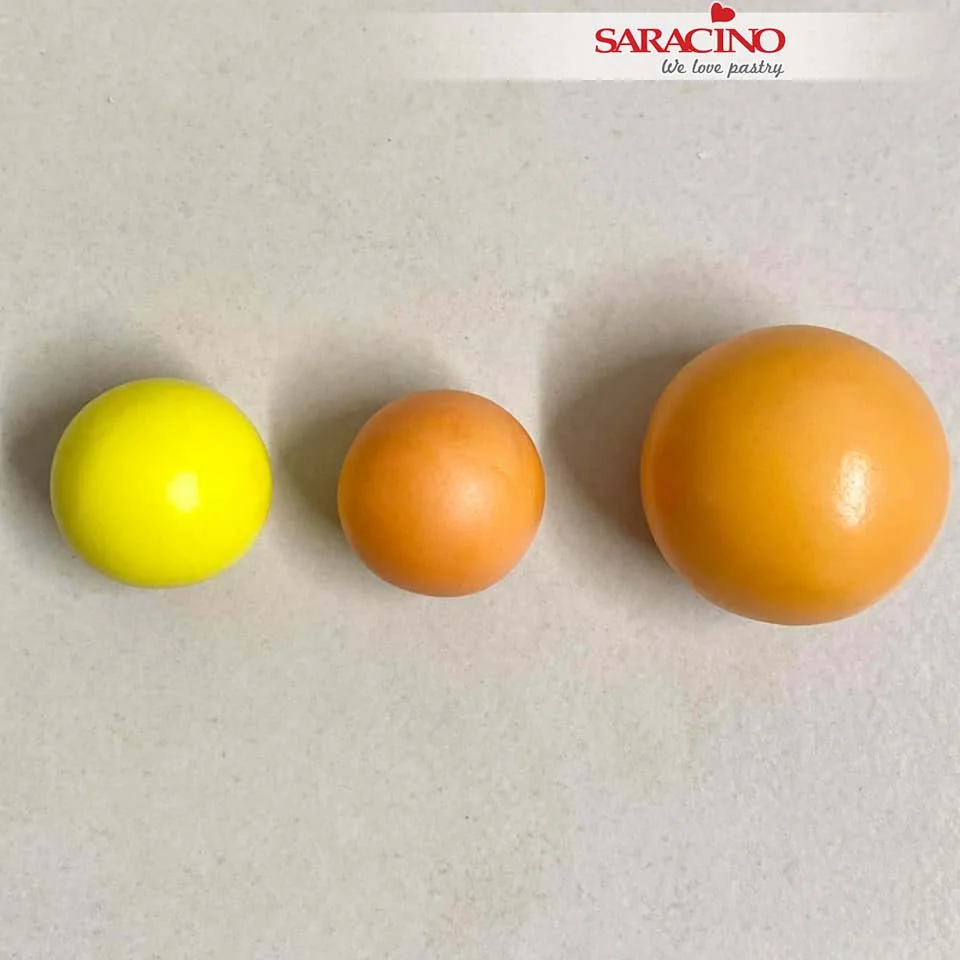
Lime green – mix 10g dark green with 25g yellow for a lovely bright lime green, more yellow will give it a more vivid green look or more green will tone down the brightness.

Step 12

Bright orange – mix equal portions of yellow and orange

Step 13

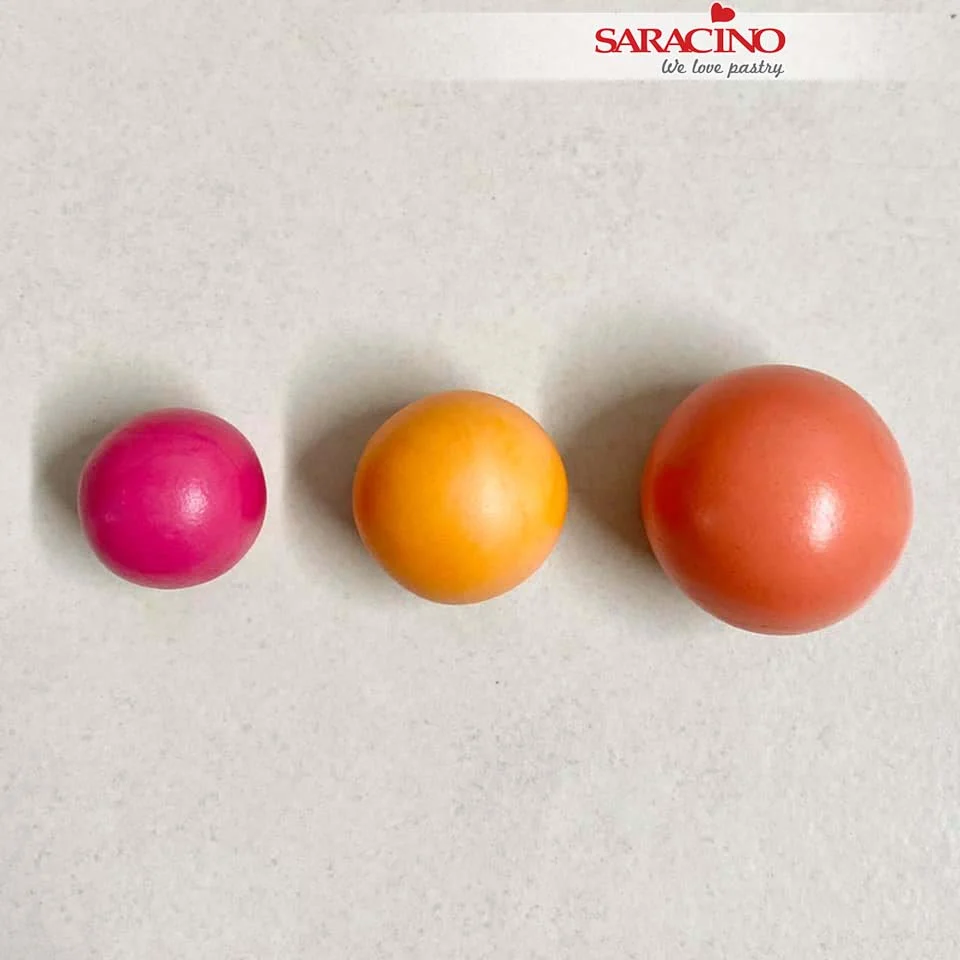
Dark coral – mix 15g fuschia with 25g orange.

Step 14

Rich purple – mix 15g dark pink with 20g purple.

Step 15

Light coral – mix 3g orange with 25g light pink

Step 16

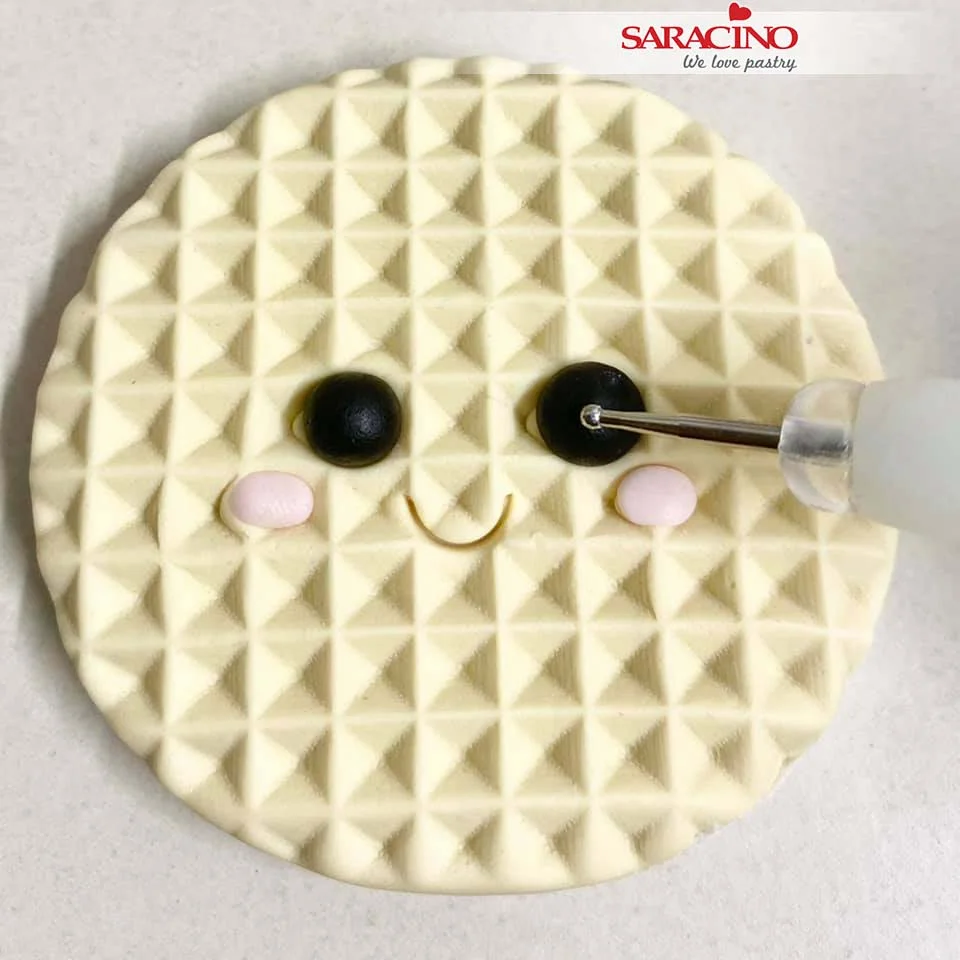
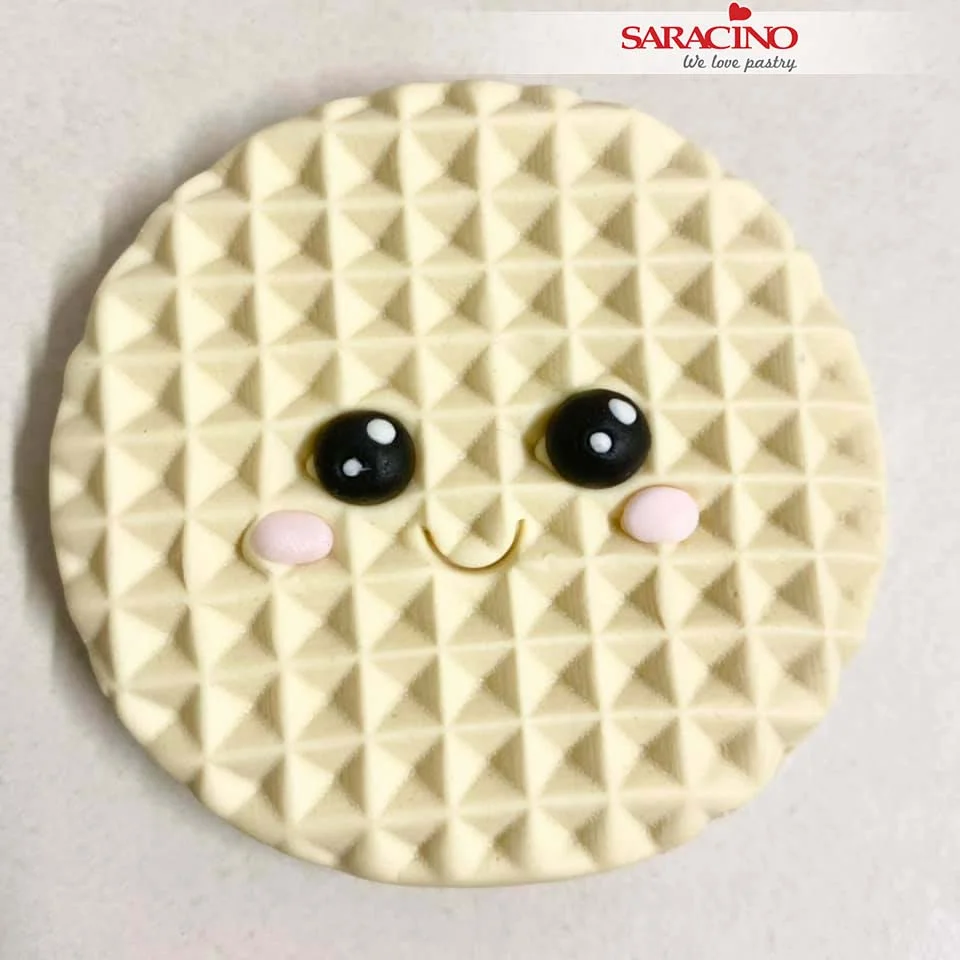
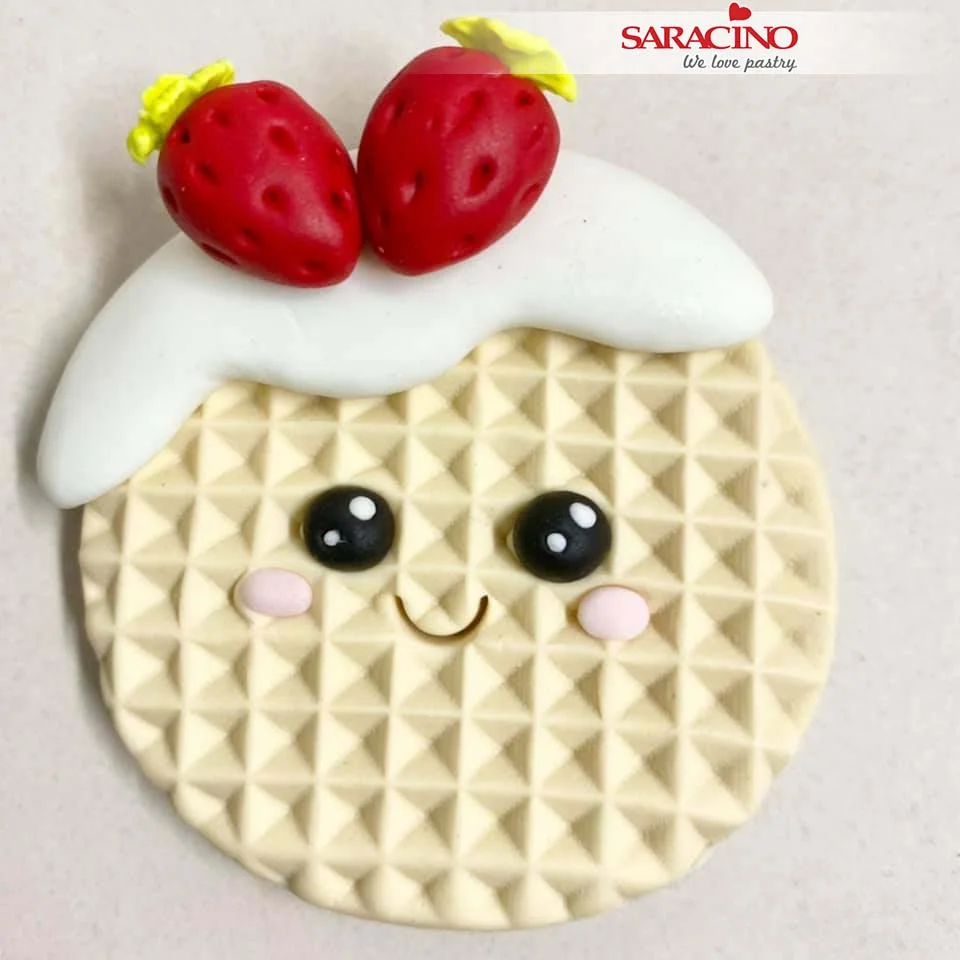
Use the waffle texture mat to texture some Pasta Model, the paste must be 5-6mm thick so it can stand up properly when dry. Cut out a circle for the waffle. I coloured this paste with a little bit of caramel and autumn leaf colours.

Step 17

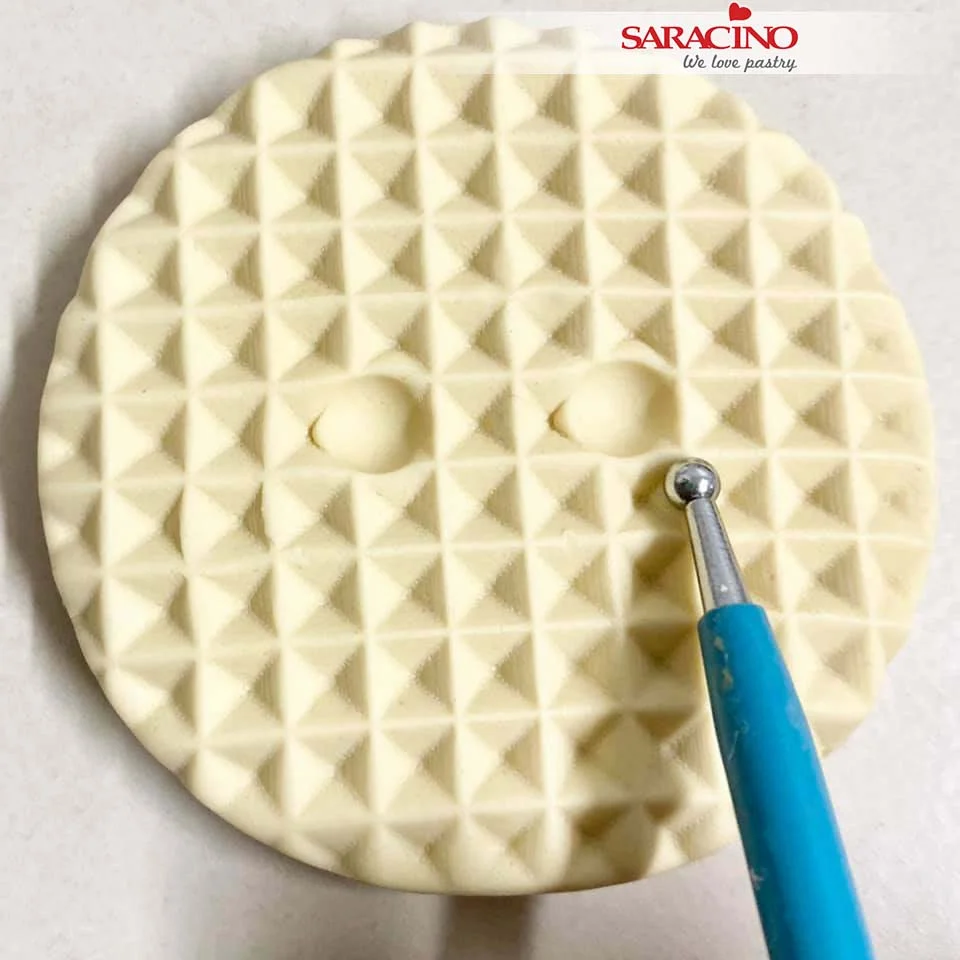
Use a medium ball tool to make some sockets for eyes. All the character faces are made exactly the same as this. Use a small ball tool to shape a small oval socket for the cheeks.

Step 18

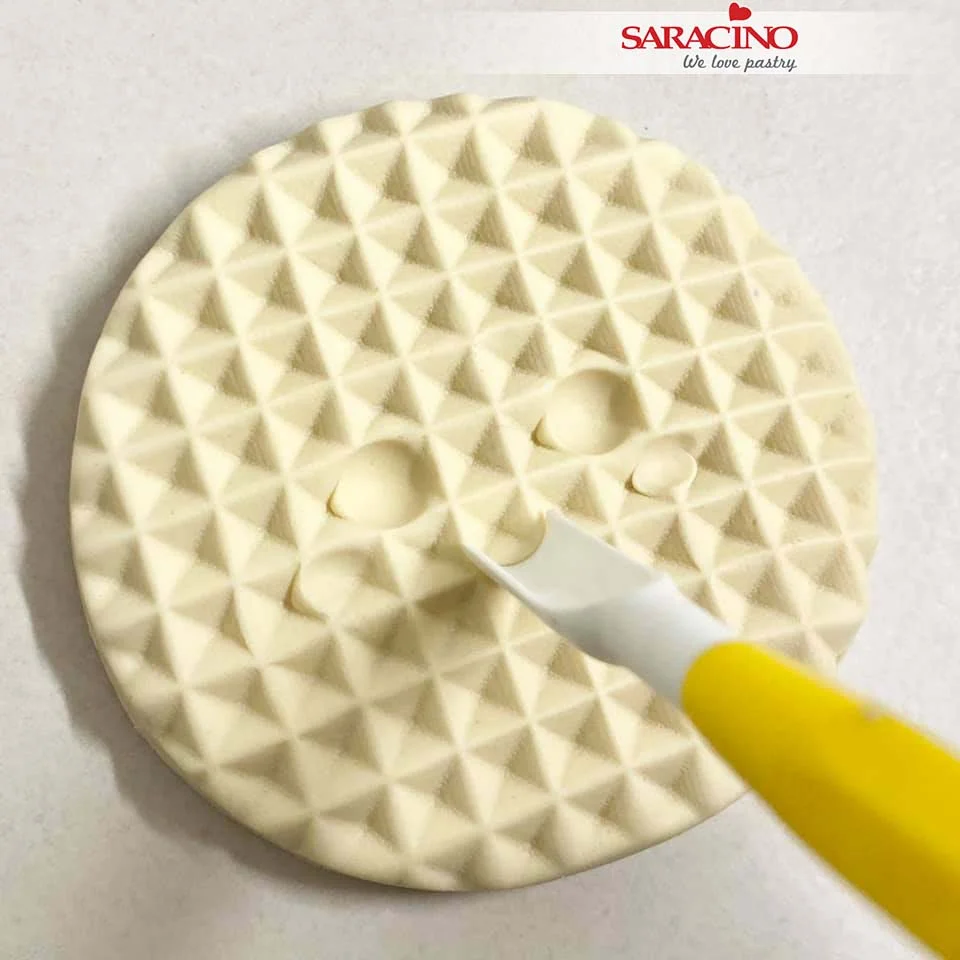
To make a small mouth use a PME scallop tool and press it in fairly deep (not all the way through).

Step 19

Using black Pasta Model add two eyes and then mark small sockets on each eye. Add two tiny sockets to each eye. Add two small balls of white Pasta Model to the cheeks.

Step 20

Add two different sized white dots to each eye to finish the face of the little character.

Step 21

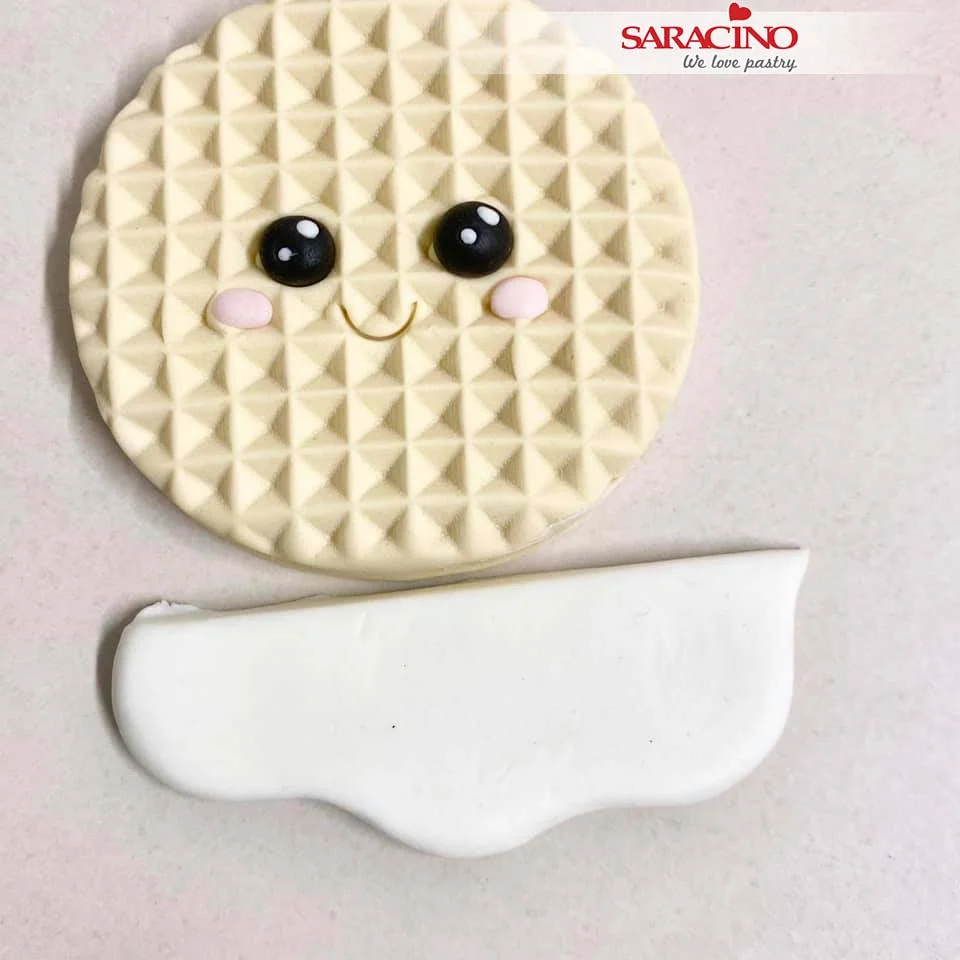
To make an icing drip, roll out white Pasta Model and shape with your fingers. Trim off the top before adding to the waffle.

Step 22

Add the icing drip to one side of the top of the waffle.

Step 23

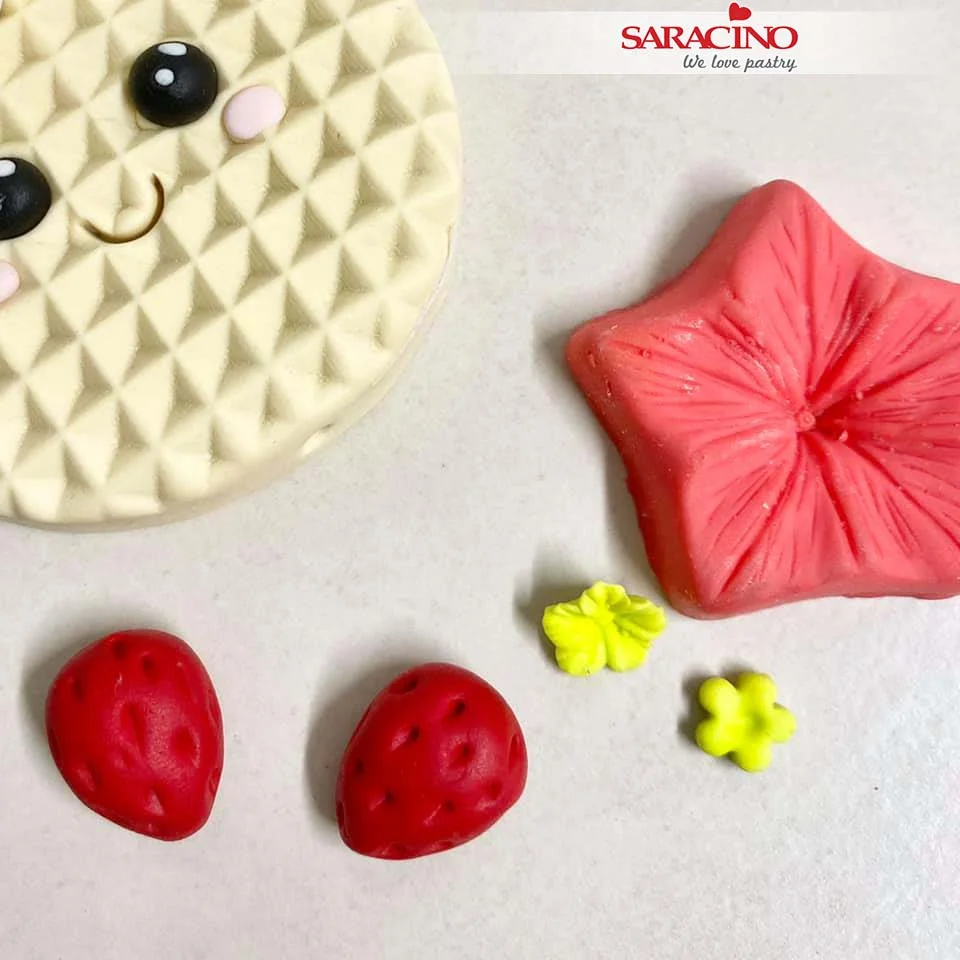
Make some strawberries for some extra decoration. Roll the strawberry shape using red Pasta Model and use a Dresden tool to mark the little seeds on the fruit.

Step 24

For the top of the strawberry use a small blossom cutter to cut 2 bright green leaves and use the veining mould to give these some texture.

Step 25

Add the strawberries at the top. Your little waffle is complete. Let it dry. 

Step 26

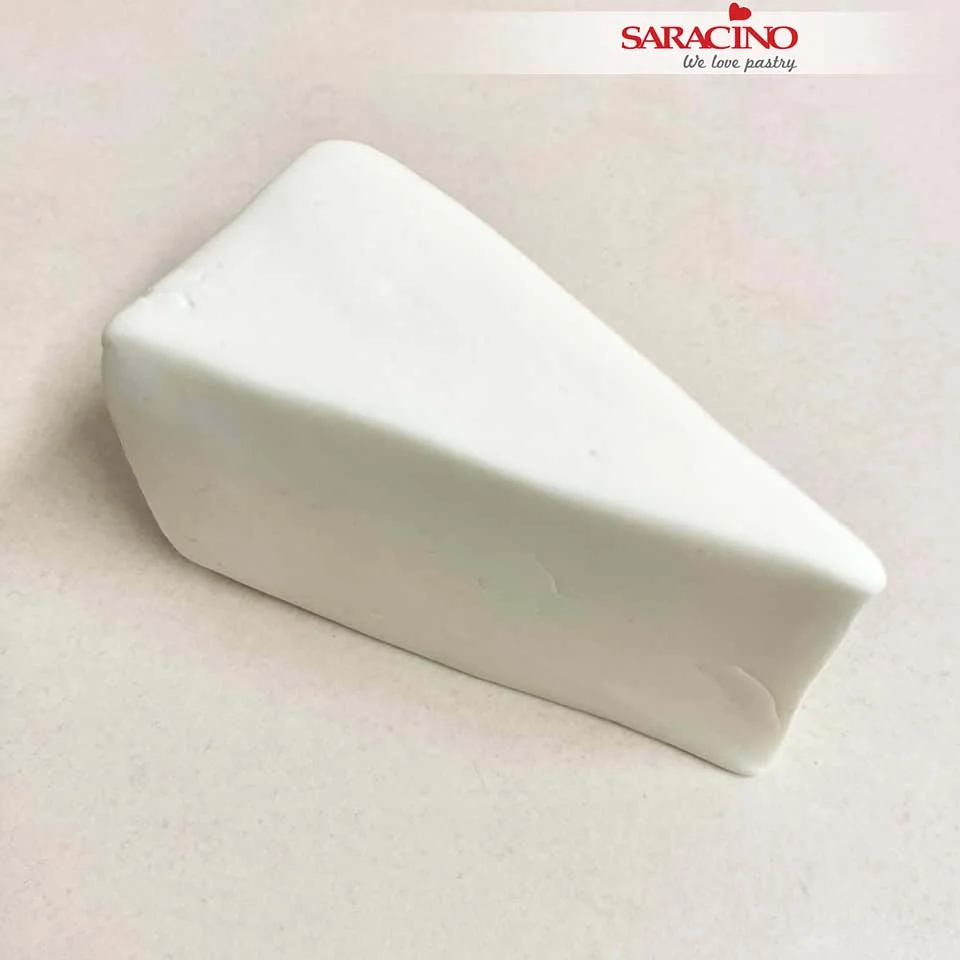
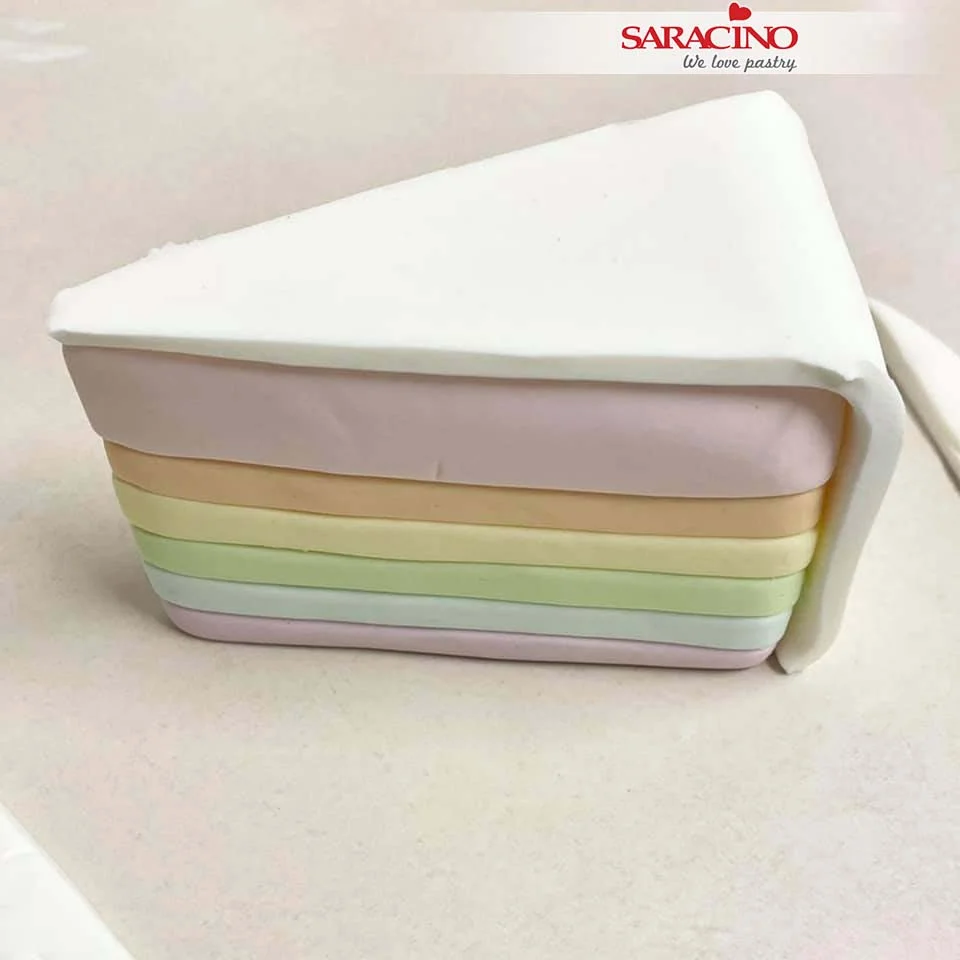
For the cake slice use Pasta Model to form a square in your hands and then roll one side thinner. Trim your shape to create a cake slice shape.

Step 27

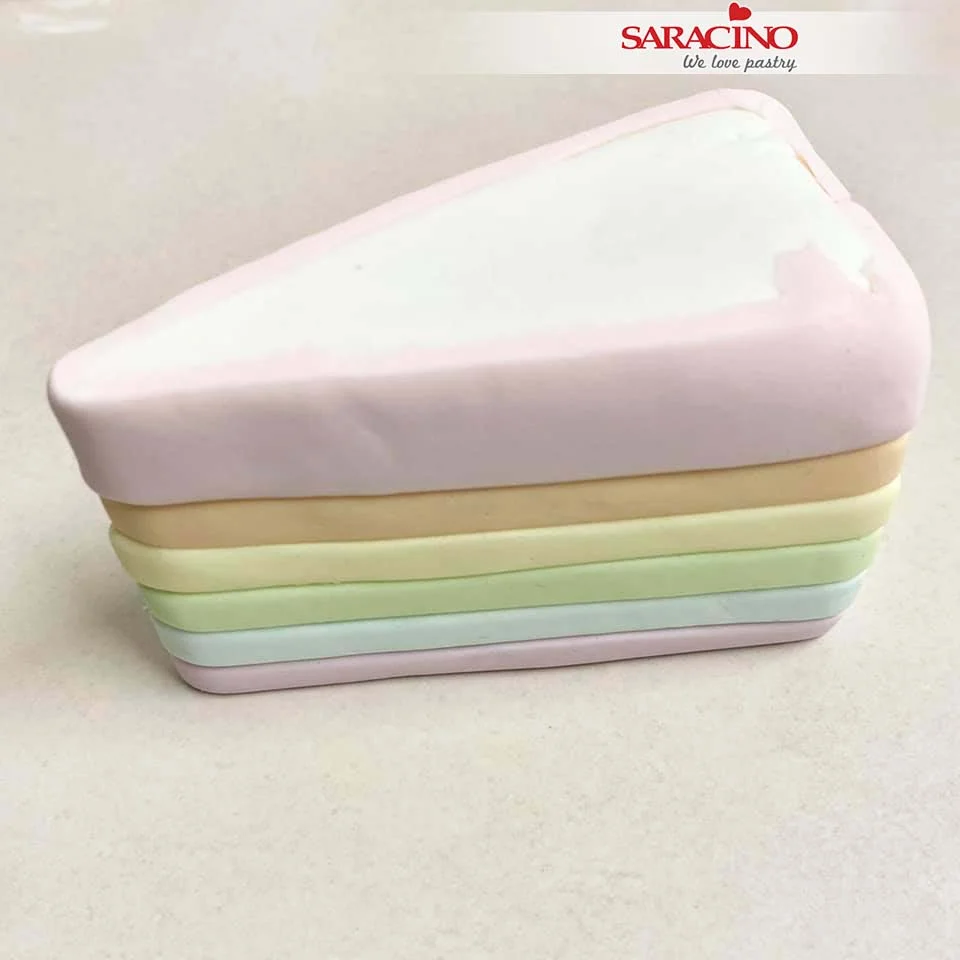
We will be using the pastel coloured pastes we mixed earlier. Roll out the paste and using a ribbon cutter cut strips of each colour.

Step 28

Start adding the stripes from the bottom and work your way up. I always finish with a wider band of colour as this allows me to add drippy icing over the top if I want to. Finished colour stripes

Step 29

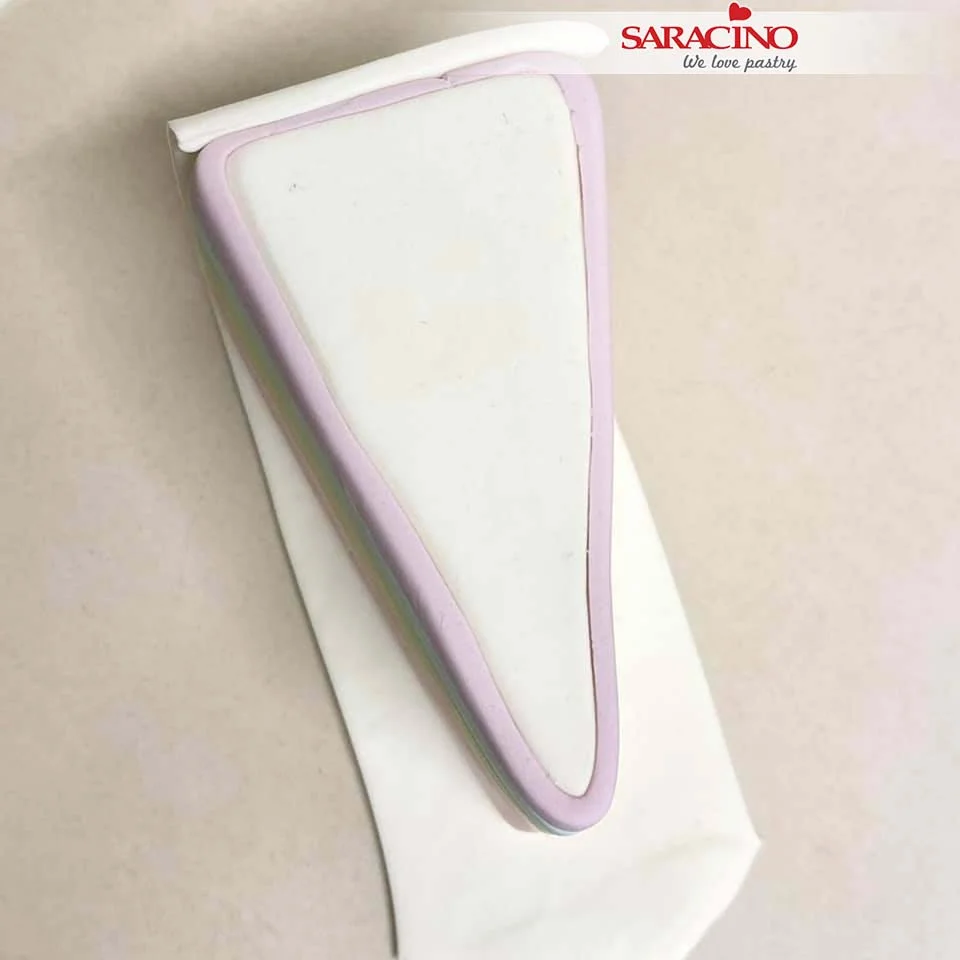
For the ‘icing’ covering roll out some white Pasta Model to approx. 3mm thick. It needs to be long enough to cover the top and side of the cake slice. Now glue the back of your cake slice on to the piece of paste.

Step 30

Trim excess icing off each side of the cake slice but keep the long piece to go over the top of the cake.

Step 31

Flip the slice over and brush the top with glue and bring the rest of the white paste up over the top.

Step 32

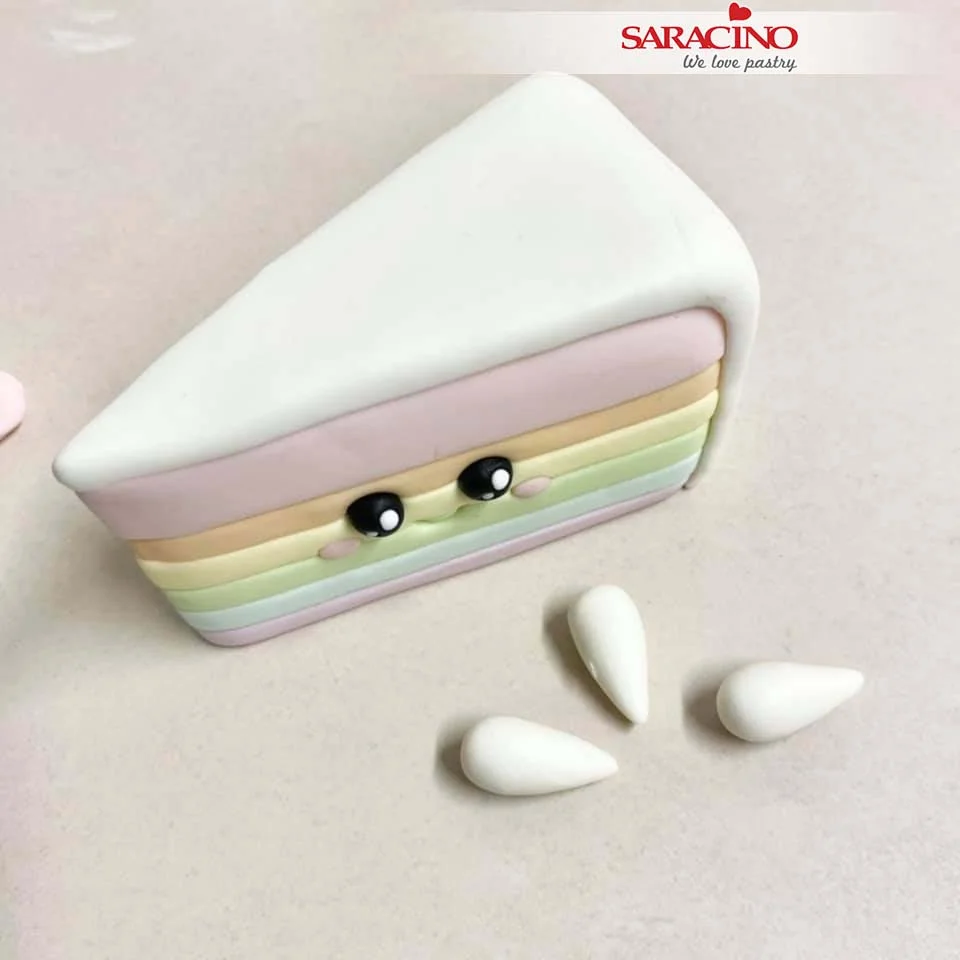
Now turn the slice upside down so you can see where you need to trim each side of the triangle top shape.

Step 33

Once trimmed flip back upright.

Step 34

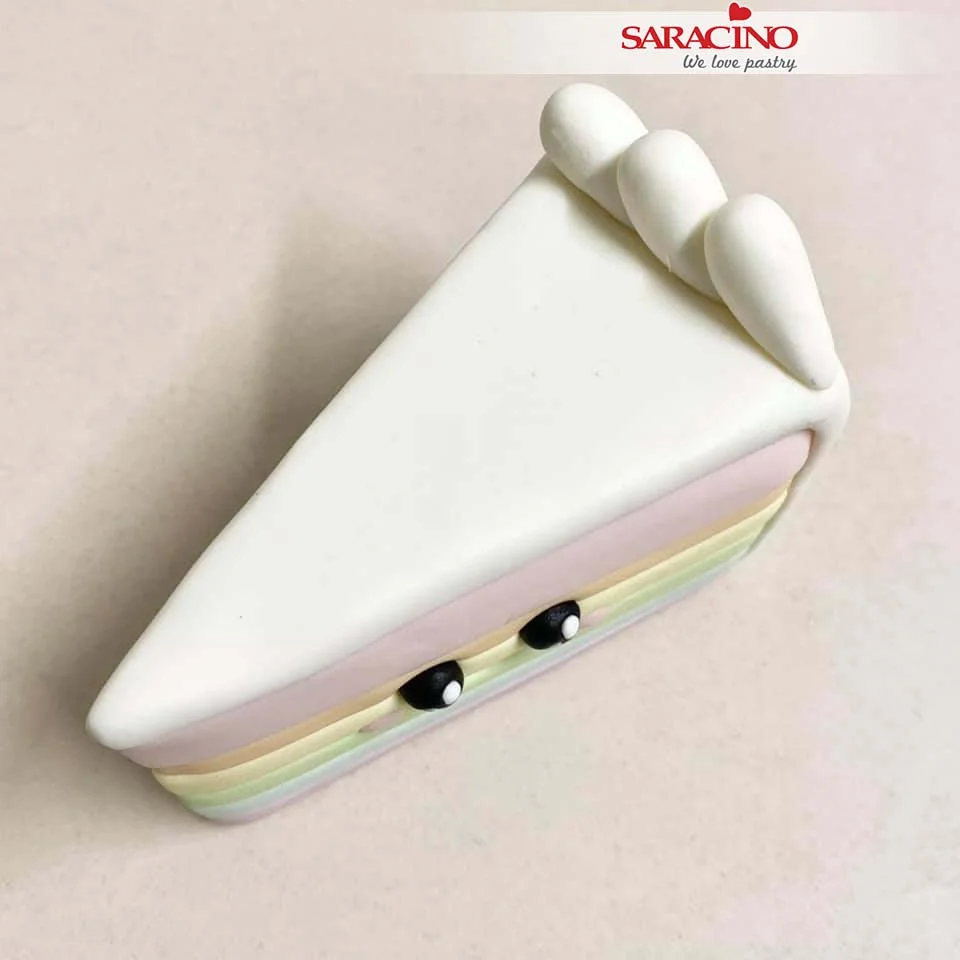
Smooth off the edges nicely. Add eyes, cheeks and mouth like you did with the waffle. Roll out some little teardrop shapes for icing.

Step 35

Add the icing decoration to the top of the cake slice.

Step 36

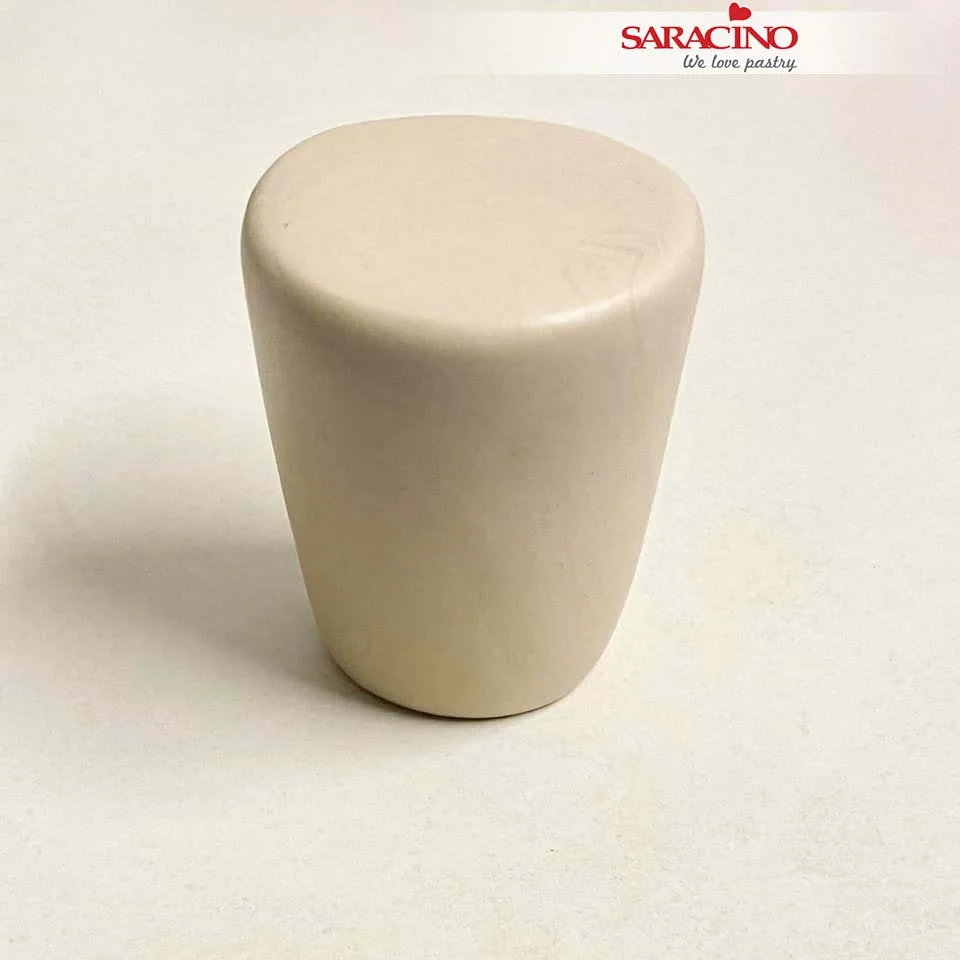
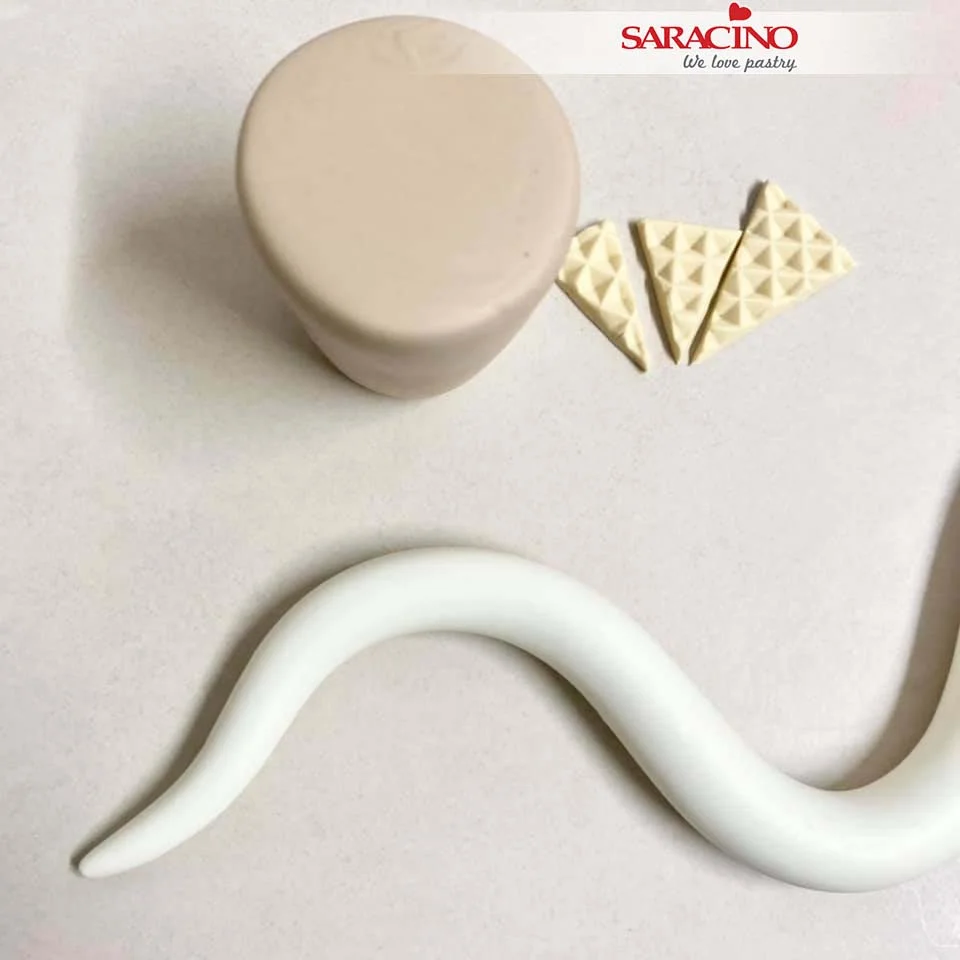
For the chocolate milk shake character use light brown Pasta Model to shape a cup.

Step 37

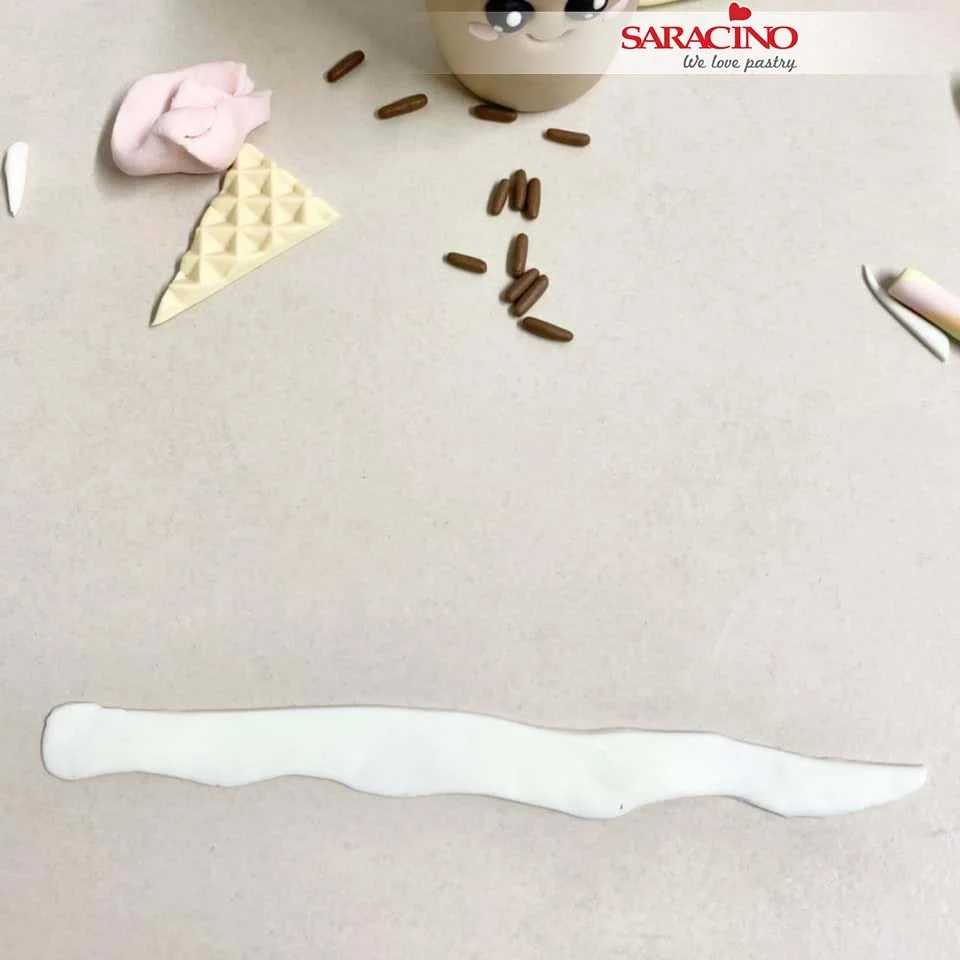
Roll out some white Pasta Top. Keep it fatter one end and then roll thinner and thinner to create a nice swirl of cream on your shake. Make some little wafers for the shake too, use the waffle mat again, cut a circle and then cut some wedge shapes.

Step 38

Add your ‘cream’ swirl to your shake.

Step 39

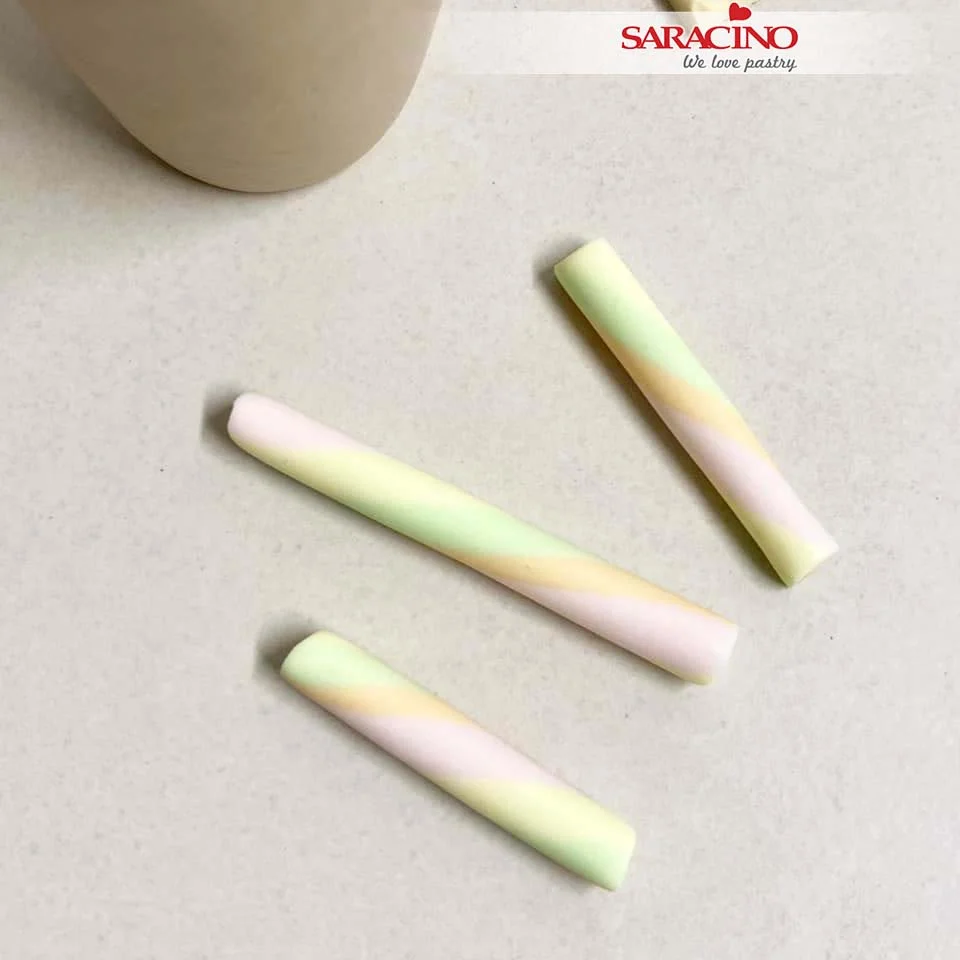
For the straw roll 2, 3 or 4 colours to a thin long sausage shape.

Step 40

Place your colours together and twist them, after a gentle twist, roll out under the palm of your hand on your mat. Twist again and roll until you have a smooth long colourful sausage shape to cut into straws.

Step 41

Cut some straws in different sizes.

Step 42

Following the steps we used previously add eyes, cheeks and mouth. Roll some little dark brown sprinkles and use a ball tool to make holes for the straws to go in to.

Step 43

Thinly roll out some white Pasta Model and cut out a drip shape. Add around the top of the cup.

Step 44

Add the wafers, sprinkles and straws to finish your character.

Step 45

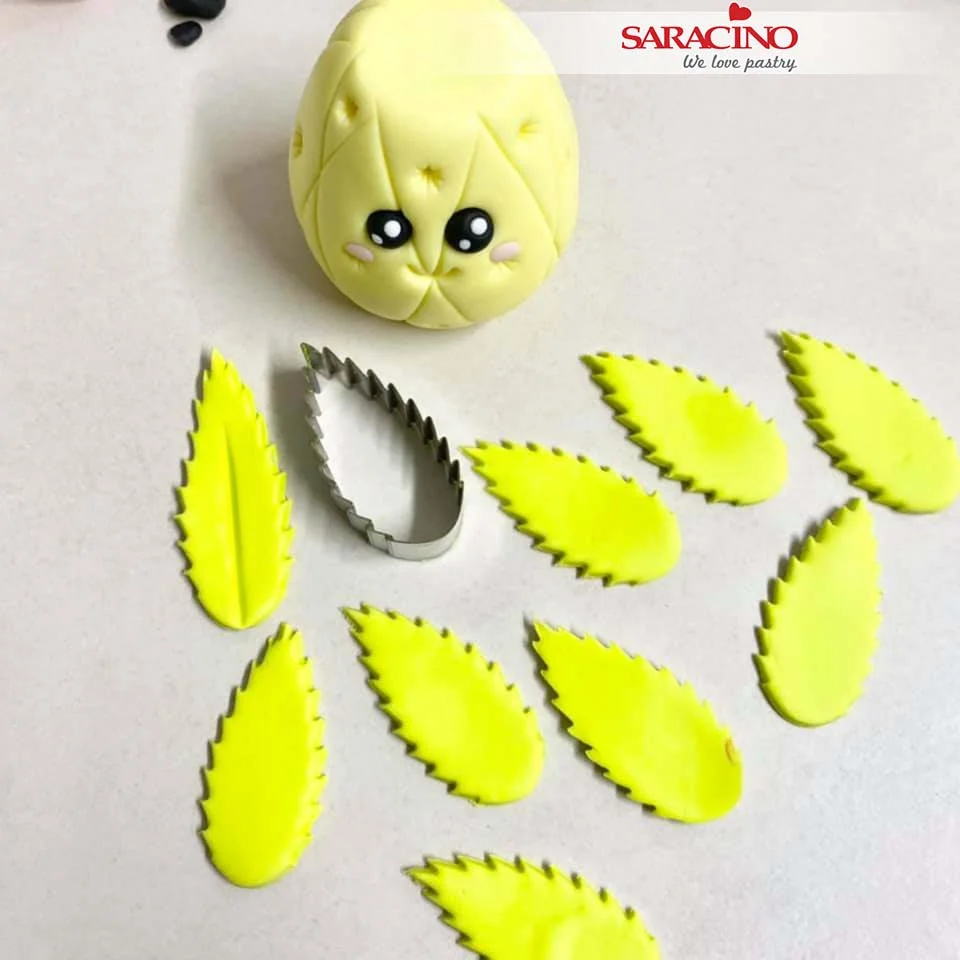
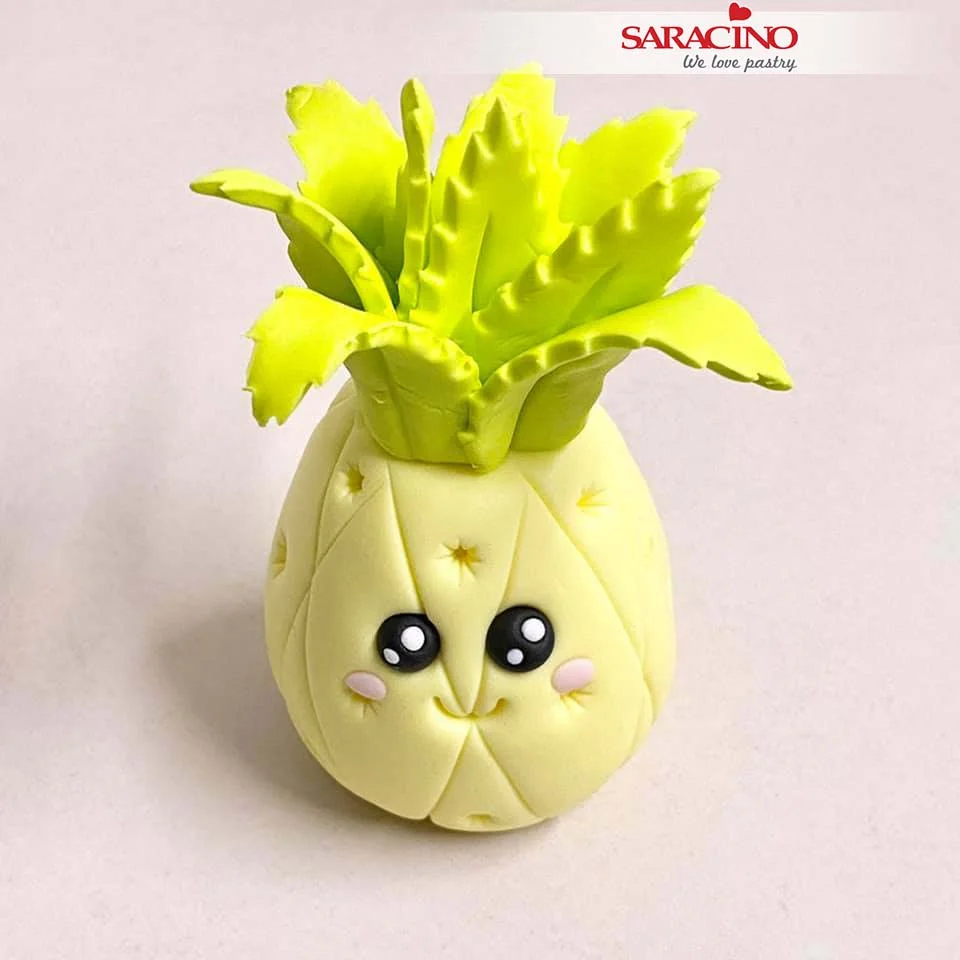
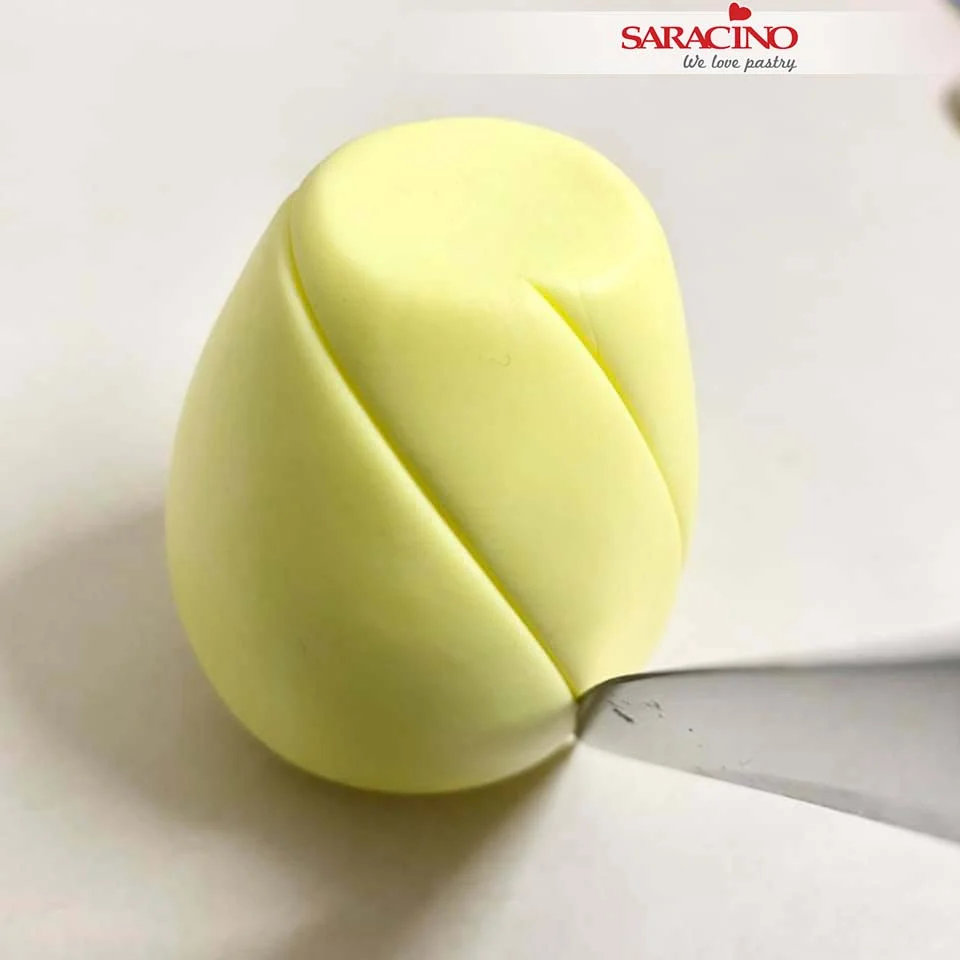
For the pineapple, use yellow Pasta Model and roll an egg shape then trim off the top. Use a long sharp knife too make some lines on the egg shape.

Step 46

I made bigger diamond shapes as they are easier to create around this pineapple shape. Use a serrated cone tool to make the little star dents inside each diamond shape.

Step 47

The little star shapes in the centre of each diamond shape.

Step 48

Add the eyes, cheeks and mouth. For the top leaves of the pineapple, use green Pasta Model and cut out some leaves using a rose petal cutter. Use a Dresden tool to mark a line in the centre of the leaf. As Pasta Model is so flexible, stretch each leaf out longer and as it stretches also thin the ends with your fingers.

Step 49

Start putting your leaves together starting in the centre.

Step 50

Once you have put all the leaves together trim off the base so they sit flush on top of the pineapple and you have another completed character.

Step 51

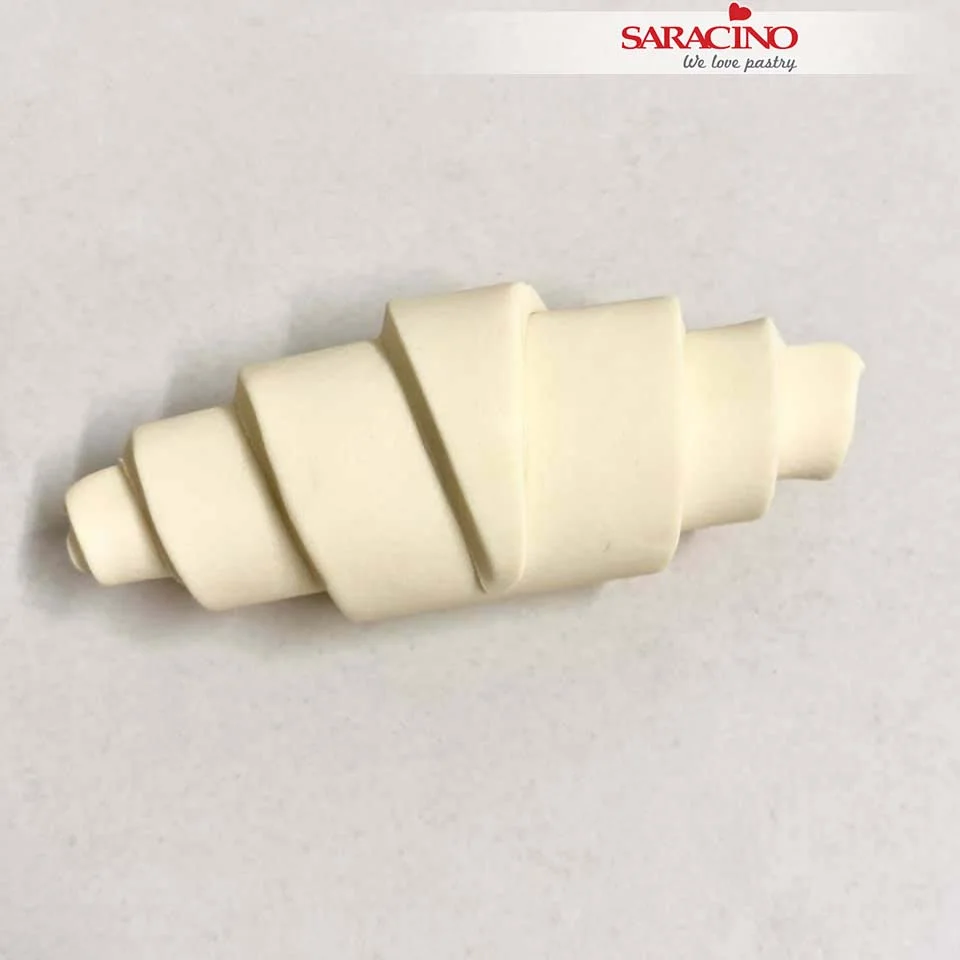
For the croissant roll out Pasta Model (the same colour as your waffle) and cut out a long triangle shape.

Step 52

Start rolling this from the larger side. Roll right to the end.

Step 53

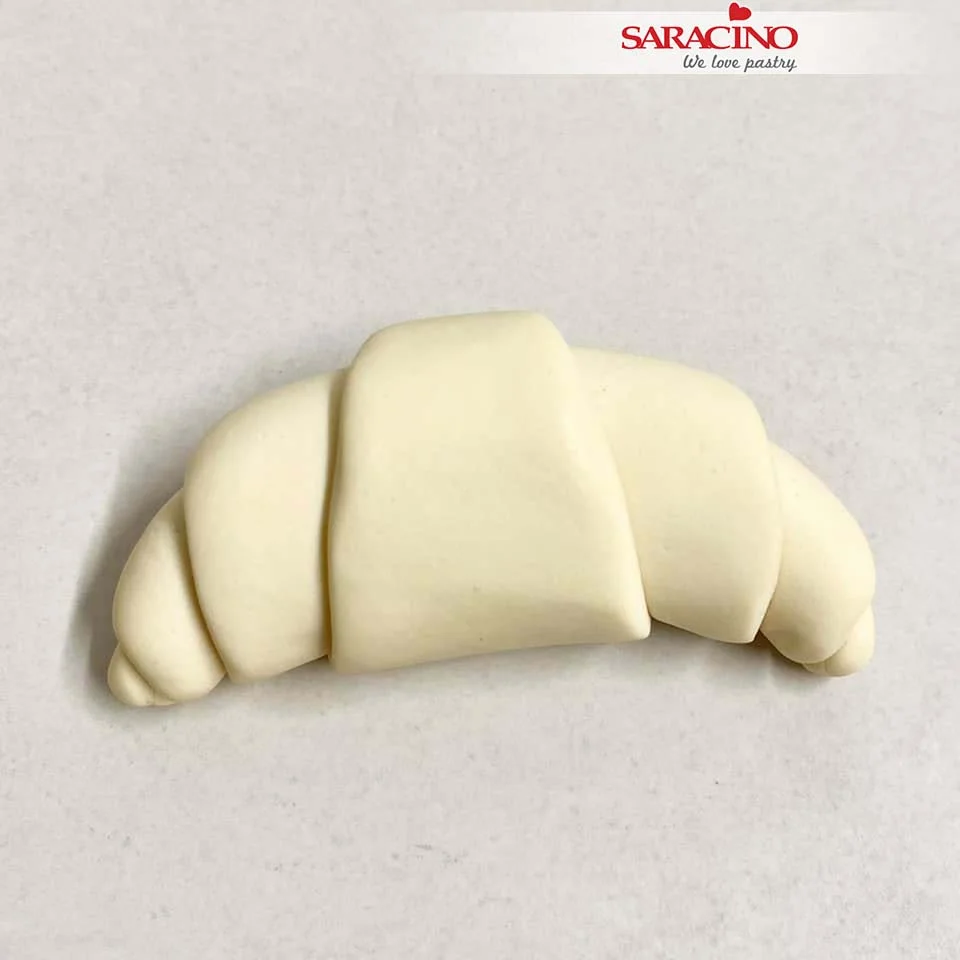
Turn this over and press together nicely. Smooth the edges and shape the ends to make your croissant.

Step 54

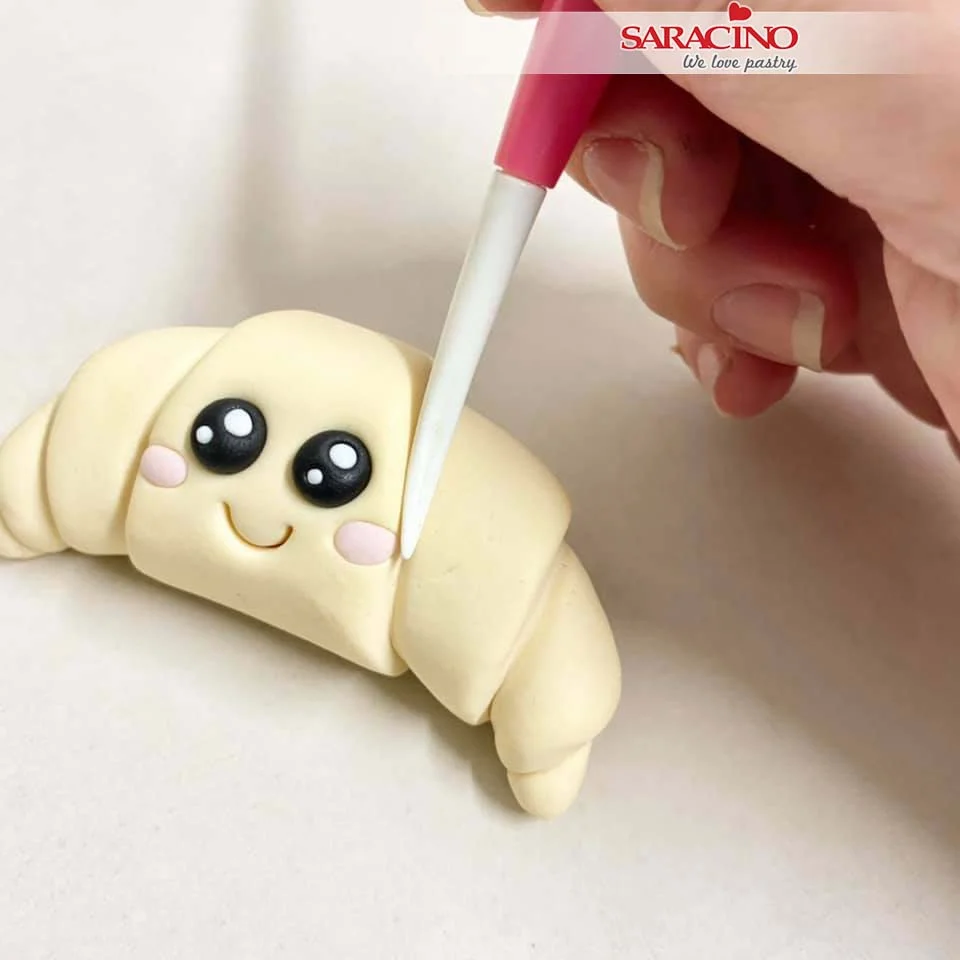
Add the little face and use the Dresden tool to indent slightly along each line.

Step 55

I used a little bit of lemon extract and autumn leaf colouring to add some colour on the croissant.

Step 56

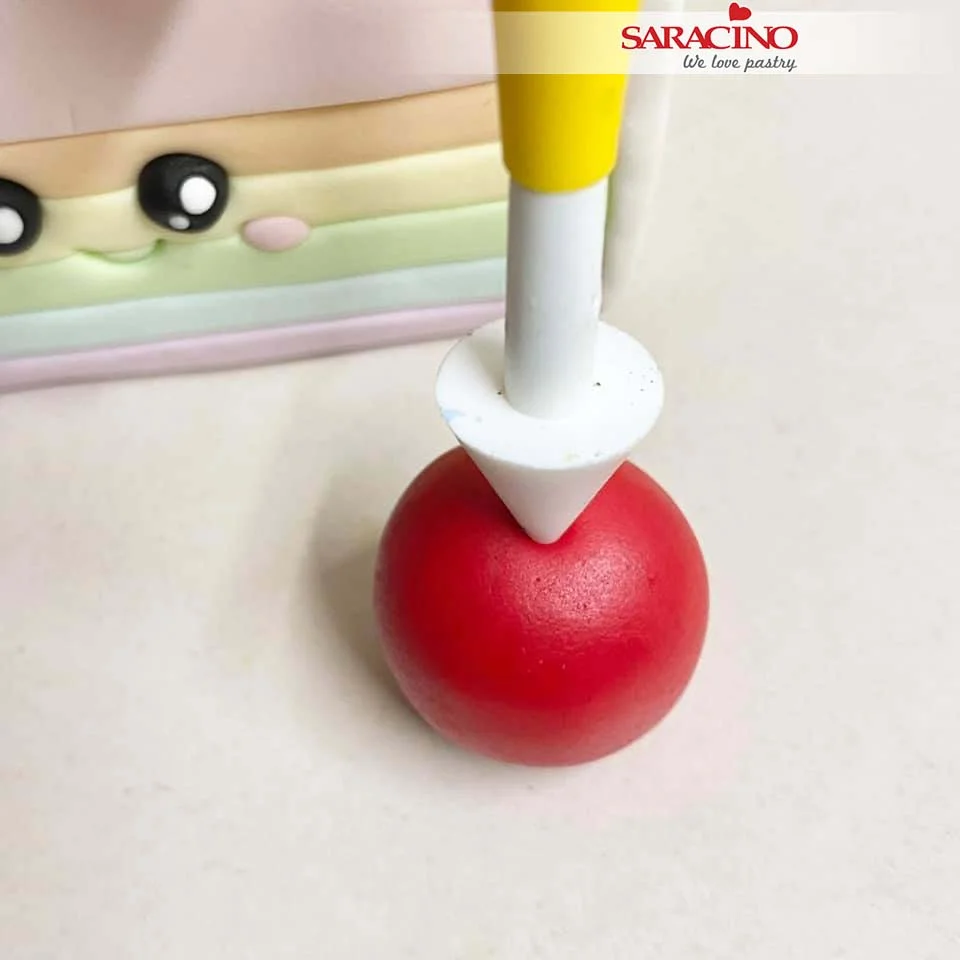
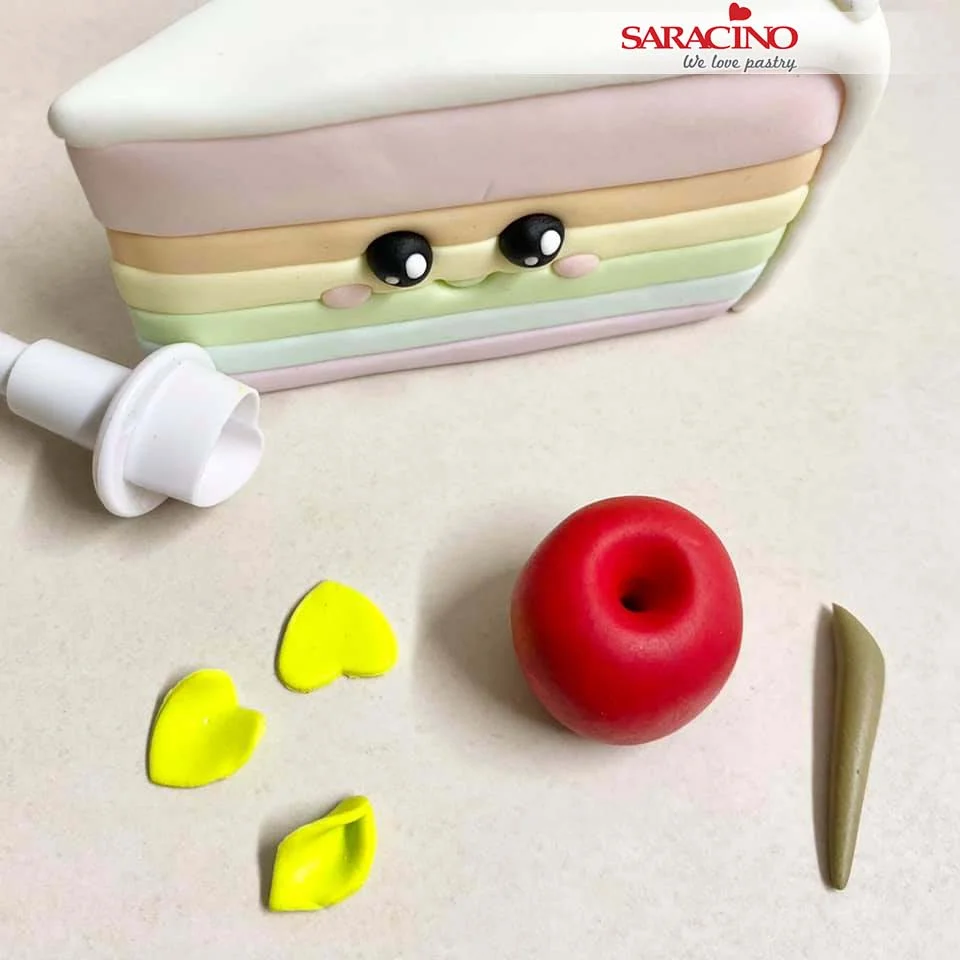
For the cherry use red Pasta Model. Roll it into a ball. Use a cone tool to make the dent in the top of the cherry.

Step 57

Use a small heart cutter to cut out some leaves and fold in on the rounded side and pinch together. Create a stalk for the cherry.

Step 58

Add the face and complete your little cherry for the top of the cake slice.

Step 59

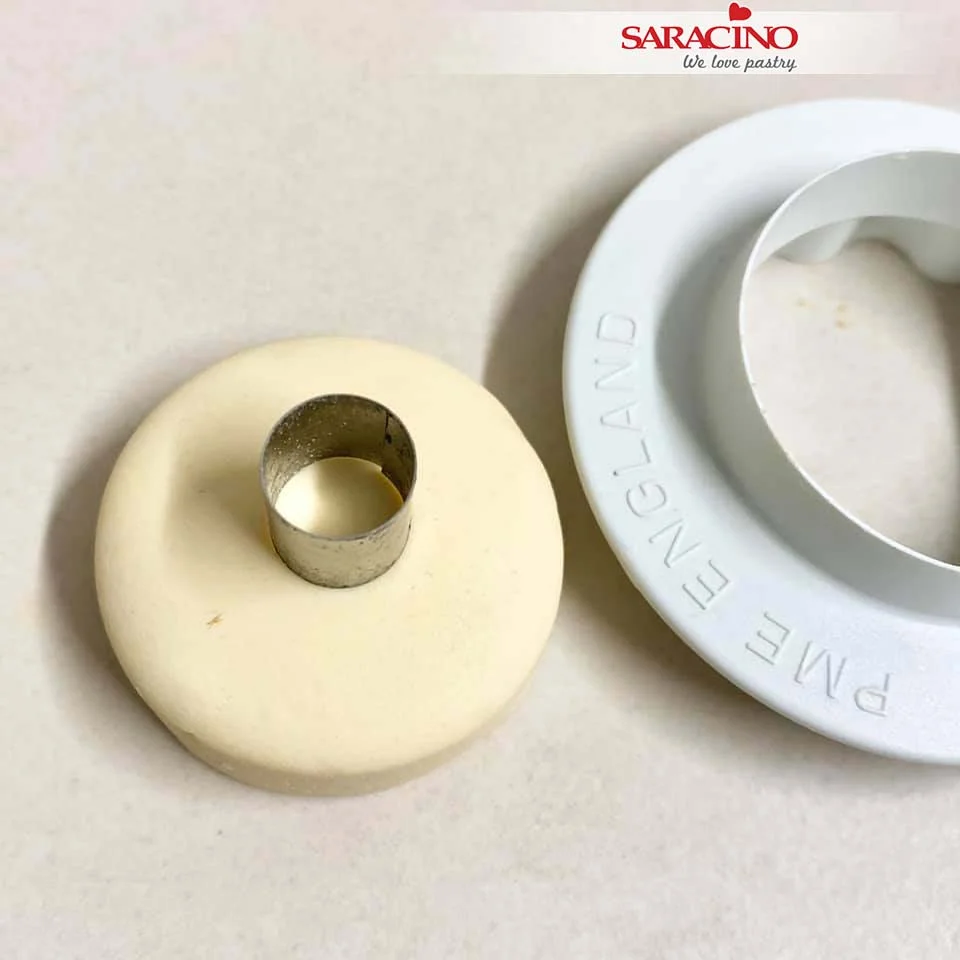
To make the donut character cut out a circle from light brown Pasta Model. Use a smaller circle cutter to remove the centre from the donut.

Step 60

Roll out some white Pasta model. Cut a wavy edge around the outside slightly smaller than your donut. Place on top of the donut.

Step 61

Use a ball tool to press the white through the centre of the donut so it fills the side of the centre hole.

Step 62

Add the happy face and finish off with some sprinkles.

Step 63

Using the pastel colours roll lots of sprinkles. Add to the top of your cake and to the cake board.

Step 64

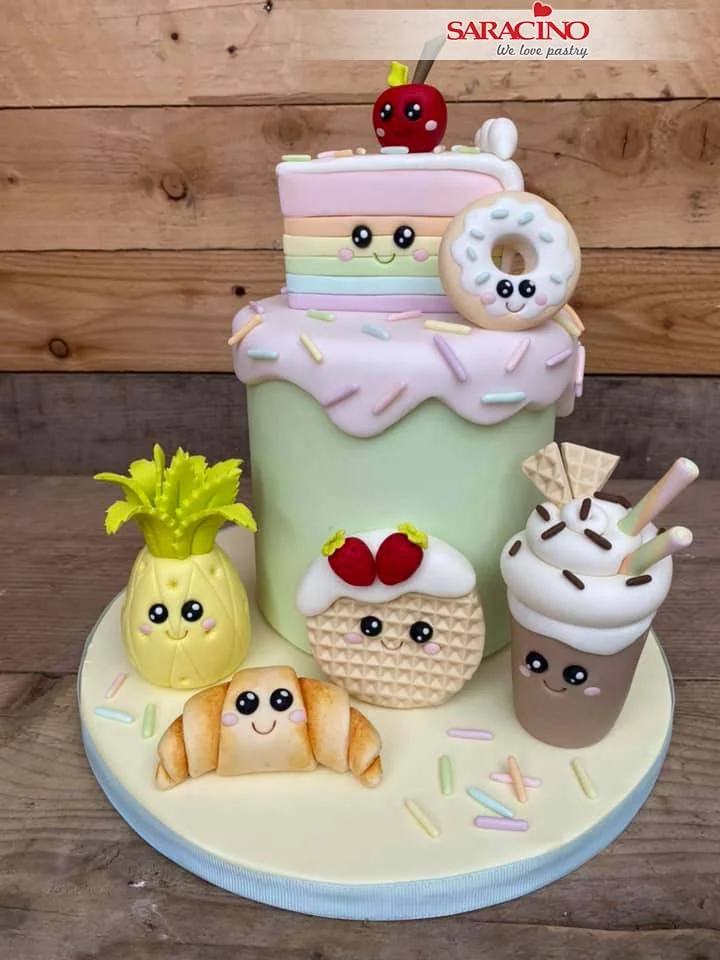
Add your kawaii characters to the cake. Ta Da! It’s ready.

SPRING BEAUTY CAKE TUTORIAL

SPRING BEAUTY CAKE TUTORIAL

Author: MARIA LECHEL

Skill level: BEGINNERS

You will need:

  • Saracino Wafer Paper 0.27
  • Yellow Saracino Pasta Model
  • Saracino powder colours: blue, white, pink, yellow and purple
  • Two tier cake finished off using buttercream to a colour of your choice  (leave some buttercream aside)
  • Flower veiner
  • Flower tape
  • Scissors
  • Pliers
  • Flower wire gauge 30 and 20
  • Paper puncher
  • Brushes
  • Clear alcohol
  • Modelling tool Cerart 502

Step 1

Cut the wafer paper into wide strips starting from the narrow edge.


Step 2

Fold the cut pieces in half.

Step 3

Cut out petals.

Step 4

Repeat for the whole strip.

Step 5

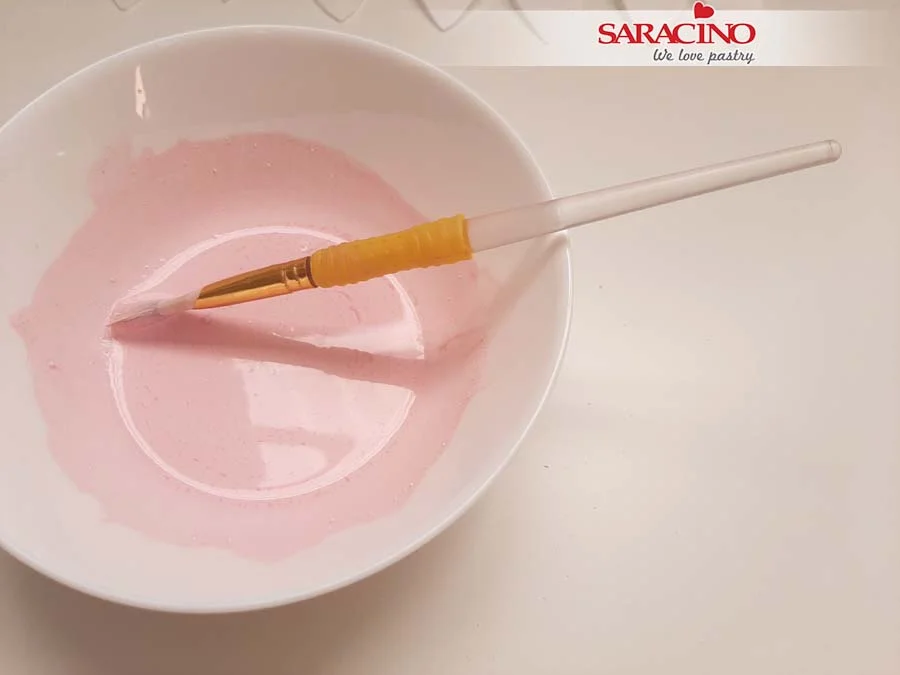
Prepare white and pink Saracino powder colour and a bowl or painting pallet.

Step 6

Add a little of the powder colours to the bowl. Add clear alcohol and mix till blended. Keep this colour as we will use it later.

Step 6

Take your 30 gauge wire and cut into small pieces. 

Step 7

Using the colours and brush paint the petal from one side. 

Step 8

Place your wire on the painted petal whilst it is still wet.

Step 9

And cover with another petal so they stick together.  

Step 10

Now you can paint it on both sides.

Step 11

Place your petal on a veiner and press gently to achieve a veined effect.

Step 12

They need to have a natural look. Let them dry on a plate or sponge mat.

TIP: If you are in rush you can dry them in the oven at 50C for 10 minutes.

Step 13

Repeat with all petals. The quantity you make depends on the amount of flowers you need.

Step 14

Cut your 20 gauge wire in half. 

Step 15

Bend your petals as shown.

Step 16

Fix a few petals around the 20 gauge wire. My flower will have 8 petals.

Step 17

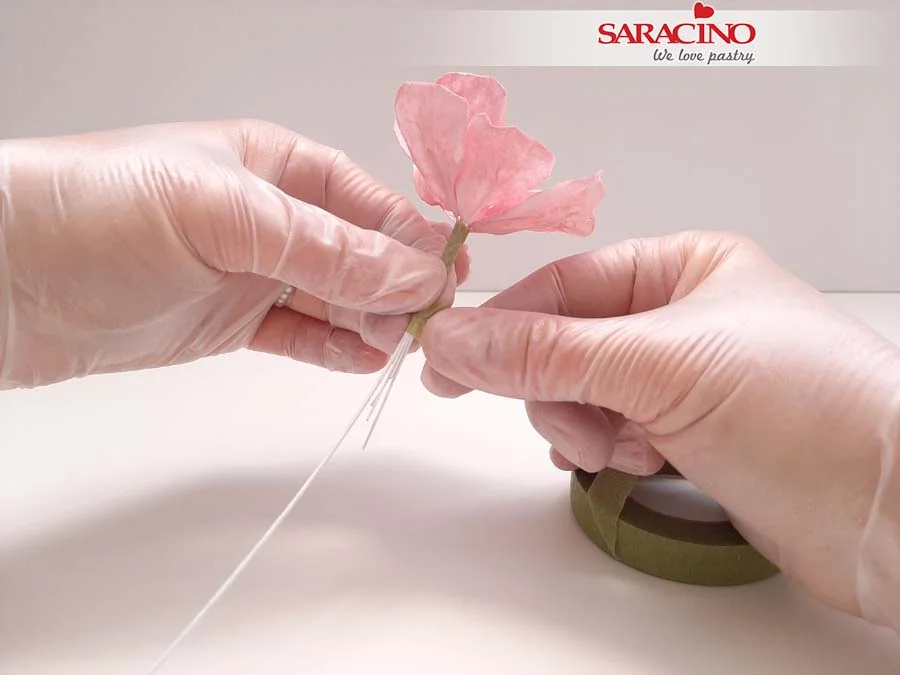
Secure the wires with flower tape.

Step 18

Using yellow Pasta Model, roll a small ball and add to the centre of the flower. Using your modelling tool add texture.

Step 19

Using blue, black and yellow colour powders shade the petals. 


Step 20

For the bottom lace, cut the wafer paper into long strips.


Step 21

Using a paper puncher of your choice create a pattern along the edge of each paper strip.

Step 22

In a clean bowl put blue, white and pink powder colours. 

Step 23

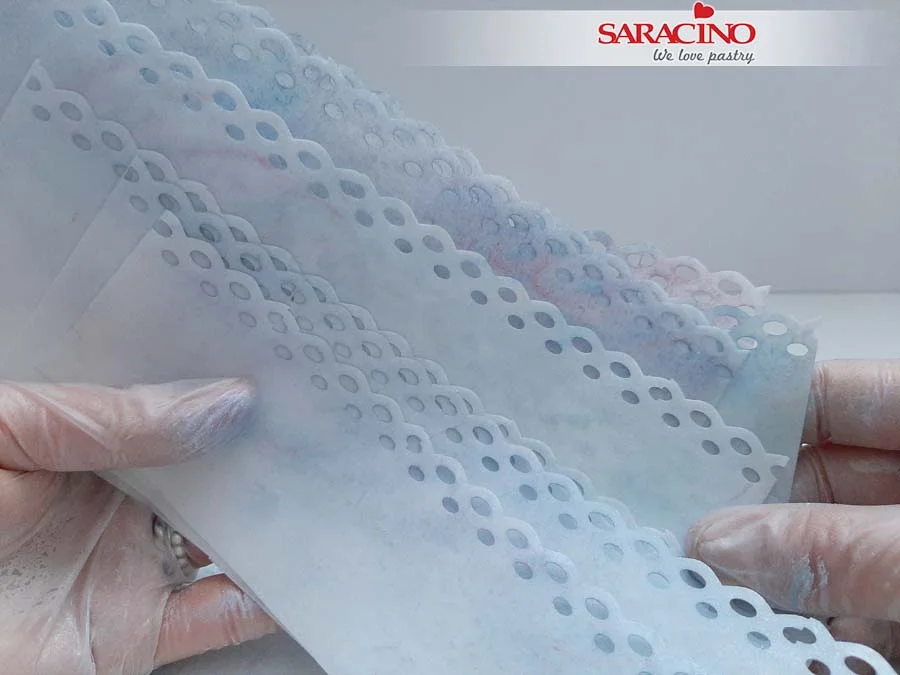
Using a soft brush shade the edges of the wafer paper.

Step 24

So they look as shown. Don’t aim for all of them to look the same. We want them to look random.

Step 25

Add a tiny bit of water to the bottom edge of the paper and start folding.

Step 26

Connect two pieces together using a little bit of water.

Step 27

Make as many as you require to cover your bottom tier. 

Step 28

Take your cake and cover with buttercream to the same colour. 

Step 29

Using a spoon, dip it in the cream and dab over the cake to give the textured look.

Step 30

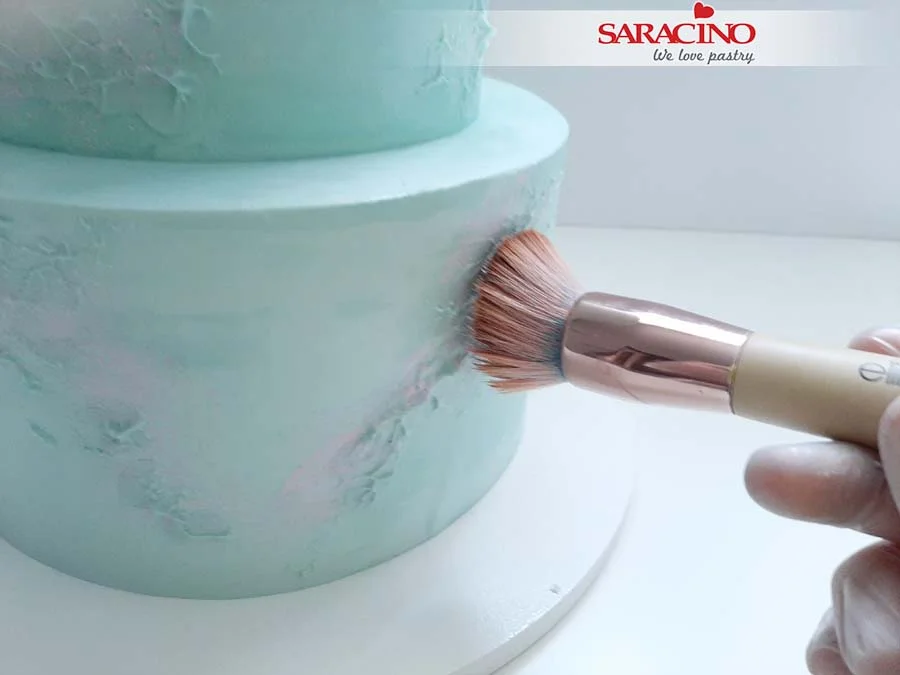
Take the previously mixed colour. There is no need to add more alcohol as it can be used as a dust.

Step 31

And dab over the cake with the brush.
Step 32

Start adding the paper lace. No need to add water if your cake has a buttercream covering.

Step 33

Continue all around the bottom of the cake. Do this twice to give a fuller look appearance.

Step 34

Add the flower randomly where required.


Step 35

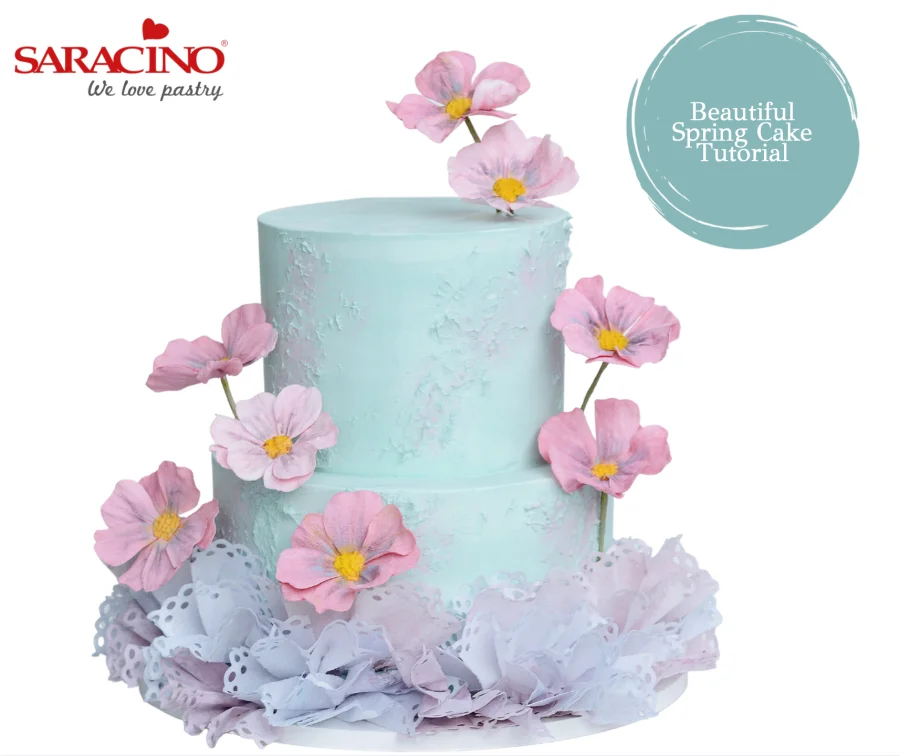
Your spring cake is ready! 

VALENTINE’S CAKE POPS TUTORIAL

VALENTINE’S CAKE POPS TUTORIAL

Skill level: INTERMEDIATE

Chocolate tempering:

White Chocolate:

Heating to 40-45 degrees, cooling to 24-25 degrees, final temperature 27-28 degrees.

Milk chocolate:

Heating to: 40-45 degrees, cooling to 27-28 degrees, final temperature 30-31 degrees.

Dark chocolate:

Heating to: 45-50 degrees, cooling to 28-29 degrees, final temperature 31-32 degrees.

You will need:

INGREDIENTS:

  • Saracino Chocolate drops white 250g
  • Saracino Food Flavouring Pistachio
  • Saracino Pasta Model Pink
  • Saracino Pasta Model White
  • Saracino Dust powder Pink
  • Saracino Gel color Pink
  • Saracino Gel color Black
  • Saracino Cakegel
  • Plain cupcake mix, butter and eggs
  • Sprinkles

EQUIPMENT:

  • Silicone popsicle mini ice cream mould (Silikomart)
  • Popsicle sticks
  • Food thermometer
  • Pan with a thick base
  • Heatproof glass bowl
  • Marble or natural stone slab for chocolate tempering 
  • Spoon
  • Pallet knife
  • Brush
  • Pastry bag
  • Rolling pin
  • Dresden tool
  • Knife
  • Ball tool
  • Round cutter diameter 45mm
  • Leaf cutter 20 x 25mm
    •  

Step 1

Using the Bain Marie technique melt the Saracino chocolate drops. Make sure everything is melted and has a temperature between 40 and 45 degrees. Check the temperature of the chocolate with a food thermometer. Pay attention! The temperature rises quickly. The bottom of the bowl should not touch the hot water. Make sure that no water gets into the chocolate.

Step 2

Now temper the melted chocolate. In this case, you are going to reduce the temperature of the melted white chocolate to 24 to 25 degrees. Do this by working with a pallet knife on a marble or natural stone surface. Use a food thermometer to check the temperature. When you have reached the temperature of 24 to 25 degrees, you heat the chocolate again to 27 to 28 degrees back in the bowl over the water. Pay attention! Tablating or tempering is a cooking technique in which melted chocolate is cooled back, so that crystals are formed in a certain way, which gives the chocolate a structure. This structure is obtained by heating the chocolate above 30°C, causing three of the four crystals to melt. Work meticulously with the temperatures for the best end result. This tutorial includes an overview of the temperatures for tempering white, milk and dark chocolate.

Step 3

Take your silicone ice pop mould and pour a heaped tablespoon of melted chocolate into it. Turn the mould around in a controlled manner so that the chocolate runs along the edges of the mould.

Step 4

Make sure all sides of the mould are covered with chocolate to the edges.

Step 5

Repeat steps 3 and 4 for each section of the mould. For a nicer end result it is better to fill each part separately with chocolate. If you want the chocolate base to be a bit thicker, repeat steps 3 and 4 again for all 4 ice pop shapes.

Step 6

Remove excess chocolate with a pallet knife. Make sure the top edge is nice and smooth.
Step 7

Let the chocolate set in the mould at room temperature.
Step 8

Bake pistachio cupcakes. Make cupcake batter according to the recipe. Add the Saracino pistachio flavouring in proportion to the batter. Bake the cupcakes. Let them cool and crumble 3 cupcakes into a bowl. For 4 cake pop ice creams, take 3 cupcakes made of 35g batter each.

Finely chop pistachio nuts as desired and mix with the crumbs.
Tip: You can play with the flavours. Saracino have 15 to choose from!

Step 9

To achieve a nice workable filling, add 1 tablespoon of Italian Meringue Buttercream or white ganache to the pistachio crumbs. Knead everything well together and divide into 4 equal portions.

Step 10

Using a spoon, gently press the cake mixture into the mould.

Step 11

Carefully slide the sticks into the cake pop through the hole in the mould.

Step 12

Make sure the cake is not above the top surface of the mould and that the top of the cake pop is as smooth as possible.

Step 13

Temper a small amount of white chocolate and cover the top. Smooth with a palette knife and remove any excess chocolate.

Step 14

Let the chocolate set at room temperature.

Step 15

When everything is set, remove the cake pop ice creams from the silicone mould.

TIP: You can put the mould in the freezer for 5 minutes before removing the cake pops.

Step 16

Take a 20 x 25 mm leaf cutter and cut out the shape for the forehead. Use a sharp knife to form the side hair. Keep these cut-out parts. 

Step 17

Shorten the area for the nose by a few millimetres. Take 30g of white Pasta Model. Roll out to 2mm thick and cut out a circle with the cutter and stick the pink part on top with cake gel.

Step 18

Use the pink drop shapes previously cut out to make ears. Roll out a small amount of white Pasta Model thinly and cut out two drop shapes with the leaf cutter. Stick them on the pink part and round off the bottom. Also use the leaf cutter for this. Using your ball tool make two indents in the head where the eyes will be

Step 19

Colour a small amount of white Pasta Model with the black gel colour. Roll two oval balls of 3mm in size for the eyes and one oval ball of 5mm for the nose. Place on the face. Use cake gel to fix.

TIP: You can also use the pre-coloured Pasta Model Black.

Step 20

Dust the tips of the ears and the top of the head with the pink dust powder.

Step 21

For the tail take 10g of pink Pasta Model and roll into a sausage shape. Cut into 2 equal parts. Repeat this step with 10g of white Pasta Model. Stick a pink and white part together with cake gel to form a tail. Leave the white end part a little bit thicker. Use the Dresden tool to add texture to the tail.

Step 22

Dust the middle part of the cake pop ice cream with pink dust powder. Dust so darker in the middle getting lighter outwards.

Step 23

Attach the head and tail to the cake pop ice cream with cake gel. Do not use too much cake gel! You can also attach the parts with melted chocolate.

Step 24

For the heart you will need a small ball of pink Pasta Model. Flatten with your finger and form a notch on one side with a Dresden tool. With your fingers make a point on the other side. Dust the top with pink dust powder.

Step 25

To decorate your cake pop ice cream with chocolate, melt a small amount of white chocolate. While heating, add pink dust powder until you reach the desired colour. Temper the chocolate as shown previously.

Put the chocolate into a piping bag with a small piping nozzle. Pipe lines over the bottom part of the cake pops. Decorate immediately with sprinkles.

Step 26

Vary with different looks. Use your imagination!

Use colours you want to achieve the look you love.