HAND PAINTED PETER RABBIT

HAND PAINTED PETER RABBIT

Skill level: INTERMEDIATE

TIPS FROM CHARLOTTE

  • Remember to keep referring to the image of Peter to keep it as close as possible to the original
  • If your brushes get clogged up, remove the excess with some kitchen roll before continuing.

.

You will need:

  • White Saracino Modelling Paste
  • Saracino Dust colours: Blue, Brown, White, Black
  • Saracino Cocoa Butter
  • Rolling pin
  • Cornflour puff
  • Craft knife
  • Cerart small ball tool
  • Fine paint brushes
  • Bowl of boiling water
  • Small glass bowl
  • Kitchen roll
  • Printed image of Peter Rabbit to the size you require

Step 1

Knead your modelling paste and flour your surface with a little cornflour. Roll out the paste to approx. 35mm thick and bigger than your image of Peter Rabbit.


Step 2

Place your image on top of your rolled out paste and using the cerart tool trace all the outlines starting at the top and work your way down being careful not to miss any.

Step 3

Remove the paper and using the craft knife cut around the outline. Smooth any edges with your finger after cutting, if needed

Step 4

Melt the cocoa butter in a small glass bowl using the instructions on the container. Place this bowl in a large bowl with boiling water to keep it liquid. Using a paint palette or individual palettes, put some dust colour in each one ready. Remember to paint the sides of your piece as well as the top.

Step 5

Starting with the brown colour, add a small amount of cocoa butter with the dust and mix. Starting with the darker parts (edges, feet and ear tips).

Step 6

Paint in slightly circular motions to add effect. Then add some white to make a lighter brown and work towards the centre of the body, ears, hands and face leaving a space to add some white.

.

Step 7

Mix up some white dust with cocoa butter and paint the rest of the body, head and ears, referring to the original image.


.

Step 8

Now mix some cocoa butter into the blue paste and add a little white on the side o make a small amount of pale blue. Paint a few highlights on the jacket in the lighter blue first then using the darker blue colour, fill in the rest of the jacket.

.


.

Step 9

Using the dark brown again add a small amount for the eye detail. Peter’s eyes are an unusual shape but if you copy the design it will turn out just right.

Step 10

Now mix the black dust with some cocoa butter. Using a fine brush begin working lightly on the outline.

.

Step 11

Continue making sure you get as much detail as possible.

.

Step 12

Leave your character to dry and then he is ready to fix on to any cake. If you wish to make him stand then dip two cocktail sticks in glue and press those ends into each foot once the shape is cut out, then begin painting.

.
COUTURE CAKERS INTERNATIONAL

COUTURE CAKERS INTERNATIONAL

Hosted by ‘Sweet Dreams by Heba‘, the Couture Cakers are back for the second year!

This annual collaboration has not only grown in number of members, but in the diversity of edible fashion-inspired cakes, cookies and figurines! Take a tour and enjoy the show!

Adela Calvo aka ARTYM

Angela Penta aka ANGELA PENTA CAKES

Aurelia Czarnecka aka AURELIA’S CAKE

Beata Mielcarek aka CAKE ARTSTUDIO

Calli Hopper aka CALLI CREATIONS

Carla Rodrigues aka PEPPER POSH-SUGAR ARTIST

Clara Presazzi aka CLARA-I DON’T EAT CAKES

Elaine Minett aka GINGER CAT CAKERY 

Evangelia Korontini aka MAD INN

Gabriela Doroghy aka SWEET US

Georgia Ampelakiotou aka GEORGIA’S CAKES

Katarzyna Janiszewska aka PLANET CAKES KASIA

Khamphet Che-Bui aka SWEET SIDES OF CAKES

Monika Liptáková aka MOLI CAKES

Stefania Sanna aka TORTE DECORATE DI STEFY

Congratulations On Your Amazing Creations!

Take Your Time And Visit Couture Cakers Facebook Page COUTURE CAKERS INTERNATIONAL To View All The Amazing Creations!

Join Our Newsletter

We’d love to send you the latest news, discounts & exclusive offers via email! By signing up below you are confirming you are happy for Saracino to send you marketing emails. We will always treat your personal details with the upmost respect & will never sell your details to other companies for marketing purposes.

• All the latest industry news   • FREE video tutorials   • Exclusive product offers

Products         Tutorials          Ambassadors           Events           Blog           Showcase         Contact


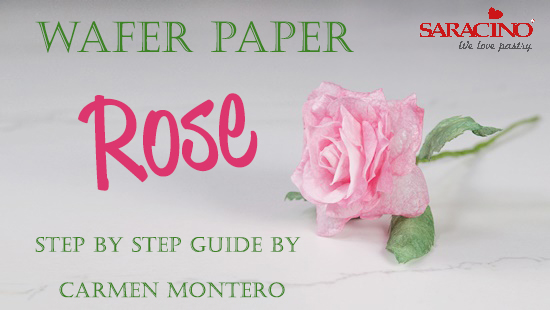
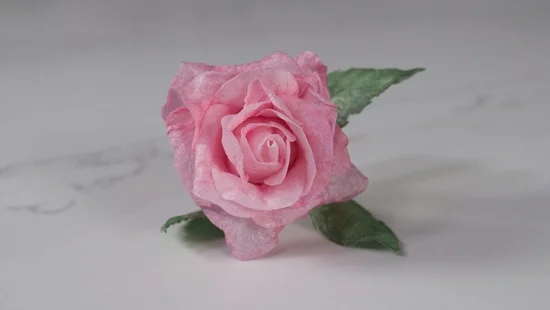
WAFER PAPER ROSE

WAFER PAPER ROSE

Skill level: BEGINNERS

You will need:

  • Saracino white modelling paste
  • Saracino wafer paper thickness 0.27mm
  • Saracino wafer glue
  • small rolling pin
  • mixing palette
  • clear alcohol
  • pink powder or gel colour
  • green powder or gel colur
  • rose petal cutter
  • rose veiner
  • rose leaf veiner
  • 20 gauge wire
  • 3 x 30 gauge wires
  • florist tape
  • 2 makeup sponges
  • small scisors
  • pair of gloves

Step 1

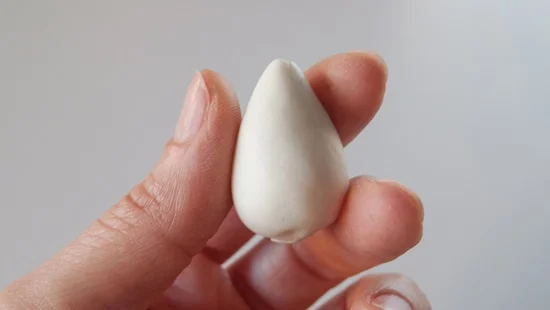
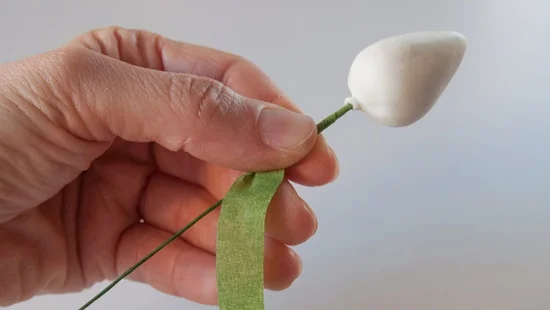
Knead the paste and form a centre cone for your rose.


Step 2

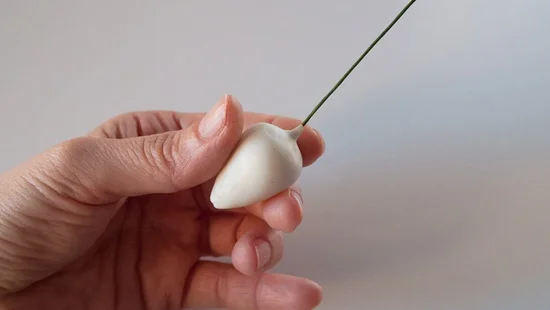
Insert the 20 gauge wire into cone and let it dry.

Step 3

Cover the wire with florist tape.

Step 4

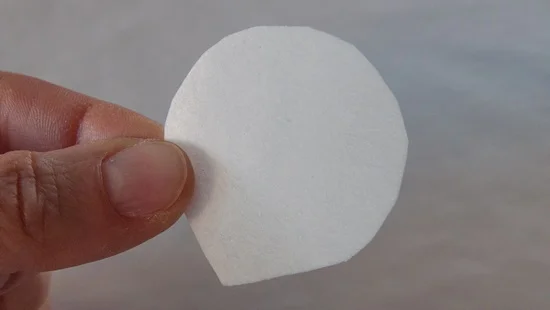
Using the rose petal cutter cut out 18-20 petals.

Step 5

Place your ready cut out rose petal on the veiner.

Step 6

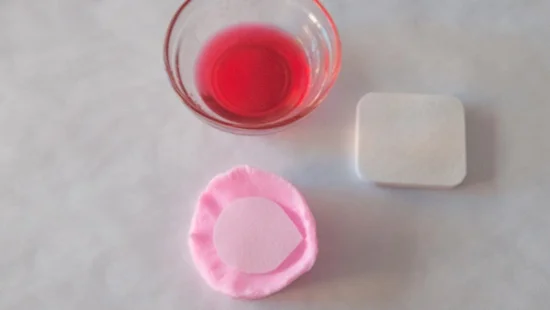
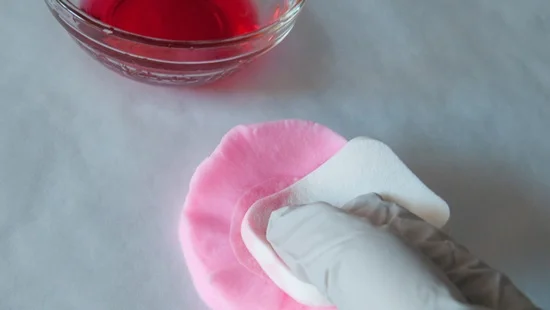
Using a makeup sponge soaked in the diluted pink colouring wet the petal and take care not to drag or tear. Simply press lightly without moving. Allow to dry but not completely.

.
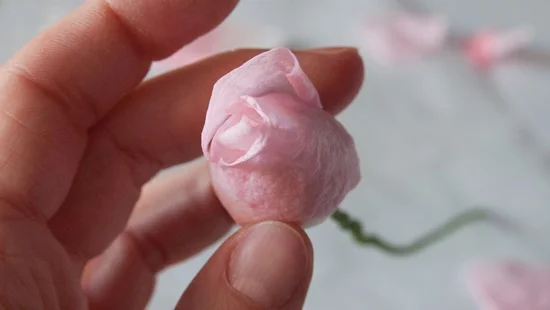
Step 7

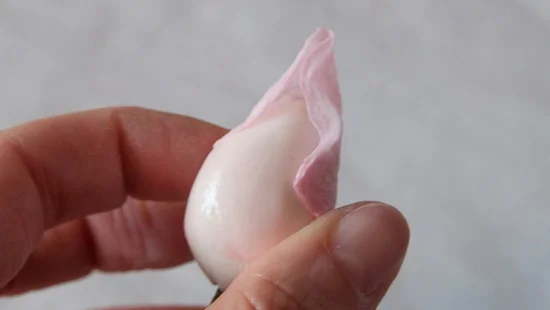
Fix the first petal to the centre cone using wafer paper glue. Texture the remainder of the petals.

.
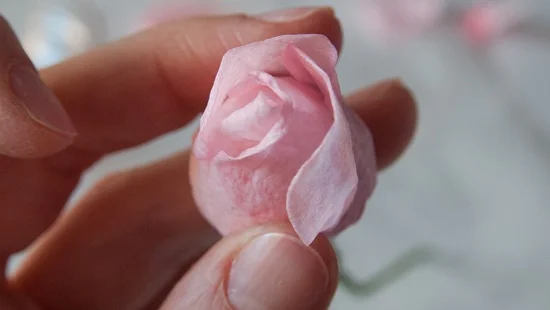
Step 8

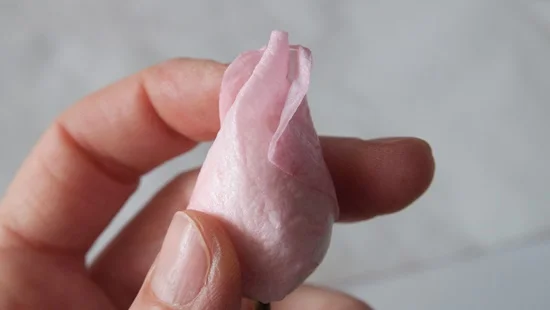
Place the next petal in front of the previous one.
.

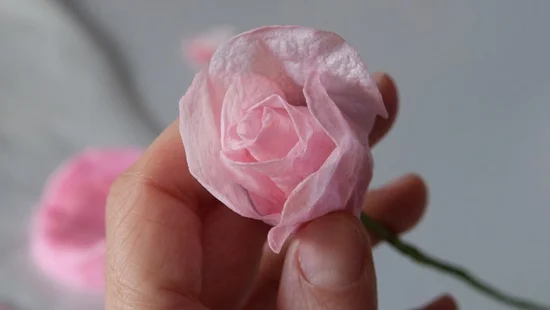
Step 9

Start adding the next layer of petals by adding one in the gap of the previous two.

Step 10

Continue adding petals, making sure the beginning of each one is placed slightly under the previous.

.

Step 11

Add another layer of 3 petals using technique described in step 10.

.

Step 12

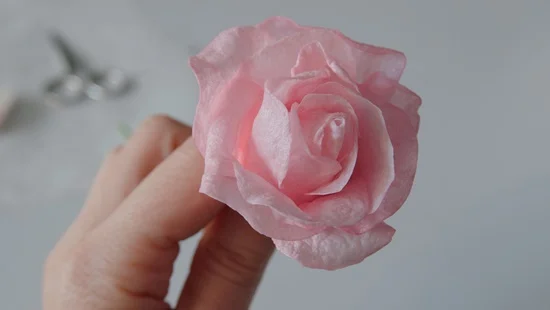
You can make the rose as large as you require by adding more petals. If you are going to add more than 4 layers of petals, make sure you cut them larger than previous ones.

.

Step 13

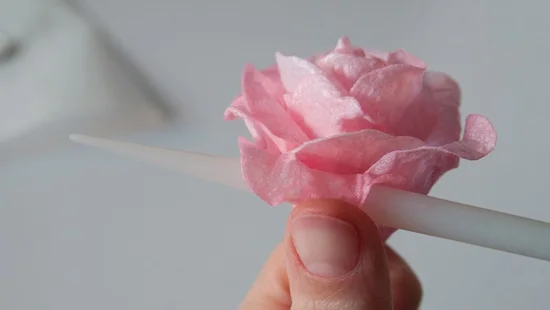
Whilst the petals are not completely dry they can be formed into shape using any circular tool, such as a small rolling pin.

Step 14

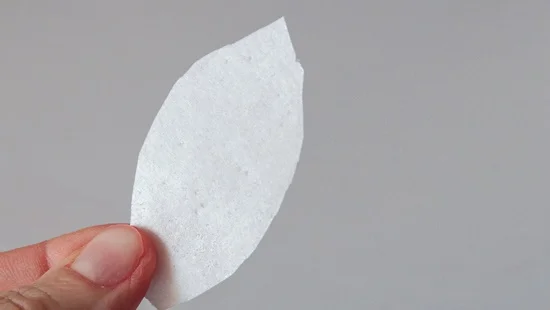
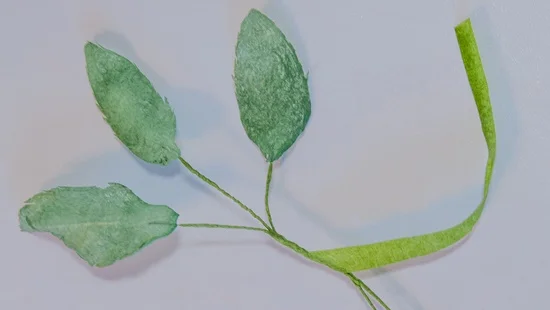
Cut out 3 rose leaves.

.

Step 15

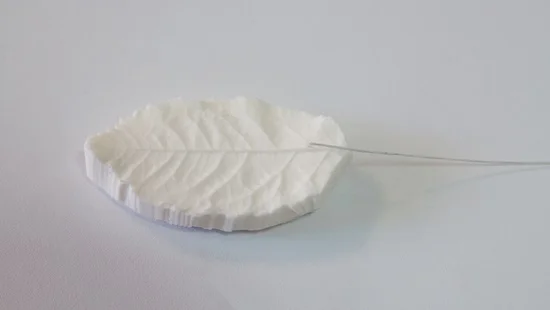
Place the 30 gauge wire on the leaf veiner.

Step 16

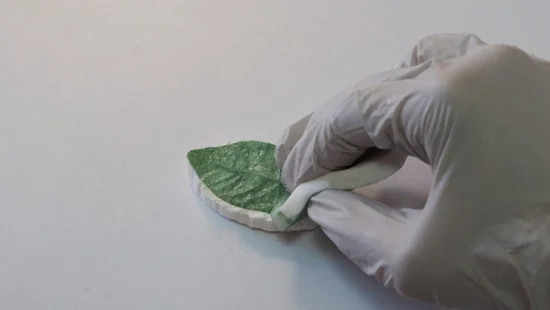
Place the wafer paper leaf over the wire on the veiner. Press with a makeup sponge that has been soaked in the green dilution. Make sure you do not move and tear the wafer paper. Allow to dry completely.

.

.

Step 17

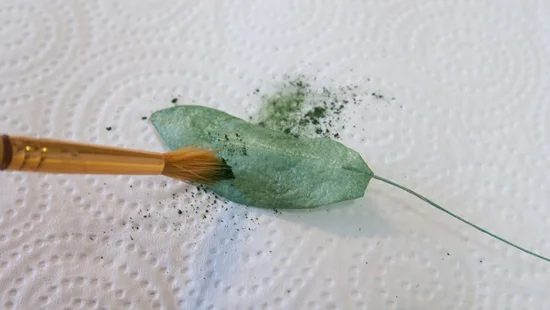
Once the leaves are dry, they can be dusted to add a more natural look.

Step 18

Fix 3 leaves together using florist tape.

.

Step 19

Assemble the leaves and rose together using florist tape.

STEAM CAKES – STEAMPUNK COLLABORATION

STEAM CAKES – STEAMPUNK COLLABORATION


We are so proud to be a sponsor of this amazing collaboration! It’s a honour to see how many amazing artists are using Saracino products!

Here are a few words from the founder of this stunning Collaboration, Carla Rodriguez: 
Steam Cakes is an international collaboration bringing together 92 talented cake artists from all around the world to amaze you with their edible art and celebrate Steampunk’s International Day, 14th June.

Steampunk is my signature style and last year I decided to run a collaboration under this theme just for fun. It was very successful, we had fantastic feedback from the audience and there were a lot of people asking if they could integrate a new edition of the collaboration, so I decided to move on to the 2018 edition.

We can see all kinds of pieces: structure, modeling, busts, animals, wedding cakes, bags and shoes and even cookies allusive to the theme. All the creations can be viewed
HERE

Hope you like it! Thank you! Obrigada!

Carla Rodrigues
Pepper Posh – Sugar Artist

Ade Cal aka Delicut Cakes

Anna Rosa Maggio aka Ana Rosa Maggio Cake Design

Aurelia Czarnecka aka Aurelia’s Cake

Beata Mielcarek aka Cake Artstudio

Carla Rodrigues aka Pepper Posh – Sugar Artist

Cecilia Lim-Foster

Charlotte Crews aka The Cake Lady

Cristina Arévalo aka Cristina Arévalo. Bolos Decorados

Daniel Diéguez aka Daniel Diéguez Cake Artist

Dina Diab aka Dina’s Delicia

Elisabete Caseiro aka Bety Sugarland

Esmeralda Trigo

Federica Cipolla aka Le Delizie di Kicca

Francesca Marangoni aka LaMeladiAurora

Gisi Prekau aka Just Little Cakes

Grégoire Goel aka Gregoire Goel Canneasucre

Isabel Tamargo aka Tartas Imposibles

Kelli Elkadri aka Cake Me Away Designs

Khamphet Che-Bui aka Sweet Side of Cakes

Laura Daluiso aka Lovely Cakes di Daluiso Laura

Maria Cristina Schiazza aka Illusion Cakes

Mary Presicci aka Mary Torte

Massimiliano Colla aka Mr Sugar Ciok

Nade Jankovska aka N SUGAR ART

Nathalie Müller-Künzig aka Designer-Cakes & Sugarart by Nathalie

Nicoletta Gobbo aka NiciSugarLab

Paul Williams aka Happy Occasions Cakes Ltd

Raquel Garcia Martinez aka Raquel García-El País Del Fondant

Sarah Leftley aka Sarah’s Cakes

Sofia Silva aka Doces Tentações

Timi Timilehin Grant aka The Cake Affair

Valentina Terzieva aka Valentina’s Sugarland

Calli Hopper aka Calli Creations

Congratulations On Your Amazing Creations!

Take Your Time And Visit Steam Cakes Facebook Page STEAMPUNK CAKES To View All The Amazing Creations!

Join Our Newsletter

We’d love to send you the latest news, discounts & exclusive offers via email! By signing up below you are confirming you are happy for Saracino to send you marketing emails. We will always treat your personal details with the upmost respect & will never sell your details to other companies for marketing purposes.

• All the latest industry news   • FREE video tutorials   • Exclusive product offers

Products         Tutorials          Ambassadors           Events           Blog           Showcase         Contact