COUTURE CAKERS INTERNATIONAL 2020

COUTURE CAKERS INTERNATIONAL 2020


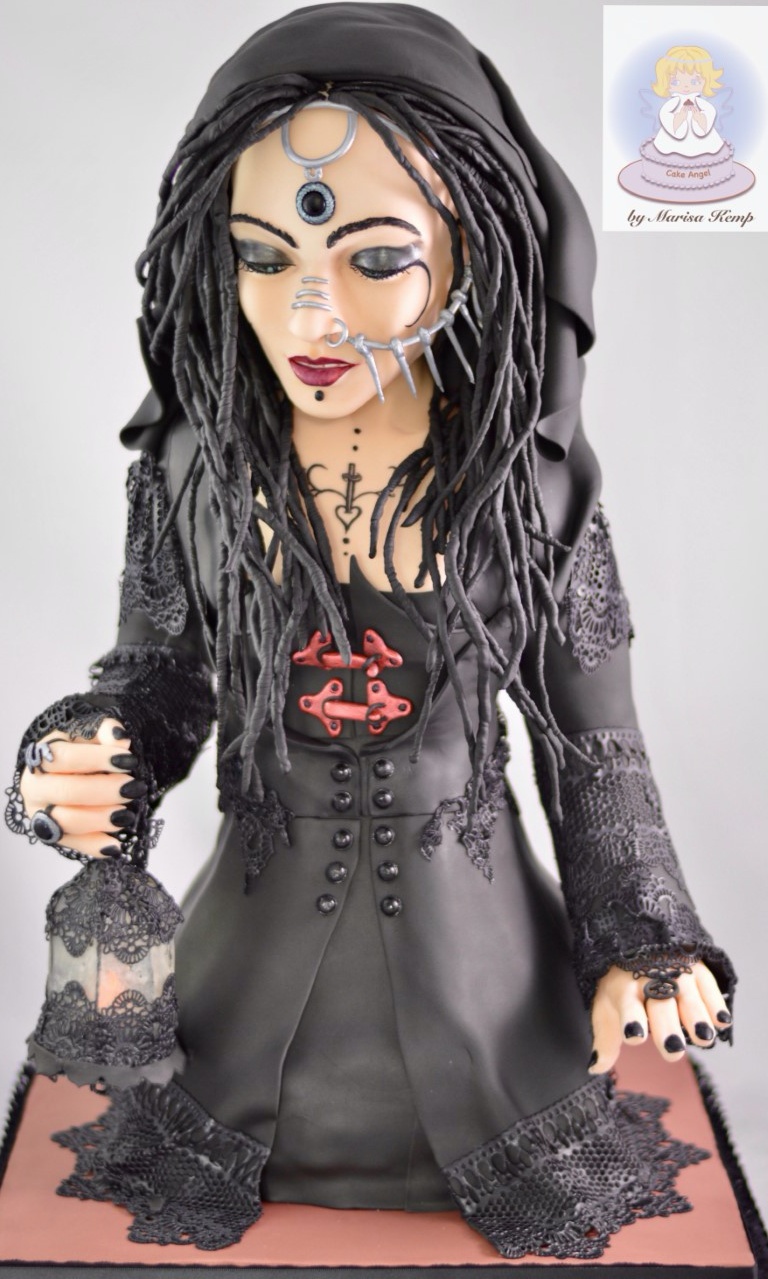
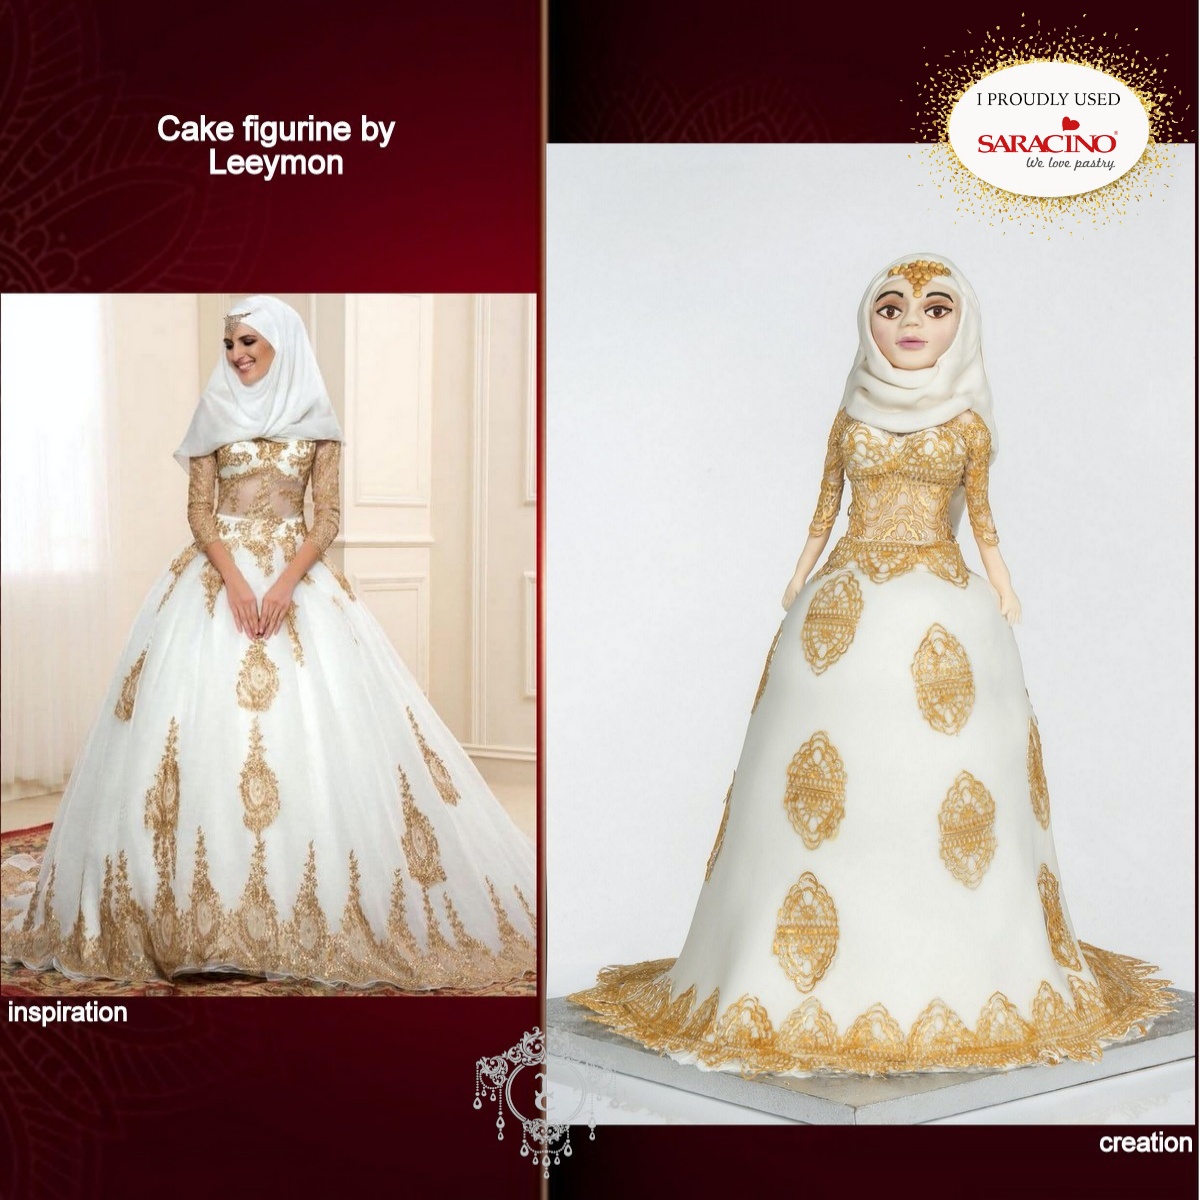
Couture Cakers International was created by Heba M Elalfy in 2017 for sugar artists who love creating edible masterpieces inspired by couture fashion. Currently in its fourth year, the Couture Cakers International collaboration challenges its members to get out of their comfort zone and dive into awe-inspiring themes using a huge array of edible products. This year, the Couture Cakers, as we like to call ourselves, bring to life Islamic bridal dresses, as cakes, cupcakes, figurines, cookies and more! Islamic bridal dresses are some of the most stunning couture in the world. Not only because I’m a Muslim woman who loves Islamic fashion, but this theme has been in the works since last year as a way to show my pride and love of Islamic bridal couture as well as introducing this line of fashion to cake artists who otherwise wouldn’t have considered creating beautiful pieces inspired by Islamic bridal dresses. I wanted the 54 Couture Cakers to interpret the hijab (head covering) and the dresses in a respectable way since it had never been done before in the sugar world as a collaboration. I’m happy to say that we’ve all accomplished this and the Couture Cakers have made me proud! One of the best outcomes of this year’s theme is that my members have created gorgeous cakes, beautiful cookie artwork, stunning figurine brides and cake busts, as well as life-like hand-painting and adorable cupcakes! Every single member has used the inspiration photos they chose to bring out the best work this collaboration has seen to date. We give all the credit for the photos which we used to their original photographers, fashion designers,fashion houses, and models.  


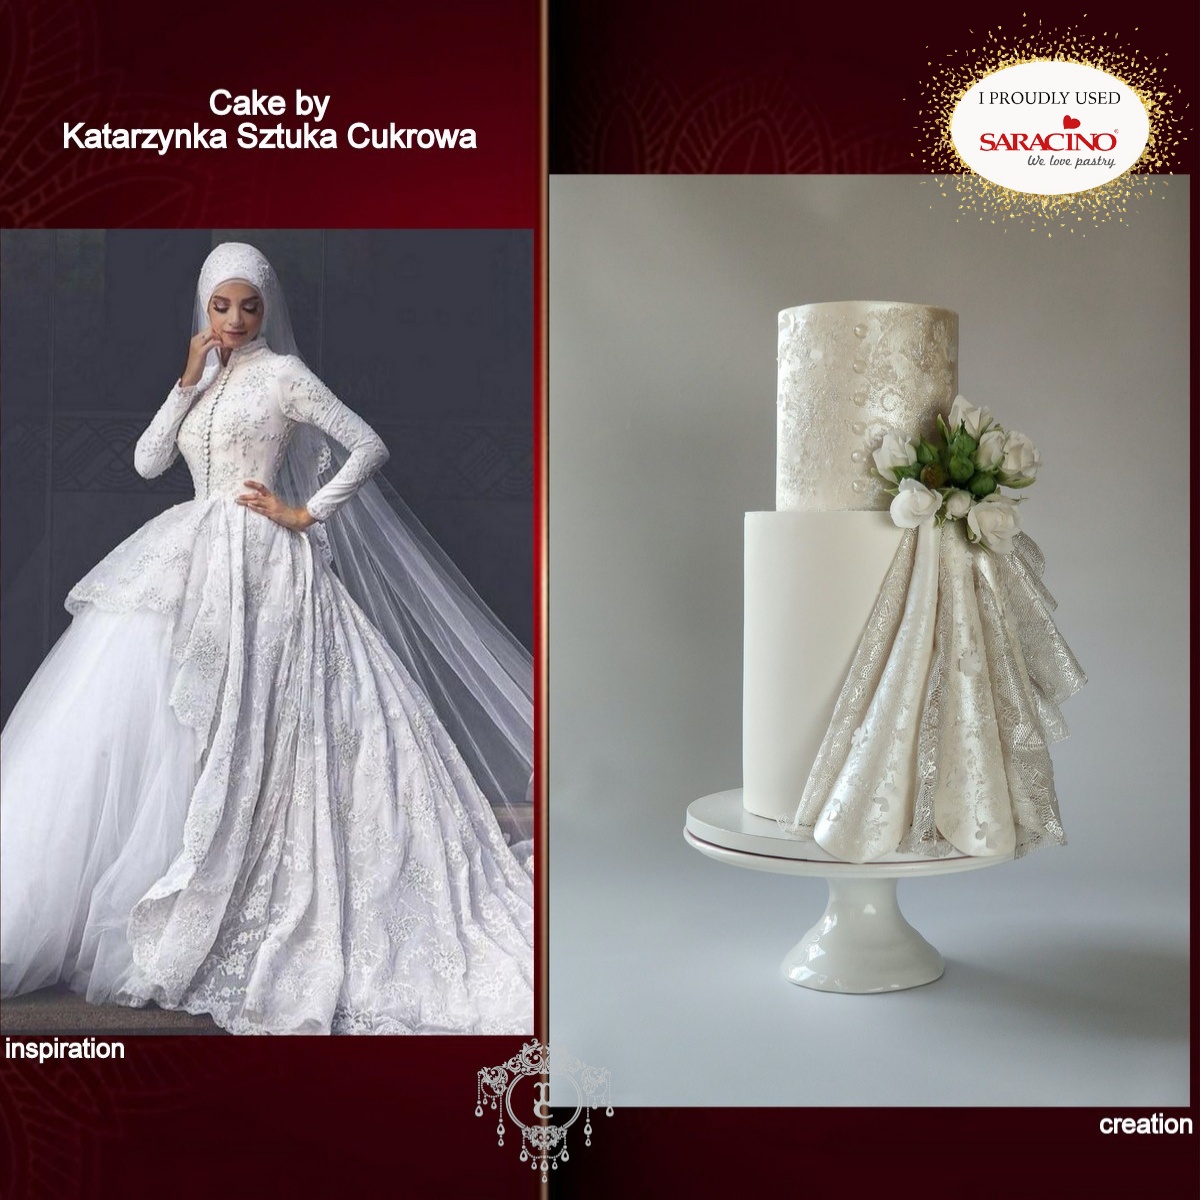
Katarzyna Koczorowska aka KATARZYNKA SZTUKA CUKROWA

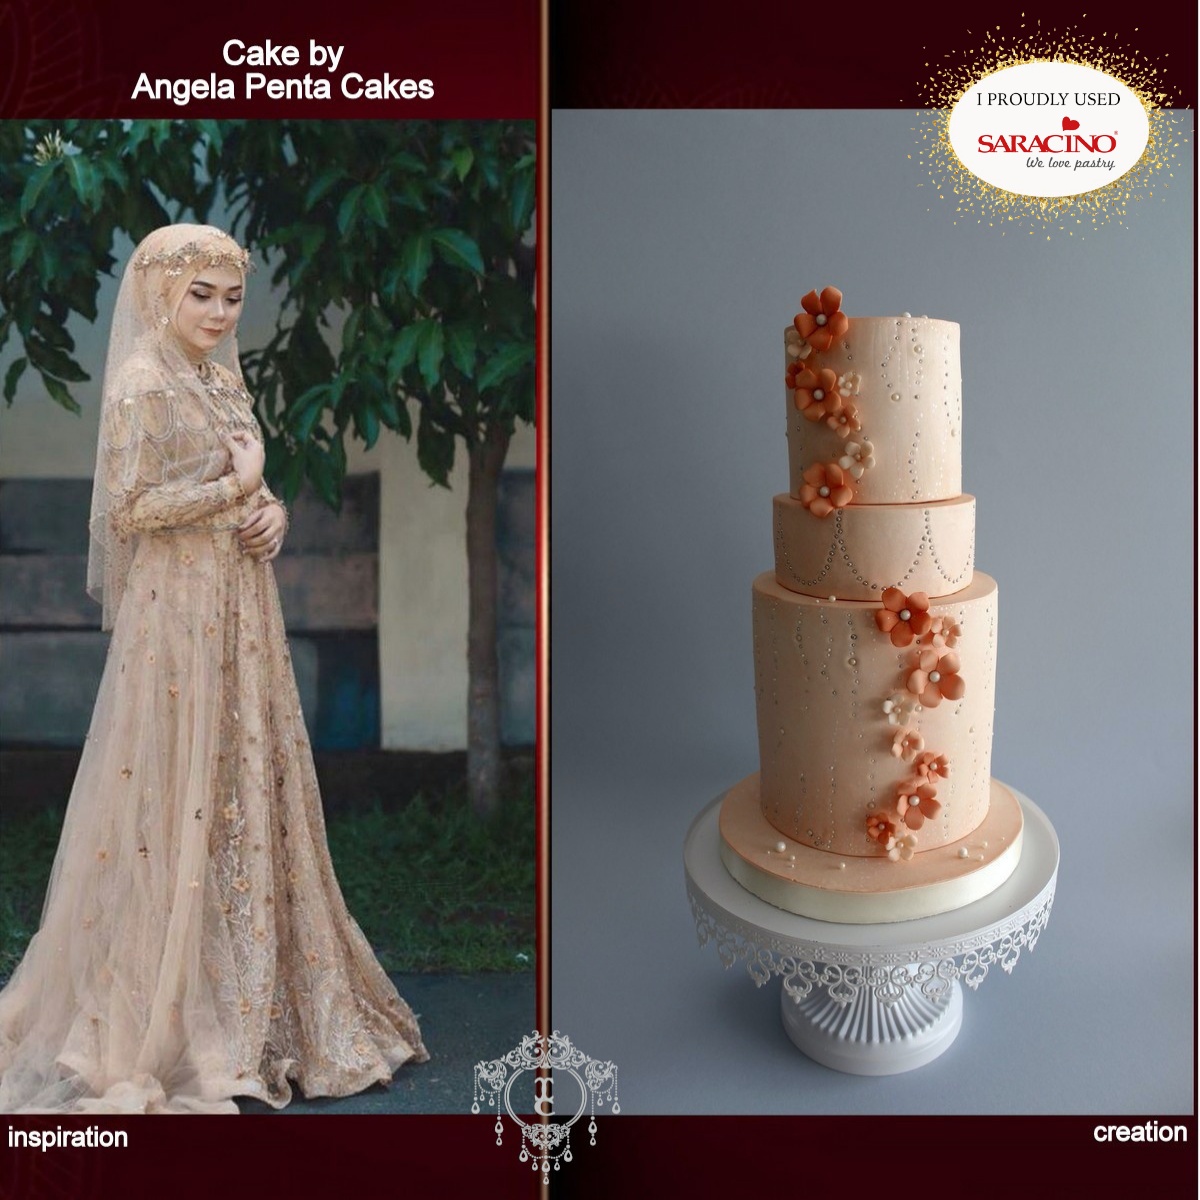
Angela Penta aka ANGELA PENTA CAKES

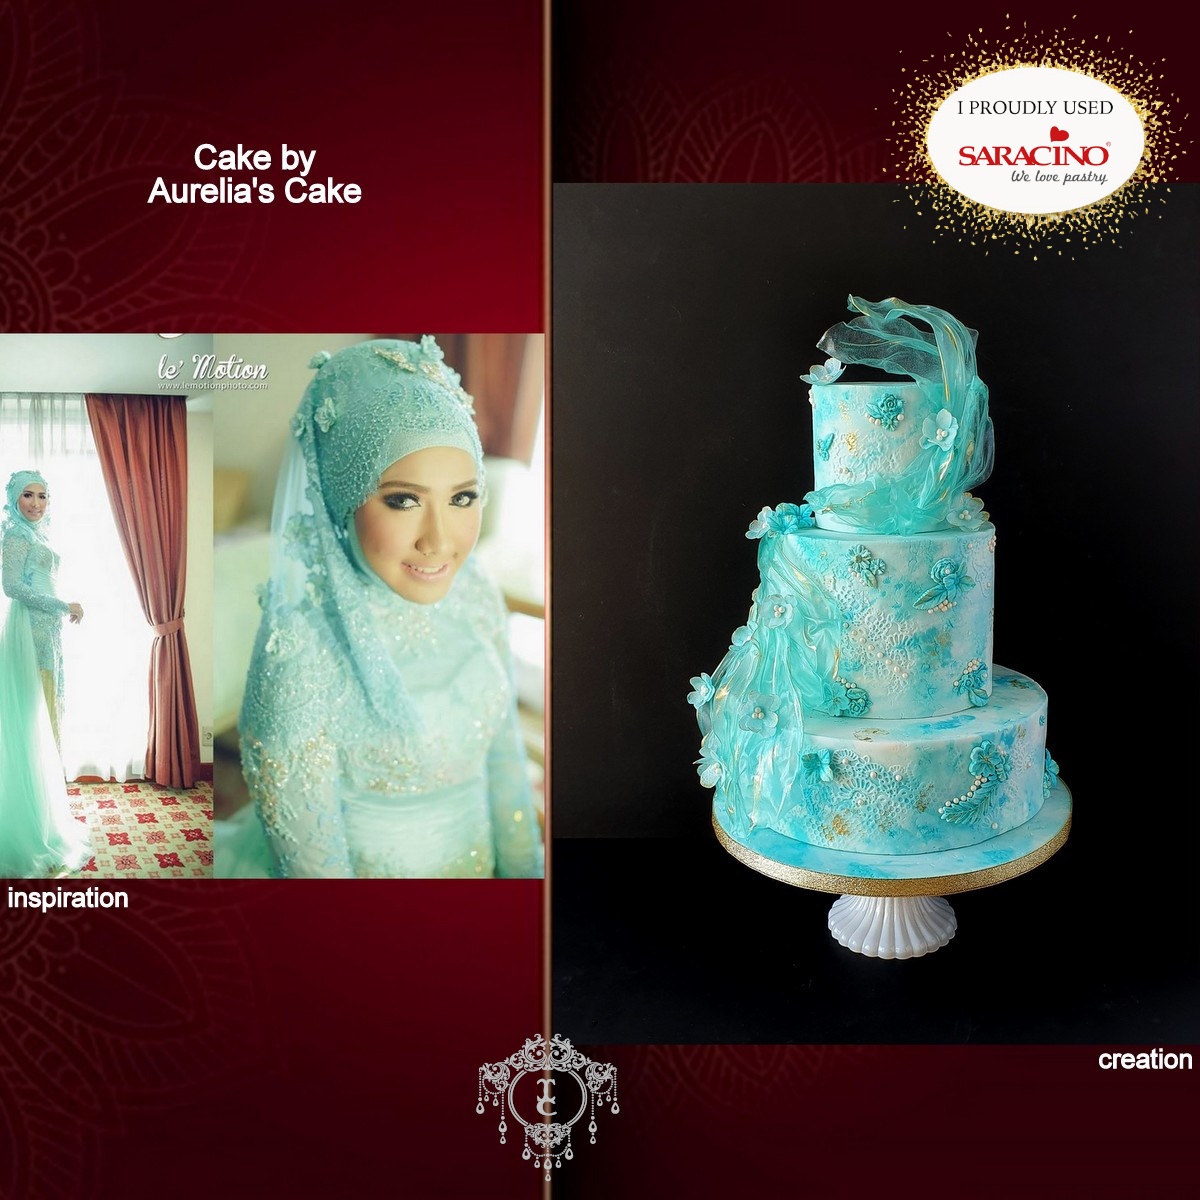
Aurelia Czarnecka aka AURELIA’S CAKE

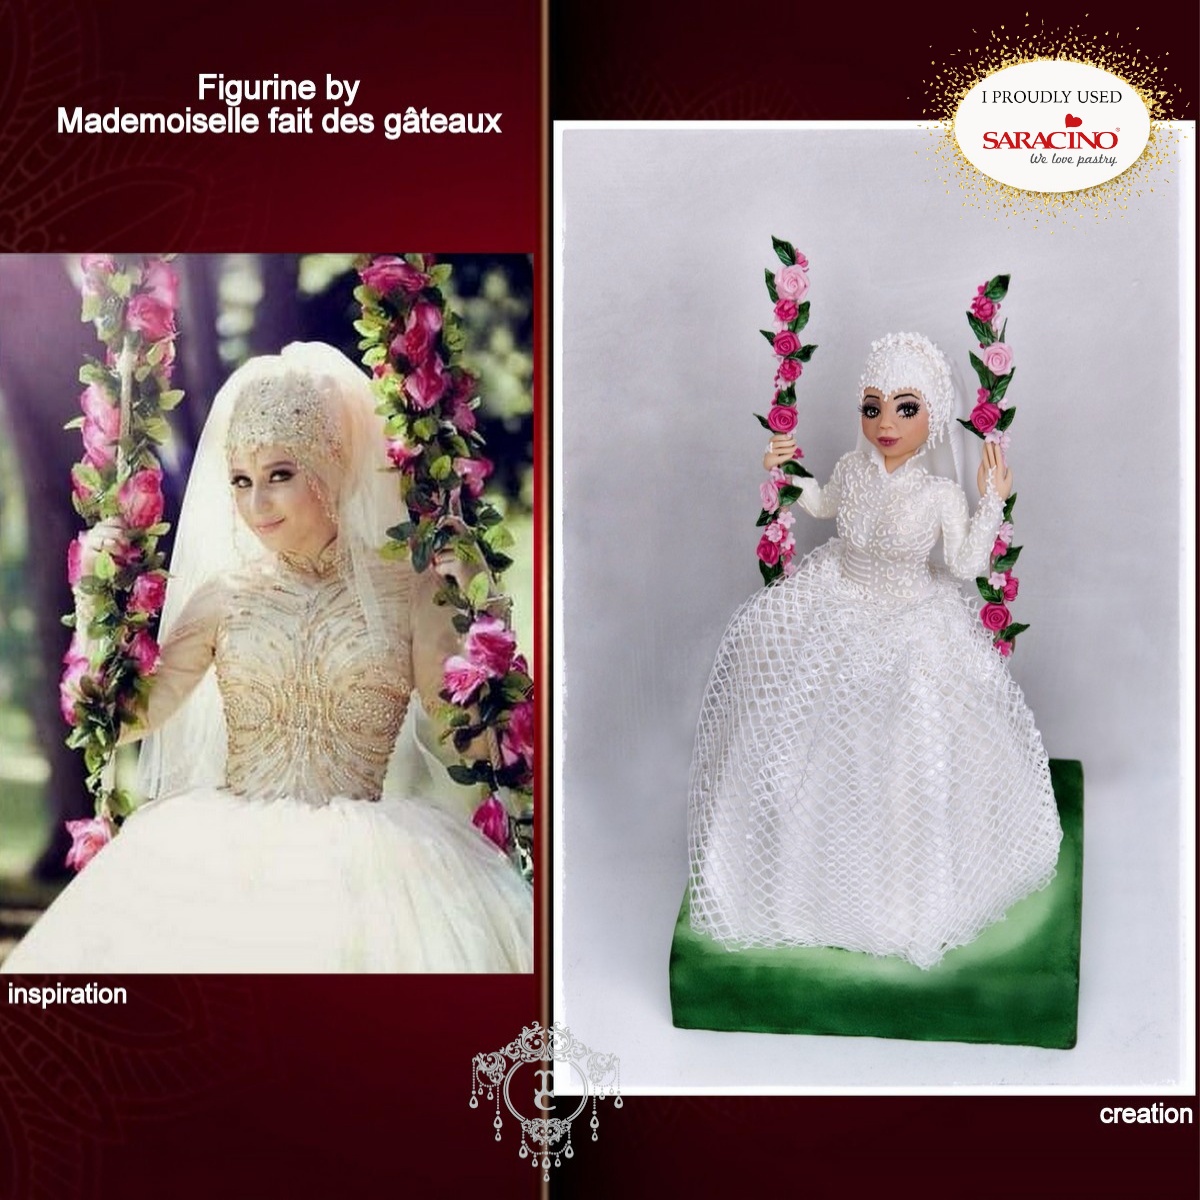
Joane Chopard aka MADEMOISELLE FAIT DES GâTEAUX


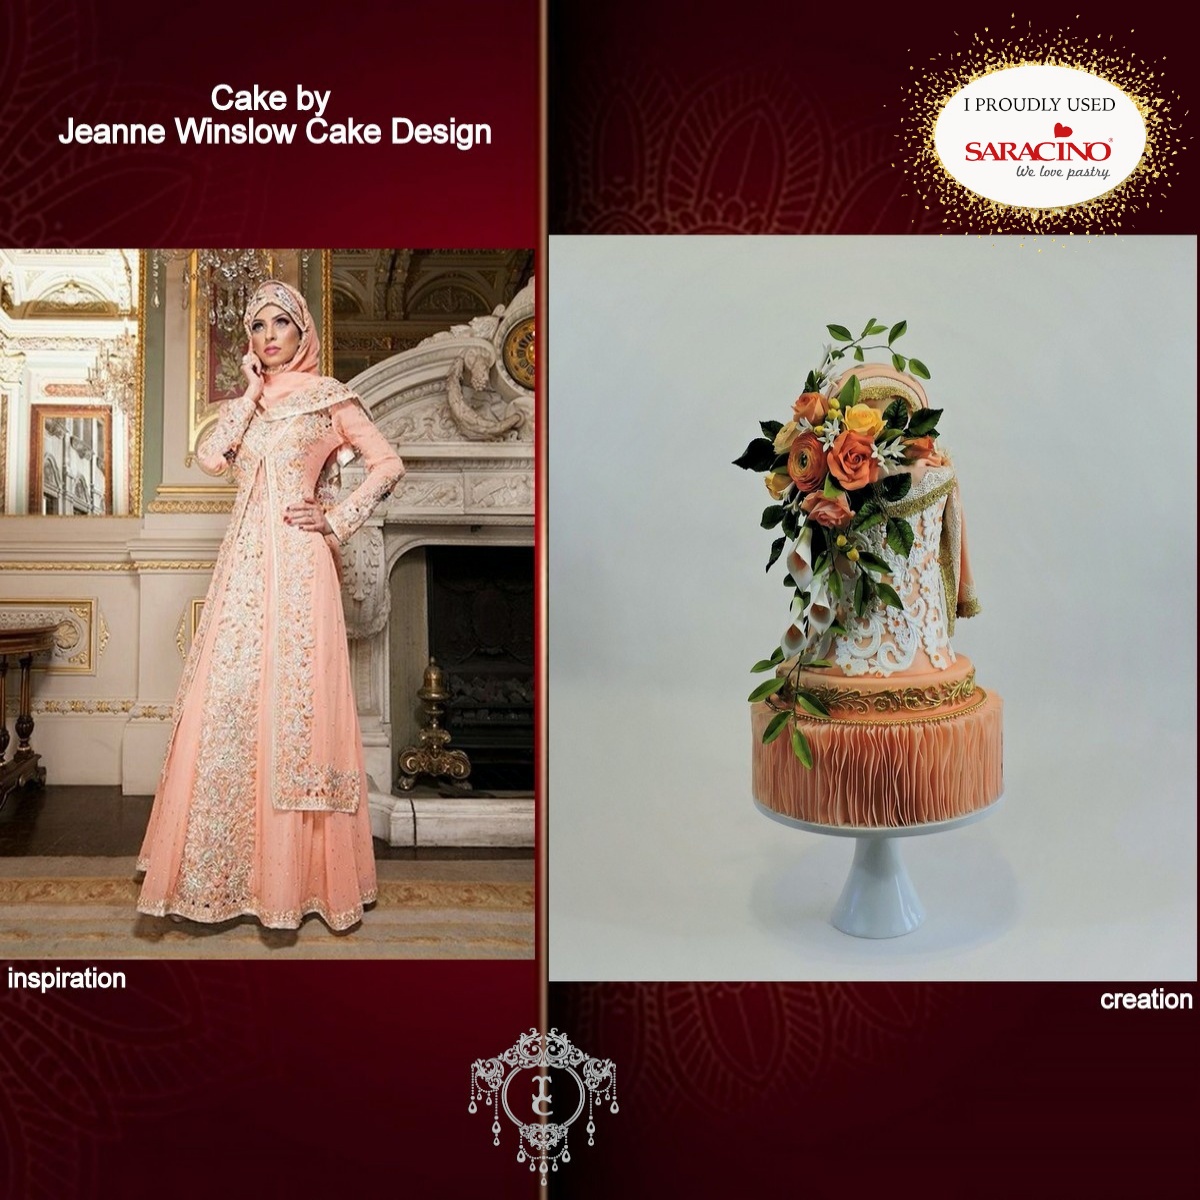
Jeanne Winslow aka JEANNE WINSLOW CAKE DESIGN

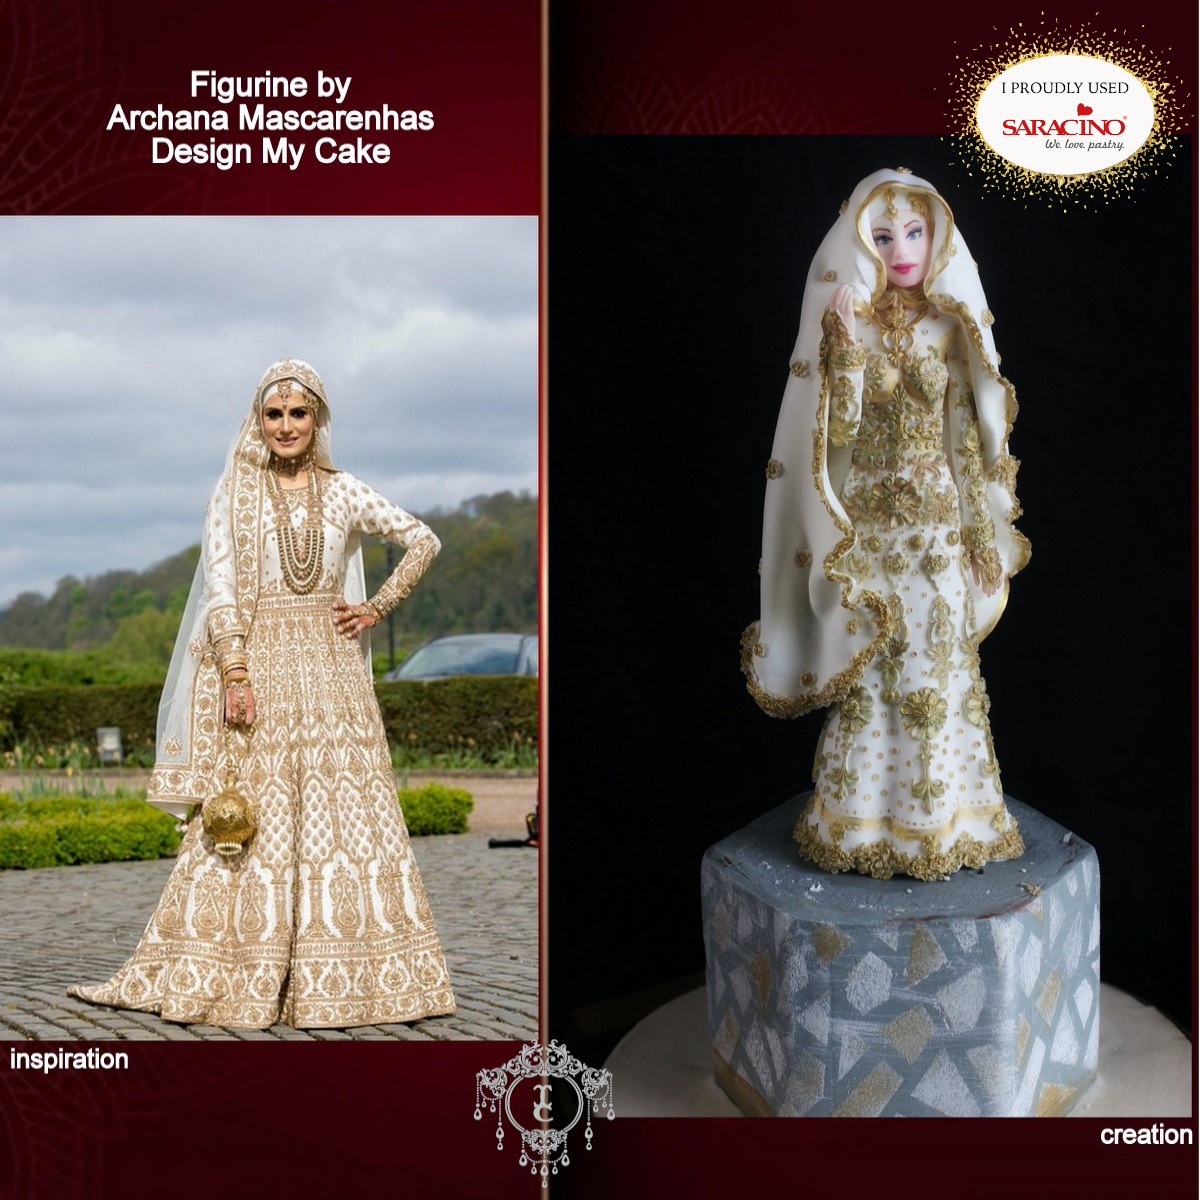
Archana Mascarenhas aka DESIGN MY CAKE


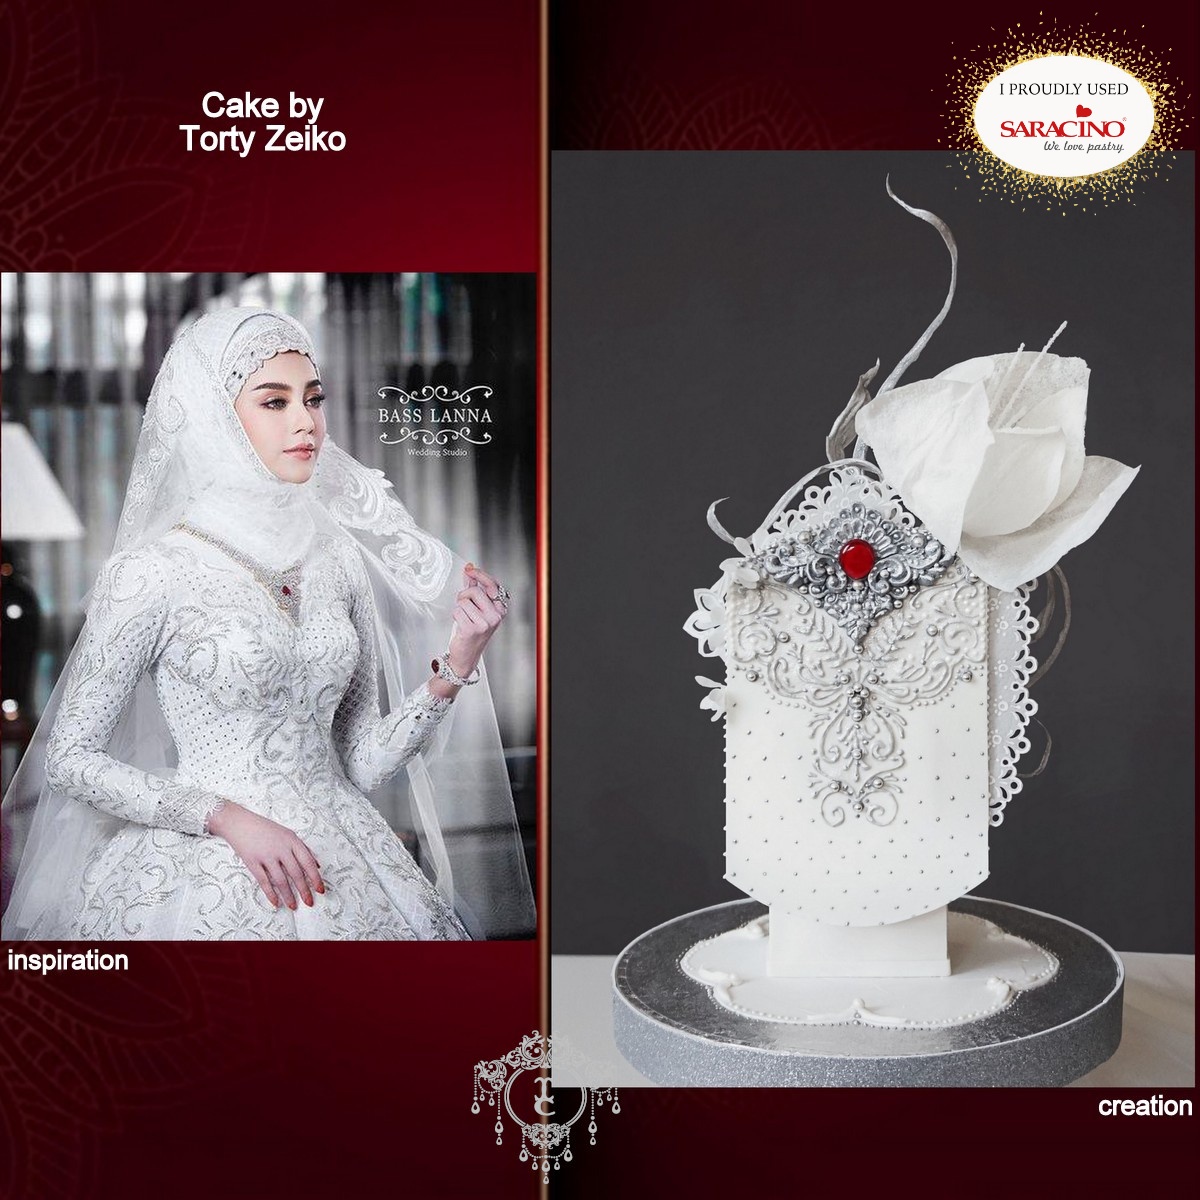
Iveta Košíková aka TORTY ZAIKO

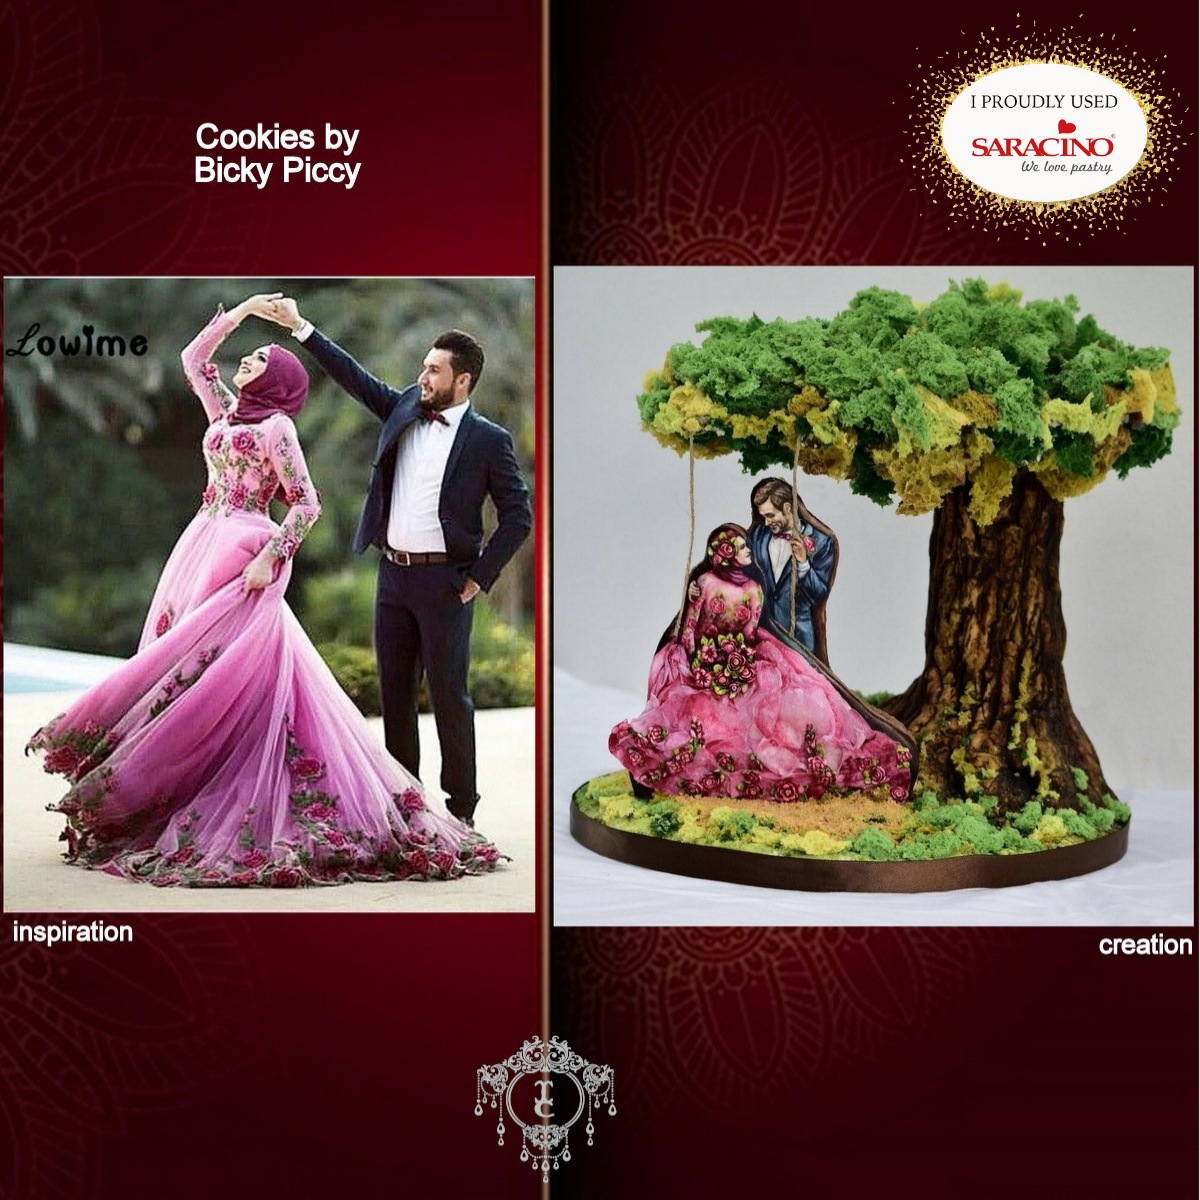
Silviya Jankowski aka BICKY PICCY


Evangelia Korontini aka SWEET MADNESS 

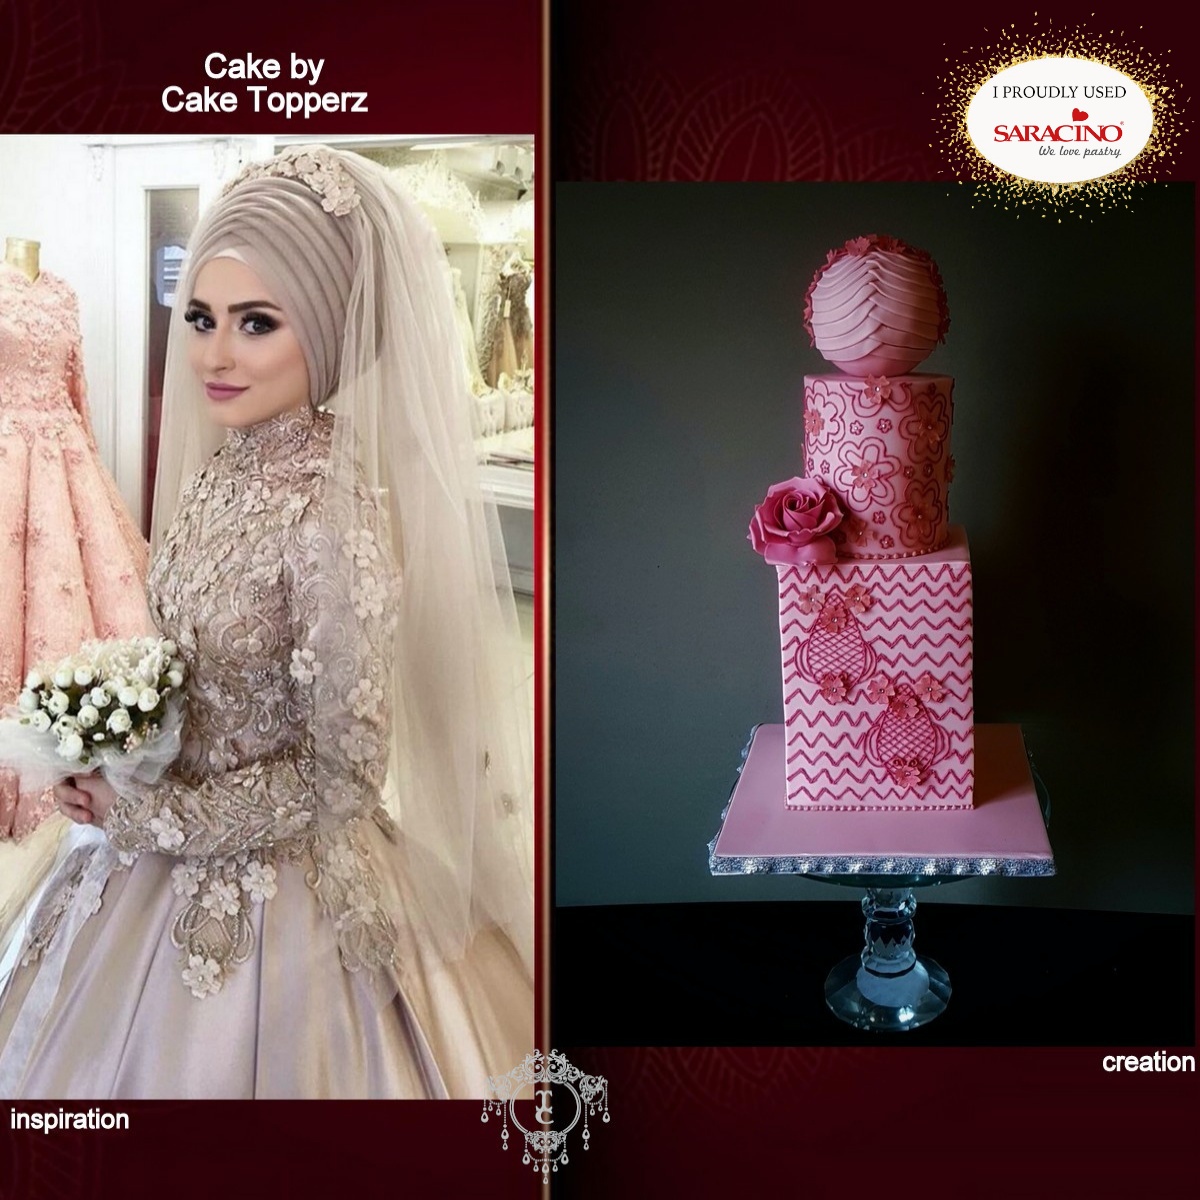
Tasnuta Alam aka CAKE TOPPERZ

 
Congratulations On Your Amazing Creations!

Take Your Time And Visit Couture Cakers Facebook Page COUTURE CAKERS INTERNATIONAL To View All The Amazing Creations!


Join Our Newsletter

We’d love to send you the latest news, discounts & exclusive offers via email! By signing up below you are confirming you are happy for Saracino to send you marketing emails. We will always treat your personal details with the upmost respect & will never sell your details to other companies for marketing purposes.

• All the latest industry news   • FREE video tutorials   • Exclusive product offers

Products         Tutorials          Ambassadors           Events           Blog           Showcase         Contact

Quiz winners – Favourite cake

Quiz winners – Favourite cake

QUIZ WINNERS

by Saracino

THANK YOU!!!

We would like to give a huge thank you to all of you who took part in our quiz. Huge congratulations to all the winners. As promised we will publish your creations with pleasure.
We have also chosen one lucky person that will receive a few goodies from Saracino.
The Prize goes to Sylwia Sidorkiewicz-Bęś. 

By Marisa Kemp aka

Cake Angel Page

By Yvonne Eggers aka

Eve’s Zucker-Himmel

Sylwia Sidorkiewicz-Bęś

Congratulations On Your Amazing Creations!

Join Our Newsletter

We’d love to send you the latest news, discounts & exclusive offers via email! By signing up below you are confirming you are happy for Saracino to send you marketing emails. We will always treat your personal details with the upmost respect & will never sell your details to other companies for marketing purposes.

• All the latest industry news   • FREE video tutorials   • Exclusive product offers

Products         Tutorials          Ambassadors           Events           Blog           Showcase         Contact

DECORATING EASTER COOKIES

DECORATING EASTER COOKIES

Skill level: BEGINNERS

Royal Icing Consistencies:

  • Stiff: for contour and volumes
  • Medium: to fill

You will need:

  • Saracino Royal Icing – Stiff: for outline and volumes
  • Saracino Royal Icing – Medium: For run-outs / filling.
  • Saracino Gel Colours: yellow, orange and green
  • Saracino Powder Colours: blue, black, yellow, orange, brown and green
  • Black edible pearls
  • Brushes: 20/0, 4 and 8
  • Needle tool
  • Piping nozzles: 1, 2, 3 and leaf
  • Piping bags
  • Pencil
  • Parchment paper
  • Clear alcohol
  • Round cookie

Step 1

Transfer your template to a piece of parchment paper using a pencil (lead free).

Step 2

Transfer the template to your cookie by placing the parchment paper over the cookie and outline the drawing with the pencil.

Step 3

Using the previously mixed stiff royal icing fill your piping bag and using a No. 2 piping nozzle outline the top eggshell and the eyes.

Step 4

Repeat the process on the bottom eggshell.

Step 5

Fill the inner of both eggshells using ‘let down’ royal giving a flowing consistency. Piping nozzle No. 3 should be used here.

Tip: To achieve the perfect run-out consistency the Royal icing should be ‘let down’ to give a flowing consistency. When you mix and lift your spatula the Royal should level and flow into itself in a count of 10 seconds. It can be let down with a small amount of water or pre-mixed diluted Albumen.

Step 6

Sometimes when we pipe air bubbles form. If this happens they can be popped using a needle tool. Allow to dry.

Tip: You can use a cocktail stick instead of the needle tool.

Step 7

Allow the shells to dry slightly and form a ‘crust’. Repeat the same process for both eyes and place one black pearl on each eye before the royal icing dries.

Step 8

Carefully, using piping nozzle No. 1 (or even the end of a cocktail stick) make one small dot of white royal icing on each black pearl.

Using the Yellow Gel, colour some of the White Royal Icing and put in a piping bag with nozzle No. 2. Outline the body  

Step 9

Pressure pipe the feathers for the wings using the ‘Stiff’ Royal mix. Apply even pressure when piping so you achieve a smooth finish. The feathers should have definition between each one. 

Step 10

Run-out the inner of the chick body using flowing consistency Royal Icing and piping nozzle No. 3.

Step 11

Pop any air bubbles using the needle tool and allow it to dry.

Step 12

Using the Orange Gel, colour some Royal Icing and let-down to give a run out consistency. Run-out the beak using piping nozzle No 3.

Step 13

Pressure pipe the carrot with orange royal icing (stiff consistency), using piping nozzle No. 2, apply even pressure and drag from top to bottom of the right wing to give the tapered carrot shape.

Step 14

Using the Green Gel, colour a small amount of the Royal Icing. Using piping nozzle No 1, pipe the leaves to the top of the carrot.

Step 15

Using the stiff green Royal Icing and a leaf piping nozzle, pipe a line of leaves under the bottom eggshell and allow them to dry.

Step 16

Make a second layer of leaves on top of the first layer. The second layer is to be staggered from the ones below. Allow the icing to dry completely before the next stage.

Step 17

Colour the top of the eyes using the Blue dust and a soft brush.

Step 18

Dust between the eyes and the bottom of the top eggshell with black.

Step 19

Dilute some of the black powder colour with clear alcohol. Using a fine paint brush outline the broken egg shells.

Tip: You can use any clear alcohol for this. 

Step 20

Using the black paint and the fine paintbrush paint lines of cracking and dots on both eggshells.

Step 21

Paint a smile on the beak with the black paint and the fine paintbrush.

Step 22

Paint some fine lines on the carrot.

Step 23

Using the Yellow Powder colour and a fine brush dust the top of the top egg shell.

Step 24

Using a flat soft brush shade the entire outline of the body and feathers with orange dust to add highlight and definition.

Step 25

Dust the corners of the beak with orange.

Step 26

Dust both shells with brown, from outside to the inside.

Step 27

Using the soft brush shade the outline of each leaf with green dust to add depth.

BOHO RABBIT AND BEAVER

BOHO RABBIT AND BEAVER

Author: SARAH BRAY

Skill level: BEGINNERS

You will need:

  • 60g Grey modelling paste (Saracino white modelling paste with a touch of black)
  • 15g Light grey modelling pate (Grey paste above with more white modelling paste added)
  • 60g Biscuit brown modelling paste (Saracino white modelling paste coloured with saracino orange, yellow and brown gel colours)
  • 30g Light biscuit brown modelling paste (biscuit brown modelling paste with more white added)
  • 25g Dark brown modelling paste (Saracino white paste coloured with Saracino brown gel colour)
  • Small pieces of Saracino black, Saracino azure blue, Saracino tiffany (light blue) Saracino pink and Saracino white modelling paste
  • Sugar glue
  • Black sugar pearls
  • Saracino edible pink dust
  • Workboard
  • Craft knife
  • Small ball tool
  • Very small ball tool
  • Paintbrush
  • Soft brush
  • Veining tool
  • Blossom plunger cutter (small)
  • Diamond plunger cutter
  • Blade tool
  • Rolling pin

Step 1

Roll 25g of grey paste into an egg shape in the palm of your hands.

Step 2

Push paste into work board to flatten base and use the tip of a craft knife to add texture to the front of the rabbits tummy.

Step 3

For the head take a 20g piece of grey paste and roll into a ball in the palm of your hands. Use the side of your hand to roll the ball backwards and forwards to make a kind of pear shape. Smooth off any edges with your fingers.

Step 4

Use your thumb and index finger to shape the top of the body so that the head will sit nicely on the front.

Step 5

Use some sugar glue to attach the head to the body at a slight angle.

Step 6

Take two small petit pois sized balls of the light grey paste and flatten onto the face.

Step 7

Use a very small ball tool to lightly indent little dots.

Step 8

Shape a small piece of pink paste into a triangle with your fingers and push between the top of the two circles.

Step 9

Make two holes for eyes using the end of the paintbrush

Step 10

Make two further holes on the top of the head for the ears to sit in.

Step 11

For the back legs roll a small cherry tomato sized ball of grey paste into a sausage with your fingers but do not roll it to the end. This larger part will become his back foot.

Step 12

Press the foot onto the board to flatten and rotate with fingers to create a foot shape.

Step 13

Pinch the top of the leg with the thumb and fingers to shape so it will sit neatly against the rabbits body.

Step 14

Push against the side of the rabbit and use fingers to shape the foot if necessary. Do not stick on at this stage so that you can move the legs slightly if needed when the front legs are added. Repeat to make the second back leg.

Step 15

To make the front legs roll a large marble sized ball of grey paste with your fingers in the palm of your hand, leaving the end bigger for the foot (in the same way as for the back legs) Don’t worry if it looks too long you can always remove the excess.

Step 16

Press the wider part into the board with your finger to create a foot.

Step 17

Shape the top of the leg and press onto the rabbit securing with sugar glue if necessary. Repeat to make a second leg.

Step 18

Use the narrow end of a veining tool to make two indents onto each paw.

Step 19

Take small balls of light grey paste and flatten in the palm of your hand for the pads on the rabbits feet.

Step 20

Put a small spot of sugar glue into each hole for the eyes and add black sugar pearl. Widen the hole if necessary with the end of a paintbrush.

Step 21

For the ears roll a marble sized piece of paste into a teardrop shape (approx. 1” in length) and flatten. Secure into hole on head with sugar glue. Support whilst drying if necessary. Repeat for the second ear bending the tip over slightly after sticking in.

Step 22

To make the feathers roll a small teardrop piece of purple paste and flatten. Add little v’s of blue paste and cut slits along both sides with a craft knife.

Step 23

Repeat in pale blue and dark blue to make a second feather and stick both to the rabbits head. Roll a thin white band of paste and stick onto the rabbits head using sugar glue if necessary.

Step 24

Add a couple of little blossom flowers and small rolled roses.

Step 25

For the teeth shape a small piece of white paste into a triangle and push between the bottom of the circles on the face.

Step 26

Roll 25g of biscuit coloured paste into an egg shape in the palm of your hands.

Step 27

Push onto the work board to flatten the base and use your fingers to accentuate the tummy.

Step 28

For the beavers head take a 20g piece of biscuit paste. Roll into a ball in the palm of your hands. Use the side of your hand to roll the ball backwards and forwards to make a kind of pear shape. Smooth off any edges with your fingers and square off the base of the head.

Step 29

Use your thumb and index finger to shape the top of the body so that the head will sit nicely on the front.

Step 30

Use some sugar glue to attach the head to the body at a slight angle.

Step 31

Take two small petit pois sized balls of the light biscuit paste, flatten onto hand and press onto face (as with the rabbit).

Step 32

Shape a small piece of black paste into a triangle and push in between the top of the two circles.

Step 33

Make two holes for eyes using the end of the paintbrush.

Step 34

To make the ears roll a pea sized piece of biscuit paste into a ball and use a ball tool to indent the centre. Cut in half and attach to either side of the beavers head.

Step 35

For the beaver’s teeth take a small piece of white paste and use fingers or a craft knife to make into a small house shape.

Step 36

Push in between the bottom of the two circles (using sugar glue if necessary) and gently mark teeth with a craft knife.

Step 37

To make the feet take a small marble sized piece of dark brown paste and shape into a teardrop. Flatten slightly and use the thin end of a veining tool in a rocking motion to mark two lines. Repeat for the other foot. Set aside to firm up a bit.

Tip: Setting paste aside, particularly the darker colours, can make it much easier to handle.

Step 38

Roll a large marble sized piece of biscuit paste into a teardrop shape and place on your index finger. Use your other hand to pull the paste down gently onto your finger to flatten the base. Repeat for the other leg.

Step 39

Place the foot just next to the beavers body (but not actually stuck to it) With the wider part at the front, push the leg onto the body and foot securing with sugar glue if necessary. Repeat for the other leg.

Step 40

For the front legs roll a small marble sized ball of biscuit paste with your finger in the palm of your hand leaving the end bigger for the foot.

Step 41

Press the wider part onto the board with your finger to make a foot and mark on two lines with the narrow end of a veining tool. Repeat for the other leg.

Step 42

Pinch the top of the leg with your thumb and fingers to shape it so it will sit neatly against the beavers body. Secure both legs to the body with sugar glue if needed.

Step 43

To make the tail shape a large marble sized piece of dark brown paste into a teardrop shape and flatten slightly with the palm of your hand. Use a Dresden tool to mark a diagonal criss cross pattern.

Step 44

Attach to the back of the beaver securing with sugar glue if necessary.

Step 45

Add a spot of sugar glue to each of the eye holes and put a black sugar pearl in each.

Step 46

To make the feathers roll a small teardrop piece of light blue paste and flatten. Add little v’s of purple paste and cut slits down either side as before. Repeat to make a second feather using dark blue and purple paste.

Step 47

Secure both feathers to the head with sugar glue.

Step 48

To make the band cut out a narrow strip of white paste. Use a diamond plunger cutter to cut out small diamonds then cut them in half and attach the triangles to the band.

Step 49

Use sugar glue to attach the band to the beavers head and trim off the excess with a craft knife.

Step 50

For the finishing touch dust the cheeks of both the beaver and the rabbit using a soft brush and edible pink dust.

CHRISTMAS NUTCRACKER

CHRISTMAS NUTCRACKER

Author: Zoe Smith

Skill level: BEGINNERS

You will need:

  • Tiffany modelling paste
  • White modelling paste
  • Skin modelling paste
  • Pink liquid colour
  • Black liquid colour
  • Craft knife
  • Small rolling pin
  • Flower tool
  • Snowflake plunge cutter
  • Edible glue
  • Work mat
  • Wooden skewer

Step 1

Roll 50g of skin modelling paste into a ball, flatten the base against your mat to make the head.

Step 2

Take a pea sized piece and pinch it into a triangle shape. Trim one side so it will sit flush against the head.

Step 3

Stick the nose to the centre of the face.

Step 4

Colour a tiny amount of paste pink and roll into to balls. Flatten and glue either side of the nose.

Step 5

Roll a pea sized amount into a ball and pinch to create a cone shape.

Step 6

Flatten and pull pointed end to make a finer tip. Curl around and wait a minute to firm.

Step 7

Glue under the nose and repeat on the other side.

Step 8

Take tiny bits of white modelling paste and roll into sausages and flatten slightly. Glue to the head as shown.

Step 9

Take 60g of Tiffany modelling paste and shape into a rectangle for the torso and pinch slightly at the base. Set aside to firm.

Step 10

With 16g of a Tiffany/white modelling paste mix make a similar shape as you made for the torso to create the legs. But make sure the top surface is nice and flat.

Step 11

With your flower tool draw a line down the center, repeat on the other side.

Step 12

To make the feet take approx 1g of the same mix and roll into an oblong shape then cut into two.

Step 13

Glue the feet to the legs.

Step 14

Roll 30g of Tiffany modelling paste to make the hat. Make one side flat. 

Step 15

Pinch the other side as shown.

Step 16

Push a wooden skewer through the legs, torso, head and hat leaving enough at the base to stick into your cake or dummy.

Step 17

For the arms roll out 7g of Tiffany and trim either end and cut into two.


Step 18

Glue to the sides of the torso as shown.

Step 19

Take small ball of Tiffany/white mix and cut into two.

Step 20

Glue to the tops of the arms. Add four tiny balls of white modelling paste flattened to create buttons.

Step 21

Colour a tiny bit of paste with a little Black to create a light grey. Roll into two shut eyes and glue above the cheeks.  

Step 22

Take 1g of white modelling paste for the beard, make an oblong shape, flatten and pinch at one end.

Step 23

Glue to the torso and push up the pinched end slightly.

Step 24

Separate 20g of white modelling paste into 8 balls. Make each ball into a teardrop shape that is flat at on end.

Step 25

Glue each of these pieces to the head ,the flat end under the hat and the pinched end to the neck.

Step 26

Roll out 2g of Tiffany /white mix into a strip long enough to wrap around the hat. With your craft knife cut out small triangles.

Step 27

Wrap around the hat and glue in place. Gently push the tips of the triangles away from the hat.

Step 28

Roll out a strip of Tiffany/white mix and glue around for a belt.


Step 29

With a small snowflake plunger cutter make a snowflake from white modelling paste. Then trim off the tips on each section.

Step 30

Glue to the hat.

Step 31

Make a teardrop from Tiffany/white mix and using the flower tool make a feather. Trim the rounded end.

Step 32

Glue to the hat and back of the snowflake. Ta da !