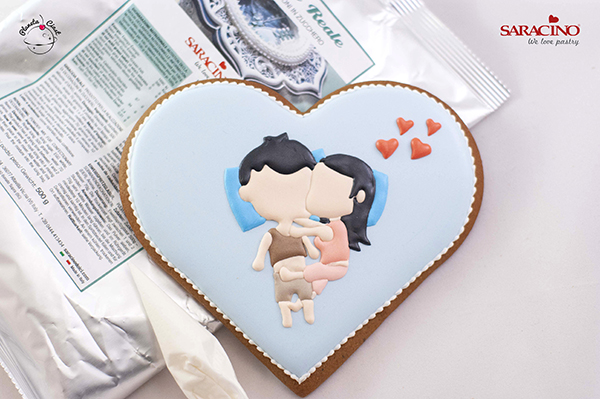
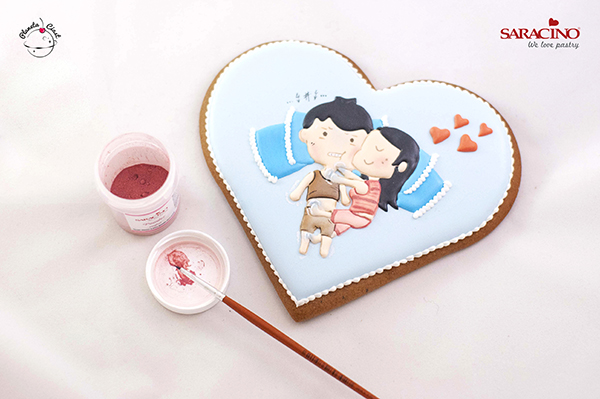
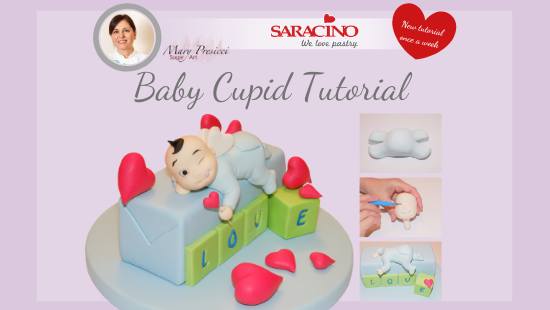
BABY CUPID TUTORIAL

BABY CUPID TUTORIAL

Author: Mary Presicci

Skill level: BEGINNERS 

You will need:

  • Light blue Pasta Model (140g)
  • Skin tone Pasta Model (85g)
  • Green Pasta Model (120g)
  • Red Pasta Model (90g)
  • Blue Pasta Model (5g)
  • White Pasta Model (5g)
  • Flower wire
  • Saracino skin powder colour
  • Scalpel
  • Modelling tools
  • Brushes in various sizes
  • Wooden skewers
  • Wire cutter
  • Saracino edible glue
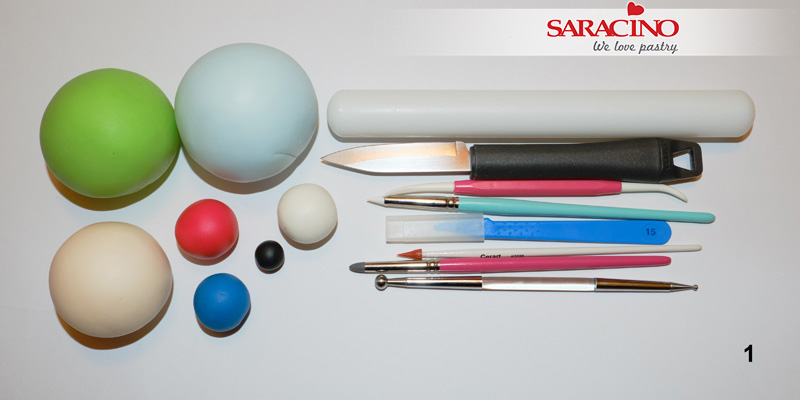
Step 1

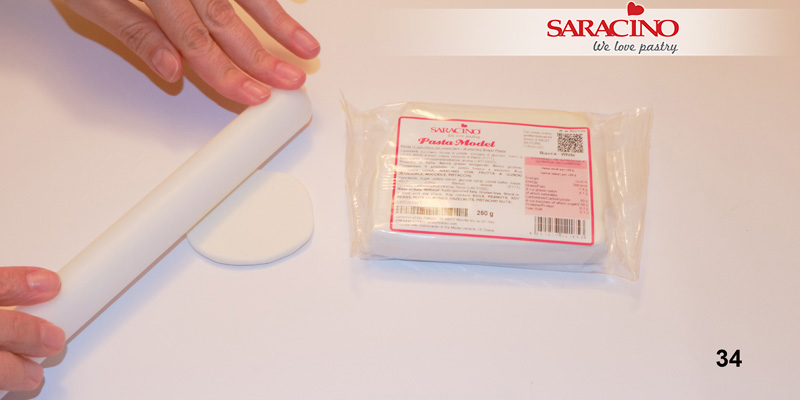
These are all the tools you will need to create this playful cupid
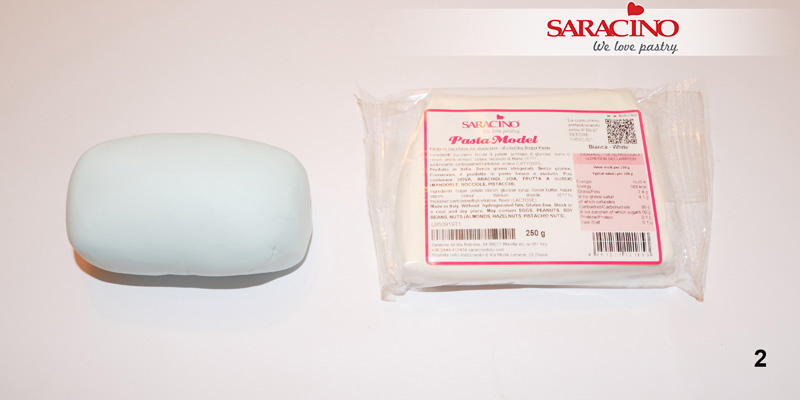
Step 2

Use your light blue paste to create a ‘pillow’ shape with rounded edges.
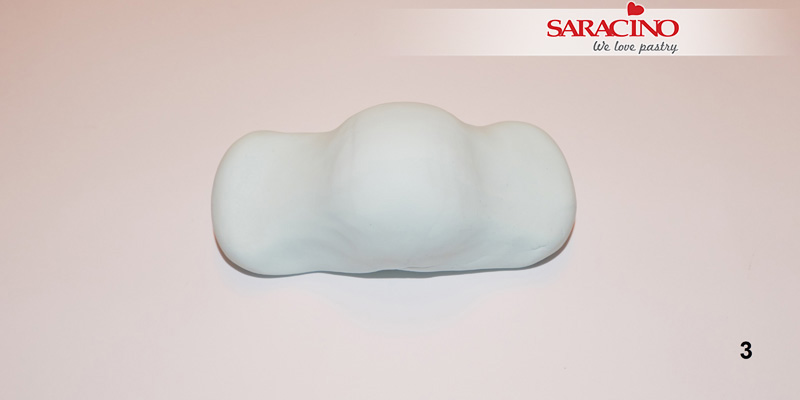
Step 3

Using your fingers press each side to flatten the ends like shown

Step 4

Using your sharp knife cut each end in half.
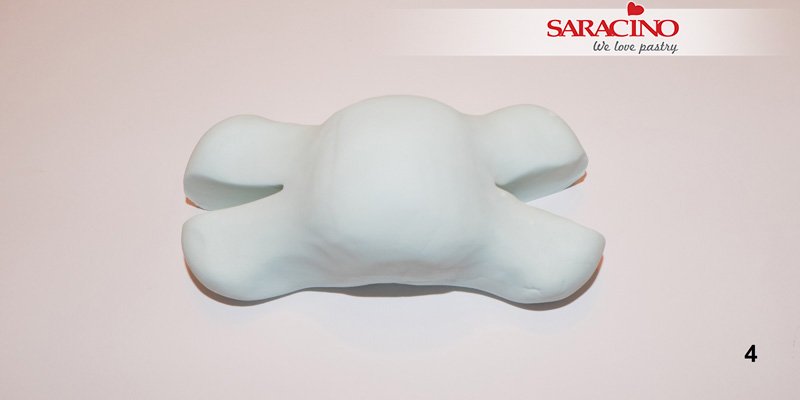
Step 5

Now use your fingers to model the shape of the character you want. Remember to smooth all the sharp edges to create the legs and arms.
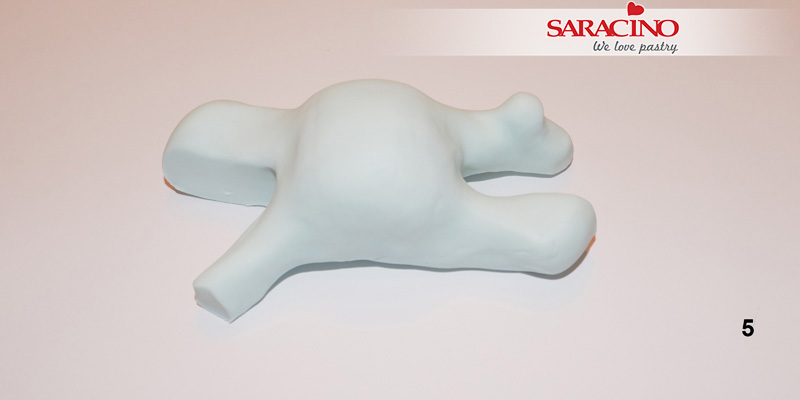
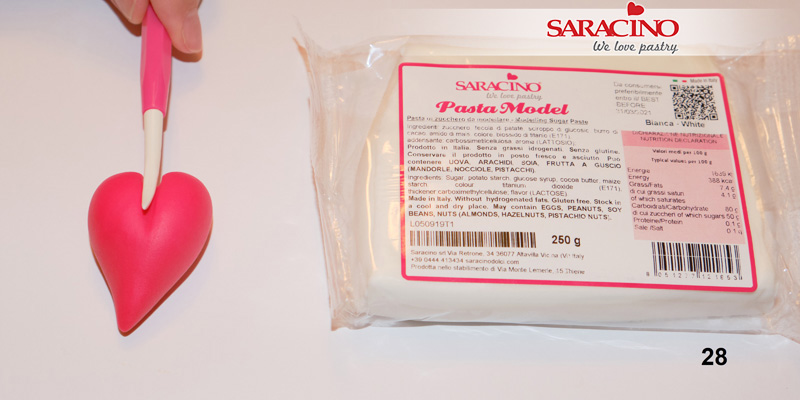
Step 6

Using a dummy as a base model the Cupid’s arm and leg into shape.
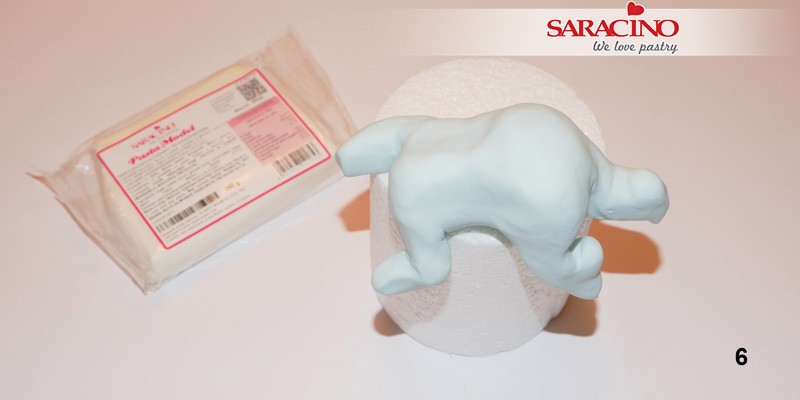
Step 7

Use your Dresden tool to mark out the shape of the nappy / pants.
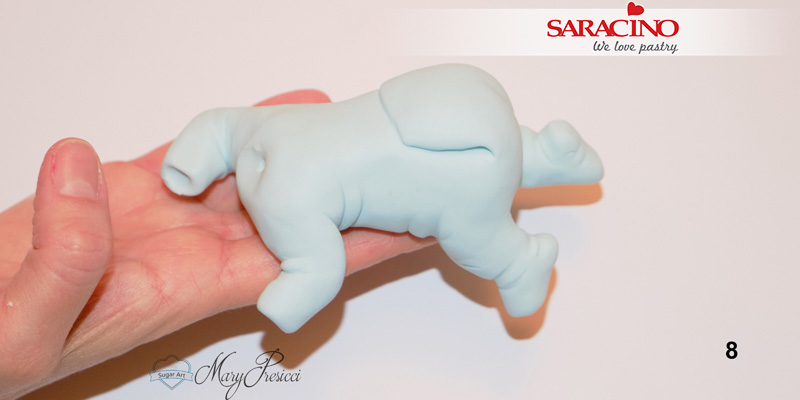
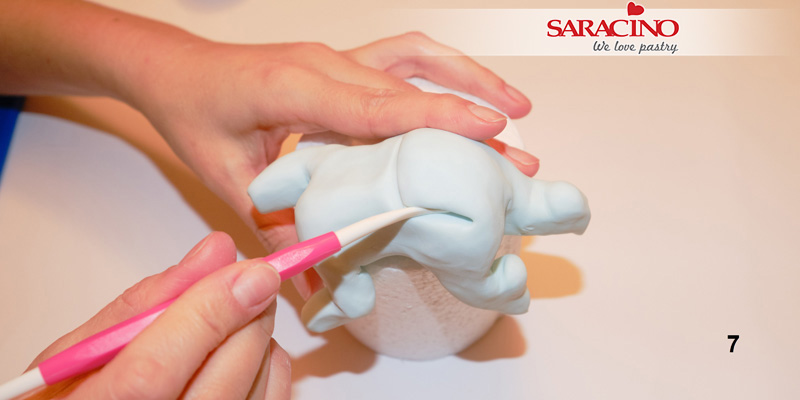
Step 8

Use your ball tool to create dents in the wrists. Now use the Dresden tool to form detail and creases to the tummy, arms and legs.
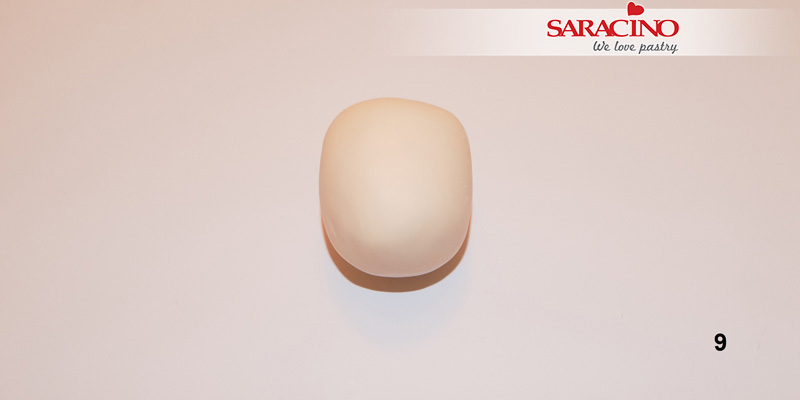
Step 9

Using 80g of your skin tone paste roll an oval shape with your hands to create the head.
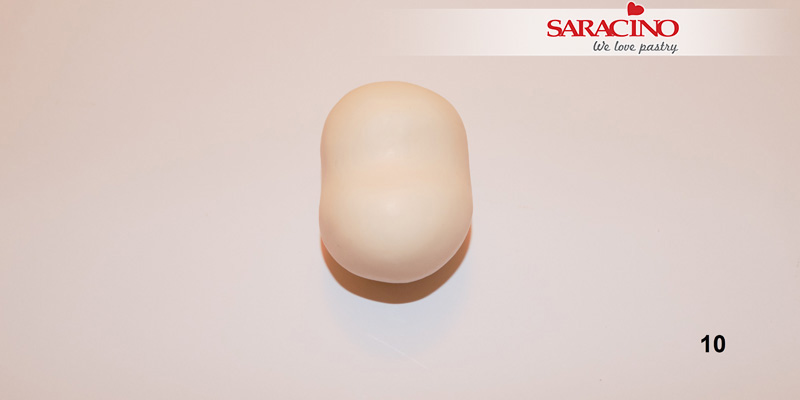
Step 10

Roll your finger across the centre to create the top of the head and the nose / mouth area.
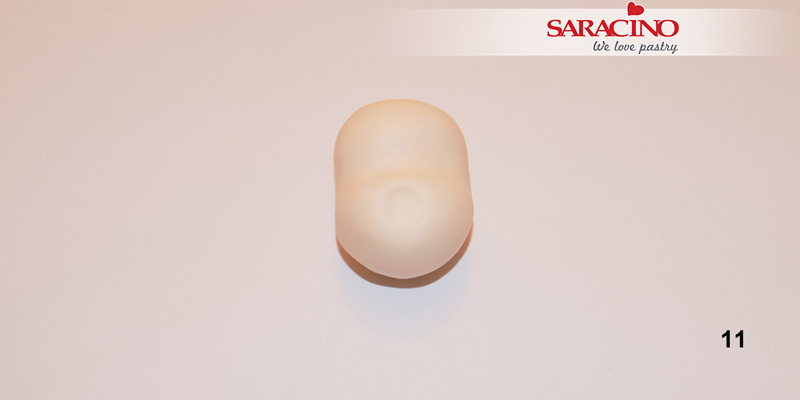
Step 11

Using your fingers gently pinch the paste to create a nose.
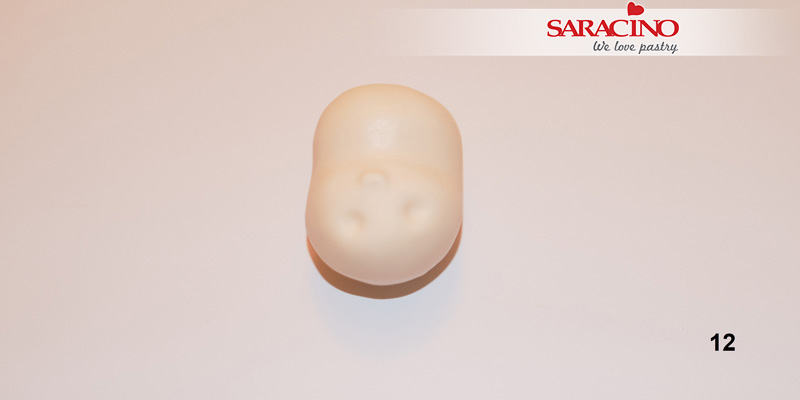
Step 12

Use your small ball tool to create a dent either side of the mouth by pressing gently.
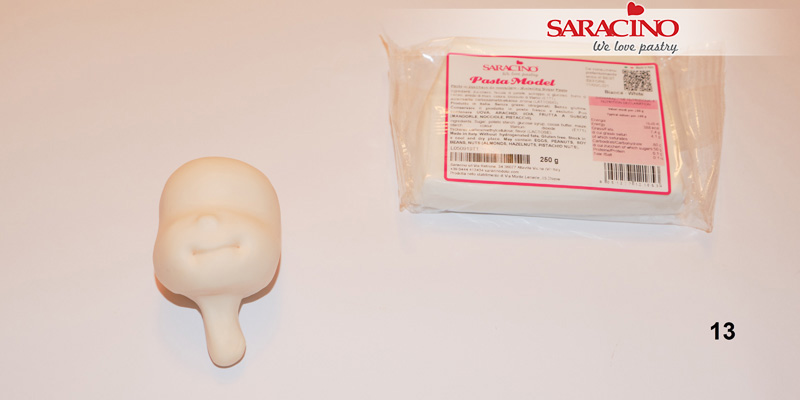
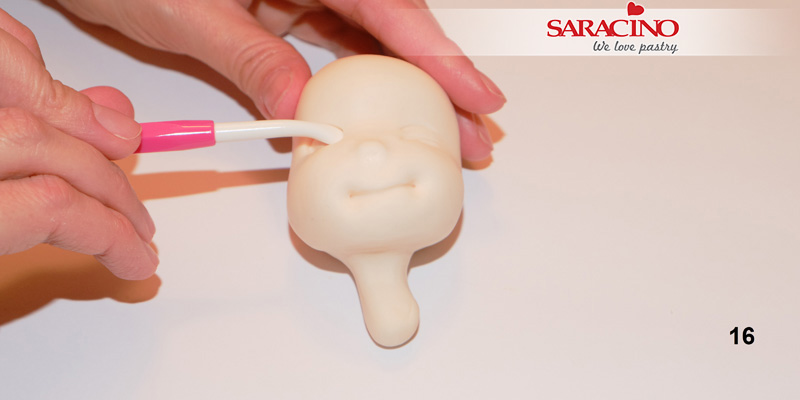
Step 13

Use your fingers to roll out a neck by rolling carefully. Then use your Dresden tool to mark the mouth.
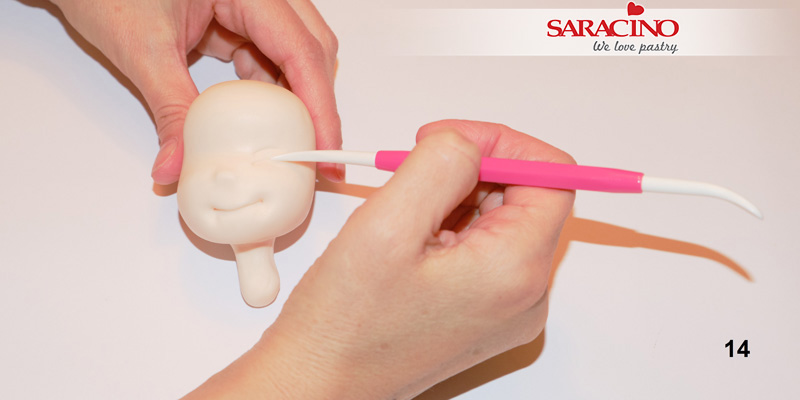
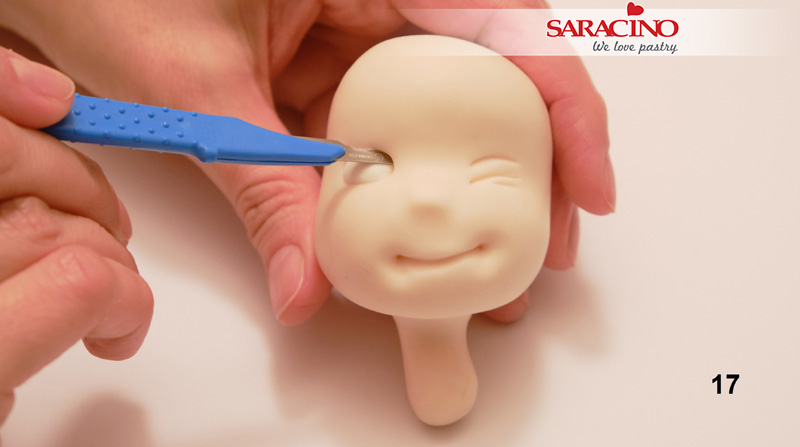
Step 14

Use your Dresden tool to mark the left eye giving a cheeky wink! Mark a couple of lines to add character.
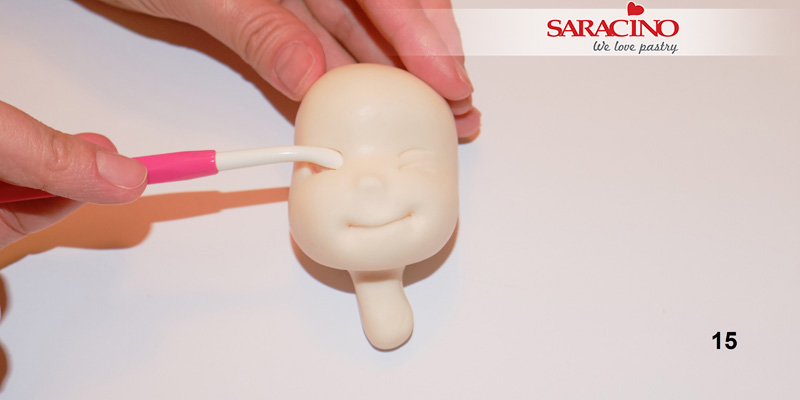
Step 15

Using the other end of your Dresden tool model the right eye.

Step 16

Use the blunt end of your Dresden tool to create the round eye pressing in at the sides.
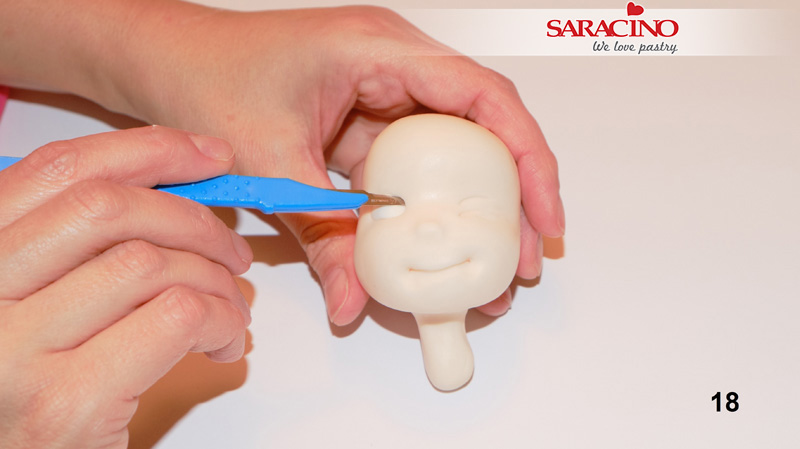
Step 17

Use your scalpel to remove some of the paste from the eye.
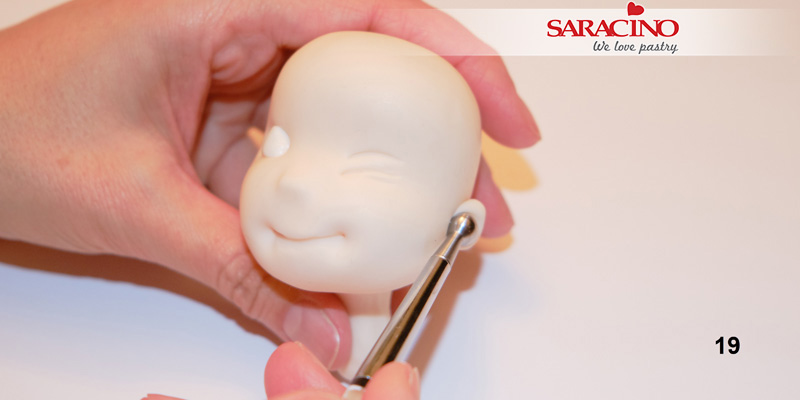
 

Step 18

Roll a small ball of white modelling paste and insert into the eye socket.

Step 19

Using skin tone paste roll two small balls to create the ears and attach them to the head by pressing using a ball tool
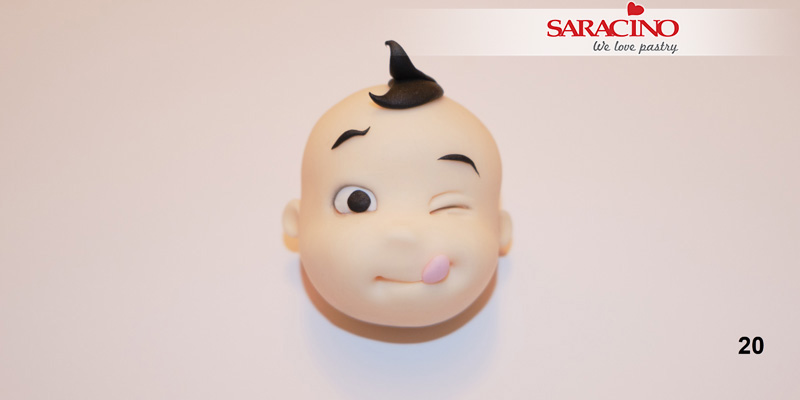
Step 20

Use some black model paste to create the pupil, the eyebrow and some locks of hair

Step 21

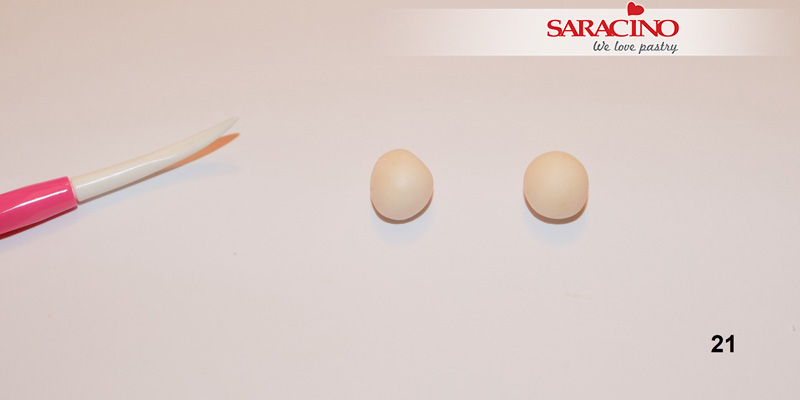
Roll two small balls of skin tone paste for your hands. 

Step 22

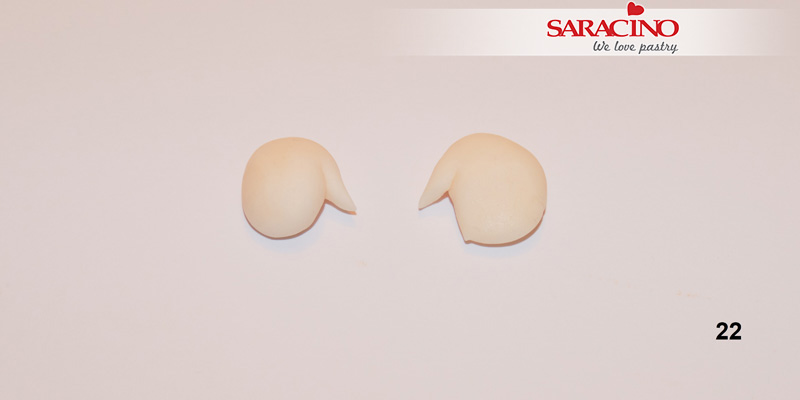
Flatten each ball slightly. Use your knife to cut the thumbs. Round off and blend using your fingers and Dresden tool. 

Step 23

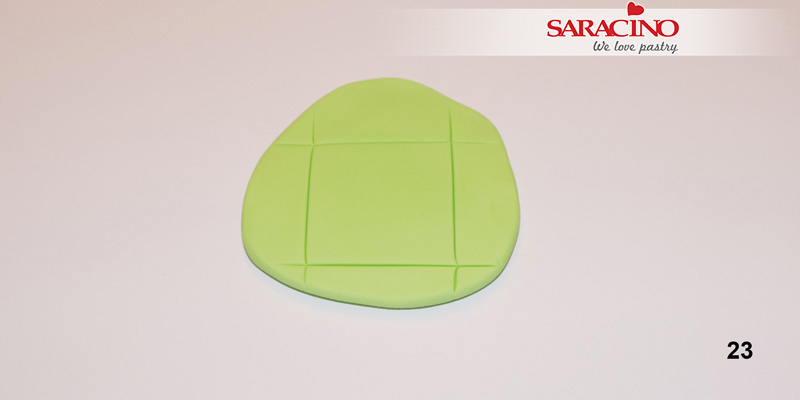
Roll your green modelling paste thinly. Cut out four 4cm x 4cm squares. 
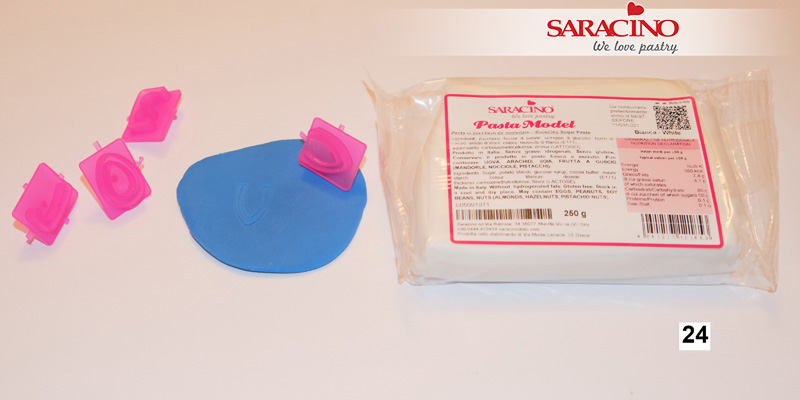
Step 24

Roll out your blue paste thinly. Using letter cutters create the letters L O V E.
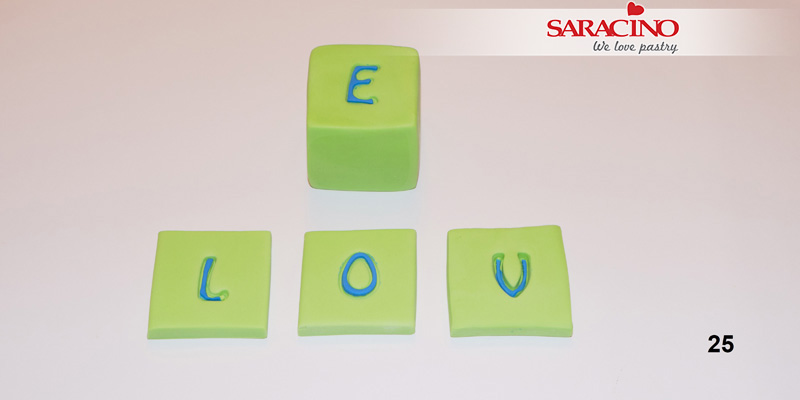
Step 25

Form a 4cm x 4cm cube from your green paste. With the squares you previously prepared press in the L O V E letter’s. 

Step 26

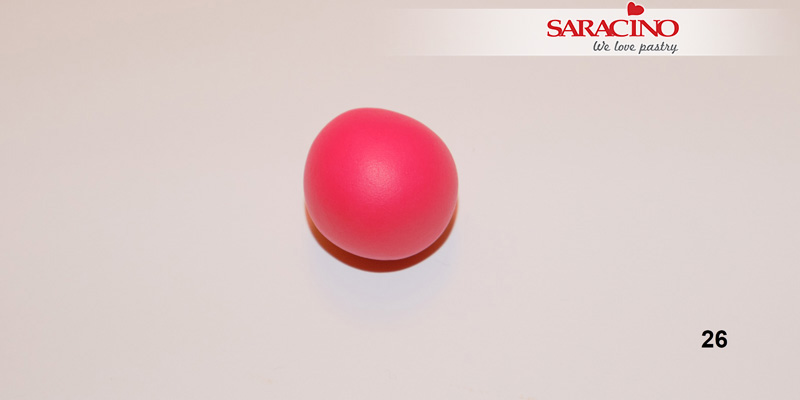
For the heart shape roll a small ball using red modelling paste.

Step 27

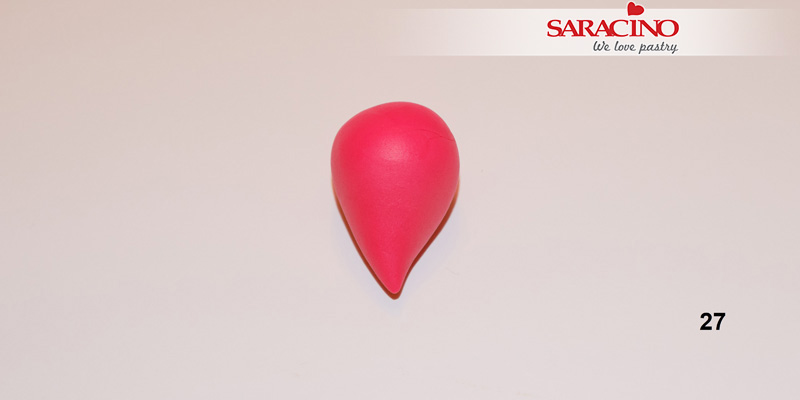
Use your fingers to roll it into a teardrop shape.

Step 28

Finish the heart using your Dresden tool. 


Step 29

Repeat this in different sizes to suit the amount of hearts you need for your piece.
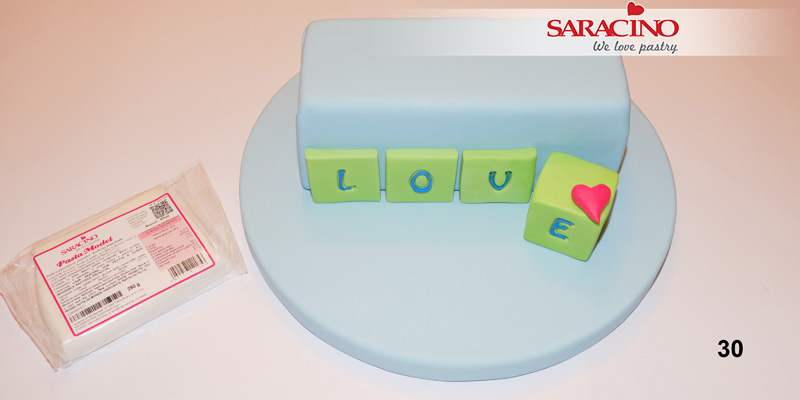
 

Step 30

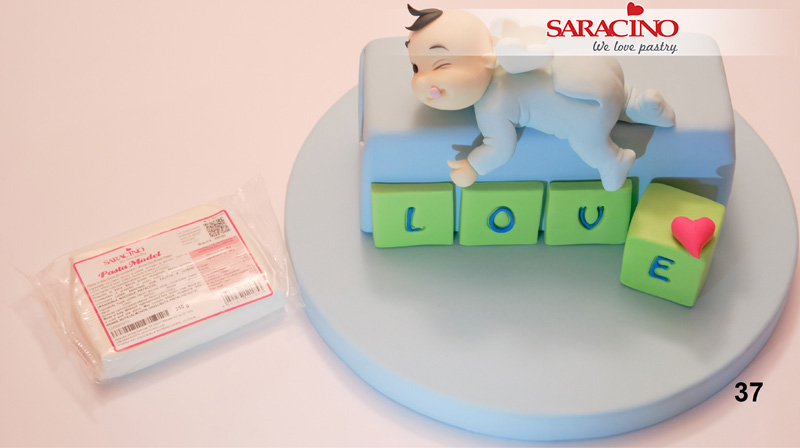
Using a little water fix the L O V to the side of your cake. Then position the E on the cube on your board so it reads L O V E. 
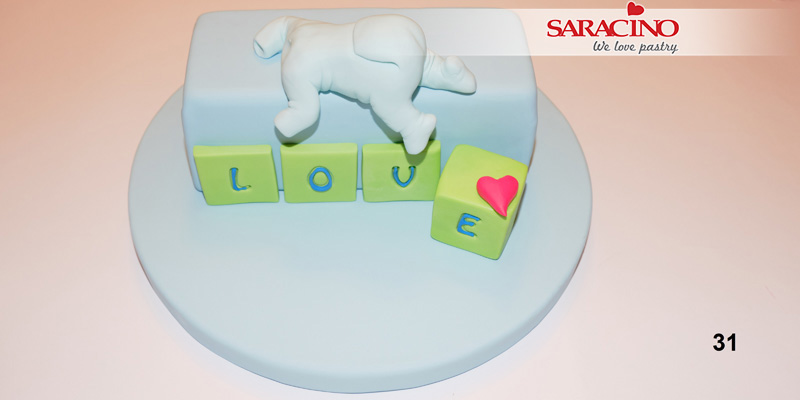
 

Step 31

Fix the cupid to the top of the cake. Use a little glue if required. You can start fixing the hearts where you would like them as well. 
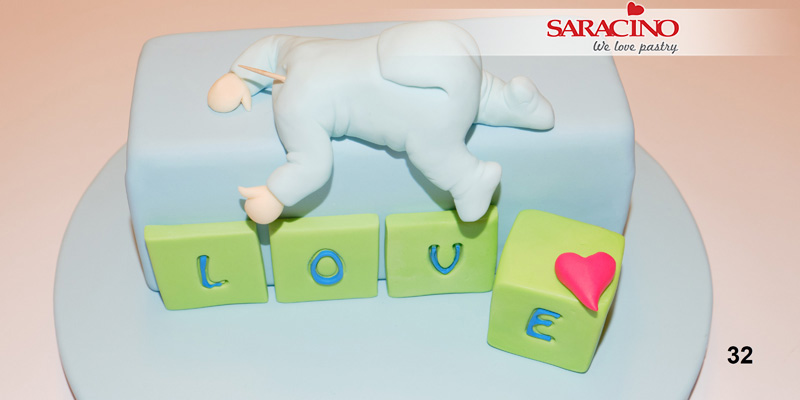
Step 32

Fix the hands using a little water. Now insert a wooden skewer / cocktail stick into the neck ready for the head.
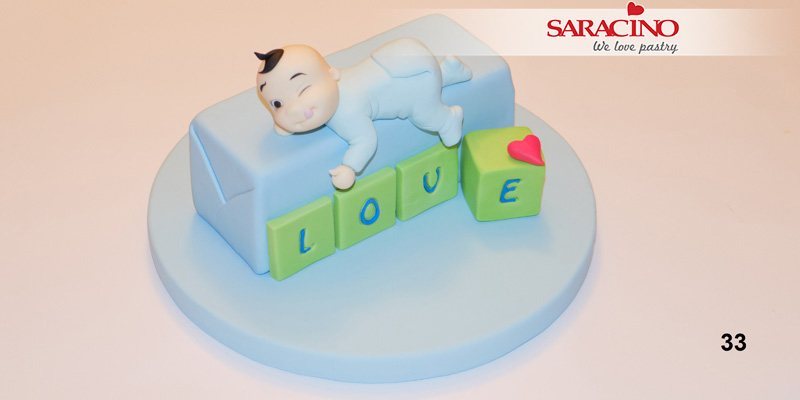
Step 33

Press the head onto the body at a cute angle. Use your Dresden tool to mark the lines on your cake. 


Step 34

Now for the wings of our cupid. Roll out some of your white paste.
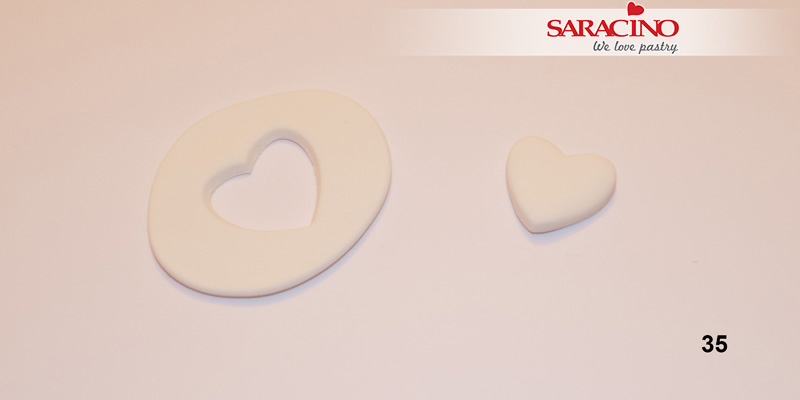
 

Step 35

Use your heart shaped cutter to cut out the two wings. You can choose the size you need!
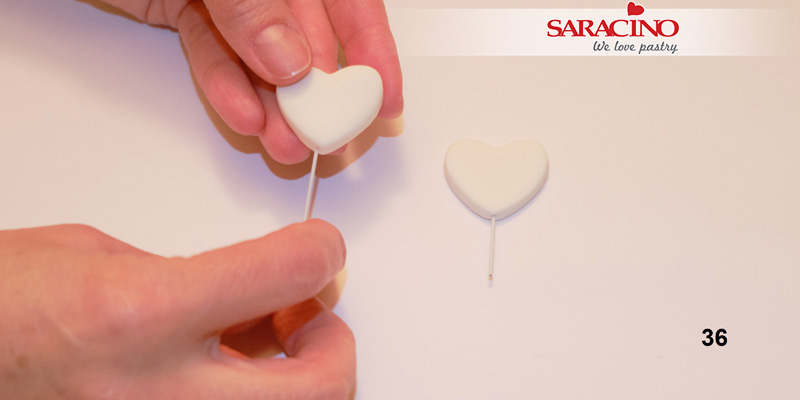
 

Step 36

Cut two short lengths of your florist wire. Insert them into each heart wing. 


Step 37

Insert the wings into Cupid’s back in the required position. 
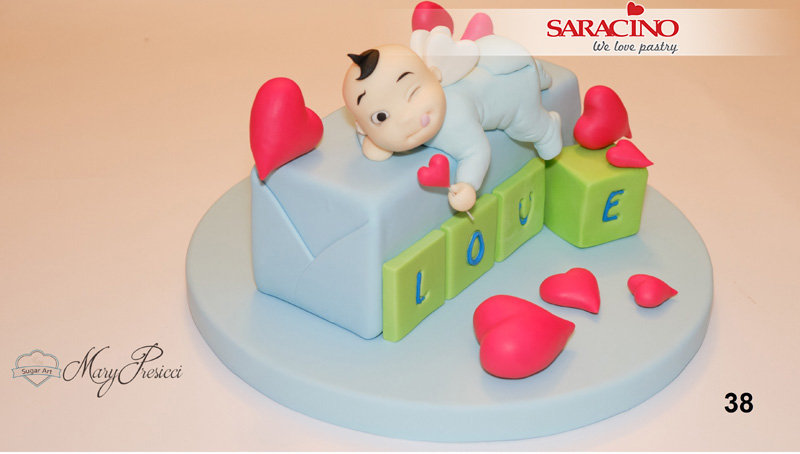
 

Step 38

Make a small heart with a length of florist wire. Place into the left hand as shown. Now fix your love hearts wherever you like on the cake to give the look you would like. 


VALENTINE’S COOKIE

VALENTINE’S COOKIE

FB: PLANETA CIAST

Skill level: ADVANCED

You will need:

  • Saracino Royal Icing
  • Sharp scissors
  • Water
  • Skewer
  • Thin precise brush
  • Small soft brush
  • Icing bags
  • Saracino gel colours: skin, red, brown, black
  • Saracino powder colours: white, skin, pink, light blue, blue, brown, black
  • Ready baked gingerbread

Step 1

Measure 250 grams of Saracino Royal icing, add 50 grams of water, mix intensively with a spoon or in a food mixer. The icing you are creating will be perfect for filling backgrounds on your gingerbread.

Step 2

Put a small amount of icing into a bowl and add Saracino blue powder coloring. Add smaller amount first and add gradually to achieve the perfect shade.

Step 3

Mix the icing until the coloring completly desolves. Well-mixed frosting with a dye should be smooth and without lumps. Advice: Put leftover icing in a sealed container or put a wet cloth on top of the bowl.

Step 4

Put one of your gingerbread on a board and fill a piping bag with the coloured royal icing.

Step 5

Cut out a small hole on the sharp end of the icing bag. Pipe a line around the edge of the gingerbread.

Step 6

Run out between the piped line with coloured royal icing.

Step 7

The background will need about 2h to dry. Alternatively you can put it in the oven on 50 degrees celcius for around 10 minutes. The icing on the top will dry out, but will still be soft under the surface. While moving the gingerbread, DON’T touch the icing!

Step 8

After the icing dries out you can put other layers. You can easily draw a shape using a skewer.

Step 9

Put some white royal icing into a bowl and add one or two drops of Saracino skin tone gel colour.

Step 10

Fill an icing bag, cut out a little hole in the sharp end of the bag.  Mark on the gingerbread face, hand and the leg of the character. Important: You can add other elements when the previous dries out.

Step 11

Mark the head of the second character and pipe the outline.

Step 12

Run out the head shape with icing after the first head has dried out slightly.

Step 13

Pipe the neck and an ear.

Step 14

Put some white royal icing in a bowl and add a drop of Saracino red gel coloring. Mix with a spoon. Put half of the prepared icing in an icing bag. Add another one or two drops of the red gel coloring into the bowl, mix it and put it in another icing bag. This way you will achieve two different shades of pink.

Step 15

Repeat steps from the 14th point, but with Saracino brown gel coloring.

Step 16

Repeat steps from the 14th point, but with Saracino black gel coloring. Add more drops to the icing as we want a strong black colour.

Step 17

Draw a shirt with the pink icing, a t-shirt with dark brown and the pants with light brown. Leave it to dry.

Step 18

Draw the first trouser leg with light pink icing, hands and legs with nude color icing.

Step 19

Draw the second trouser leg with light pink icing, hands and legs with the nude color icing.

Step 20

With the nude color icing, pipe the leg and the belly.

Step 21

Pipe the hair outline with the black icing.

Step 21

Run out the hair with black royal icing.

Step 22

Pipe the hairline of the second character.

Step 23

Run out the hair with black royal icing.

Step 24

Put the light blue icing into a bowl and add a little more Saracino blue powder to achieve stronger colour. Mix it, put into the icing bag and pipe the pillows. Advice: You can also use the gel colour to colour your icing.

Step 25

Put the remaining pink icing into a bowl and add more red gel colour to get a deep red. Mix it well and put it into an icing bag and pipe hearts.

Step 26

Measure 125g of Saracino Royal icing and add 18 g of water. Mix it well. You’ll get icing perfect to make edge bead. Put it into an icing bag and pipe the beads around the gingerbread.

Step 27

The gingerbread should look like this with the decorative bead around the edge.

Step 28

Take blue powder colour and dust the hands of the characters with a brush to achieve effect of cold hands and feet. Important: Don’t put the colour direct onto the icing without  dabbing it on a paper towel first.

Step 29

Repeat step 28 with pink powder colour, dust the hoodie, the trousers and the cheeks of the characters.

Step 30

Use the brown powder colour to add shadows on the hoodie and the trousers. Important: If you have only one brush, wash it and dry it after every usage.

Step 31

Mix the brown powder colour with water or clear alcohol using a small brush. Draw around the hoodie and the trousers.

Step 32

Use the diluted brown colour to paint eyes, and use the nude color to draw around hands and the legs.

Step 33

Add one more pillow next to both sides of characters. Use the diluted white powder colour to draw lines around the characters as shown on the photograph.

Step 34

Dilute the black powder colour and draw symbols above the characters. Use the white thick icing (one you have used to pipe decorative beads around the edges of the gingerbread) to pipe a patern around the pillows.

Step 35

With pink diluted powder colour paint around the trousers, shirt and add stripes on the shirt.

Step 38

Put the rest of the white icing into a bowl and add a tiny bit of black icing, mix it and put into another bag. Pipe around the hair. Dust some shadows with blue powder colour.

Step 37

Da Da your gingerbread is ready to give to a loved one.