


SURPRISE SANTA CLAUS CAKE TOPPER TUTORIAL



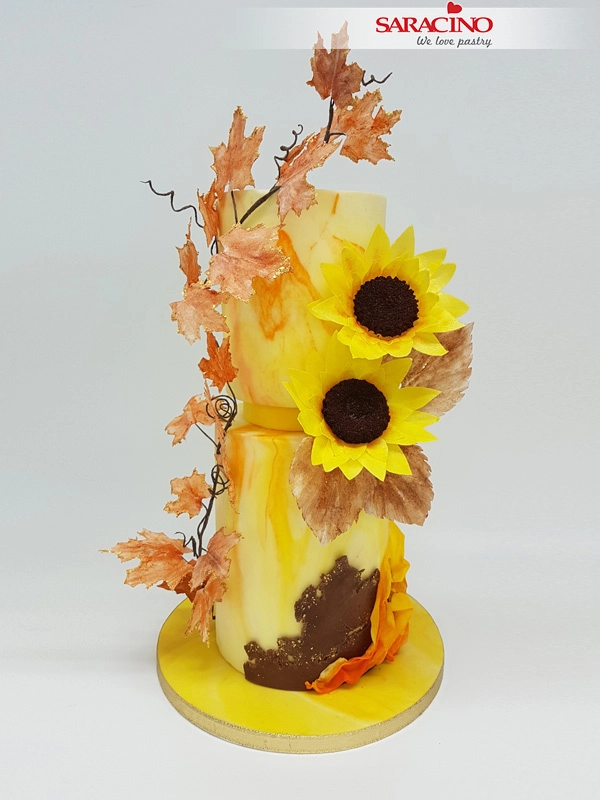
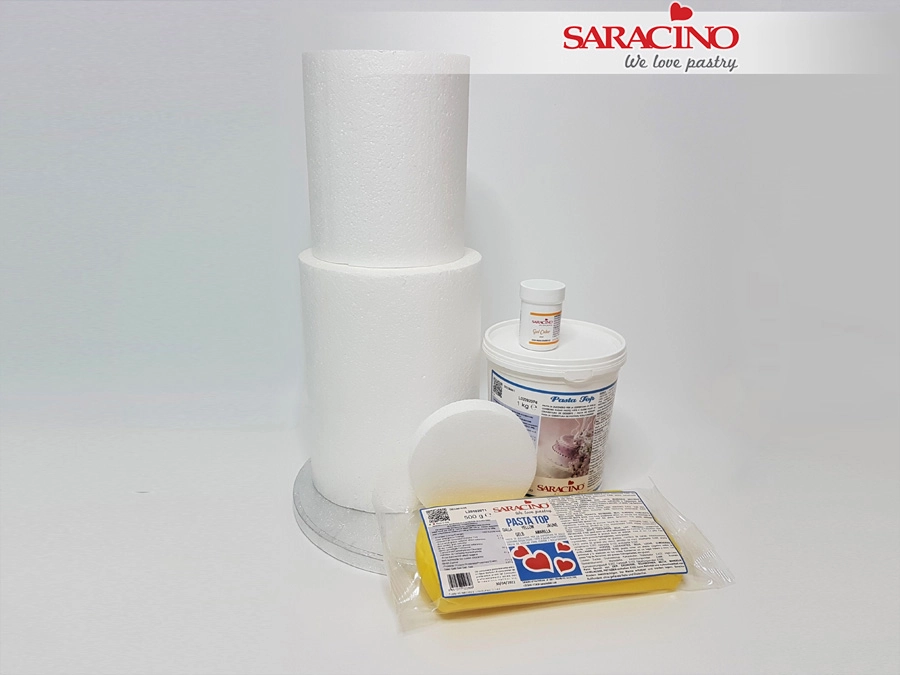
Prepare your dummies and products.
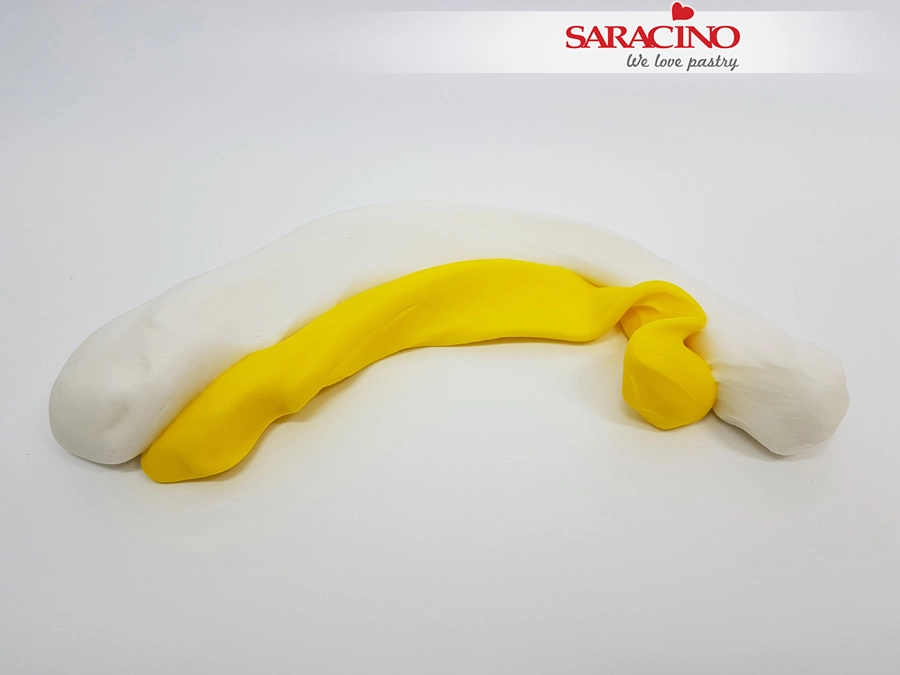
Prepare 600g white Pasta Top and 100g yellow Pasta Top (knead each until soft). I used pre-coloured yellow paste but you can also colour white Pasta Top with yellow gel colour. We want to achieve a marbled effect so roll the Pasta Top and place them against each other as shown.
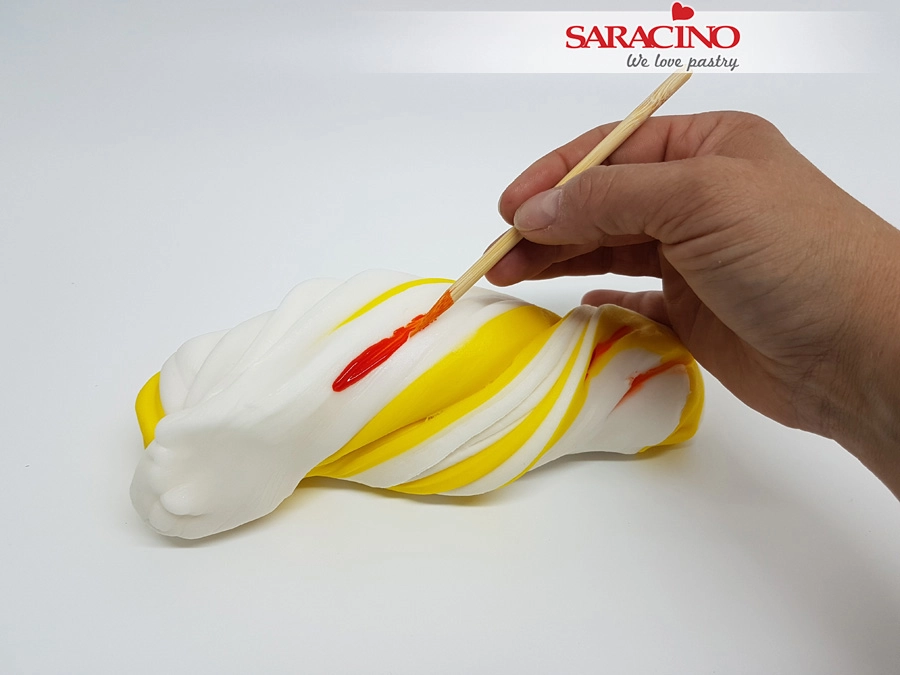
Twist the white and yellow paste together as shown in the photo. Limit the number of twists so that the paste does not mix too much. Add a little orange gel colour to a few places.
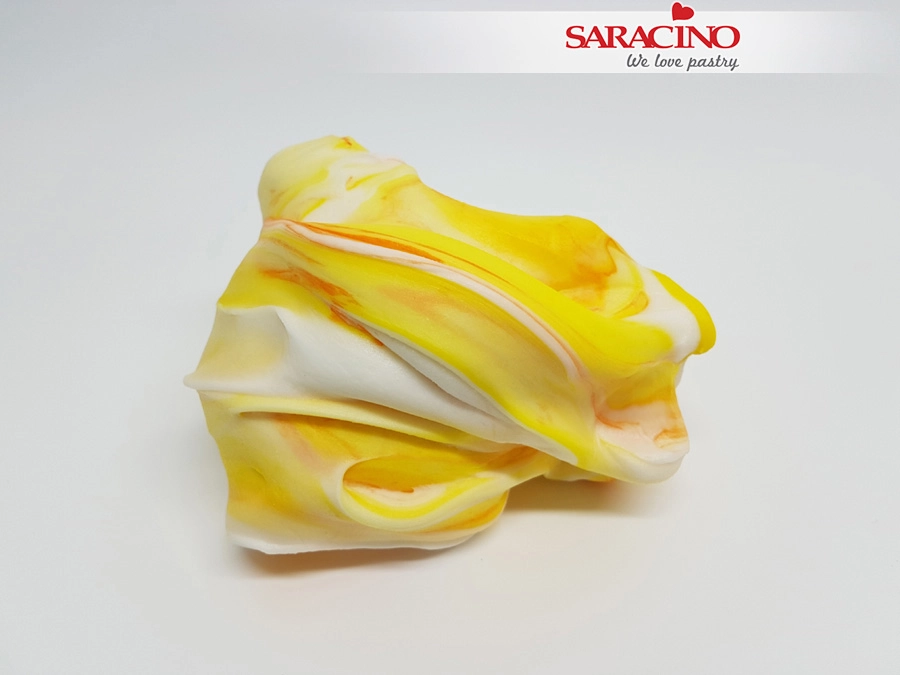
Now pull and twist the paste 3 to 5 times. Not too often otherwise the colours will mix too much.
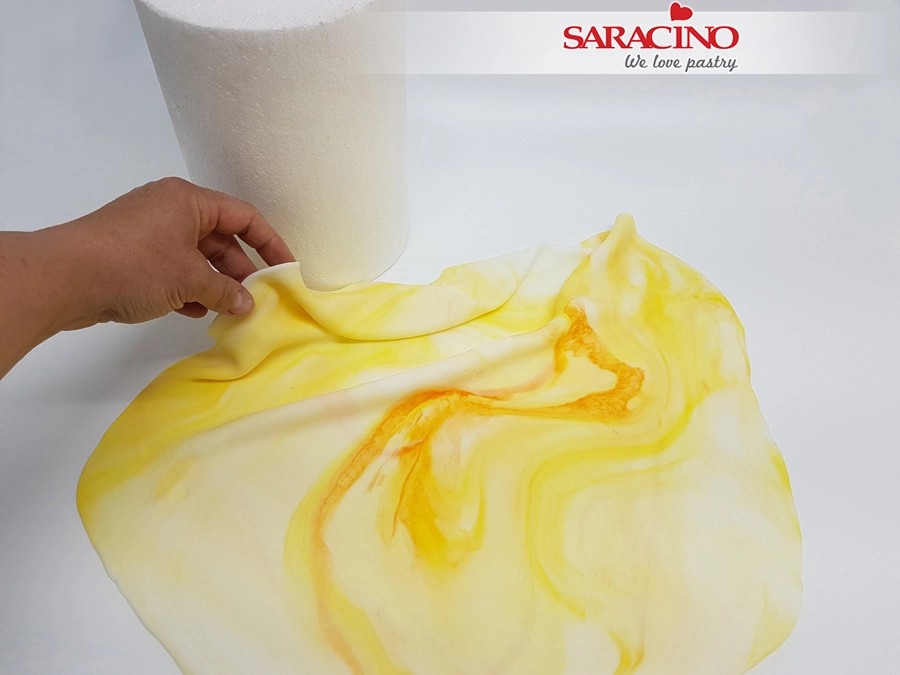
Brush your dummy with cake gel or boiled water. Roll out the marbled Pasta Top to 2 to 3mm thick and a diameter of approximately 50cm.
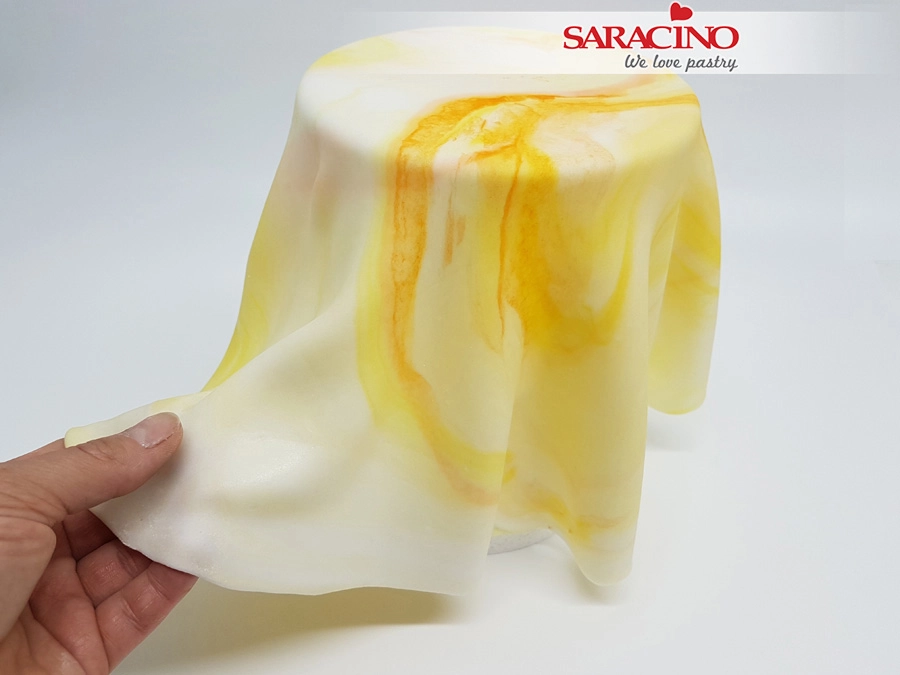
Place the Pasta Top on the dummy and smooth out to the bottom. This doesn’t have to be perfect but there should be no air bubbles between the Pasta Top and the dummy. Trim off any excess paste with a sharp knife and store in an airtight plastic bag.
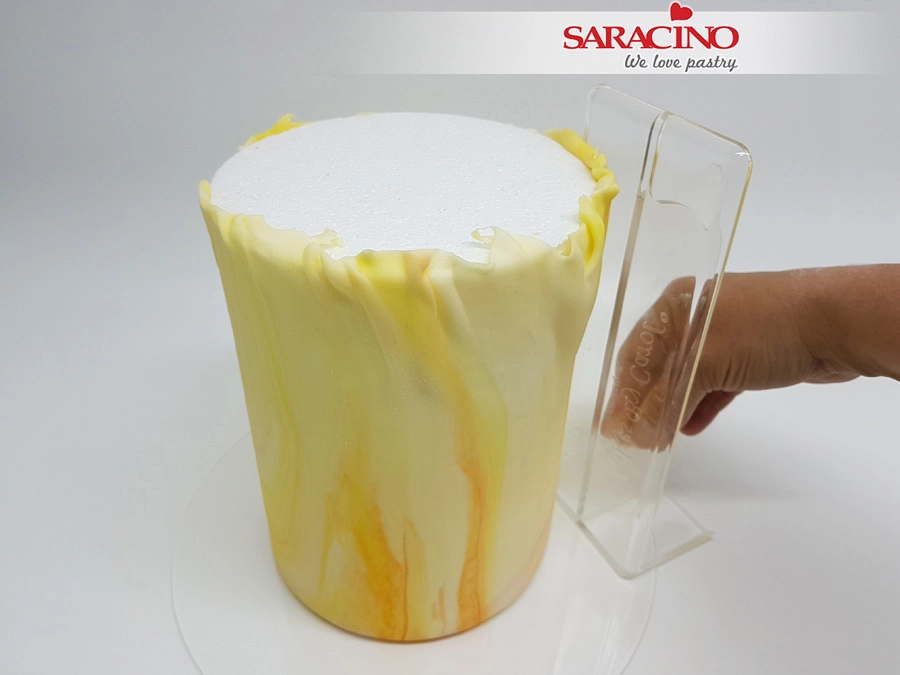
To achieve nice sharp edges take an acrylic disk with a diameter of at least 26 cm and cover with cornflour. Turn your dummy (or cake) upside down on the acrylic disk as shown. Take the Sharp Edge Smoother and work around the dummy until you get a nice smooth result. It is important that you put extra pressure where the cake touches the acrylic disk. This is where the magical sharp edge appears.
Tip: On the Instagram site: “Sharp Edge Smoother” you can find various instructional videos about using the Sharp Edge Smoother made by Carol Smith.
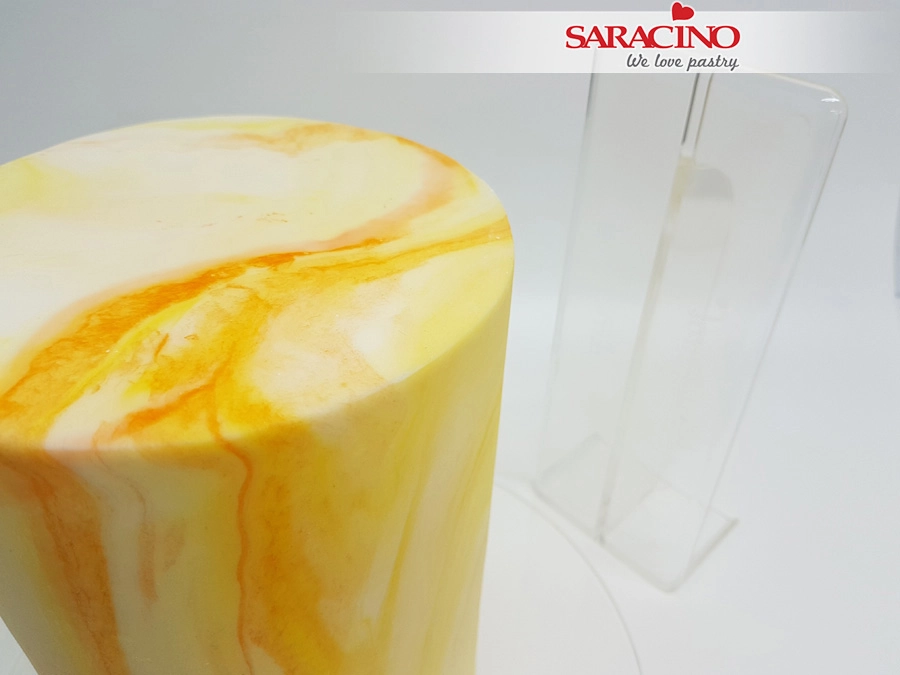
When you have finished smoothing, turn the whole thing over again. Carefully remove the acrylic disk. If necessary, you can smooth out small irregularities. You should have sharp edges.
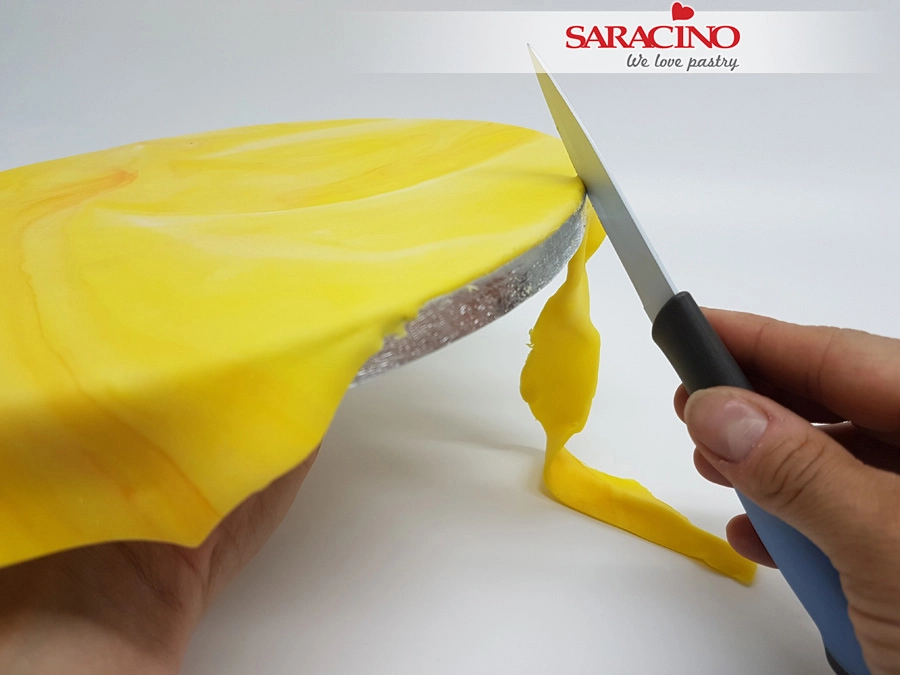
Knead the remaining Pasta Top until it becomes a solid colour and cover the 25cm diameter cake drum. Trim excess paste with a sharp knife.
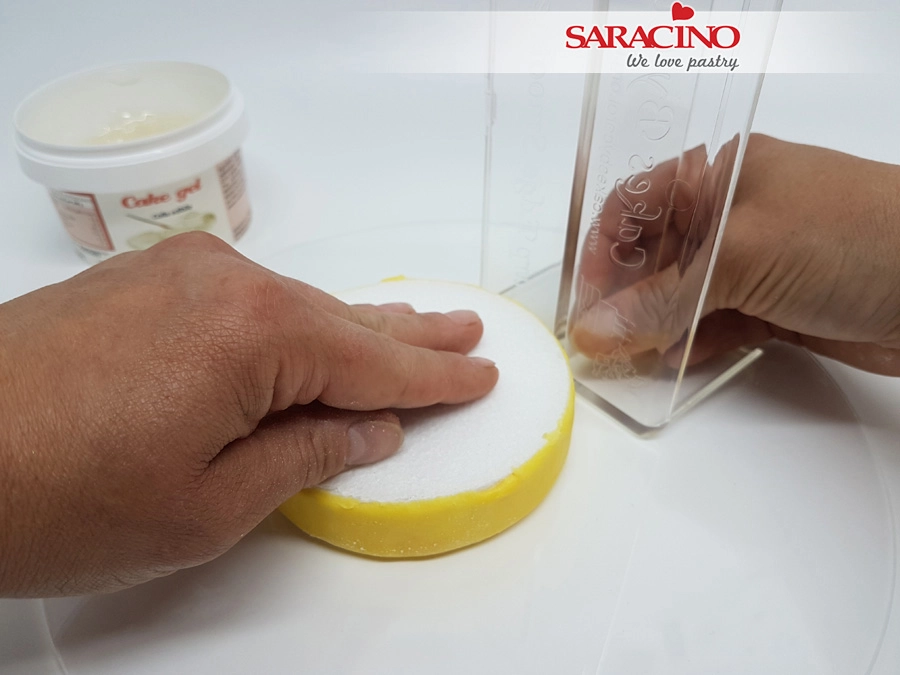
Using the solid yellow colour cover a dummy disk of 2cm high and 10cm diameter.
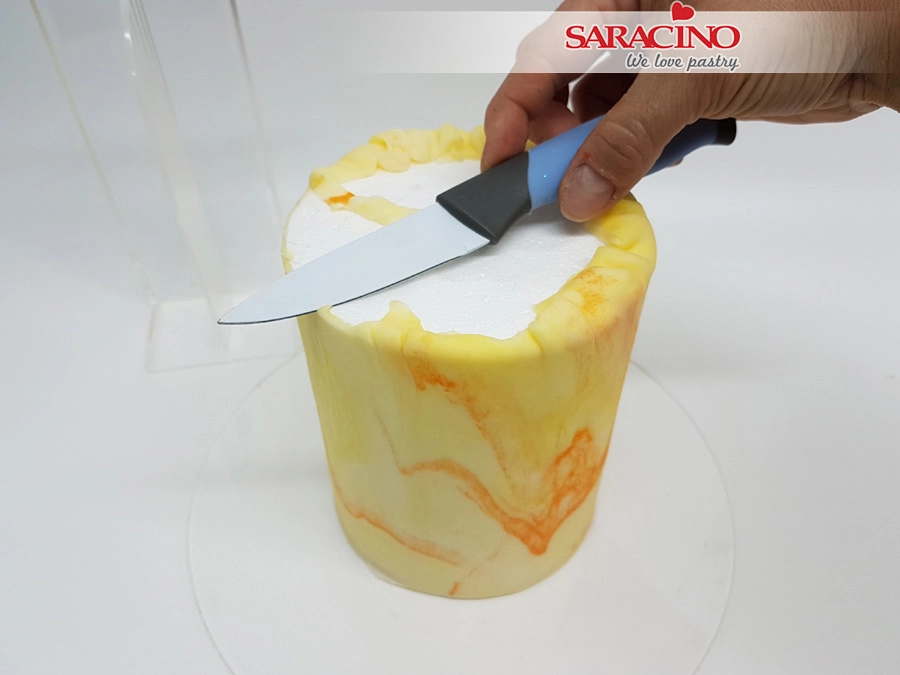
Using 450g white and 50g yellow Pasta Top repeat the marbling effect. Roll to a diameter of approximately 40cm. Cover the dummy then repeat previous steps to achieve the sharp edges.
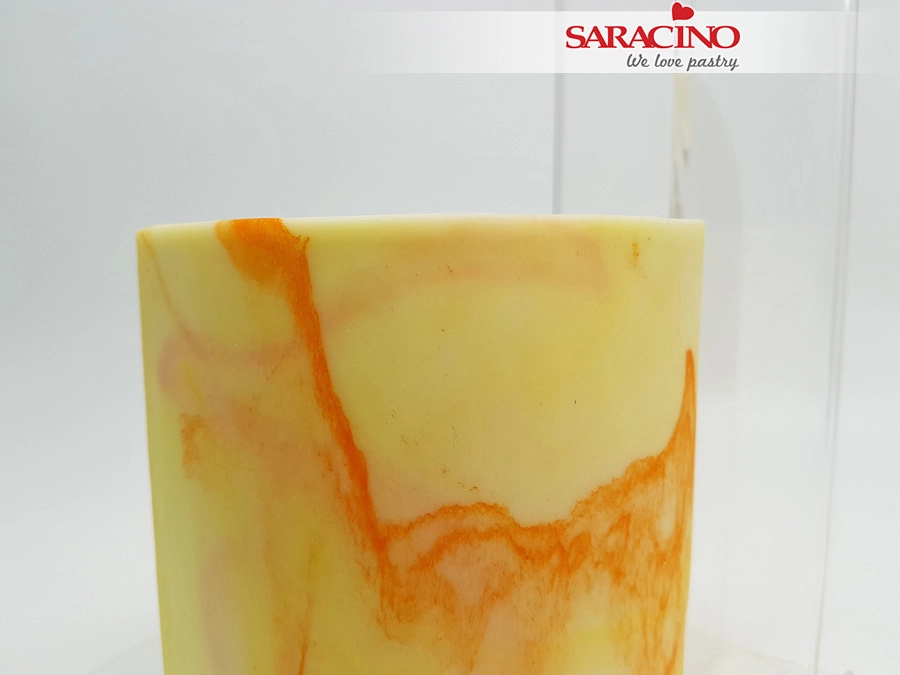
Then turn the cake over. Carefully remove the acrylic sheet. If necessary, you can smooth out small irregularities.
Tip: The more often you use the smoother, the faster and easier you can create the Sharp edge effect. So you can practice the technique well on dummies.
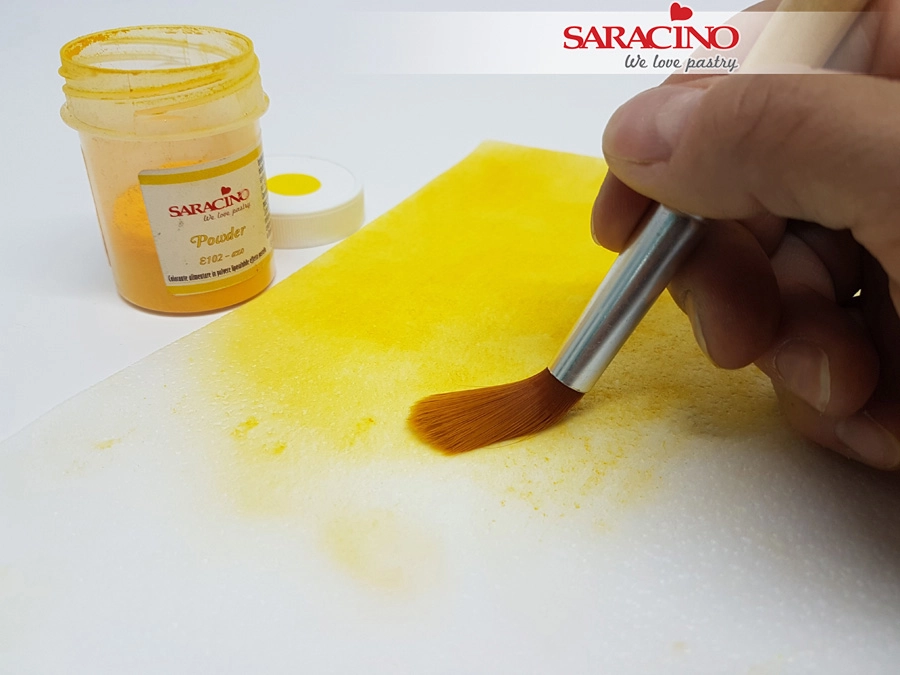
Take 2 sheets of Saracino 0.27 wafer paper. Colour the wafer paper yellow on both sides with the airbrush colour and airbrush. Work in several thin layers. Allow the airbrush colour to dry thoroughly before applying the next coat. The number of layers added determines the brightness of the colour. If you do not have an airbrush, you can also colour Saracino wafer paper with an alcohol-free conditioner coloured with yellow powder or gel colour.
RECIPE alcohol-free conditioner:
*½ tsp food grade glycerin
* 2tbsp water (distilled preferably)
Mix the two ingredients in a bowl and it is ready to use. You can colour it with Saracino dust or gel colors. You can also use the mix in the airbrush. Mix made with distilled water can be stored for a month in a dark place. It can be stored for 1 day with tap water.
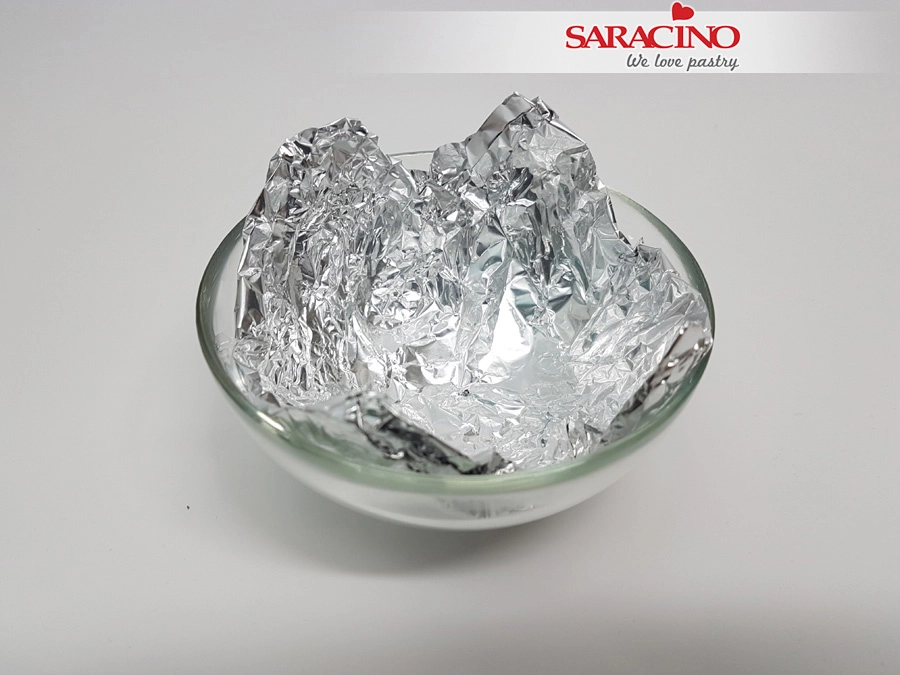
Prepare a mould to dry the sunflower later. Take a piece of aluminum foil and fold it to a 12 x 12cm square. Now press the piece of folded aluminum foil into a glass bowl with a 12cm diameter. The size and curvature of the aluminium mould can be adjusted to the size of the flower.
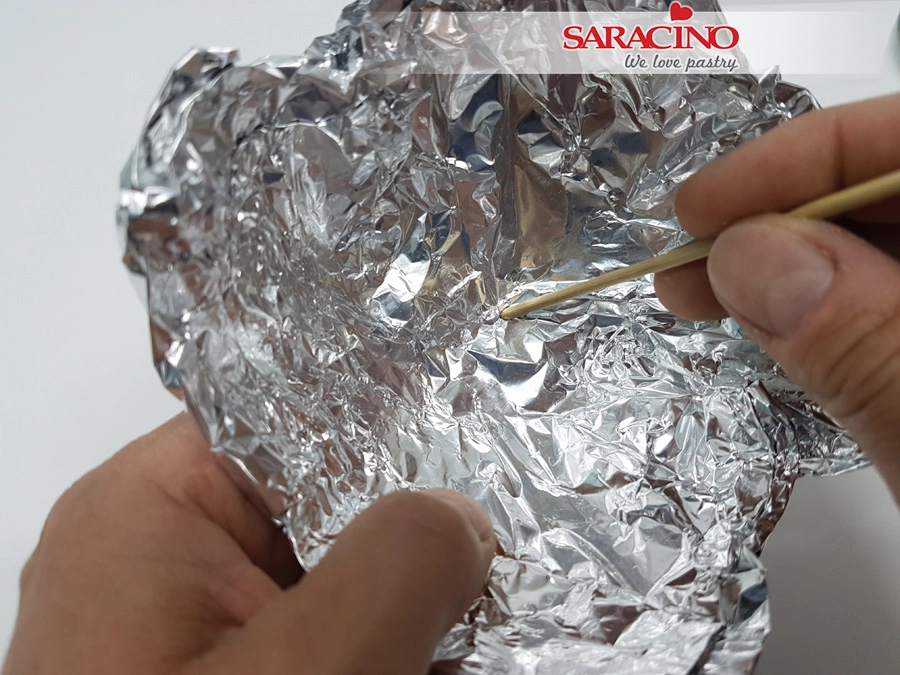
Pierce a hole in the center of the aluminium mould. Set aside until needed.
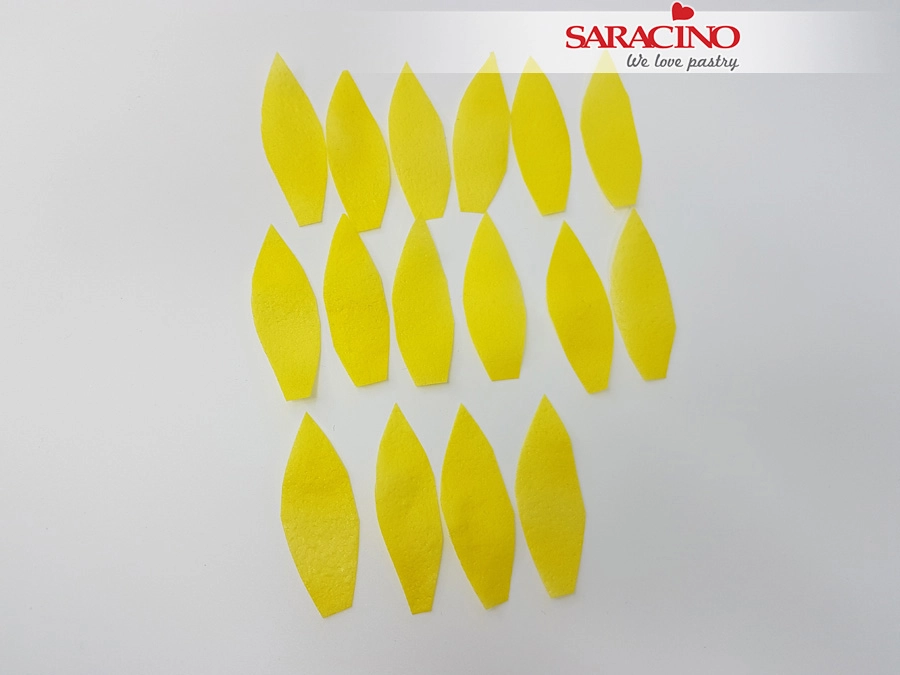
Cut 16 small strips of the coloured wafer paper with a width of 1.5cm and length of 6cm. You can cut 3 layers of wafer paper at the same time. Lay the 16 petals on your worksheet.
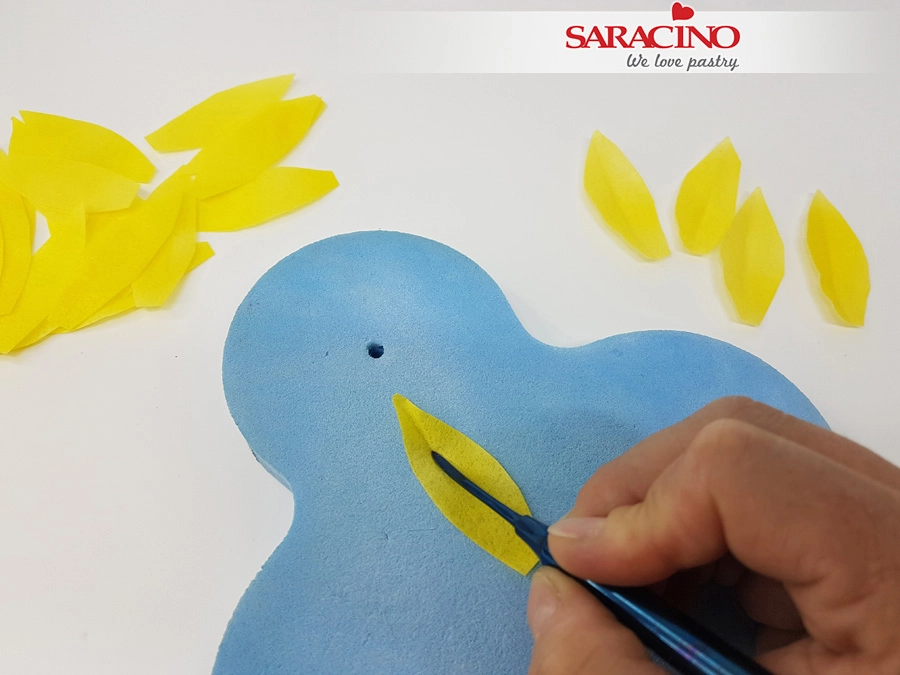
Take a foam flower pad and a Dresden tool. Place a petal on the pad and run your Dresden tool from top to bottom in a smooth motion. Apply light pressure so that the leaf gets a nice upright shape.
Tip: Wafer paper has a smooth side and a textured side. Use the textured side as the top of your leaf. This gives your leaf a more natural look.
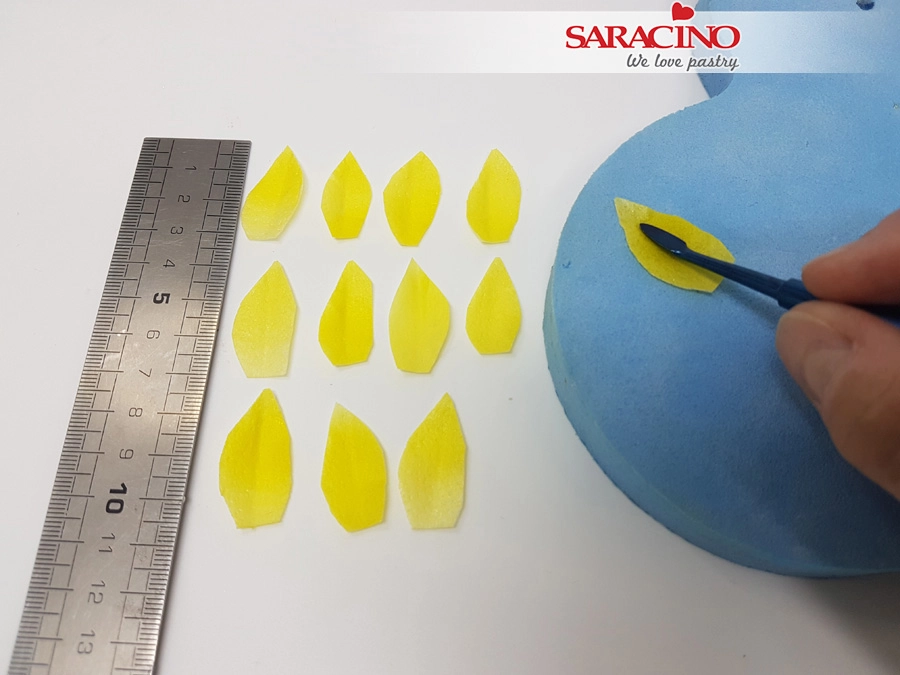
Cut a 6cm long strip in half into 2 equal 3cm lengths. Then cut strips of 1.5cm wide.
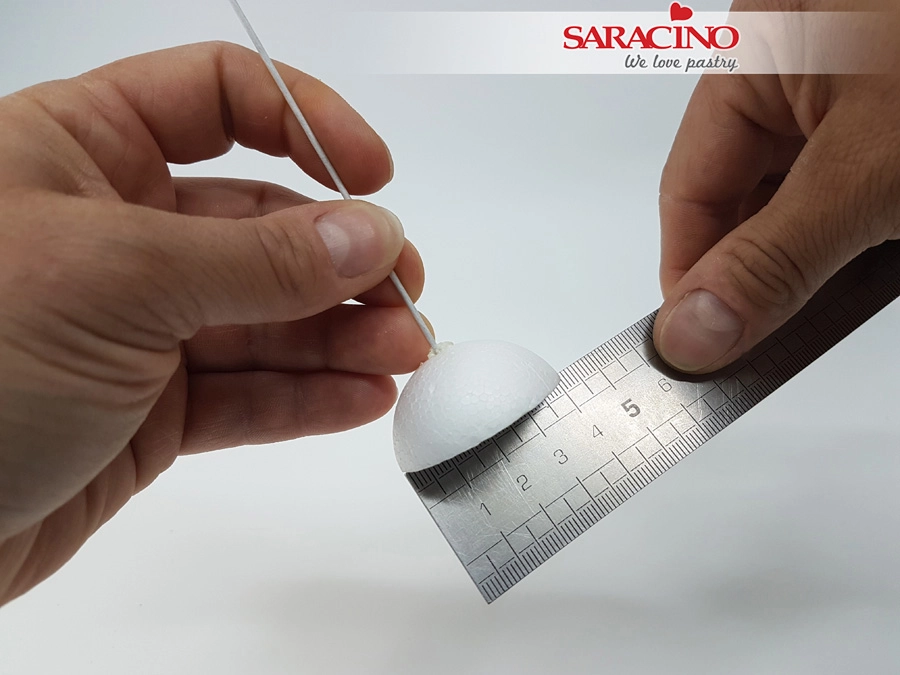
Take a 4cm diameter styrofoam hemisphere on wire (from Stryropor Products).
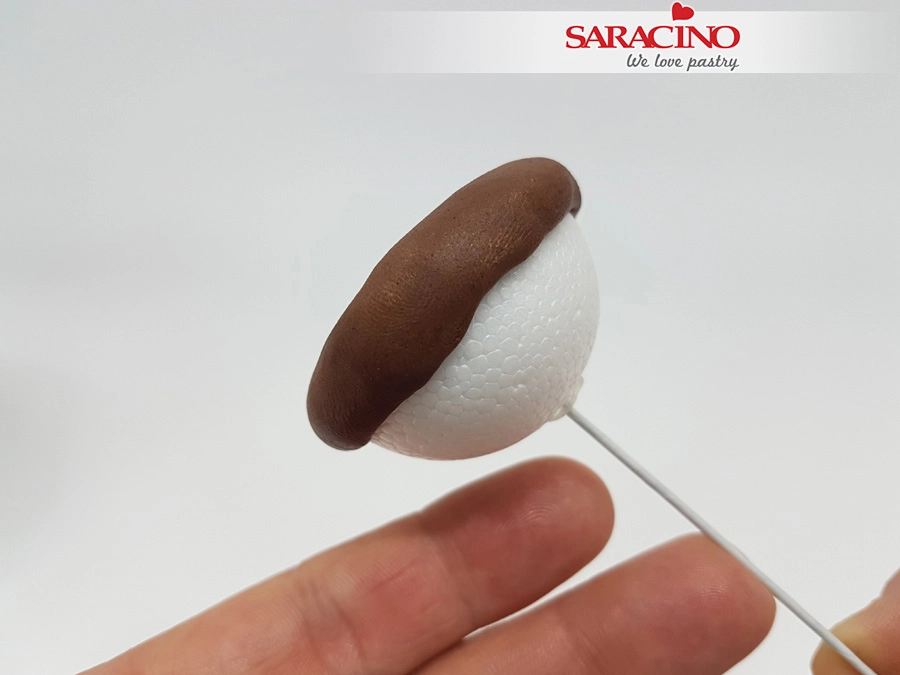
Take 8g of brown Pasta Model and knead gently. Shape the paste into a flat circle with a diameter of 5.5 cm. Place the brown Pasta Model circle on the hemisphere and fix using a small amount of cake gel. Make sure that an equal amount protrudes around the edge. Leave a bulge in the edge.
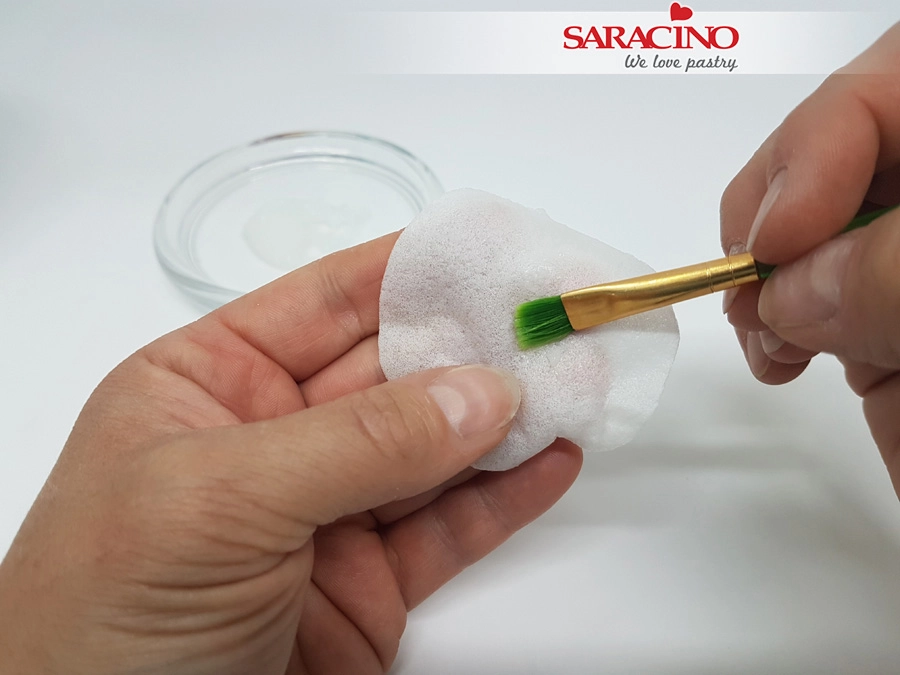
Prepare a 5cm diameter circle of 0.27 wafer paper.
RECIPE wafer paper glue:
Shred a small amount of wafer paper and put in a glass jar. Add a small amount of distilled water and let it sit overnight. Shake everything well and your wafer paper glue is ready to use. It can be stored in the refrigerator for 1 week.
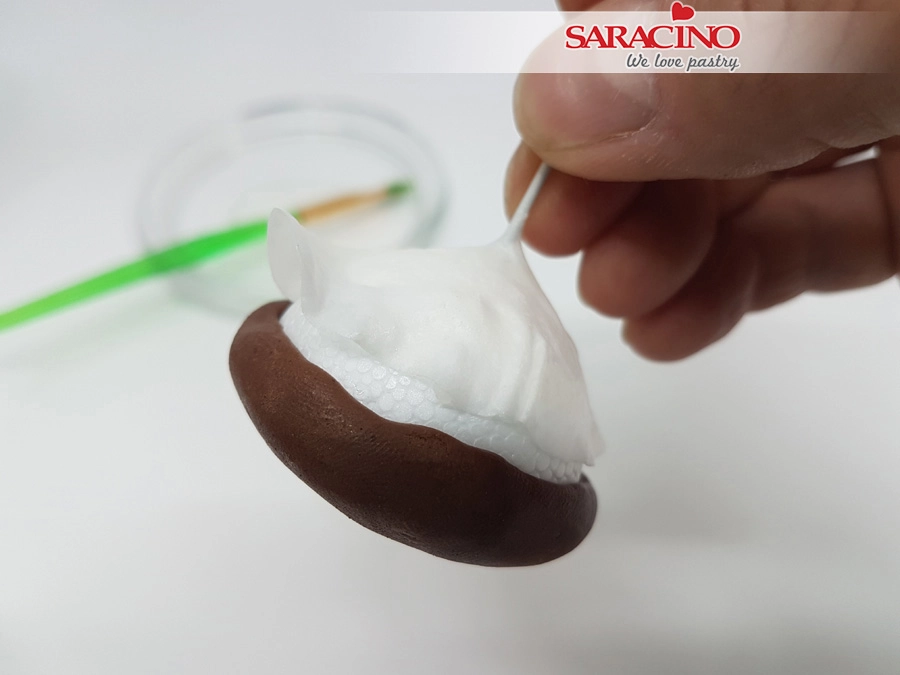
Put the flower wire through the center of the wafer paper circle and fix it to the bottom of the hemisphere. Allow to dry well.
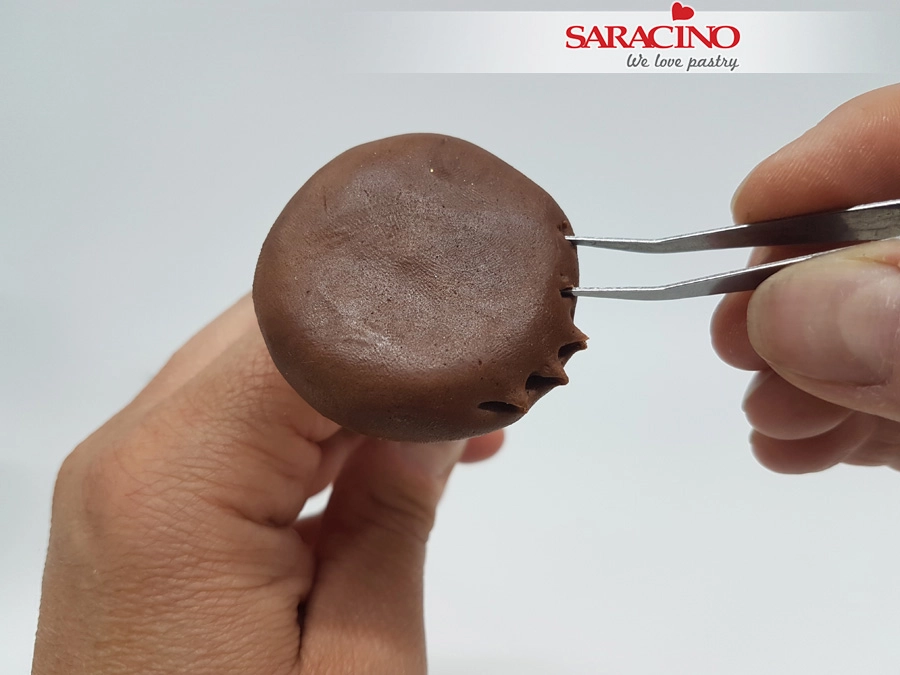
Using tweezers, pinch small points around the outer edge. Make the points random all around the outside edge.
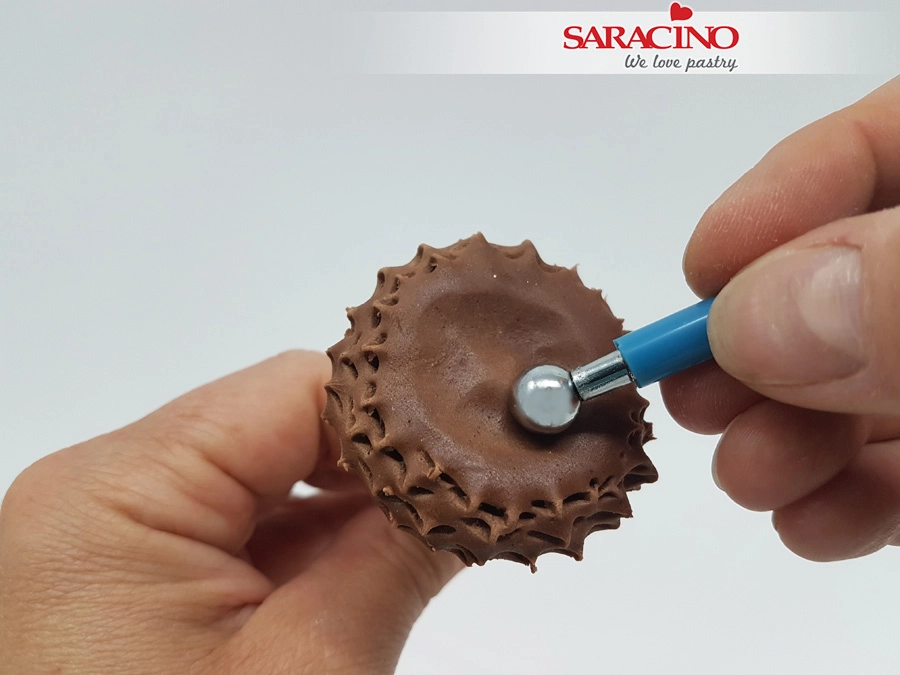
Using a ball tool gently press in the center of the brown Pasta Model. Make a circular motion and leave the paste slightly higher in the centre.
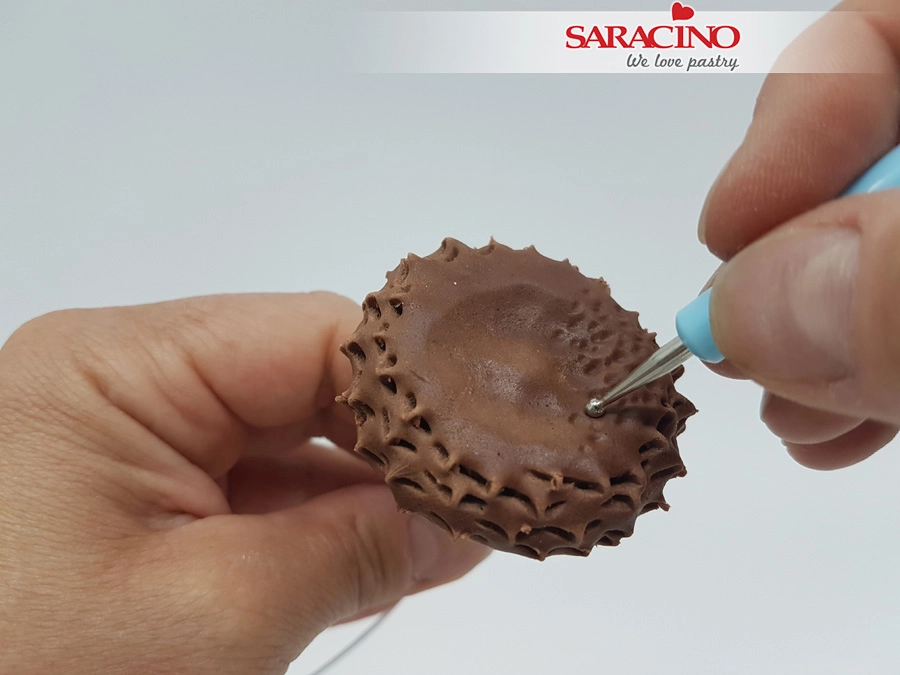
Use a small ball tool to add texture to the centre.
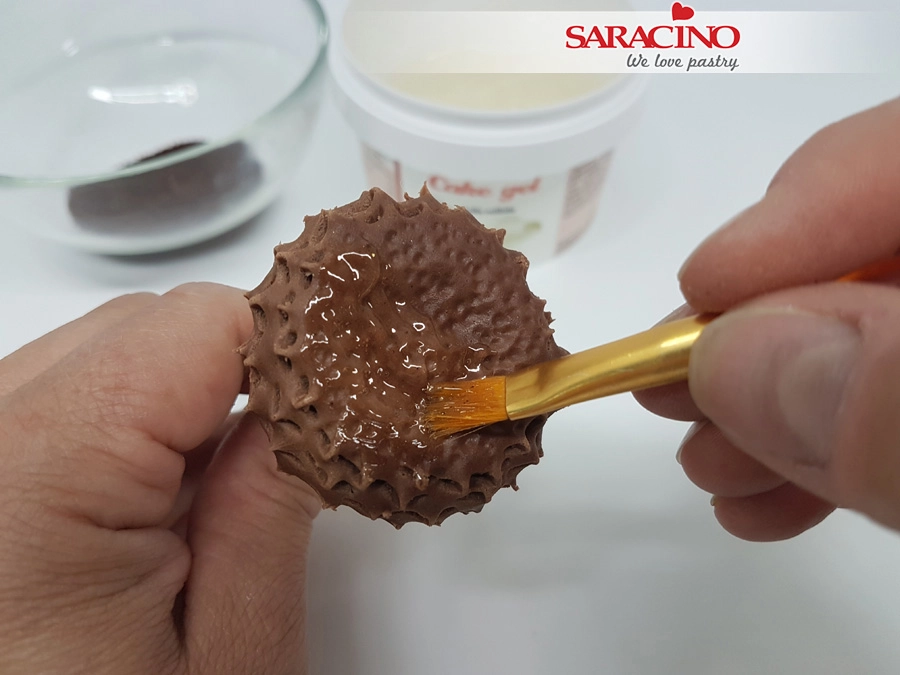
Apply cake gel over the textured brown paste.
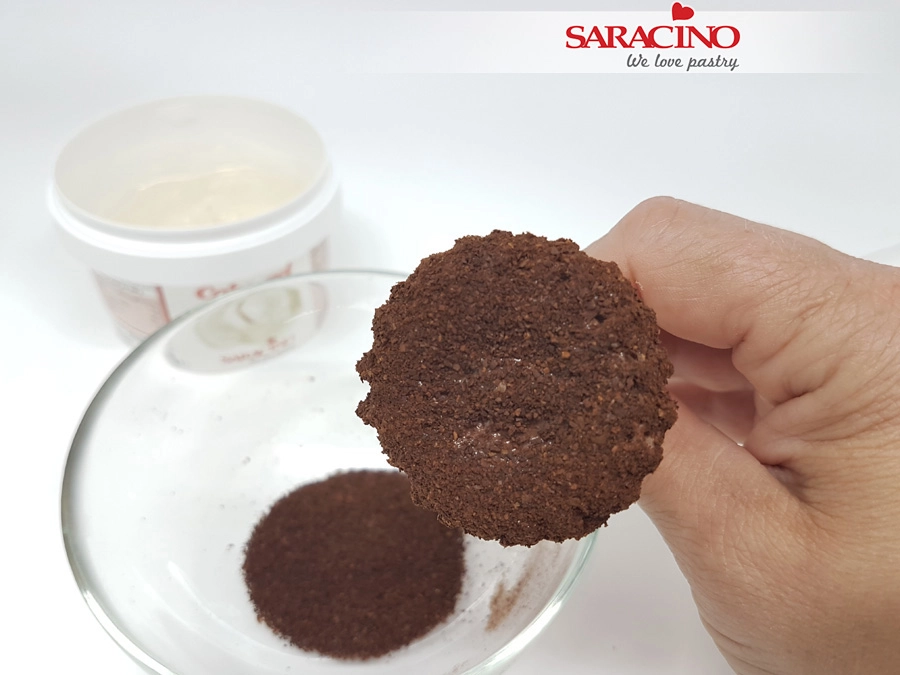
Take a small bowl of ground coffee. Dip the flower centre until it is completely covered with ground coffee. Let it dry for a few hours.
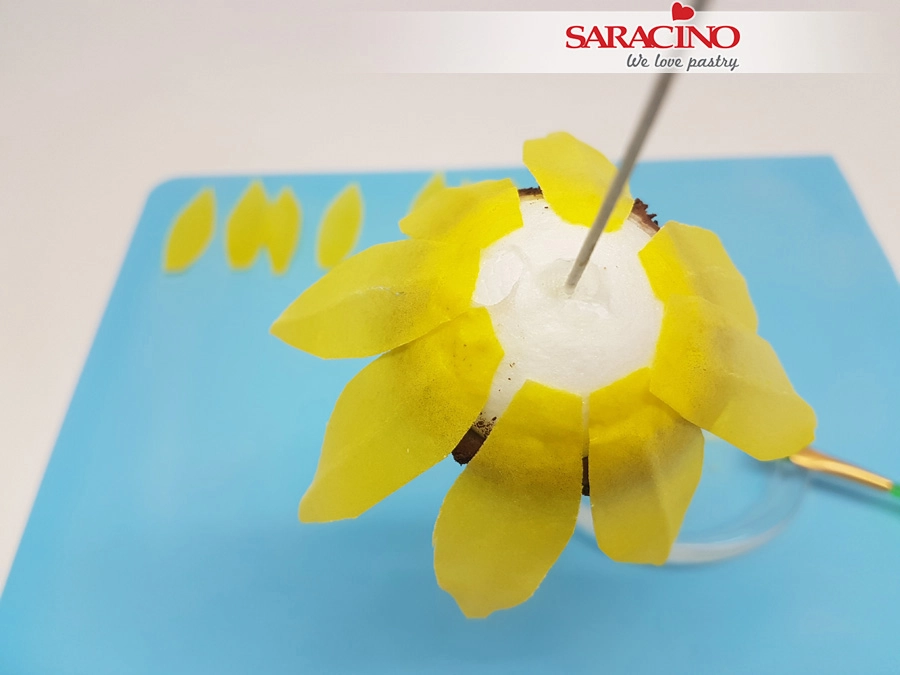
Using your 16 large yellow petals add wafer paper glue to 1cm at the base. Do not use too much glue as this will melt the wafer paper. Fix four petals at equal centres to the bottom of the flower base. Add another four petals equally.
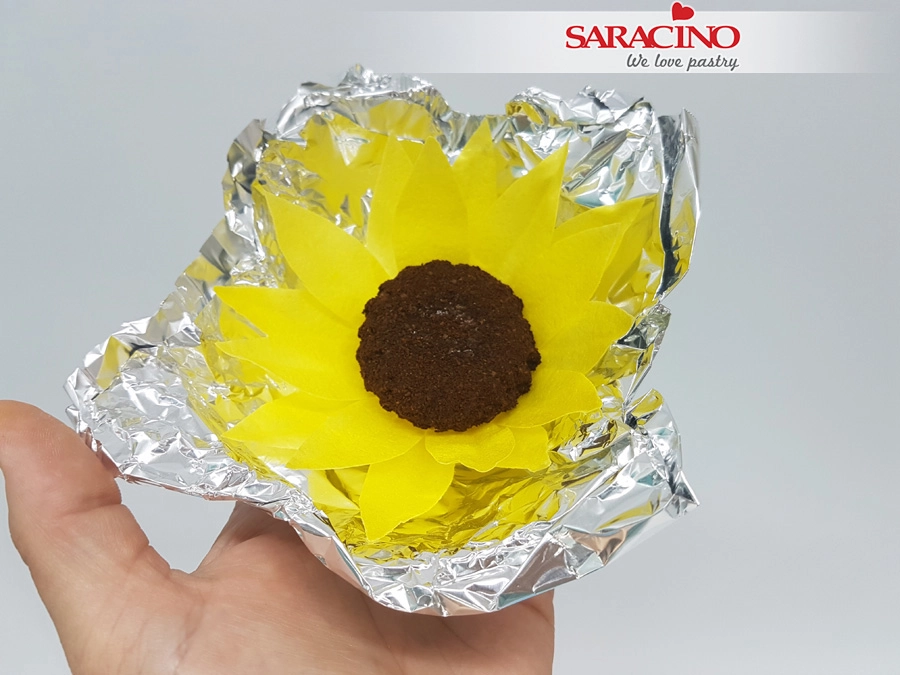
Add all the large petals. Make sure that they are nicely arranged around the flower centre. Insert the flower wire through the aluminium mould and allow to dry for a few hours. Drying time will depend on humidity.
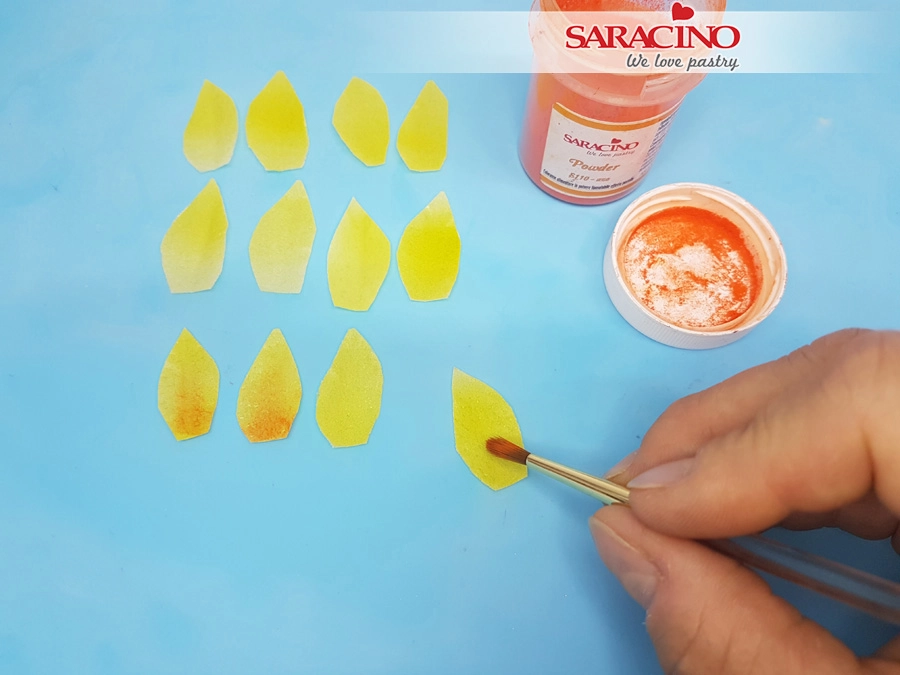
Dust the smaller petals using orange powder colour. It should be darker at the wider end.
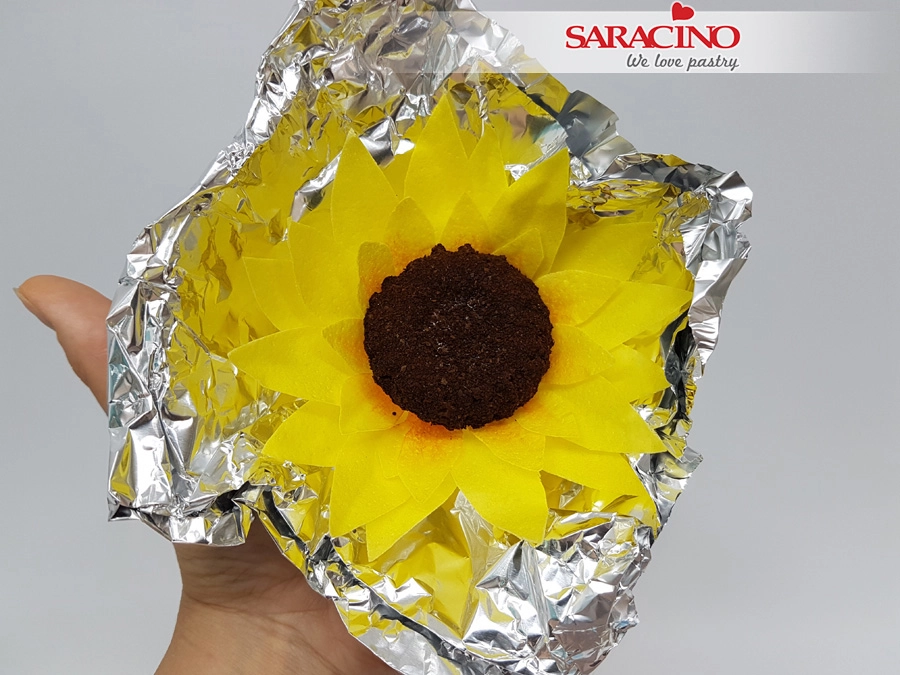
Brush the lower edge of the small petals with wafer paper glue and attach between the large petals and the centre. Arrange the petals nicely around the centre.
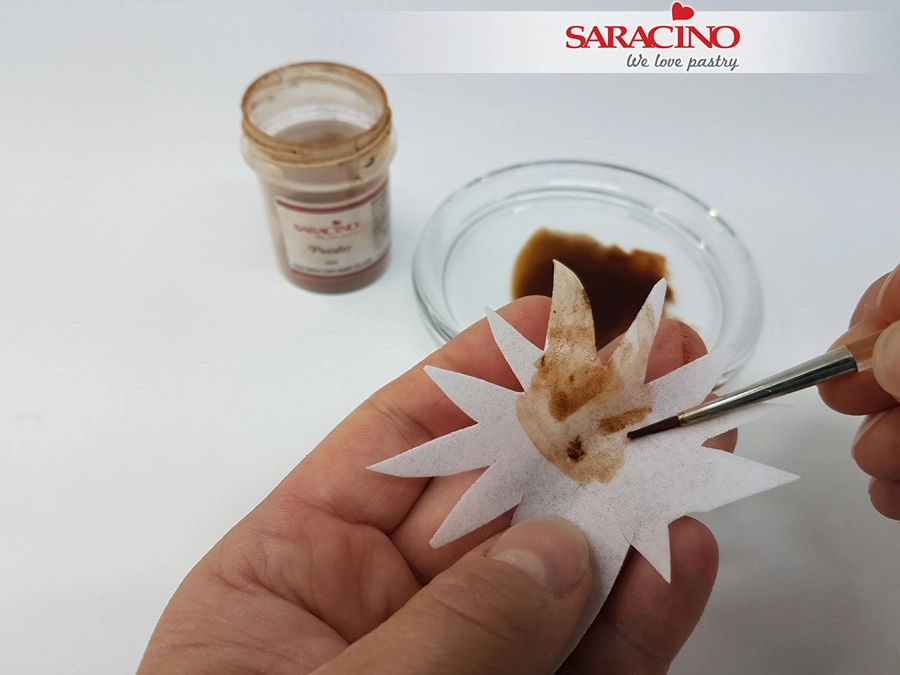
Cut out a star shape with long points from the wafer paper. Paint with the alcohol-free conditioner that has been coloured with brown powder colour.
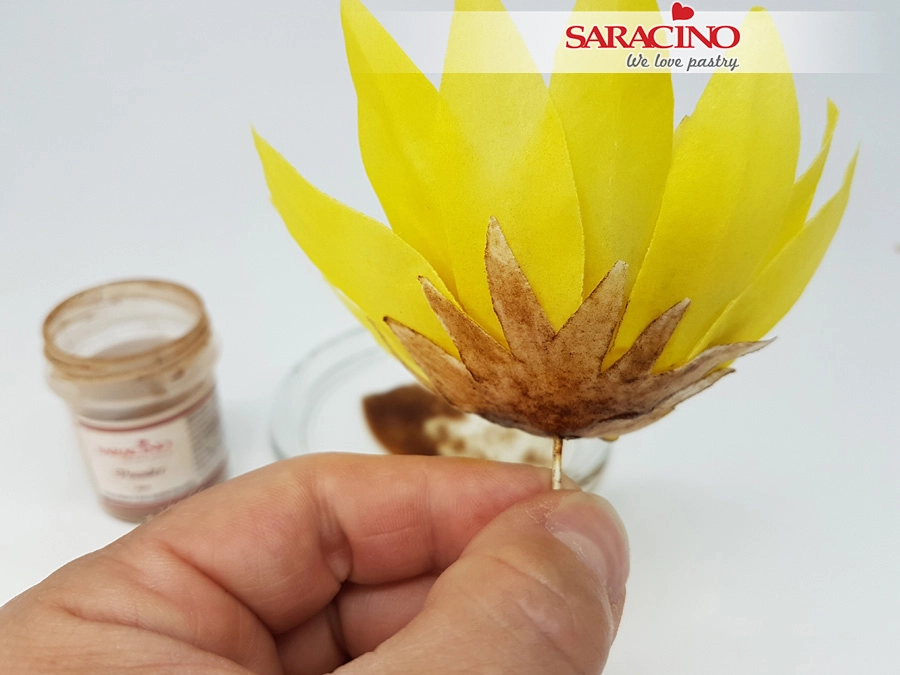
Fix to the bottom of the flower. Allow to dry.
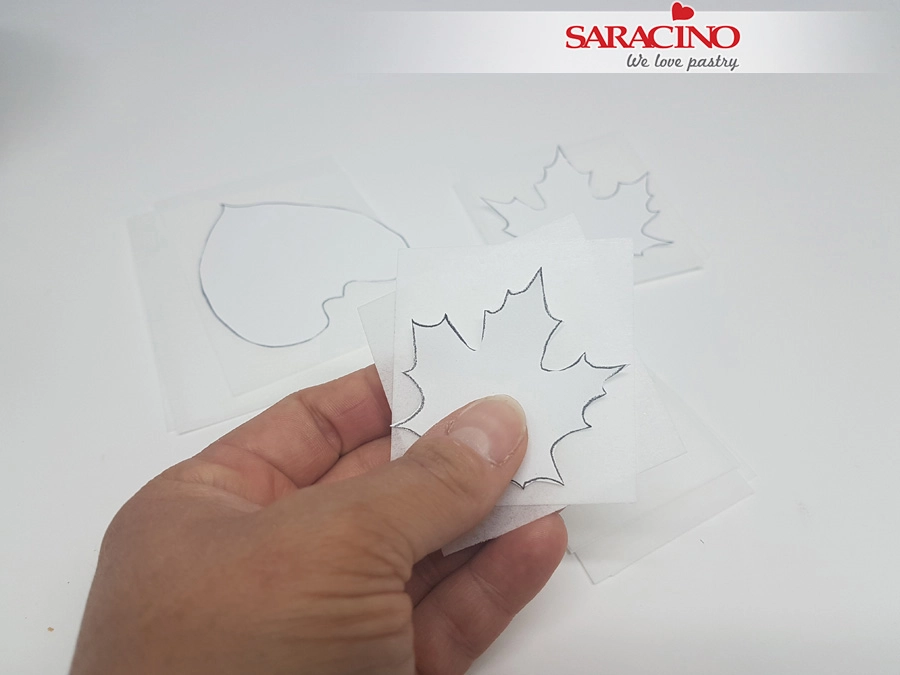
For the leaves we need two different sizes. Print the template at the end of this tutorial or choose your own leaf shape and size. Cut out a template for the leaves from a sheet of paper. Place the template on three layers of 0.27mm wafer paper. Cut out 3 leaves at a time. We need 10 large and 10 small leaves. Cut some extra leaves as spare.
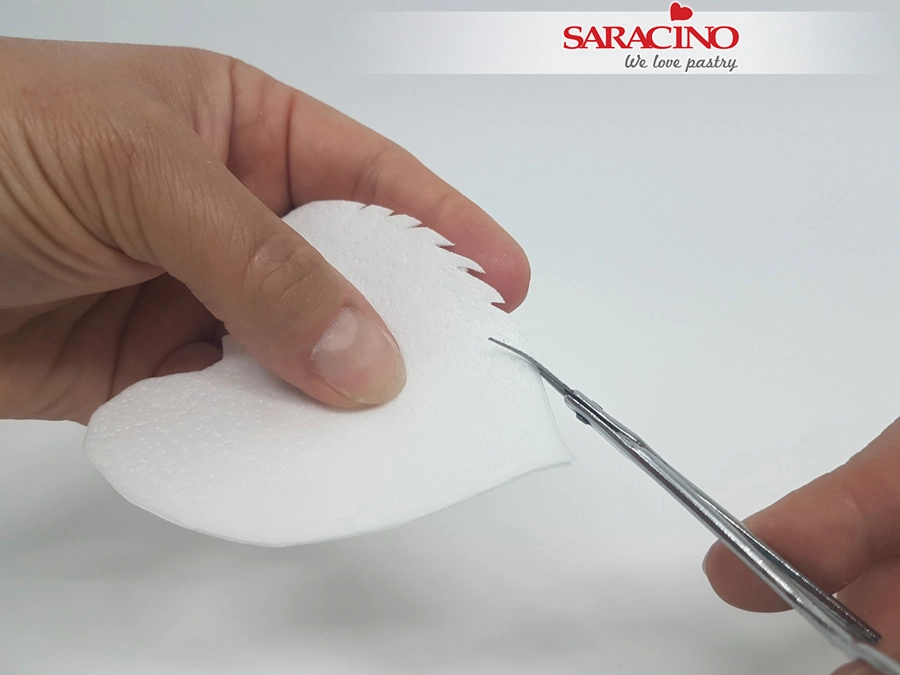
For the sunflower leaf cut serrations with small scissors. This can be random. Point the serrations slightly toward the pointed end for a more natural look. Make 3 leaves.
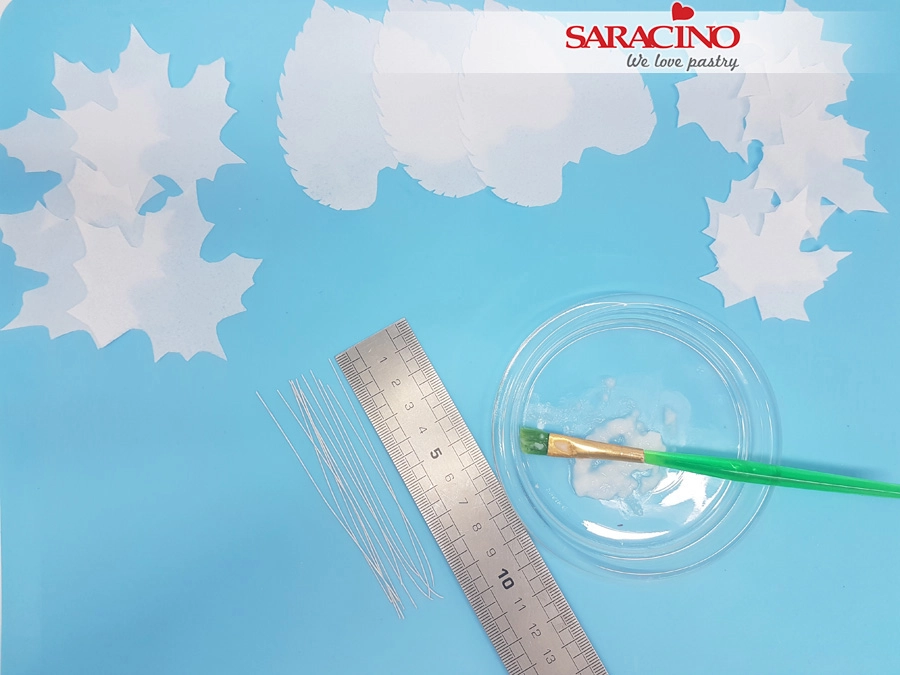
Lay out your leaves by variety with the smooth side up. Cut 23 10cm lengths of 28 gauge flower wire. Take a small amount of wafer paper glue.
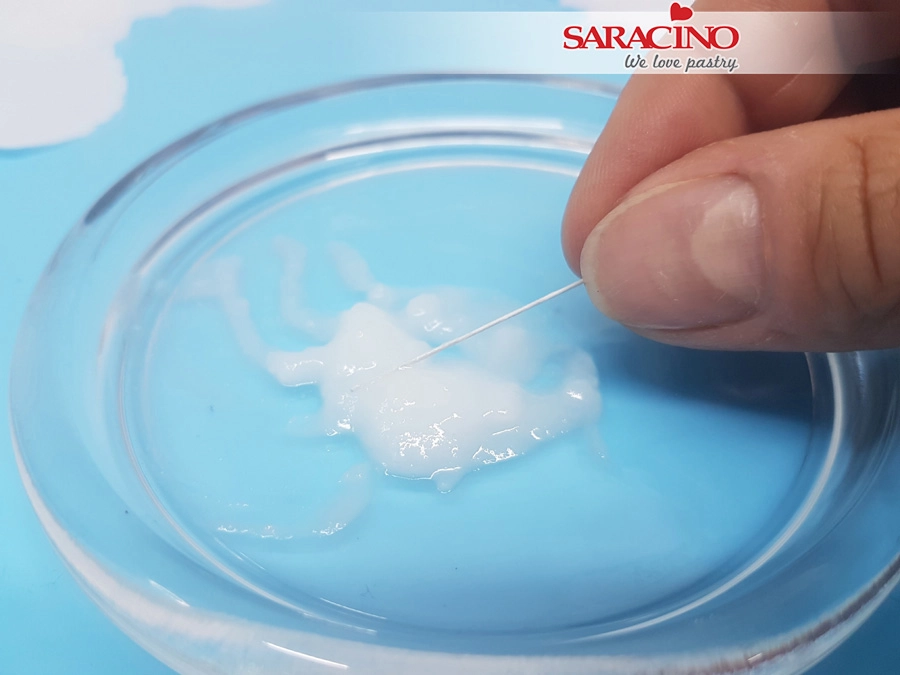
Add wafer paper glue to the end of the wire.
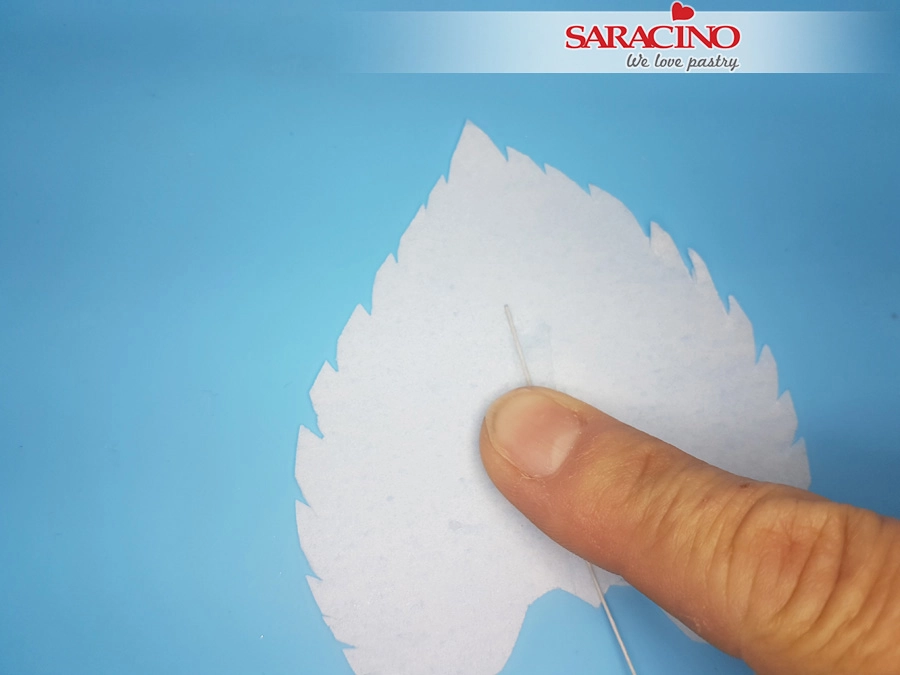
Press the flower wire to the centre of the leaf. Press firmly for a few seconds to achieve a good bond.
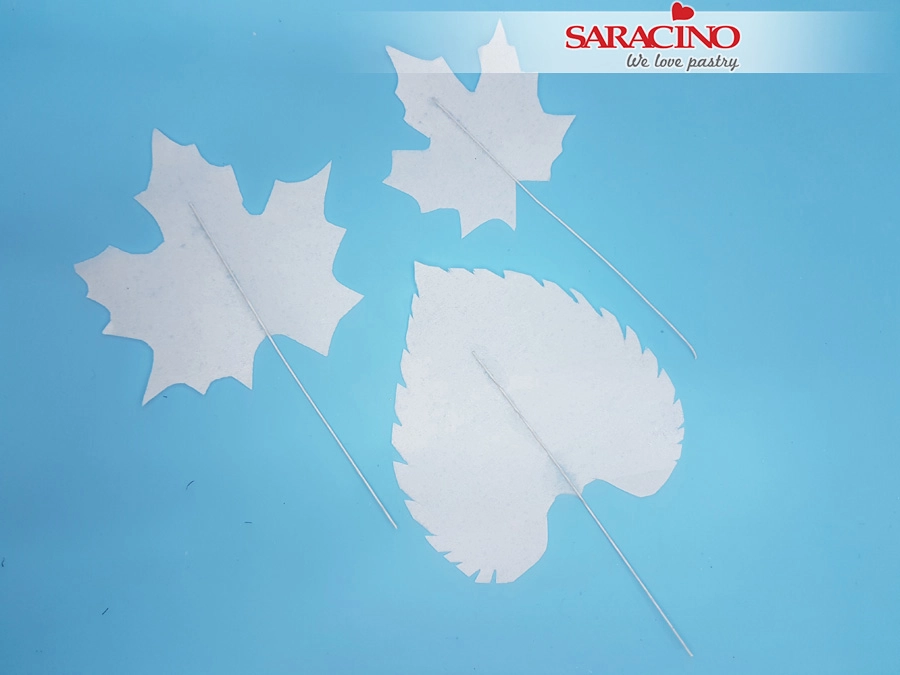
Repeat to add a wire to all of the leaves. Allow to dry for 10 minutes.
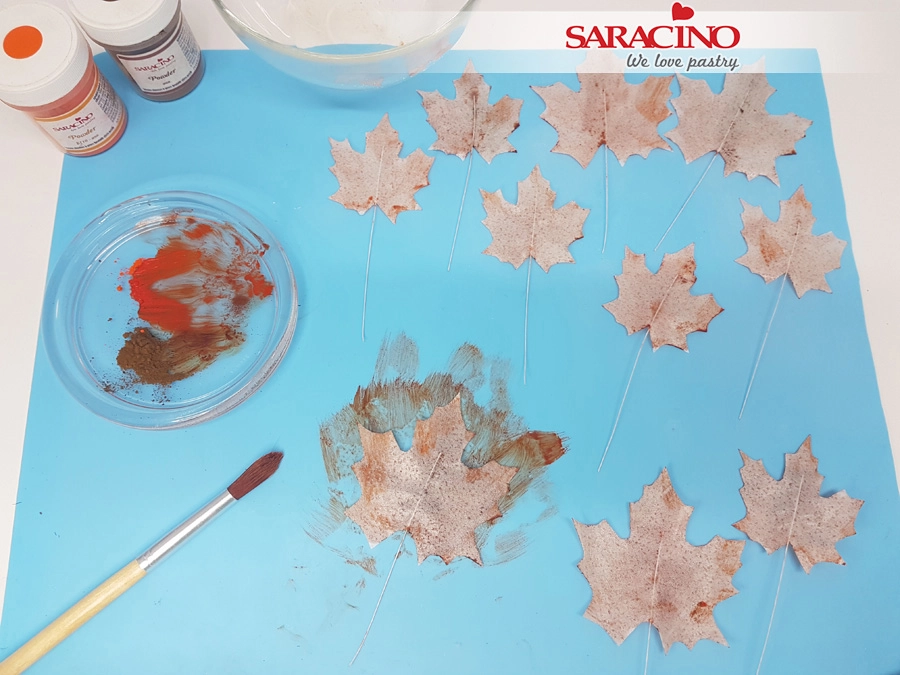
Mix orange and brown powder colour with clear alcohol to a thin paint. Paint the smooth side of the paper and place the leaf upside down on your work surface. It is best to use a silicone mat so that the leaves do not stick to the surface.
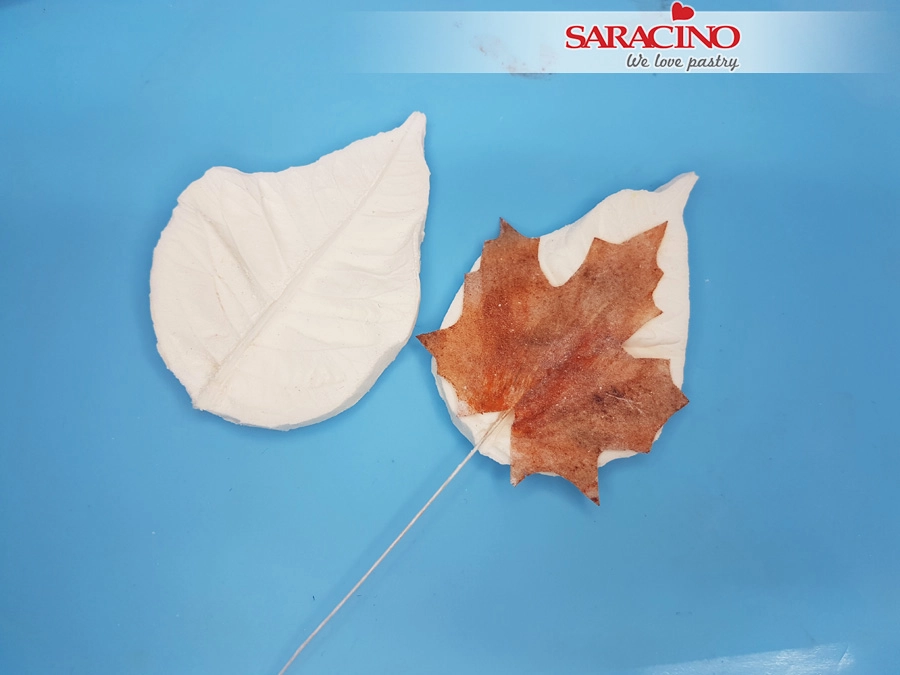
When the leaves no longer stick you can turn them over. Paint the rough side of the leaf with the brown alcohol-free conditioner and dab the leaf with a small amount of cornflower. Press the leaf in a leaf mould for 5 seconds. Open the mould and carefully remove the leaf. Make sure you do not add too much conditioner as it could stick. You should now have a grain in the leaf. Allow to dry well.
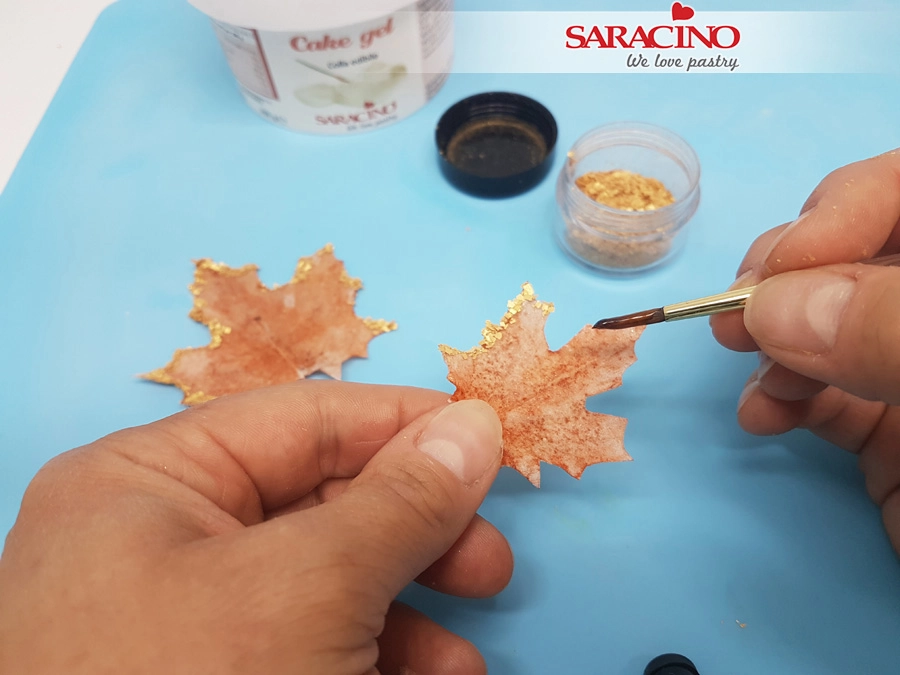
When the leaves are fully dried brush the edges with a little cake gel. Do not add too much gell or the wafer paper will melt. Dip the edges in the Saracino gold glitter flakes and allow to dry.
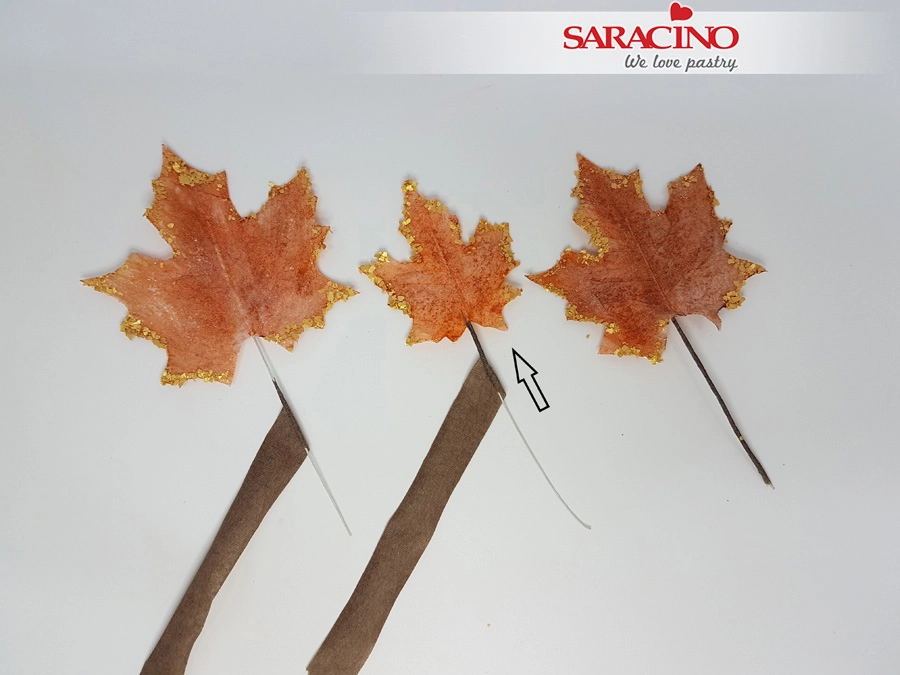
Add flower tape to all of the leaves.
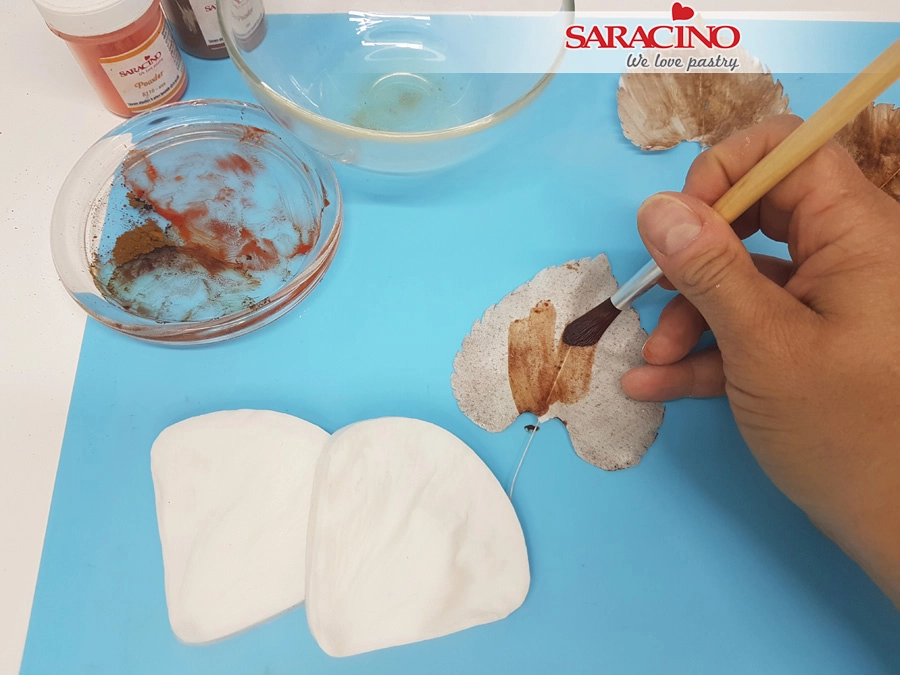
For the sunflower leaf repeat the previous steps but use a larger veiner.
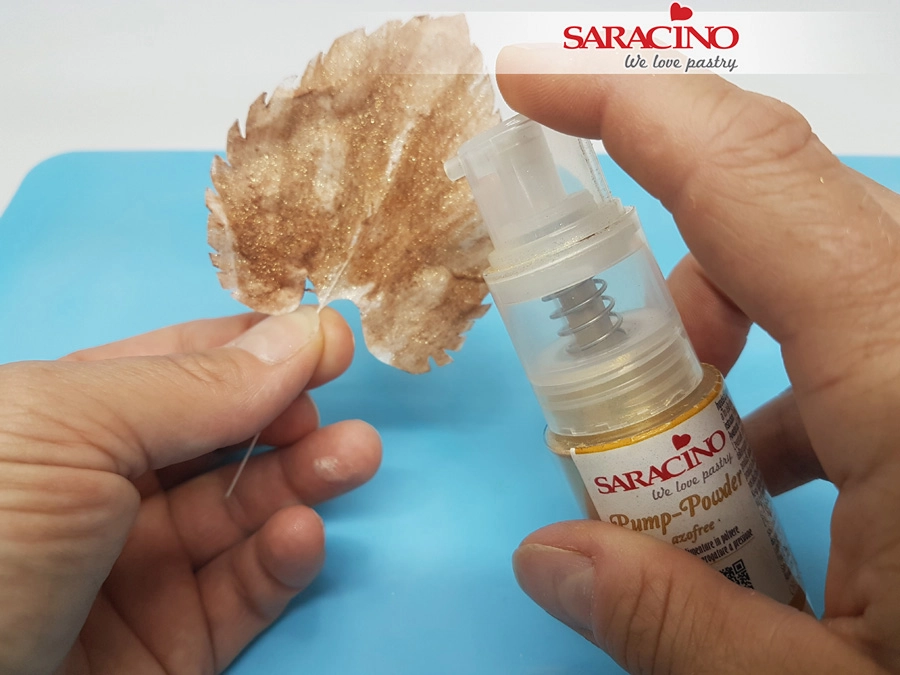
When the leaf is completely dry, apply a sparkling effect to the leaf using Saracino pump powder gold glitter.
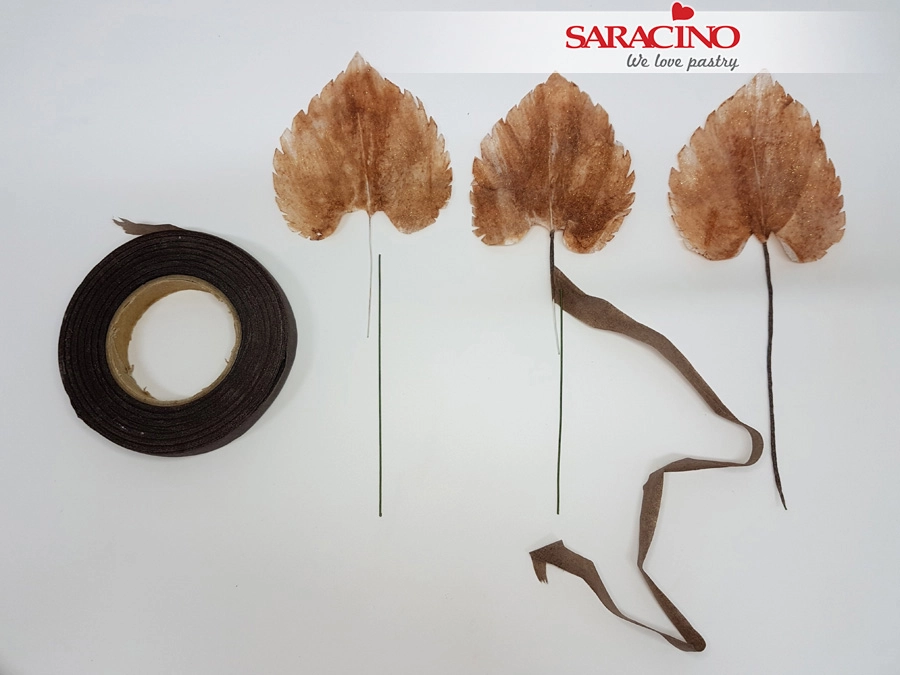
Tape using the brown flower tape.
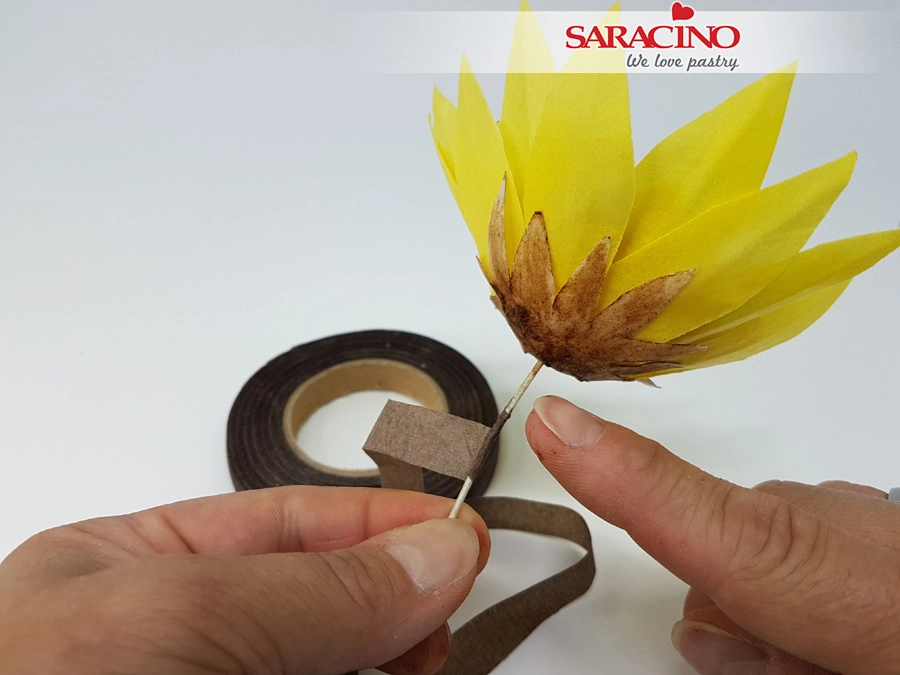
Tape the sunflower stem using the brown flower tape.
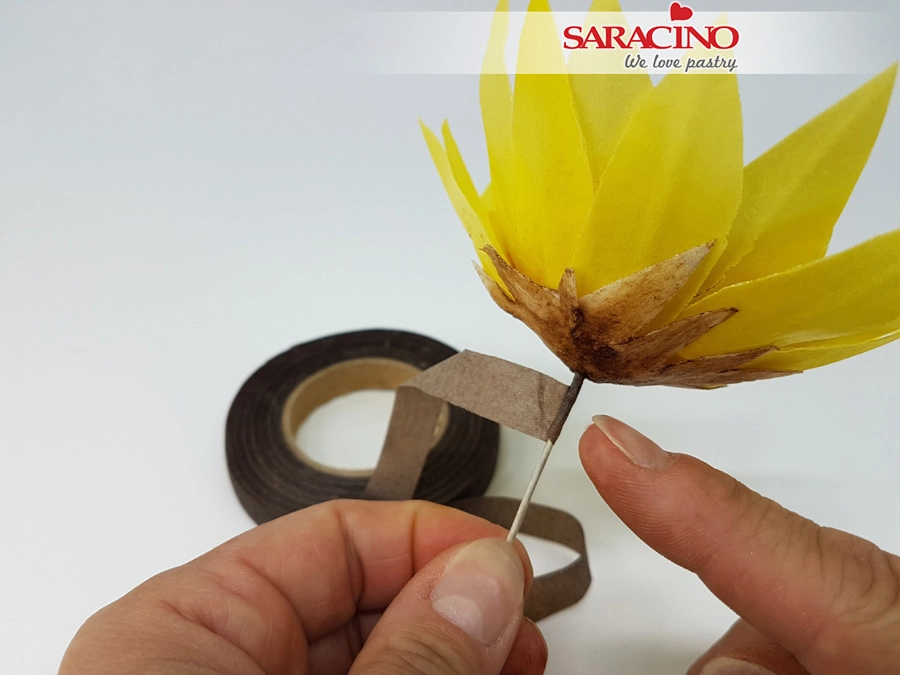
The wire should be fully taped up to the base of the flower.
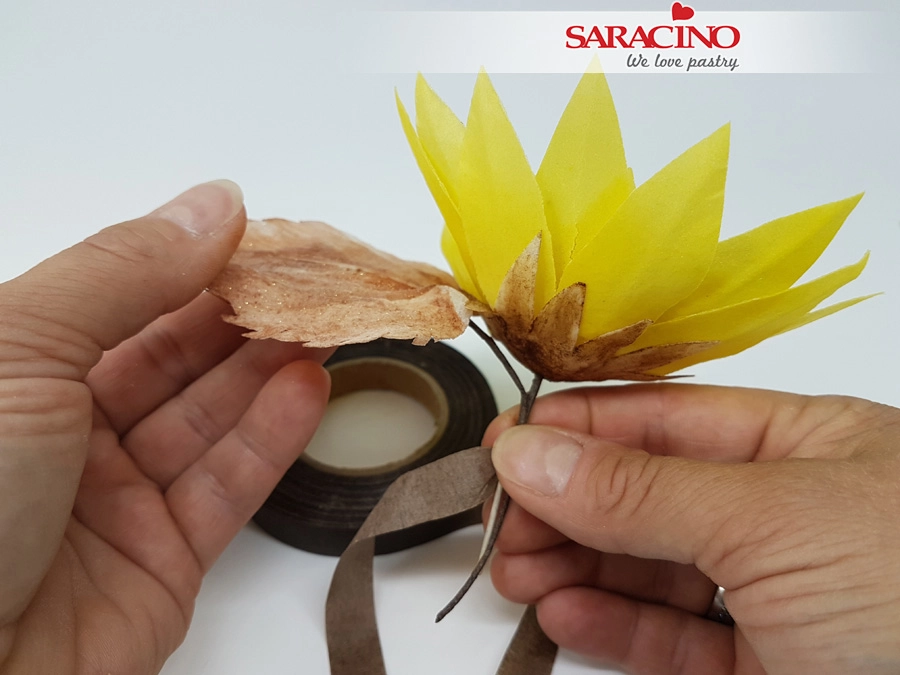
Add the first leaf to the flower stem.
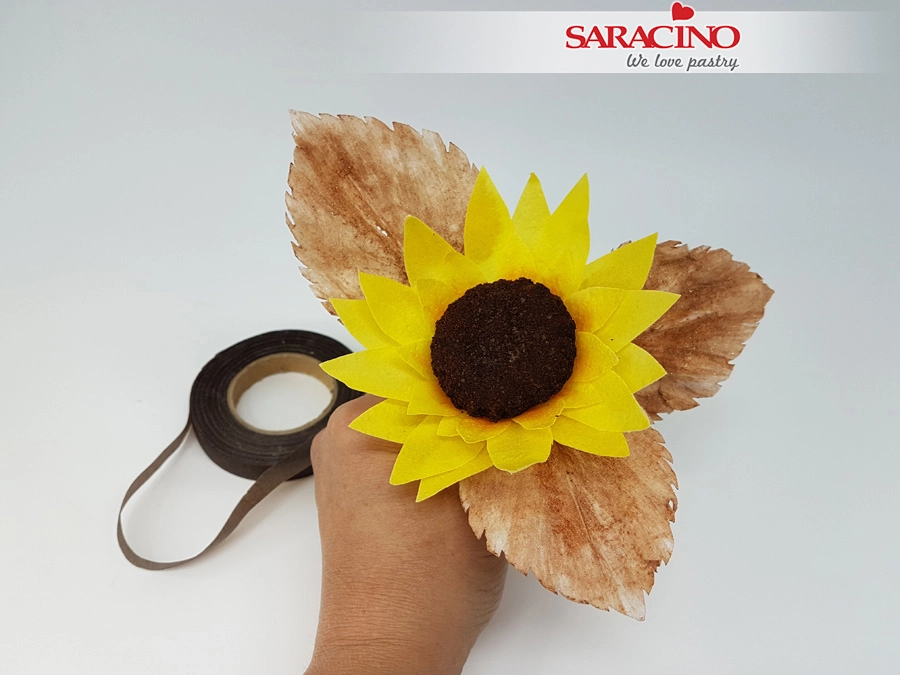
Attach the other two leaves to the flower stem and arrange them. With the other sunflower only the flower stem needs to be taped as it has no leaves.
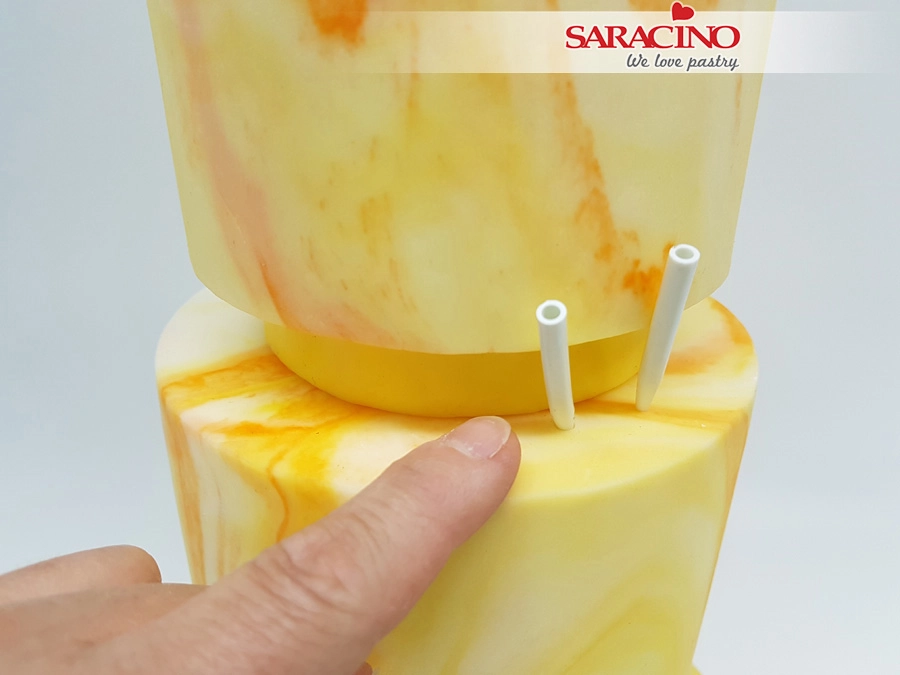
Stack your cake or dummies. Use dowels if you are using real cake.
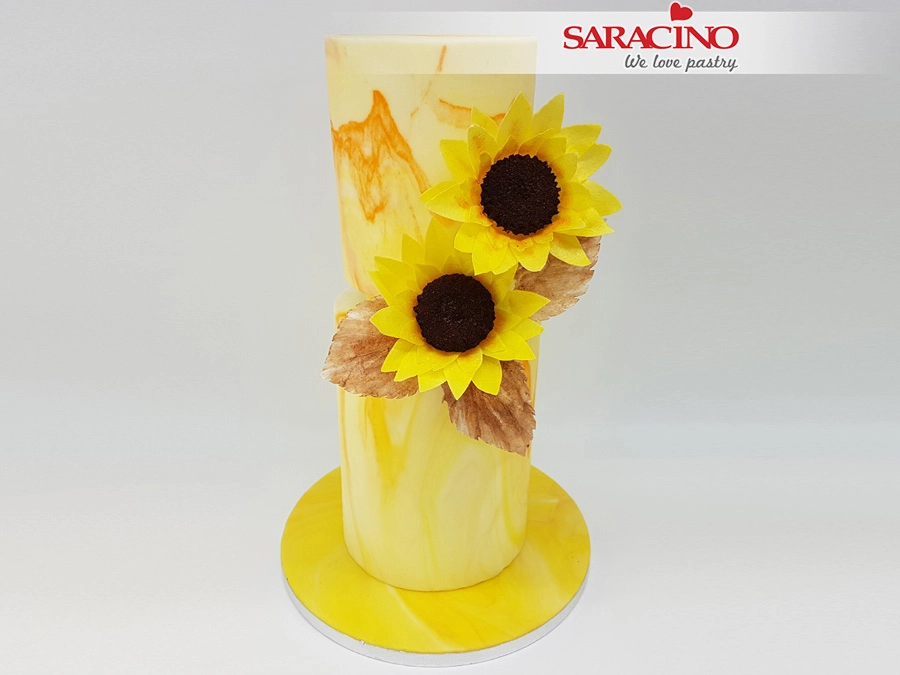
Insert the sunflower with leaves into the front flower pick. Cut the base wire to the desired length. If the hole in the flower pick is too big, you can first fill it with a small amount of white Pasta Model. Insert the flower into the flower pick. Cut the second sunflower stem to the desired length and insert into the back flower pick. Make sure that the flowers are facing forward.
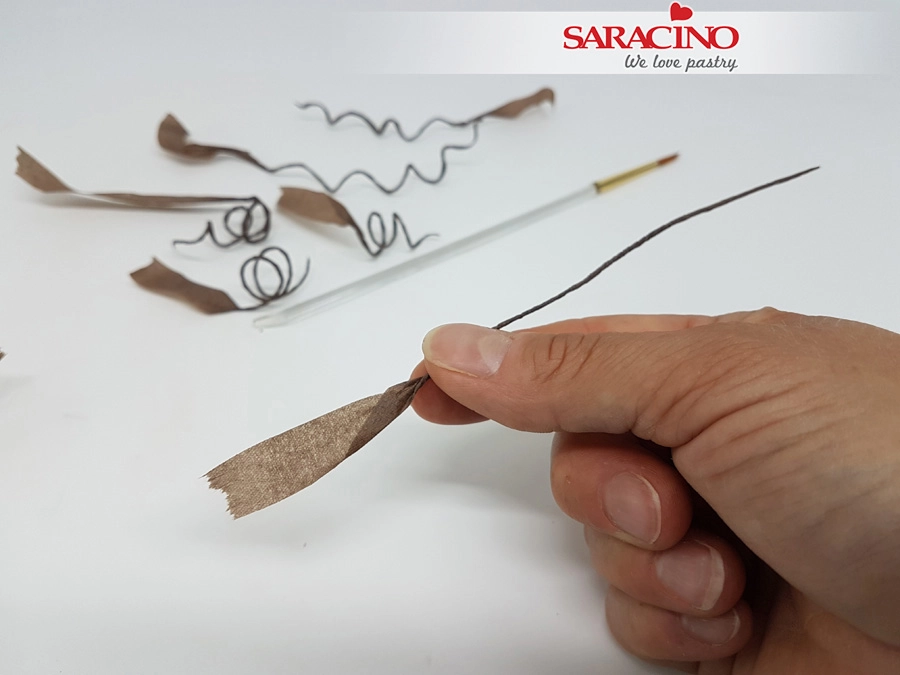
For the vines take a piece of brown flower tape and twist the tip between thumb and forefinger to a point. Continue twisting to a length of 10cm.
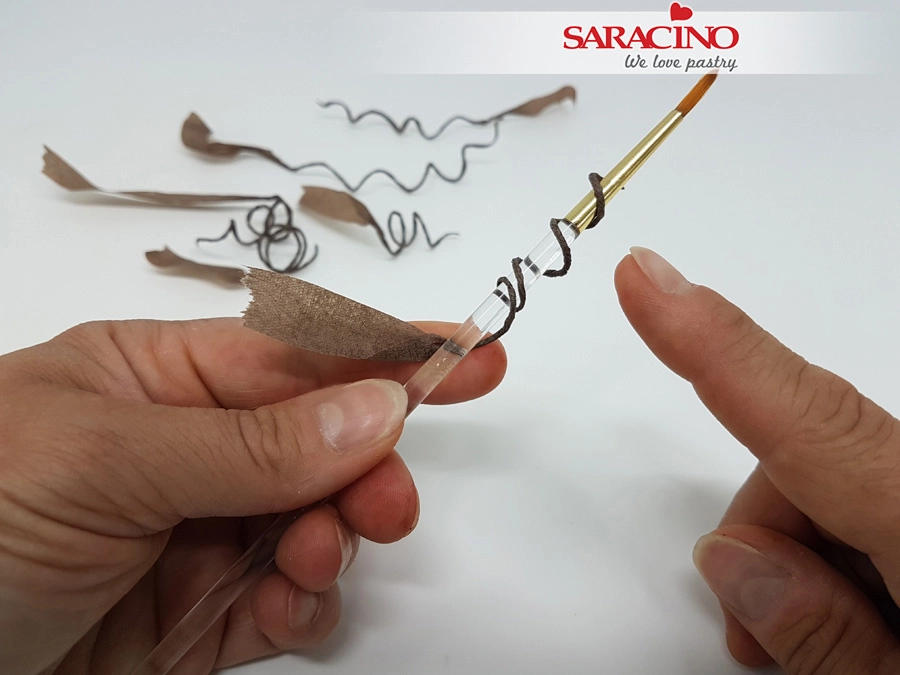
Wrap the tape around the handle of a paint brush.
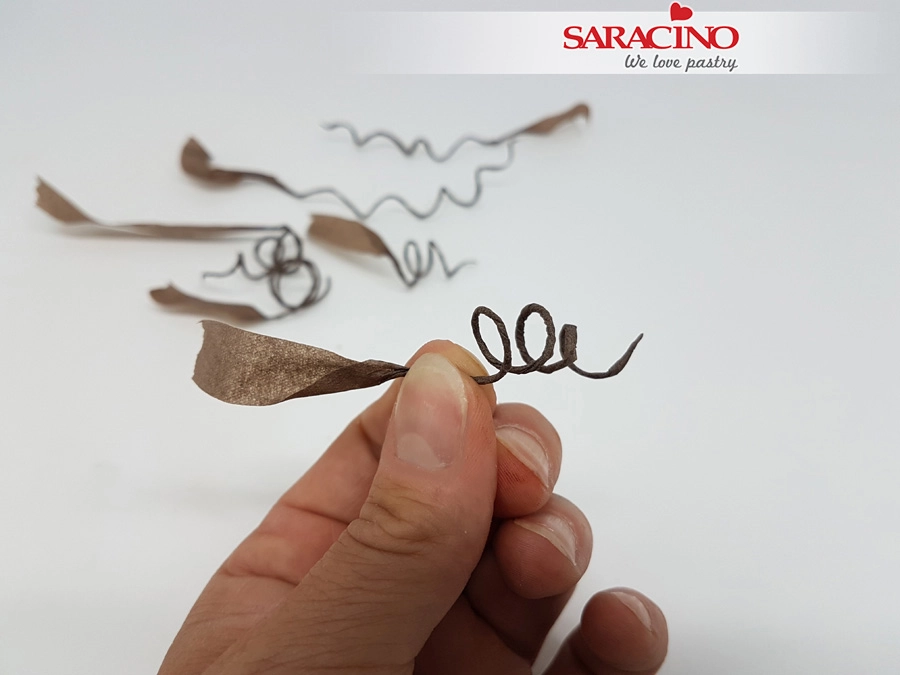
Carefully slide off the brush and set aside. Make approximately 9 vines.
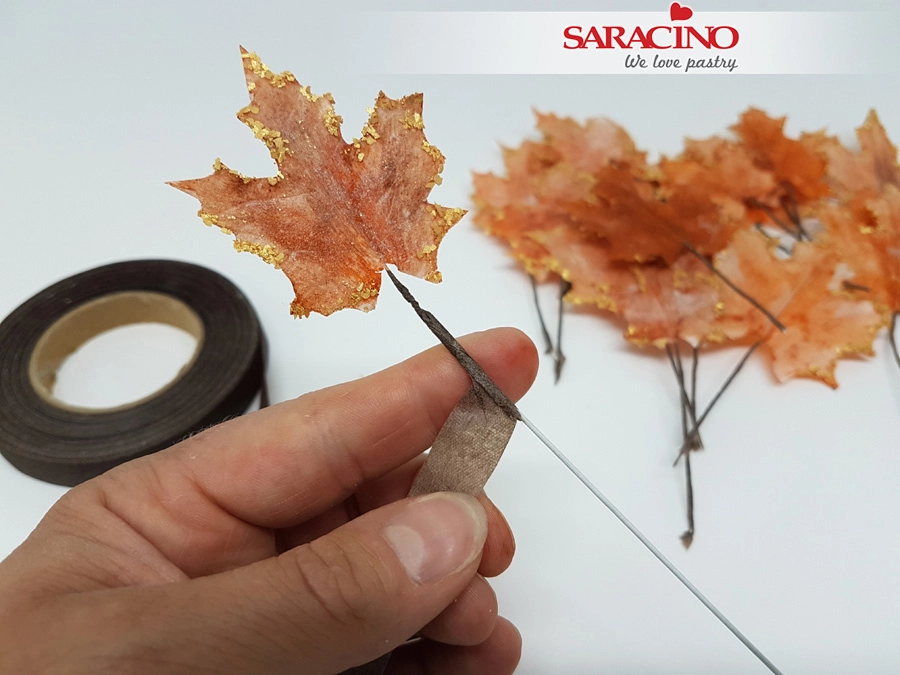
Using brown flower tape, tape the first autumn leaf to the end of a 20 gauge flower wire.
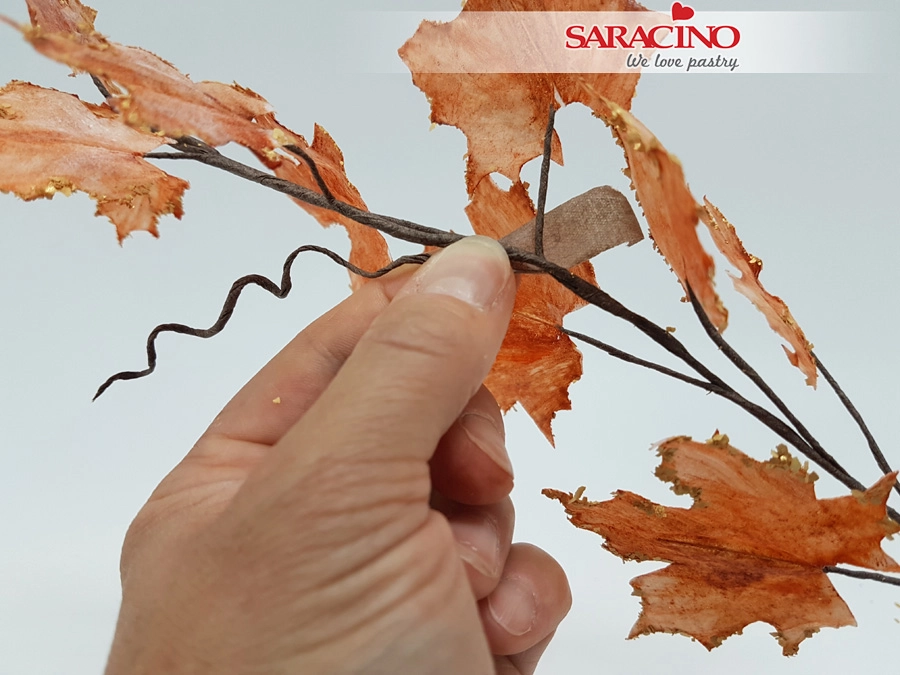
Arrange and attach the leaves to the base wire. Alternate large and small leaves and play with the distance between the leaves. This gives a natural look to your leaf vine. Tape the decorative vines between the leaves randomly. Attach 2 lengths of 20 gauge flower wire together with brown flower tape to achieve the required length for the leaf branch.
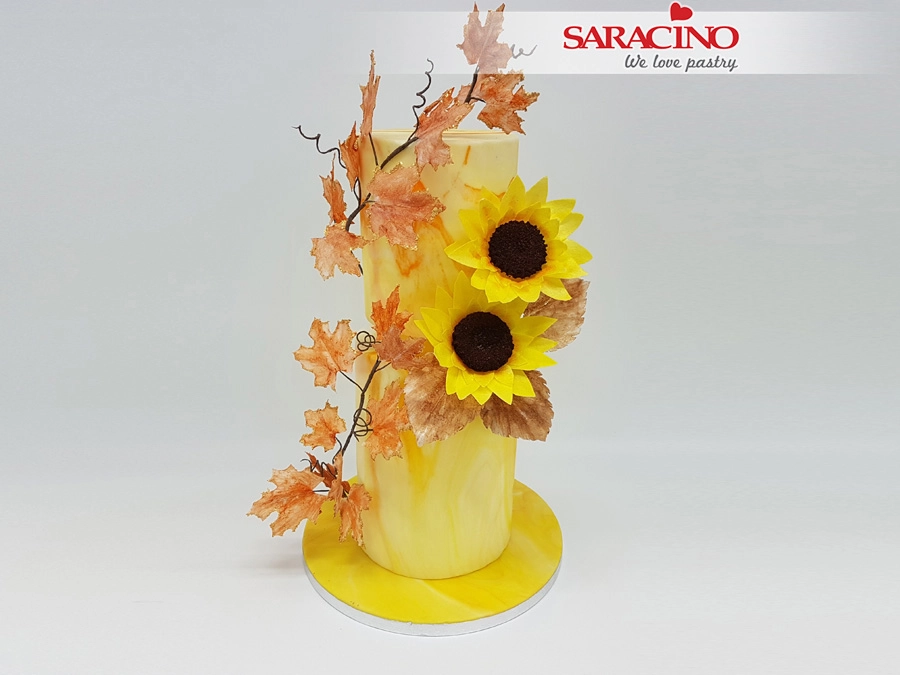
Twist the leaf branch around your cake and attach it. The leaf branch should start on the base board and finish on the top of the cake.
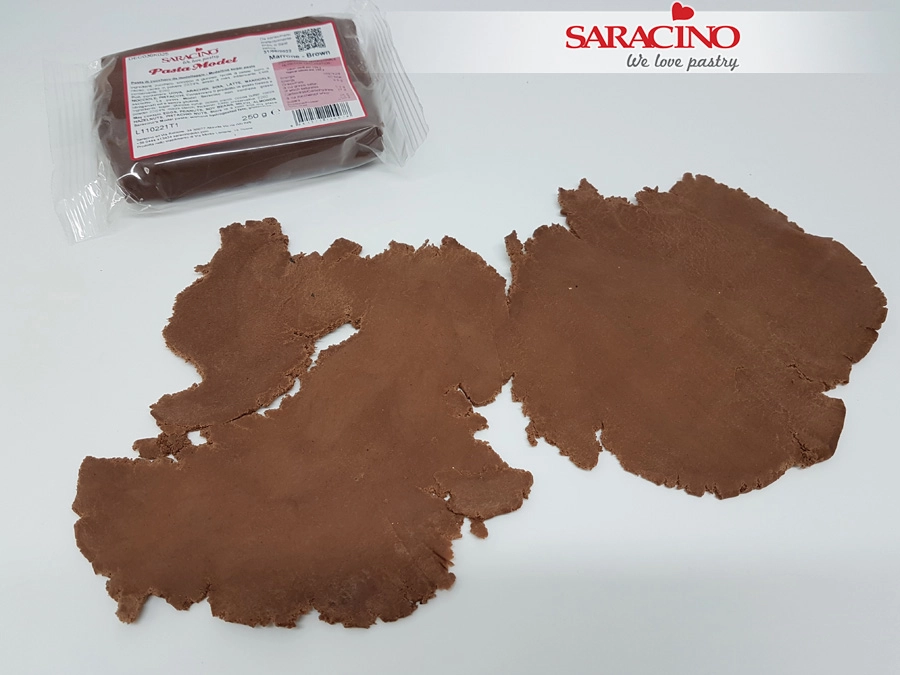
Using 200g of brown Pasta Model. Do not knead before use. Roll the un-kneaded Pasta Model with a rolling pin. Roll to about 3mm thick. We want a rough textured edge to the paste. By rolling the Pasta Model without kneading you get a rough texture at the edge.
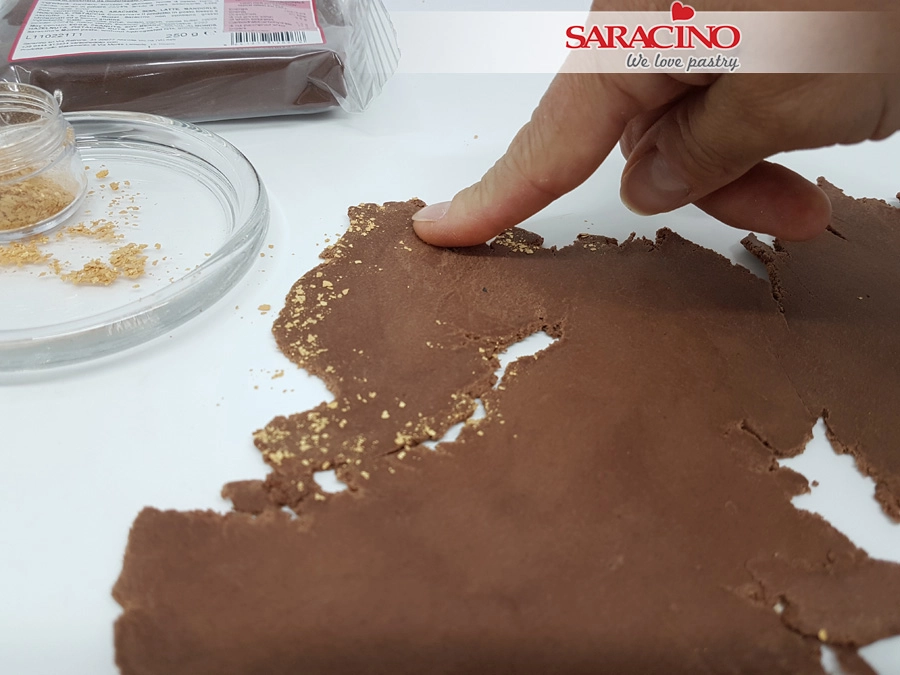
Sprinkle gold glitter flakes along the edge of the Pasta Model and press gently with your finger.
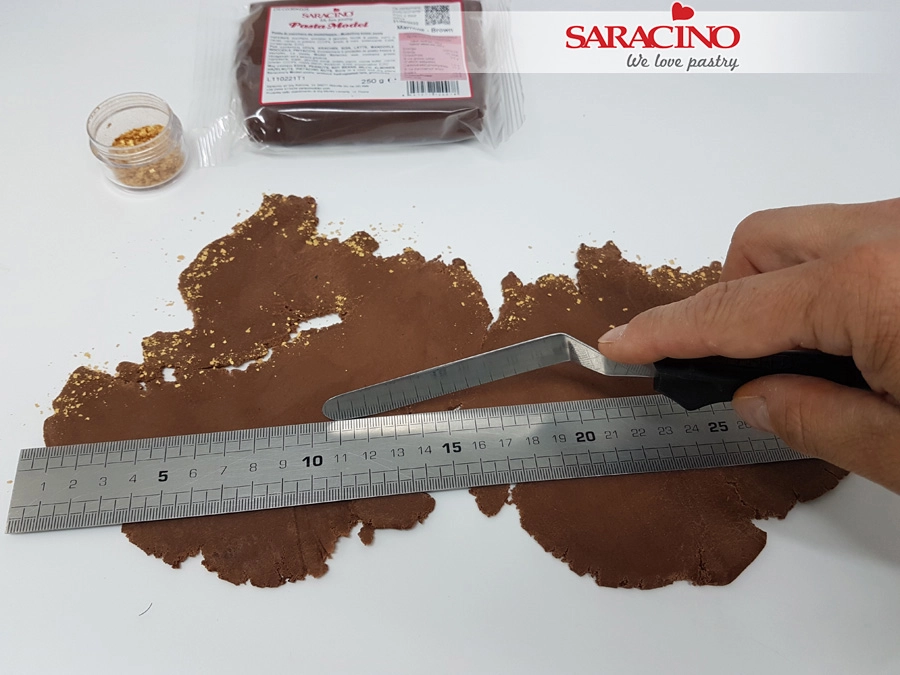
Cut a straight edge. Choose a piece that is visually the most attractive with the most feature and texture.
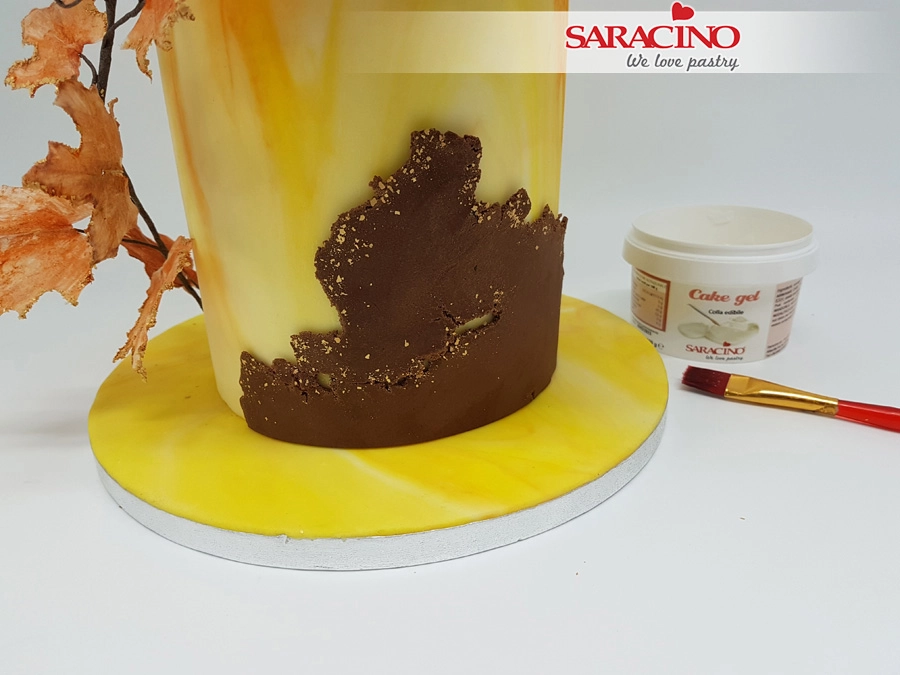
Use a little cake gel to attach to the bottom tier with the straight edge on the board.
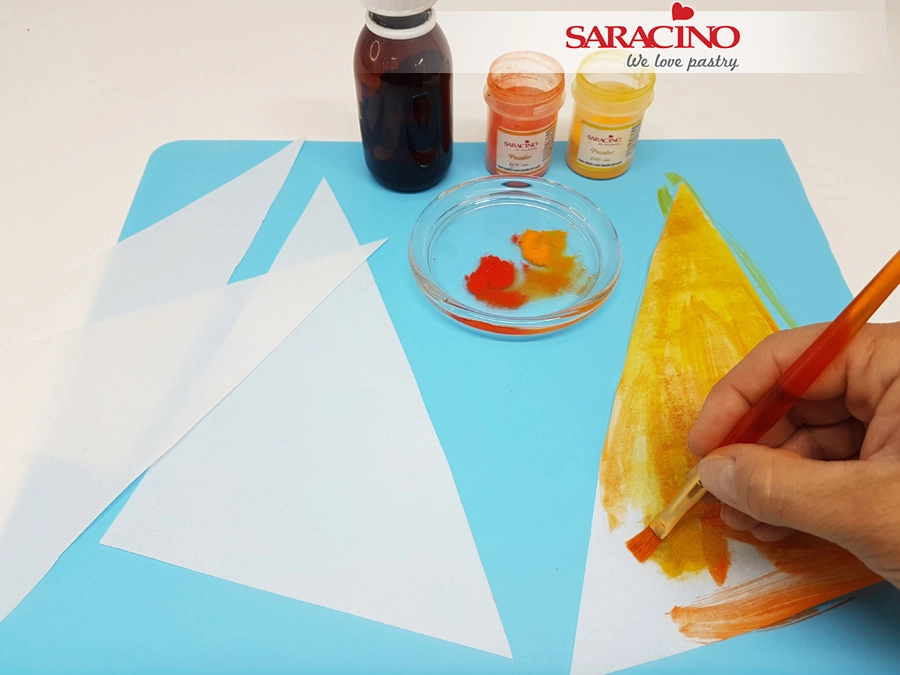
Take 2 sheets of 0.27mm wafer paper and cut diagonally in half. Add yellow and orange powder colour to clear alcohol to make a thick paint. Paint the wafer paper. Try to provide a nice colour gradient from yellow to orange. Allow to dry for 10 minutes.
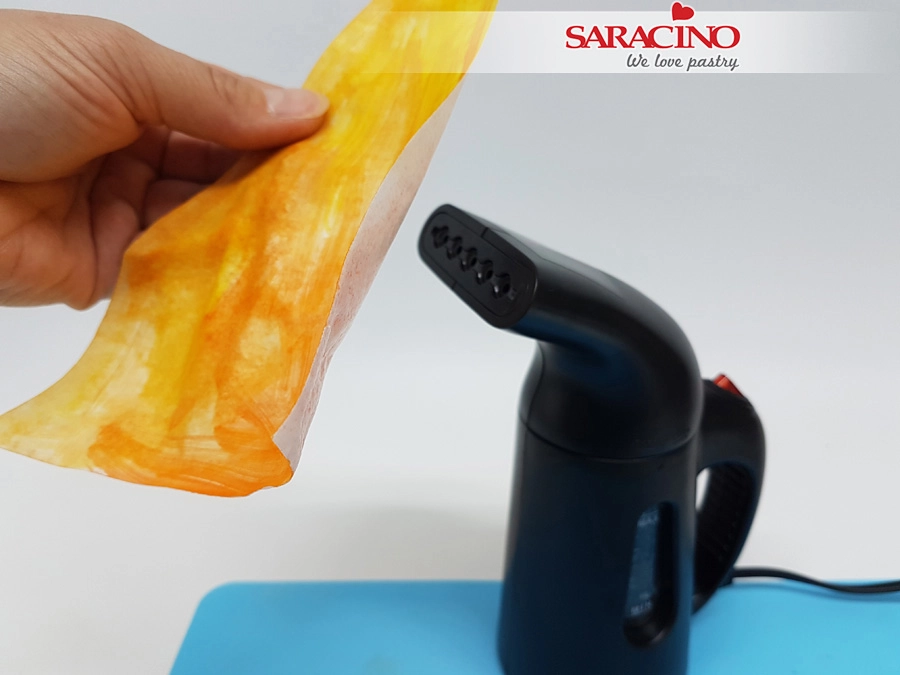
Gently steam the wafer paper so that it becomes limp and flexible.
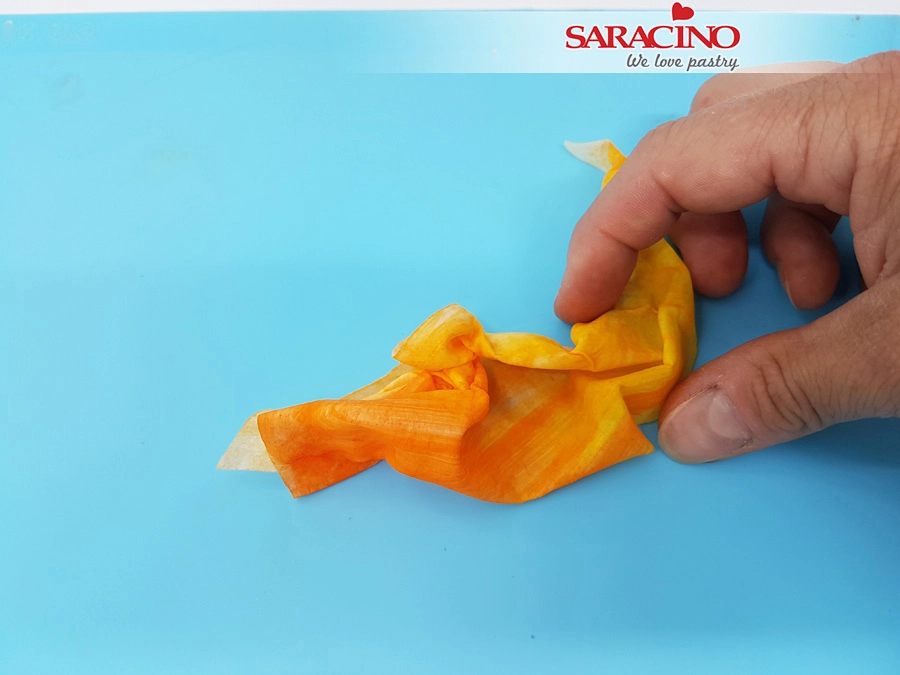
Use your fingers to give the desired shape on a silicone mat. You need to work quickly at this step. Make sure not to press the limp wafer paper too much as you cannot separate wafer paper when it has stuck together. Create multiple shapes. You should have a minimum 4 pieces but more is always possible. Experiment to get a look you want!
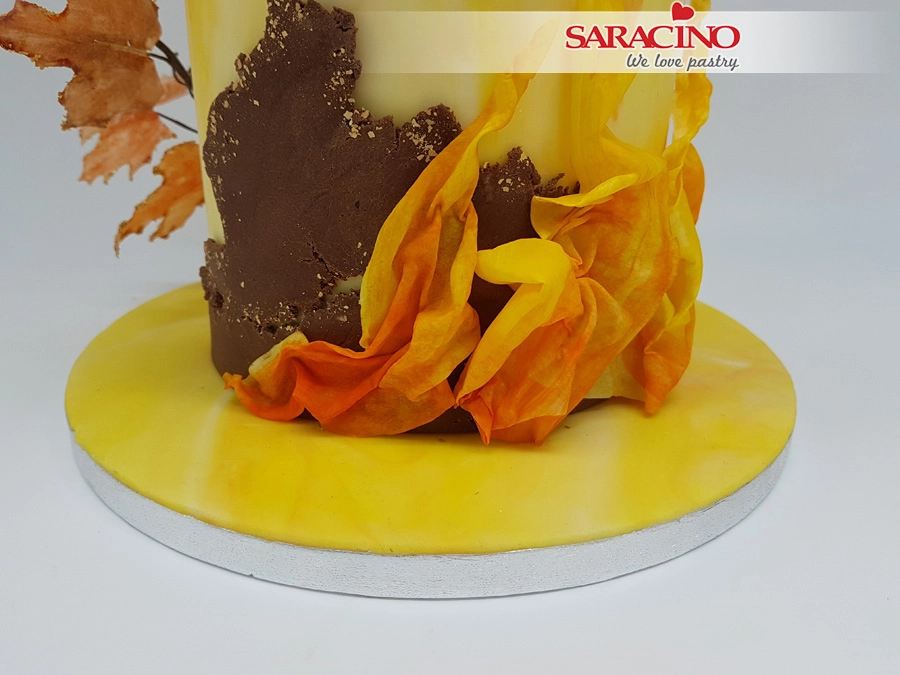
Use a little cake gel to attach the wafer paper to the brown part of the bottom layer. Finish the cake drum with a ribbon of your choice.


Place one sheet of wafer paper on top of your template. Use the dull end of the Drezden tool and transfer the impression of the shape onto the wafer paper.

Alternatively, you can use a pencil or light-coloured edible marker to transfer the petal outline onto the wafer paper.

Using sharp scissors, cut out your petals. To save time, you can cut up to 3 sheets of wafer paper at the same time.

Prepare three petals and one calyx.

To make AC Tonic™ wafer paper conditioner, mix ½ tsp food-grade glycerin and 2 tbsp water (preferably distilled).

Add soft pink gel colour to your mixture. Add more conditioner or gel colour to get your preferred shade of pink.

To condition wafer paper, gently press your brush on the side of the palette to remove excess moisture.

Apply AC Tonic™ conditioner on the smooth side of your petal first.

Gently press the conditioner into the wafer paper to get a soft and flexible petal.

If your wafer paper is melting or gets sticky, use a fluffy brush and apply a small amount of cornstarch.

Apply the same treatment to the other (rough) side of the petal.

Place your conditioned petal in the silicone veiner with the rough side up. Keep your veiner on the table and firmly press, hold for 5-10 seconds.

You should get a soft textured wafer paper petal.

Place your petal on a petal former or a spoon. Set aside to dry completely.

Repeat the previous steps to condition the medium size petals.

Press the petals in the veiner with the rough side up. Place a medium-side petal into a former to create a cupped shape. Set aside to dry.

Cut 22 gauge white wire in half. Using needle-nose pliers, create a large closed hook.

Take half-width white floral tape, stretch and start shaping a bud. Add 10-15 layers of floral tape to make the base for the sweet pea flower.

Take a small petal with the rough side up. Apply the conditioning mixture to get a saturated, even coverage.

Place your sweet pea bud inside a small petal.

Pinch both sides of the small petal to create the center. Set aside to dry.

For leaves, cut two pieces of wafer paper, roughly the size of your template.

Mix AC Tonic™ with the green gel colour of your choice. Apply a thin layer of conditioning mixture to one piece of wafer paper.
TIP: Use a scrap piece of wafer paper to check the colour and saturation of your mixture.

Take a piece of 28 gauge white wire and press in the middle of the wafer paper. Sandwich with another piece of wafer paper.

Press both layers together to make sure that the wire is secured in the middle.

Using the same conditioning mixture, colour the wafer paper.

To prevent wafer paper from sticking, apply a small amount of corn flour with a large fluffy brush.

Place your leaf template on top of the coloured wafer paper. Narrow end pointing the wire. Using sharp scissors, cut out the wafer paper leaf.

Gently peel off the paper template. You should have a teardrop-shaped leaf with the wire in the middle.

Place your wafer paper leaf on a floral foam pad and press with the dull end of the Dresden tool.

You can curl and shape your leaf to give it some movement. Set aside to dry.

To make tendrils take a piece of light green floral tape and stretch to activate the glue. Start twisting the tape to create the base for the tendrils.

Using a thin paintbrush, shape your floral tape onto the handle to make the spiral tendril. Gently twisting the brush, remove the tendril from the handle.

For the calyx condition the rough side of the wafer paper with the green AC Tonic™ mixture.

Place your conditioned calyx on the floral foam pad with the smooth side up. Use a ball tool to add shape to the calyx.

Place it in a petal former and leave it to dry completely before assembling.

Dusting petals – Make sure that all your petals are dry before dusting the flower.

Apply a generous amount of dusty pink powder colour to the outside part of the sweet pea center.

Add moss green powder colour at the inner base of the center.

Apply dusty pink powder colour to the outer edge of the medium petal.

Add moss green powder colour at the base.

Dust your large petal using the same colours and patterns.

Using moss green powder colour, dust your leaves. To make it more dimensional, add a touch of dusty pink. The petal on the left is before dusting and on the right dusted with moss green and dusty pink.

Prepare all the dusted petals and calyx before starting assembly.

Using a small brush, apply water in the middle of medium size petal to make it sticky.

Attach your sweet pea center to the medium size petal and hold for a few seconds.

Repeat with the large petal applying a little water in the centre.

Attach to the sweet pea flower. Hold for a few seconds.

Add the calyx to the flower. Apply a small amount of water as glue.

Gently press the calyx onto the sweet pea flower.

You can reshape and form the flower while it is still soft.

Use a half-width light green floral tape to cover the stem.

To make sweet pea buds, use small and medium size petals. Shape the petals to a more closed look.

Make sweet pea flowers at different stages of bloom, leaves and tendrils to create a full branch.

Start by grouping and taping flowers together.

Tape a few tendrils and flowers to another piece of 22 gauge wire. Add flowers every 3-4cm.

At the base of the flower, add two leaves on the opposite sides of the stem. Use light green floral tape to assemble the sweet pea.

Add more flowers, leaves and tendrils to achieve the desired look.
TIP: Use posy picks to insert your flowers into an edible cake. Floral wires should never be exposed inside the cake.


Saracino powder colours: pink, purple, yellow, green
Saracino Royal Icing mix
Ingredients for Pate Decor:
Ingredients for Swiss Roll Mixture:
Ingredients for Filling:
Equipment:
Food mixer
Baking paper
Baking film
Silkomart 01 silicone tray
Spatulas
Fine sieve
Bowls of various sizes
Royal icing piping nozzle (Wilton 125 for rose petals and Wilton 352 for leaves)
Round piping nozzle number 2
Royal Icing flower nail
Parchment paper

Prepare the ingredients for the pate decor. You will need the butter, icing sugar, egg whites, flour and Saracino powder colours (purple, green, yellow and pink).

Combine the butter with the icing sugar until you have a fluffy consistancy.

Gradually add the egg whites and the flour alternatively until the mixture is smooth and well blended.

Prepare the required design on to a piece of paper.

Prepare the silicone swiss roll tin / mould and cut transparent film (it is important the film is suitable for baking) to the same size as the mould.

Place the design face up on the silicone swiss roll tray and cover it with the baking film. I am adding two templates which will make two smaller Swiss rolls.

Divide the pate decor into 5 equal parts and colour with powder colours : pink, lilac, light green, dark green and yellow.

Add a number 2 piping nozzle to a piping bag and fill with the yellow pate decor.

Repeat for the lilac colour.

Pipe to make the flowers as shown.

Using a number 2 nozzle again add light green and dark green to piping bags. Using the dark green pipe small stems and twigs.

Pipe some of the larger leaves with light green.

Finish the larger leaves with dark green. Place in the refrigerator to cool well.

Prepare the ingredients for the Swiss roll mixture: whole eggs, sugar, Saracino almond flour, plain flour, almond paste, egg whites, a pinch of salt.

Whisk the eggs and a first part of the sugar in the mixer until light and fluffy.

Mix the almond flour and salt well.

Using a sieve add the flours to the whipped mixture.

Combine gently with a spatula (from top to bottom) without overworking the mixture.

Gently combine the almond paste.

Whip the egg white until stiff and add the second part of sugar.

Gently combine the two mixtures without losing the entrained air.

Remove the paper template from uder the baking film sheet. Add the Swiss roll mixture evenly over the painted design. Take care not to damage your design.

Using an elbow spatula fill the silicone pan completely evenly taking care not to overwork and lose the air. Place in the oven and bake at approximately 170° for 10 minutes.

Once cooked, turn the Swiss roll over onto a baking sheet and allow to cool. Once cold, gently remove the silicone mould.

Remove the bakable film.

Cut to the length of Swiss roll you would like.

Prepare the ingredients for the filling : butter, condensed milk, Saracino Supreme Raspberry food flavouring.

Whip the butter in a mixer.

Add the condensed milk and continue to whisk until a soft cream is obtained.

Add the Supreme Raspberry to give taste and colour. Mix well.

Turn the sponge upside down by placing it on parchment paper cut to size and prepare the ingredients for the filling.

Spread a very thin layer of raspberry compote.

Spread a thick layer of our raspberry flavour cream filling on top of the jam.

Add the fresh raspberries on the cream evenly.

Using the baking paper roll up the Swiss roll.

Finish the roll so that the design is on top and allow to cool in the refrigerator.

Use a mixer to prepare the Saracino royal icing in accordance with the instructions on the packaging (just add water and mix).

Divide the royal icing into 3 equal parts and colour with Saracino powder colours (pink and green) to obtain light pink, pink and green.

Remove the parchment paper from the roll.

Use a sharp long bladed knife to trim the ends precisely to highlight the internal filling.

Add light pink royal icing to a piping bag that has a petal piping nozzle.

Fix a small square of parchment paper to the top of a flower nail. Pipe a cone of royal icing in the centre.

Pipe the inner 3 petals and allow to dry.

Pipe the second layer of 5 petals and dry.

Pipe the final circle of petals and dry. Repeat to create other buds and roses in light and dark pink.

Add green royal icing to a piping bag with a leaf nozzle. Add a small amount of royal icing to the top of the Swiss roll as shown.

Remove the royal icing flower from the flower nail. Remove the parchment paper.

Place the rose on the green royal icing to fix into place.

Continue decorating the roll with the other roses and buds following the design created on the sponge.

Finish by piping leaves around and between the roses.

GRASS BOARD
375g Pasta Top coloured green
75g Pasta top coloured grey
Saracino gel colour – yellow, green, blue, black
Saracino powder colour – green, white, brown
PAVING
375g Pasta Top coloured grey
20g Pasta Top coloured green
3 Bourbon biscuits
Saracino gel colours – black, green, yellow
Saracino powder colour – black, brown
WOOD
375g Pasta Top coloured grey
5g Black Pasta Model
Saracino powder colour – black, brown
Equipment
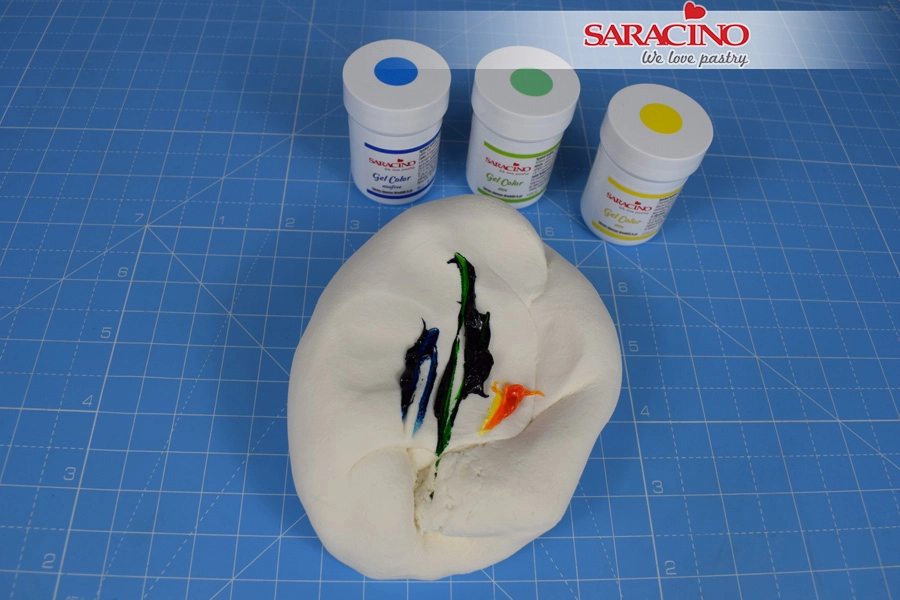
GRASS: Using a small amount of yellow, green and blue gel, colour 375g of pasta top green. Knead the paste until the colour is fairly uniform throughout.
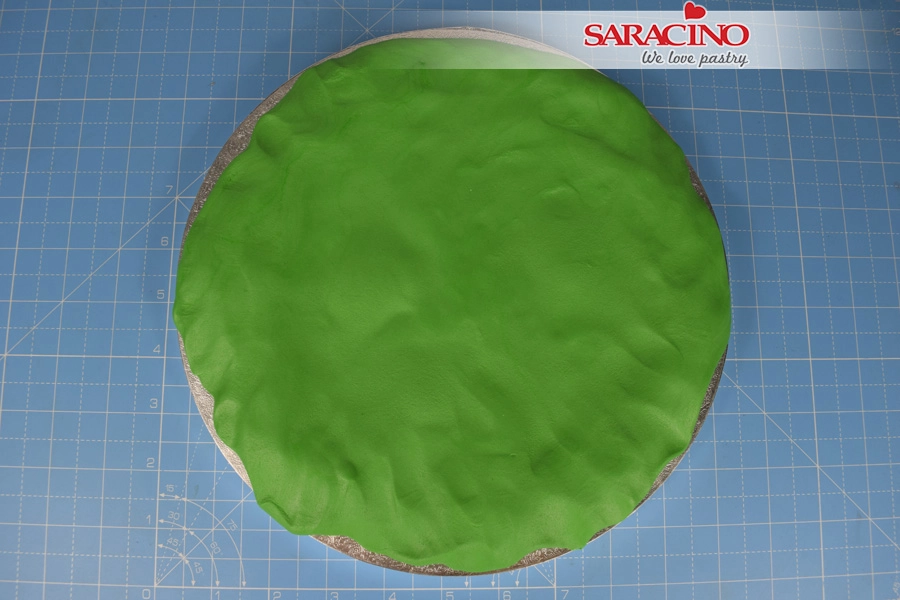
Place the paste on the centre of the board. Using your fingers, stretch and push out the paste so that it is thicker around the edge of the board and fairly flat in the centre where your cake will sit.
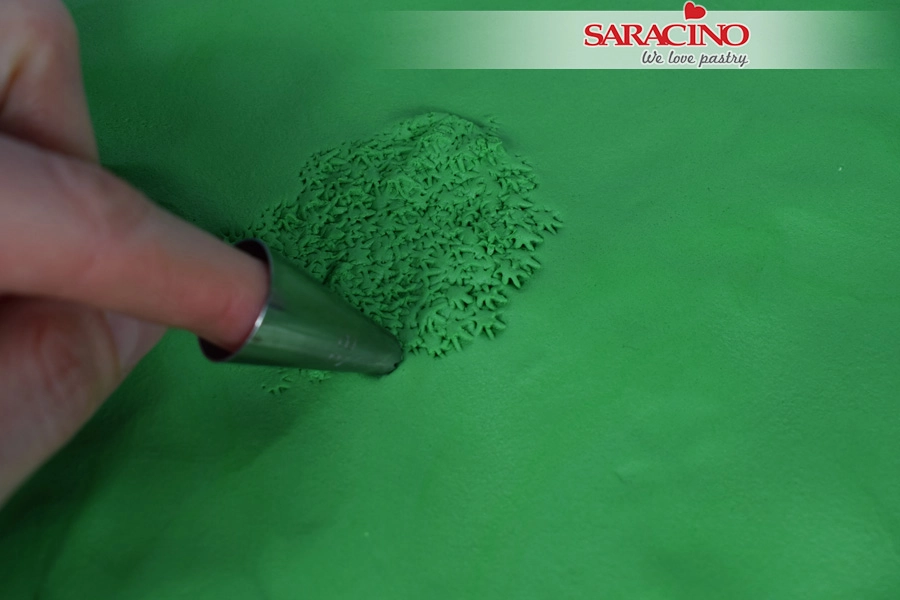
Take a star piping tip and gently begin to push into the paste repeatedly to texture the grass.
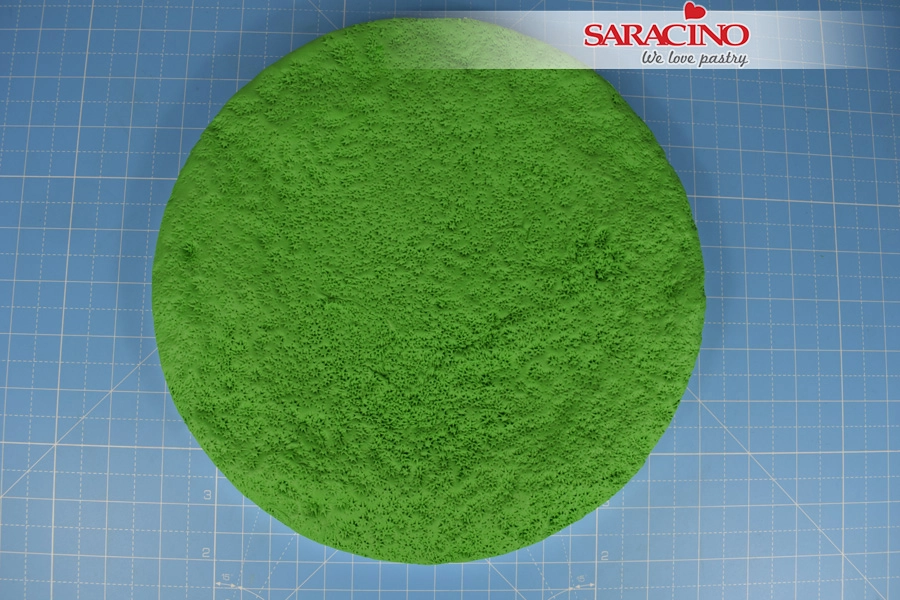
Continue until the whole board is covered. Trim the excess paste from around the edge with a sharp knife.
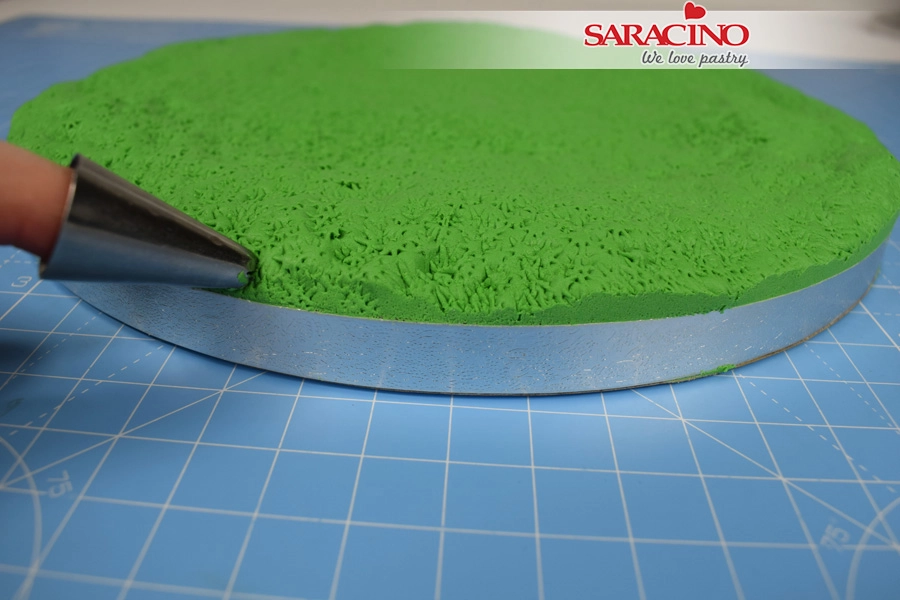
Texture the cut edge with the piping tip.
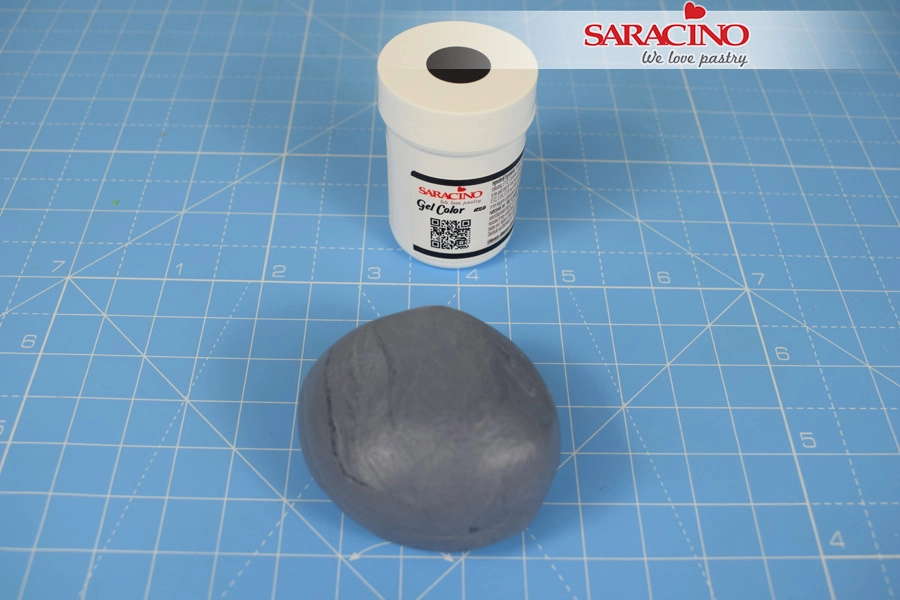
Colour 75g of pasta top with some black gel colour to create a dark grey.
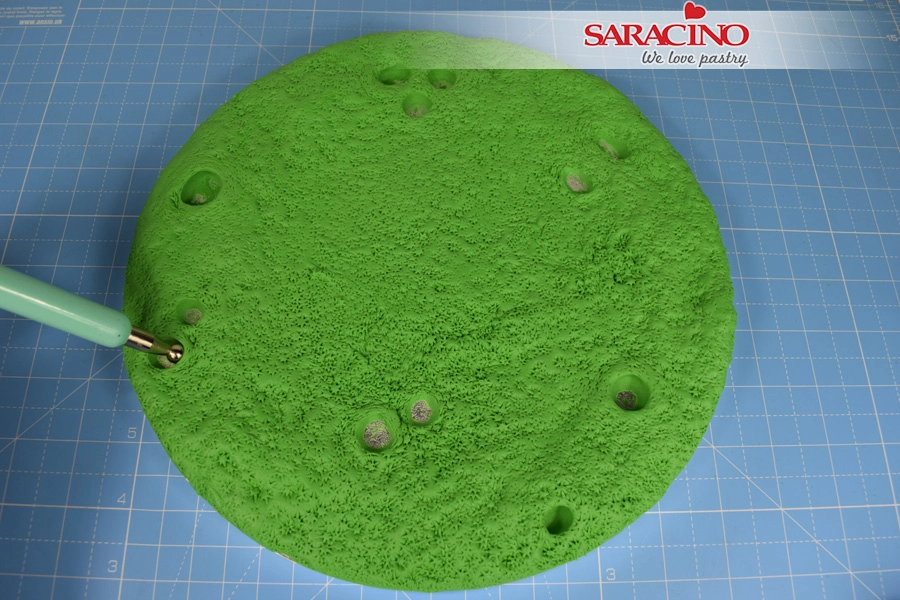
Use the end of the balling tool to create random holes in the paste around the edge of the board.
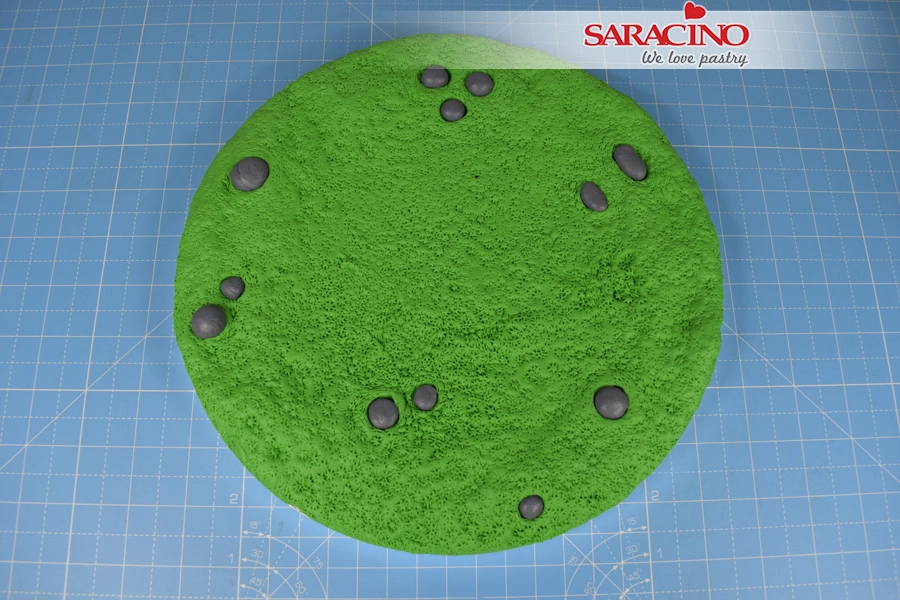
Roll small balls of grey paste and with a small amount of water stick into the holes.
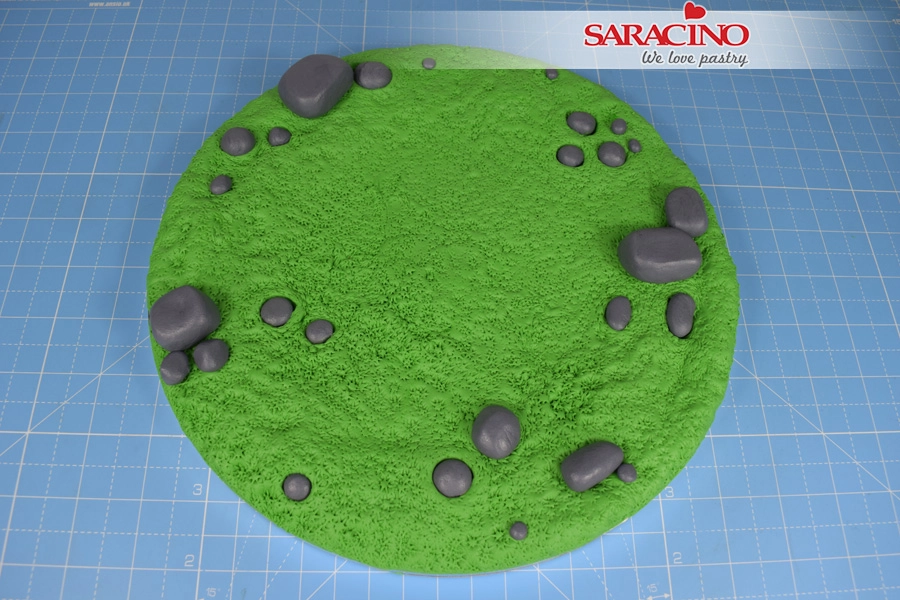
Use the remaining grey paste to make stones to sit on the surface of the board. Group the larger ones together and dot tiny ones at random places.
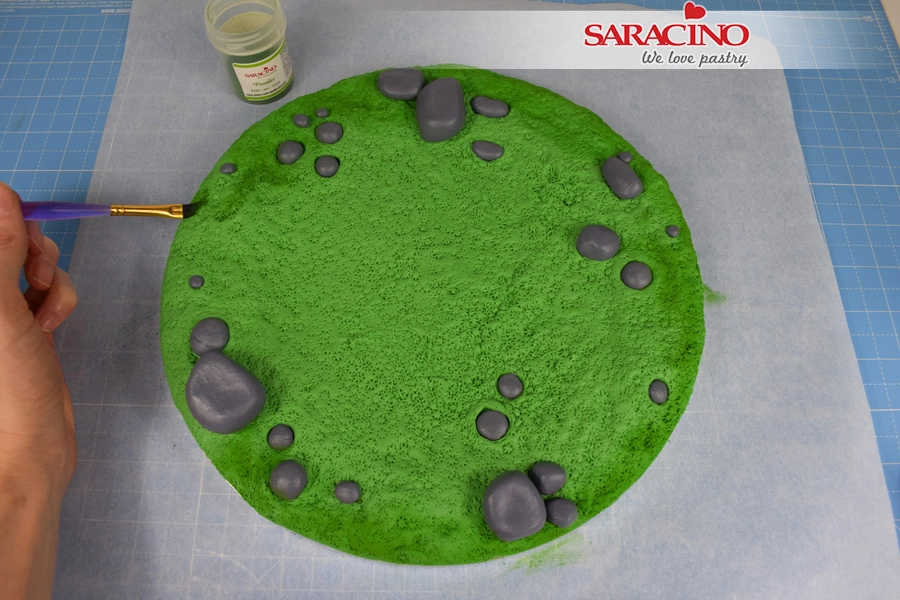
Using a flat angled paintbrush apply some green dust around the edge of the board.
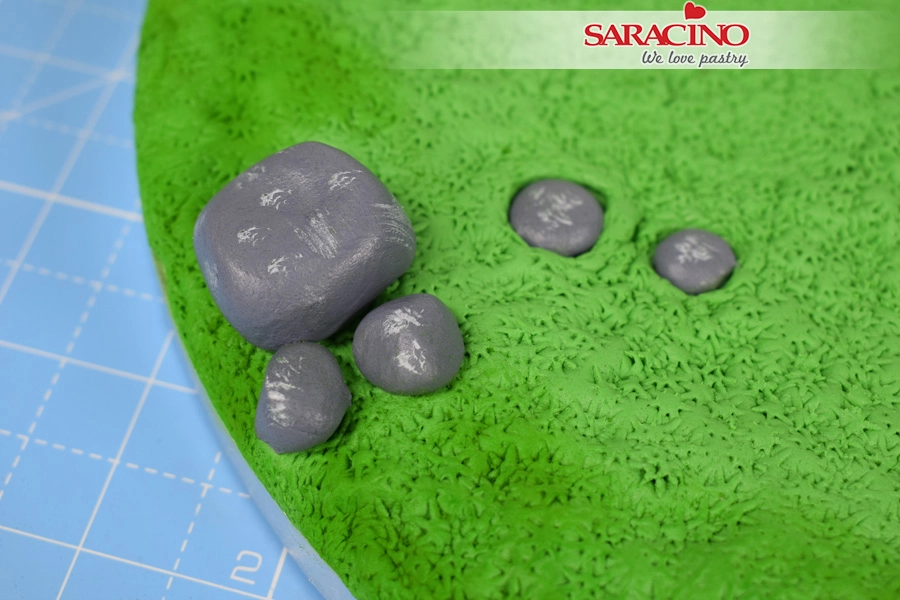
Mix a small amount of white dust with a couple of drops of water. Paint white flecks onto the surface of the stones.
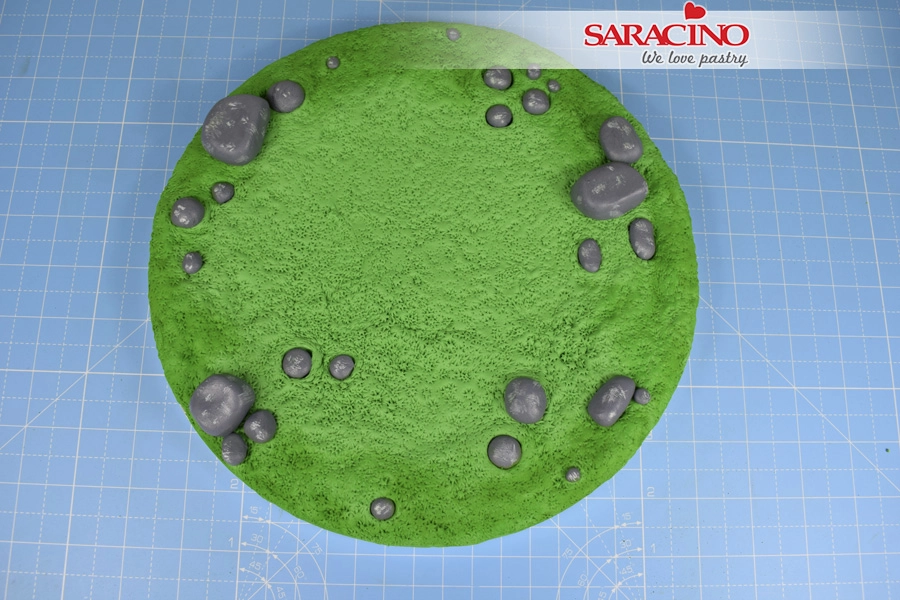
Continue until all the stones are painted.
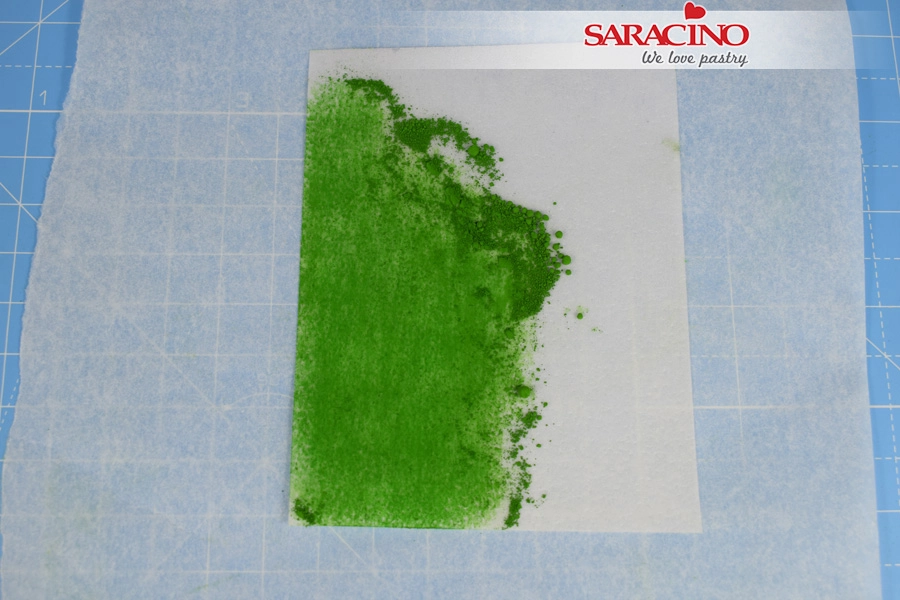
Lay a small square of wafer paper onto a piece of greaseproof paper. Use your finger to rub green dust into the surface of the paper. Turn the paper over and repeat on both sides.
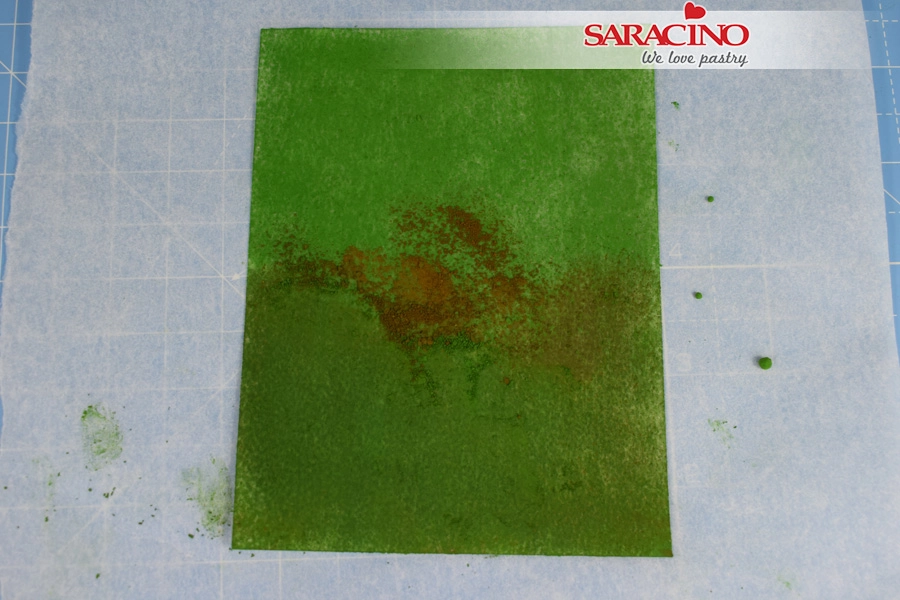
Once the paper has been coloured green, take a small amount of brown dust and colour one side to create a darker shade of green.
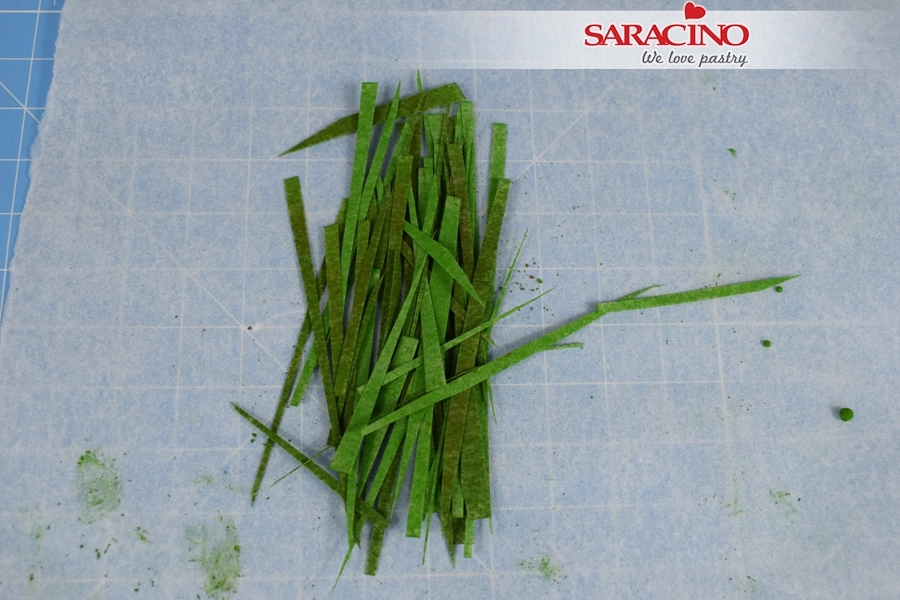
Use a pair of scissors to snip the paper into blades of grass.
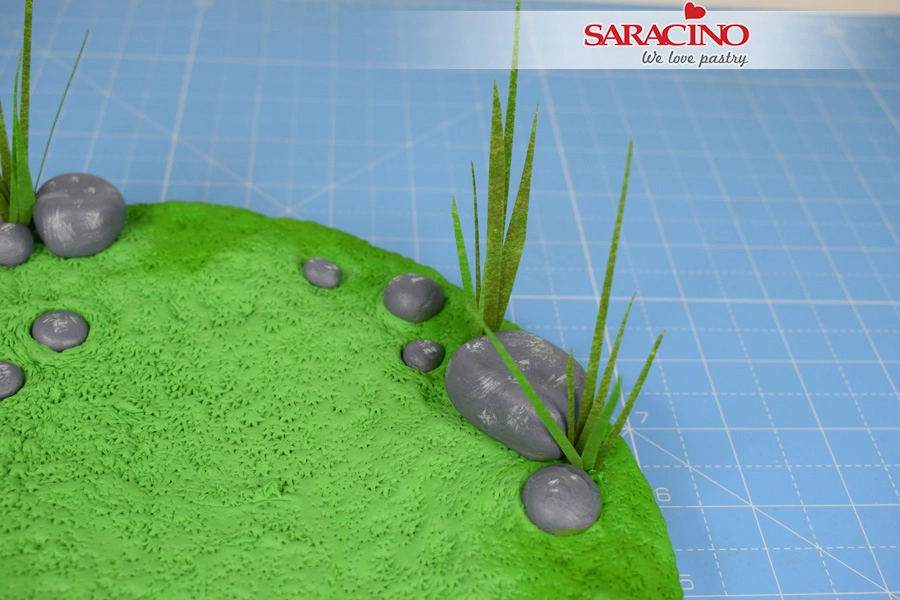
Use the wide end of the Dresden tool to poke a hole in the paste either side of the large rocks. Apply a small amount of water to the hole. Bundle together small groups of grass and stick in the hole. Push the paste back together to hold the blades in place.
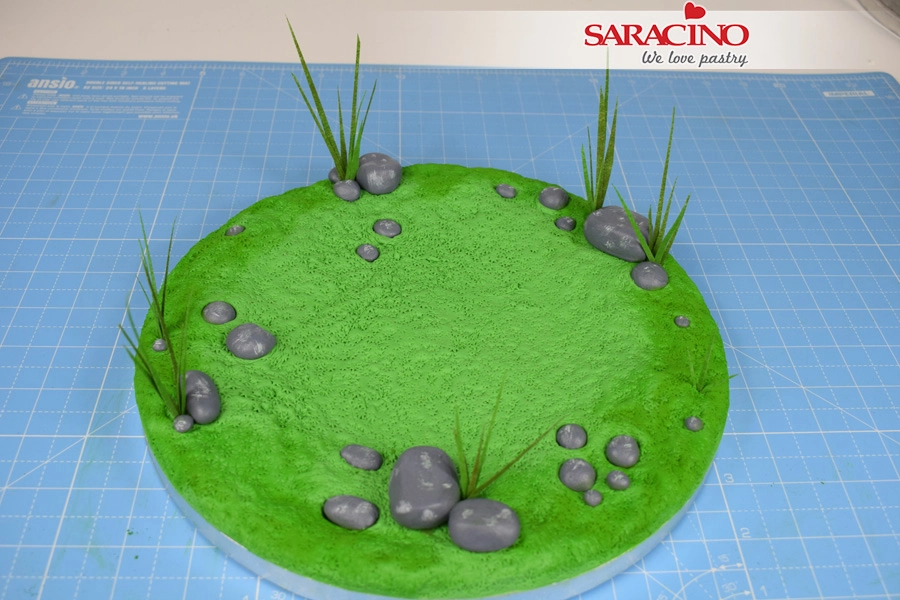
Repeat at random places across the board until you’re happy.
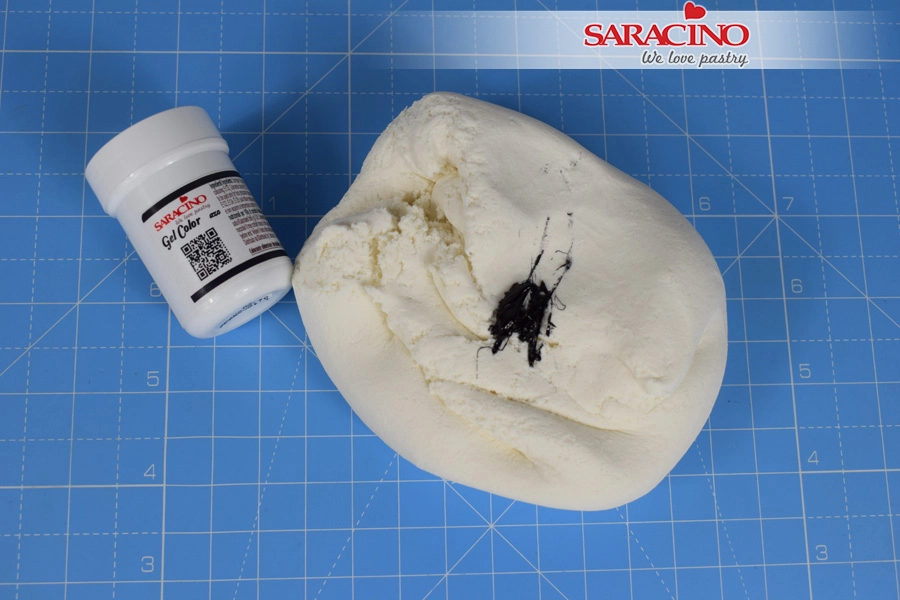
PAVING: Using a small amount of black gel, colour 375g of Pasta Top light grey. Knead the paste until the colour is fairly uniform throughout.
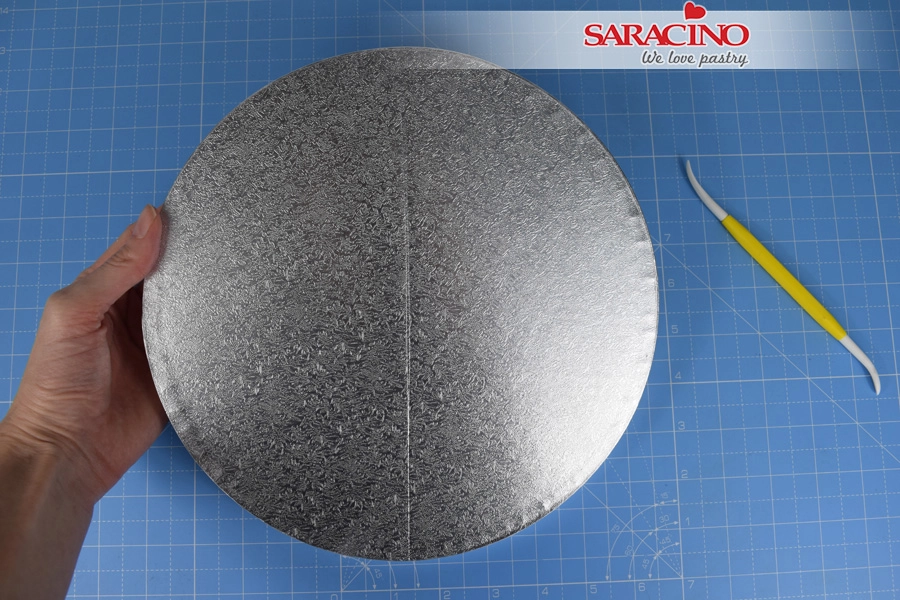
With the pointed end of the Dresden tool, gently score a line down the centre of the board.
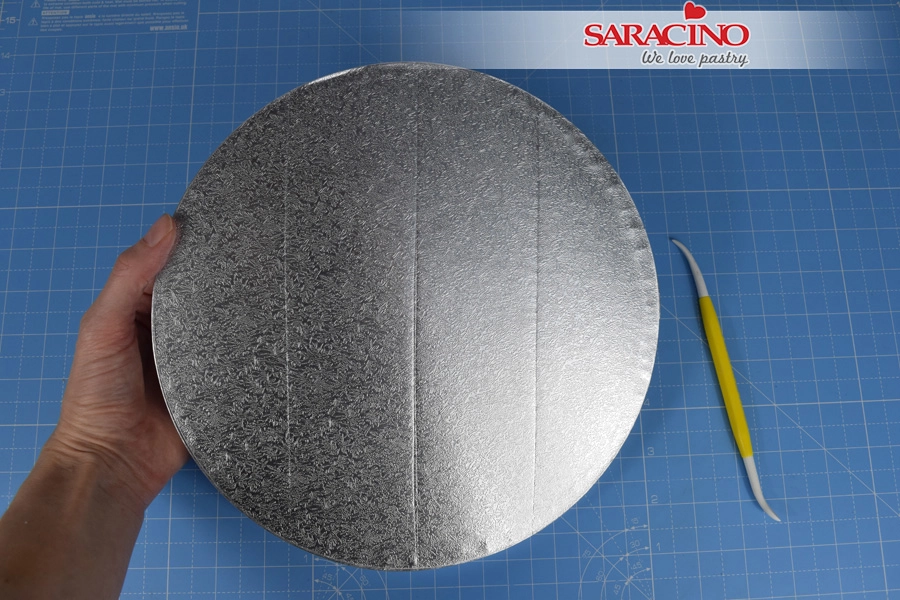
Score two more lines dividing the board roughly into quarters.
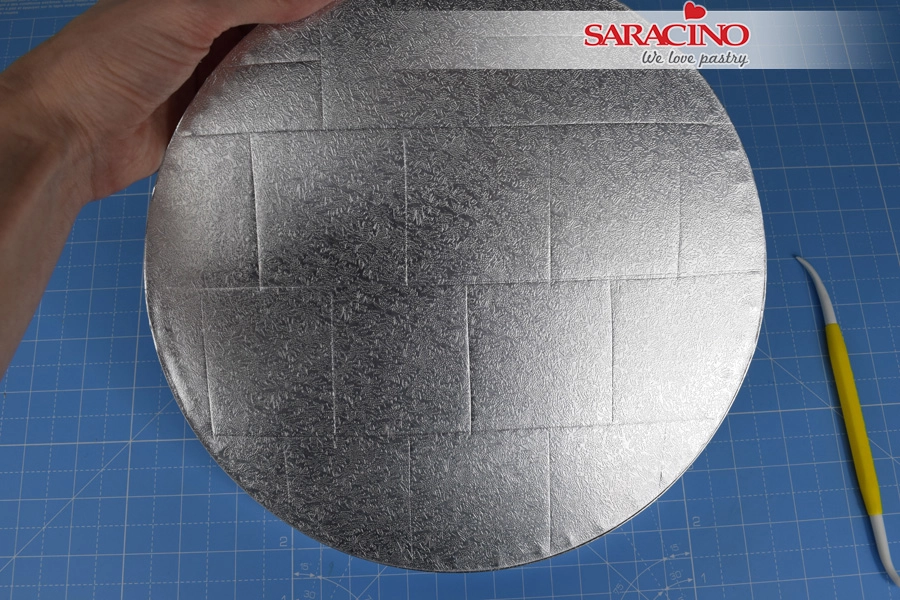
Score lines dividing the strips into rough squares, staggered in a brick pattern.
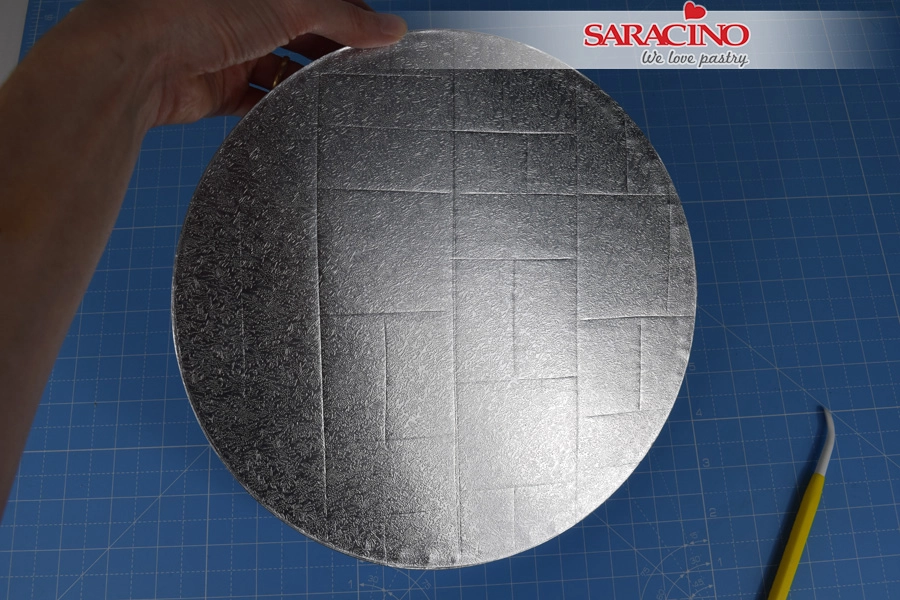
Score lines dividing random squares into smaller rectangles and squares. Don’t worry if they’re not perfect, you can change any as you go along later on.
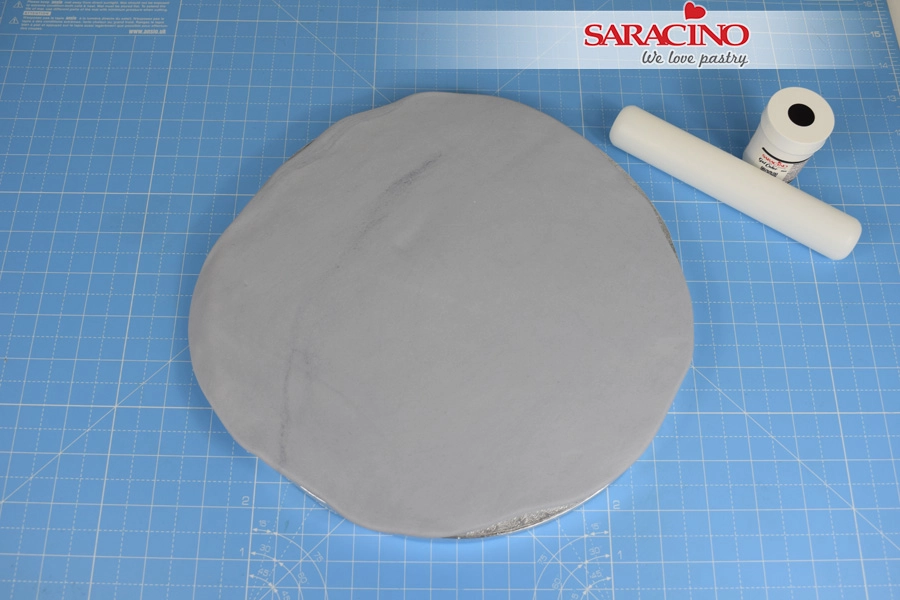
Roll out the paste to a thickness of around 5mm until it roughly covers the board.
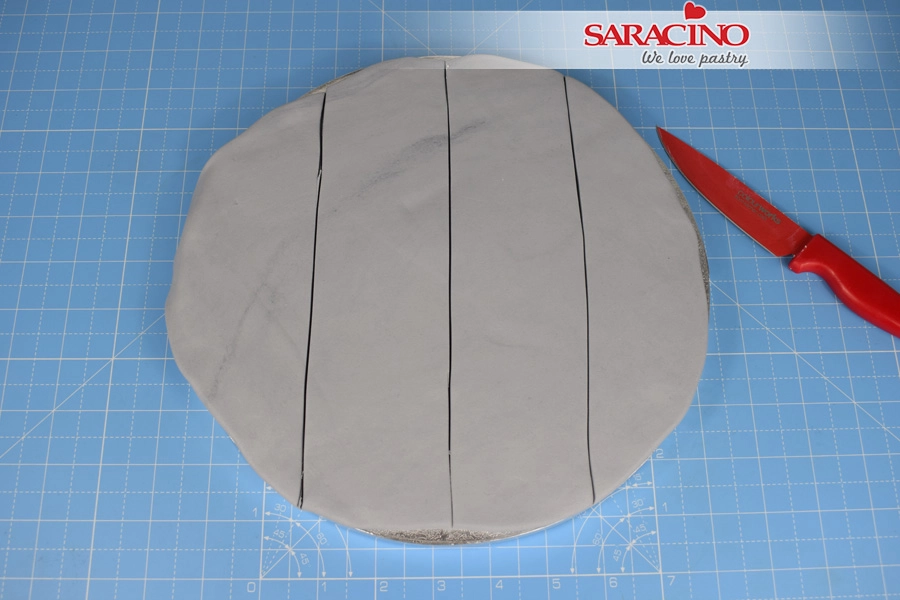
Lay the paste on the board. Using a sharp knife and the quarter lines you scored first as a guide, cut the paste.
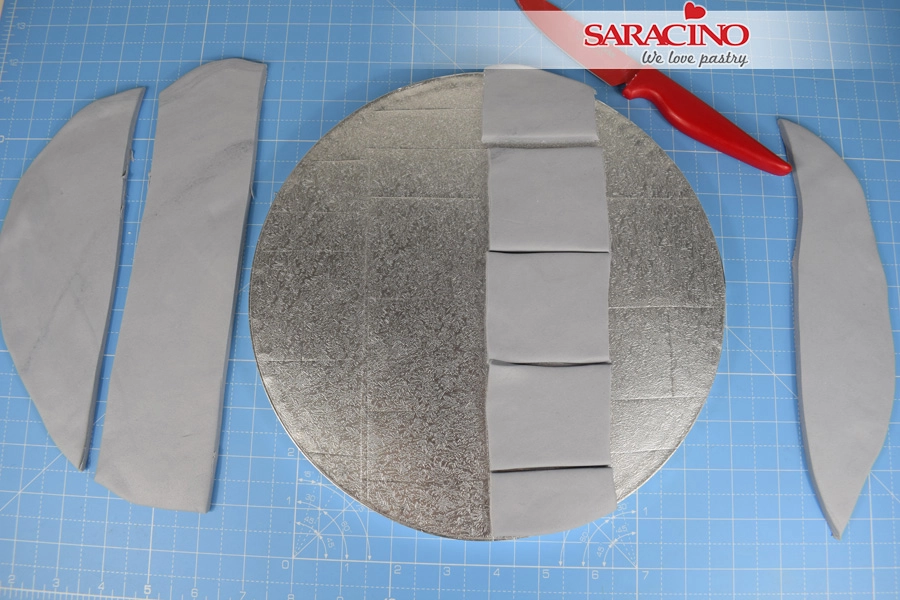
Take one strip and use the square lines you marked in step 4 to cut the paste again.
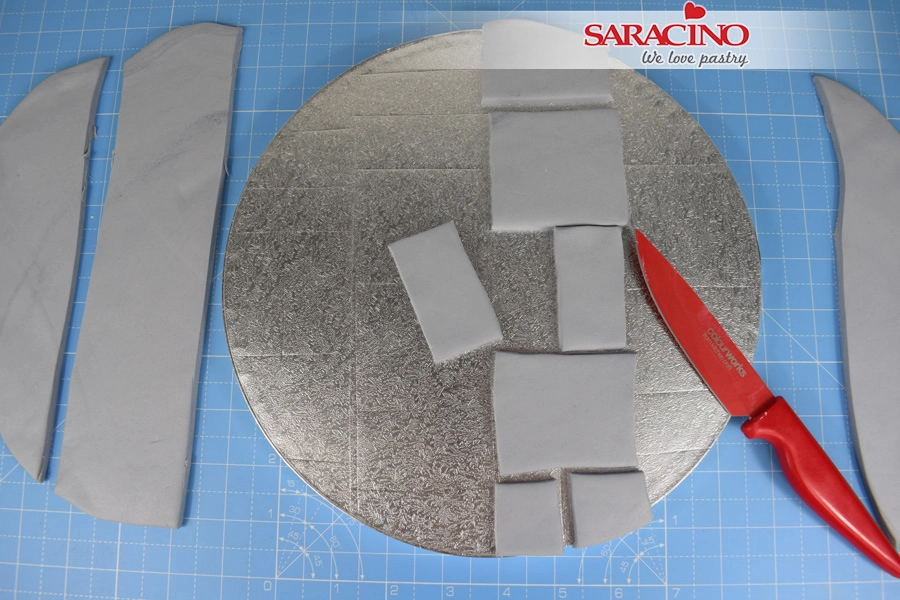
Use the marks you scored in step 5 to divide each of the squares.
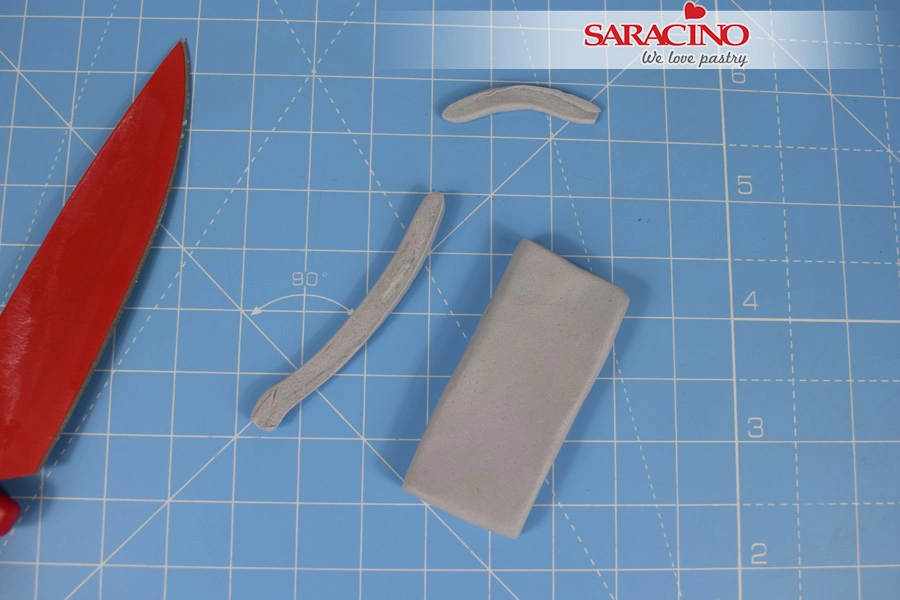
Trim a tiny amount from each of the smaller pieces so that they fit within the marked area on the board.
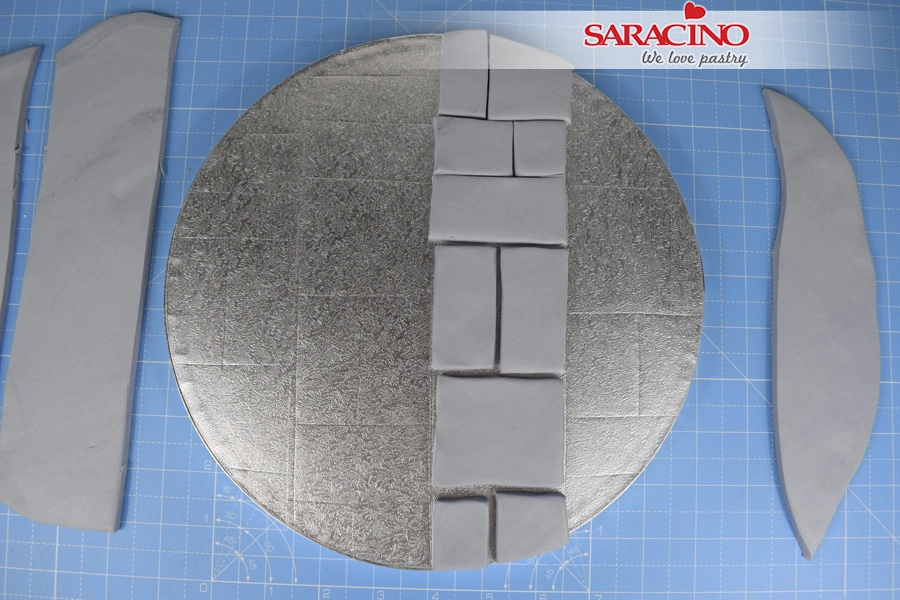
Continue to trim each piece smaller and lay on the board in position. Smooth the cut edges of the pieces with your finger tips then pinch to define.
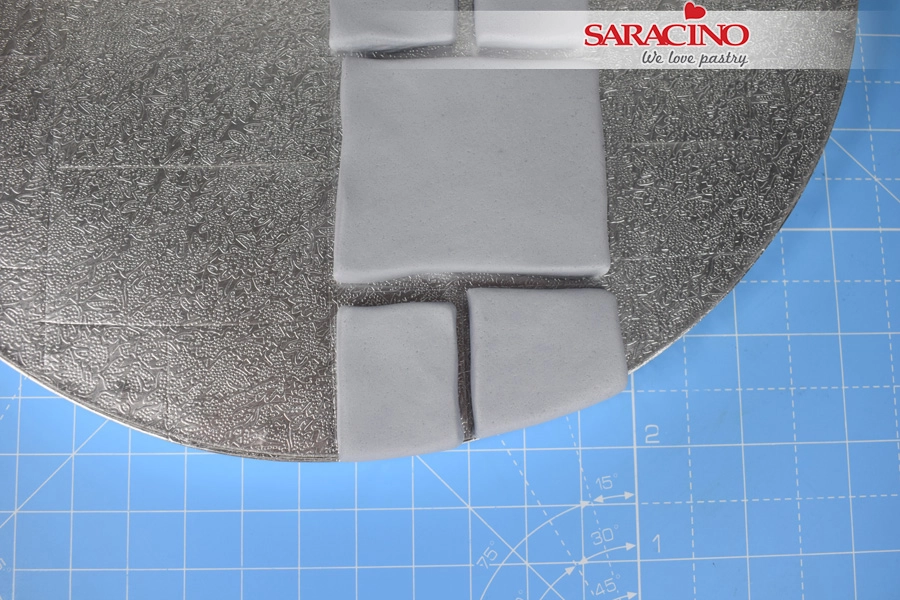
On outer pieces only trim the inside edges so that the paste and the board line up and there are no gaps.
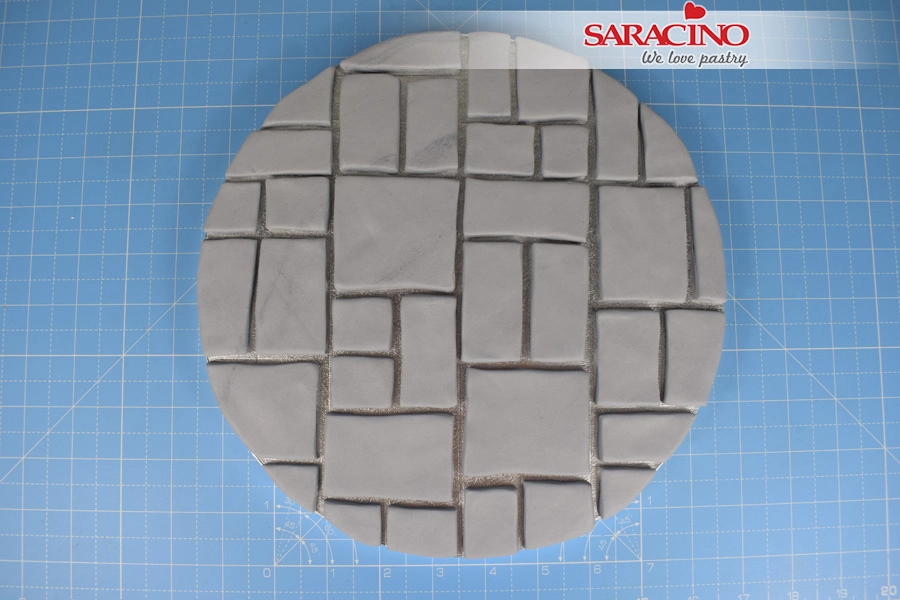
Repeat this process for each strip until the whole board is covered. You can change the pattern within any square as you go along if you choose to.
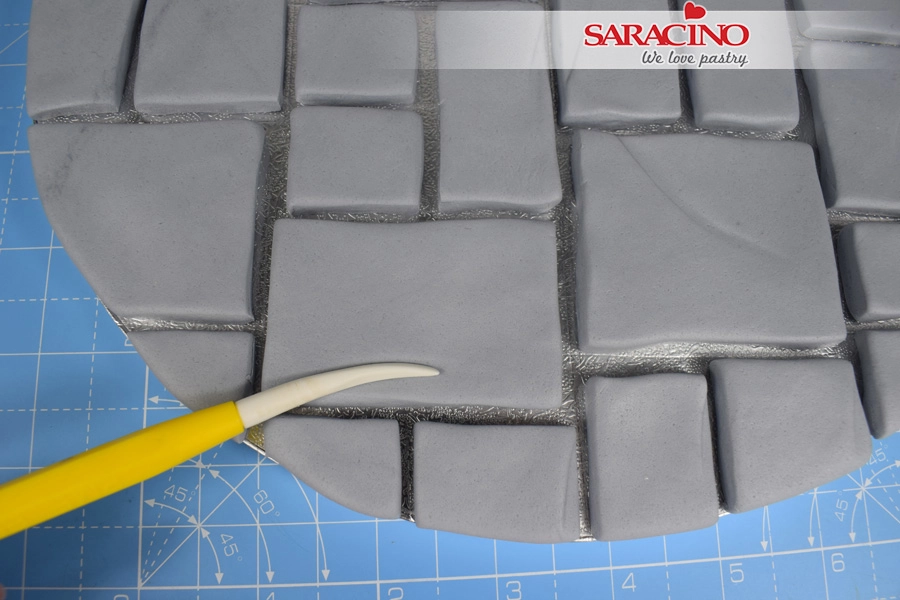
Turn the Dresden tool on its side and use the veining end to mark lines across the tops of random tiles.
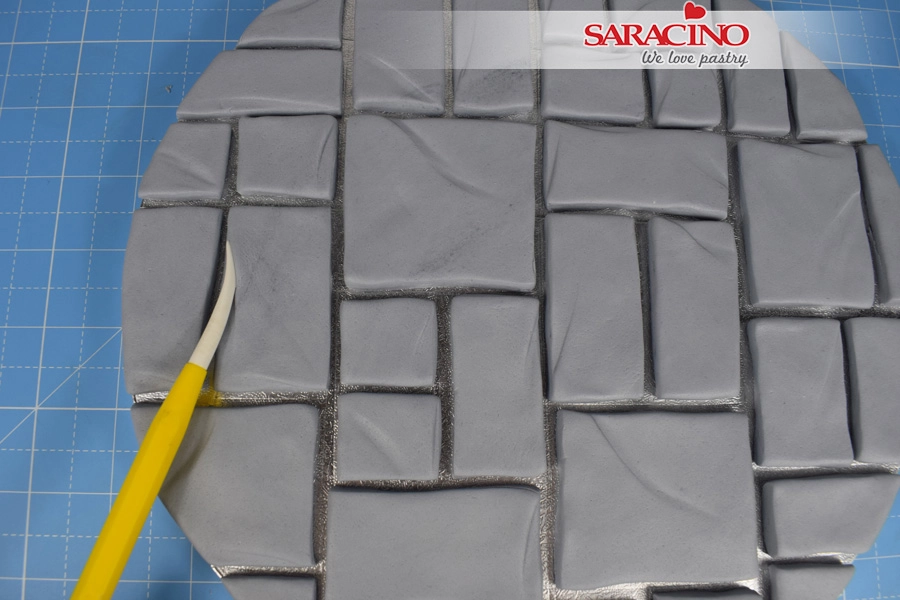
Mark lines down the edges of tiles also.
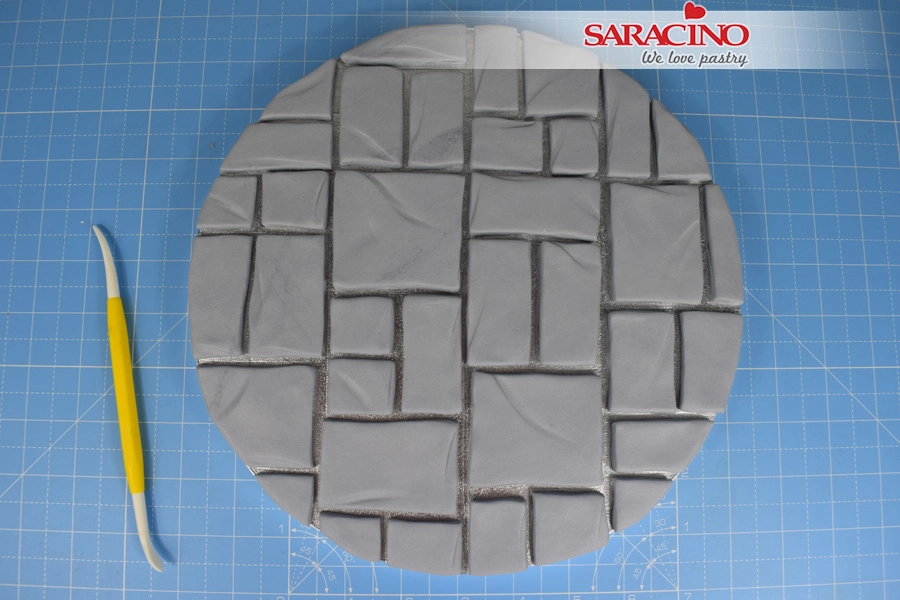
Once all tiles are marked lift them one at a time and stick into place with water / edible glue. Be careful not to get any water on the edges of the tiles or you’ll have to wait for it to dry before continuing.
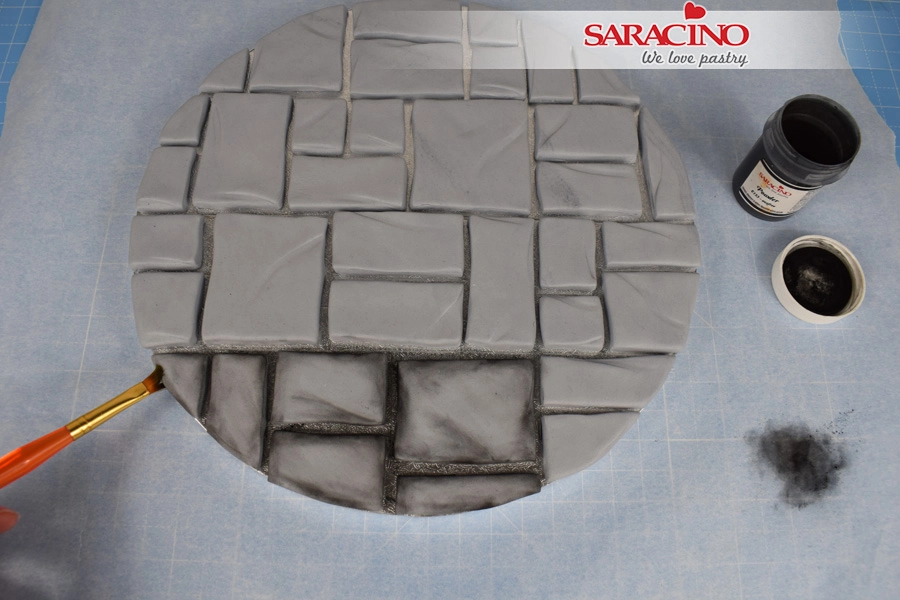
Take a flat angled paintbrush and apply a small amount of black dust to the edges of each tile
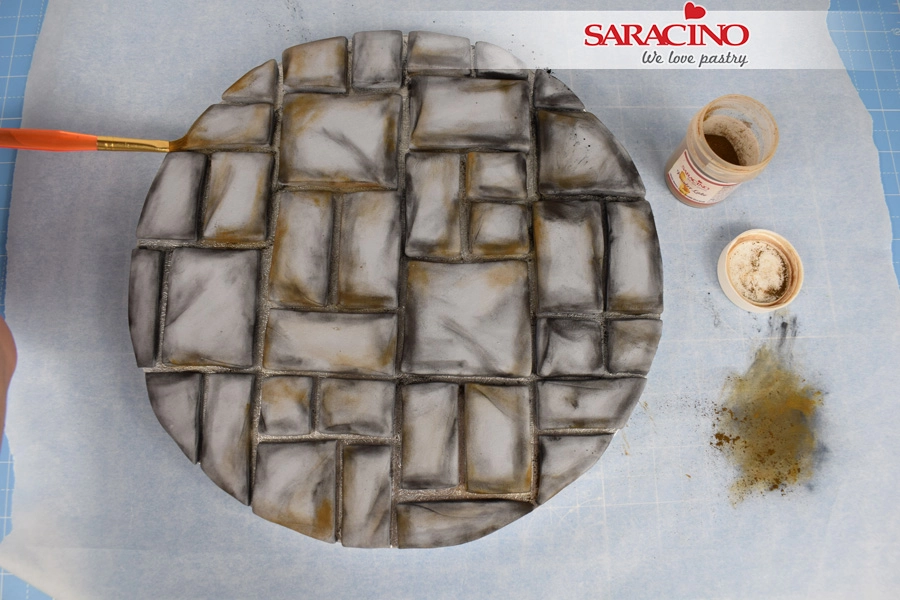
Once all tiles are dusted with black, repeat the process with brown dust.
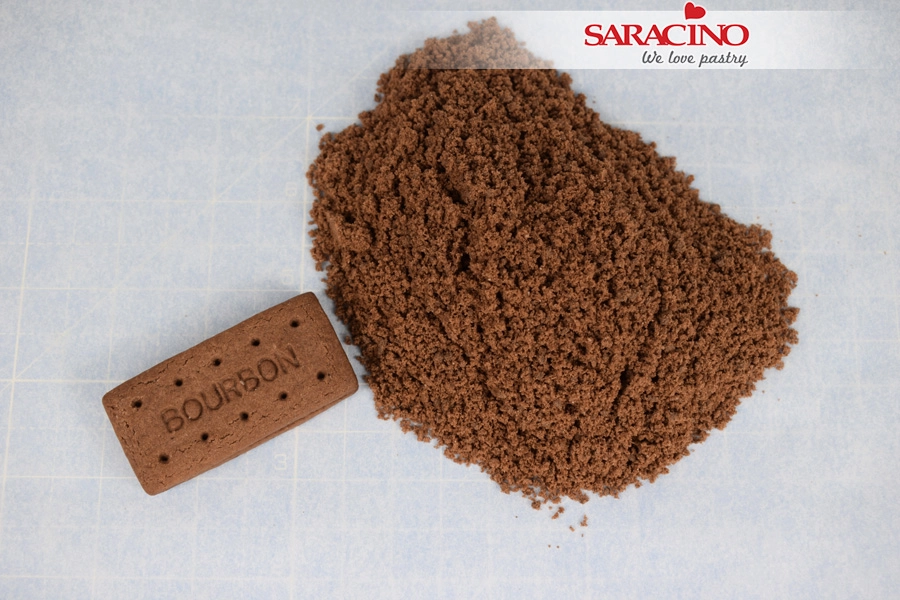
Crush 3 Bourbon biscuits.
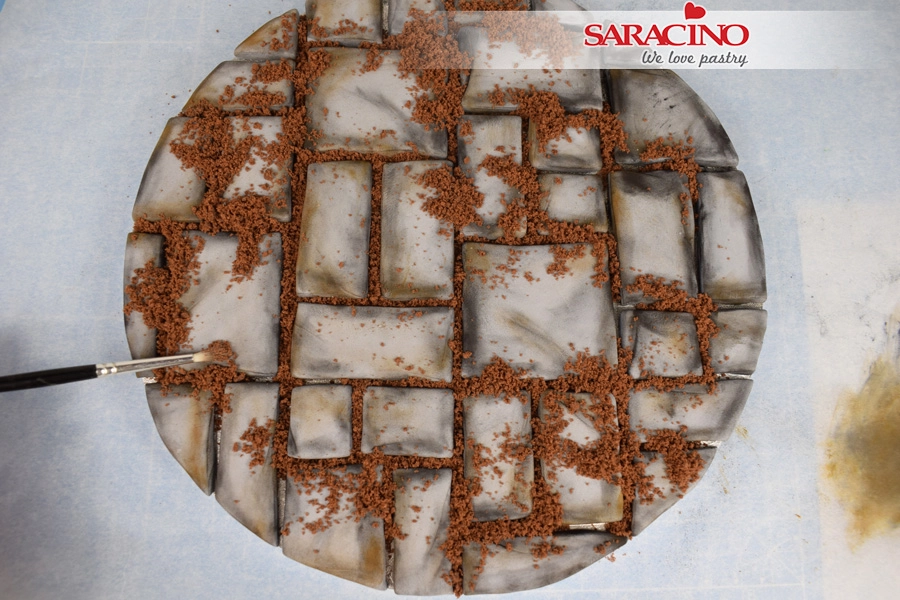
Spoon the biscuit crumbs into small piles on the board.
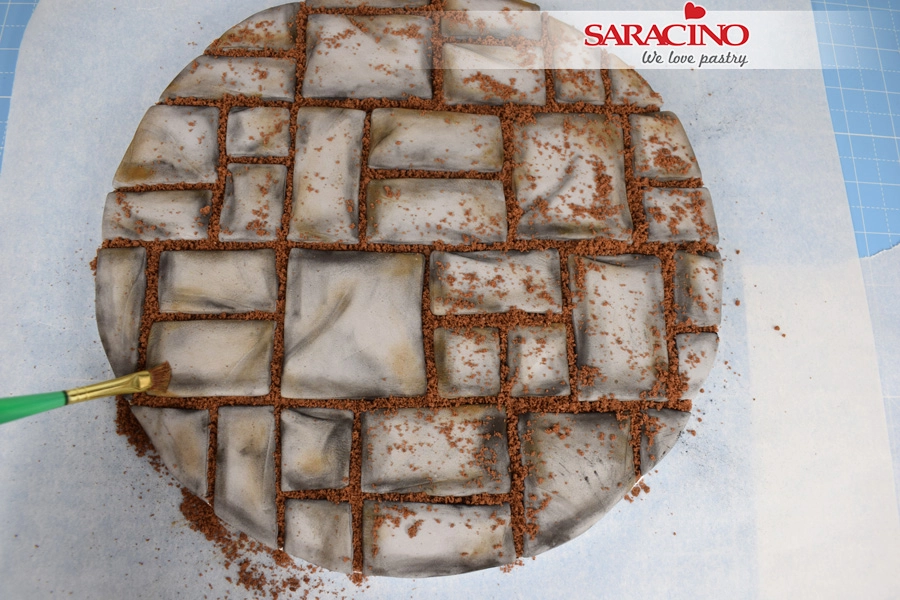
Working from the centre of the board outwards, use a paintbrush to push the crumbs into the cracks.
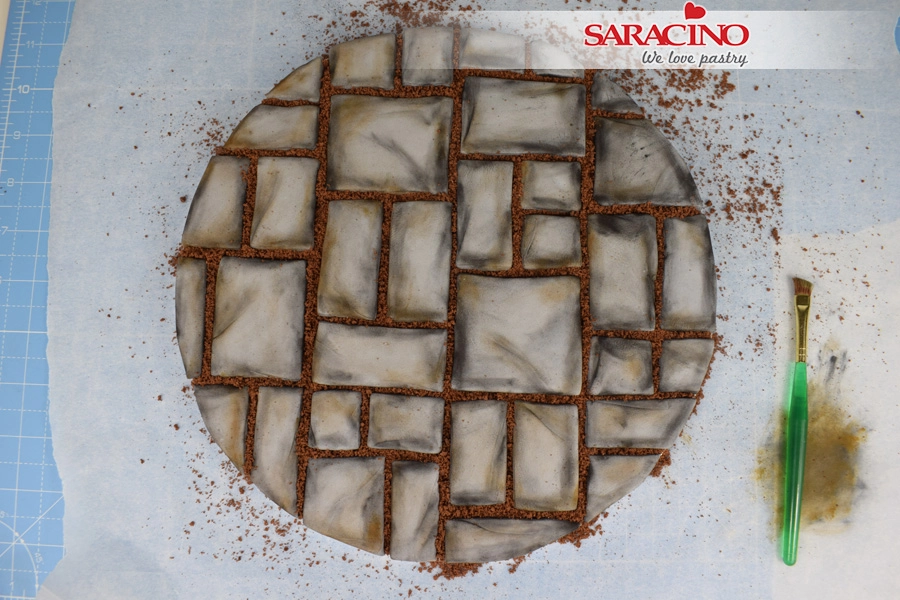
Keep going until all the gaps are filled, brush any excess crumbs onto the paper.
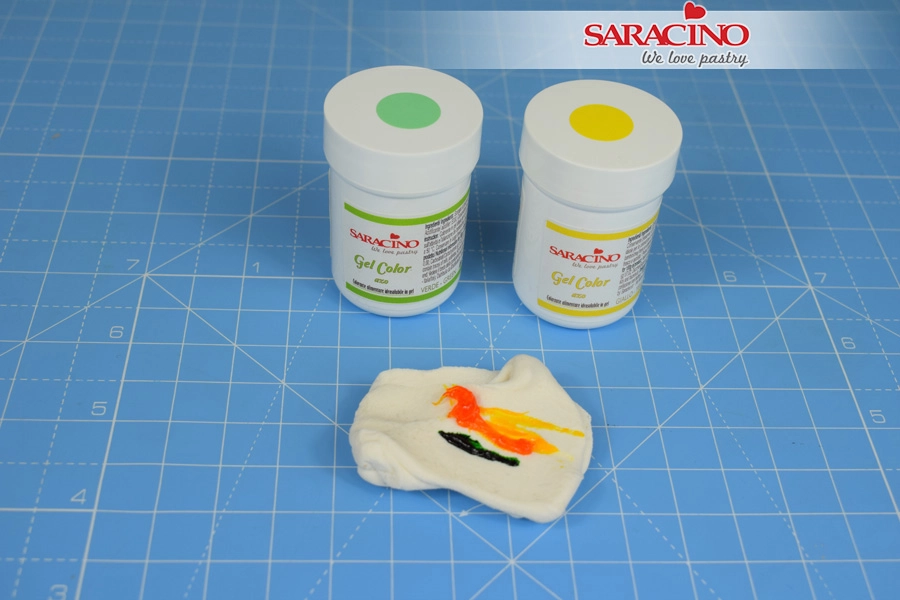
Colour 20g of pasta top with a small amount of yellow and green gel colour, to achieve a bright green.
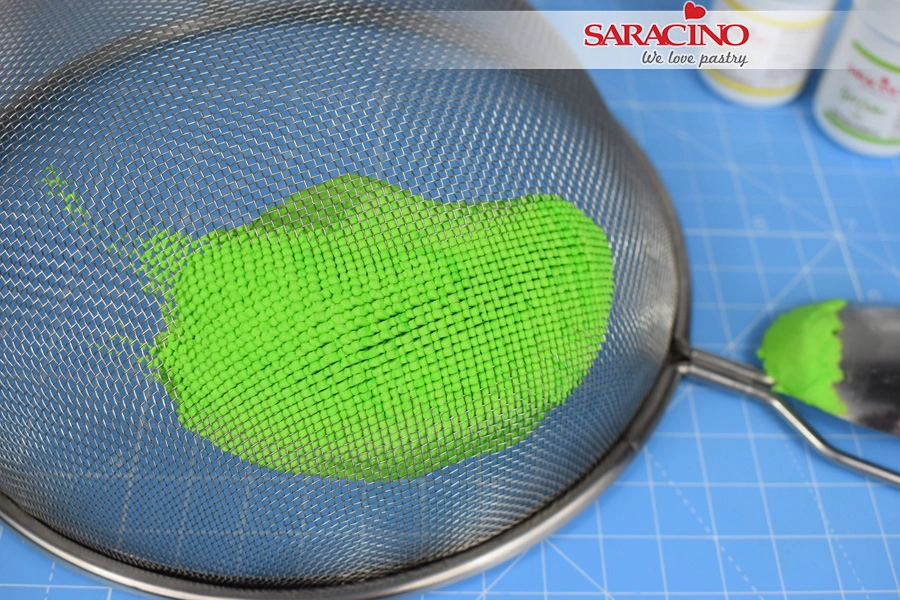
Push the paste through a sieve using the back of a spoon.
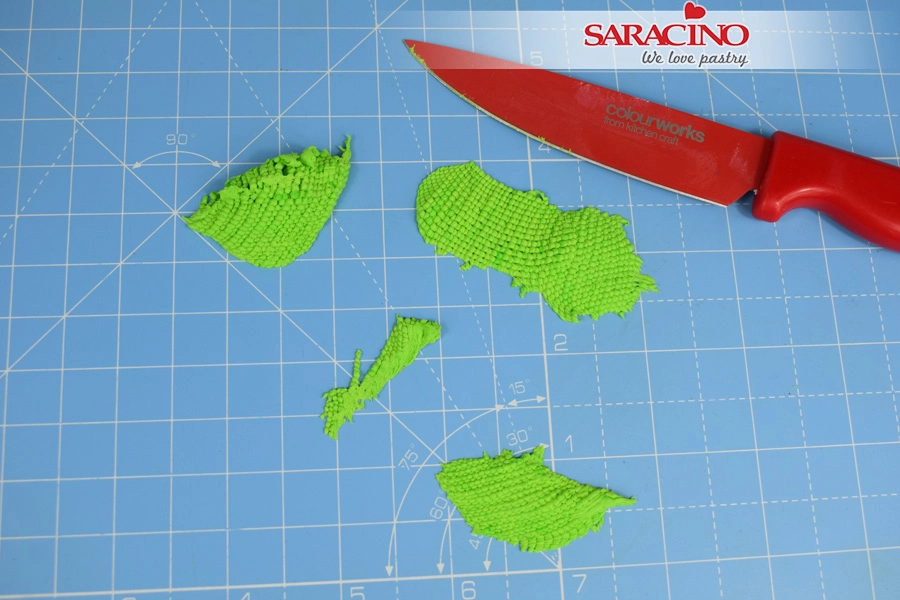
Carefully use a sharp knife to slice off the paste.
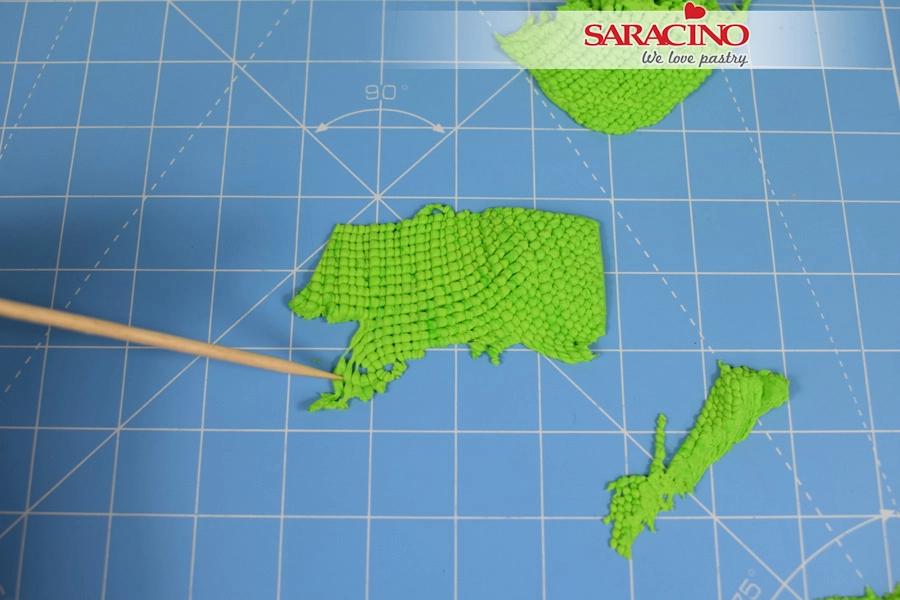
Use a cocktail stick to pull small amounts of paste off.
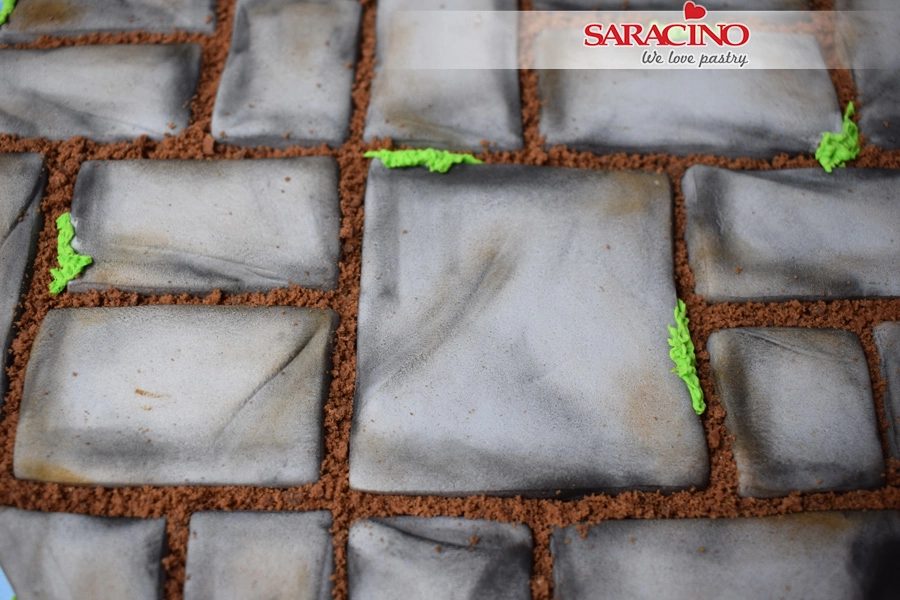
Randomly stick small amounts of the green paste to the edges of tiles.
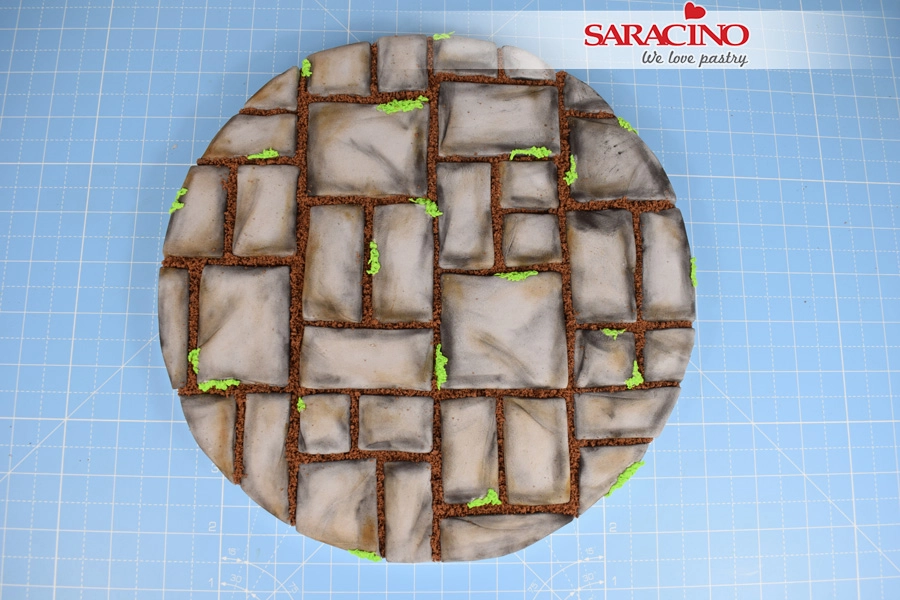
Continue across the board until you’re happy, and your board is now ready for your cake.
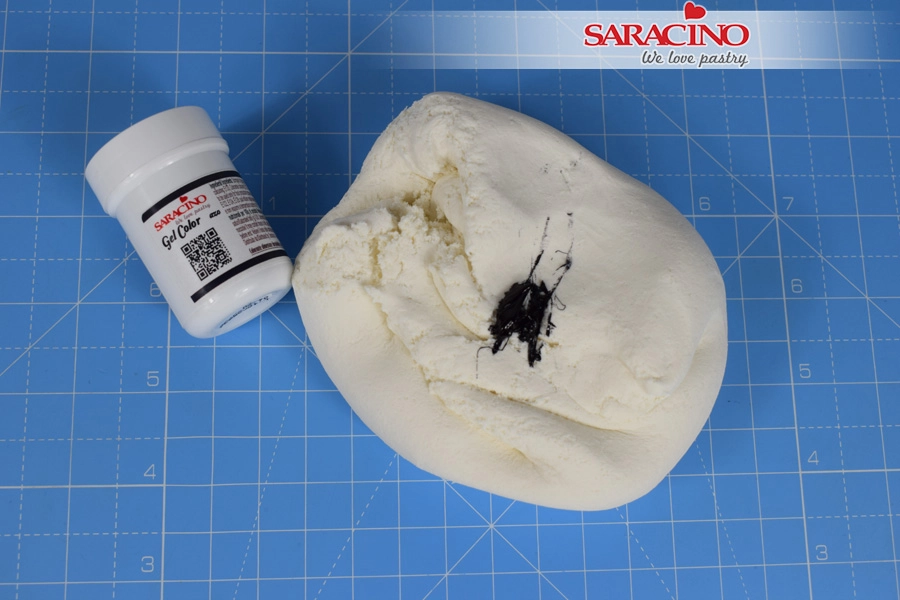
WOOD: Using a small amount of black gel colour 375g of pasta top light grey. Knead the paste until the colour is fairly uniform throughout.
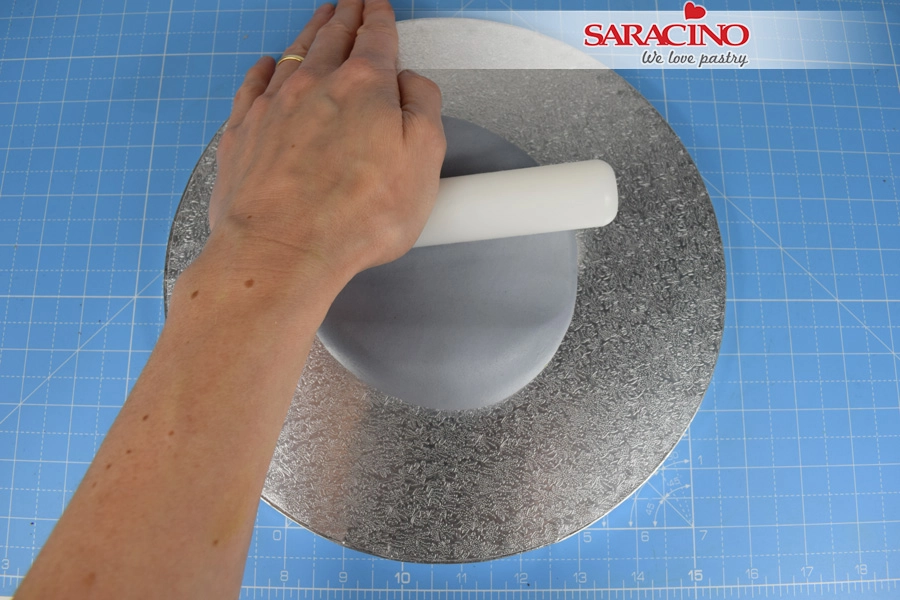
Place the paste on the centre of the board and begin to roll out using a small rolling pin.
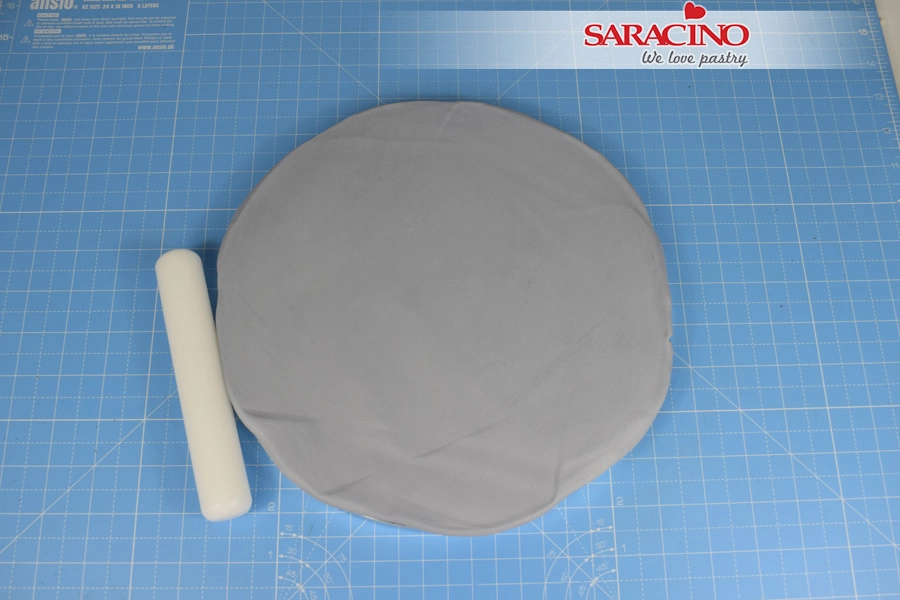
Keep rolling out the paste until the whole board is covered
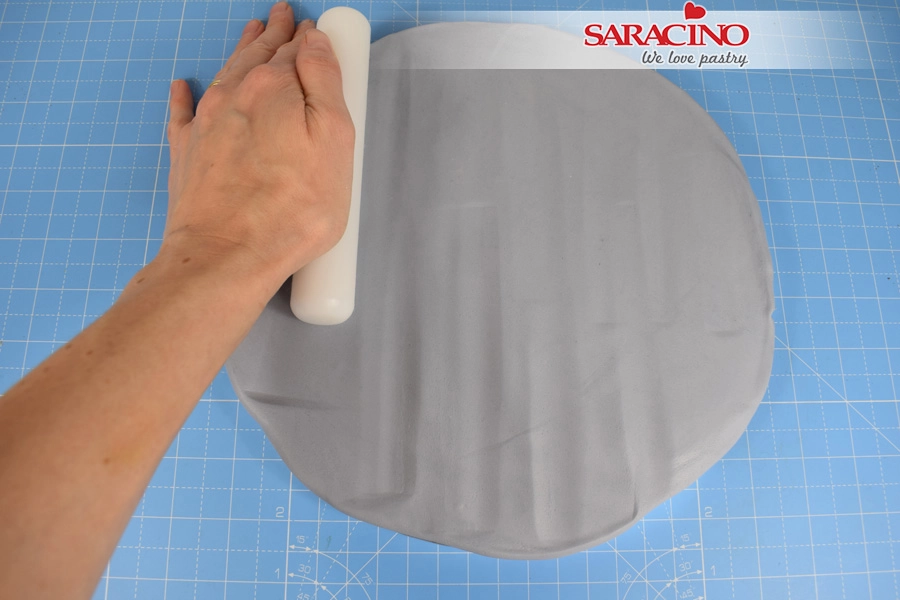
Press the rolling pin into the paste to create grooves and ridges. Keep the lines you mark in the same direction.
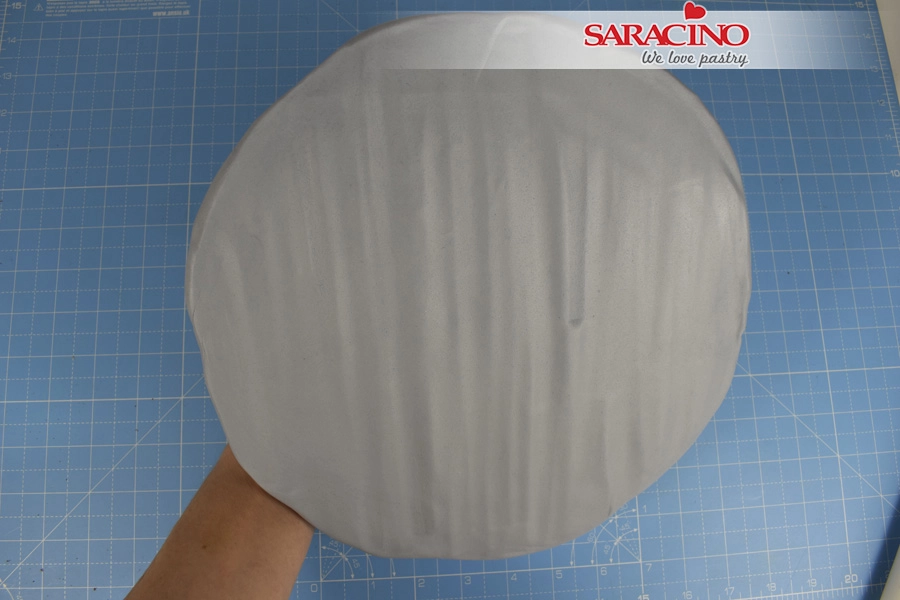
Continue to mark the paste across the whole board.
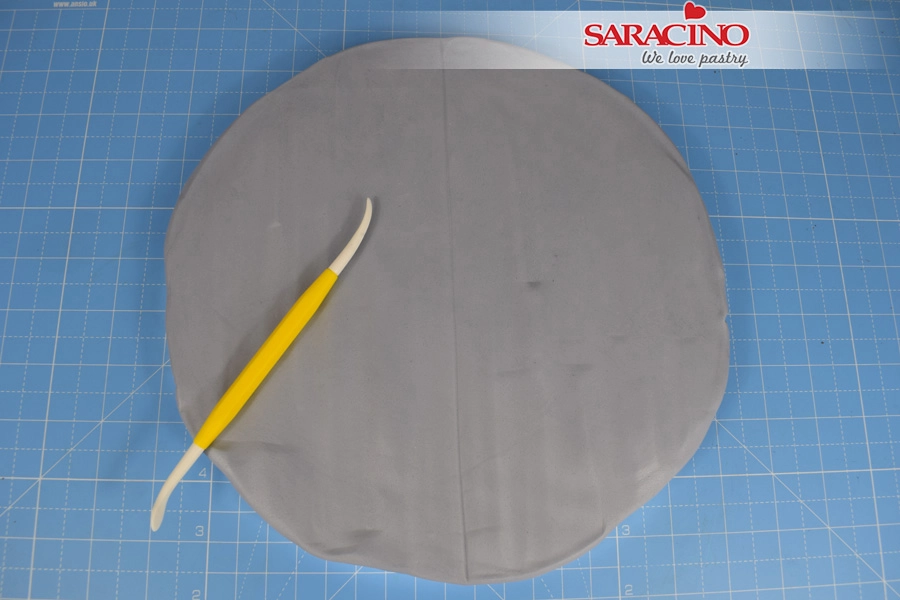
With the pointed end of the Dresden tool, gently score a line down the centre of the board.
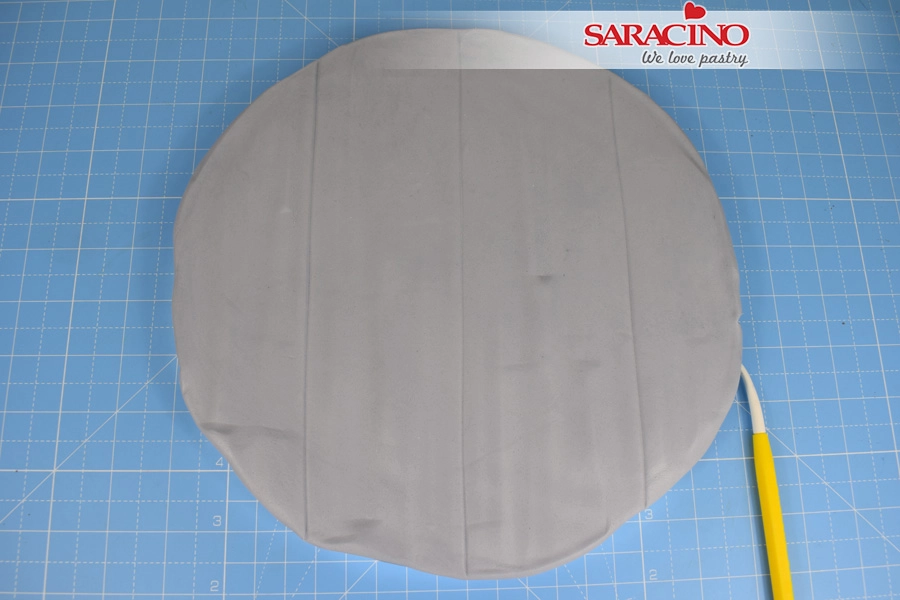
Score two more lines dividing the board roughly into quarters
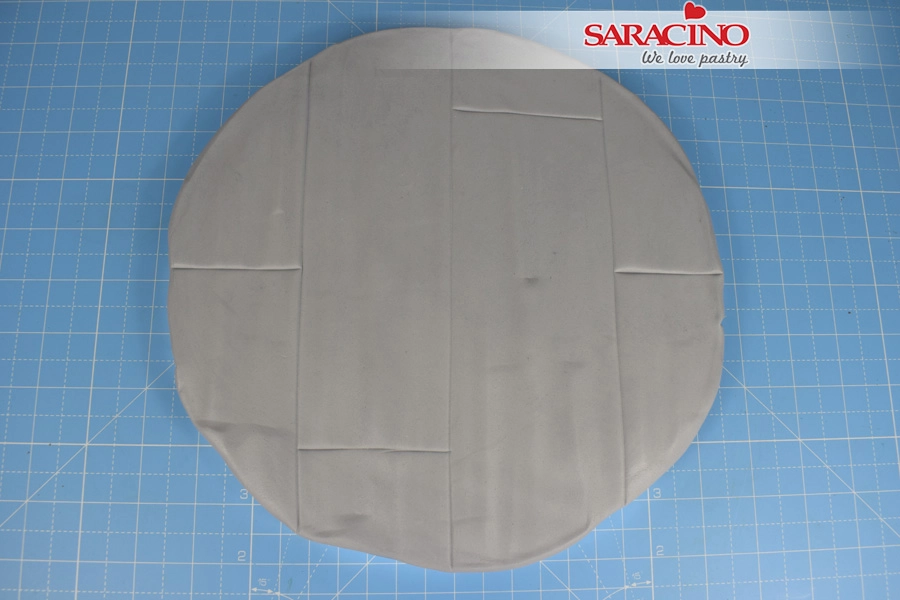
Score 4 small lines across the strips to divide the planks as shown.
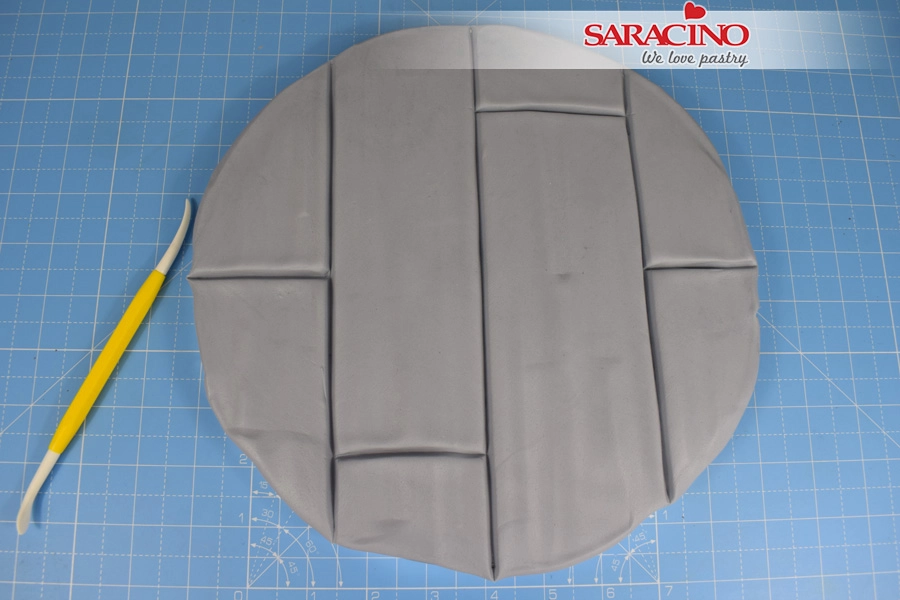
When you are happy with the lines go over them with the Dresden tool this time applying more pressure to create deeper grooves
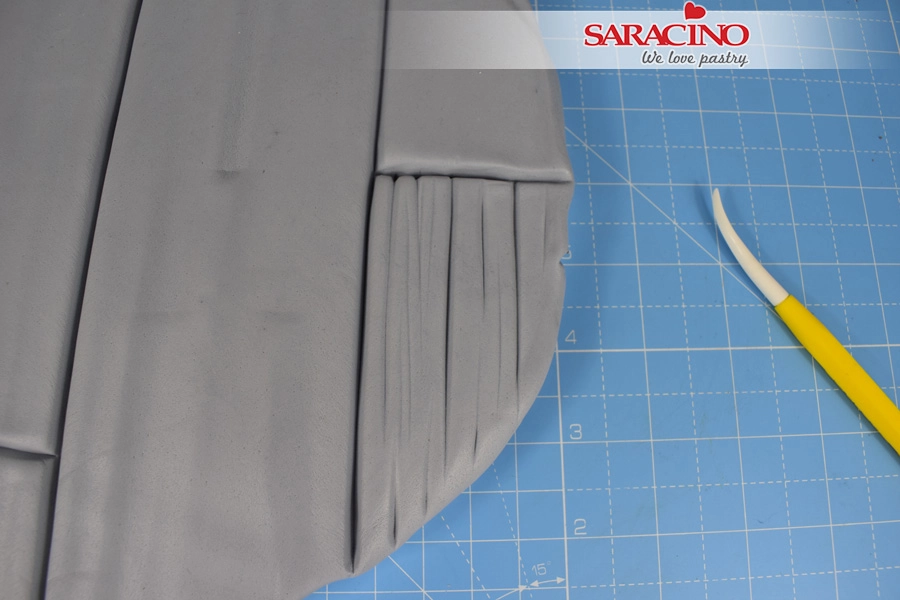
Starting on the outside edge, mark the planks using the Dresden tool with a series of random lines and grooves. Varying the pressure will vary the depth of each line.
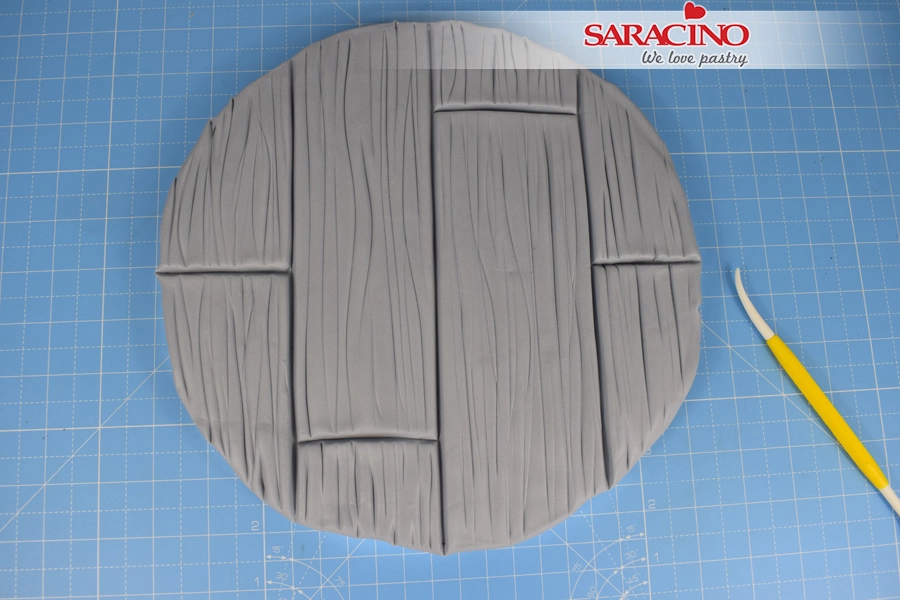
Mark each plank separately until the whole board is done.
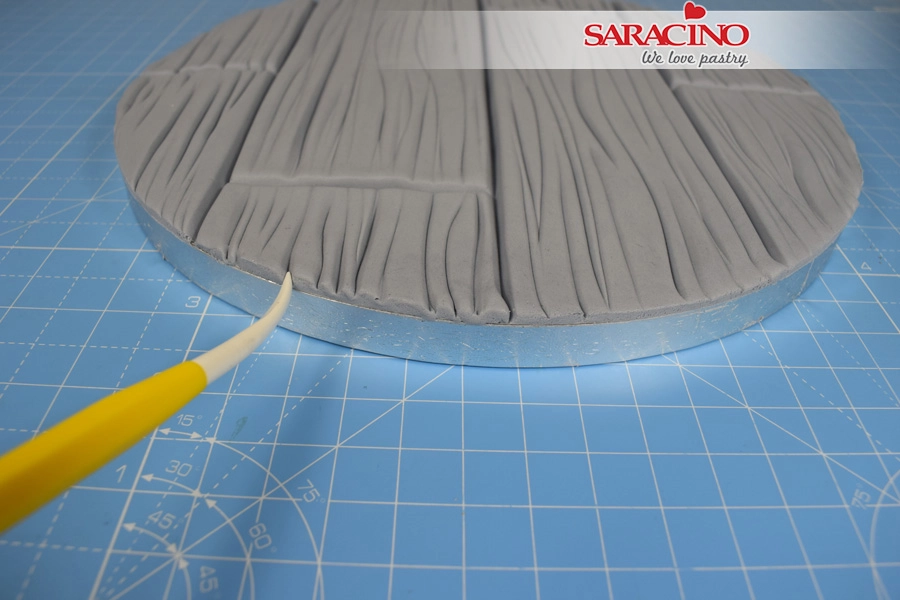
Use the tip of the Dresden tool carry the lines over the edge of each plank around the edge of the board.
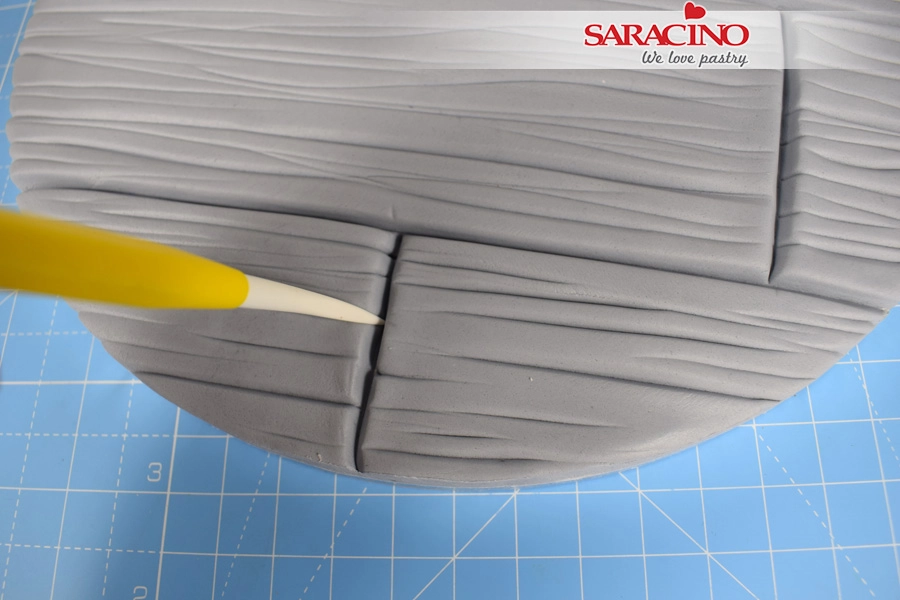
Mark the inside edges of each plank.
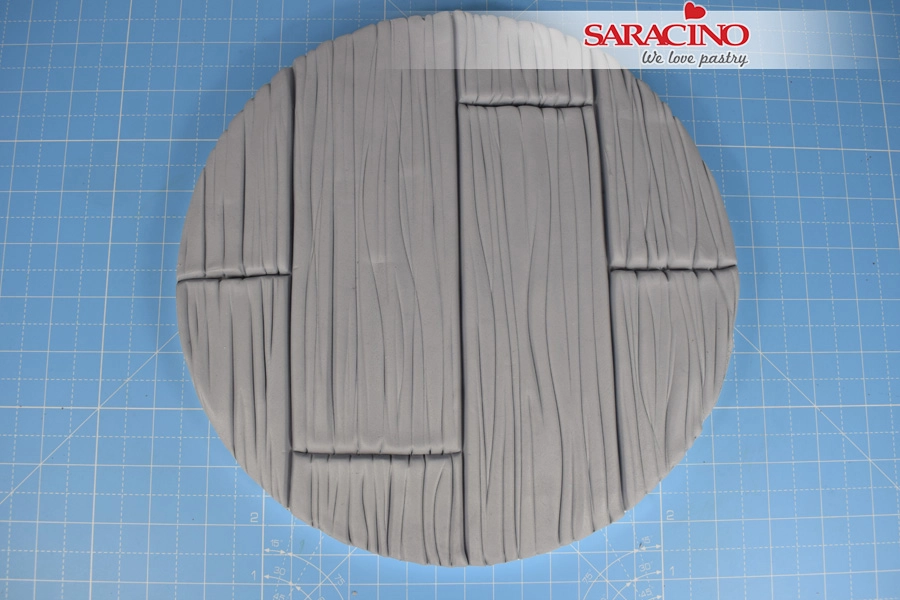
Continue across the board.
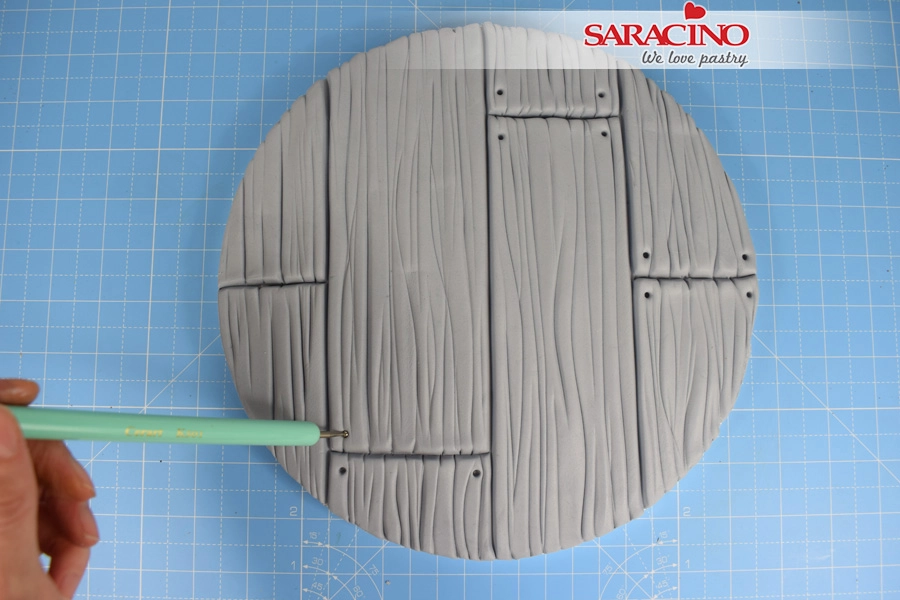
Use a small balling tool to mark nail holes at the end of each plank.
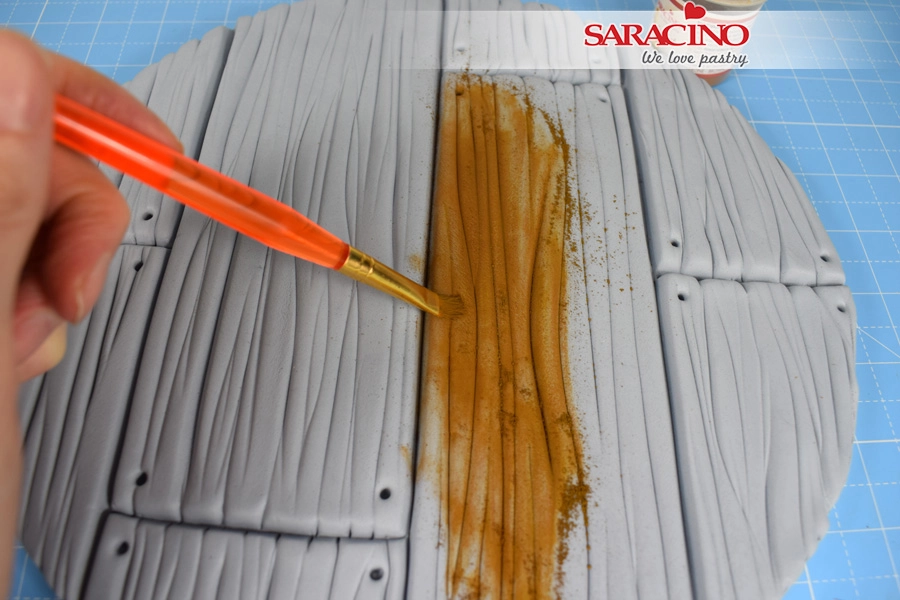
Place your board on a piece of grease proof paper. Take a flat angled paintbrush and begin to apply brown dust to the planks. Rub the dust in circular motions to work into the paste.
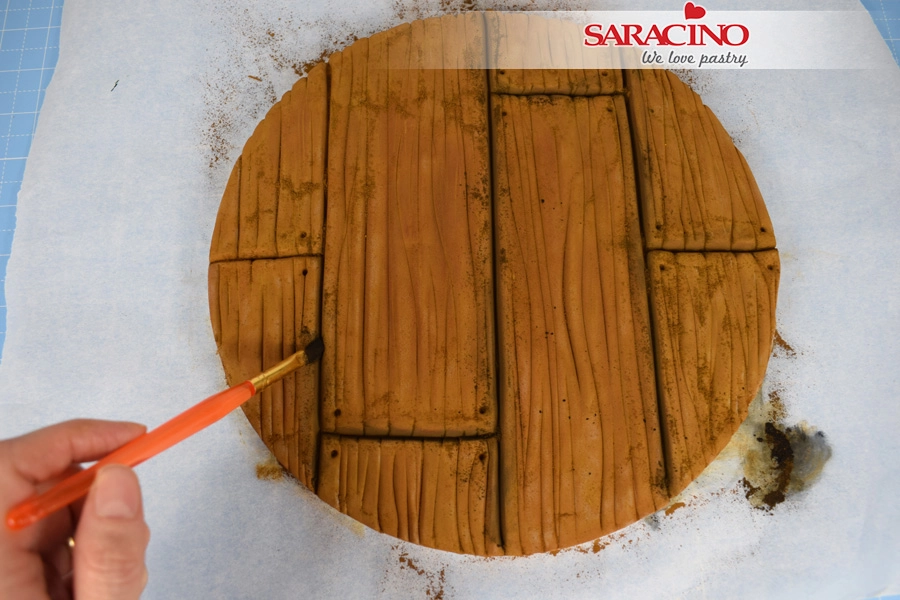
Once all planks are dusted with brown, apply a small amount of black dust to the gaps between each plank.
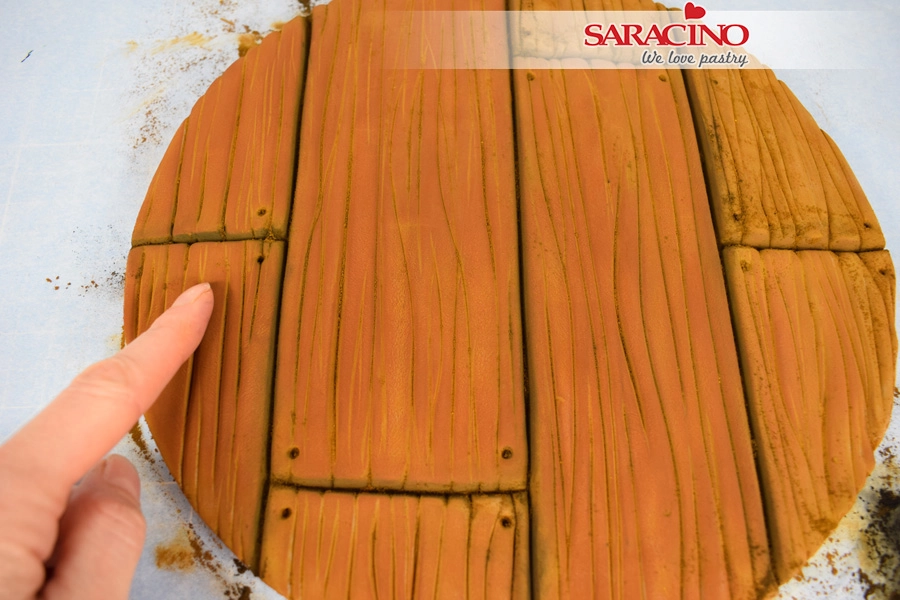
Use your finger tips to gently rub the dust into the paste. This will cause the dust to darken and create a wood like sheen.
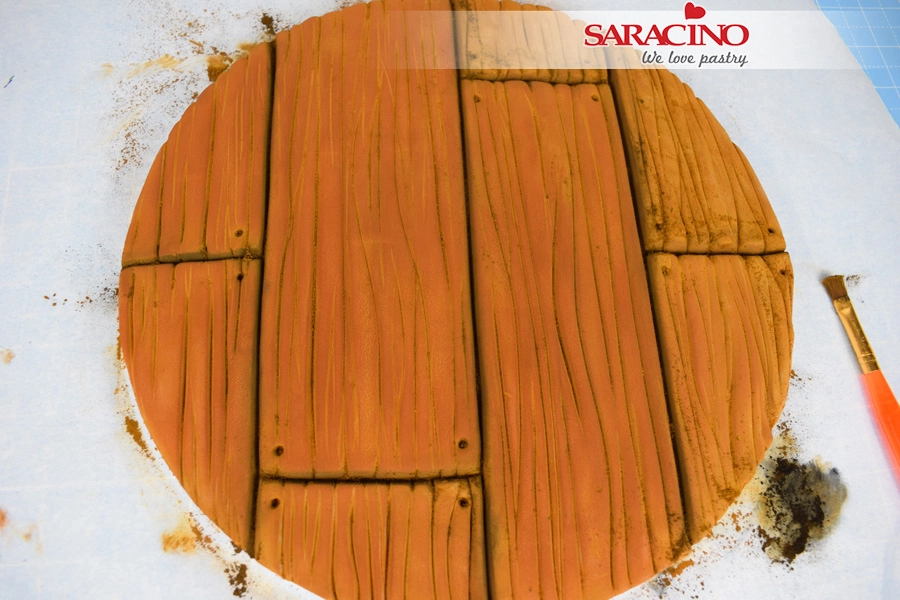
Work across the board, rub more in some spots than others to vary the depth of colour.
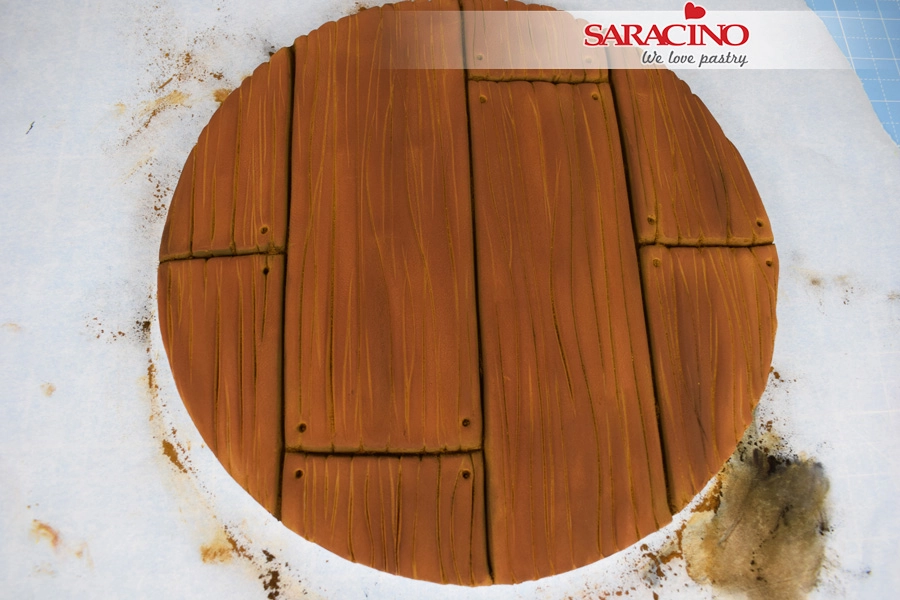
Lightly rub your finger in the black dust on the paper and transfer it to the board in random areas to further darken the wood.
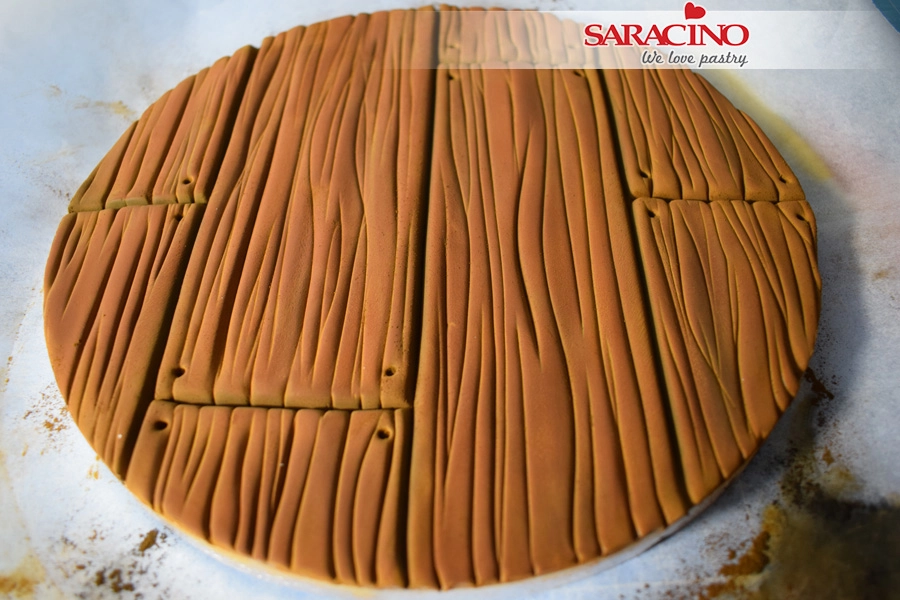
Dusting instead of painting means that you retain all the lines you scored and marked at the start. It also means you don’t have to wait for your board to dry.
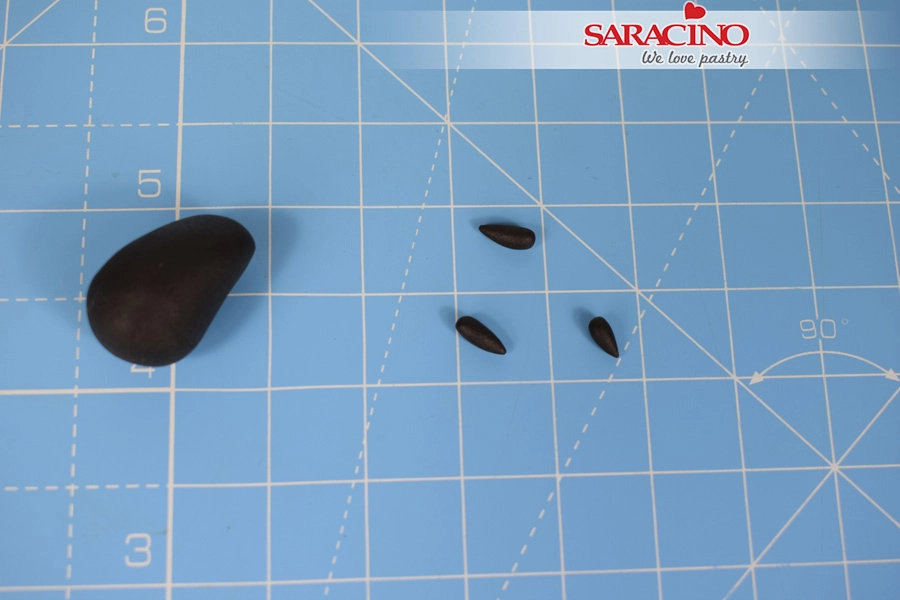
For the nails take a small amount of black modelling paste and roll 14 small teardrops.
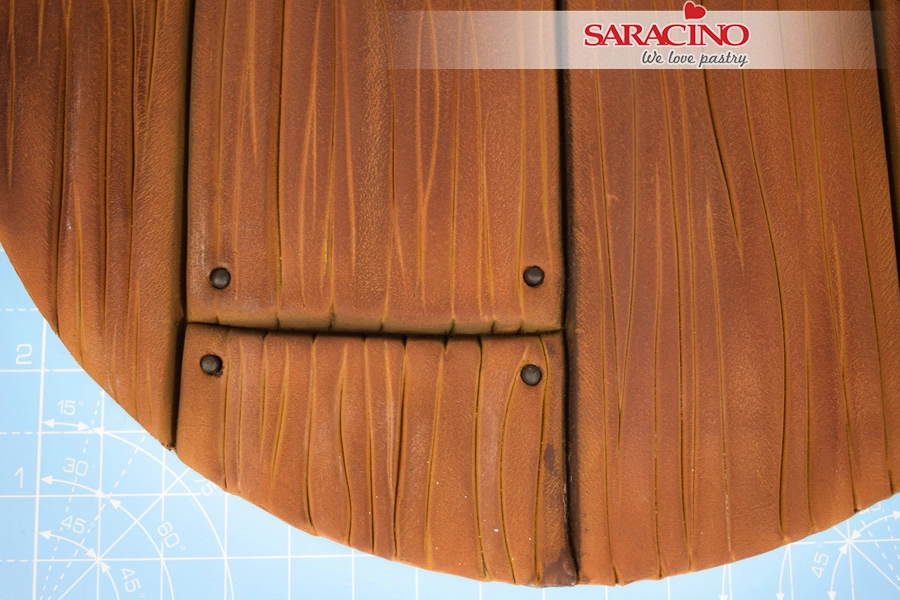
Stick each into place with a small amount of water.
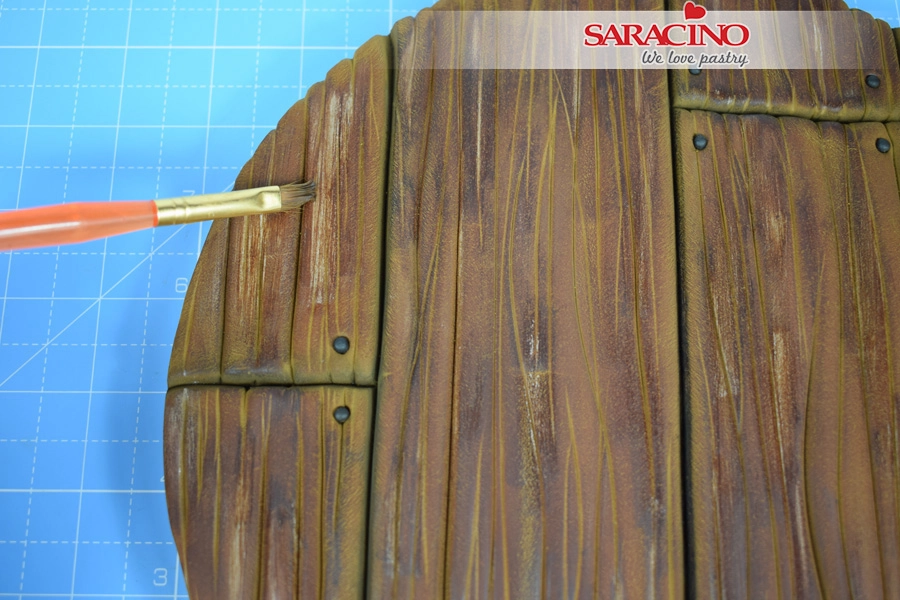
Dip the flat paintbrush into some water and remove almost all of the water from the brush. Gently brush across each plank, following the grain to remove some of the colour and create an aged look to the wood.
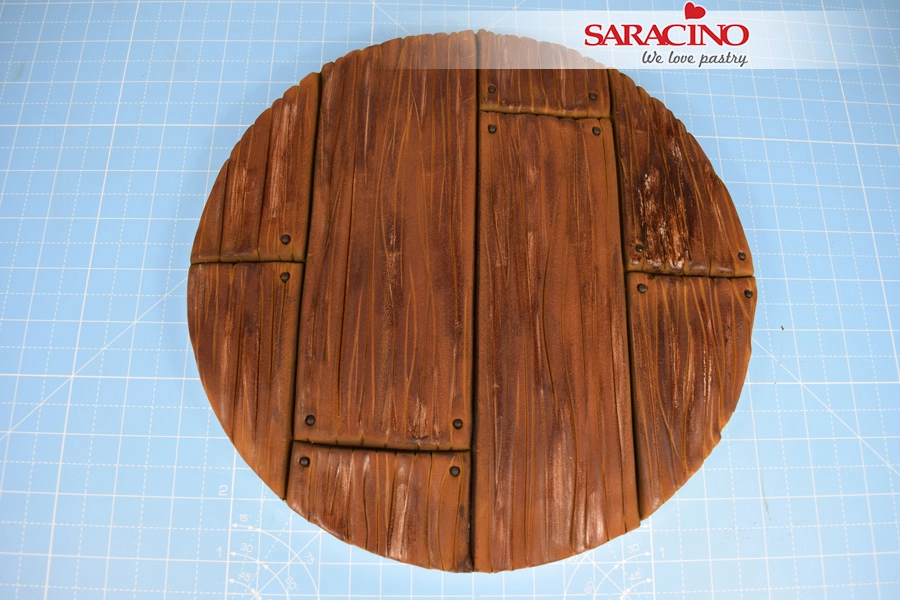
If you remove too much colour by accident (see right hand side of board) allow the paste to dry throughly and then re dust with the brown.


