RASPBERRY SWISS ROLL CAKE

RASPBERRY SWISS ROLL CAKE

Author: Mabanuby

Skill level: INTERMEDIATE

You will need:

  • Saracino powder colours: pink, purple, yellow, green

  • Saracino Royal Icing mix

Ingredients for Pate Decor: 

  • 80g soft butter
  • 80g icing sugar
  • 60g egg whites
  • 70g plain flour

Ingredients for Swiss Roll Mixture: 

  •  200g eggs
  • 100g sugar
  • 150g Saracino Almond flour,
  • 40g plain flour
  • 2g salt
  • 60g almond paste
  • 140g egg whites
  • 70g sugar

Ingredients for Filling:

  • 250g butter
  • 200g condensed milk
  • 60g Le Supreme Raspberry food flavouring paste
  • 250g fresh raspberries
  • Raspberry jam

Equipment:

  • Food mixer

  • Baking paper

  • Baking film

  • Silkomart 01 silicone tray

  • Spatulas

  • Fine sieve

  • Bowls of various sizes

  • Royal icing piping nozzle (Wilton 125 for rose petals and Wilton 352 for leaves)

  • Round piping nozzle number 2

  • Royal Icing flower nail

  • Parchment paper

Step 1

Prepare the ingredients for the pate decor. You will need the butter, icing sugar, egg whites, flour and Saracino powder colours (purple, green, yellow and pink).

Step 2

Combine the butter with the icing sugar until you have a fluffy consistancy.

Step 3

Gradually add the egg whites and the flour alternatively until the mixture is smooth and well blended.

Step 4

Prepare the required design on to a piece of paper.

Step 5

Prepare the silicone swiss roll tin / mould and cut transparent film (it is important the film is suitable for baking) to the same size as the mould.

Step 6

Place the design face up on the silicone swiss roll tray and cover it with the baking film. I am adding two templates which will make two smaller Swiss rolls.

Step 7

Divide the pate decor into 5 equal parts and colour with powder colours : pink, lilac, light green, dark green and yellow.

Step 8

Add a number 2 piping nozzle to a piping bag and fill with the yellow pate decor. 

Step 9

Repeat for the lilac colour.

Step 10

Pipe to make the flowers as shown.

Step 11

Using a number 2 nozzle again add light green and dark green to piping bags. Using the dark green pipe small stems and twigs. 

Step 12

Pipe some of the larger leaves with light green.

Step 13

Finish the larger leaves with dark green. Place in the refrigerator to cool well.

Step 14

Prepare the ingredients for the Swiss roll mixture: whole eggs, sugar, Saracino almond flour, plain flour, almond paste, egg whites, a pinch of salt.

Step 15

Whisk the eggs and a first part of the sugar in the mixer until light and fluffy.

Step 16

Mix the almond flour and salt well.

Step 17

Using a sieve add the flours to the whipped mixture.

Step 18

Combine gently with a spatula (from top to bottom) without overworking the mixture.

Step 19

Gently combine the almond paste.

Step 20

Whip the egg white until stiff and add the second part of sugar.

Step 21

Gently combine the two mixtures without losing the entrained air.

Step 22

Remove the paper template from uder the baking film sheet. Add the Swiss roll mixture evenly over the painted design. Take care not to damage your design.

Step 23

Using an elbow spatula fill the silicone pan completely evenly taking care not to overwork and lose the air. Place in the oven and bake at approximately 170° for 10 minutes.

Step 24

Once cooked, turn the Swiss roll over onto a baking sheet and allow to cool. Once cold, gently remove the silicone mould.

Step 25

Remove the bakable film.

Step 26

Cut to the length of Swiss roll you would like.

Step 27

Prepare the ingredients for the filling : butter, condensed milk, Saracino Supreme Raspberry food flavouring.

Step 28

Whip the butter in a mixer.

Step 29

Add the condensed milk and continue to whisk until a soft cream is obtained.

Step 30

Add the Supreme Raspberry to give taste and colour. Mix well.

Step 31

Turn the sponge upside down by placing it on parchment paper cut to size and prepare the ingredients for the filling.

Step 32

Spread a very thin layer of raspberry compote.

Step 33

Spread a thick layer of our raspberry flavour cream filling on top of the jam.

Step 34

Add the fresh raspberries on the cream evenly.

Step 35

Using the baking paper roll up the Swiss roll.

Step 36

Finish the roll so that the design is on top and allow to cool in the refrigerator.

Step 37

Use a mixer to prepare the Saracino royal icing in accordance with the instructions on the packaging (just add water and mix).

Step 38

Divide the royal icing into 3 equal parts and colour with Saracino powder colours (pink and green) to obtain light pink, pink and green.


Step 39

Remove the parchment paper from the roll.

Step 40

Use a sharp long bladed knife to trim the ends precisely to highlight the internal filling.

Step 41

Add light pink royal icing to a piping bag that has a petal piping nozzle. 

Step 42

Fix a small square of parchment paper to the top of a flower nail. Pipe a cone of royal icing in the centre. 

Step 43

Pipe the inner 3 petals and allow to dry.

Step 44

Pipe the second layer of 5 petals and dry.

Step 45

Pipe the final circle of petals and dry. Repeat to create other buds and roses in light and dark pink.

Step 46

Add green royal icing to a piping bag with a leaf nozzle. Add a small amount of royal icing to the top of the Swiss roll as shown. 

Step 47

Remove the royal icing flower from the flower nail. Remove the parchment paper. 

Step 48

Place the rose on the green royal icing to fix into place.

Step 49

Continue decorating the roll with the other roses and buds following the design created on the sponge.

Step 50

Finish by piping leaves around and between the roses.

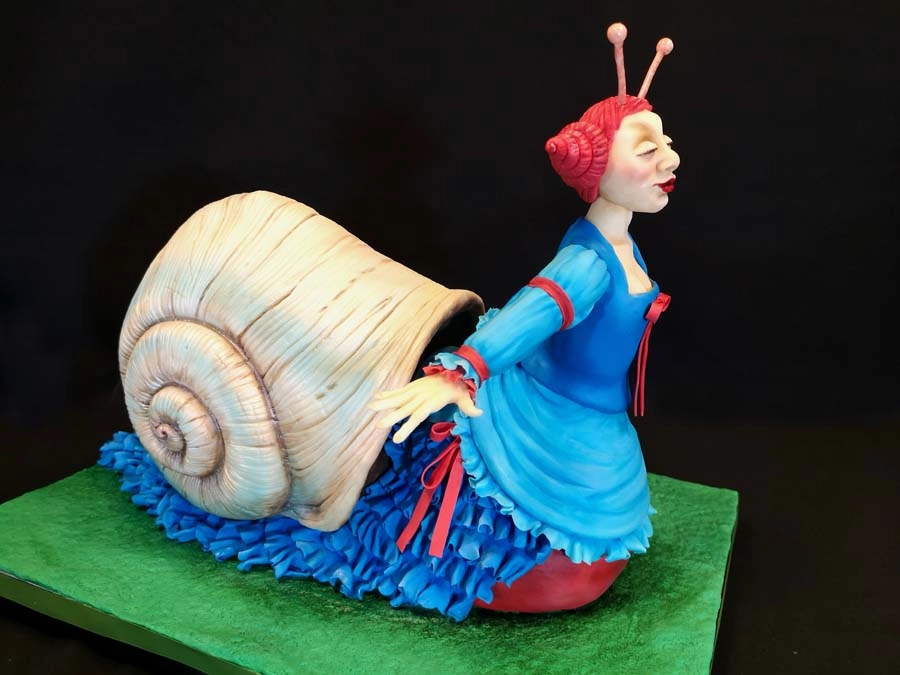
SNAIL QUEEN 3D CAKE TUTORIAL

SNAIL QUEEN 3D CAKE TUTORIAL

Skill level: INTERMEDIATE

You will need:

  • Saracino Dark chocolate drops
  • Saracino white and green Pasta Top
  • Saracino modelling chocolate
  • Saracino Pasta Model: white, skin tone, light blue
  • Saracino gel colours: blue and red
  • Airbrush colours blue, mother of pearl
  • Saracino dust colours: red, white, blue, brown, skin
  • Saracino liquid shiny
  • Cream for ganache
  • Rice krispie mix
  • Cake drum or wooden board
  • Cake 
  • Wooden skewers

  • Hot glue gun

  • Armature wire

  • Dresden tool

  • Bulbous tool

  • Ball tool

  • Rolling pin

  • Craft knife

  • Frill cutter

  • Paintbrushes

  • 6mm threaded rod 9inch long, 2 nuts and washers

Step 1

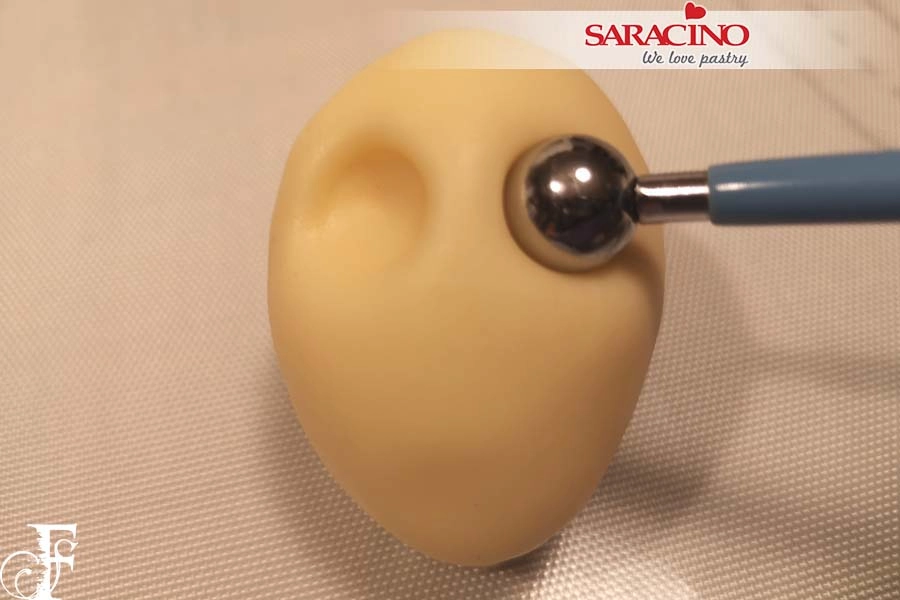
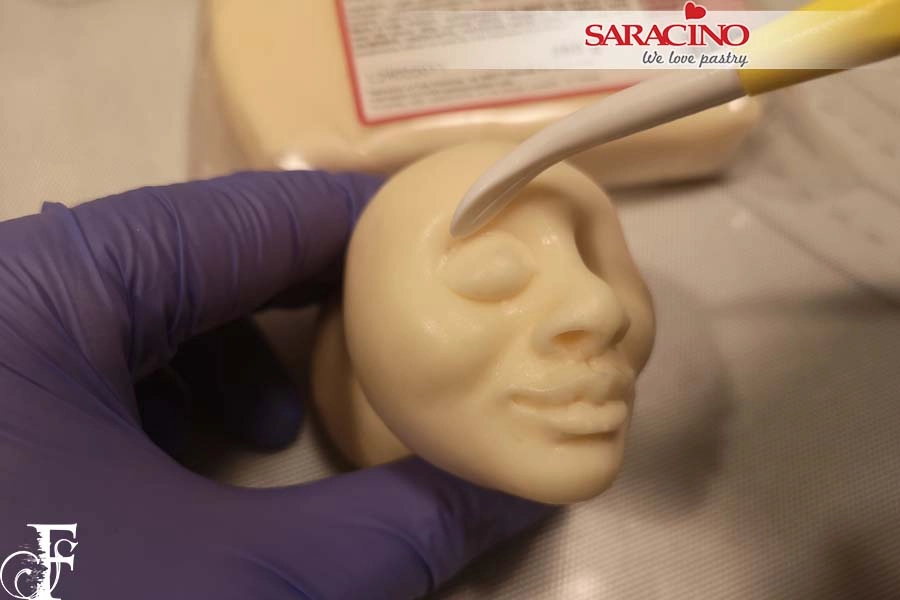
Start by making the head. Take some Saracino skin tone modelling paste and roll it into an egg shape. You can use a small piece of paste to support the head while you work. Using a ball tool, make 2 eye sockets. Soften the edges with a Dresden tool.

Step 2

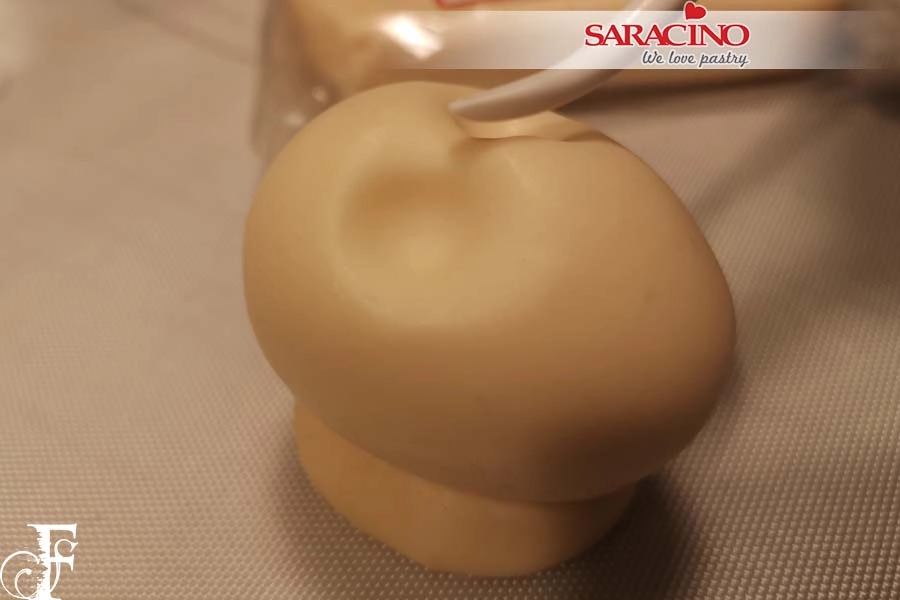
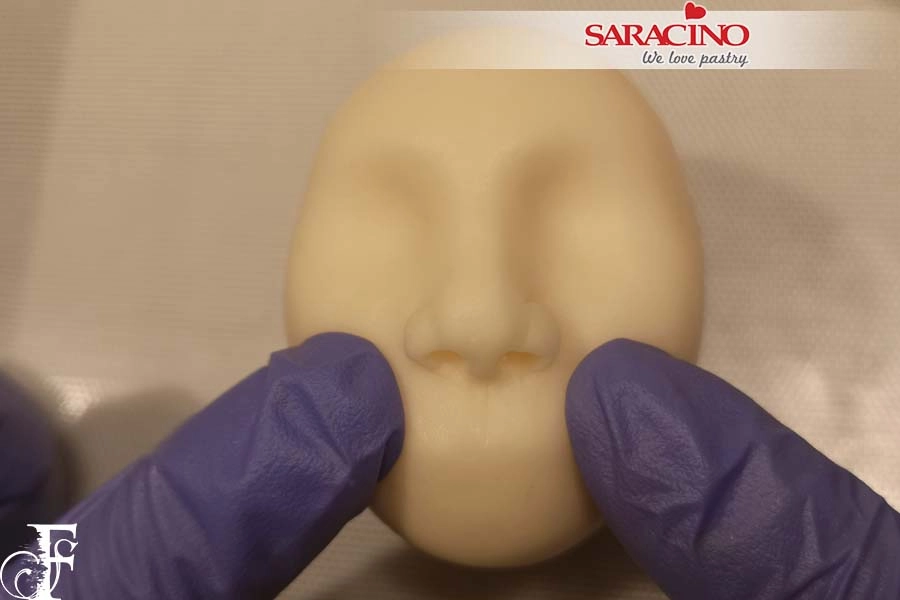
Make an indent with the Dresden tool for the top of the nose.  With your fingers squeeze paste together to shape the nose.

Step 3

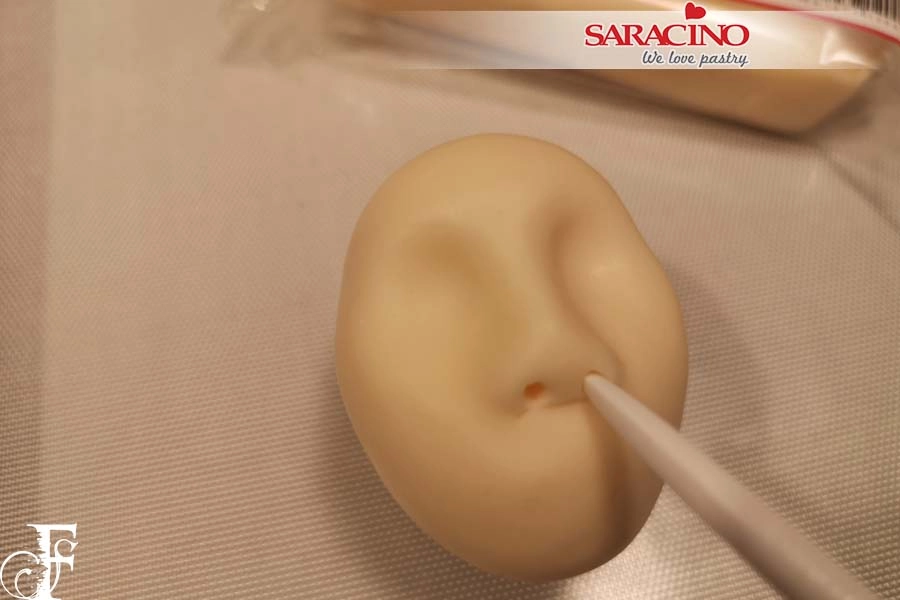
Using your Dresden tool form the nostrils and shape the details for the nose.

Step 4

With your fingers push up to form the cheeks and blend them in using the Dresden tool.

Step 5

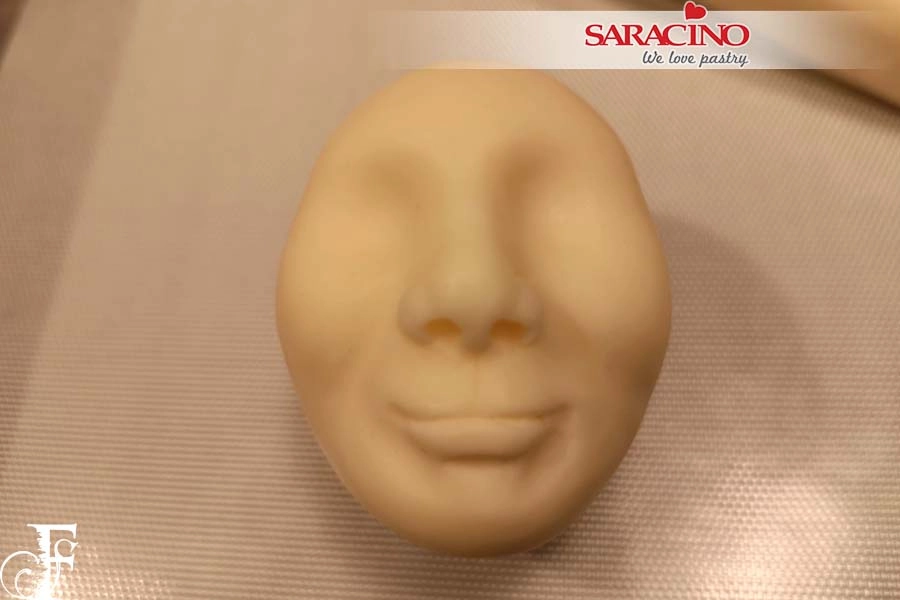
Cut a line to create the mouth with a craft knife.

Step 6

With the Dresden tool shape the bottom lip.

Step 7

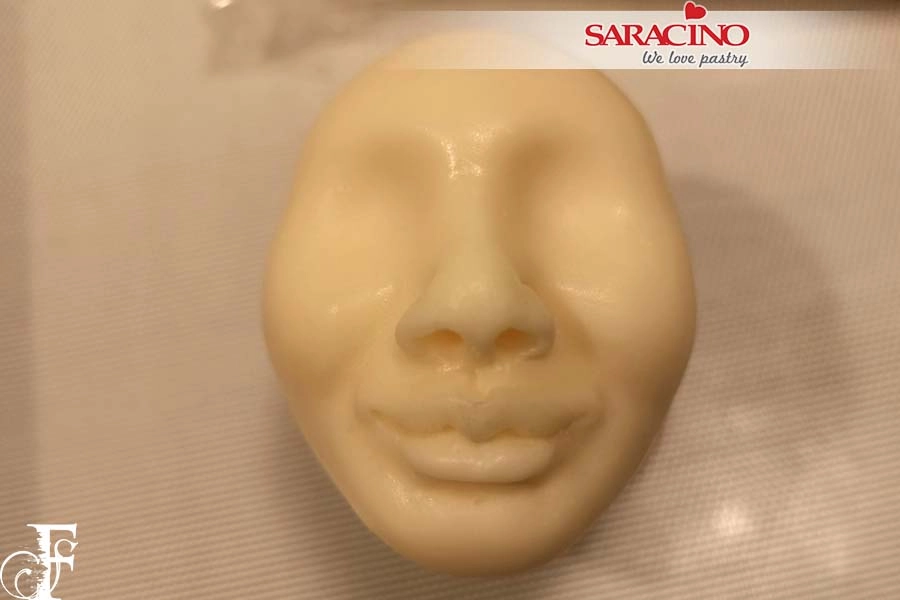
Shape the top lip. Add a little more paste if needed. Add extra details to the face around the cheeks and mouth to your desired effect.

Step 8

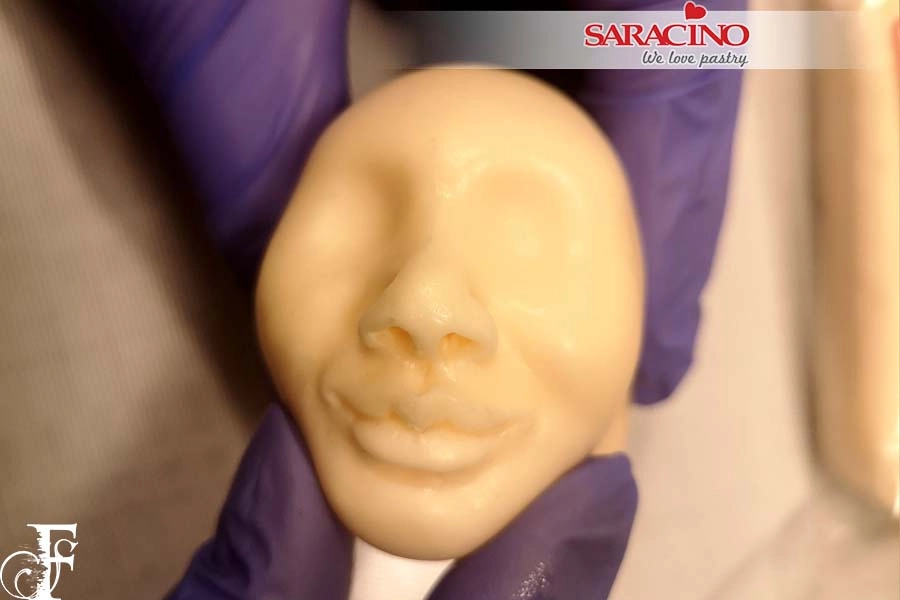
Use your fingers to pinch and shape to bring out the chin.

Step 9

Make 2 small balls of skin tone modelling paste and place in the eye sockets.

Step 10

Blend the eye into the socket. Use a Dresden tool to shape the eyebrow area.

Step 11

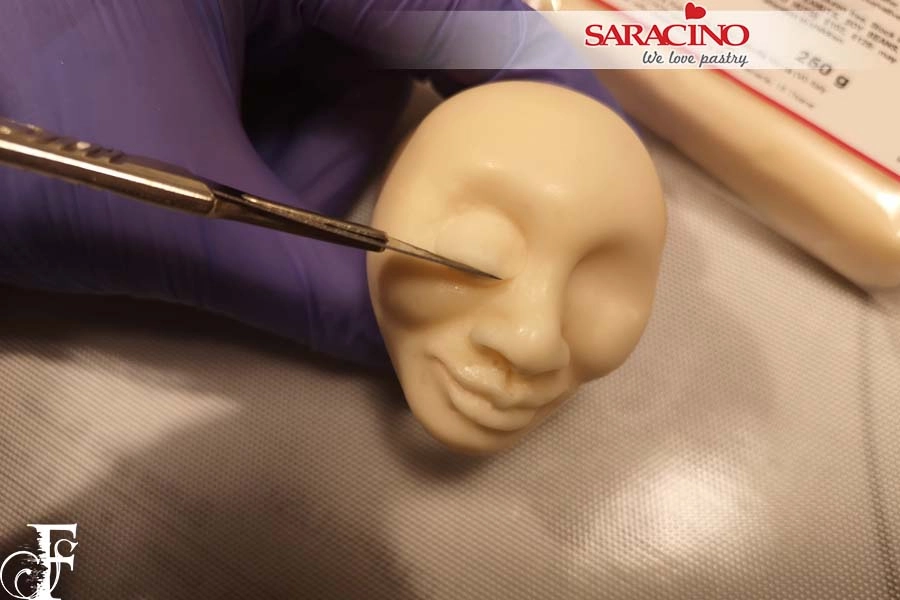
Using the craft knife, cut to form the eyelid.

Step 12

Blend in the bottom lid, then repeat for the second eye.

Step 13

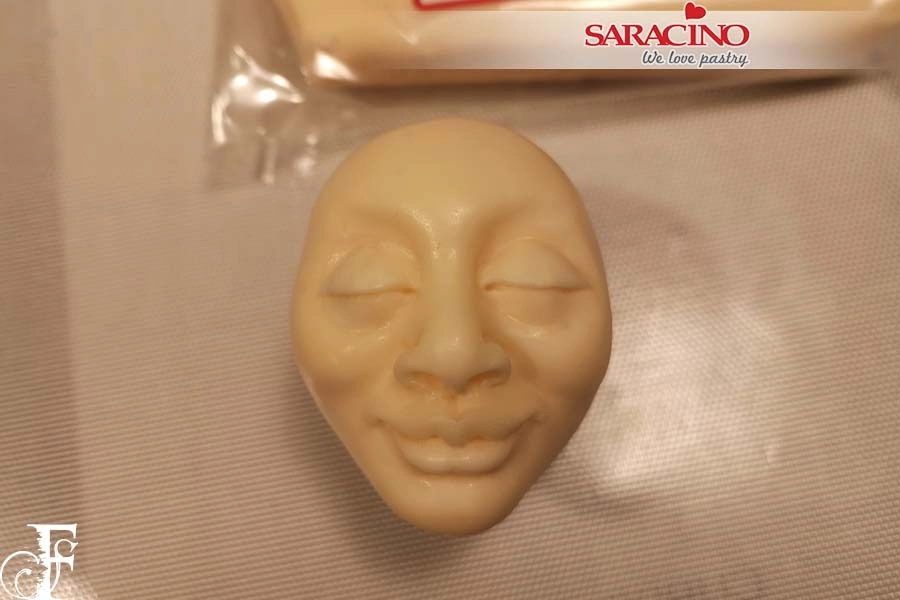
With the Dresden tool shape in high eyebrows.

Step 14

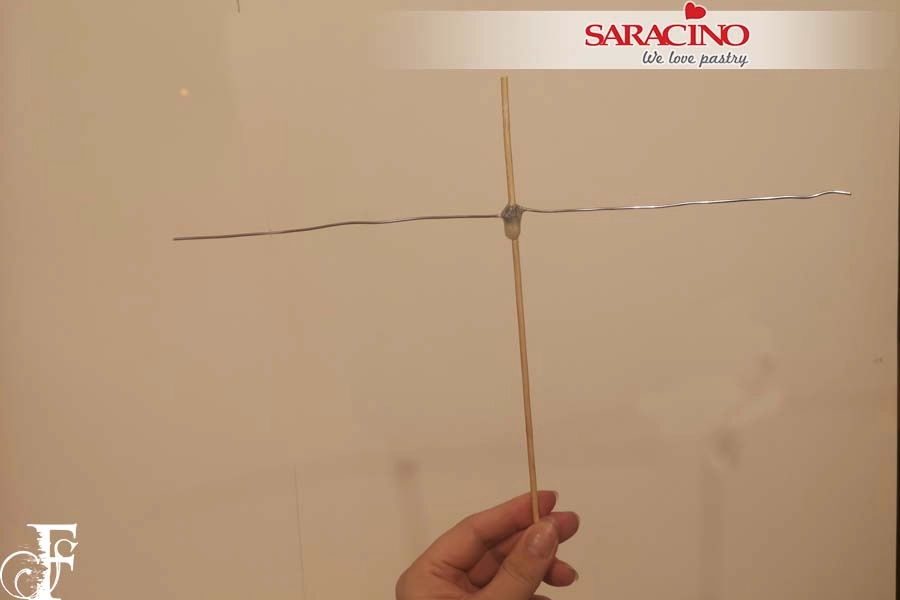
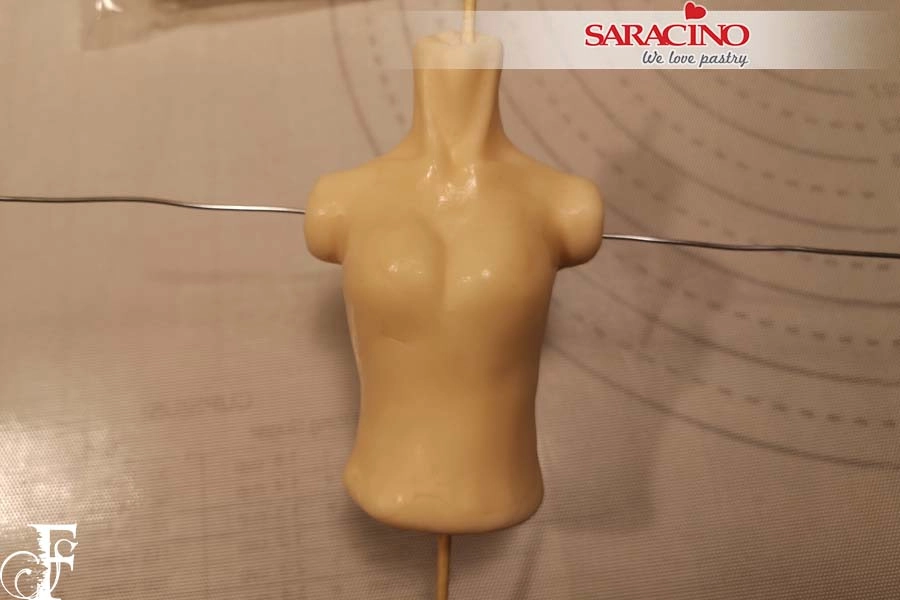
Cut a wooden skewer down to around 10 inches in length. From the top measure down roughly 2 1/2 inches. Wrap a length of armature wire around as tight as you can. Add a good amount of hot glue to keep it in place.

Step 15

Add edible glue to the skewer and wrap skin tone modelling paste around, blending in joints with your fingers.

Step 16

Mould the neck, shoulders and breasts into shape with your fingers and the Dresden tool, adding all the details as shown. You can add and blend more paste if needed. Don’t worry about the size of the waist at this time.

Step 17

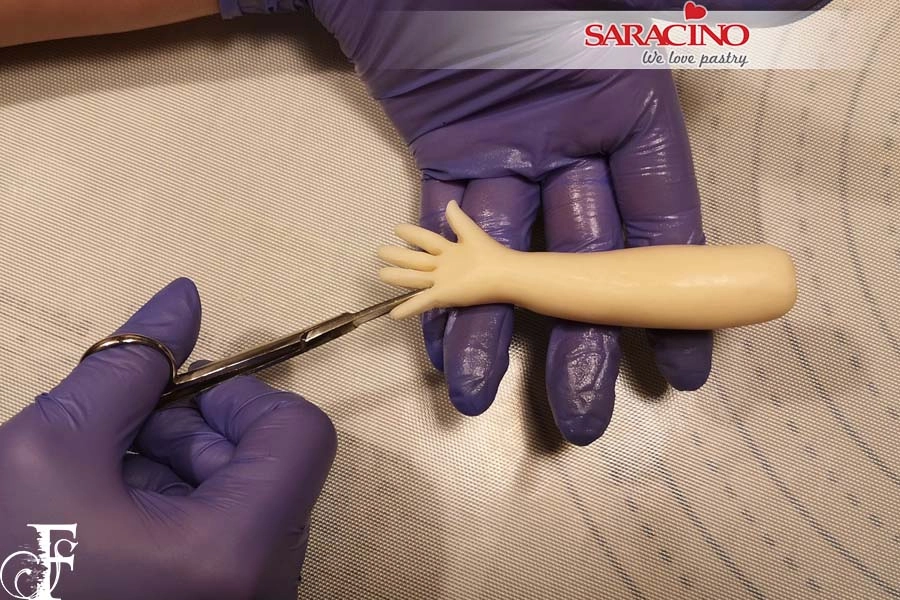
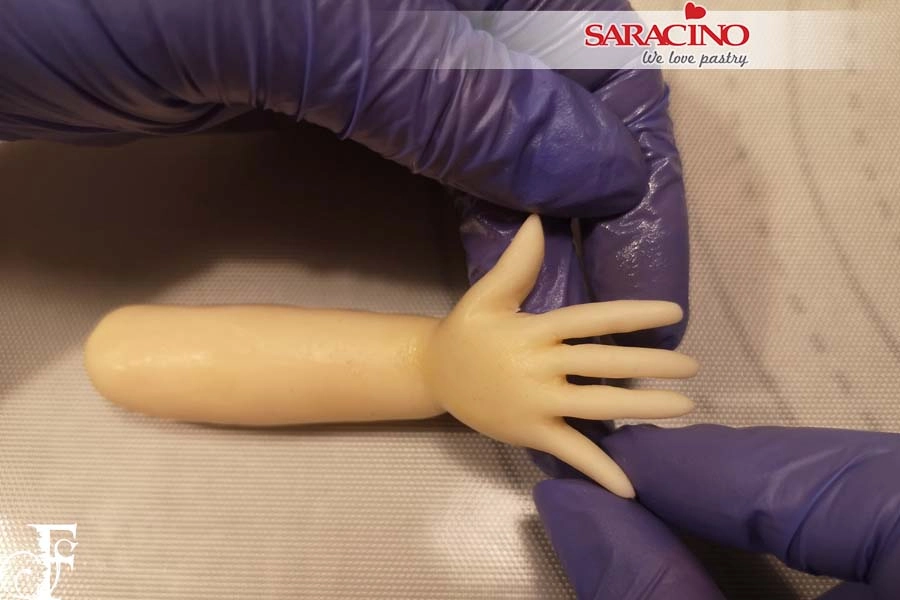
Shape skin tone modelling paste into a baseball bat shape. At the thin end flatten into a spoon shape. Using small scissors or a knife cut to form fingers.

Step 18

With your fingers gently roll each of the fingers into shape, then use the Dresden tool to add details.

Step 19

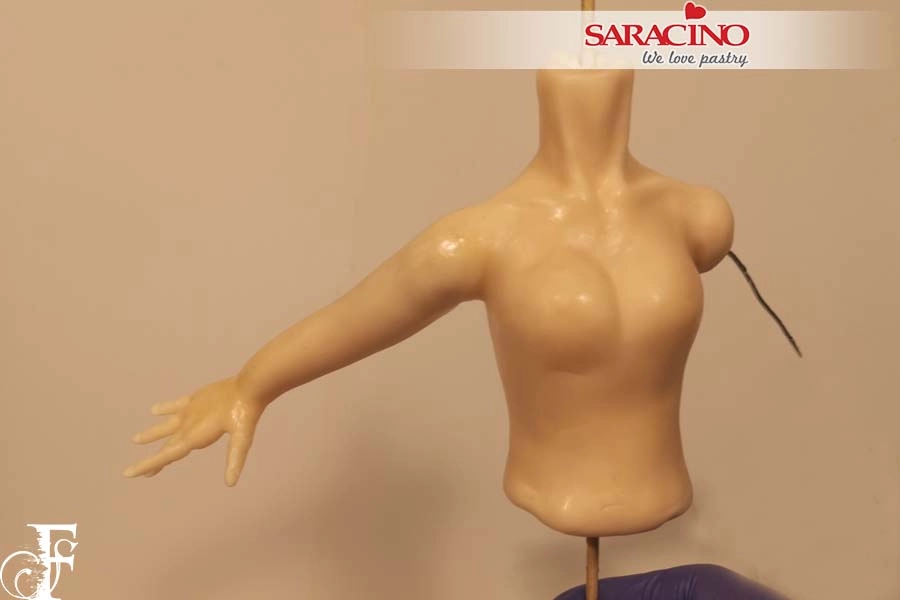
Cut the arm wires to roughly 3 inches in length and bend the wires back from the shoulders. Cover the wires in glue and feed the arms up over the wire. Blend at the shoulders. The arms will be covered so don’t worry about any imperfections.

Step 20

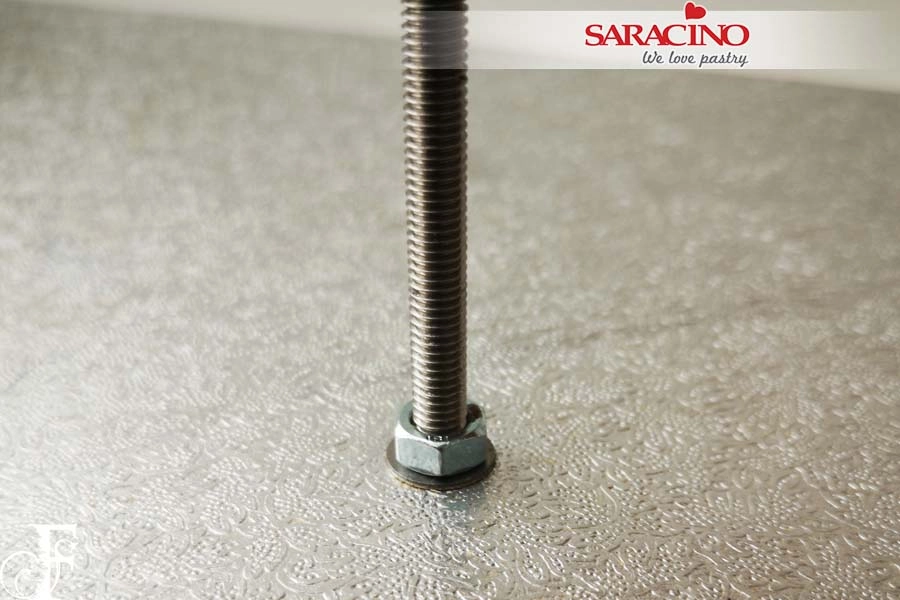
With the drum board, drill a 6mm hole off center. Put the threaded rod in and fix with nuts and washers, tighten with a spanner.

Step 21

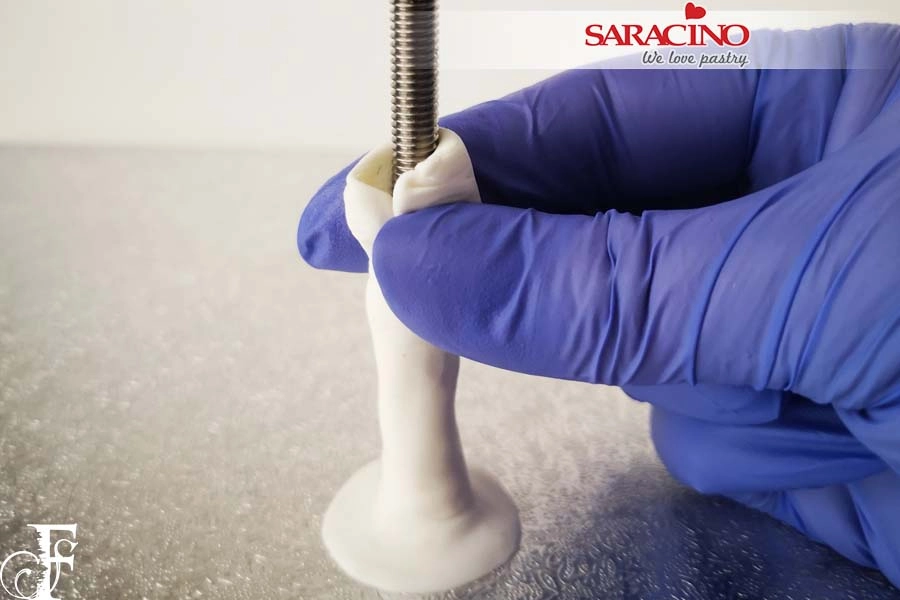
Cover the threaded rod with modelling chocolate or alternatively cover with a straw.

Step 22

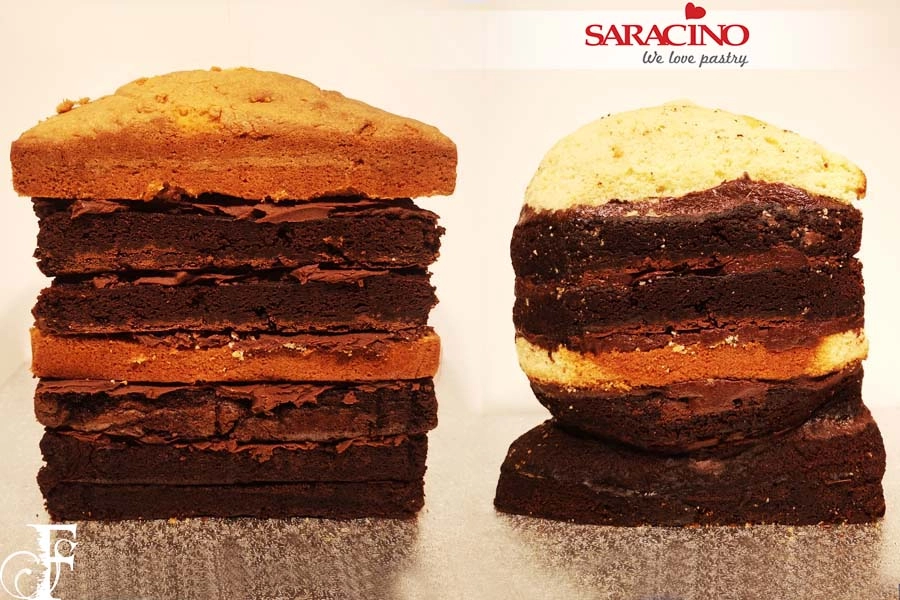
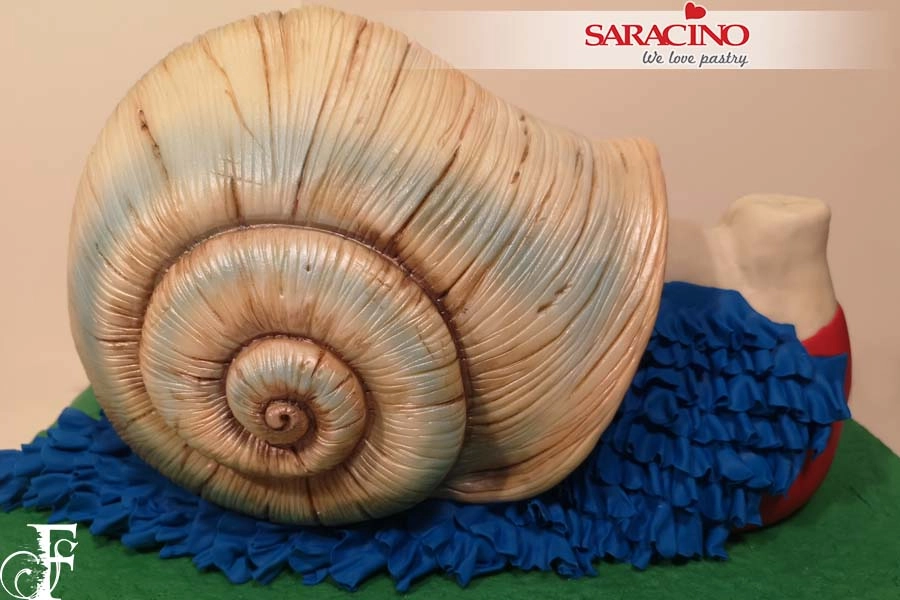
Stack cake using your filling of choice, carve the cake into a round shell shape.

Step 23

With the crumbs from the carving mixed with ganache make a cake pop mixture. I like to call this ‘cake putty’. Form the swirl on the side of the shell. The back of the shell can be any of design you wish.

Step 24

Cover the carved cake in ganache and leave to set or chill in the fridge.

Step 25

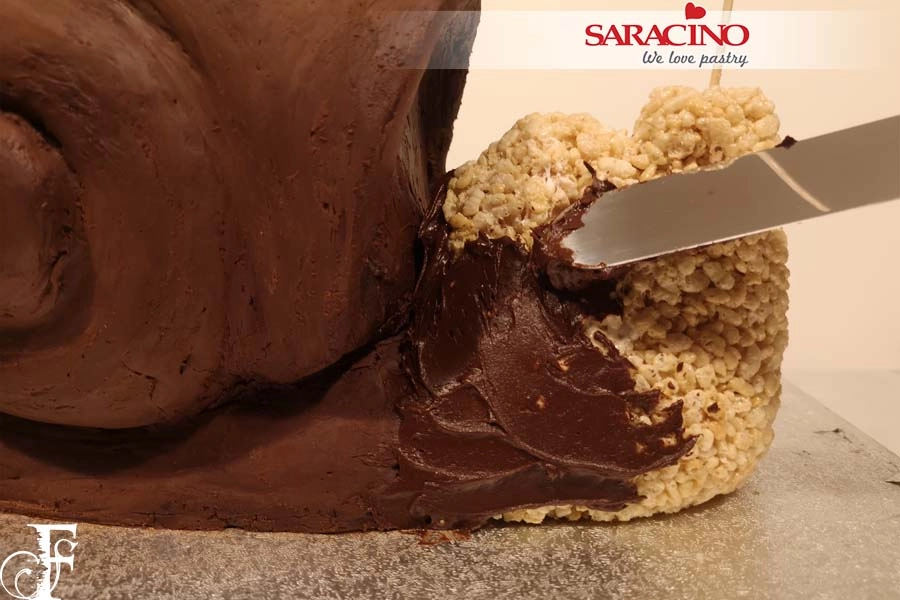
Using a marshmallow and rice krispie mix, make the shape of a duck body with a hump on its back. Add a skewer while it’s cooling. Alternatively this piece can be made of cake if you wish.

When cooled, stick to the cake with ganache and cover with ganache. Leave to set.

Step 26

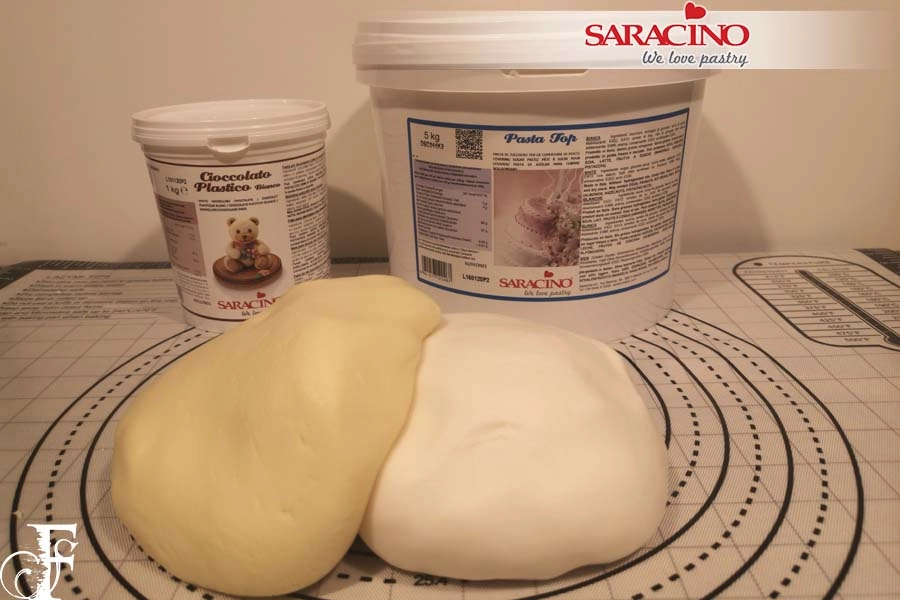
Blend together equal amounts of modelling chocolate and white pasta top.

If too hard, place in the microwave for a few seconds to soften it then knead into a soft pliable paste.

Step 27

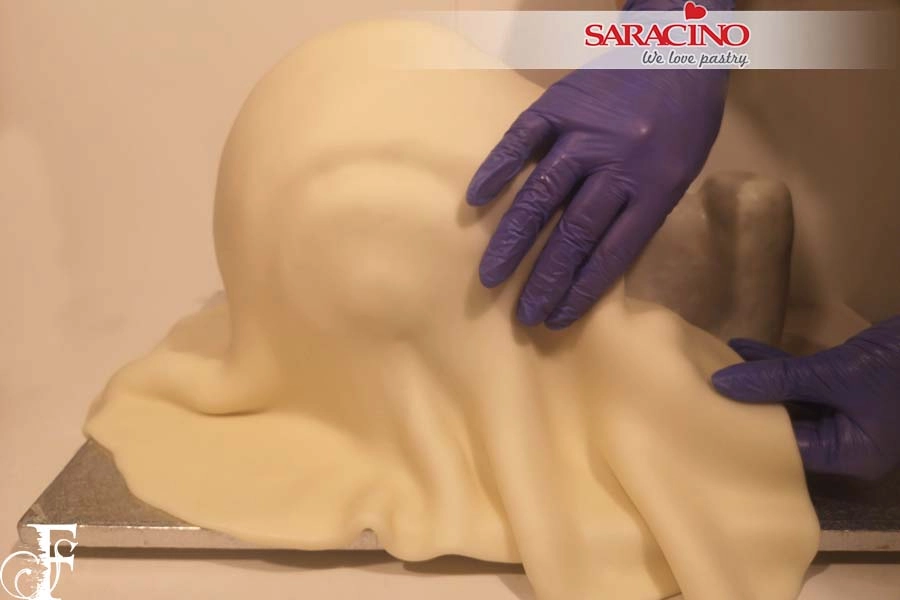
Roll out and cover the cake, you can cover it in two pieces if this makes it easier. Smooth into the swirl of the shell, gently manipulate the paste into all the crevices with your fingers. 

Don’t worry about the finish on the duck shaped body as it will be covered.

Step 28

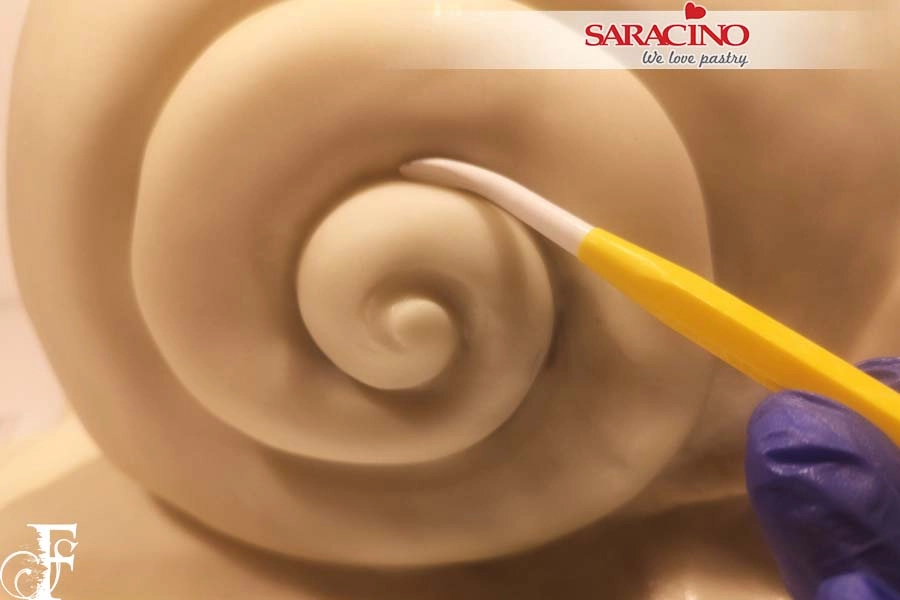
Using a Dresden tool gently shape in the swirl. 

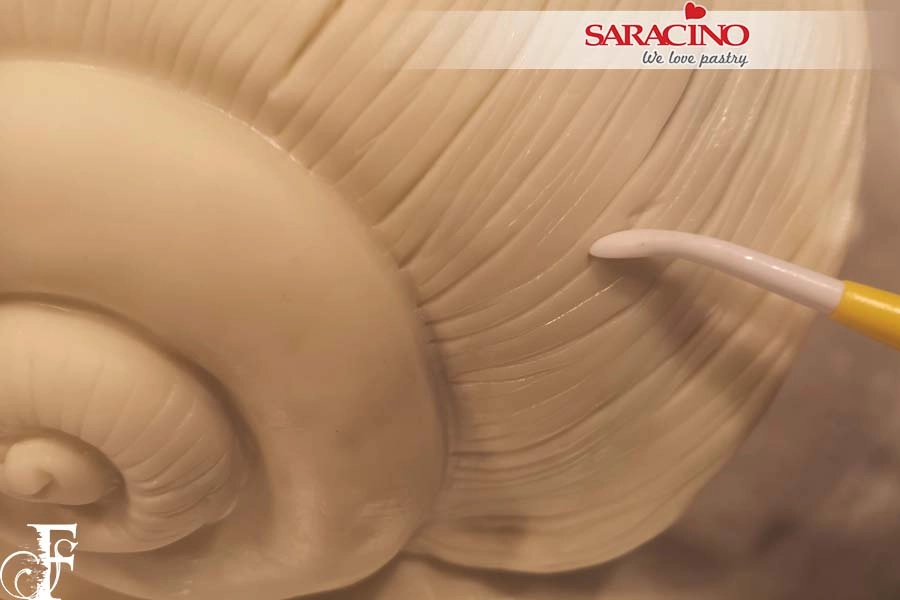
Step 29

Then make the details on the shell body with lines and dents. Have fun with this bit.

Step 30

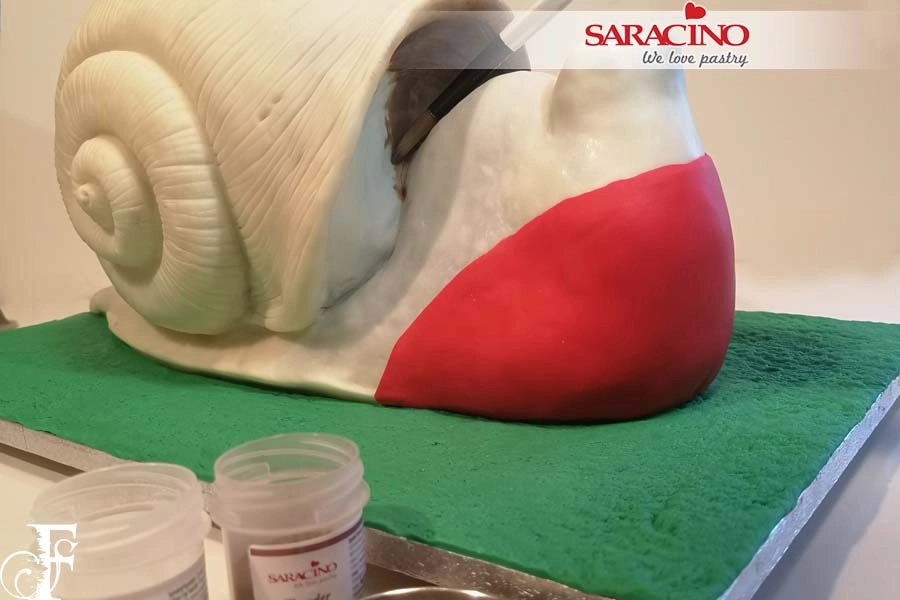
Paint inside the shell with brown and white dust mixed with a little water. Take some of the red modelling paste and roll out. Cut to a semi circle, stick using water or edible glue to the front as shown.

Step 31

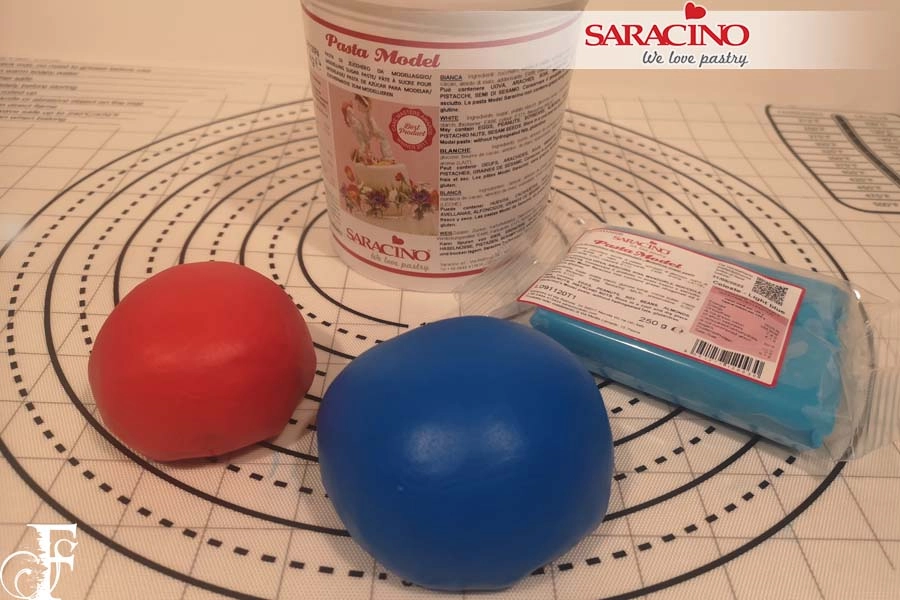
Mix Saracino modelling paste with red and blue gel colours. Alternatively add colouring to pre-coloured paste. Keep adding until you reach your desired colour, keep in mind the blue has to be dark.

Step 32

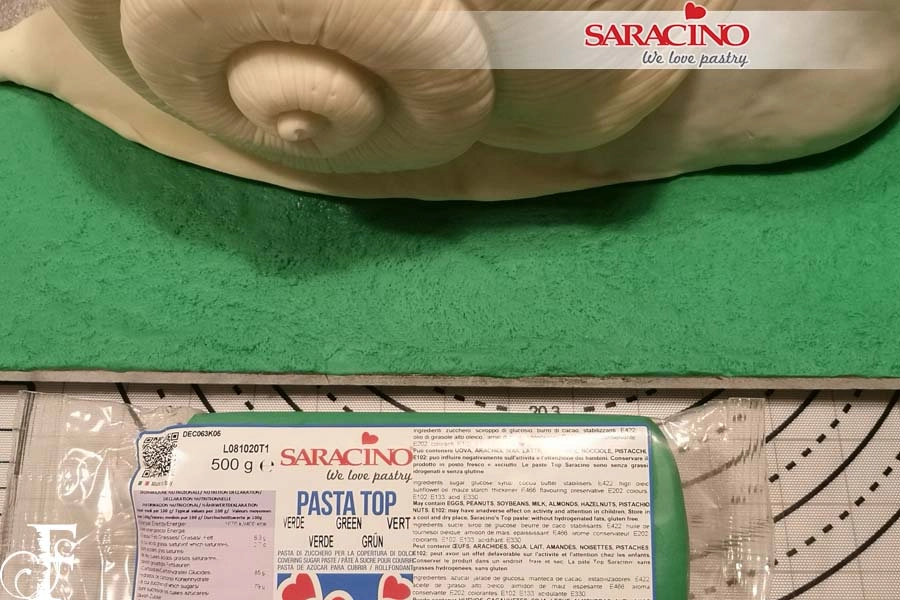
Cover the board with green Pasta Top. Use a hard stiff brush to give texture.

Step 33

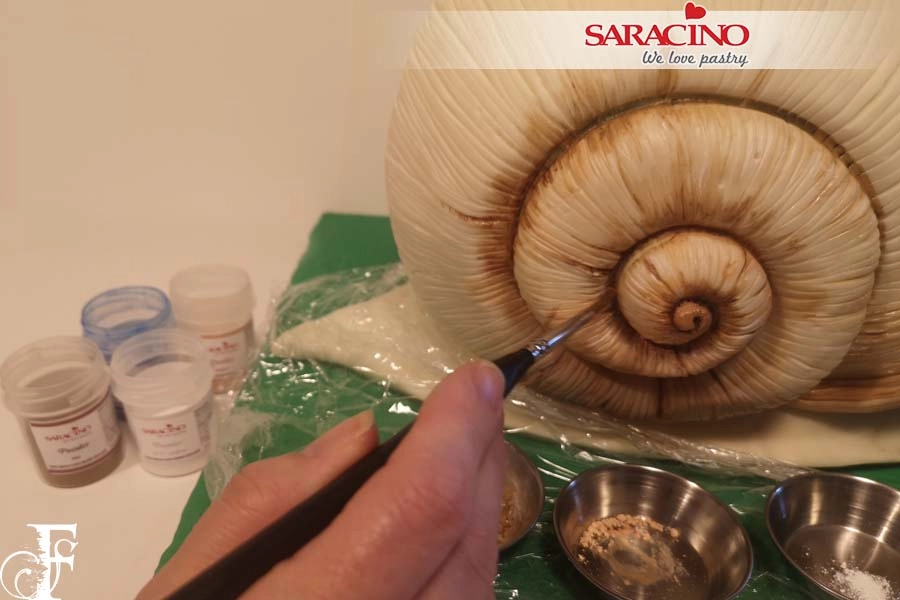
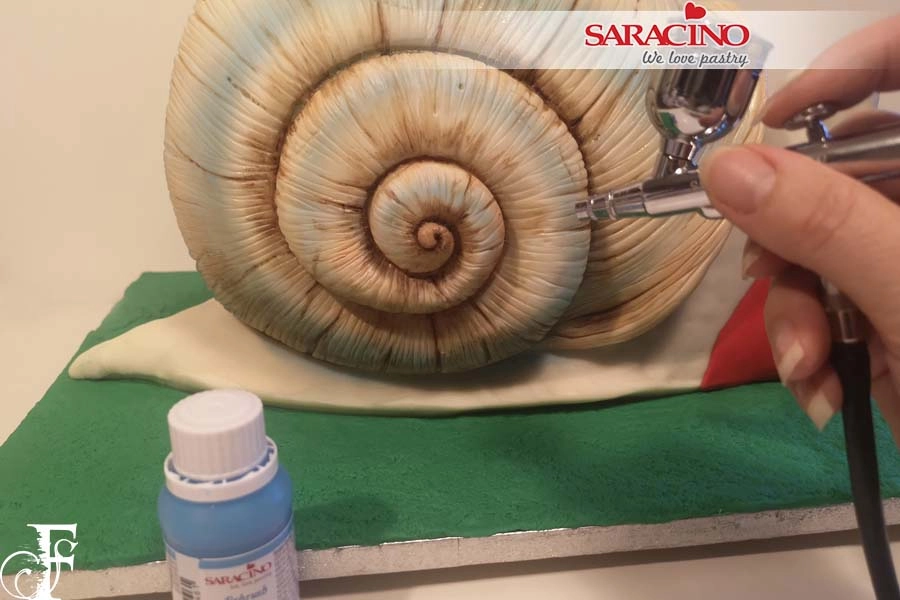
Start painting the shell with white, brown, blue and skin tone Saracino dust colours mixed with a little water or alcohol. Start from the center with a little brown and gradually paint around the swirl using different colours.

Step 34

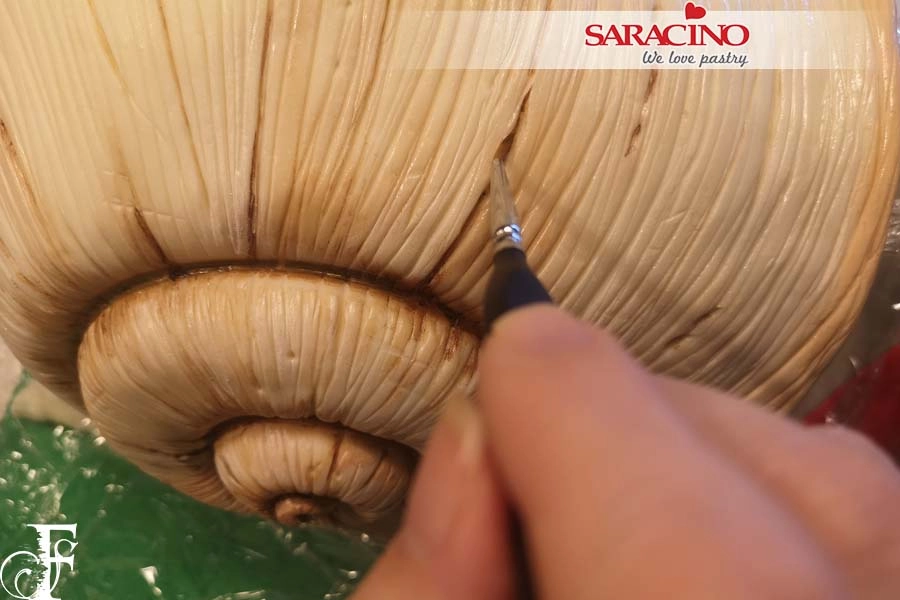
With the brown dust and a fine brush paint in the lines.

Step 35

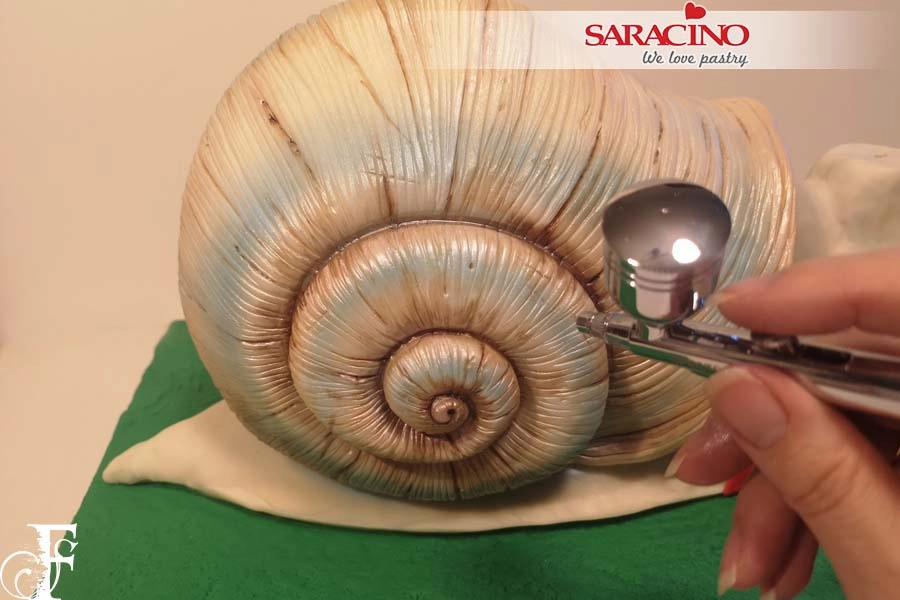
To achieve the blue swirl airbrush with blue colour.

Step 36

Using the mother of pearl airbrush colour, airbrush the shell completely to give it a lovely sheen.

Step 37

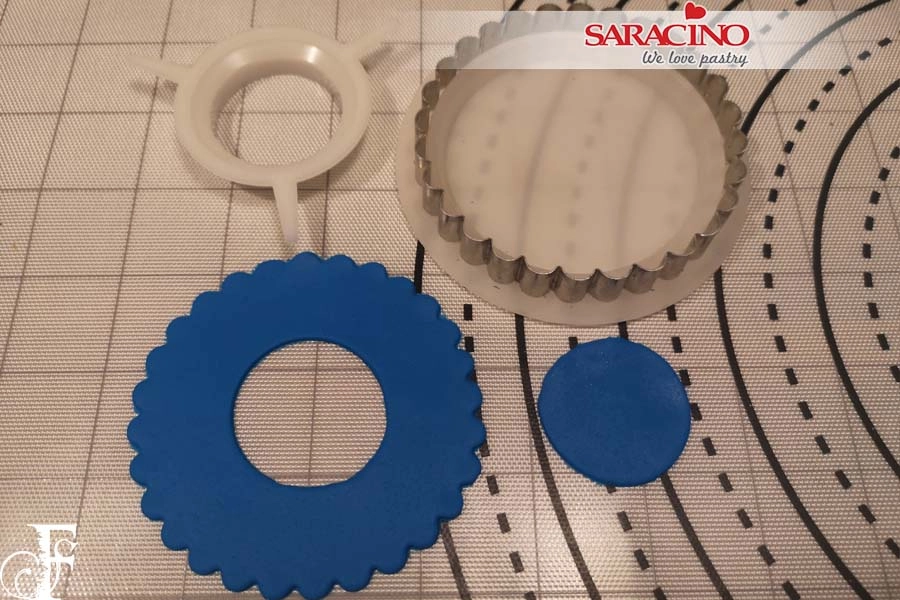
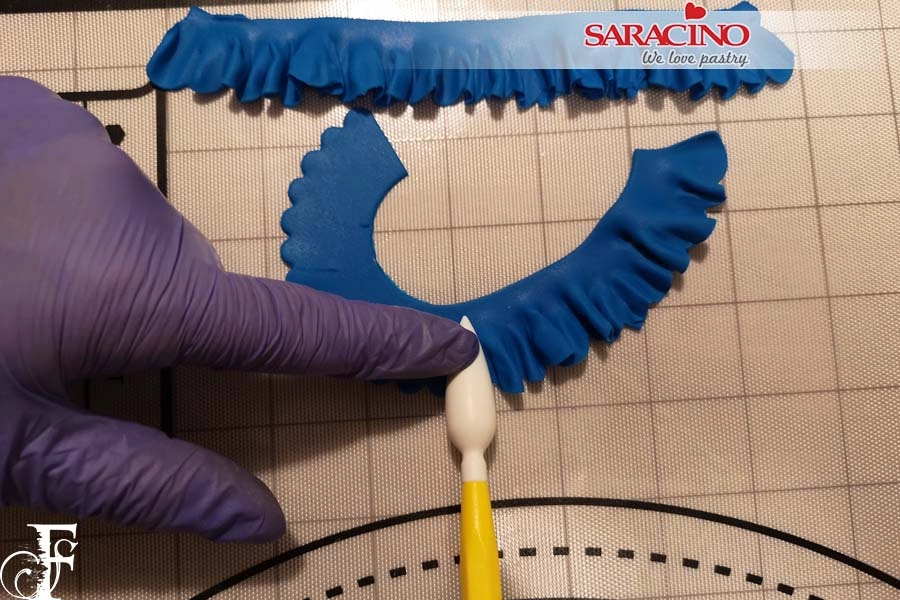
Take some of the blue modelling paste and roll it out thinly, cut out circles with a frill cutter. You will need to make lots of these.  Alternatively you can use a cookie cutter.

Step 38

Using a bulbous tool, roll back and forth creating a frill.

Step 39

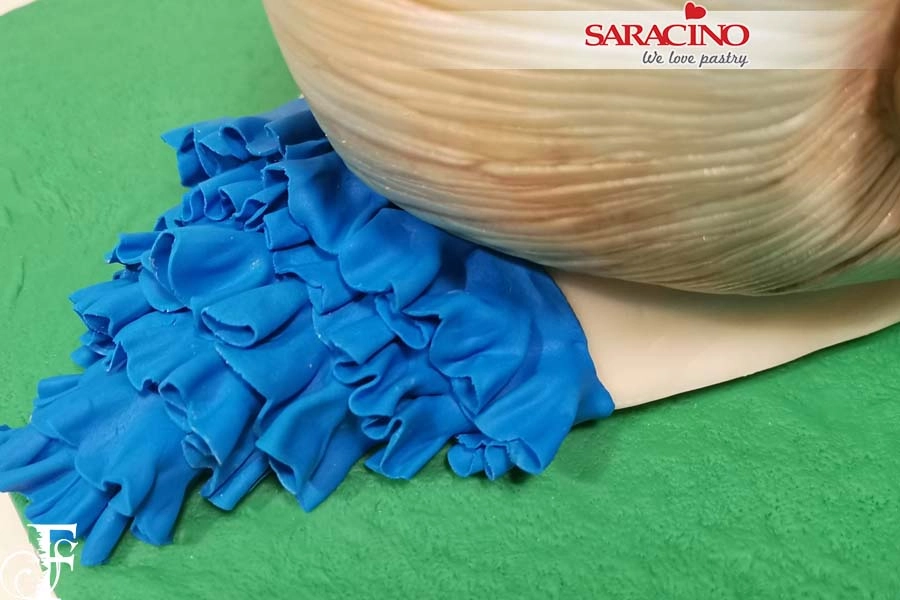
Starting from the tail work your way along the body fixing with water or edible glue.

Step 40

Adding each frill on top of another until you reach the front, stagger the layers up as shown. Some will be covered.

Step 41

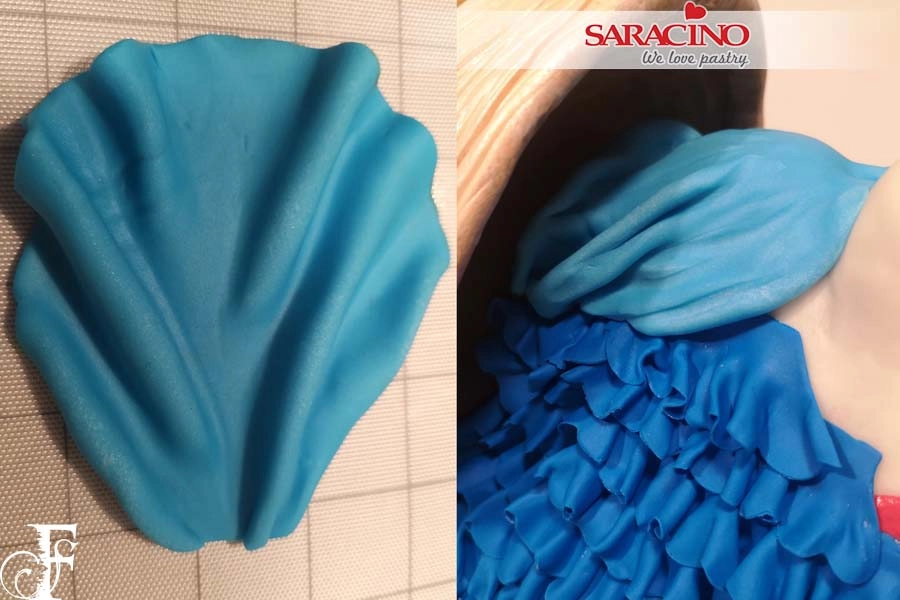
With some of the light blue Saracino modelling paste roll out and cut out a large circle, pinch at one end and make some folds. Cover the hump up into the shell.

Step 42

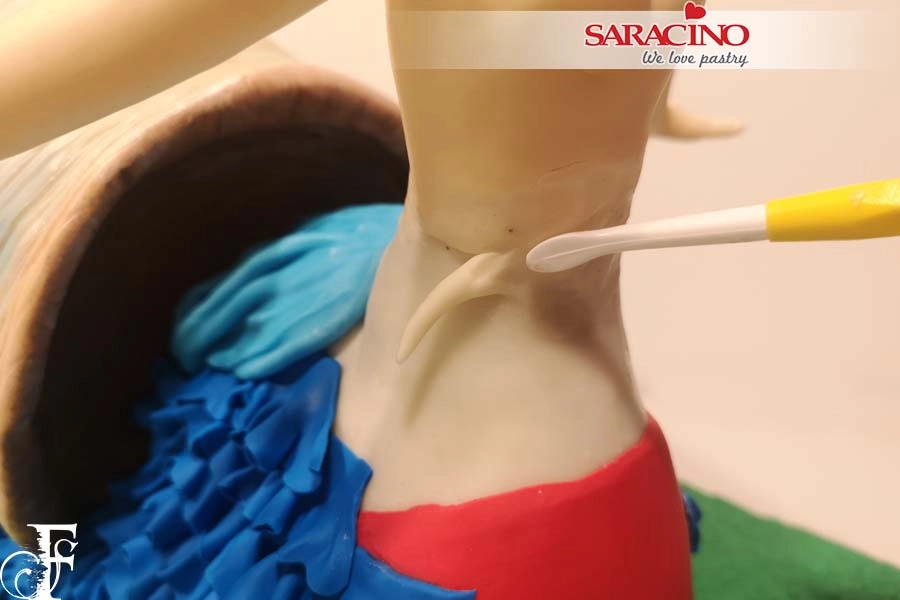
Take your modelled torso and with a little edible glue fix it on the cake. If needed trim the waist to fit and add a little paste to fill and blend the joint.

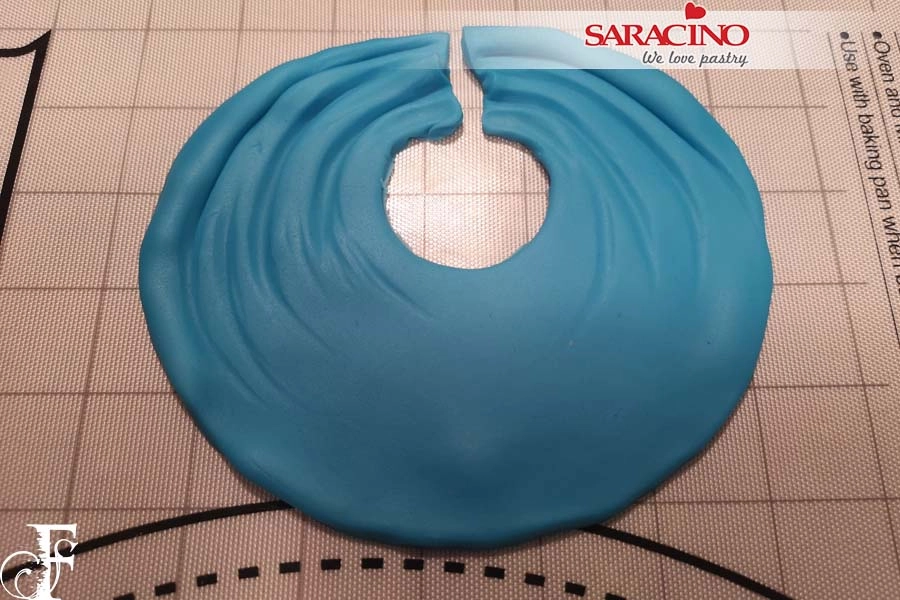
Step 43

Roll out the light blue modelling paste (not too thinly) into a large circle, cut an off centre hole and add a few creases.
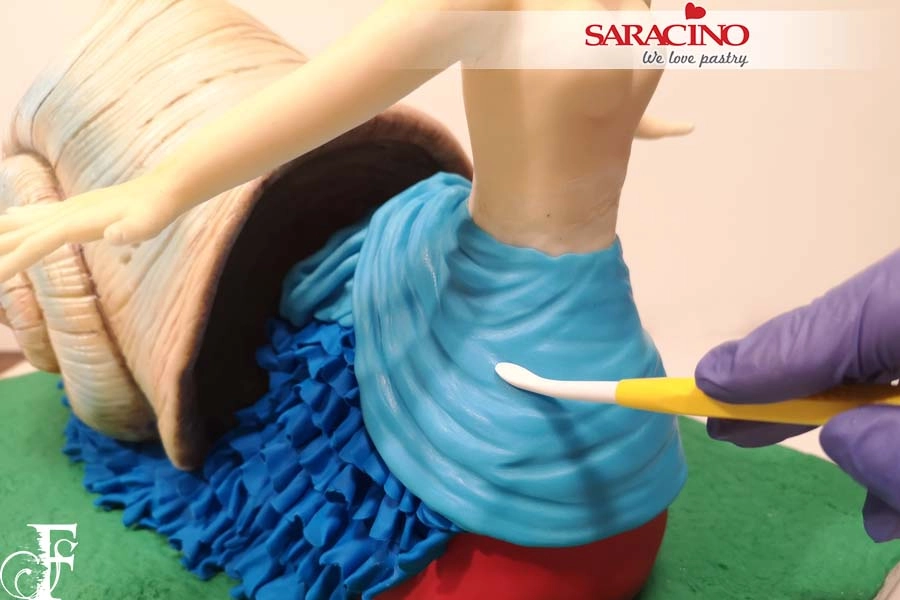
Step 44

Glue to the model. Position the joint on top of the hump, blend in enhancing the pleats with a Dresden tool.

Step 45

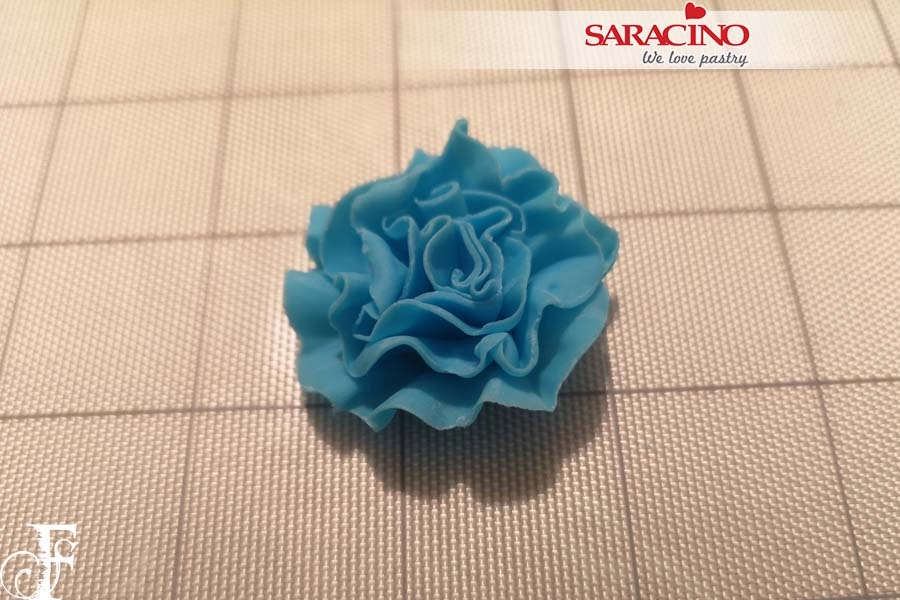
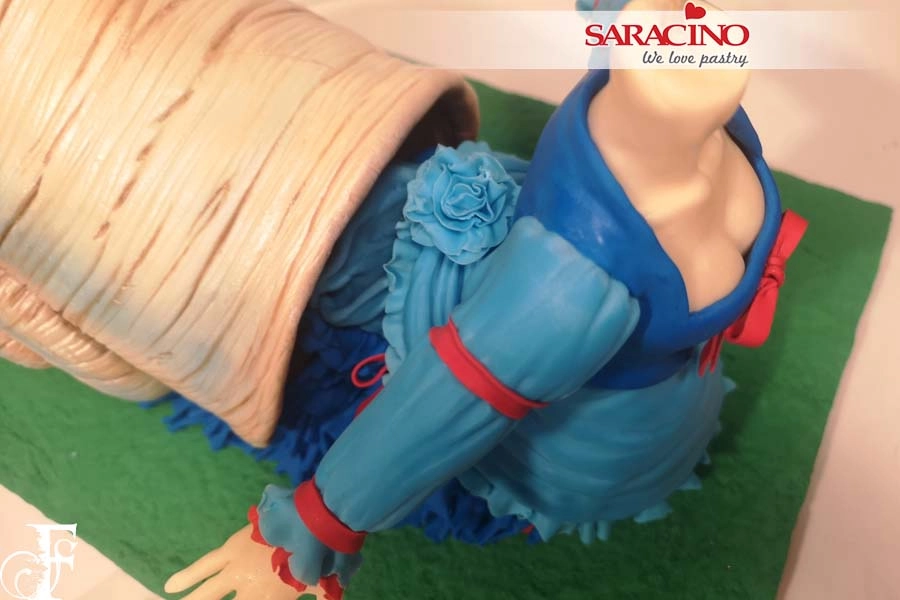
For the back of the dress make a long frill from light blue modelling paste and roll it up.

Step 46

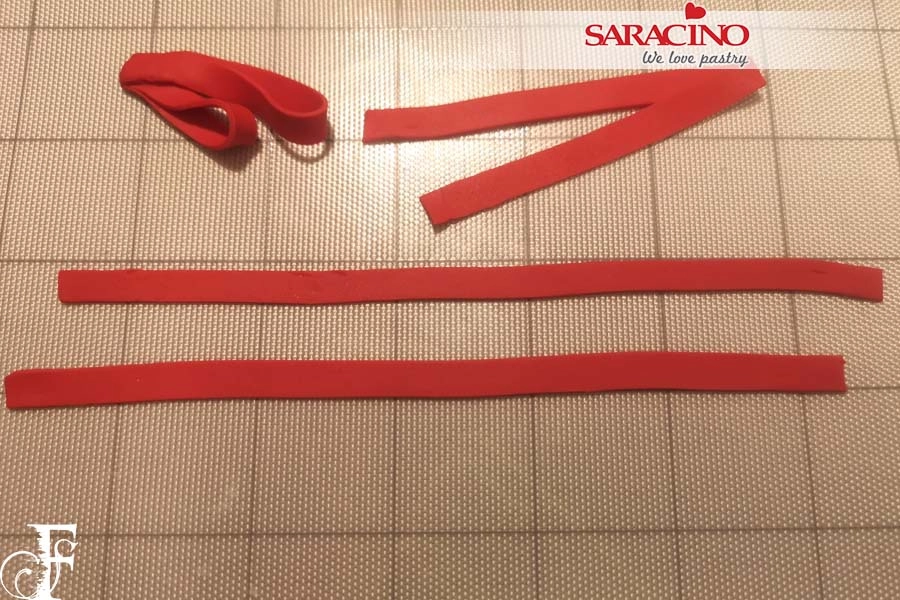
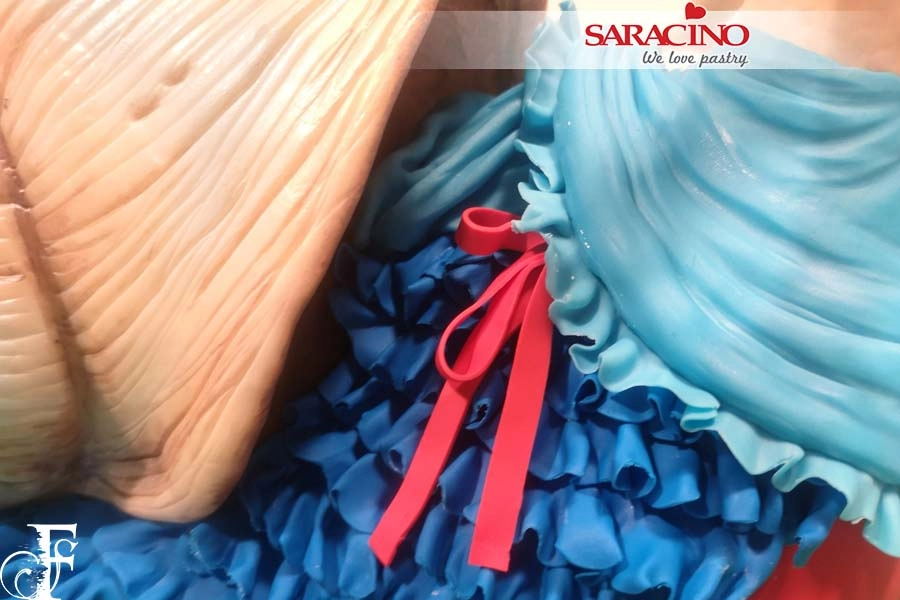
Roll out red modelling paste thinly and cut four fine strips for ribbons. Fold two in half and make four separate loops with the other two.

Step 47

Roll a light blue frill and fix around the bottom of the dress. Carefully fix ribbons in place with a little glue. 

Step 48

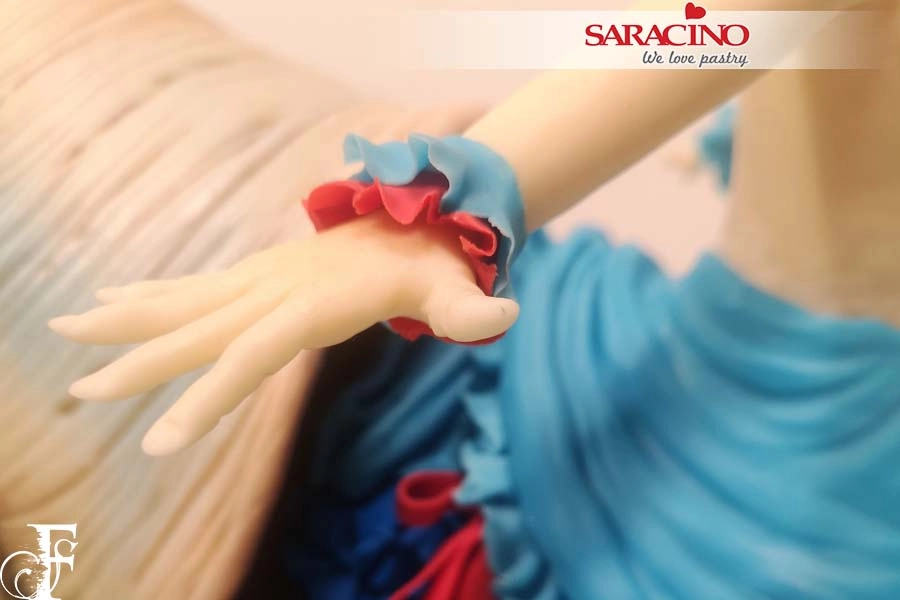
Add red and blue frills to the wrists.

Step 49

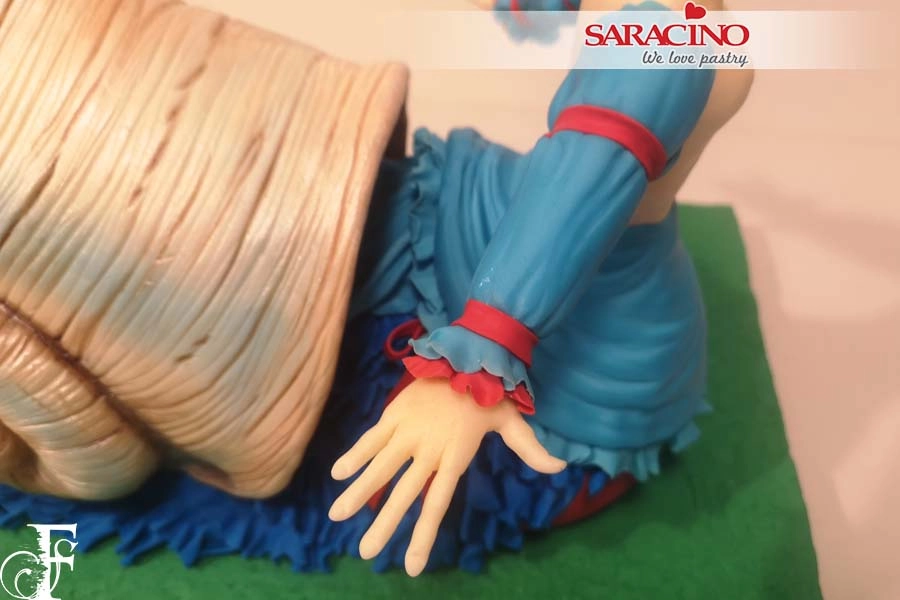
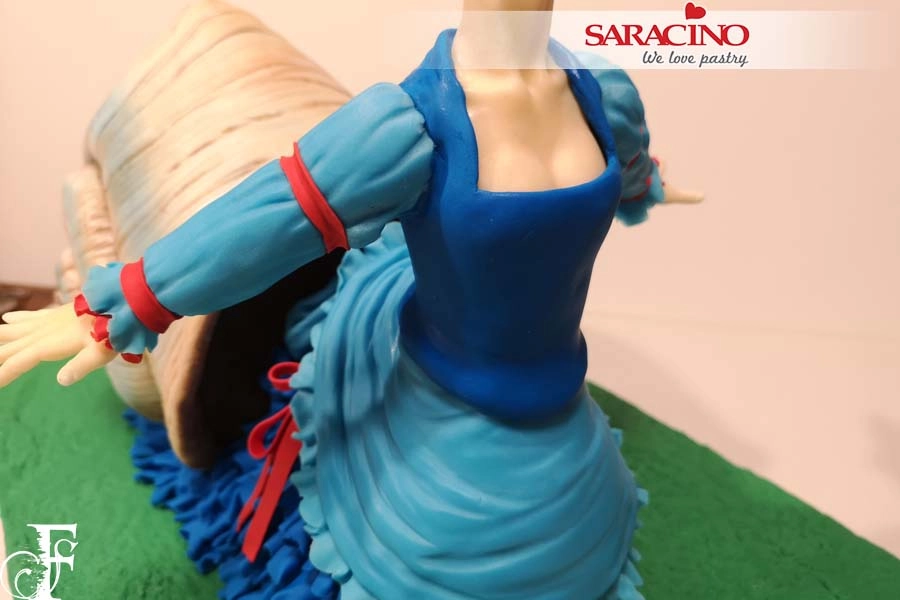
Roll out the light blue modelling paste into two fan shapes a little larger than the length of the arms. Glue to the arms adding creases and trimming off the excess. Add red ribbon strips at the wrists and upper arms.

Step 50

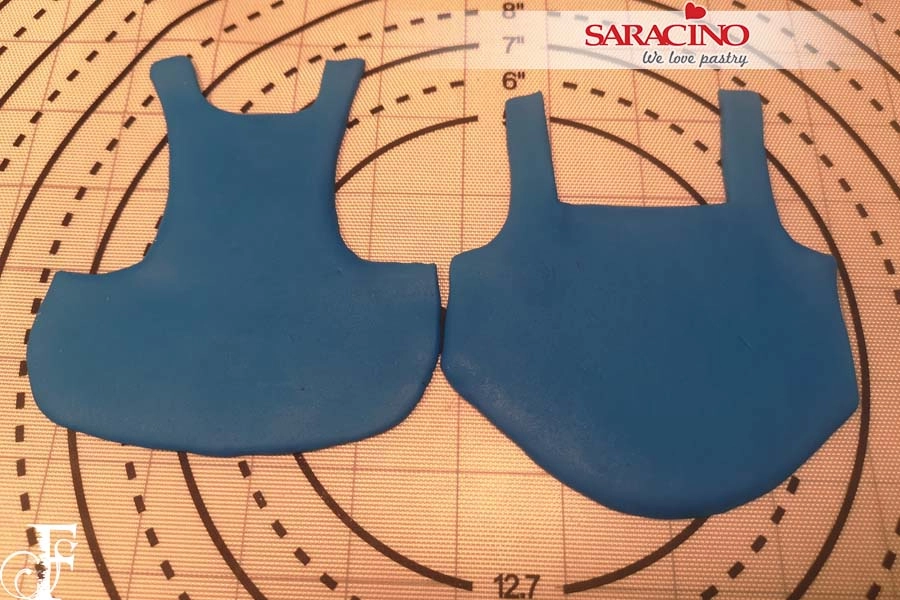
Roll out the dark blue modelling paste and make apron shapes for the bodice front and back.

Step 51

Stick to the body with edible glue. Trim and shape to the body blending in the joints with your fingers and Dresden tool.

Step 52

Glue a little bow to the front of the bodice and glue the rolled frill on top of the hump.

Step 53

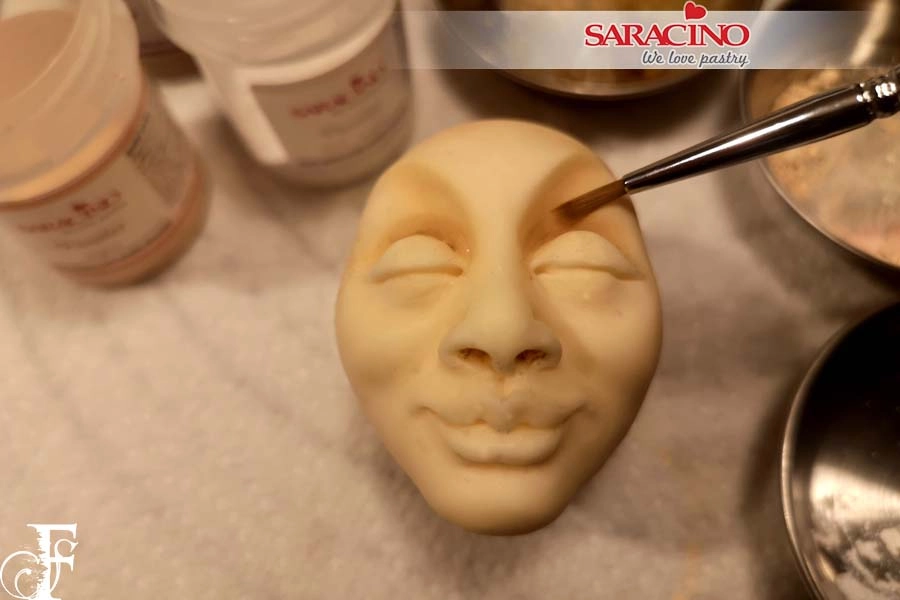
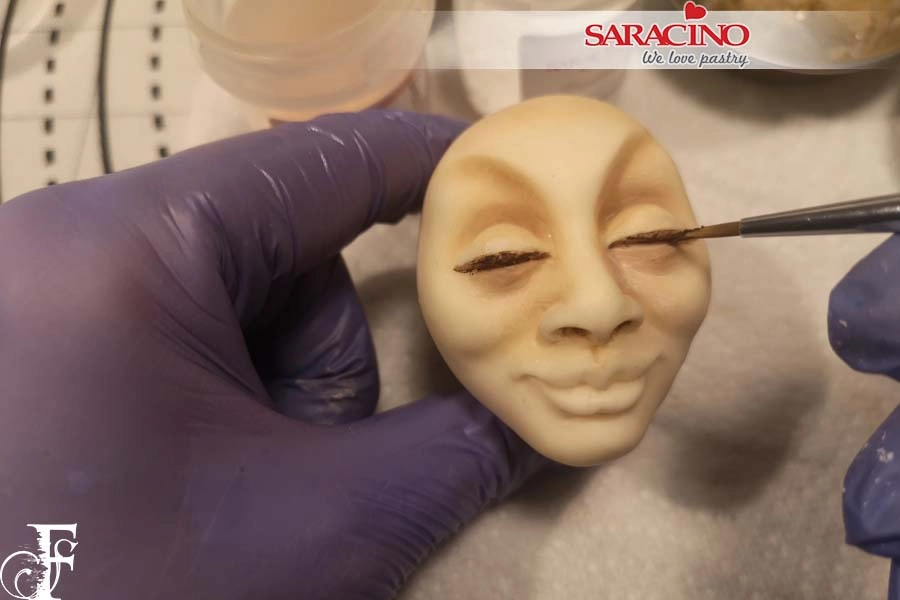
With brown and skin tone powder colour start to dust around the eyes and brows.

Step 54

Paint an eyelash line with brown dust mixed with a little water, add white dust to lids.

Step 55

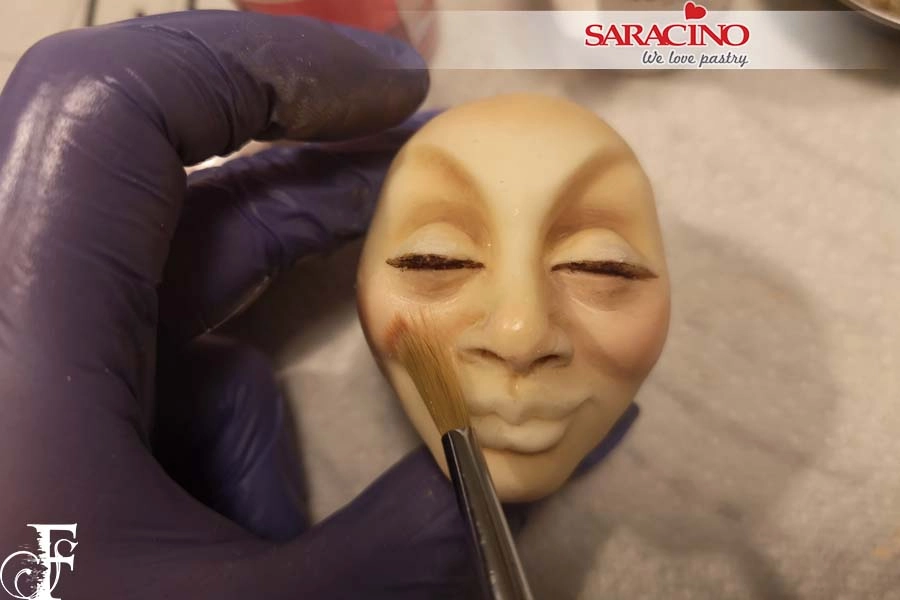
Dust her cheeks with red dust.

Step 56

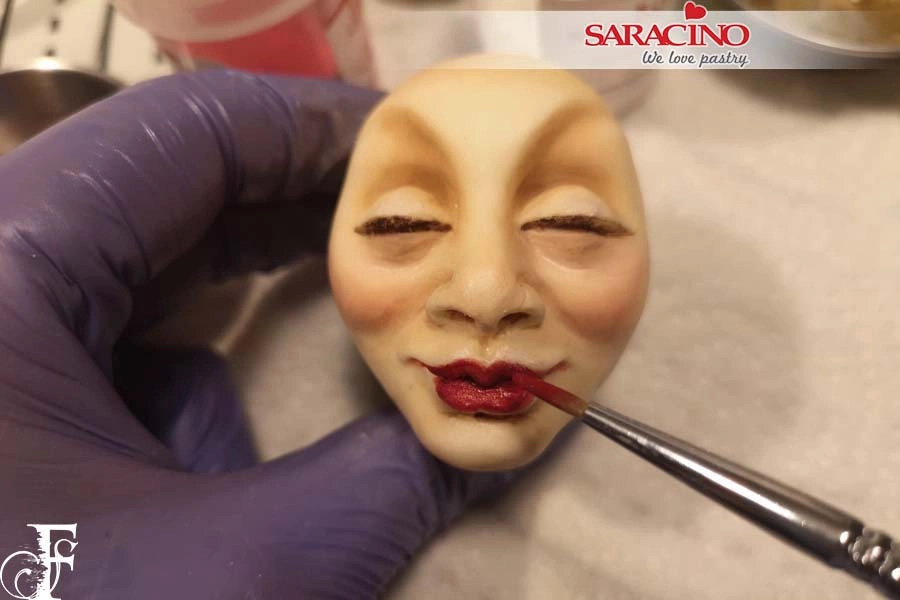
Paint her lips with red dust colour mixed with a little water, blend around with skin tone dust colour.

Step 57

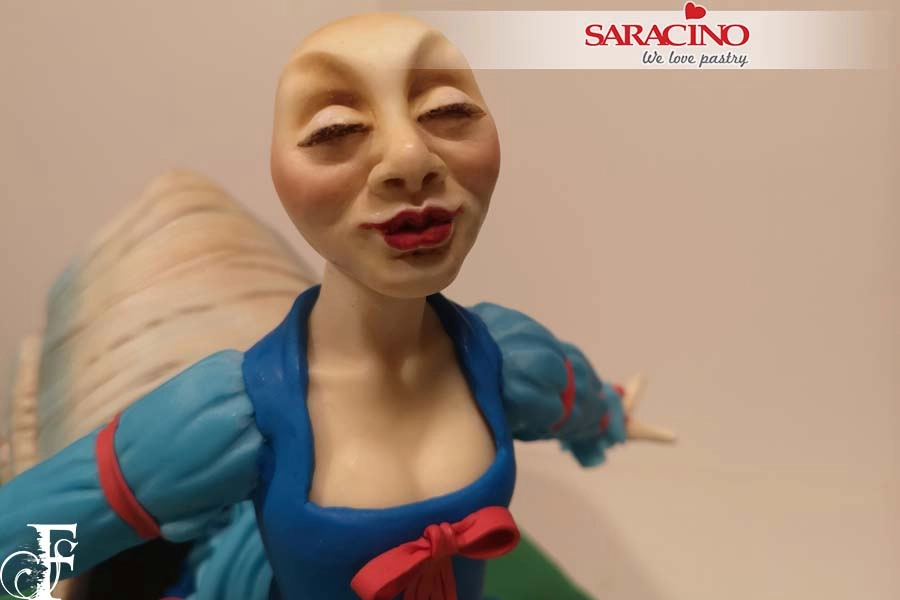
Trim the neck down to desired size and add a little glue then attach the head.

Step 58

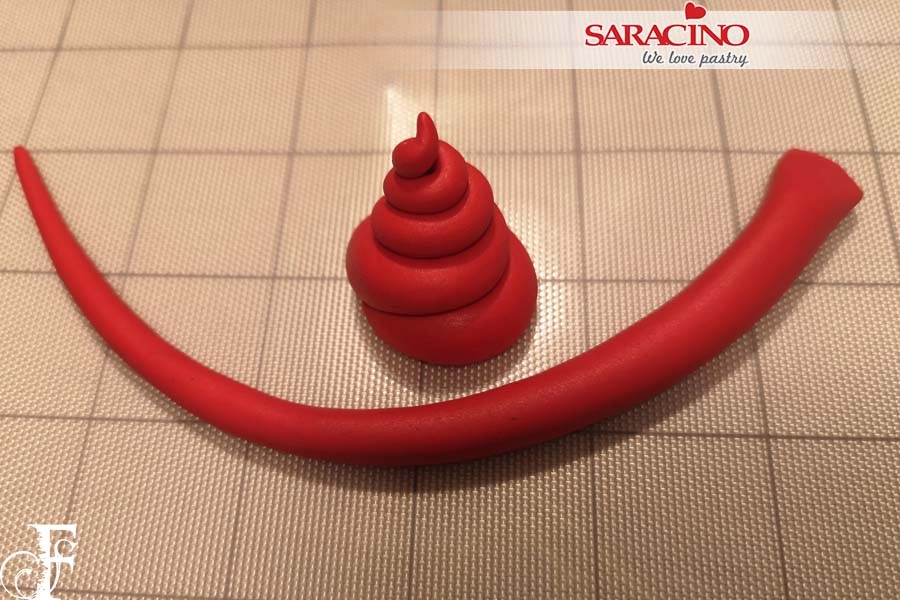
Roll two tapered sausage shapes and curl them to make two swirls.

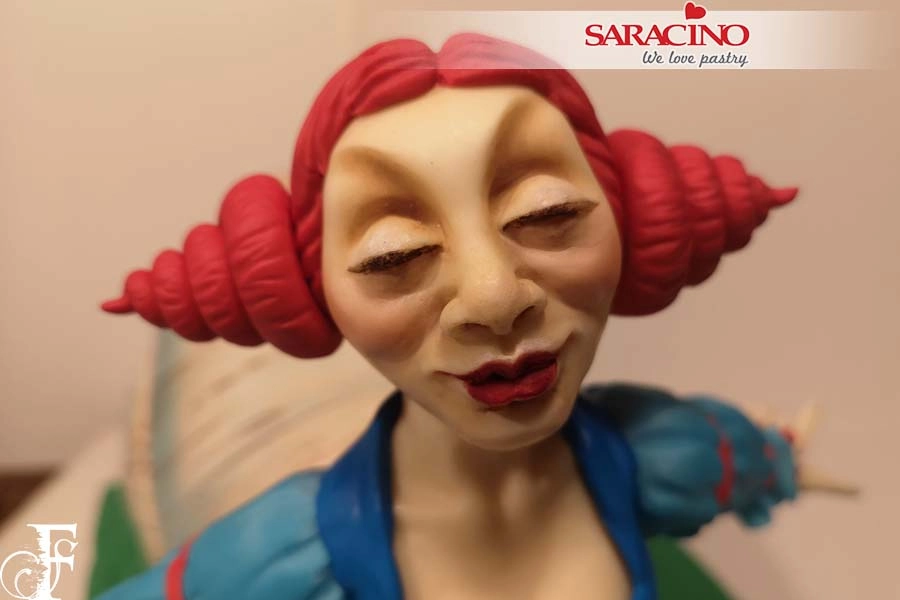
Step 59

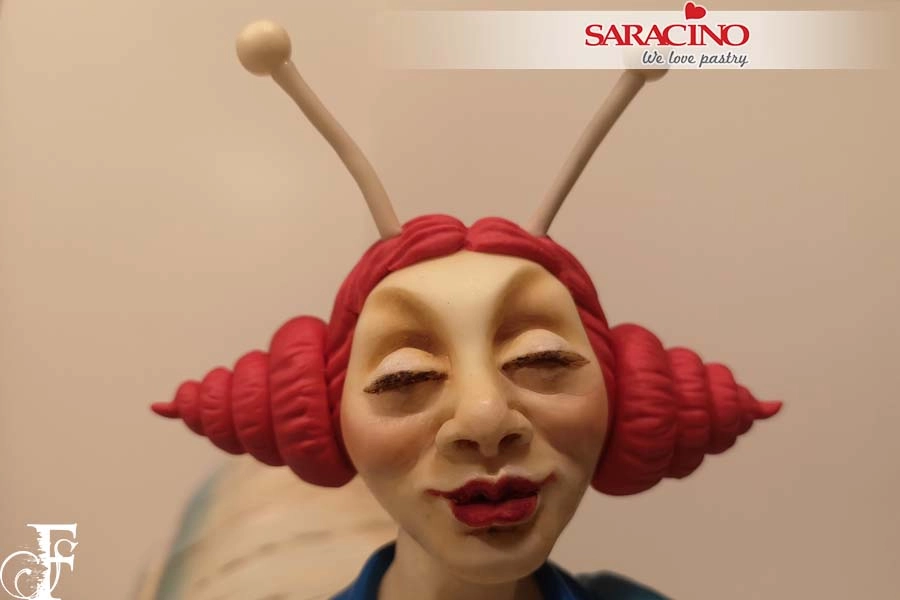
Cover the head with a little red paste, then use your Dresden tool to give the effect of hair texture. Fix the two swirls to the side of the head.

Step 60

Make two antennae out of skin tone modelling paste and glue to the top of the head, very gently dust them with skin and red colour powders.

Step 61

Dust the neck, hair, clothes and board to give shadow, depth and highlights. Using Saracino liquid shiny, paint the antennae, lips and the red underside.

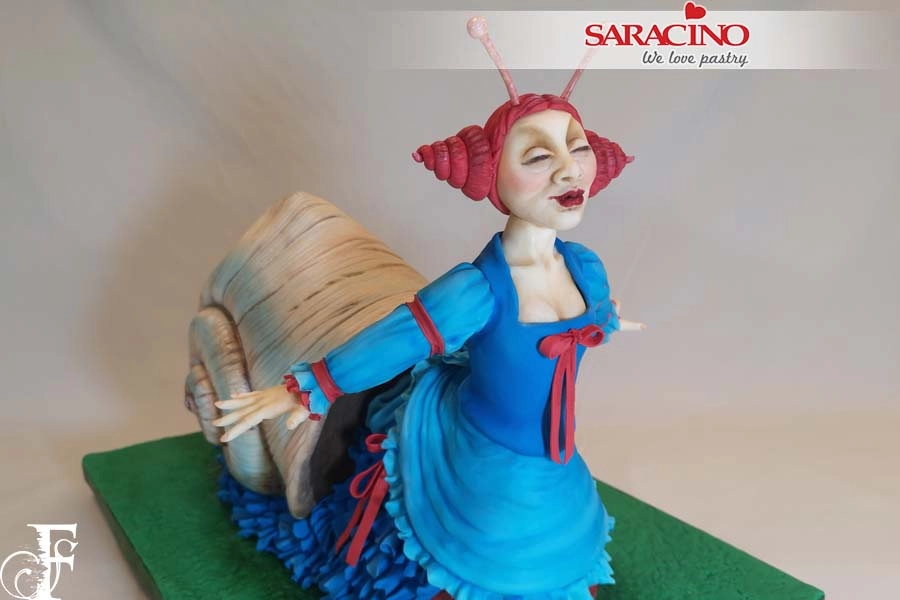
Your Snail Lady is ready!

CAKE BOARD PATTERNS

CAKE BOARD PATTERNS

Skill level: BEGINNERS

You will need:

GRASS BOARD

  • 375g Pasta Top coloured green

  • 75g Pasta top coloured grey

  • Saracino gel colour – yellow, green, blue, black

  • Saracino powder colour – green, white, brown

PAVING

  • 375g Pasta Top coloured grey

  • 20g Pasta Top coloured green

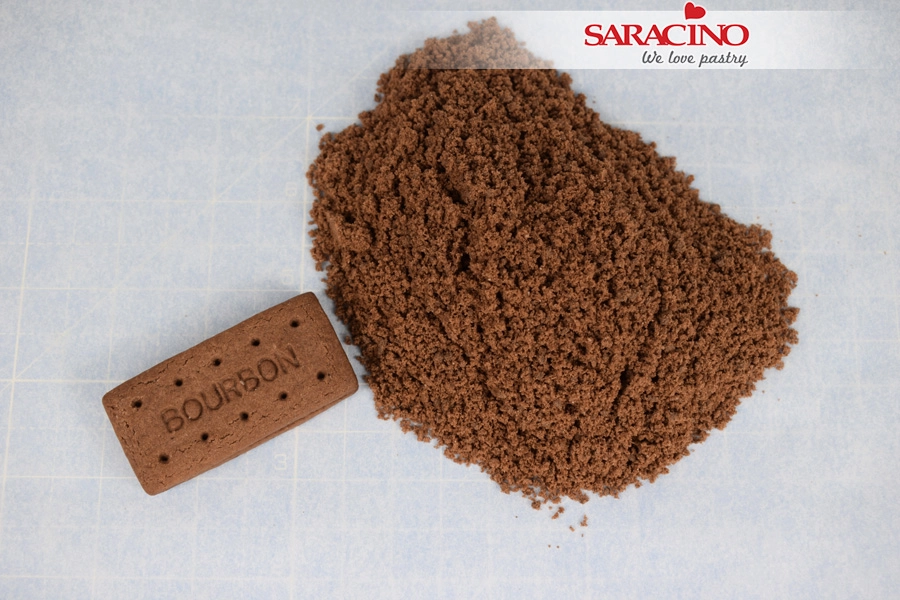
  • 3 Bourbon biscuits

  • Saracino gel colours – black, green, yellow

  • Saracino powder colour – black, brown

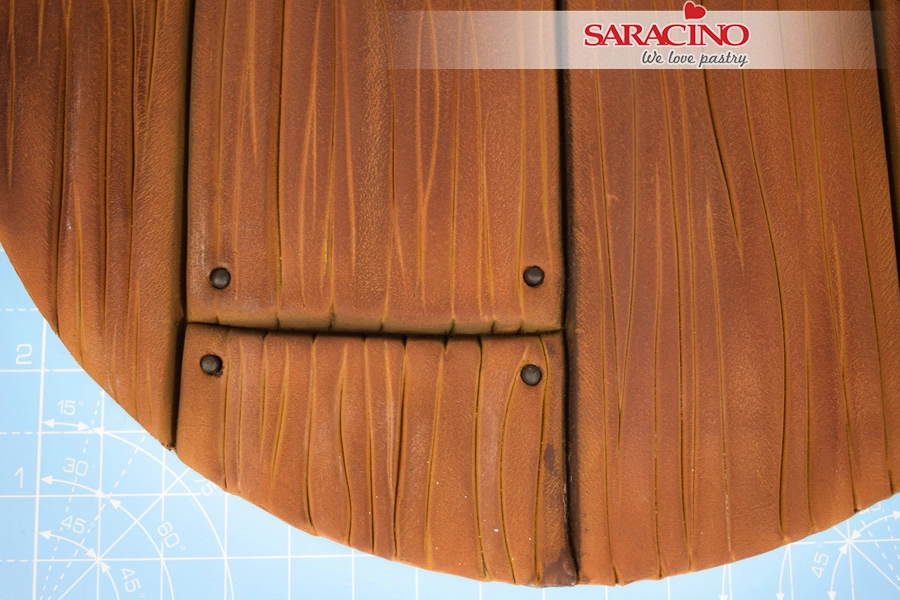
WOOD

  • 375g Pasta Top coloured grey

  • 5g Black Pasta Model

  • Saracino powder colour – black, brown


Equipment

  • 1 sheet Saracino wafer paper 0.27g
  • 10 inch round cake drum
  • Knife
  • Cocktail sticks
  • Dresden tool
  • Flat angled paintbrushes for dusting.
  • Small paintbrush for gluing
  • Cool boiled water / edible glue
  • Balling tool (Cerart K500)
  • Star piping tip
  • Grease proof paper
  • Scissors
  • Rolling pin
  • Sieve
  • Spoon


Step 1

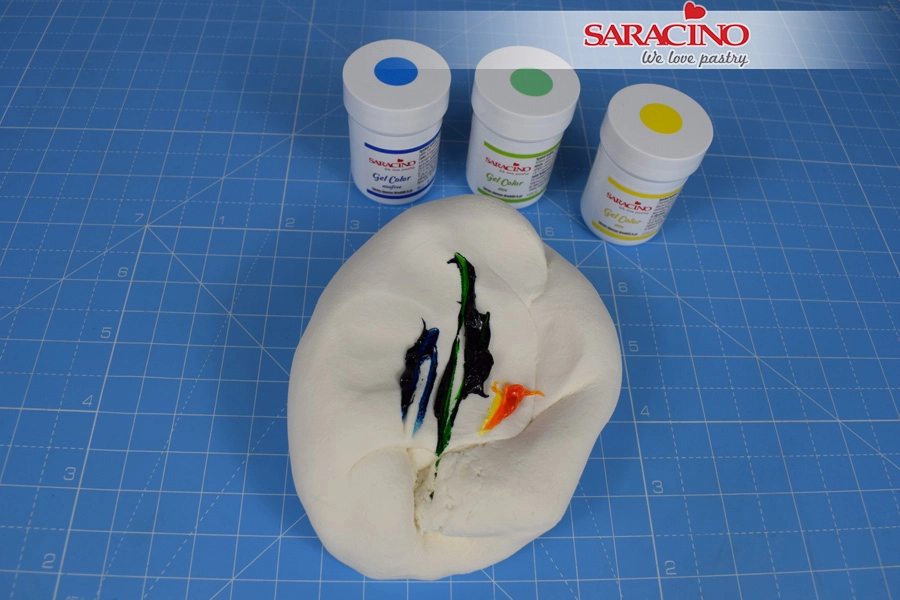
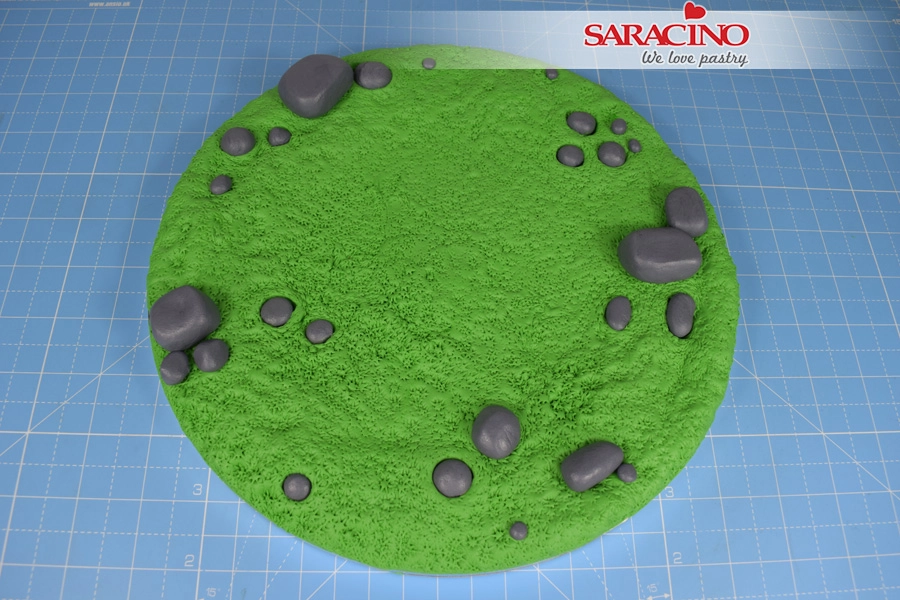
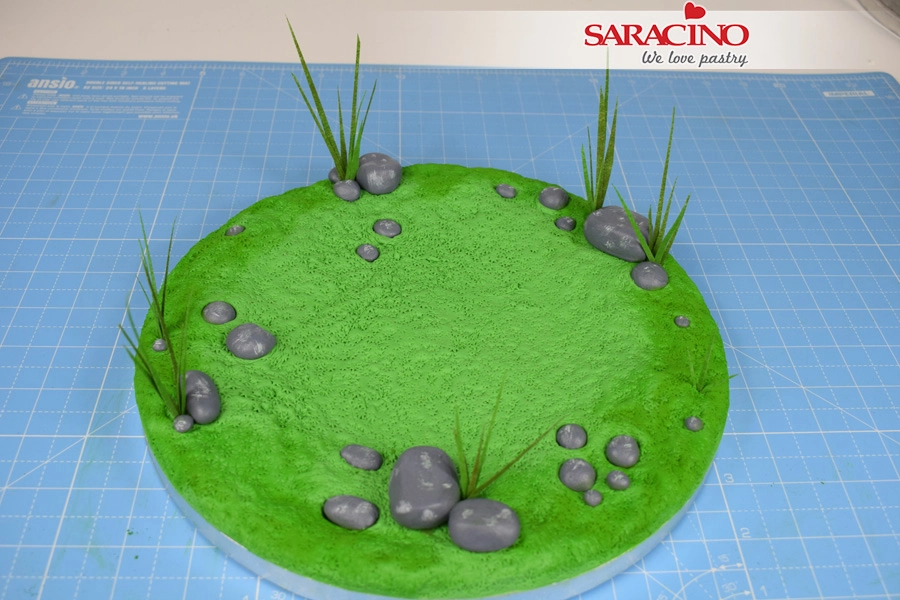
GRASS: Using a small amount of yellow, green and blue gel, colour 375g of pasta top green. Knead the paste until the colour is fairly uniform throughout.

Step 2

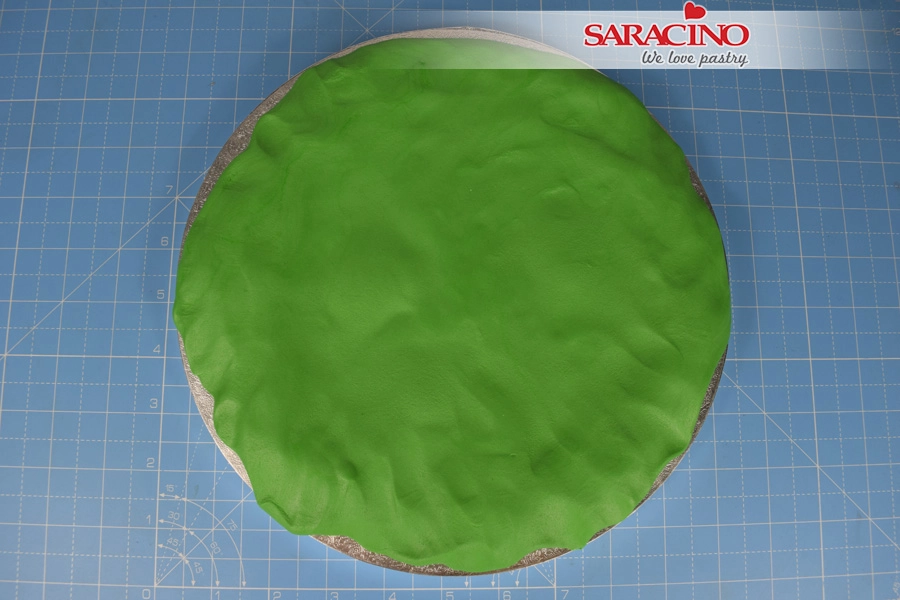
Place the paste on the centre of the board. Using your fingers, stretch and push out the paste so that it is thicker around the edge of the board and fairly flat in the centre where your cake will sit. 

Step 3

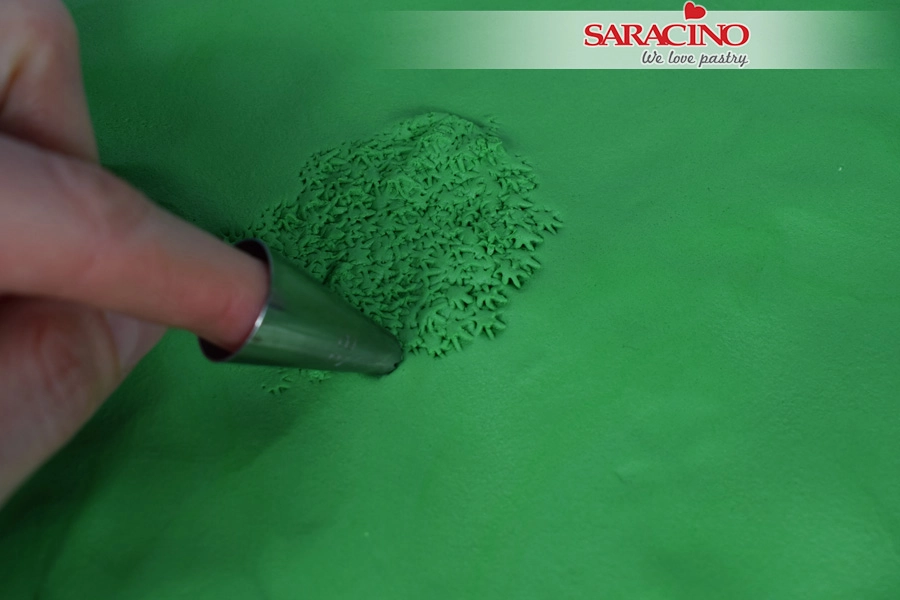
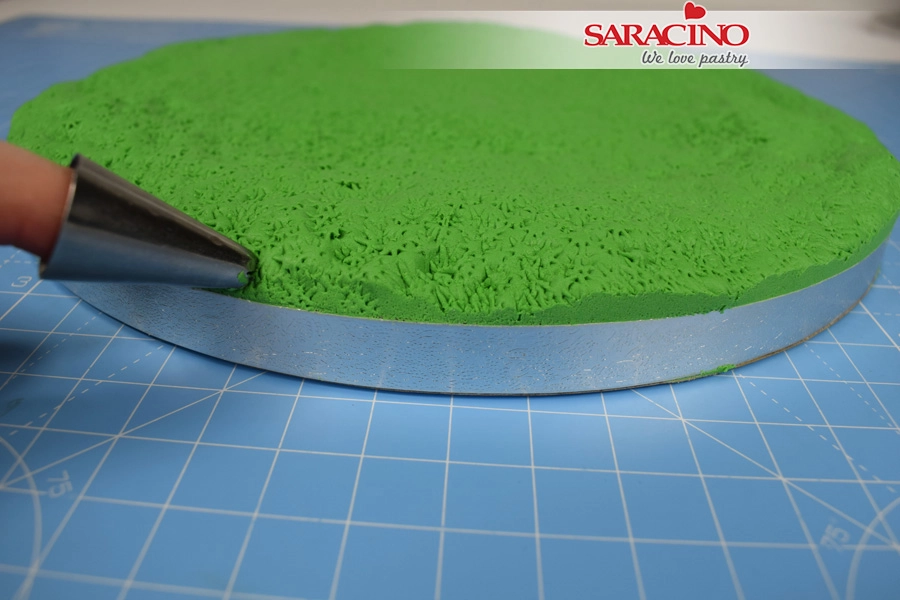
Take a star piping tip and gently begin to push into the paste repeatedly to texture the grass.

Step 4

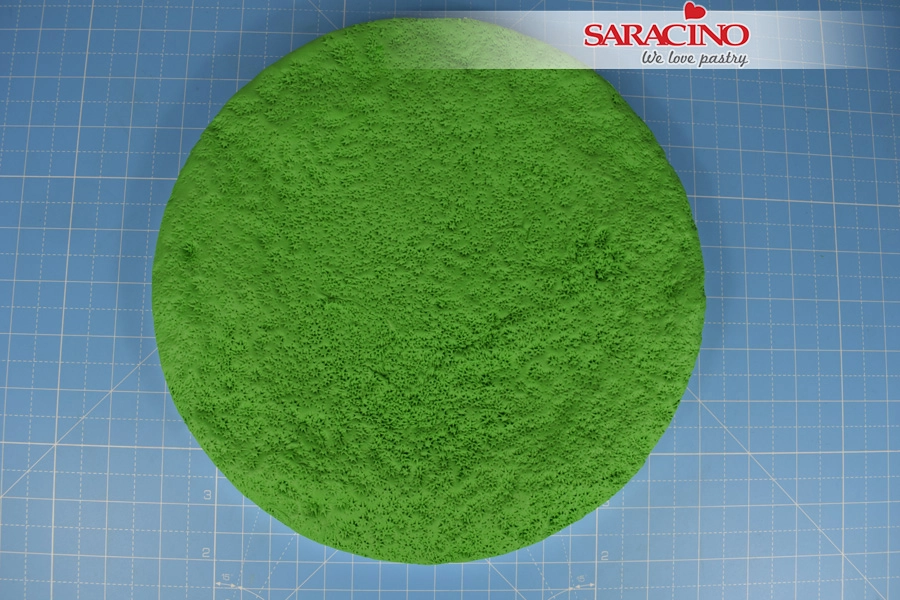
Continue until the whole board is covered. Trim the excess paste from around the edge with a sharp knife.

Step 5

Texture the cut edge with the piping tip.

Step 6

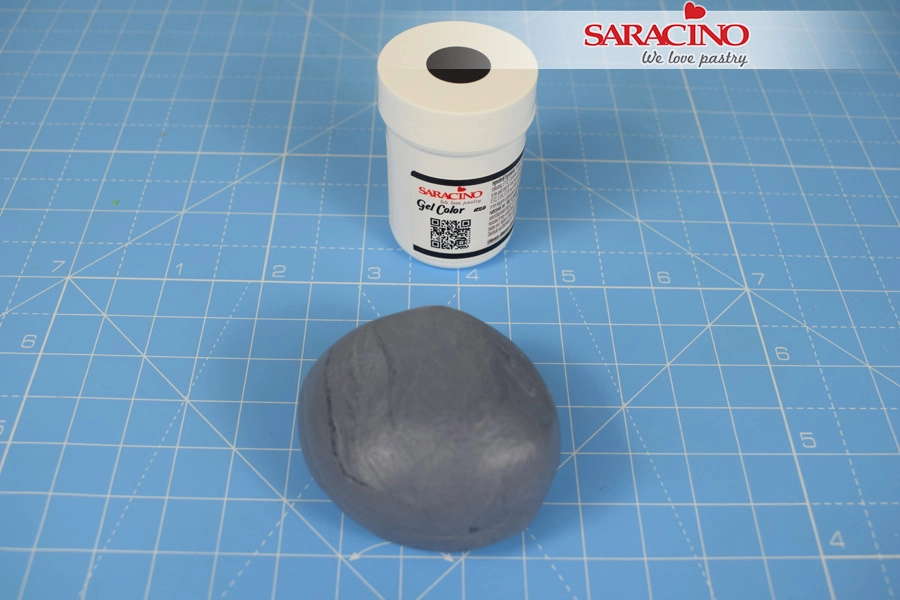
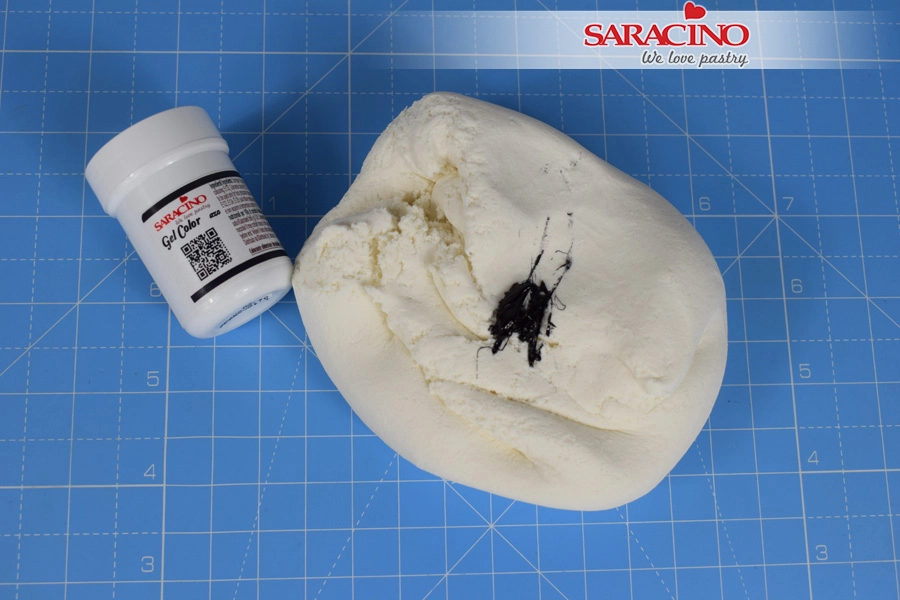
Colour 75g of pasta top with some black gel colour to create a dark grey.

Step 7

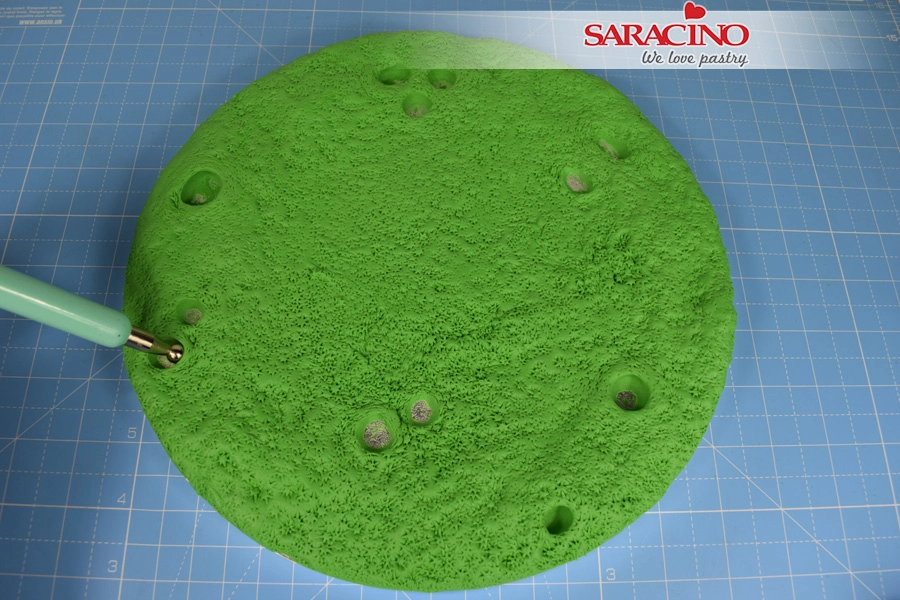
Use the end of the balling tool to create random holes in the paste around the edge of the board.

Step 8

Roll small balls of grey paste and with a small amount of water stick into the holes.
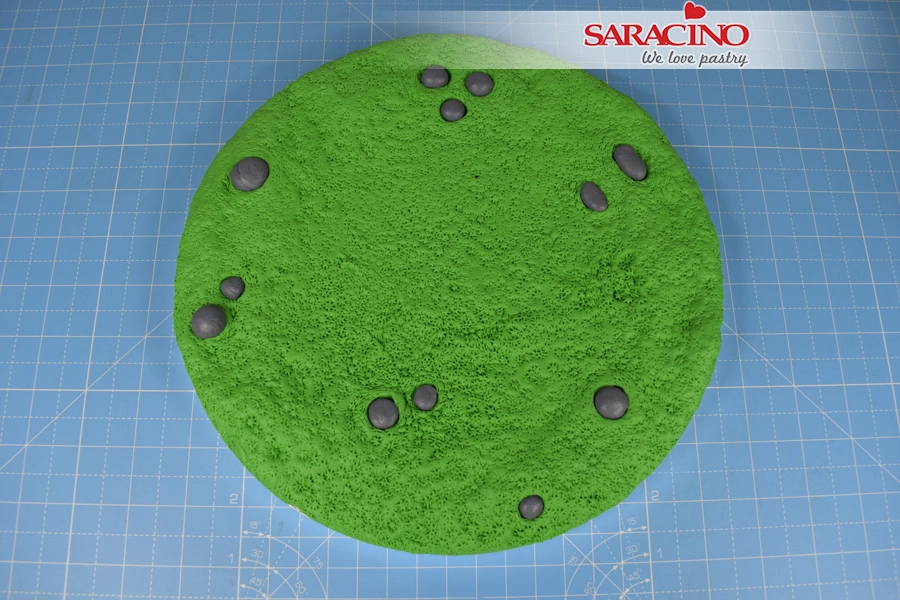
Step 9

Use the remaining grey paste to make stones to sit on the surface of the board. Group the larger ones together and dot tiny ones at random places.
Step 10

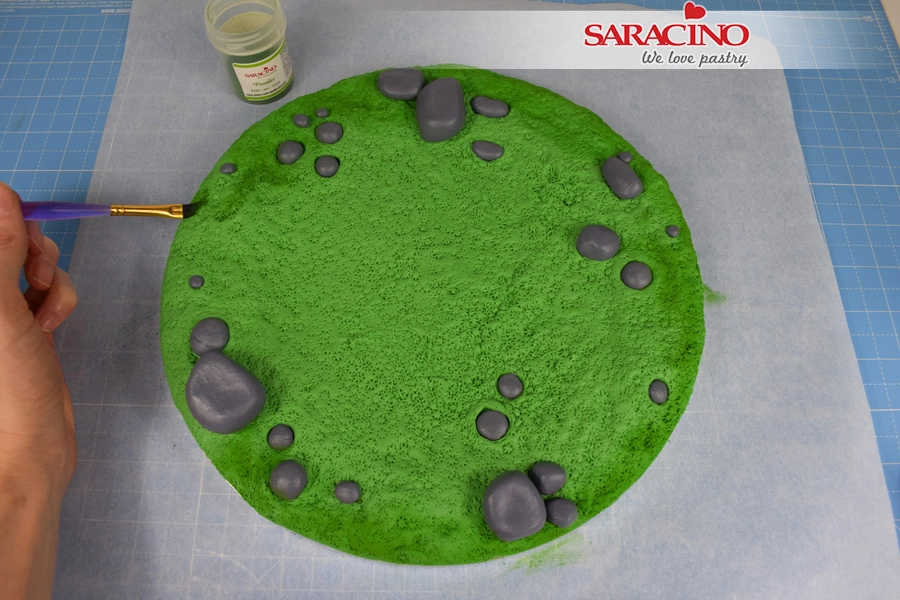
Using a flat angled paintbrush apply some green dust around the edge of the board.
Step 11

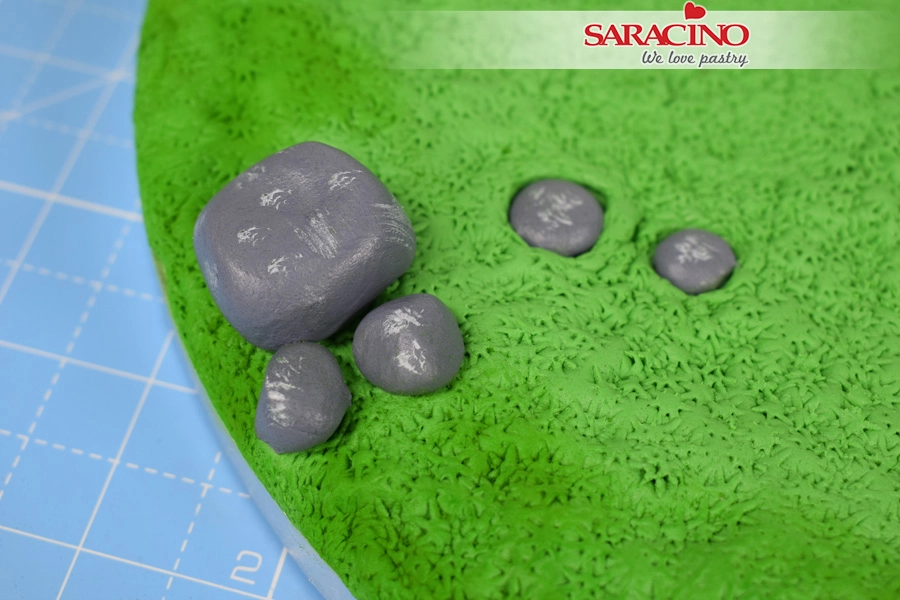
Mix a small amount of white dust with a couple of drops of water. Paint white flecks onto the surface of the stones.
Step 12

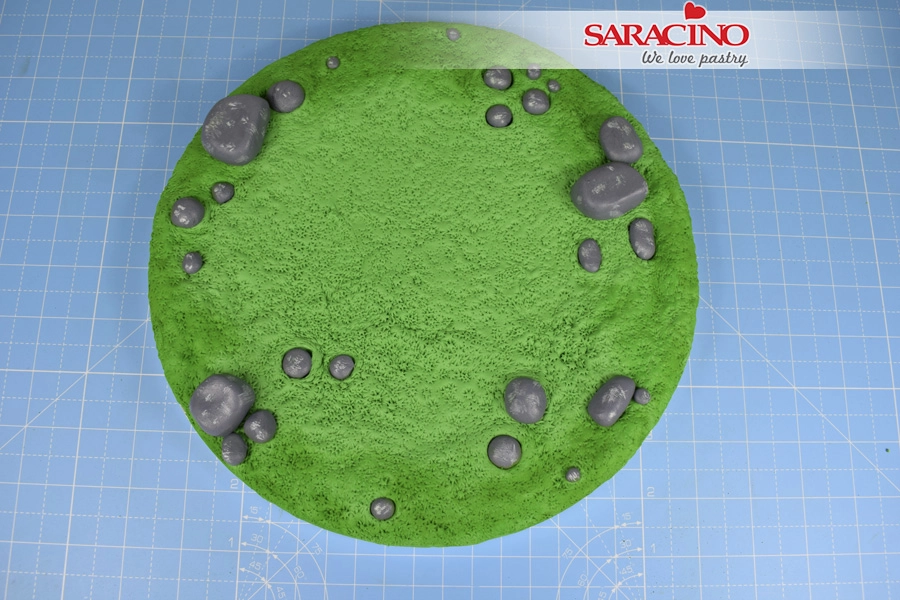
Continue until all the stones are painted.

Step 13

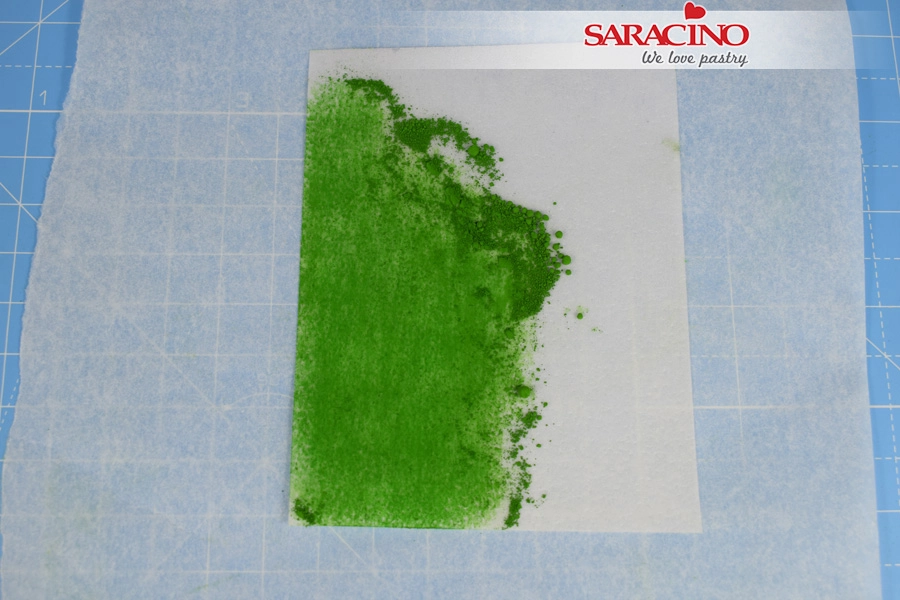
Lay a small square of wafer paper onto a piece of greaseproof paper. Use your finger to rub green dust into the surface of the paper. Turn the paper over and repeat on both sides.
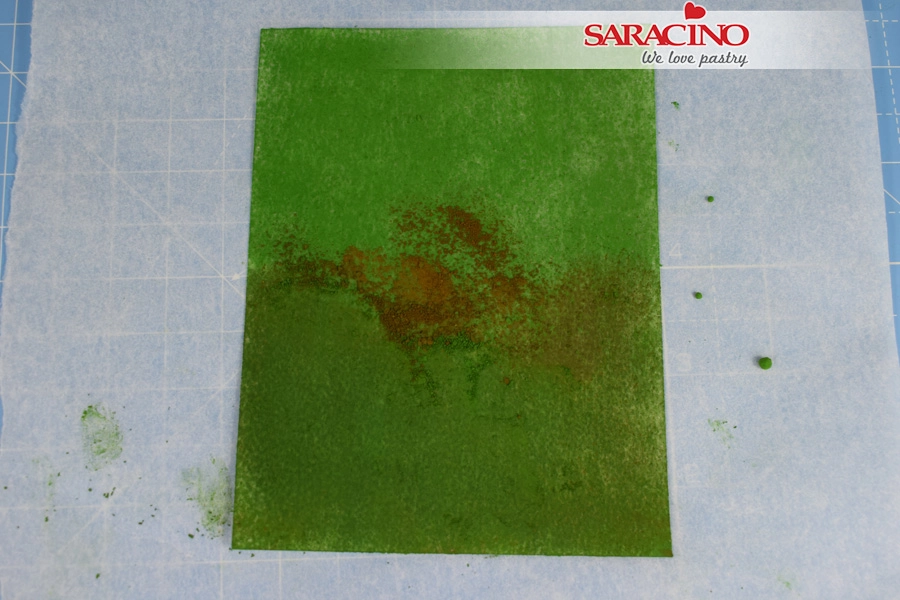
Step 14

Once the paper has been coloured green, take a small amount of brown dust and colour one side to create a darker shade of green.
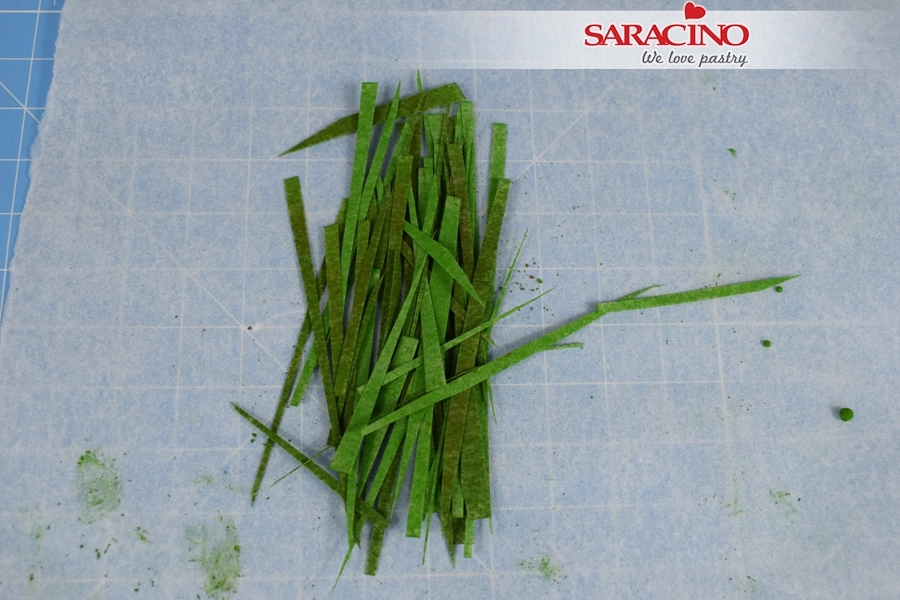
Step 15

Use a pair of scissors to snip the paper into blades of grass.

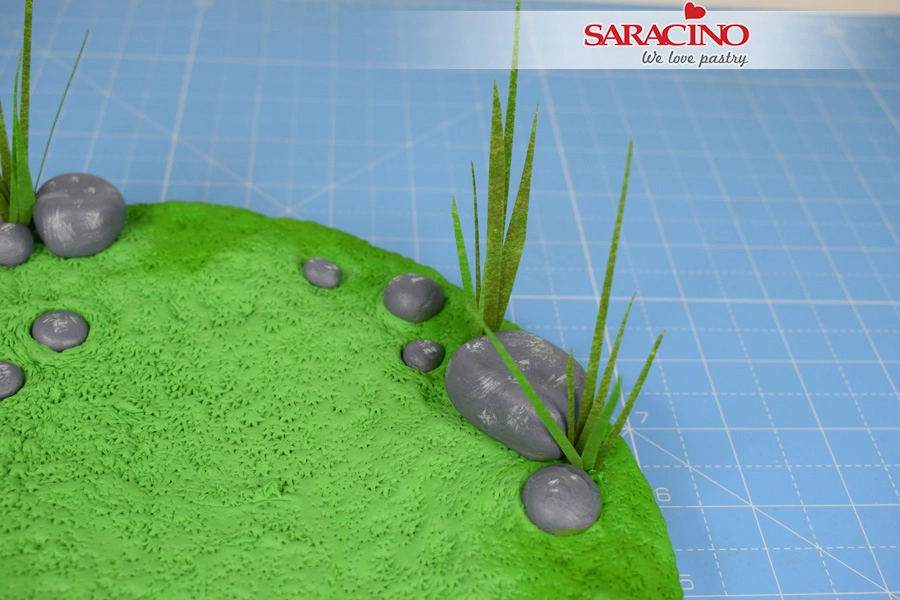
Step 16

Use the wide end of the Dresden tool to poke a hole in the paste either side of the large rocks. Apply a small amount of water to the hole. Bundle together small groups of grass and stick in the hole. Push the paste back together to hold the blades in place.

Step 17

Repeat at random places across the board until you’re happy.

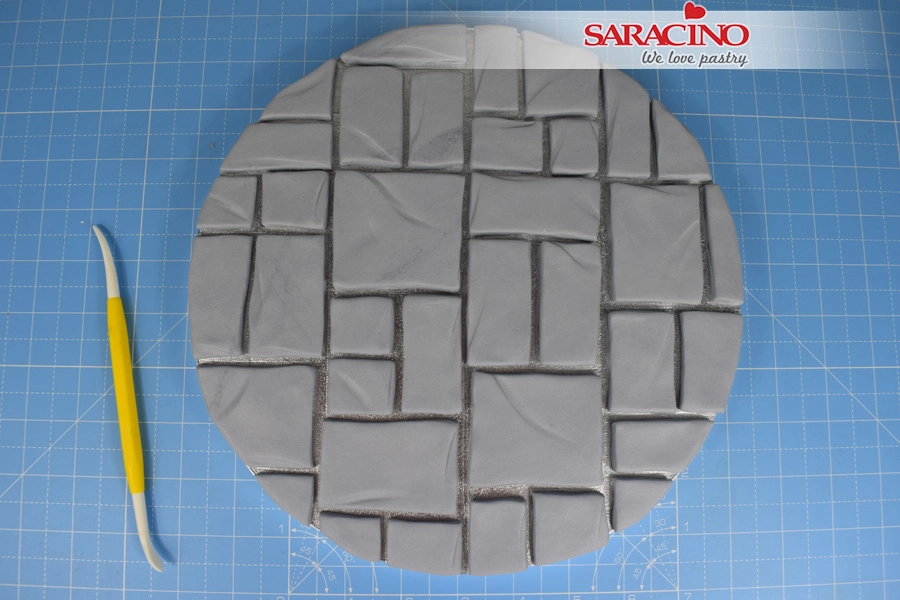
Step 1

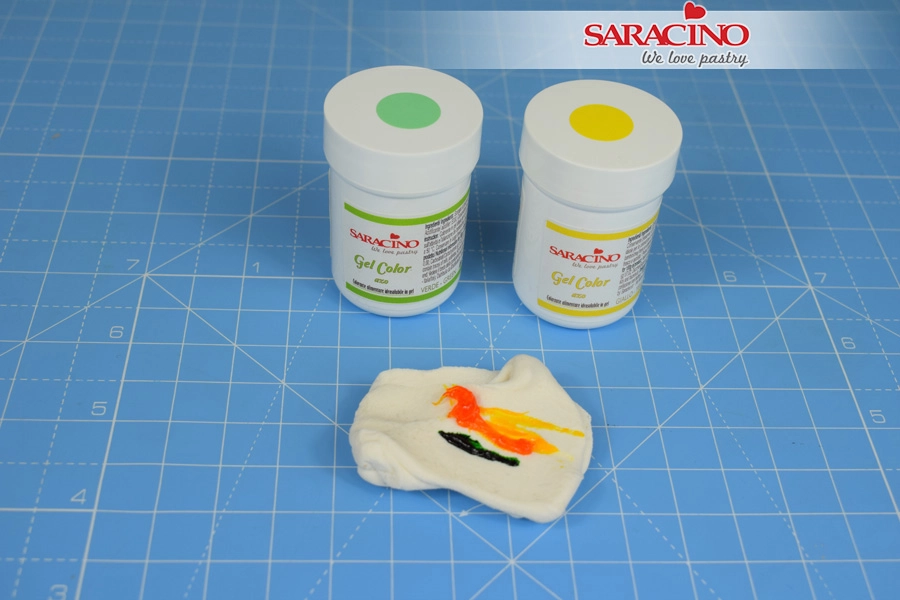
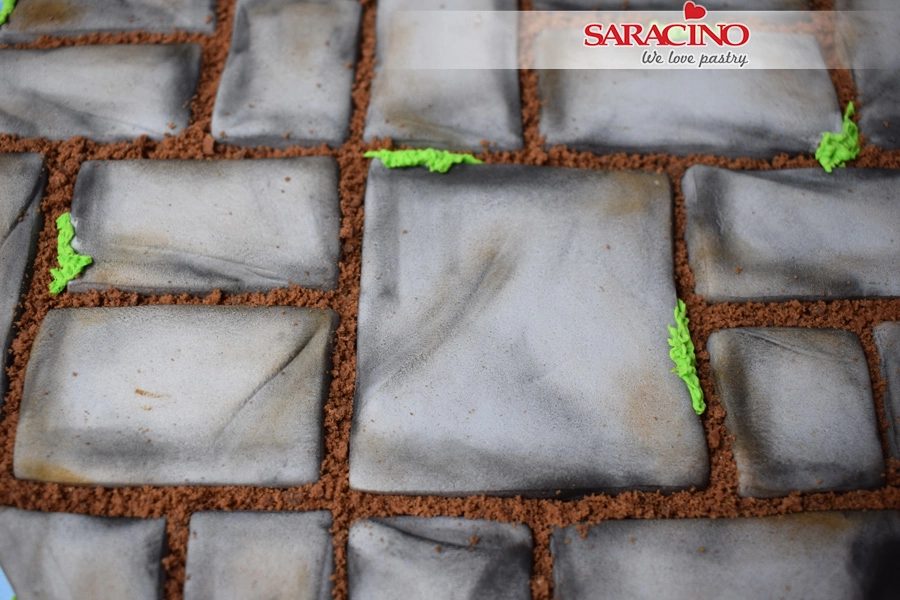
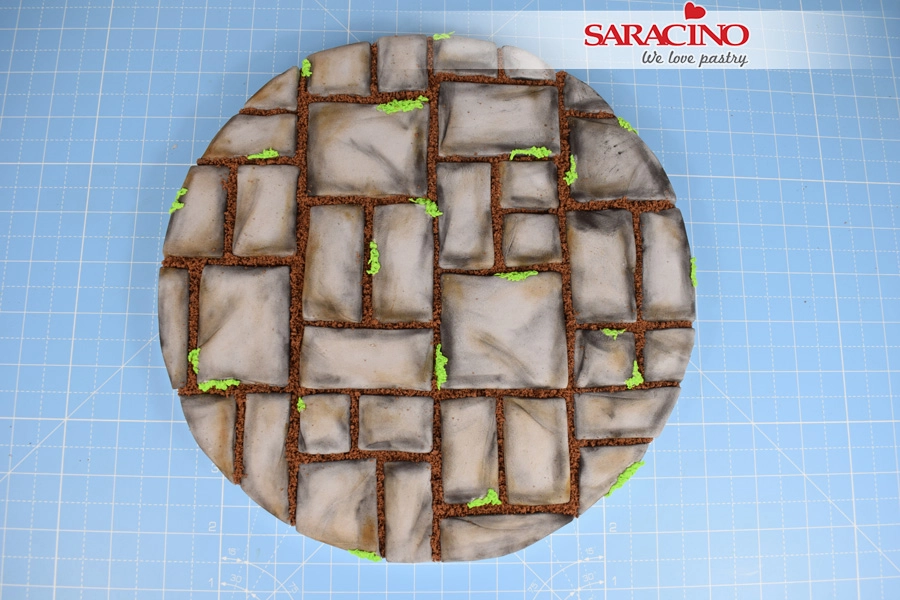
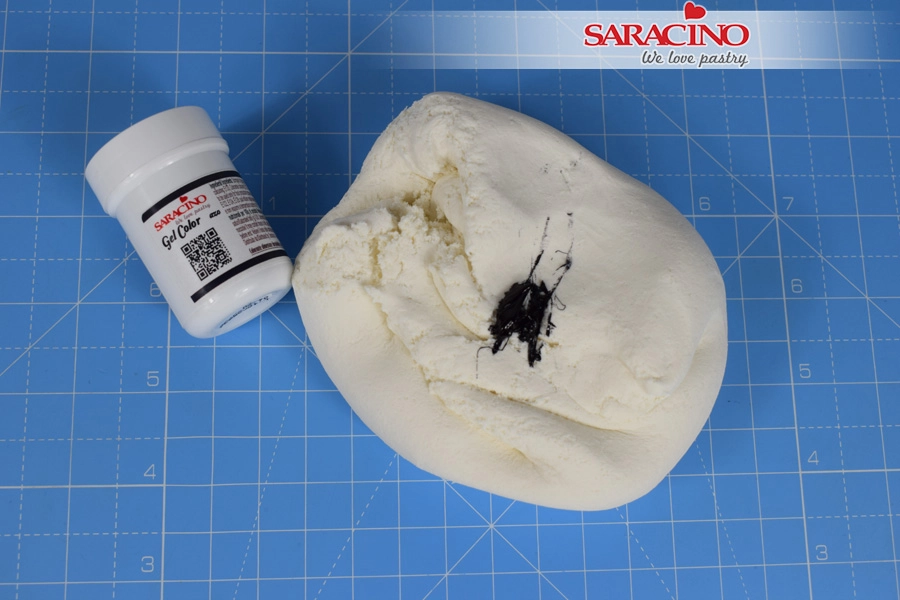
PAVING: Using a small amount of black gel, colour 375g of Pasta Top light grey. Knead the paste until the colour is fairly uniform throughout.

Step 2

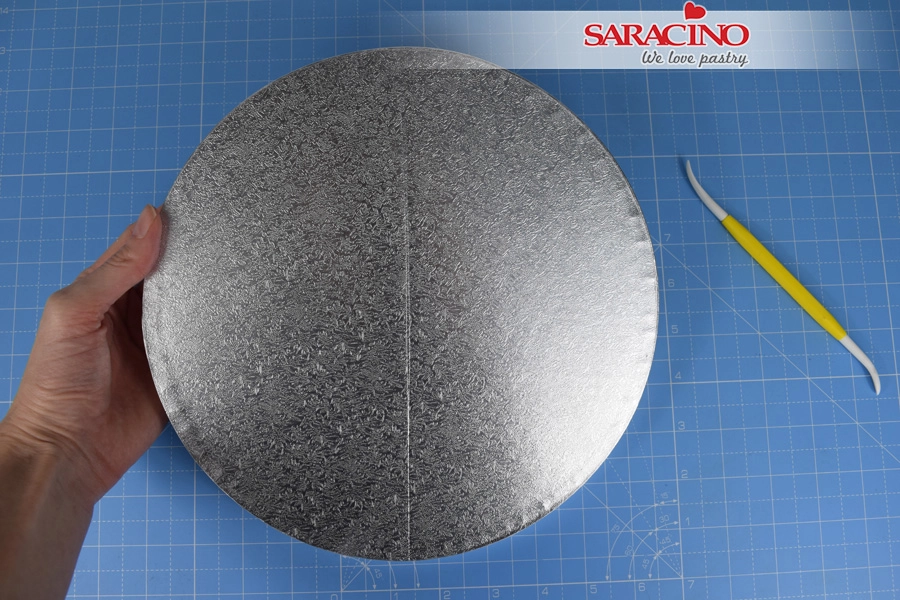
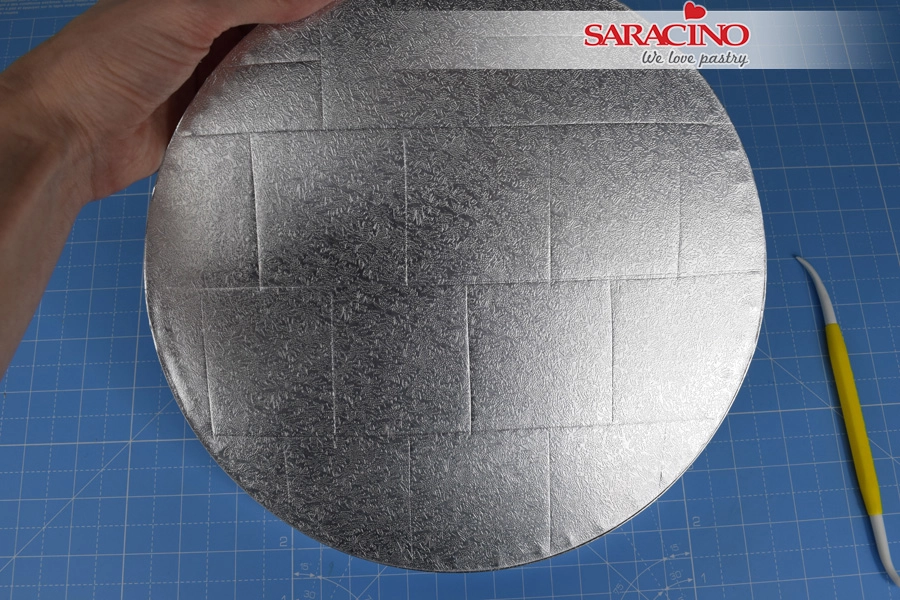
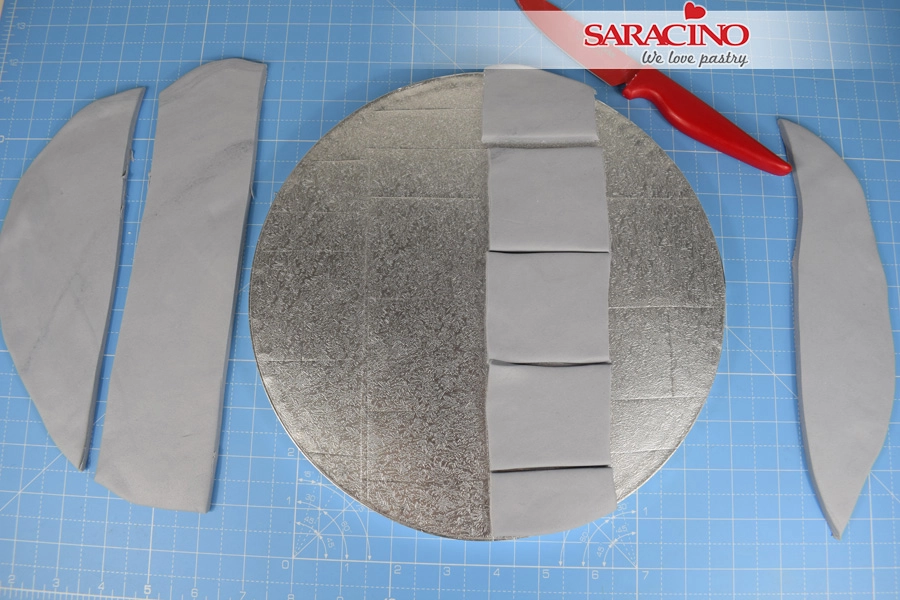
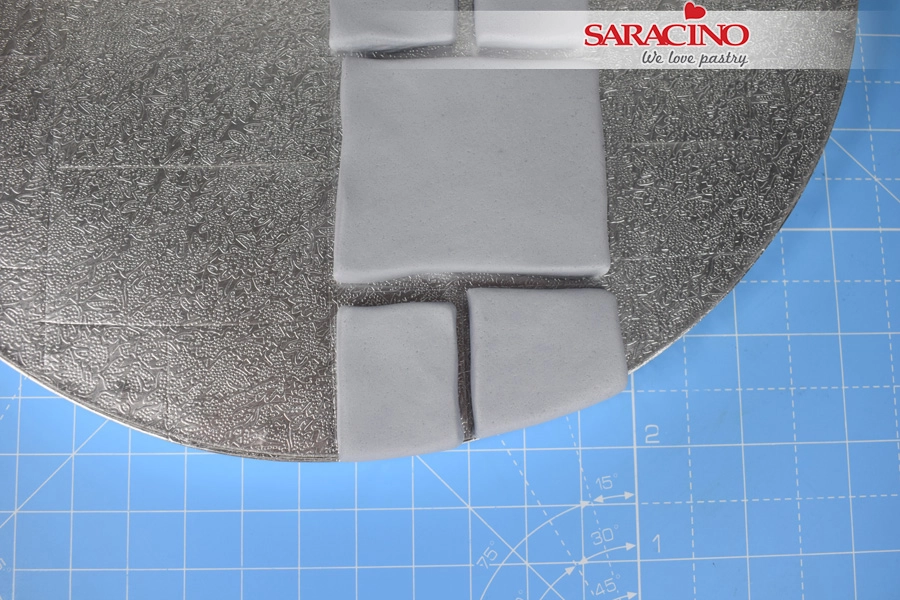
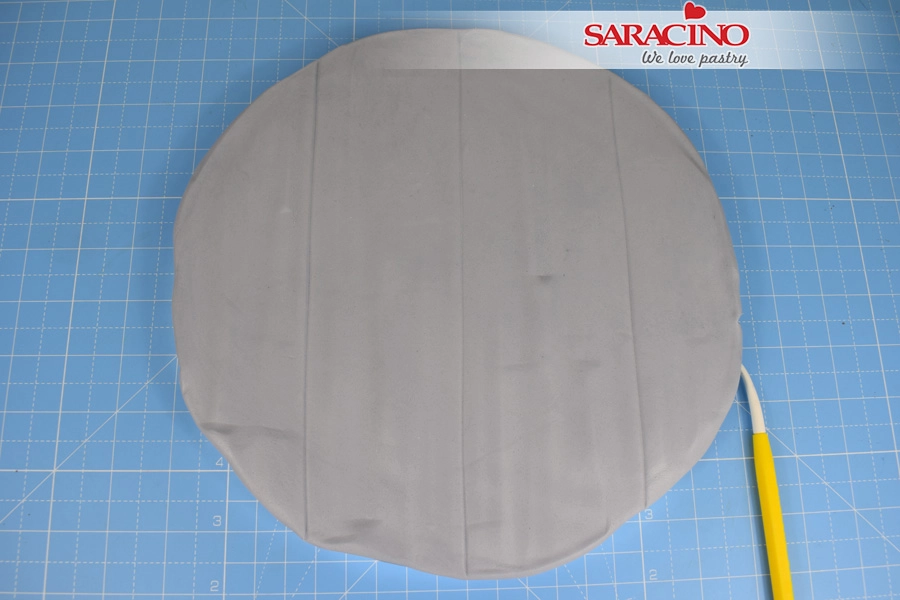
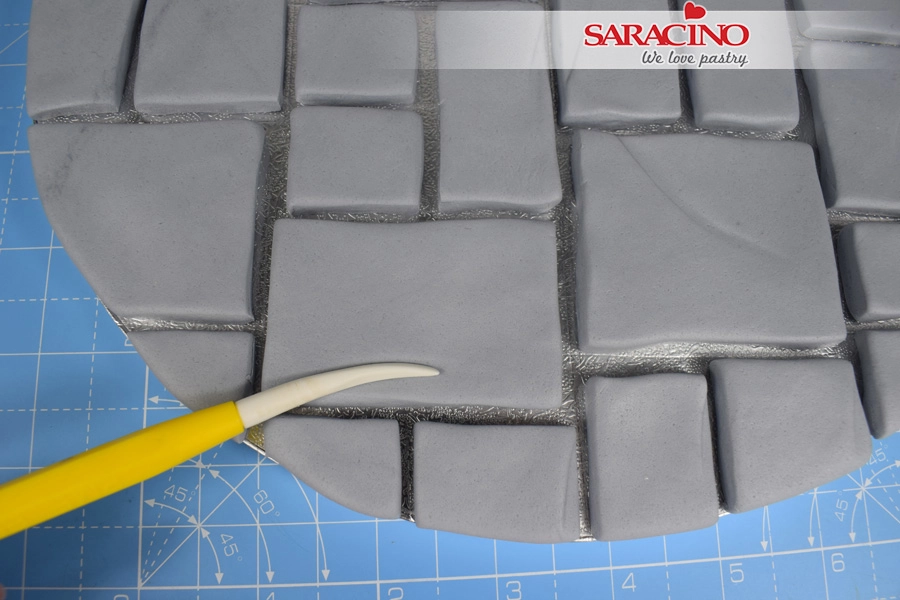
With the pointed end of the Dresden tool, gently score a line down the centre of the board.


Step 3

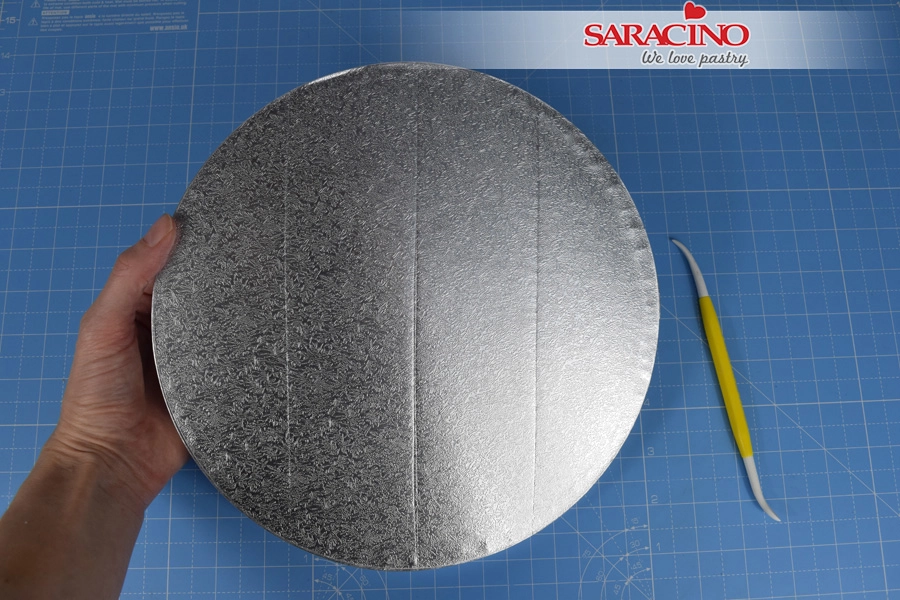
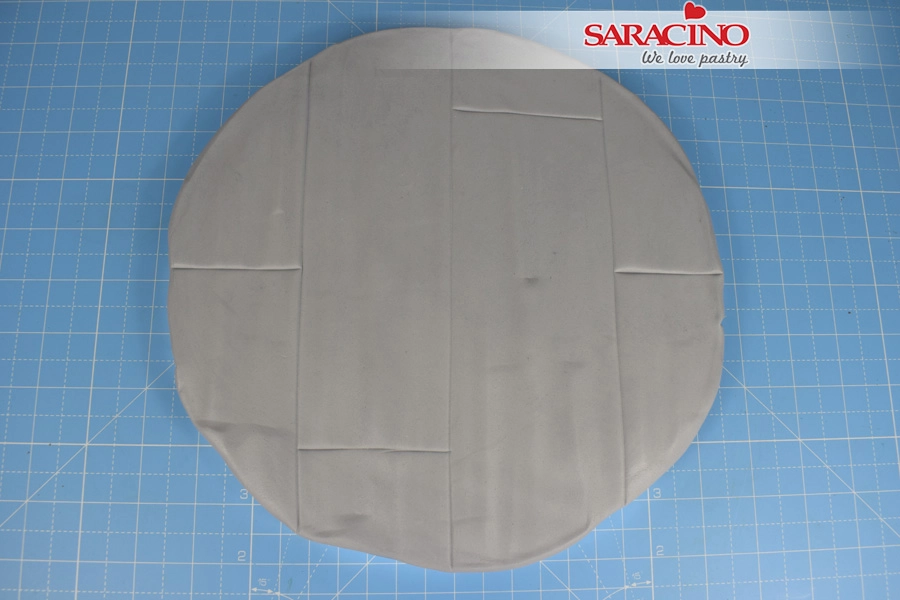
Score two more lines dividing the board roughly into quarters.

Step 4

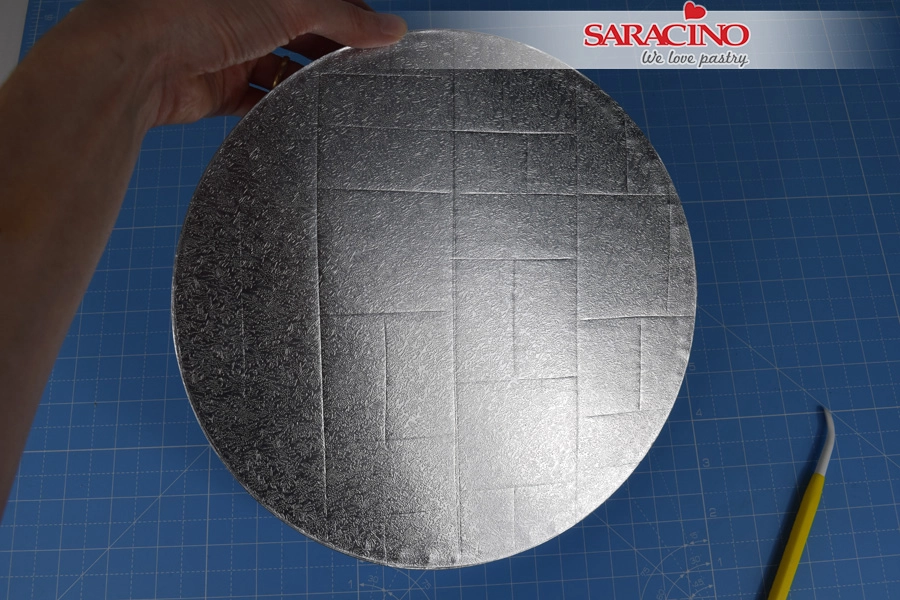
Score lines dividing the strips into rough squares, staggered in a brick pattern.

Step 5

Score lines dividing random squares into smaller rectangles and squares. Don’t worry if they’re not perfect, you can change any as you go along later on.

Step 6

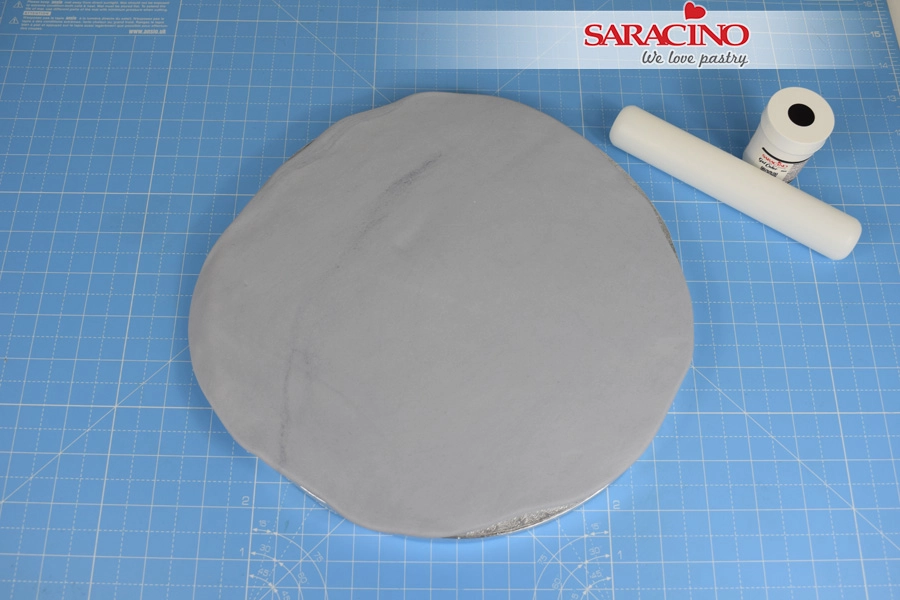
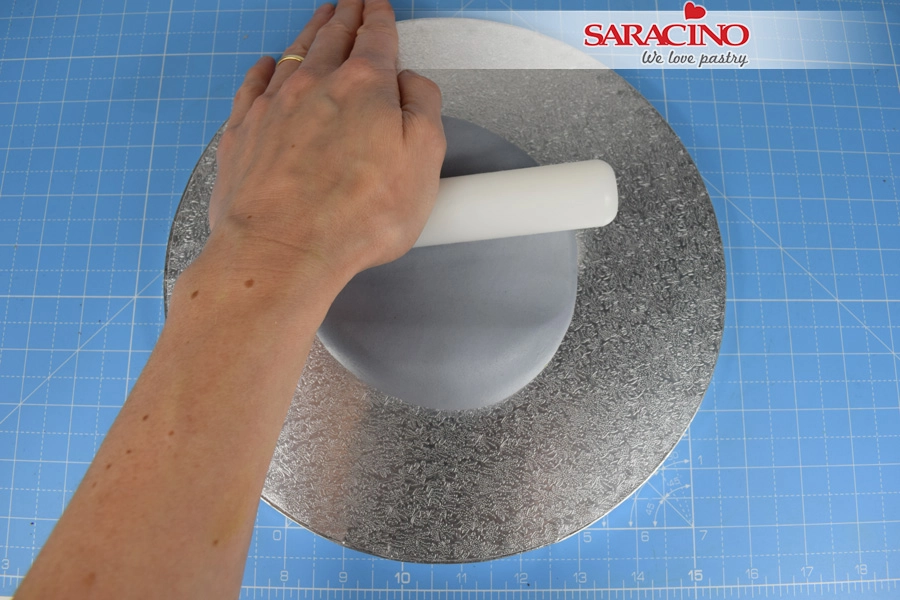
Roll out the paste to a thickness of around 5mm until it roughly covers the board.

Step 7

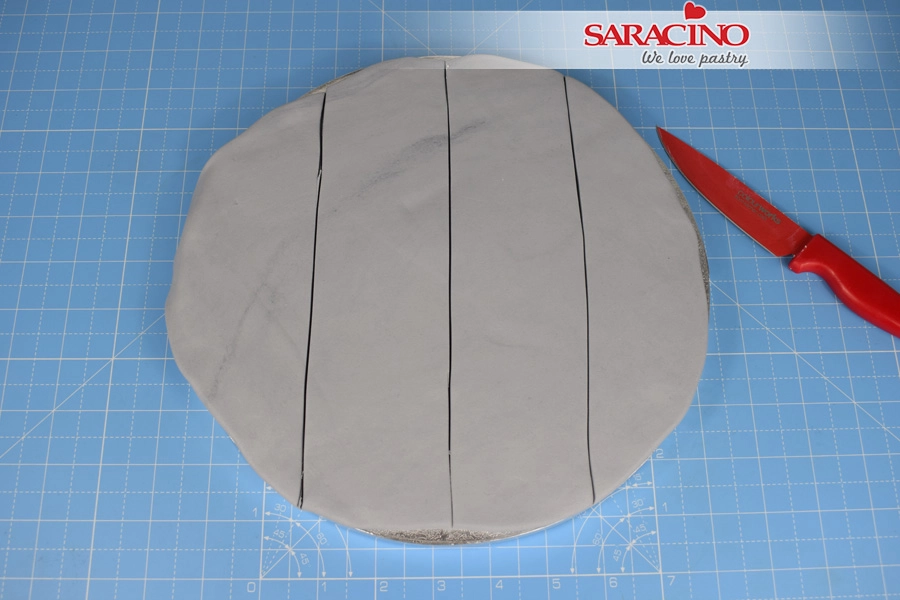
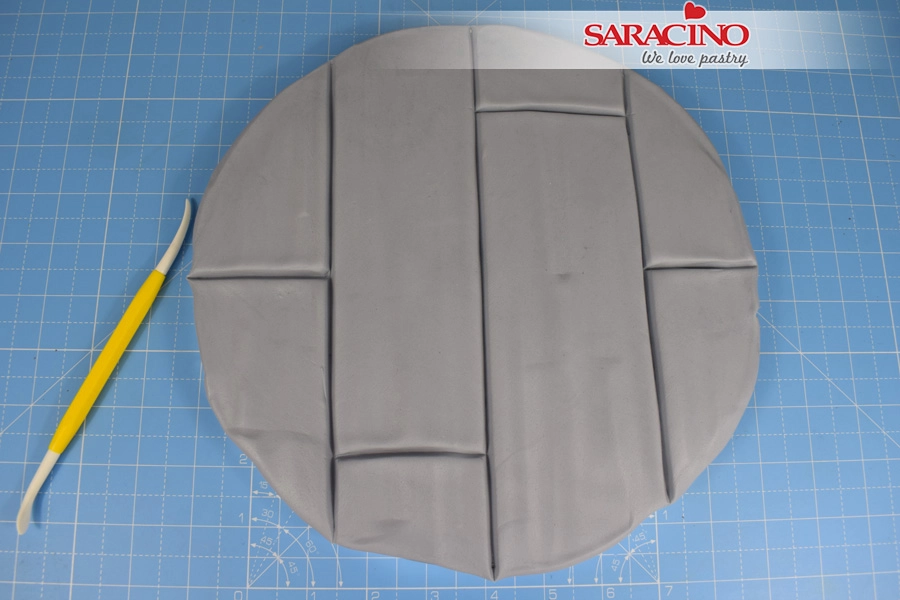
Lay the paste on the board. Using a sharp knife and the quarter lines you scored first as a guide, cut the paste.

Step 8

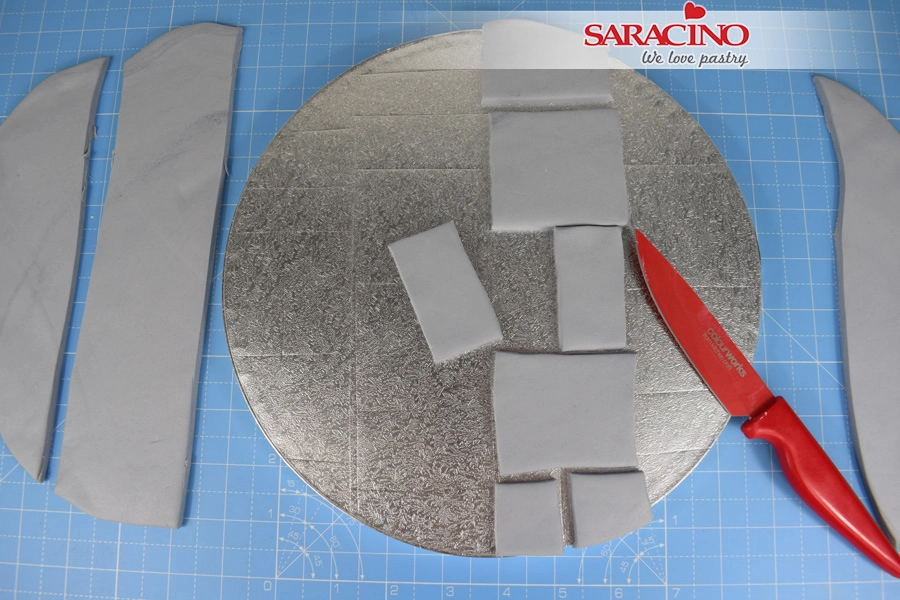
Take one strip and use the square lines you marked in step 4 to cut the paste again.

Step 9

Use the marks you scored in step 5 to divide each of the squares.

Step 10

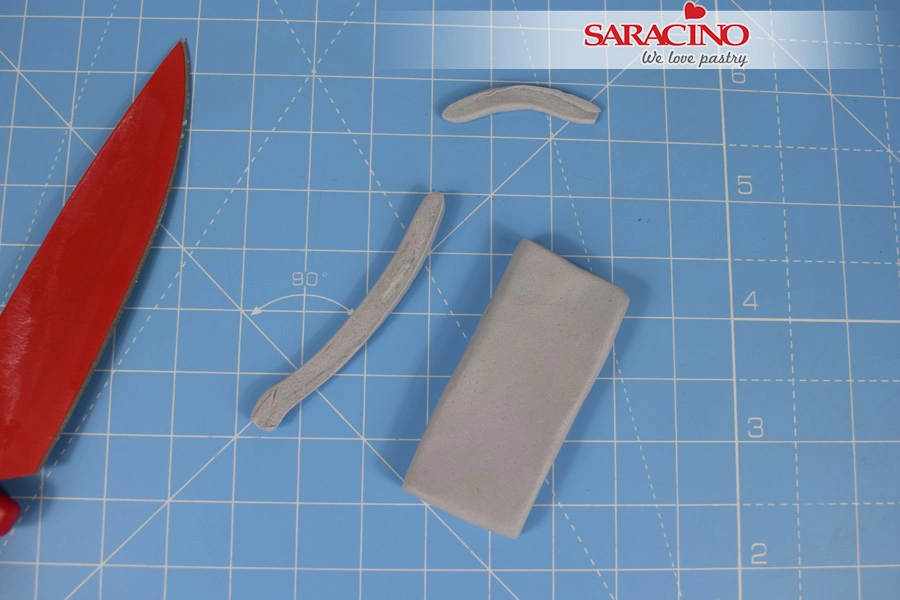
Trim a tiny amount from each of the smaller pieces so that they fit within the marked area on the board.

Step 11

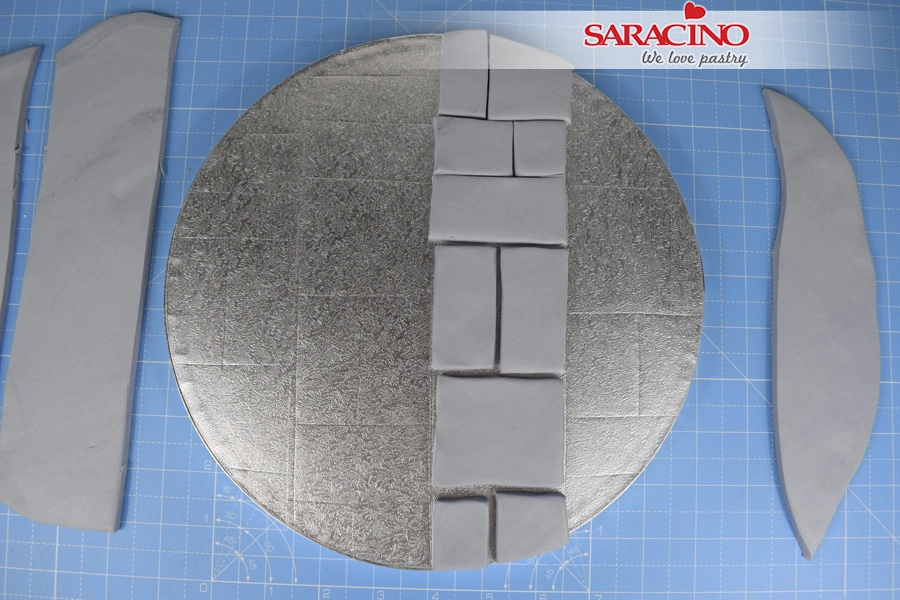
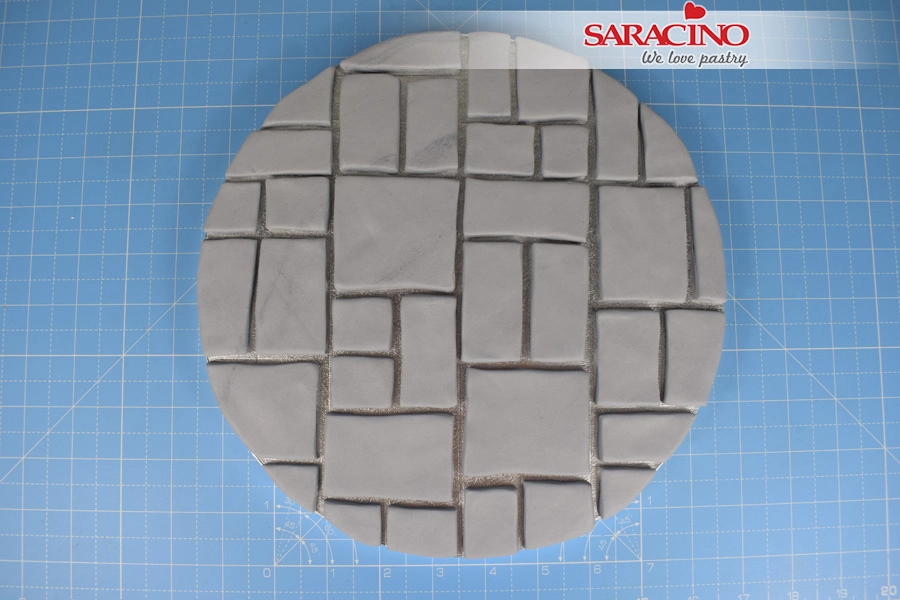
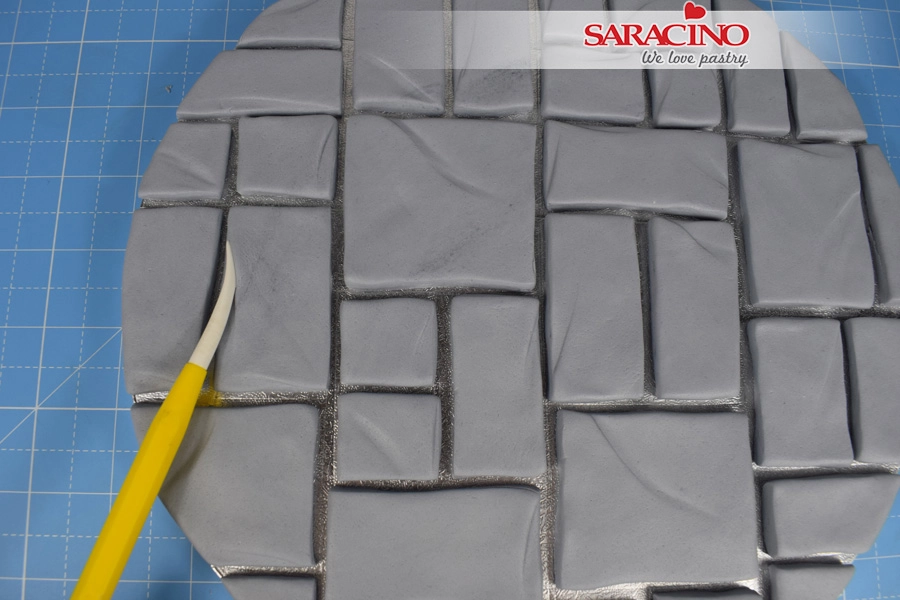
Continue to trim each piece smaller and lay on the board in position. Smooth the cut edges of the pieces with your finger tips then pinch to define.

Step 12

On outer pieces only trim the inside edges so that the paste and the board line up and there are no gaps.

Step 13

Repeat this process for each strip until the whole board is covered. You can change the pattern within any square as you go along if you choose to.

Step 14

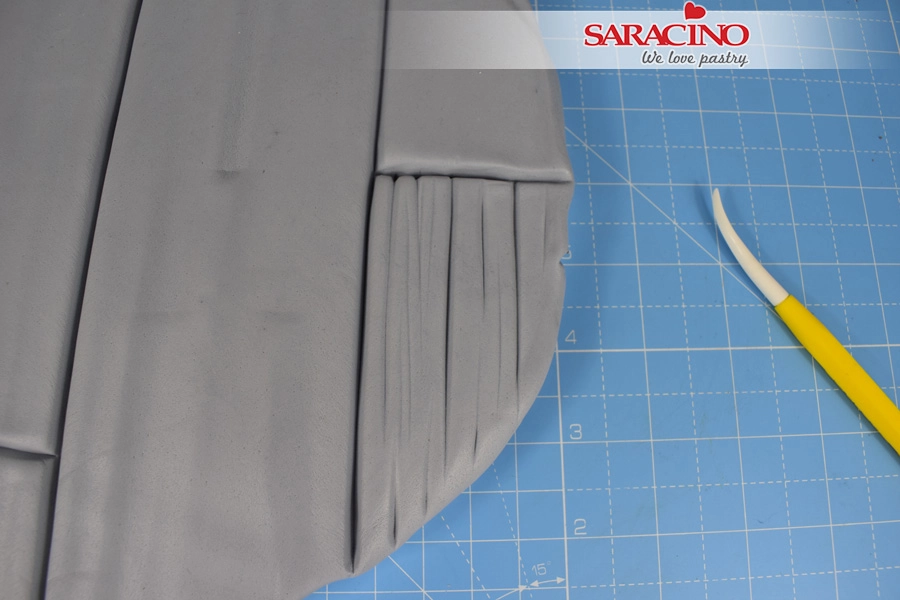
Turn the Dresden tool on its side and use the veining end to mark lines across the tops of random tiles.

Step 15

Mark lines down the edges of tiles also.

Step 16

Once all tiles are marked lift them one at a time and stick into place with water / edible glue. Be careful not to get any water on the edges of the tiles or you’ll have to wait for it to dry before continuing.

Step 17

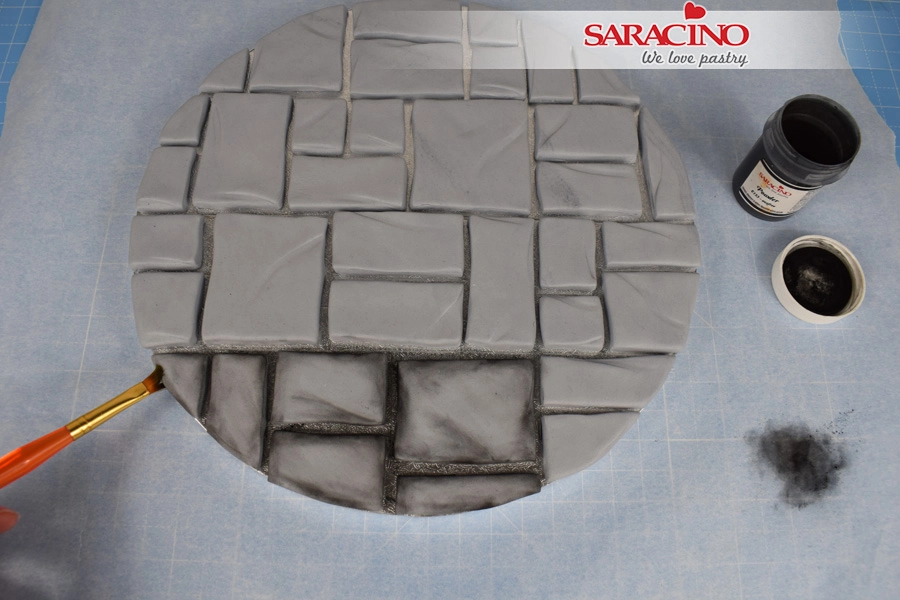
Take a flat angled paintbrush and apply a small amount of black dust to the edges of each tile

Step 18

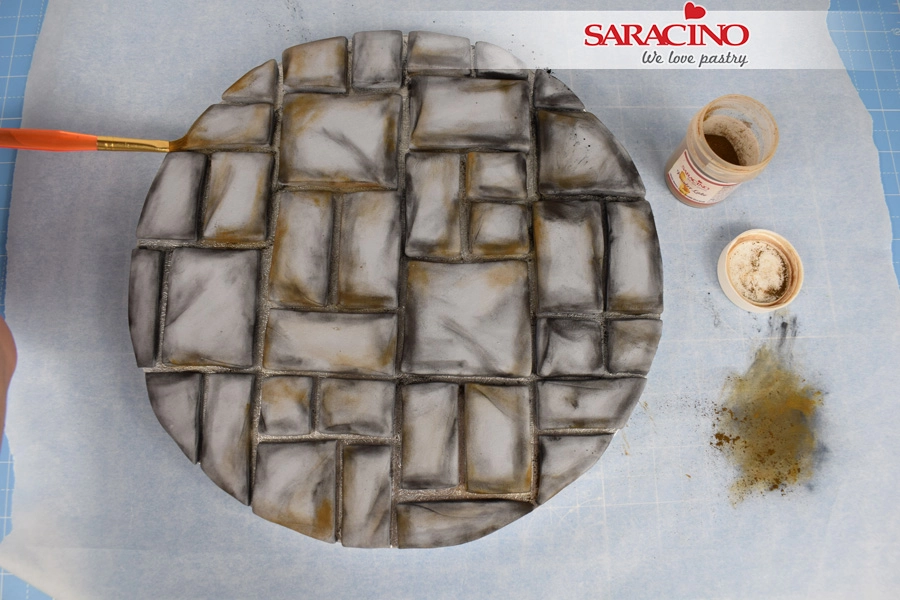
Once all tiles are dusted with black, repeat the process with brown dust.

Step 19

Crush 3 Bourbon biscuits.

Step 20

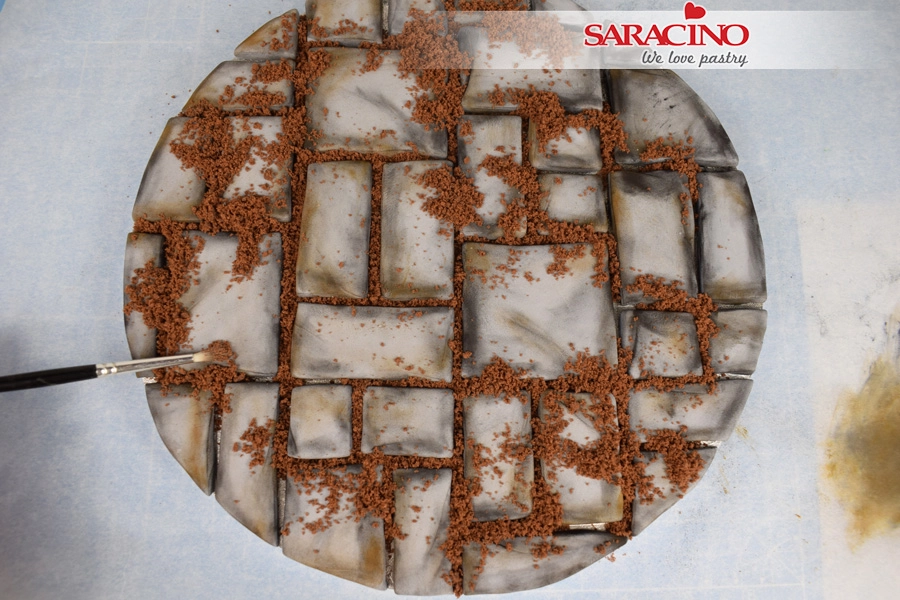
Spoon the biscuit crumbs into small piles on the board.

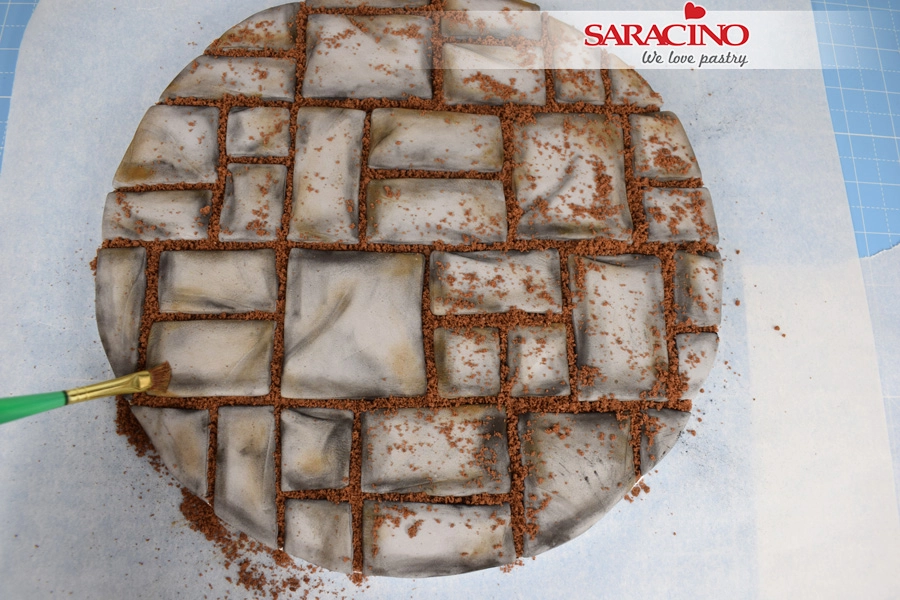
Step 21

Working from the centre of the board outwards, use a paintbrush to push the crumbs into the cracks.

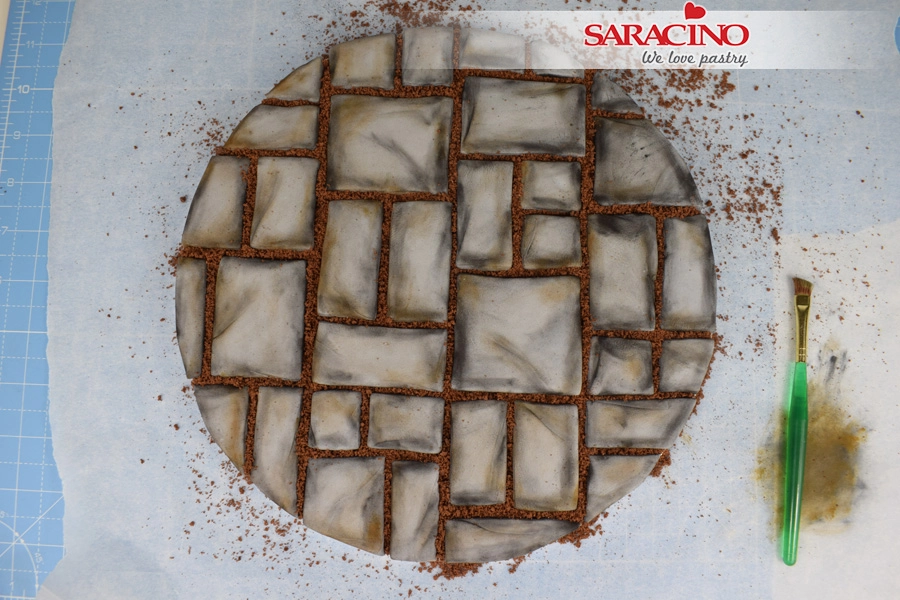
Step 22

Keep going until all the gaps are filled, brush any excess crumbs onto the paper.

Step 23

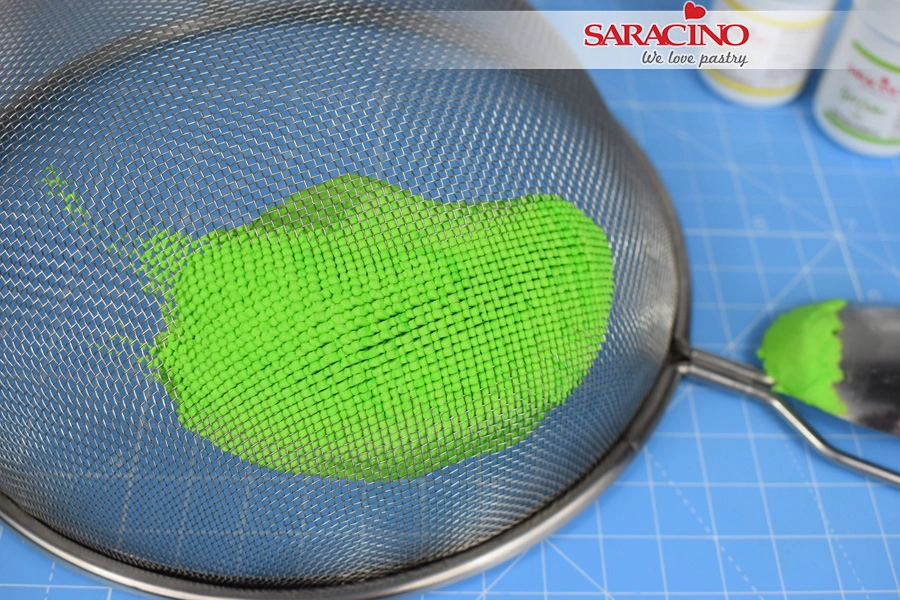
Colour 20g of pasta top with a small amount of yellow and green gel colour, to achieve a bright green.

Step 24

Push the paste through a sieve using the back of a spoon.

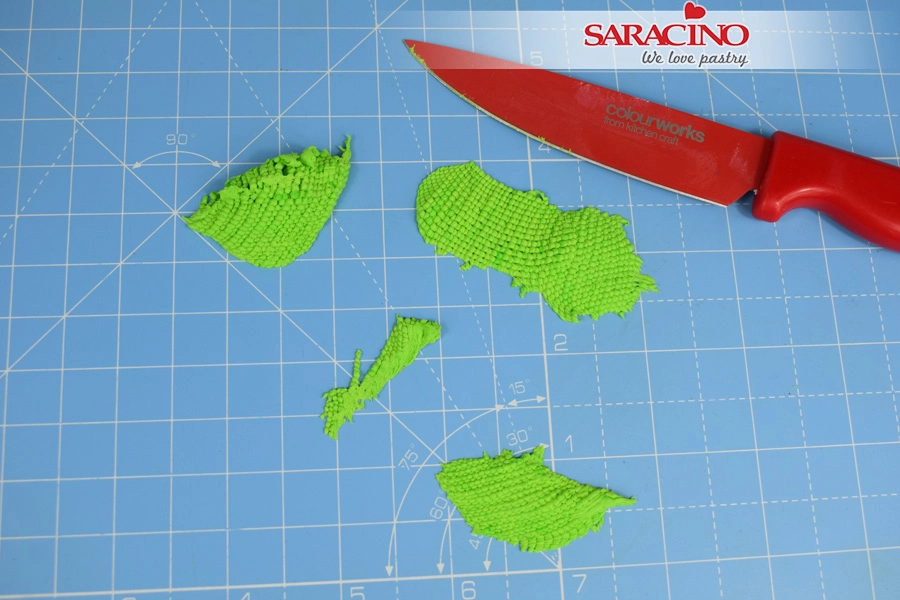
Step 25

Carefully use a sharp knife to slice off the paste.

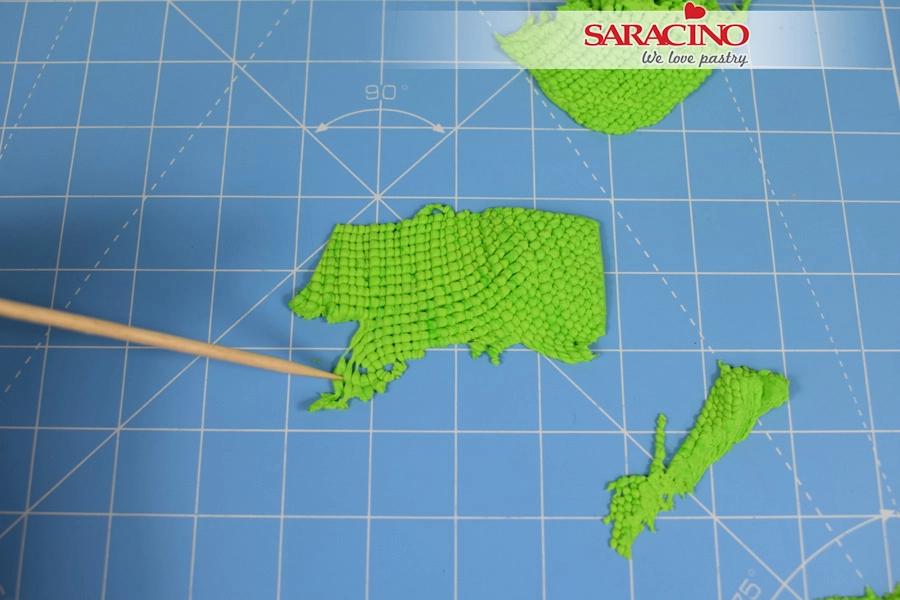
Step 26

Use a cocktail stick to pull small amounts of paste off.

Step 27

Randomly stick small amounts of the green paste to the edges of tiles.

Step 28

Continue across the board until you’re happy, and your board is now ready for your cake.

Step 1

WOOD: Using a small amount of black gel colour 375g of pasta top light grey. Knead the paste until the colour is fairly uniform throughout.

Step 2

Place the paste on the centre of the board and begin to  roll out using a small rolling pin.

Step 3

Keep rolling out the paste until the whole board is covered

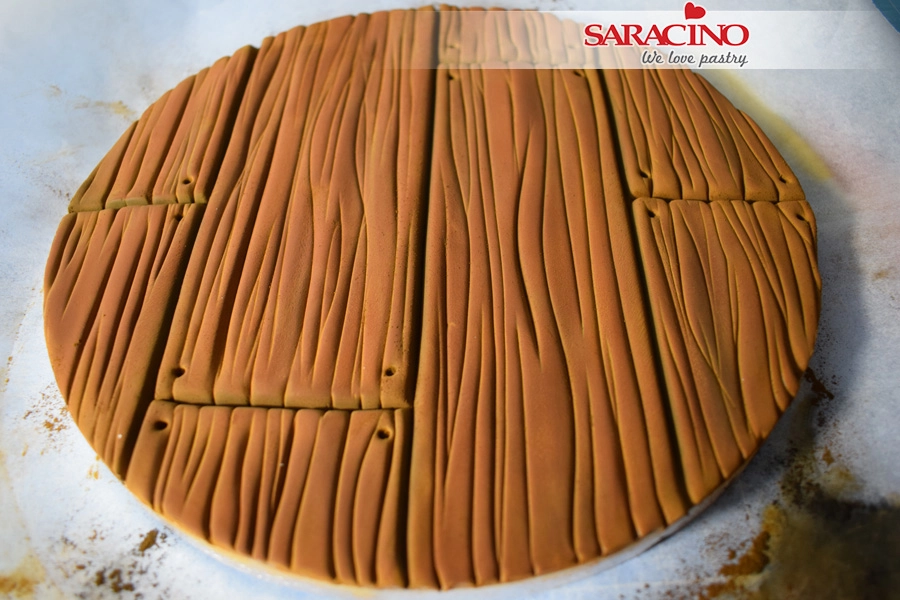
Step 4

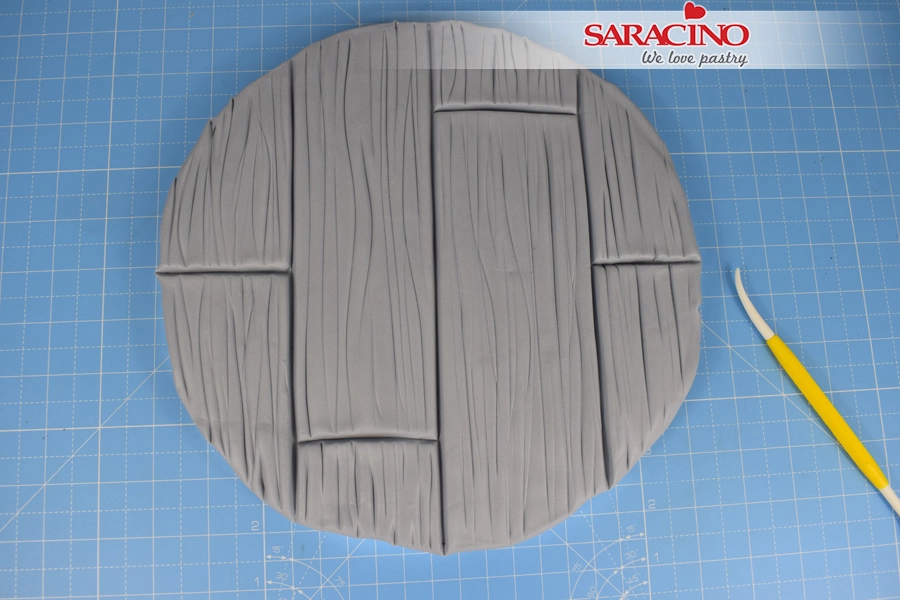
Press the rolling pin into the paste to create grooves and ridges. Keep the lines you mark in the same direction.

Step 5

Continue to mark the paste across the whole board.

Step 6

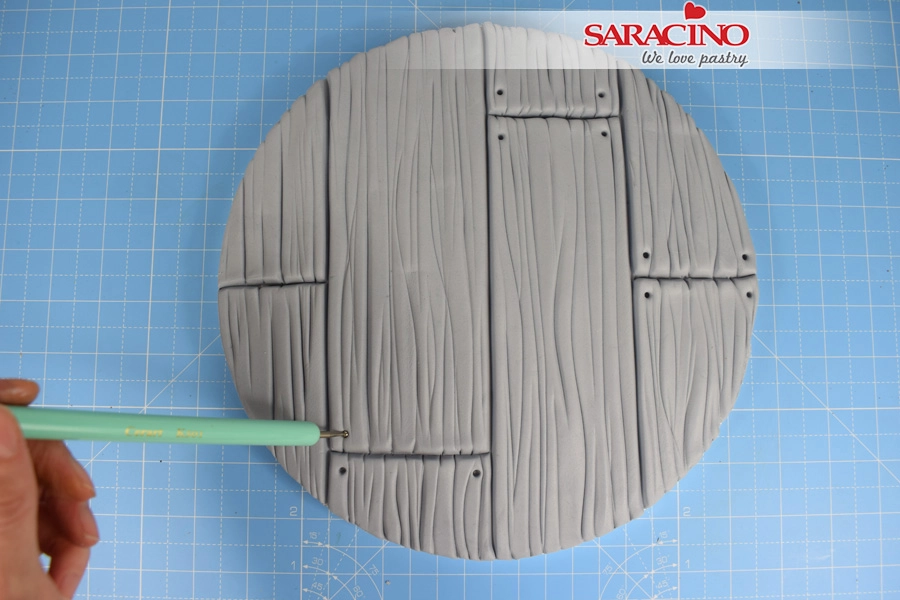
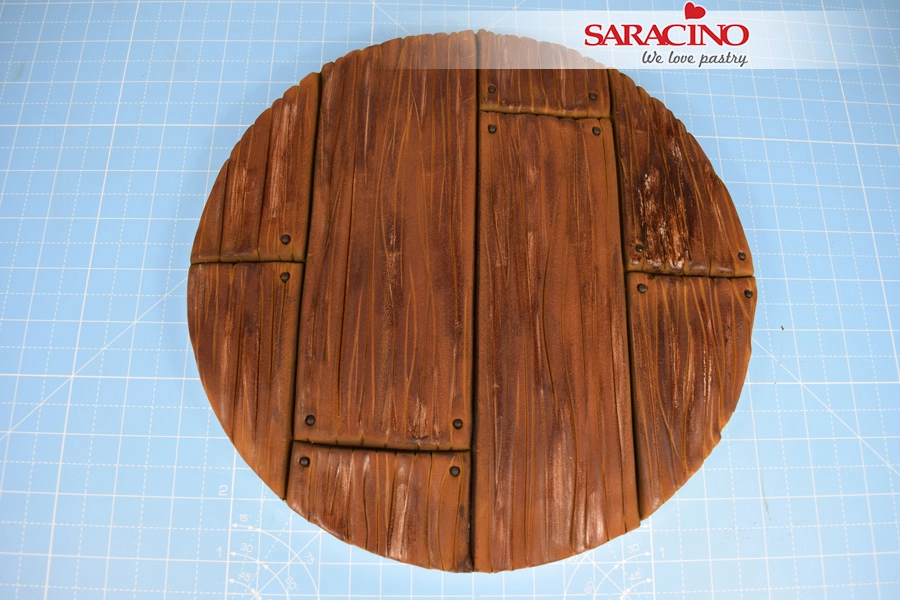
With the pointed end of the Dresden tool, gently score a line down the centre of the board.

Step 7

Score two more lines dividing the board roughly into quarters

Step 8

Score 4 small lines across the strips to divide the planks as shown.

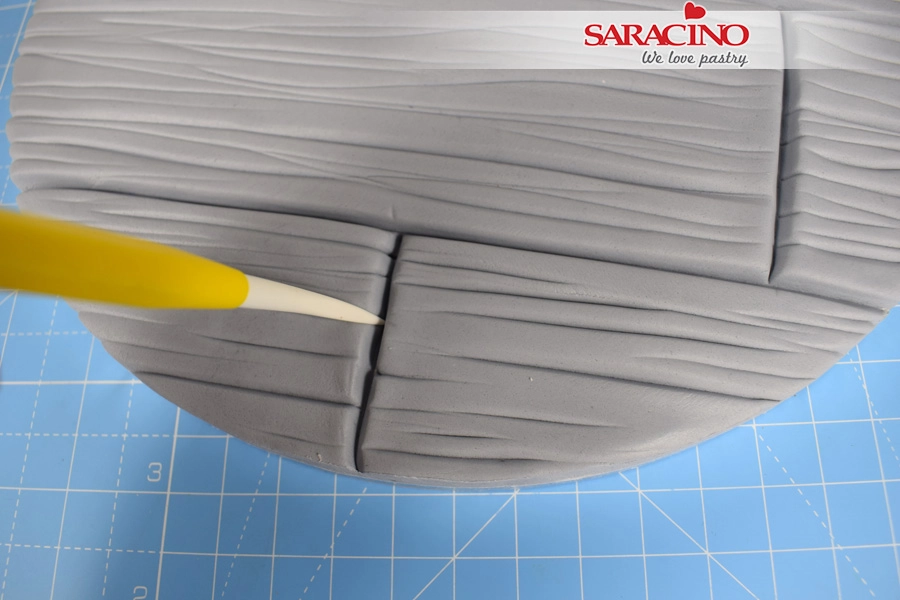
Step 9

When you are happy with the lines go over them with the Dresden tool this time applying more pressure to create deeper grooves

Step 10

Starting on the outside edge, mark the planks using the Dresden tool with a series of random lines and grooves. Varying the pressure will vary the depth of each line.

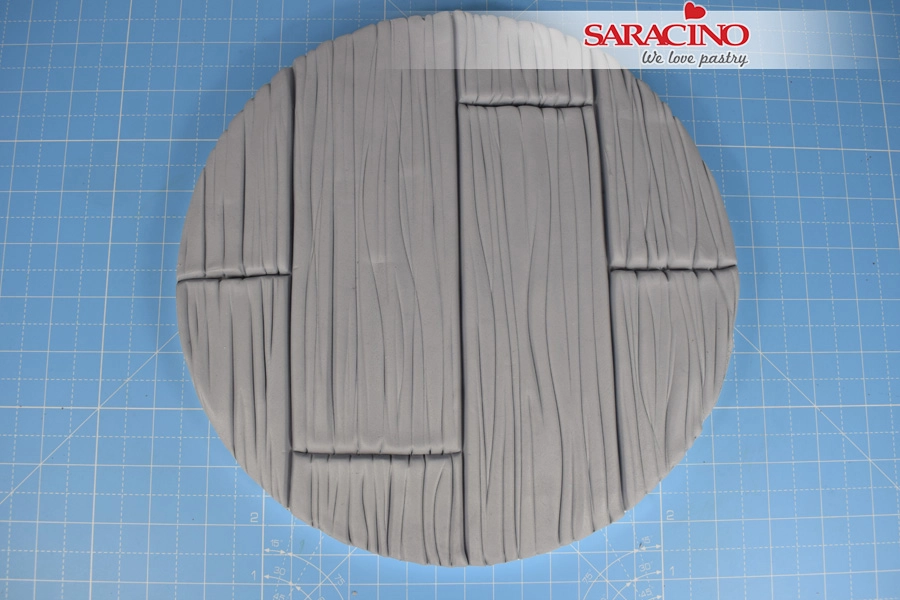
Step 11

Mark each plank separately until the whole board is done.

Step 12

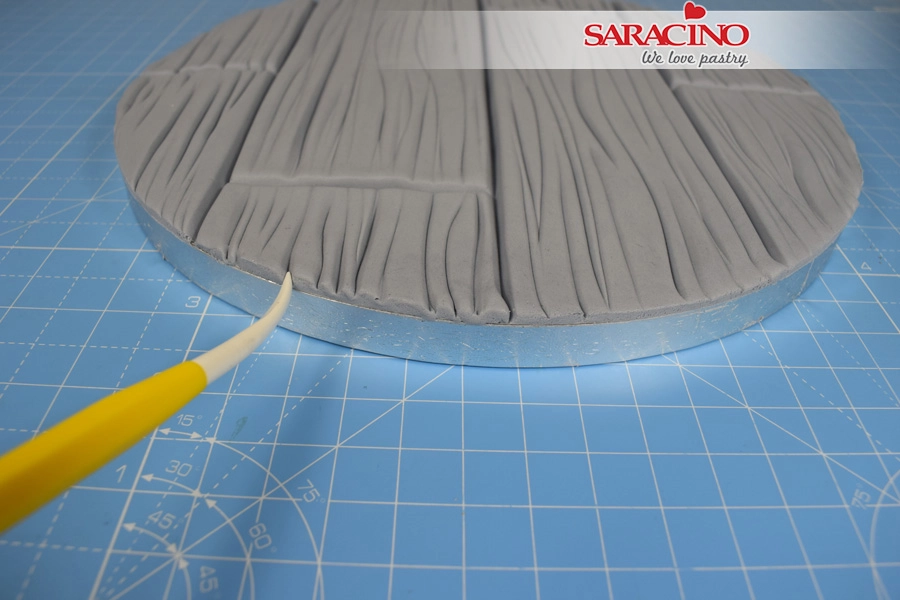
Use the tip of the Dresden tool carry the lines over the edge of each plank around the edge of the board.

Step 13

Mark the inside edges of each plank.

Step 14

Continue across the board.

Step 15

Use a small balling tool to mark nail holes at the end of each plank.

Step 16

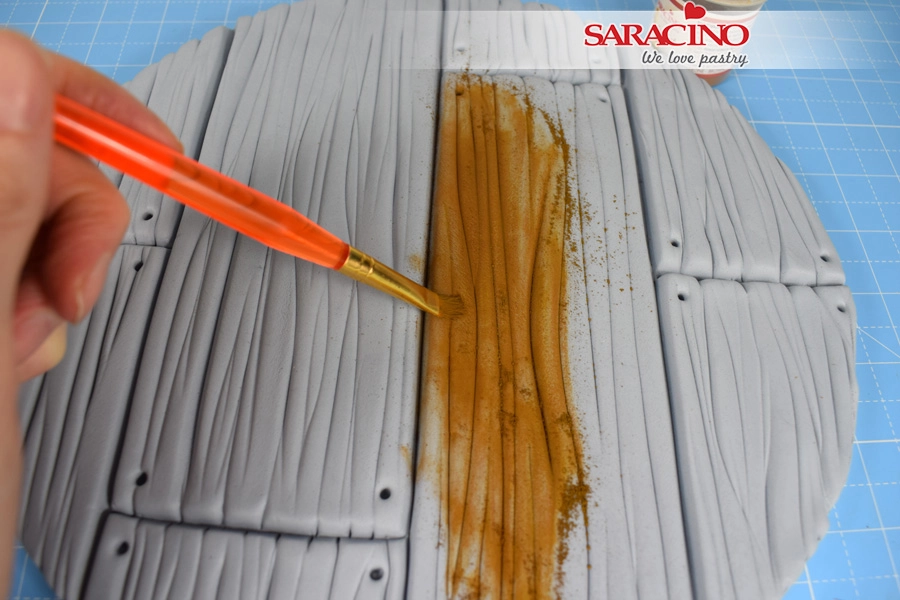
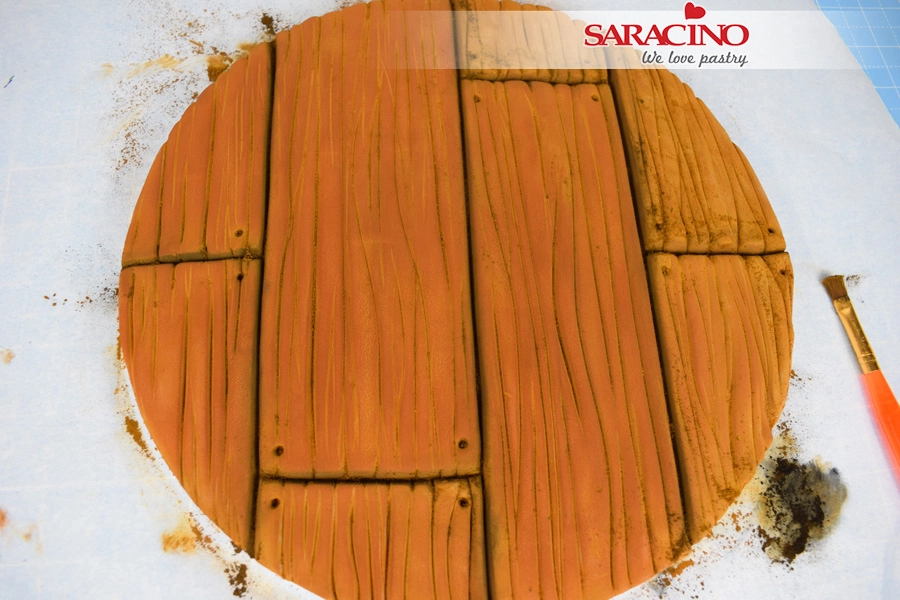
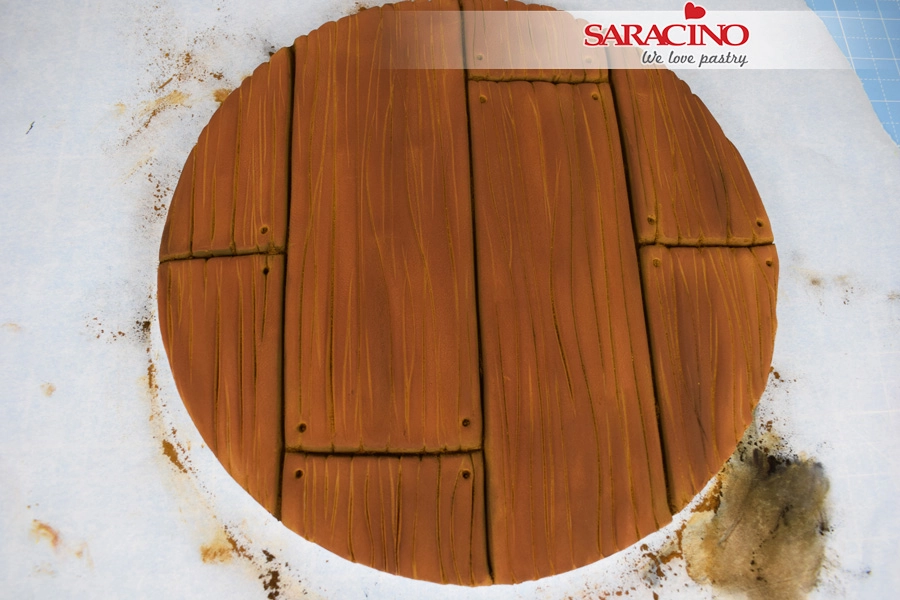
Place your board on a piece of grease proof paper. Take a flat angled paintbrush and begin to  apply brown dust to the planks. Rub the dust in circular motions to work into the paste.

Step 17

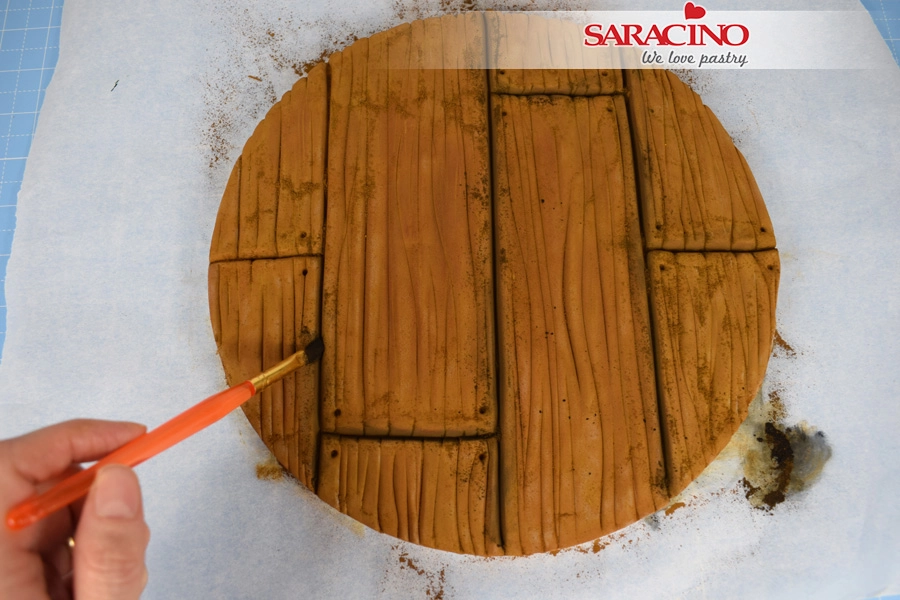
Once all planks are dusted with brown, apply a small amount of black dust to the gaps between each plank.

Step 18

Use your finger tips to gently rub the dust into the paste. This will cause the dust to darken and create a wood like sheen.

Step 19

Work across the board, rub more in some spots than others to vary the depth of colour.

Step 20

Lightly rub your finger in the black dust on the paper and transfer it to the board in random areas to further darken the wood.

Step 21

Dusting instead of painting means that you retain all the lines you scored and marked at the start. It also means you don’t have to wait for your board to dry.

Step 22

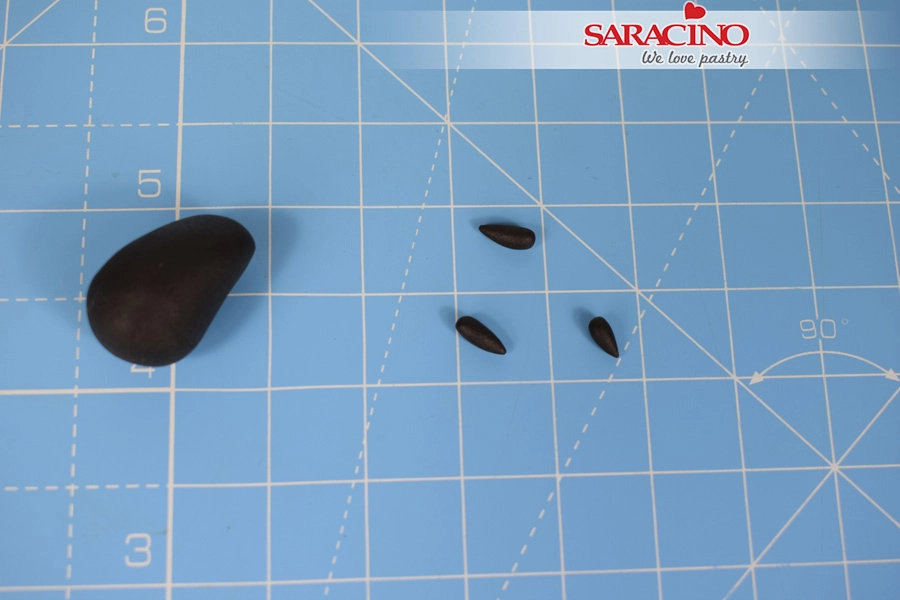
For the nails take a small amount of black modelling paste and roll 14 small teardrops.

Step 23

Stick each into place with a small amount of water.

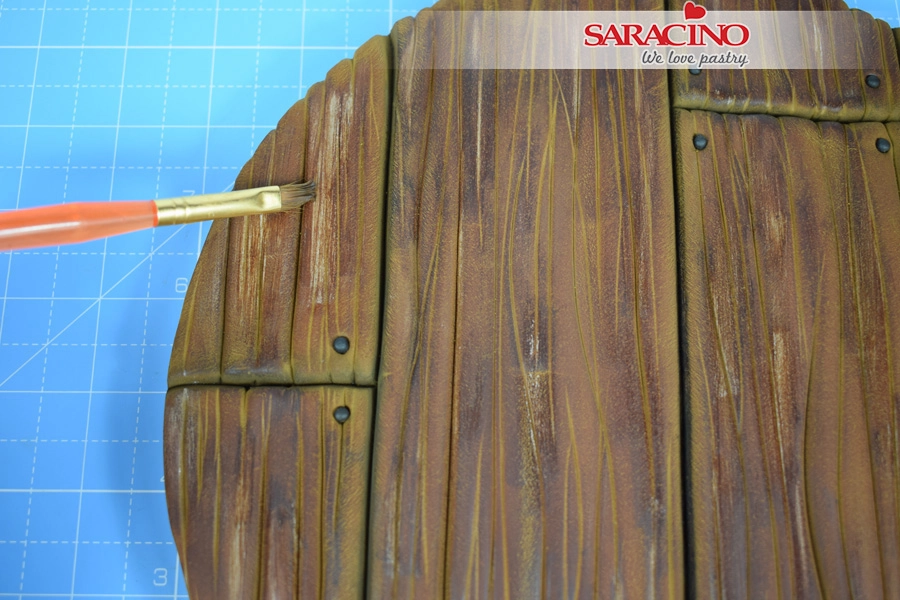
Step 24

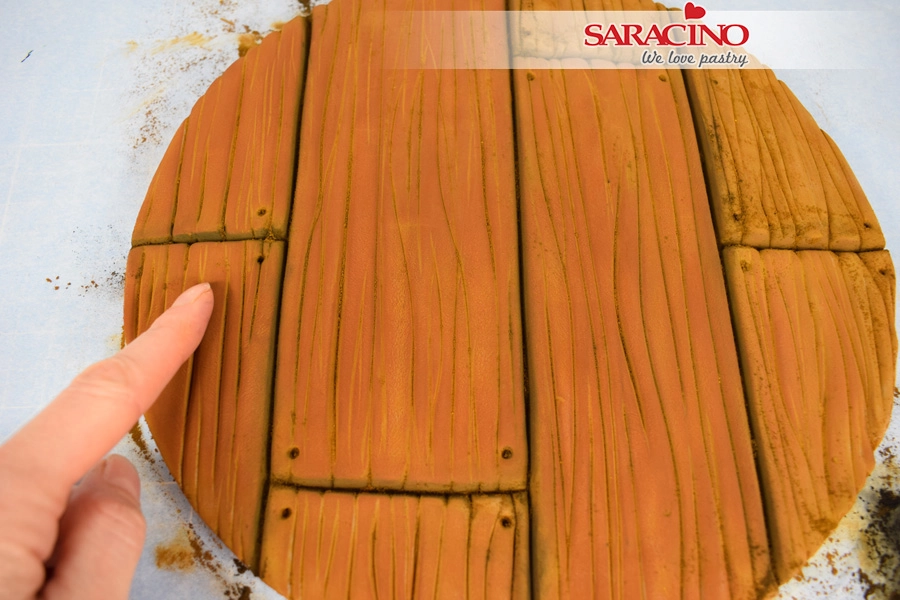
Dip the flat paintbrush into some water and remove almost all of the water from the brush. Gently brush across each plank, following the grain to remove some of the colour and create an aged look to the wood.

Step 25

If you remove too much colour by accident (see right hand side of board) allow the paste to dry throughly and then re dust with the brown.

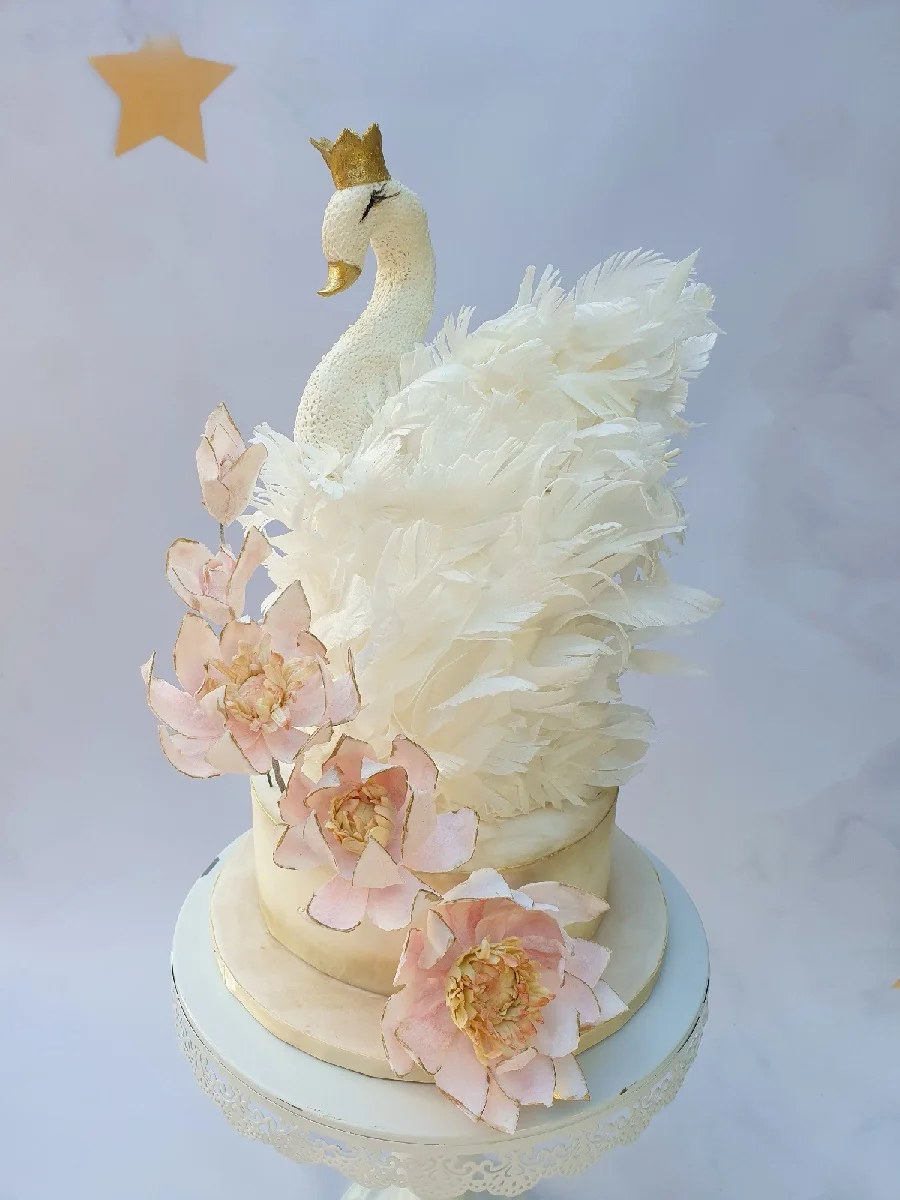
SWAN CAKE

SWAN CAKE

Skill level: BEGINNERS

You will need:

  • 2 tier cake
  • Saracino white Pasta Top
  • Saracino white Pasta Model
  • Saracino Wafer Paper 0.27
  • Florist Wire Nr.20 and Nr.28
  • Edible glue
  • Black edible marker
  • Cake drum
  • Sculpting tools
  • Small scissors
  • Two brushes
  • Clear alcohol
  • Powder colours: gold, white, yellow and 2 shades of apricot
  • Saracino Pasta Bouquet
  • Two daisy-shaped cutters of different sizes
  • Green florist tape

Step 1

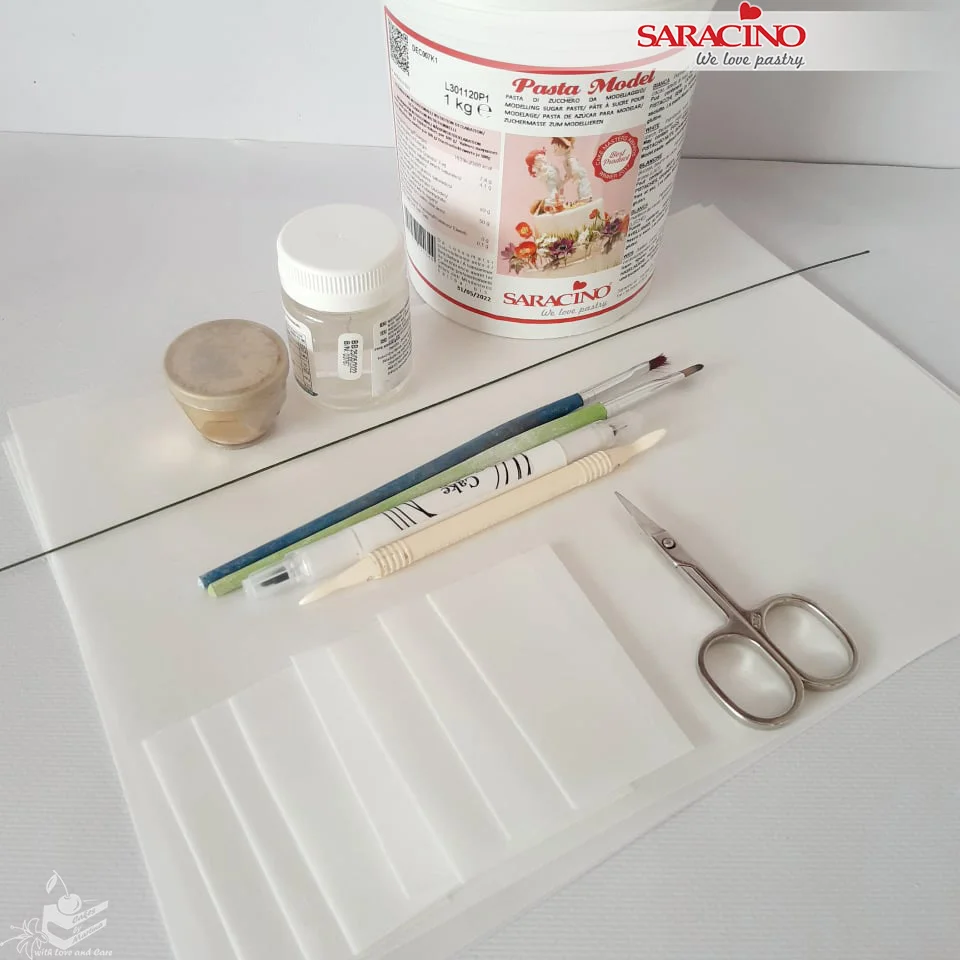
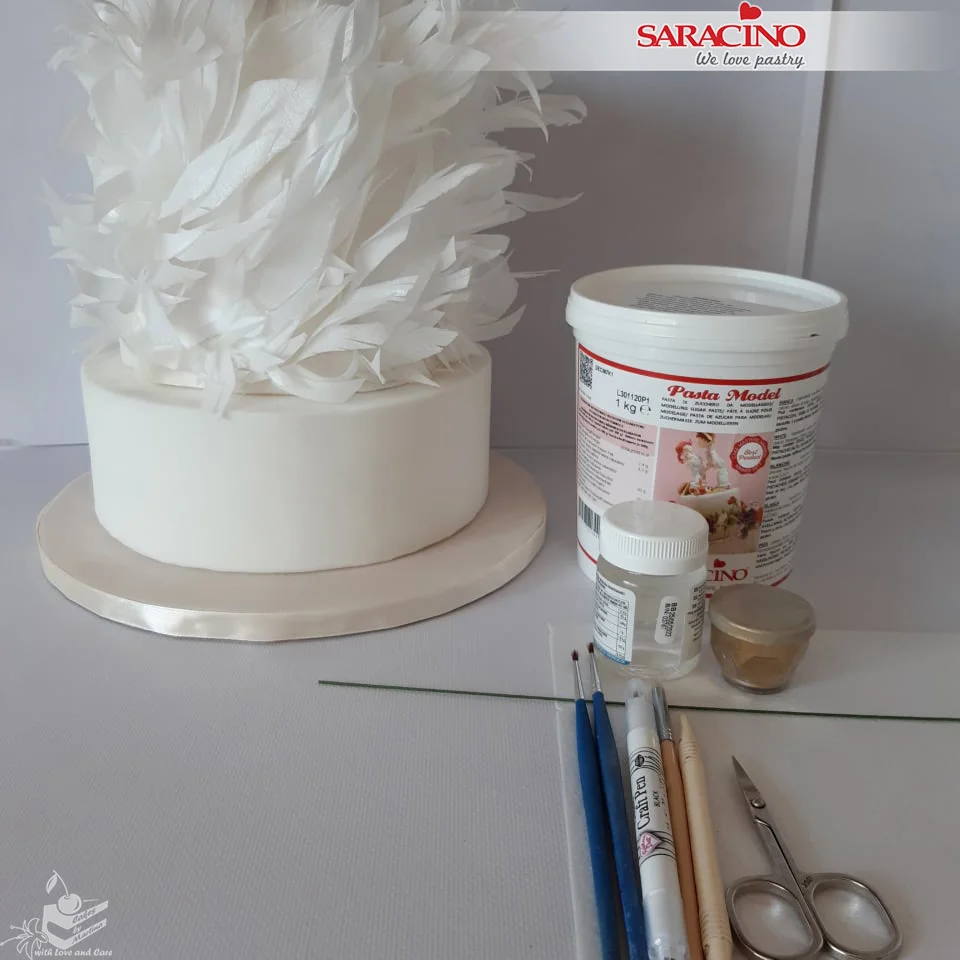
To make the swan you will need: 2 cake tiers, Saracino Pasta Top, Saracino Pasta Model, Saracino Wafer Paper, Florist Wire Nr.20, edible glue, edible marker (black), base, sculpting tool, small scissors, two brushes, clear alcohol, and gold powder colour.

Step 2

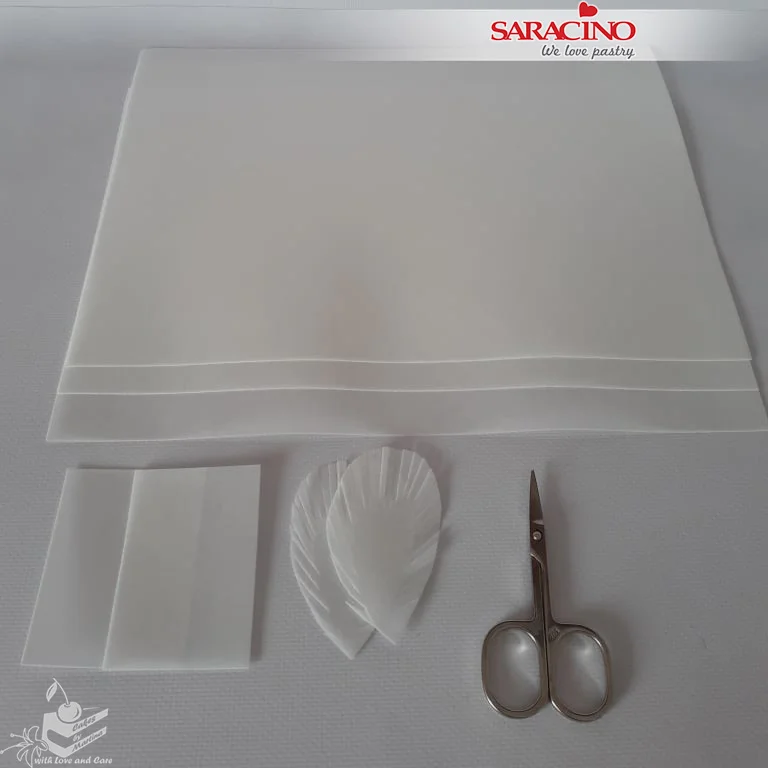
Prepare rectangles of the wafer paper and cut out various sized feathers. Make small cuts along the outer edges. You will need enough to cover the whole cake and the swan. 

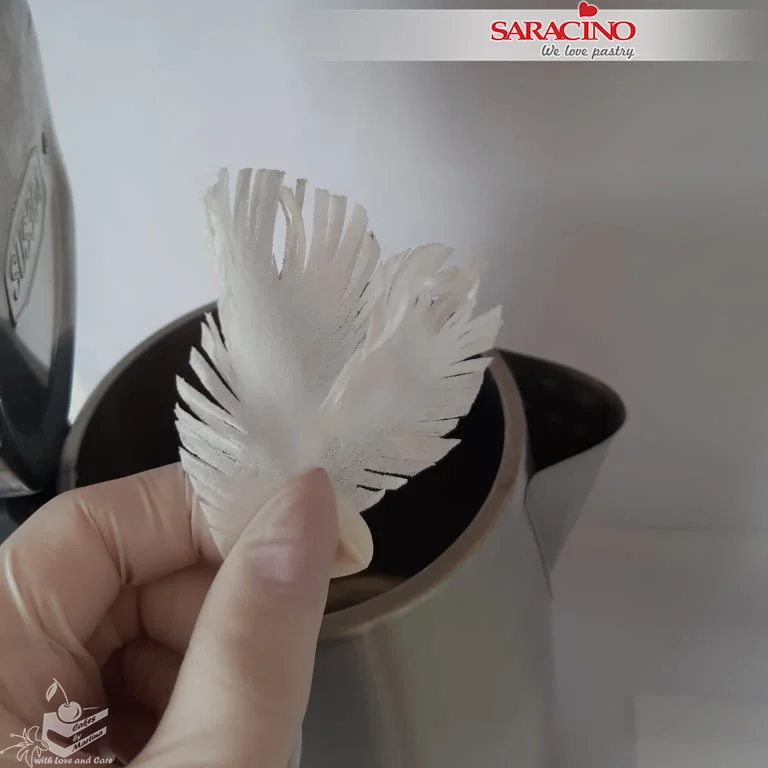
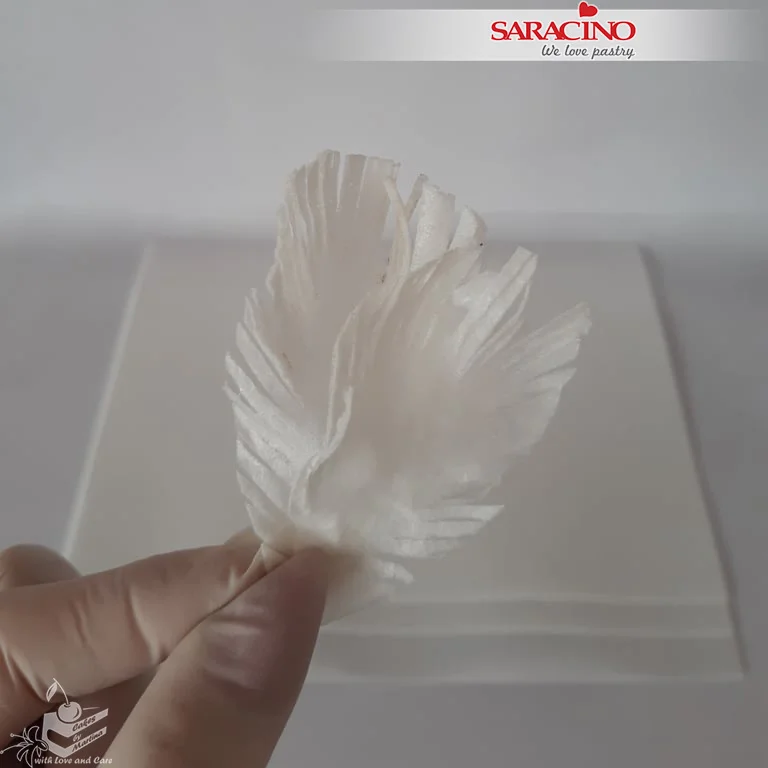
Step 3

Carefully hold the prepared feathers over steam (e.g. from a kettle) to achieve a ruffled effect.

Step 4

Continue to make feathers until you have enough to cover both wings and a cake tier.

Step 5

Cover the cakes using Saracino Pasta Top and place on the base. Using edible glue attach the feathers to the top tier of your cake giving it a random ruffled look.                                                            

Step 6

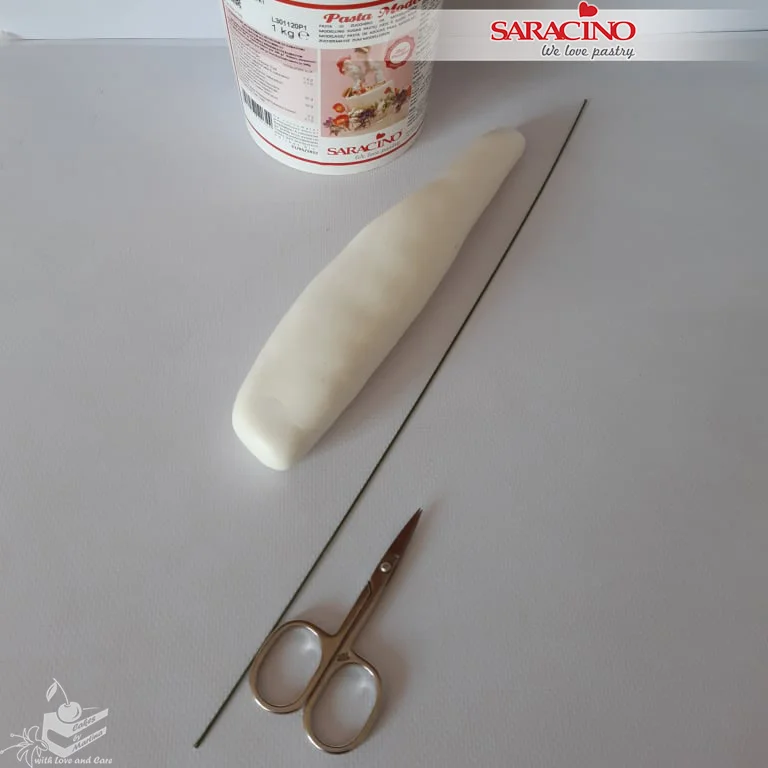
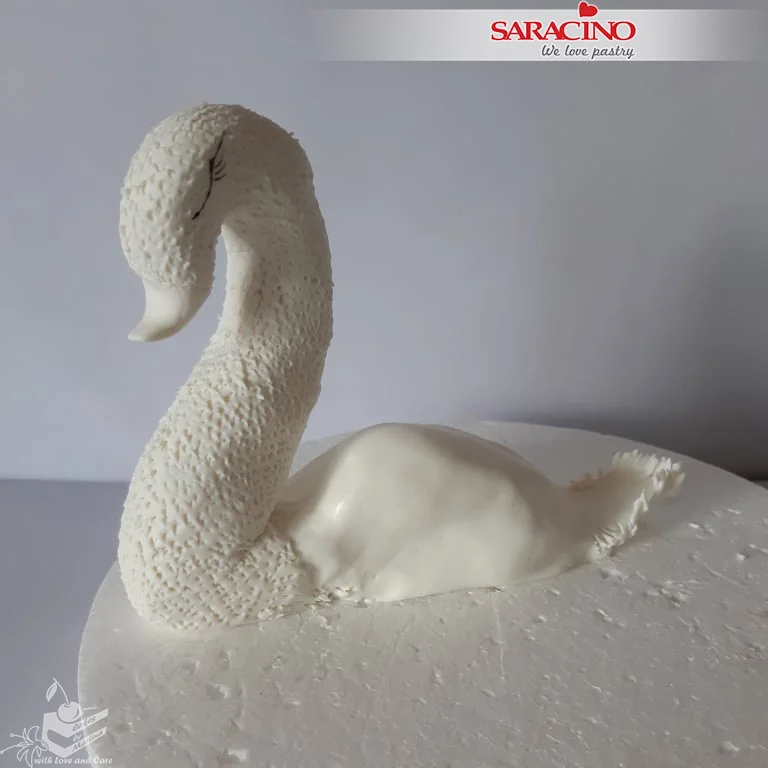
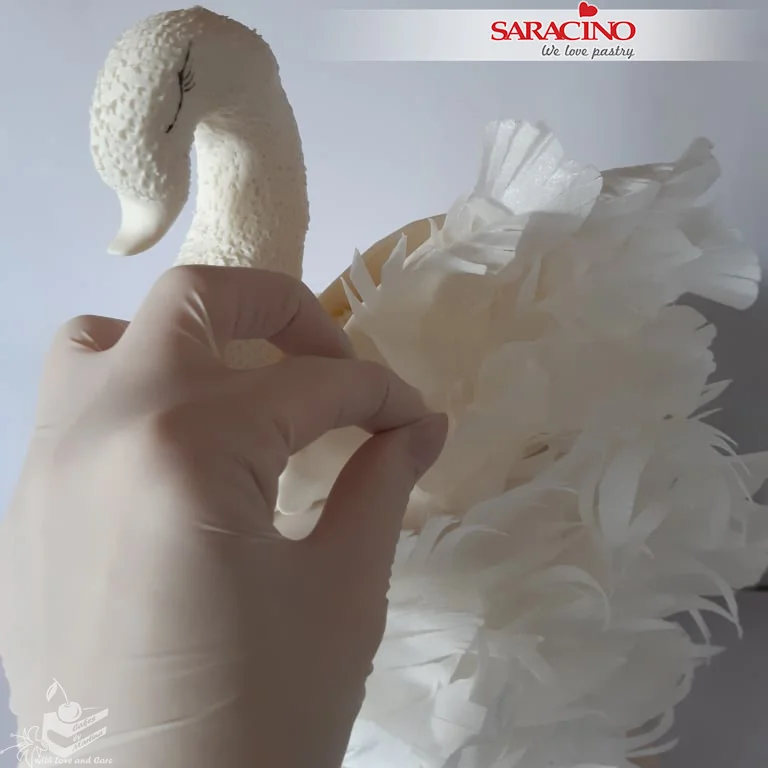
Use Pasta Model to roll the neck of the swan (approximately 23cm in length). Insert a flower wire into the centre of the neck.

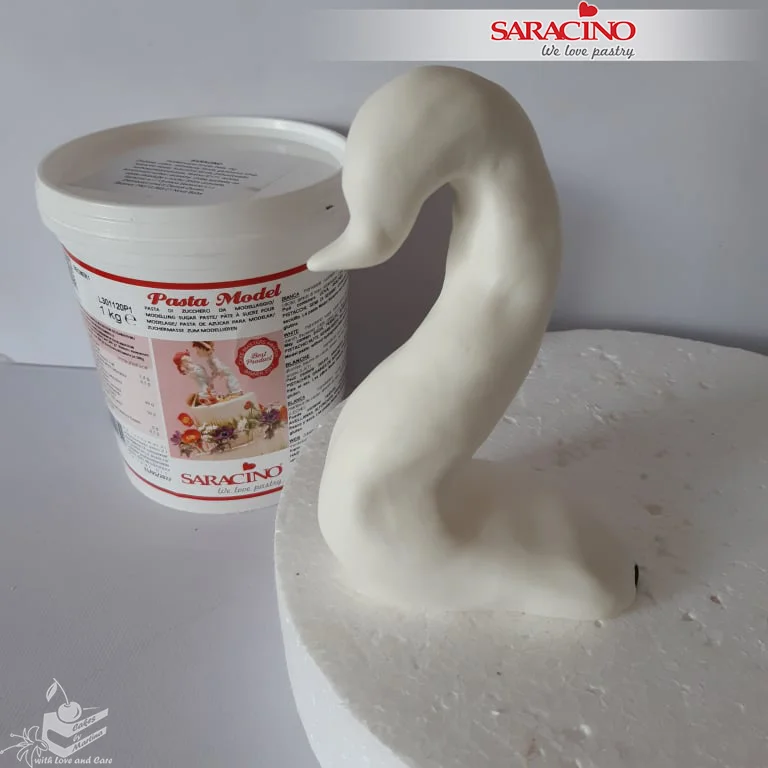
Step 7

Model the neck and beak to match the shape in the picture. Smooth the surface.

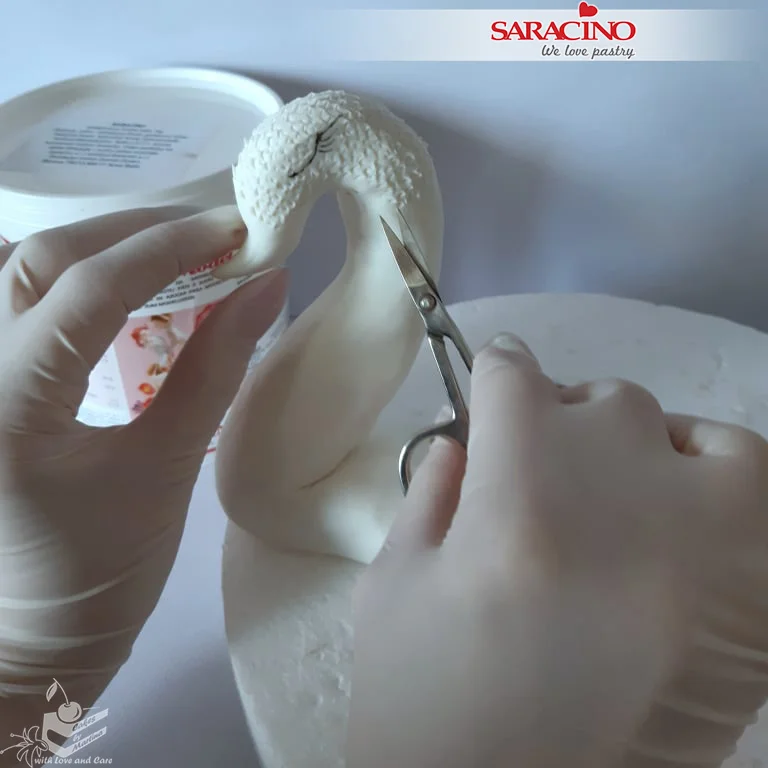
Step 8

Using the edible marker draw the swan’s eyes. Use sharp scissors to give a feather texture.

Step 9

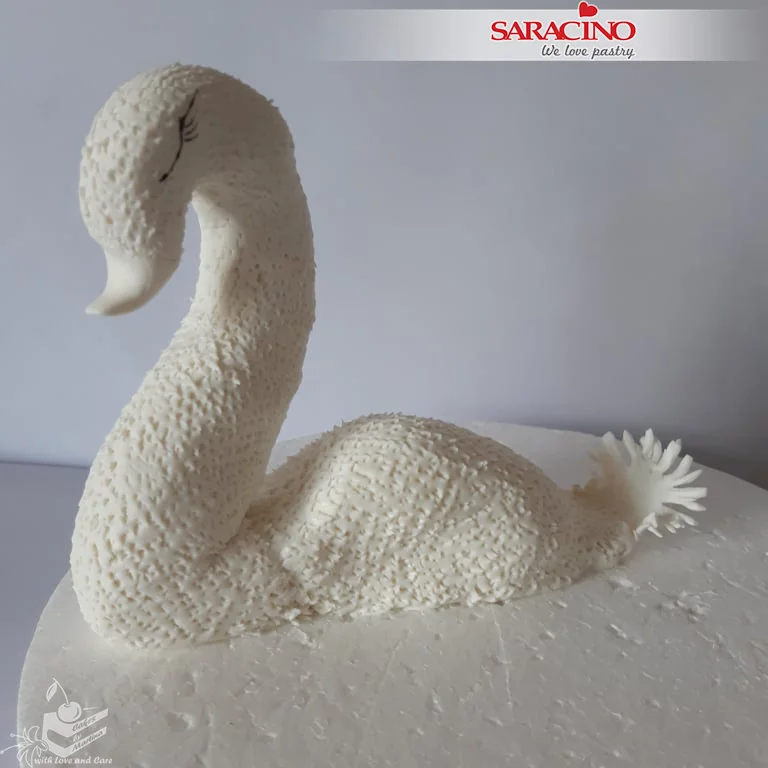
Model the swan’s body using Pasta Model. Use a sculpting or modelling tool to smooth the joints.

Step 10

Use the scissors to achieve the feather texture on the body.

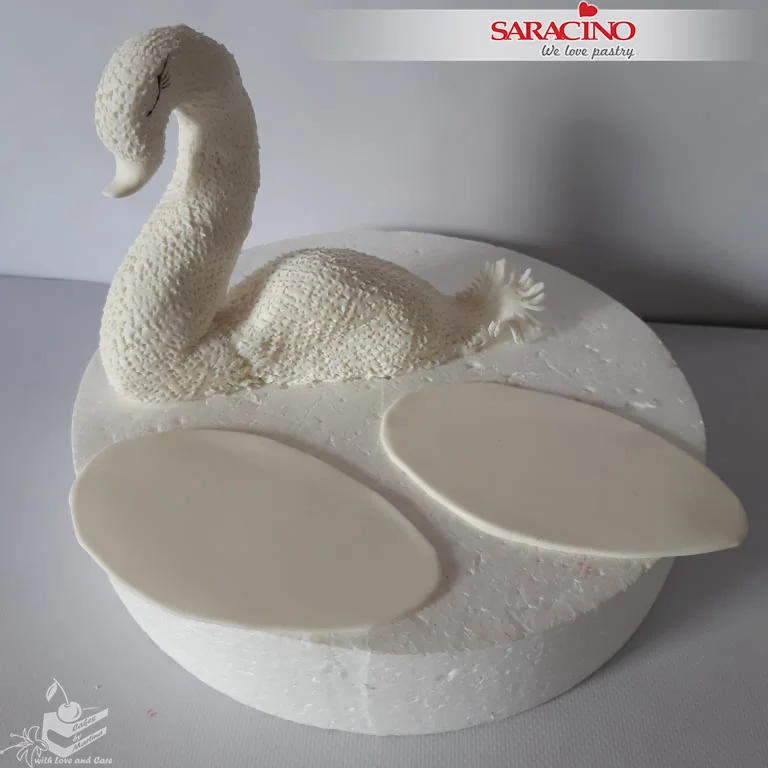
Step 11

For the wings roll white Pasta Model and cut out two oval shapes.

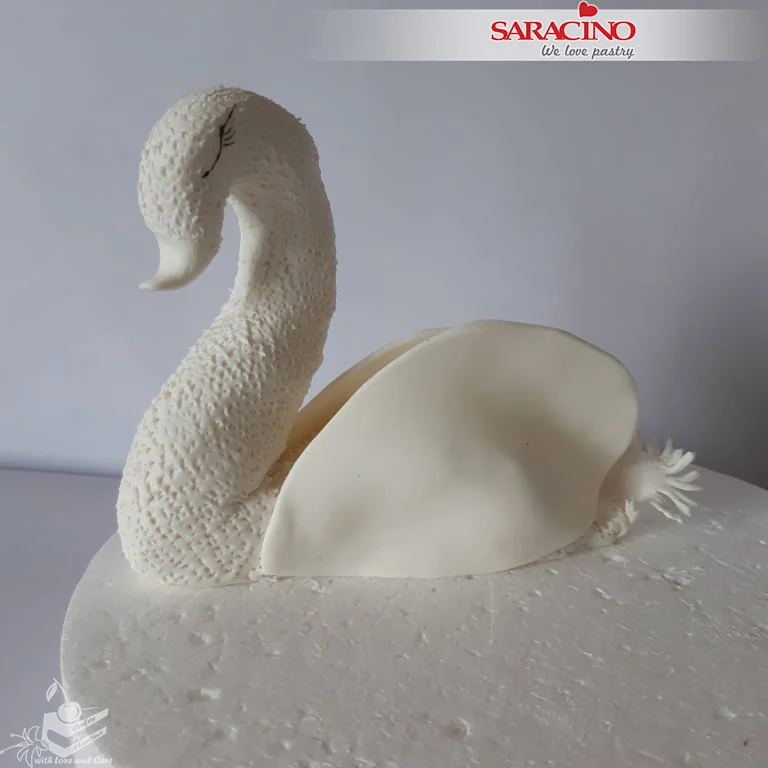
Step 12

Use a little edible glue to attach the wings either side of the body.

Step 13

Attach the wafer paper feathers to both wings using a little edible glue.

Step 14

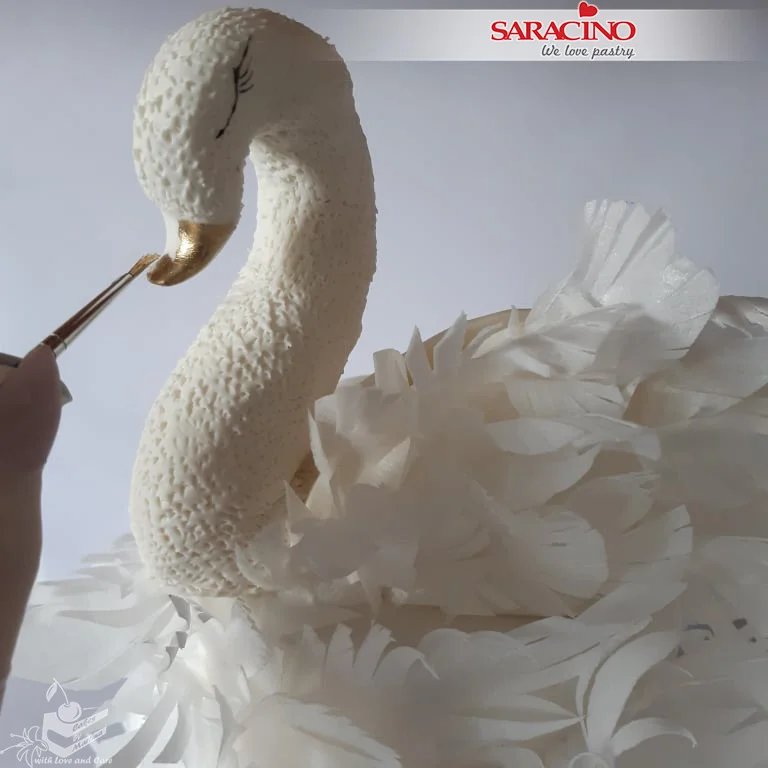
Mix gold powder colour with the clear alcohol and paint the swans beak.

Step 15

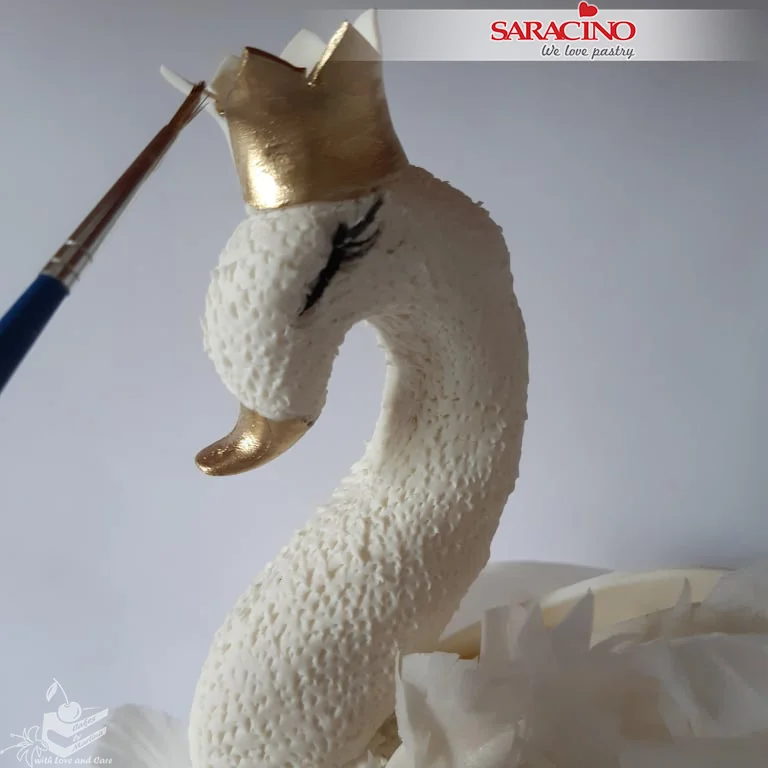
Model a small crown using Pasta Model and fix to the swans head. Paint gold.

Step 16

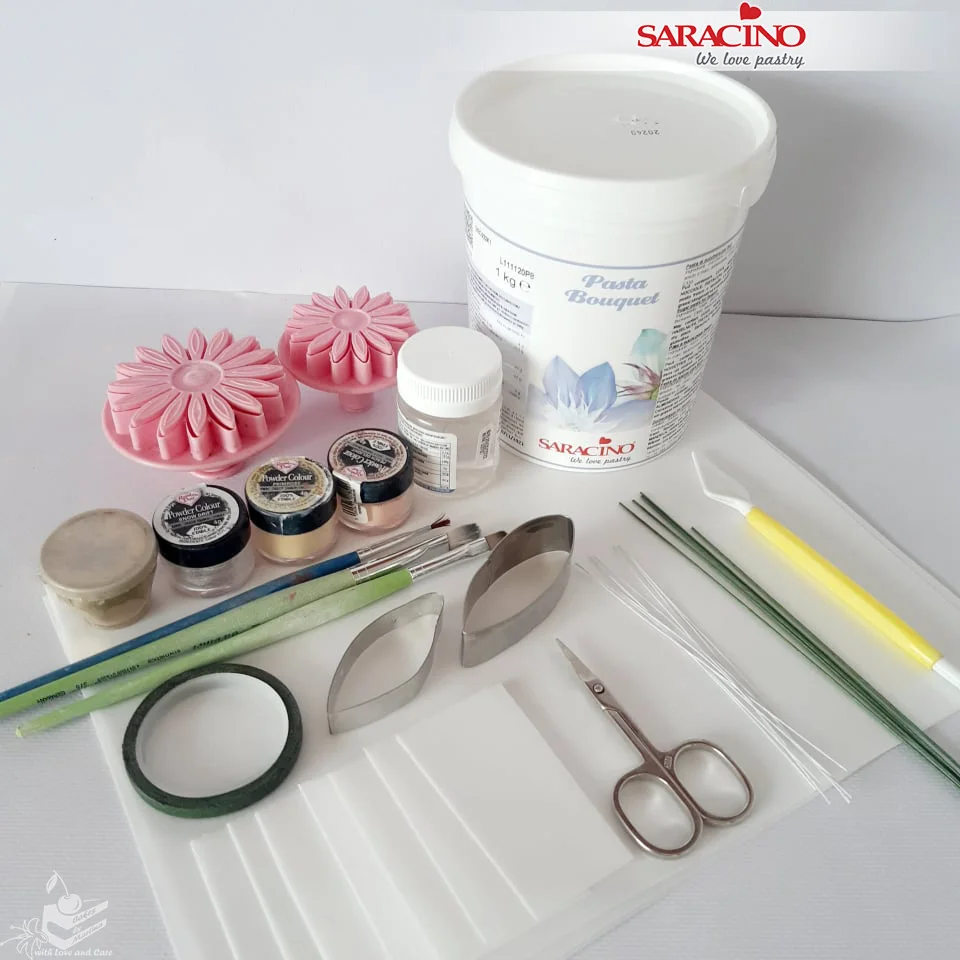
To make the flowers you will need: Saracino Pasta Bouquet, Saracino Wafer Paper, two daisy cutters of different sizes, petal-shaped cutter, edible glue, florist wire Nr.20 and Nr.28, small scissors, brushes, green florist tape, sculpting tool, powder colours (gold, white and 2 shades of apricot).

Step 17

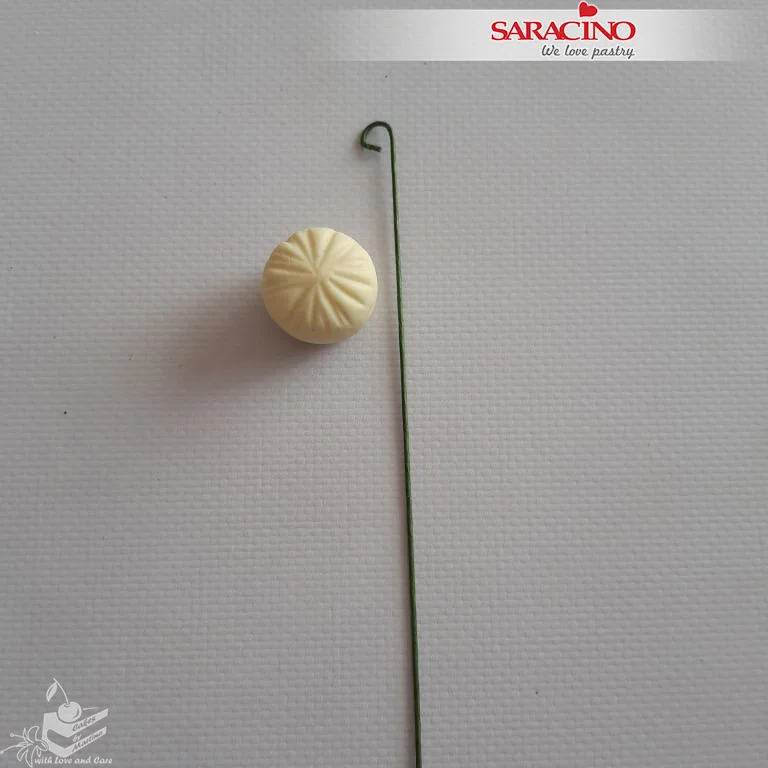
Mix a little Pasta Bouquet with yellow powder colour. Roll a small ball and use a modelling tool to form shallow grooves. Loop the end of a florist wire Nr.20, heat and insert into the ball.

Step 18

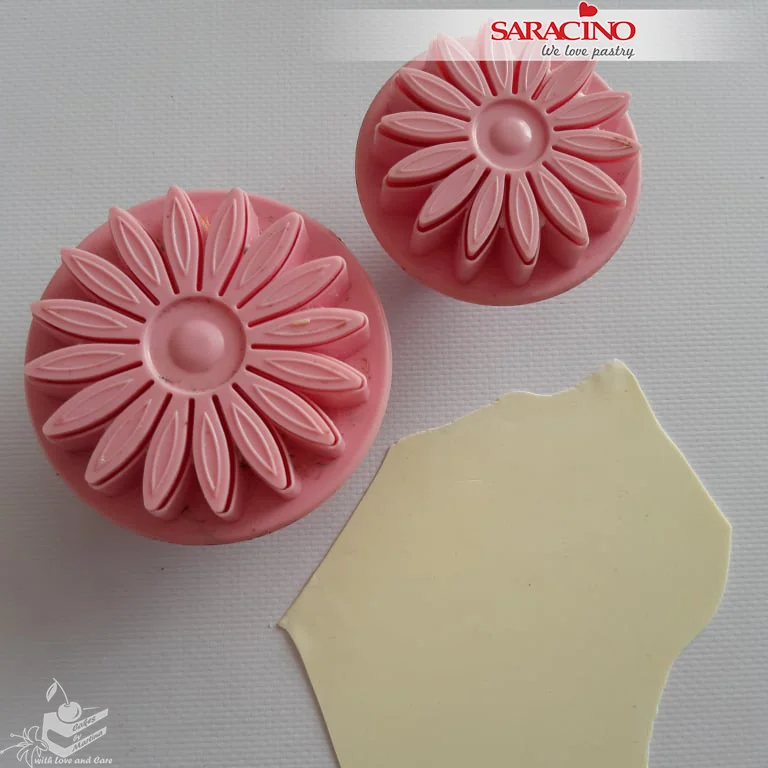
Roll out the yellow Pasta Bouquet and cut out 1 small and 2 large daisies.

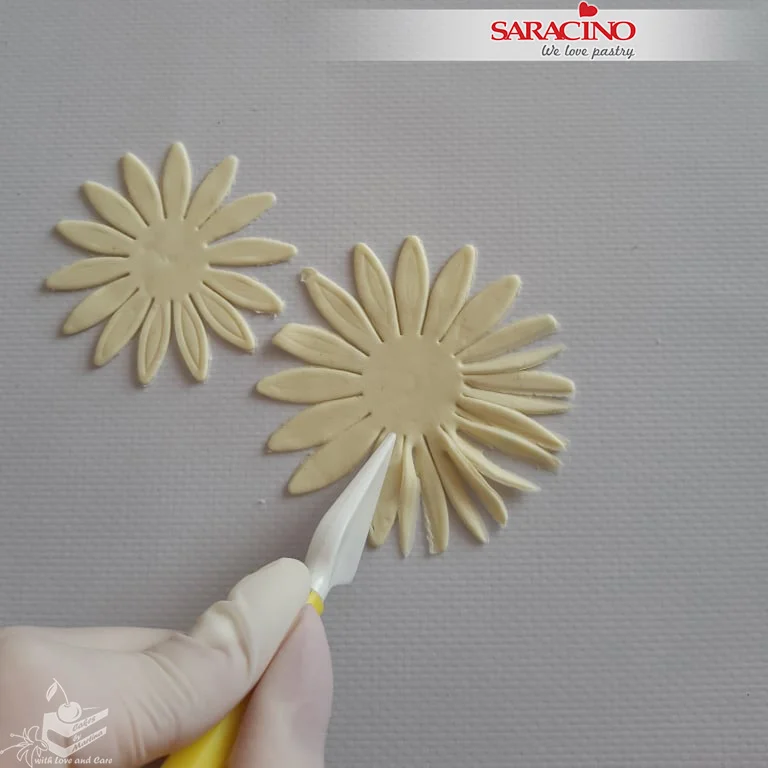
Step 19

Use a knife or modelling tool to cut each of the daisy petals in half.

Step 20

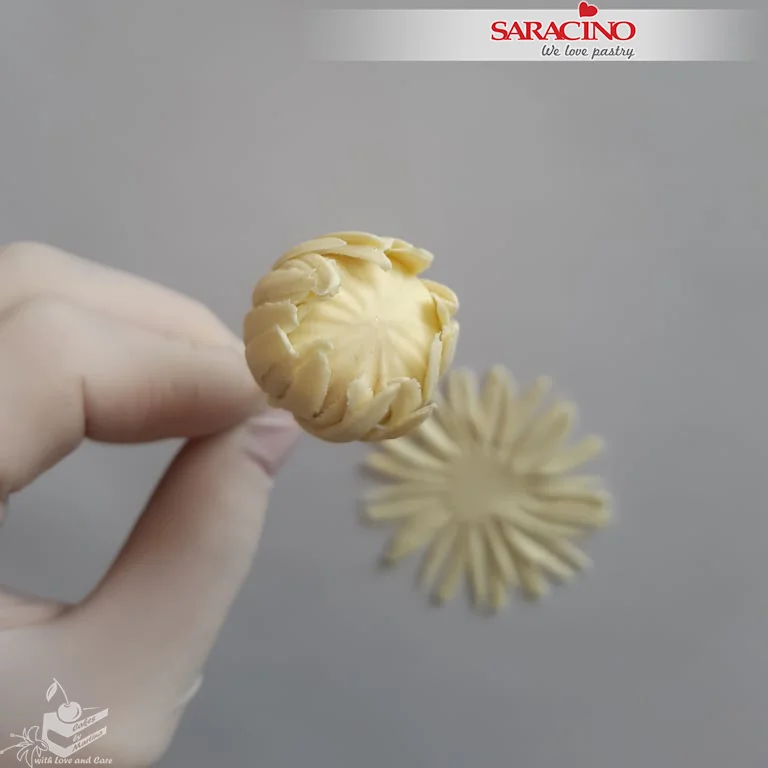
Use a little glue to attach the small daisy to the bottom of the centre ball.

Step 21

Repeat to fix the two larger daisies. Adjust the center of the flower to achieve a natural ruffled look.

Step 22

Using a soft brush and the apricot powder colour lightly dust the centre of the flower.

Step 23

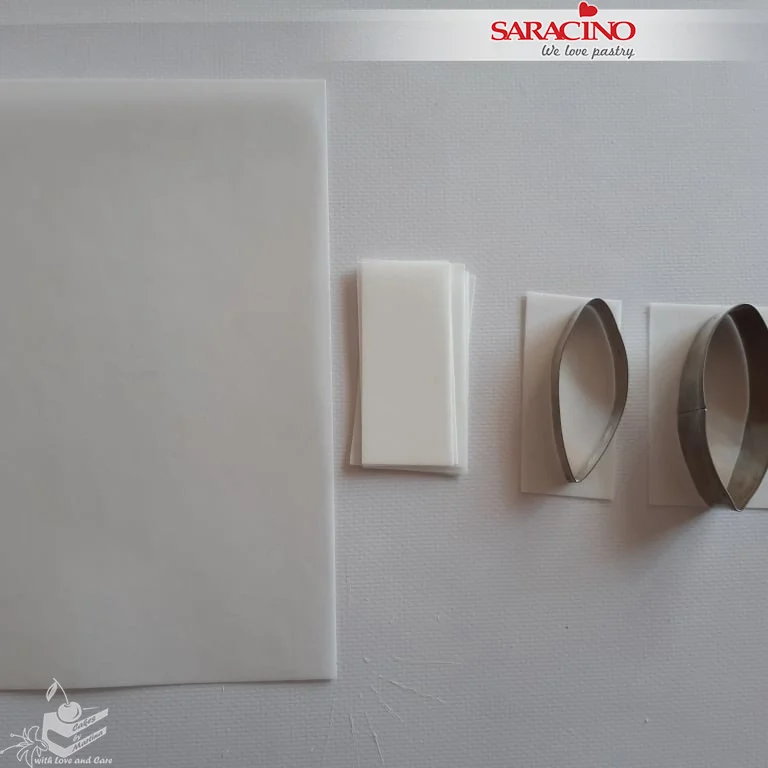
Cut the wafer paper into rectangles. Using half of them cut petals using the petal cutters. You will need approximately 5 small and 7 large, depending on how large you would like your flower.

Step 24

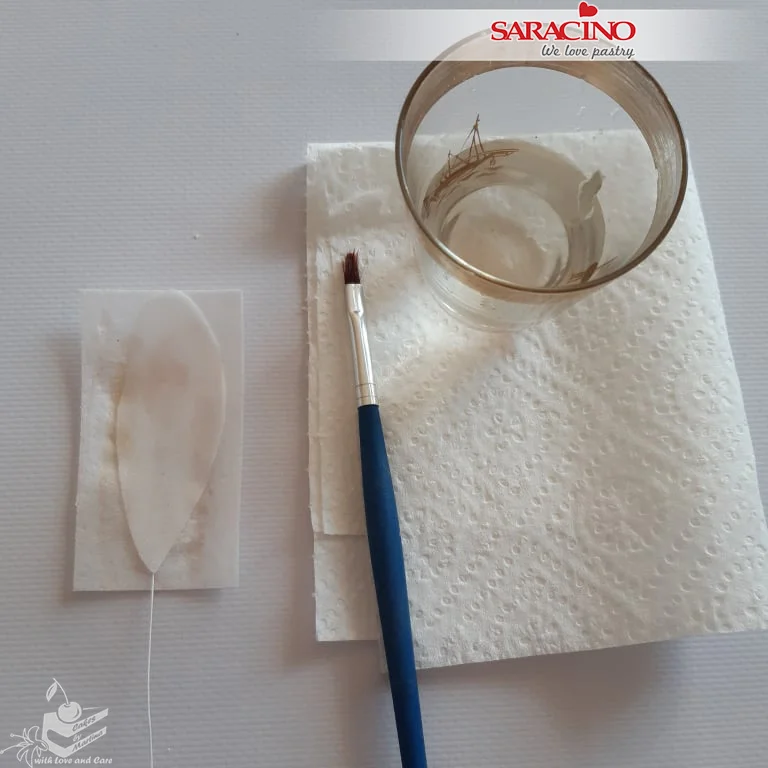
Use a brush to apply a little water to the rough side of the rectangle. Place a Nr.28 wire and cover it with a petal with the rough side facing down. Press together.

Step 25

Prepare approximately 5 smaller petals this way then cut the rectangles to match the shape of the petals.

Step 26

Repeat to make seven larger petals.

Step 27

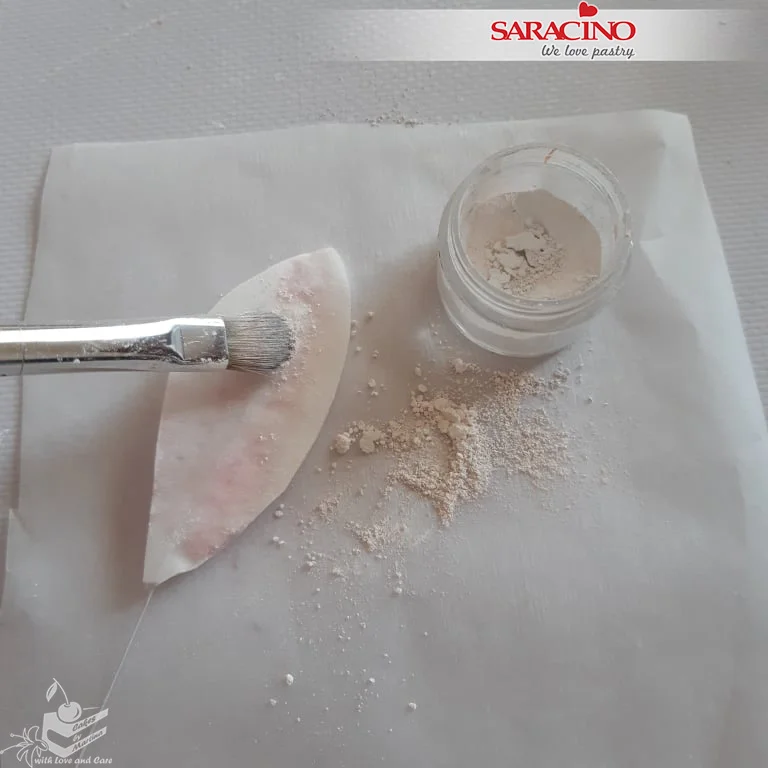
Mix a little apricot and white powder colour with clear alcohol. Gently paint each petal.

Step 28

Use a soft brush and white powder colour to dust each petal.

Step 29

Allow the petals to dry. Ideally on a rolling pin or other cylindrical object so they dry in a curved shape.

Step 30

Using the smaller petals attach one by one using green florist tape.

Step 31

Keep adding the petals to finish a flower. Repeat for as many flowers you need. Prepare some smaller flowers and buds using smaller and less petals on each.

Step 32

Using the gold paint carefully paint the edges of the petals.

Step 35

Fix the flowers to the cake. Use posy picks if required.

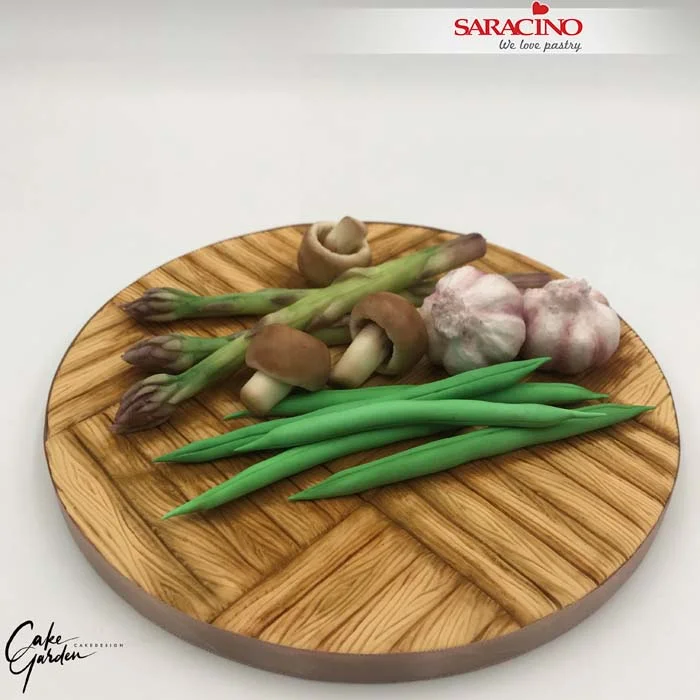
SUGAR VEGETABLES

SUGAR VEGETABLES

Skill level: BEGINNERS

You will need:

  • Saracino Pasta Model
  • Saracino Modelling Chocolate

  • Saracino Wafer Paper 0.27 mm
  • Saracino gel colour green and white 
  • Cerart modelling tool 500 + 301 + 505
  • Knife
  • Large ball tool
  • Water
  • Brushes
  • Dust colour powders: alpine green, spring green, dark brown, light brown, aubergine, claret, peach

Step 1

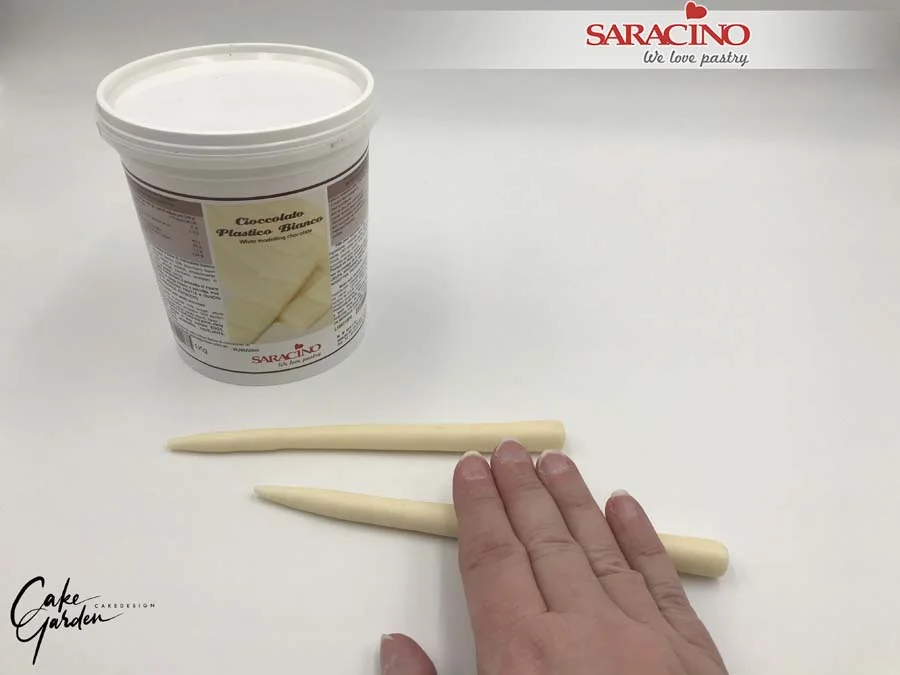
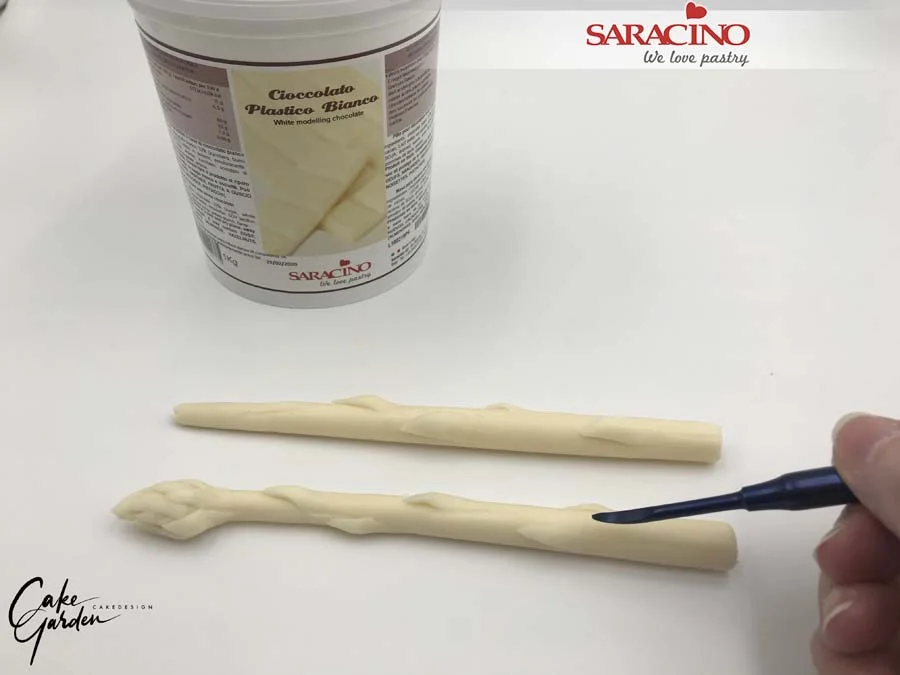
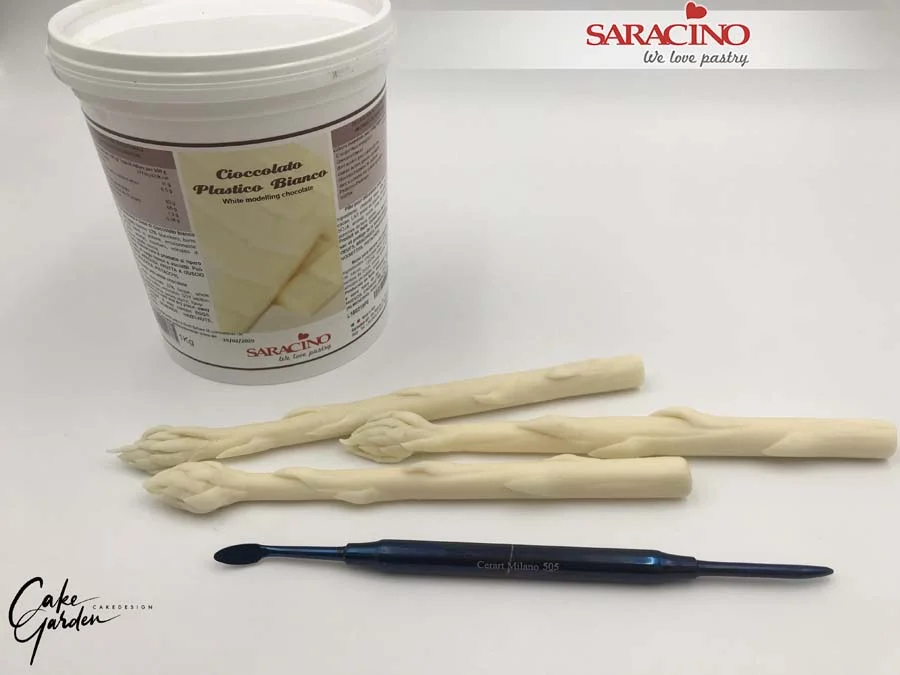
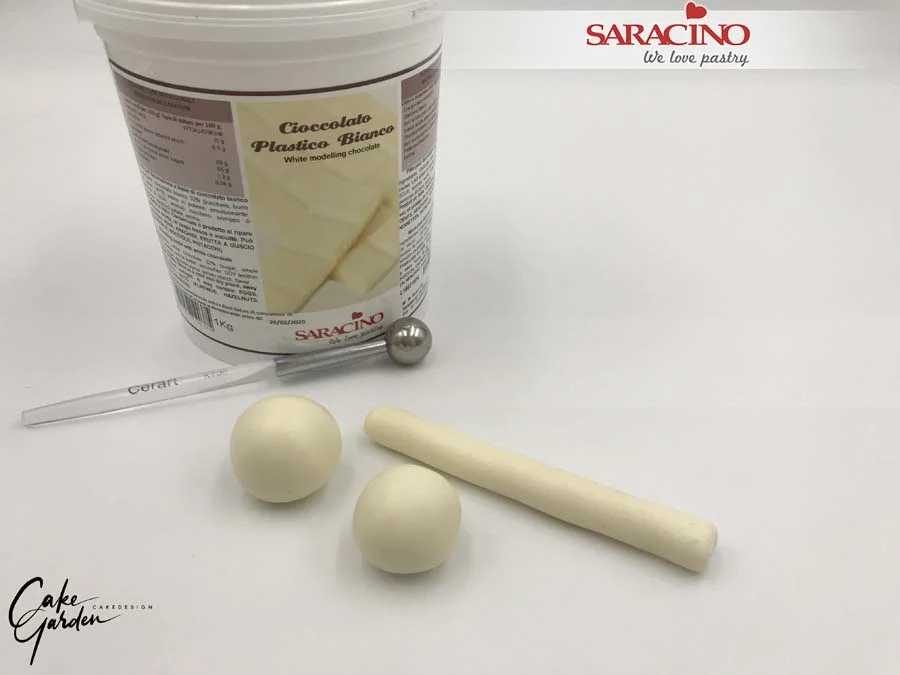
To make the asparagus you will need about 18-22g of white modelling chocolate. Knead the modelling chocolate until it is smooth and pliable. Roll a long cone shape to about 17-22cm long. If you create more asparagus make sure they are not exactly the same length. The thickest part has to be 1.2  to 1.5cm in diameter.

Step 2

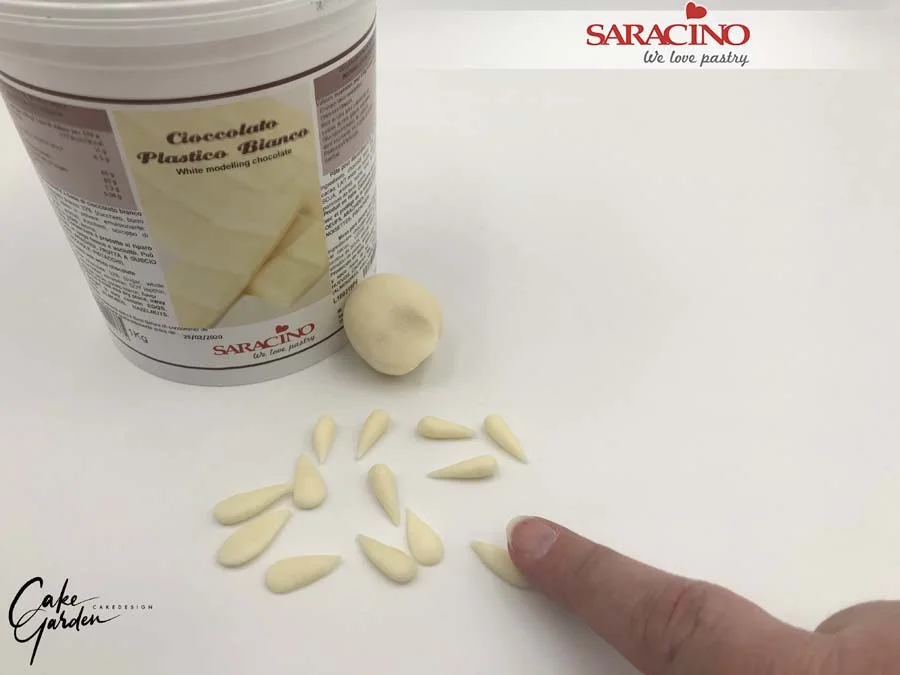
Create small cone shapes for the asparagus leaves and flatten each of them with your finger. Make sure the leaves are not too thin as they must have some thickness to look realistic.

Step 3

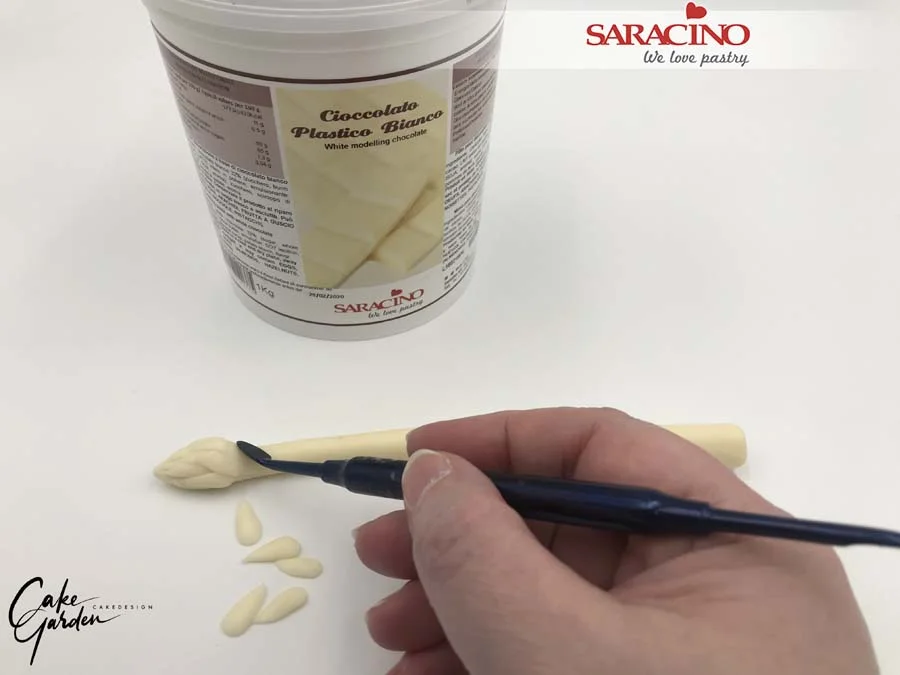
Start attaching the small leaves to the thin end of the stem with your modelling tool. Fix only the bottom of each leaf (the wide side) to your asparagus stem. Smooth the joints so the leaves blend into your stem. Repeat to attach the leaves around until you have a small flowerly like head.

Step 4

Attach a few leaves randomly to the stem. Using your modelling tool create some grooves (not too deep) on the stem and around the bottom.

Step 5

Repeat the previous steps if you want to create more asparagus. If you have enough asparagus made, leave them to harden.

Step 6

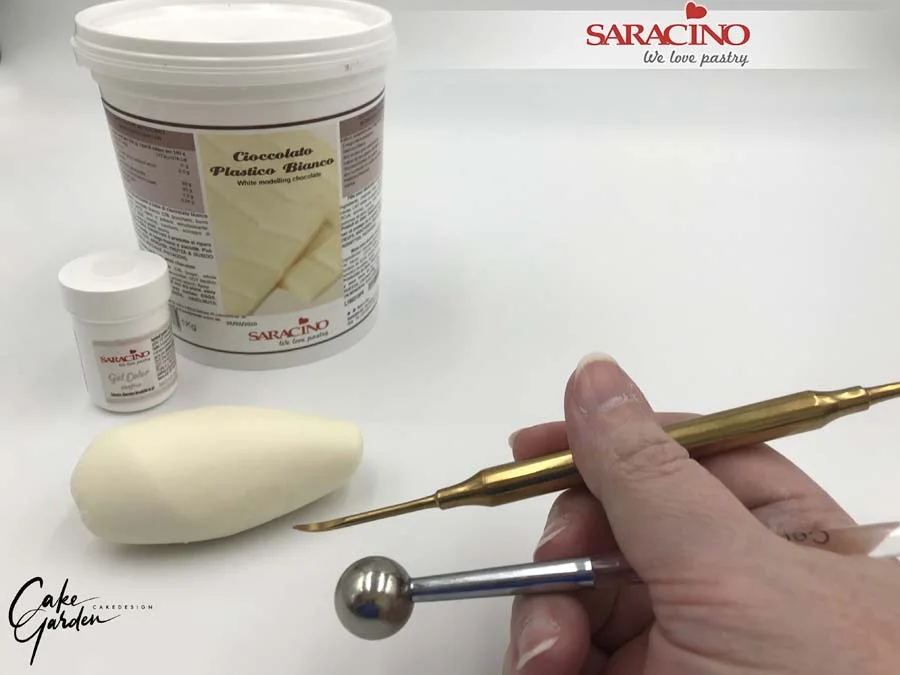
For the mushroom heads you will need about 8-14g of modelling chocolate for one mushroom. For the stalk you will need 4-6g of modelling chocolate. You will need about 18-20g for the whole mushroom. Knead the modelling chocolate until it’s smooth. I added some white gel colour to the modelling chocolate so it becomes less yellowish. You will need your modelling and ball tool for the next steps.

Step 7

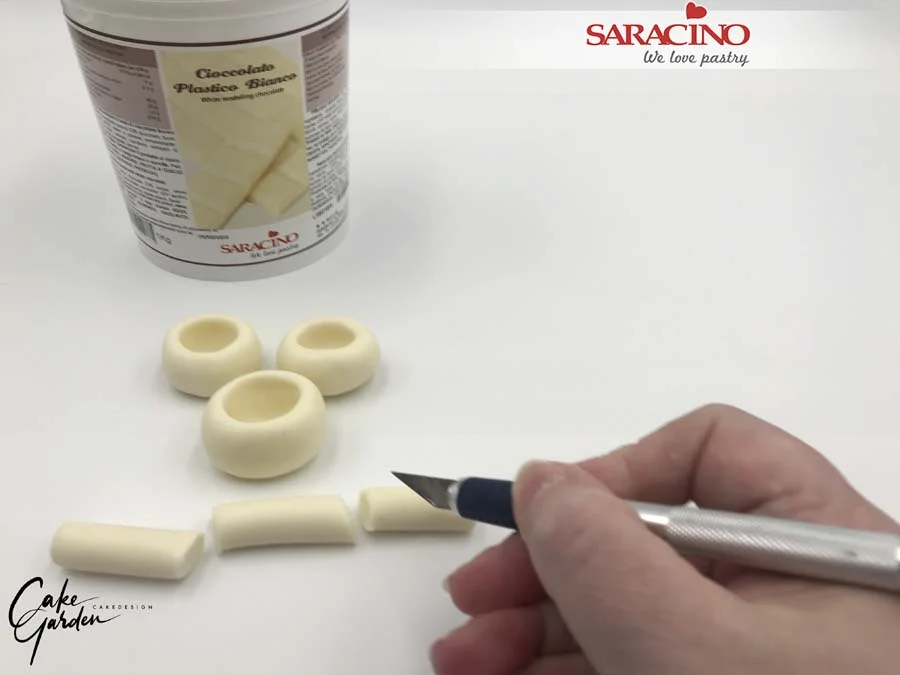
Roll balls of modelling chocolate for the mushroom caps and a long stalk for the stem.

Step 8

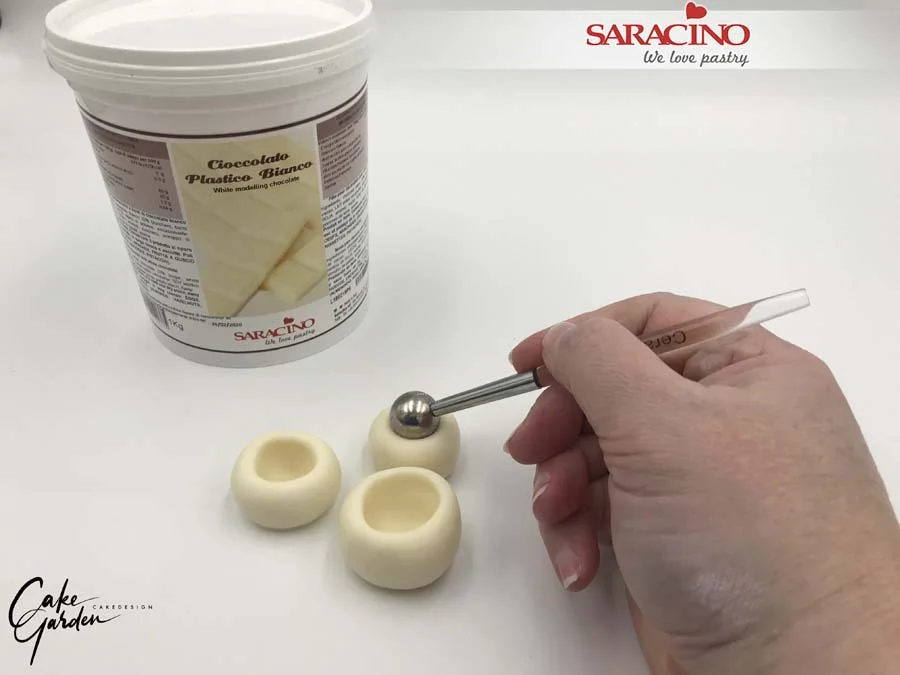
Use your ball tool to create sockets.

Step 9

Cut the long stalk into smaller varying length pieces.

Step 10

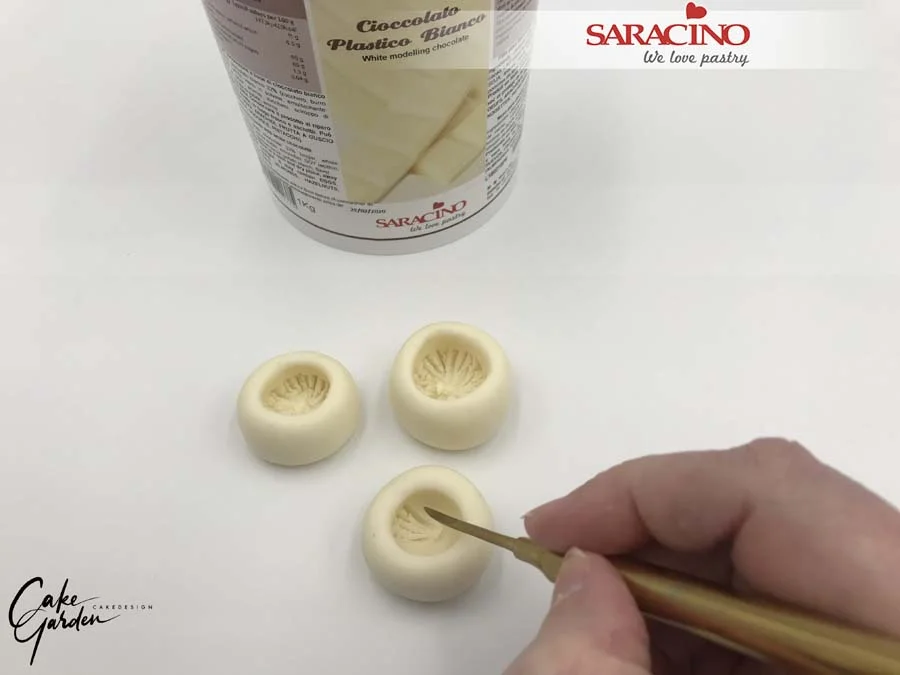
Use your modelling tool to create gills inside the caps. Make sure the inside of the cap remains wide enough to attach the stalk.

Step 11

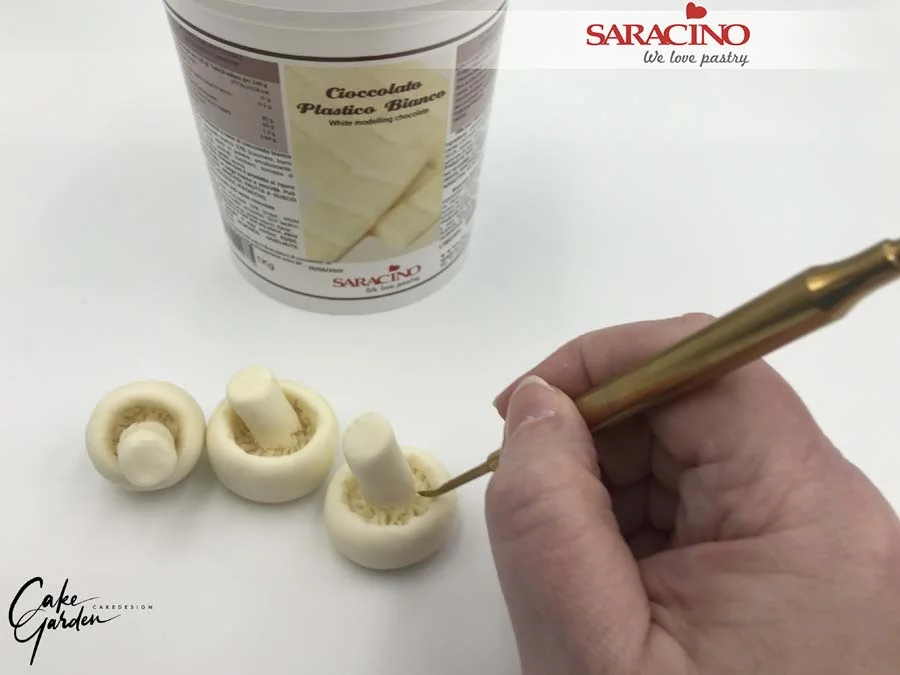
Attach the stalk into the cap, using a modelling tool push some modelling chocolate from the stalk down onto the gills. Use your tool to create some small shallow notches at the bottom of the stalk. Set aside to harden.

Step 12

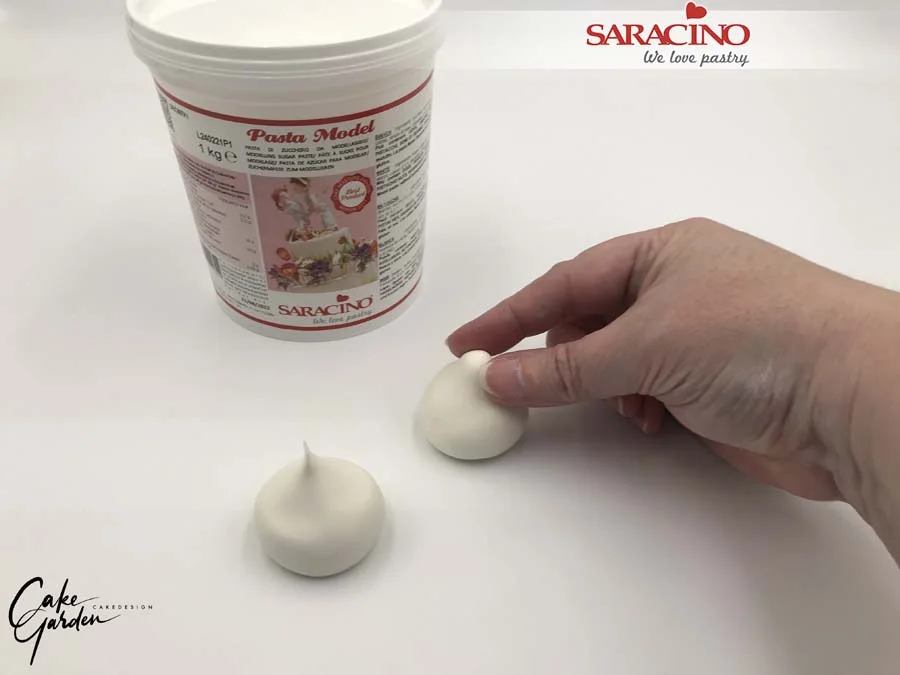
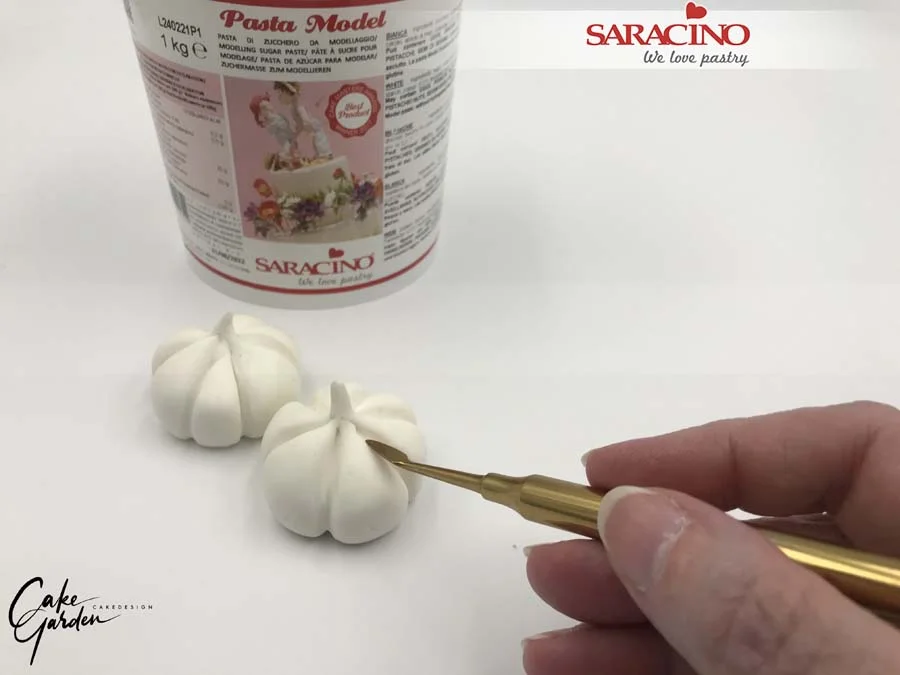
For the garlic you will need approximately 35g of white Pasta Model. Knead the modelling paste well and roll to a ball shape. Create a small tip at one side of the ball.

Step 13

Use your modelling tool to create the garlic gloves. It doesn’t have to be very neat because we cover later with wafer paper.

Step 14

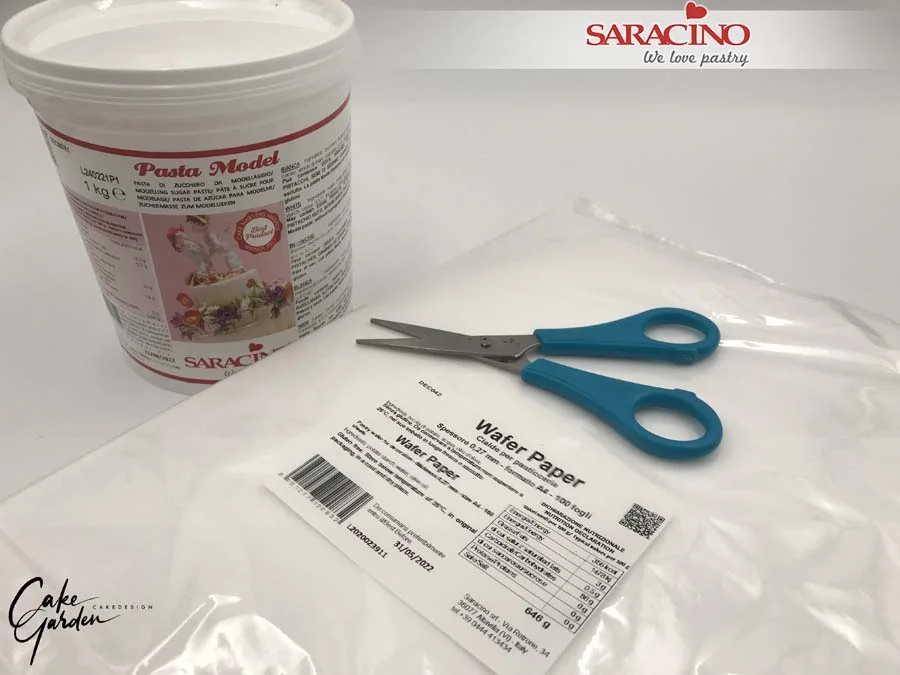
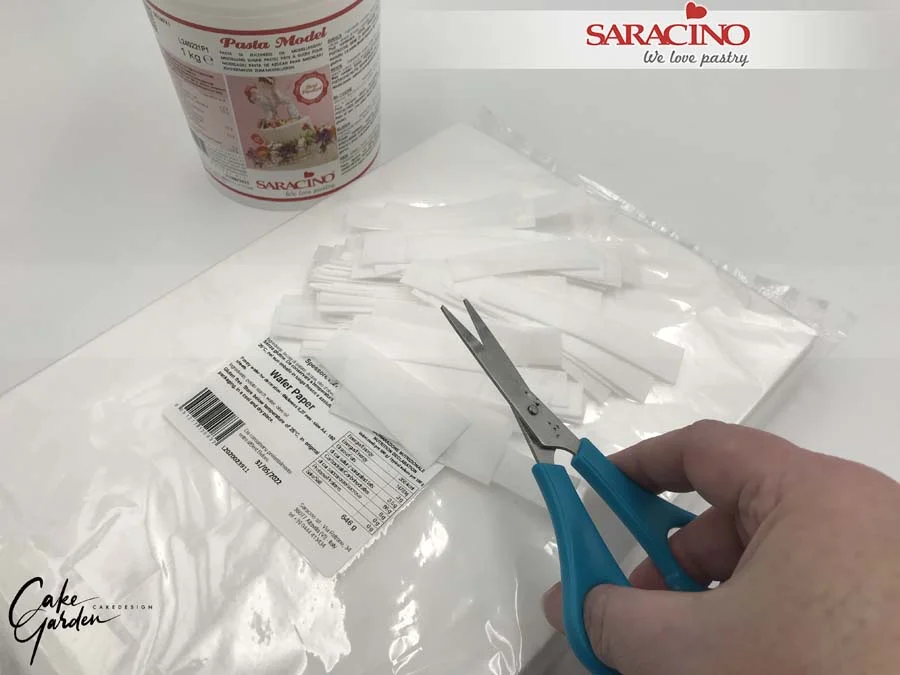
You will need Saracino wafer paper 0.27mm and scissors.

Step 15

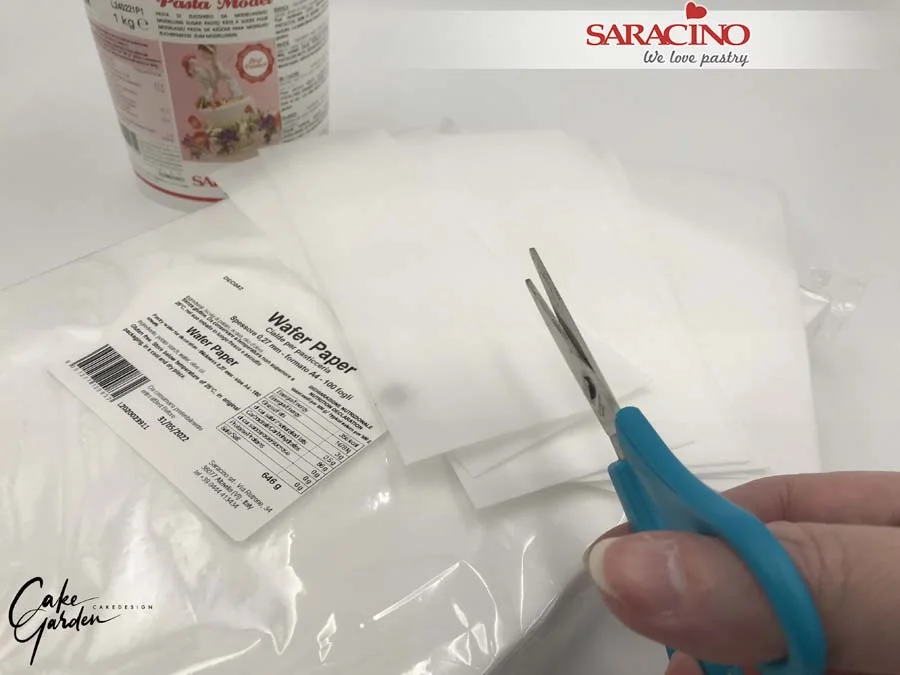
Cut the wafer paper in 4 pieces across the width.

Step 16

Cut the strips narrower. They dont have to be the same size. Cut some narrow and some wider strips. The strips dont have to be cut neatly.

Step 17

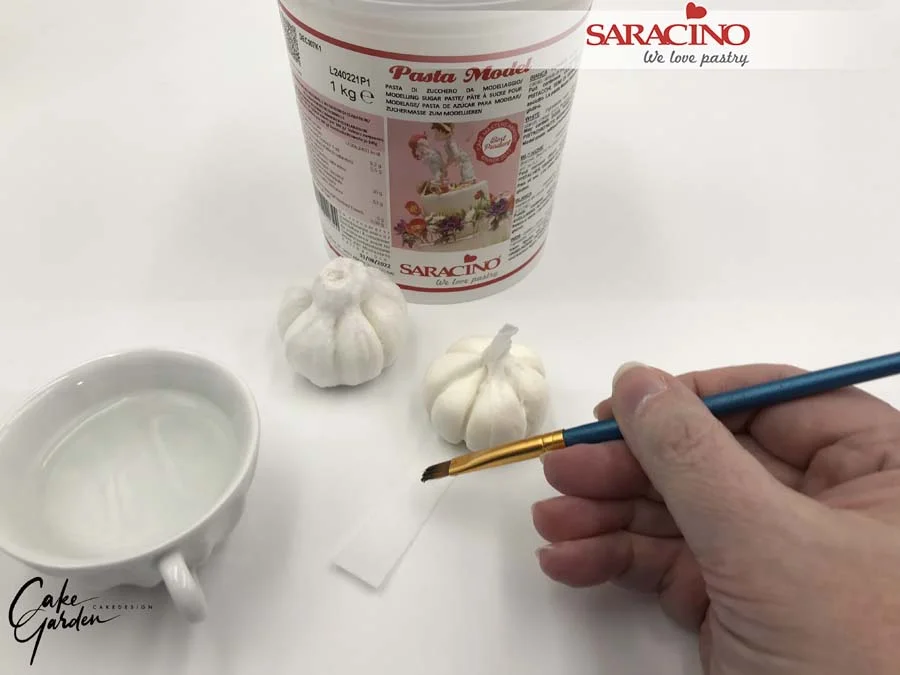
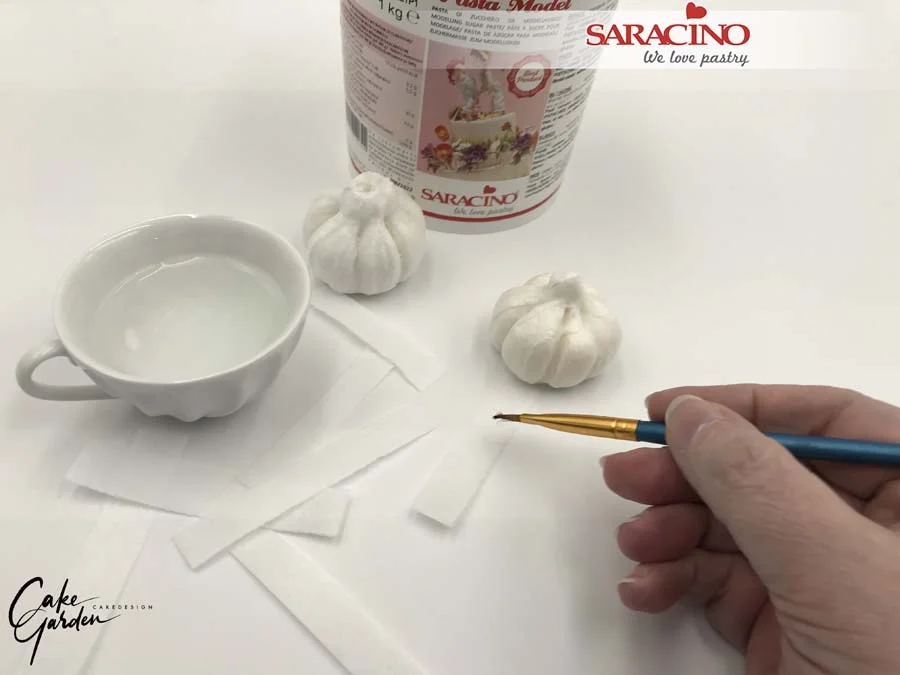
Use a brush to add some water to the strips and attach them to your garlic. Start from the bottom of the garlic and attach them up to the top. Don’t wait too long to attach the wafer paper strips.

Attach the wafer paper strips all around the garlic bulb. If your strips are too long you can trim using scissors. I cut around the top of the garlic with small scissors so it looks like real thin skins on top of each other. You can repeat around the bottom to create some small roots. I have left the tops of the garlic quite short but you can leave them longer if you want to. Leave your garlic to dry on a drying rack so the water can evaporate.

Step 18

Repeat step 17 to attach a second layer and leave it to dry for 24 hours until completely dry.

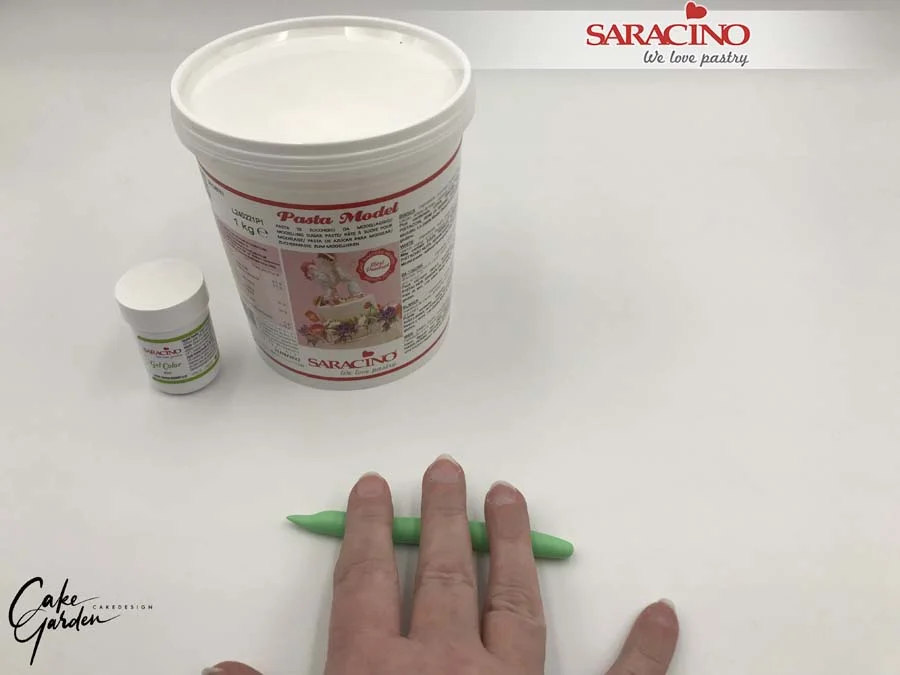
Step 19

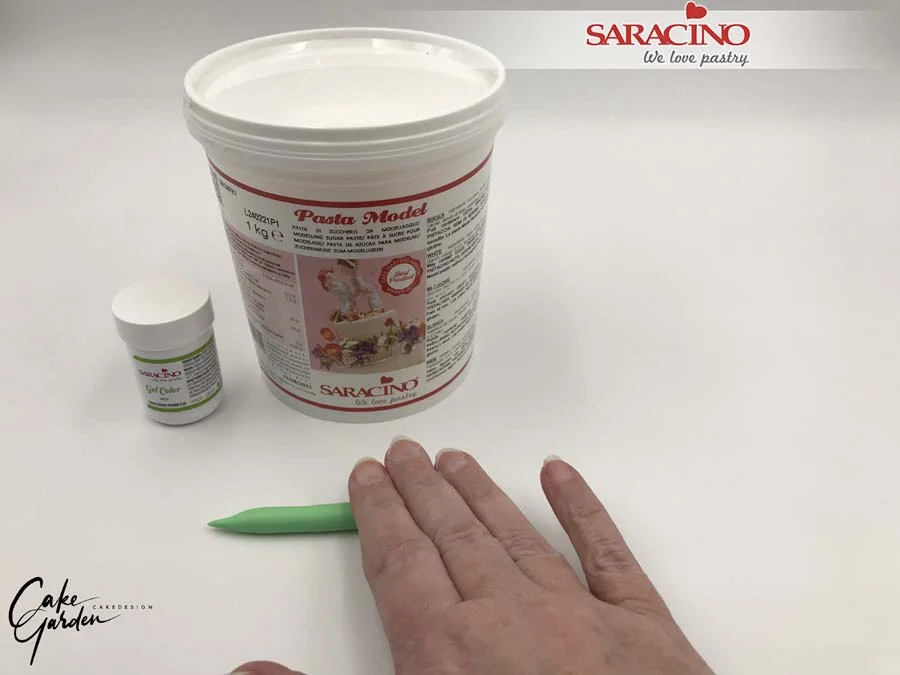
For the green beans you will need about 8-9g of modelling paste for one bean.

Add green gel colour to your modelling paste and knead it well. Roll to a ball.

Step 20

Use about 8-10g of modelling paste and create a 16-18cm long sausage shape. Make sure the ends of the bean are rolled to a point.

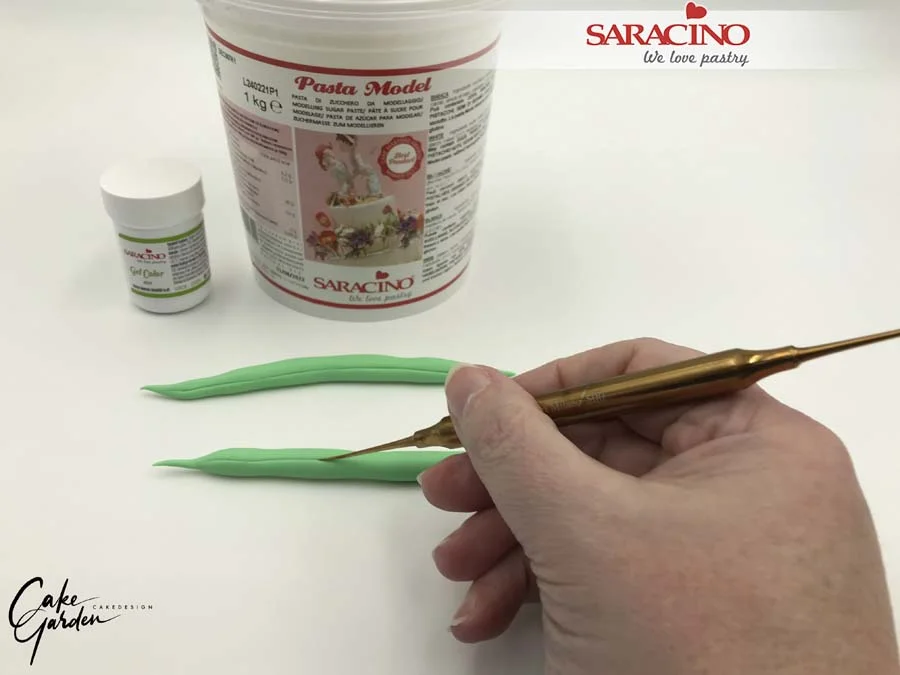
Step 21

Use your fingers to create a lightly lumpy surface so it looks like it has seeds inside.

Step 22

Use a sharp modelling tool to create two thin grooves at the top and bottom of the bean.

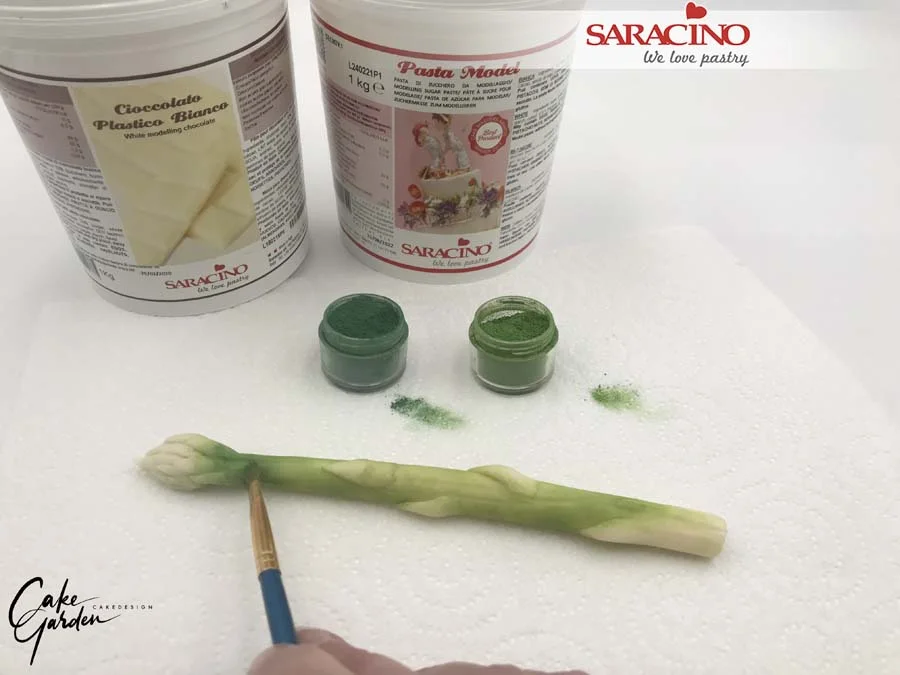
Step 23

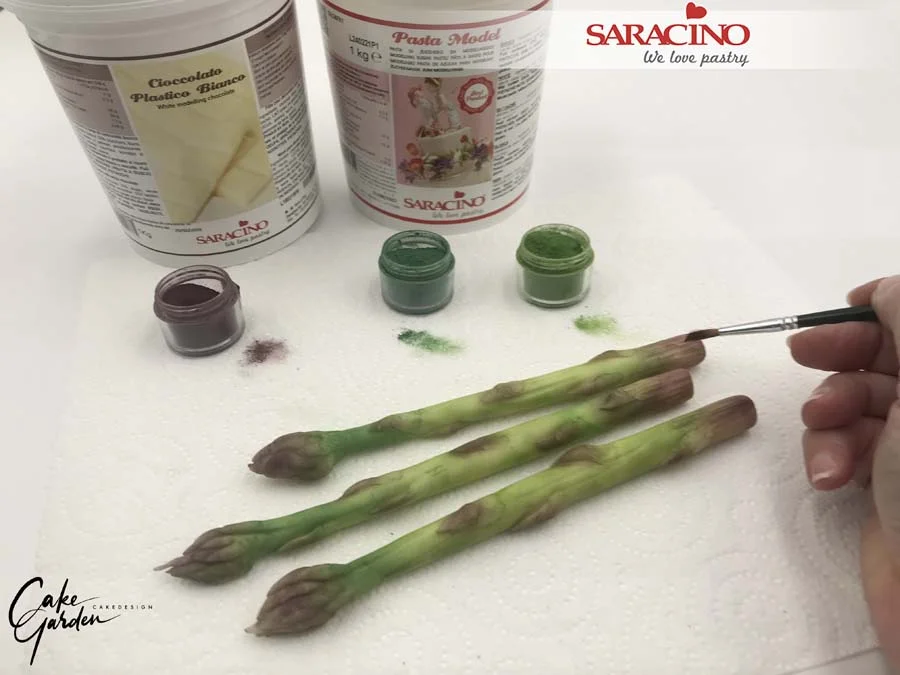
Once the asparagus are dried we are going to dust them to give a realistic appearance. You will need Alpine green, Spring green, aubergine and claret powders. Start by dusting the asparagus stem with the spring green. Don’t use too much dust at once and knock off the excess dust from your brush every time.

Step 24

Using the alpine green dust below the top of the asparagus and add highlights to the stem.

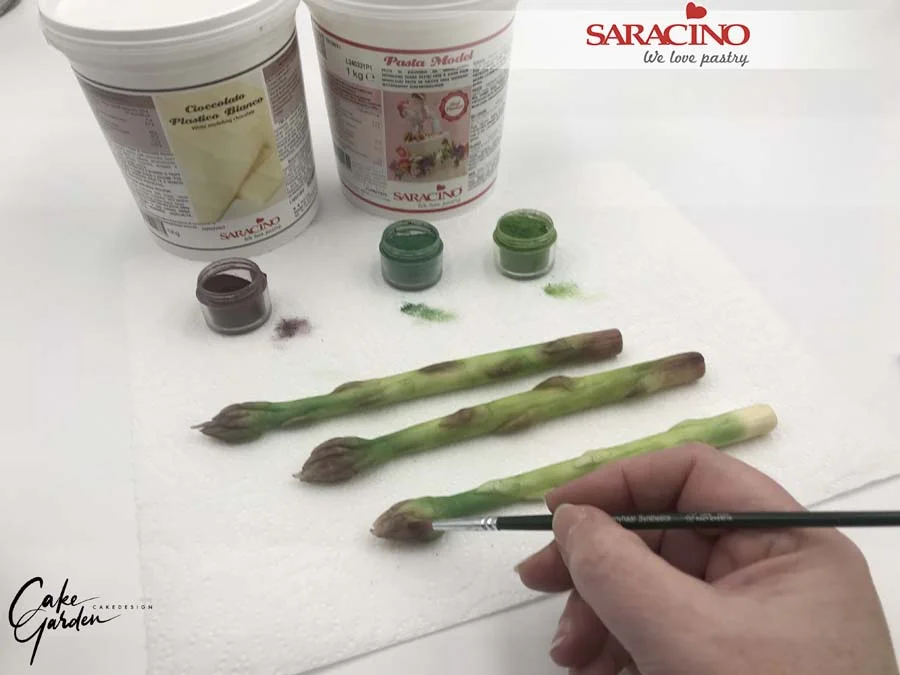
Step 25

Use the aubergine powder to dust the leaves at the top of the asparagus and the leaves on the stem.

Step 26

Also dust the bottom of the stem with the aubergine powder.

Step 27

Use a little claret dust on top of the aubergine to create a warmer look. I used dry kitchen paper to remove excess dust.

Step 28

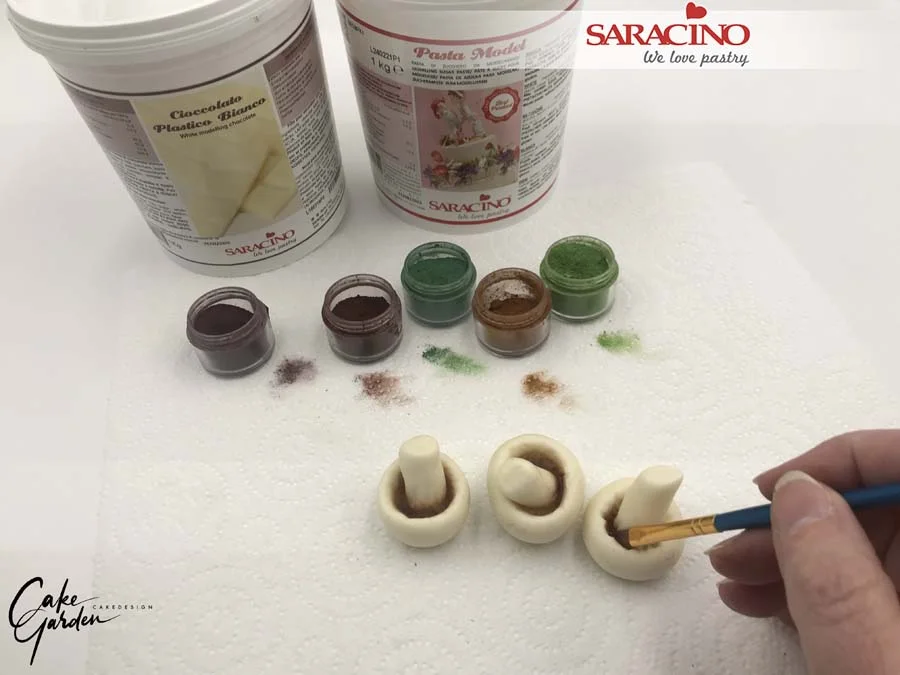
Use the dark brown colour powder to dust the gills of the mushroom.

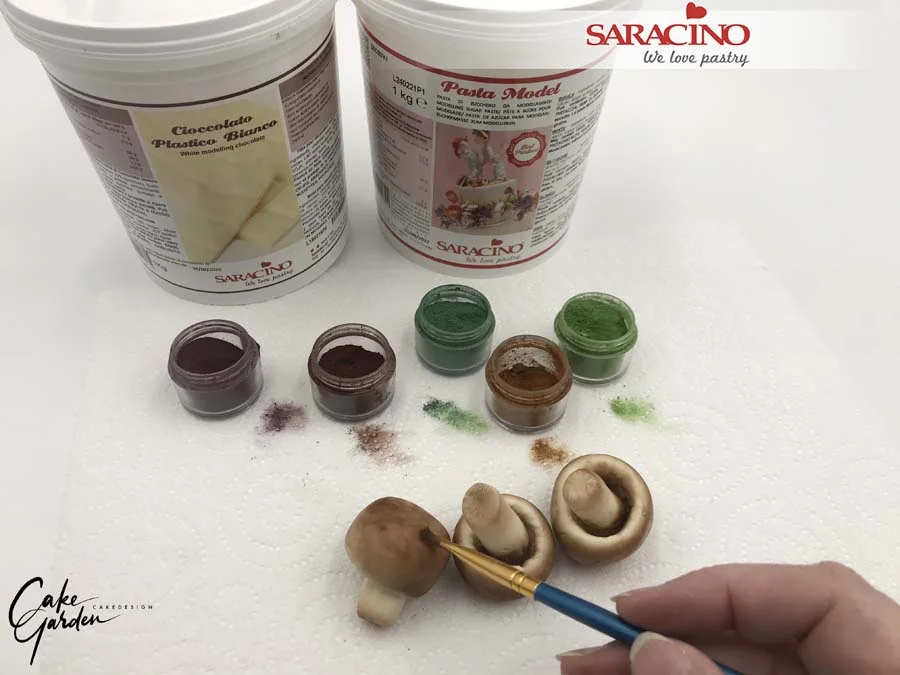
Step 29

Mix the light and dark brown colours, don’t mix the colours too much as you still have to see the two seperate colours. Use a thin brush to apply the dust onto the cap of the mushroom. Make sure you remove the excess dust on your brush each time. Dust the mushroom all around the cap. And dust the bottom of the stem to give definition to the shallow notches.

Step 30

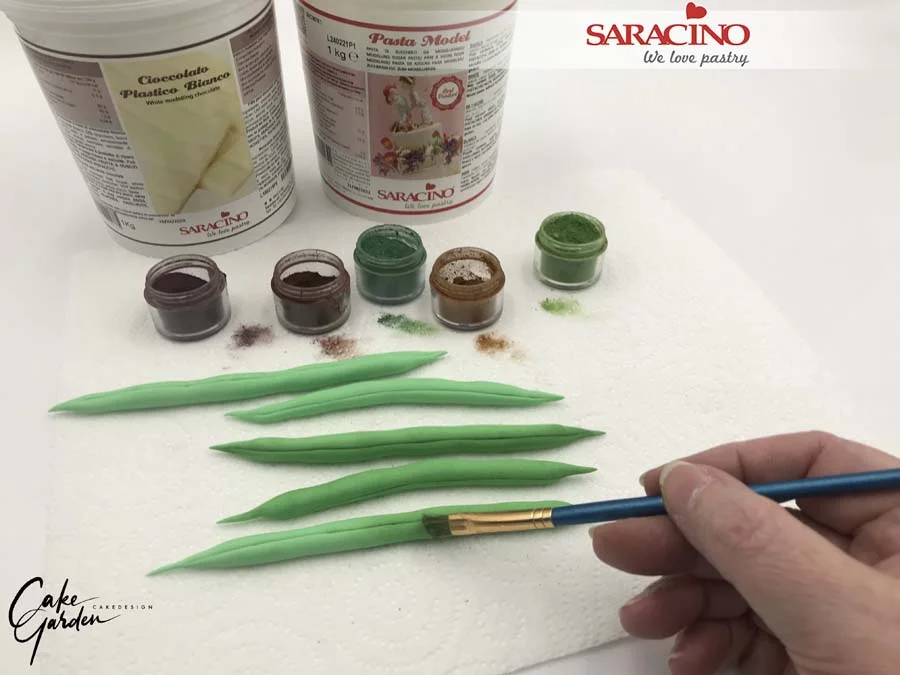
Mix some alpine green and spring green powders to dust the green beans. Dont over mix and make sure you still see both colours. Dust the beans with a soft brush.

Step 31

When the garlic is completely dry use the aubergine and peach powder to dust the garlic.

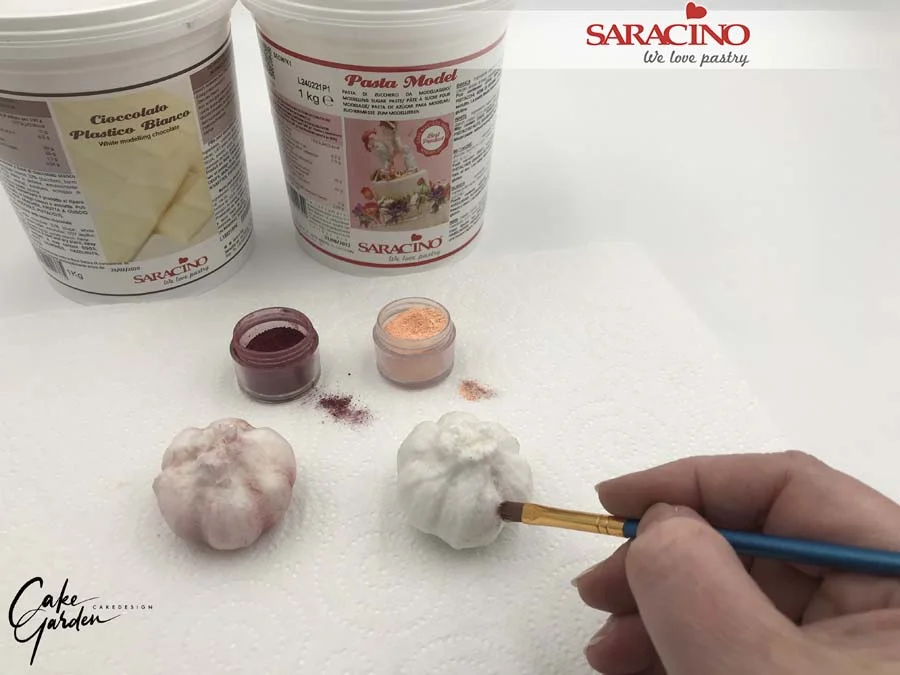
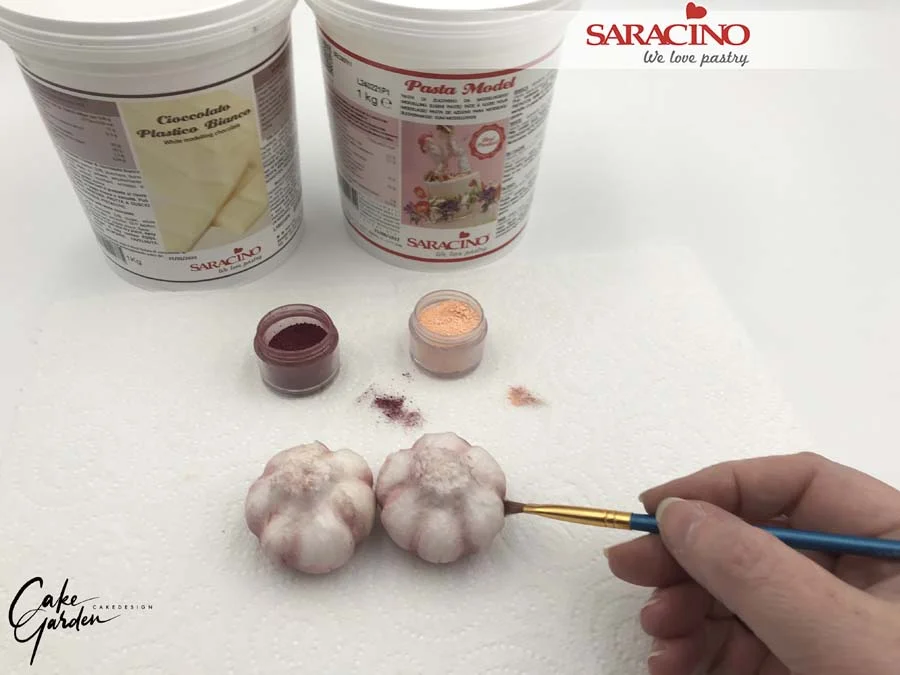
Start with the peach and use the aubergine to highlight the deeper parts between the cloves. If you like you can also use some claret dust to add warmth to the colours.

Step 32

Keep adding shade until you achieve the required look.

Step 33

Now you are ready to decorate your cake! Have fun!