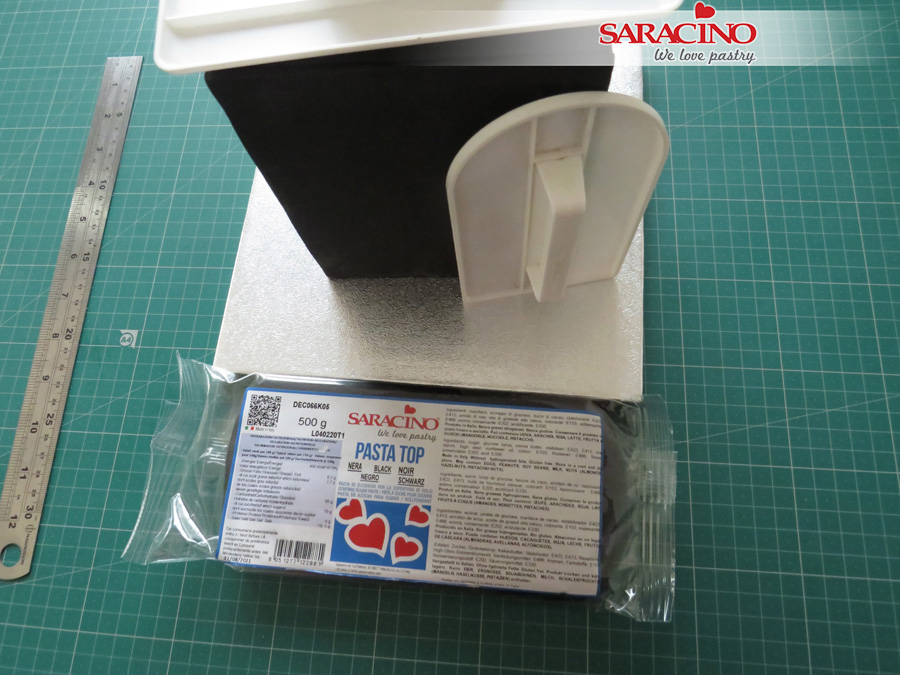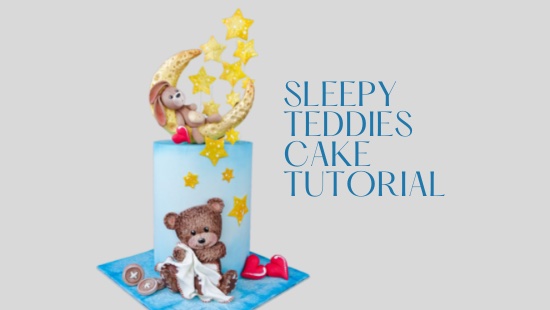
Jul 6, 2021 | Cakes, Modelling
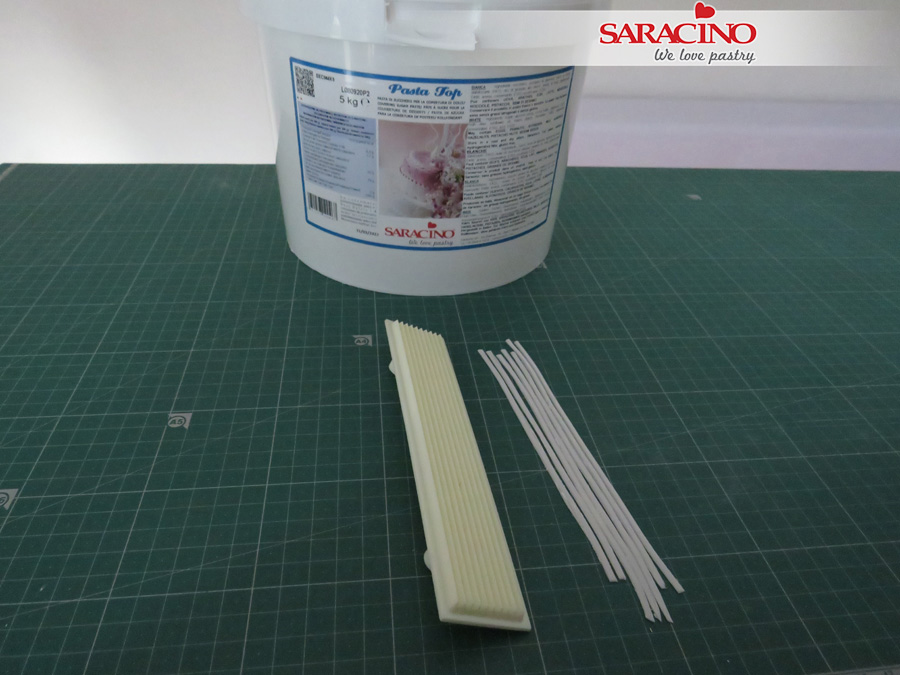
You will need:
- Saracino Pasta Top : white
- Saracino Pasta Model : white, brown, yellow and black
- Saracino powder colours : white, blue, yellow and red
- Saracino powder : light gold
- Saracino Liquid Shiny confectioners glaze
- Saracino Wafer paper 0.27
- Saracino cake gel
- Brown edible food pen
- Round cake with a diameter of about 18cm
- Silicone pad
- Roller
- Craft knife
- Ball and other modelling tools
- Round cutters
- Round nozzle
- Paint brushes
- Scissors
- White florist wires
- Water
Step 1
For covering the board and the cake, mix blue and white Saracino Pasta Top together. For the board roll out thinly and cut into strips and squares of different sizes. Fix randomly on the board to cover the entire area with ‘paving’.
Step 2
Using a bunched up piece of aluminum foil add texture to the board.
Step 3
Dust the board with Saracino blue powder colour. Add areas of white using white powder colour.
Step 4
Dust the top and bottom of the cake using the blue powder colour.
Step 5
For the teddy bear, mix brown and white Pasta Model. Roll a teardrop shape for the body. Flatten the back.
Step 6
Use a sharp pair of scissors to cut the fur texture.
Step 7
Use the brown Pasta Model that we used for the body to roll the head and model the ears. Use a light brown for the nose.
Step 8
Texture the head and ears with scissors. Add light brown paste into the ears. Use a ball tool to form eye sockets. Mark the mouth and nose using a modelling tool.
Step 9
Use black Pasta Model for the eyes and nose.
Step 10
Using the dark brown paste model the bear’s legs and arms.
Step 11
Add the fur texture using the sharp scissors. Fix the arms and legs to the bear.
Step 12
For the blanket roll a rectangular shape of white Pasta Model. For the patchwork pieces cut out shapes using brown paste.
Step 13
Fix the brown “patches” to the blanket. Cut out small strips of white paste and fix as shown to give the stitching look.
Step 14
Add a stitching look to the blanket by painting around the edges with a brown edible food pen.
Step 15
Fix the bear to the cake. Add the blanket into the bears arms. Fix small pieces of brown paste to the bears feet then add small pieces of white paste to give the stitching look.
Dust the bear to add shade using brown powder colour. Paint small white highlights to the eyes and nose using white powder mixed with Liquid Shiny confectioners glaze.
Step 16
For the crescent moon mix yellow and white Pasta Model. Roll out and shape the crescent.
Step 17
Using ball tools of differing sizes add holes to the moon surface. Allow to dry.
Step 18
Fix the moon to the top of the cake. Insert a toothpick to add additional support. Dust the edges of the moon with orange powder colour. Paint the moon surface with light gold powder mixed with Liquid Shiny glaze.
Step 19
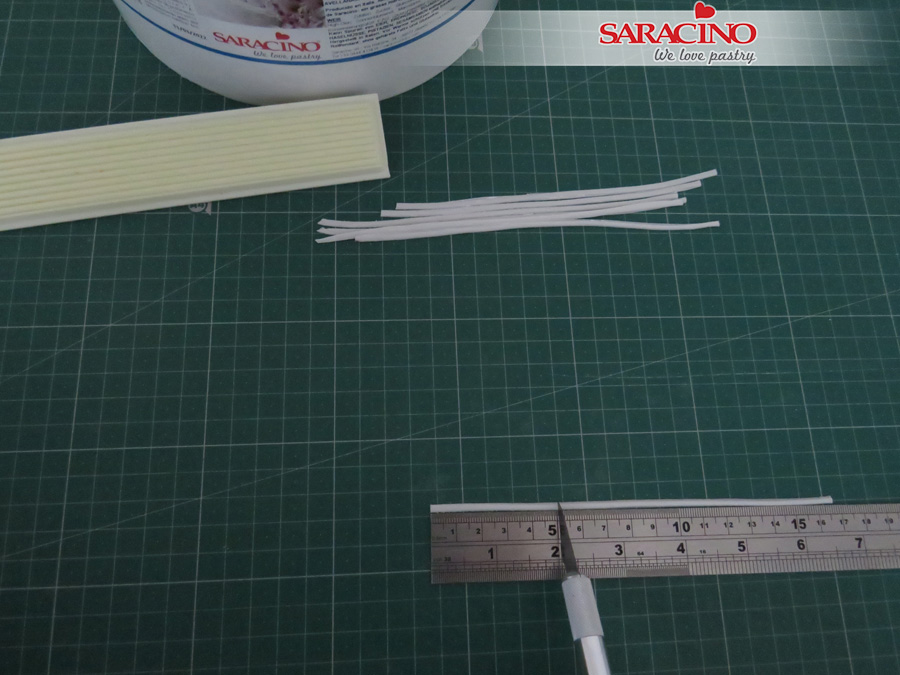
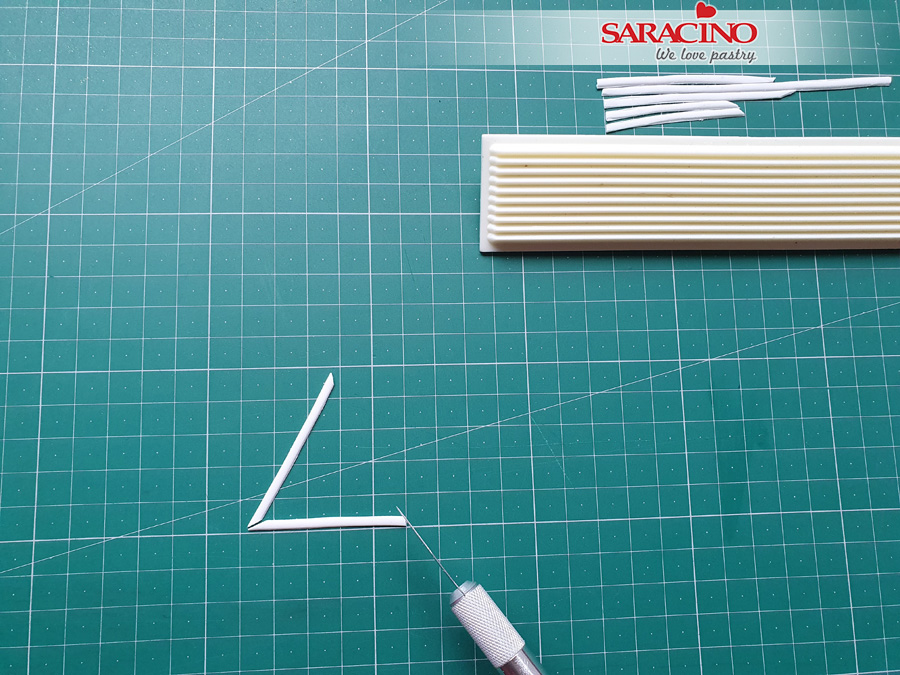
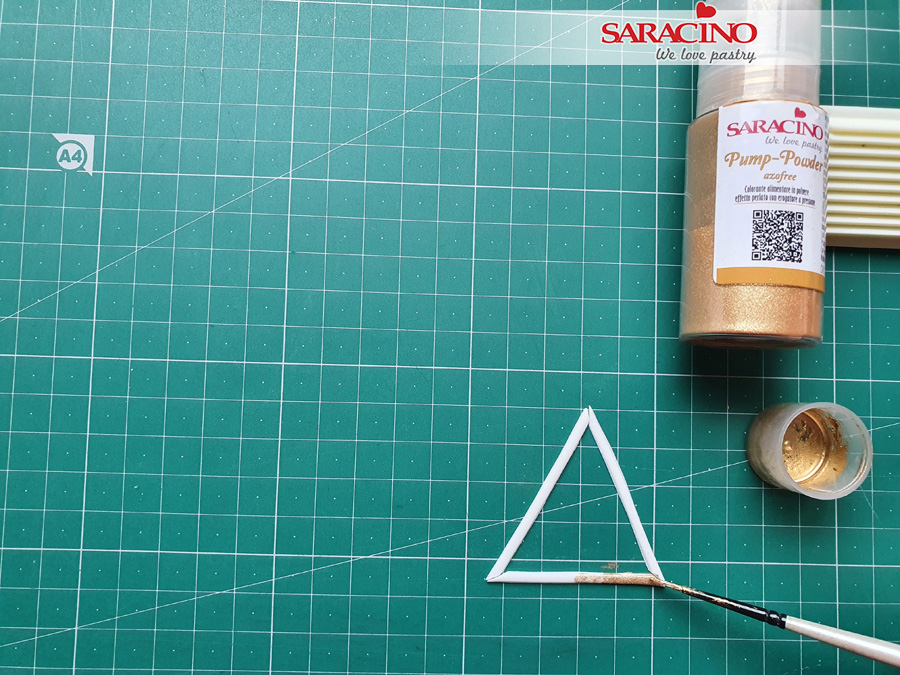
Cut out large stars from wafer paper. Paint one side of a star with a little water. Add a flower wire to the star and press another star shape over. you will need some stars without the wire.
Step 20
Mix yellow powder colour with Liquid Shiny confectioners glaze. Paint both sides of the star and allow to dry. Mix white powder colour with Liquid Shiny confectioners glaze and paint white dots on the stars.
Place wired stars to the back of the cake. If you are using a real cake use posy picks or straws. Fix a few stars to the front of the cake.
Step 21
Mix brown and white Pasta Model for the rabbit. Model the rabbit in a similar way as the bear. Do not texture the fur and make the rabbit’s ears longer.
Use light brown Pasta Model for the nose and tummy. Add eye sockets using a ball tool. Use a sharp tool to draw the line on the head.
Step 22
Add black Pasta Model for the eyes and nose. Draw the mouth and tummy lines with a modelling tool.
Step 23
Dust the rabbits ears and cheeks using pink powder colour. Fix the rabbit to the moon. Mix white powder colour with Liquid Shiny confectioners glaze and paint white dots in the eyes and nose of the rabbit. Use a sharp tool to add the mouth and tummy button.
Step 24
Use red Pasta Model to model three heart shapes.
Step 25
Mix white powder colour with Liquid Shiny confectioners glaze. Add white dots and lines on the side of the hearts. Fix one heart to the rabbit’s paw and two hearts on the cake board.
Step 26
For the buttons cut out a disk using light brown Pasta Model. Use a smaller cutter to mark the outline of the button.
Step 27
Using the end of a piping nozzle cut 4 holes in the centre of the buttons. Roll two white strips of white Pasta Model and insert them into the holes of the button for a stitching look. Mix white powder with Liquid Shiny confectioners glaze and paint white dashes on the side of the buttons.
Step 28
Your cake is ready!
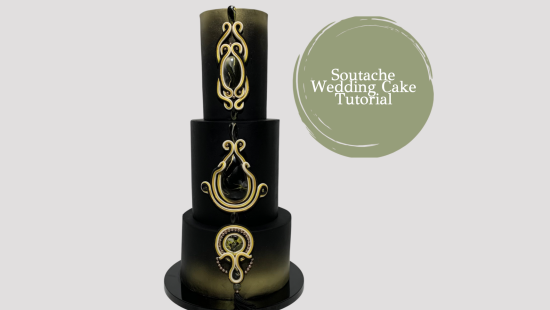
Apr 6, 2021 | Cakes, Modelling
You will need:
-
Saracino black Pasta Top
-
Saracino skin tone Pasta Model
-
Saracino yellow Pasta Model
-
Saracino black Pasta Model
-
Saracino gold dust
-
Gold airbrush colour
-
Saracino cake gel
-
Saracino Liquid Shiny
-
Trex
-
Rolling pin
-
Paint brushes
-
Long blade or knife
-
Scalpel
-
Three dummy cakes 5 and 7 inch cakes (8 inch high) 9 inch cake (5 inch high)
-
Work mat
-
Rolling mat
-
Cake smoothers
-
Cake drum
-
Extruder
-
Ball tool
-
Straws
Step 1
Prepare your cakes or dummies. Brush each one with Trex to help the fondant to stick. Place the Saracino Black Pasta Top on your work surface, kneed until smooth and pliable. Roll out the fondant to your preferred thickness.
Step 2
Trim off the excess fondant with a sharp knife.
Step 3
Use cake smoothers around the side and top of the cake. Smooth it until you achieve a sharp edge. Repeat for the 7 and 5 inch cakes or dummies.
Step 4
Stack your tiers. When using real cake remember to use support between the tiers. Airbrush the top and the bottom of the cake with gold airbrush colour.
Step 5
Take a piece of black pasta model and an equal amount of skin tone and yellow to the proportions shown.
Step 6
Mix colours together. You can use your fingers to move and stretch the modelling paste so the colours will slightly blend.
Step 6
Smooth the modelling paste and create an oval shape. Place the oval shape on the mat and squeeze the bottom to create a tear drop shape. Smooth the edges with your fingers.
Step 7
Repeat to create smaller tear drop and circular shapes. You will need one large tear drop. One large oval. One medium circle. Five small tear drop. 2 small circles. Two smaller circles. See the picture at the end of the tutorial to check for sizes.
Step 8
Cover your work surface with cling film. Using Saracino Liquid Shiny Glaze add a shine to the ‘stones’. Paint your stones with glaze (Afterwards use an alcohol to clean your brush).
Step 9
Prepare Saracino gold dust. Mix gold dust with a little glaze.
Step 10
Using fine brush paint irregular lines on the stones.
Step 11
We want to achieve this beautiful stone effect.
Step 12
Roll out the skin tone, yellow and black modelling paste, approximately 1mm thickness. Cut the paste into long strips. Cover it with stretch cling film to prevent drying too quick.
Step 13
Fold the strips of Saracino modelling paste in half lengthways. Use Saracino cake gel to stick the modelling paste together.
Step 14
Layer the three colours as shown. Apply a little cake gel between each layer to stick together. This way you will achieve the three colour combination.
Step 15
Using a sharp knife cut a strip off the top of the three coloured modelling paste.
Step 16
You need to achieve coloured strips, round on the top and flat on the bottom.
Step 17
Place the largest tear drop stone and brush the sides with a little cake gel. Place the strip around the outside of the tear drop. Fix it all the way around the outside of the stone. Leave a short length which we will curl. Cut the excess.
Step 18
Curl both ends, you can use the end of a brush and place it in the middle to twist around. Use a long blade to lift it up off the mat.
Step 19
Dust some corn starch on your work surface to prevent sticking. Make more strips of the three colour modelling paste. Fix it around the previous strip as shown.
Step 20
Curl the ends of the second strip on both ends. Place both ends over the first strip and onto the stone. Fix another strip of the modelling paste.
Step 21
Curl both ends and place two of the previously prepared small circles inside the curl. Fix smaller tear drops on the top and bottom of the design.
Step 22
Place an oval shaped stone on your mat and fix two of the coloured strips. Trim the excess leaving a length as shown.
Step 23
Curl the ends at the top and bottom of the stone.
Step 23
Take one of the strips and cut in half.
Step 24
Curl to create the round ends.
Step 25
Make two identical strips, make sure the skin colour is inside on both sides.
Step 26
Place the two strips on the top of design and prepare another two.
Step 27
Place strips on the bottom and trim the excess to the length required.
Step 28
Using two small tear drop shapes place them at the top and the bottom. Do not stick them just yet, we will fix them directly onto the cake.
Step 29
Using a round stone wrap a strip of the modelling paste around it. Trim the excess.
Step 30
You will need 3mm – 4mm sugar pearls.
Step 31
Use cake gel to brush the side. Fix sugar pearls around the perimeter.
Step 32
Apply a little glue to another strip. Wrap it around the pearls.
Step 33
Using a small tear drop stone wrap another three coloured strip around the outside. Fix it together at the top. Place it on top of the round stone design already made. Curl the top.
Step 34
Fix the ends underneath the round design.
Step 35
Place two small round stones at the bottom of the design.
Step 36
Mix black modelling paste with Trex and knead well. Use an extruder with small holes. Push out the paste. Cut to length and repeat the process.
Step 35
Create the tassel by fixing together at the end.
Step 36
Place it on the bottom of our design. Do not fix yet.
Step 37
Our three edible jewels are ready to fix to the cake.
Step 38
Use Saracino glaze and gold dust, mix them together. Paint the yellow lines on all three designs.
Step 39
Brush the back of your jewels with cake gel.
Step 40
For the middle tier fix two tear drop stones. One on the top and one on the bottom.
Step 41
Fix the top tier jewel.
Step 42
Fix the bottom tier jewel and add some pearls to the design.
Step 43
Add a little glue ready to fix sugar pearls inside the curves on the middle and top tier.
Step 44
Fix the pearls inside the curls. Fix the tassle and ball to the lower jewel. Place the final sugar pearl just above the tassel.
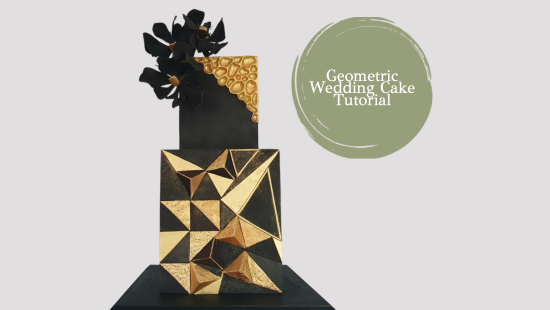
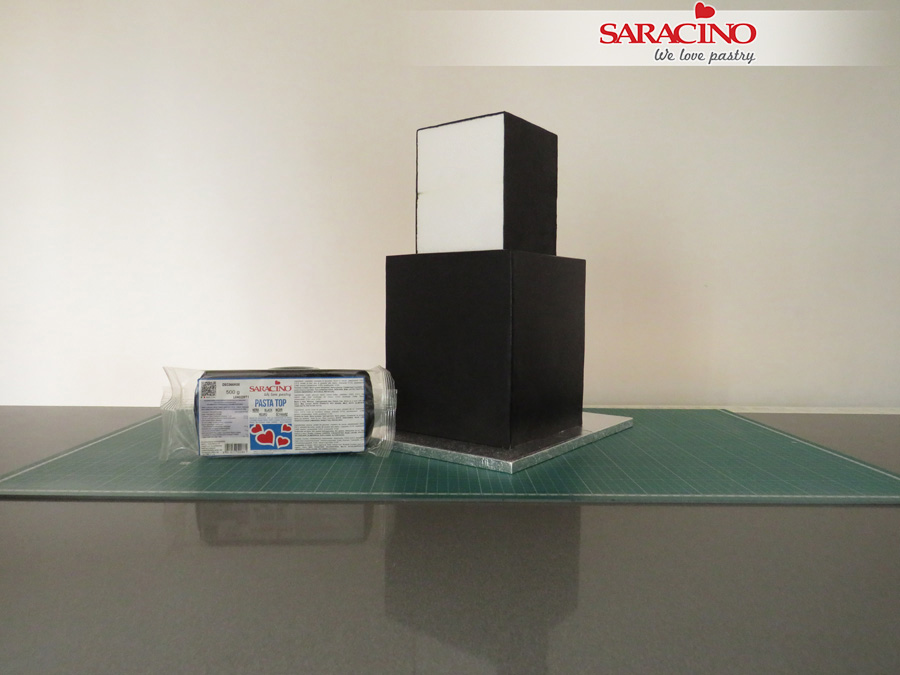
Apr 6, 2021 | Cakes, Modelling
Skill level: INTERMEDIATE
You will need:
INGREDIENTS:
- Saracino Black Pasta Top
- Saracino White Pasta Top
- Saracino Black Pasta Model
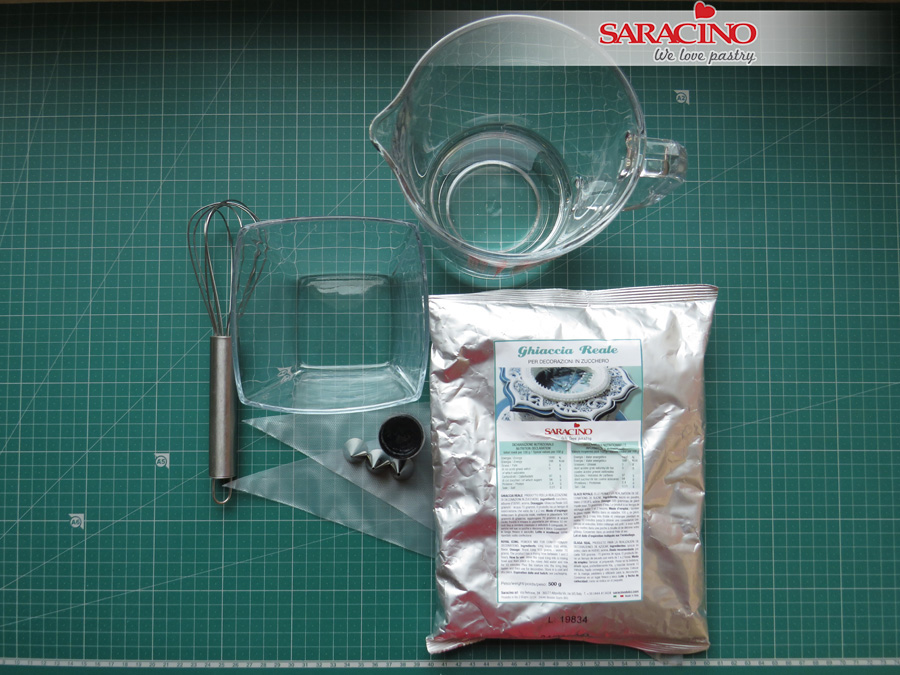
- Saracino Ready to Mix Royal Icing
- Saracino Gold Spray Pump-Powder
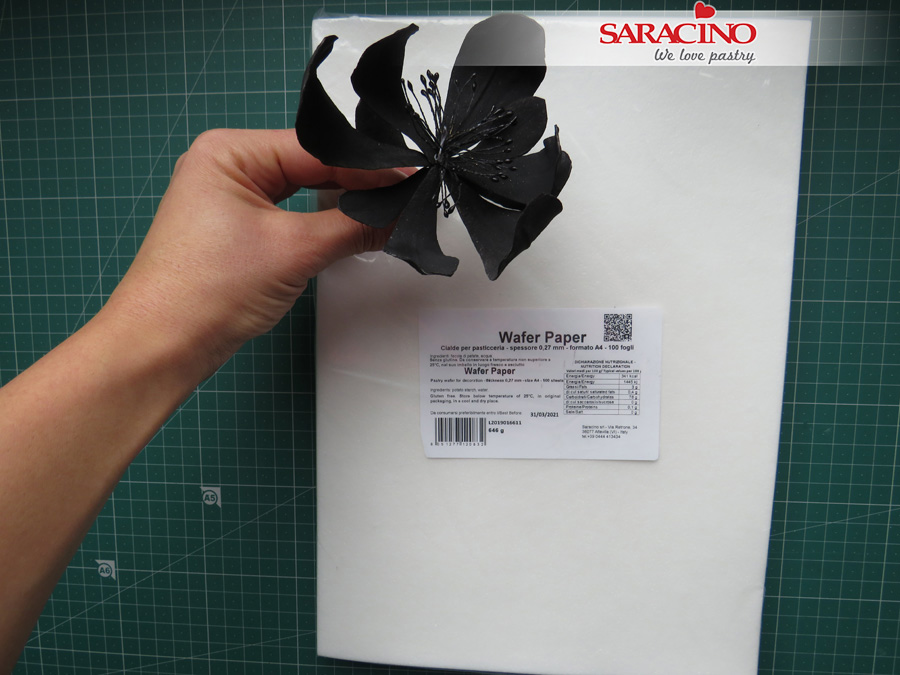
- Saracino Wafer Paper – 0.27 mm thick
EQUIPMENT:
- 2 square cake dummies – 5”, 7”/ top – 6” deep, bottom – 8” deep / or a square cake of two tiers
- Cake turn-table
- Rolling pin with spacers
- Fondant smoothers
- Exacto knife
- Food grade rejuvenator spirit or clear alcohol
- Ball modelling tool
- Dresden tool
- Piping bags
- Piping metal nozzles – No 2 and No 3
- PME multi-cutter or any rectangle cutter set
- Square cutter
- PME strip cutter No 1
- Square cake drum
- Edible glue
- Black edible gel colour
- Clean brushes
- Round sponge brushes
- Scratch wire brush/ Metal brush
- Posy flower picks
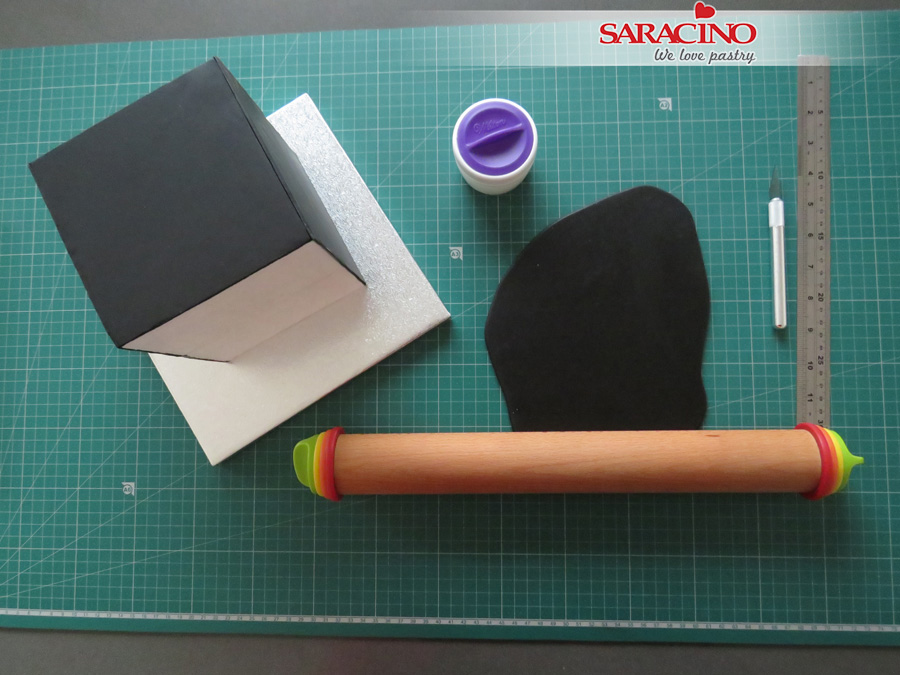
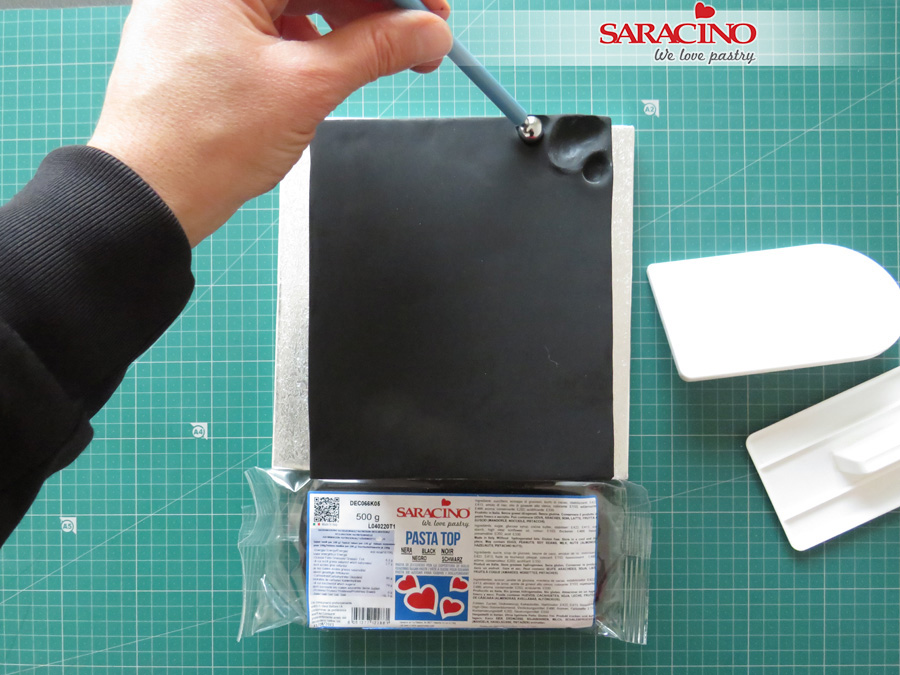
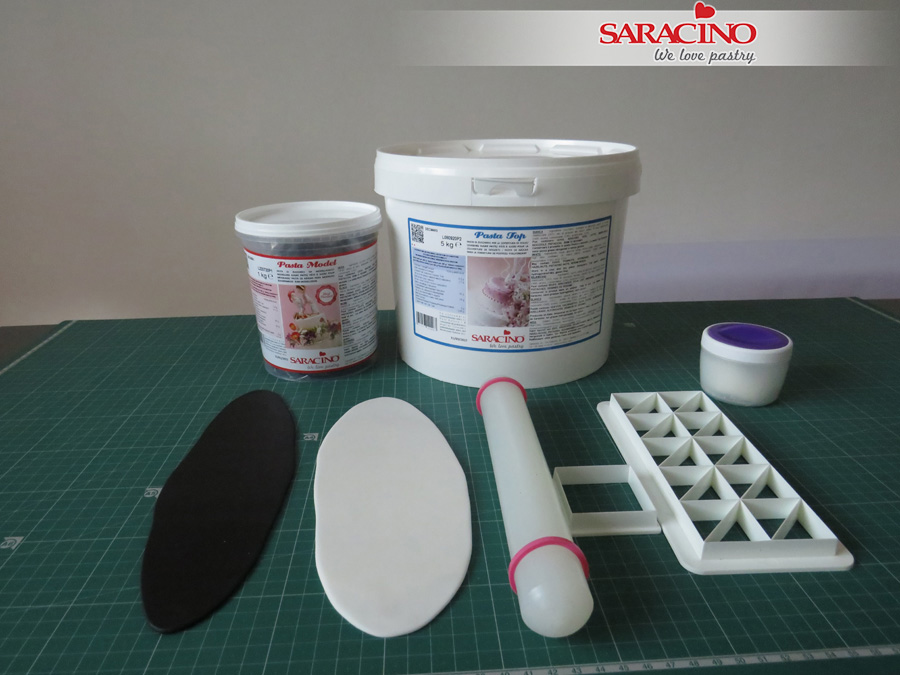
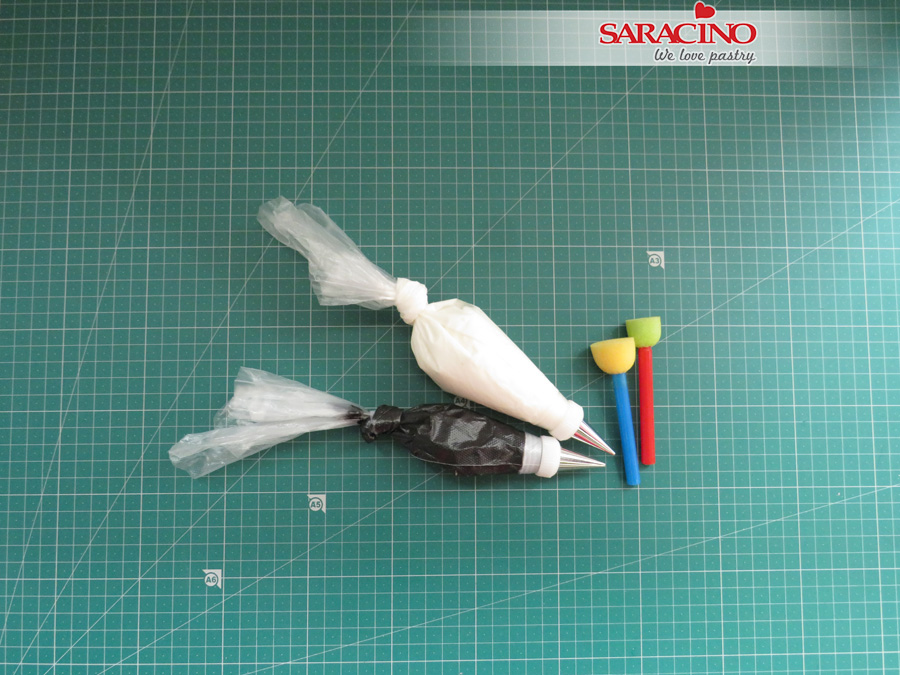
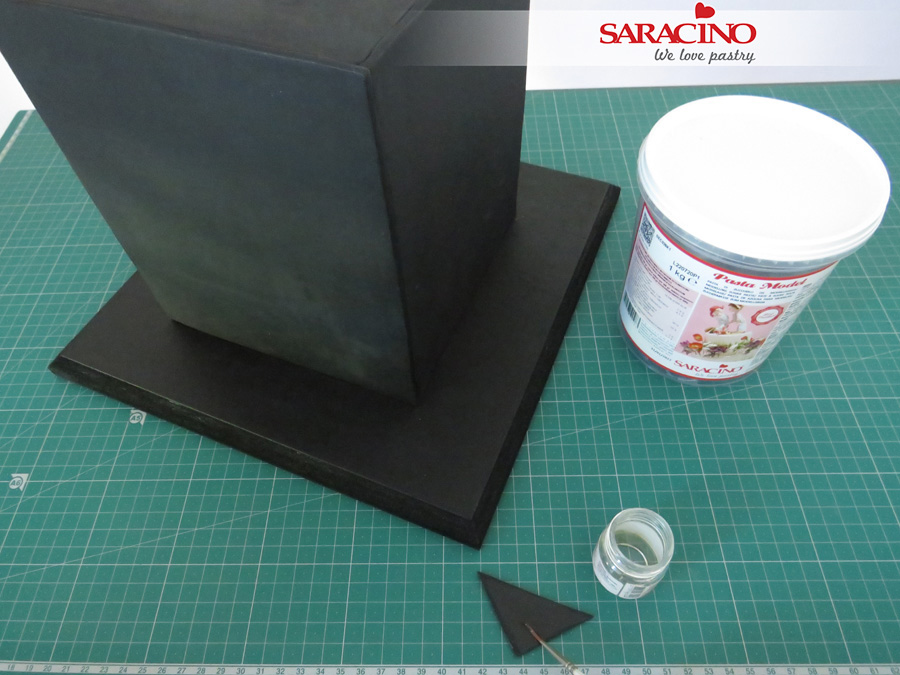
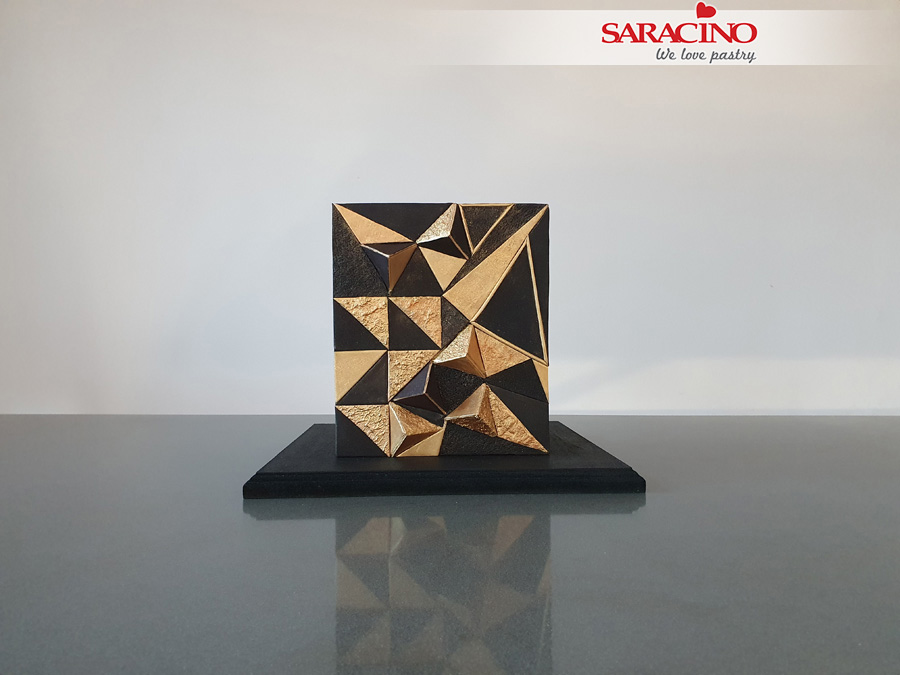
Step 1
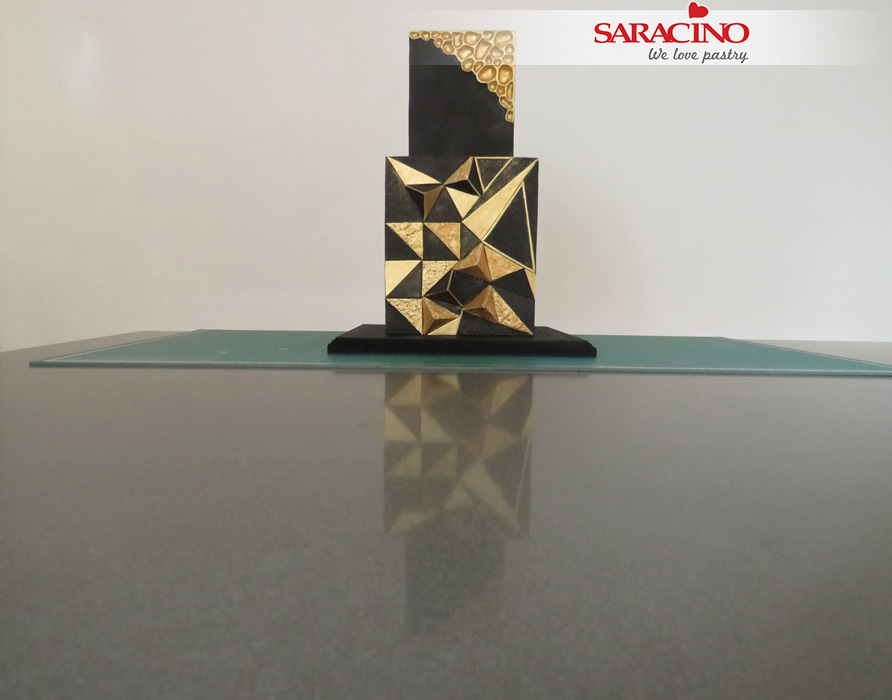
Cover your cakes/dummies using the Black Pasta Top and leave the front side of the top tier uncovered. You can use panelling method to cover the dummies.
TIP 1: Pasta Top is Vegan, Gluten free and has NO hydrogenated fats. It’s very stretchy and can be rolled very thin.
TIP 2: Panelling square cakes is a bit more time-consuming than covering a square cakes in one piece of fondant, but it does result in super sharp and clean edges, so the extra time is worth it.
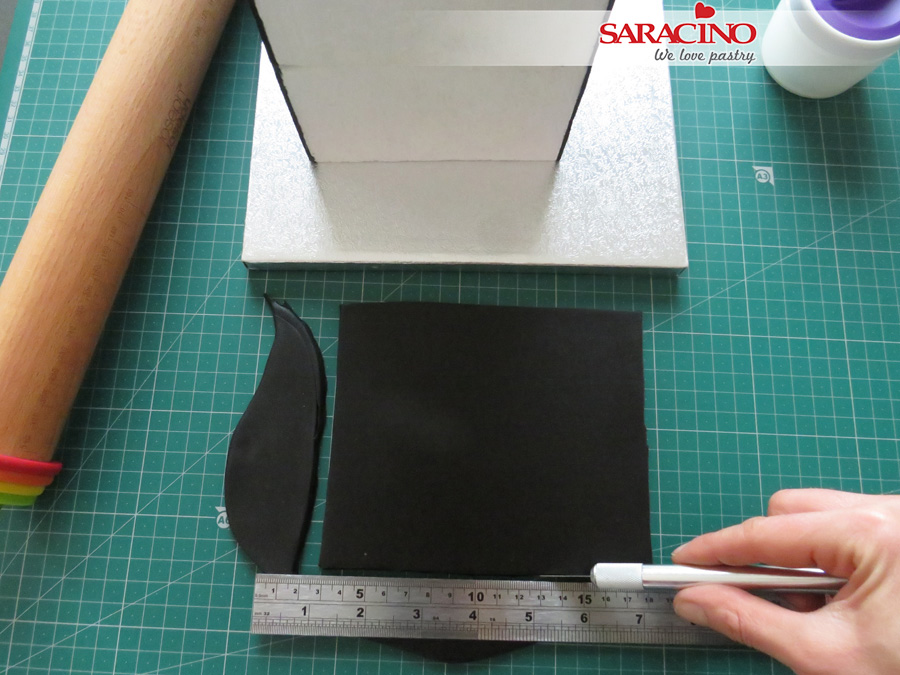
Step 2
Roll out the fondant to about ¼” (6 mm) thick.
Step 3
Trim the fondant to your cake measurements and try to keep it as square as possible.
Step 4
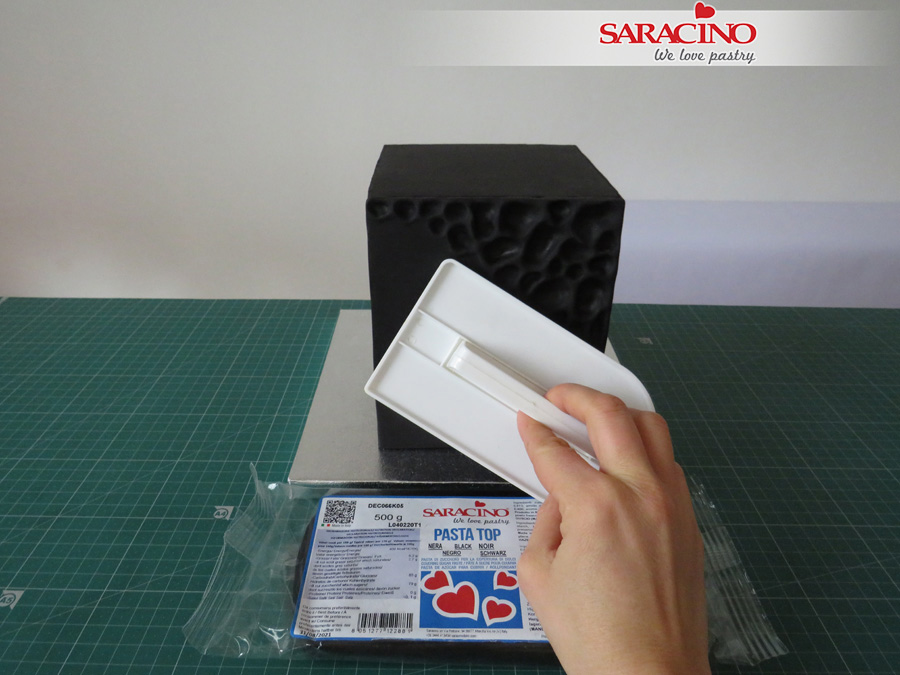
Take the fondant panel and place it at the front side of the top tier. Use the fondant smoothers around the side and top of the cake. Keep smoothing until you get sharp edges.
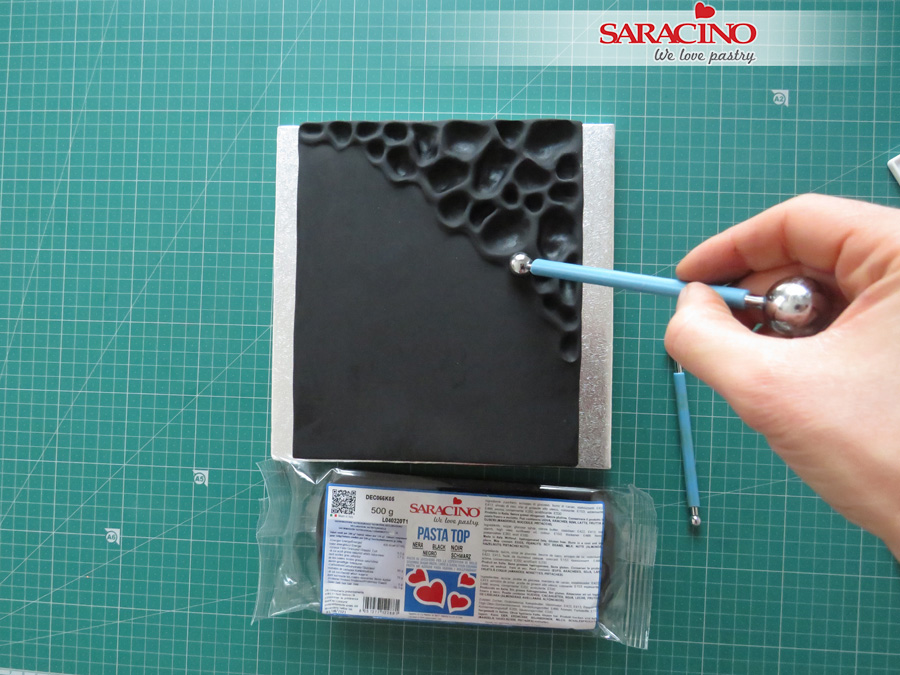
Step 5
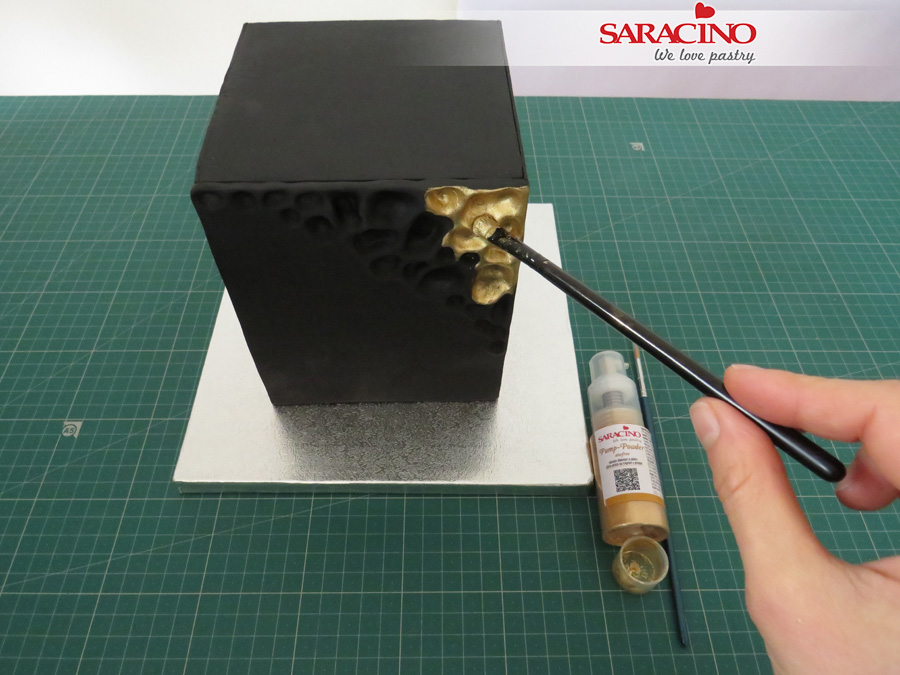
Turn the cake front side up and start to press your ball tool into the fondant to form the moon crater pattern.
Step 6
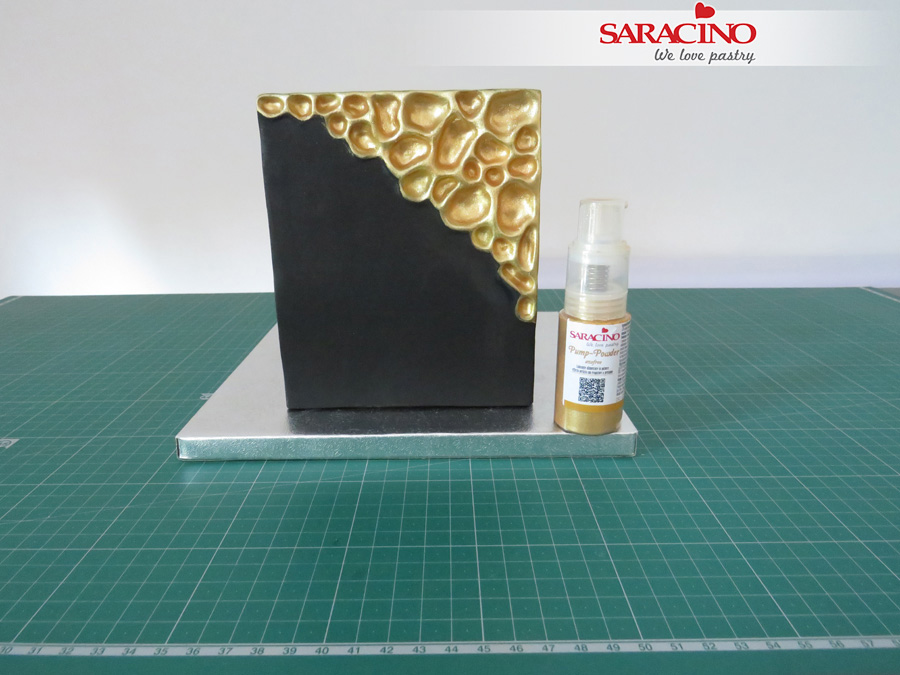
Keep forming it until you get the desired effect.
Step 7
Gently press the smoother onto the fondant to form an edge at the end of the pattern.
Step 8
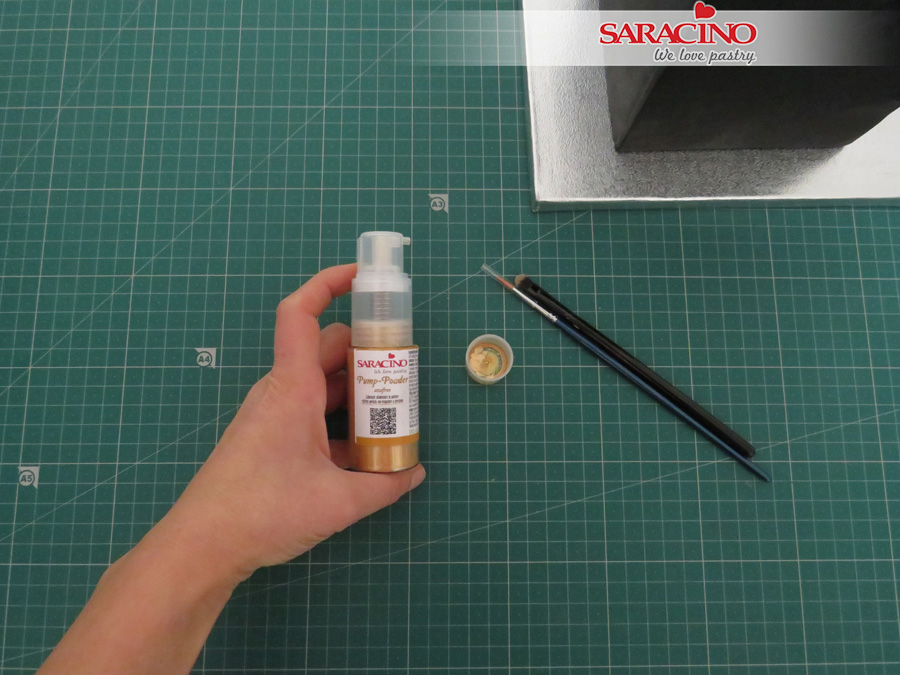
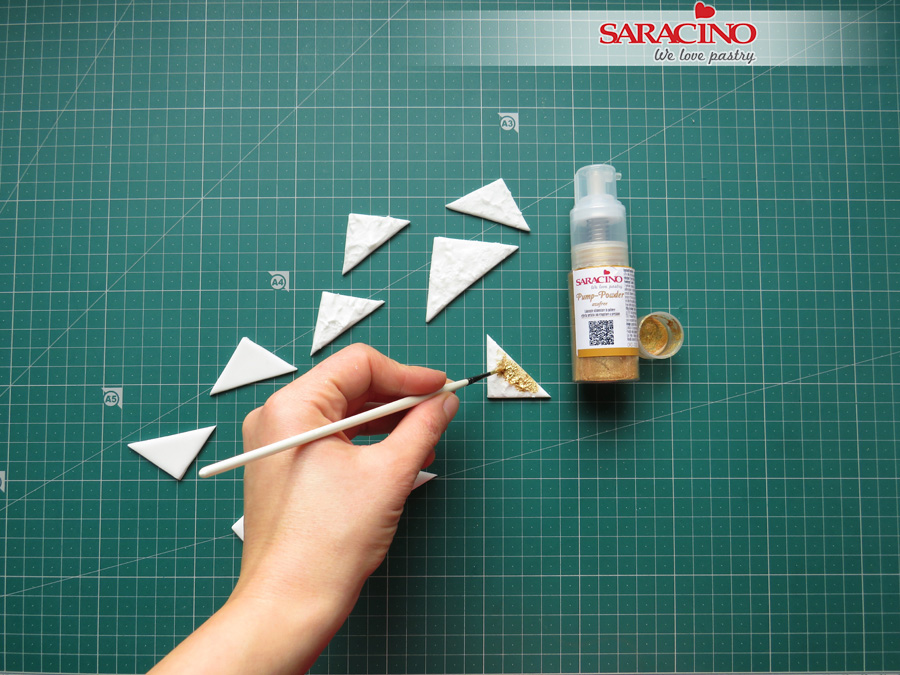
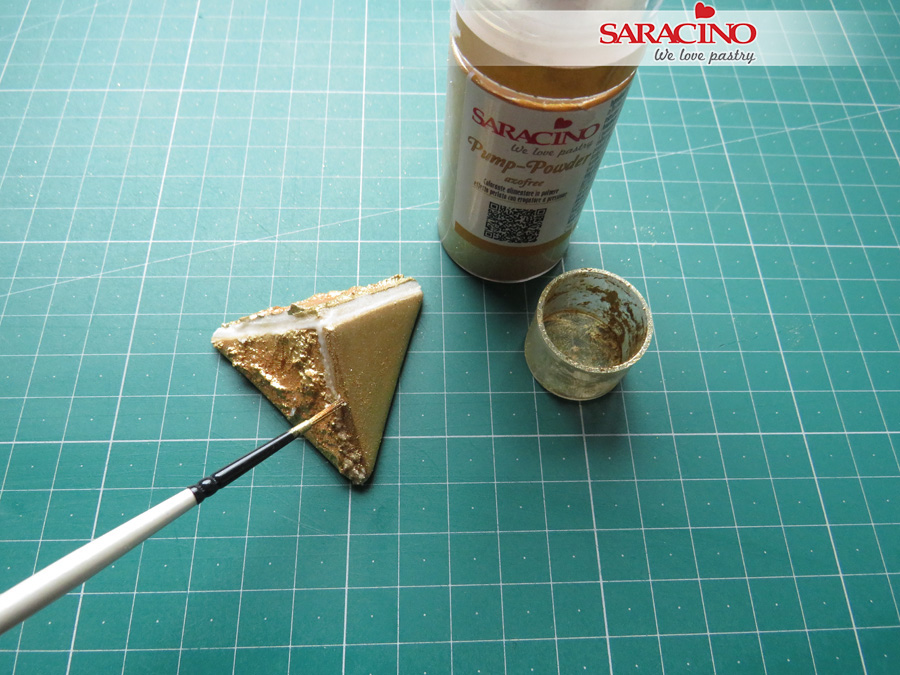
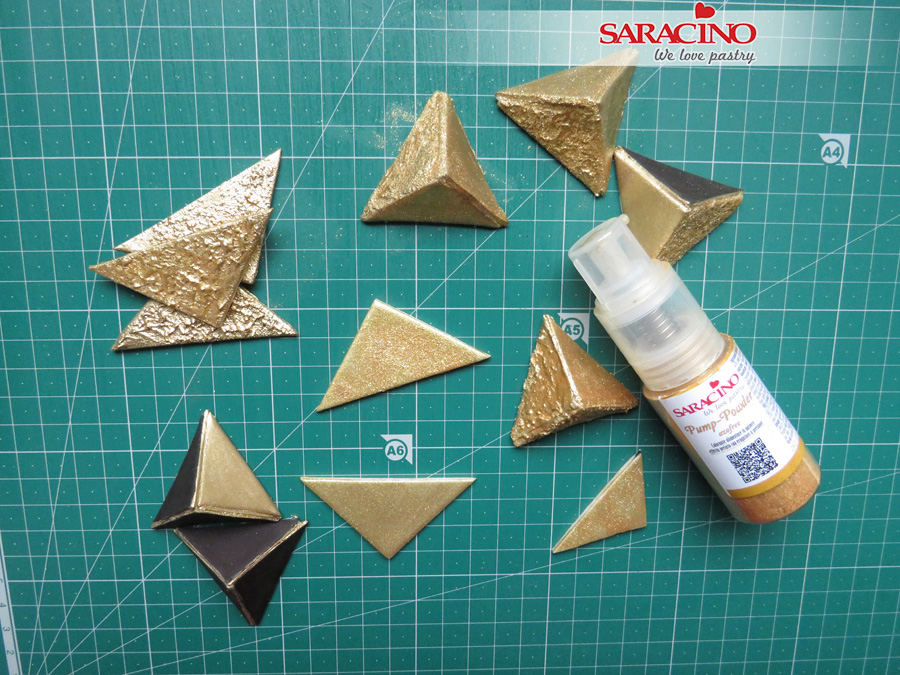
Use Saracino Pump-powder Gold Dust and mix it with a few drops of food grade rejuvenator spirit or clear alcohol.
Step 9
Apply the gold mixture with a flat brush onto the pattern.
Step 10
Cover the whole pattern part and paint it again after the rejuvenator spirit evaporates.
TIP: You can apply a thin layer of piping gel to cover your pattern. Then use the pump-powder and spray over it to get different shades of metallic colour.
Step 11
Put the bottom tier on a cake drum and choose at least two sizes of triangle cutters.
Step 12
Measure your triangle cutter. Use the height of the small triangle and make sure it’s equal to the length of the side of the big triangle.
TIP: Use isosceles triangles for the main part of the design as it has 2 sides of equal lengths and helps you to finish it easier.
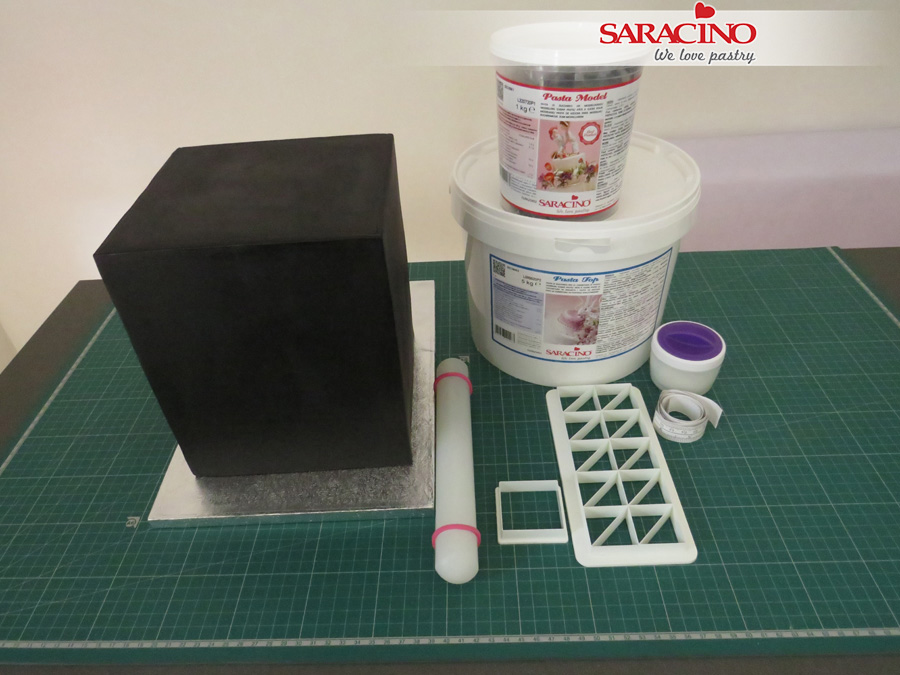
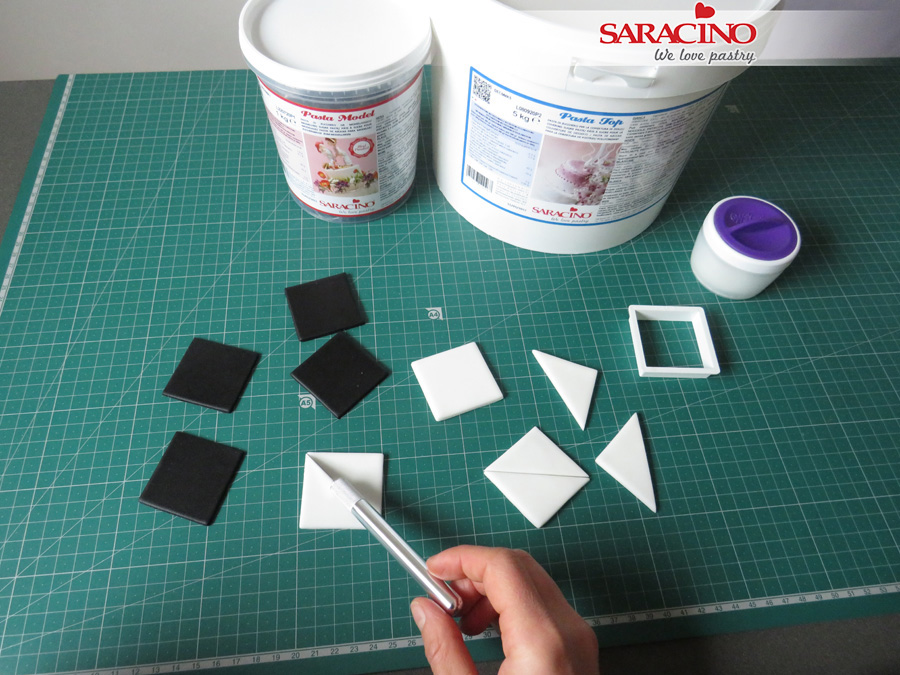
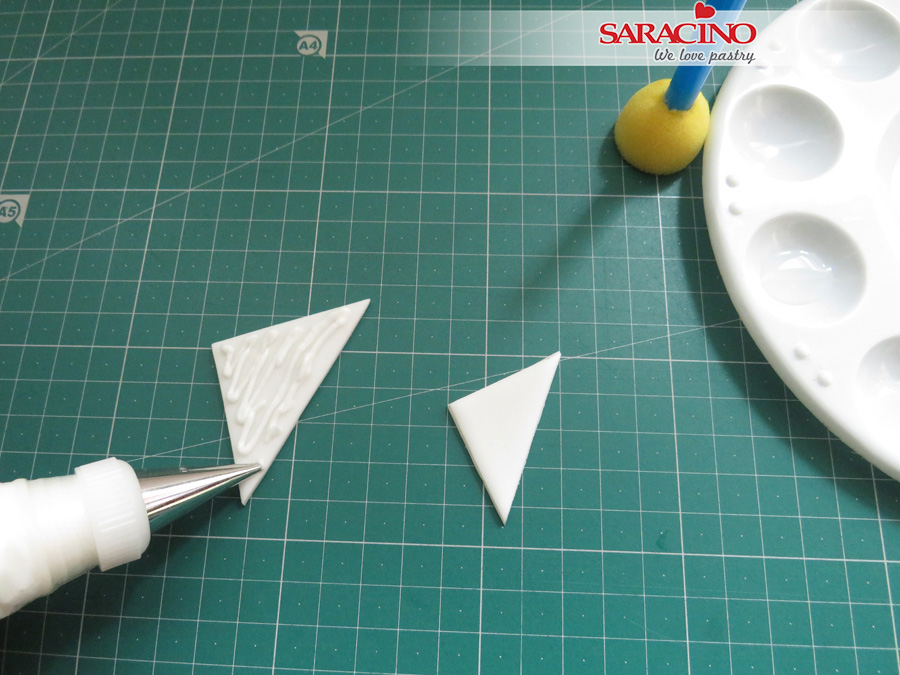
Step 13
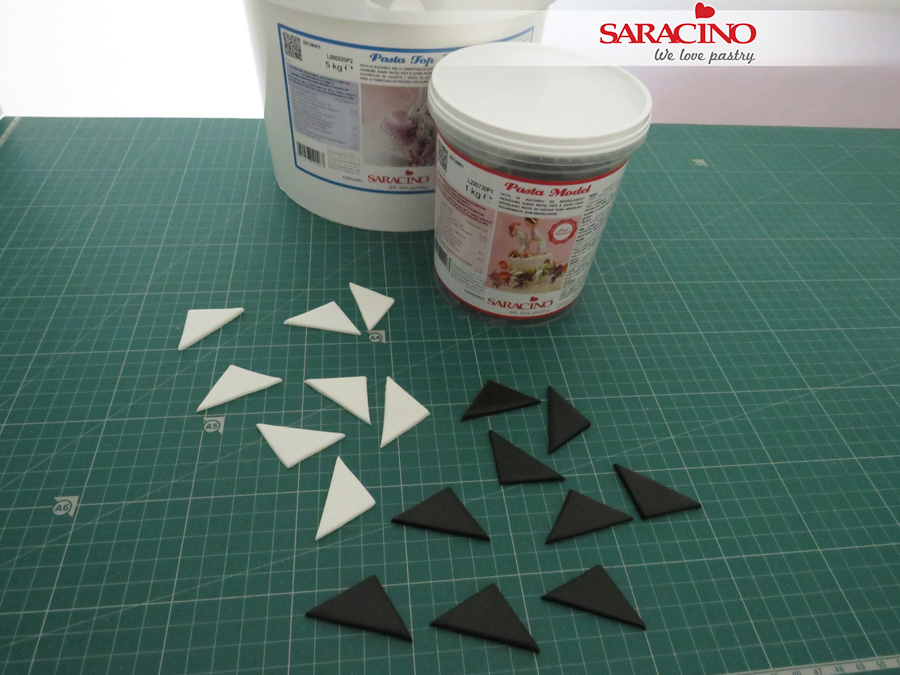
Roll out a piece of black Pasta Model and another piece of white Pasta Top.
Step 14
Cut some squares of both colours. Use the exacto knife to cut each square from corner to corner to form two equal larger triangles.
Step 15
Leave the shapes aside and let them dry out.
Step 16
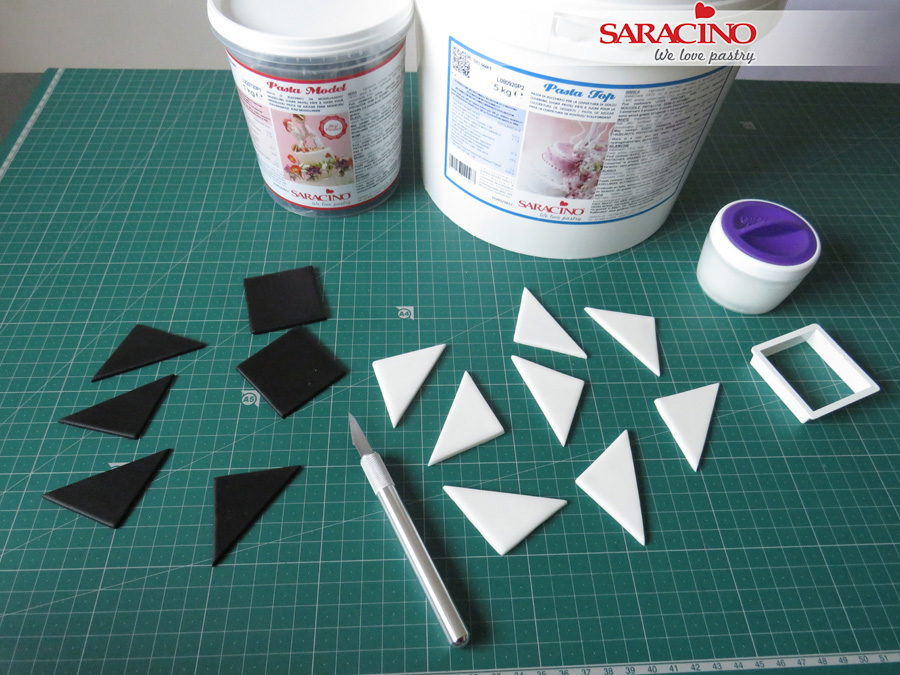
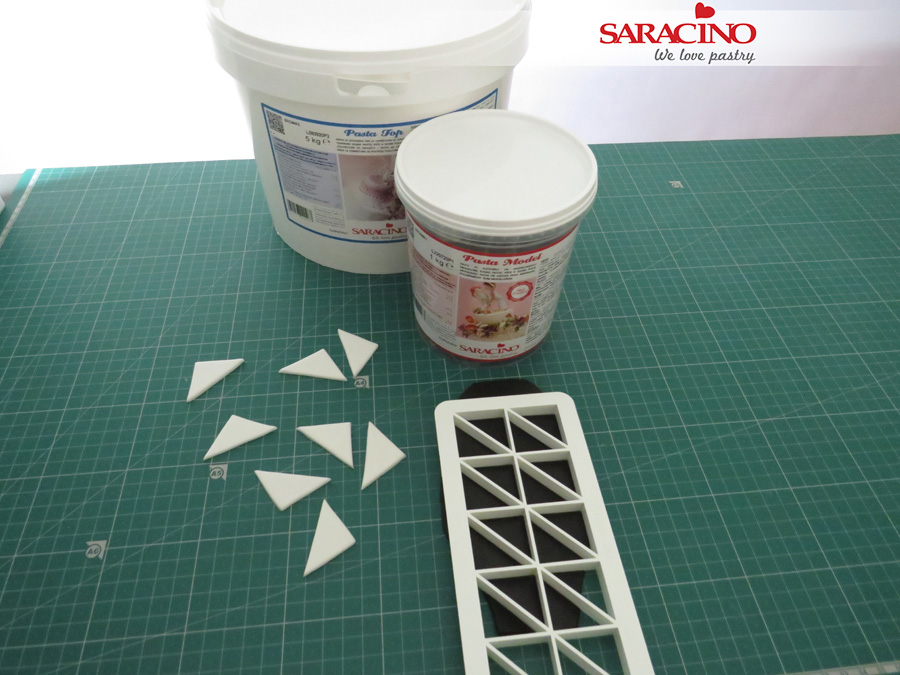
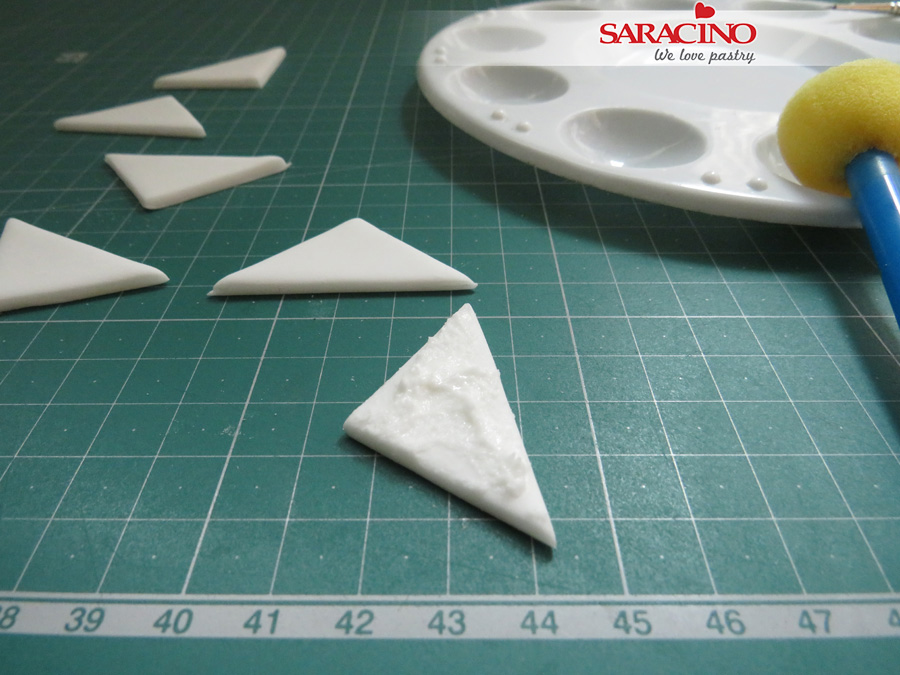
Roll out a piece of white Pasta Top for the small triangles.
Step 17
Use the triangle cutter to cut them out. You’ll need at least 8 pieces of each colour.
Step 18
Put them aside and allow to dry out.
Step 19
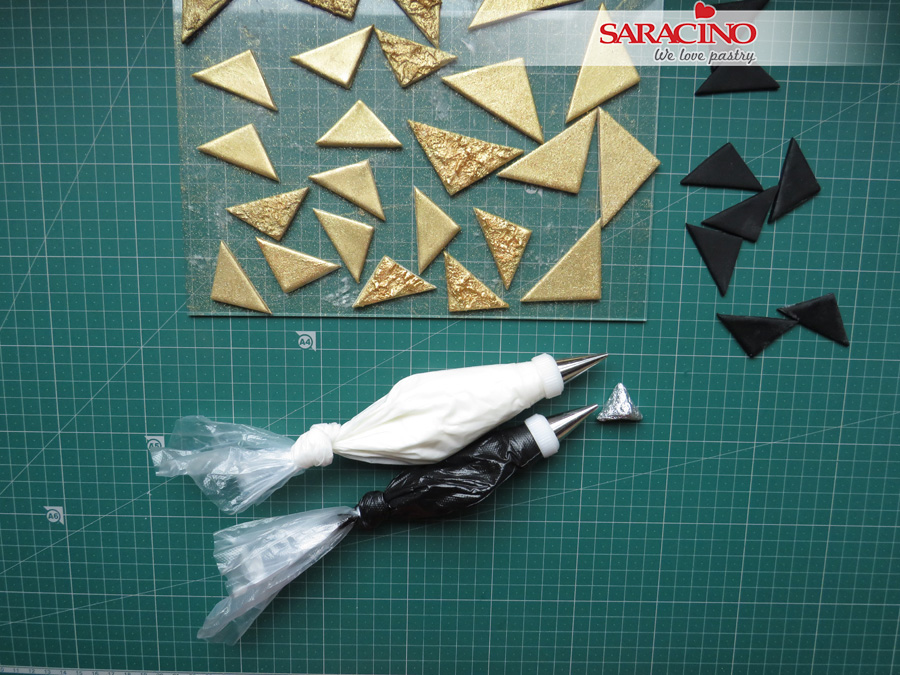
You’ll need two colours of Royal Icing – black and white. For the black one, use gel colour to achieve black Royal Icing.
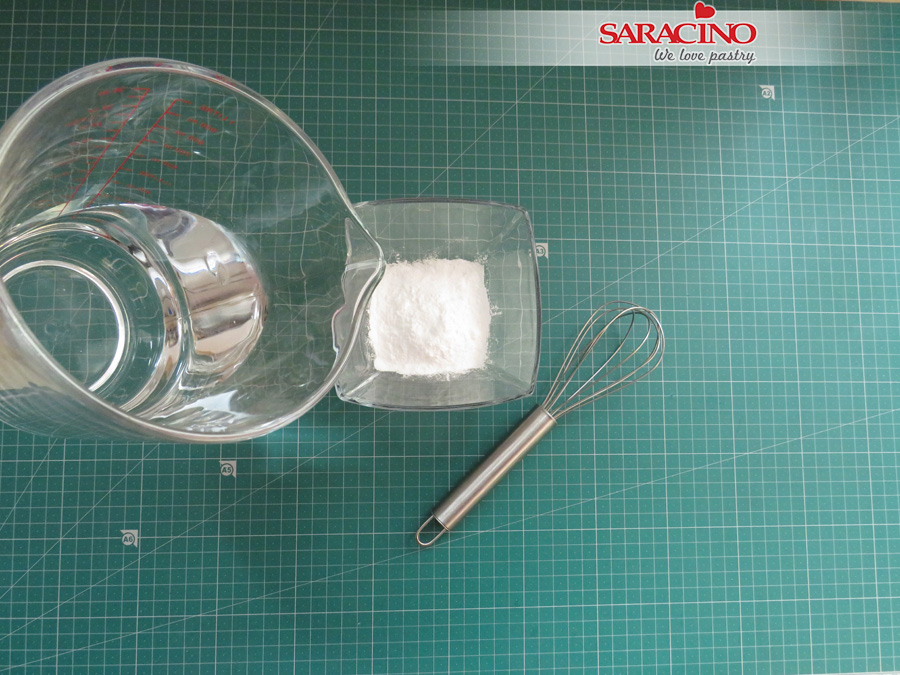
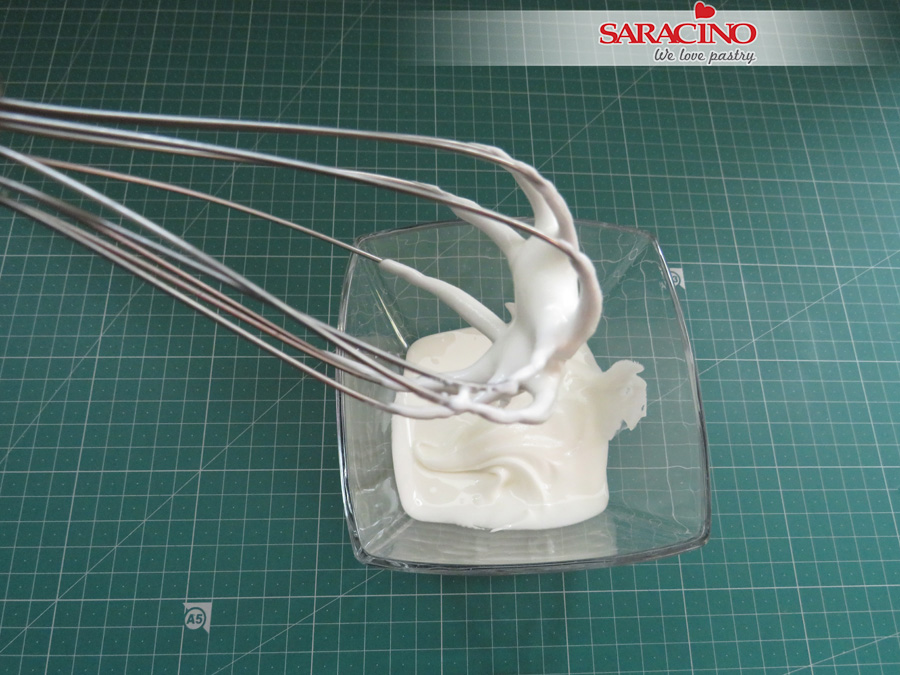
Step 20
Prepare the Royal Icing. Follow the instructions on the package.
Step 21
You will need a toothpaste consistency (soft peaks).
Step 22
Put the Royal Icing in two piping bags with metal nozzles on – No 2 and No 3.
Step 23
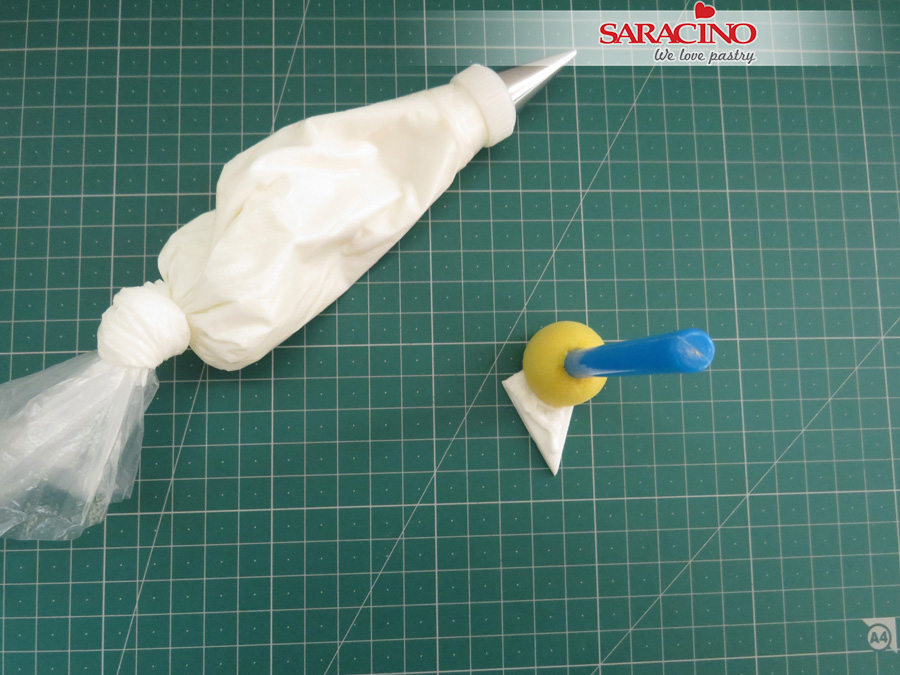
Pipe a few lines across the dried triangle
Step 24
Apply the sponge brush firmly onto the piped lines and pull it out gently to form the peaks pattern.
Step 25
Leave it aside to dry out and make a few of each size.
TIP: Use black Royal Icing for the black triangles if you want to achieve different shades of the gold colour.
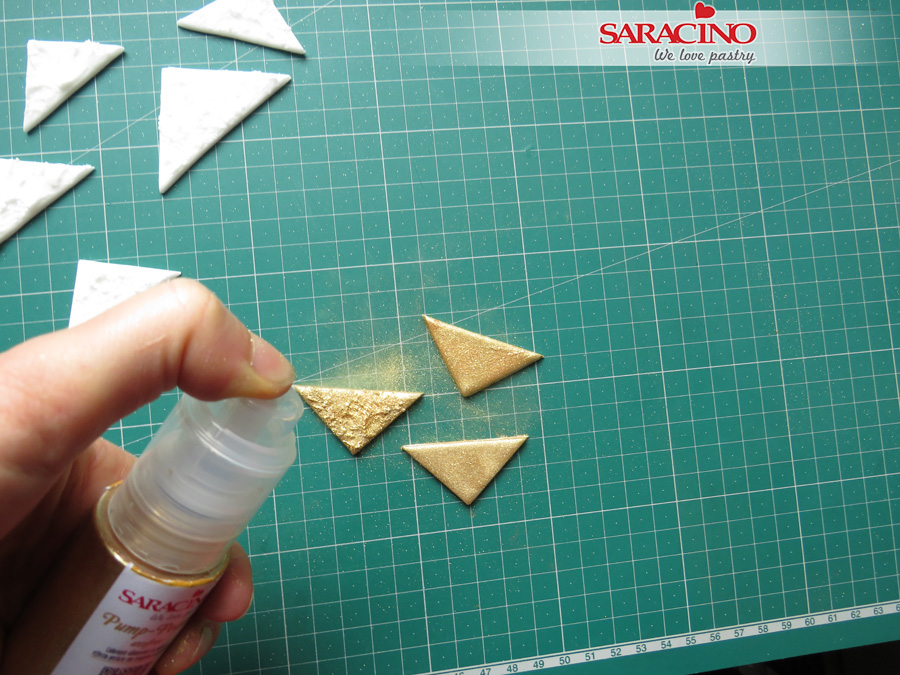
Step 26
Apply the gold mixture onto the peaks pattern.
Step 27
You can use the Pump-powder Gold Spray directly onto the triangles, for the best results.
Step 28
Finish all the pieces you have prepared.
Step 29
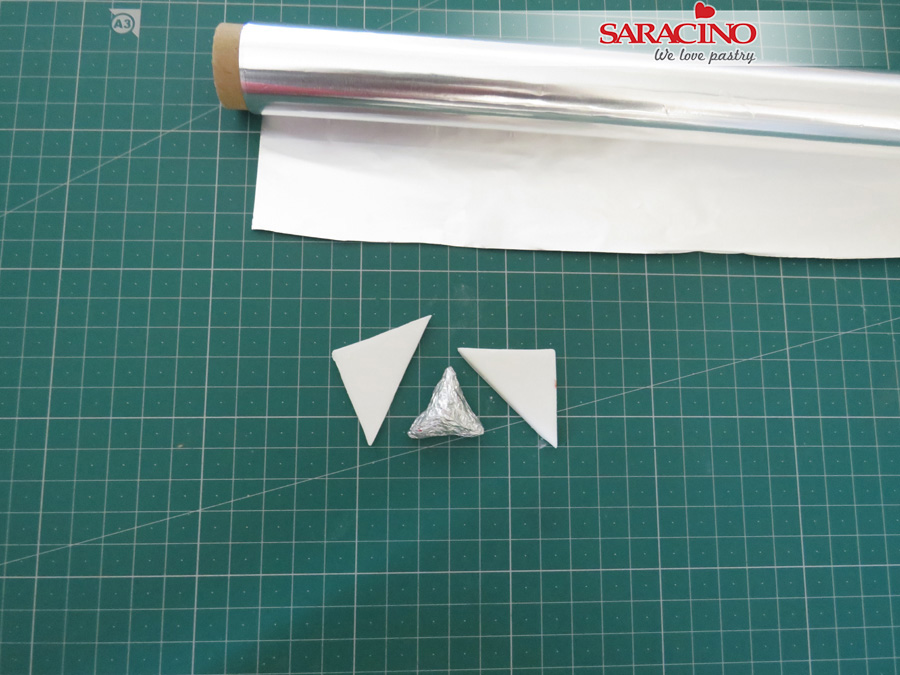
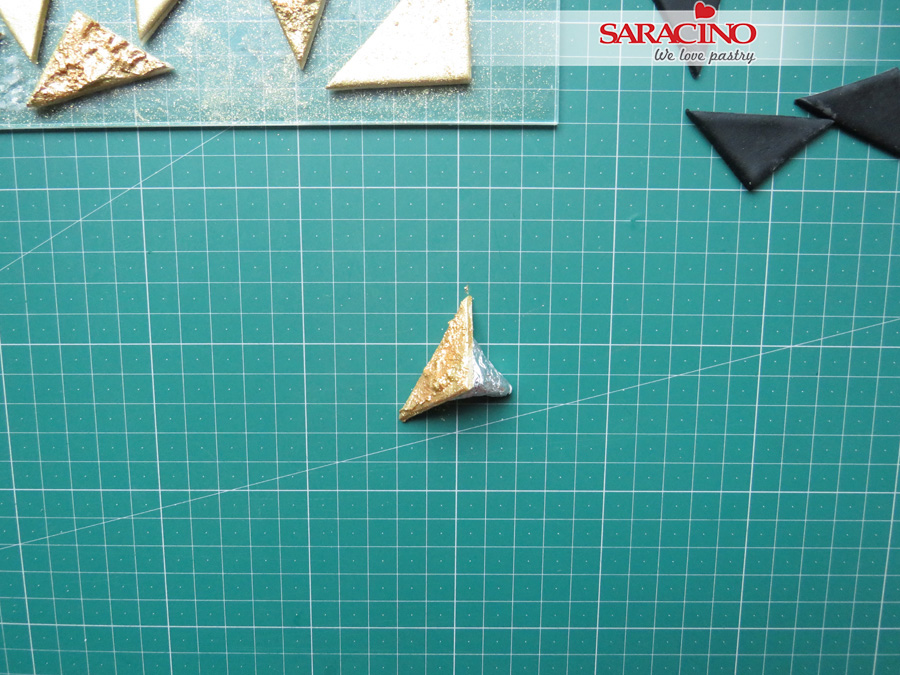
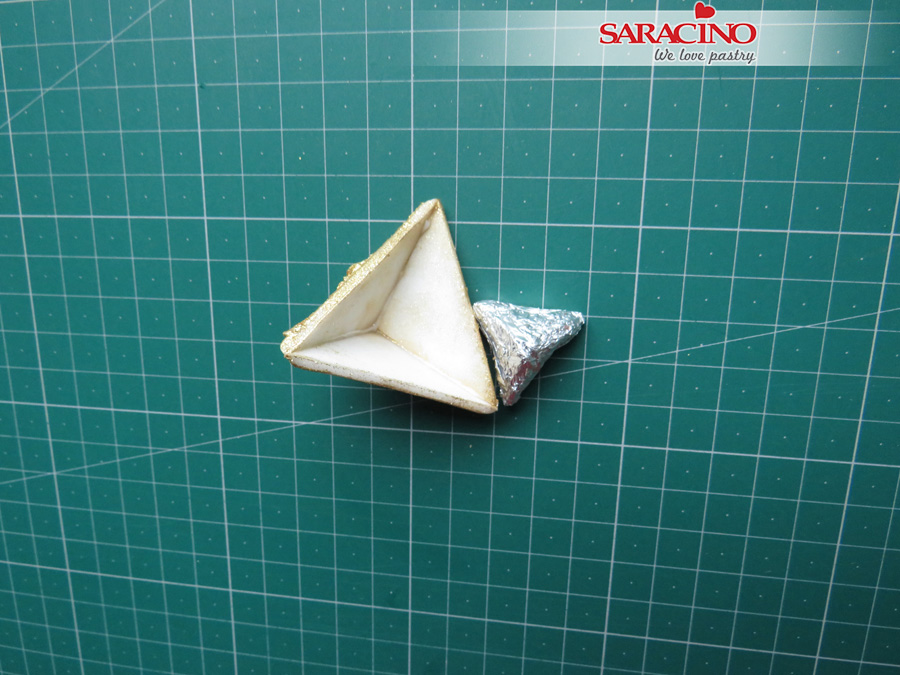
My little secret in order to be creative. I make a pyramid from kitchen foil to support the process of creating the fondant pyramids. You can use an alternative object.
Step 30
Put a small triangle on one side of the foil pyramid.
Step 31
Pipe a line of white Royal Icing on the triangle edge.
Step 32
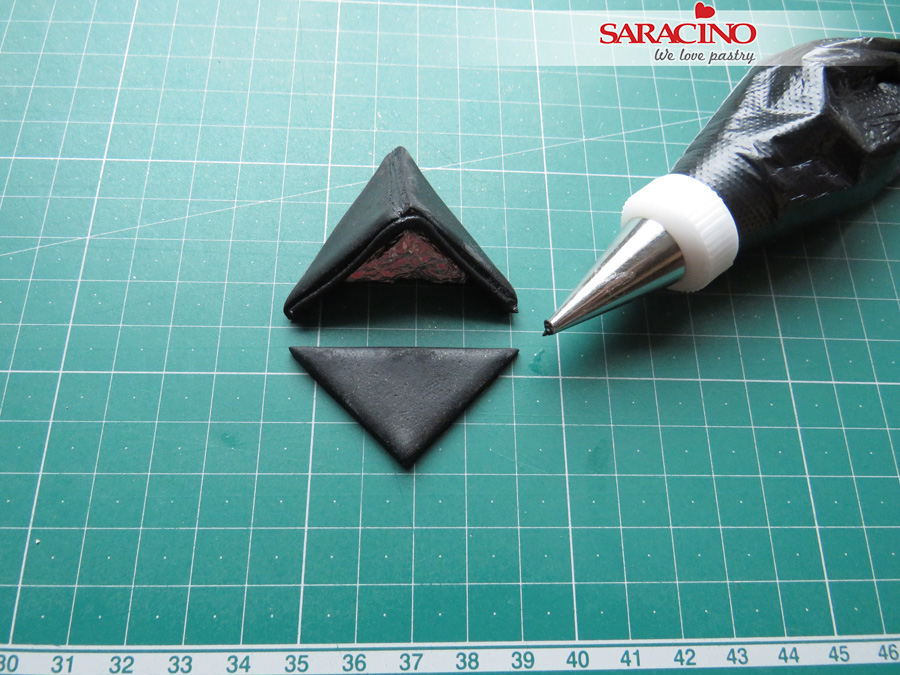
Attach the second triangle to start forming a fondant pyramid.
Step 33
Use the Royal Icing to attach the third part of the fondant pyramid and paint with gold to cover the joints.
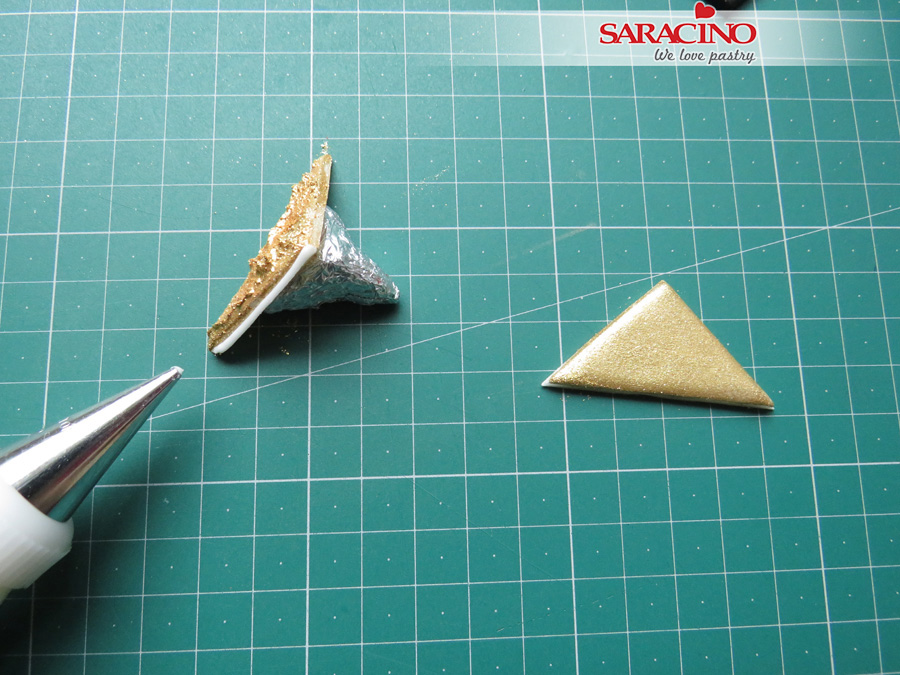
Step 34
Once the Royal Icing is dry separate the fondant pyramid from the support.
Step 35
Repeat the process with the rest of the pyramids. You can use black Royal Icing for the black ones.
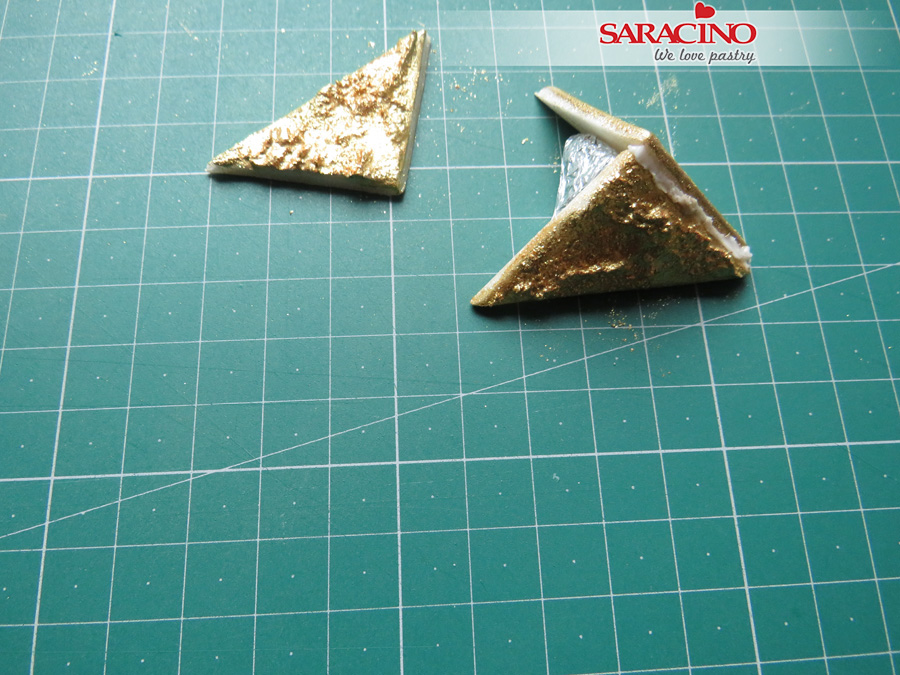
Step 36
Finish all the pyramids and triangles you’ve prepared. You can paint the edges of the black pyramids in gold.
Step 37
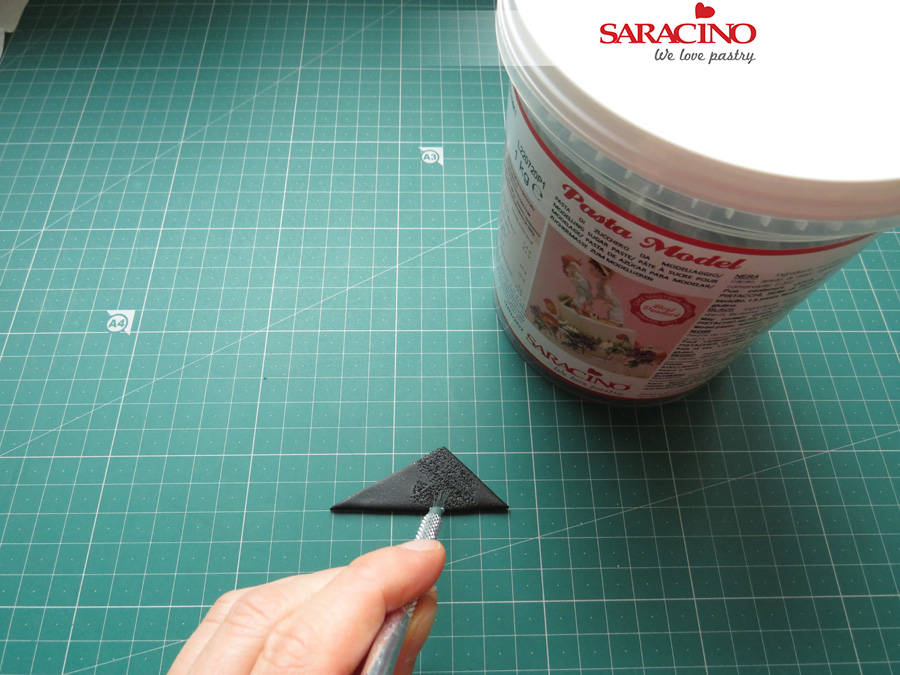
Prepare some uneven sized triangles to fill the gaps between pyramids and the isosceles triangles. You can use a small metal brush to achieve the texture.
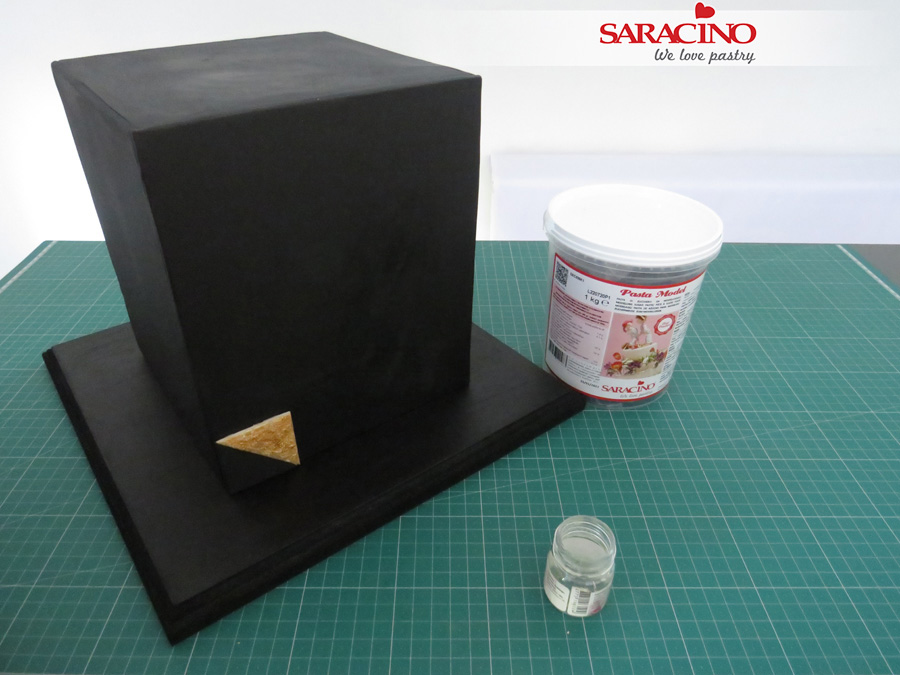
Step 38
Starting from the bottom corner attach the pieces to the cake. Brush the back of one piece with edible glue and attach it to the cake.
Step 39
Repeat it with the second triangle of your choice.
Step 40
To attach the pyramid pieces, you can use black Royal Icing.
Step 41
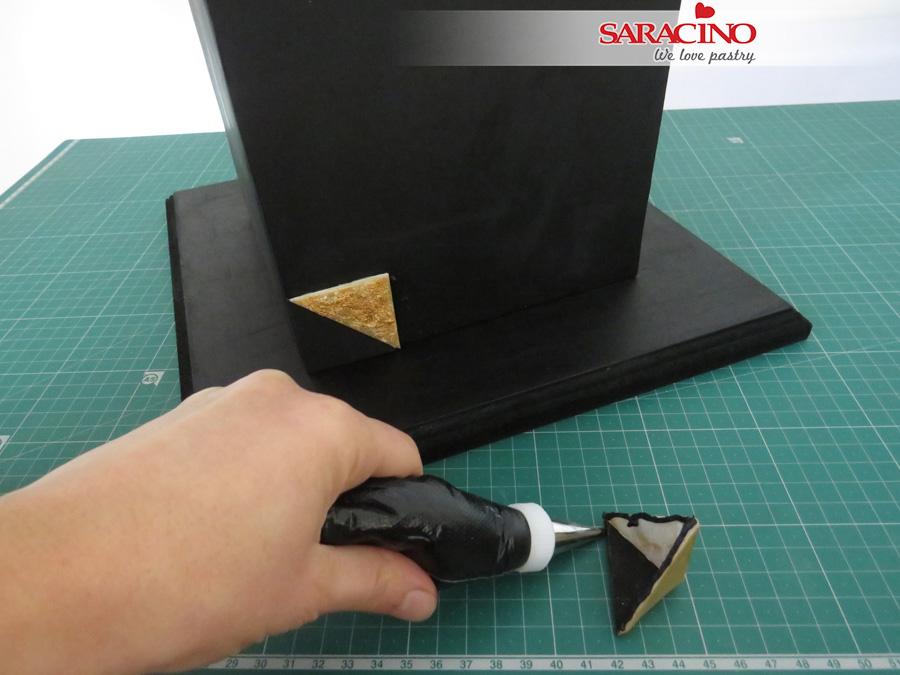
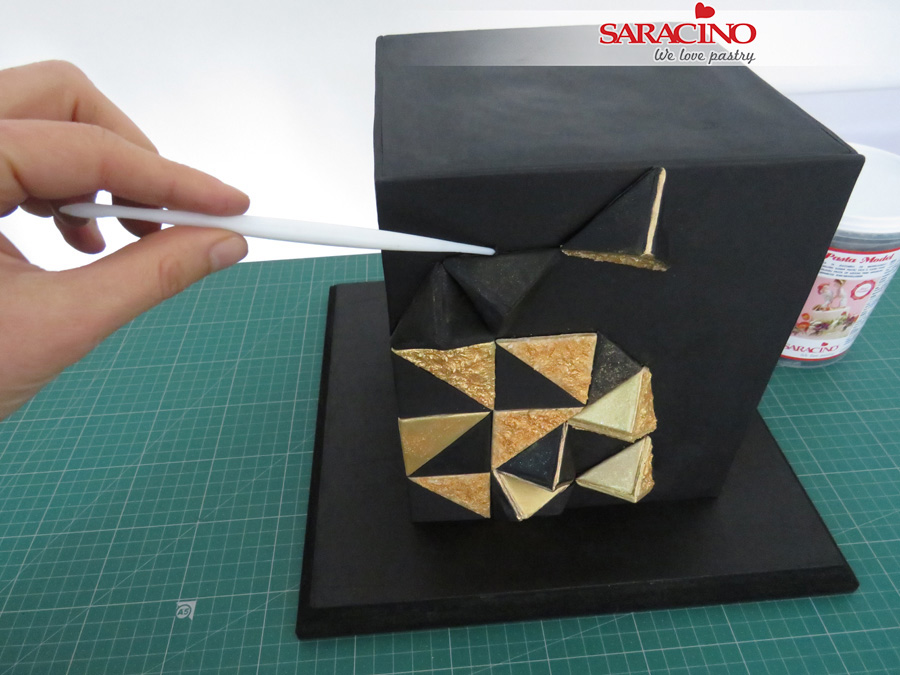
Continue to attach the pieces of your design to the cake.
TIP: You can plan a pattern of your choice that will help you calculate all triangles and pyramid pieces you will need.
Step 42
Remove the excess Royal Icing using a Dresden tool.
Step 43
Roll out some white Saracino Pasta Top and cut out the strips using PME strip cutter No 1.
Step 44
You should cut your strips to the length you require
Step 45
Cut out the angles to form a triangle of the strips.
Step 46
Apply the gold mixture onto the strips and attach them over the black triangle of your choice.
TIP: You can apply a thin layer of piping gel and spray the Pump-powder directly onto the piece if you prefer. Leave them to dry out before using.
Step 47
Your finished bottom tier should look similar to this, depends on your chosen design.
Step 48
Use Royal Icing to secure the top tier.
Step 49
I made some Wafer paper flowers using a Saracino Wafer Paper (0.27 mm thick) and dust/colour them in black. You can use flowers of your choice.
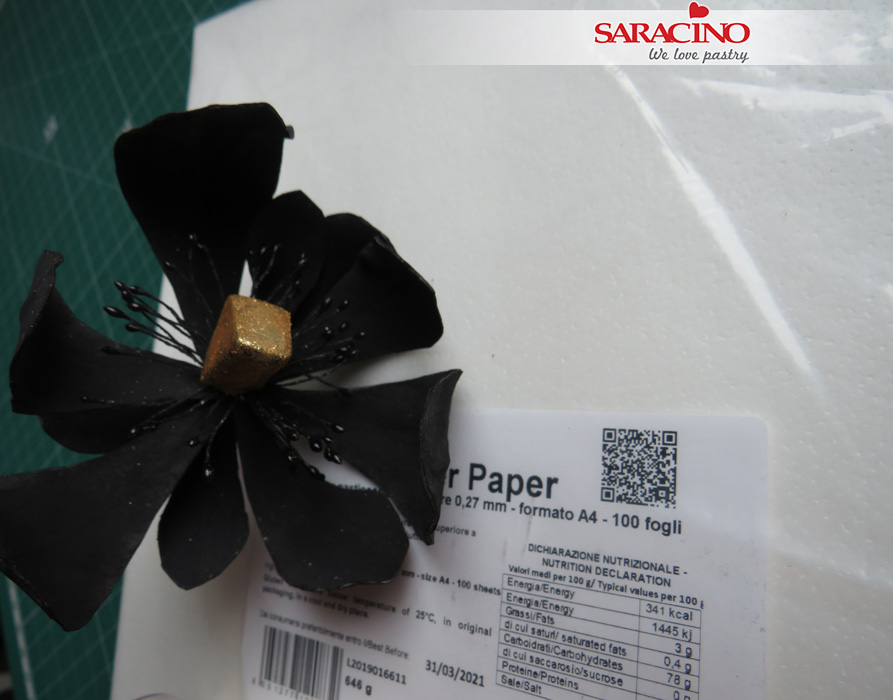
Step 50
For the centre of the pre-made flowers you can use a small piece of black Saracino Pasta Model to create a triangle shape centre and paint it in gold or use piping gel and pump-powder spray method. I’ve used the second option.
Step 51
Arrange the flowers on the cake to finish the design.
TIP: Flower wires should never be inserted directly into a cake. Use a posy flower pick.
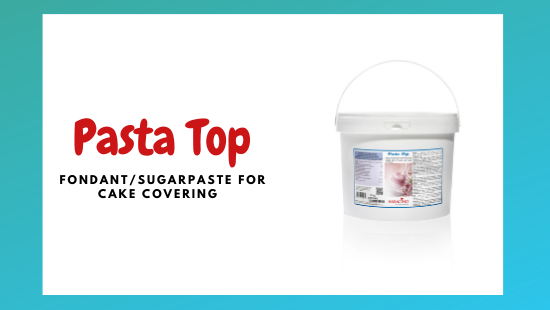
Apr 28, 2020 | Blog, News
PASTA TOP – sugar paste designed for cake covering
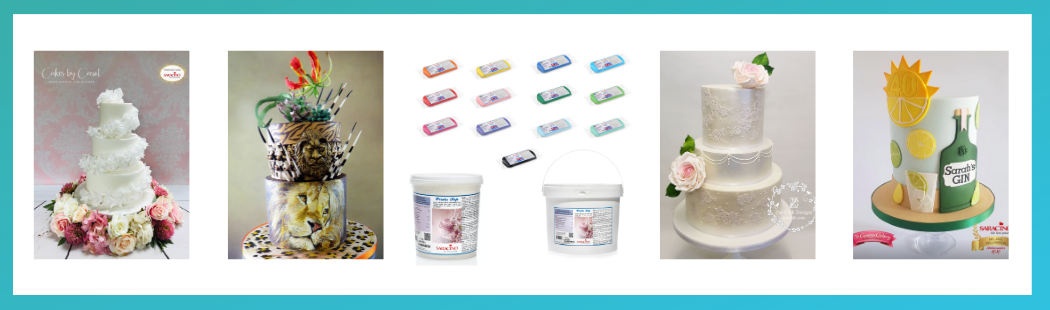
PASTA TOP DESCRIPTION
Saracino TOP Paste (known as Pasta Top) is a ready-made fondant created by Saracino for covering cakes.
It is VEGAN FRIENDLY, GLUTEN FREE and DOES NOT CONTAIN HYDROGENATED FATS OR PALM OIL.
We recommend working the paste by hand before using it for at least two minutes in order to make it elastic and tear resistant. If this is not enough, it can be heated briefly in a microwave to soften. Just for 10 seconds (700W).
The warmth makes the cocoa butter ingredient melt and make the paste soft and easy to work. One of its other ingredients is tragacanth, a natural product that makes our Pasta TOP extremely elastic. It is easy to roll to as thin as 1mm with a rolling pin or with a sheeter. In this way, it will be perfect to cover cakes guaranteeing a great look.
It is suitable for use in hot and humid climates, it easily withstands temperatures above 35° and high humidity levels guaranteeing perfect stability on the cake.
It can easily cope with temperature changes without sweating or cracking.
Pasta TOP can also be used for decoration on cold desserts as refrigeration does not affect the Pasta Top.
It can also be coloured with powder, gel or airbrush colours.
The delicate vanilla aroma and taste is not overpowering, and it perfectly blends with the flavours of your cake.
Our white Pasta TOP is available in 5kg buckets or 1kg tubs. Our coloured Pasta TOP is available in practical 500g packages in the following colours: orange, blue, light blue, baby blue, fuchsia, yellow, lilac, black, pink, red, tiffany, light green, green and brown.
FAQ – PASTA TOP
-
- WHAT CAKE FILLING SHOULD I USE?We suggest a light butter cream or a white chocolate ganache. Darker shades of filling may be seen through the paste if it is rolled thinly. Remember that cake fillings with high moisture content (such as whipped cream) risk dissolving the sugar paste.
- HOW CAN I MAKE THE PASTA TOP STICK TO A CAKE DUMMY?Simply use Saracino Cake Gel, our edible glue, or a small amount of water.
- WHAT IS THE IDEAL THICKNESS FOR THE PASTA TOP?We suggest rolling it to a thickness between 1mm to 3mm (max). We recommend keeping to these limits so that the paste does not become invasive (if too thick) or breaks (if too thin)
- CAN IT BE USED TO COVER VERY TALL CAKES?Thanks to its elasticity, our Pasta TOP is perfect for covering tall cakes without tearing.
- CAN I USE SARACINO PASTA TOP FOR MODELLING?We recommend using the Award winning Saracino Modelling Paste for modelling. As an alternative, it is possible to add 5% of CMC to the Pasta TOP to make it firmer and more resistant.
- DOES SARACINO PASTA TOP COME IN DIFFERENT COLOURS?Yes, it does. Our Pasta TOP is available in 14 colours: Light blue – baby blue – yellow – orange – red – pink – green – light green – purple – tiffany – black – fuchsia – brown – white.
- CAN I PAINT PASTA TOP?Of course, you can use clear alcohol or oil mixed dyes that provide quick drying but need a precise design. You can also use water-mixed dyes which need longer drying times but create pleasant shades. It is also perfect for airbrushing.
- CAN I USE SARACINO PASTA TOP TO COVER CAKES THAT NEED TO BE STORED IN THE REFRIGERATOR?Yes, with the only advice being to carefully evaluate the type of cake and fillings. Our Pasta TOP is not affected by the temperature difference of inside the fridge and outside.
- IF I MAKE A MISTAKE WHILE COVERING A CAKE, CAN IT BE REPAIRED?Yes, one of the main ingredients of our Pasta TOP is cocoa butter, which makes our paste extremely elastic and perfect for smoothing / blending. So, if you make a mistake while covering your cake, you just need to add a small amount of Pasta TOP over the damaged area and gently smooth it with your hand or with a smoother. You won’t notice any imperfections or joints once blended.
- DOES IT DRY FAST?No, our Pasta TOP remains soft and perfect to cut even a few hours after use.