STRAWBERRY & LEMON MOUSSE DESSERT

STRAWBERRY & LEMON MOUSSE DESSERT

Author: Justyna Kowal

Skill level: BEGINNERS 

You will need:

Wedding lemon mousse and strawberry coulis on butter cookie desserts – approx 15-20 pieces

COULIS

  • Saracino La Supreme strawberry food flavouring
  • 500g fresh strawberries
  • 2 table spoons of lemon juice
  • 2 table spoons of corn flour
  • 4 table spoons of water

LEMON MOUSSE

  • Saracino La Supreme lemon food flavouring
  • 130g lemon juice
  • 110g sugar
  • 450g double cream-  30%
  • 3 tsp gelatine disolved in 100g cold water 

BUTTER BISCUITS

  • Saracino La Supreme vanilla food flavouring
  • 360g plain flour
  • 30g sugar powder
  • 1 egg
  • 200g soft butter
  • pinch of salt

SUEDE EFFECT

  • Saracino cocoa butter – aprox 200g
  • Saracino white chocolate drops – approx 200g
  • Saracino white powder colour 


    Step 1

    Prepare all your ingredients. Make sure they are all at room temperature.

    Step 2

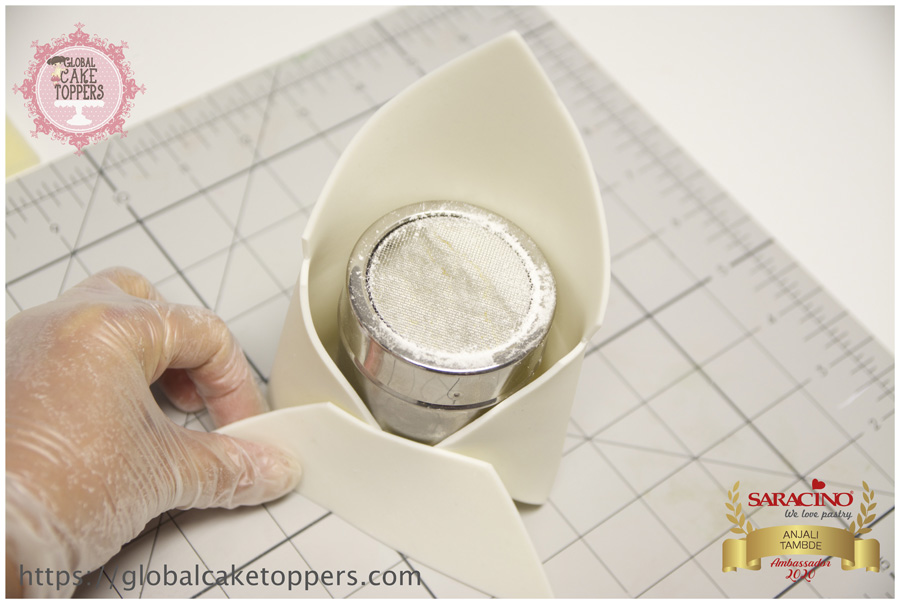
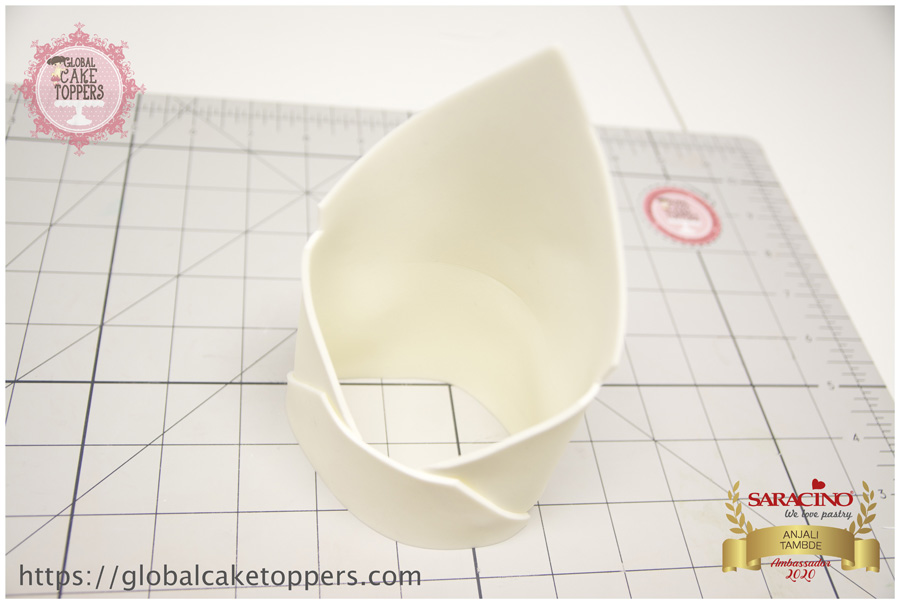
    Prepare basic confectionery equipment – bowls, spoons, teaspoons, blender, small saucepan, mixer, rolling pin, baking paper, two silicone moulds (for mousses and inserts), a small knife and an airbrush with a wider nozzle (for cocoa butter) and turntable.

    Step 3

    Cut your strawberries into small pieces. 

    Step 4

    Put half of the chopped strawberries in a saucepan and add lemon juice.

    Step 5

    Blend until smooth.

    Step 6

    Prepare a cup of water and cornflour.

    Step 7

    Mix the cornflour and water thoroughly.

    Step 8

    Pour the cornflour mixture into the strawberry, mix and bring to a boil.

    Step 9

    Add the remaining strawberries and 2 teaspoons of strawberry flavour.

    Step 10

    Mix thoroughly and add into a small silicone mould. Freeze over night.

    Step 11

    Prepare the ingredients for the shortbread cookies.

    Step 12

    Put all ingredients in a bowl, add 1 teaspoon of vanilla flavour.

    Step 13

    Manually knead the dough to a uniform consistency.

    Step 14

    Roll the dough to a sausage shape and place it between two layers of baking paper.

    Step 15

    Roll out into an even, thin layer, approx. 2-3mm.

    Step 16

    Using a cookie cutter, cut out shapes approx. 3cm wider than the diameter of the mousse moulds, bake at 190 degrees for approx. 12-15 minutes.

    Step 17

    Allow to cool on a wire rack.

    Step 18

    Prepare the ingredients for the lemon mousse.

    Step 19

    Put lemon juice and sugar in a saucepan, bring to a boil until sugar is dissolved.

    Step 20

    Add soaked gelatin and 1 teaspoon of Saracino lemon flavour to the hot juice, mix thoroughly and allow it to cool to room temperature.

    Step 21

    Prepare a piping bag and mousse moulds.

    Step 22

    Whip the cream.

    Step 23

    Mix 2-3 tablespoons of whipped cream with lemon juice.

    Step 24

    Pour the mixture into the remaining cream and mix very thoroughly with a silicone spatula.

    Step 25

    Put the mousse into the piping bag.

    Step 26

    Remove the frozen strawberry from the freezer. Pipe some of the mousse into a mould, placing a strawberry filling into each, fill each to the top with mousse and freeze.

    Step 27

    Prepare the suede effect ingredients – cocoa butter and Saracino white chocolate drops.

    Step 28

    In a microwave oven melt the cocoa butter on low power.

    Step 29

    Add Saracino powder colour as needed until the desired colour is achieved and blend well.

    Step 30

    Add white chocolate and mix to a smooth consistency (use a blender if necessary), cool to approx. 35 degrees Celsius. Pour the cocoa butter and chocolate mix into the airbrush reservoir.

    Step 31

    Prepare shortcrust biscuits (you can put them on the placemats) and remove the frozen mousses. Remove the mousses from the mould. Using an airbrush, spray the frozen mousses to give a suede effect. Use your turntable and twist the plate while applying so that the mousse is applied evenly in a thin layer.

    Step 32

    Using a spatula, carefully transfer the mousses to the biscuits.

    Step 33

    Decorate with pieces of edible gold or another decoration of your choice.

    Step 34

    ET VOILA! Enjoy your mousses.

    HAND PAINTED WEDDING CAKE TUTORIAL

    HAND PAINTED WEDDING CAKE TUTORIAL

    Author: ANGELA PENTA

    Skill level: ADVANCED

    You will need:

    INGREDIENTS: 

    • Pasta Top Black

    • Pasta Model White, Red, Light blue and Yellow

    • Powder colours Skin tone, Black, Yellow, Red, Sky blue, Blue and White

    • CMC

    • Cake gel glue

    • Shiny Effect Confectioners Glaze

    EQUIPMENT: 

    • 4×4″ round cake or dummy

    • 6×8″ round cake or dummy

    • 9″ round cake board

    • Black ribbon

    • Large and small rolling pins

    • Fondant Smoother

    • Flexible fondant smoothers

    • Ruler

    • Knife

    • Craft knife

    • Palette knife

    • Stars and heart plunger cutters 

    • Small ball tool

    • Brushes

    • Paintbrushes

    • Cocktail sticks

    • Small plastic dishes

    • Clear alcohol

    • Corn starch

    Step 1

    For this project we need 2 dummies (or cakes) 4×4″ round, 6×8″ round and a 9″ round cake board that will be covered with black Pasta Top.

    TIP 1: Pasta Top is Vegan, Gluten free and has NO hydrogenated fats. It’s very stretchy and can be rolled very thin.

    Step 2

    Roll out the paste large enough to cover each tier.

    Step 3

    Roll the black Pasta Top thinly. You can use a little corn starch on your work surface so it doesn’t stick (but not too much to stain the black paste)

    Step 4

    Brush the dummy with water and put the paste on top of the dummy as shown

    Step 5

    Using a smoother press on top to make it smooth and with the hands smooth the paste down the sides of the cake

    Step 6

    Use the same process to cover the other tier and create sharp edges using flexible fondant smoothers

    Step 7

    Brush the cake board  with water, roll out the black Pasta Top and cover the cake board

    Step 8

    Smooth the surface with a smoother to remove any air bubbles

    Step 9

    Trim the excess paste from around the board using a craft knife

    Step 10

    Add the black ribbon around the cake board

    Step 11

    Assemble the cake as shown in the picture

    Step 12

    Use a ruler to measure the size of the pop art inspired illustrations and print them, these images will be used as a template

    Step 13

    Let’s start with the painting, we need the printed illustration, Pasta Model white, CMC and powder colours skin tone, black, yellow, red, sky blue, blue and white

    Step 14

    Add a little bit of CMC to the paste to help it become firmer.

    Step 15

    Roll out Pasta Model to about 3 mm thick, it must be larger than the printed image

    Step 16

    Place the printed image over the paste and using a small ball tool, trace outlines on the paste

    Step 17

    Use craft knife to cut out the shape

    Step 18

    Begin by painting light colours, mix skin tone and white powder colours with alcohol and paint faces and hands

    Step 19

    Continue painting with light colours, for yellow mix yellow and white powder colours and dilute with alcohol

    Step 20

    Mix sky blue and white powder colours with alcohol and paint the bright reflections of the hair, you don’t need to be precise because we will define the design later with black

    Step 21

    Complete by painting the red and blue areas using the red and blue powder colors diluted with alcohol

    Step 22

    Mix black powder colour with alcohol and paint using a fine brush

    Step 23

    Using the picture as reference paint the design on the paste using the black powder colour mixed with alcohol

    Step 24

    Once the painting is complete, paint the sides with black powder colour diluted with alcohol

    Step 25

    When the painting is dry we can glue the piece on the cake using Cake gel glue

    Step 26

    Glue the piece on the bottom tier being careful not to touch it too much with your hands as this may damage or smudge the painting

    Step 27

    Roll out red Pasta Model and cut out a heart using the heart plunger cutter. Set aside.

    Step 28

    Mix red Pasta Model with a little bit of CMC

    Step 29

    Roll out red Pasta Model to about 3 mm thick

    Step 30

    Place the printed image on the paste and, using a small ball tool, trace the outlines of the red heart on the paste

    Step 31

    Do the same using the white and yellow paste

    Step 32

    Roll out light blue Pasta Model to about 2 or 3 mm thick and using a small ball tool, trace the outlines of the word LOVE

    Step 33

    Once all the shapes are traced use a craft knife to cut them out, these are all the pieces needed to make the comic heart

    Step 34

    Using a thin brush paint a black line on the outline and sides of the heart shape

    Step 35

    Do the same for all shapes

    Step 36

    Glue all the pieces of the comic using Cake gel glue

    Step 37

    Glue the word LOVE using the printed image as a reference

    Step 38

    Add a layer of Cake gel glue to the back of the big red heart

    Step 39

    Stick the comic onto the top tier, support with toothpicks if necessary until dry and then they can be removed.

    Step 40

    Roll out the white Pasta Model and cut out some stars with 2 sizes of stars plunger cutters 

    Step 41

    Using the black powder colour diluted with alcohol paint the sides of the stars

    Step 42

    Make about 35 stars of different sizes

    Step 43

    Using a brush add a little bit of Cake gel glue to the back of each star

    Step 44

    Glue the stars to the cake and cake board randomly

    Step 45

    Add a shine to the word LOVE with the Shiny Effect Confectioners Glaze

    Step 46

    Your cake is ready <3 

    VALENTINE MODELLING TUTORIAL

    VALENTINE MODELLING TUTORIAL

    Skill level: BEGINNERS

    TIPS:

    Tip 1: If you are not confident enough to write directly on the cake using edible pens then use a needle tool to write on the cake and then write with the pen over it, this will avoid any spelling mistakes and save time re-doing things  

    Tip 2: Use tooth picks or cocktail sticks to secure the figurines on the cake along with some glue, this keeps the figurines safe while travelling with the cakes.

    You will need:

    INGREDIENTS: 

    • Saracino pasta model pink
    • Saracino pasta model blue
    • Saracino pasta model red
    • Saracino pasta model skin
    • Saracino modelling chocolate brown
    • Saracino modelling paste white
    • Saracino modelling paste black
    • Edible glue
    • Pink dust powder colour
    • Gel colours: white, brown, black, pink
    • Black edible pen
    • Cornflour

    EQUIPMENT: 

    • 10” Round cake or dummy
    • Polystyrene cone
    • Envelope template
    • Rolling pin
    • Craft knife
    • Ball tool
    • Dresden tool
    • Shell tool
    • Soft modelling tools
    • Brushes
    • Mat
    • Heart cutter

    Step 1

    To make an envelope knead some white Saracino Modelling Paste until workable.

    Step 2

    Using rolling pin roll it thinly.

    Step 3

    Cut out the envelope template. You can download it HERE. Place on the rolled icing ready for cutting.

    Step 4

    Fold both sides

    Step 5

    Cut the bottom piece and keep aside

    Step 6

    Use any cylindrical shape and mould the envelope around 

    Step 7

    Glue the left over piece in such a way that the base is left hollow 

    Step 8

    Remove the cylinder once the envelope is dry 

    Step 9

    For the head knead Saracino skin tone modelling paste. Roll it into an egg shape.

    Step 10

    Using the ball tool make indents on either side.

    Step 11

    With the dresden tool shape the nose 

    Step 12

    Mark the nostrils 

    Step 13

    Using your dresden tool gently shape the lower lip and then the upper lip 

    Step 14

    With a dresden tool or sharp knife open up the mouth to give that depth

    Step 15

    Shape the forehead and eyebrow to create expressions 

    Step 16

    Finally finish the lips and make two dimples on either sides 

    Step 17

    Add small amount of white modelling paste for the teeth 

    Step 18

    Add small white balls of white paste for the eyes and blend well, mark the eye lids with the sharp end of your Dresden tool.

    Step 19

    Using brown modelling chocolate make tiny eyebrows by rolling thinly and use a small ball tool or needle tool to place them, apply a small amount of edible glue if required

    Step 20

    Blush the cheeks, forehead and nose with pink powder colour. Be careful to dust lightly.

    Step 21

    Make thin eyelashes and eyelids using edible black pen 

    Step 22

    Paint the iris of the eyes with light brown and white edible gel colours

    Step 23

    Paint the pupil of the eyes in black

    Step 24

    Finish the male and female heads and add a bit of gloss on lips if required using red for the female. 

    Step 25

    Using skin tone modelling paste model the body for both the male and female

    Step 26

    Roll some light blue modelling paste into a thin sheet

    Step 27

    Wrap around the male body to form the shirt and fold edges to make collar 

    Step 28

    Add small balls of white paste for buttons and press with a sharp modelling tool.

    Step 29

    Cut two rectangular pieces for the sleeves out of the same blue sheet 

    Step 30

    Using skin tone paste form a hand by making a ball, press down and cut out the thumb. Then shape to give a natural look. Roll the blue modelling paste to create arms and attach the hand. Add folded thin cuffs to finish off the sleeves. 

    Step 31

    Attach the arms over the shoulders and blend the joint. You can use dry pasta inserted into the arm to secure in place.

    Step 32

    Attach the head to the neck, use a toothpick to keep it in place 

    Step 33

    Add a small thick circular piece of black modelling paste over the head to make the hair 

    Step 34

    Use a shell tool to make the texture of the hair 

    Step 35

    Keep the figurine upright and let it set

    Step 36

    Form the female chest and fix to the body. Glue the female body to the polystyrene cone and cover the cone with white modelling paste to make the skirt 

    Step 37

    Now roll a thin sheet of white modelling paste and form some frills and pleats 

    Step 38

    Glue the pleated skirt around the waistline and add shape and form with a modelling tool.

    Step 39

    Now pleat a pink sheet of modelling paste and cover the white skirt

    Step 40

    Blend the skirt well with the upper body 

    Step 41

    Cut a rectangular piece in pink with sweetheart neckline to make the bodice and glue it to the upper body, blend well at the back

    Step 42

    Make the hands and form the fingers.

    Step 43

    Glue the arms on the body and blend it over the shoulders 

    Step 44

    Take some brown modelling chocolate and roll an elongated piece, then cut thin triangular strips and twist for the hair.

    Step 45

    Secure it over the head with some glue 

    Step 46

    Using the same chocolate paste add fringes.

    Step 47

    Texture the hair with the Dresden tool. Roll a thin white strip and add a bow around the waist.

    Step 48

    Add some edible red gel colour to white modelling paste to make red or use pre-coloured modelling paste 

    Step 49

    Roll a thin sheet of the red paste and cut heart shapes using heart cutter 

    Step 50

    Glue the hearts on the hands of the man

    Step 51

    Glue one heart on the envelope 

    Step 52

    Place one heart over a brown square made with modelling paste to make the stamp 

    Step 53

    Using black edible pen paint the print over the stamp and crimp the edges.

    Step 54

    Write any imaginary address to give a personal touch 

    Step 55

    Cover a 10” round cake with Saracino Pasta Top and decorate with some hearts 

    Step 56

    Now place the male figurine in the envelope and glue it over the cake, place the female figurine beside him and your “Valentine Cake” is now ready to be served with love 

    BRIDE IN PINK TUTORIAL

    BRIDE IN PINK TUTORIAL

    Skill level: BEGINNERS

    TIP:

    To achieve the light pink colour I add a drop of pink gel colour (actually half drop because it needs a really small quantity) to the skin tone modelling paste.
    To achieve the brick colour I add a bit of white sugar paste to the brown, then I put a drop of red gel colour and a drop of orange (the proportion depends if you want a colour tending to the red or to the orange)

    You will need:

    • Rolling pin

    • Scalpel or sharp knife

    • Dresden tool 

    • Small ball tool

    • Large ball tool

    • Pointed silicone tool

    • Number 5 Piping Tip

    • Wood skewer

    • Straw

    • Soft brushes (large and small)

    • Small paintbrushes (flat and pointed)

    • Easy Eyes – princess set

    • 82/85g light pink Saracino modelling paste

    • 35g skin tone Saracino modelling paste

    • 20g red Saracino modelling paste

    •  small amount of white, light blue and black Saracino modelling paste

    • Water or edible glue

    Step 1

    For the body roll 30g of pink paste into a shape with one end narrower than the other

    Step 2

    Flatten the smaller side

    Step 3

    To form the chest area make a groove using the Dresden tool

    Step 4

    Tapering the waist and the knee

    Step 5

    Thread the wooden skewer through the body into the dummy below and leave a length projecting from the top.                                                                            

    Step 6

    Make some straight marks on the bottom of the dress first using the Dresden tool then the back of the scalpel

    Step 7

    For more pleats on the dress roll 5 long cones (using about 9g of pink paste for each one) and bend them on the pointed side

    Step 8

    Stick all of them starting from the hips and finishing at the back

    Step 9

    Create both puffs and arm sleeves using 7g of pink paste in total

    Step 10

    Stick first the upper sleeves

    Step 11

    Then place the arms on the dress

    Step 12

    Cut out a diamond shape on the centre of the chest, remove the paste inside and flatten the inside using a small ball tool

    Step 13

    Place a piece of skin tone paste inside the hole, flatten it and mark a small cleavage. Smooth the edges to form a nice shape.

    Step 14

    To create a neck fix a small piece of skin tone paste around the wooden skewer

    Step 15

    Cut out a small strip for a collar and taper each end.

    Step 16

    Attack it around the neck

    Step 17

    For the hands roll a very small piece of skin tone paste into a sausage shape (0.5mm diameter). Cut in half diagonally, flatten the palm area, create the wrist by rolling gently, cut to form the thumbs 

    Step 18

    Place the hands to the arms on top of each other

    Step 19

    Roll an oval shape as smooth as possible using 35g of skin tone paste. Roll the little finger (or the handle of a tool if your fingers are too large) in the middle of the oval, from side to side

    Step 20

    Round-off the corner of the upper side to model the forehead

    Step 21

    Push your fingers either side of the nose area to form the nose.

    Step 22

    Use a big ball tool to define the eye socket.

    Step 23

    Go on shaping the point of the nose using the handle of a tool or the Dresden .

    Step 24

    Put the Easy Eyes tool right in the middle of the nose.

    Step 25

    Push it gently.

    Step 26

    Define the eyebrows using the Dresden tool

    Step 27

    Adjust all the borders

    Step 28

    Cut a smile

    Step 29

    Remove the paste from inside the mouth

    Step 30

    Replace with a small quantity of white paste

    Step 31

    Smooth the upper lip

    Step 32

    Define the lower lip

    Step 33

    Mark edges of the mouth

    Step 34

    Form the teeth with a sharp knife

    Step 35

    Cut the excess paste from the chin

    Step 36

    Shape the head with the fingers. Pay attention to round off and smooth all the straight sides and edges

    Step 37

    Put a piece of paste on the top of the head

    Step 38

    Paint the eyes first using the white gel color

    Step 39

    Paint the eyebrows

    Step 40

    Cut out two small light blue circles using a straw  and stick them on the eyes

    Step 41

    Cut out  two black pupils using a no. 5 piping nozzle

    Step 42

    Create the eyelashes using a very small roll of black paste, paint some more eyelashes just on the outside of the eyes. Paint with a light blue gel colour the outline of the iris

    Step 43

    Dust the lips and the face using a pink powder colour and a soft brush. Add definition / highlights

    Step 44

    Cut out several strips of different sizes, wavy on one edge and straight on the other.

    Step 45

    Cut the timber skewer to the correct length and push the head gently to the body. Stick the hair starting from the front to the back

    Step 46

    The aim is to form the hair so it looks like a rose on the back of her head.

    Your bride is now ready