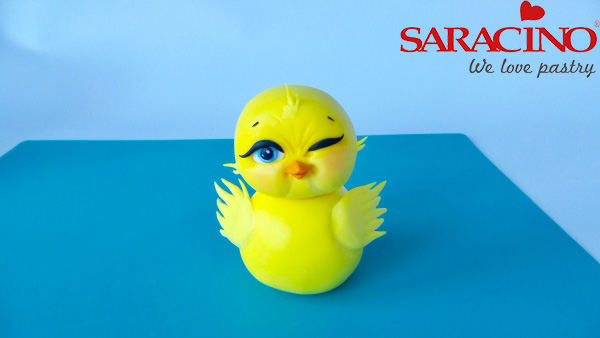
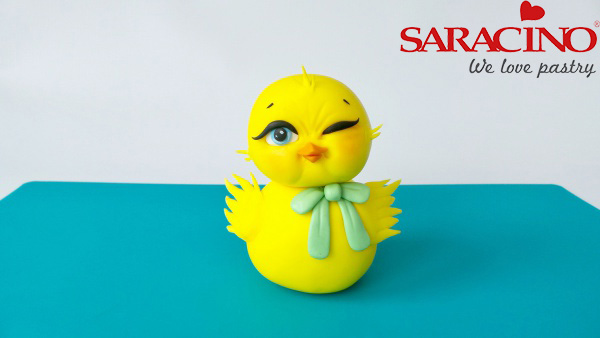
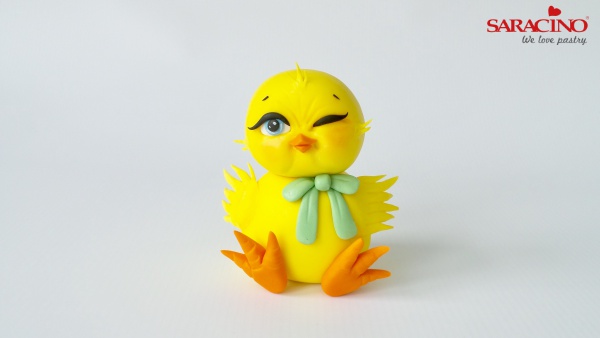
SARACINO EASTER CHICK
You will need:
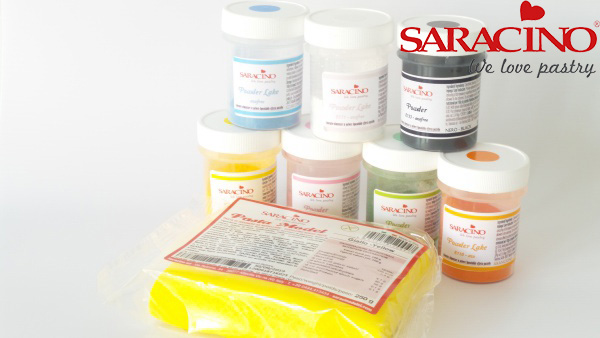
- Saracino white modelling paste
- Saracino yellow modelling paste
- Saracino black modelling paste
- Saracino yellow powder dust
- Saracino white powder dust
- Saracino green powder dust
- Saracino blue powder dust
- Saracino orange powder dust
- Cerart flower tool 303
- Cerart leaf tool 301
- Sharp knife
- Fine brush
- Soft brush
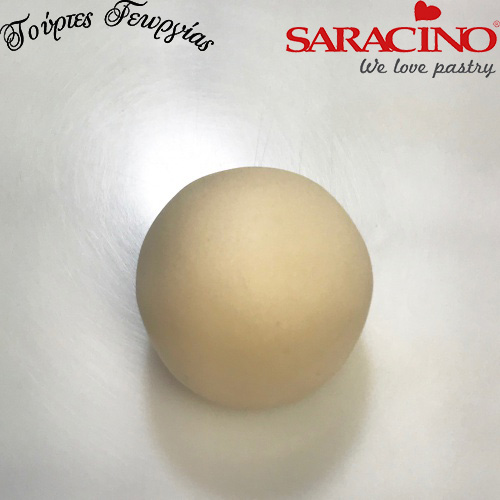
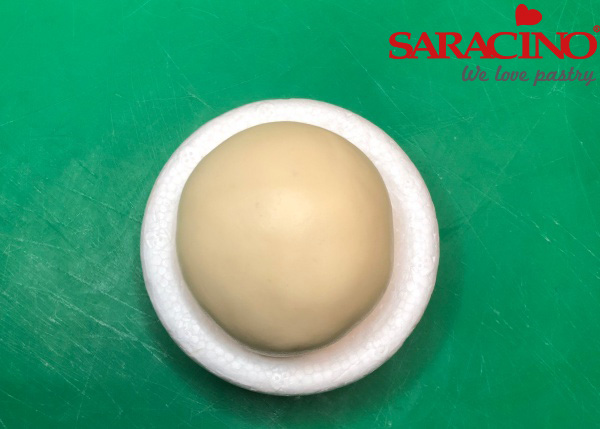
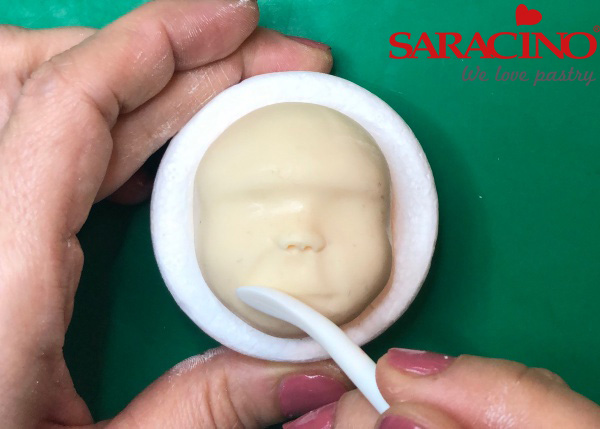
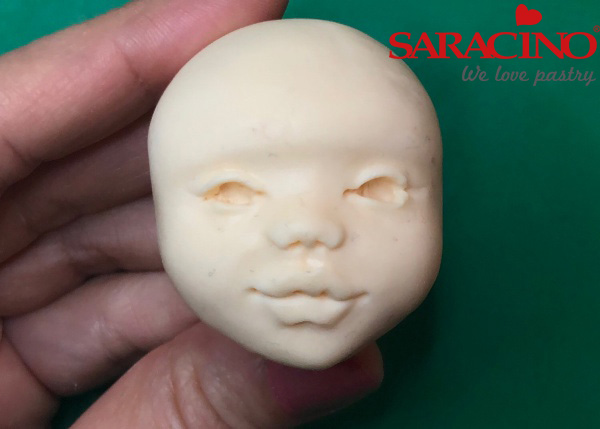
Step 1
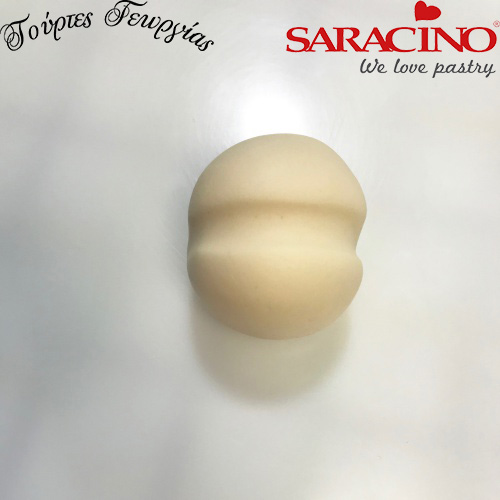
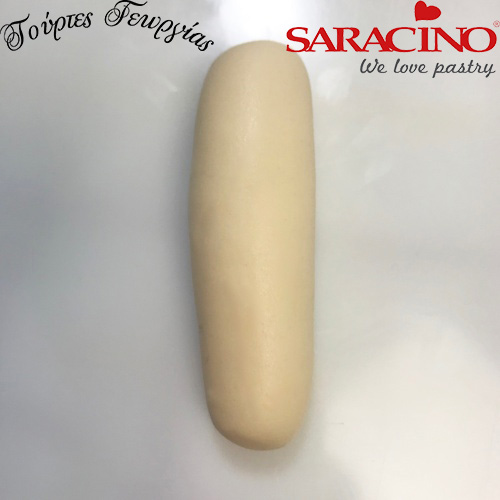
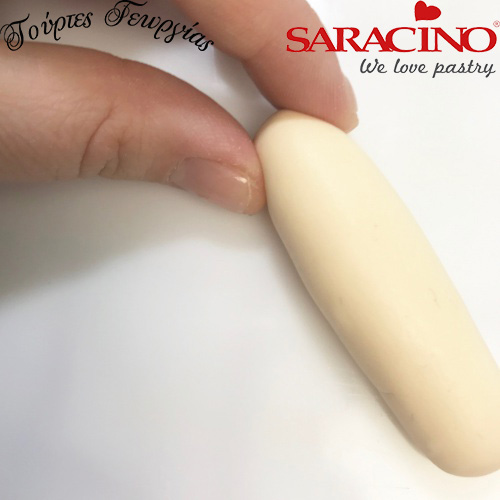
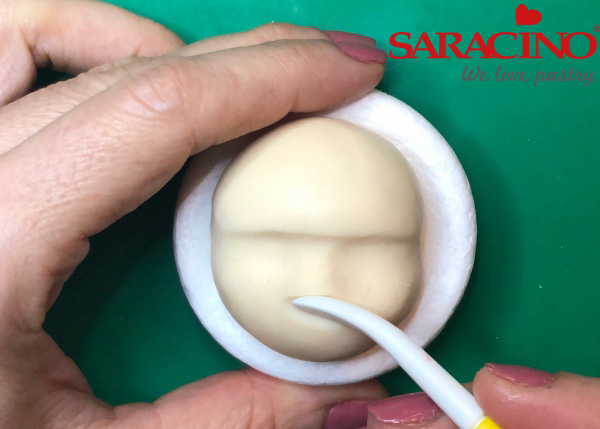
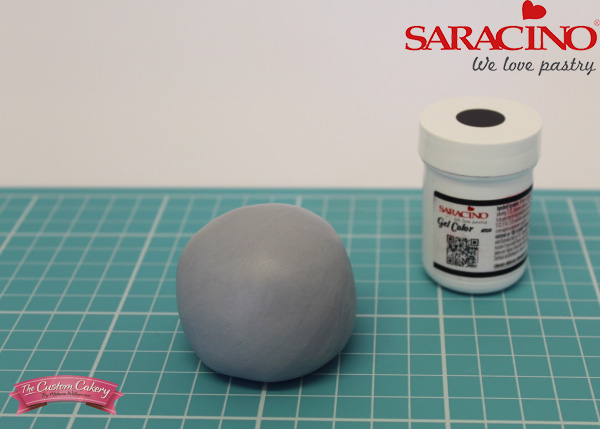
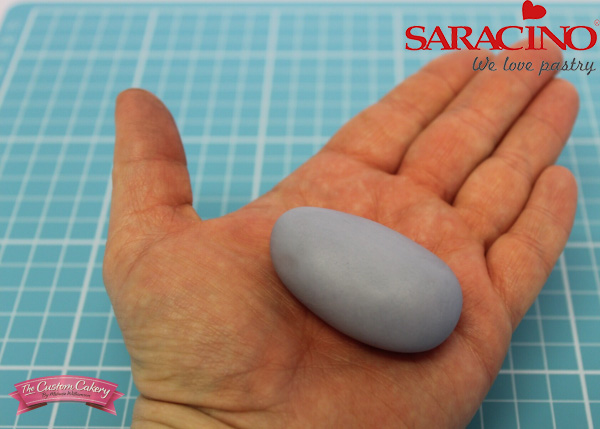
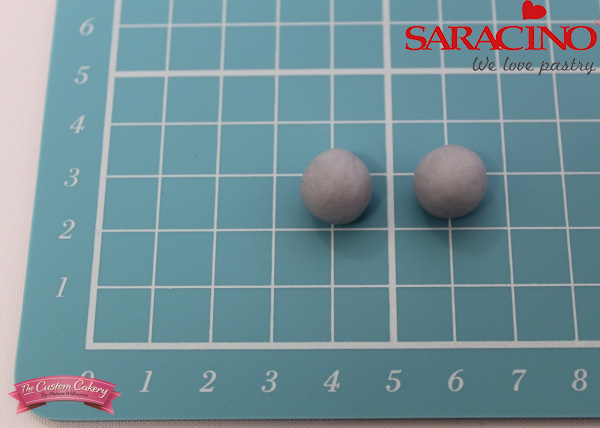
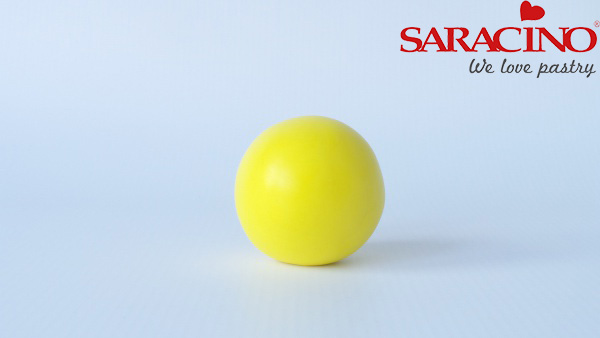
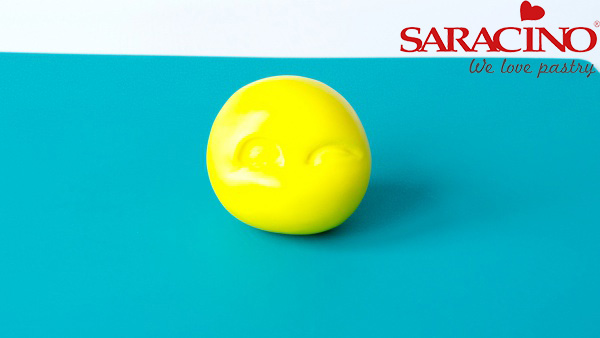
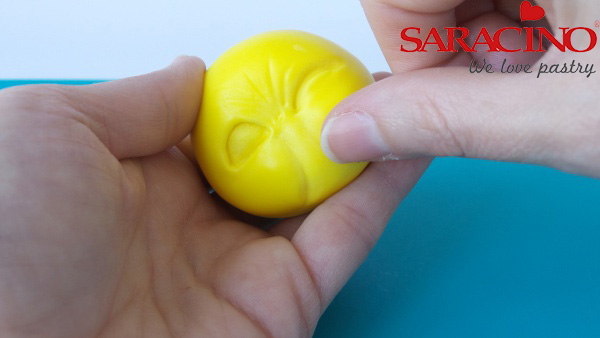
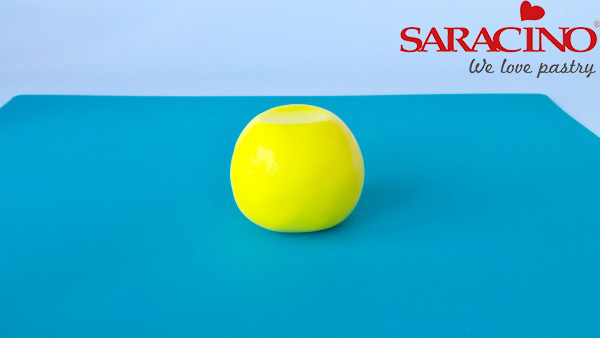
Roll 60g of yellow Saracino modelling paste into a ball.
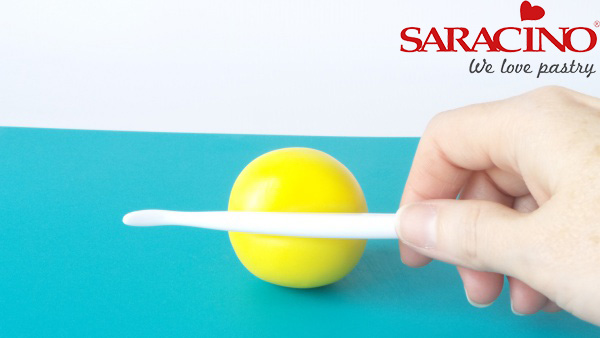
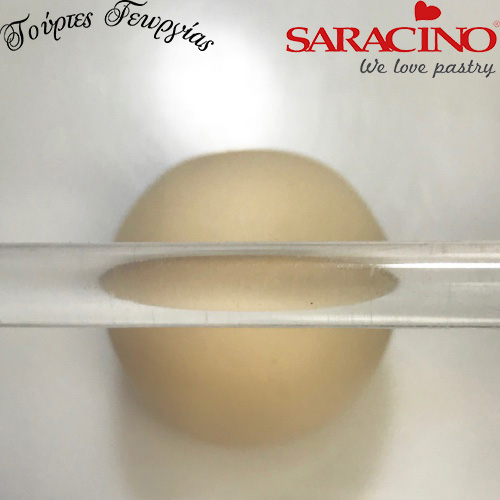
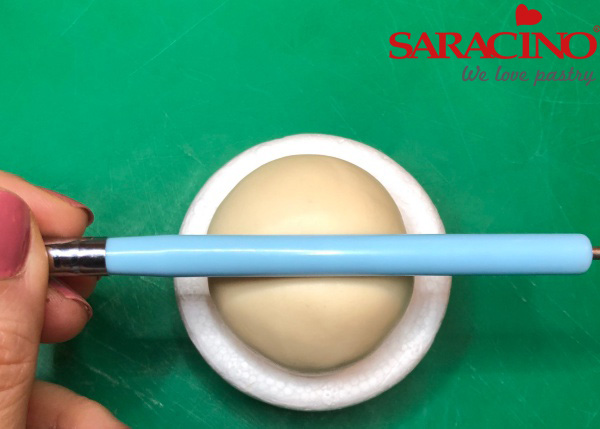
Step 2
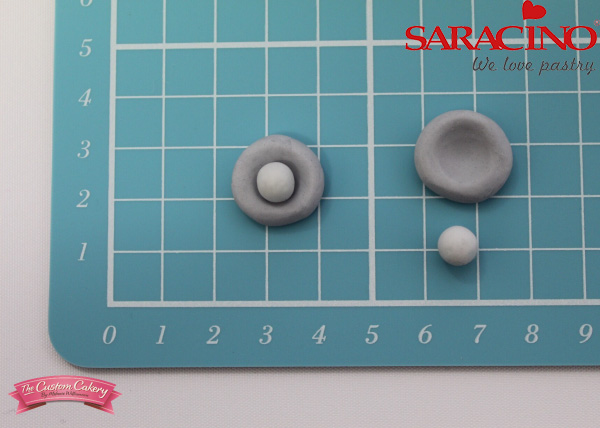
Press a straight handled tool across the middle for the eye-line.
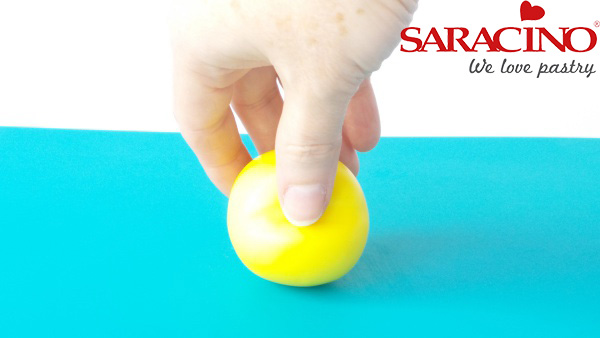
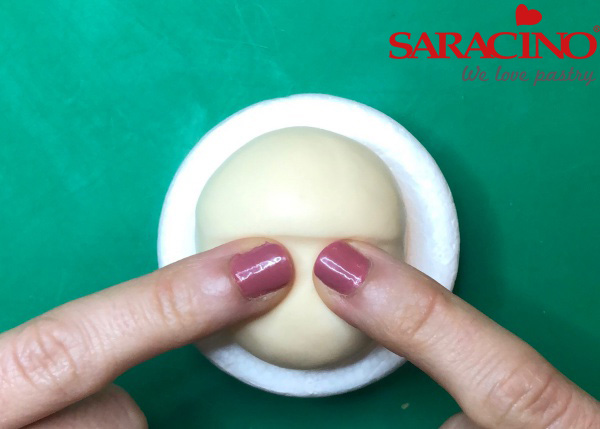
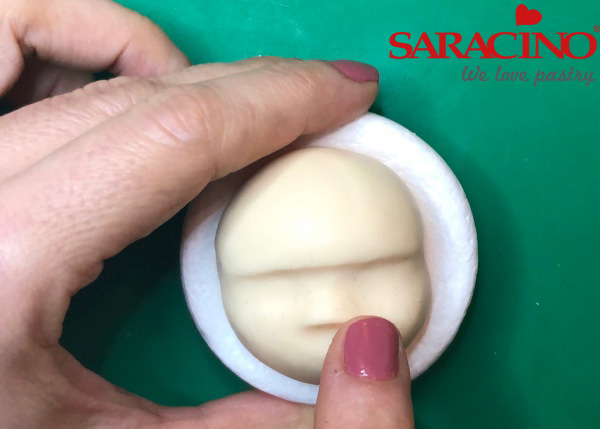
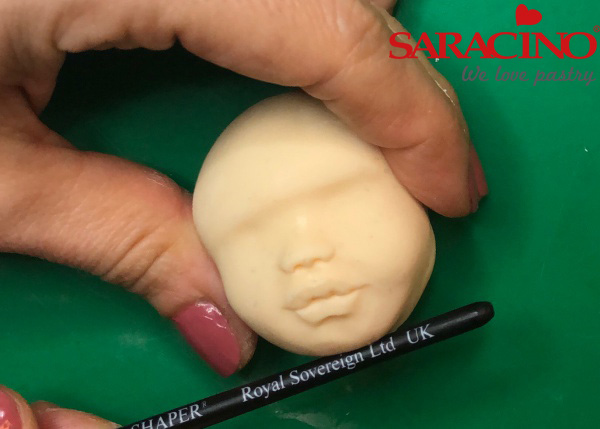
Step 3
Smooth the middle in between where the eyes will be with your thumb.

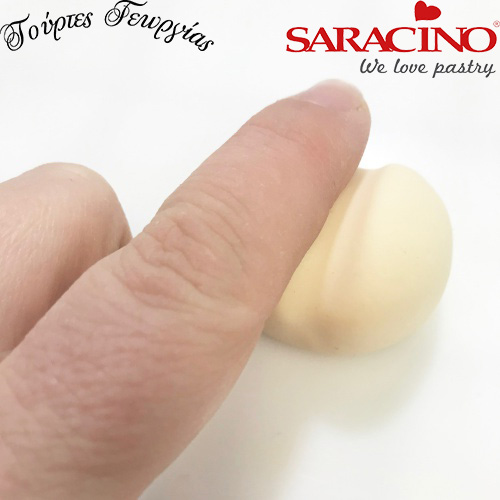
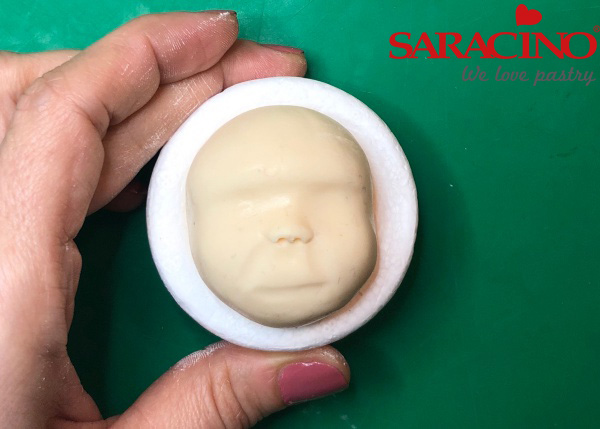
Step 4
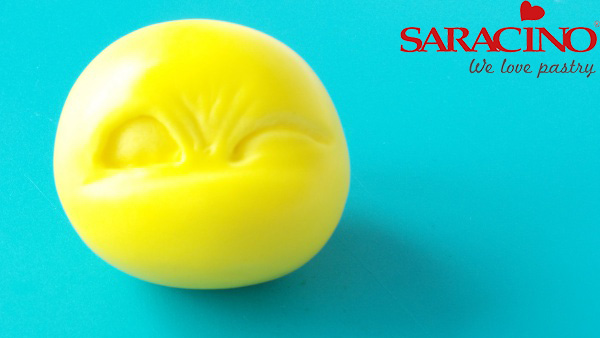
This is what the profile should look like.
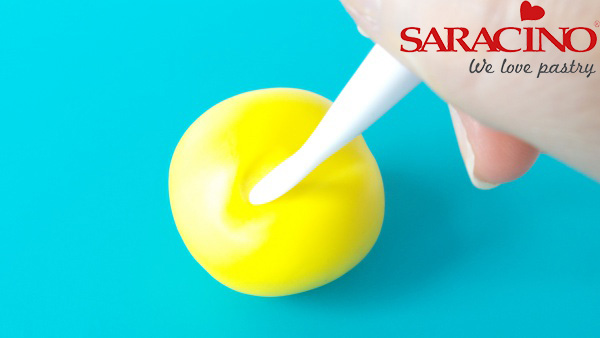
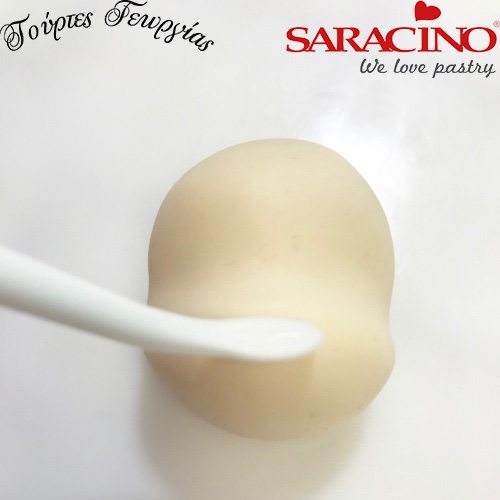
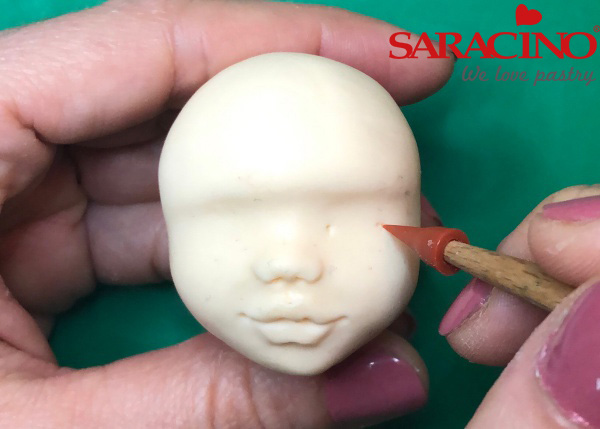
Step 5
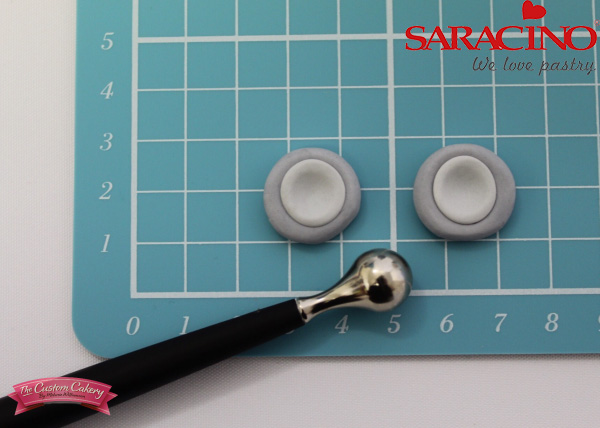
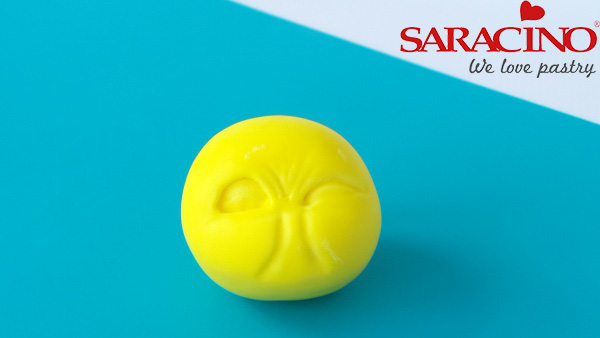
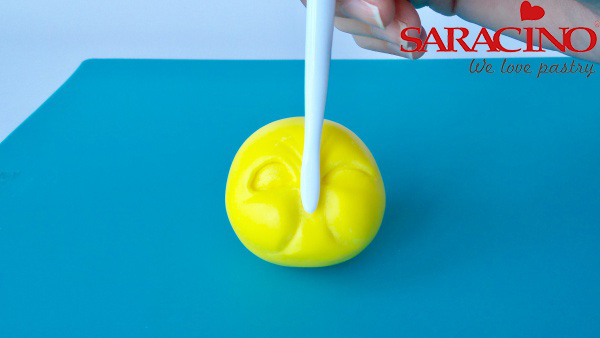
With a flower making tool shape one eye in the eye-line that you created.
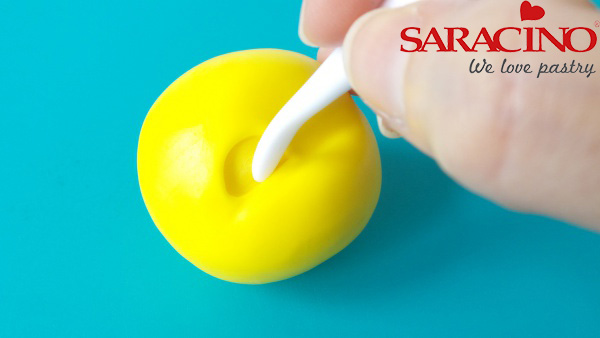
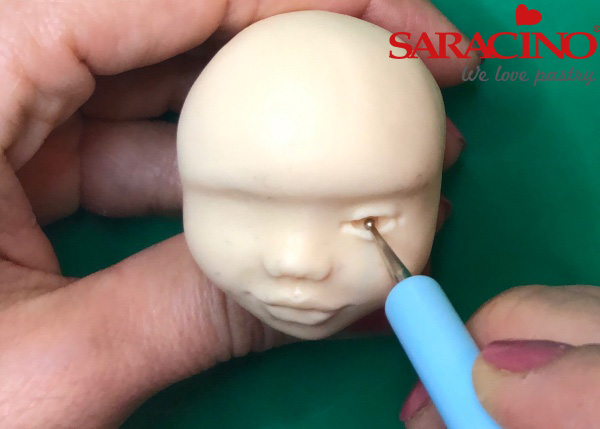
Step 6
Work into the eye to create a little depth so there is space for you to add the eyeball later
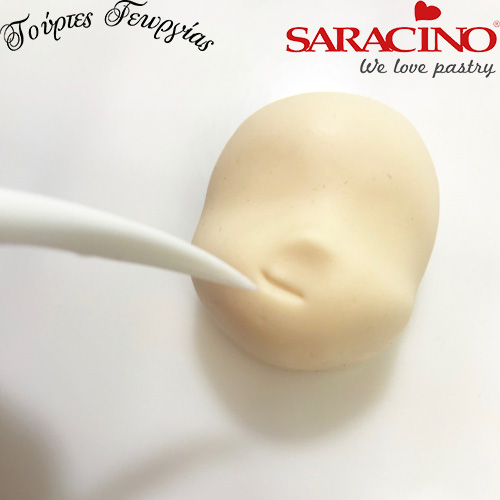
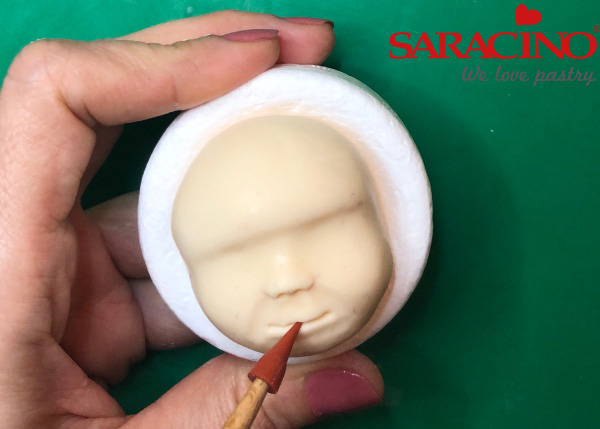
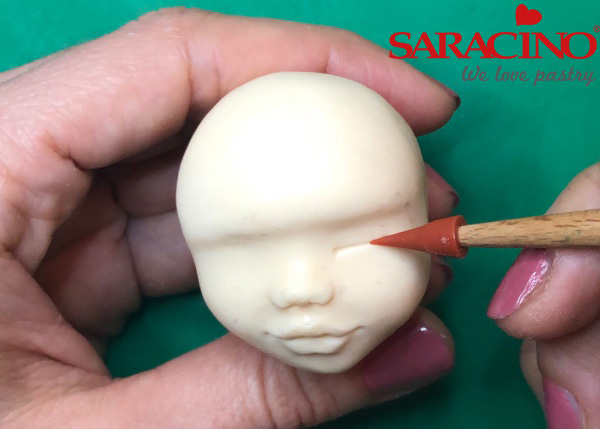
Step 7
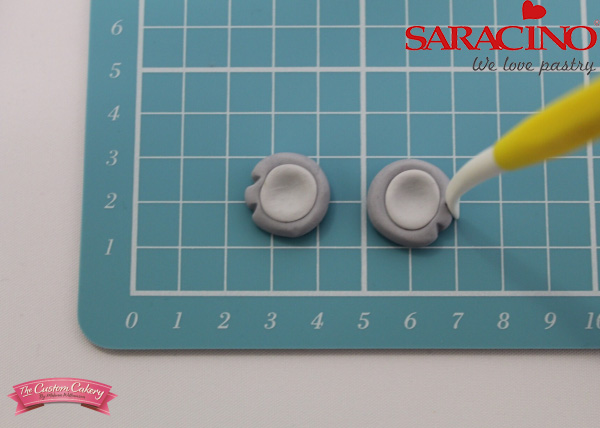
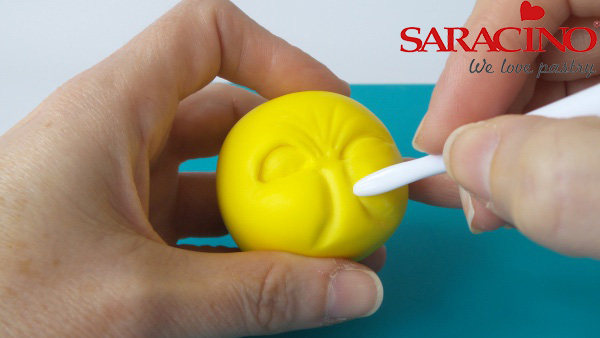
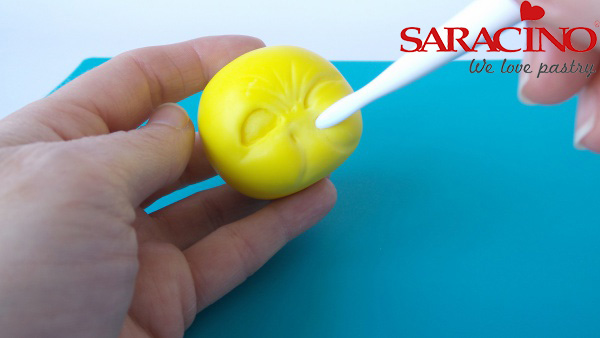
For the other eye draw a semi circle to make it look shut.
Step 8
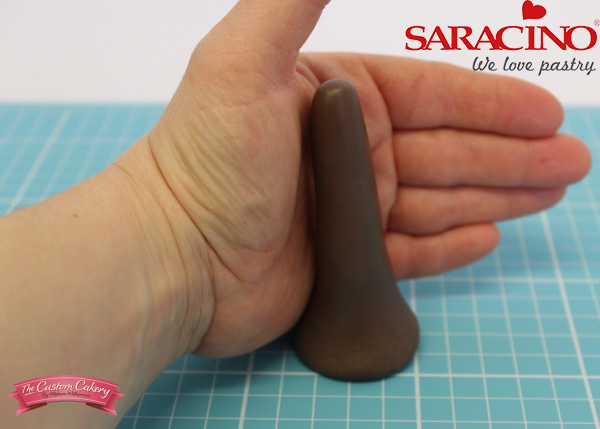
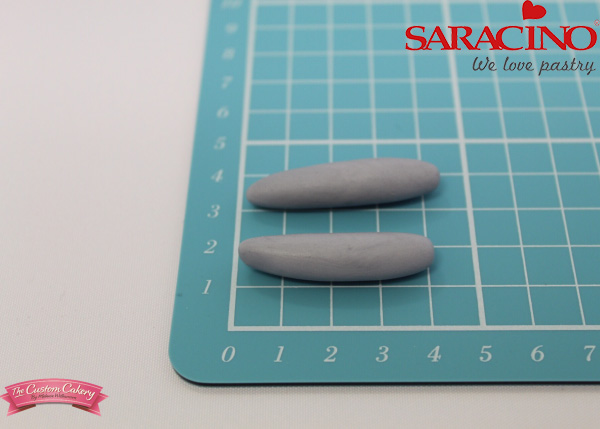
Add in some detailing in between the eyes.
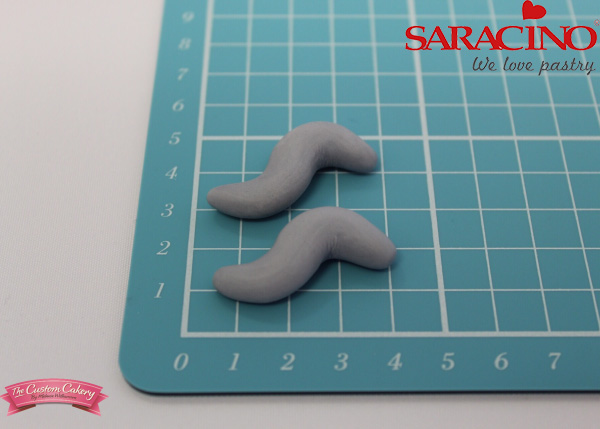
Step 9
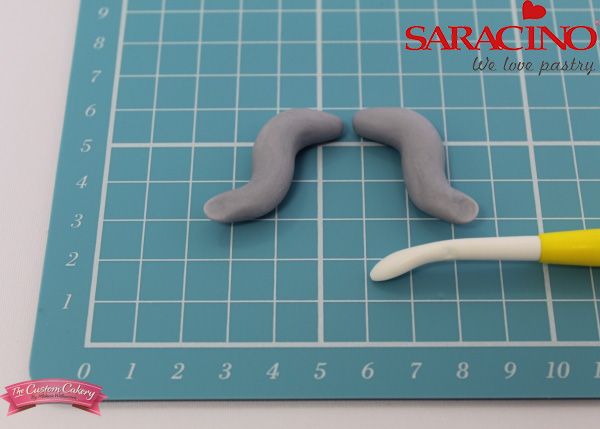
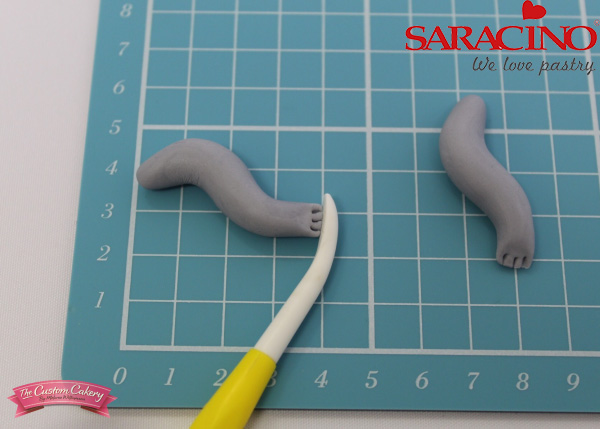
Next make two semi circles for cheeks.
Step 10
Work into the cheeks to build depth.
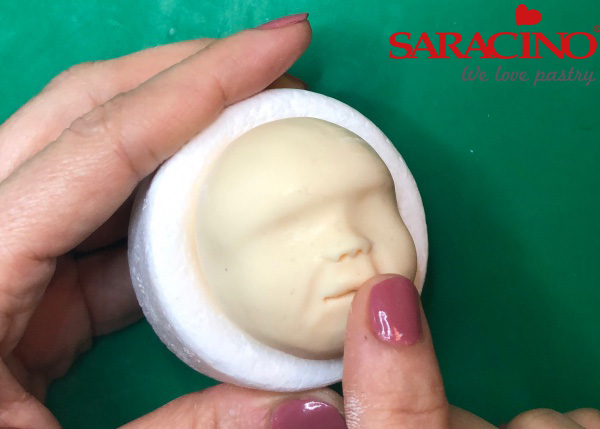
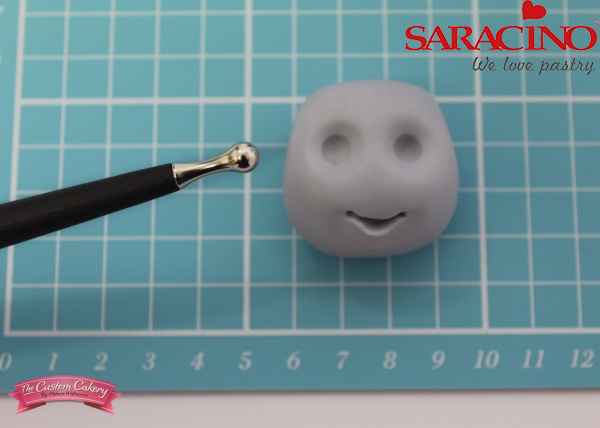
Step 11
Smooth the cheeks with your finger.
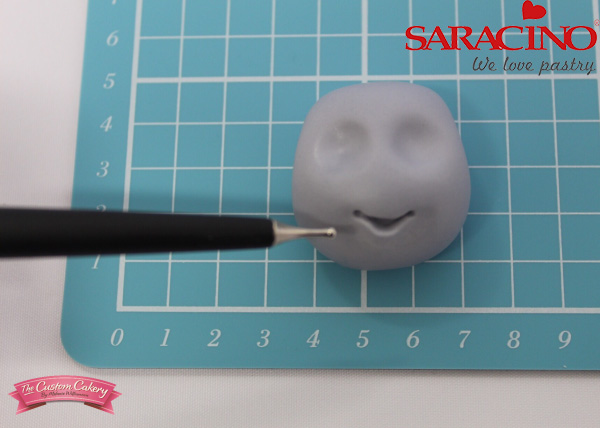
Step 12
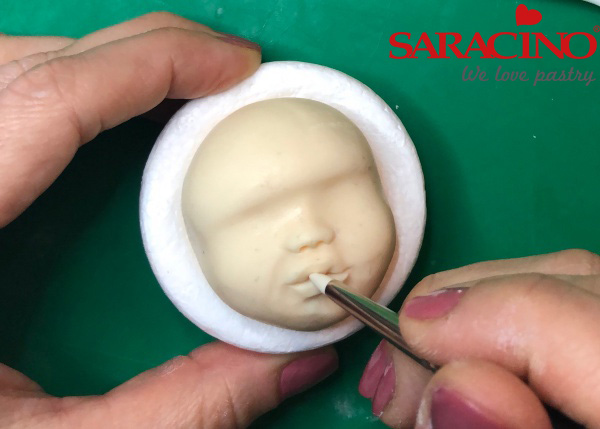
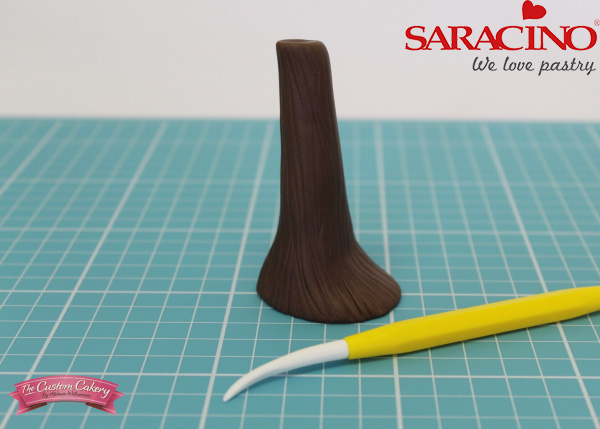
Smooth the section between the cheeks so that the beak will have somewhere to stick to.
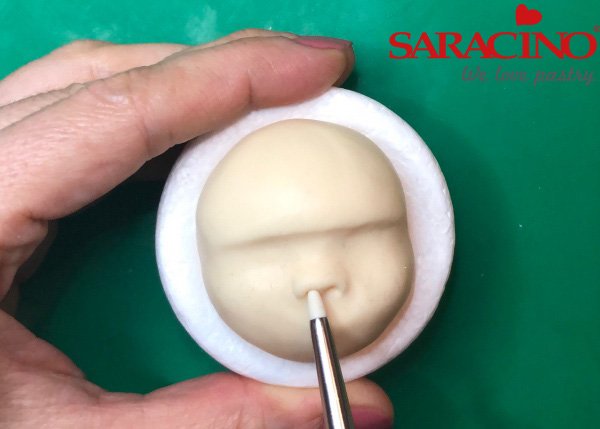
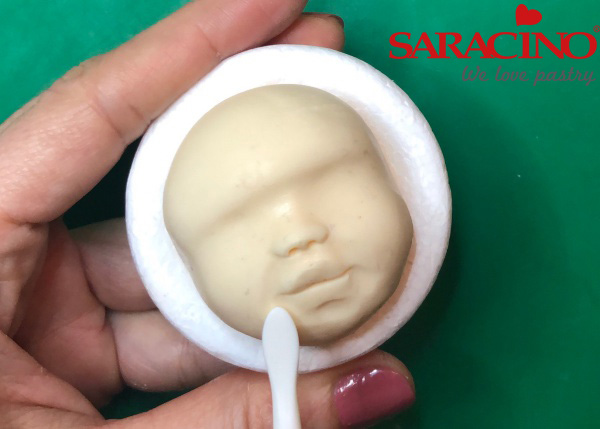
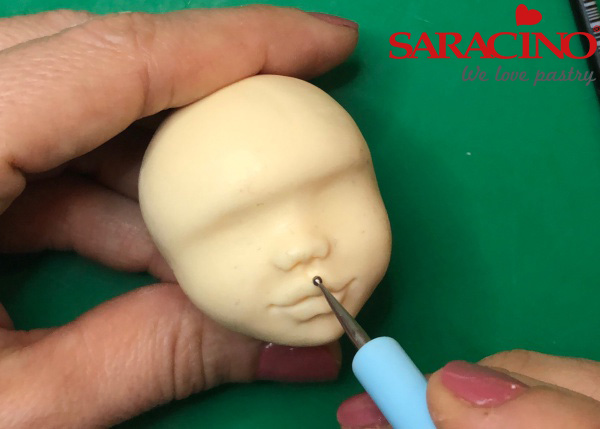
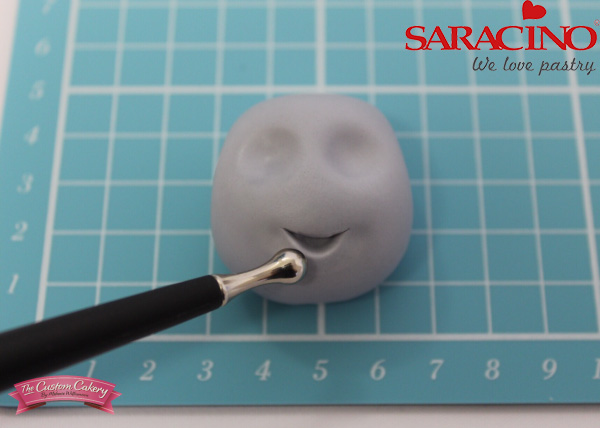
Step 13
Make indentations at either side of where the beak will sit.
Step 14
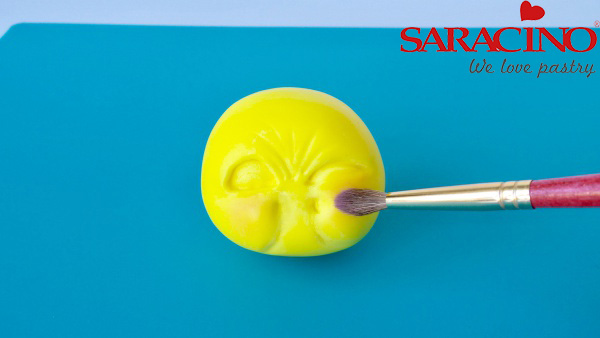
Dust the cheeks with Saracino pink powder dust using a soft dry brush.
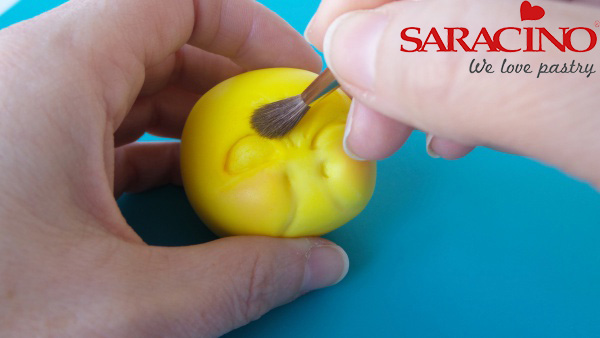
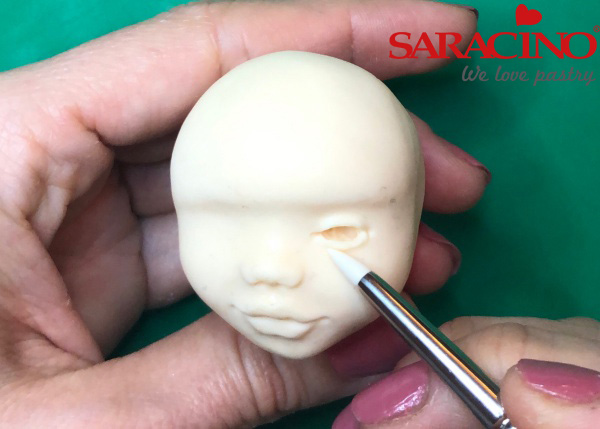
Step 15
Dust Saracino yellow powder dust around the eyes using a soft dry brush to add depth.
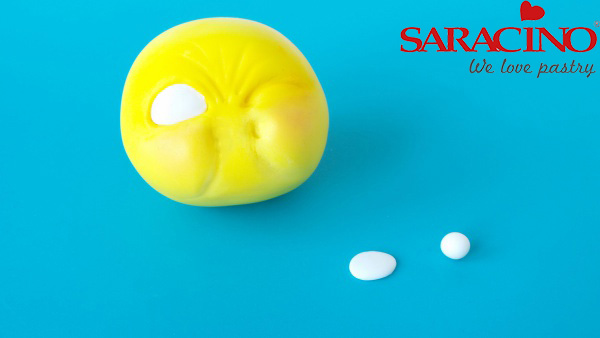
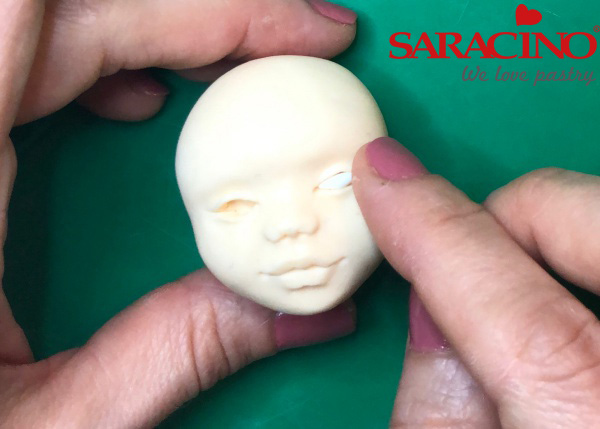
Step 16
Use a pea sized amount of Saracino white modelling paste to create a ball. Flatten the ball into an oval shape and attach it to the socket with either a little cooled boiled water, edible glue or piping gel.
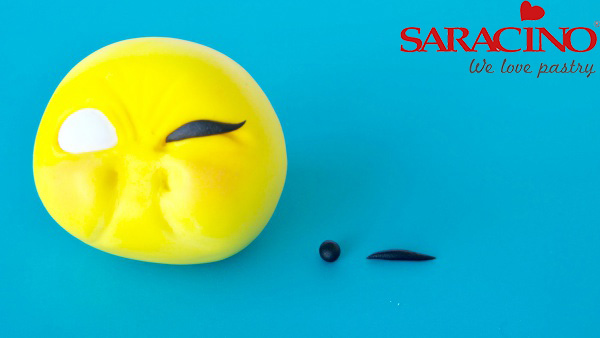
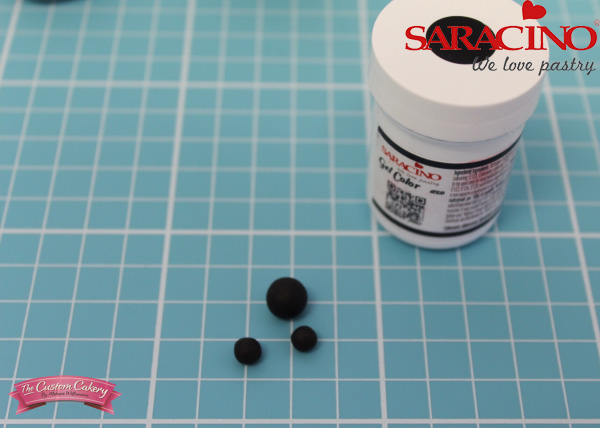
Step 17
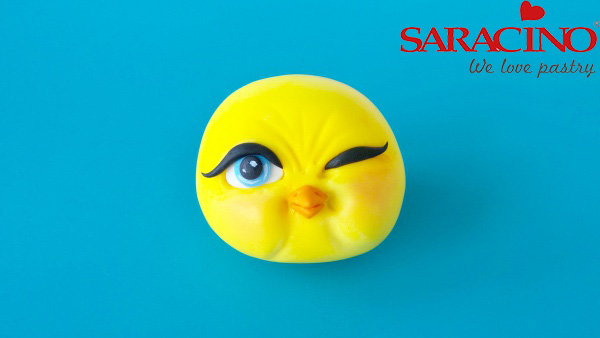
Roll a tiny ball of black into an eyelash and attach it to the other eye as shown.
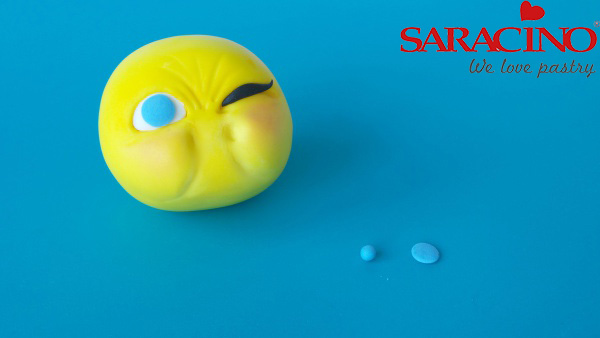
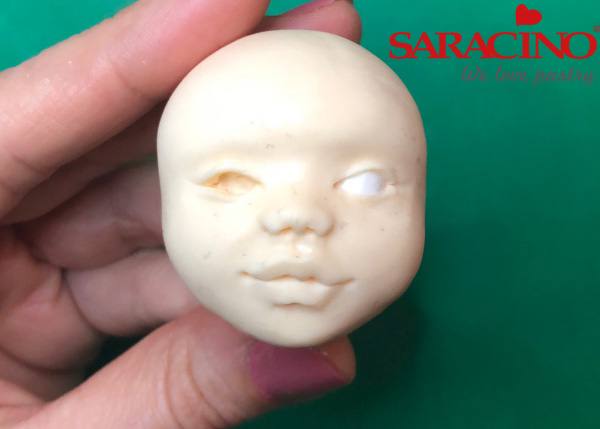
Step 18
Colour a tiny amount of paste with Saracino blue powder dust and flatten it into a circle. Attach to the eyeball.
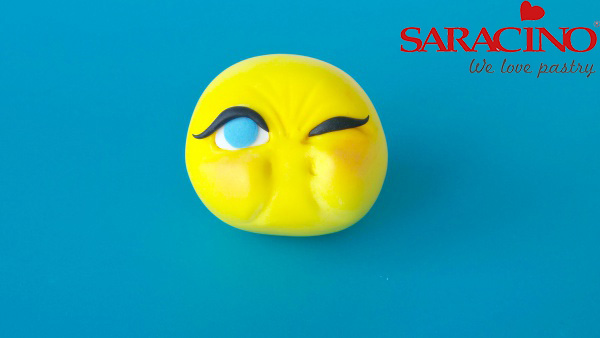
Step 19
Add another set of eyelashes to the open eye.
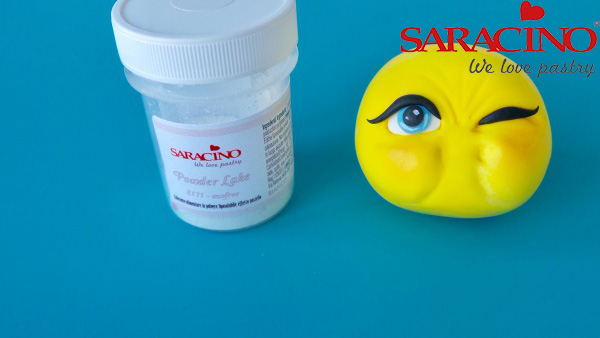
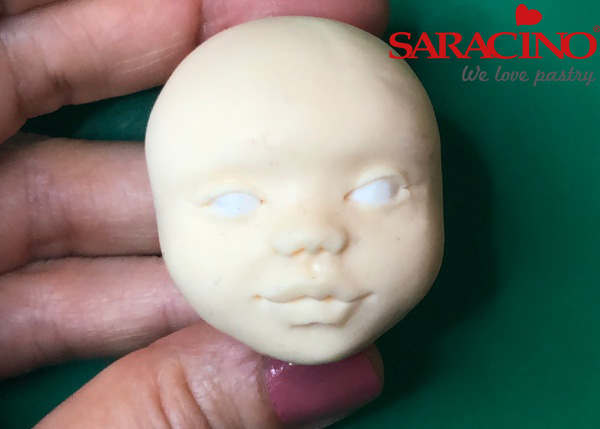
Step 20
Mix some Saracino white powder dust with some cooled boiled water and paint highlights to the eye – some small lines on the blue iris and two tiny dots on the black pupil.
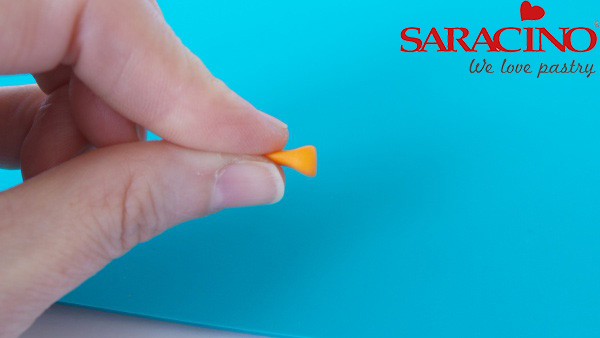
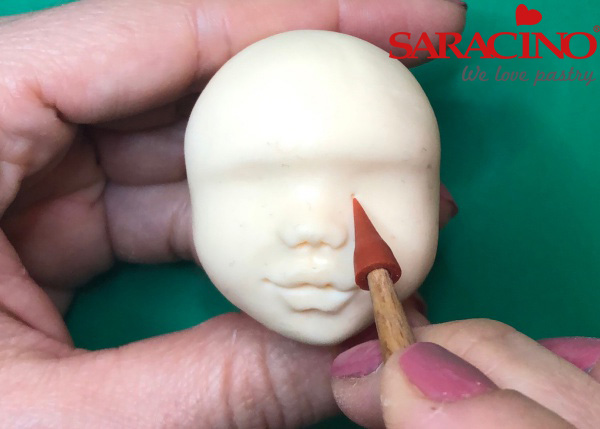
Step 21
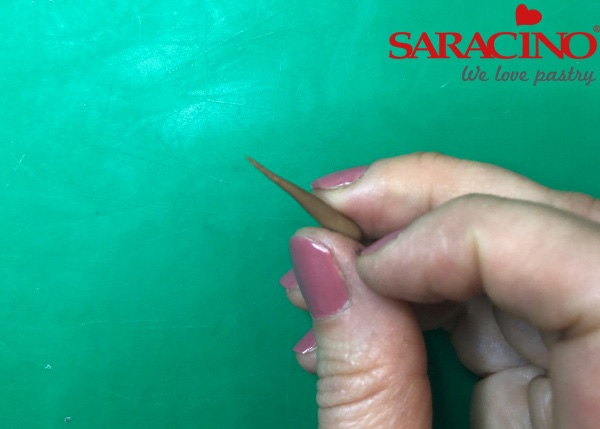
To make a beak take a small amount of paste and colour it using Saracino orange powder dust and pinch one end and flatten the other.
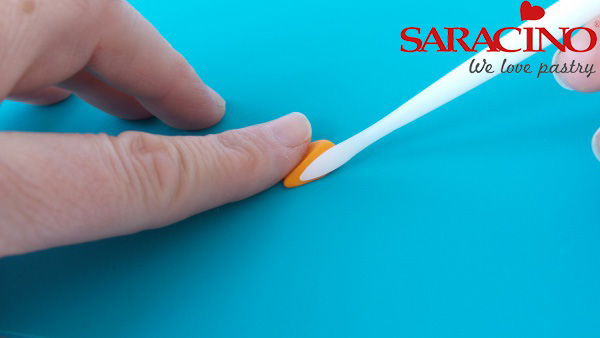
Step 22
Next press it as shown using a leaf tool to create a ridge running down the centre to the tip of the beak. Repeat with smaller piece.
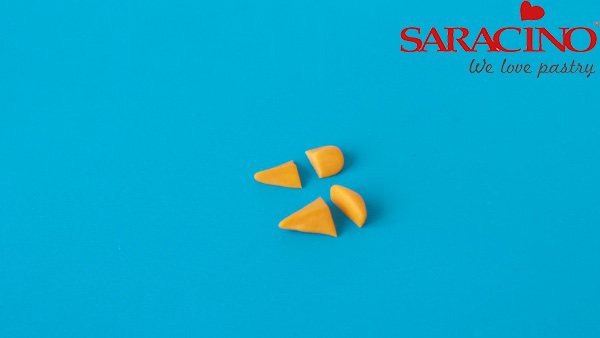
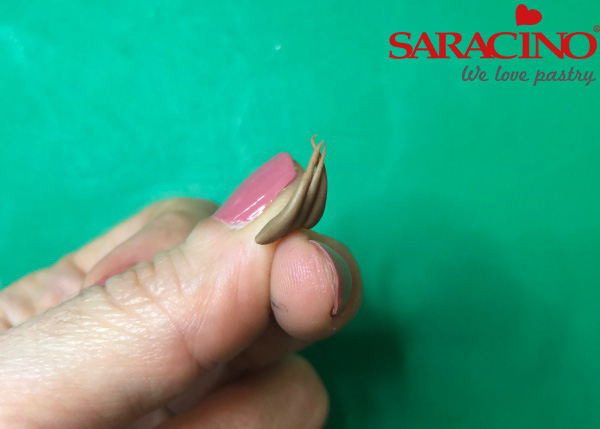
Step 23
Trim both sections. The larger of the two will become the top of the beak and the smaller will be the lower.
Step 24
Glue the beak into place and add two tiny nostrils with the leaf tool.
Step 25
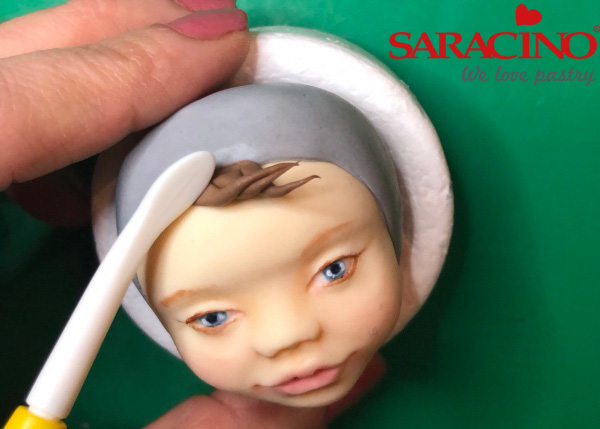
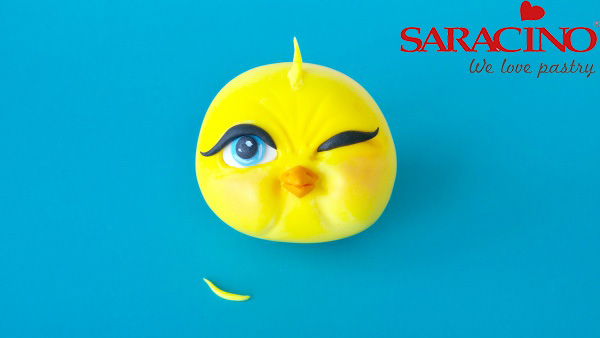
Take two little pieces of yellow modelling paste and roll them into fine tapered section of feathers. press them onto the head as shown and smooth joins.
Step 26
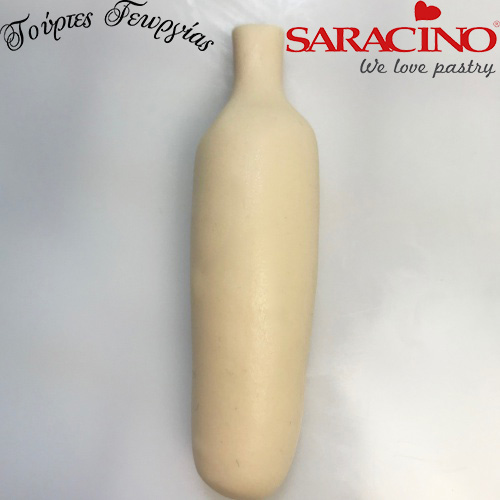
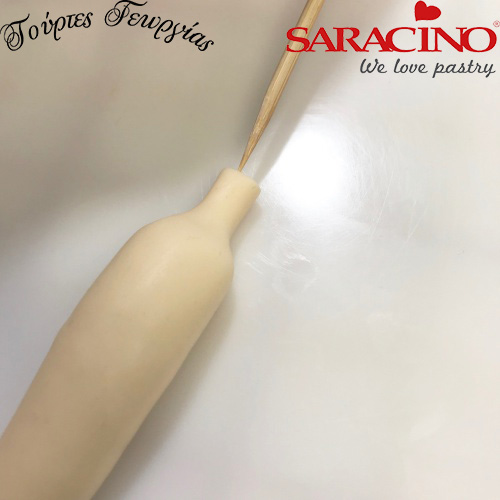
Roll a ball of 90g of yellow modelling paste and flatten the base and the top to make the body.
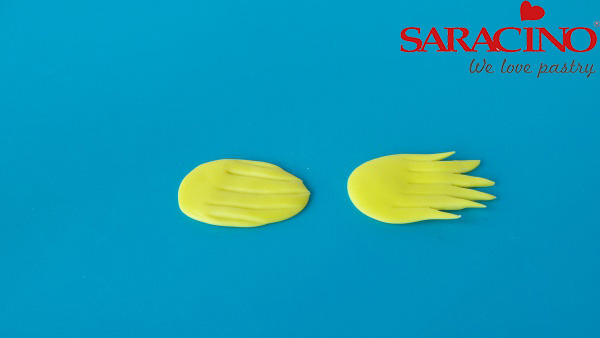
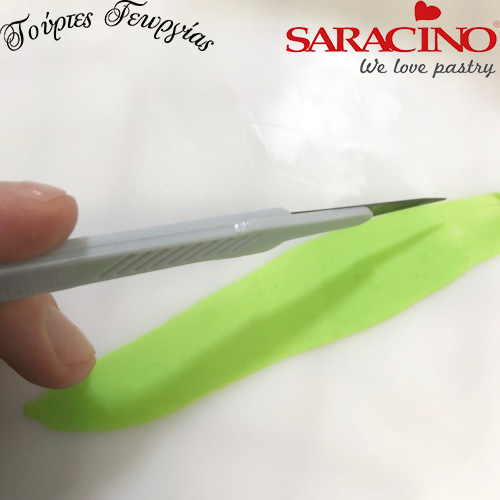
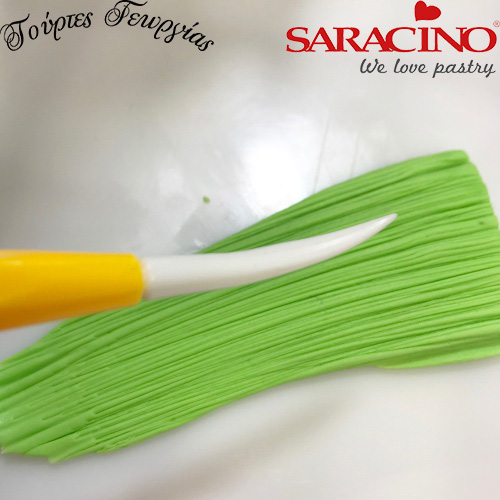
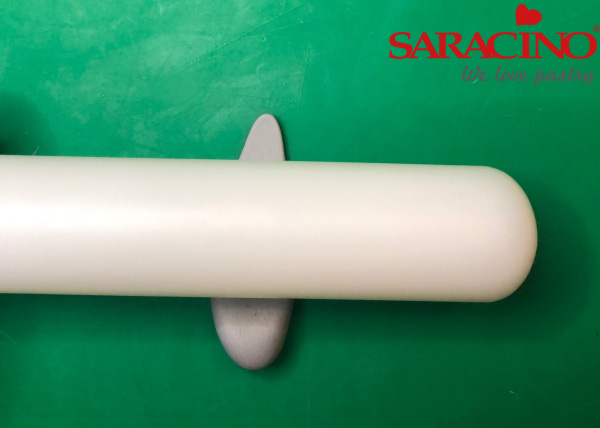
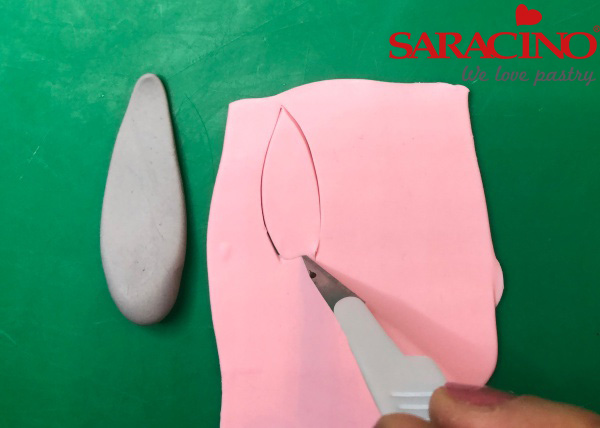
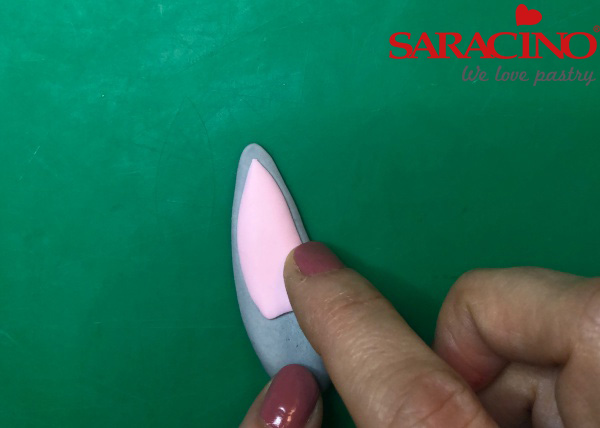
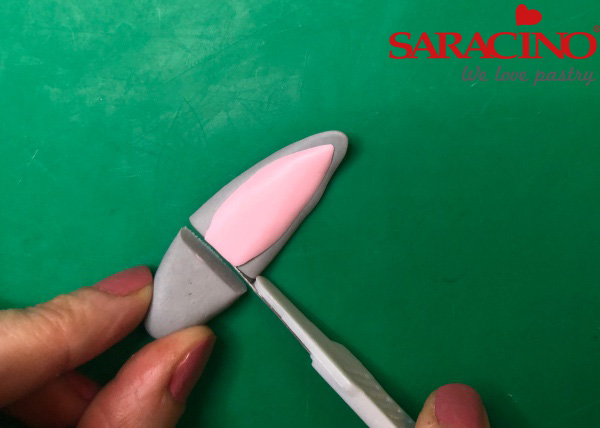
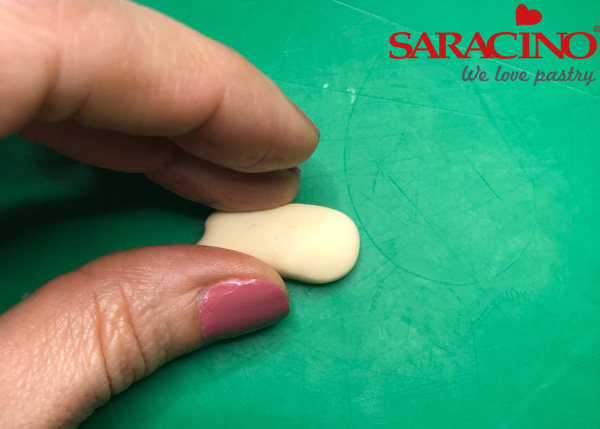
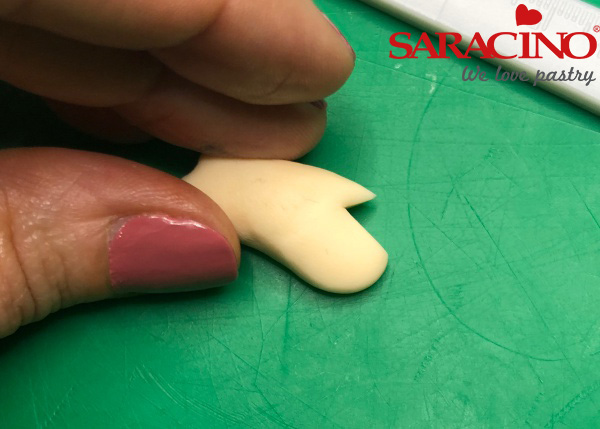
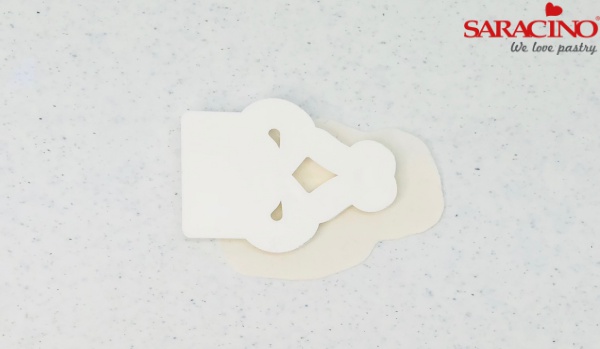
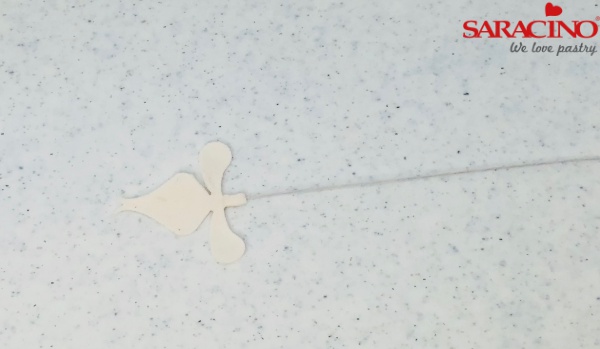
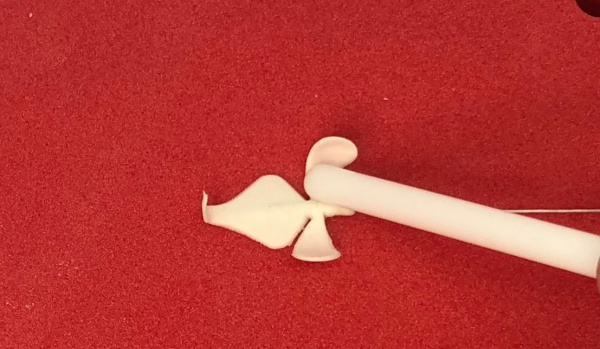
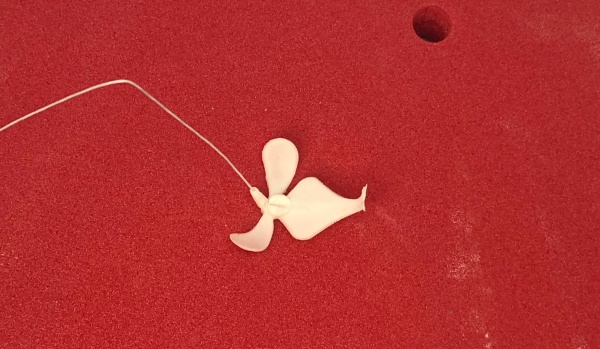
Step 27
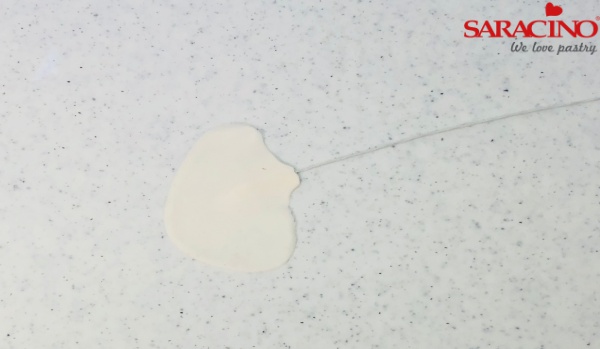
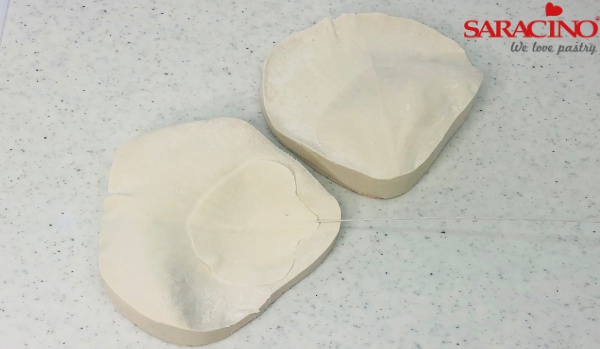
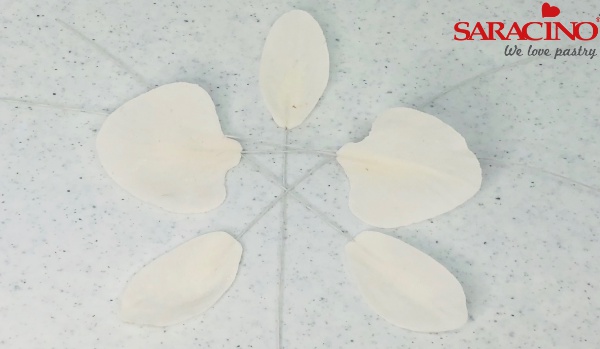
To create the wings use 4g of yellow modelling paste and make two equal flat ovals. Score 5 lines from one end into the oval but all the way across. Then cut along the lines with a sharp knife. Pinch each section into a point as shown.
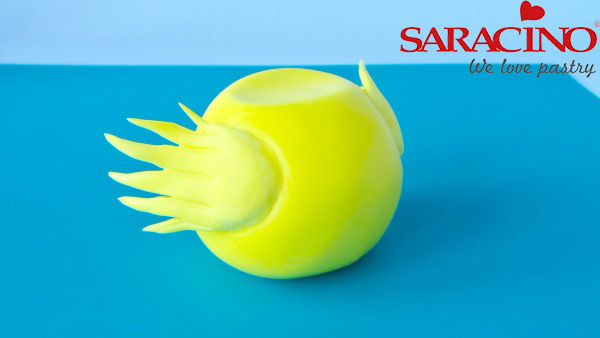
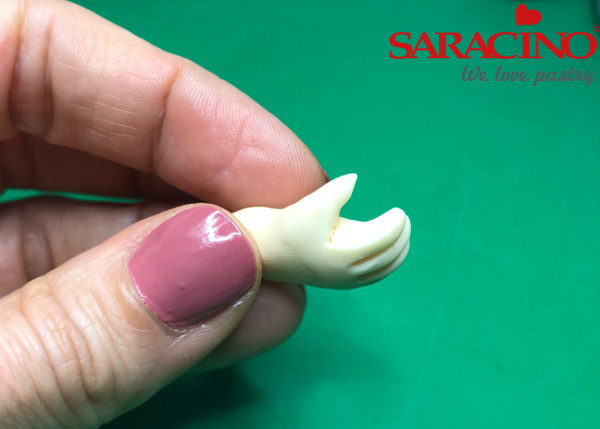
Step 28
Glue the wings to the side of the body and smooth joins with flower tool. Make sure that you lift the cut feather pieces away from the body.
Step 29
Next glue the head to the body.
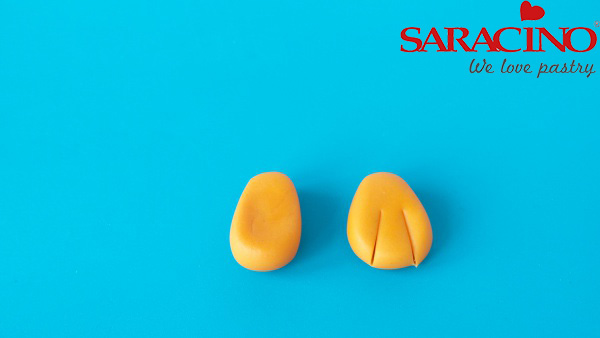
Step 30
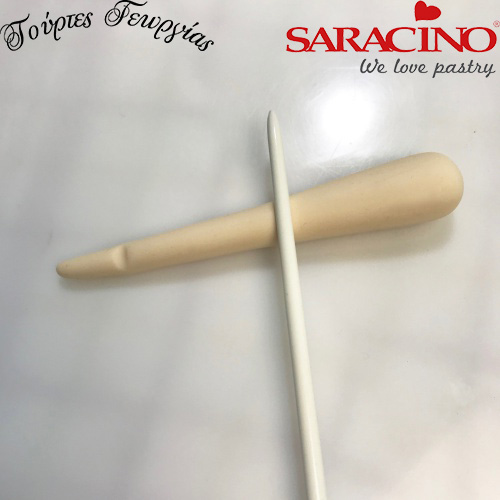
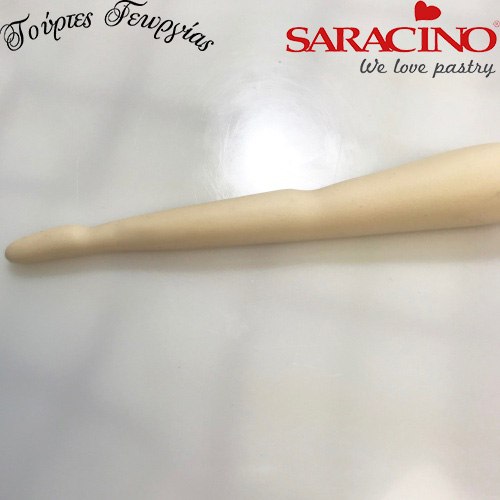
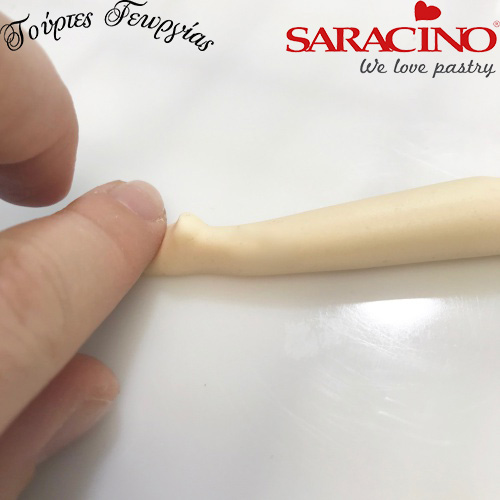
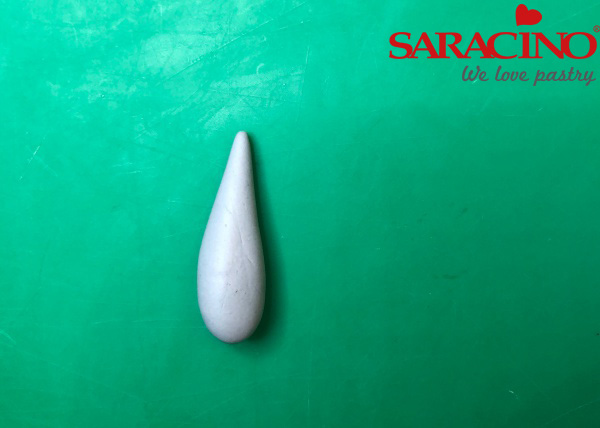
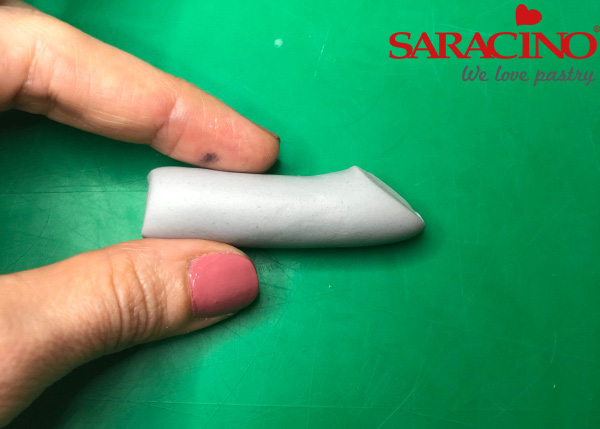
For the chick’s feet take 4g of paste coloured orange and make two teardrop shapes. Make two cuts into the broader end.
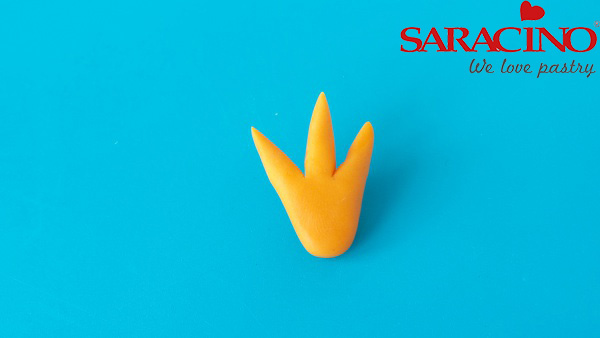
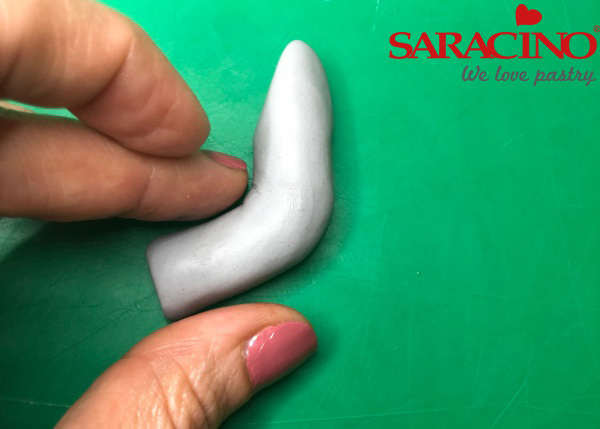
Step 31
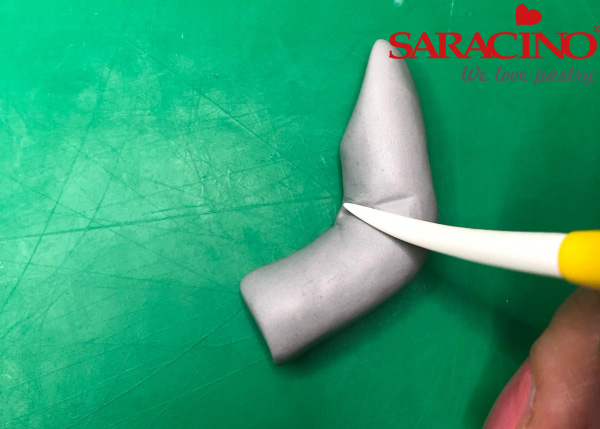
Pinch these ends into points.
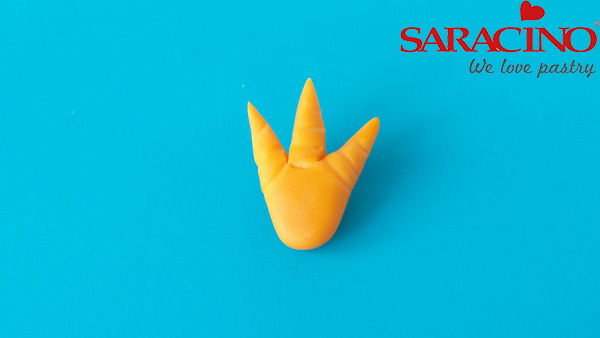
Step 32
Add lines across the toes.
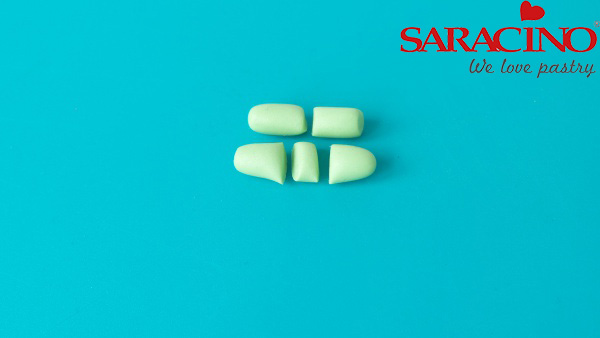
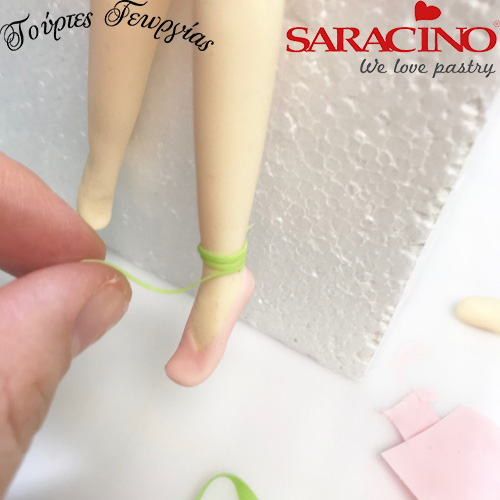
Step 33
For the bow use 2g of paste coloured with Saracino green powder dust. Roll into two sausages and cut one into 2 equal pieces and the other into 3 pieces, 2 the same size and one smaller.
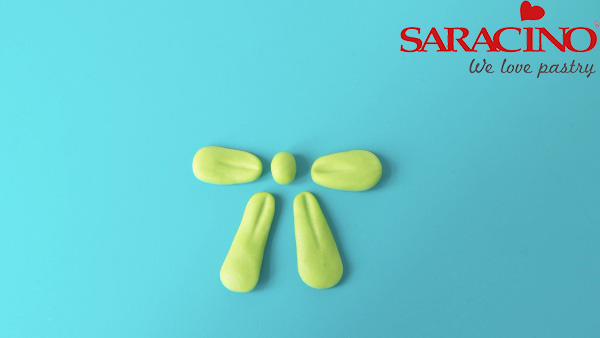
Step 34
The section that is cut into 2 should be rolled into long sausage shape and flattened. Repeat with 2 longer sections of the other piece and roll the small piece into a ball for the knot. Add lines using the leaf tool as shown.
Step 35
Glue to the neck, the larger pieces first, then the shorter and finally attach the knot.
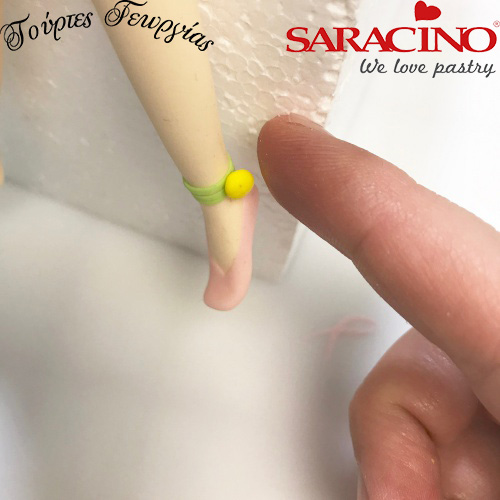
Step 36
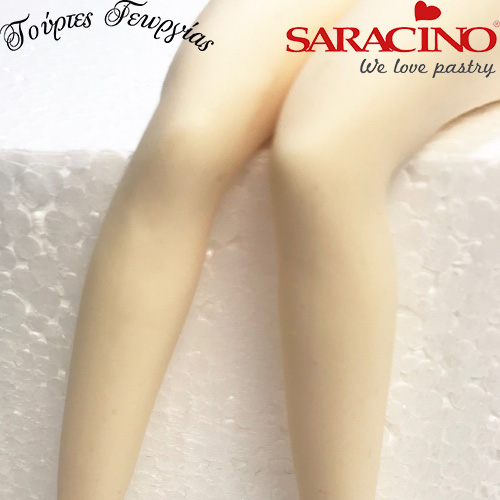
Lastly glue the feet to the body and add two tiny pieces of black paste for eyebrows.