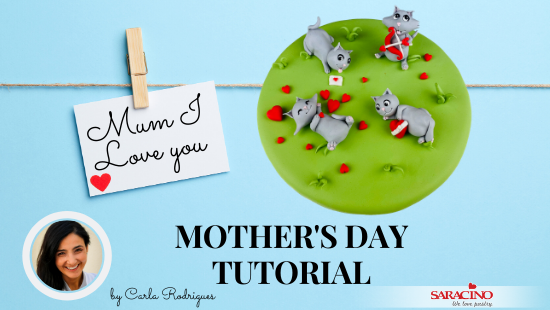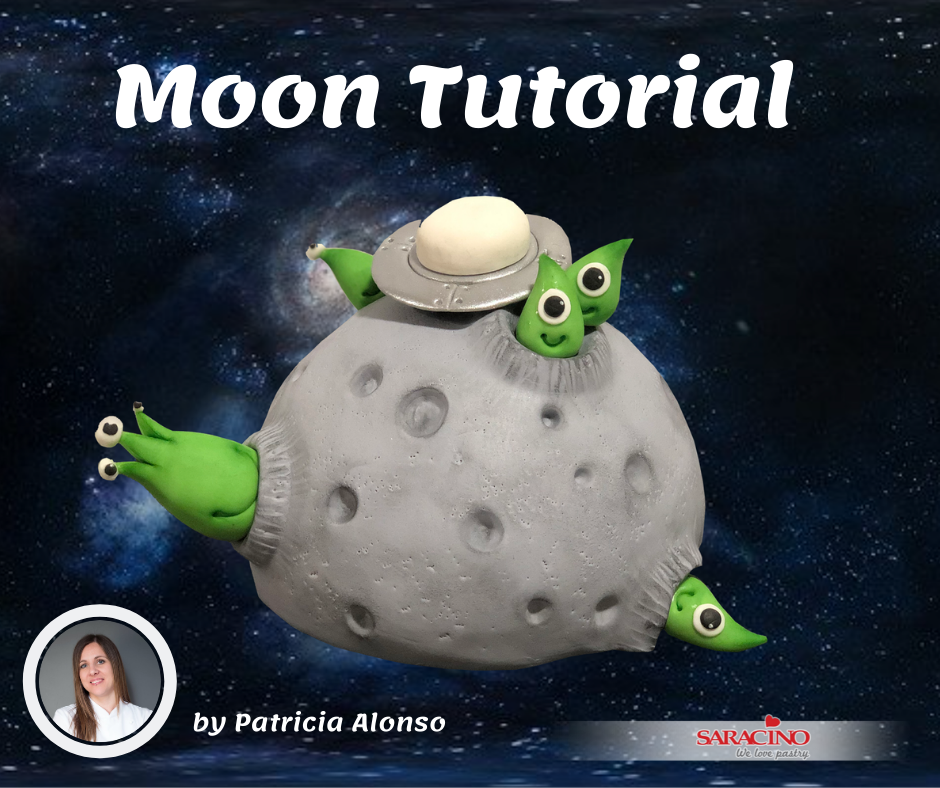
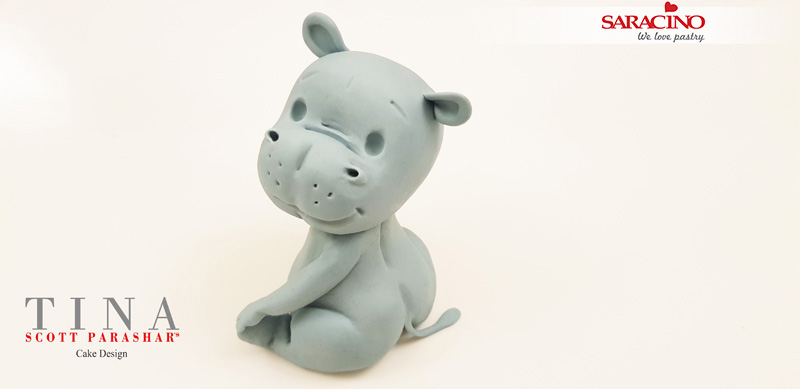
CUTE BABY HIPPO
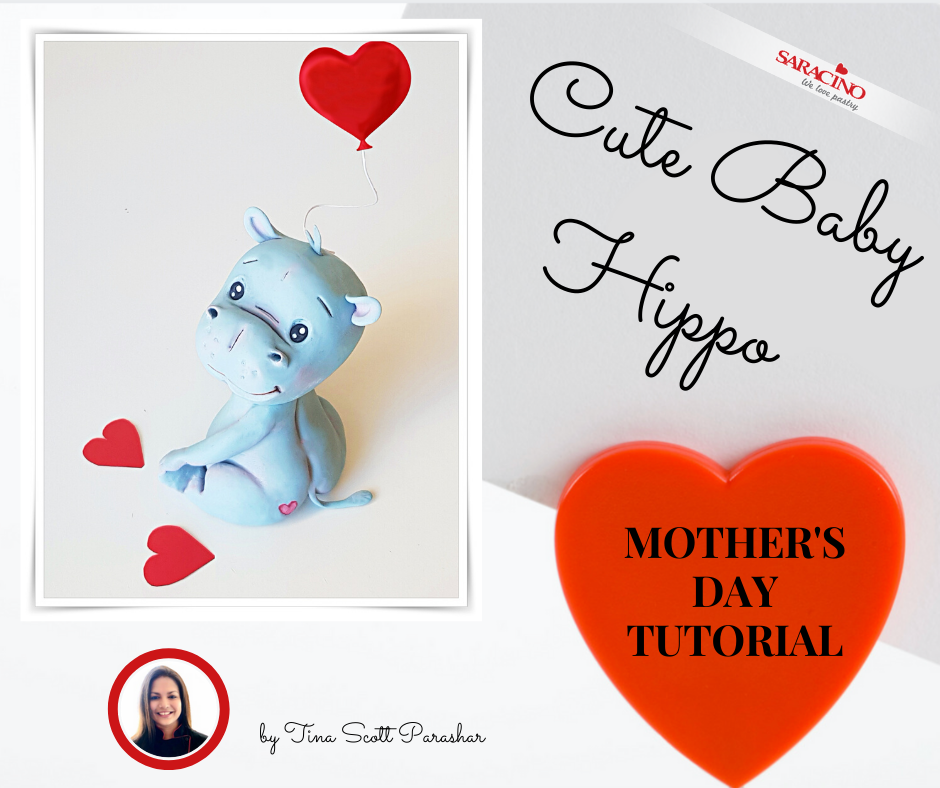
Author: Tina Scott Parashar

Skill level: BEGINNERS
TIP:
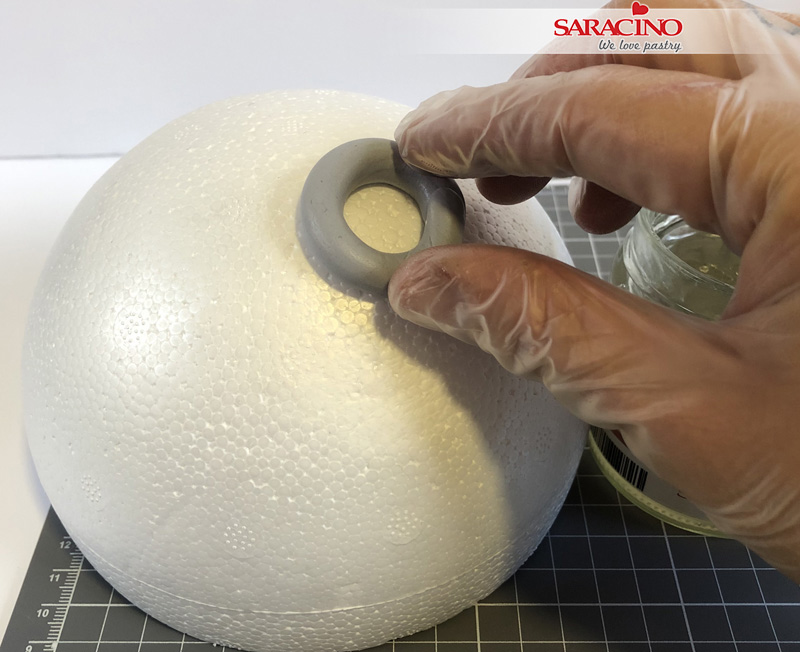
Tina recommends drying the parts before attaching them to each other. The body especially should dry a couple of hours before you place the head so that it can support the head. Also, if you pre-make the hole where the stick will go in, it helps with drying out the centre of the body faster.
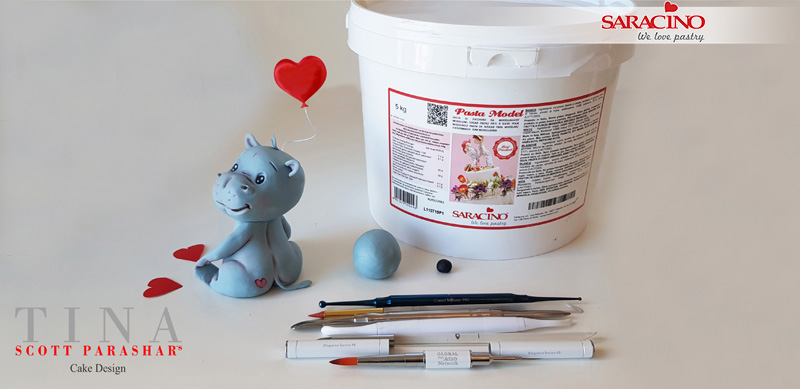
You will need:
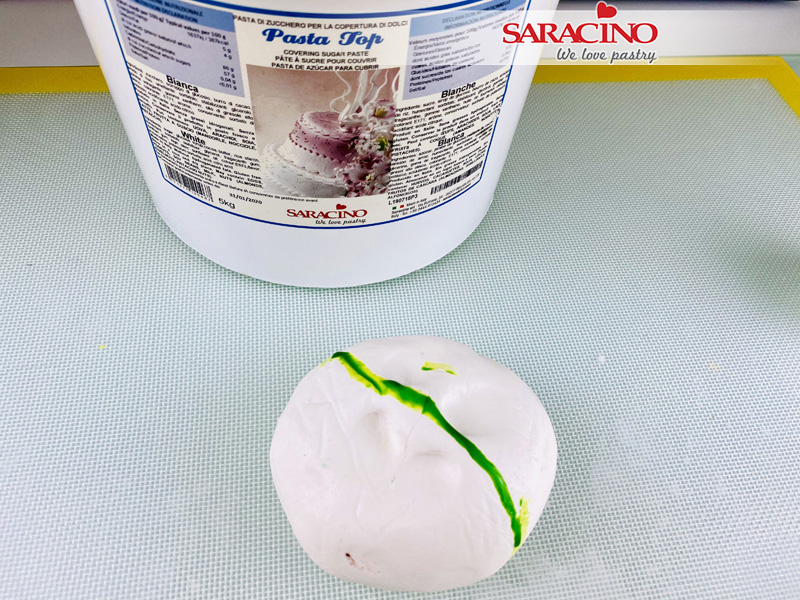
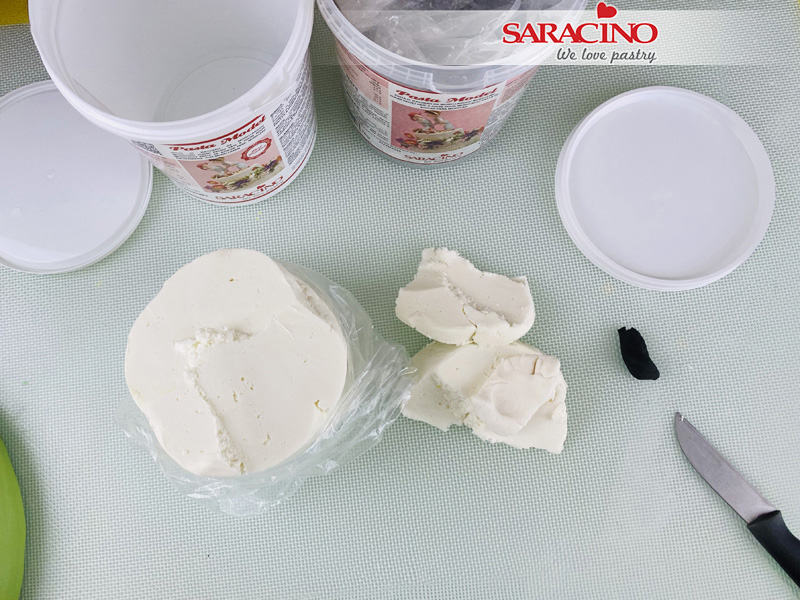
- Saracino modelling paste white coloured with grey
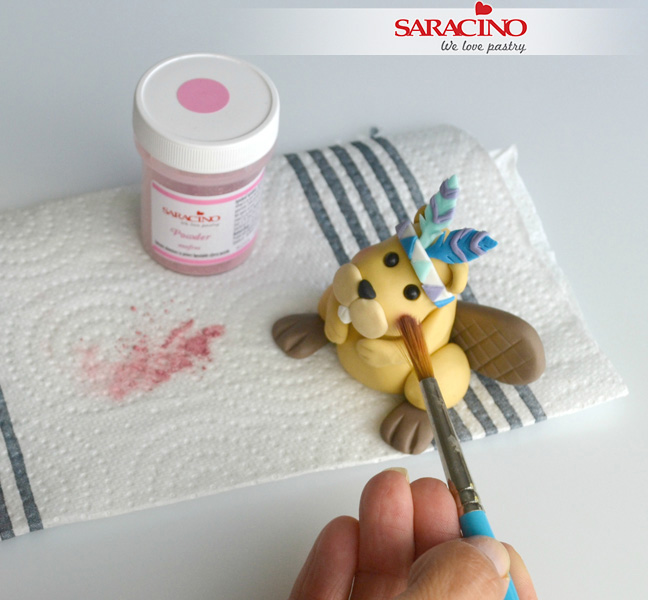
- Light pink dust for dusting
- Pre-coloured red wafer paper
- Red colour gel
- Wooden cocktail stick
- Ball tools
- Dresden tool
- Sugar shaper
- Pointed tool
- Fine paint brush
- Brush for dusting
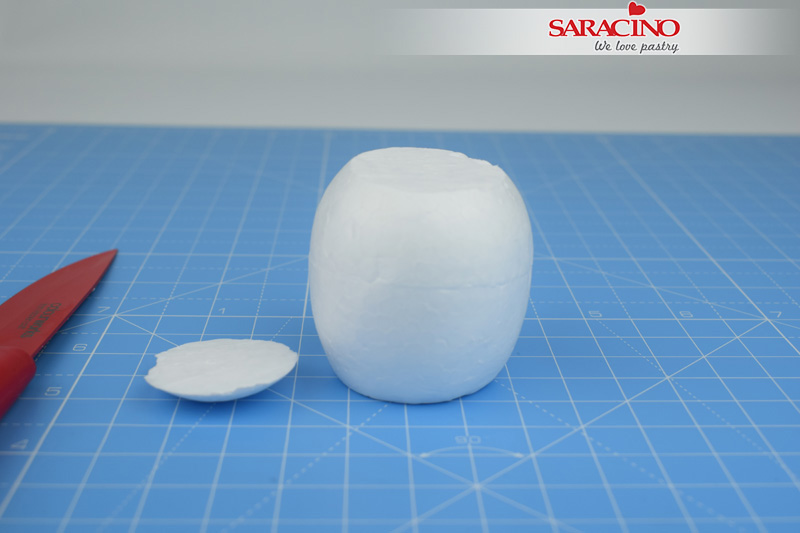
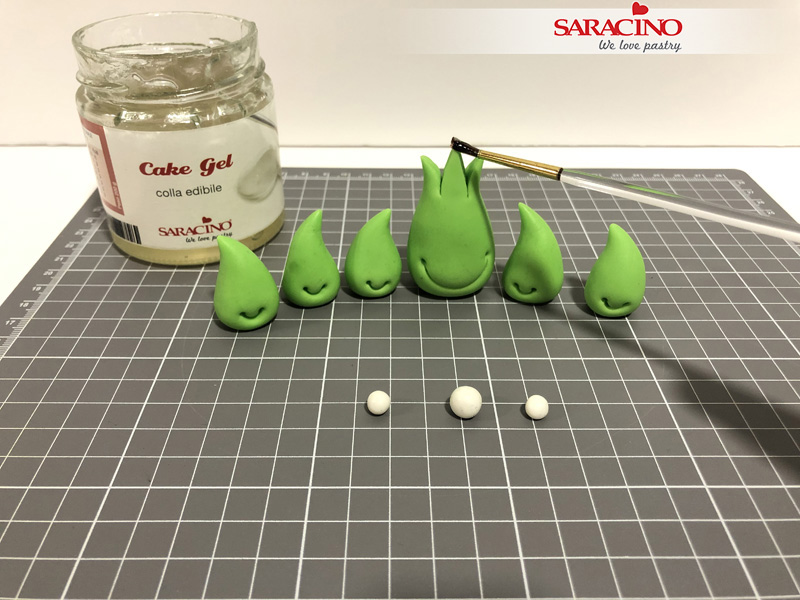
Step 1
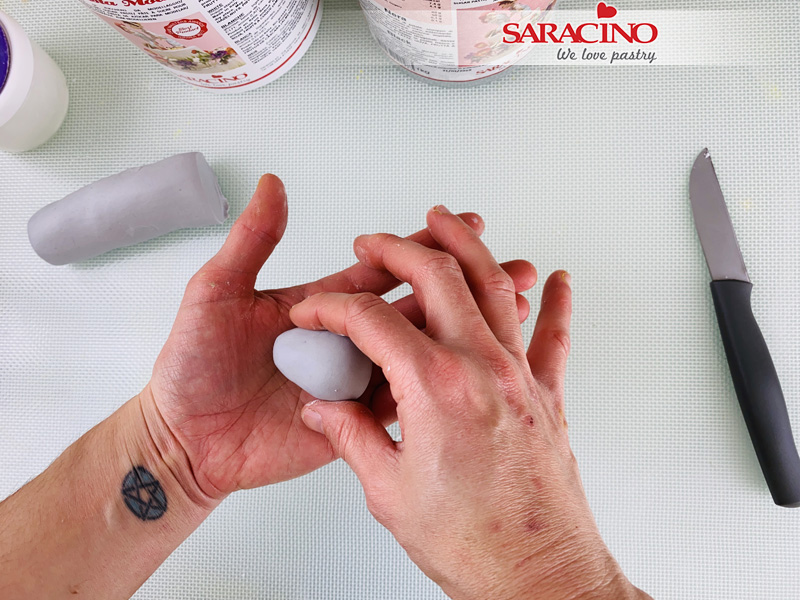
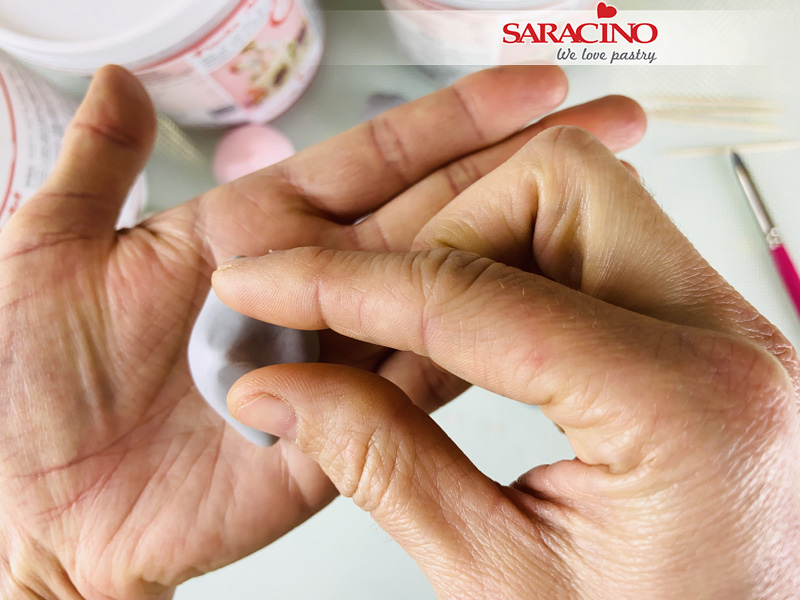
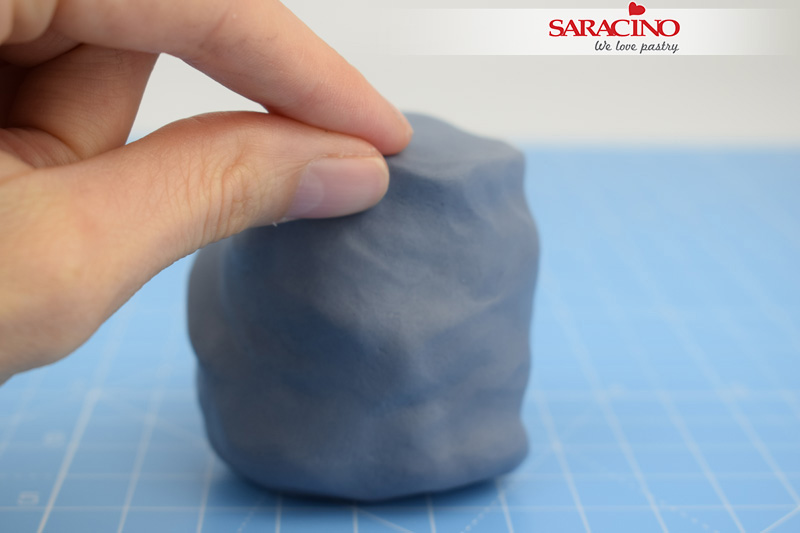
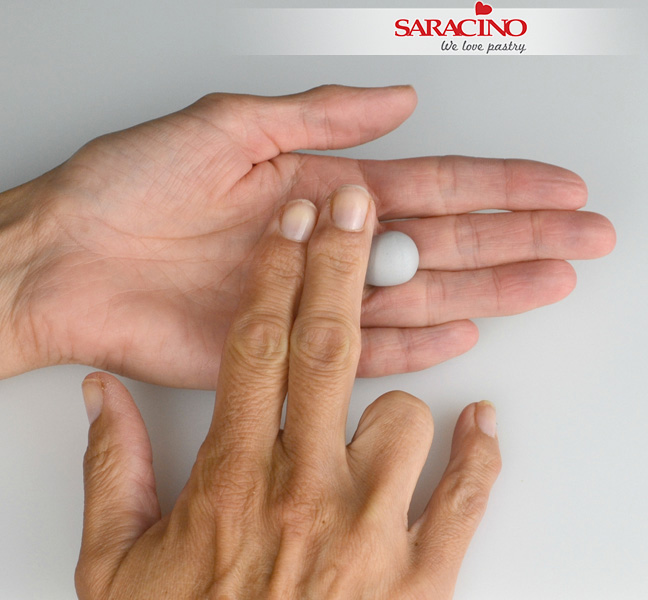
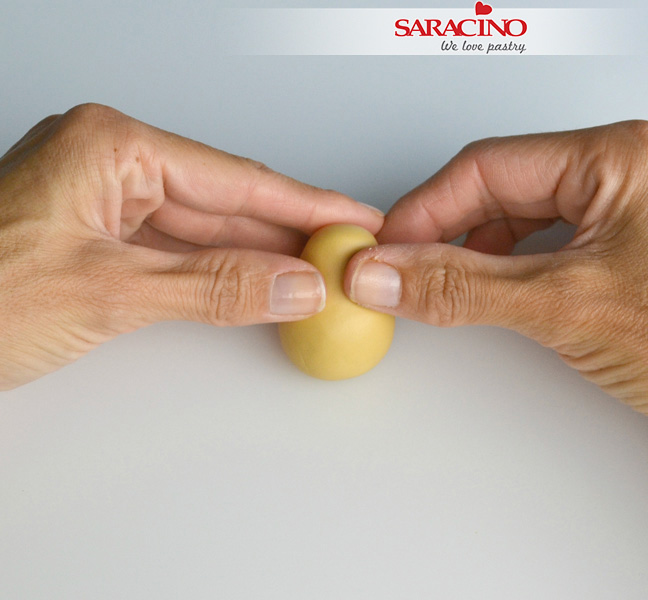
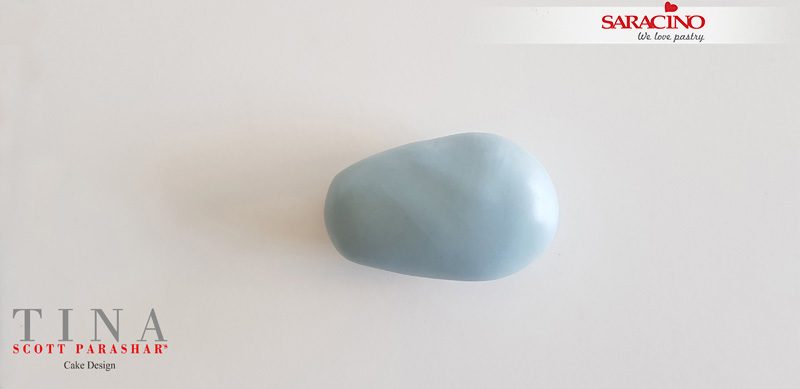
Take a ball of the coloured Saracino modelling paste, roll it into a sausage shape and then make one end thinner than the other.
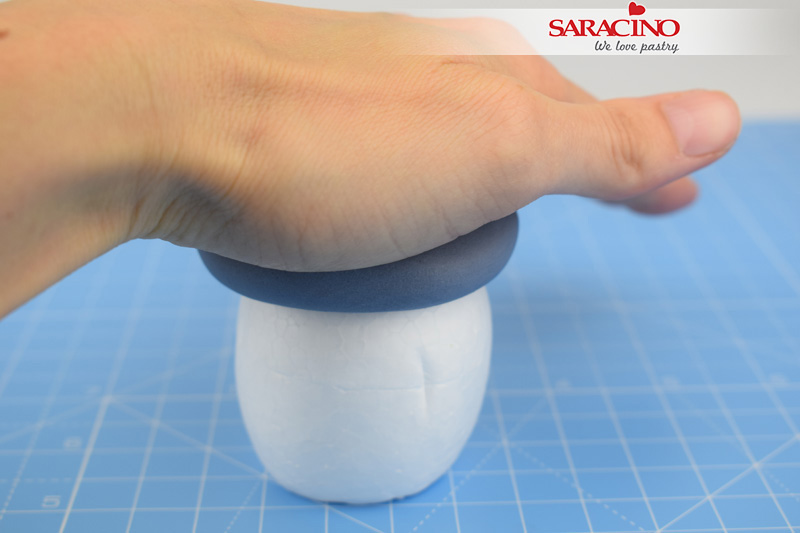
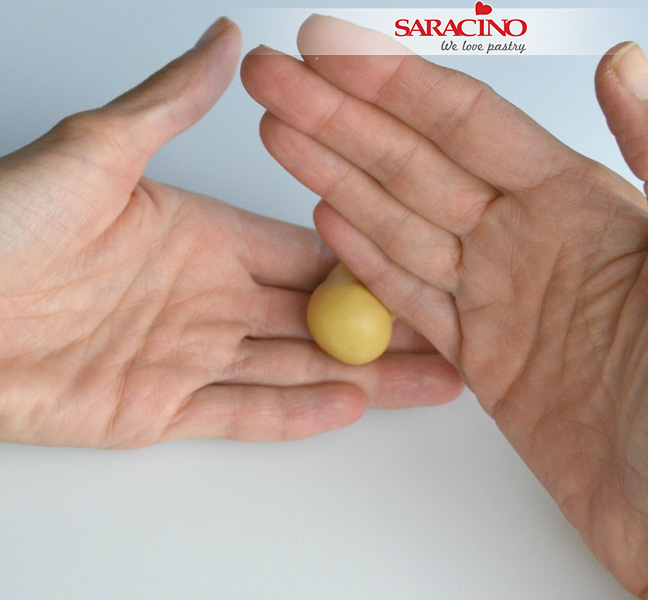
Step 2
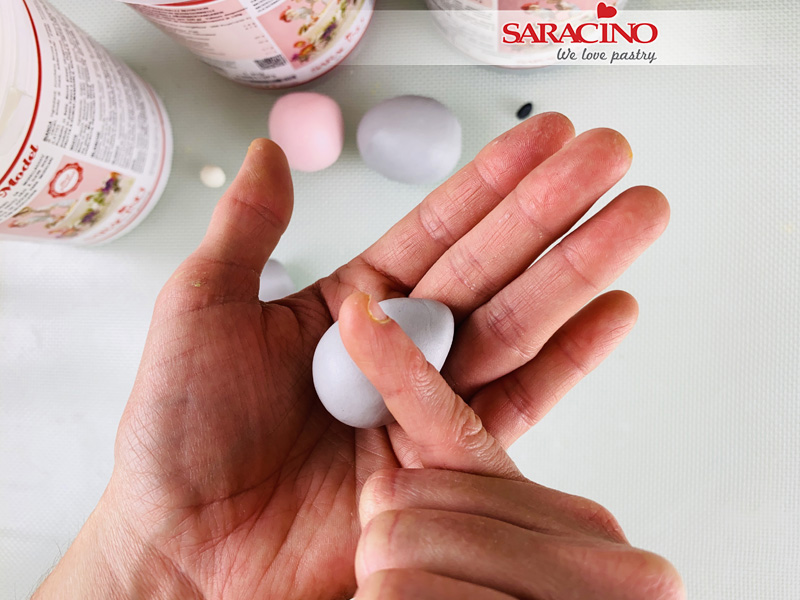
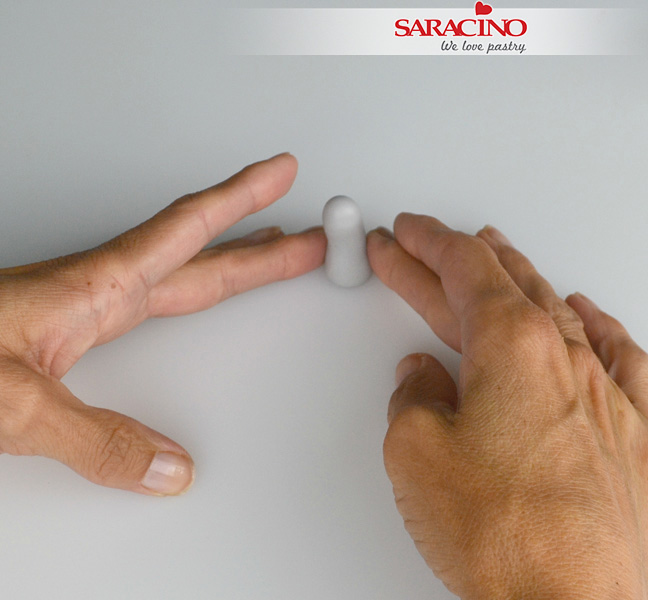
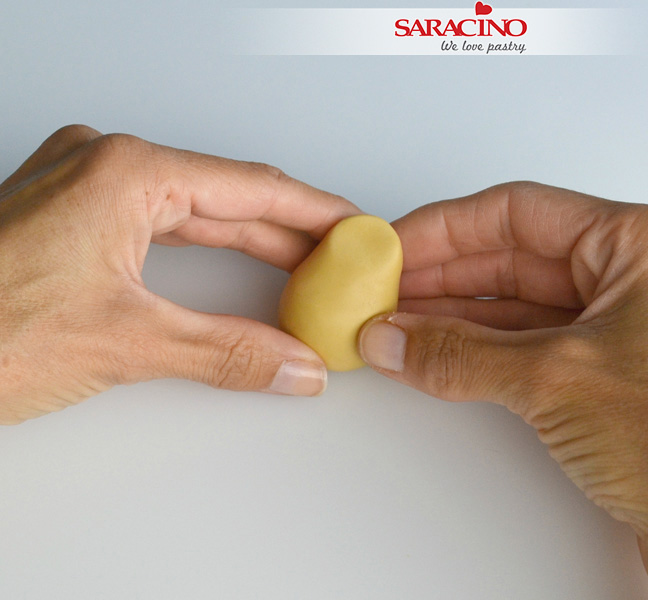
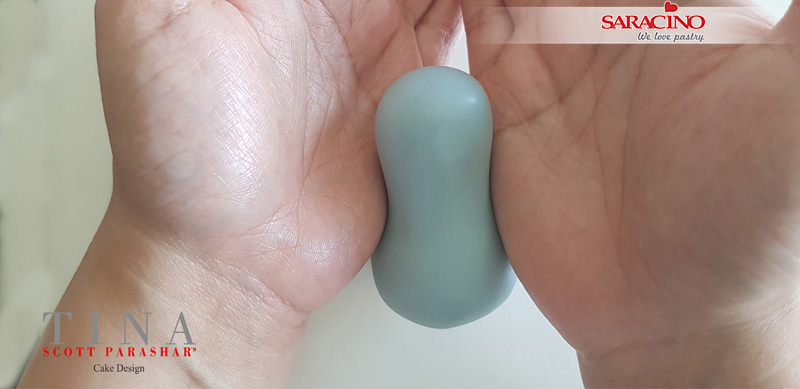
Use your hands to shape the piece to give the tummy its rounded shape.
Step 3
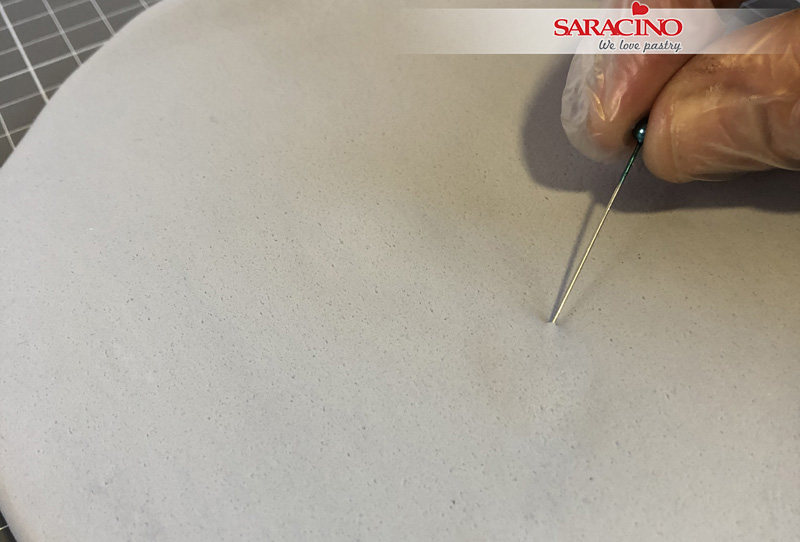
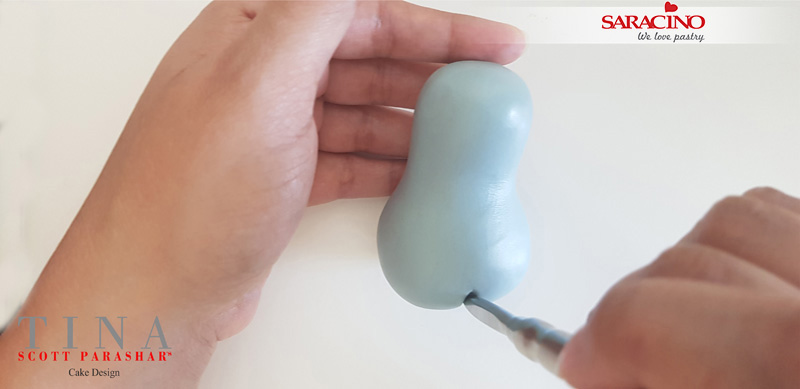
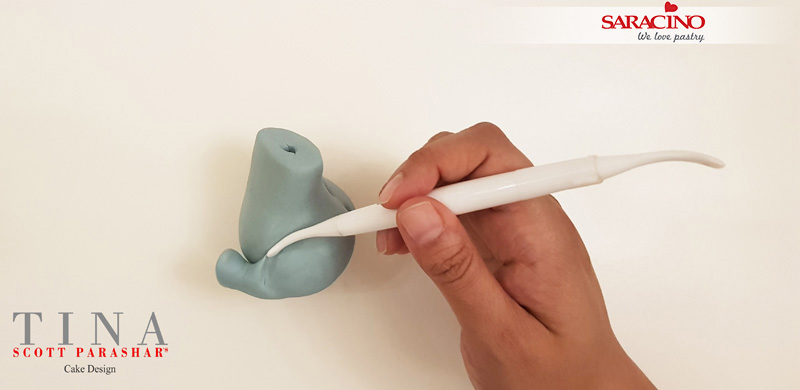
Using your tool, mark a little V at the bottom to shape it’s cute bottom. 😉
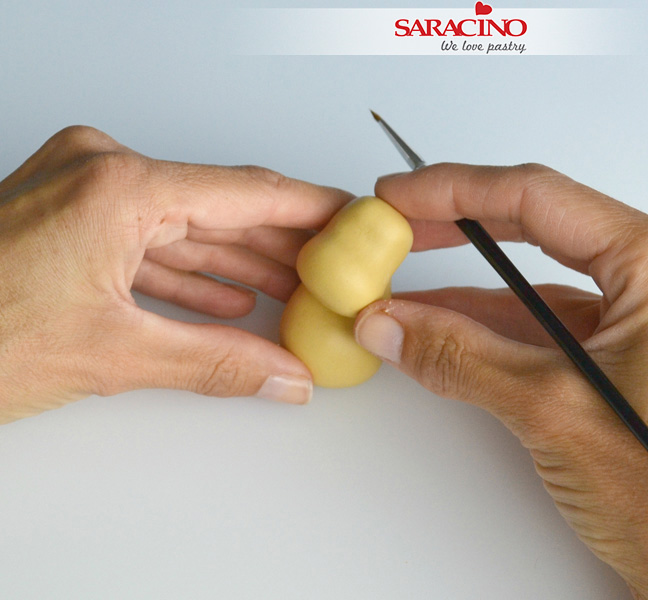
Step 4
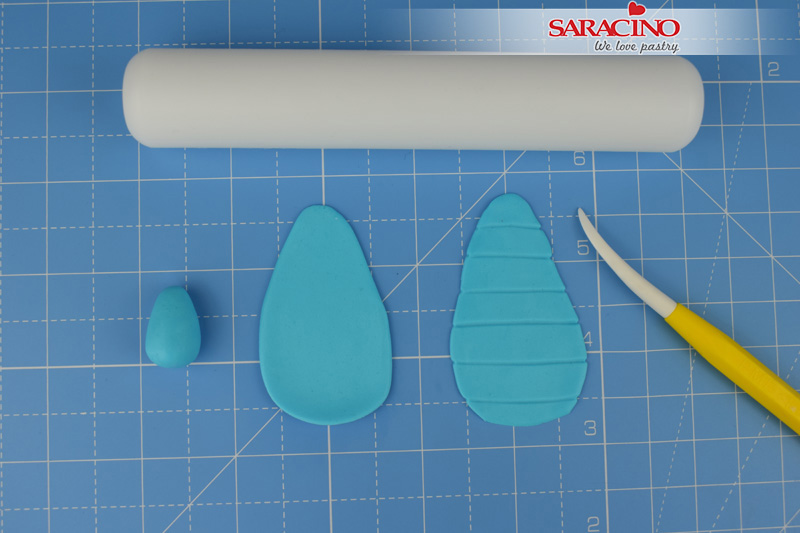
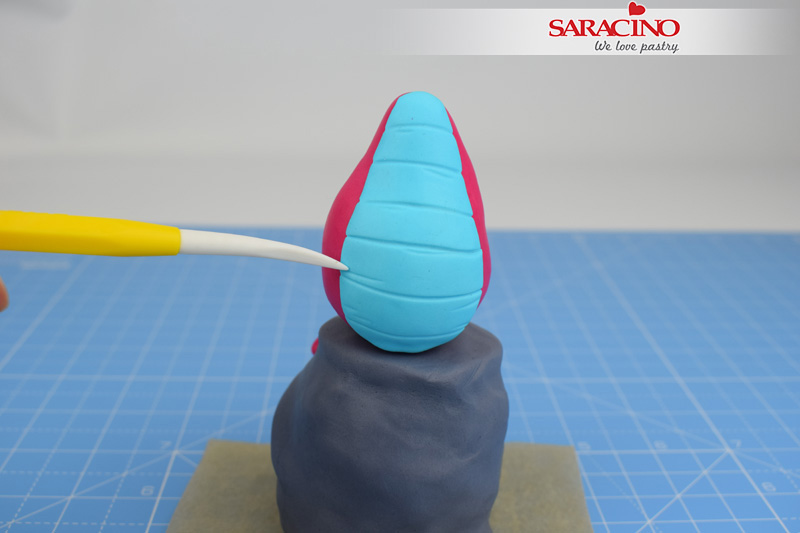
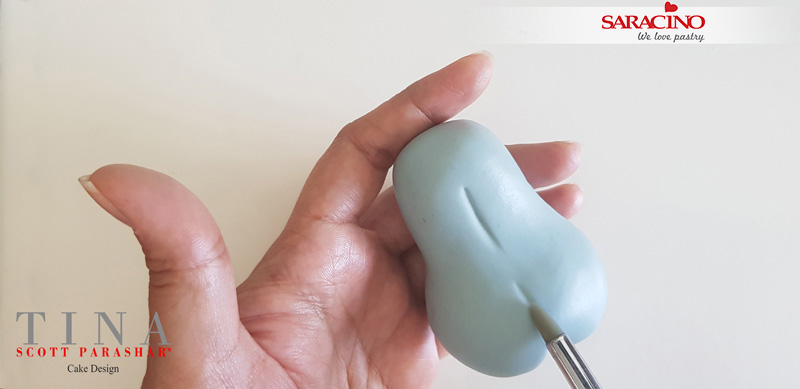
Using your sugar shaper, mark the line on the back.
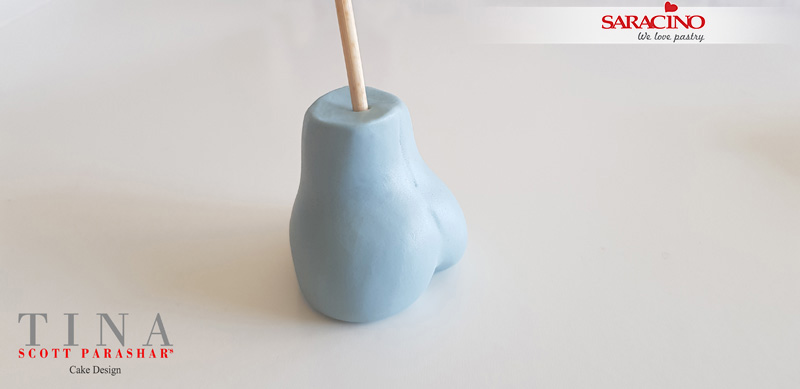
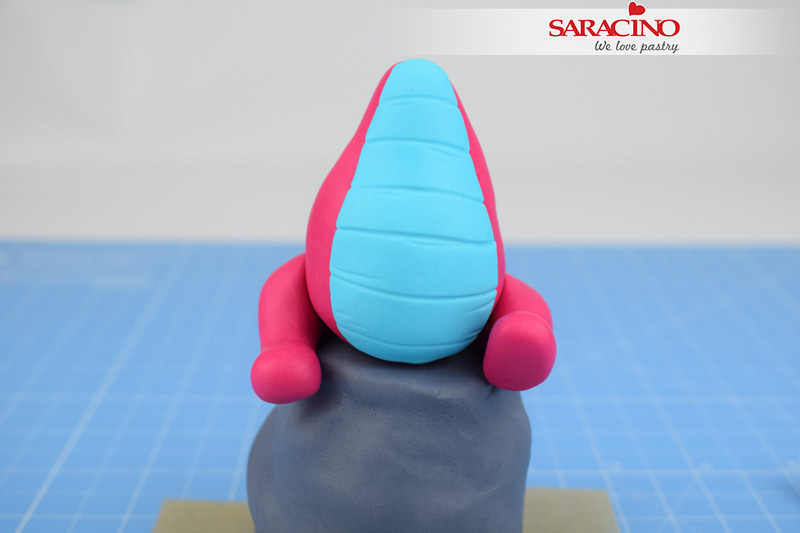
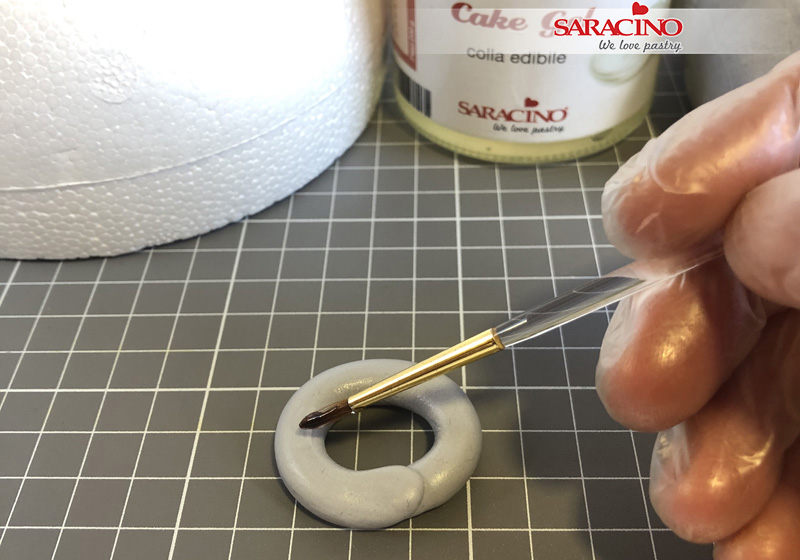
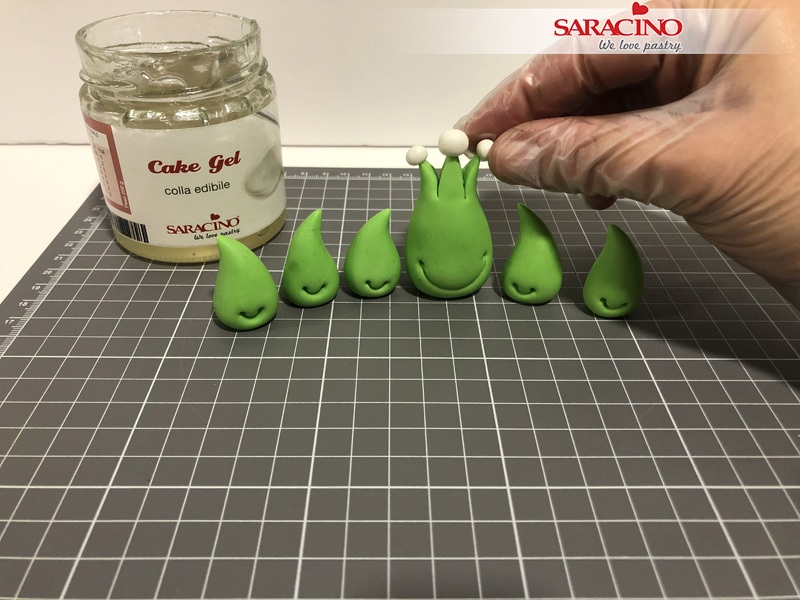
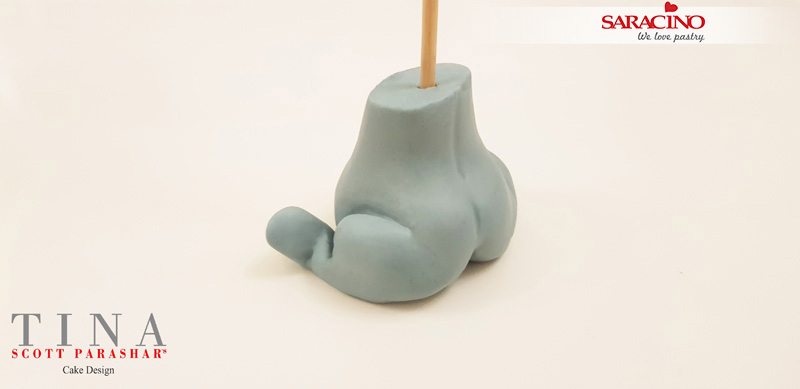
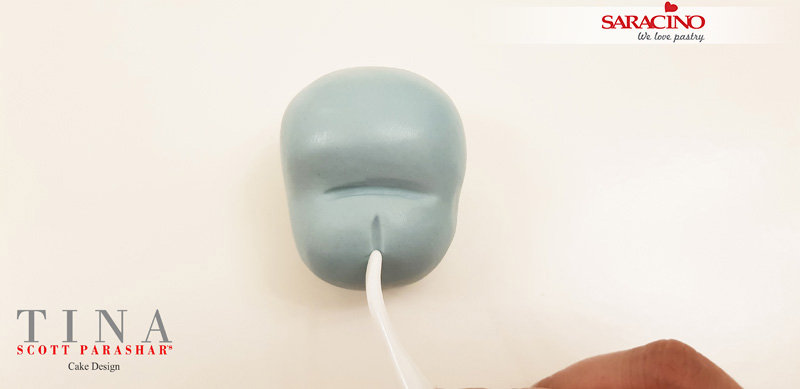
Step 5
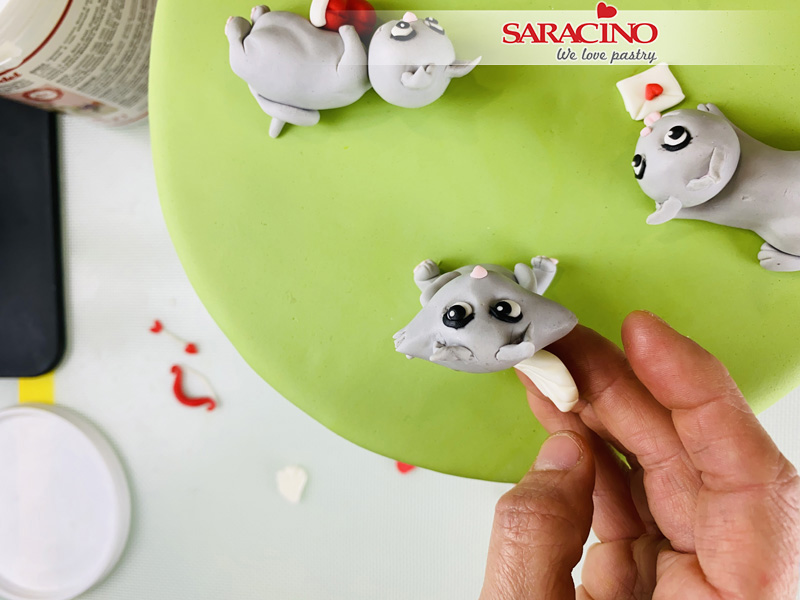
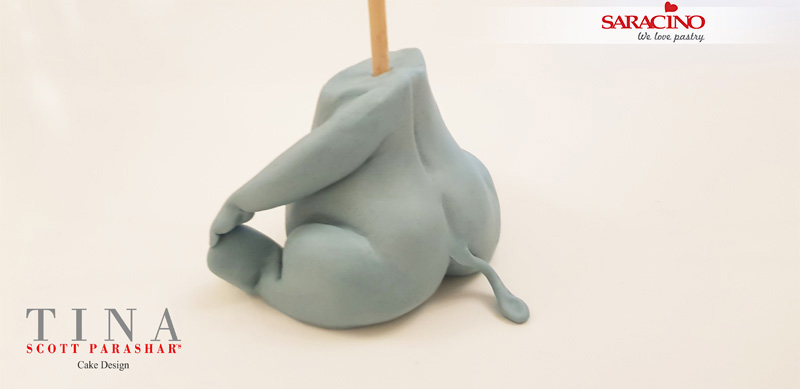
Cut the top to get a flat shape for the head to sit on. Insert the skewer and remove it, so that when you leave it to dry, it dries faster in the centre as well.
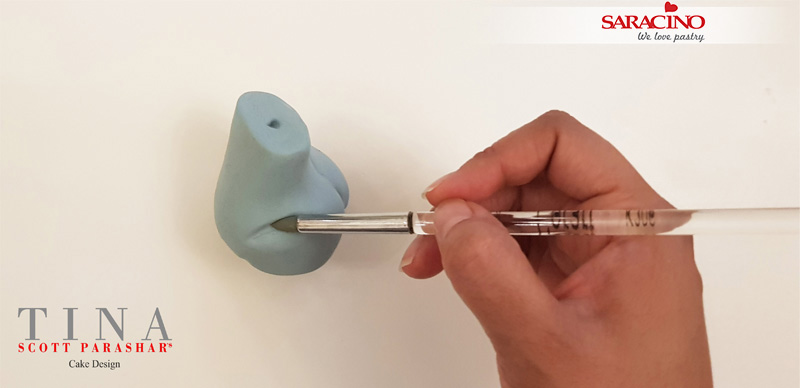
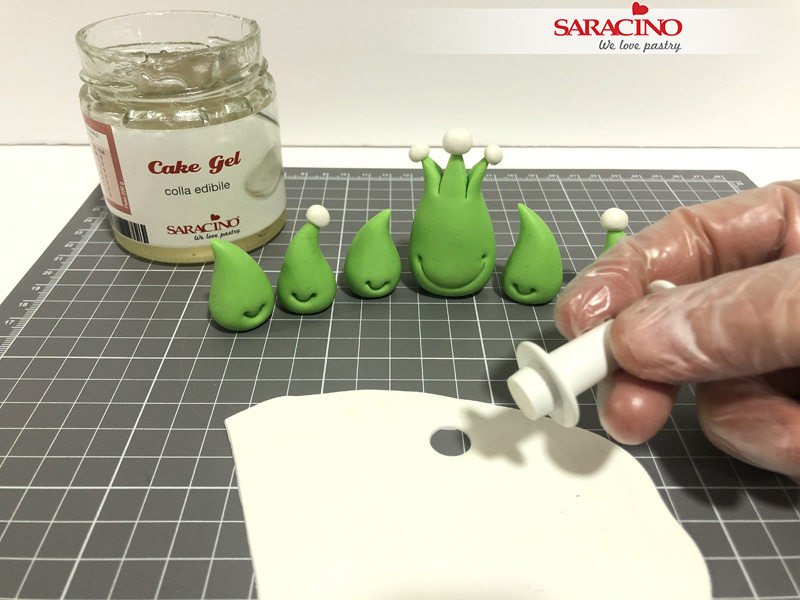
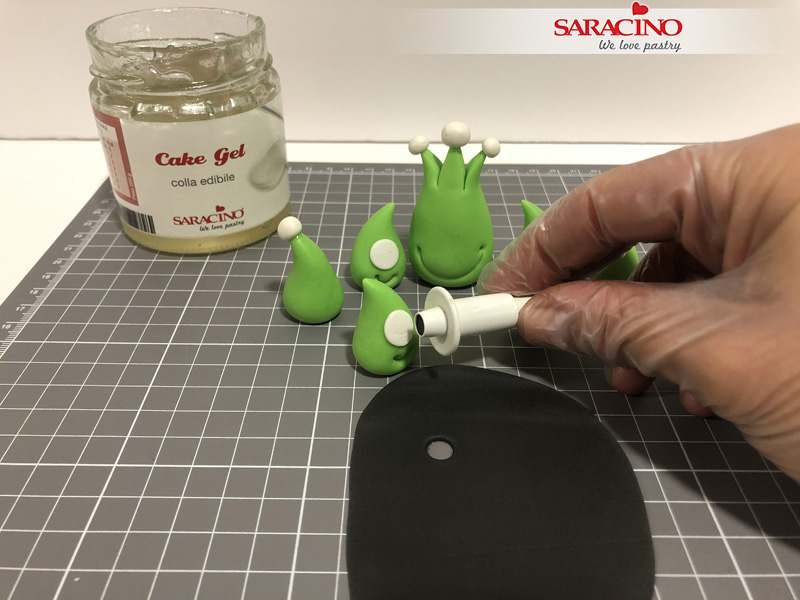
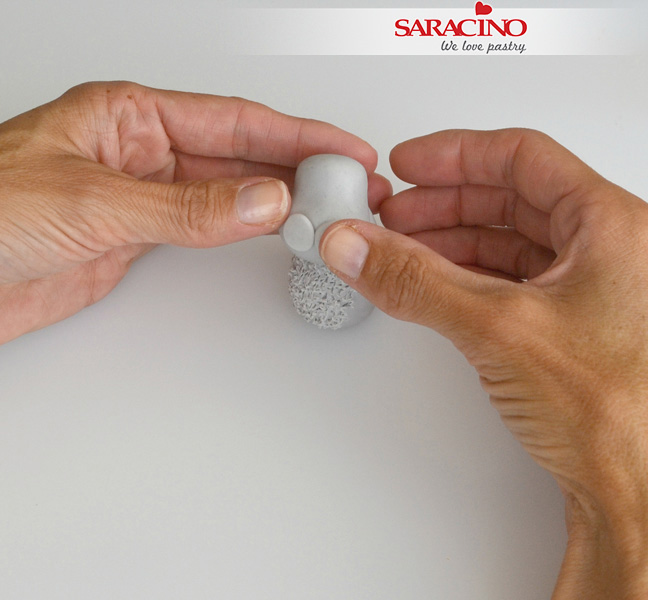
Step 6
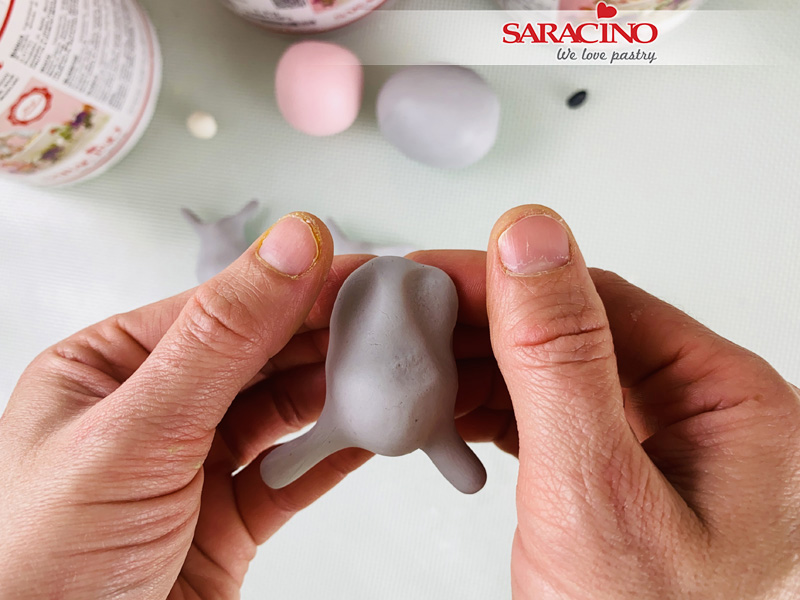
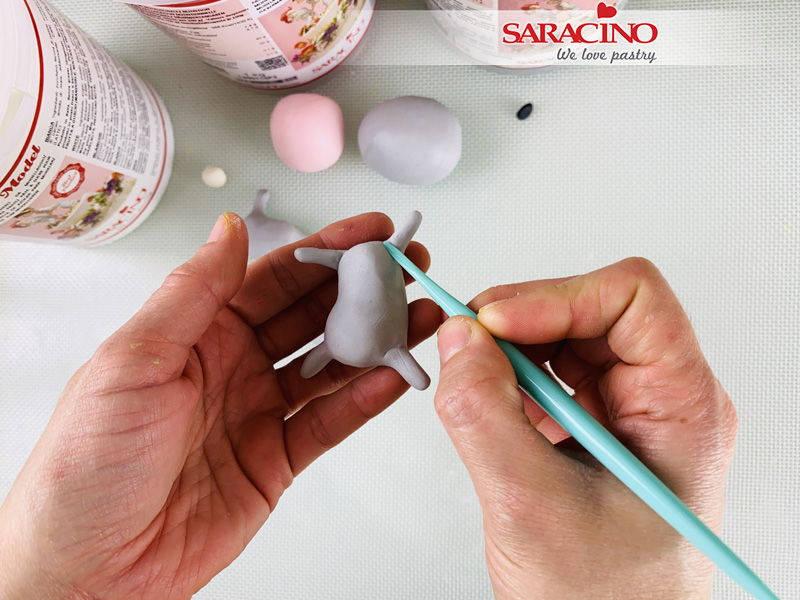
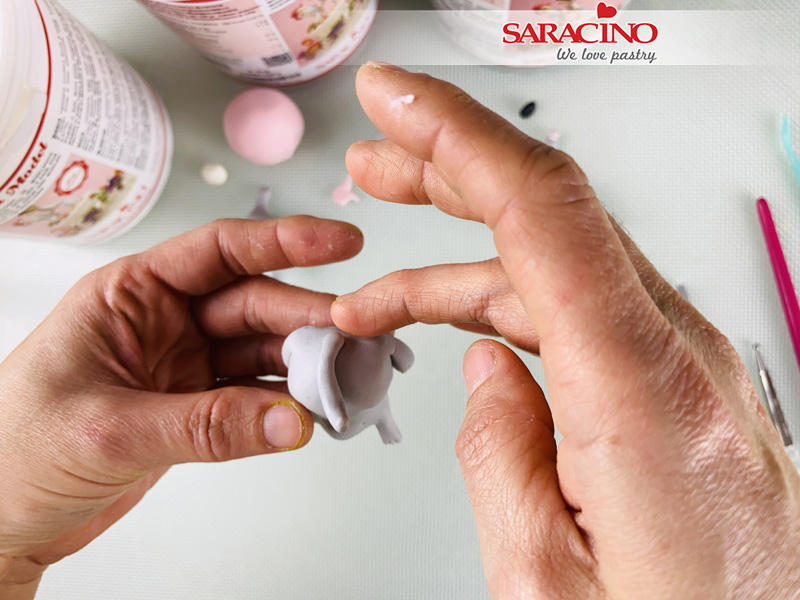
Using your sugar shaper, mark the hip and leg joint.
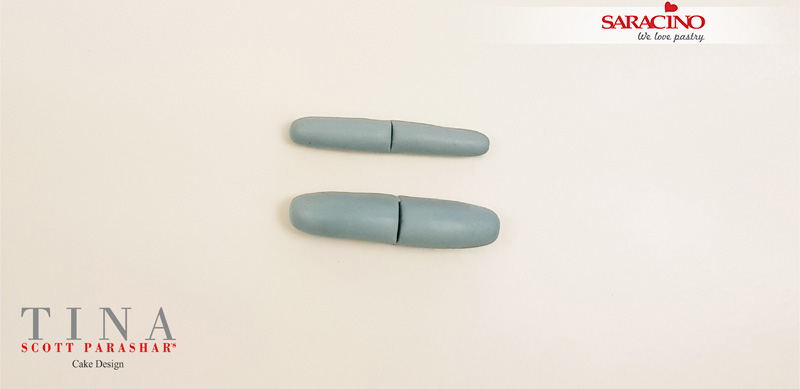
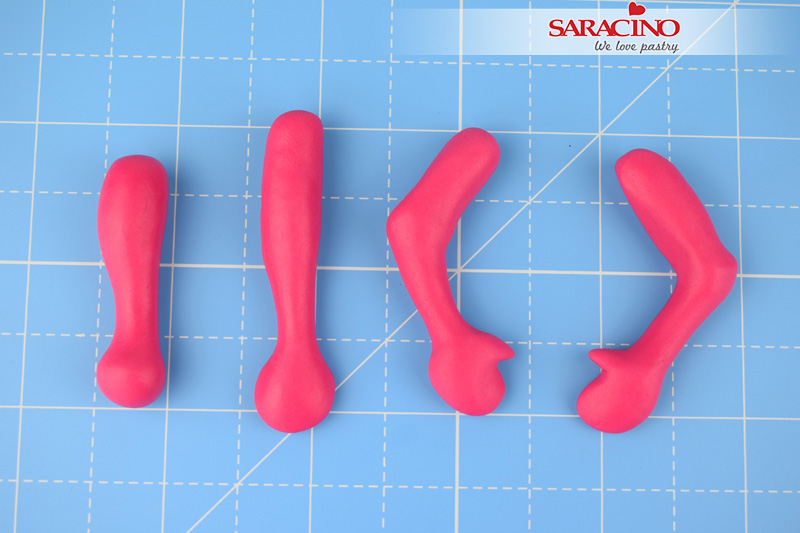
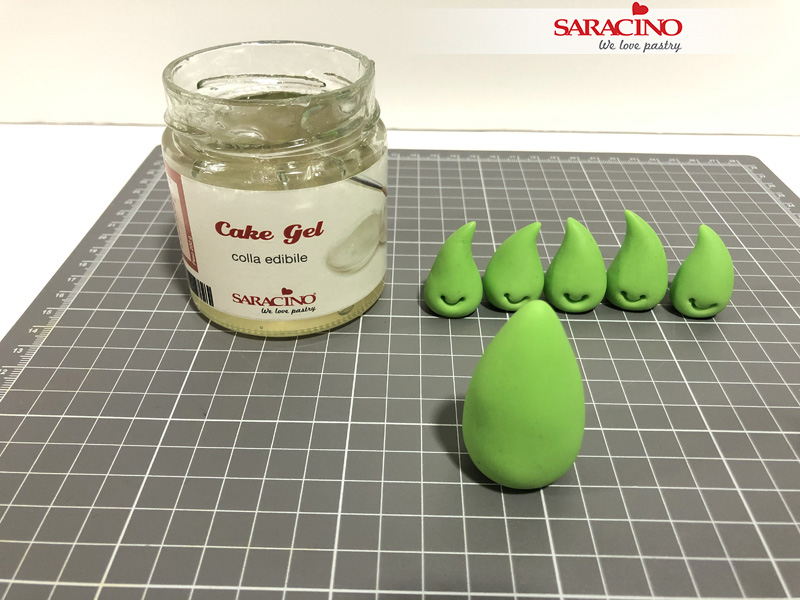
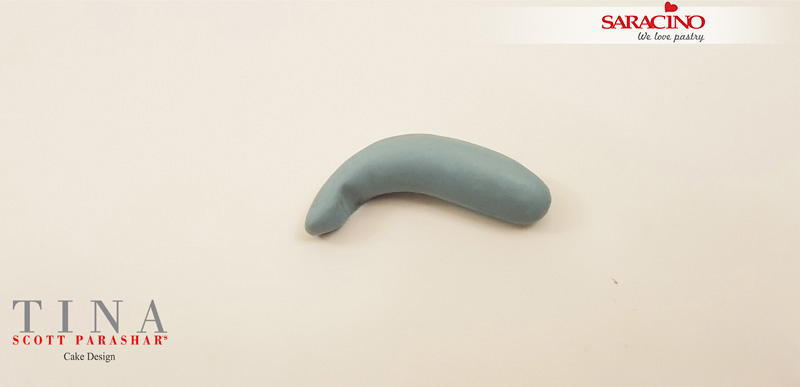
Step 7
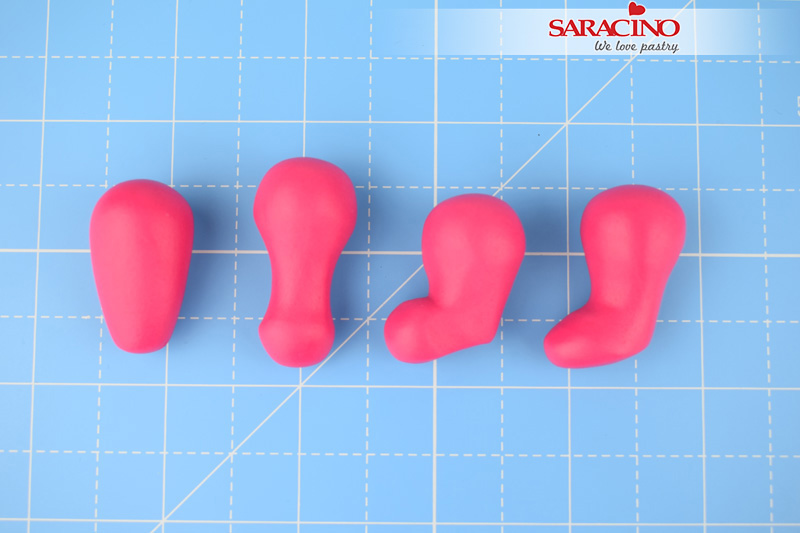
Take two sausage shapes (one thicker for the legs and one thinner for the arms). Cut both into half.

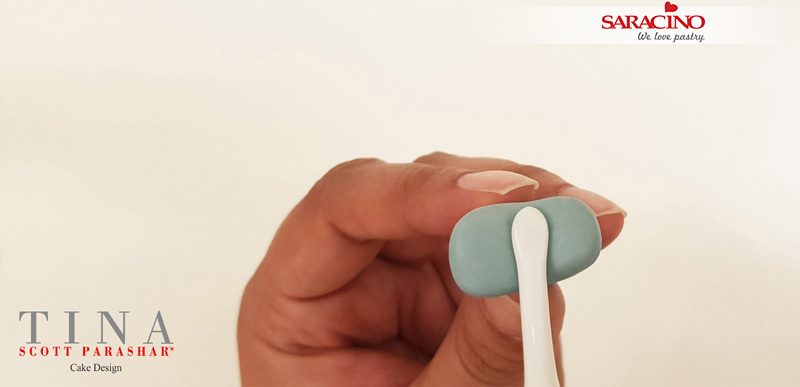
Step 8
Using your fingers shape the ankle, thighs and feet.
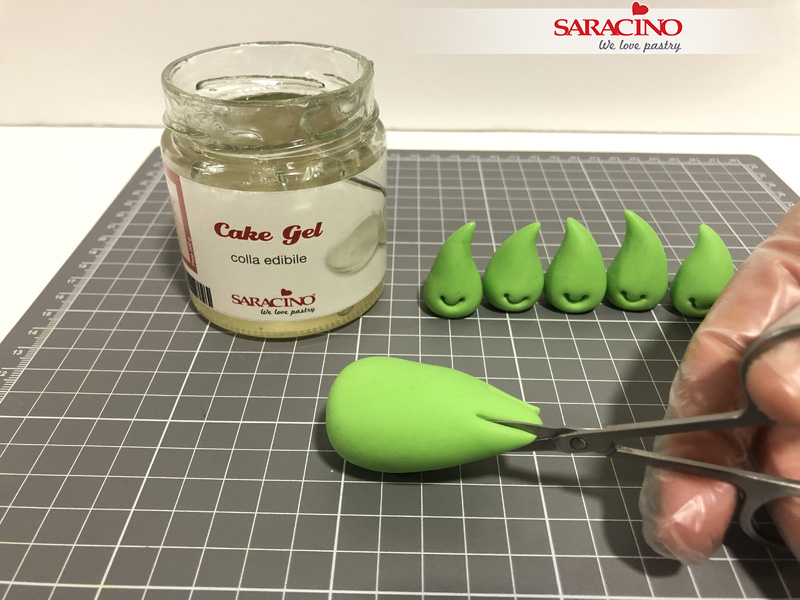
Step 9
Use your tool to shape the feet further.
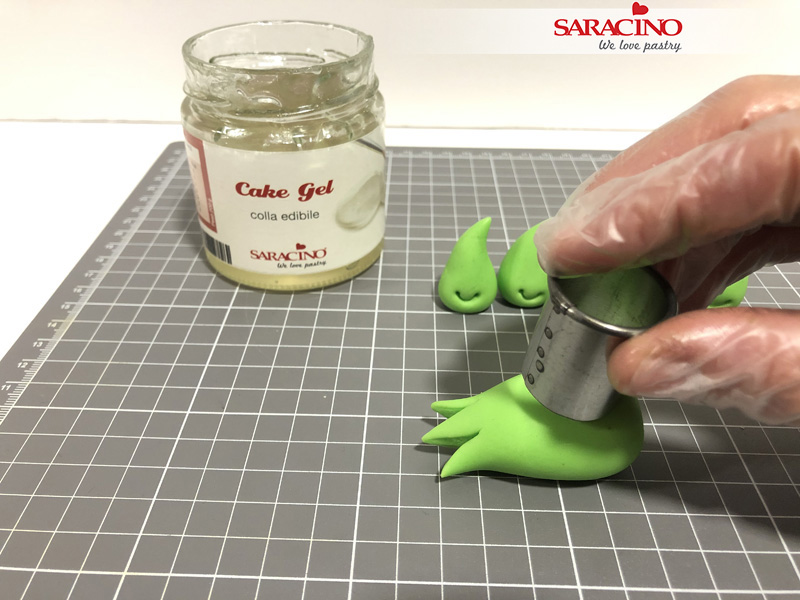
Step 10
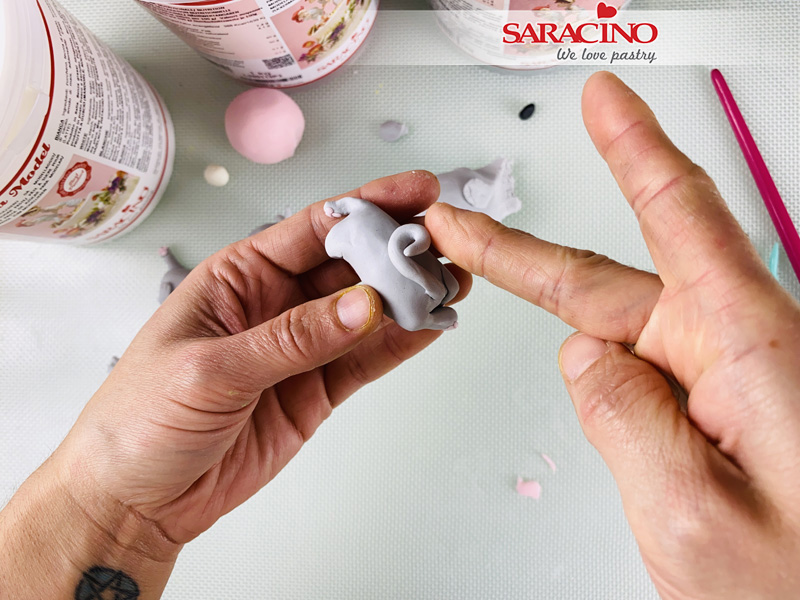
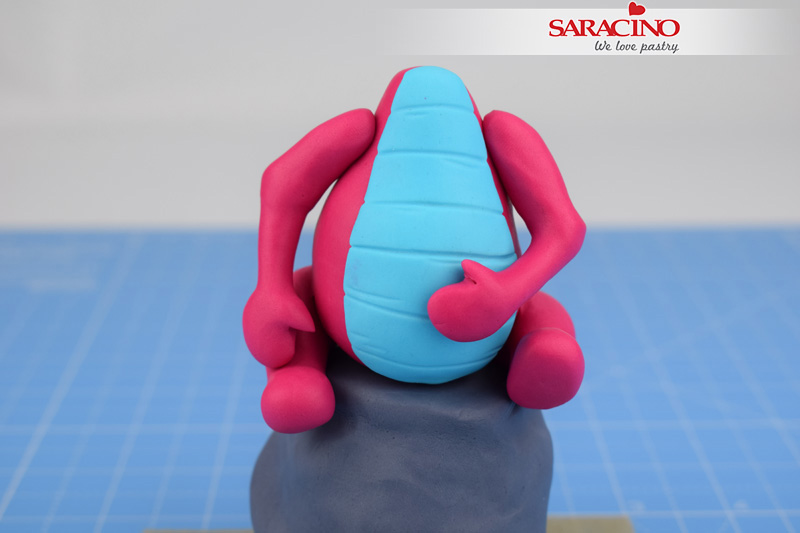
Attach the legs to the body. Blend to hide the joint.
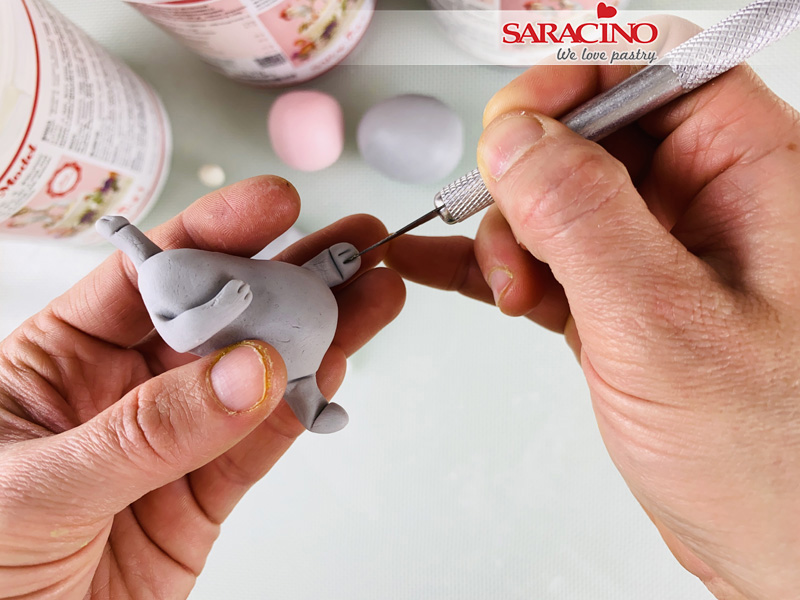
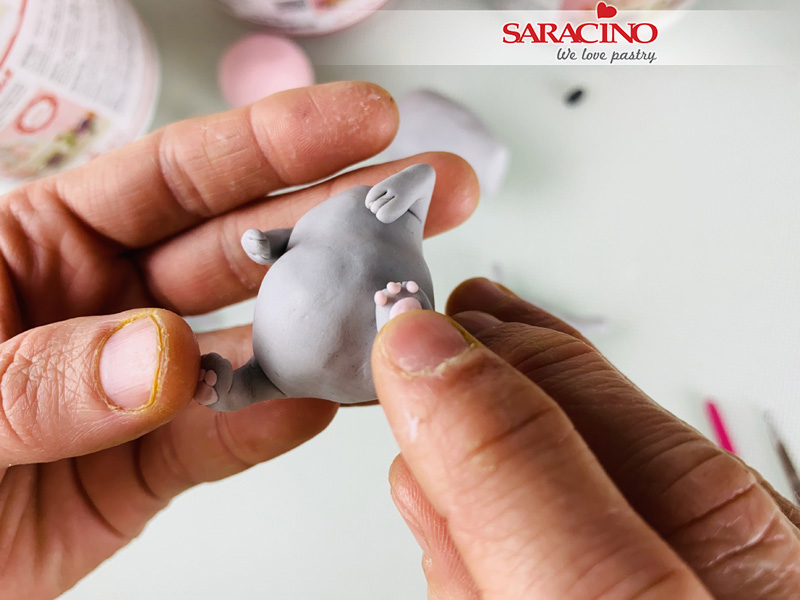
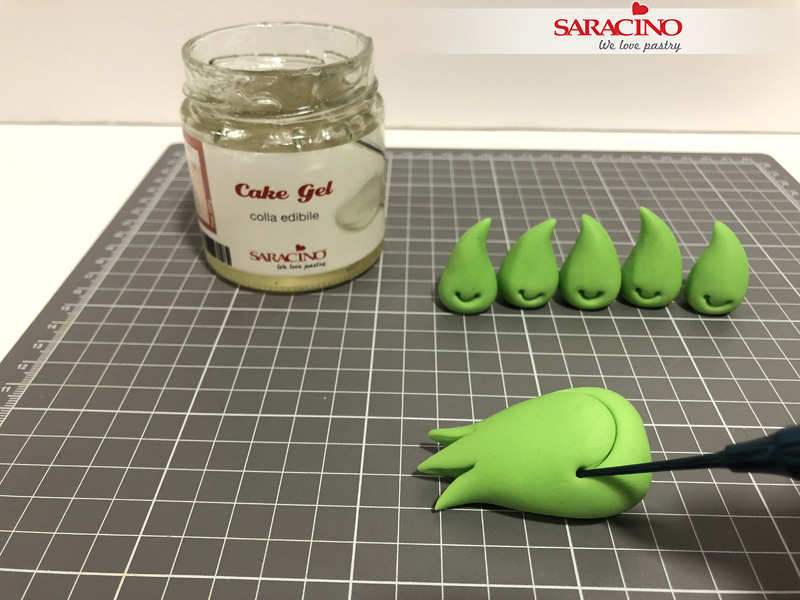
Step 11
This is how it will look. You can now adjust the feet the way you would like.
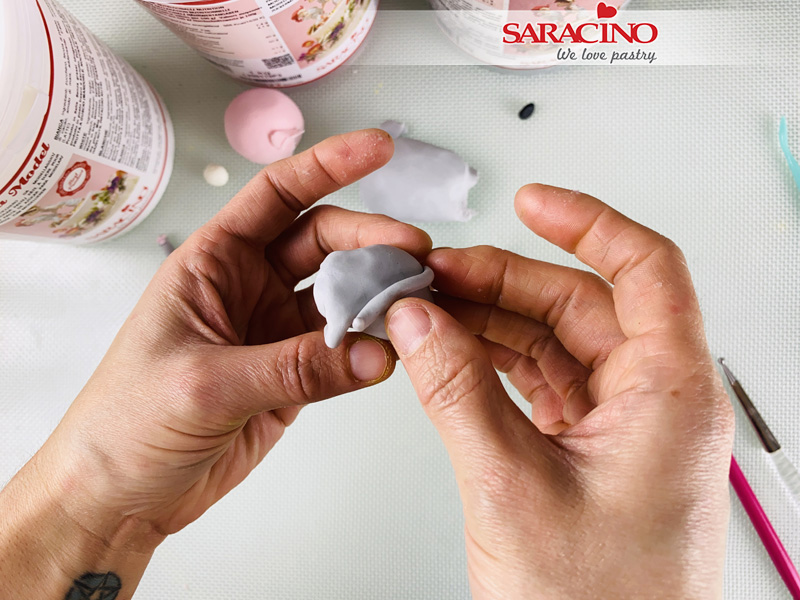
Step 12
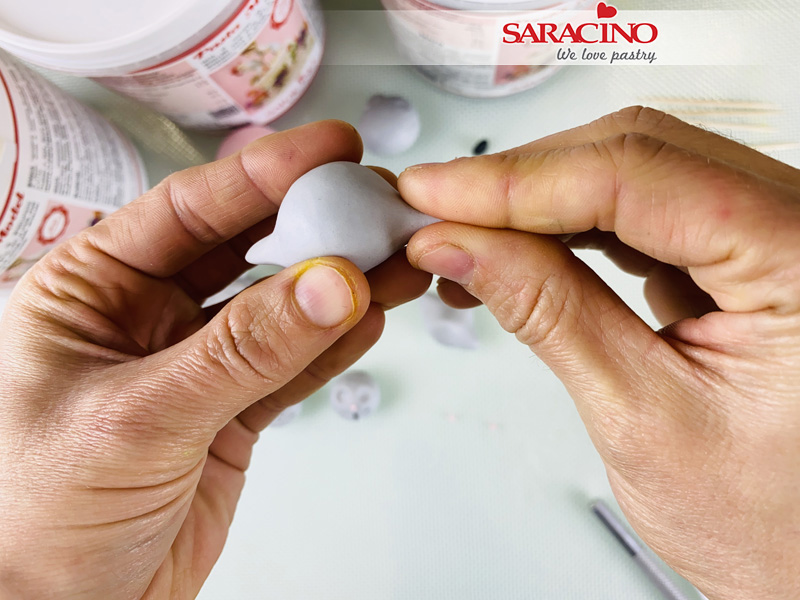
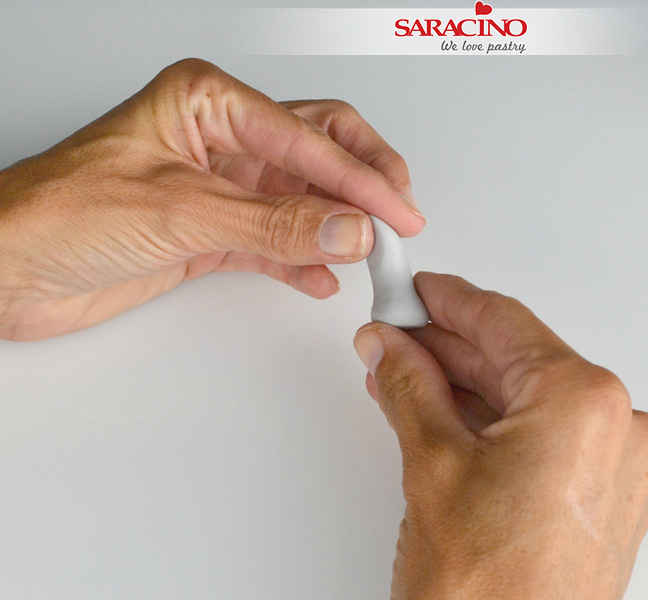
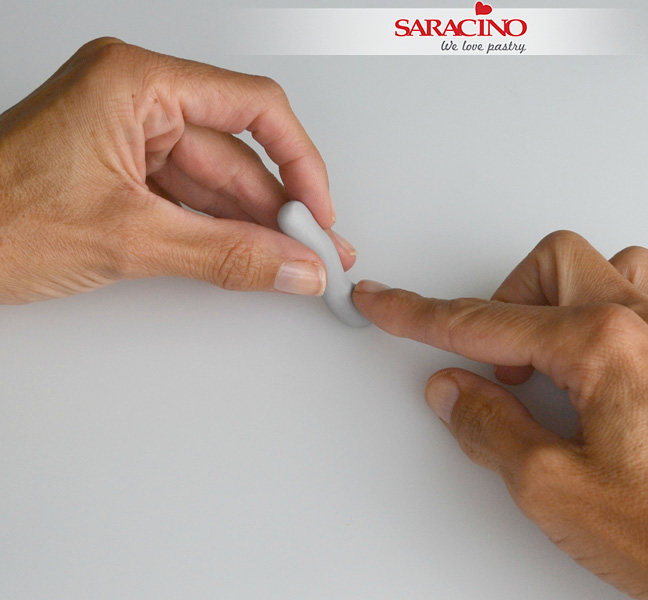
Now for the arms, bend the sausage shape to get an almost ‘U’ shape. Use your tool to mark the hand and shape it.
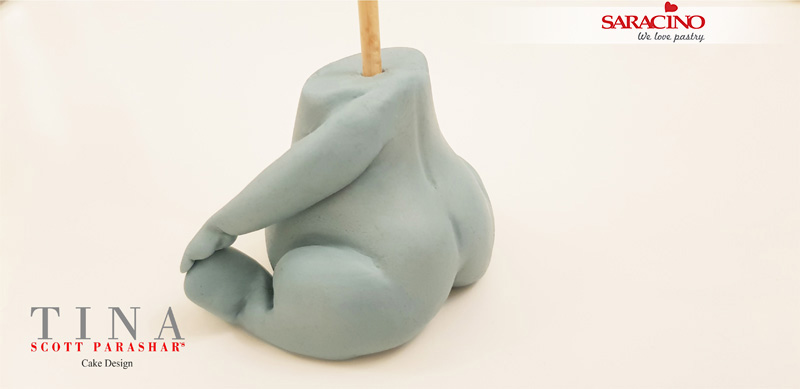
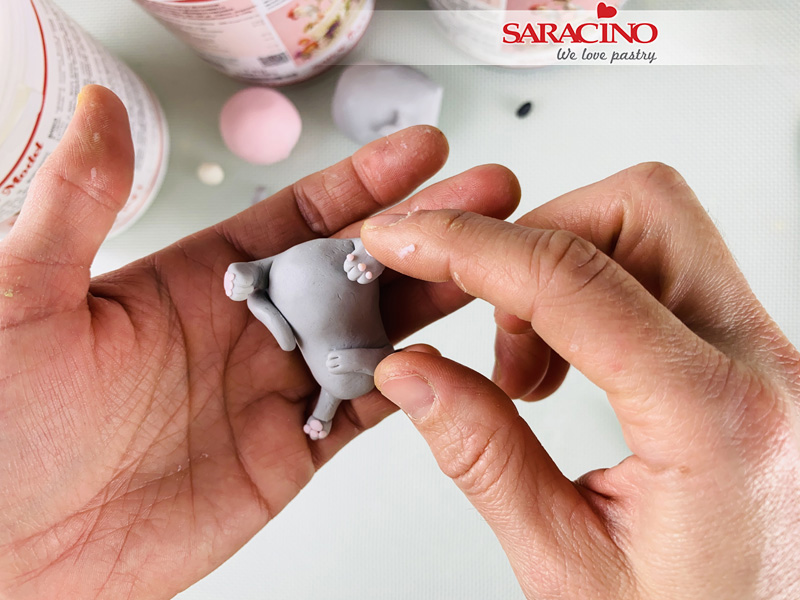
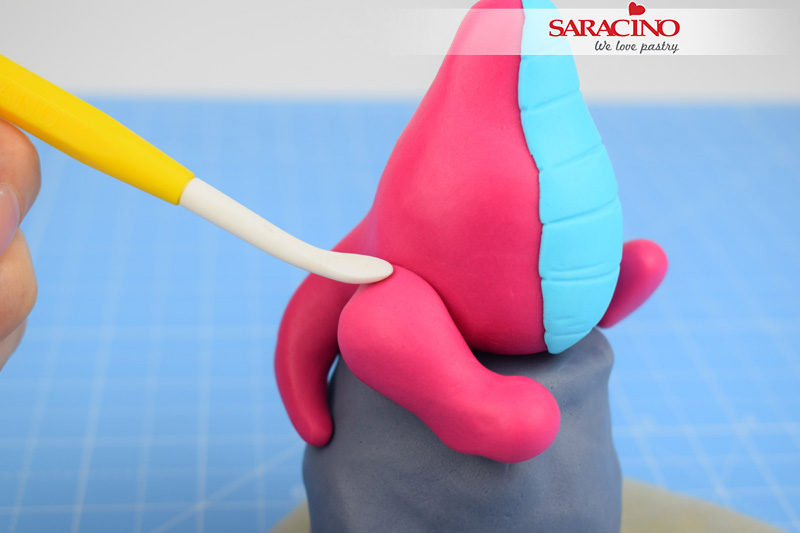
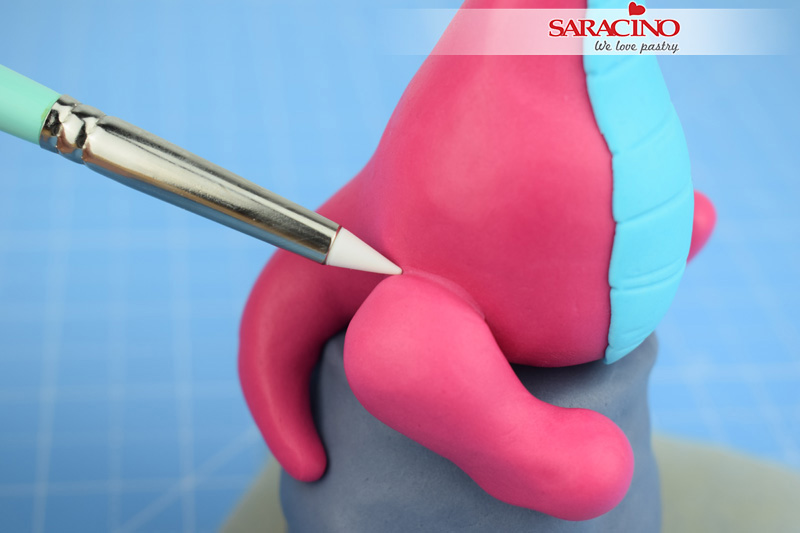
Step 13
Attach the arms to the body. Blend the paste to hide the joint.
Step 14
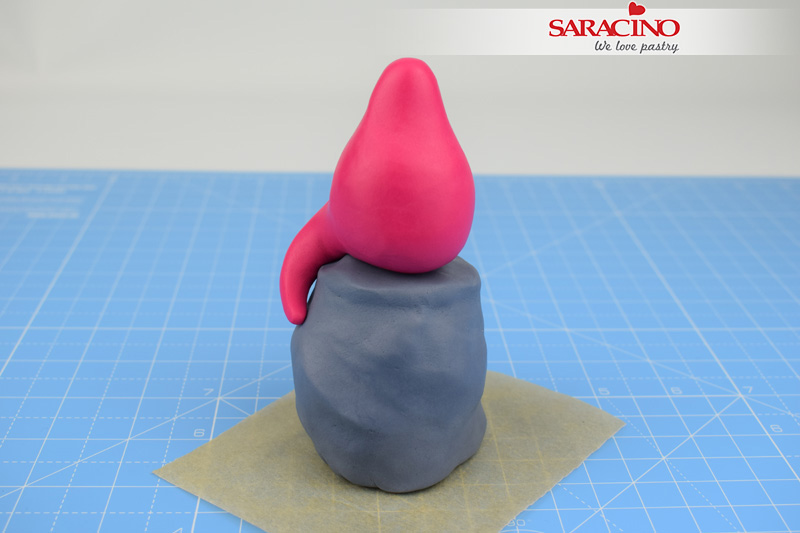
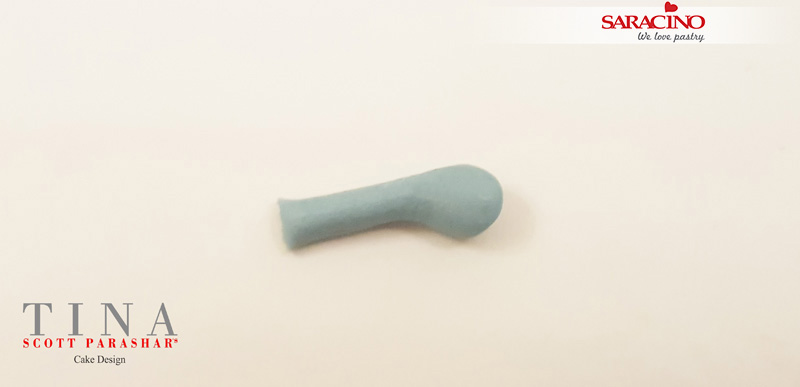
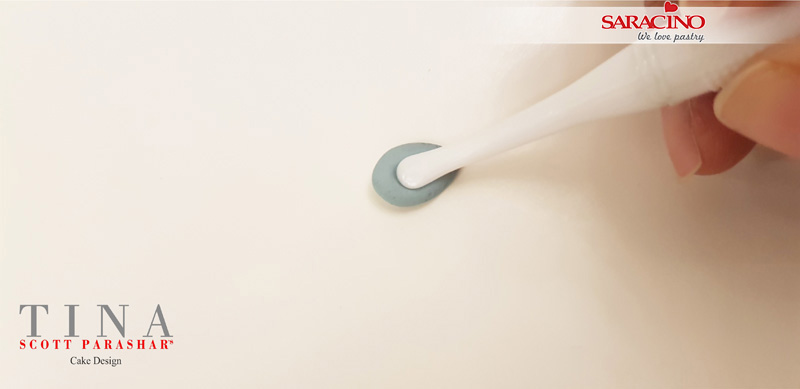
Take a thin sausage shape of the paste and flatten it at one end to make the tail.
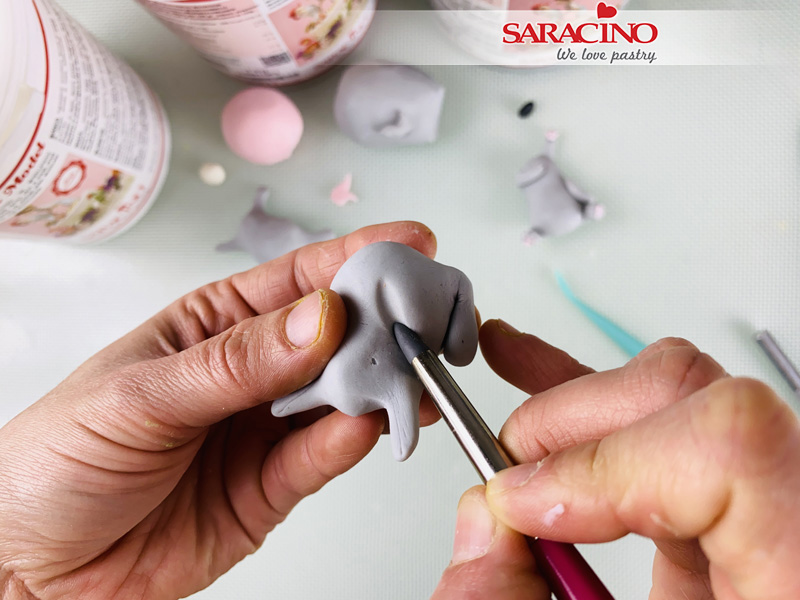
Step 15
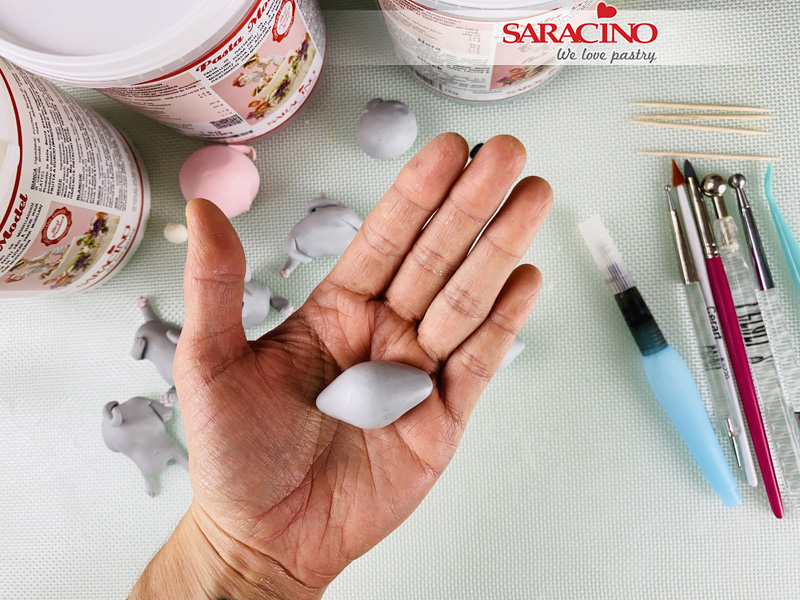
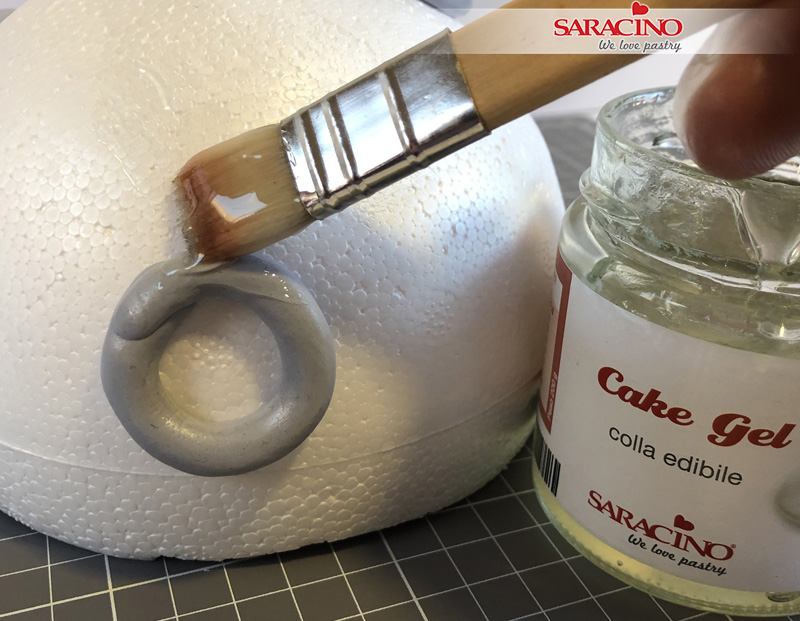
Attach the tail to the body and blend the joints. Now let the body dry for at least an hour before placing the head on so that it will support the weight of the big head.
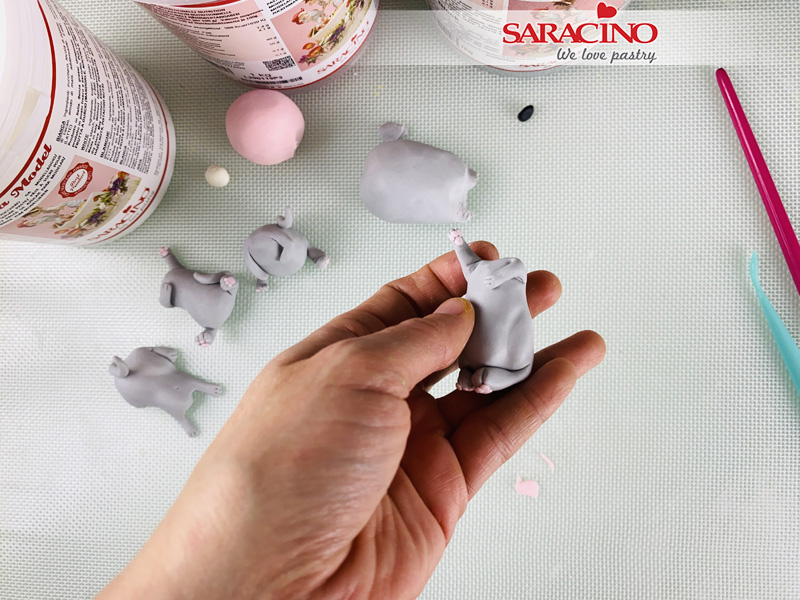
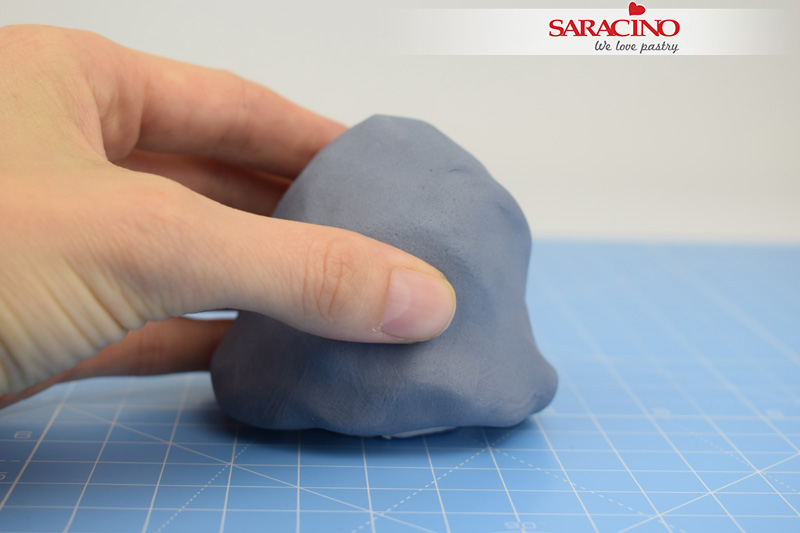
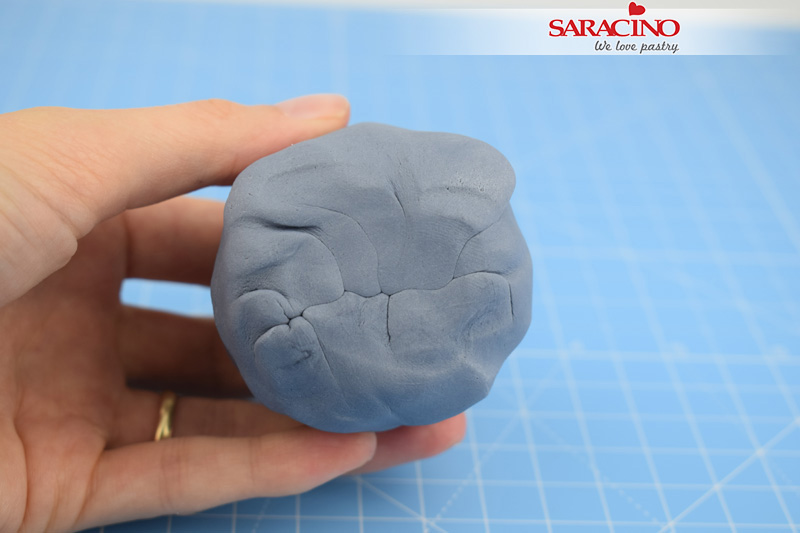
Step 16
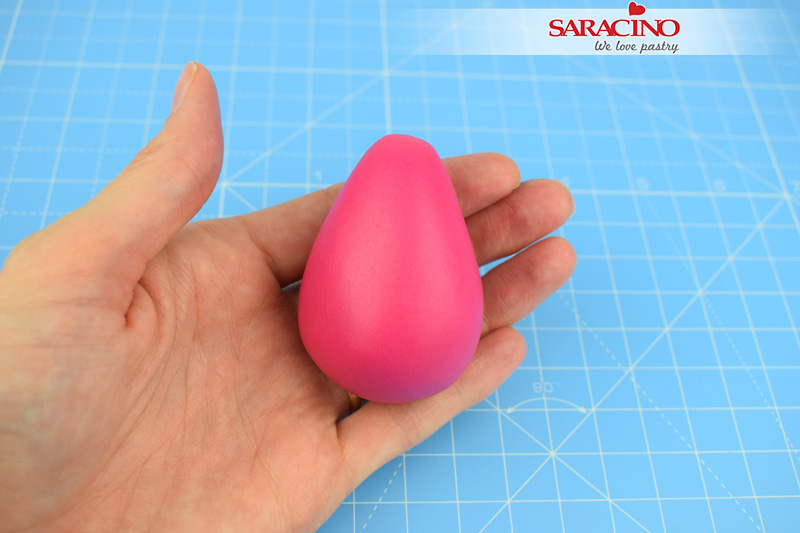
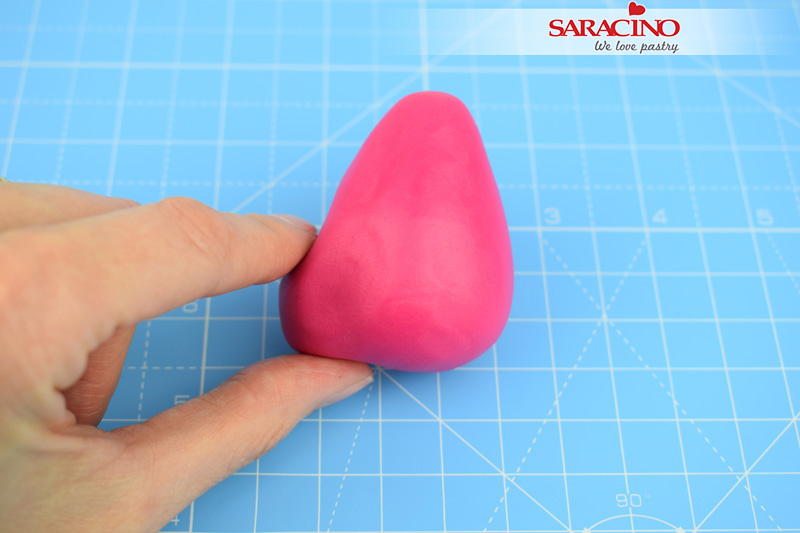
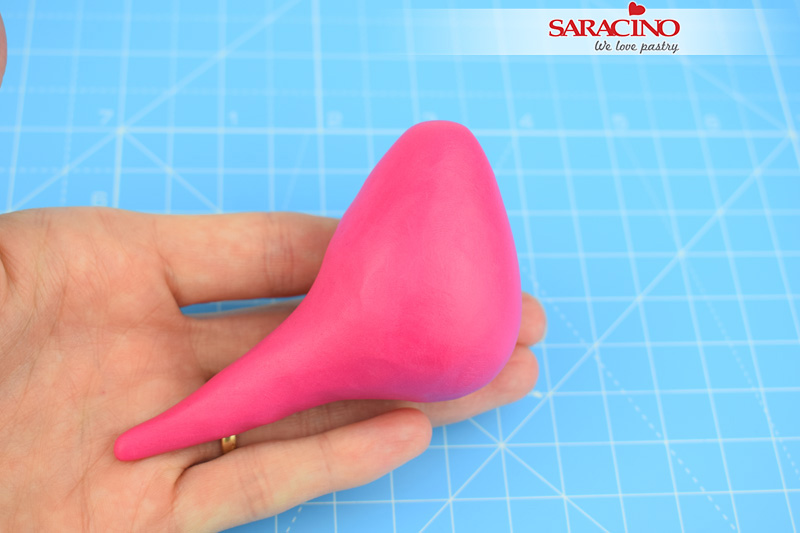
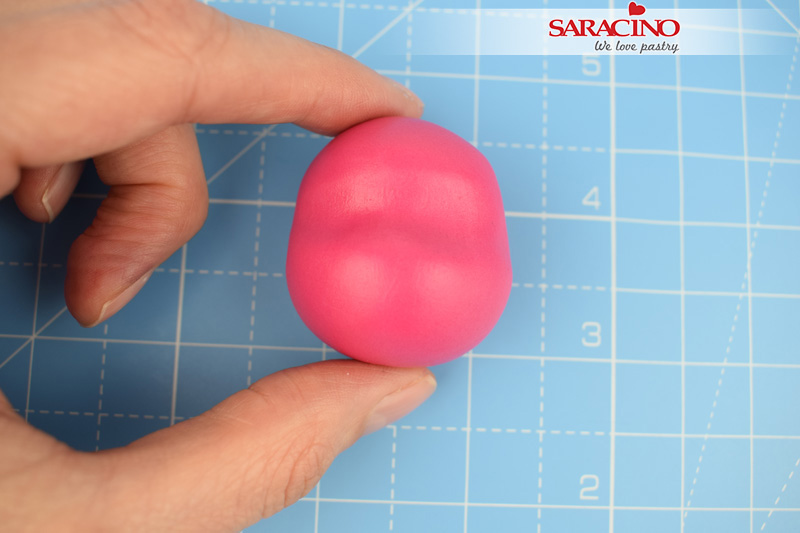
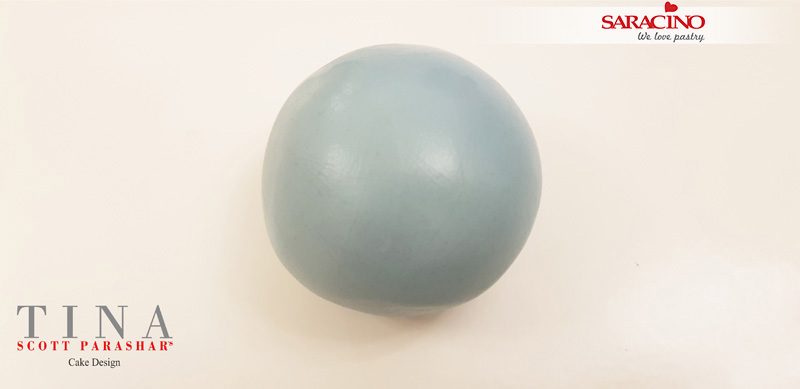
Take a big ball of paste. Make sure its bigger than the body.
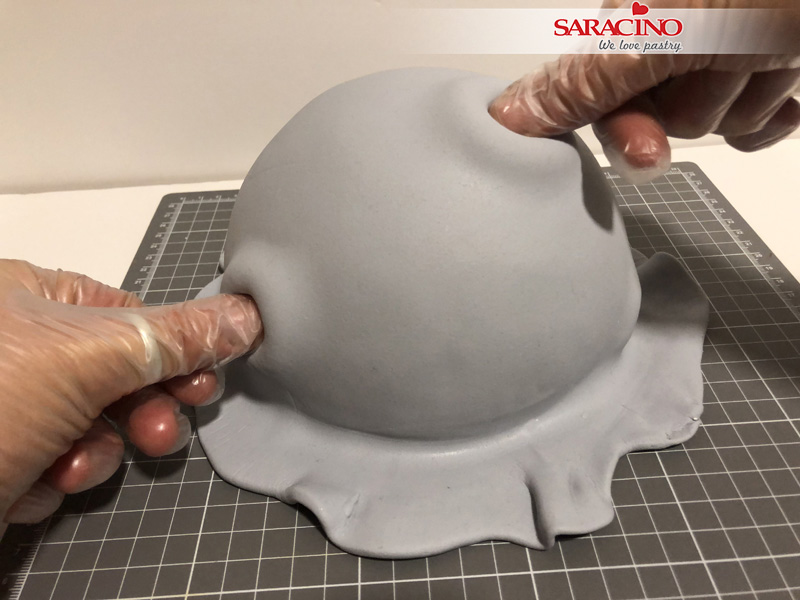
Step 17
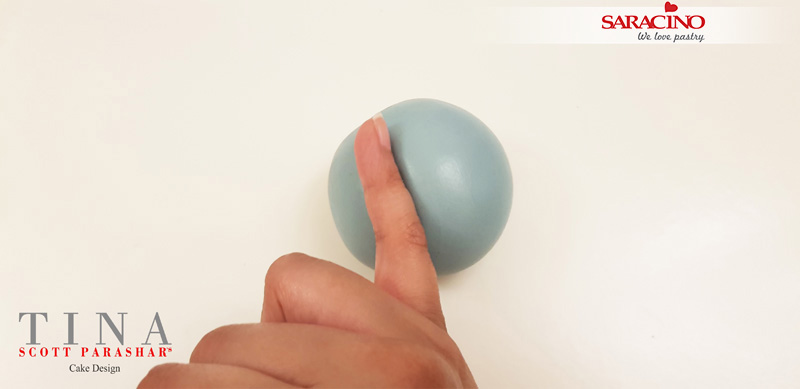
Using your little finger shape the face.
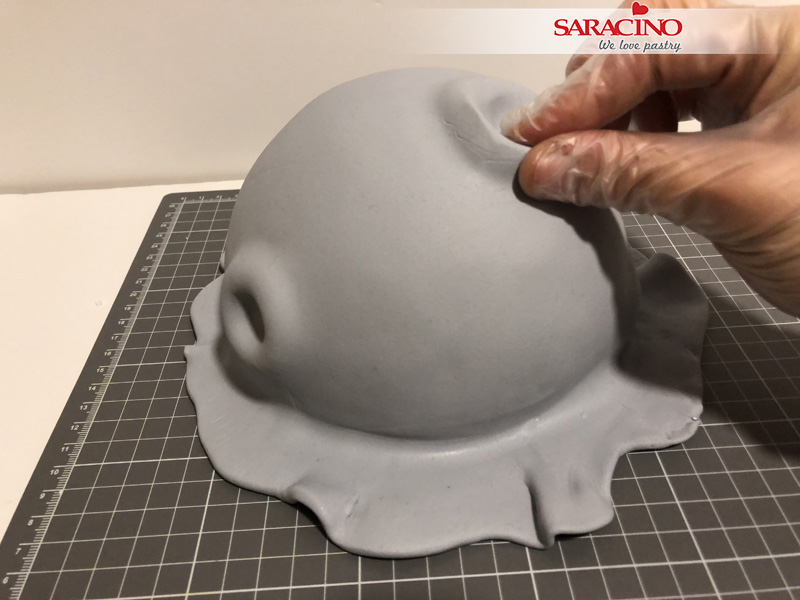
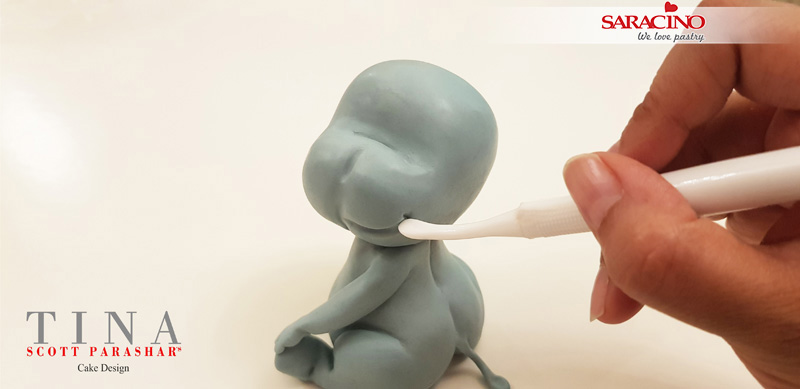
Step 18
Use your tool to mark the lines for the face.
Step 19
Place the head at the required angle on the body. Make your baby Hippo smile using your tool.
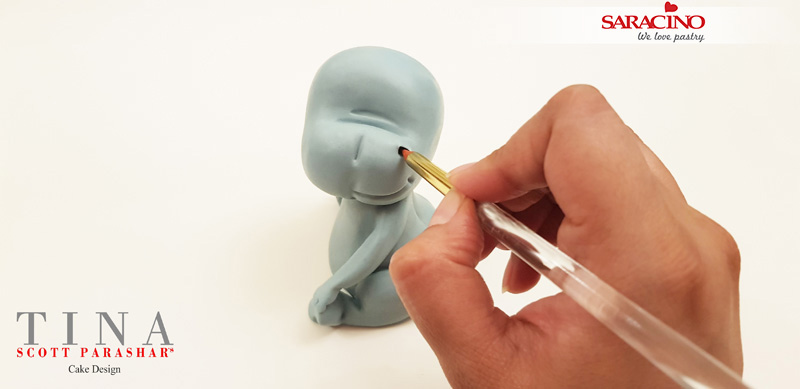
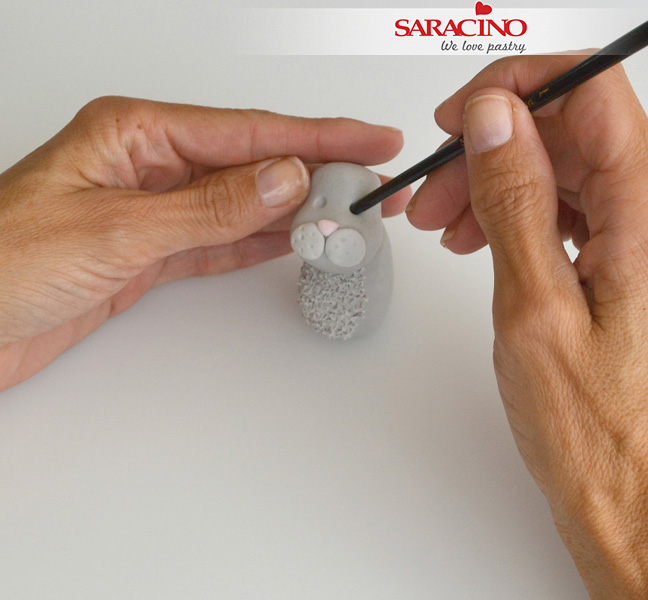
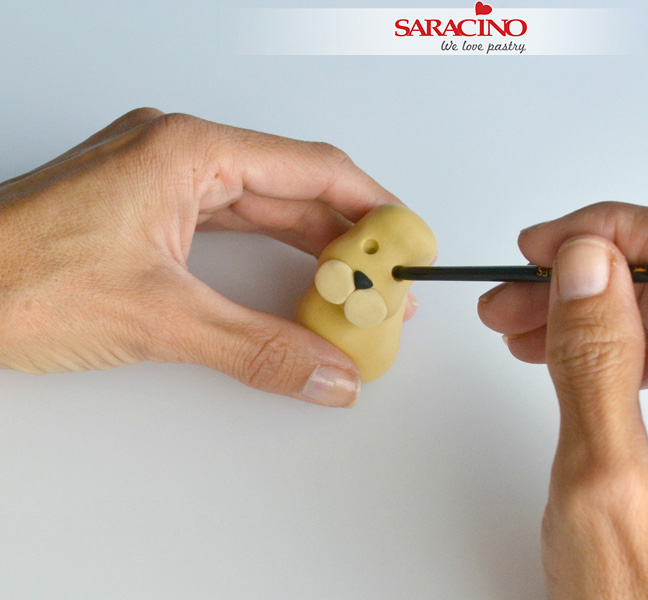
Step 20
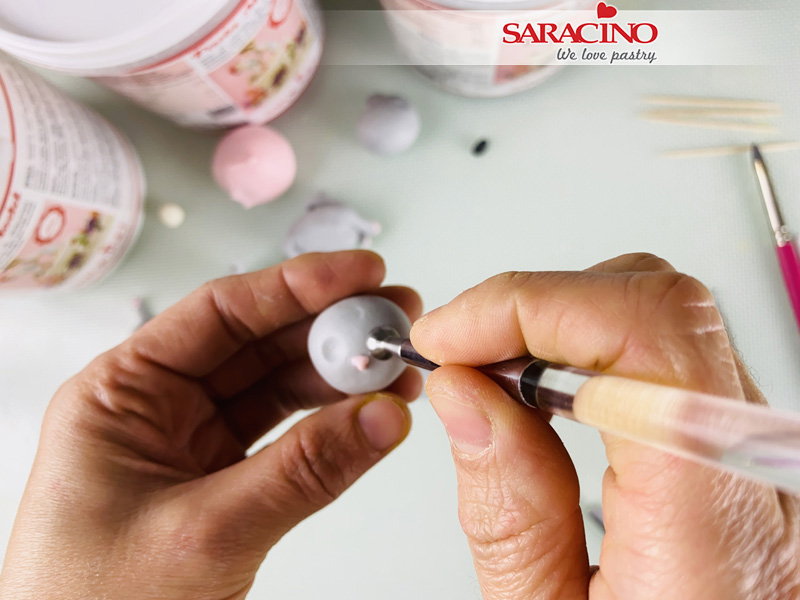
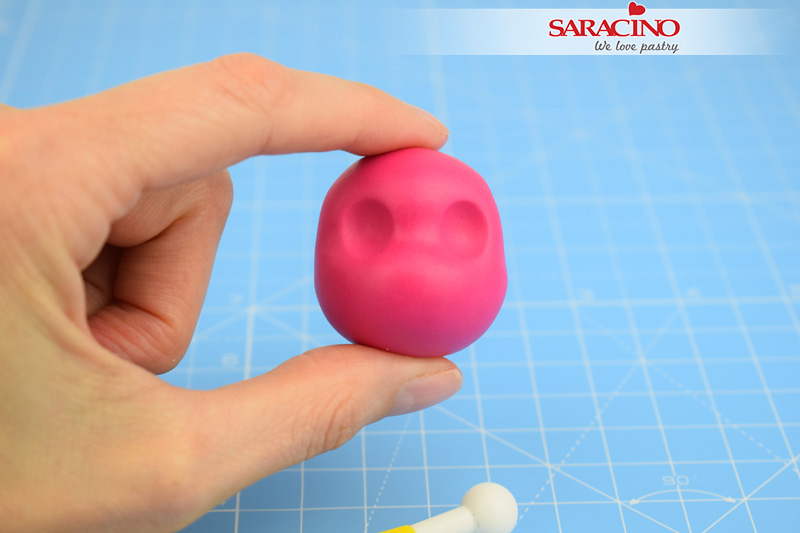
Using your tool, make the nostrils. Make a hole and then pull the paste out a little to form the flare of the nostrils
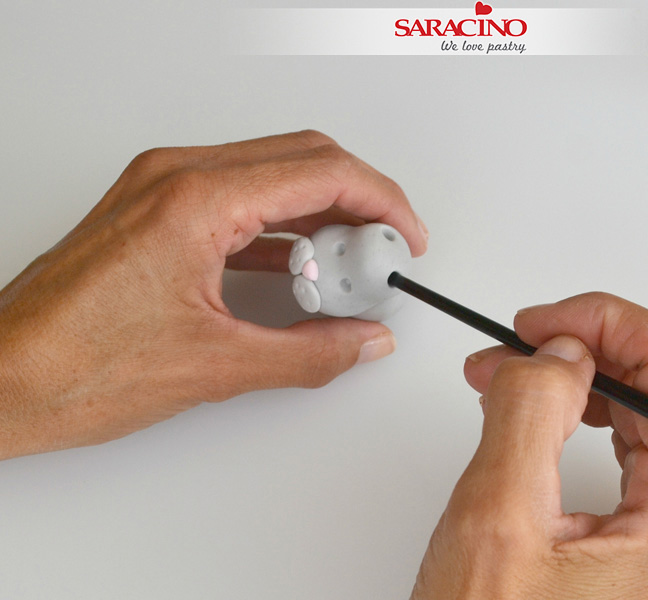
Step 21
Smooth the paste around the nostrils with your fingers.
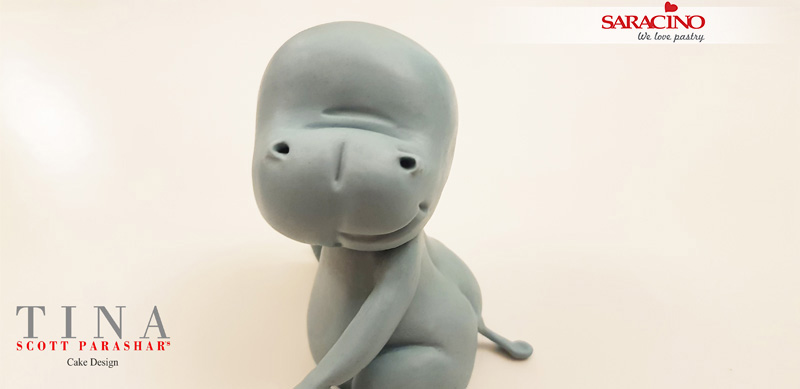
Step 22
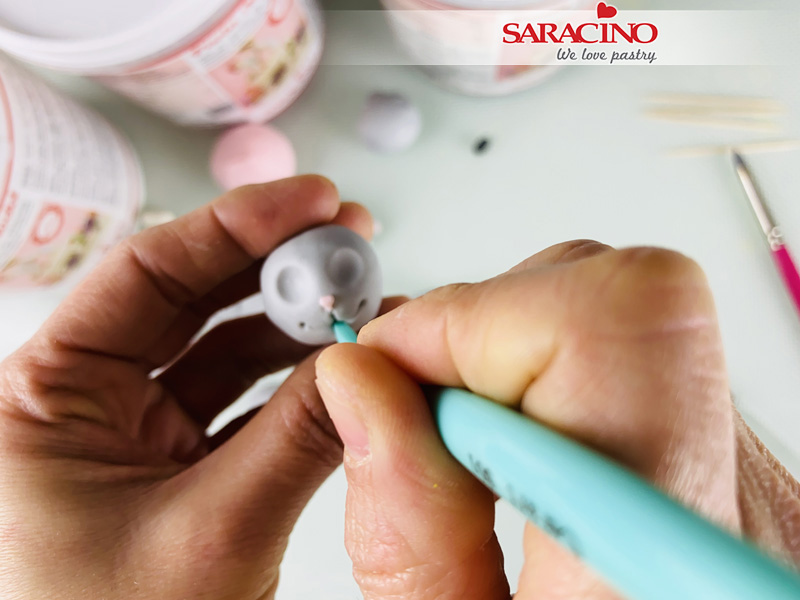
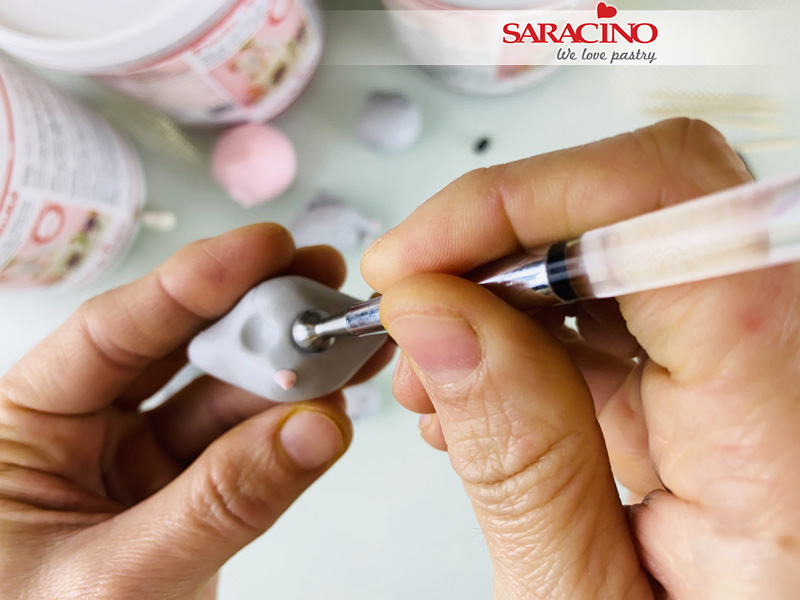
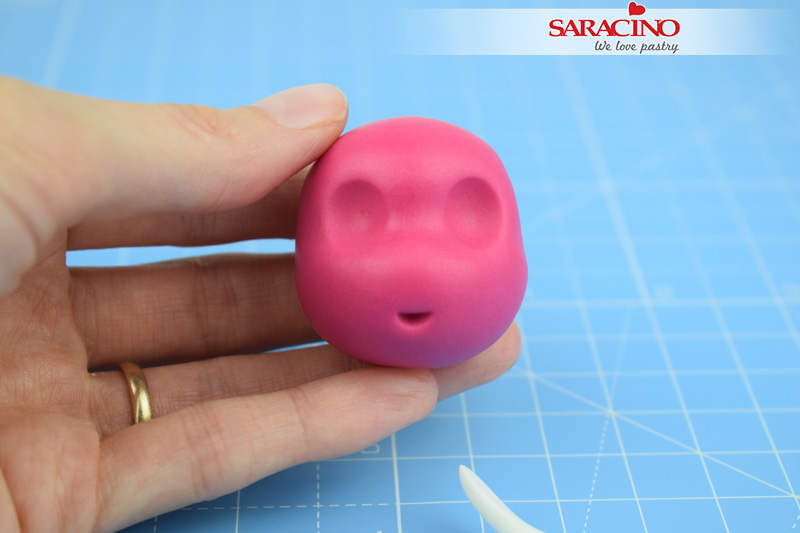
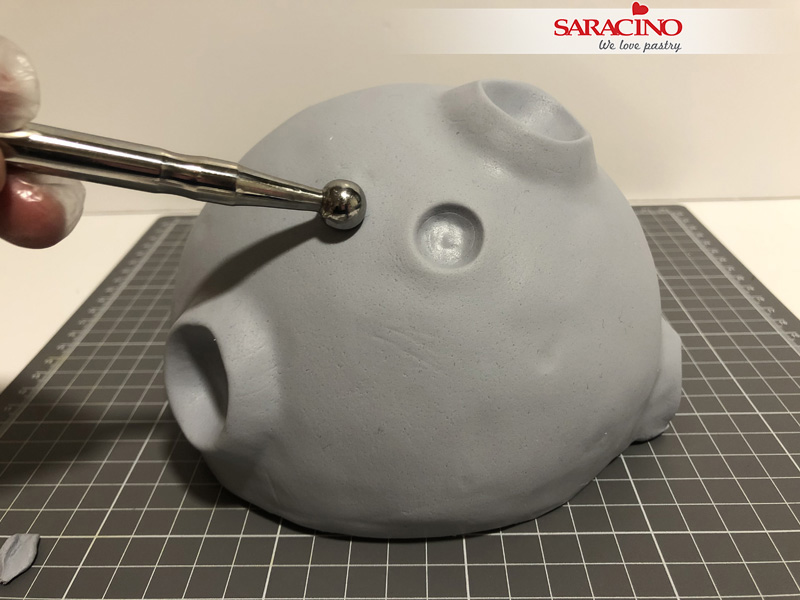
Using your ball tool, mark the eyes.
Step 23
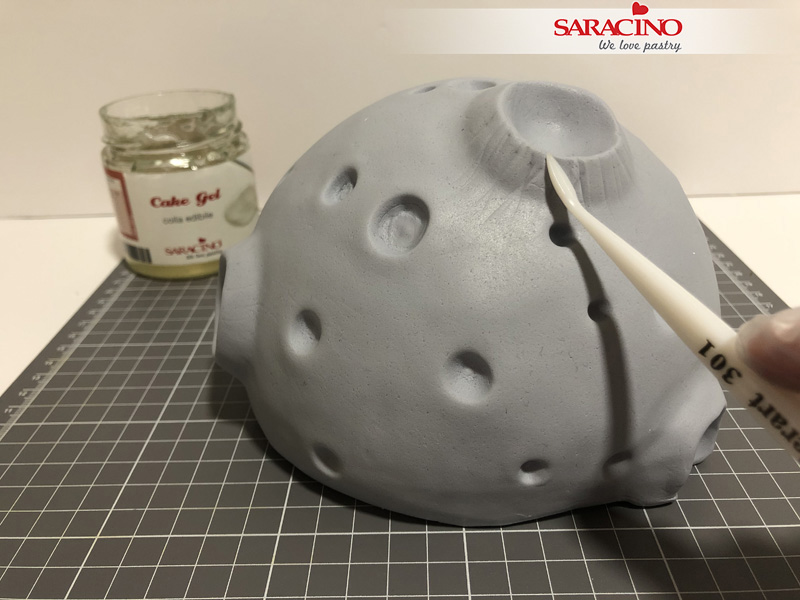
Mark the eyebrows. We will paint it later, but it helps to first mark it so that you are happy with the placement of the brows.
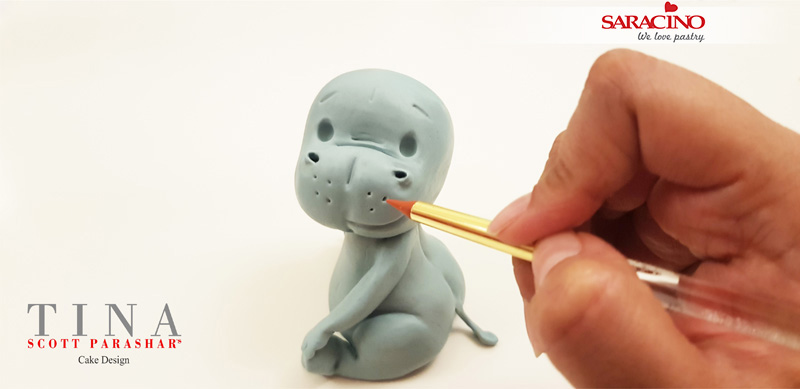
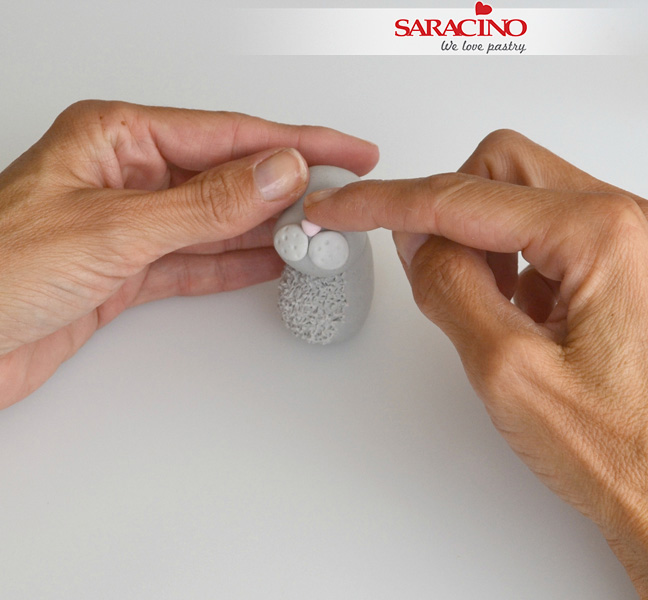
Step 24
Mark little dots above the mouth.
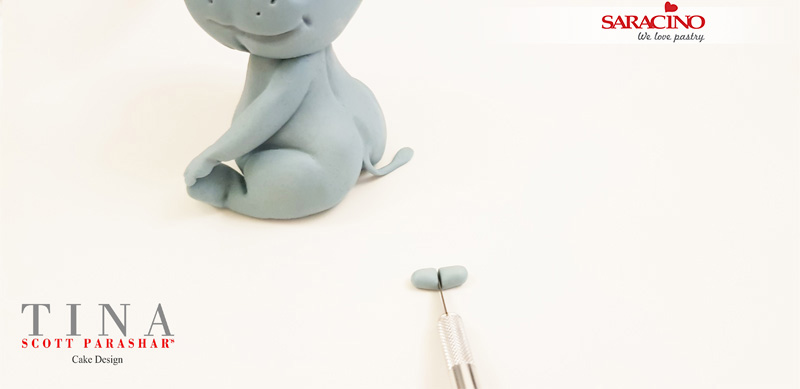
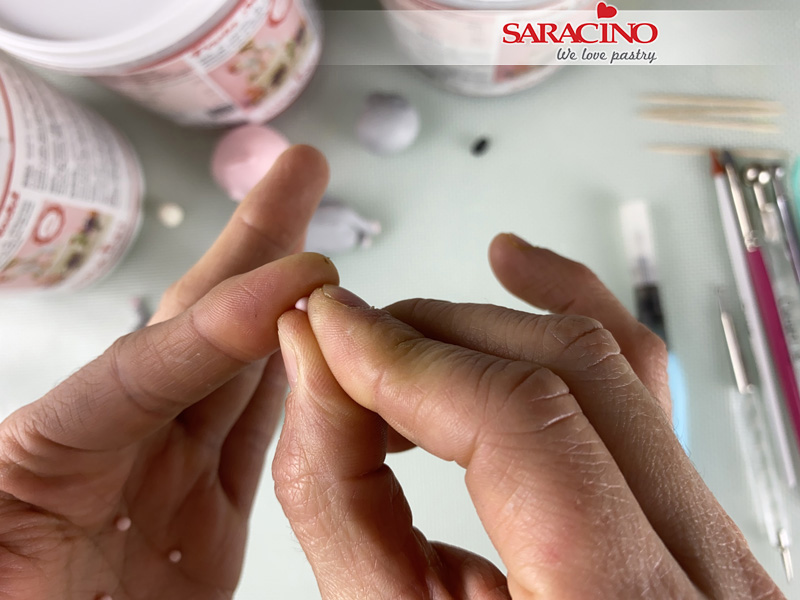
Step 25
Take a small piece of paste and cut it into two.
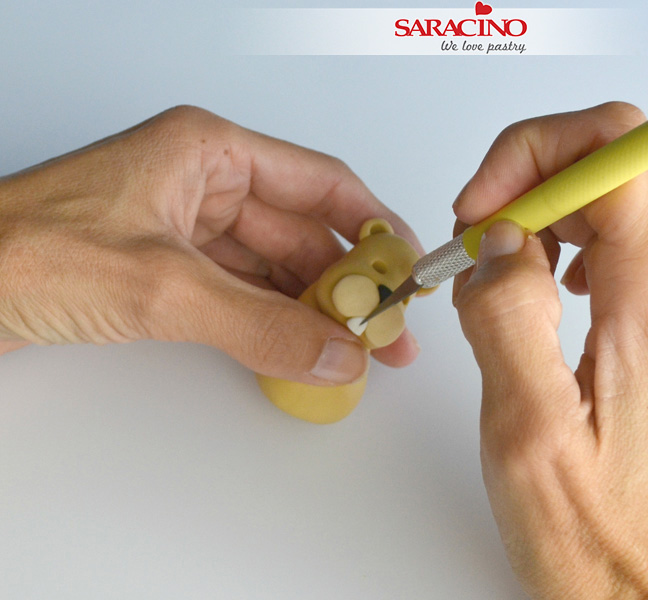
Step 26
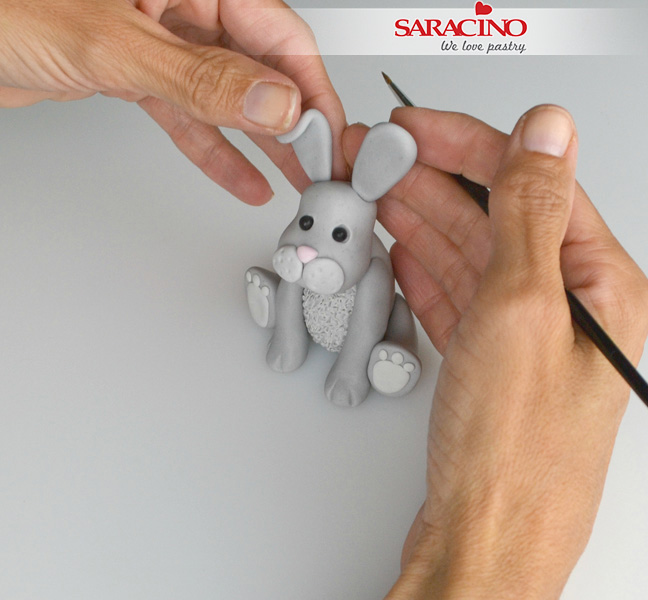
Use your tool to shape the ears.
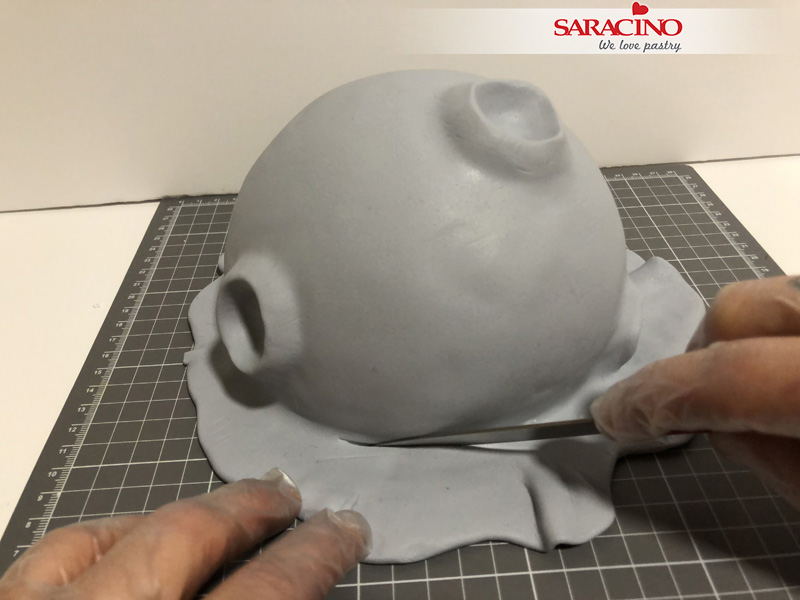
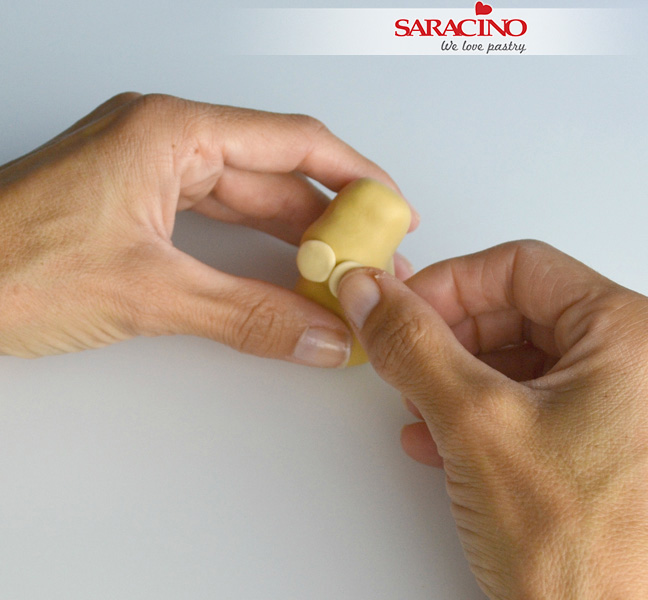
Step 27
Attach the ears to the head, folding it a little at the base to shape it.
Step 28
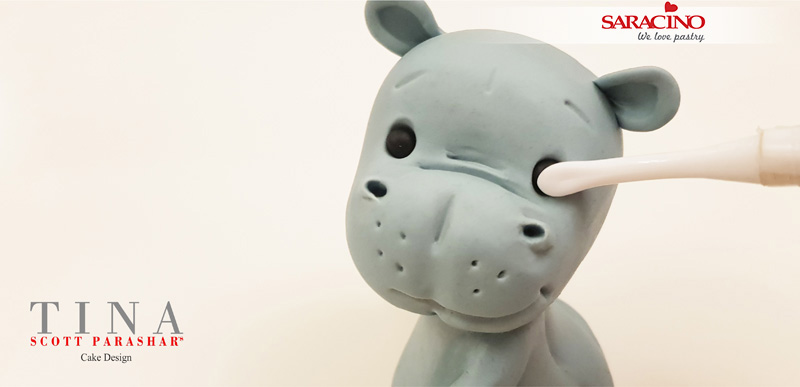
Insert two black balls of paste into the eye sockets to form the eyes.
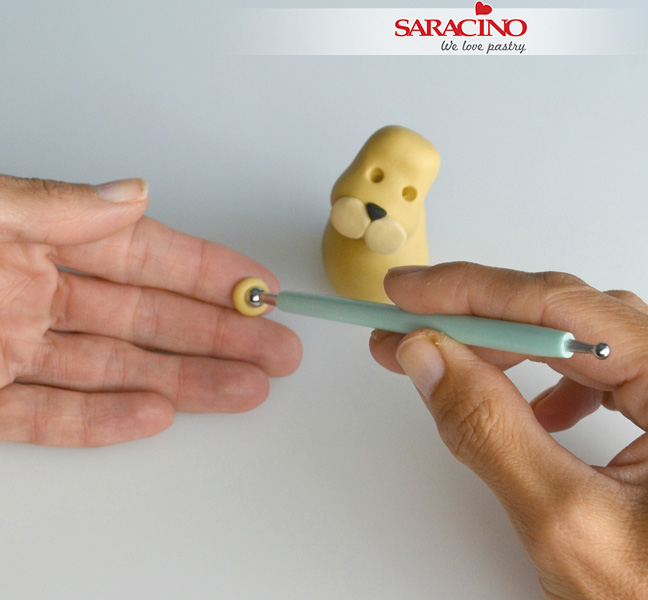
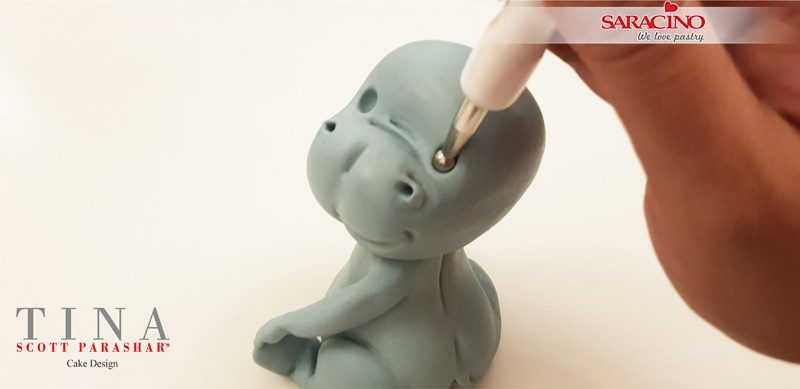
Step 29
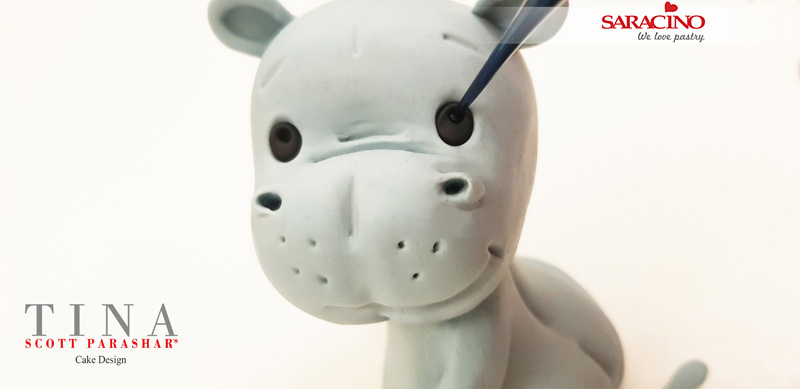
Using your ball tool, mark two small holes for the twinkle in the eyes!
Step 30
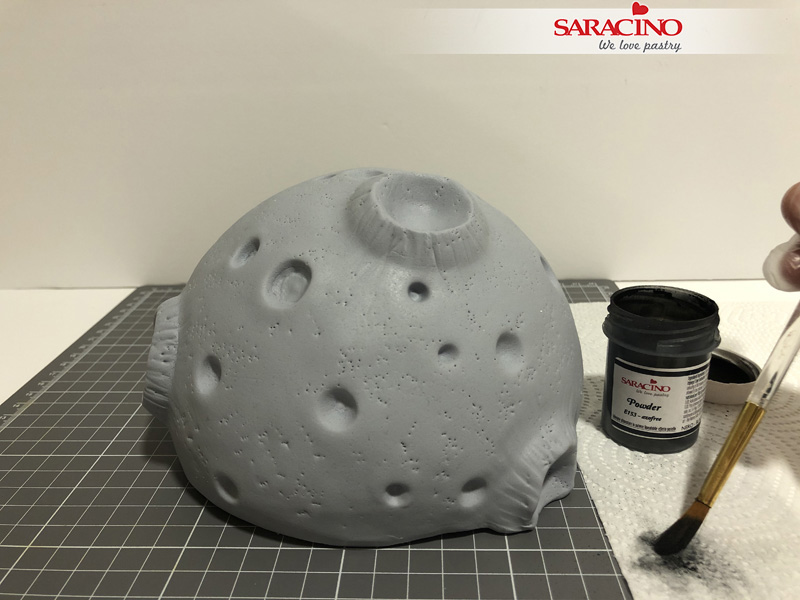
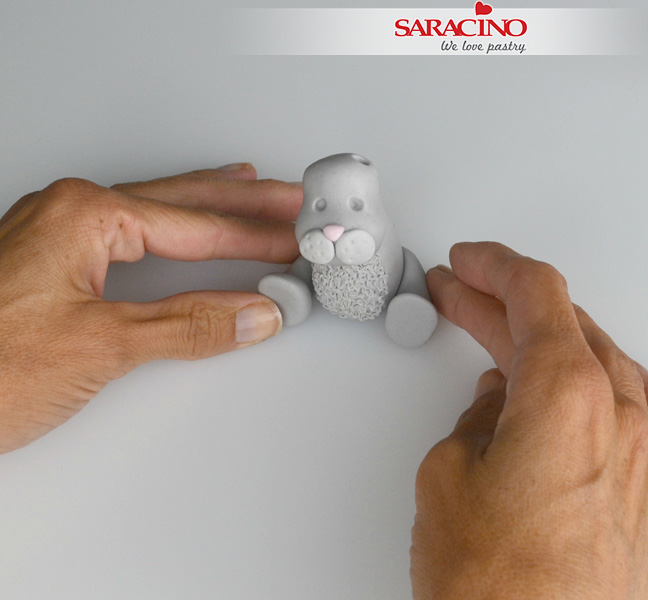
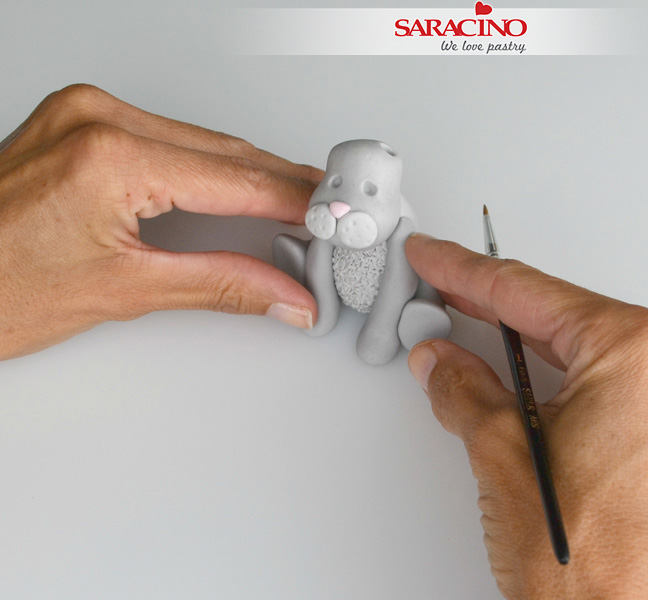
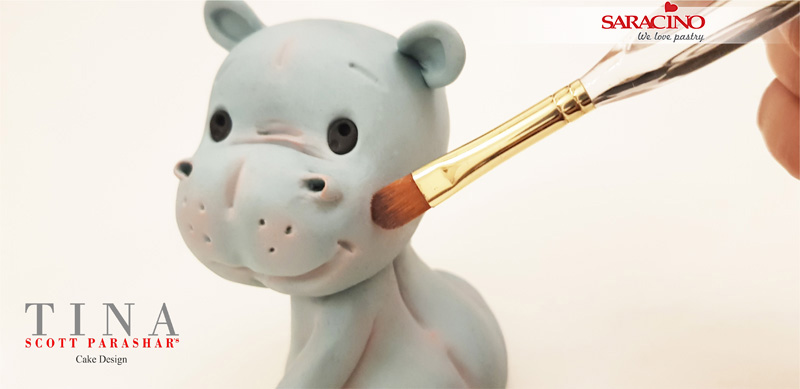
Dust the baby rhino with pink for the cheeks, ears and the other details on the face and body.
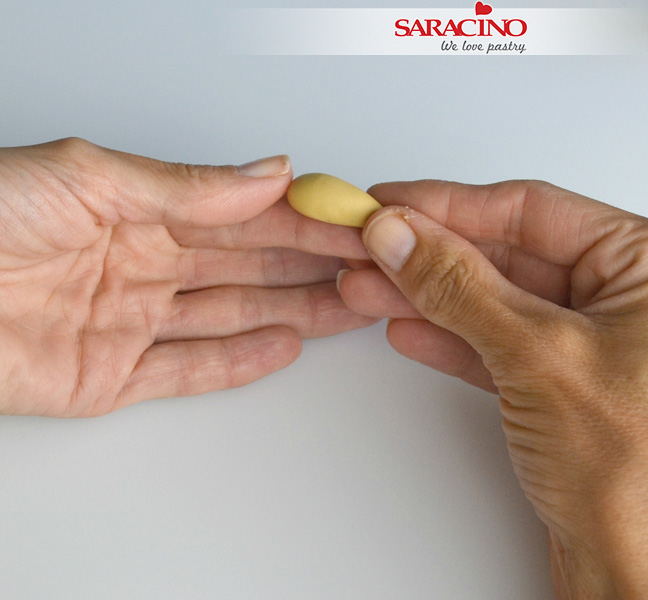
Step 31
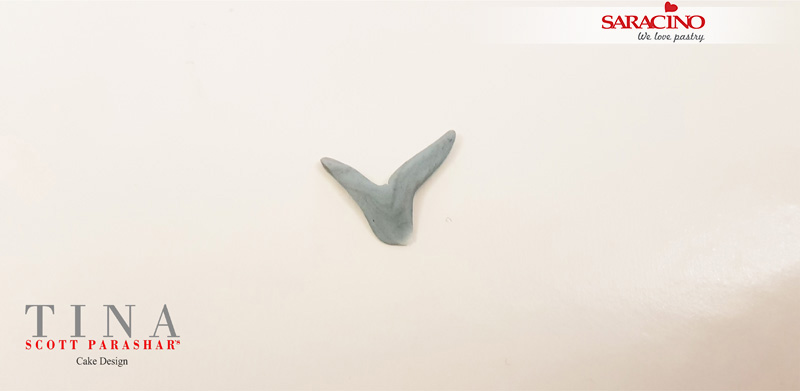
Take a tiny piece of paste and form it into a V shape for the hair.

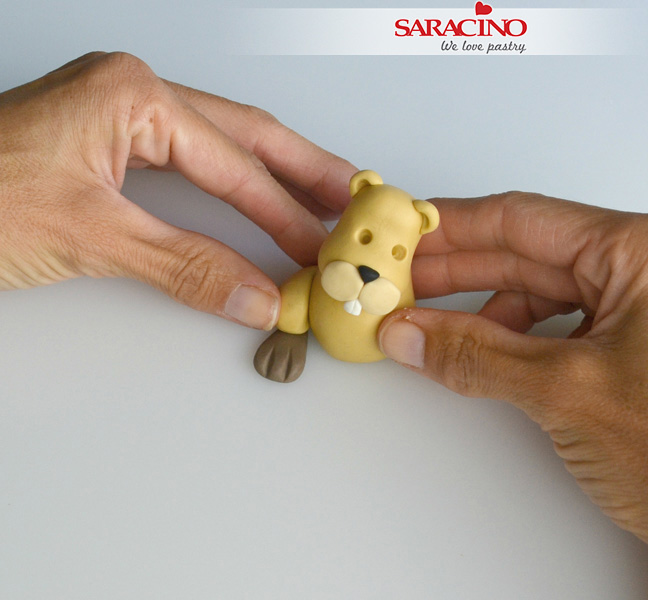
Step 32
Attach the V to the head and shape it the way you would like it to sit on the baby rhino.
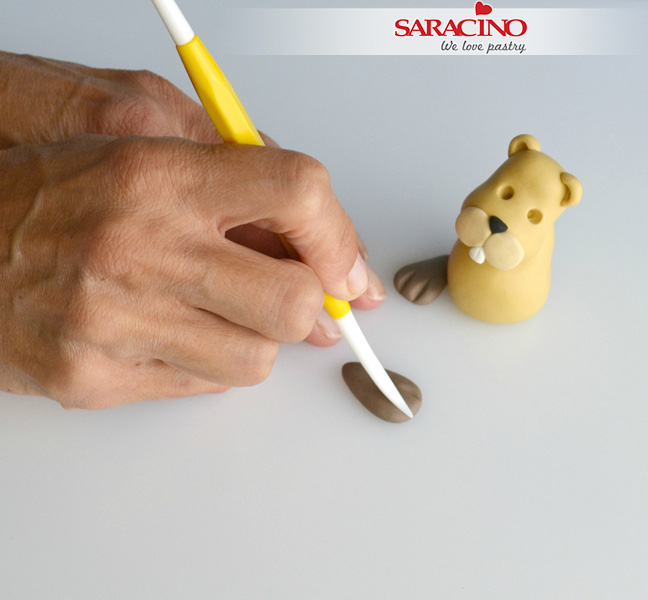
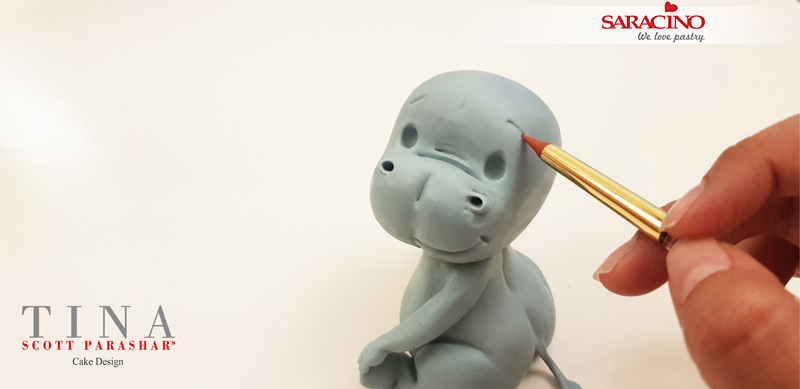
Step 33
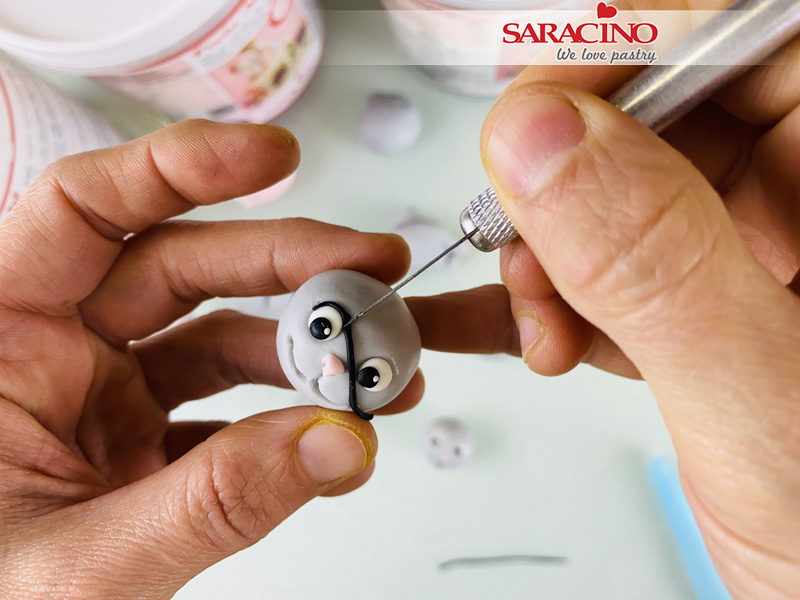
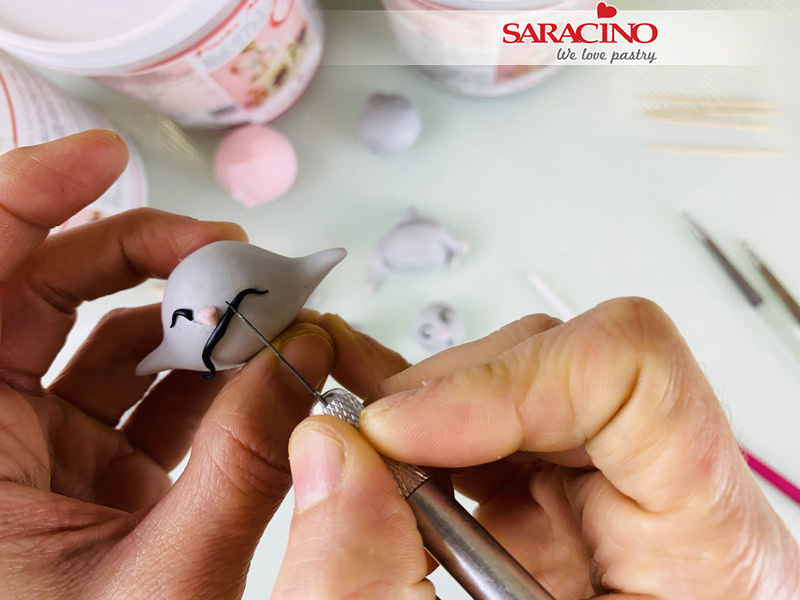
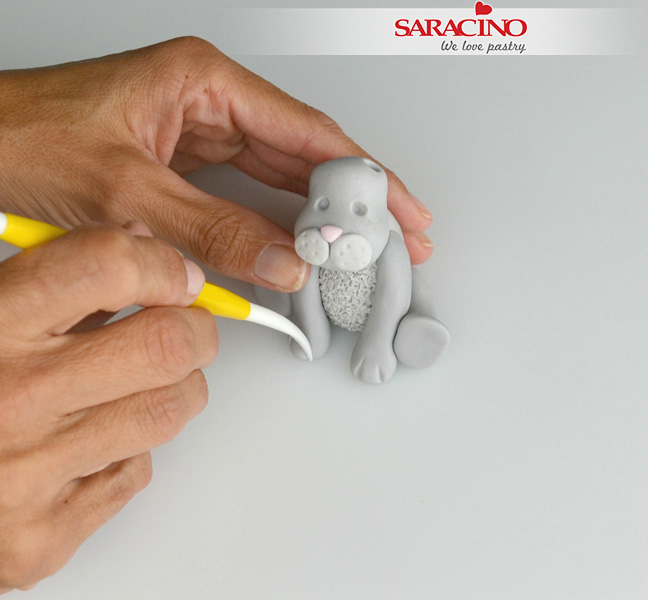
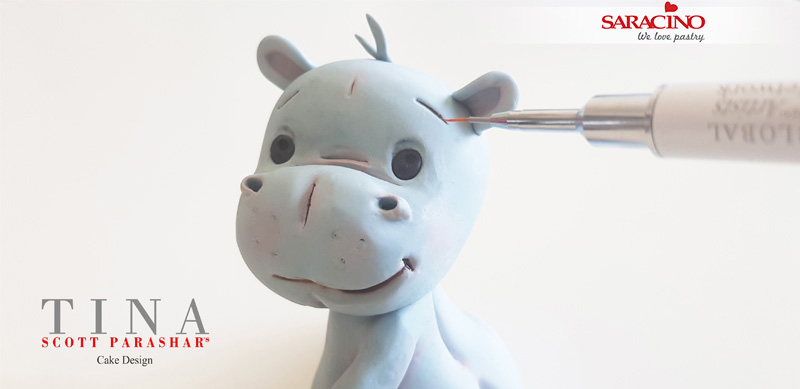
Using a thin brush, paint the eyebrows and other details.
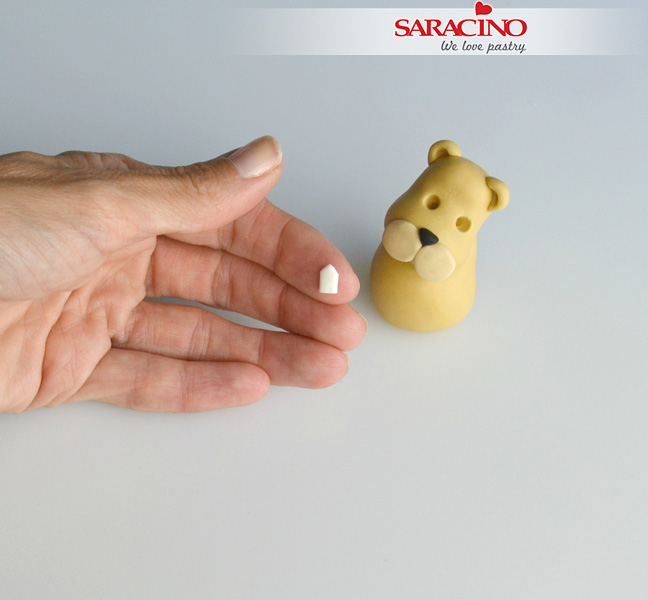
Step 34
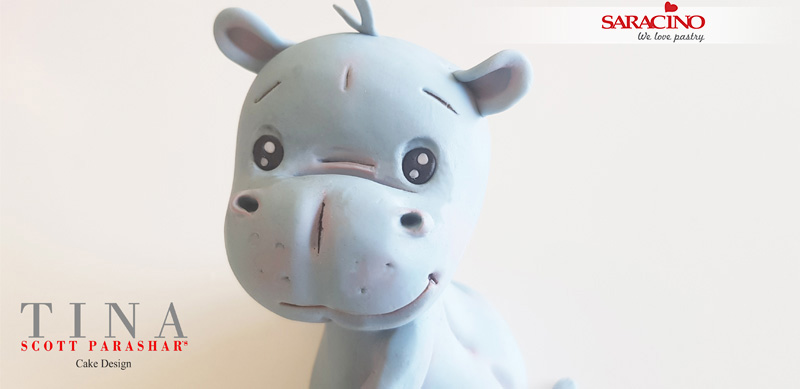
Add the twinkle to the eyes by taking two tiny white balls and filling the holes made using the tiny ball tool.
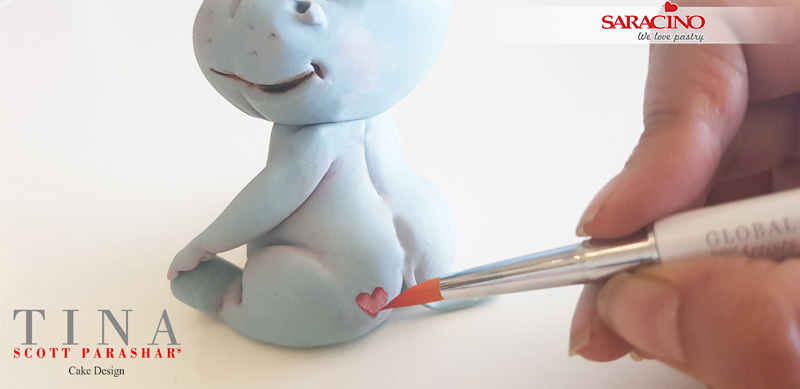
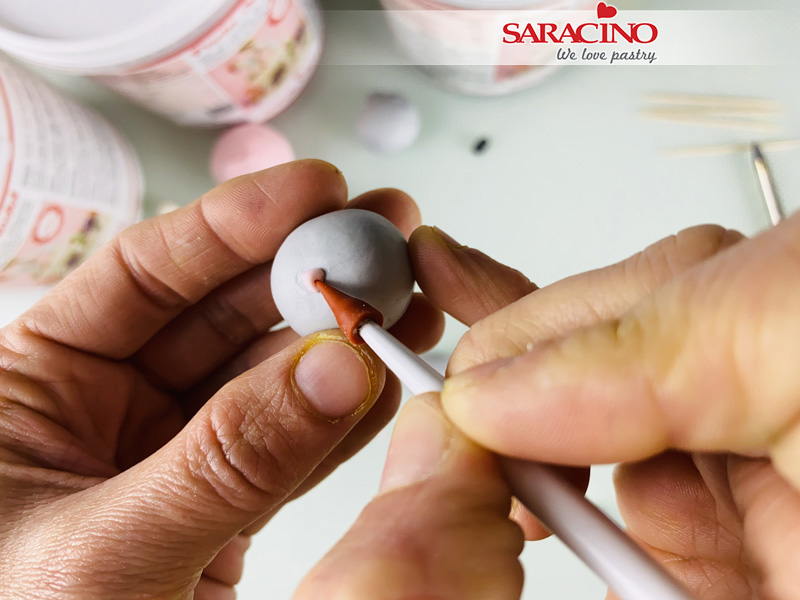
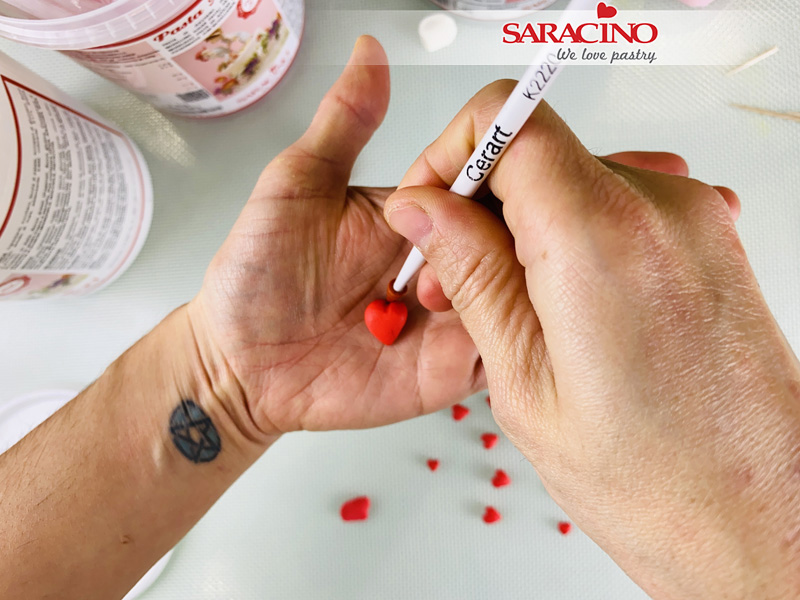
Step 35
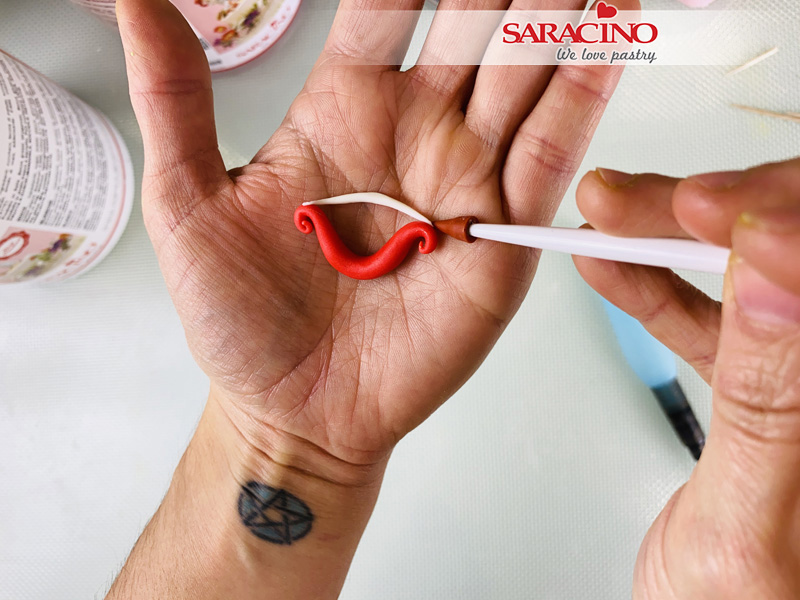
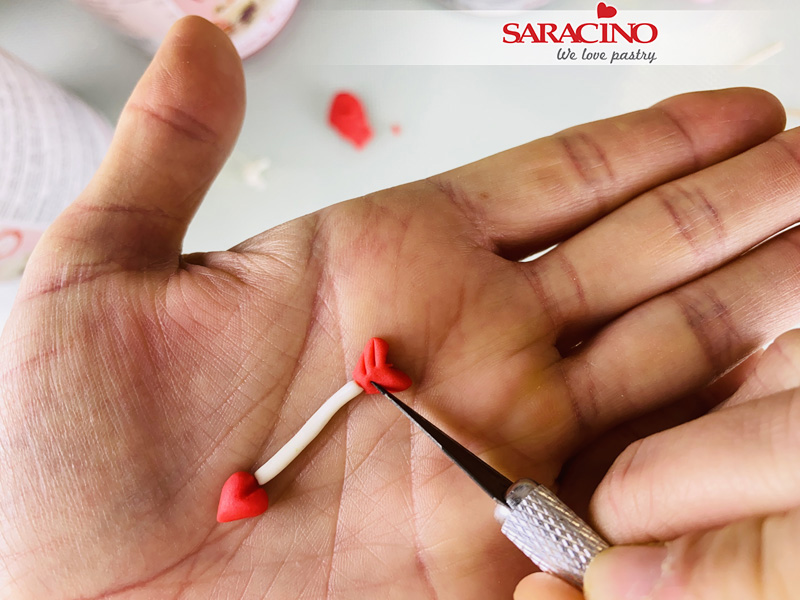
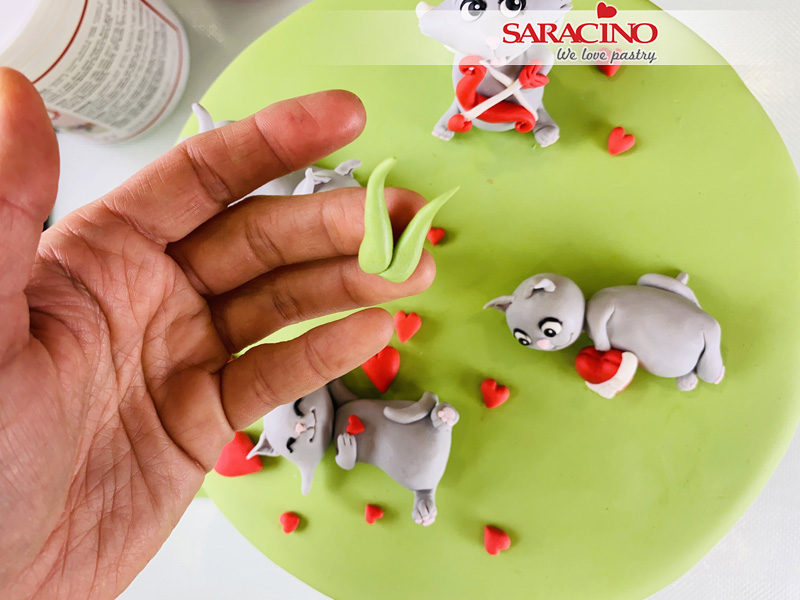
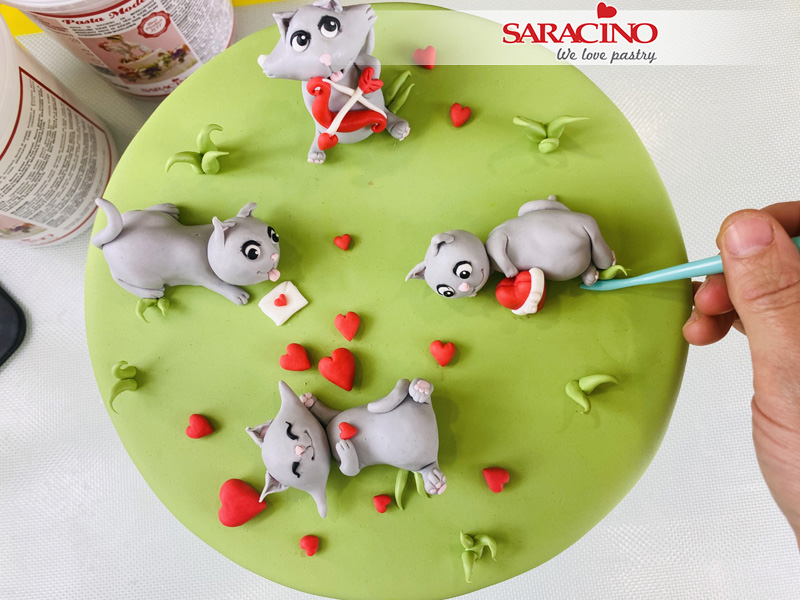
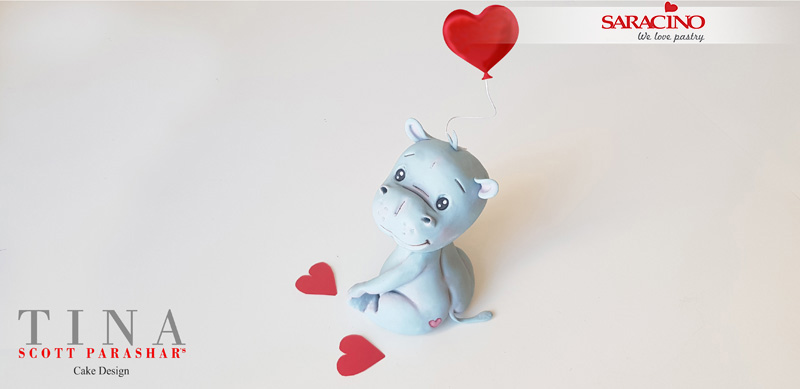
Using red gel colour and a fine brush paint the little heart on the baby hippo’s bottom.
Step 36
Take a thin flower wire and two red pieces of wafer paper and cut it into two equal heart shapes. Attach a piece either side of the wire and paint the paper to give a light and shadow 3d effect. Add tiny triangle shapes at the bottom of the hearts to look like a balloon tied at the bottom. Alternatively, you could also make the balloon with modelling paste.