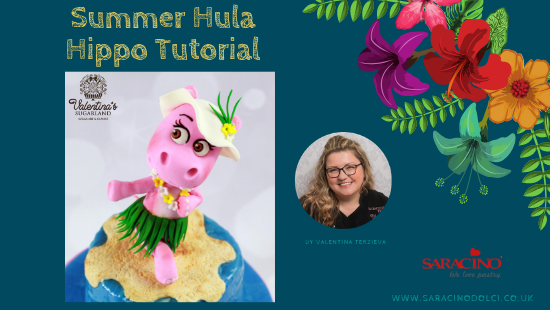
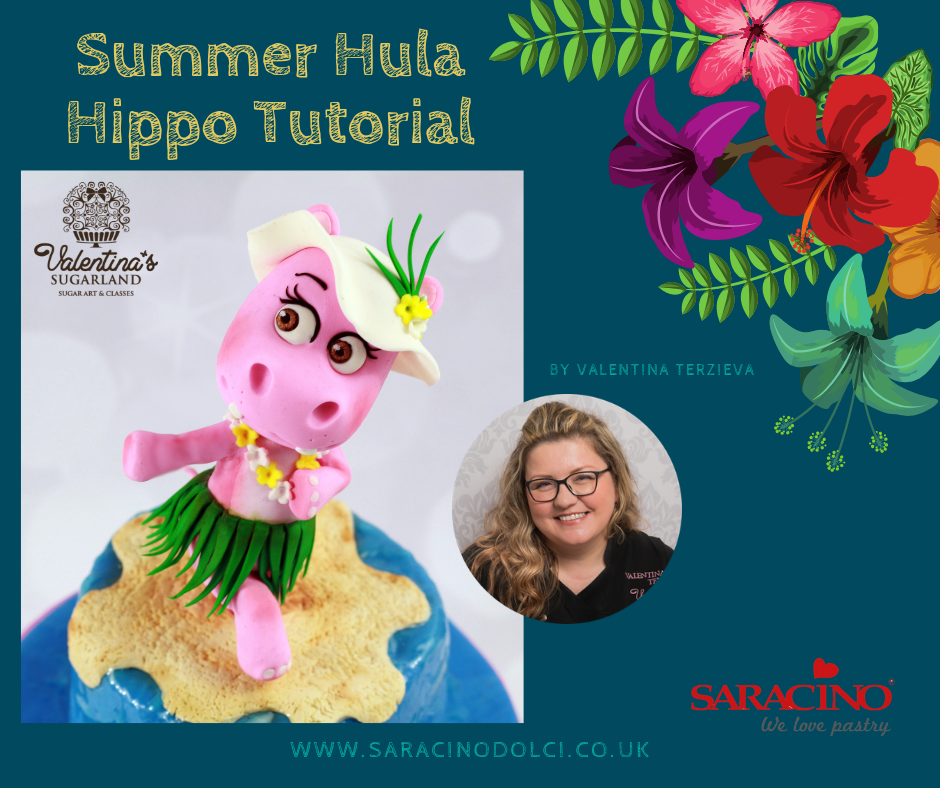
SUMMER HULA HIPPO

SUMMER HULA HIPPO

Skill level: BEGINNERS

You will need:

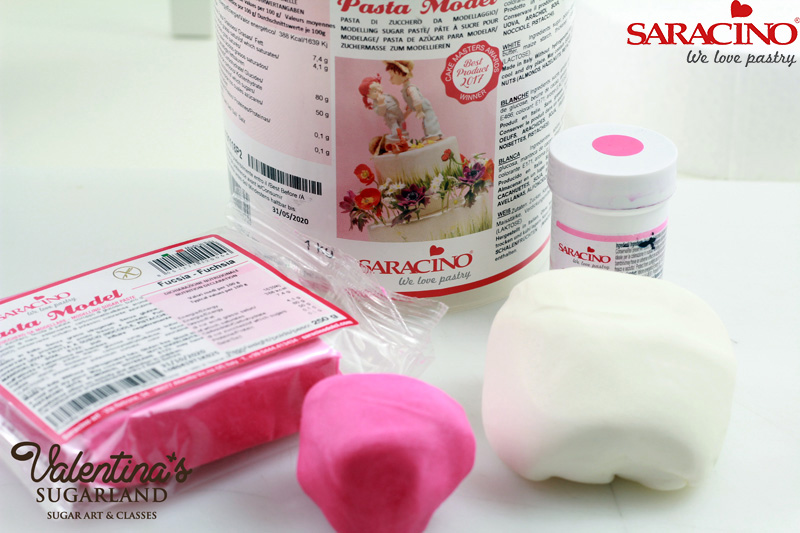
  • Saracino Modelling Paste – 50g fuchsia, 100g white, 20g green, 10g brown, 10g black and 10g yellow
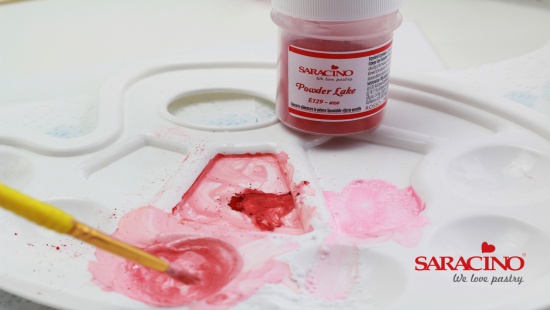
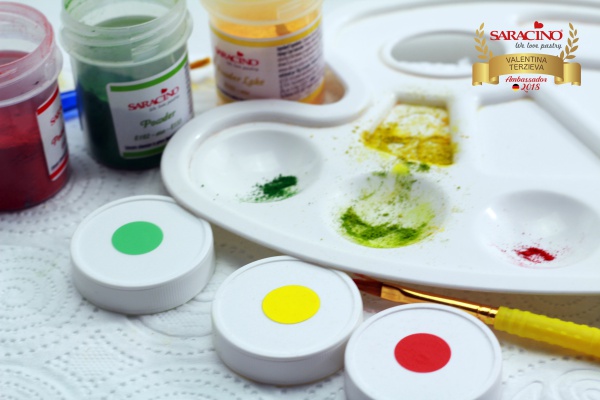
  • Saracino Dust Colours – pink, brown, green, bronze and white
  • Saracino Cake Gel
  • Cake Dummy
  • Modelling Tools and brushes
  • Knife
  • Round cutter 3cm and 5.5cm
  • Wooden skewer/Barbecue skewer
  • Lemon extract/alcohol

Step 1

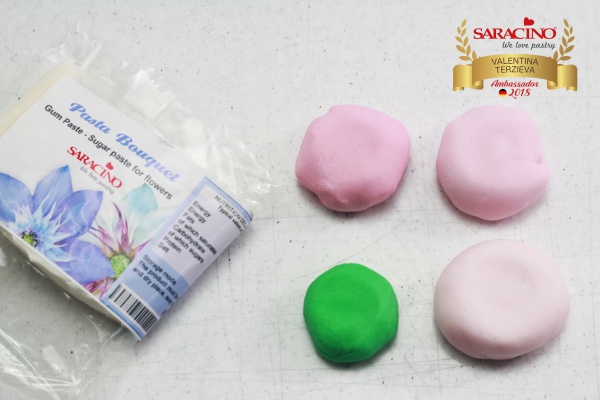
Prepare the Saracino Modelling Paste required for the Hippo. I used 40g fuchsia and 60g white modelling paste mixed together to get the pink colour paste, take 2g from this colour and mix it with 10g white to achieve the brighter pink for details.
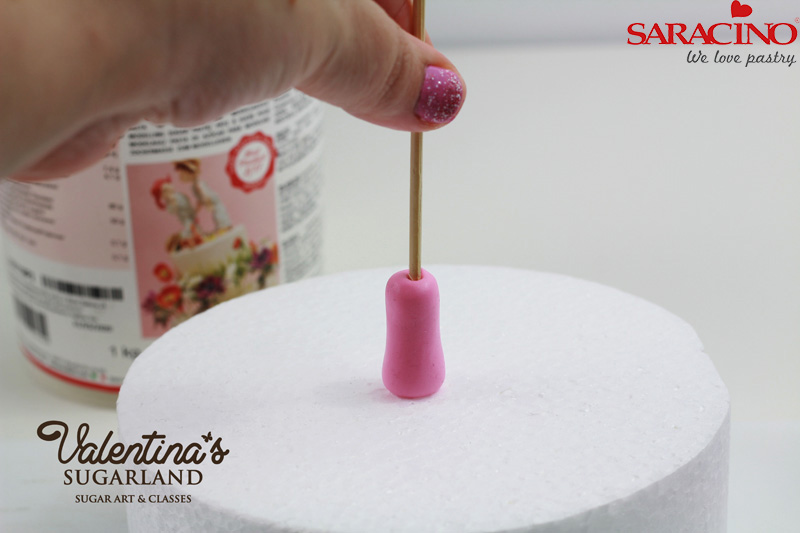
Step 2

You will need 5g pink paste for one leg. Knead the paste thoroughly until pliable. Form a ball and roll it between your hands to a 3cm long sausage. Pierce it with a wooden skewer from one end to the other. Place it on a cake dummy and push the skewer into the styrofoam to be able to hold the hippo upstanding.
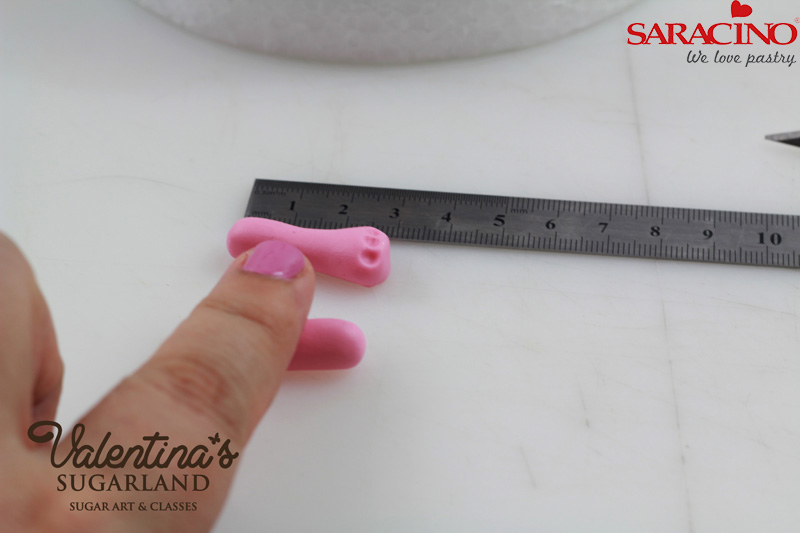
Step 3

Using a blade side of a modelling tool form the sausage as leg. Press with your finger or with a tool in the middle of the leg to get the hollow of the knee. On the front side press the front lower side of the leg backwards.
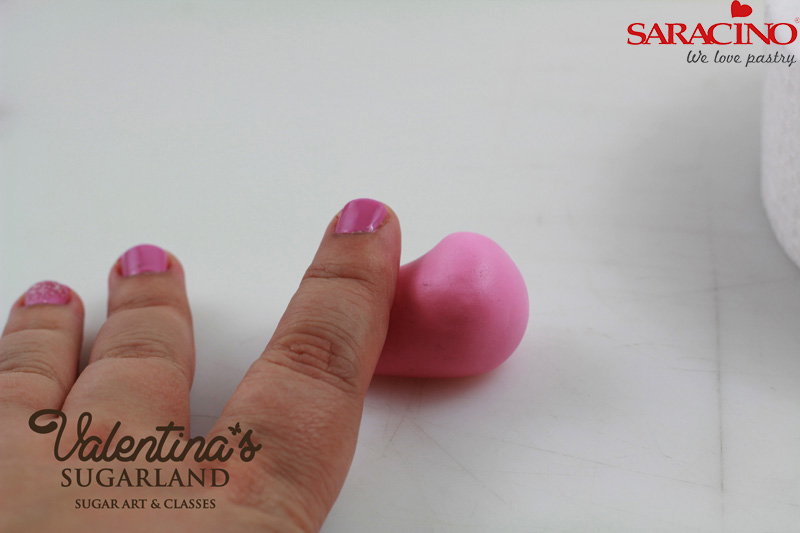
Step 4

Use 25g pink modelling paste and form it to a pear shape – make a ball and then roll one side of the ball few times between a modelling pad and your finger. The body should be about 5cm long.
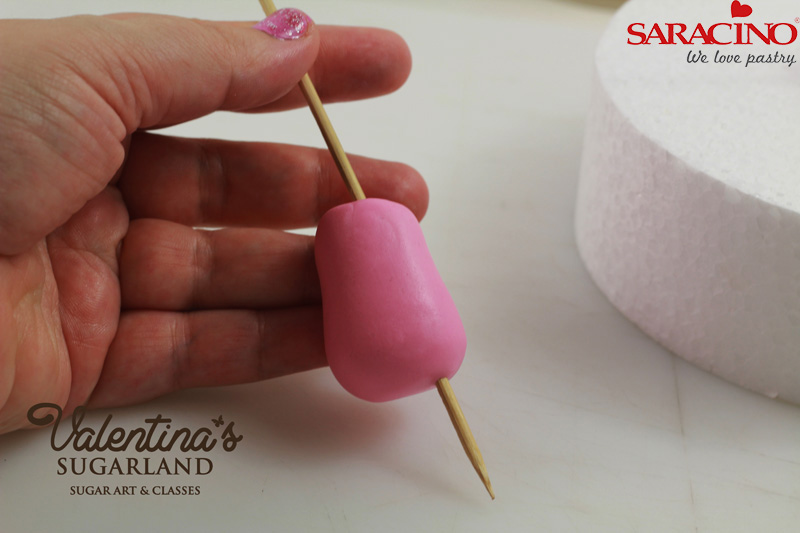
Step 5

Use a second skewer to pierce diagonally through the body and the tip should come out sidewise on the thicker end of the pear.
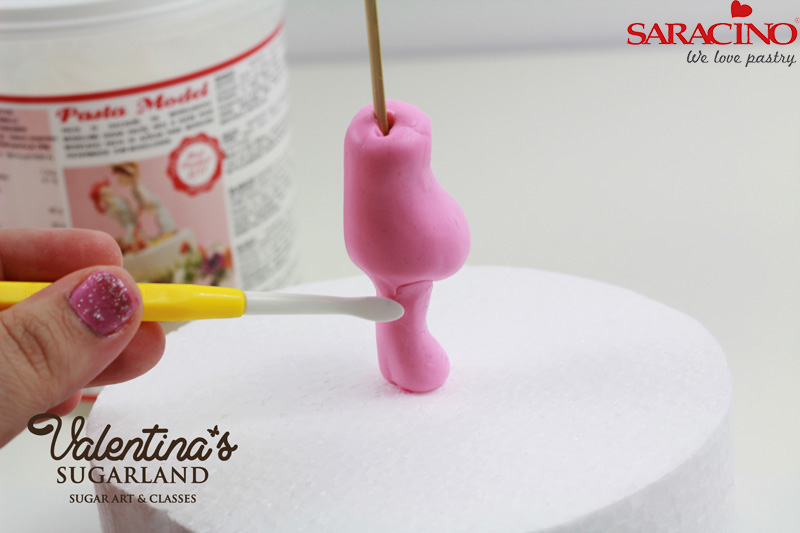
Step 6

Take out the skewer and place the body on the skewer attached to the leg and the cake dummy. Apply water on the joining seam between leg and body and using a Dresden tool or silicon brush smooth the seam.

Tip:I use only water to join and smooth two pieces of Saracino modelling paste together. You don’t need sugar glue or piping gel for that. Apply water and go a few times with your tool over the seam.
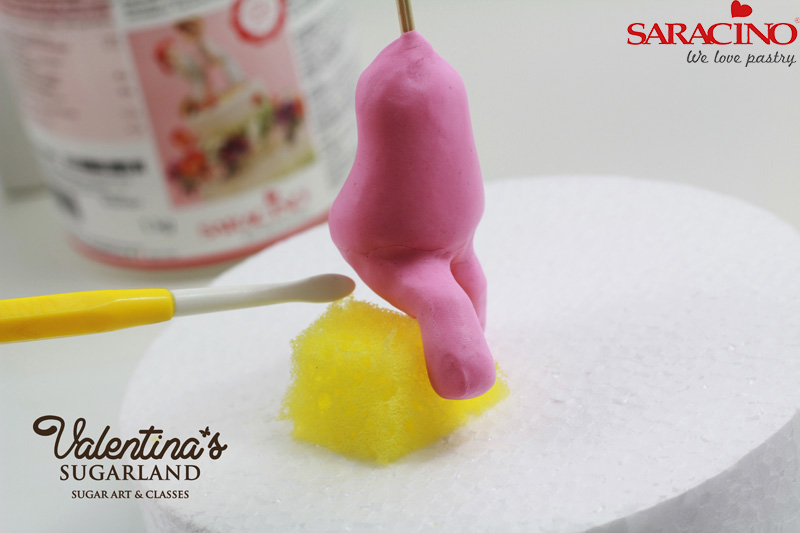
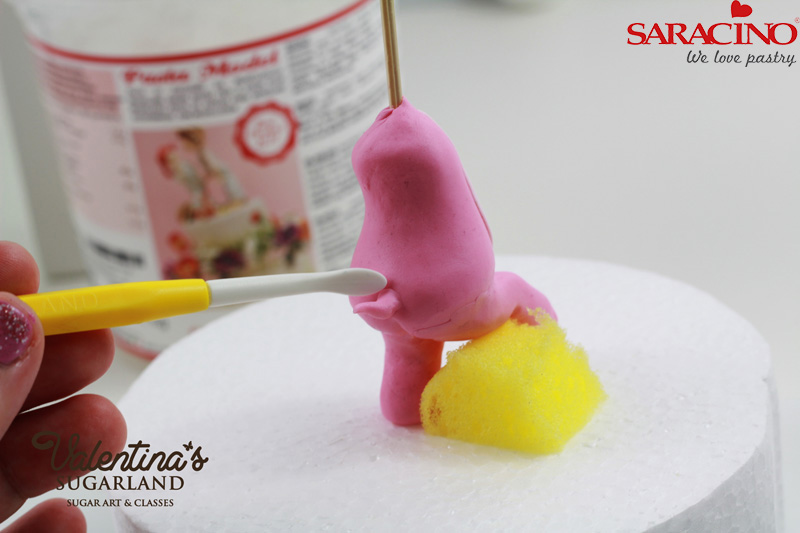
Step 7

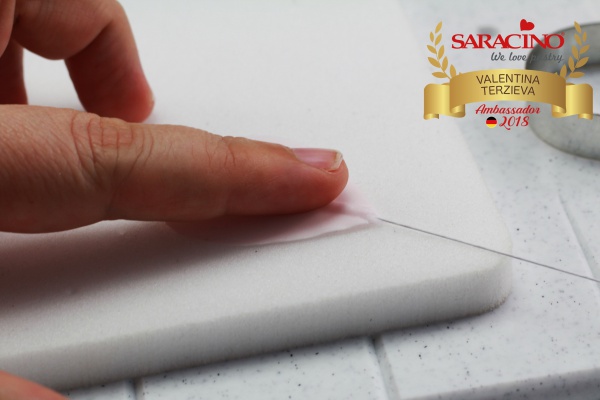
For the second leg use 5g paste and roll it to a sausage 3cm long. Roll in the middle between two fingers to thin it for the knee area and attach with water to the body. Use piece of sponge to support the leg while working on it and until it dries and can hold itself in the air.
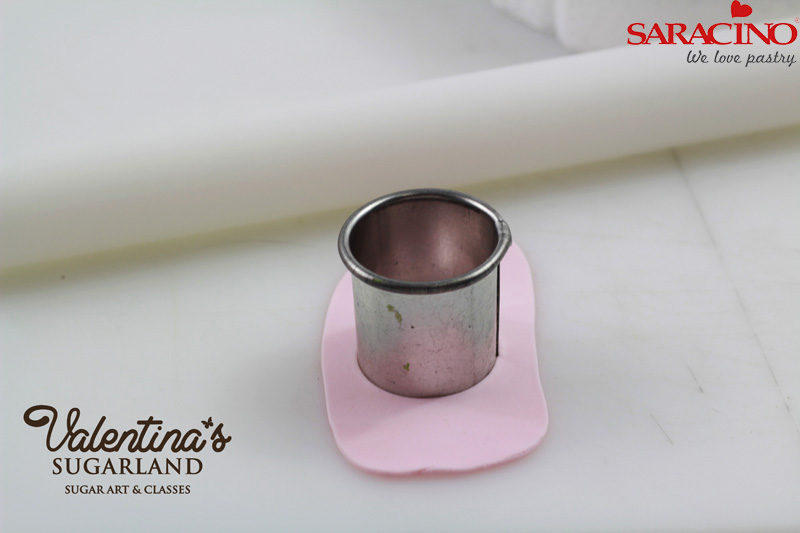
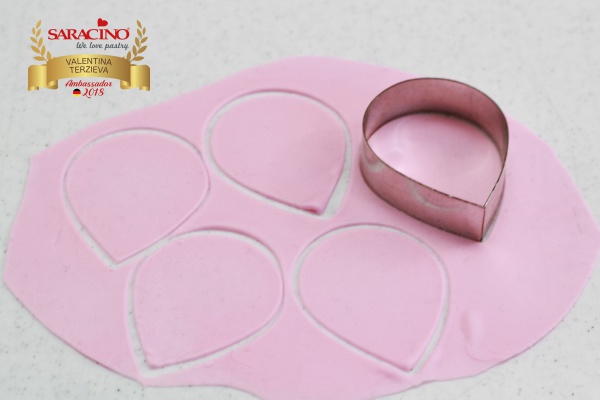
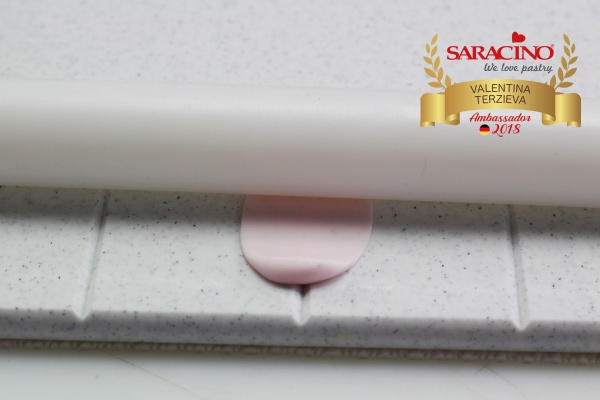
Step 8

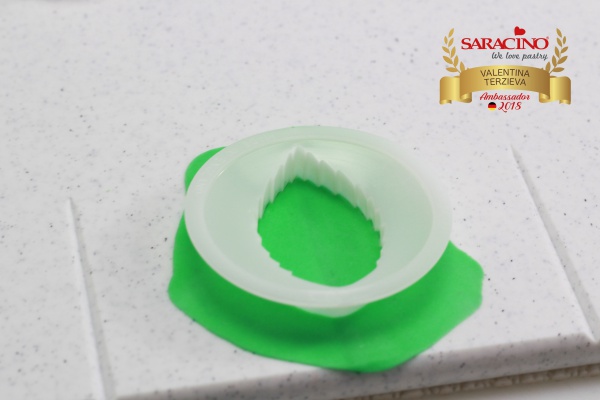
Roll out thin bright pink paste and cut a circle with a 3cm cutter
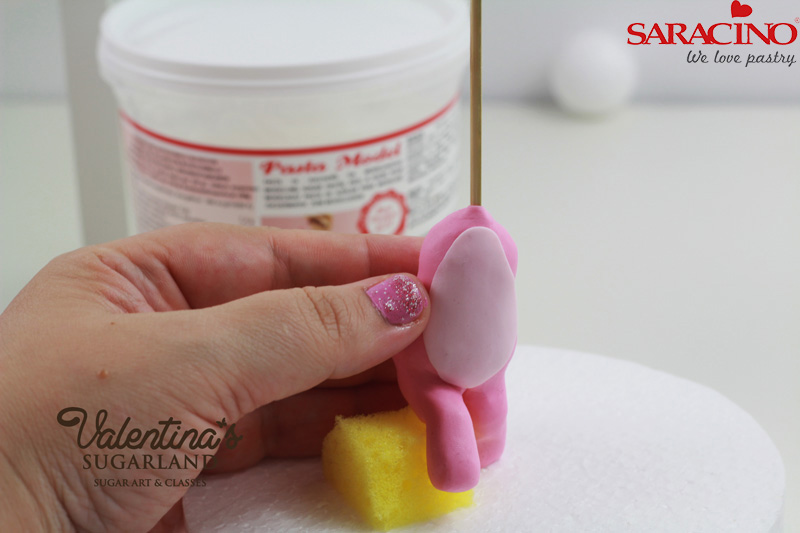
Step 9

Strech it between your fingers to get an oval shape and place it over the hippo belly. Use water on the back side so its sticks to the body.
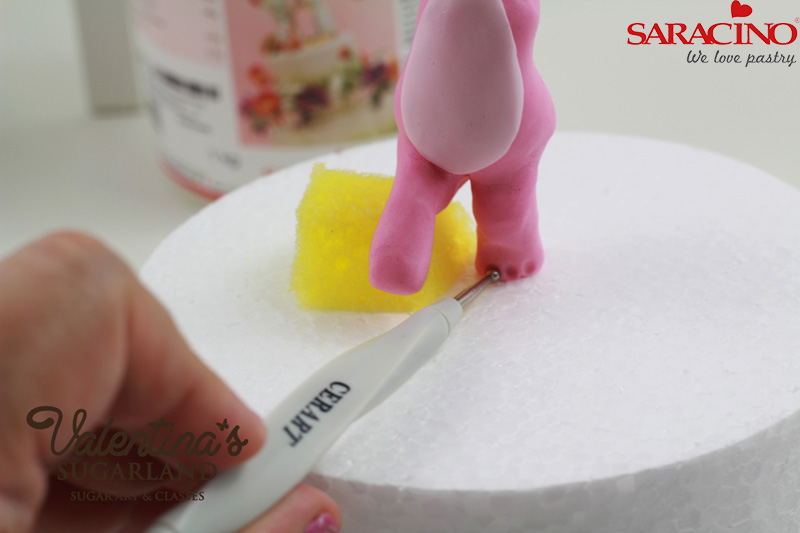
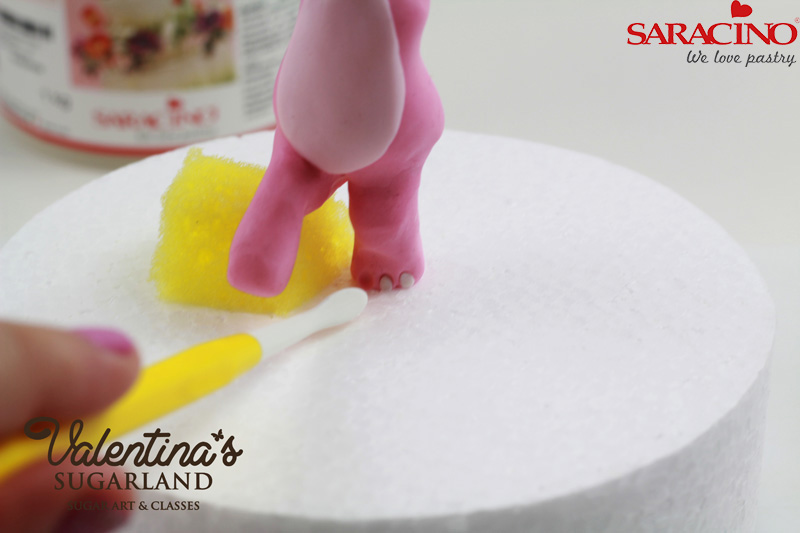
Step 10

Use a small ball tool to indent three holes on the toes of both feet.

Step 11

Fill the holes with small  balls of white modelling paste and press them flat with your finger or a tool.

Step 12

Form a small pointy sausage and place it on the back for a tail. Smooth with the Dresden tool.

Step 13

For each of the arms knead well and shape 2.5g Saracino Modelling Paste into a 3cm long sausage. Indent on each hand three holes for the finger nails and put in each hole a small ball of white modelling paste.
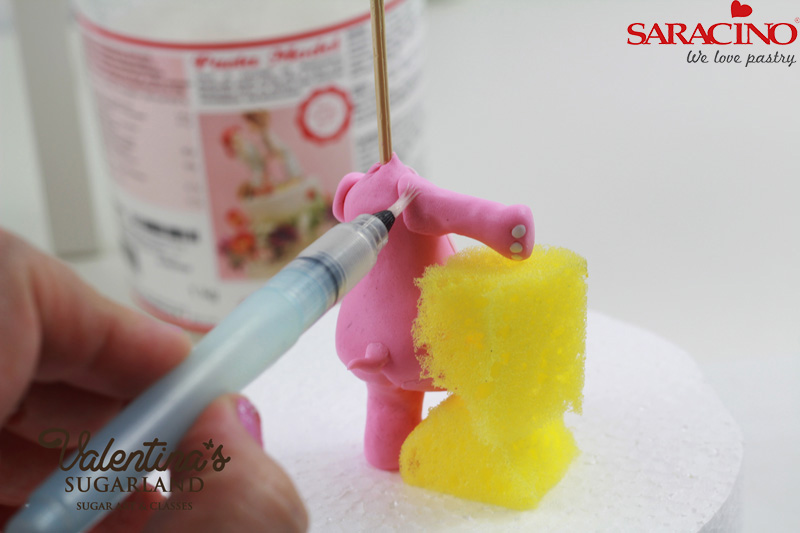
Step 14

Attach the arms to the body. One arm is streched out to the side, one is bent and is resting on the belly. Use water to blend the seams. Support the arm with a piece of sponge and leave the body over night to dry.
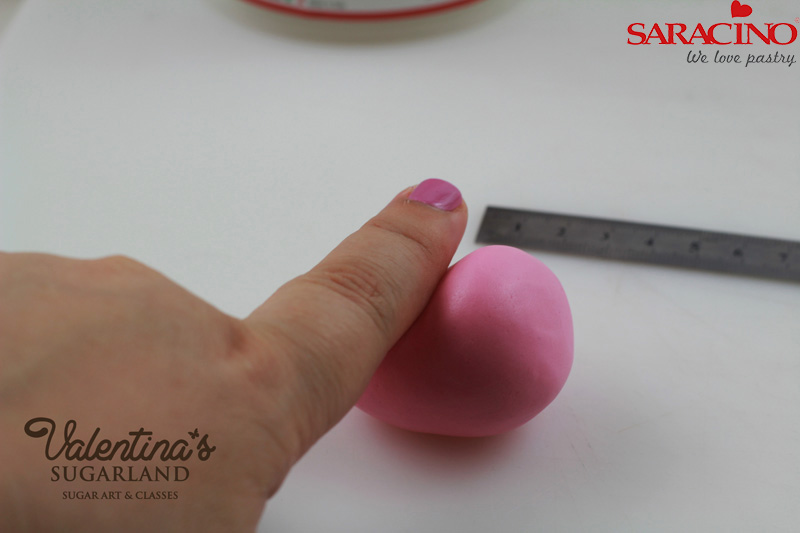
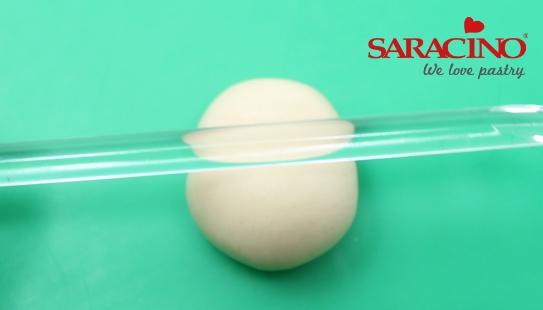
Step 15

For the head you will need 40g pink Saracino modelling paste. Knead well and form a ball. Roll the ball on the modelling pad with one finger on one side and thin this area a bit. The head should be about 5cm long.
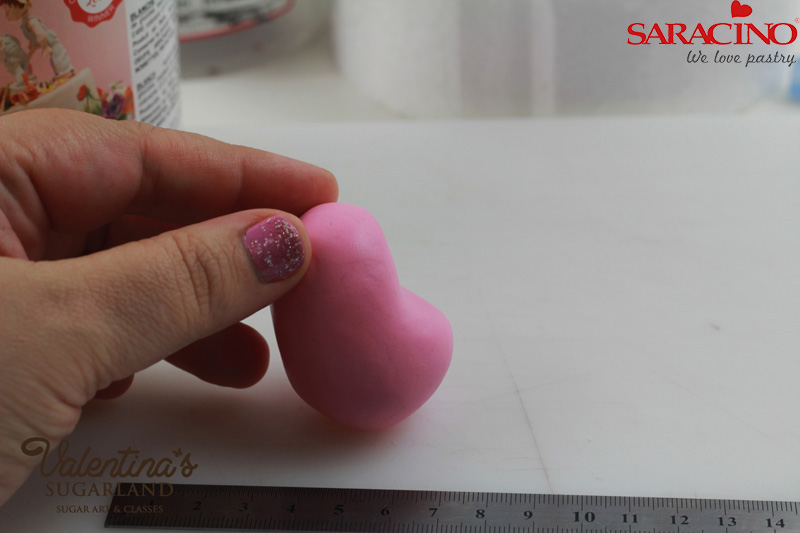
Step 16

From the side it should look like this.
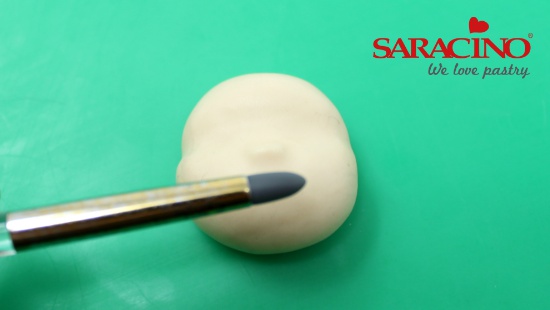
Step 17

Using a ball tool or a CelPin make two dents for the eyes in the middle of the head length.
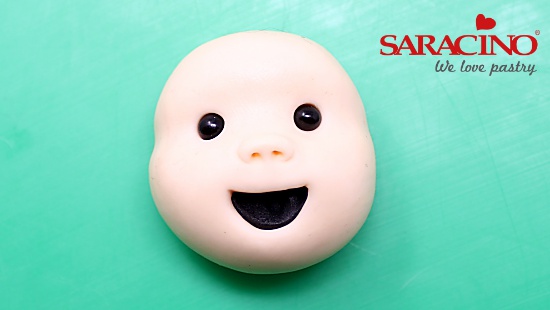
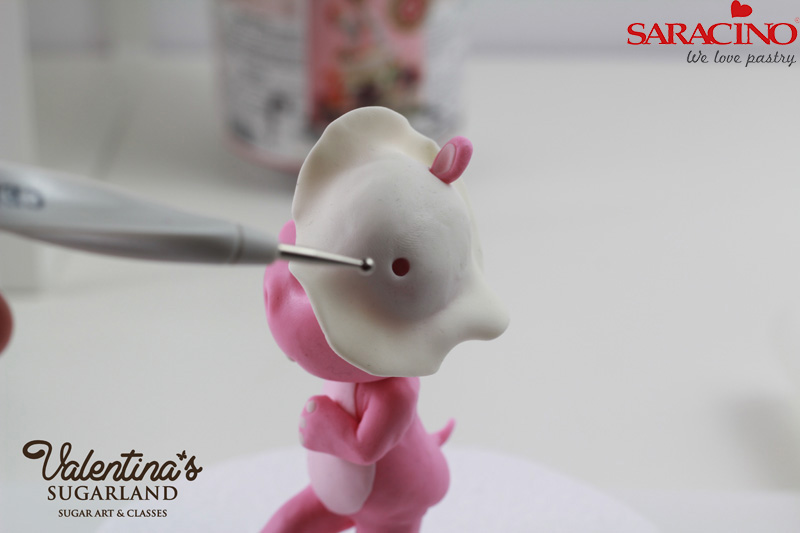
Step 18

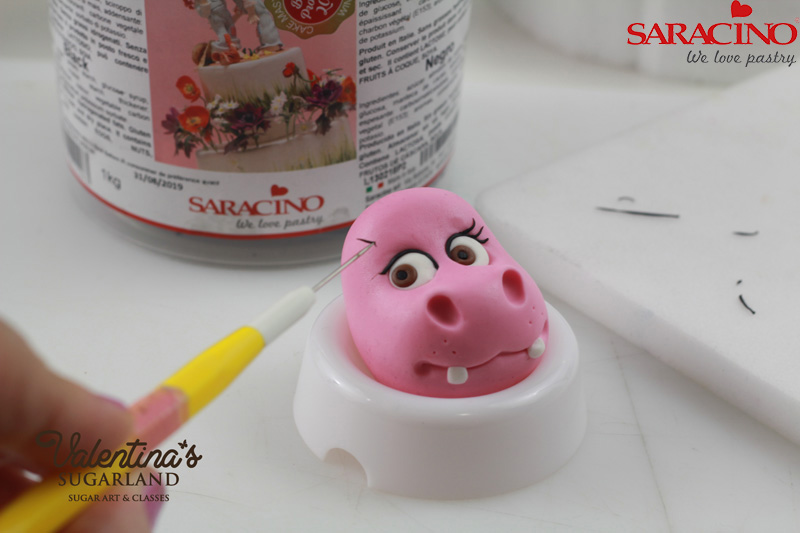
Using a smaller ball tool make the nostrils. With the smaller side of the Dresden Tool draw the lines of the mouth. Impress two smaller holes on both sides of the mouth line.
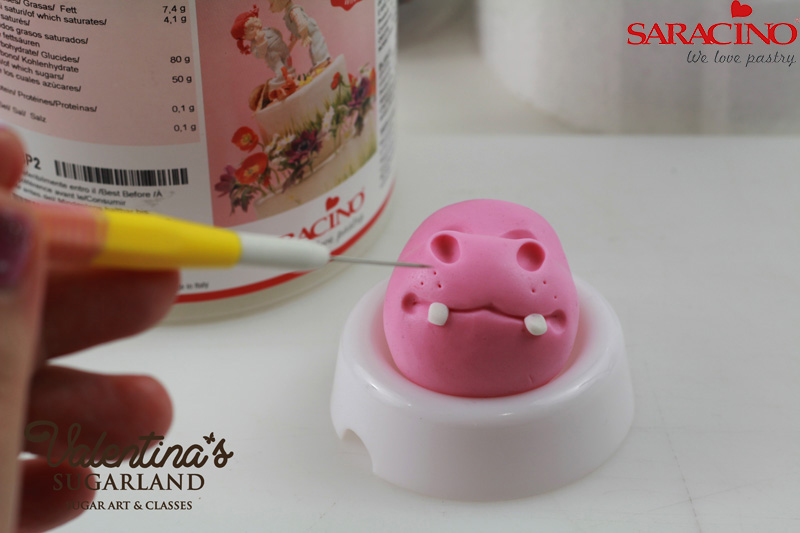
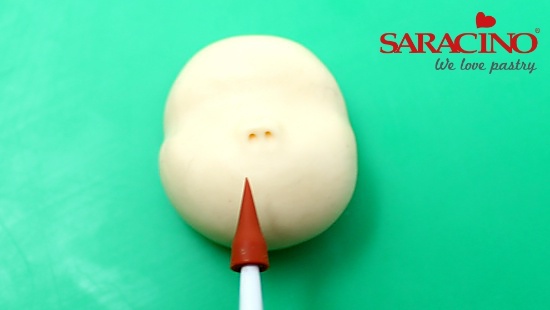
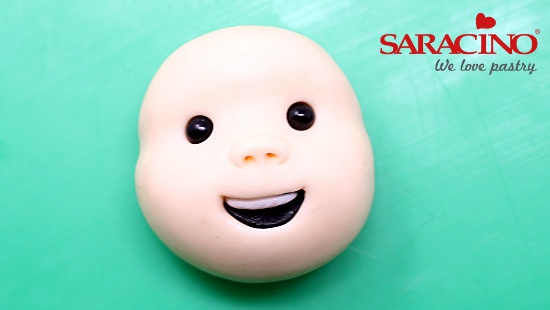
Step 19

Form two teeth out of white modelling paste and place them on the mouth line. With the needle tool make a few holes on both sides underneath the nostrils.
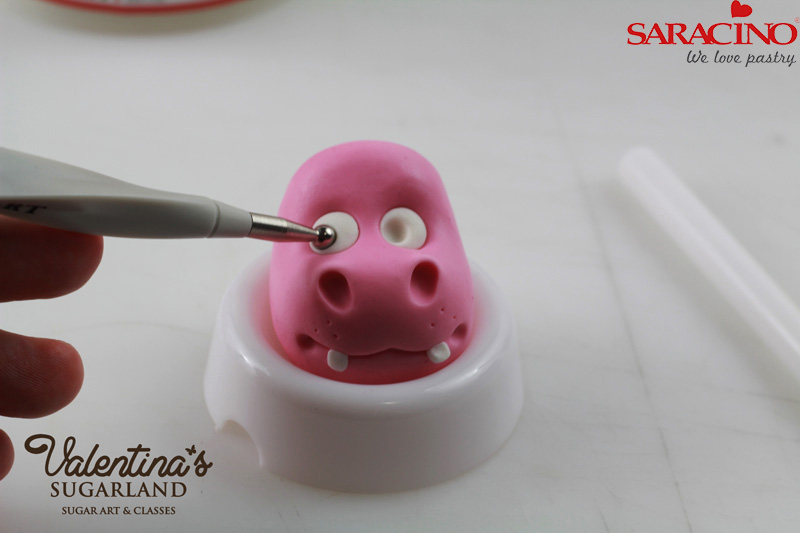
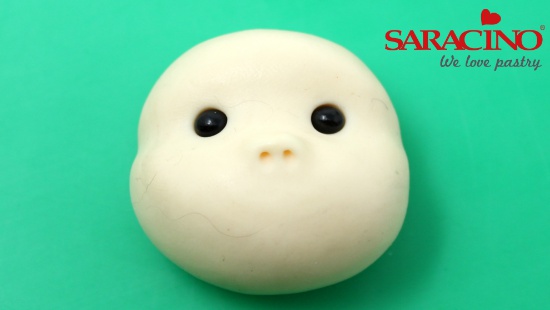
 

Step 20

Fill the eye dents with small white balls and press them flat with your finger tips. Make holes in the white balls using small ball tool. Important here is to pay attention where you put these holes. It depends in which direction your hippo is going to look.

Tip: I am using small plastic or styrofoam cups that are usually used to dry sugar flowers in them so the head is not becoming flat on the back while I am working on it or while it is drying.
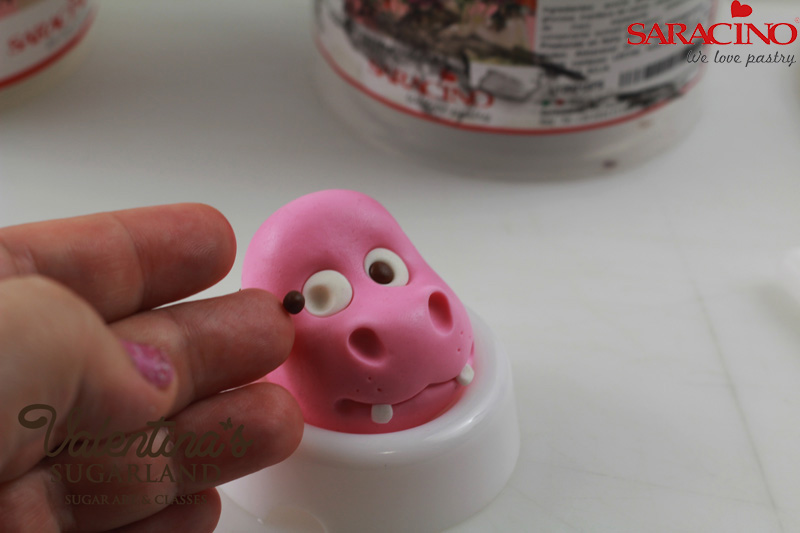
Step 21

Put small brown ball of Saracino modelling paste into the holes. Press with your finger over it.
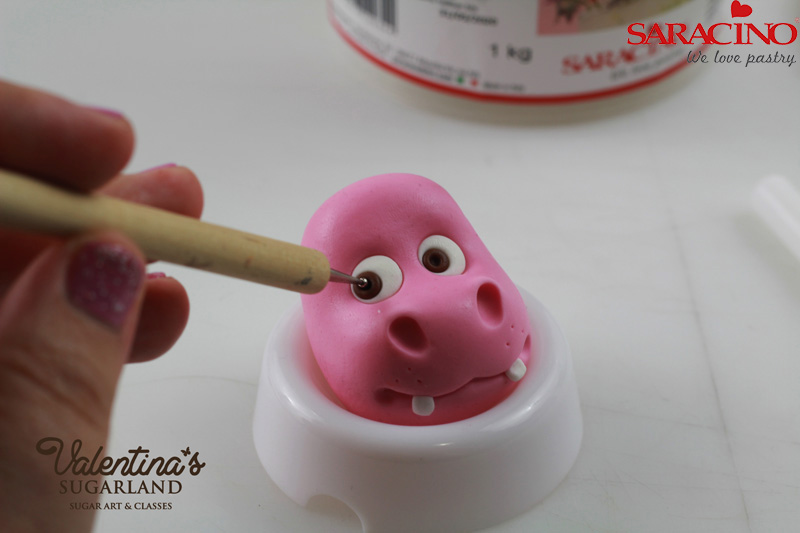
 

Step 22

Makes holes in the middle of the brown circle with smaller ball tool.

Step 23

Make tiny black balls and put them in the middle of the brown circle.
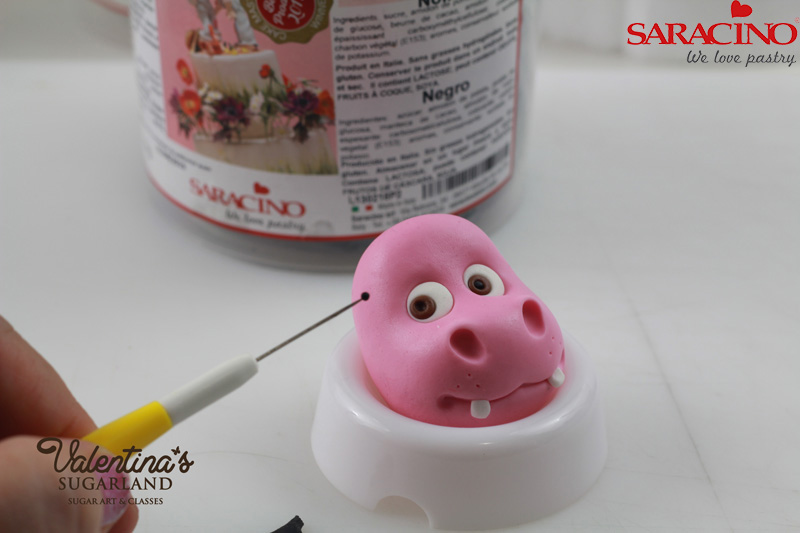
 

Step 24

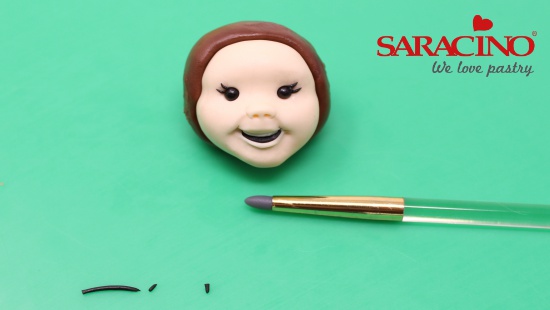
Roll small amount black modelling paste into a very thin strand and put it as eye liner on the upper eye lid. Use little water to make it stick.

Step 25

If you like put 2-3 tiny pointy strands for eye lashes.
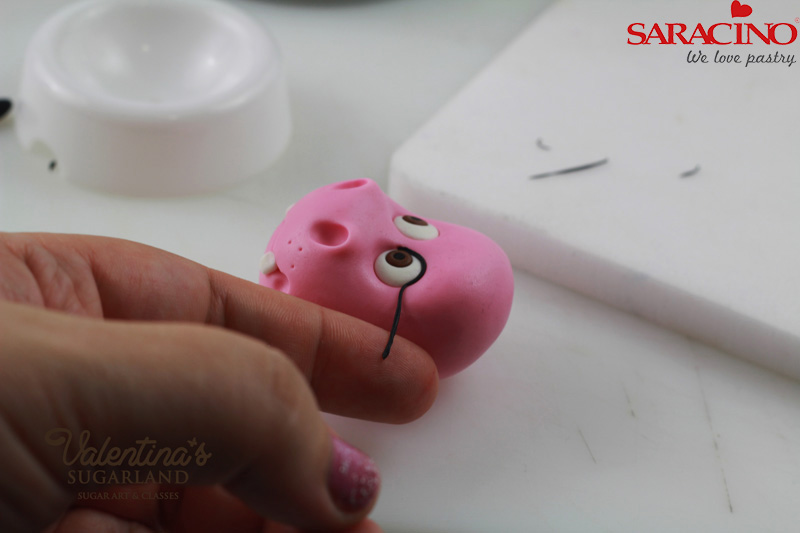
 

Step 26

Put two black strands for eyebrows.
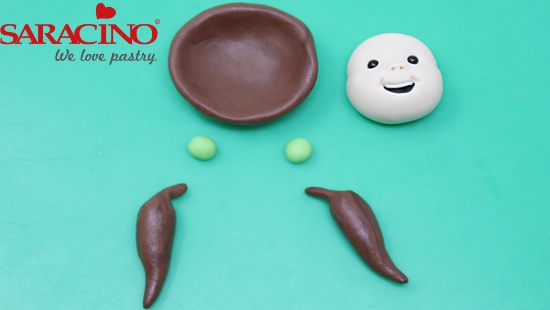
Step 27

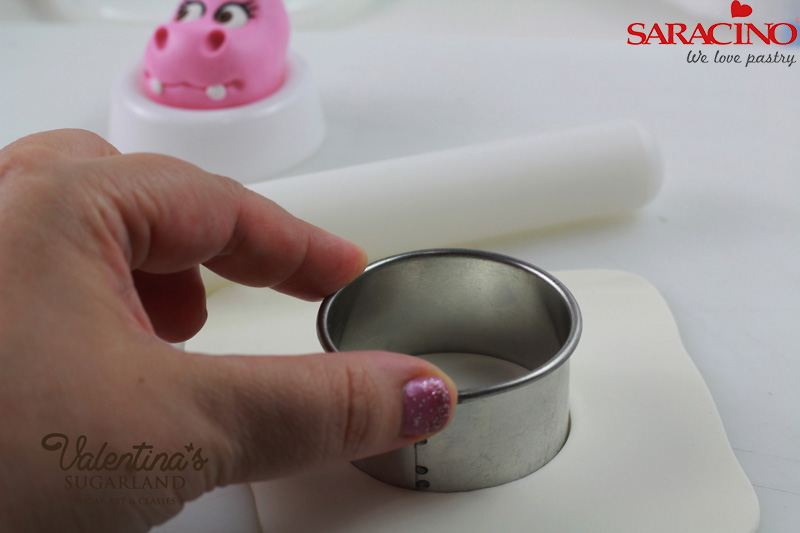
Roll out white modelling paste and cut a 5.5cm circle.
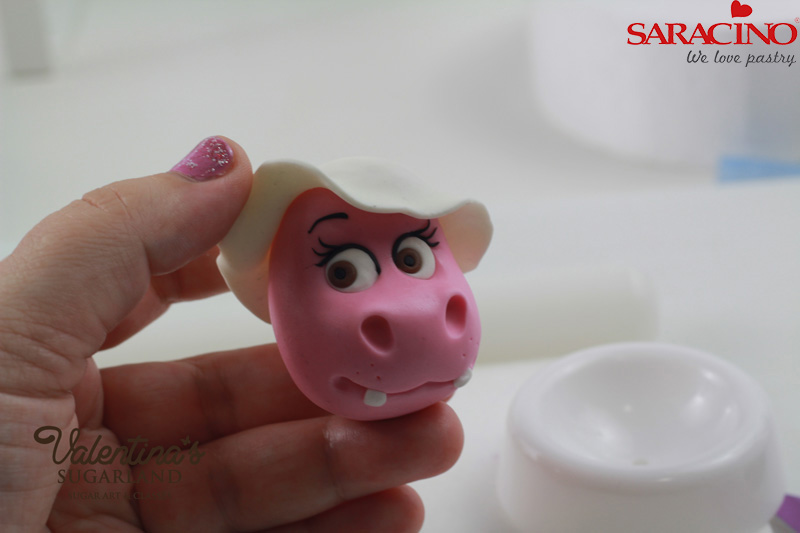
 

Step 28

Place it on the head as hat and curl one side upwards so it looks like a textile summer hat.
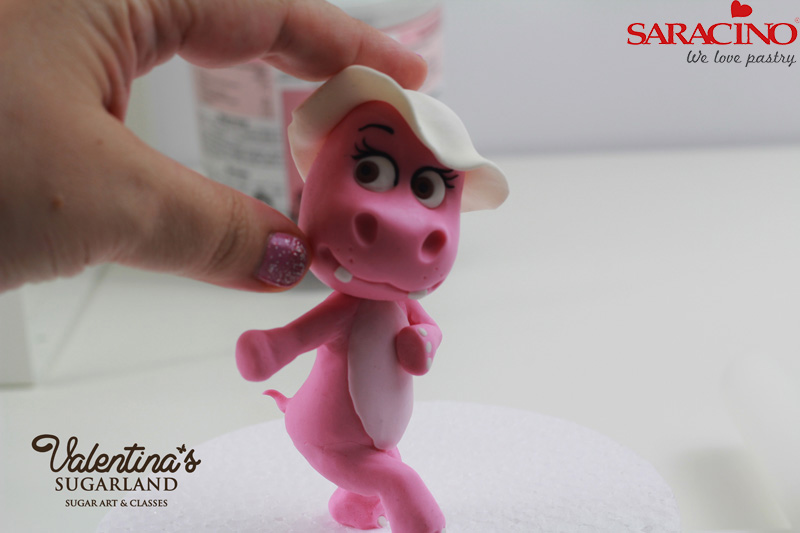
Step 29

Cut the wooden skewer so it projects about 2-3 cm above the shoulders. Apply cake gel or piping gel in the middle of the shoulders and put the head on the shoulders using the wooden skewer as support.
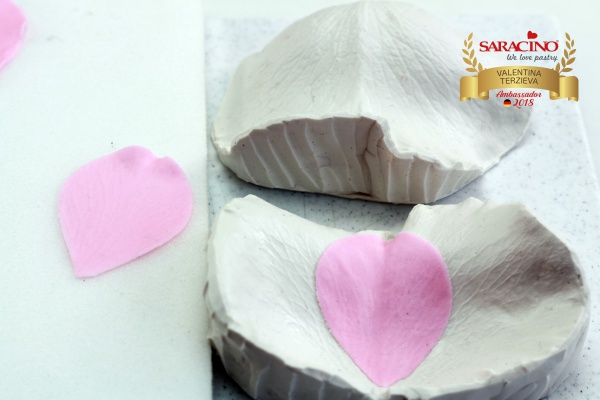
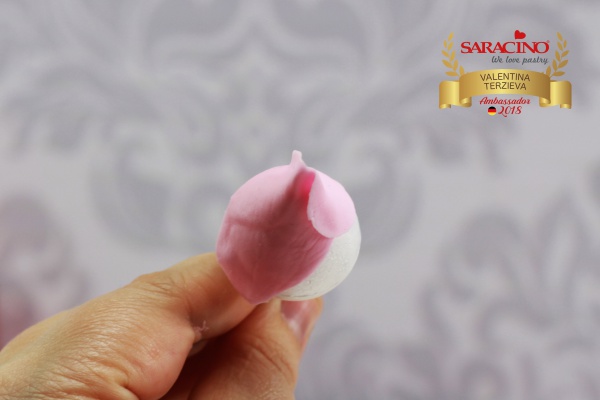
 

Step 30

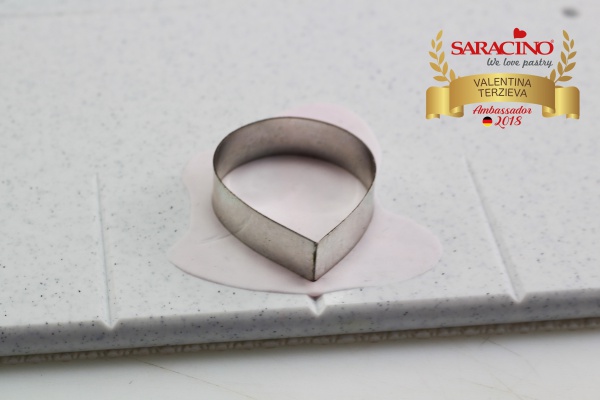
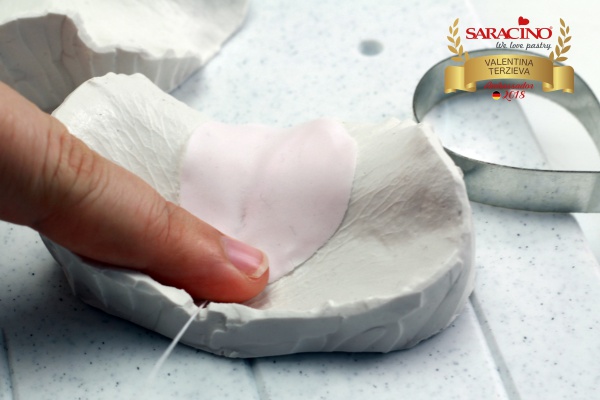
For the ears make two teardrops out of pink modelling paste and a much smaller teardrops out of the bright pink paste. Place the smaller drops on to the bigger one and press them together.

Step 31

Make two holes into the head and insert the pointier end of the ears into them.


Step 32

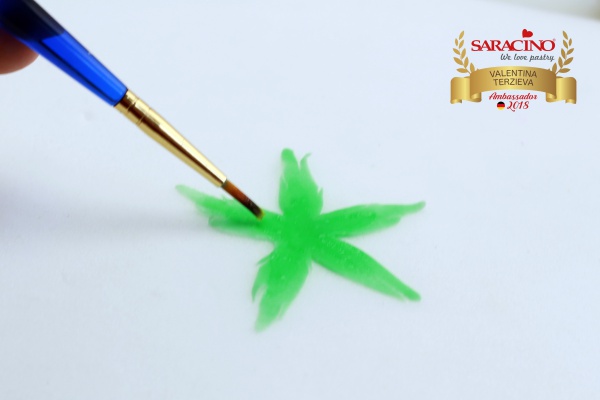
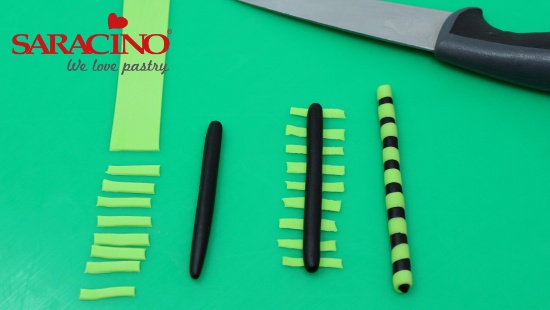
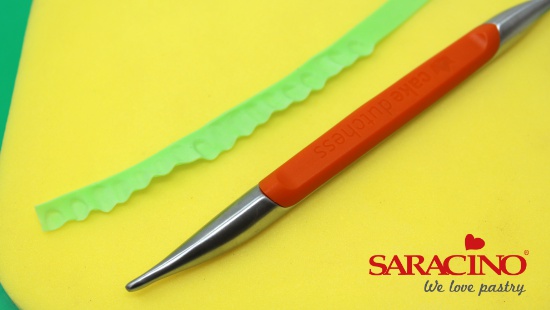
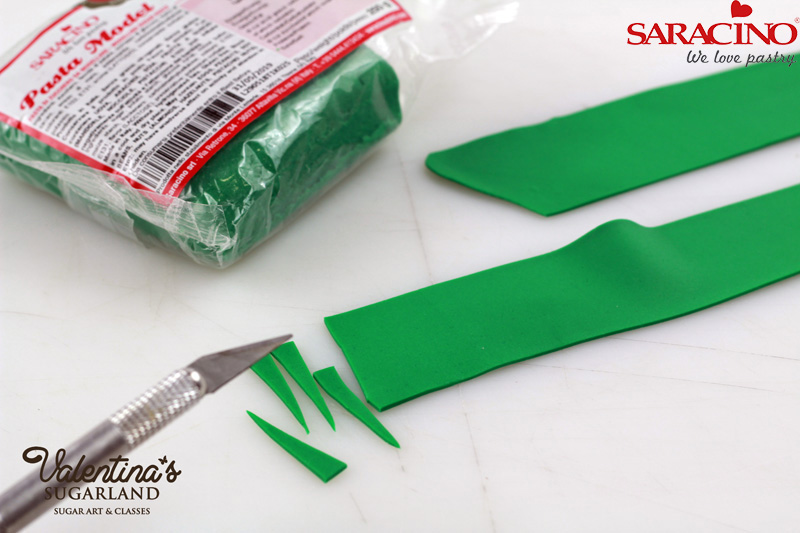
Roll out thin green Saracino modelling paste and cut with little sharp triangles with a craft knife.
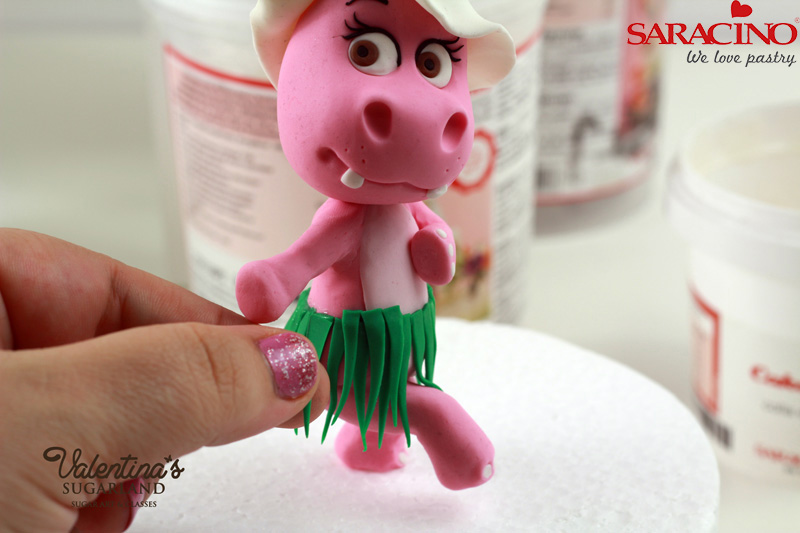
Step 33

Apply Saracino cake gel on the waist and place the triangles around the waist. I put them in three layers.
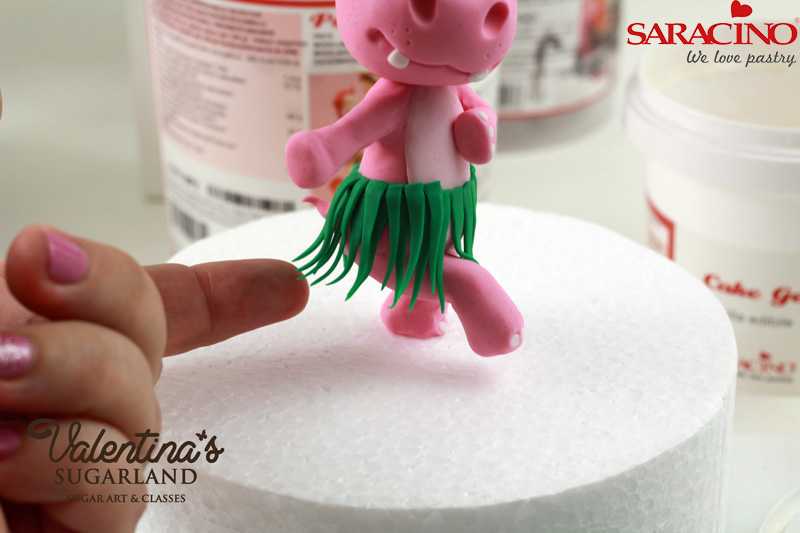
 

Step 34

You can curve the tips of the triangles on one side so it seems as they move with the Hippo’s “dancing” moves.

Step 35

Use few triangles as hat decoration.


Step 36

Cut small flowers out of white and yellow Saracino modelling paste and decorate the hat and the neck of the hippo.

Step 37

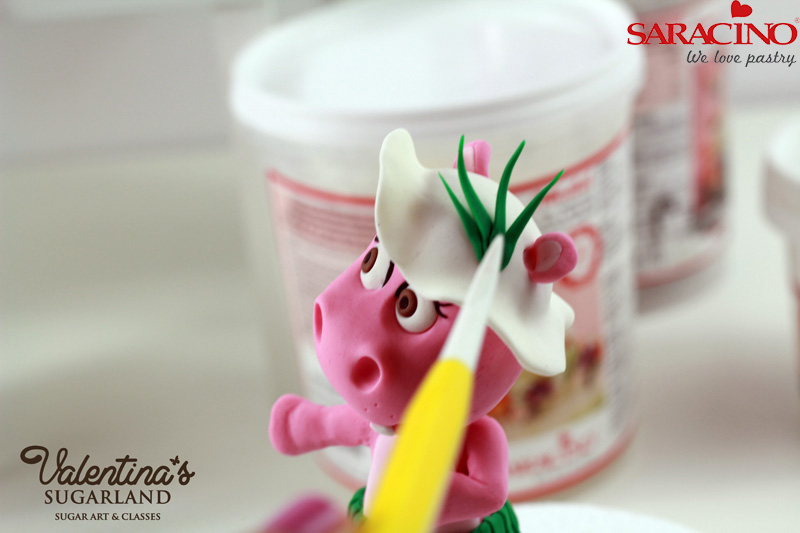
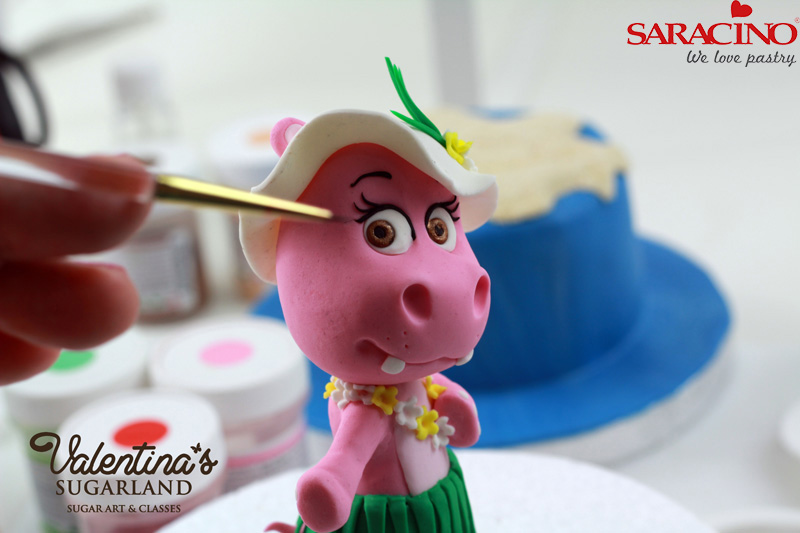
Mix Saracino bronze powder with lemon extract or alcohol and paint the brown of the eyes with the mixture. Mix white Saracino powder with lemon extract and put one white spot into each eye.


Step 38

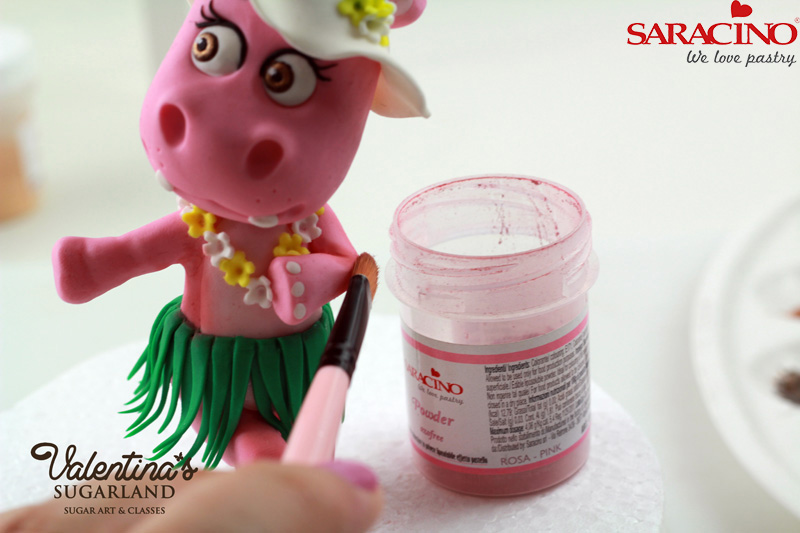
Use pink Saracino powder and a soft brush to add shadows on the elbows, on the cheeks, on the knees and on the nostrils.
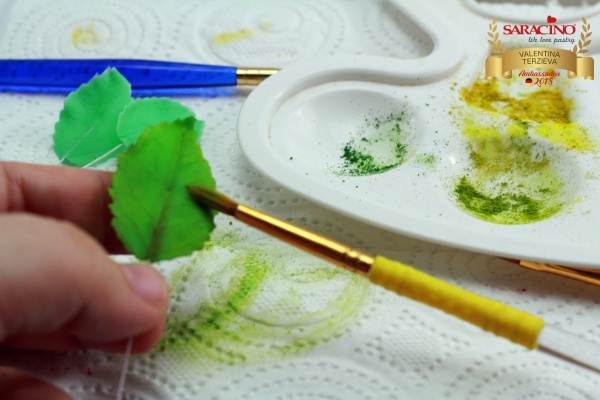
Step 39

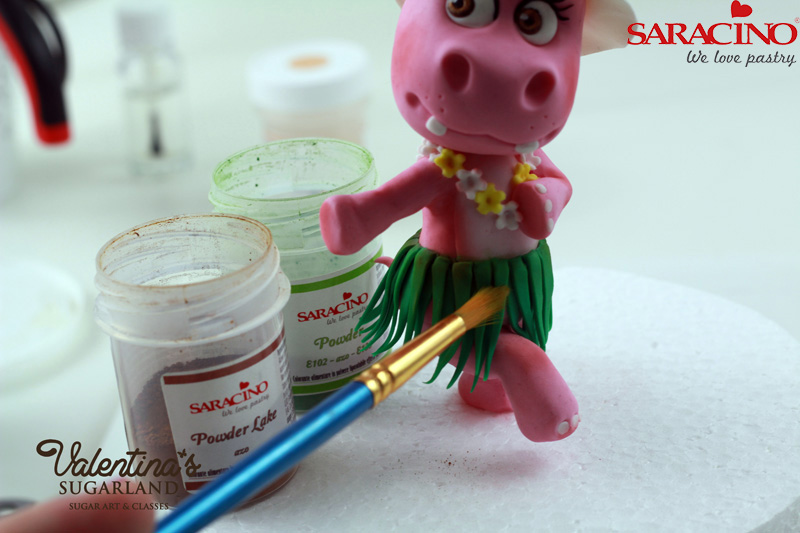
Add shadows on the skirt with brown and green Saracino dust powder
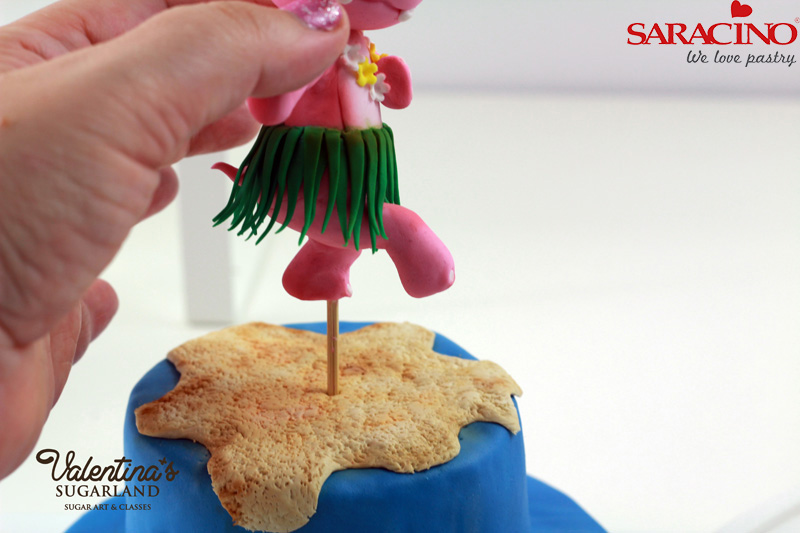
 

Step 40

Leave the Hippo to dry for at least 2-3 days before using it on a cake.

CREATE A WAFER PAPER FEATHER

CREATE A WAFER PAPER FEATHER

Author: Gisi Prekau

Skill level: BEGINNERS

You will need:

  • Wafer Paper from Saracino – 0.27 thickens
  • Saracino cocoa butter
  • Powder dust – black, brown, green, blue, yellow, orange from Saracino
  • Flower wire 24 gauge
  • Piping gel from Saracino 
  • Small scissors
  • Pencil
  • Dresden tool
  • Painters palette
  • Brush big wide
  • Fine brushes

Step 1

Choose a feather template and cut it out with scissors.

Step 2

Fold the waferpaper so that the rough side is inside. Transfer the template to the outside of the paper using a pencil.

Step 3

Prepare floral wire to a length suitable to fit the centre of the feathers and bend them slightly to give them gentle curvature.

Step 4

Coat the edible paper on the inside with piping gel using a large brush, then place the floral wire and fold. Give good pressure to glue the waferpaper well.

Step 5

Using a dresden tool push the wafer paper over the wire to form the centre of the feather. Let it dry for several hours.

Step 6

Cut out the feathers carefully with small scissors. Add texture to the feather using a Dresden tool.

Step 7

Now you are ready to paint your feathers as required.

Step 8

Melt the cocoa butter and mix with powder colours.

Step 9

Using a thicker mixture paint the darker parts of the feather. To achieve more transparent colour for the lighter sections use a thinner mix.

Step 10

I always start with a general base colour (thinner blend) and work with the details gradually. The following details are usually marked in colour and applied with a finer brush.

Step 11

The colour scheme can be made as you wish – add a fine marking outer line around the edge of the feather.

CREATE A BEAUTIFUL ROSE

CREATE A BEAUTIFUL ROSE

Skill level: BEGINNERS

You will need:

  • 50-70g Saracino Pasta Bouquet Gum Paste
  • Saracino Cake Gel or glue
  • Gel colours green and pink
  • Dust colours – pink, green, white, yellow, red
  • Floral wire green 20G and 28G
  • Floral wire white 28G
  • Styrofoam rose center 3.5cm 
  • Floral tape, green
  • Teardrop cutter 4.5cm and 5cm
  • Rose leave cutter 4cm and 3cm 
  • Veiner rose petal, large
  • Veiner rose leave
  • Calyx cutter 3.5cm
  • Cell-board with grooves
  • Foam pad
  • Ball tool, big
  • Craft knife
  • Hot Glue
  • Pliers
  • Plastic spoons

Step 1

Use a styrofoam rose center glued on the 20G green wire or make one out of 15g white Gum Paste. If you are using a gum paste center make it ahead of time and leave it to dry well.

Step 2

Colour your paste in three different shade of pink using gel colour and one shade of green. You will probably need to colour about 10-20g for each colour. 

Step 3

For the rose petals roll out the paste with the darkest colour very thin. Before rolling out apply some vegetable fat on your board, that will allow you to roll out thin. Cut out 5 petals with the 4.5cm teardrop cutter. 

Step 4

Place the petals on the foam pad and thin the edges using a large ball tool. Applying pressure roll the ball tool half on the paste and half on the pad. If needed use some cornstarch to make sure the paste will not stick to the pad or to the ball tool. 

Step 5

Place every petal in the veiner and firmly press to texture with the petal structure. Before first use of the veiner dust it with little cornstarch and dab off. Open the veiner and carefully lift the petal and place on a tablespoon to dry a bit.

Step 6

Use two petals to  cover the centre completely. Apply glue to the center and attach the first petal so it covers half of the cone. Keep one side open and slide the second petal underneath the open edge. Stick to the cone tightly.

Step 7

Apply glue to the edges of the pointed tip of the three remaining petals – like a “V”

Step 8

Add the first petal of the second row overlapping the joint of the petals of the first row. Keep the left side open. Add the second and third petal clockwise. Slide the left edge of the third petal under the open edge of the first. The petals are tight around the cone, only the upper edges are slightly open. 

Step 9

Roll out the middle colour and cut out 6 petals of 4.5cm. Thin the edges and press between the veiner as shown before. For the third row place three petals around the cone as shown in step 8. Leave the upper edges a bit more open than in row 2. 

Step 10

For the fourth row place the remaining three petal in the same way as for row 3. Curve the upper and the side edges with your finger tips. 

Step 11

Roll out very thin the lightest colour of your Pasta Bouquet and cut out 5 petals with the 5cm long teardrop cutter. Thin the edges and impress with the veiner. Place to dry on the tablespoons. Curve the upper edge with your finger tip and leave a bit longer to dry. The petals are ready to be placed on the rose when they can hold their shape and have a leathery feel.

Step 12

In the meantime prepare your last row of petals. To have more movement on those petals, you have to support them with wire and let them dry longer. Use a non stick board with grooves. Apply vegetable fat over one groove, place small amount gum paste of the brightest colour and roll out thin.

Step 13

Cut out a petal with the teardrop cutter with 5cm length.

Step 14

Cut one 28G wire in three and use one piece per petal. Place the petal with the back side up on the foam pad. Place one finger over the thicker center and insert the wire carefully with the other hand. It may help if you slightly twist the wire. Apply glue on the wire end before inserting. Now turn the petal with the right side up and using the ball tool thin the edges.

Step 15

Place the wired petal onto the veiner and press with one finger in order for the wire to bend to the curves of the veiner. Impress the petal structure as usual.  

Step 16

Carefully lift the petal out of the veiner and place it on a tablespoon.

Step 17

Curve the edges and leave at lease for 1 hour to dry. 

Step 18

If the fifth row petals are dry enough, you can assemble them around the rose. Apply “V”-like glue on the petal and place them clockwise around the cone, every one slightly under the previous one. 

Step 19

This petal row is more open and only glued to the base of the cone. Leave it for at least 30min to dry assembled like this. 


Step 20

Dust the rose centre and the edges of the petals with edible dust colours. I am using here Saracino Dust colour in pink and white, mixing the intensity depending on that which part I am dusting – darker in the center, lighter on the outer petals.

Step 21

Dust the wired petals too. Apply the dust on the edges and on the base of the petal inside and outside.


Step 22

Using flower tape put together the wired petals clockwise and always slightly one underneath the other. 

Step 23

Roll out thick green gum paste and cut out one calyx. 


Step 24

Using the ball tool go over each petal of the calyx and stretch it.

Step 25

Cut with a craft knife the top of each petal in two or three sections. Apply glue on the petals leaving the tips glue-free. 


Step 26

Attach the calyx to the rose and make sure it is sticking to the rose petals. Place small amount green gum paste behind the calyx and shape it as a half-ball.

Step 27

For the leaves roll out small amount green gum paste over the rill board and cut out one 4cm leaf. Insert a piece of 28G wire inside and thin the edges.  


Step 28

Impress with petal structure using a veiner. Make another two leaves each 3cm long and leave all three of them to dry. 

Step 29

Mix green and and yellow dust colour to achieve different shades of green. You will also need a bit of red dust. 


Step 30

Dust the rose leaves with darker and lighter green. Dust the edges with red. Dust also the calyx with these colours.

Step 31

Bind the three leaves with florist tape, the biggest leaf is in the middle, the smaller ones lower and on the sides. Bind rose and leaf branch together. 


TRICK OR TREAT CUTE WITCH

TRICK OR TREAT CUTE WITCH

TRICK OR TREAT CUTE WITCH


You will need:
  • 80g sugarpaste: brown
  • Saracino pasta model: (24g skintone; 60g light green; 30g brown; 210g orange; 20g; 150g black)
  • Edible glue
  • Cornflour puff
  • Saracino dust colours: yellow; orange; brown; rose
  • 4mm dragees x 2: Drageekiss black
  • Small rolling pin
  • Small sharp knife
  • Palette knife
  • No.8 filbert paintbrush
  • Scissors
  • No. 0 round silicone shaper (cerart)
  • Hard point silicone shaper (cerart)
  • Large celpin
  • Dresden (PME)
  • Cake Dutchess modelling tool set
  • 15cm cake drum
  • Scalpel
  • Kebab wooden skewer
  • 5.5cm diameter polystyrene ball
  • Celpad

Step 1

Pin the brown sugarpaste straight onto the damp round cake drum. Trim the excess from the edge and texture firmly with a nailbrush. Reserve the trimmed paste.

Step 2

Use a sharp knife to cut a hollow slightly narrower than the top of the polystyrene ball.

Step 3

Roll out 170g of orange Saracino and cover the polystyrene ball with the hollow at the top. Blend the seams underneath and create the hollow with a celpin.

Tip

The paste will adhere to the polystyrene either by brushing with water or with piping gel.

Step 4

Roll the celpin around the ball, leaning into the paste to create the hollows. Blend the joins at the base and smooth.

Step 5

Add as many segments as you wish using the celpin. Use the narrow end of the Dresden to enhance them.

Step 6

Smooth over the grooves with a small bone tool. Create the stalk from a mushroom shape of 2.5g of the brown sugarpaste and press the wide end into place in the hollow. Mark the grooves with the Dresden tool.

Step 7

Create a small pumpkin from 40g of Saracino by first rolling into a ball, then creating the indents with a narrow paintbrush handle. Use 1g of brown sugarpaste to make the stalk as before.

Step 8

Roll two legs from black Saracino. Each leg is to be 10cm long and weigh 2g. Repeat to make two arms, this time 6cm long each and weighing 1.5g each. Roll out light green Saracino and cut narrow strips as in the image. Wrap around the arms and legs and roll to fix.

Tip

Saracino that is still soft does not need edible glue to stick to itself.

Step 9

Create the body using 28g of light green Saracino rolling to a sausage measuring 5cm tall and 2.5cm wide. Roll out black Saracino and cut narrow stripes. Wrap around the body and trim the excess. Roll the body to blend.

Step 10

Thinly roll out more light green Saracino and cut a strip 24cm long by 1cm wide. Place on a celpad and use the orange Cake Dutchess tool wide end to press onto the paste and pull. This will leave a frill-like texture. Leave to rest while you complete the next stage.

Step 11

Roll out 50g of black Saracino to 25cm long and minimum of 7cm wide (we will trim this to size shortly). Place on top of the green frill and press to attach. Find three similar width handles and create the pleats by sliding one handle underneath the paste and placing a handle on top either side, the gently press the outer handles and slide towards the middle.  (See image). Repeat along the length of the paste.

Tip

Work quickly when creating the pleats, but if the paste begins to dry out, gently warm with a hair dryer

Step 12

Gently tighten the pleats by pushing the paste together and trim with a smooth bladed knife. Reserve the trimmed sections without damage in order to create the back of the skirt.

Step 13

Bend the two legs one third of the way down and place onto the pumpkin. Place the body on top and push a wooden skewer down through the polystyrene ball. 

Safety Tip

Cut the skewer to slightly longer than needed and push a brightly coloured spare piece of paste on top.

Step 14

Lightly brush edible glue around the waist band and gently wrap the skirt around, pressing gently into place. Cut to fit with the scissors and add the reserved pleated black paste at the back if there is a gap. Roll a narrow sausage of black Saracino as a waistband and use the narrow end of the orange Cake Dutchess tool to press into the waistband above each pleat.

Step 15

Use the cone end of the green Cake Dutchess tool and create a hollow to fix the arm into. Roll 1.5g of skin Saracino into a sausage and fix into place for the neck.

Step 16

Pinch the arms over at the top as in the image and cut each to 6cm long. Create the hands from 1g of skin Saracino each. Roll to a double ended cone and slightly flatten one end. Use a scalpel to cut away a wedge to separate the thumb and pinch the top to a point. Hollow the end of the arms and press the hand into place. Lift as in the image.

Step 17

Glue inside the arm sockets and fix the arms into place with the palms down on the pumpkin.

Step 18

Roll out 50g of black Saracino and cut out the cloak as in the template. Turn over and curl back the straight sides.  Use a handle to lift pleats from the curved side.

Step 19

Glue slightly around the shoulders and wrap the cloak around. Use the handles to lift the cloak up and give movement.

Step 20

Thinly pin out more black Saracino and cut very narrow strips. Attach two as strings at the opening of the cloak. Bend two more into loops and attach with edible glue. Press the paintbrush handle onto the knot area to fix. Cut out the collar as in the template.

Step 21

Glue around the base of the neck and add the collar with the straight side at the bottom. Curl back the fronts.

Step 22

Cut any excess off the legs and pinch to a point. Cut 1g of black Saracino and half and roll each into a ball. Open up the ball with the pointed end of the green Cake Dutchess tool and place the tool back inside, pressing against the work board repeatedly to create the frilly sock shape in the image. Roll 1.2g of black Saracino into a pointed cone, press the knife end in for the heel. Repeat for the other boot.

Step 23

Fix the sock onto the base of the legs. Push the cone tool into the top of the shoe, glue and push the sock into the shoe. Fix in place against the pumpkin with a little edible glue.

Step 24

Roll 20g of skin Saracino into a slight egg shape. Press the handle of the no.0 round Cerart tool. Smooth over the tool lines with fingertips.

Step 25

Stroke to lift up a little paste to form the nose. Round off with the no.0 round tool. Smooth over with fingers.

Step 26

Gently push the hard point tool in for the nostrils.

Step 27

Push the two black dragees in for the eyes, first with a finger, then firmly into place with the no.0 round tool.

Step 28

Open the mouth by pushing the wide end of the Dresden gently into the face first of all straight, then tilt from side to side to create the straight line of the upper lip.

Step 29

Fill the mouth with a small banana shape of black Saracino. Use the Dresden tool to smooth it into place.

Step 30

Roll a tiny sausage of white Saracino and press against the underside of the top lip.  Indent the corners of the mouth with the broad end of the Dresden.

Step 31

Roll a ball of 21g of brown Saracino and hollow so that the head can sit in the hollow. Roll the bunches from 4.5g each of brown Saracino in the shapes as in the picture. Cut 1g of light green Saracino in half and roll two balls of paste.

Tip

To attach tiny pieces of paste, glue the area they are to fix to, and lift the paste into place with a damp paintbrush

Step 32

Gently push the head into the hollowed brown paste and press into place to fix. Narrow the chin by pressing either side at the base. Mark the two lines either side of the mouth by stroking with the no.0 round tool, then stroke around the lower part of the mouth to create the lip. Add eye lashes using tiny teardrops of black Saracino. 

Step 33

Push the head onto the skewer allowing the skewer to go all the way through for support. Use the Cake Dutchess cone tool to create hollows where the hair bunches will go. Roll the green balls into teardrops, insert into the hole and hollow those before pushing the bunches into place.

Step 34

Add tendrils to frame the face and a fringe from narrow sausages of brown saracino.

Step 35

Trim off the excess kebab skewer. Dust the lips and cheeks with saracino rose dust and a no.8 filbert brush.  Dust the smooth segments of the pumpkin with yellow. Dust the indentations first with an orange and red mix, then with brown at the base.

Step 36

Roll 43g of black Saracino into a broad cone shape.

Step 37

 Press down the lower third of the cone to broaden and continue to flatten against the work board to create the brim of the hat.  Trim the brim to a circular shape with a scalpel. Bend over the tip of the hat and add indentations for character.

Step 38

 Hollow out the inside of the hat so that it fits over our little witches head and fix into place with a little edible glue.