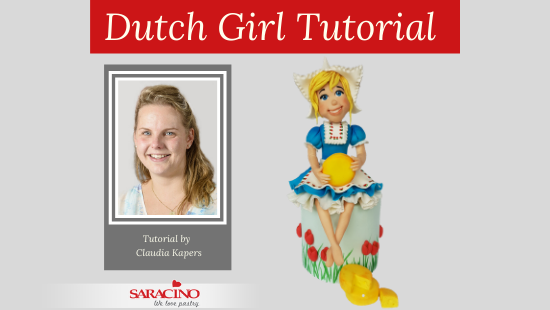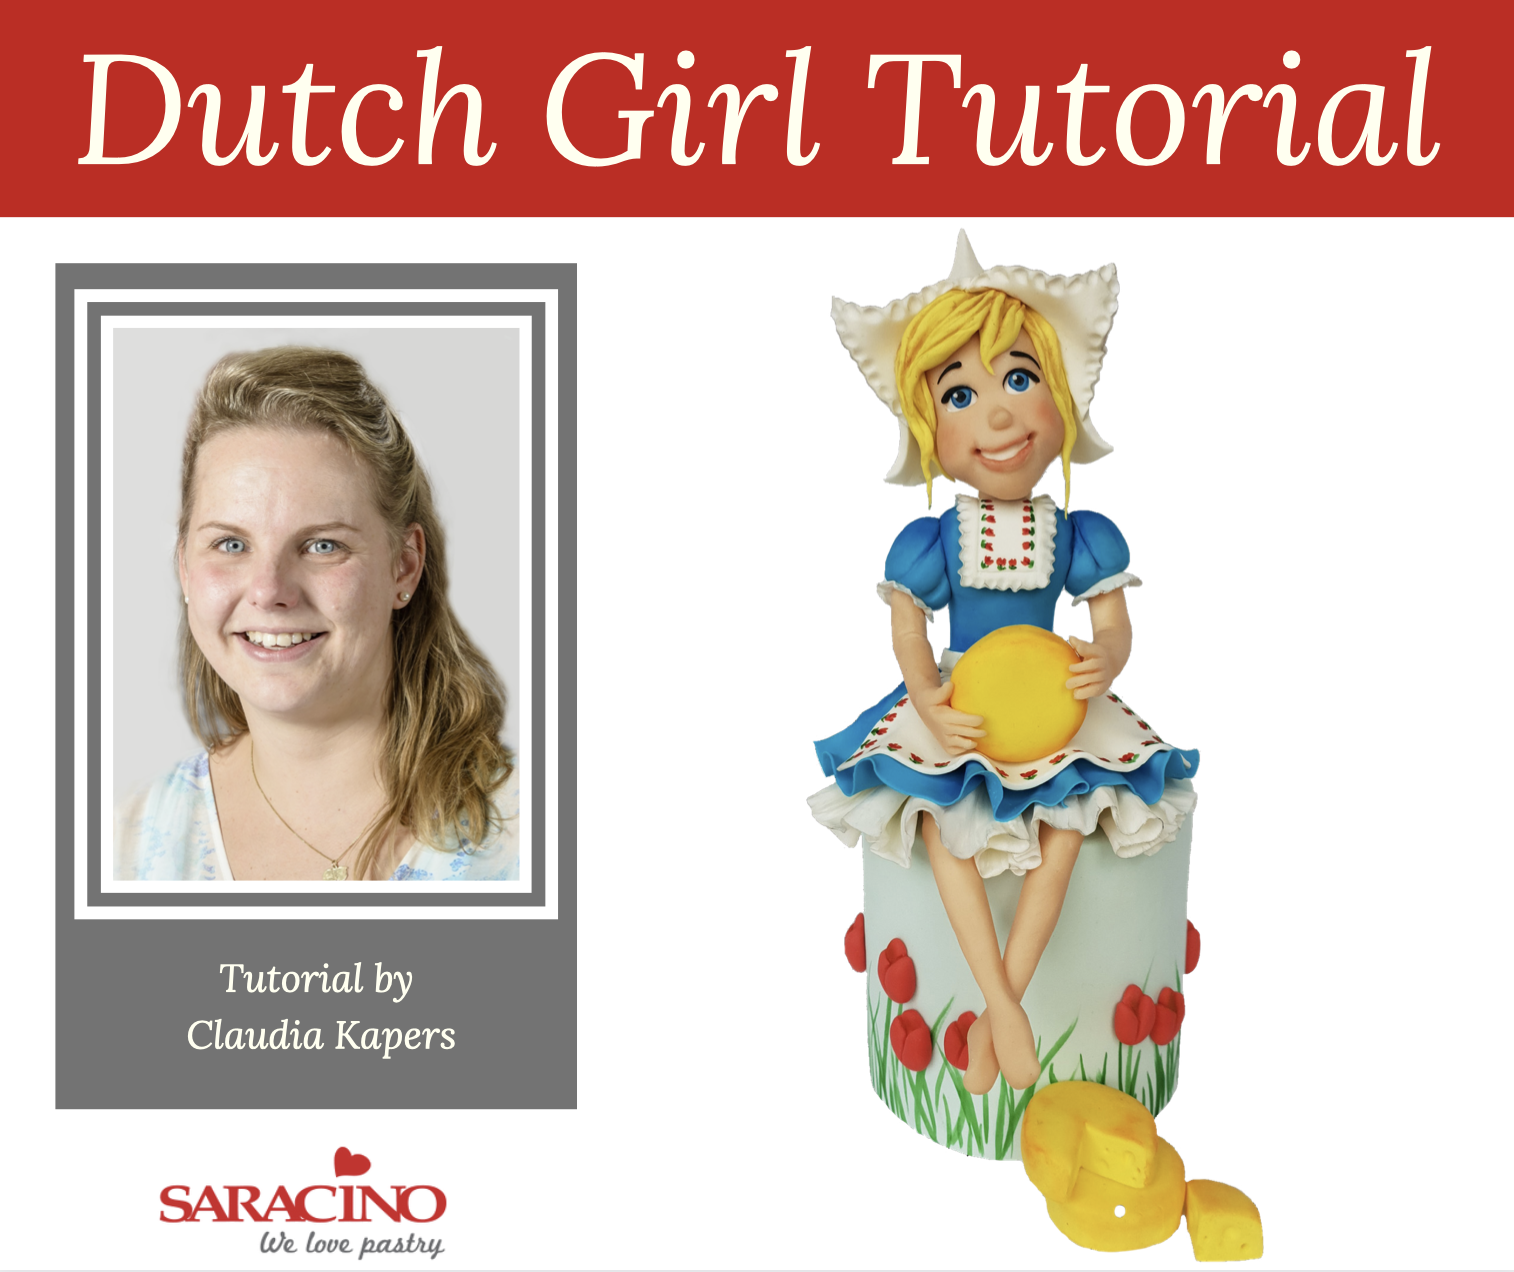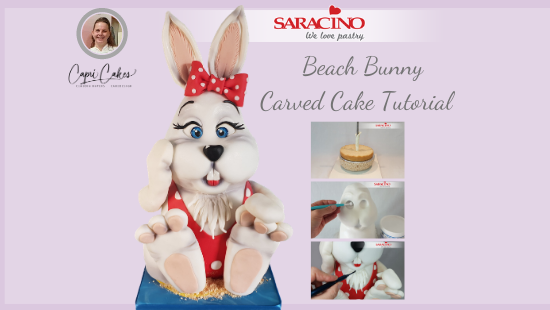
BEACH BUNNY CARVED CAKE TUTORIAL
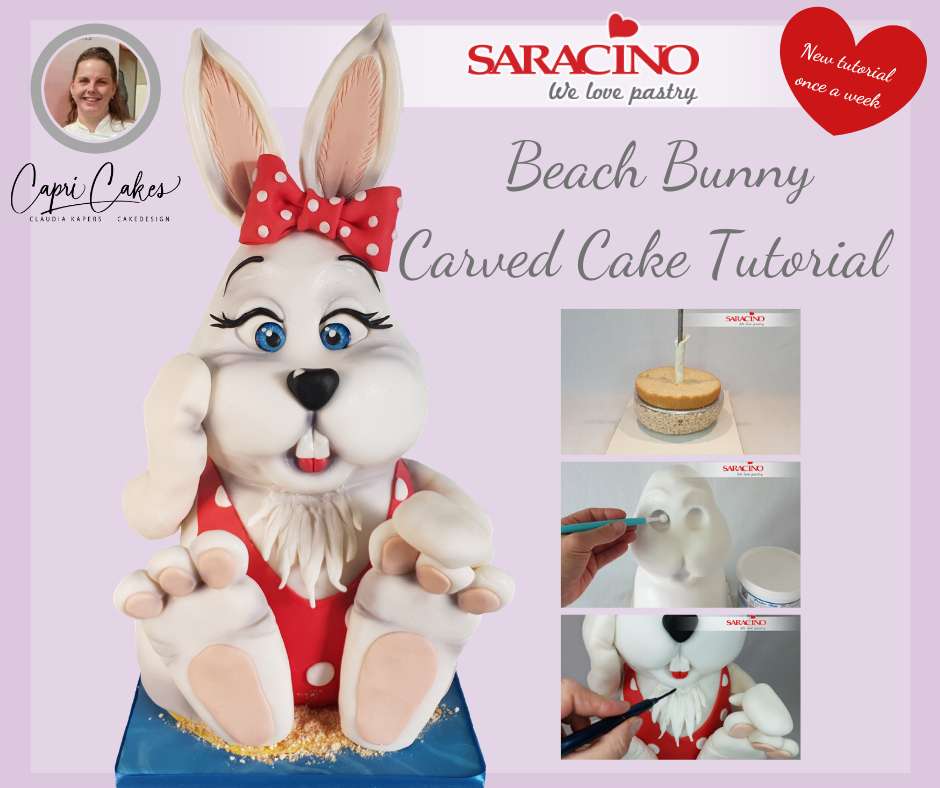
Author: Claudia Kapers
FB: Claudia Kapers
Skill level: INTERMEDIATE
How to make a perfect ganache:
Place 750g Saracino chocodrops and 250ml whipping cream. Bring whipping cream to a boil. Pour on the chocolate drops and let stand for a minute. Stir well until all drops are dissolved. Pour into a sealable container and let stand for 24 hours. Heat the required amount in the microwave. Be careful not to make it too thin. Chocolate spread is the ideal consistency.
You will need:
For Stainless Steel armature construction
- 8mm threaded rod 20cm long.
- 5 x 8mm stainless steel washers
- 5 x M8 stainless steel nuts
- 2 x spanner size 13
- MDF or Wooden Board 25 x 20cm
- Cake boards diameter 15cm and 10cm and 3mm thick
- 2 x cake diameter 15cm and height 10cm
- Ganache 1kg
- Sturdy filling as desired
For the Cake you will need
- Pasta Top white 1400g
- Model chocolate white 1050g
- Pasta Model white 35g
- Pasta Model red 250g
- Pasta Model black 10g
- Gel colours: yellow, blue and skin
- Dust powder colours: white, black and blue
- Airbrush colours white and black
- Saracino Cakegel
- Rice krispies 150g
- Marshmallows 150g
- Butter 30g
- 2 x tea biscuit
- Uncooked spaghetti
- Modelling tools Cerart
- Precision knife
- Rolling pin
- Ball tool
- Brushes
- Pallet knife
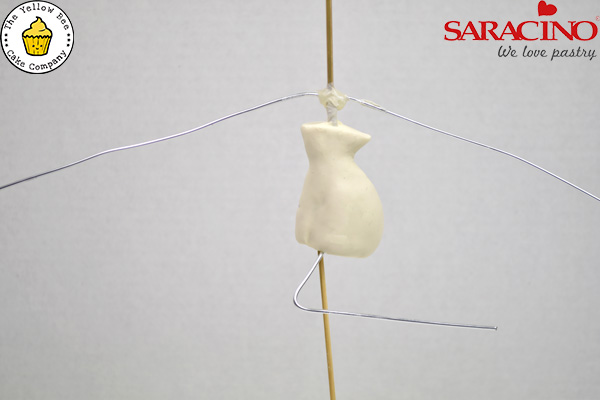
- Two wooden skewers
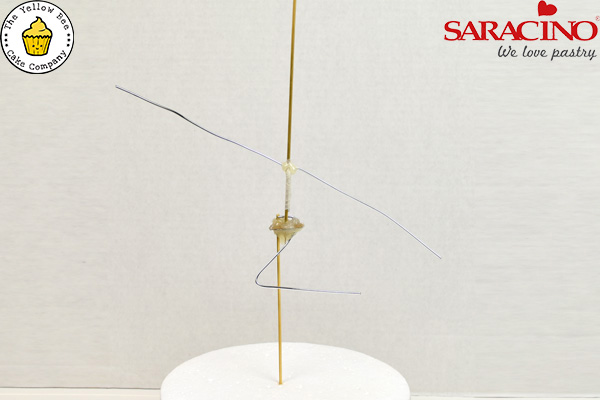
Step 1
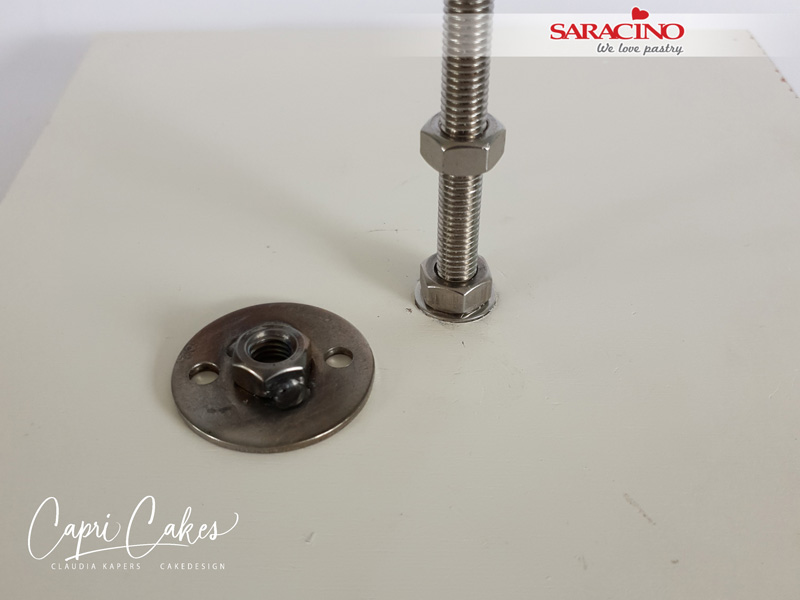
Take a 20 x 25 centimetre wooden board or MDF board. Ideally use a stainless steel baseplate in the middle of the board. This will alleviate the need to drill etc.
If you are unable to purchase a baseplate type fixing you can drill a 9mm hole in the middle of the board. Attach an 8mm stainless steel threaded rod. Make a recess on the bottom of the board so the nut is not proud of the underside of the board. Use stainless steel washers under the nuts. Tighten everything firmly.
Place a piece of felt at the bottom of the board at each corner.
Step 2
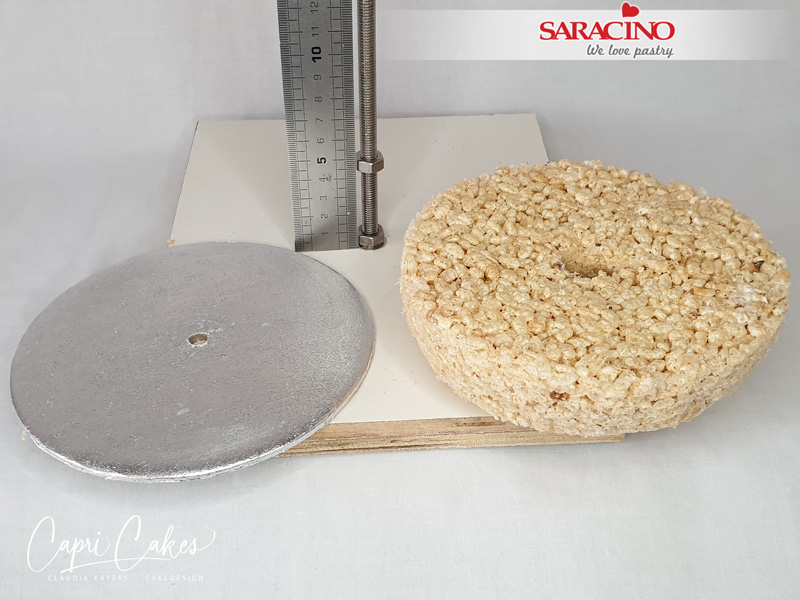
Using your 15cm cake board drill a 8mm hole in the centre.
Heat 150g of marshmallows and 30g of butter in the microwave or pan, add 150g of rice Krispies and make a dish shape 5cm high. Make a hole in the center through which the threaded rod will pass.
Now place a nut on the threaded rod at a height of 5cm.

Step 3
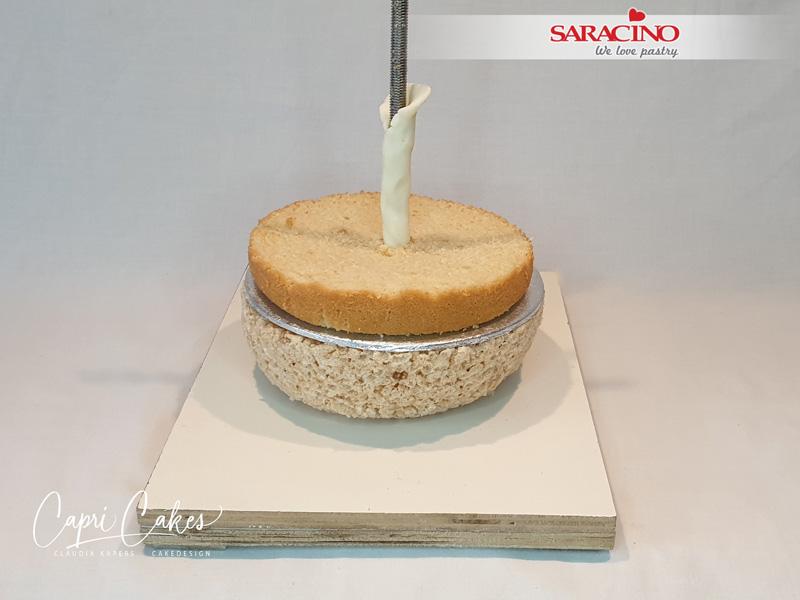
Slide the rice krispies down over the threaded rod. If necessary, trim the rice krispies around with a sharp knife. Now place a stainless steel washer on the nut and on top of the cake board. As we have a rice krispie base, the cake board does not need to be secured.
Step 4
Line the threaded rod with a small amount of modelling chocolate to about 10cm height.
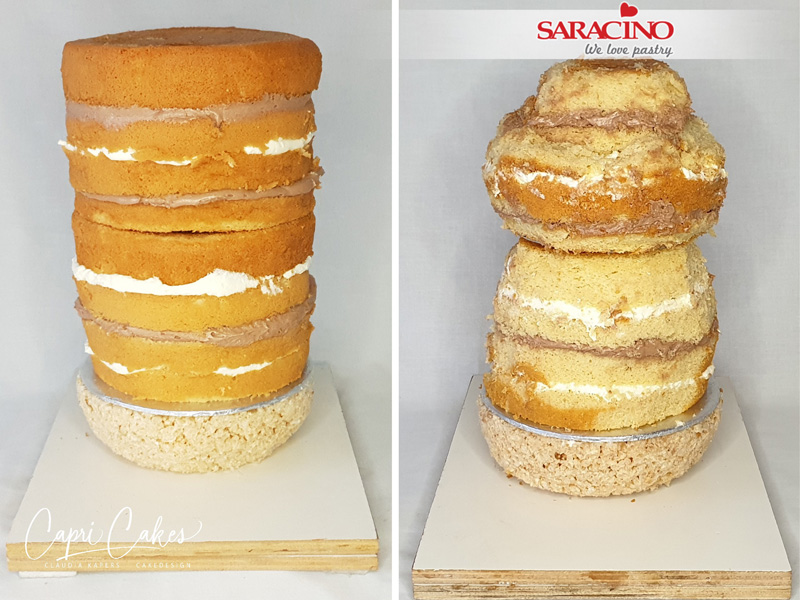
Cut a hole of 1 cm diameter in the middle of each cake layer. Stack the cake layers over the threaded rod and put a nice filling of your choice between the layers.
TIP: Use a firm filling otherwise you may get settlement and bulges in your bunny. Swiss meringue buttercream, ganache, jam or normal buttercream are ideal.

Step 5
Take a cake board with a diameter of 10cm and make a 8mm hole in the middle. Place a stainless steel washer and then nut on the threaded rod from the top. Tighten well and coat the exposed portion of the threaded rod and nut with a small amount of modelling chocolate.
Step 6
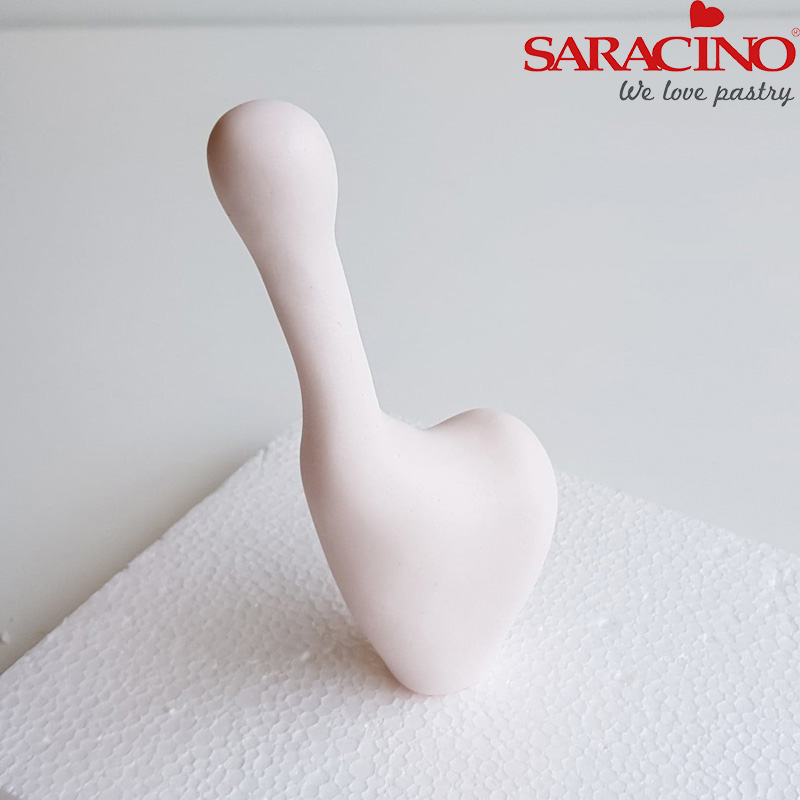
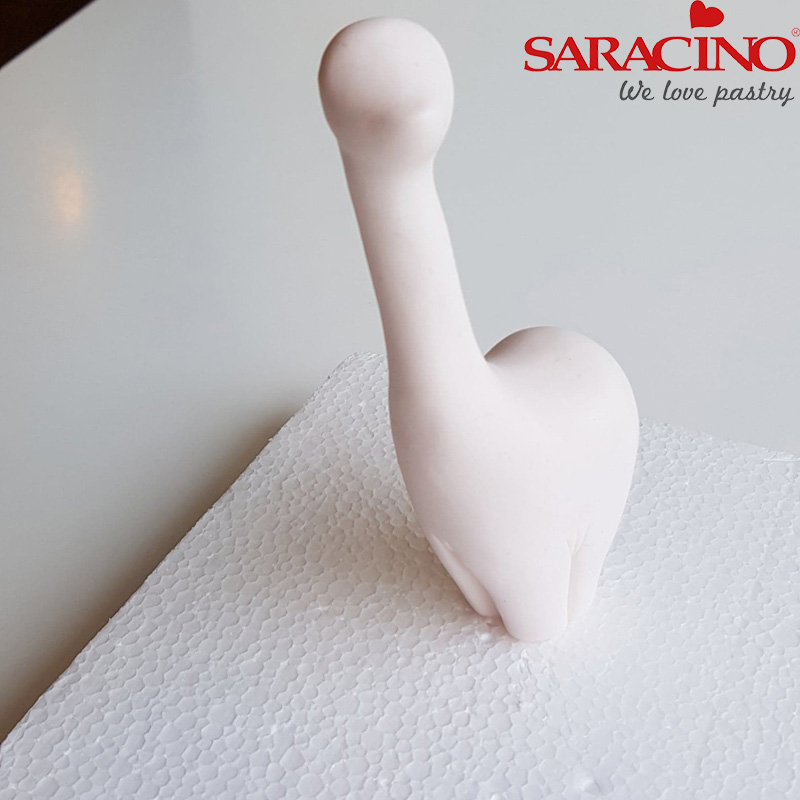
Place the next cake layers over the board with your chosen filling. Chill the cake in the refrigerator for at least an hour. Cut the cake into the desired shape as shown.
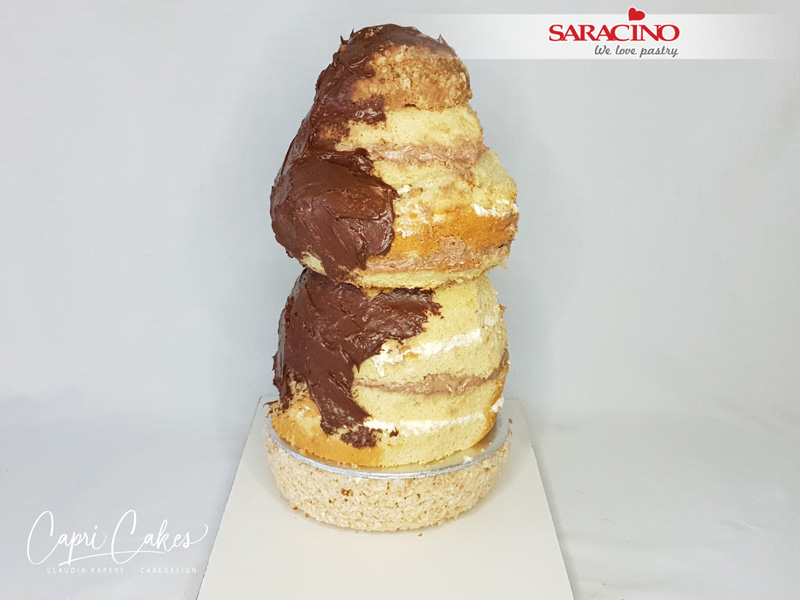
Step 7
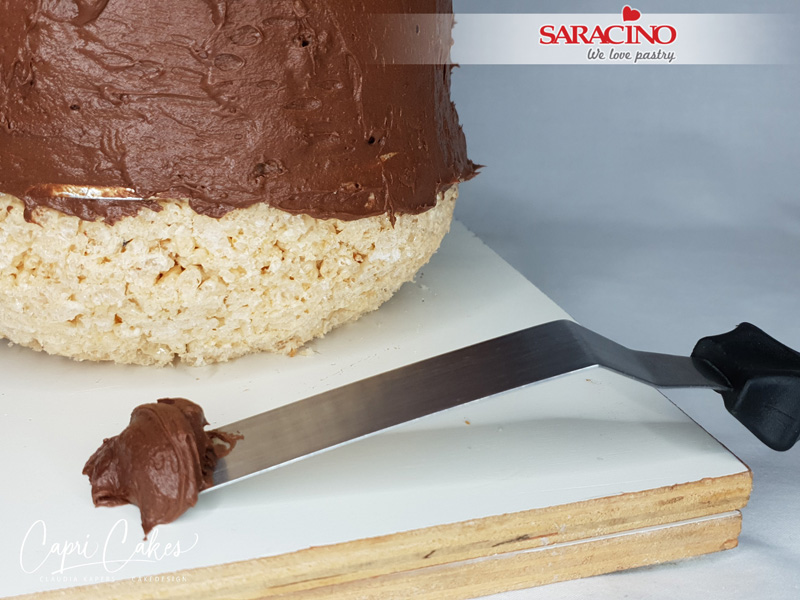
Using the carved leftovers raise the cake as shown. Then cover with ganache.
Step 8
Also cover the rice krispies with the ganache.
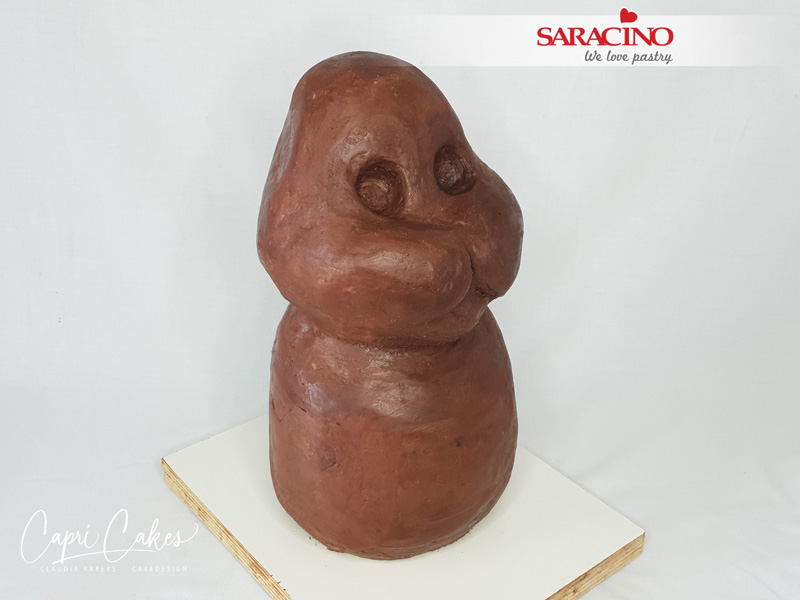
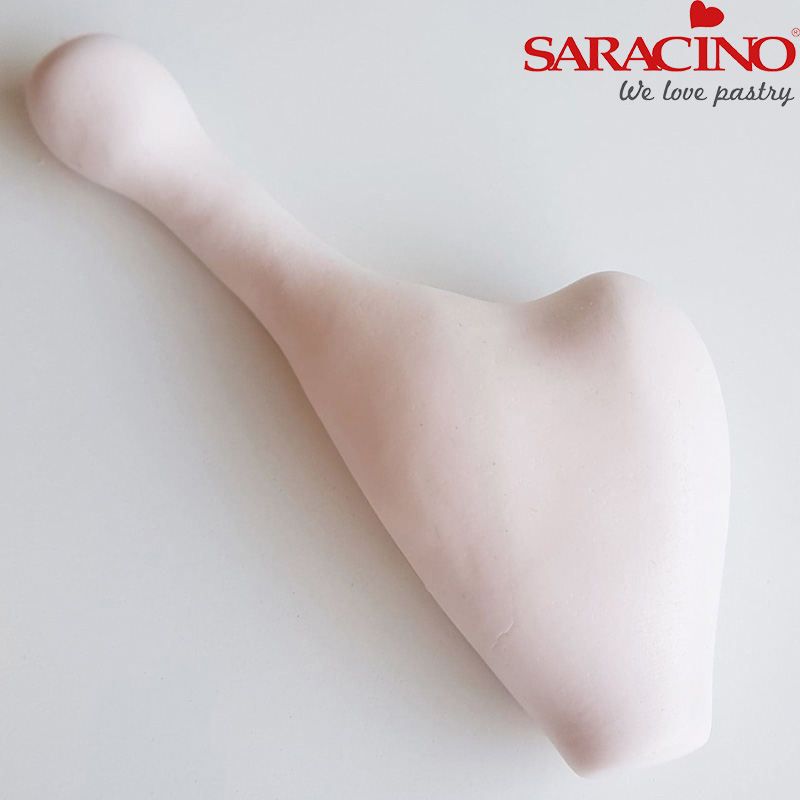
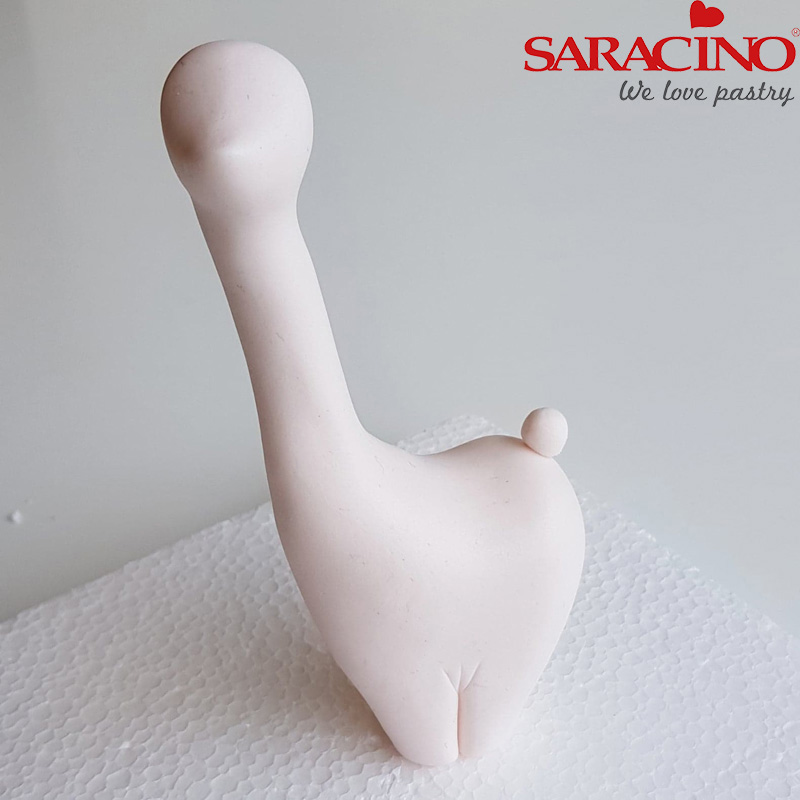
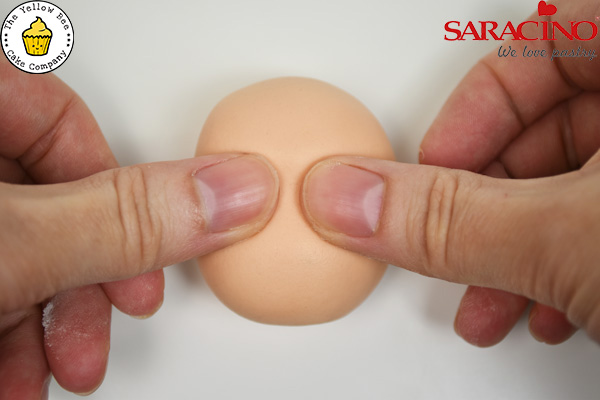
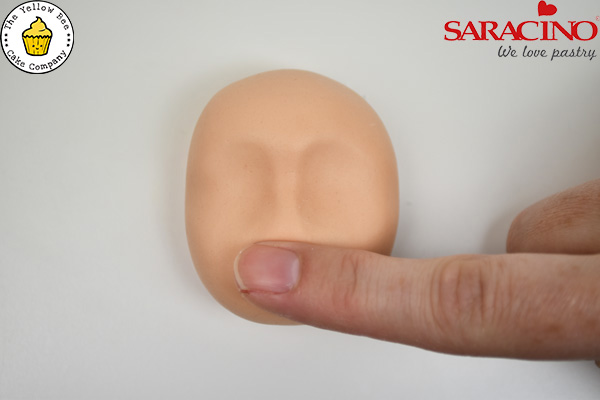
Step 9
Make sure to form the eye sockets and the snout into the desired shape. Put the cake into the refrigerator and let it stand for at least three hours to go firm ready for the next step.
Step 10
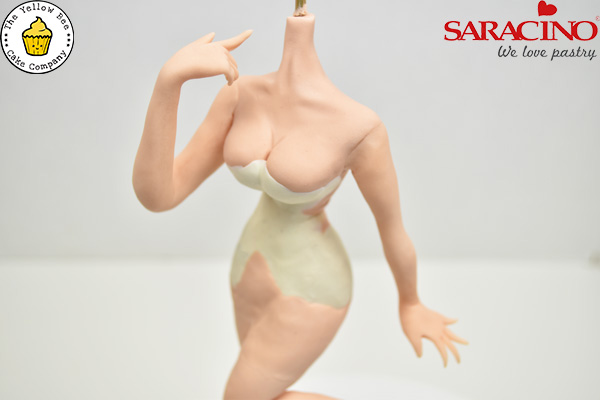
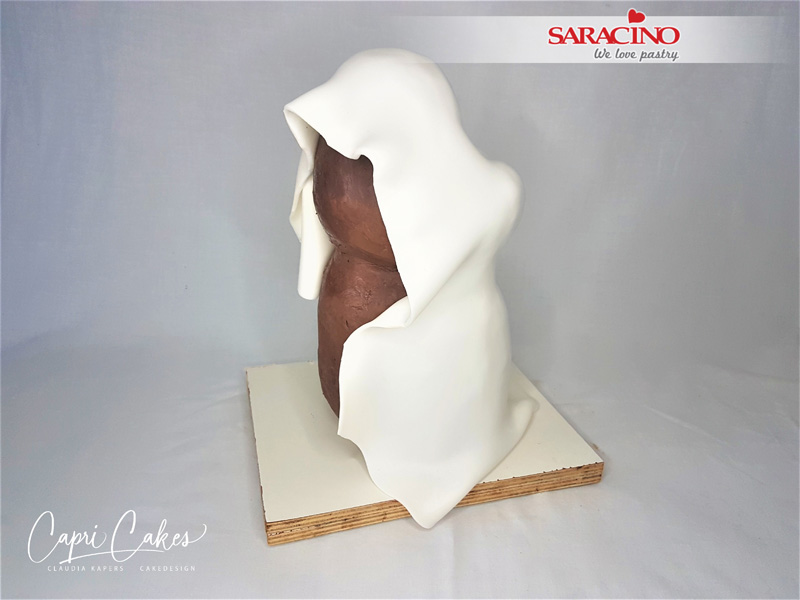
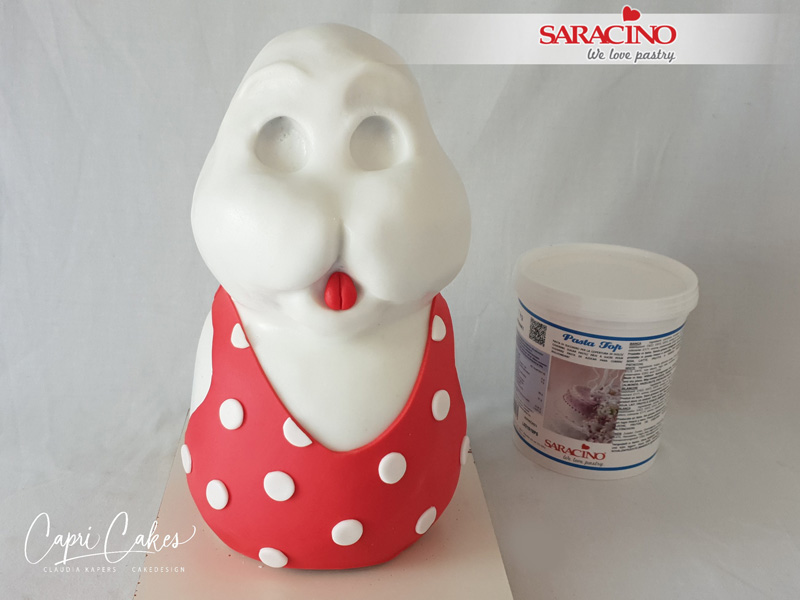
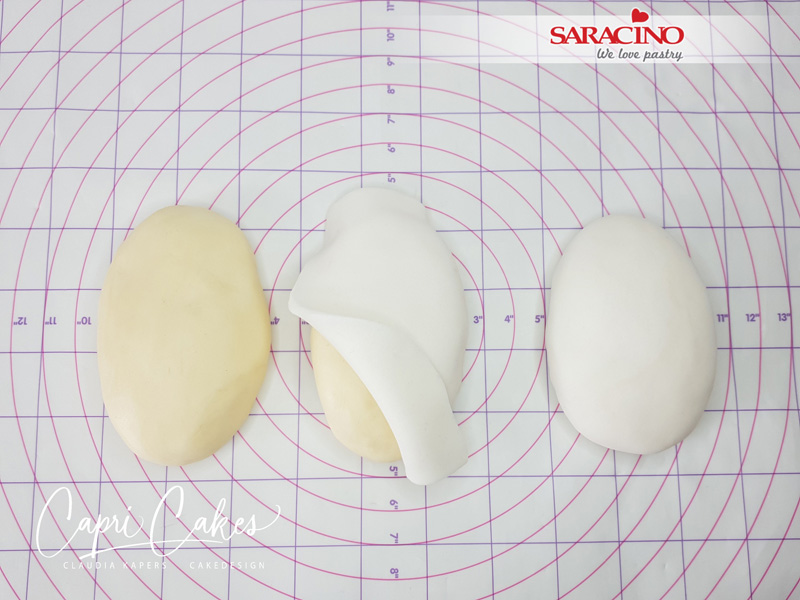
Take 750g of white Pasta Top and knead it until pliable and ready to work. Roll out thinly and cover the rabbit. Start at the front of the rabbit and finish at the back. Smooth seams neatly away with your cake smoothers or fingers.
TIP: Due to the great elasticity of the paste, you can stretch and blend the paste at the back until it closes so you see no joint. All excess paste can easily be cut away with scissors.
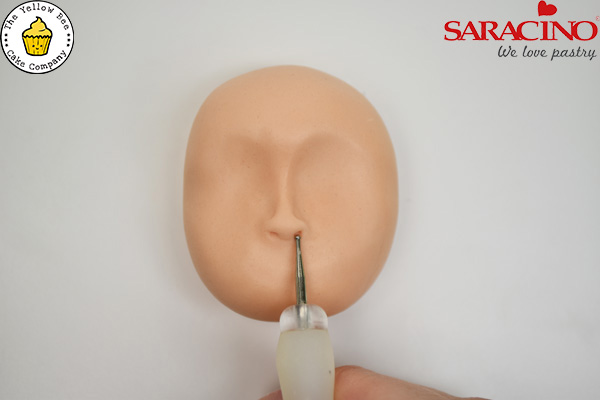
Step 11
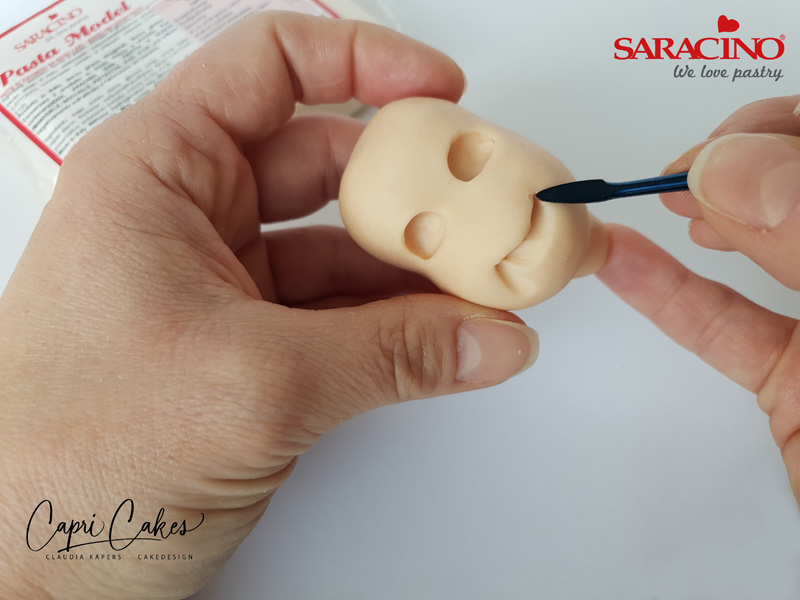
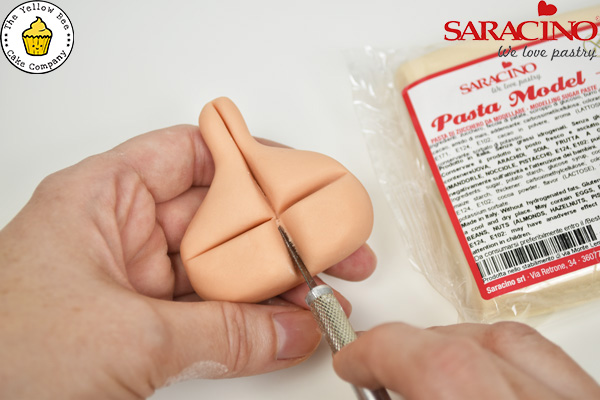
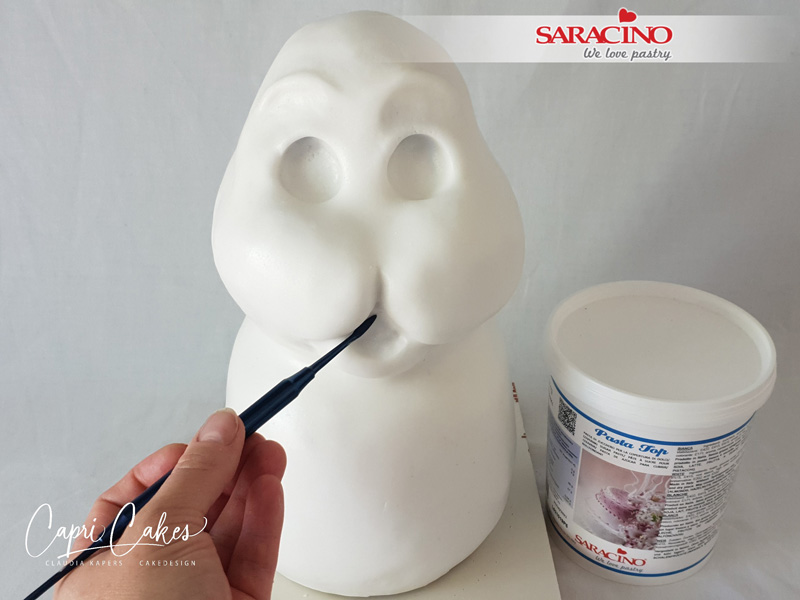
Use a ball tool to form the eyebrows. Use your Dresden tool to shape the lines of the snout. Using your ball tool shape the mouth.
Step 12
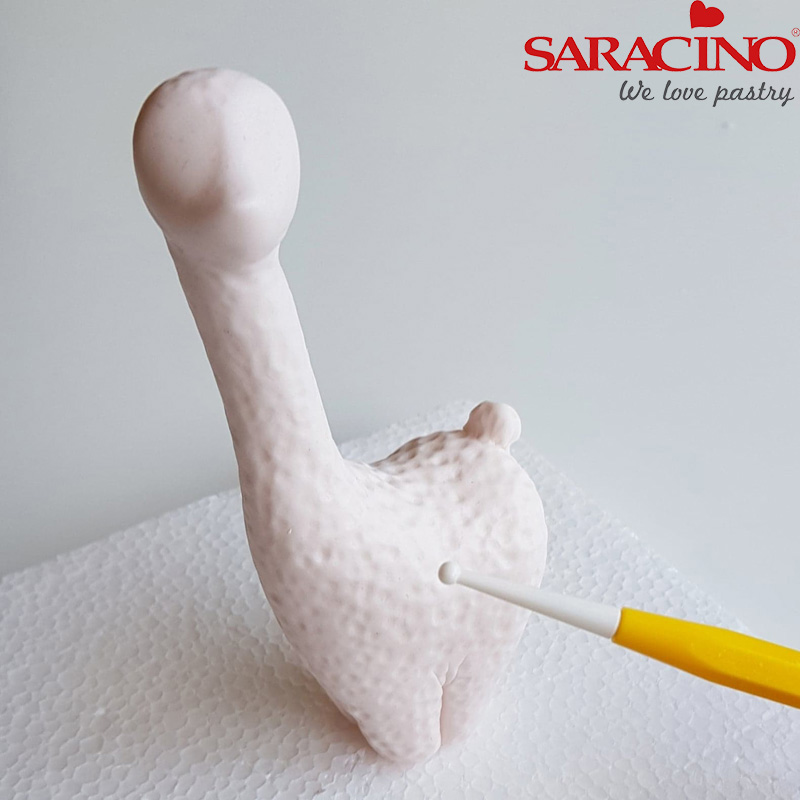
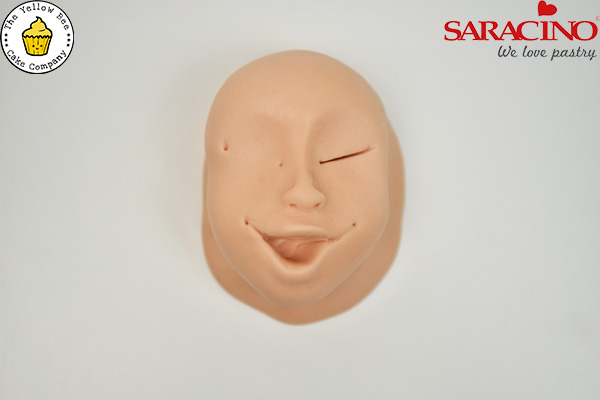
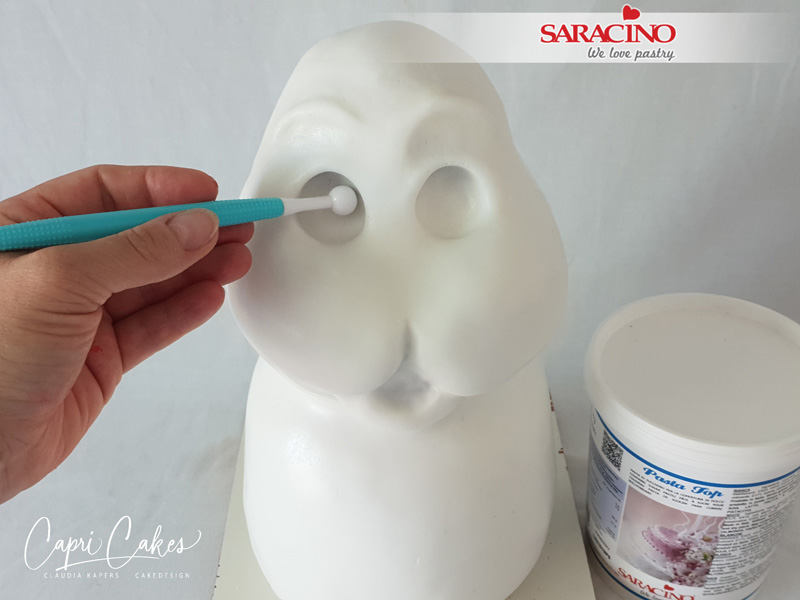
Smooth the eye sockets with the ball tool.
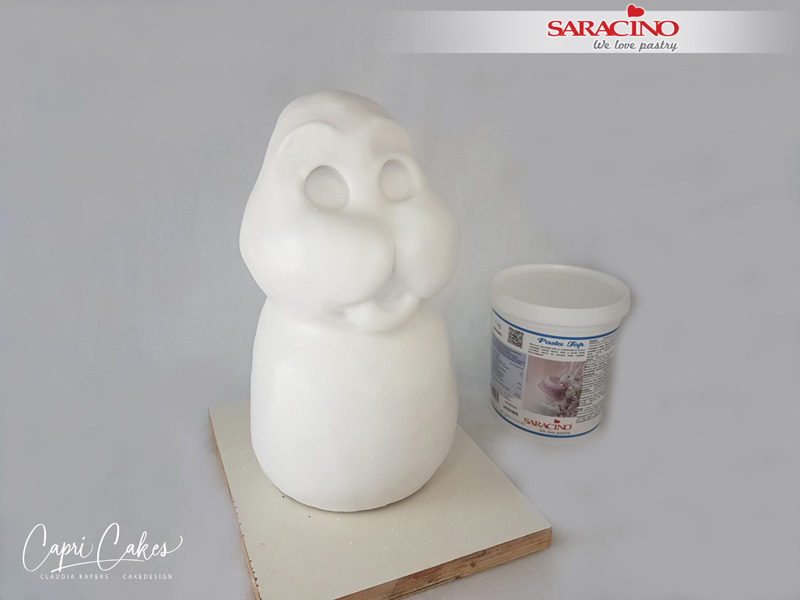
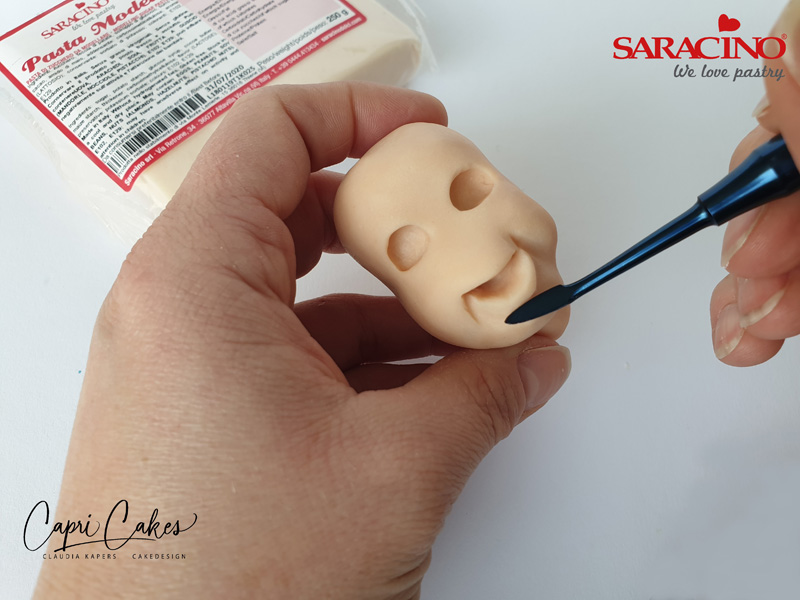
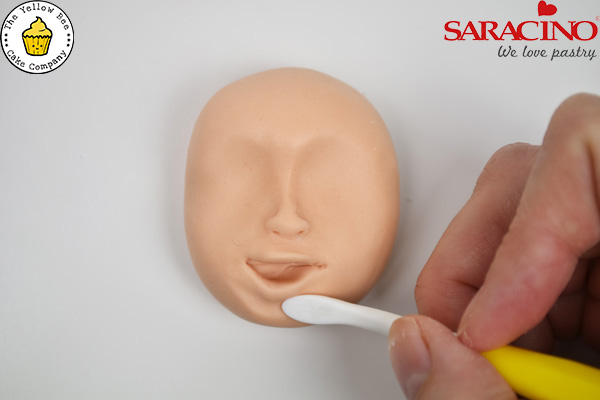
Step 13
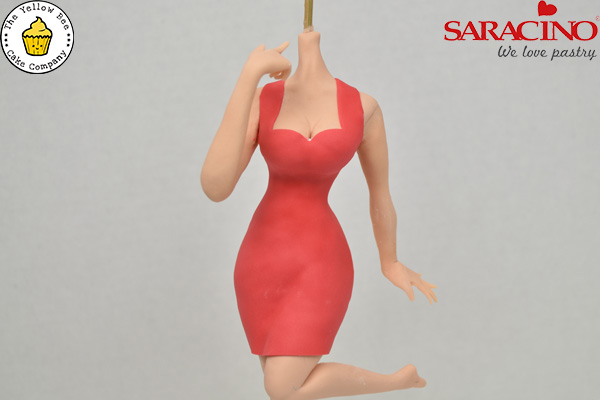
Before we start dressing your rabbit it should look like this.
Step 14
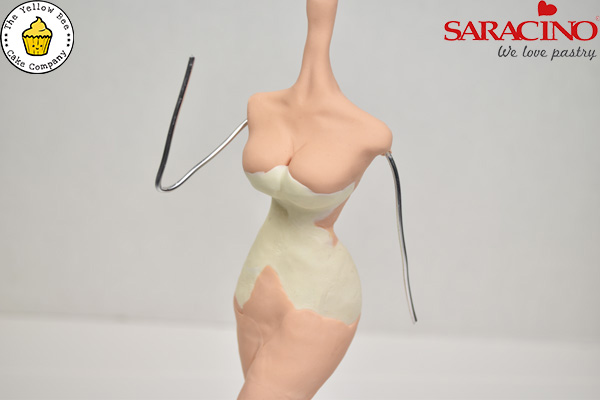
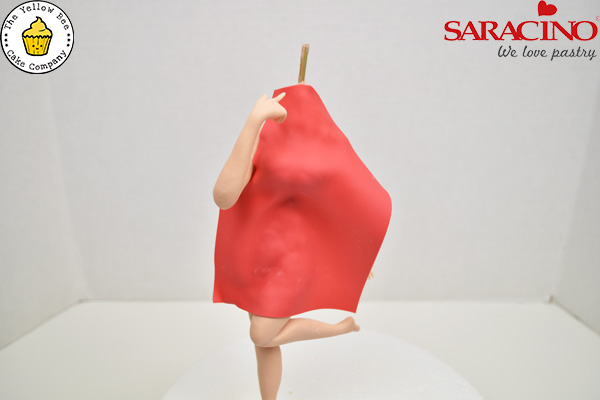
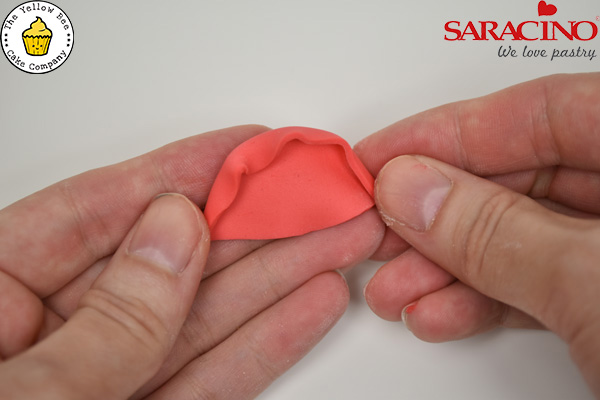
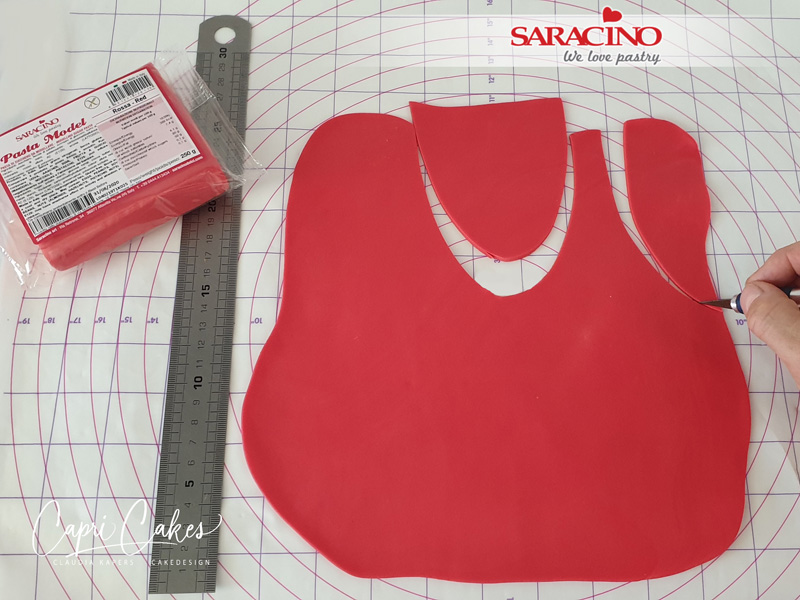
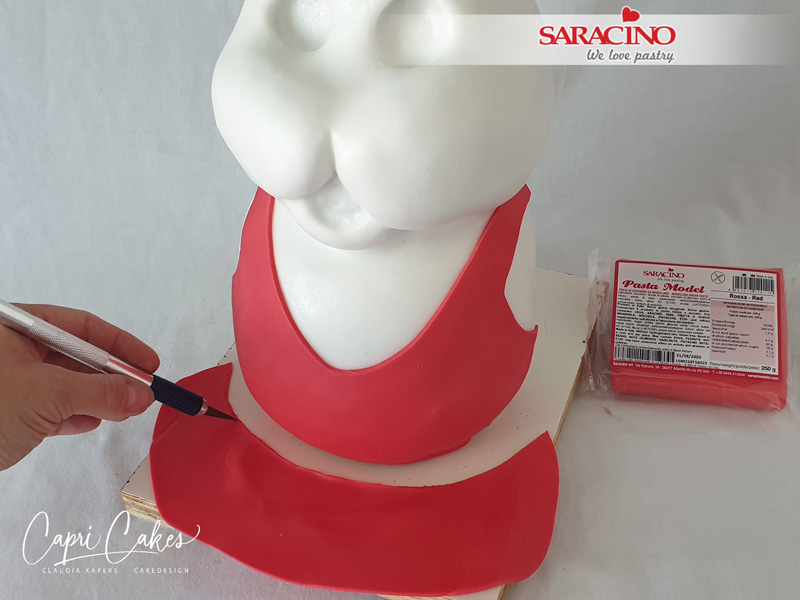
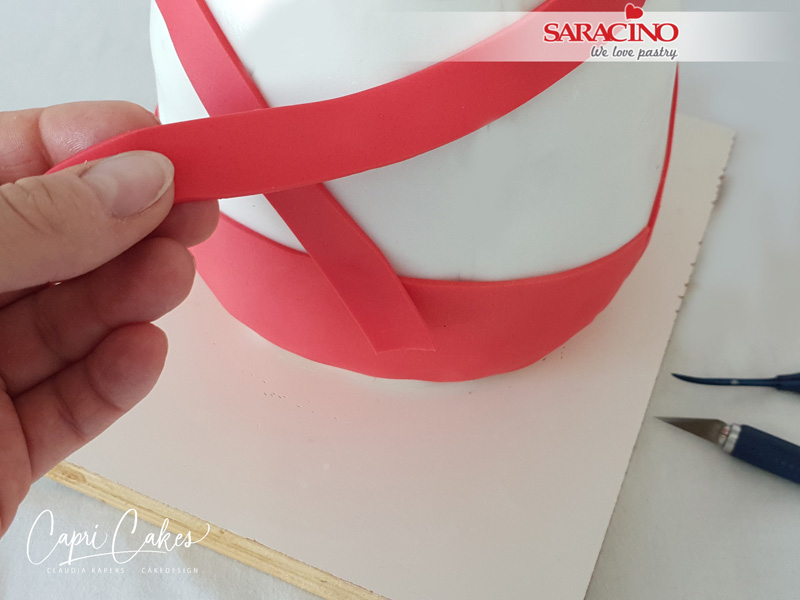
Take 150g of red Pasta Model and roll out thinly. Cut a half oval at the top. This is the neck of the swimsuit. Cut out the shapes for the arms on the sides.
Step 15
Place the paste on the front of the rabbit to cover the whole of the front to make the swimsuit. Cut away excess paste at the base with a sharp knife.
Step 16
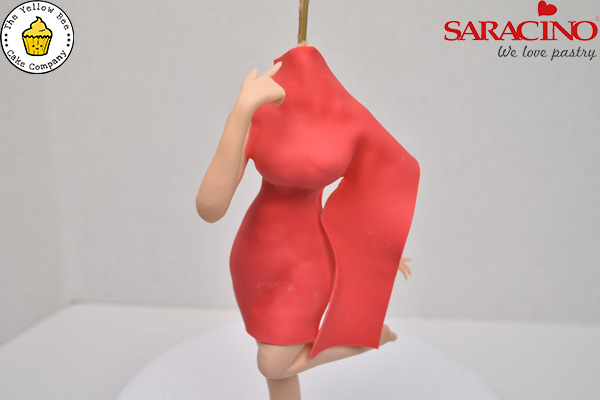
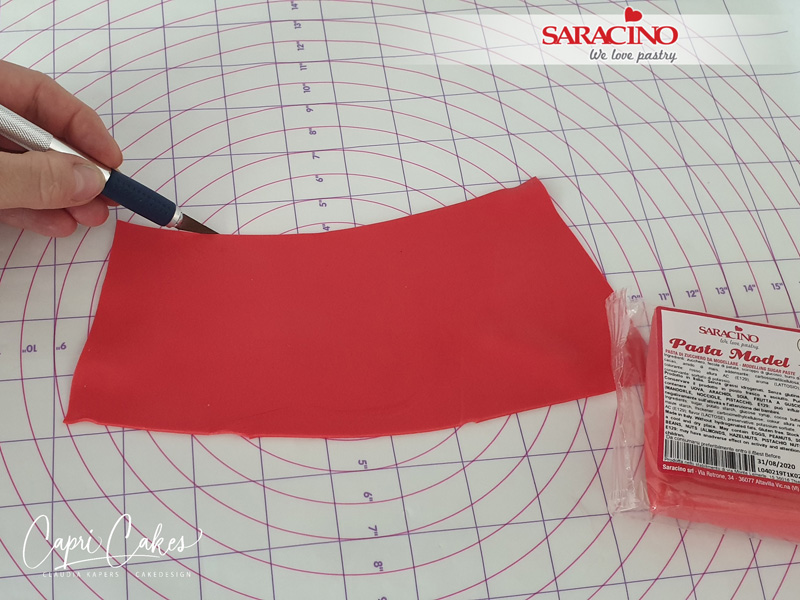
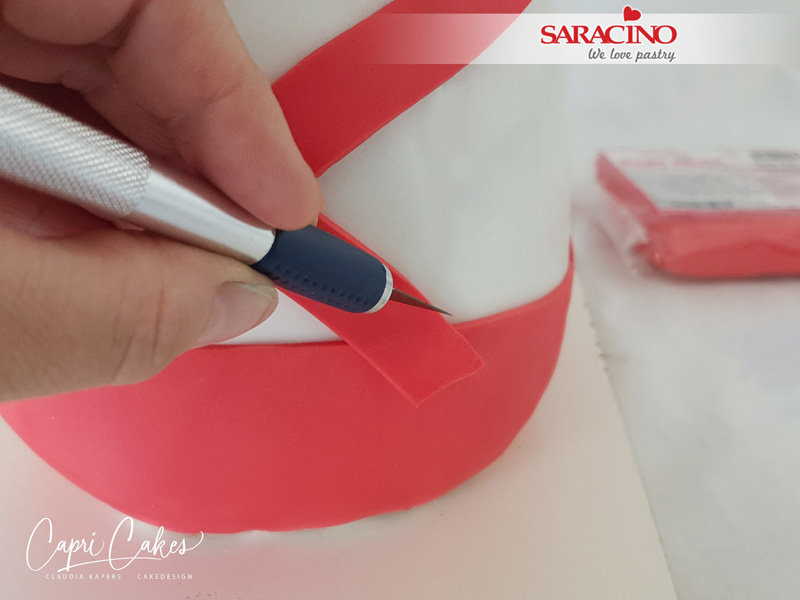
Now for the back cut out a rectangular piece of red Pasta Model about 16cm wide and 8cm high. Cut the top slightly into a curve.
Step 17
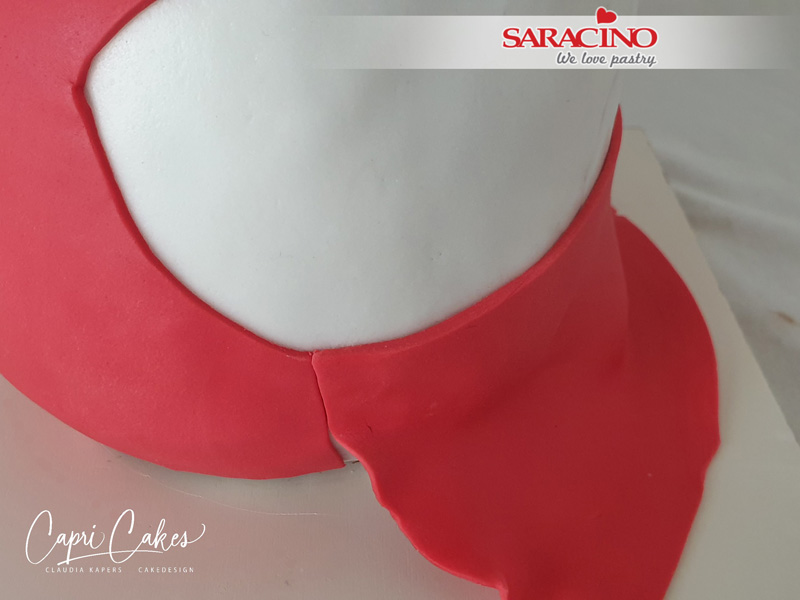
Attach to the back of the rabbit and cut away excess Paste.
Step 18
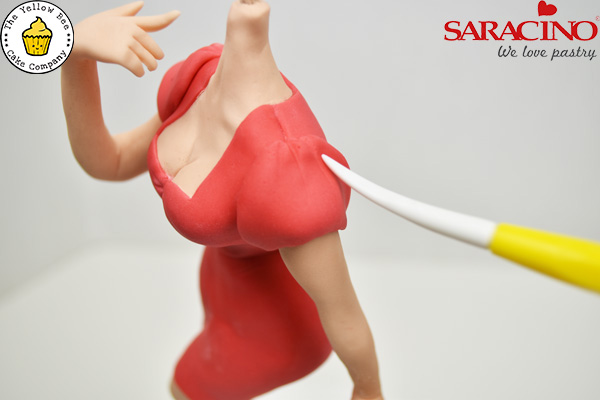
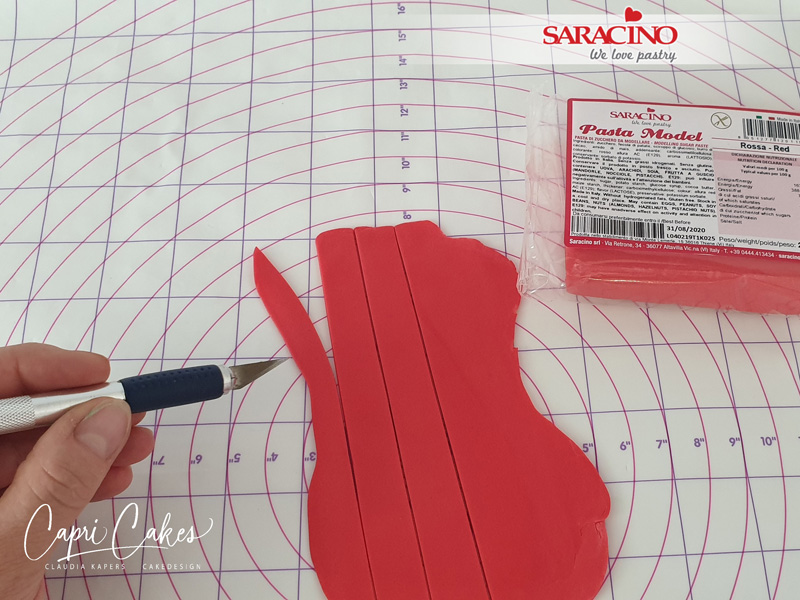
Cut two strips of red Pasta Model about 12cm long and 1.5cm wide.
Step 19
Attach the straps to the back of your bunny. Connect it to the swimsuit at the front.
TIP: You can use a little water to attach them if needed.
Step 20
Finish neatly with a knife.
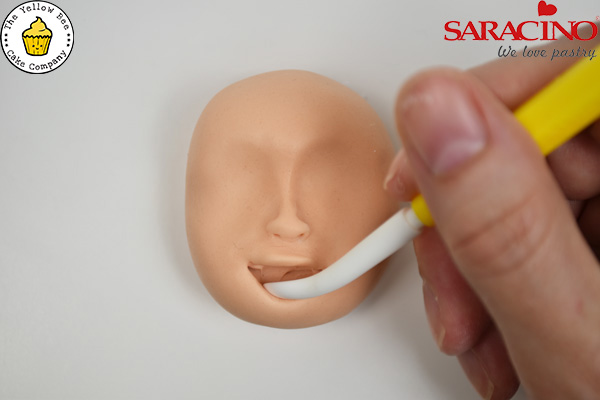
Step 21
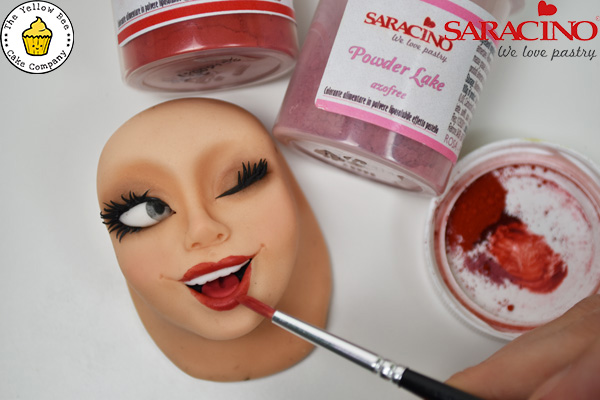
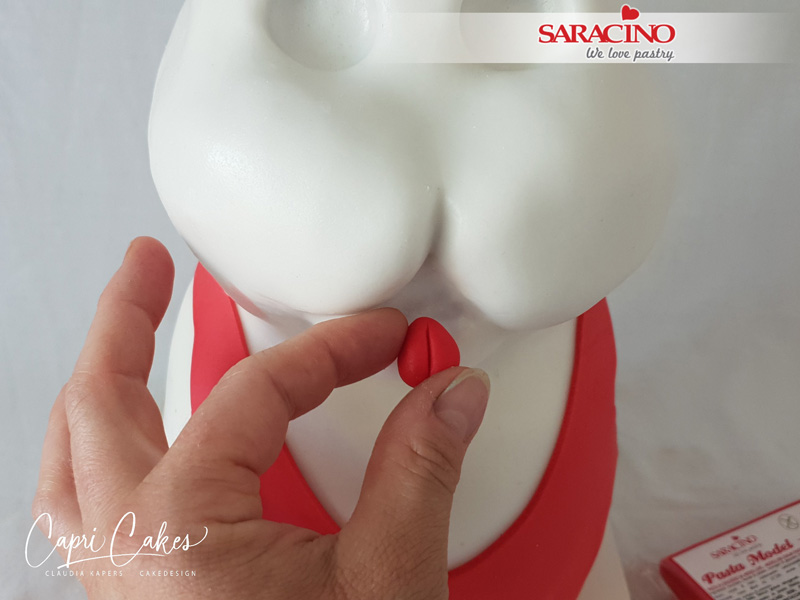
Now for the tongue. Take 7g of red Pasta Model and model a teardrop shape. Using your knife make a line on the center. Place the tongue in the mouth again using a little water if needed.
Step 22
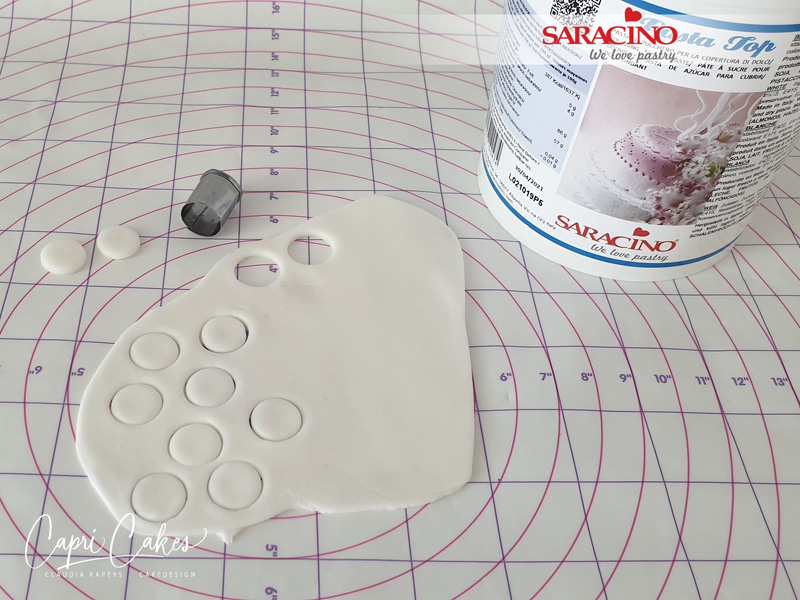
For your polka dots roll out white Pasta Top thinly and cut out your desired amount of round shapes of 1cm diameter.
Step 23
Place the white circles randomly on the bathing suit.
Step 24
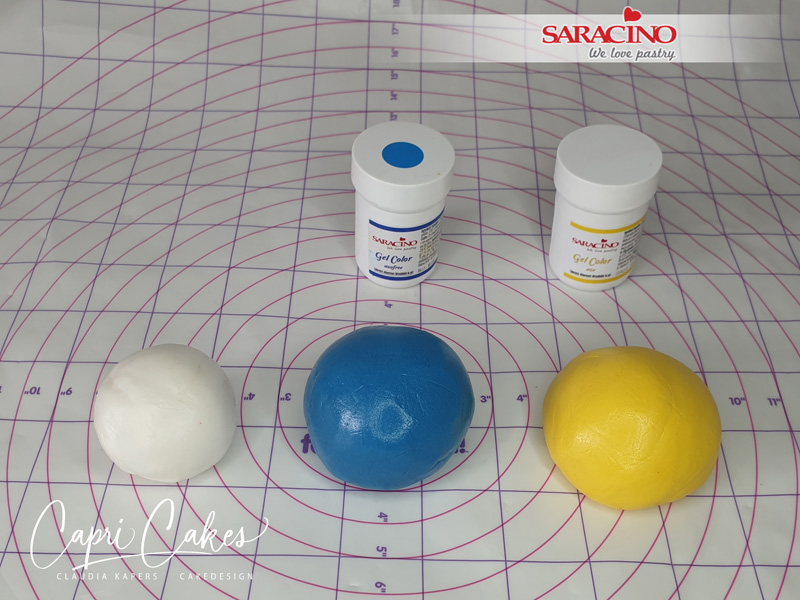
For the board covering. Colour 100g white Pasta Top with blue gel colour, colour 90g white Pasta Top with yellow gel colour and take 60g white Pasta Top.
Step 25
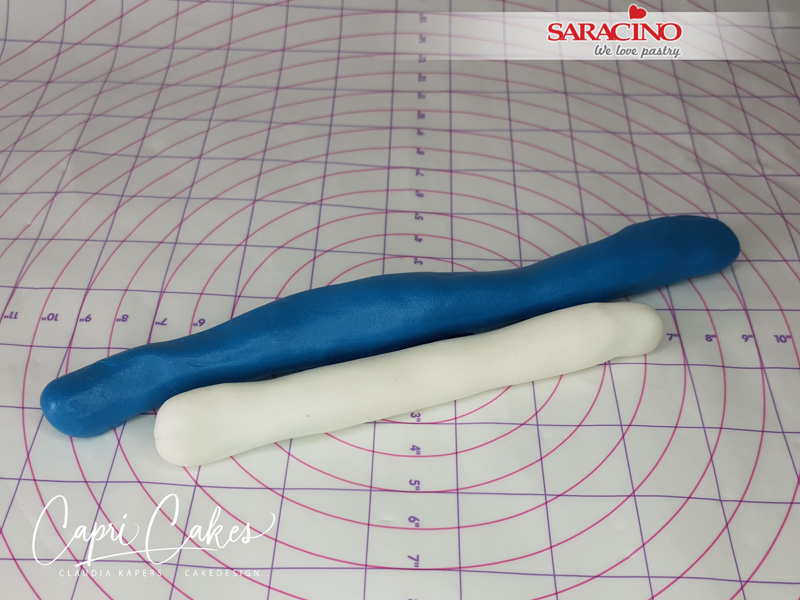
Roll the blue and white into sausage shapes. Lay side by side.
Step 26
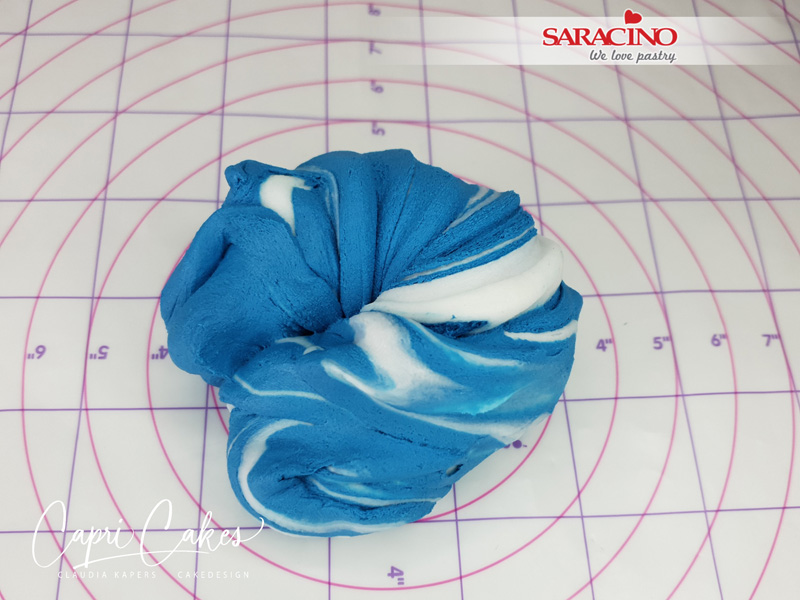
Twist the white and blue strands together to create a marble effect. Don’t twist too much! A few twists is sufficient.
TIP: If you twist too much you will lose the marble effect you are looking for.
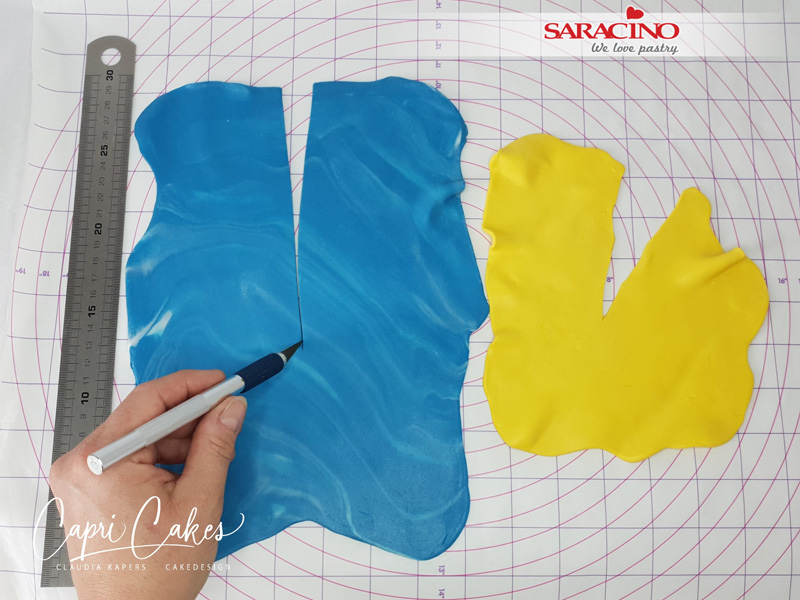
Step 27
Roll out your marble paste and yellow paste into rectangular shapes. The marble needs to be big enough to cover your board. Cut out circles from the side so they can wrap around your bunny.
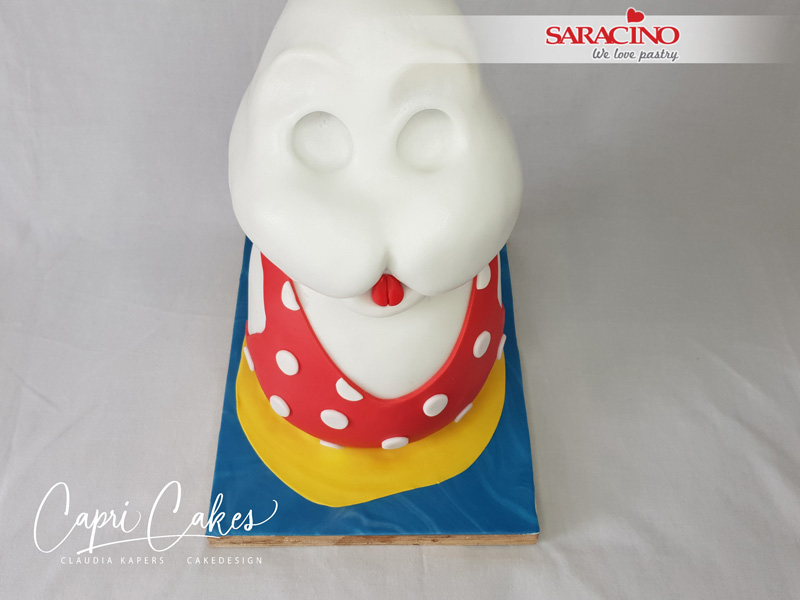
Step 28
Cover the board with the blue paste applying a little water to the board first to help it stick.Then fix the yellow paste. Make sure it fits well around the base of the rabbit. Finish neatly by blending and smoothing the paste so you see no joints.
Step 29
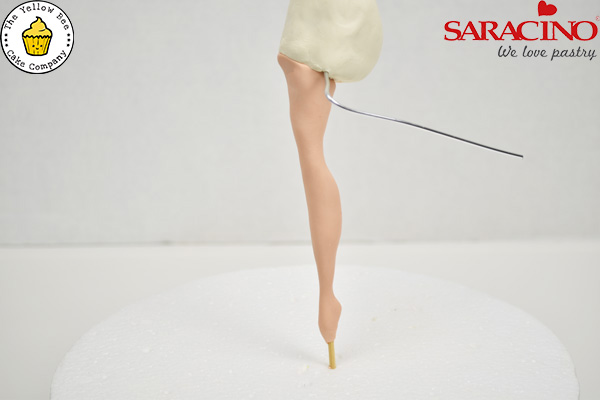
For the rabbit’s legs. Take two pieces of 150g of modelling chocolate. Form two flat oval shapes. Cover each leg with 20g thinly rolled white Pasta Top.
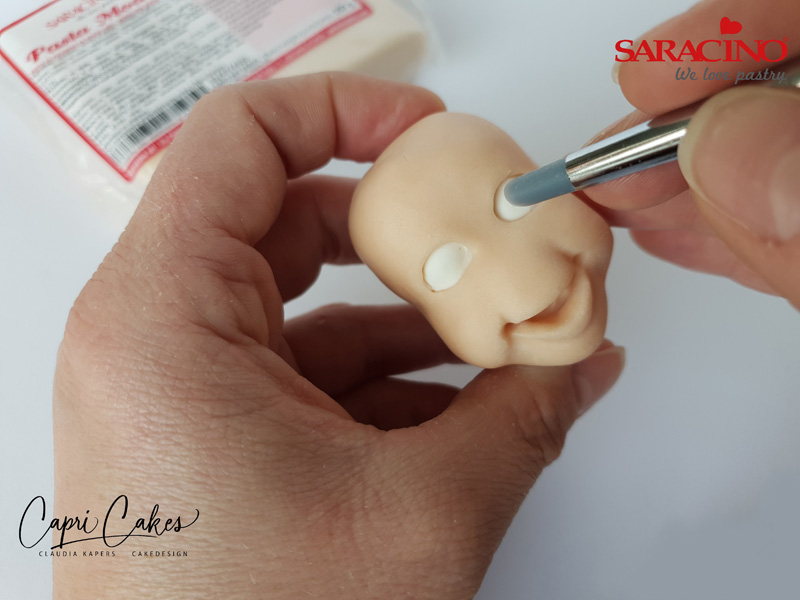
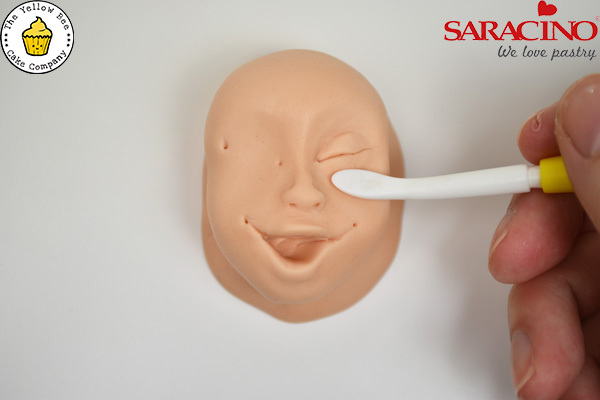
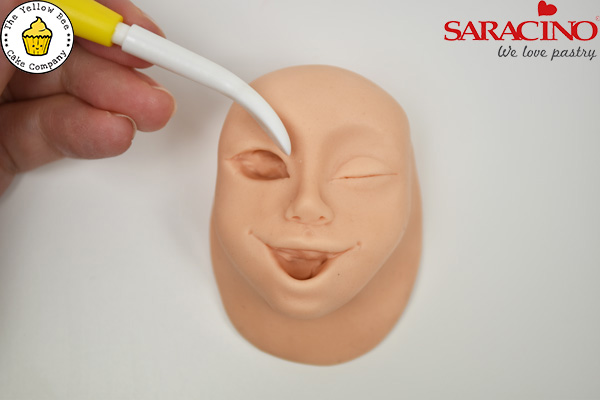
Step 30
Attach to the sides of the rabbit and press down firmly. Now using white Pasta Model fill the eye sockets. Using your Dresden tool form lines around the eyes to give character.
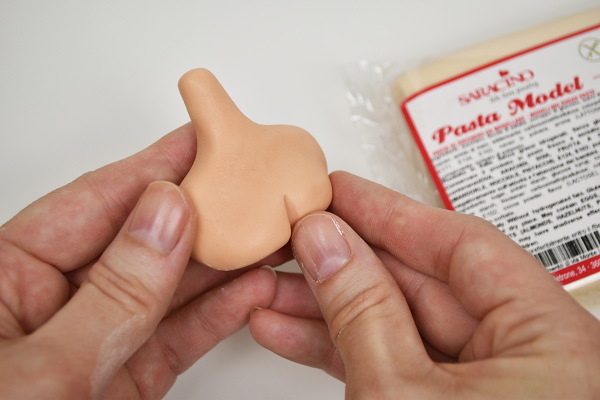
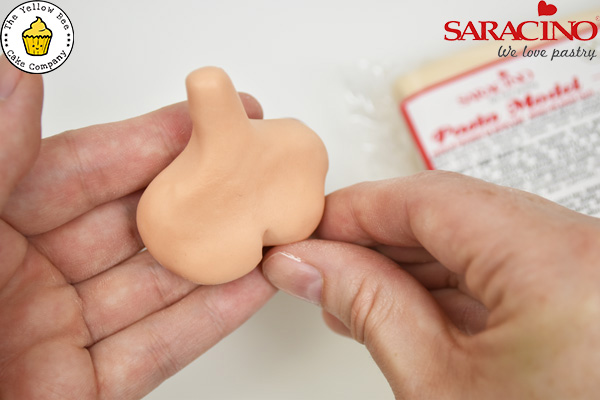
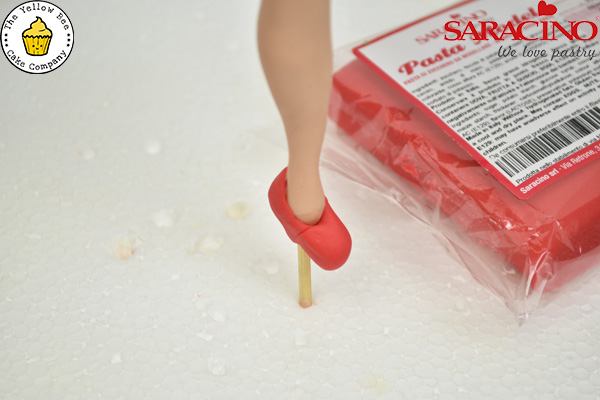
Step 31
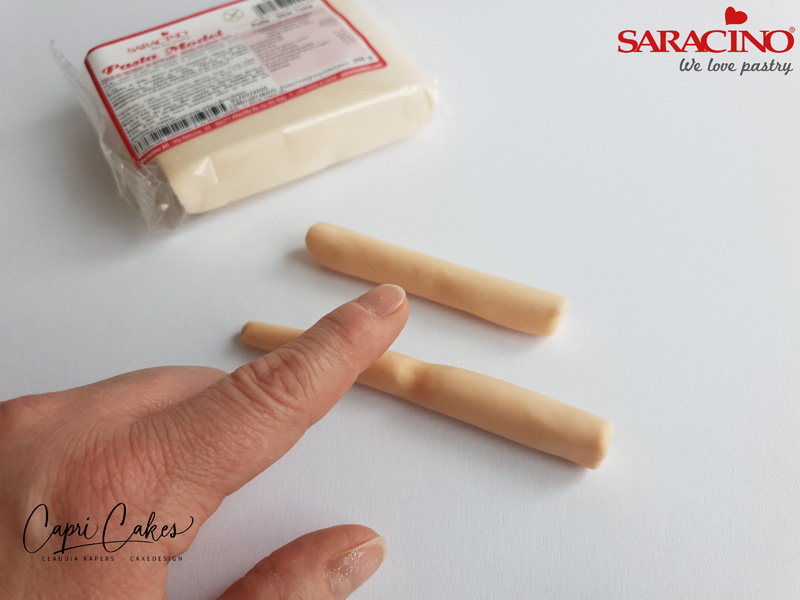
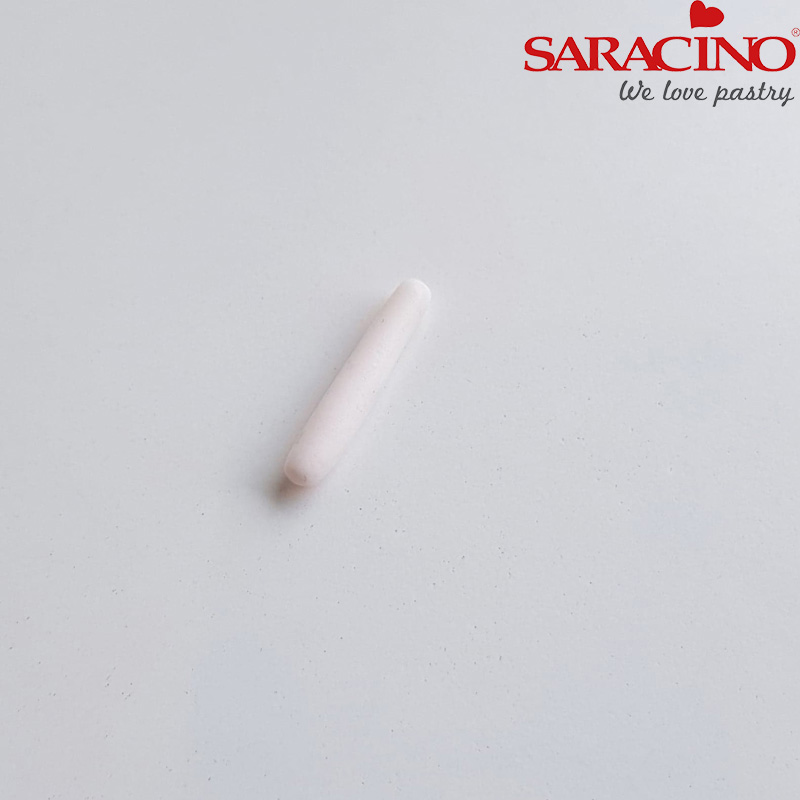
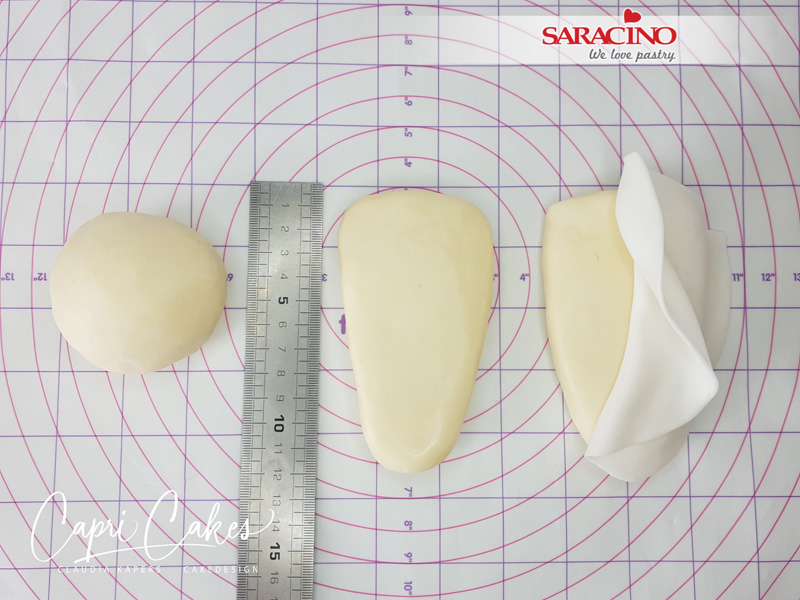
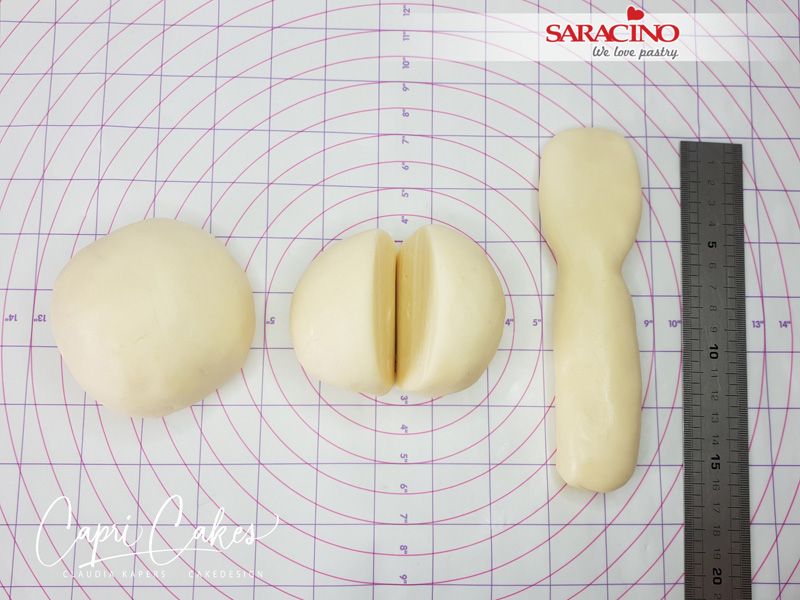
For the feet take two 150g pieces of white modelling chocolate. Make two blunted triangles and cover each foot with 30g of thinly rolled white Pasta Top.
Step 32
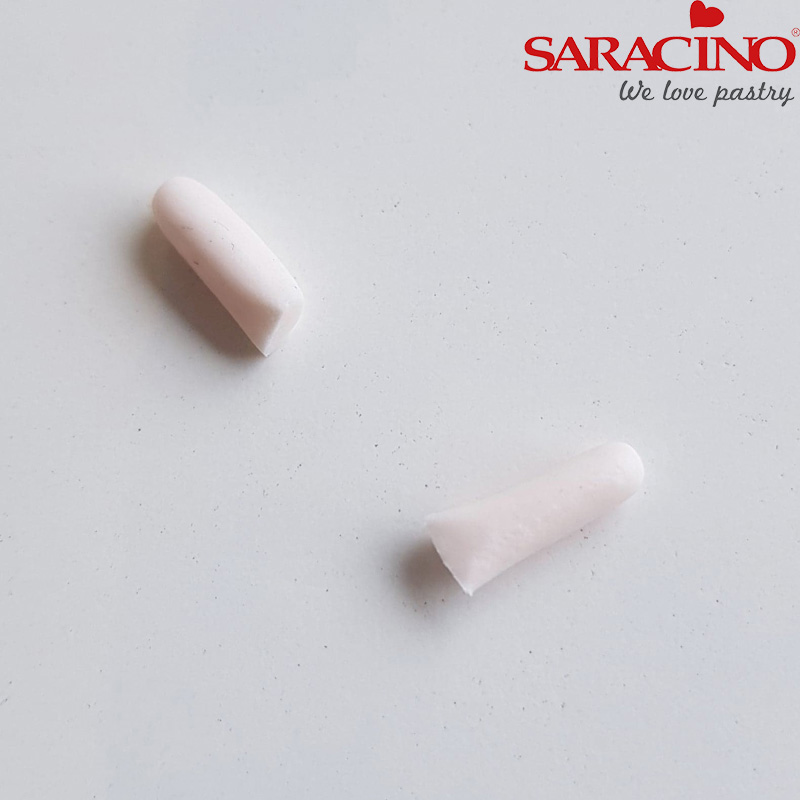
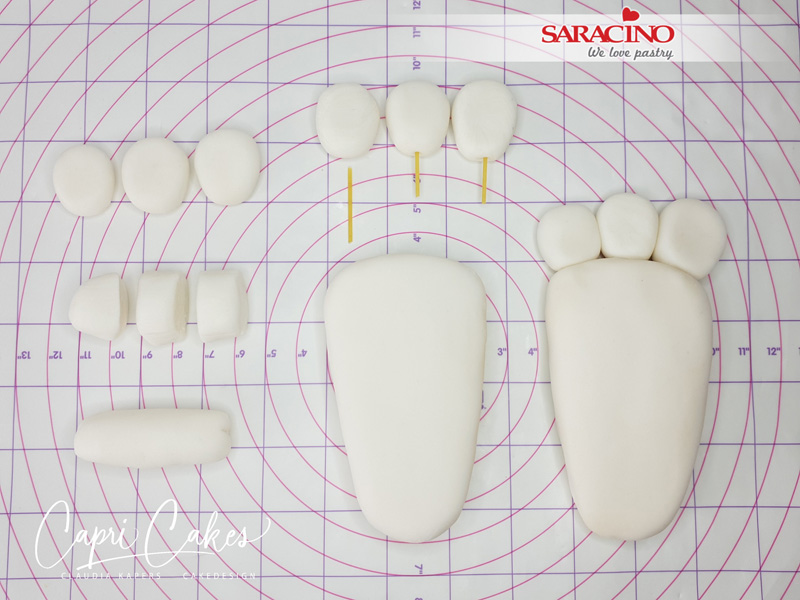
For the toes of one foot. Use 40g of Pasta Top and divide it into two pieces of 12g (smaller toes) and one of 16g (big toe). Make round balls and press a little flat. Insert a piece of uncooked spaghetti into each toe. Repeat this step for the toes on the other foot.
Step 33
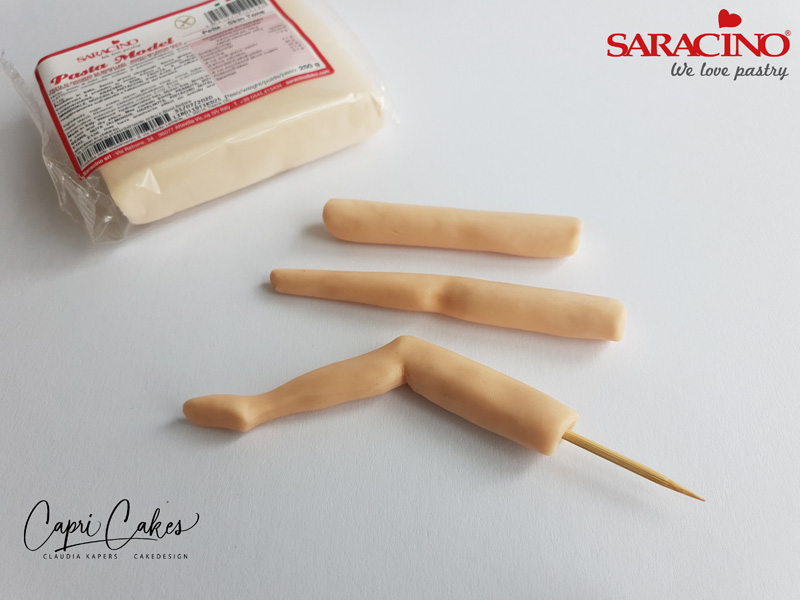
Colour 20g of your white Pasta Top with skin gel colour. Cut in two halves. You will need 1.5g for each toe and 5.5g for each sole. Roll out thinly and attach to the toes and foot using water or cake gel.
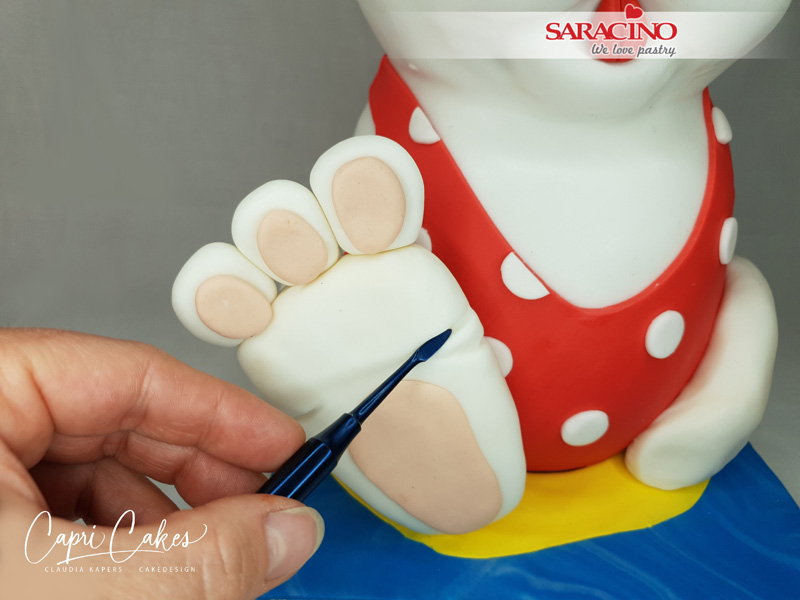
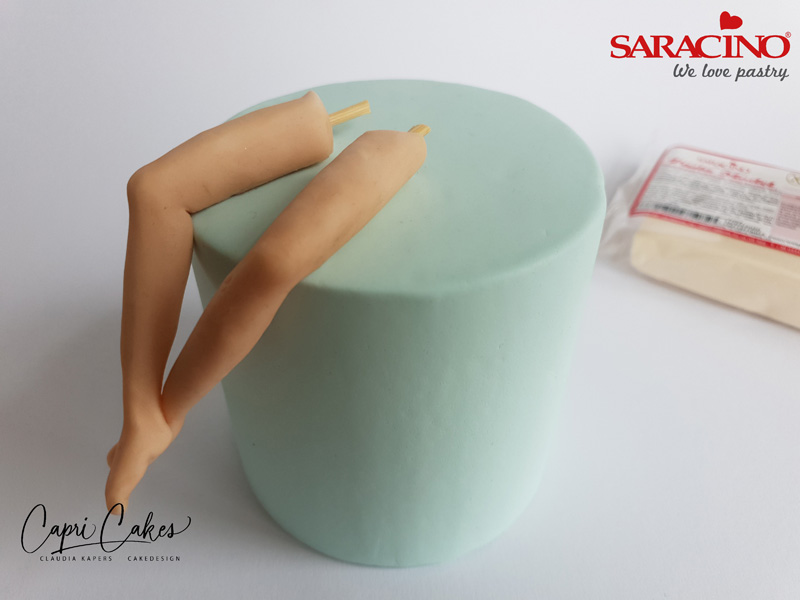
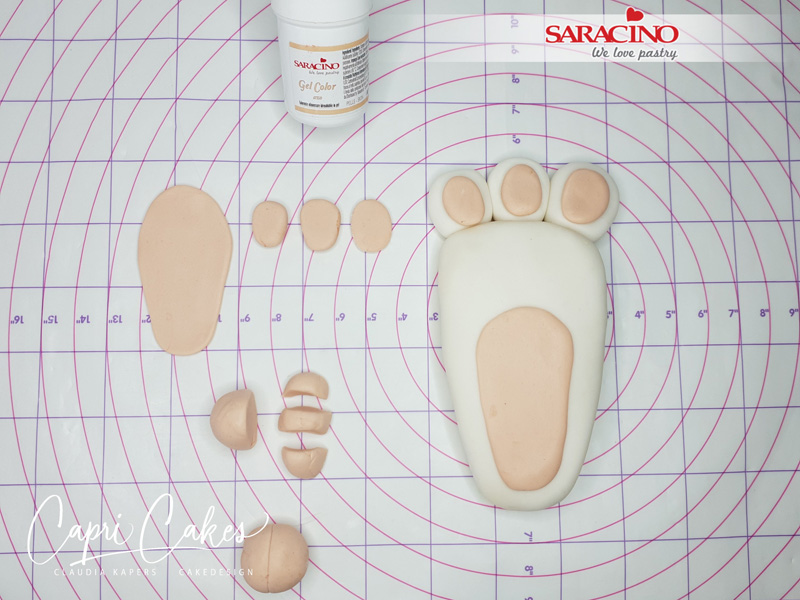
Step 34
Attach the feet to the rabbit’s legs using a little cake gel. Using your Dresden tool form some detail as required.
Step 35
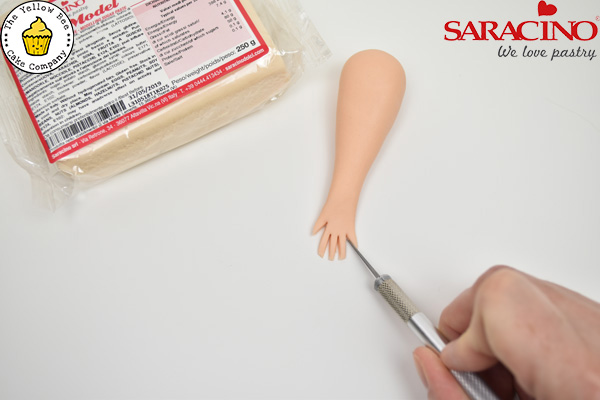
For the arms take 300g of white modelling chocolate and divide into two equal pieces of 150g. Roll each into sausage shape approximately 16cm long. Press down to make slightly flat and then using your fingers roll the wrist shape.
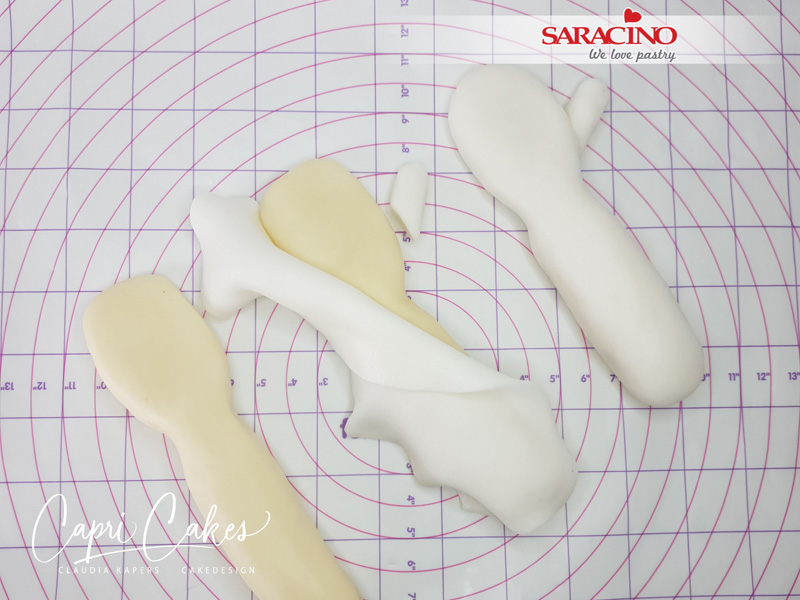
Step 36
Cover each arm with 40g of white Pasta Top. For the thumbs take 5g each and roll to a thumb shape with your fingers. Attach to the hand using cake gel or water.
TIP: Remember there is a left and right hand when fixing the thumbs.
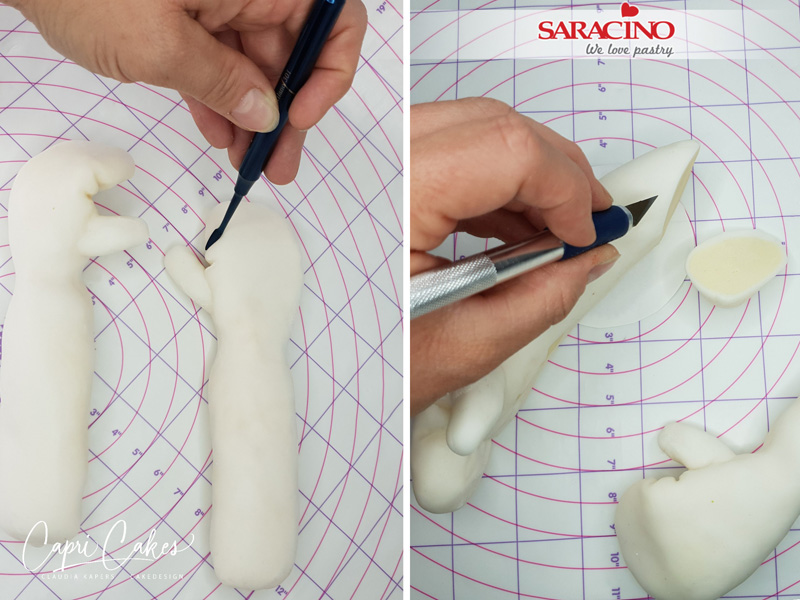
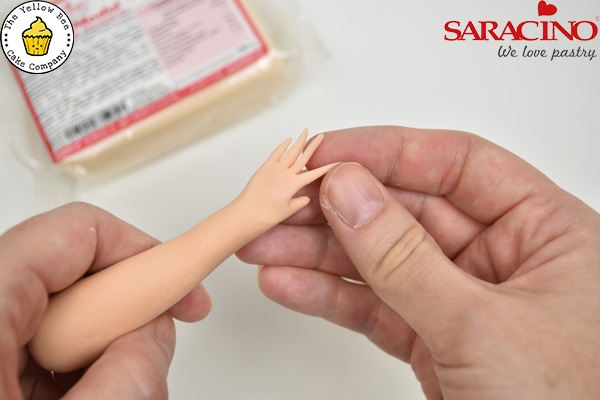
Step 37
Shape the hands with finger pressure. Using your Dresden tool form the finger lines. Use a sharp knife to cut the top of the arms diagonally for attaching to the shoulder. Be careful with your cutting as it effects how the arms look on your bunny. Attach them as required using cake gel or water.
Step 38
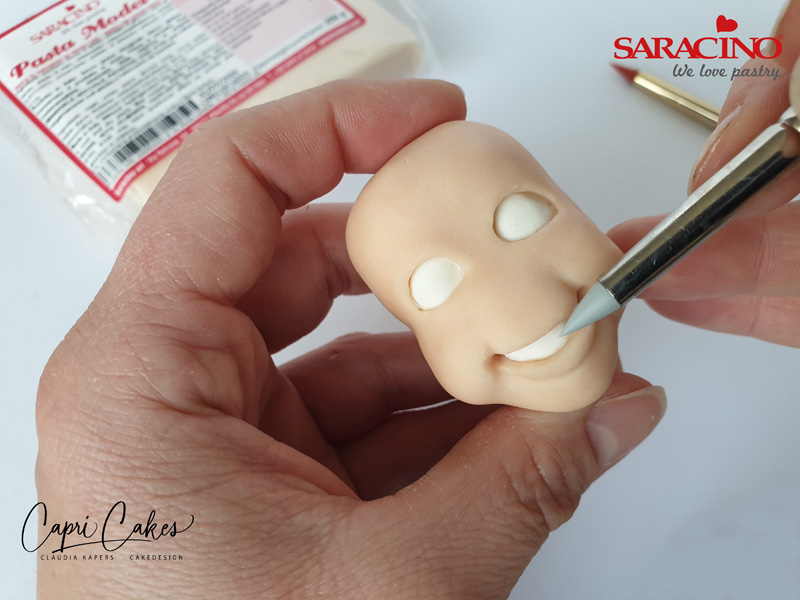
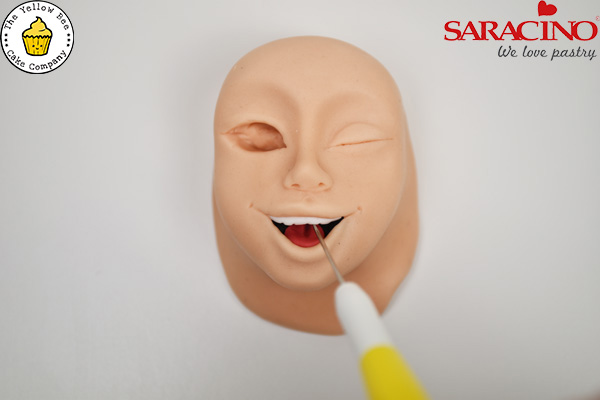
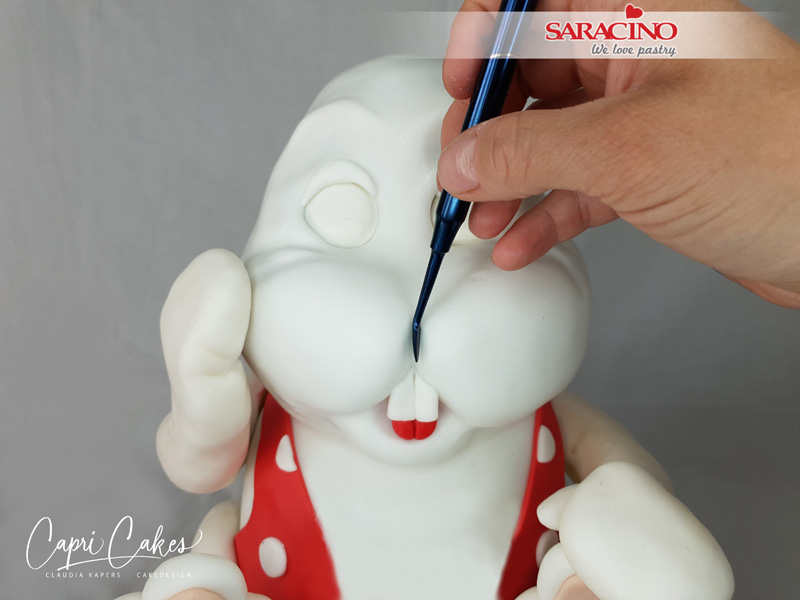
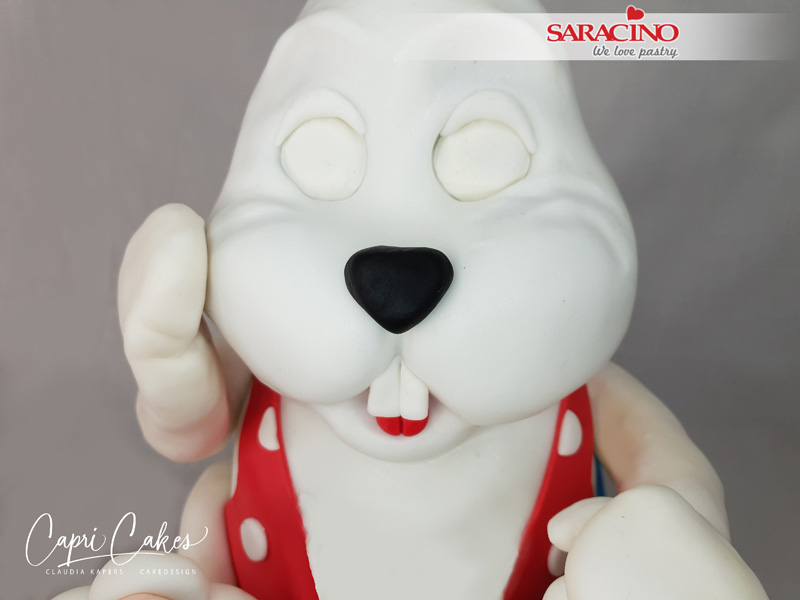
For the teeth take 5g white Pasta Model and cut into a small rectangle. Cut both sides diagonally to form a point. Make a line in the middle with a knife. Fix the teeth in the mouth.
Step 39
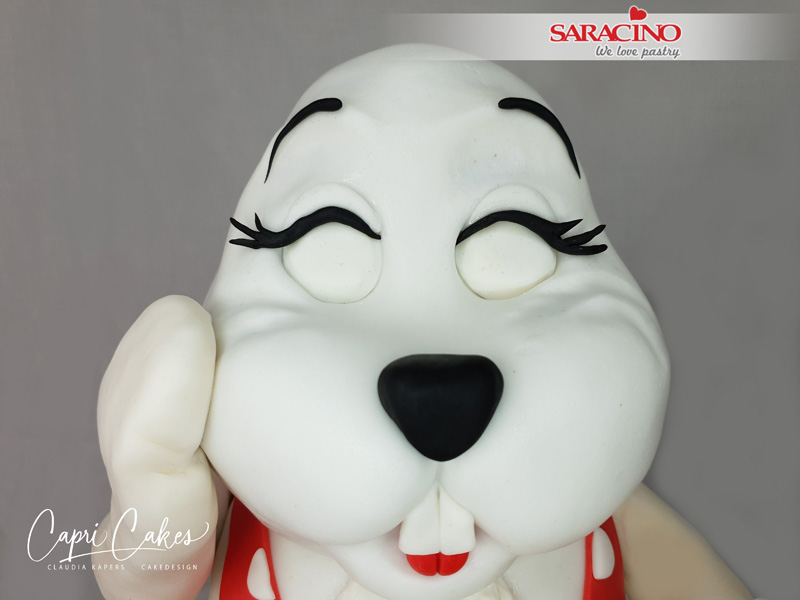
Roll 3g Pasta Top into a small sausage and attach to the top of the eye. Repeat for the other eye.
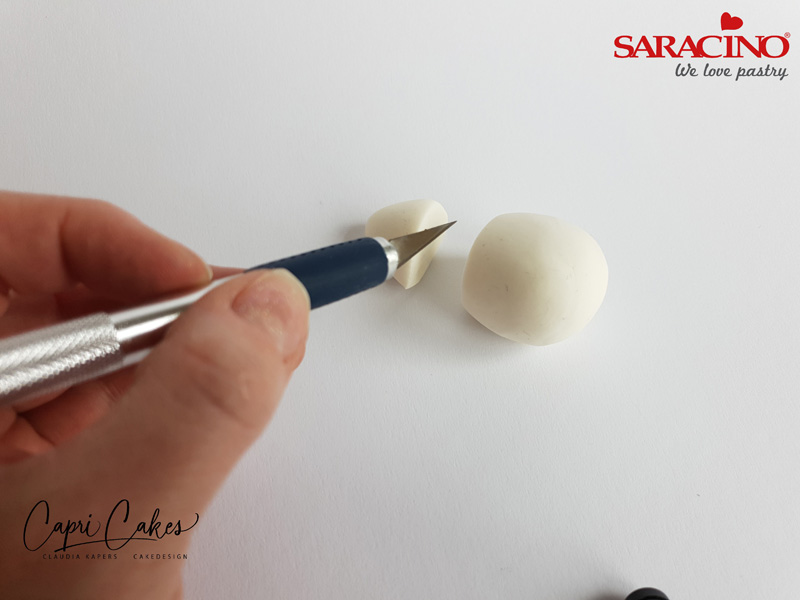
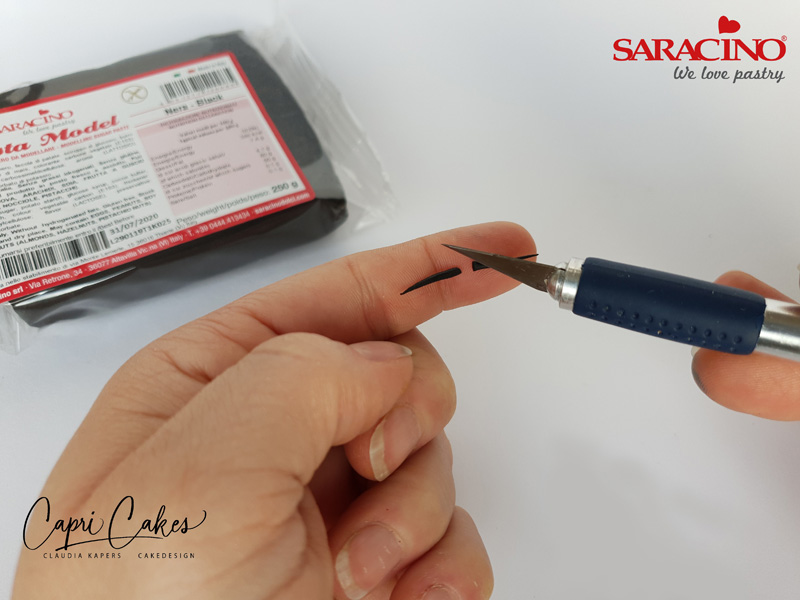
Take 5g black Pasta Model and using your fingers form a triangular nose. Fix with a little cake gel.
Step 40
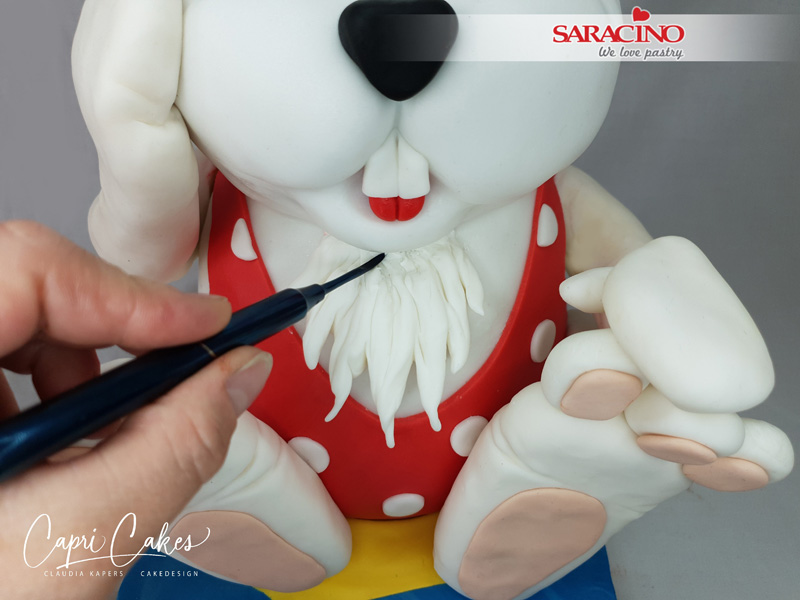
For the hair on the chest take 20g white Pasta Top. Roll elongated strands and press down on one side. Attach under the chin with cake gel and using your Dresden tool shape and give texture.
Step 41
Step 42
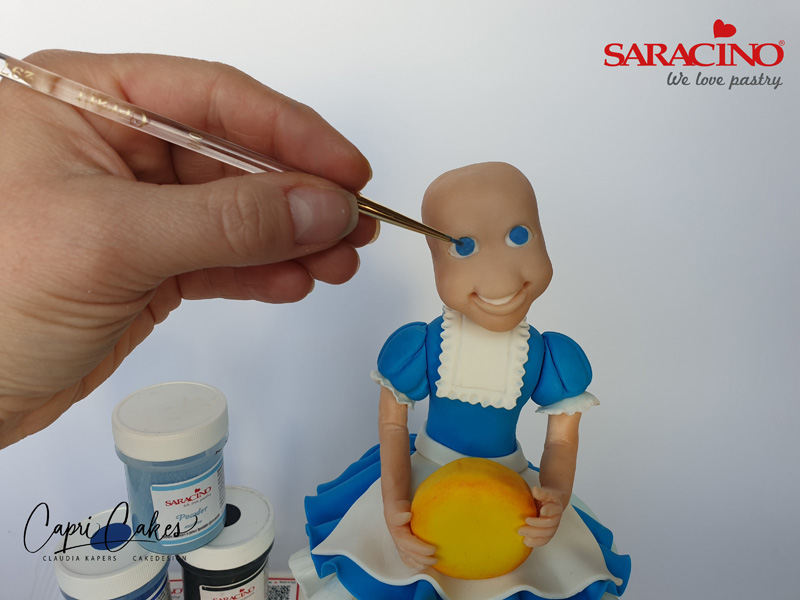
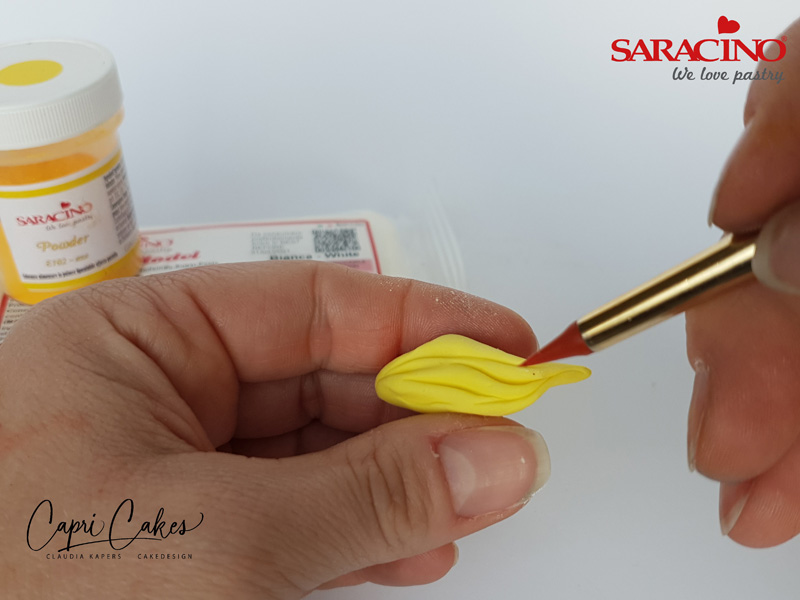
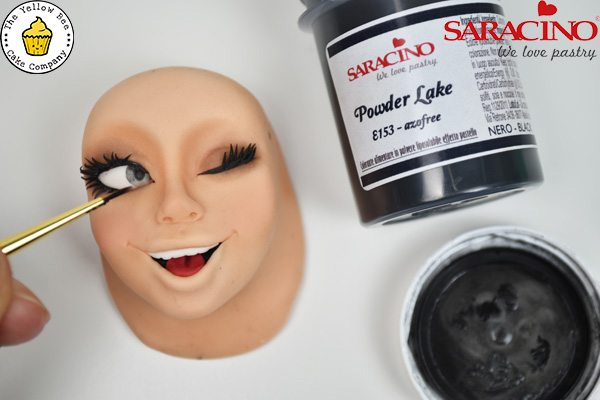
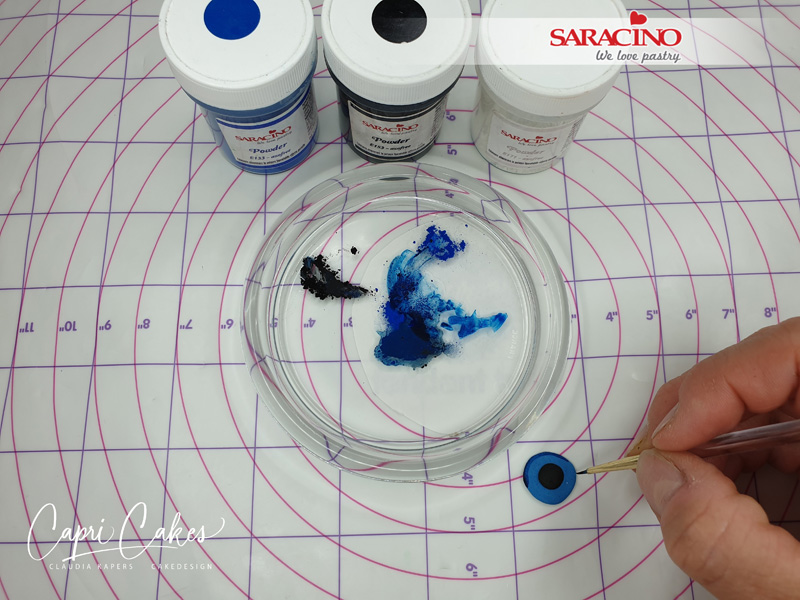
Now for te eyes use two small balls of blue Pasta Top. Mix your black powder colour with the clear alcohol. Paint a black pupil using a small paint brush. Now mix your blue powder with clear alcohol and paint the remainder of the eyes.
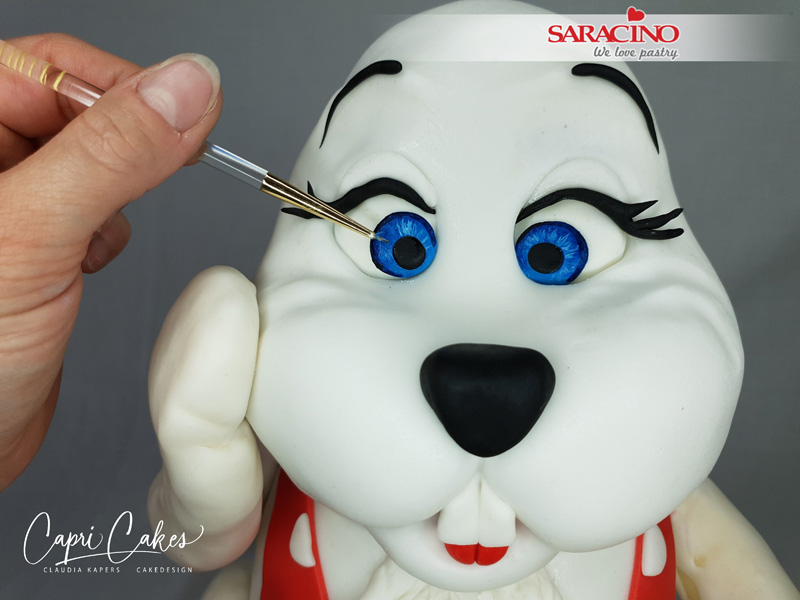
Step 43
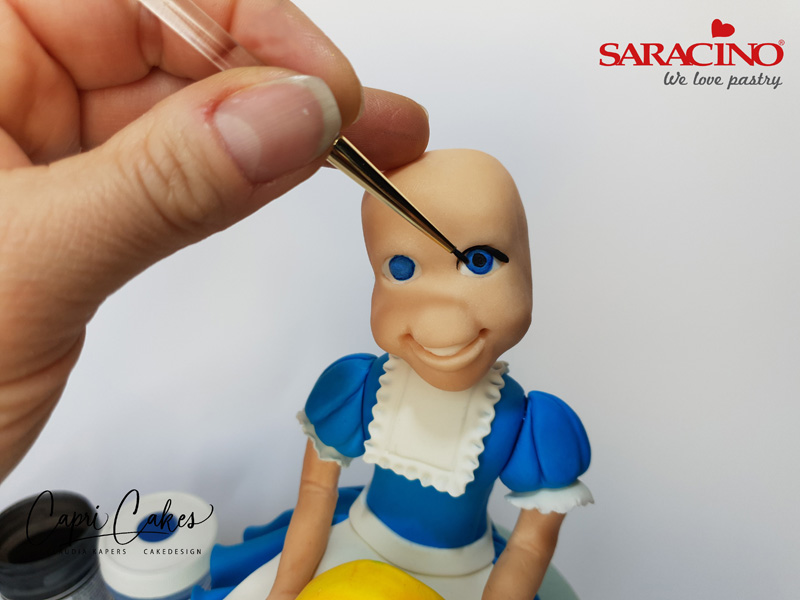
Fix them to the eye balls in the position required. Add detail and highlights using white powder and a fine brush.
TIP: How you position the eyes effects how the rabbit’s mood is! Happy, serious, confused, moody, crazy! You choose.
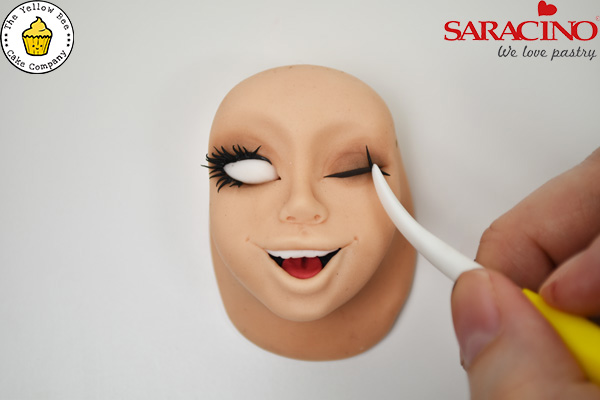
Step 44
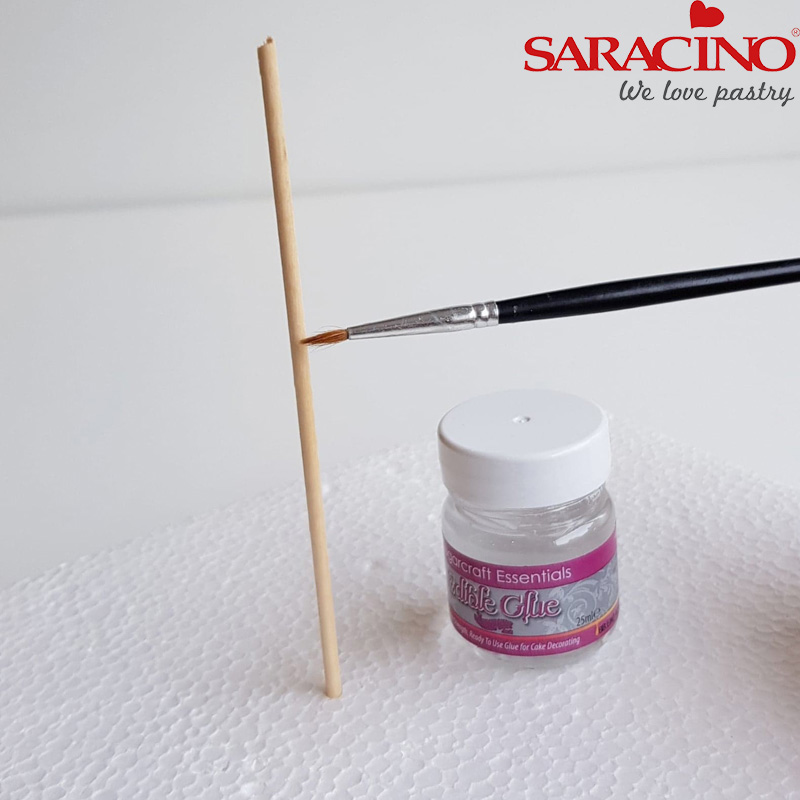
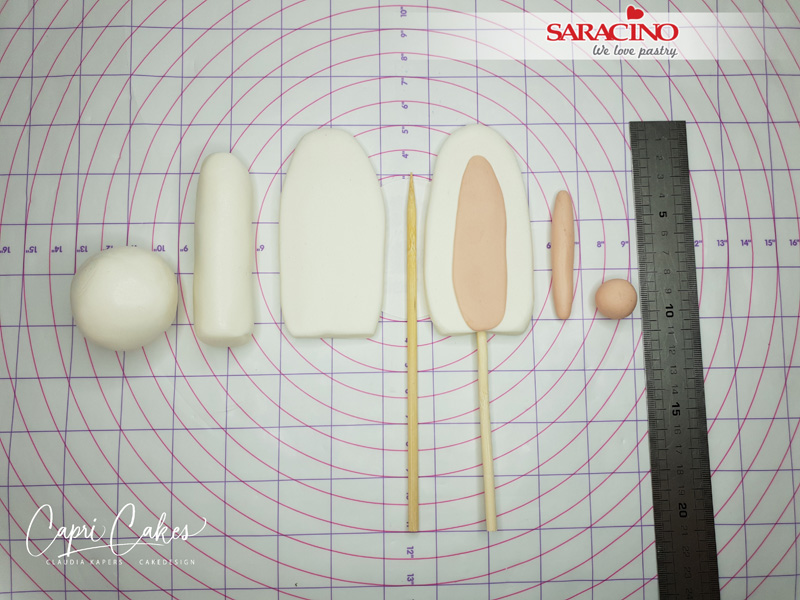
For the ears, take two pieces of 70g white modelling chocolate. Roll two sausage shapes of approximately 10 cm long and press flat. Colour 5g Pasta Top with skin gel colour for the inside of the ears. Insert a wooden skewer into each ear.
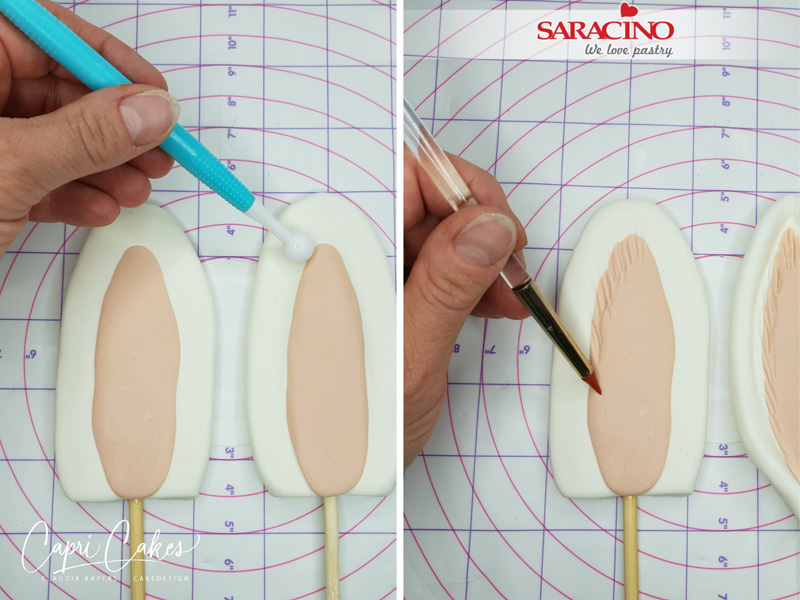
Step 45
Place the pink insert on the ear. Smooth the edges of the ear insert using a ball tool. Add detail and texture using a Dresden tool or Cerart silicone modelling tool.
Step 46
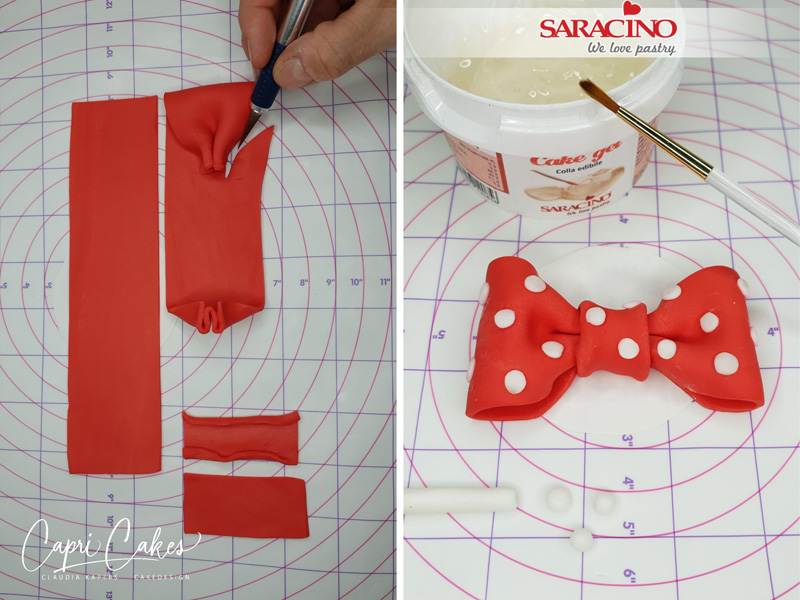
For the bow. Take 70g of Red Pasta Model and roll thinly to a rectangle shape of approximately 16cm x 4cm. Fold the ends into the middle and pinch to form the ruffled effect at the centre. Use a little cake gel to fix in place as required. Now roll a rectangle 5cm x 2cm and wrap around the centre of the bow. Cut out some small white dots and decorate as you wish.
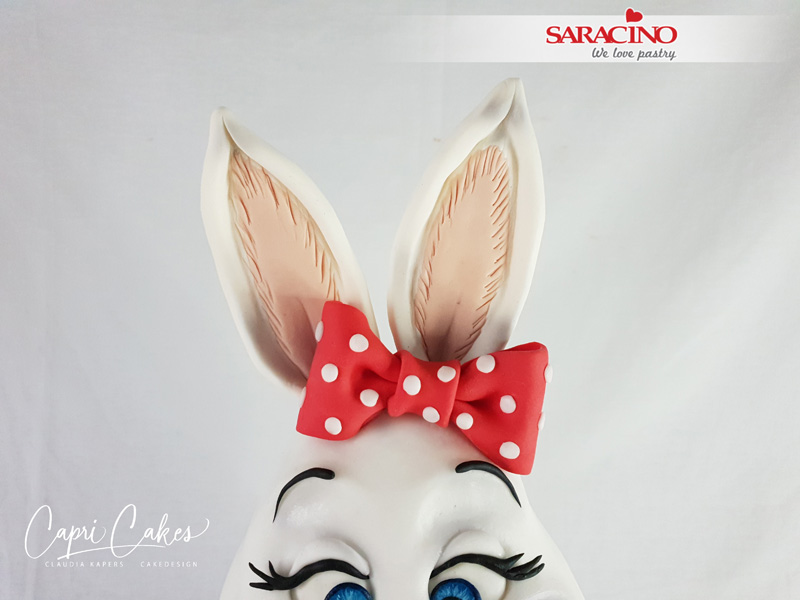
Step 47
Insert the ears to the head and attach the bow directly in front of it. Use a little cake gel if required.
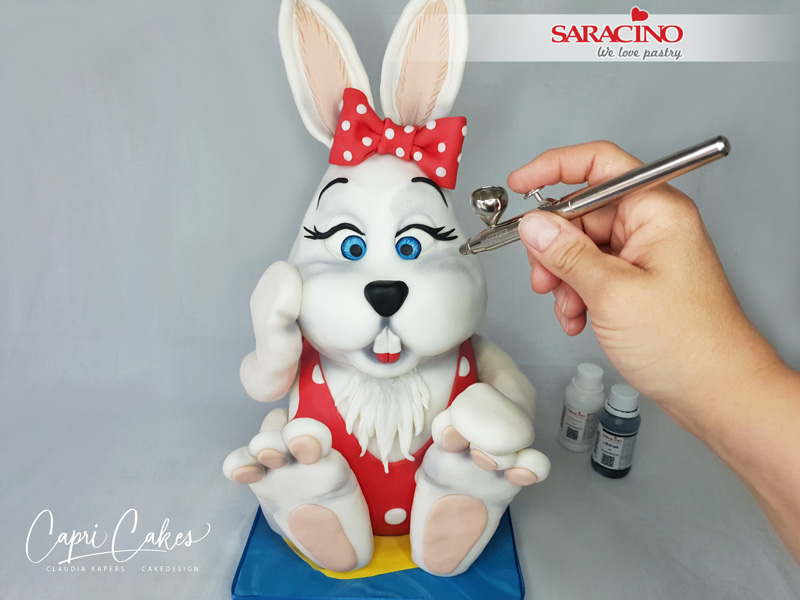
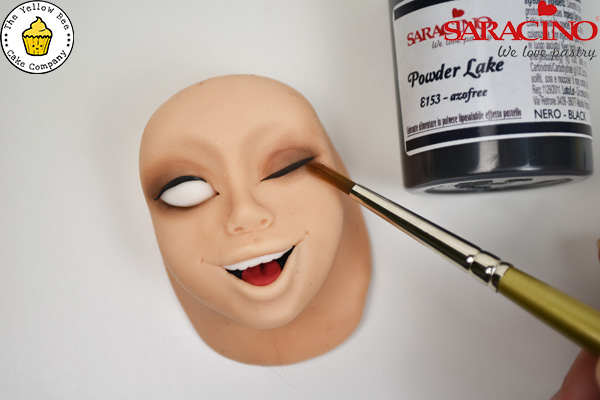
Step 48
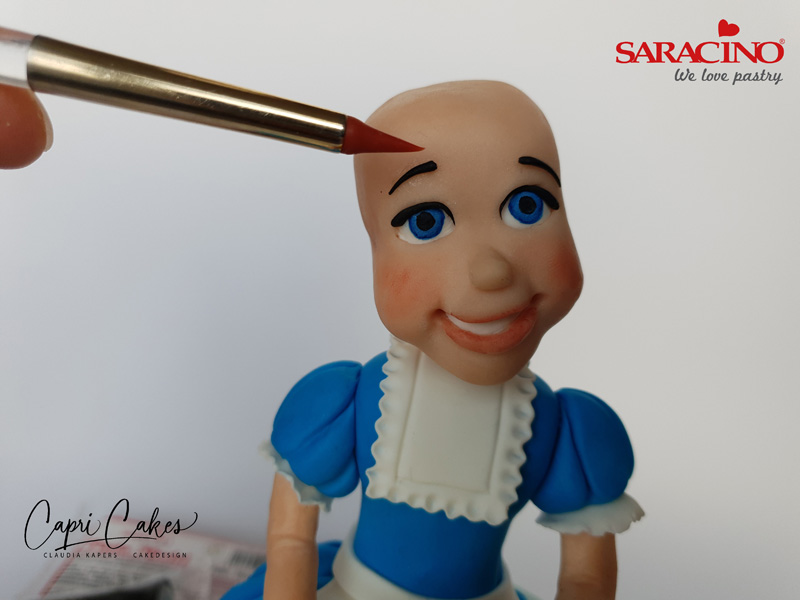
To give shade and character you can use an airbrush or dust lightly with Saracino dust colours.
TIP: If using an airbrush mix Saracino white and black to give a grey colour. If dusting use a soft fine brush. Remember to be subtle with your colouring.
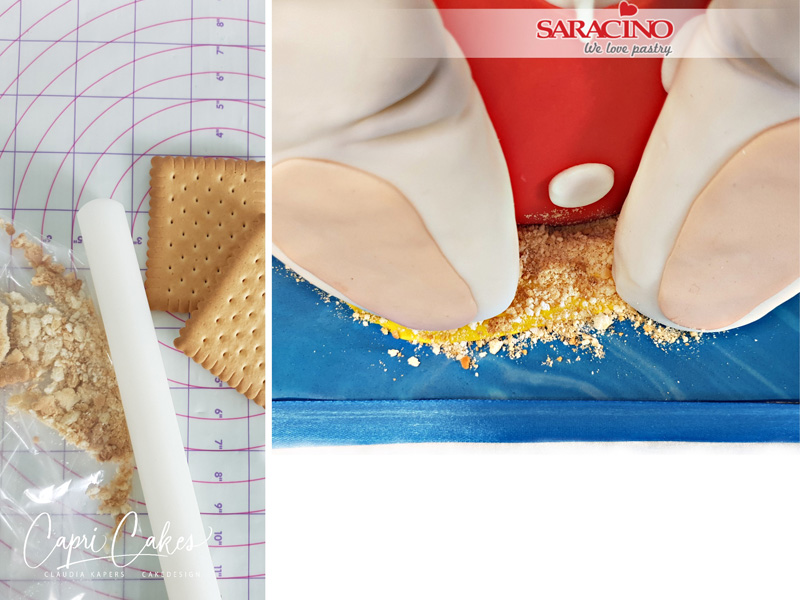
Step 48
For the sand, crumble two tea biscuits and sprinkle them around the base of the rabbit. Finish the board with a matching ribbon.