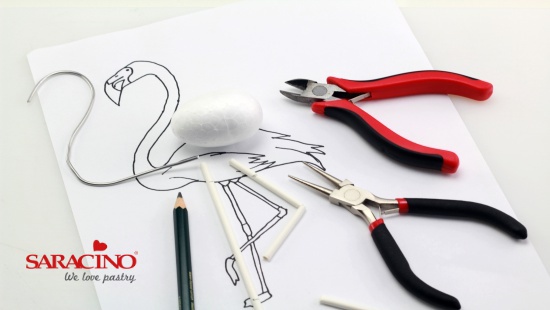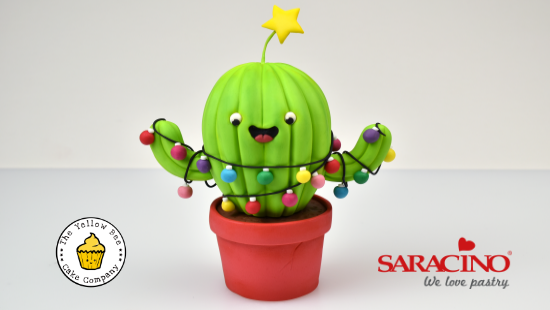
CHURRO THE CHRISTMAS CACTUS
Author: VICKY TEATHER

FB Page : https://www.facebook.com/YellowBeeCakeCompany/
Skill Level:
Beginner
Tips from Vicky:
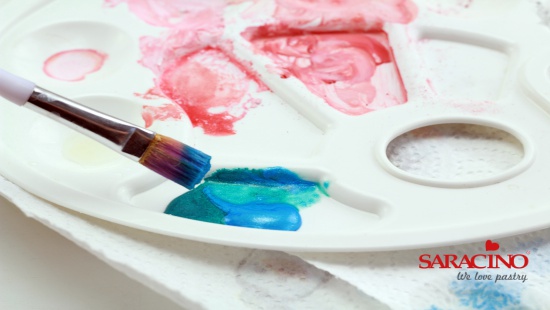
If like me you have warm hands and find your paste gets sticky whilst working, just rub a small amount of cornflour over the paste or your hands to remove the sticky surface. Use combinations of the Saracino Gel Colours to create new shades.
Preparation:
Bright Red: Colour 100g of White Sugarpaste with the Orange and Red gel colour.
Bright Green: Colour 250g of Light Green Modelling Paste with the Yellow gel colour.
You will need:
- Saracino Modelling Chocolate: 50g White
- Saracino Sugarpaste: 100g White
- Saracino Modelling Paste: Black, Brown, Fuchsia, Green, Light Blue, Light Green, Light Pink, Lilac, Red, White, Yellow
- Saracino Gel Colour: Orange, Red, Yellow
- Saracino Dust Colour: Brown, Green, Red, Yellow
- Piping Gel
- Round Polystyrene Dummy: 6cm deep, 5cm diameter
- Egg Polystyrene Dummy: 9cm tall
- Shereen’s Cakes and Bakes Flexi Smoothers
- Circle Cutter: 6cm
- Dresden Tool
- Large Ball Tool
- Ball Tools
- Star cutter
- 20 gauge florist wire
- No.4 Piping Tip
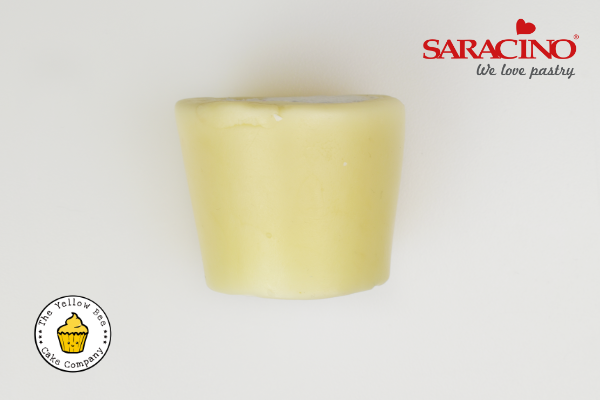
Step 1
Paint a thin layer of Piping Gel over the sides of the round dummy. Roll 50g of White modelling chocolate into a sausage and wrap around the top edge of the dummy. Use your fingers to shape the modelling paste down over the sides of the dummy and into a flower pot shape. Place the flowerpot on its widest side and paint the base and sides with water. Roll out 75g of the bright Red modelling paste thinly and cover the flowerpot dummy. Use flexi smoothers to smooth the surface. Flip the dummy over, so that the narrow end is now the base.
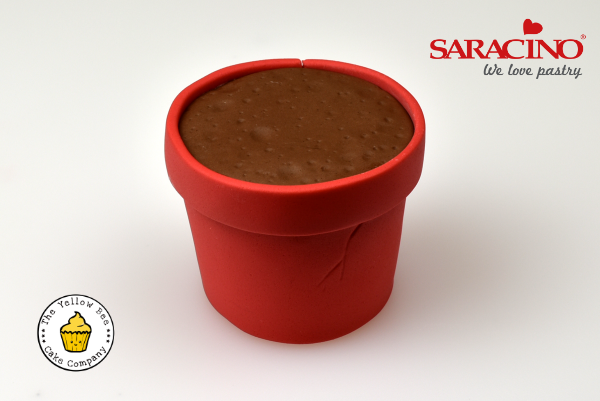
Step 3
Roll out 40g of Brown modelling paste and cut out one 6cm circle. Place the circle on top of the dummy. Use a selection of Ball Tools to mark the surface. Roll out the remaining bright Red sugarpaste into a long sausage. Roll over with the rolling pin to flatten then use smoothers to shape the paste, so that it is an even strip. Alternatively, you can trim the paste into a strip using a wheel cutter. Glue the strip around the top edge of the flowerpot.

Step 3
Place some Red dust colour onto a piece of kitchen paper and then load up a fluffy paintbrush with the dust. Brush off the excess onto the paper and then dust over the bottom, top and under the rim of the flowerpot.
Step 4
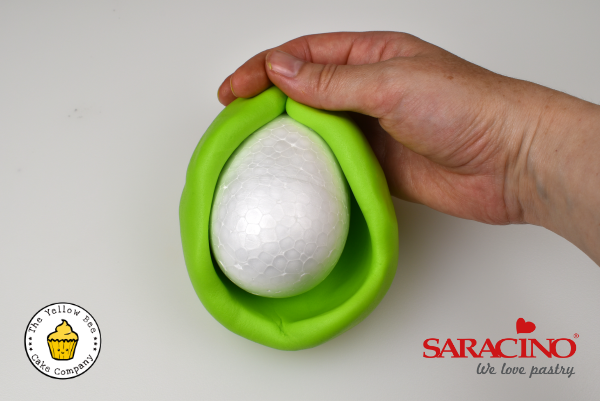
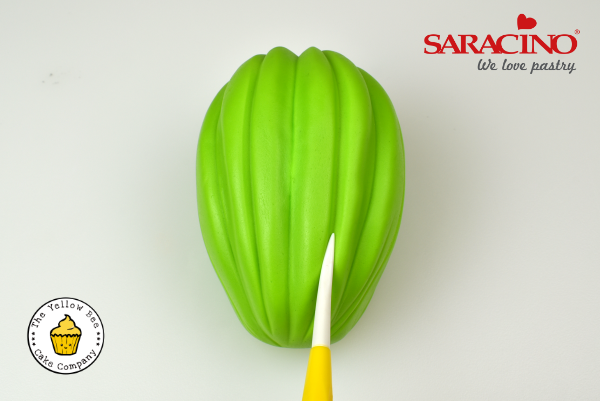
Roll out 215g of the bright Green modelling paste thickly. Paint a thin layer of piping gel over the underside of the paste and wrap around the Egg dummy. Use your fingers to fit the paste to the egg. Smooth the join with your fingers and the flexi smoothers.
Step 5
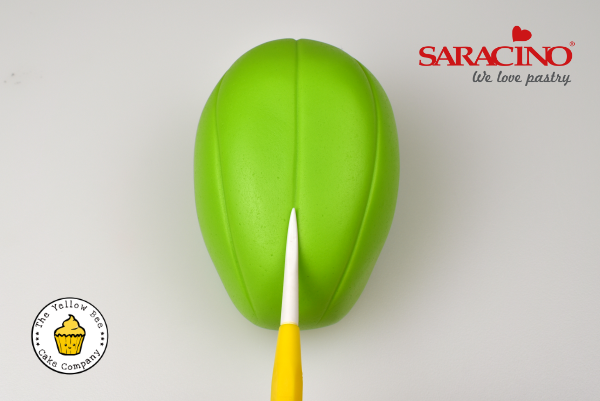
Draw lines down the surface of the cactus using the Dresden tool.
Step 6
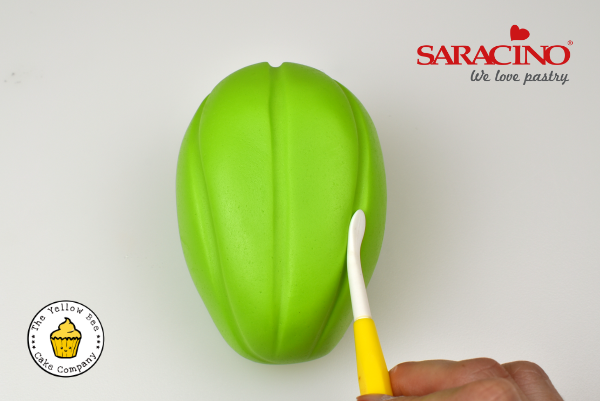
Use the wide end of the Dresden tool to deepen the lines.
Step 7
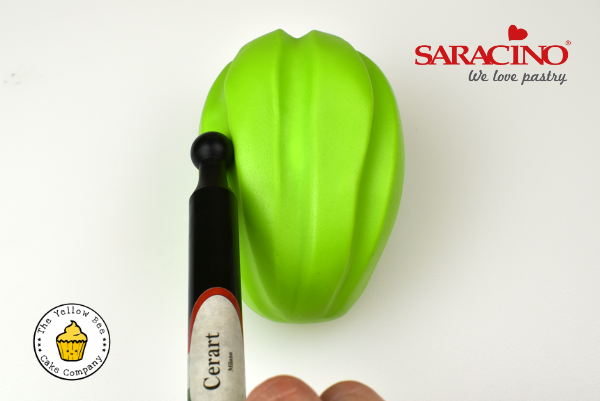
Use the large ball tool to further deepen the groove. Then use your fingers to smooth away the tool marks and shape the paste.
Step 8
Use the Dresden tool to mark a crease into the centre of each groove. Insert a skewer into a spare dummy and push the cactus onto it, narrow end first. Repeat step 5 to 8 on the back of the cactus.
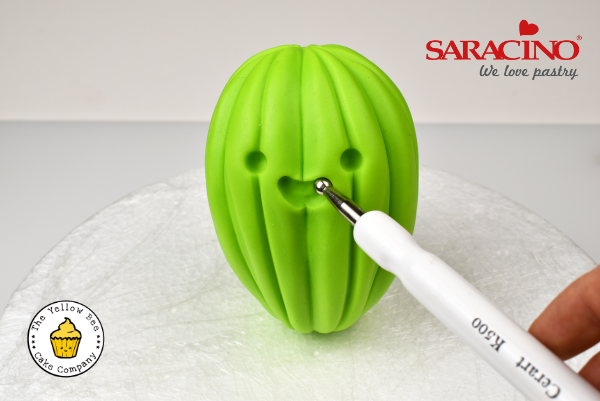
Step 9
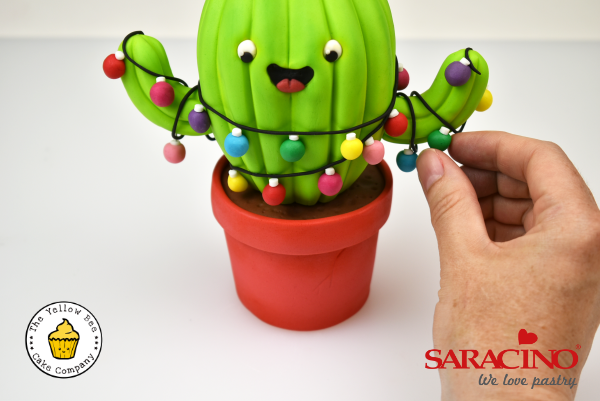
Press a Ball tool into the front of the cactus to mark the eyes. Then use the wide end of the Dresden tool and a Ball tool to mark the mouth.
Step 10
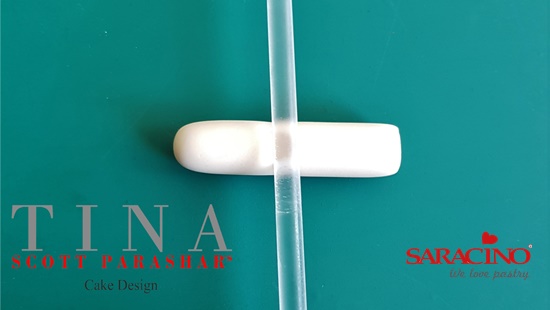
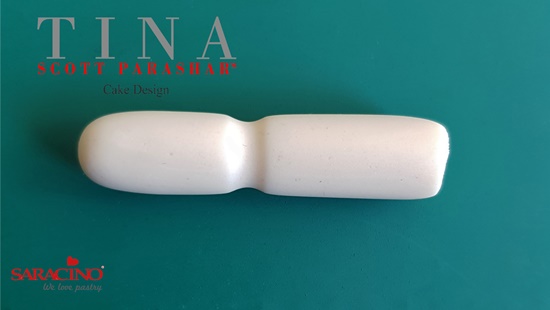
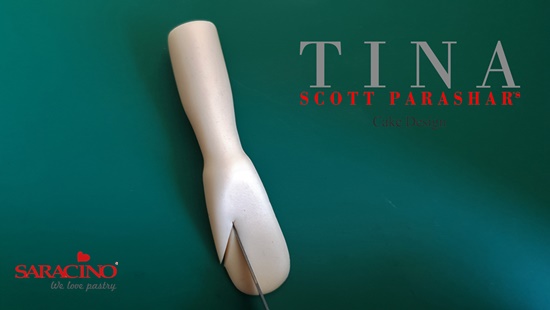
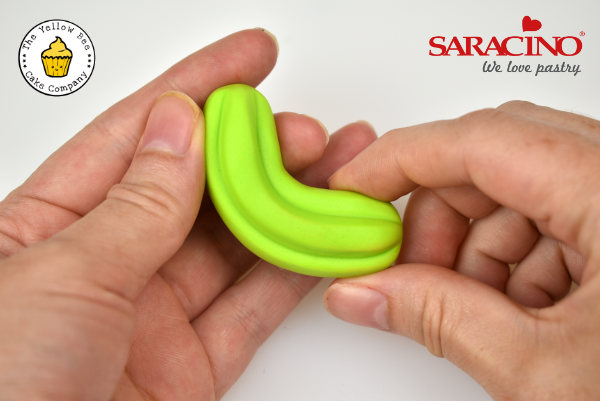
For the arms, roll two 16g of bright Green modelling paste into 6cm long sausages. Repeat step 5 to 8 to add five grooves along the length of each arm. Lightly bend the arm into a curve. Insert a cocktail stick onto each side of the cactus and glue the arms in place.
Step 11
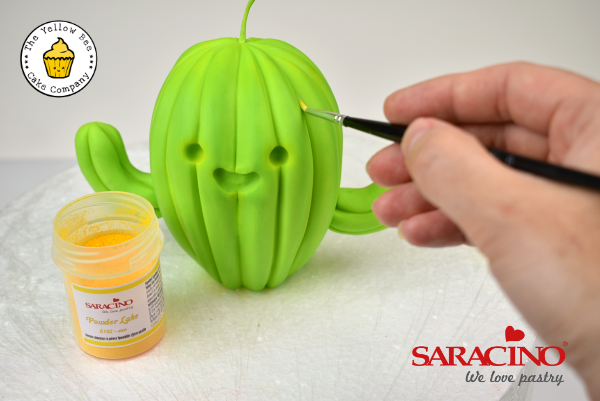
Dust the high points of each groove with Green dust colour and the centre of the grooves, around the eyes and mouth and on top of the cactus with the Yellow dust colour.
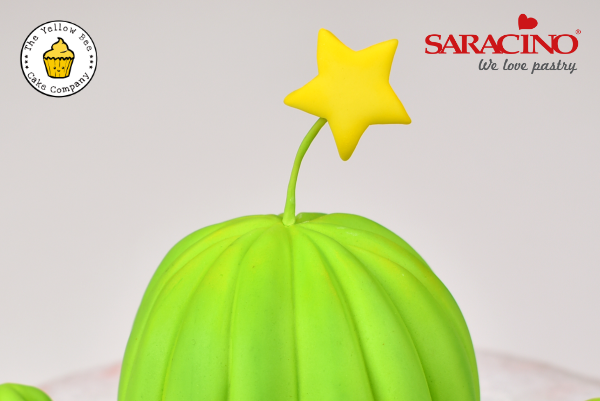
Step 12
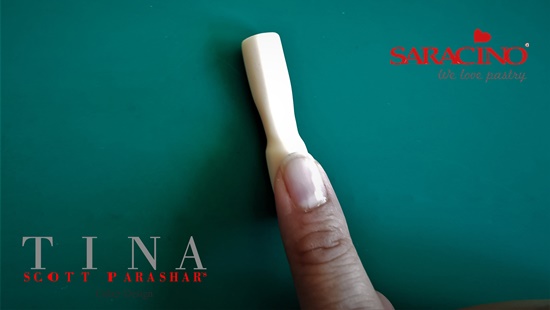
Cut a 20-gauge florist wire into a 10cm length. Insert the wire into a small ball of bright Green modelling paste and then roll the ball into a sausage, covering half of the wire. Trim away 1cm of the sausage from the end. Push the wire into the centre of the cactus. Roll out 10g of Yellow modelling paste and cut out a star. Leave to dry for an hour and then dust around the edges and sides with the Yellow dust colour. Insert the star onto the 1cm piece of bare wire.

Step 13
Fill the eyes with two small balls of White modelling paste. Press a small ball tool into the bottom of each eye and then fill the hole with a small ball of Black modelling paste. Finish with a tiny ball of White for the highlight. Shape a small ball of Black modelling paste to fit the mouth, glue in place. Add a small semi-circle of bright Red sugarpaste to the bottom of the mouth and then use the Dresden tool to mark in the centre of the tongue. Place a skewer in the middle of the flowerpot and carefully attach the cactus.
Step 14
Roll Black modelling paste into a very fine sausage. Wrap the sausage around the arms and body. Roll pea sized balls of Red, Fuchsia, Light Pink, Lilac, Light Blue, Dark Green and Yellow modelling paste. Roll out 5g of White modelling paste and use a no.4 piping tip to cut out circles. Glue one circle onto the top of each ball. Glue the baubles in the colour order above along the length of the Black sausage. For the hanging baubles, push a 2cm piece of 20 gauge florist wire into the cactus and then insert a bauble onto the end.