GOTHIC SUGAR ART COLLABORATION

GOTHIC SUGAR ART COLLABORATION


Gothic Sugar Art Collaboration is an international collaboration featuring 32 sugar artists from 17 different countries around the world, who are recreating the gothic theme into sugar art. Gothic has many branches – art, architecture, literature, fashion, lifestyle and the idea behind this collaboration is, to give everyone the freedom to discover and interpret gothic for themselves. The dark side of gothic is full of demons and fear and through our pieces we cast light on them and make them bearable.


Congratulations On Your Amazing Creations!

Take Your Time And Visit Their Facebook Page GHOTIC SUGAR ART COLLABORATION To View All The Amazing Creations!


Join Our Newsletter

We’d love to send you the latest news, discounts & exclusive offers via email! By signing up below you are confirming you are happy for Saracino to send you marketing emails. We will always treat your personal details with the upmost respect & will never sell your details to other companies for marketing purposes.

• All the latest industry news   • FREE video tutorials   • Exclusive product offers

Products         Tutorials          Ambassadors           Events           Blog           Showcase         Contact


PARROT TULIP TUTORIAL

PARROT TULIP TUTORIAL

Skill level: INTERMEDIATE 

FROM ZLATINA

The tulips have three petals and three sepals, but for ease I have referred to petals here.

I’ve made the flower as near to nature as possible, although it is not 100% botanically accurate.

You will need:
  • Saracino flower paste – Pasta Bouquet – 70g
  • Florist wires white (30, 26 and 20 gauge)
  • Florist tape – mid-green
  • Edible Saracino colour dusts (yellow, pink, red, violet, white, black)
  • Edible glue
  • Semolina – coloured in yellow and violet colours
  • Cornflour for dusting
  • Ball tool
  • Dresden tool
  • Cutting wheel
  • Non-stick rolling pin
  • Cel Board
  • Foam Pad
  • Parrot tulip cutter & veiner
  • Paint brushes (Flat for dusting)
  • Wire cutter
  • Scissors
  • 2 Pipe cleaners
  • Drying shapers or sponge


  •  

Step 1

For the stamens of the flower you will need a lentil size of gumpaste and a length of florist wire gauge 30 cut into 6.

Step 2

Roll out the small piece of gumpaste into a sausage, insert the wire into it and give it a teardrop shape

Step 3

Squeeze and shape the paste as to give it slightly more bulbous tip.

Step 4

Make six stamens. Using your Dresden tool shape a groove down the length of the each stamen. Dust them with black dust colour.

Step 5

Dip each stamen into a little dish with violet coloured semolina and set aside.

Step 6

To make the pistil of the tulip, you will need a pea size of pasta bouquet and 20 gauge wire cut in ½ with a hook formed at the end of it.

Step 7

Form the pasta bouquet into a teardrop shape with a length approximately 3cm and insert the hook to the middle of it. With a ball tool push the end side of the paste to flatten the pointy shape of the teardrop.

Step 8

With the tips of a pair of tweezers, squeeze three evenly spaced ridges into the very top of the paste.

Step 9

With the tweezers, form small ridges at the side of the pistil. With the help of a small cutting wheel, cut a tiny grove into each of the three ridges, made at step 8. 

Step 10

Colour the pistil with pale green colour.

Step 11

Dust the top of the pistil with little amount of yellow colour.

Step 12

Dip the top of the pistil into yellow coloured semolina

Step 13

Now this resembles the pollen on top of the pistil

Step 14

Tape the stamens to the pistil with ½ thickness florist tape

Step 15

Tape all of the stamens to the pistil and set aside.

Step 16

For the petals of the flower you need gumpaste and a ¼ length of a 26 gauge wire

Step 17

Roll out a piece of flower paste on the grove board and cut your petal shape. Make sure the centre of the petal is over one of the grooves in your board

Step 18

Your petal should look like this

Step 19

Insert the wire half way into the petal. A slow twisting motion helps to insert the wire

Step 20

Pinch gently the end of the petal to secure it to the wire

Step 21

Lay the petal on the parrot tulip veiner and press carefully to imprint the veins, but not to break the petal.

Step 22

Carefully remove the petal from the veiner and place it on the foam mat.

Step 23

Gently roll the ball tool over the edge of the petal – half on the foam mat half on the petal, thin the edges and slightly frill them as you are pressing on top of the petal.

Step 24

Make gentle strokes on the inner side of the petal with the Dresden tool. As you pull inwards this will make the petal edges curl in slightly.

Step 25

Make six petals for each flower you make. Leave them to dry on a foam shaper sponge or a clean foam fruit tray. Make sure you position the petals correctly during the drying process.  You can reposition them now and again, to help them fit nicely when assembling them later.

Step 26

Take yellow colour and mix it with little bit of white dust colour.  Use the pale yellow colour to dust the centre of the inner side of the petals.

Step 27

With green colour gently dust the centre of the outer side of the petals

Step 28

Mix together pink, violet, white and little bit of red dust colours to make a brighter pink colour, or you can also use a ready mix colour of your preference.

Step 29

Dust with bright pink food colour around the edges of each petal

Step 30

Attach each petal closely to the base of the stamens and pistil and tape tightly with half width mid-green florist tape

Step 31

Place the three petals close together around the base of the stamens and tape them down the stem.

Step 32

Add the next three petals. Using half width florist tape, attach the petals, alternating with the first three, to complete the flower

Step 33

Use pipe cleaners to add to the main stem wire and tape them together using mid green florist tape.

Step 34

Tape down the pipe cleaners and wire. As this will add to the thickness of the stem and will make it look more natural.

Step 35

By using different dust colours, you can create different colour blossoms. Let Nature be your inspiration.


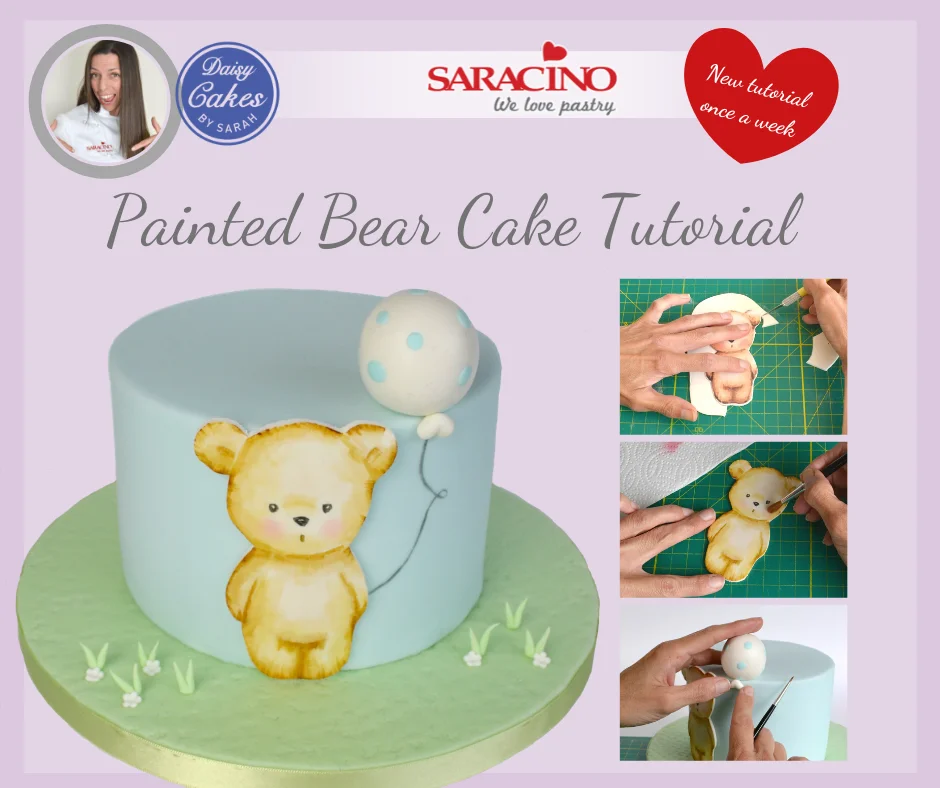
PAINTED BABY BEAR CAKE

PAINTED BABY BEAR CAKE

Author: SARAH BRAY

Skill level: BEGINNERS

You will need:

  • White Saracino pasta model approx. 100g

  • Pale blue Saracino pasta model 10g (white coloured using blue edible gel colour)

  • Pale green Saracino pasta model 10g (white coloured using green edible gel colour)

  • Pale green Saracino pasta top approx. 150g (white coloured using green edible gel colour)

  • 6” cake (or dummy) covered in pale blue Saracino  Pasta Top (white coloured using blue edible gel colour)

  • Boiling water

  • Saracino cocoa butter

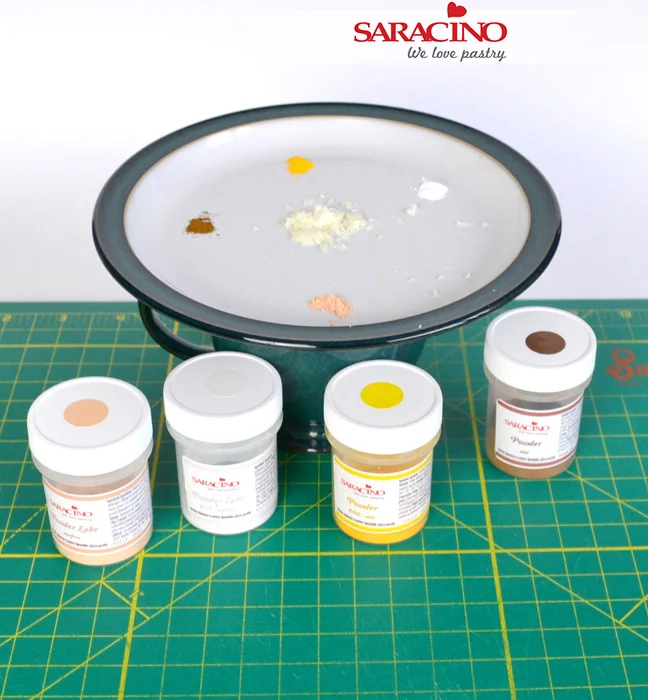
  • Saracino edible dusts in white, skin tone, brown, yellow, black, pink

  • Sugar glue

  • Bear image: Download HERE

  • Sharp scissors

  • Dusting pouch

  • Cutting mat

  • Rolling pin

  • Craft knife

  • Small ball tool

  • 10” round cake drum

  • Sharp knife

  • Washing up/kitchen brush

  • Small cup

  • Small plate

  • Paintbrush (flat, size 6 is ideal)

  • Fine paintbrush

  • Soft brush

  • Small daisy plunger cutter

Step 1

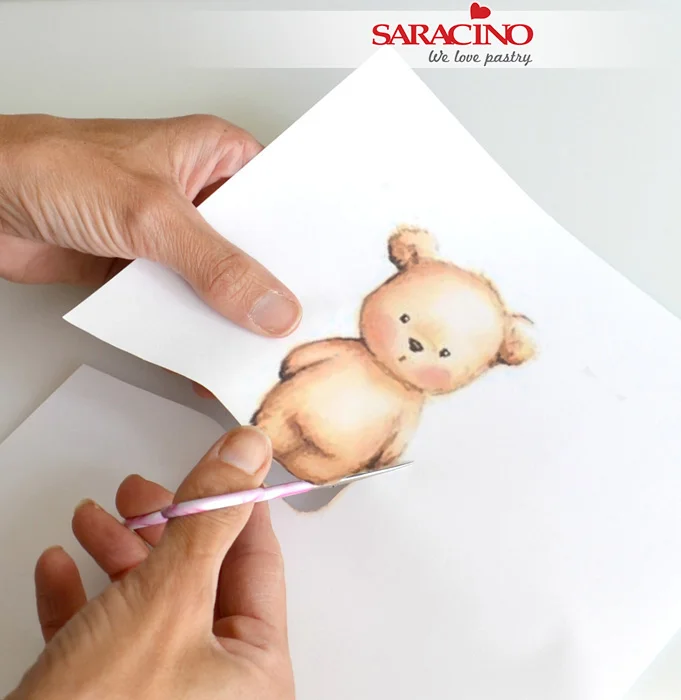
Print off the bear image so that it is just over 4” in height (If your cake is taller or shorter adjust the image accordingly) Cut bear out using a sharp pair of scissors.

Step 2

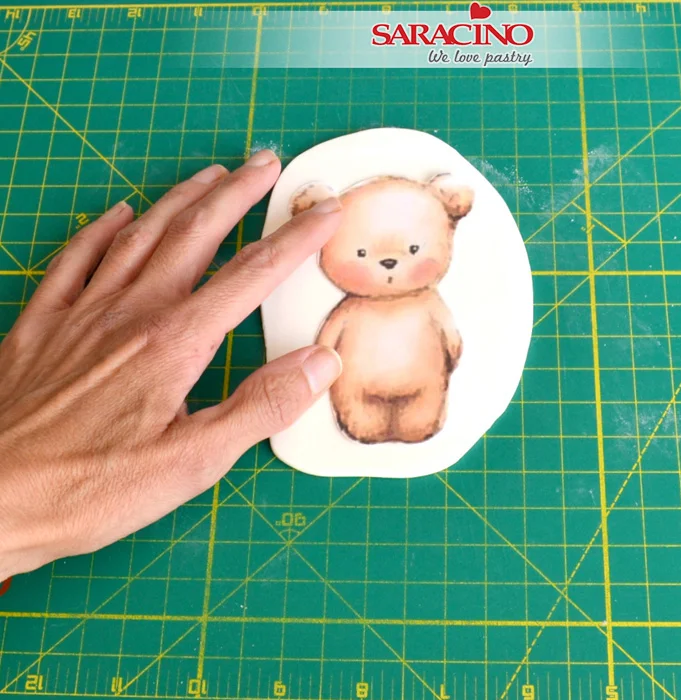
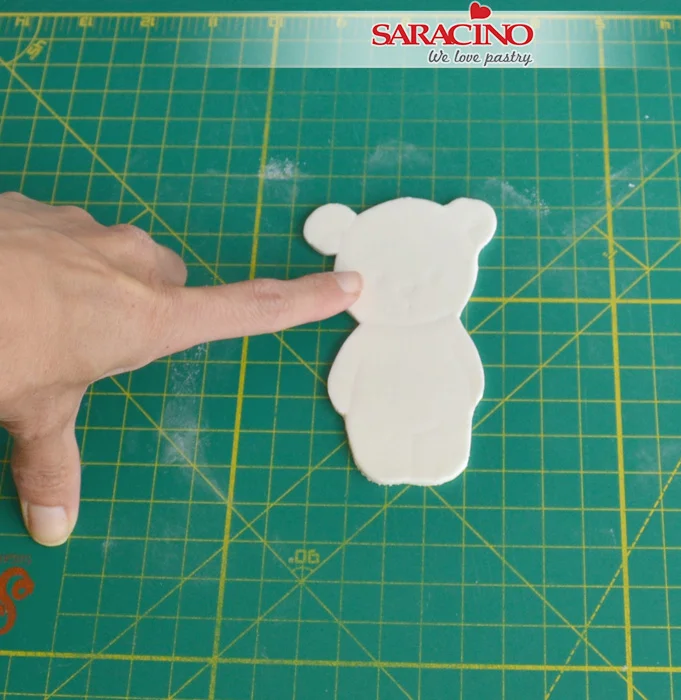
Dust cutting mat very lightly with cornflour dusting pouch. Roll out modelling paste to approx. 3-4mm in thickness using a rolling pin. Make sure it is big enough to lay the image on top. Remove the image and let the paste firm up for a few minutes. This makes it much easier to cut cleanly and without the paste dragging as you cut.

Step 3

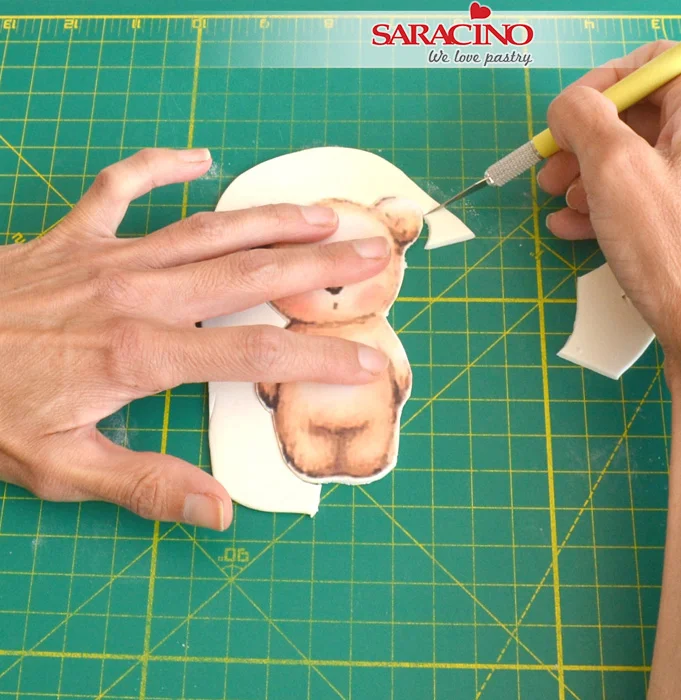
Put image back on top and carefully cut around using a craft knife trying not to move the paste or distort the shape.

Step 4

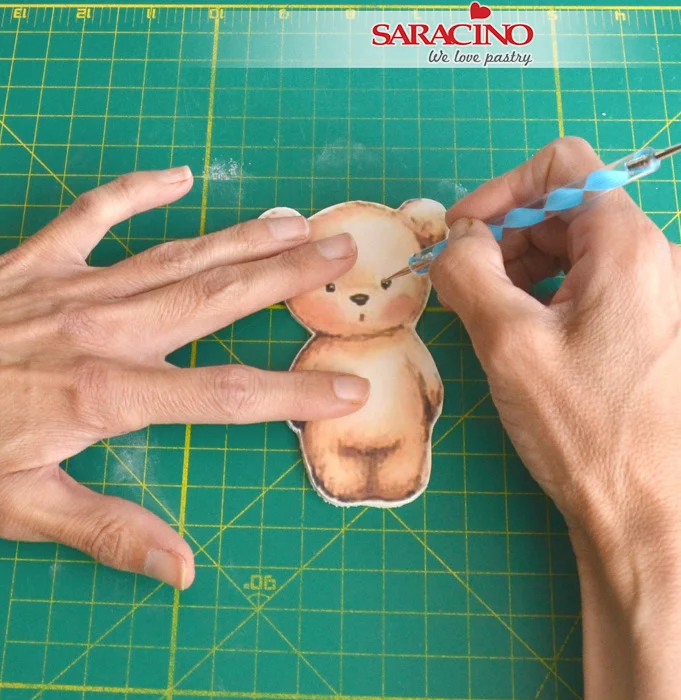
Using a small ball tool gently mark where the eyes, nose, mouth, the bottom of his head, arms and legs are. 

Step 5

This will provide guidelines for painting later on. If possible leave overnight as then painting will be easier.

Step 6

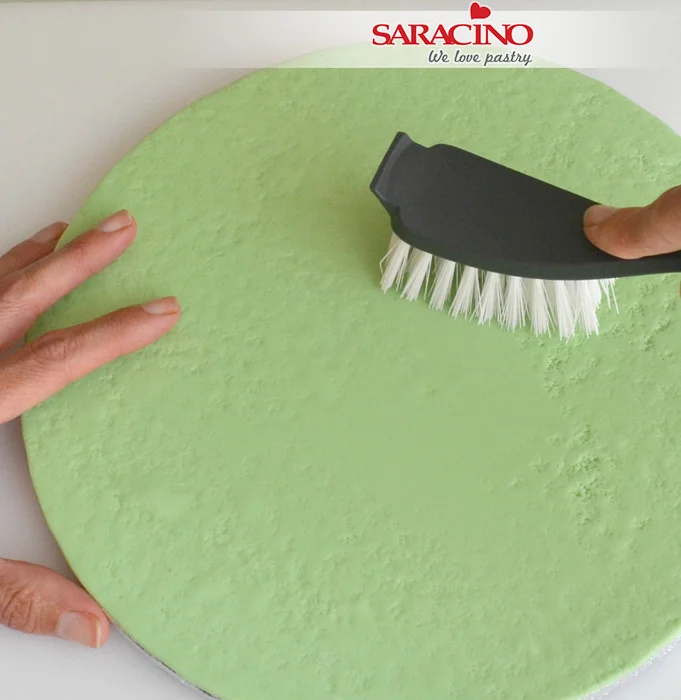
Role out pale green Pasta Top and attach to the cake drum with cool boiled water. Trim off the excess with a sharp knife and add texture using the kitchen brush. Leave to dry. Use a small blob of either ganache or royal icing to secure cake to centre of drum and leave to dry.

Step 7

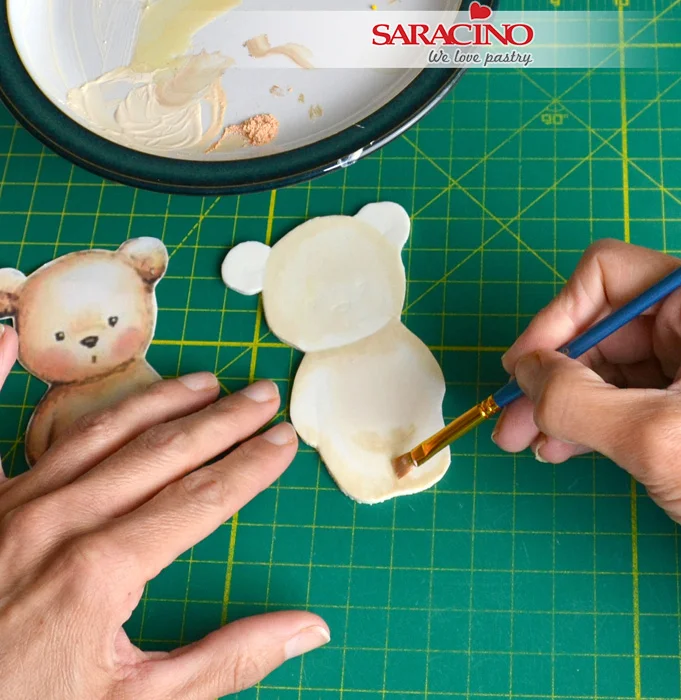
To paint the image you will need a small bowl or cup of boiling water and a plate on top. Add a small amount of cocoa butter to the centre of the plate and some skin tone, brown, yellow and white edible dust around the outside.

(NB you will need to change the water from time to time as the boiled water cools down)

Step 8

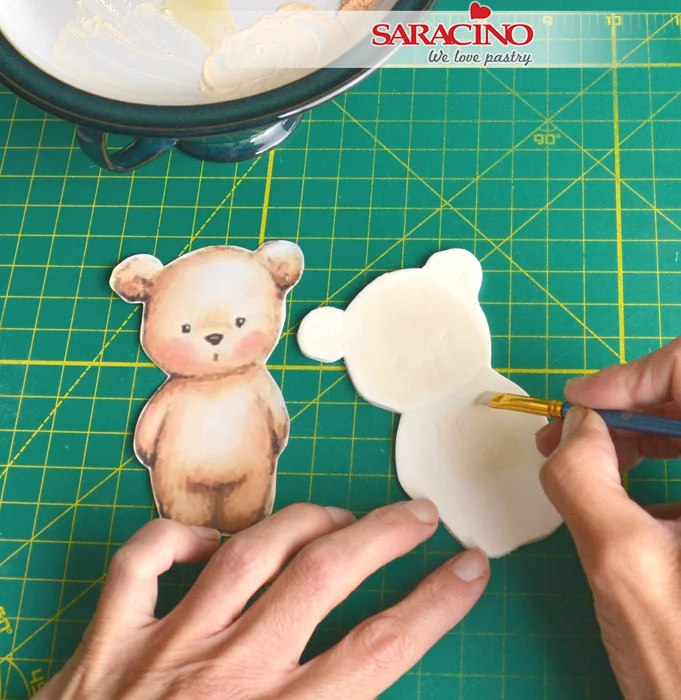
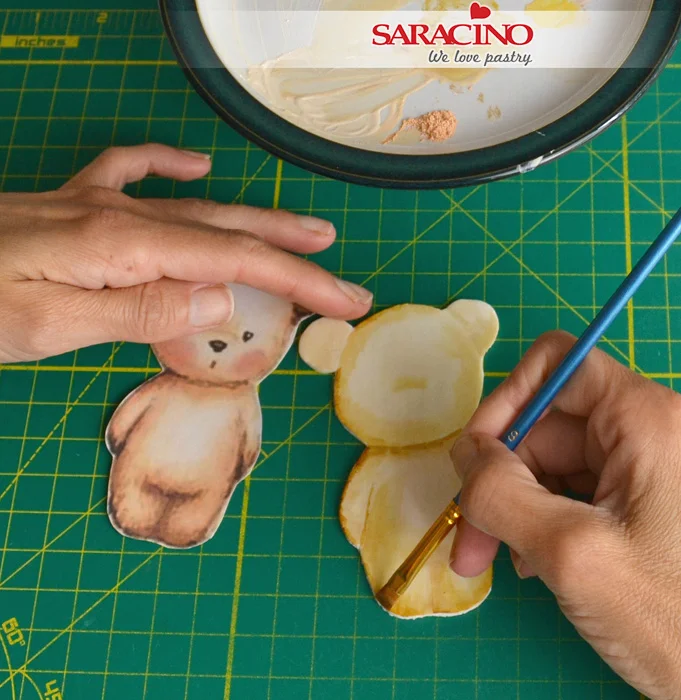
Start by mixing the skin colour dust with white and a tiny speck of brown with the melted cocoa butter. Paint this light colour as a base over the head, tummy and top of the bears legs. In all the lighter areas of the bear.

Step 9

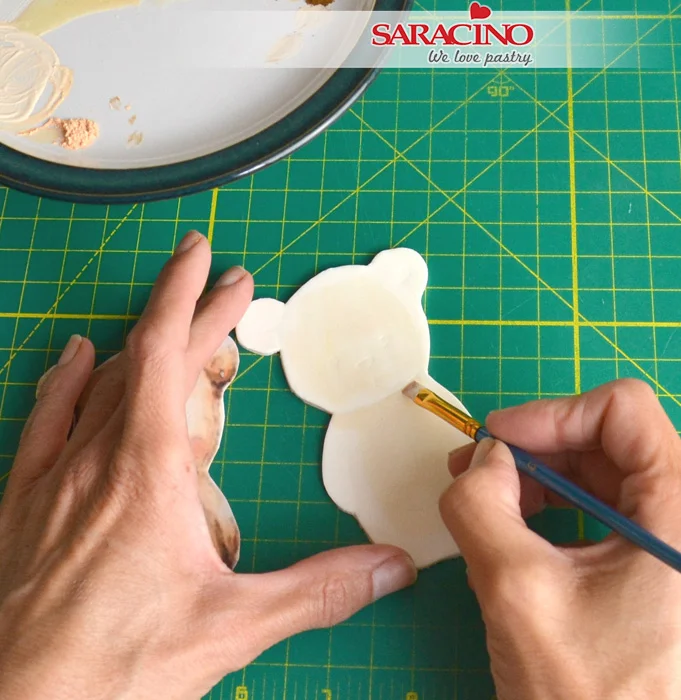
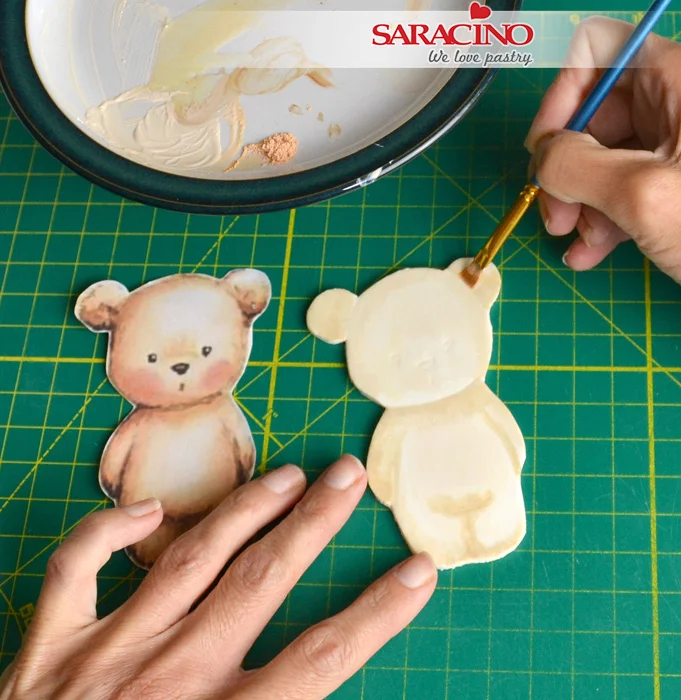
Add a bit more skin colour dust and a speck of brown if necessary to create a slightly darker tone and paint underneath the chin along the line in small downward brush strokes, blending into the lighter colour as you go.

Step 10

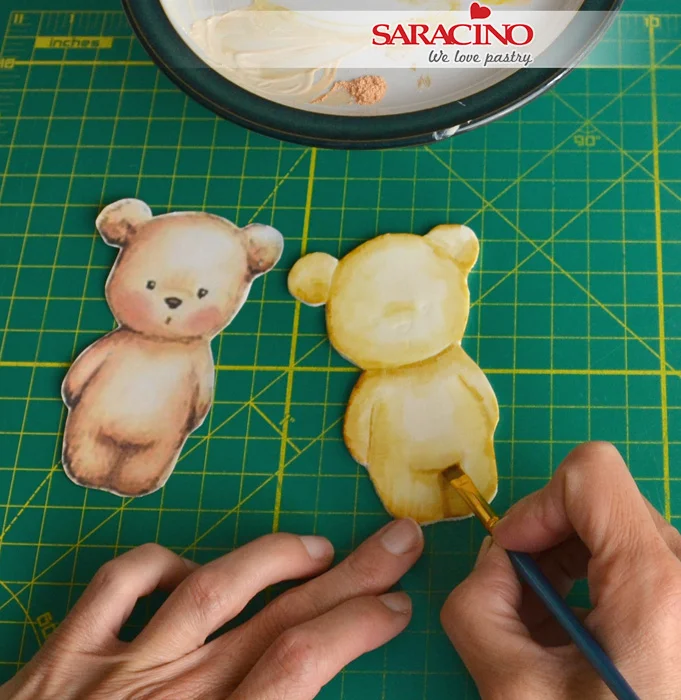
Use this darker colour to paint inwards strokes around the edges of the bear.

Step 11

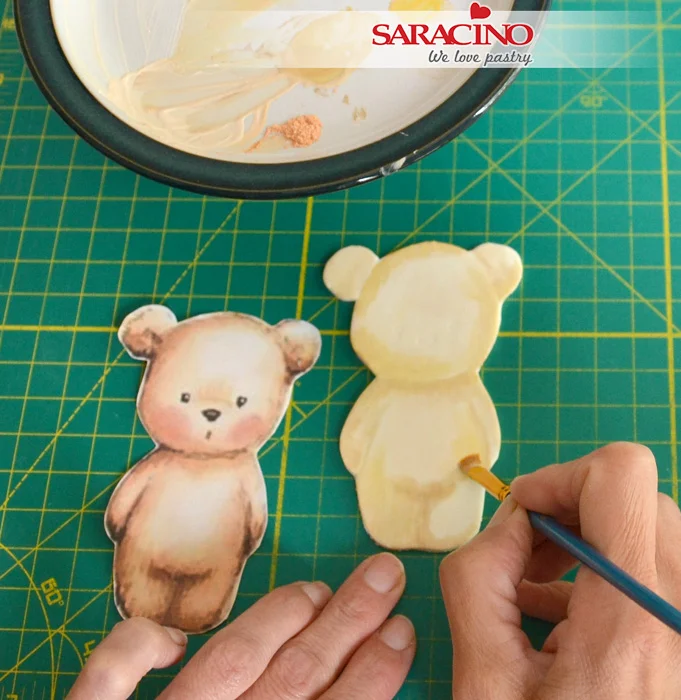
Continue painting in the line between his legs and arms in short horizontal strokes and then on the line where his tummy is. Don’t worry about getting it completely even as this is the style of the bear.

Step 12

Continue adding this darker shade on his arms and ears. When you paint the ears try to leave a small section of the ear on the right unpainted where it is lighter on the picture.

Step 13

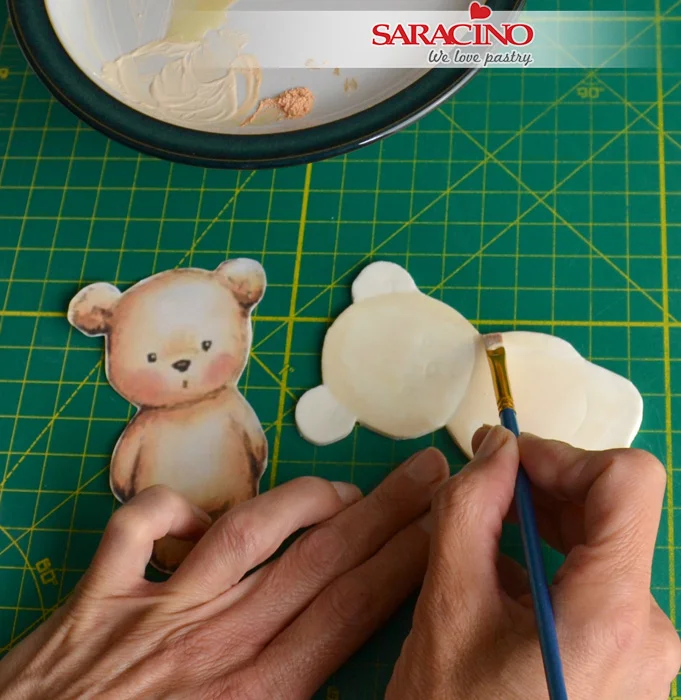
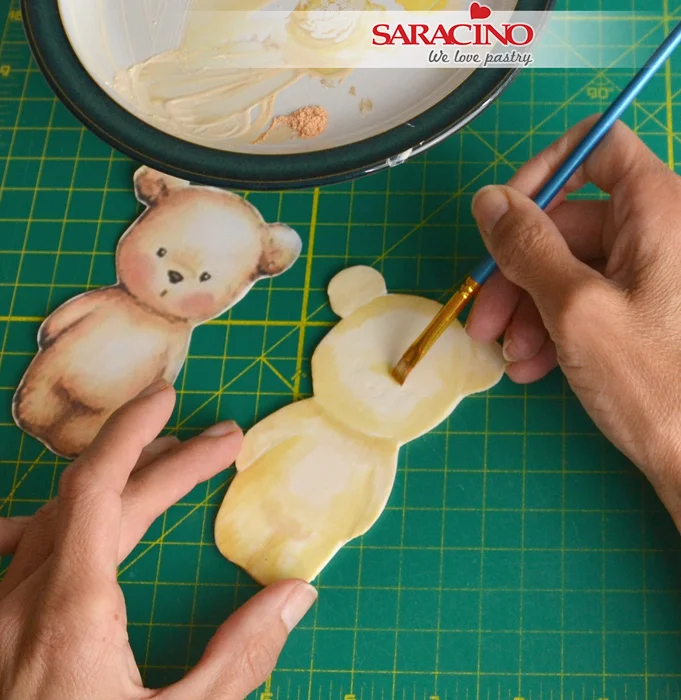
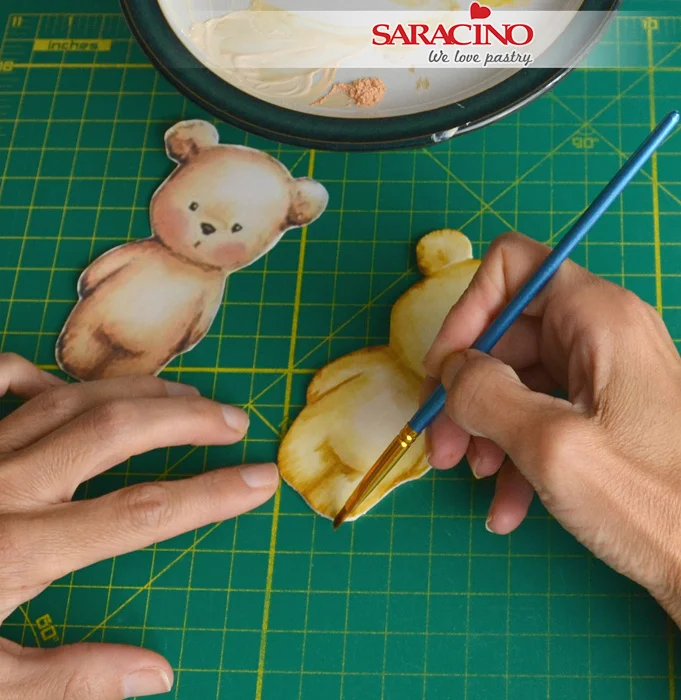
Add a bit more yellow dust (a tiny bit at a time) and a speck of brown to get a straw colour and use this to build up the colour on his face, tummy and legs.

Step 14

Following the line over his nose use this same straw colour to add in the shading. Place the tip of the brush on the top of the line and using short upward strokes to add this shading in. Build up the colour on the bears ears too.

Step 15

Mix some yellow and brown dust with cocoa butter to create a darker yellowy brown. Use this to go around the edges of the bear. Try to catch the very edges of the bear in light flicky motions.

Step 16

Add further shading to the tummy area and ears using this same shade but with a bit more cocoa butter added. At this stage refer back to the image and just see if any more shading needs to be added.

Tip: I use a spare piece of white paste to test colours on before using them on the piece itself.

Step 17

Using the side of the brush, add little flicks of colour in this darker brown shade to make the bear look a bit more furry. Continue to do this around the edge of the bear.

Step 18

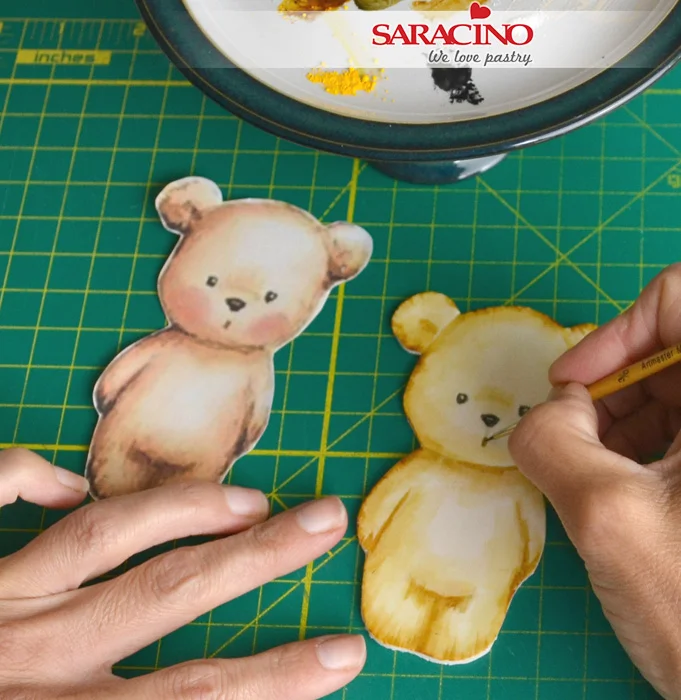
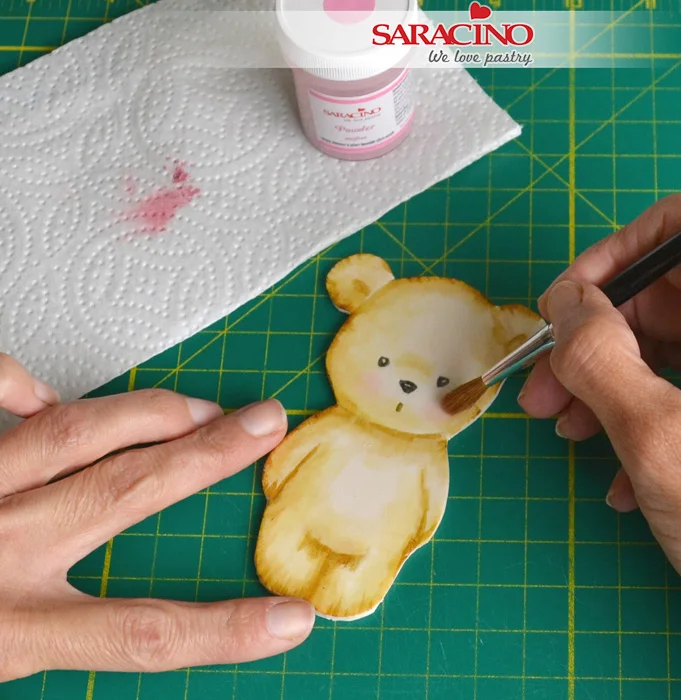
Mix a smaller amount of black dust and melted cocoa butter. Using a fine paintbrush paint in the eyes, nose and mouth. Be careful to leave a tiny speck of the eyes and nose unpainted as this makes them sparkle

Step 19

When the image is completely dry use a soft brush and some pink dust to add the cheeks. Be careful to remove the excess from your brush before dusting.

Step 20

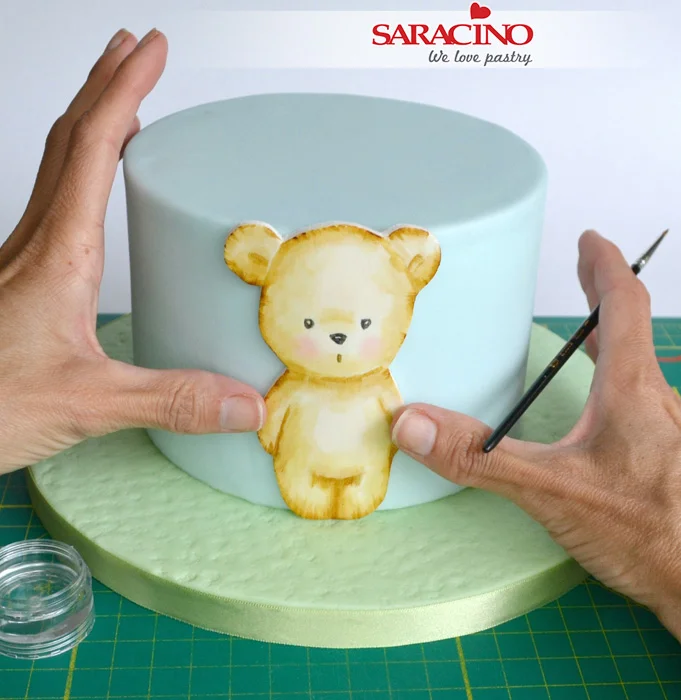
Use sugar glue to attach the image to the front of the cake. As you have left it on the cutting mat whilst working on it, it should still be flexible enough to shape around the cake.

Step 21

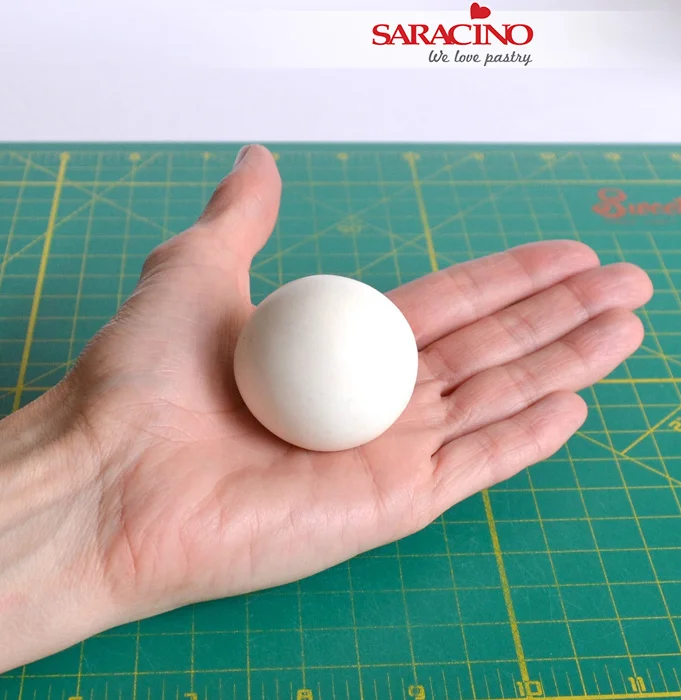
To make the balloon roll a 50g piece of white modelling paste into a ball in the palm of your hands. Try to roll it as smooth as possible.

Step 22

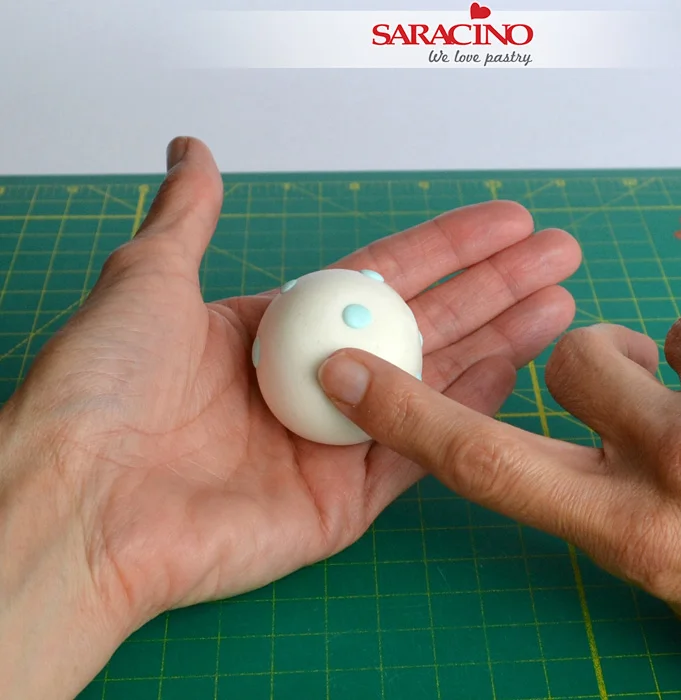
Roll tiny pieces of pale blue modelling paste into little balls with your finger on the palm of your hand. Push these as flat as possible onto the white ball.

Step 23

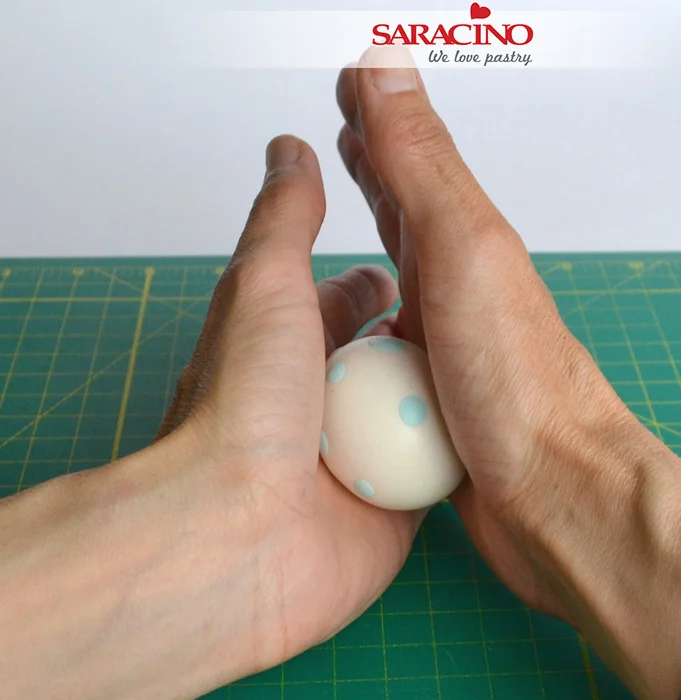
Roll the ball carefully in the palm of your hands to further flatten the spots into the balloon.

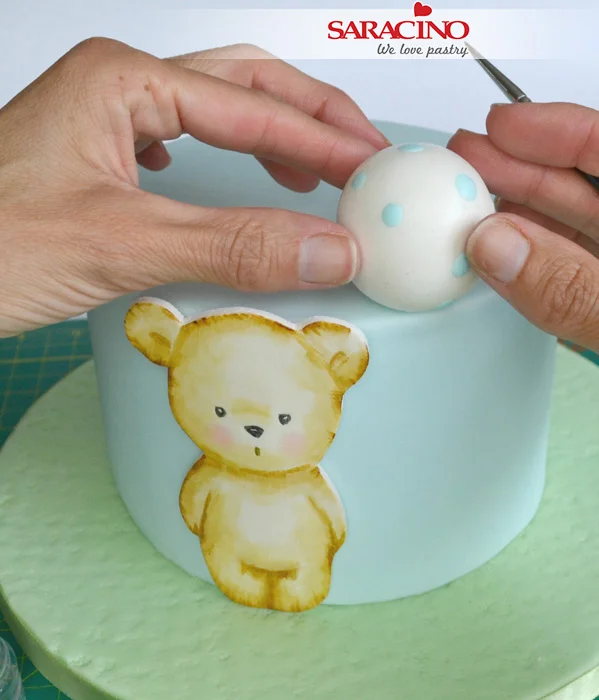
Step 24

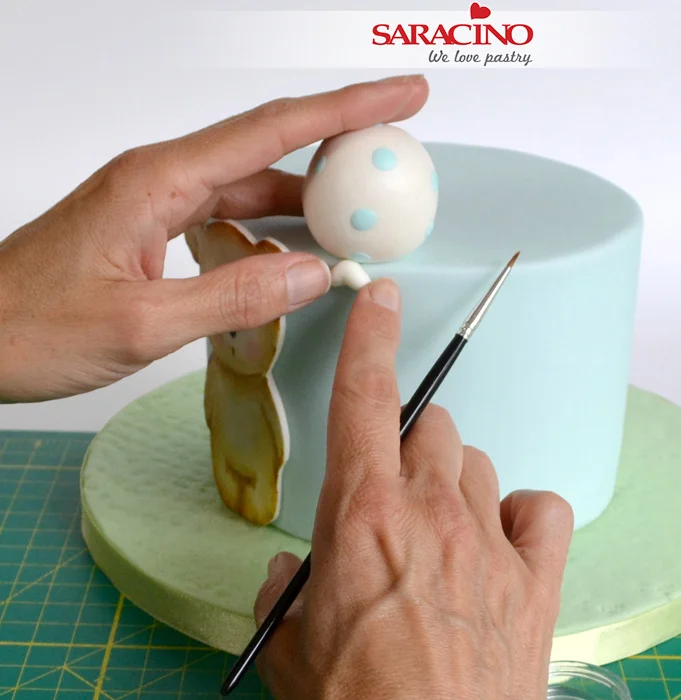
Secure the balloon on the edge of the cake using sugar glue (for extra security you could attach to the cake using a cocktail stick if desired).

Step 25

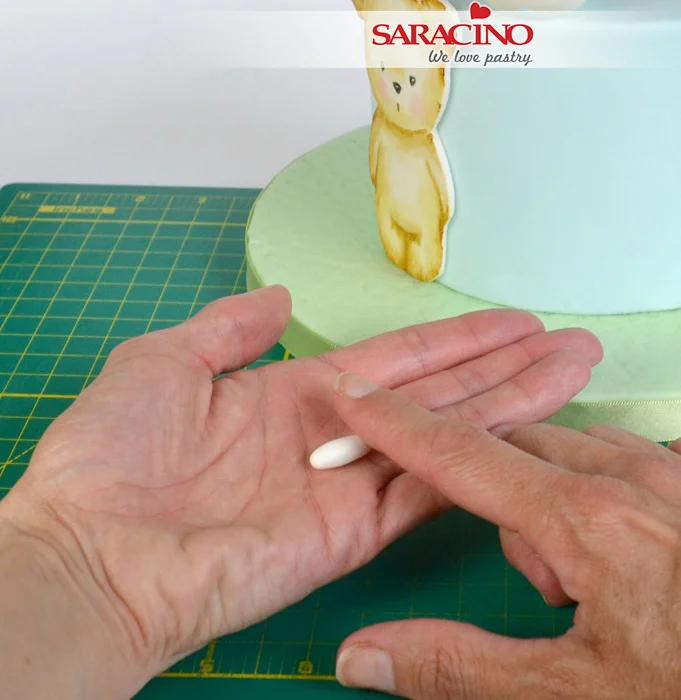
Roll a large pea sized ball of white paste into a sausage in the palm of your hand with your finger.

Step 26

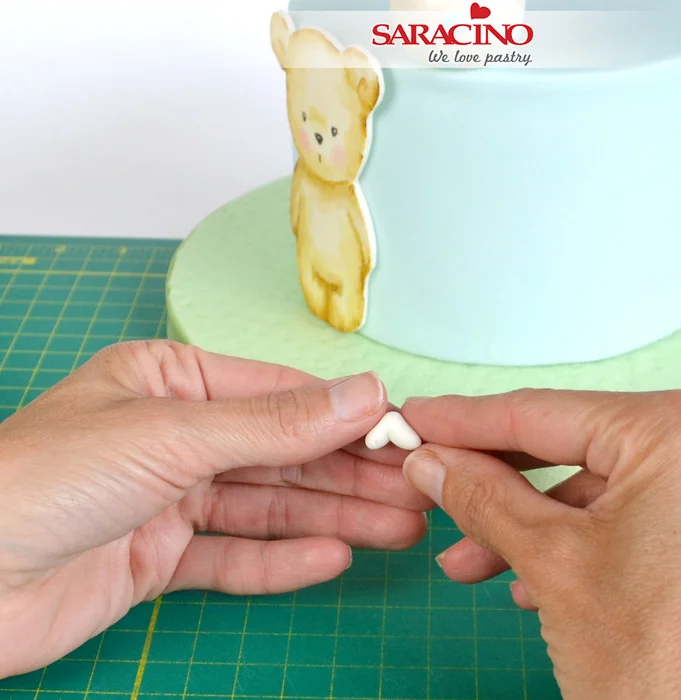
Bend the little sausage over in half to form the tie of the balloon.

Step 27

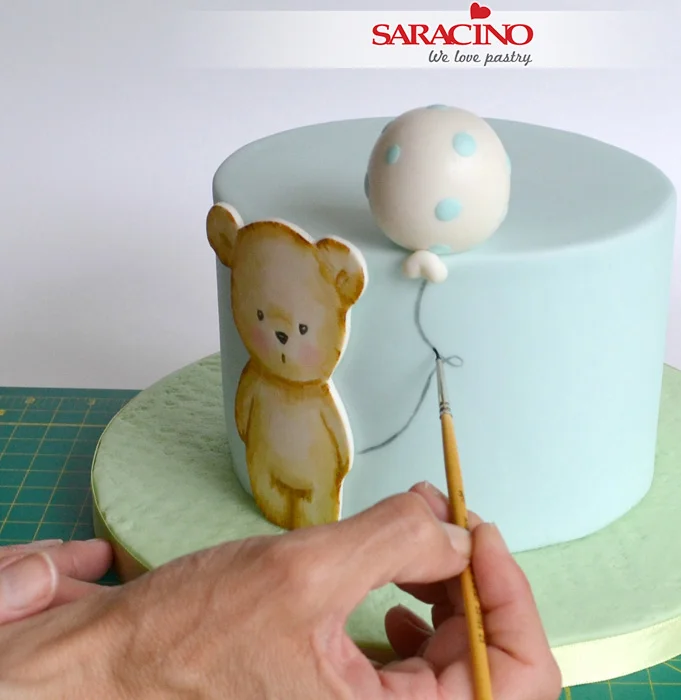
Use sugar glue to attach the tie to the bottom of the balloon on the top rim of the cake.

Step 28

Use a fine paintbrush with black dust and cocoa butter to paint on a string for the balloon down to the bears arm.

Step 29

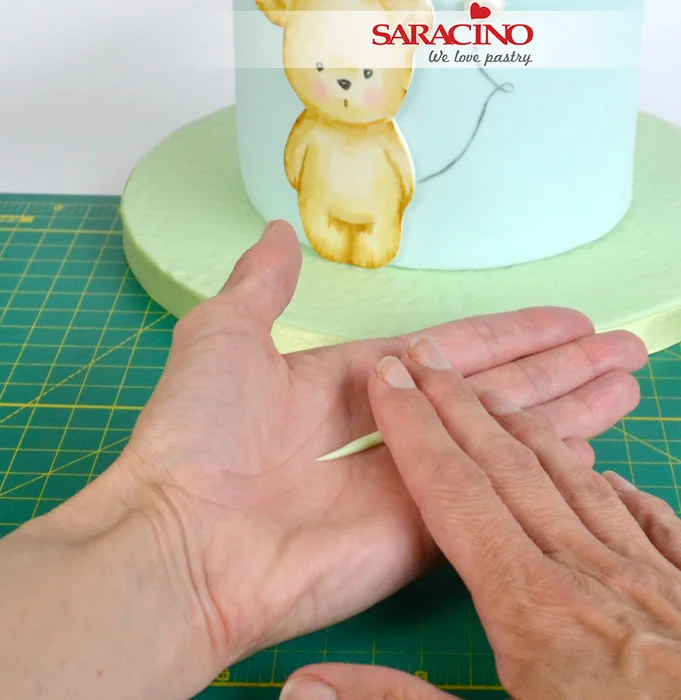
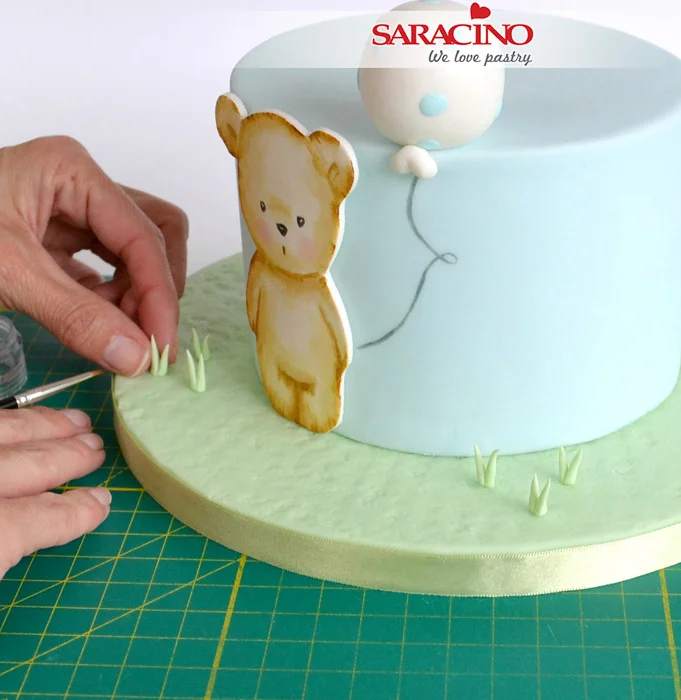
Roll little sausage shapes of pale green modelling paste in the palm of your hands with your fingers. Make sure you roll the ends to a point. Repeat to make 6 or 7 of these.

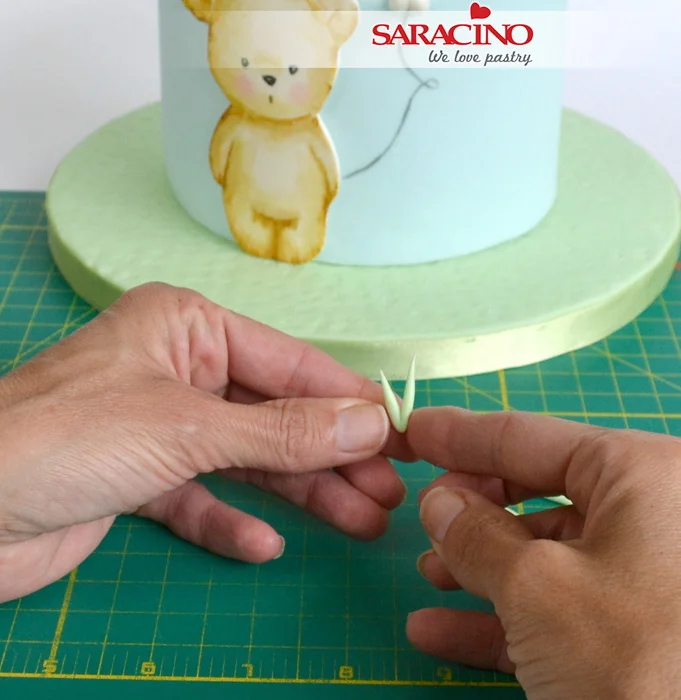
Step 30

Bend each in half to make a little v shape piece of grass.

Step 31

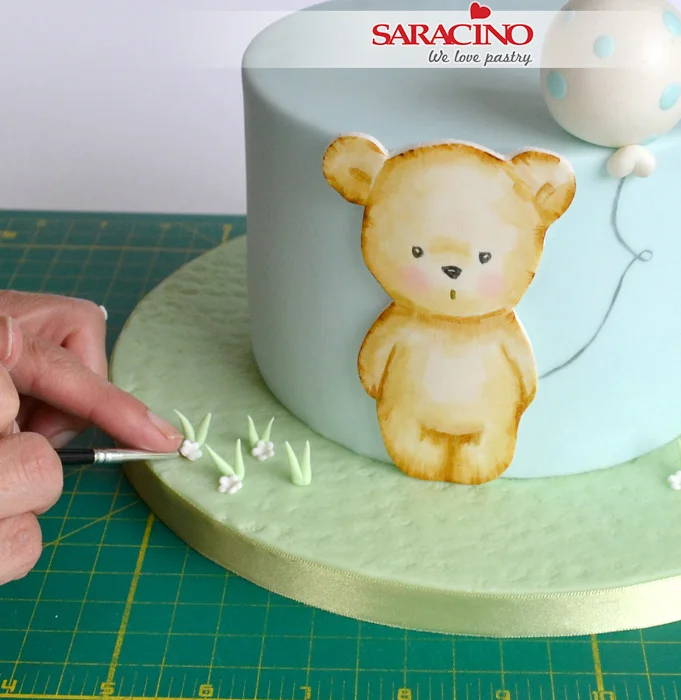
Use sugar glue to attach these to the board either side of the bear.

Step 32

Finally roll out a piece of white modelling paste and cut out 5 or 6 daisies using a small plunger cutter. Use sugar glue to stick these near to the grass.

MERINGUES WITH RASPBERRY AND STRAWBERRY MIX

MERINGUES WITH RASPBERRY AND STRAWBERRY MIX

Author: Justyna Kowal

Skill level: BEGINNERS 

You will need:

To prepare the fruit mix you will need:

  • 200g raspberries (can be frozen)
  • 50g freeze-dried strawberries
  • 1 tbsp sugar
  • 1 tsp pectin
  • 1 tsp Saracino Supreme natural raspberry food flavouring 

To prepare the meringues you will need as follows:

  • 6 egg whites (approximately 240g)
  • 300g caster sugar
  • 120g icing sugar

Step 1

Before you start bring all the ingredients to room temperature.

Step 2

Transfer the raspberries to a heavy bottomed saucepan, slowly bring to a boil.

Step 3

Mix sugar and pectin thoroughly. Add carefully to the boiling fruit and mix.

Step 4

Grind the freeze-dried strawberries into a powder texture.

Step 5

Slowly add the ground strawberry powder to the boiling mix and stir carefully. 

Step 6

Add a teaspoon of raspberry flavour Saracino Supreme food flavouring. Stir and cook for a short while.

Step 7

Let the fruit mix cool down until it thickens. Meanwhile heat the oven to 100-120 degrees Celsius (fan oven).  Line your baking tray with greaseproof paper. 

Step 8

Place 6 egg whites into a mixing bowl. Beat to stiff consistency then slowly add your caster sugar until it is fully incorporated. Take care not to over beat your egg whites. 

Step 9

Add icing sugar to the mix and combine.

Step 10

Now get everything ready for the next stage. You will need your cooled jam mix, your meringue mix and a hand whisk. This next stage you have to be as quick as you can. Don’t leave these standing for any period of time.

Step 11

Gently mix the jam into the meringue. Take care not to over mix. It does not have to be fully blended. 

Step 12

Place the combined mixture into a piping bag with a star nozzle. 

Step 13

Pipe your meringue nests onto the baking paper (do not pipe them too close to each other). Bake in the oven for 90 minutes. Remove from the oven and allow to cool before decorating. 

Step 14

Add your favourite cream and fresh fruit on top. They also taste great without any additions!

LITTLE MERMAID TUTORIAL

LITTLE MERMAID TUTORIAL

Skill level: BEGINNERS

You will need:

  • Pasta Model Green

  • Pasta Model Pink

  • Pasta model Fuchsia

  • Pasta Model White

  • Saracino white powder colour

  • Saracino black powder colour

  • Saracino pink powder colour
  • Saracino pink gel colour

  • Saracino blue gel colour

  • Saracino silver glitter powder
  • Cake Gel
  • Straw
  • Brushes – fine and flat
  • Toothpick
  • Clear Alcohol 
  • Scissors
  • Small star cutter
  • Small circle cutter


Step 1

For the head you will need 30g of skin modelling paste. Roll an egg shape and using one of your tools press approximately half way to create the eye area.

Step 2

Using your little finger or a ball tool pass two eye sockets gently into the eye area.

Step 3

Using your fingers press up gently to form the nose 

Step 4

Your face should look similar to this with an indent for the mouth area.

Step 5

Place a small piece of cling film over your face.Using a small round cutter indent the eyes through the cling film. 

Tip – If you do not have a small enough round cutter you can use the end of a straw.

Step 6

Mix your white gel colour with a little clear alcohol. Paint the eye balls with a small brush.

Step 7

Colour a little of your white paste with the blue gel colour. Roll a small ball and press with your finger to flatten. Place on the white eye balls. Now dilute some of the blue gel with the alcohol and using a small paint brush add highlight and shade around the blue area.

Step 8

Dilute some of your black powder colour with the clear alcohol. Using a fine paint brush paint the pupils, eyelashes and eyebrows. 

Step 9

Add two small dots of white colour to each eye. Now dilute pink powder colour with the clear alcohol and using a fine brush paint the lips.

Step 10

Using your pink powder colour and a soft paint brush lightly dust the cheeks.

Step 11

Prepare 15g of white paste and 50g of pink paste.

Step 12

 Roll out each colour and overlap them. Fold down and roll again. We are achieving our colour blend.

Step 13

Repeat the same process 5 or 6 times, until you get a gradient from pink to white.

Step 14

Without mixing colours, shape the body and tail of the mermaid by forming an elongated pear shape ending in the thinner white for the tail.

Step 15

Flatten the tail and using a small scissors or sharp knife cut the tail shape.

Step 16

Using the end of a rolling pin push down into the top of the pink to create a dent. Round the edges of the tail as shown.

Step 17

Use your Dresden tool to add lines / texture to the tail. Now use a ball tool or similar to roll out and thin all the edges to create a more natural appearance.

Step 18

Pinch the edge of the upper hollow.

Step 19

Trim your straw, and mark the scales of the tail.


Step 20

Shape the tail area into a sitting position on a piece of polystyrene or something similar. The sitting position should match how you want it to appear on your cake.

Step 21

Using 40g of skin tone modelling paste roll a pear shape for the body. Using your fingers gently roll out and form a neck.

Step 22

Using a little cake gel fix the body into the top of the tail / lower body. Insert a cocktail stick into the neck ready to attach the head.

Step 23

Model two 1g fuchsia ovals, flatten them with the shell tool to form the bra of the swimsuit.

Step 24

Glue to the chest area.

Step 25

Using 4g of skin modelling paste roll out a sausage shape. You will need two (one for each arm). Now form the elbow and wrist joints using your modelling tool.

Step 26

Flatten the hands and cut a triangle to form the thumbs.

Step 27

Bend your arms to give them their final position.

Step 28

Attach the head to the body

Step 29

Attach arms in the position you require. The left arm will need to be outstretched as this will be holding your oyster shell.

Step 30

 For the hair you will need to mix a little pink paste with white paste to form light pink. Roll out thinly to approximately 6cm long and then add definition using your Dresden tool or other sharp tool.

Step 31

Attach the first piece to the back of the head. Now using a sharp knife or scissors form the separate locks of hair. Shape to give a curl and a little character.  

Step 32

Repeat this process around the head. The hair is to cover the shoulders.

Step 33

You can use thinly rolled individual strands to finish off the hairstyle as you desire. 

Step 34

Using your fuchsia paste roll out thinly. Now with your small star cutter cut out a star shape.

Step 35

Shape to create a starfish. Add texture using the end of a small piping nozzle. Fix to the Mermaids head.

Step 36

Make the oyster shells with a white pearl in the centre using the same technique as for the bra. Attach to the hand.

Step 37

Using your silver powder colour and a soft brush lightly dust the tail. Using the white gel colour and a fine brush add detail to the bra and the starfish.

Step 38

TA DA! Your mermaid is finished!