


You will need:
For the cake:
-
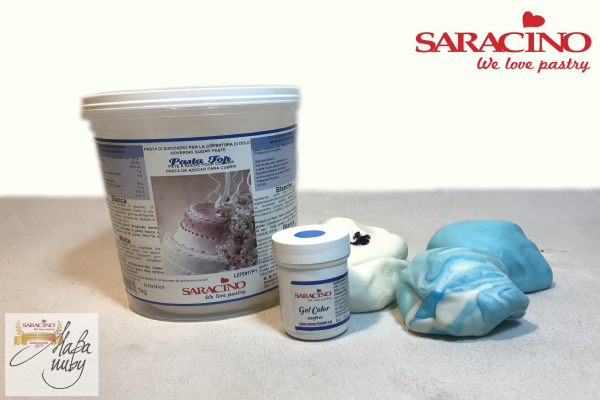
Saracino white Pasta Top
-
Saracino blue gel colour
-
Dummy cake (circular) about 20 cm high. Or cake with same dimensions.
-
Saracino airbrush colours: black, light blue, blue
-
Saracino gold powder colour
-
Saracino powder spray dispensers: gold and silver
-
pure clear alcohol
-
Side smoother
-
Work base
-
Stiff bristled brush
-
Airbrush
For chocolate planets:
- Polycarbonate half circle moulds of various sizes
- Cocoa butter
- Saracino powder colours: gold, white, bronze, blue and copper
- Brush with stiff bristles
- Brush with soft flat bristles
- Dark chocolate
- Marble or steel worktop
- Spatulas
- Baking tin
Step 1
Prepare blue pasta top: Add a little Saracino blue gel colour to the Saracino Pasta Top, until an intense blue colour is obtained.
Step 2
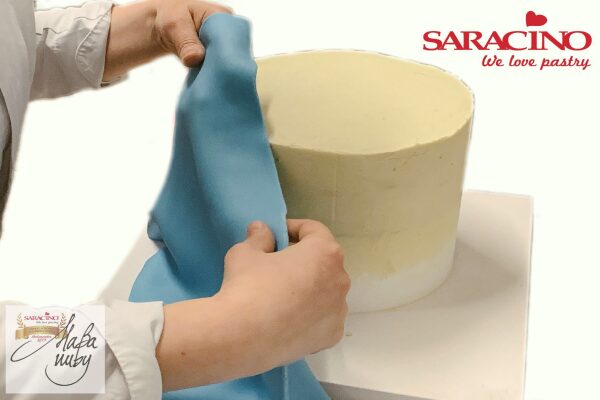
Roll out the dough into a strip as high as the dummy / cake.
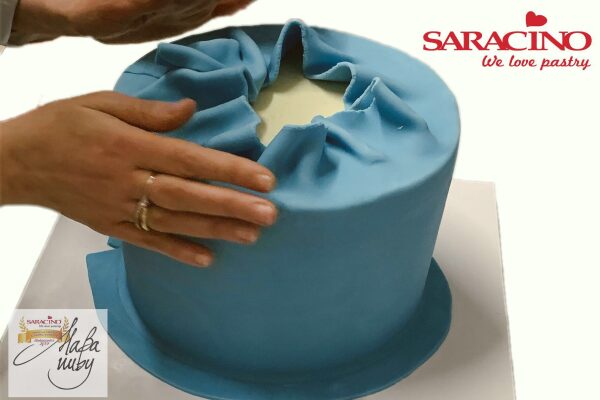
Step 3
Cover the side of the cake bringing the excess upwards
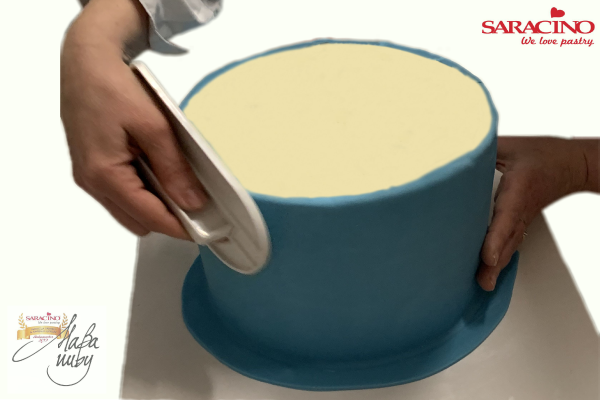
Step 4
Cut the excess and finish with the smoother.

Step 5
Roll out some more of the blue paste and cut out a circle of the exact size of the cake and close the top by blending the paste very well with the smoother.
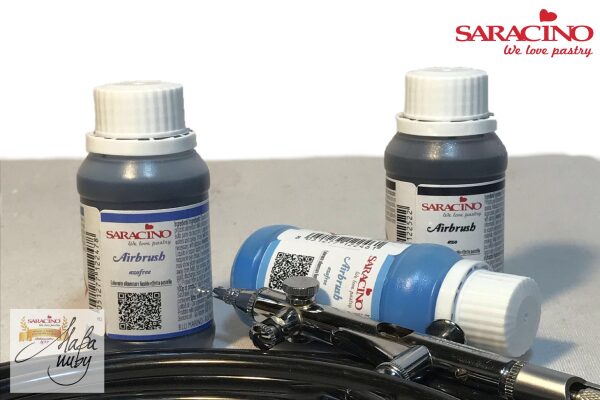
Step 6
Prepare the airbrush colours (black, dark blue and light blue). Since these are alcohol-based colours, the high concentration of pigment is deposited on the bottom, so before use it is advisable to shake / mix well.
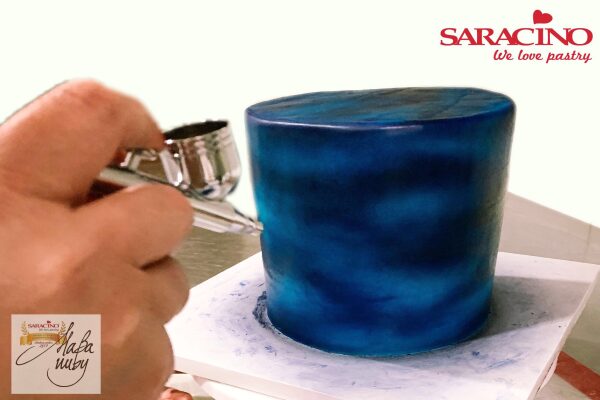
Step 7
With the airbrush create horizontal shades on the whole cake alternating the different colours, starting from the lightest to finish with black.
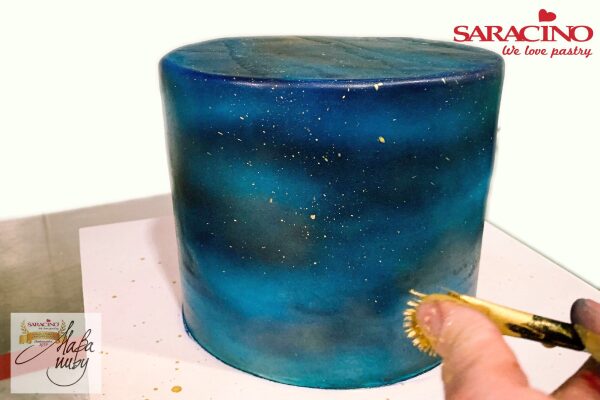
Step 8
With Gold Pearl dust diluted in pure alcohol use a brush with stiff bristles to ‘flick’ the paint onto the cake, create splashes and stains on the surface.
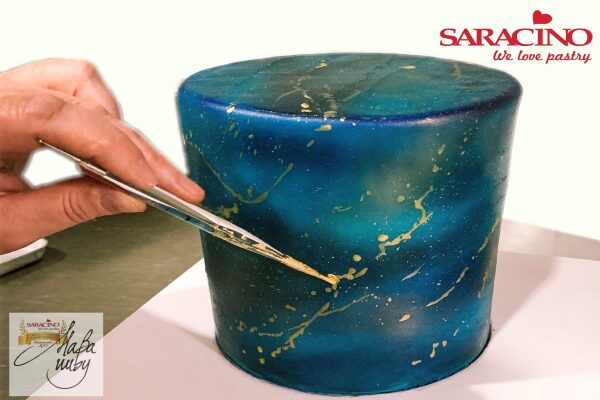
Step 9
With a thin tipped soft bristled brush, use the Gold colour diluted in alcohol to sketch out some irregular lines, trying to follow both the style of the colour given by the airbrush and the splashes of gold.
Step 10
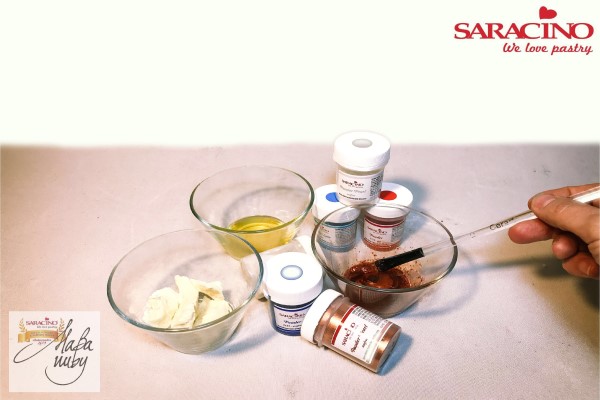
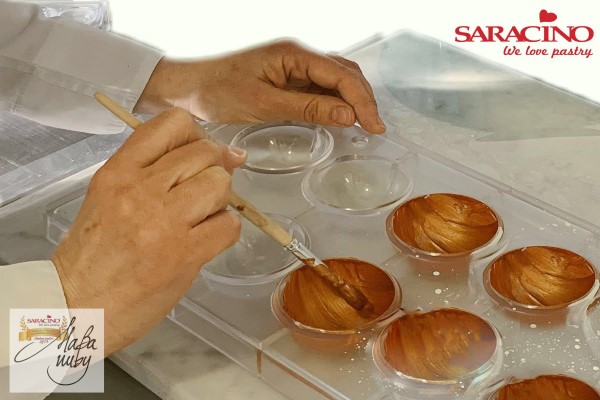
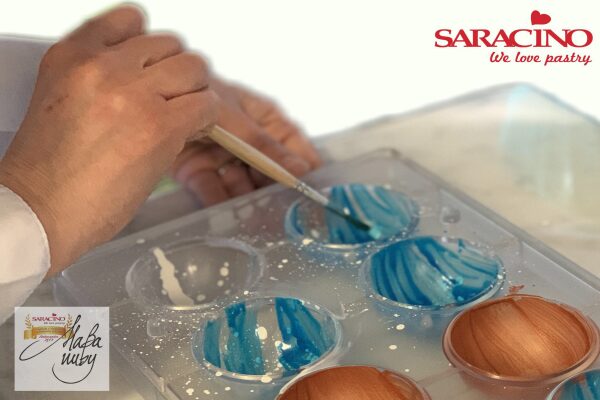
Prepare the colors to be used in the polycarbonate half circle moulds (use different sizes). Melt cocoa butter, separate it into 5 different bowls, in each of them mix the following colours: White Powder, Bronze Pearl Powder, Gold Pearl Powder, Blue Powder, Copper Pearl Powder.
Step 11
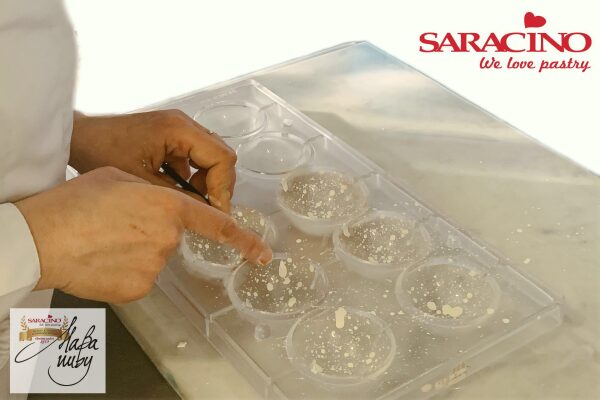
With the white coloured cocoa butter use a stiff bristle brush to create splashes directly on the polycarbonate moulds. Allow to cool for a few minutes in the refrigerator.
Step 12
With the gold and bronze coloured cocoa butter use a soft flat bristle brush to completely cover some of the moulds alternating the two colours as desired, while in other moulds create streaks. Leave to cool for a few minutes in the refrigerator
Step 13
With the Blue and Copper coloured cocoa butter, use small brushstrokes to alternate the different colours to create different shades and streaks, also covering over the white droplets or over streaks of other colours created previously. Allow to cool for a few minutes in the refrigerator. There are no rules, you can play with different colours and patterns to create new and different effects.
Step 14
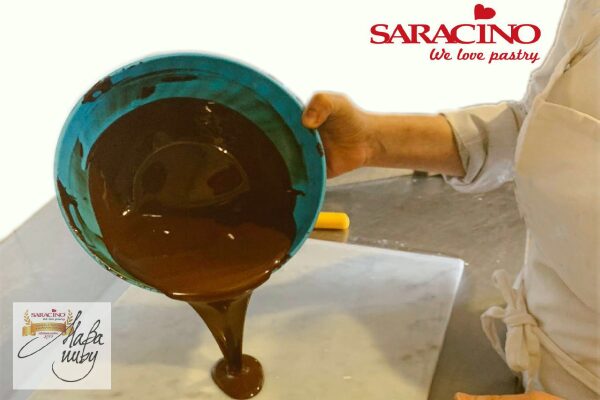
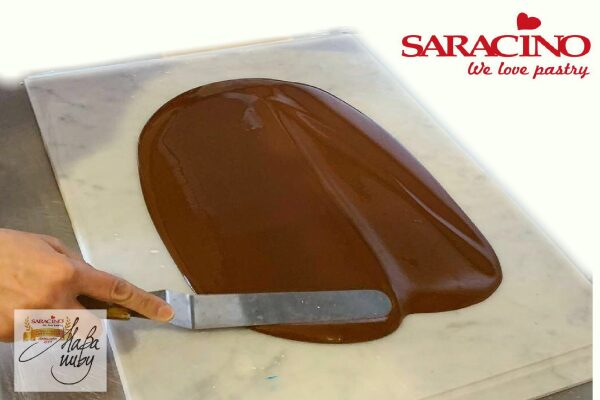
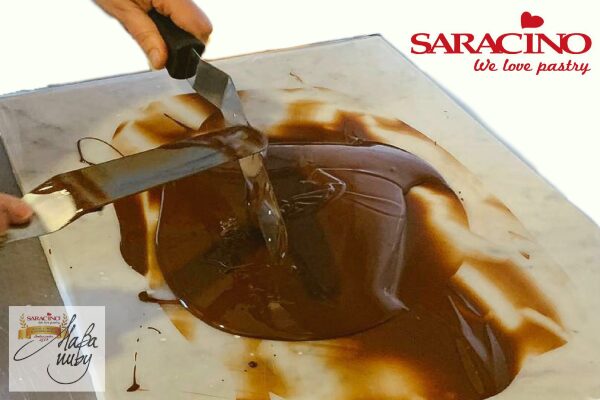
Prepare the dark chocolate bringing it to a temperature of 45 degrees. Proceed with the tempering of the chocolate. Pour two-thirds of the chocolate onto the marble surface. This operation can also be done on a steel surface.
Step 15
With the spatula spread the chocolate on the marble surface, and then gather again. If you want to protect the marble top, you can place an acetate sheet on the marble or wet steel surface and proceed with the tempering on the acetate sheet.
Step 16
Repeat the operation several times until the chocolate reaches 27 degrees. The movement with the spatulas is important to obtain an excellent tempering of the chocolate.
Step 17
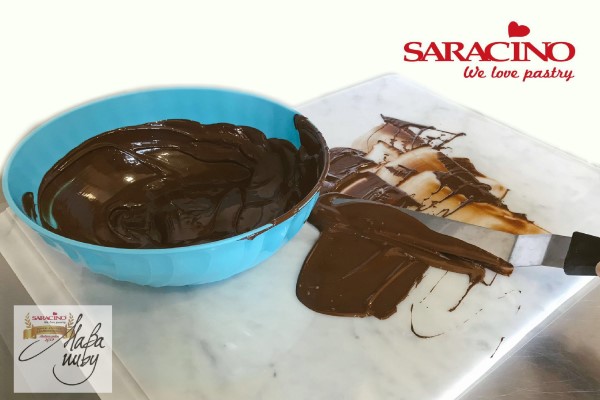
Collect the chocolate from the work surface and return it to the bowl with the remaining chocolate, allow it to reach 29 degrees.
Step 18
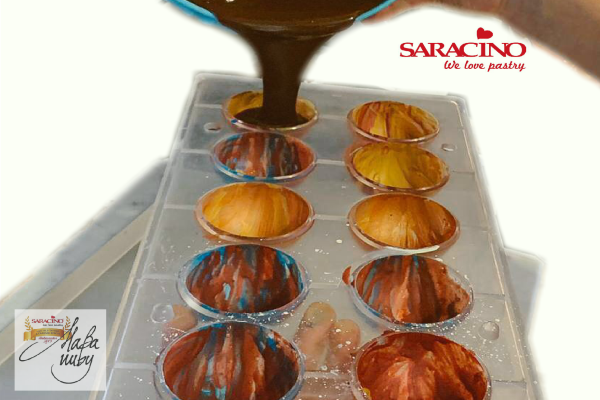
Pour the tempered chocolate into the previously painted moulds.
Step 19
Tip out the excess, checking that the chocolate completely covers the half circle mould.
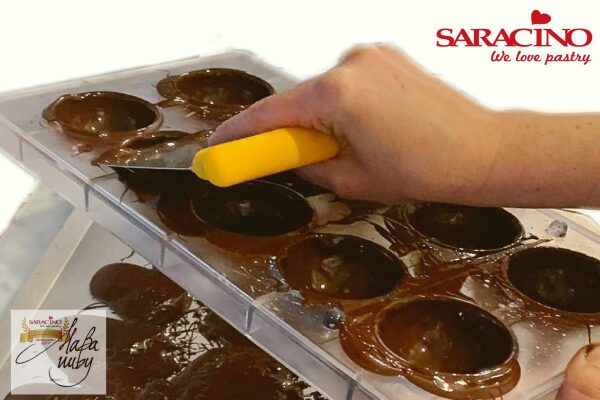
Step 20
Clean the mould top very well with a spatula in order to have perfect edges to each of the half circles and leave to cool in the refrigerator for a few minutes. If the correct tempering temperatures have been achieved, the chocolate will become shiny with a smooth finish as it cools down.
Step 21
When set you can remove the half circles from the moulds. To make removal easier, you can tap the back of the mould with your spatula.
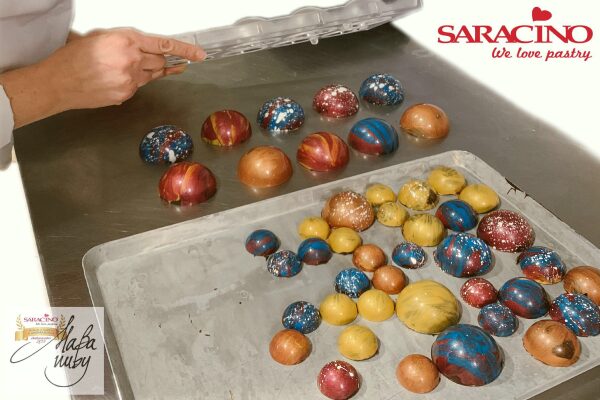
Step 22
Prepare different sizes with different shades of colours.

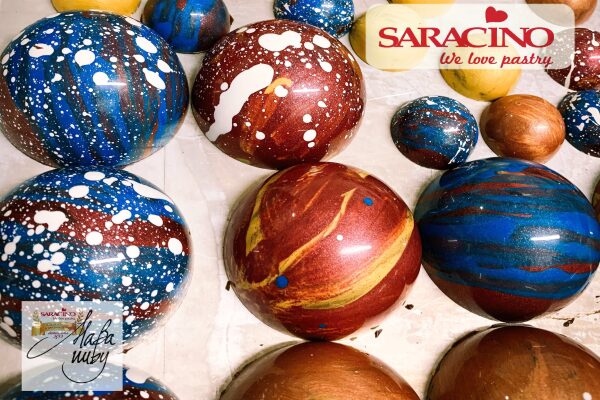
Step 23
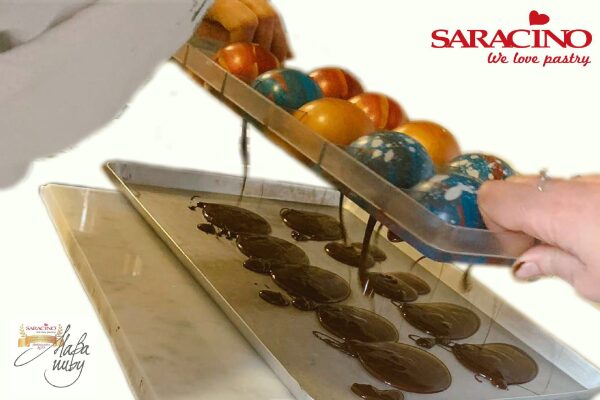
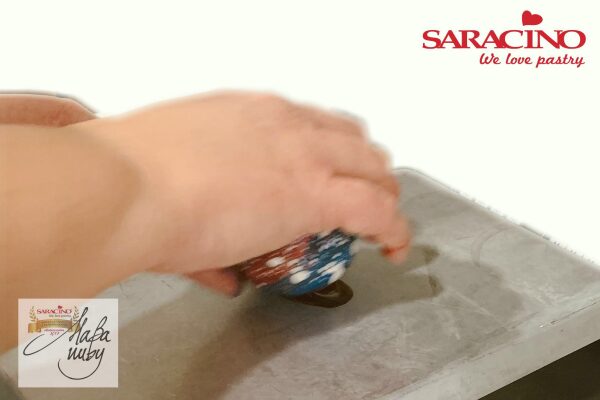
Using a baking tray sitting over a hot pan of boiling water, lightly touch the edge of the chocolate to the surface to melt the edge of two half balls of the same size and with similar colouring.
Step 24
Join the two halves together to create balls. Allow them to cool by placing them in the polycarbonate moulds.
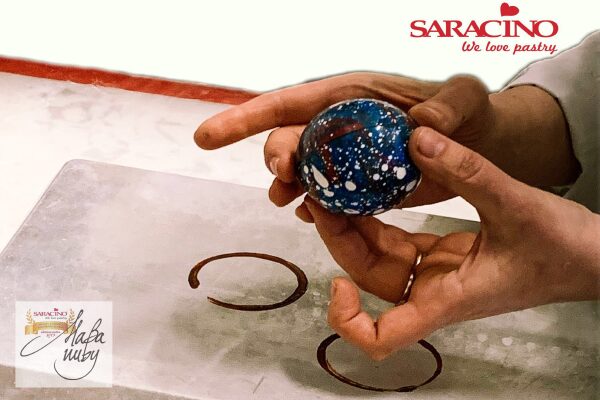
Step 25
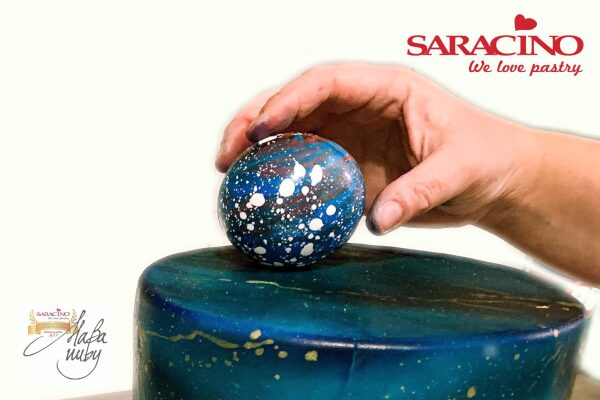
Using your hot baking tray lightly melt a part of the ball (this is getting it ready to stick to the cake).
Step 26
Stick the balls to the top of the cake, allowing the chocolate to cool and set well.
Step 27
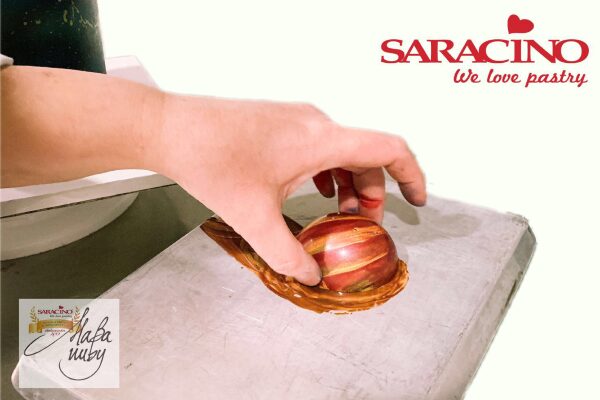
Again using the hot baking tray lightly melt the edge of some half circles.
Step 28
Fix the half circles to the top of the cake allowing the chocolate to cool well.
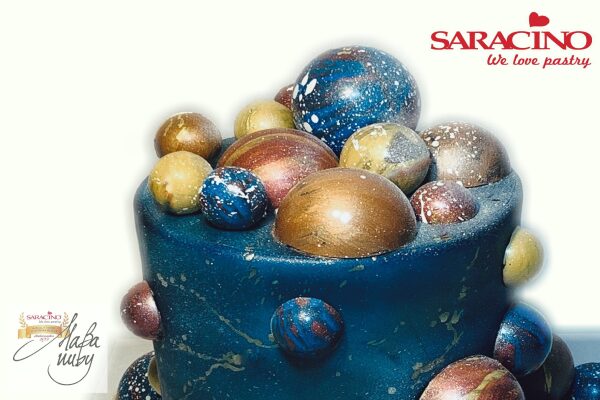
Step 29
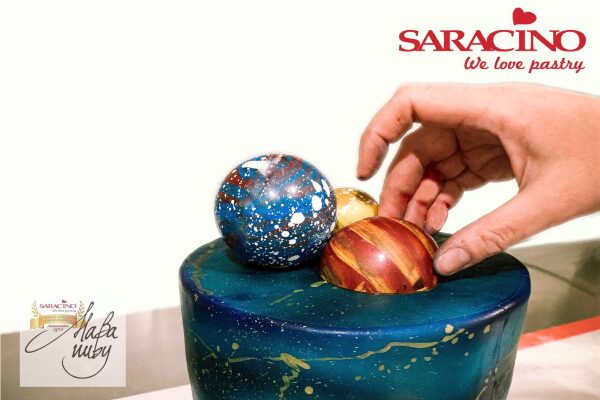
Proceed by attaching some full balls and half balls on to the sides of the cake until you have the pattern and effect you want.
Step 30
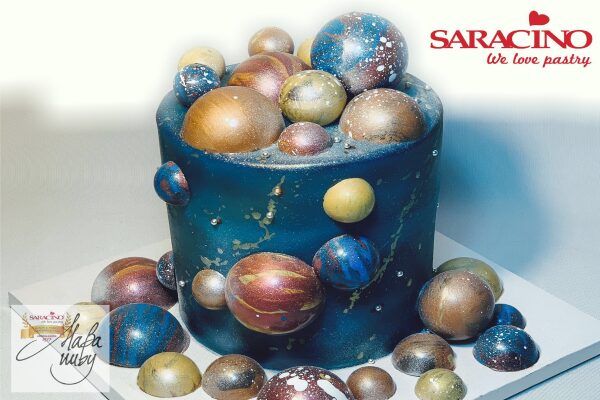
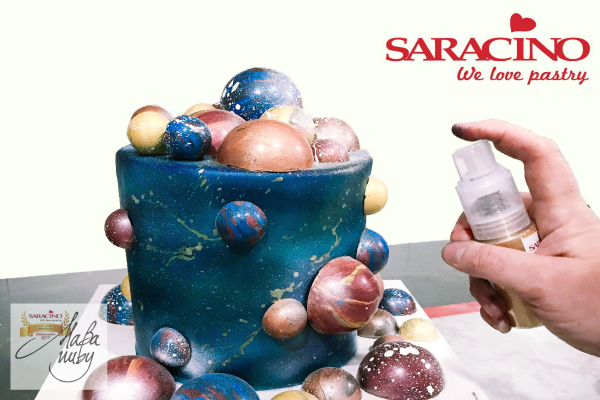
To add extra effect spray the cake with Saracino edible glitter dust. Use silver and gold.
Step 31
Finish with the addition of some silver and golden dragees (sugar balls) as you like.
