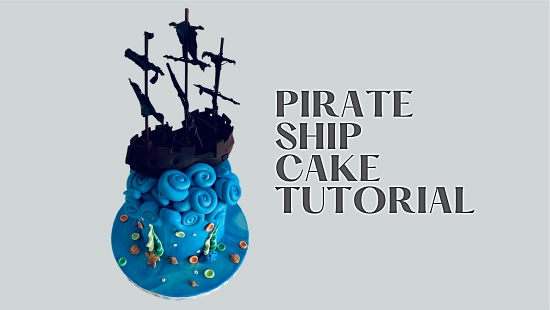
PIRATE SHIP CAKE TUTORIAL

PIRATE SHIP CAKE TUTORIAL
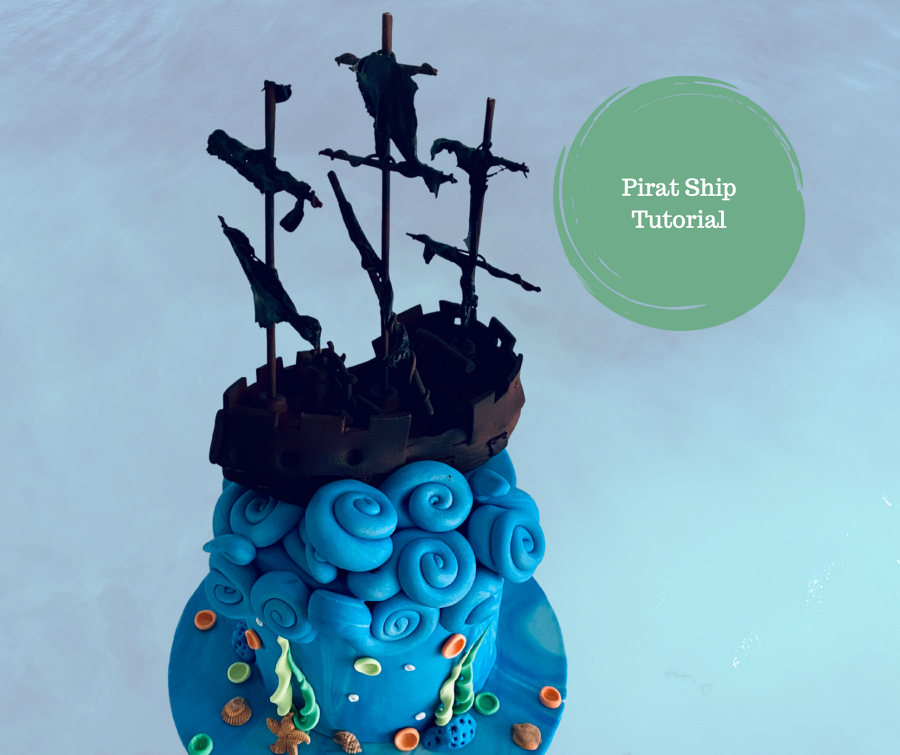
Skill level: INTERMEDIATE

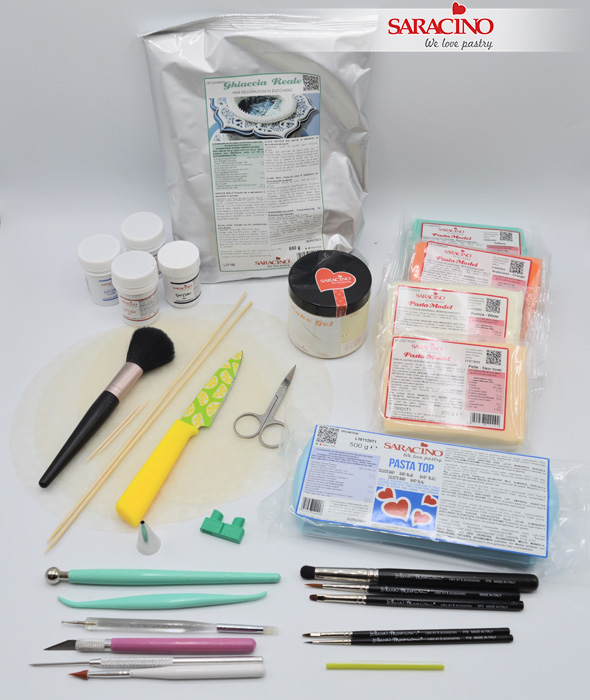
You will need:

  • A dummy or cake
  • Cake drum
  • Saracino Pasta Top (blue, tiffany, white) to cover dummy / cake and cake drum
  • Saracino Pasta Model (brown, orange, blue, green)
  • Airbrush
  • Airbrush colours (brown, black)
  • Rolling pin
  • Modelling tools
  • Smoother
  • Silicone mould shells
  • Scalpel
  • Long and short toothpicks
  • Saracino Wafer Paper 0.27
  • Water
  • Brush

Step 1

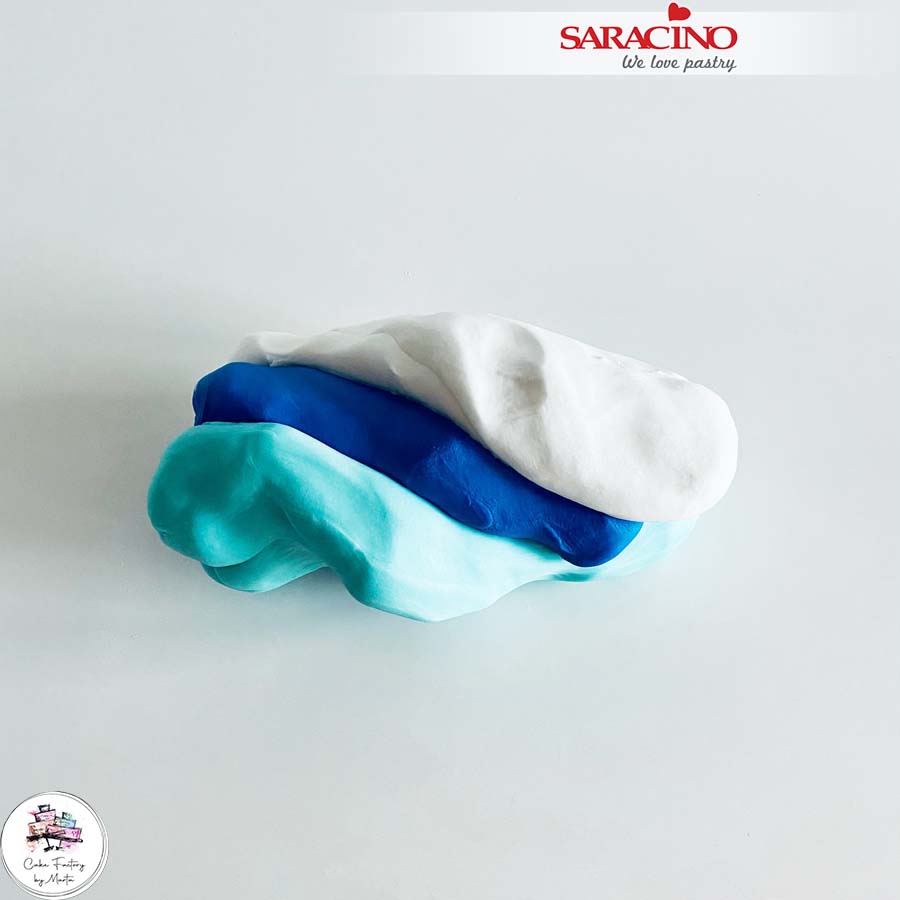
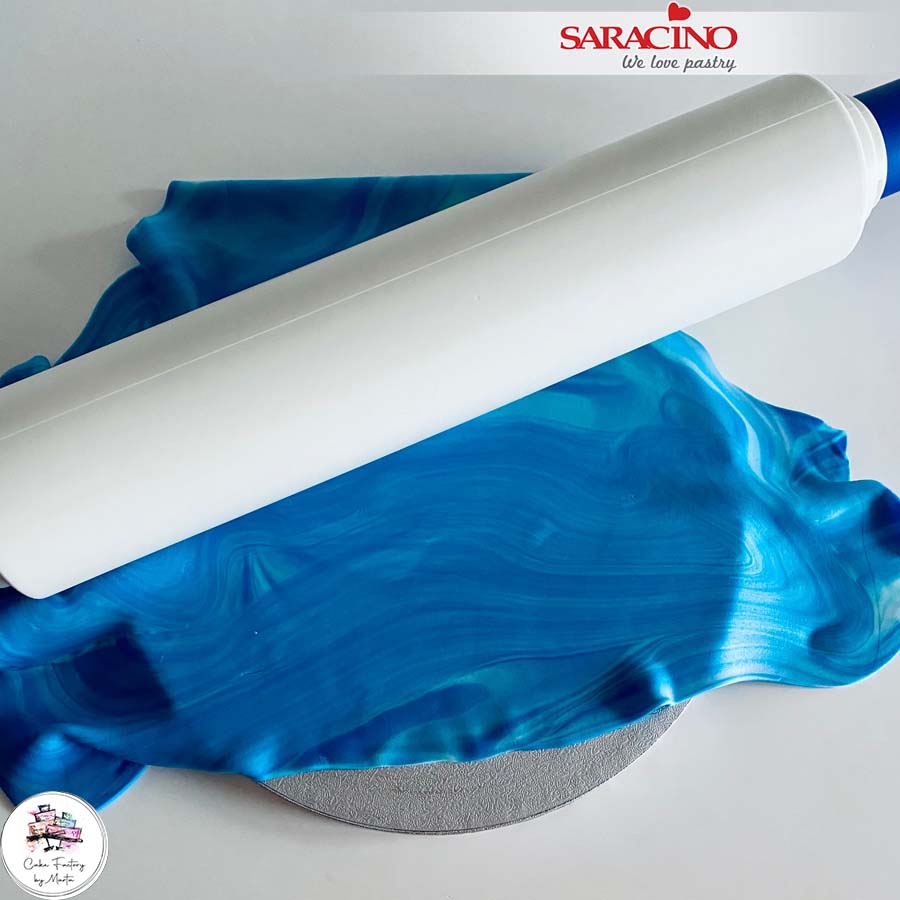
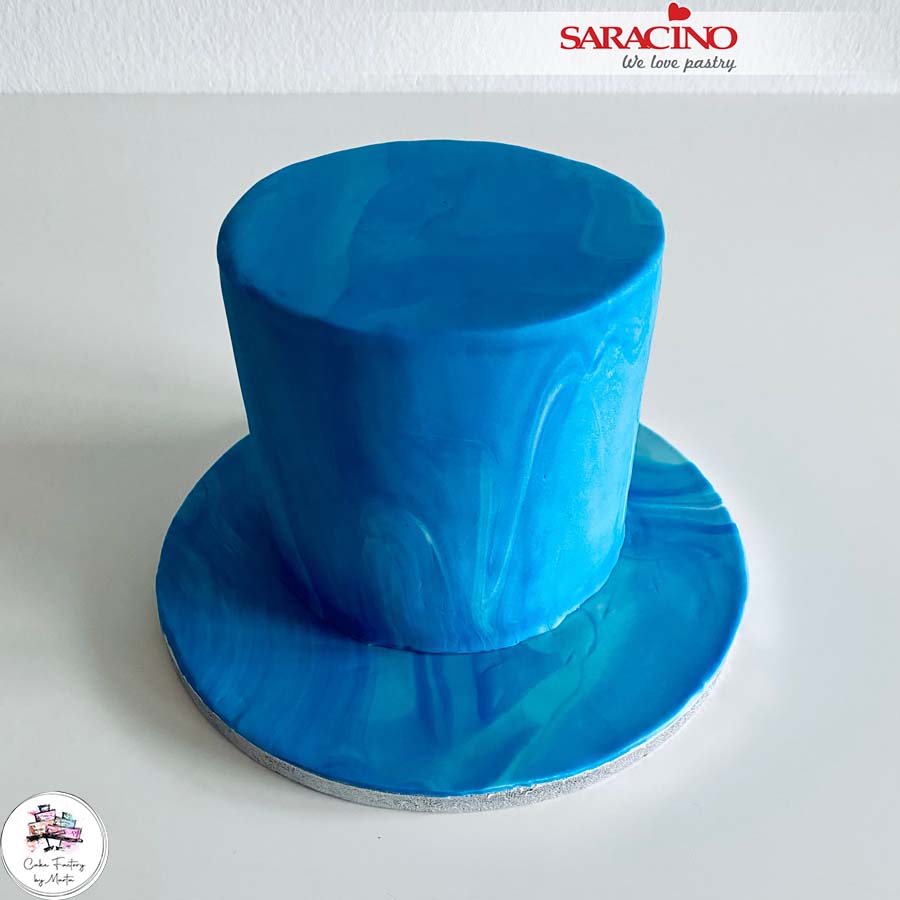
Combine the white, tiffany and blue Pasta Top and mix. Dont worry about mixing too well as we want a marble effect.
Step 2

Cover the cake board.
Step 3

To cover the dummy / cake use the coloured Pasta Top. If you need to dust the work surface with cornflour before rolling the fondant to prevent it sticking. Lightly moisten the dummy or cake using water or cake gel so that the fondant sticks.
Step 4

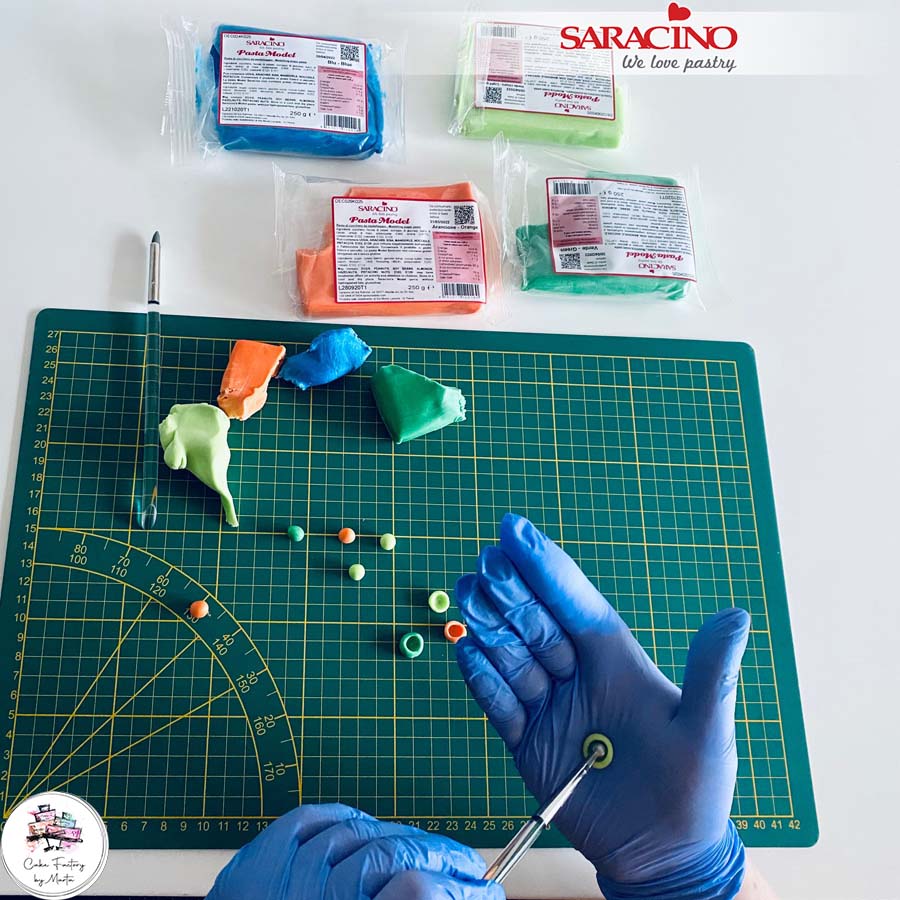
For the shells to the side of the cake roll small balls using three different colours. Use your ball tool to create an indent and hollow out to form the curved shape.
Step 5

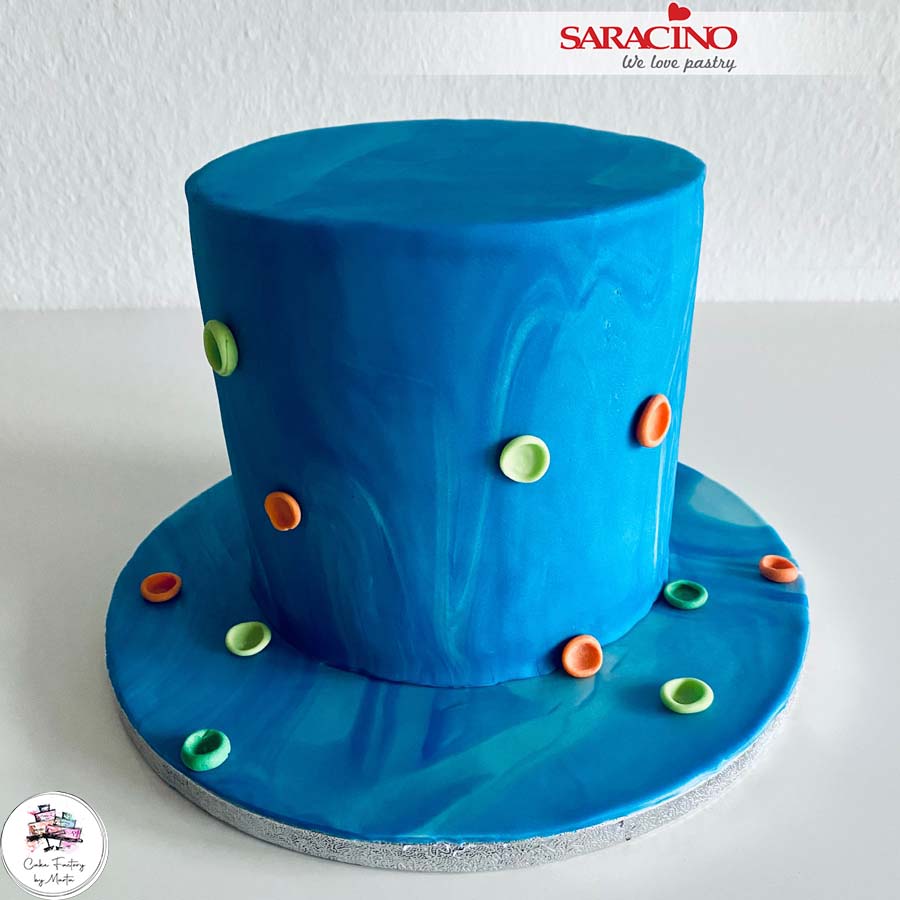
Attach them randomly to the cake and board.
Step 6

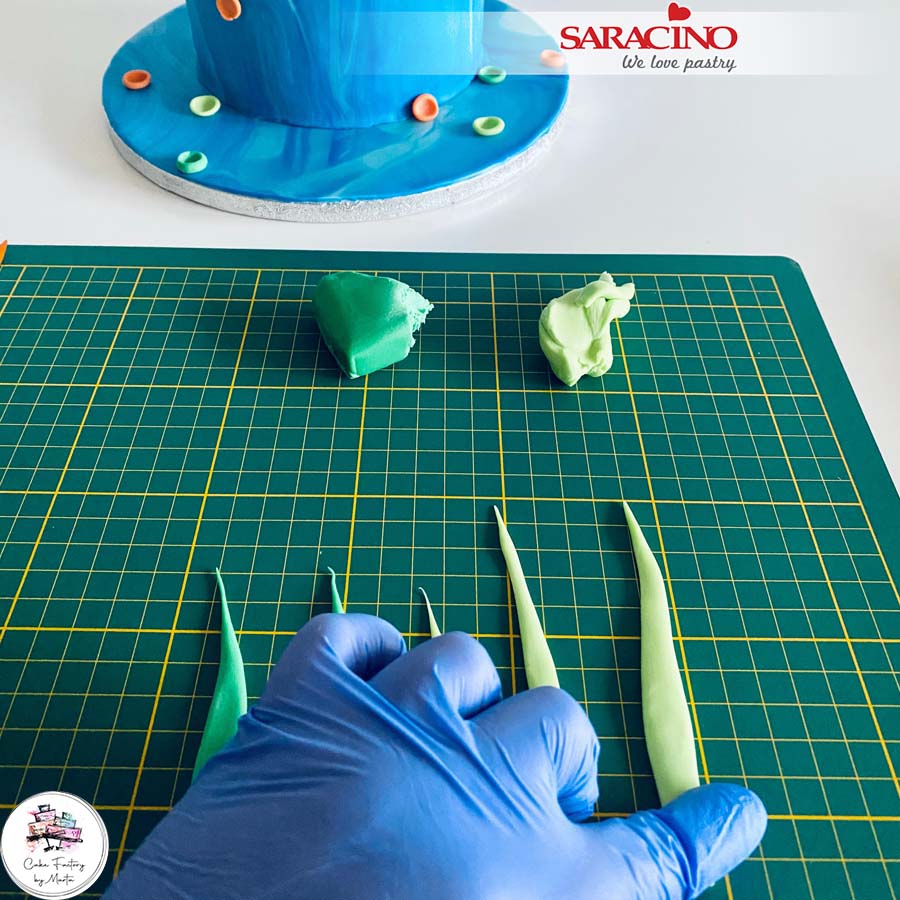
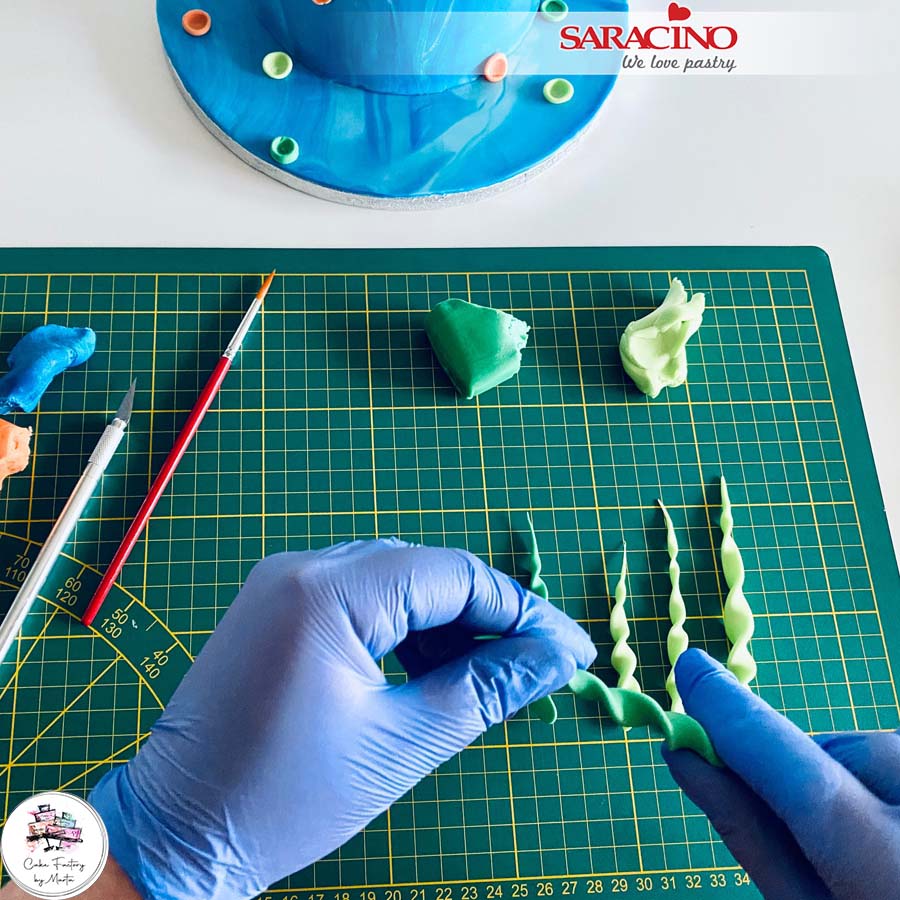
For the seaweed roll long sausage shapes from two shades of green Pasta Model. Use your fingers to flatten.
Step 7

Twist them into a seaweed shape. Fix them to the cake as you wish.
Step 8

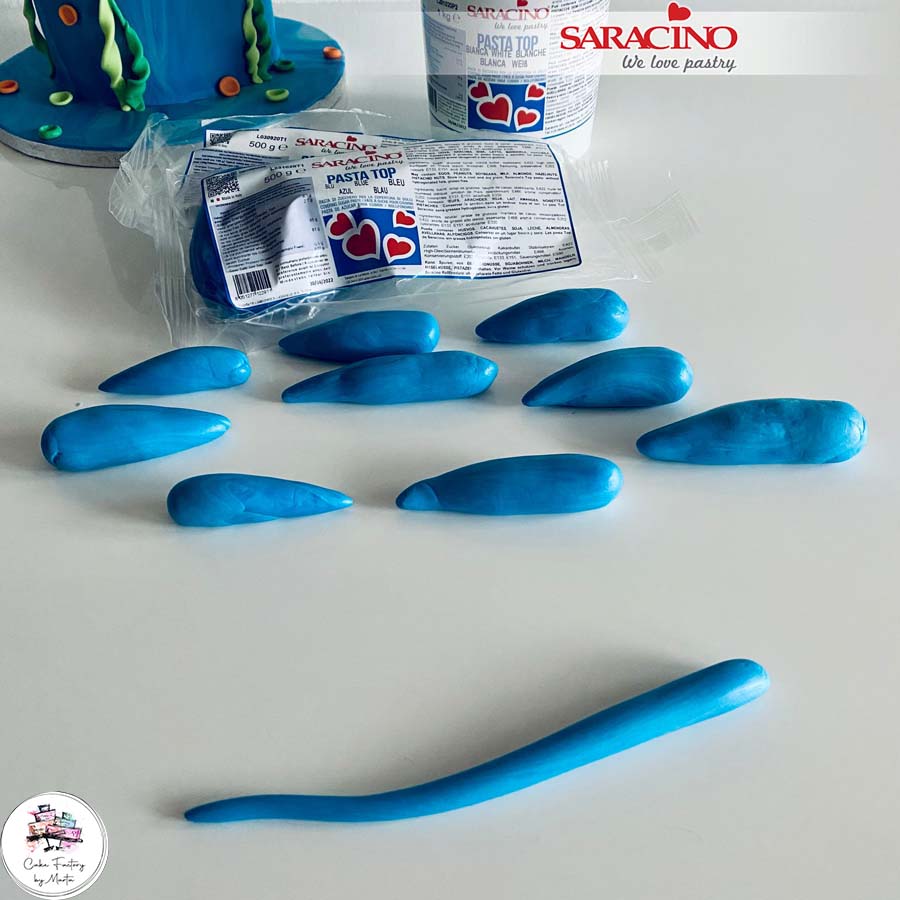
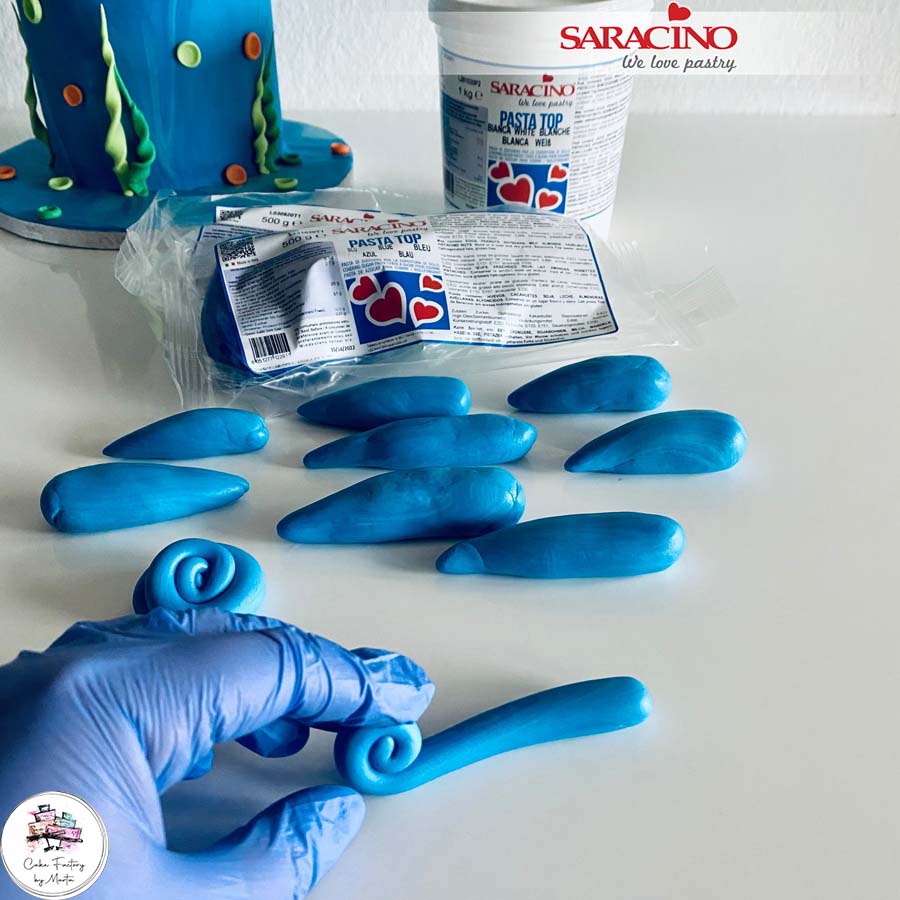
For the waves use the remaining coloured Pasta Top. Weigh out pieces of 18-30g and roll each of them to a long teardrop shape. Again this does not have to be perfect as we want to achieve a random sea look.
Step 9

From the narrow end roll into a snail shell shape.
Step 10

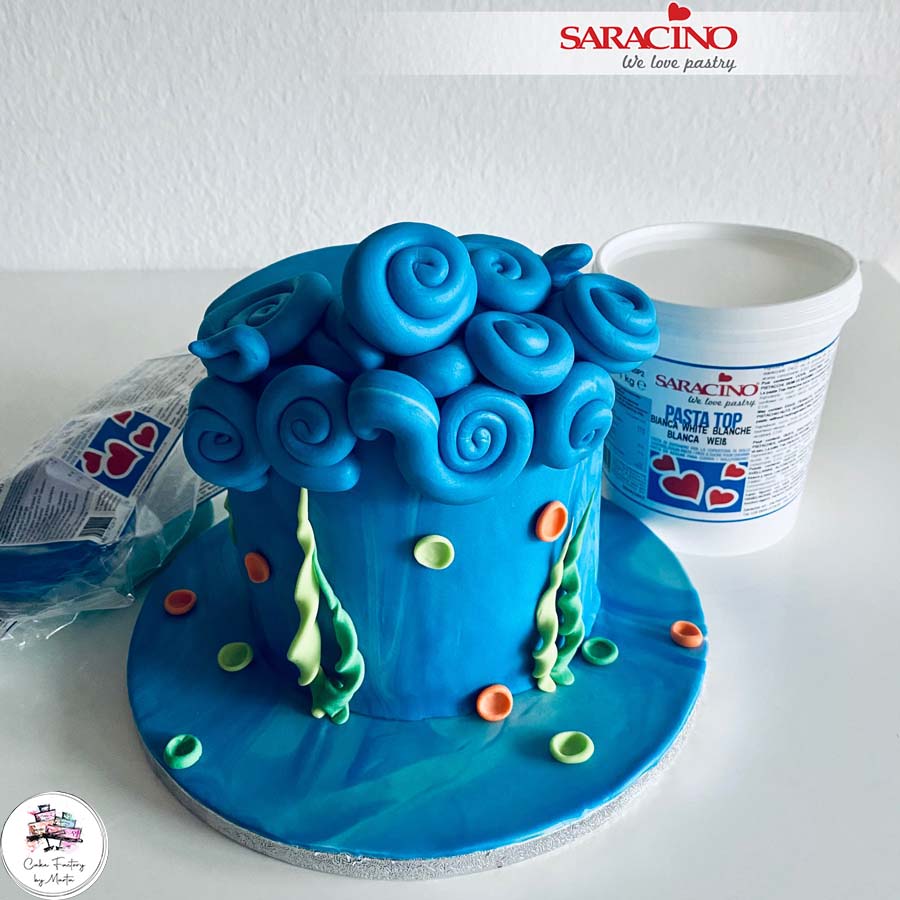
Bend and shape the waves randomly to give a flowing sea feel. Fix to the top and sides of the cake using a little water or edible glue.
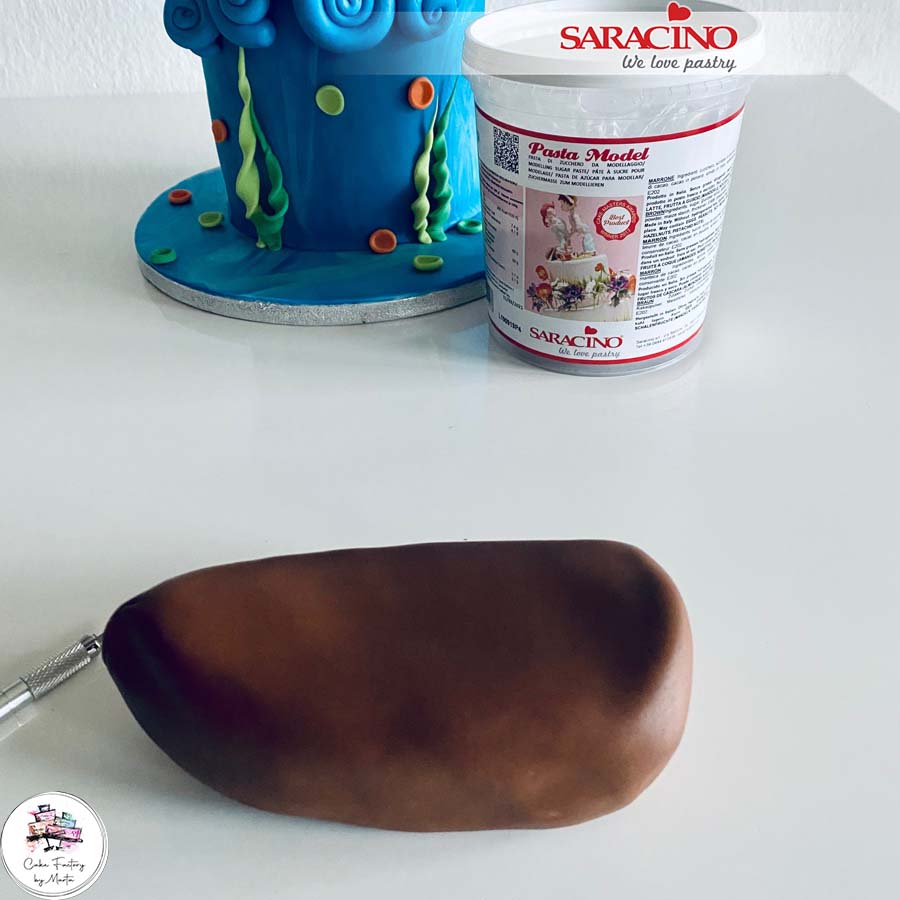
Step 11

Using 500g brown Pasta Model model the shape of the boat. 
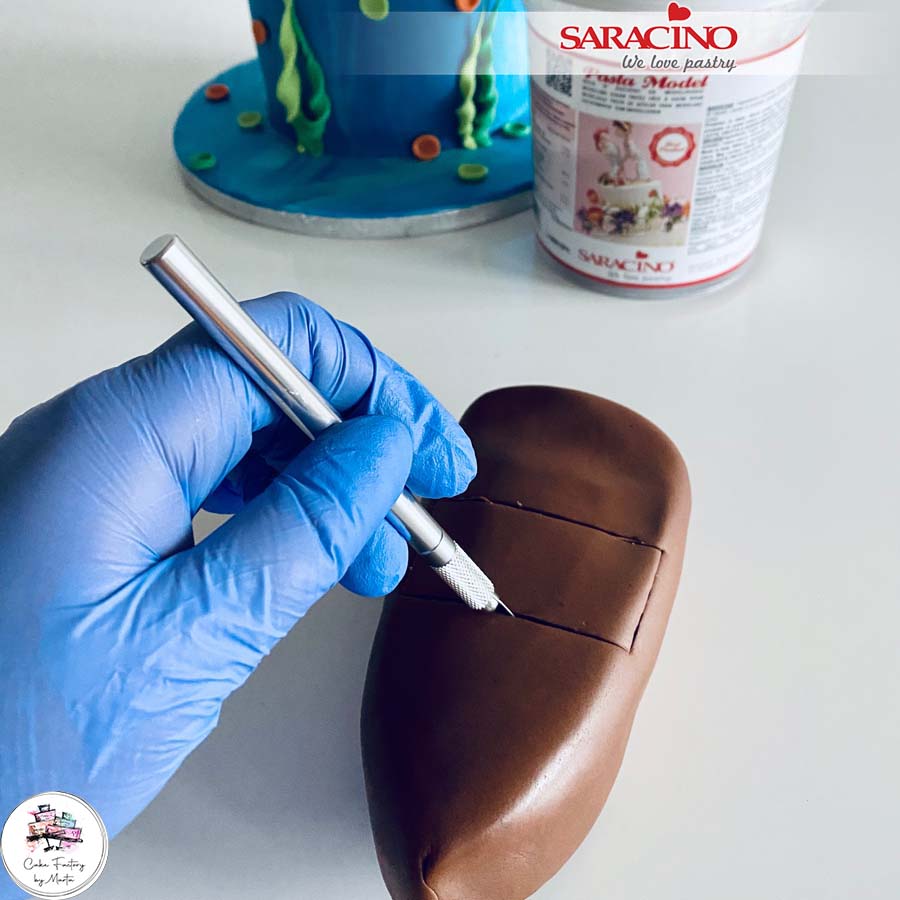
Step 12

Use your scalpel to cut out a rectangle shape for the hollowed out deck area.
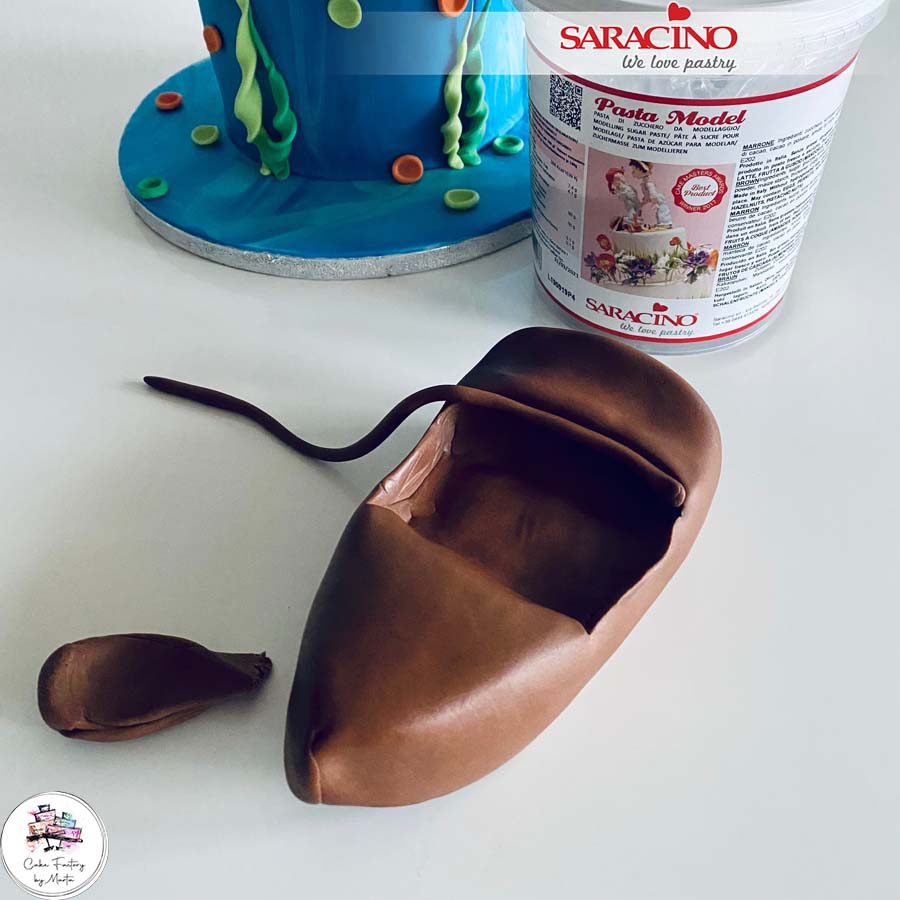
Step 13

Roll thin strands of brown paste. Flatten gently and cut into strips to attach to the back of the deck area. We want to achieve a wooden plank effect.
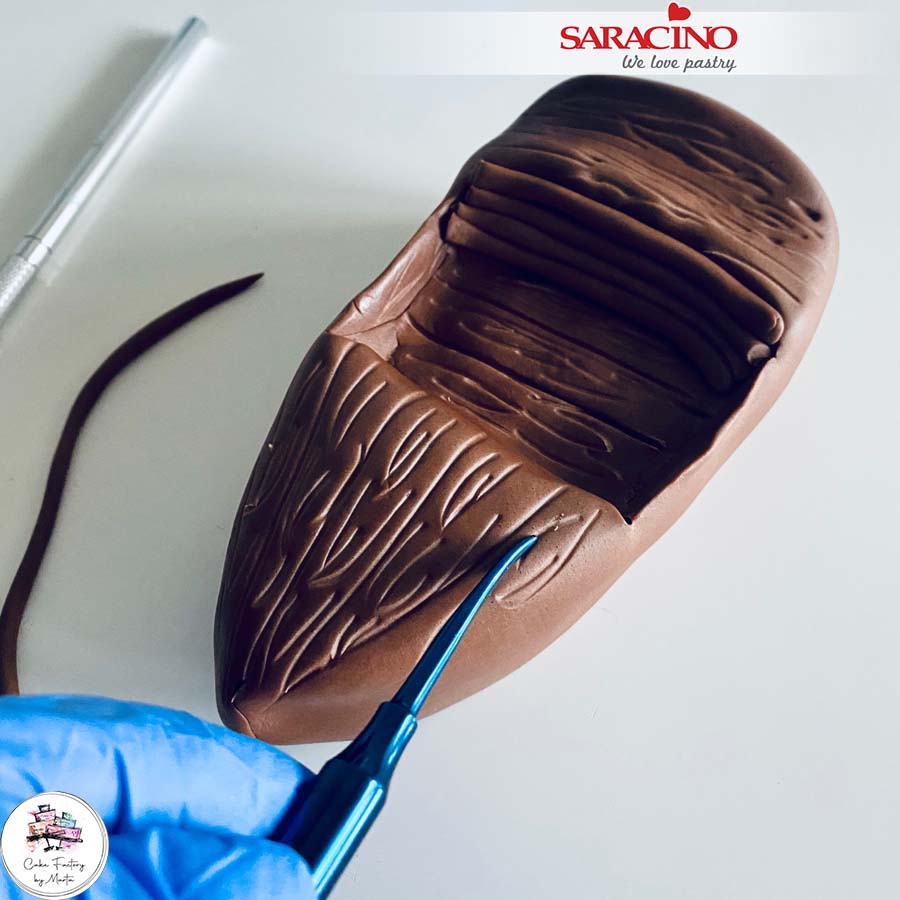
Step 14

Use your Dresden tool to apply a wood look texture to the ship. 
Step 15

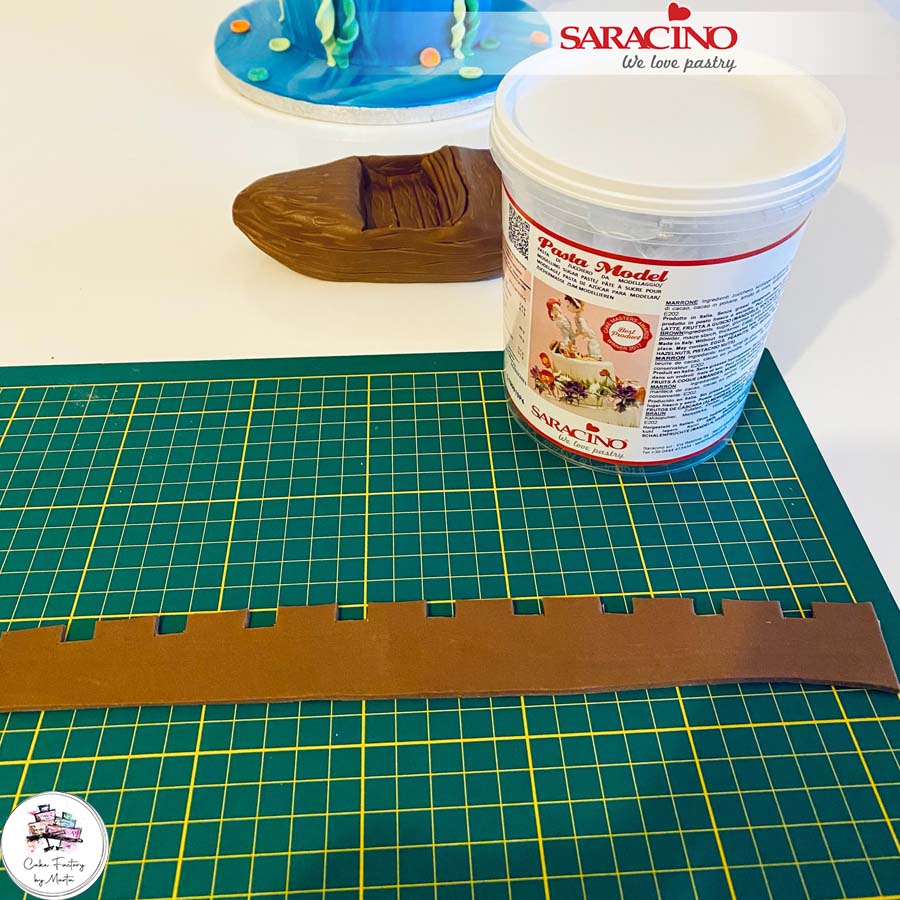
Roll out a 3cm wide strip of brown Pasta Model. Use a sharp knife to form a turret shape across the top.
Step 16

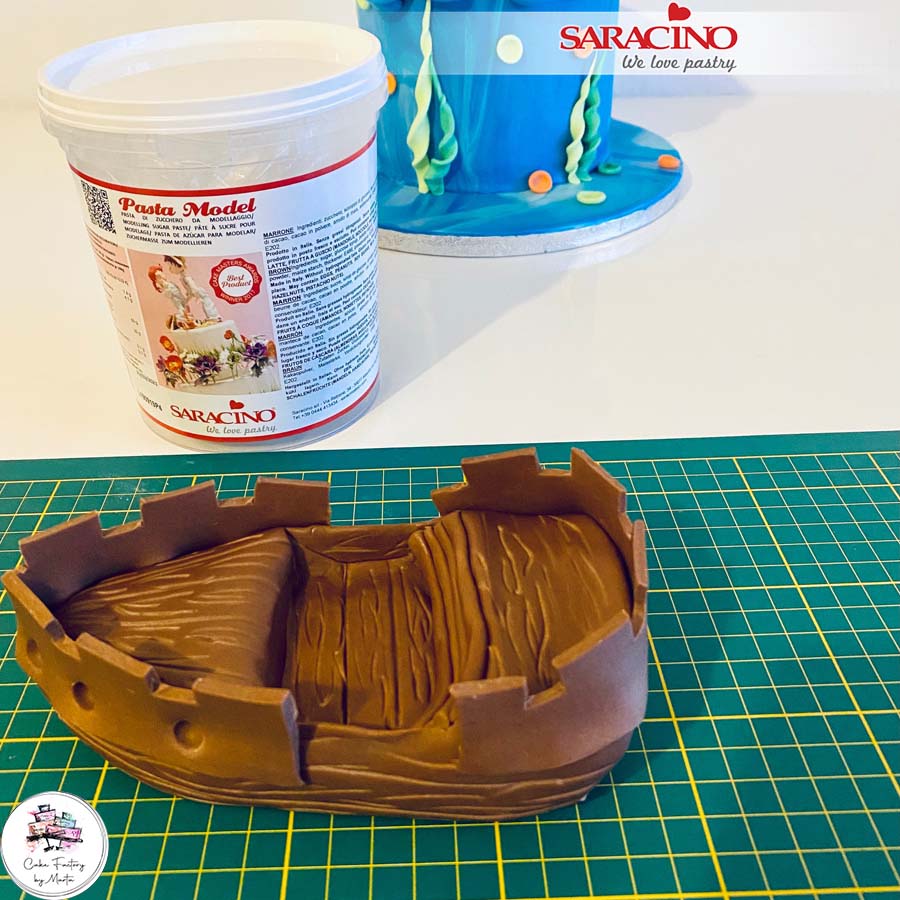
Using a little water fix to the bow and stern of the ship cutting the piece to the length you need. Using a ball tool make indentations in the front for the port holes.
Step 17

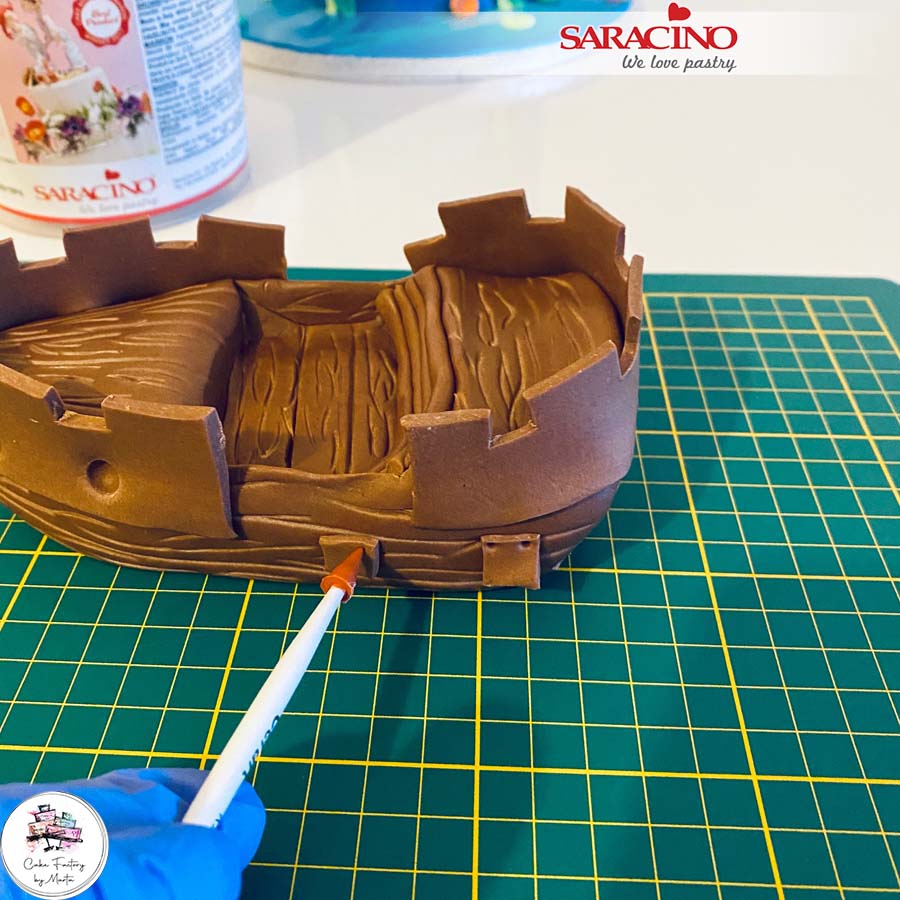
For the cannon shutters shape 8 small squares and fix them to the sides of the ship pressing with point shapers.
Step 18

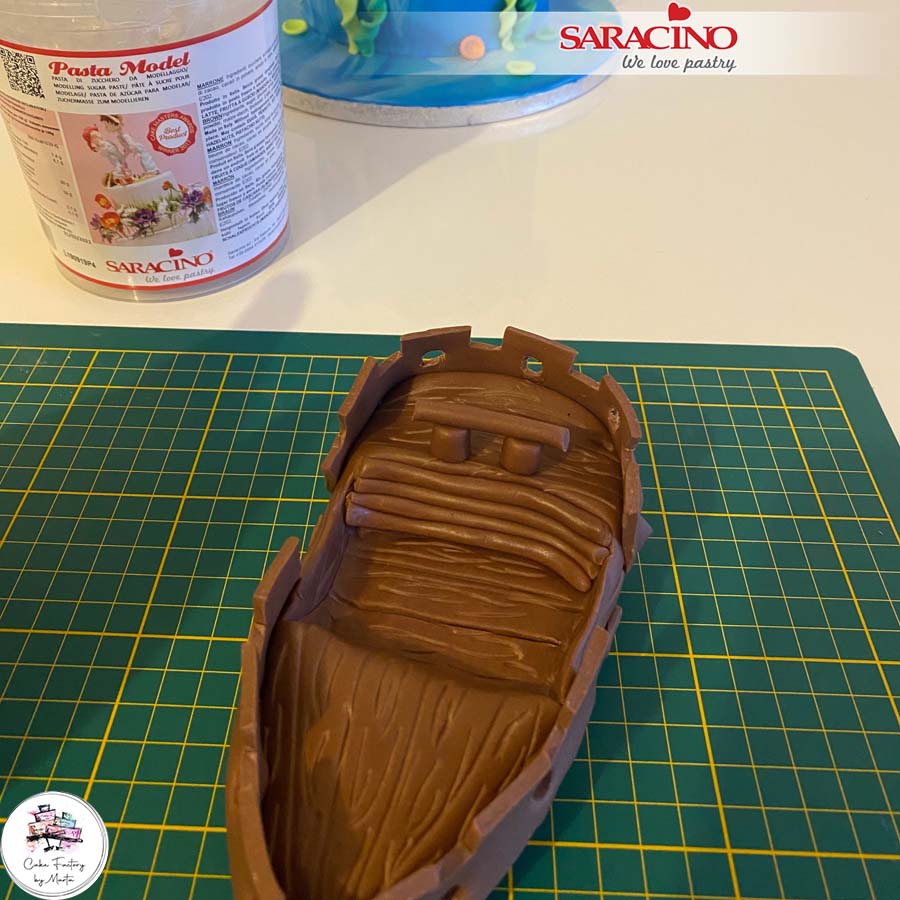
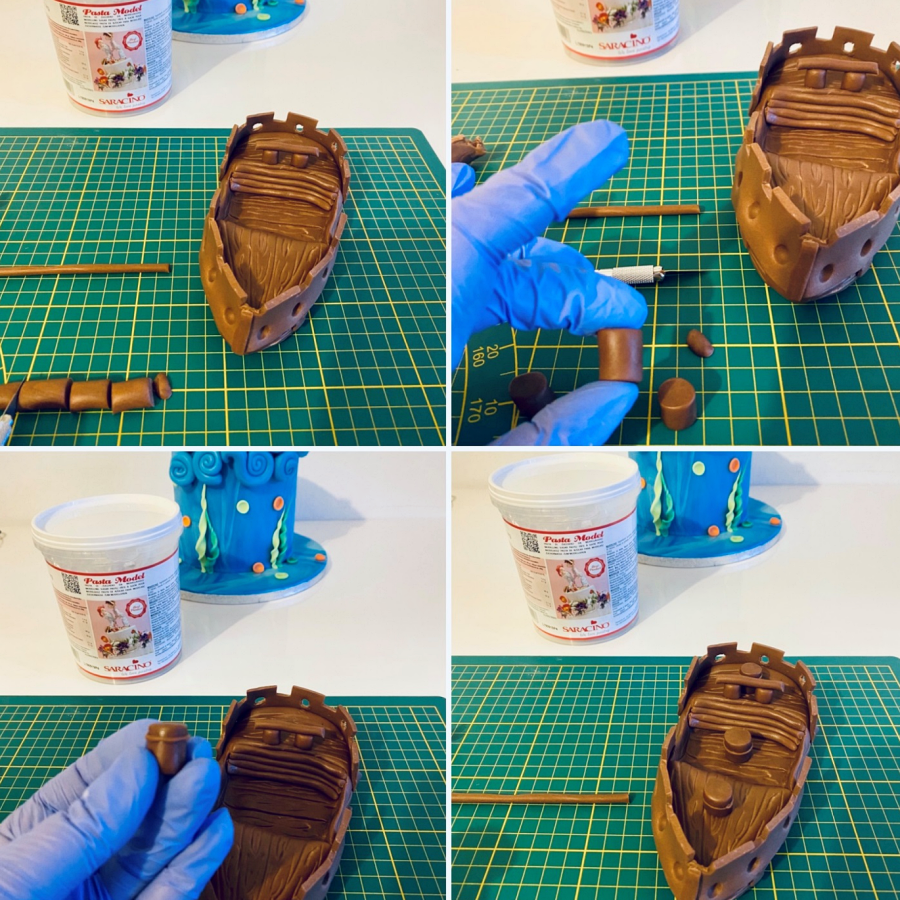
Roll a 3cm long sausage shape and cut into two. Fix vertically on the back end of the ship. Roll a thinner sausage shape and fix over the two vertical pieces.
Step 19

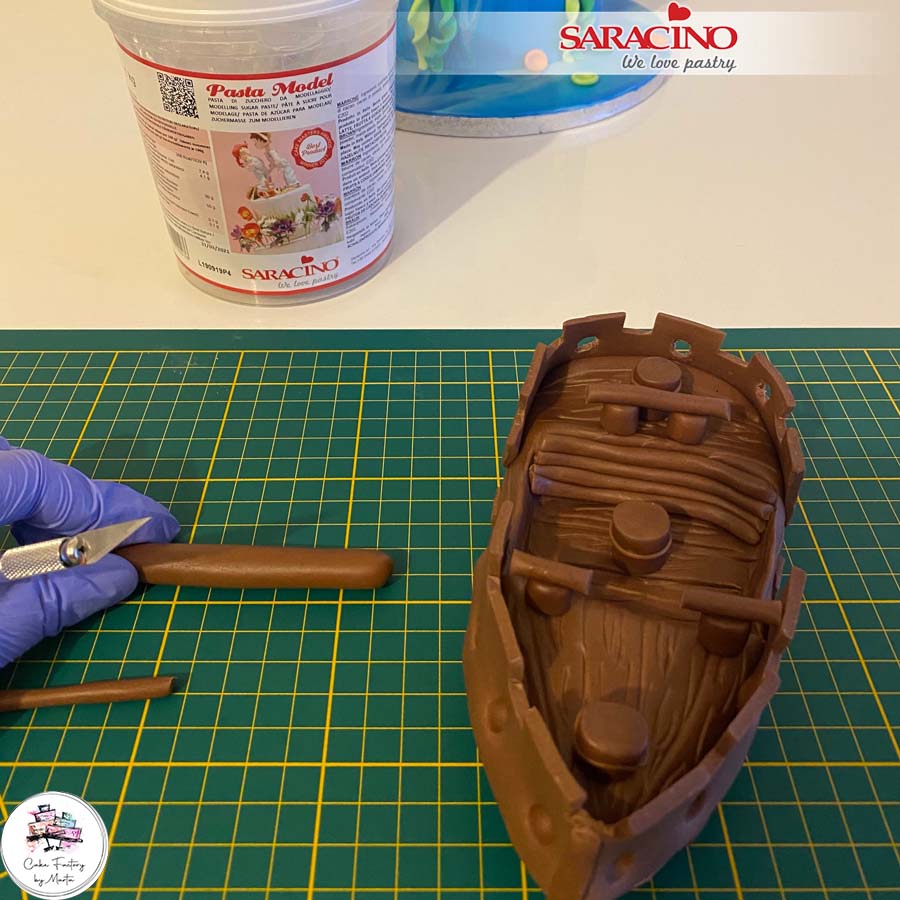
For the mast pads roll 1.5cm long sausage shape and divide into three equal parts. Roll a thin strip and fix around the top of each mast base. Fix the mast bases to the front, middle and back as shown.
Step 20

For the two front handrails roll a 1cm diameter sausage shape 3cm long and cut in half fix to the deck as shown. Roll a thinner piece and divide into two and stick to the top of each post to form the handrail.
Step 21

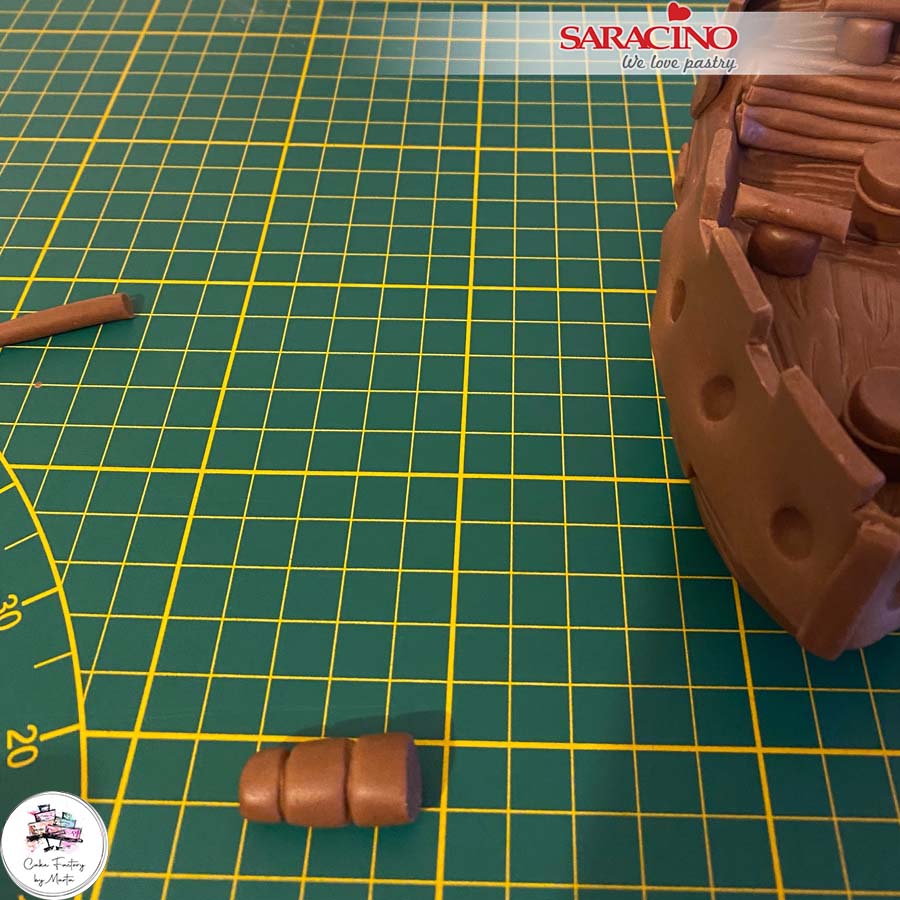
For the steering wheel support roll a 3cm long sausage shape slightly narrower at the top end. Mark 3 grooves around it. Fix between the handrails.
Step 22

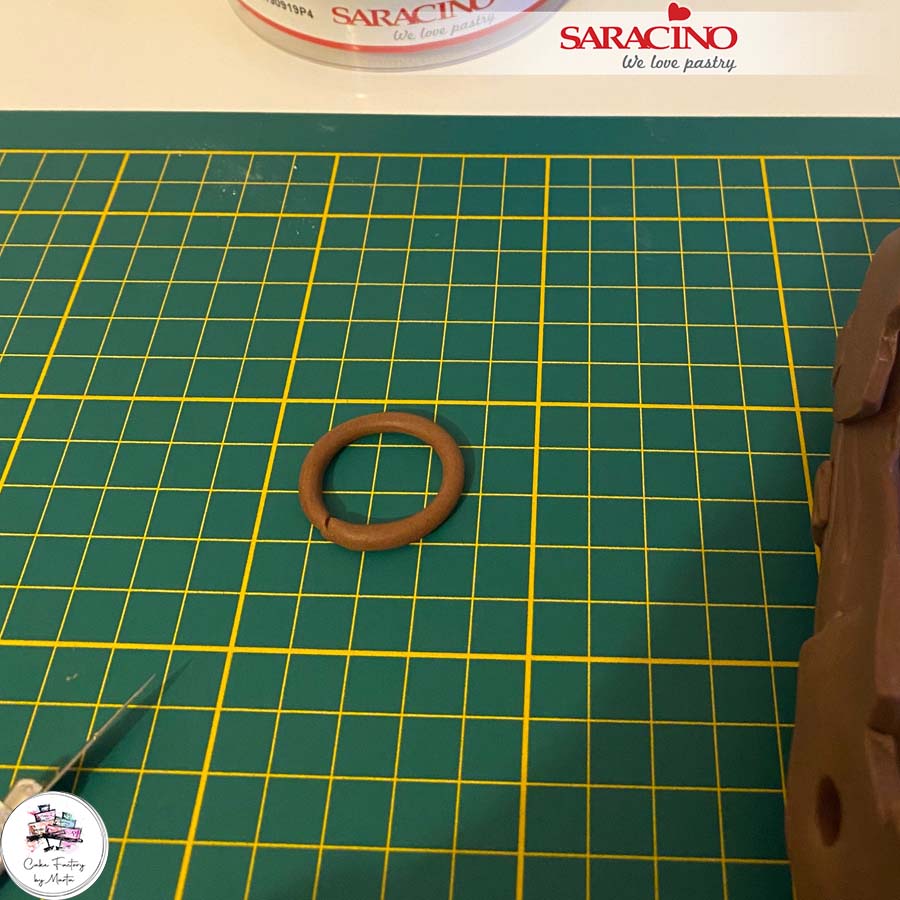
Using a thin line of rolled paste form a round steering wheel.
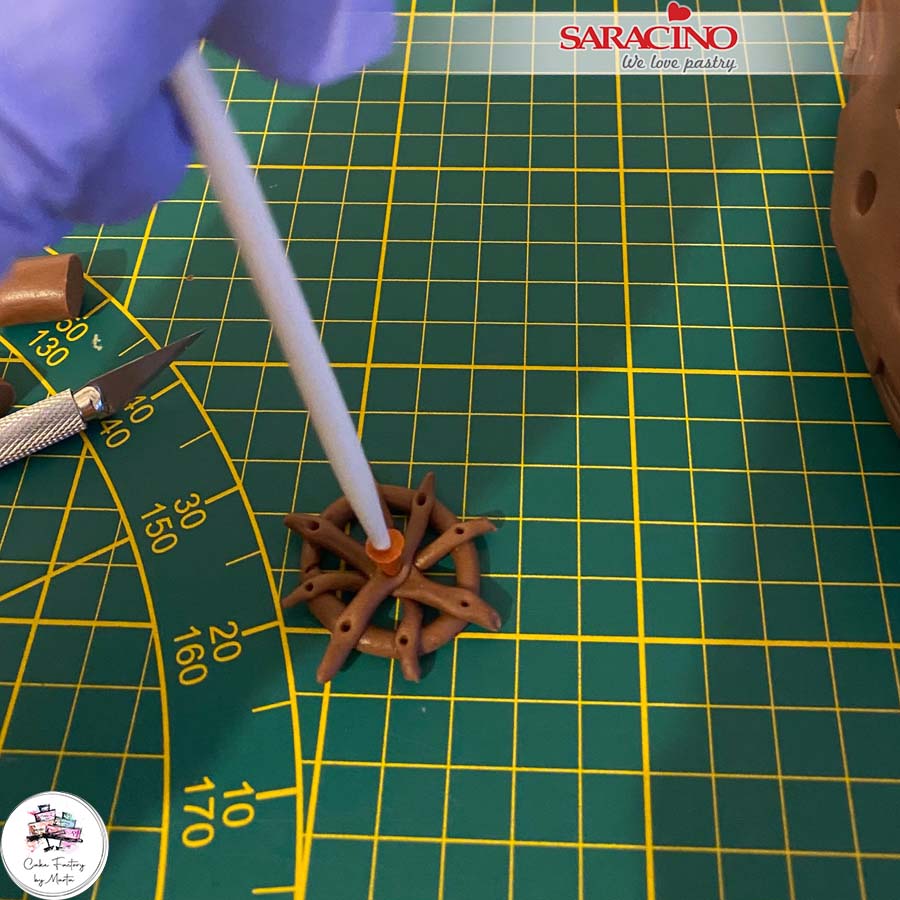
Step 23

Add 8 small lengths of thin brown paste to the wheel meeting in the centre. Use a sharp modelling tool to mark small holes at the joining points.
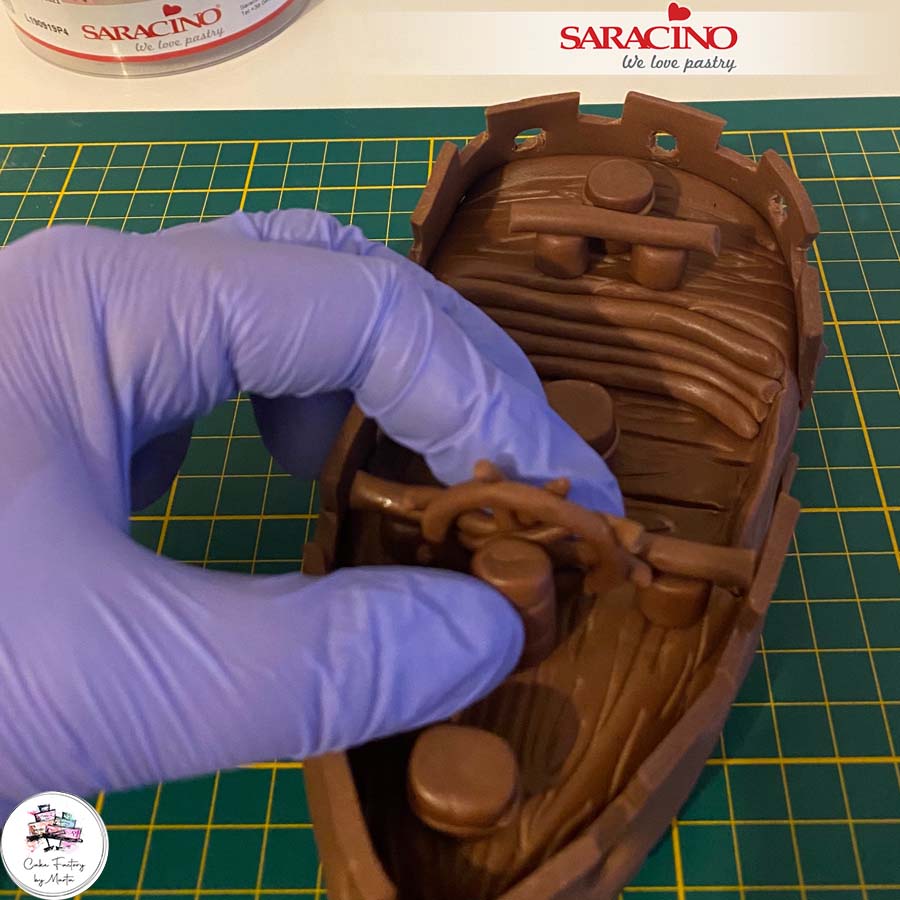
Step 24

Attach the wheel to the upright column.
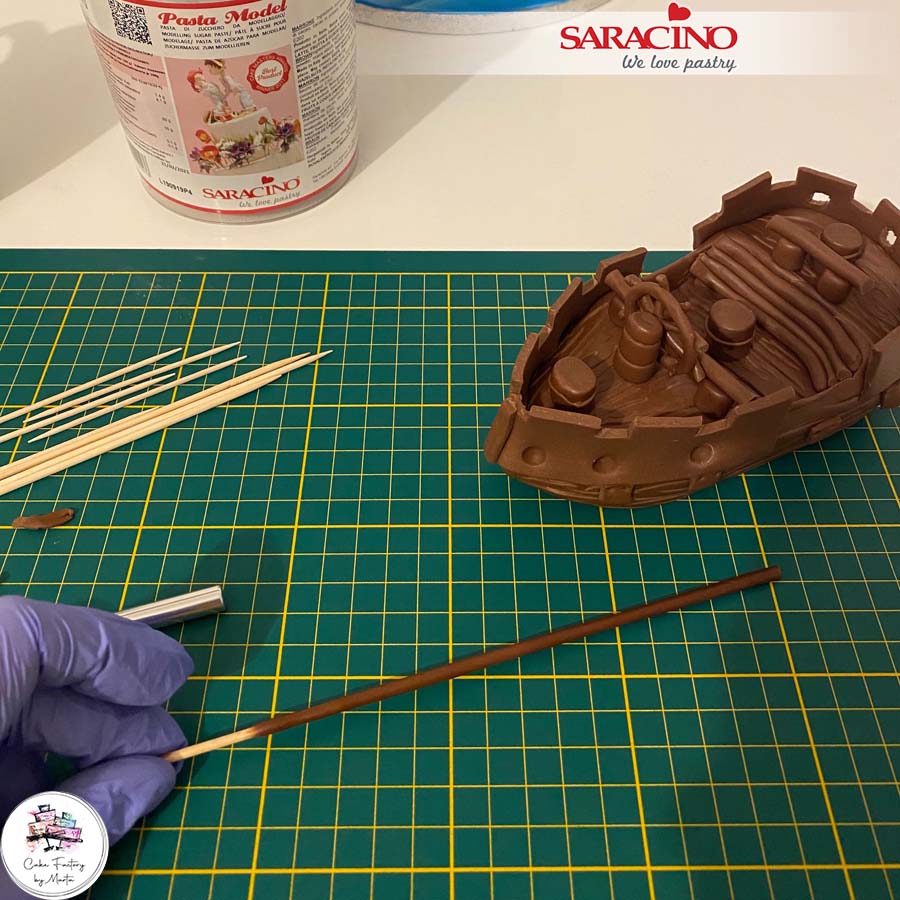
Step 25

Work your brown paste until it is soft. Cover three wooden skewers with the paste. 
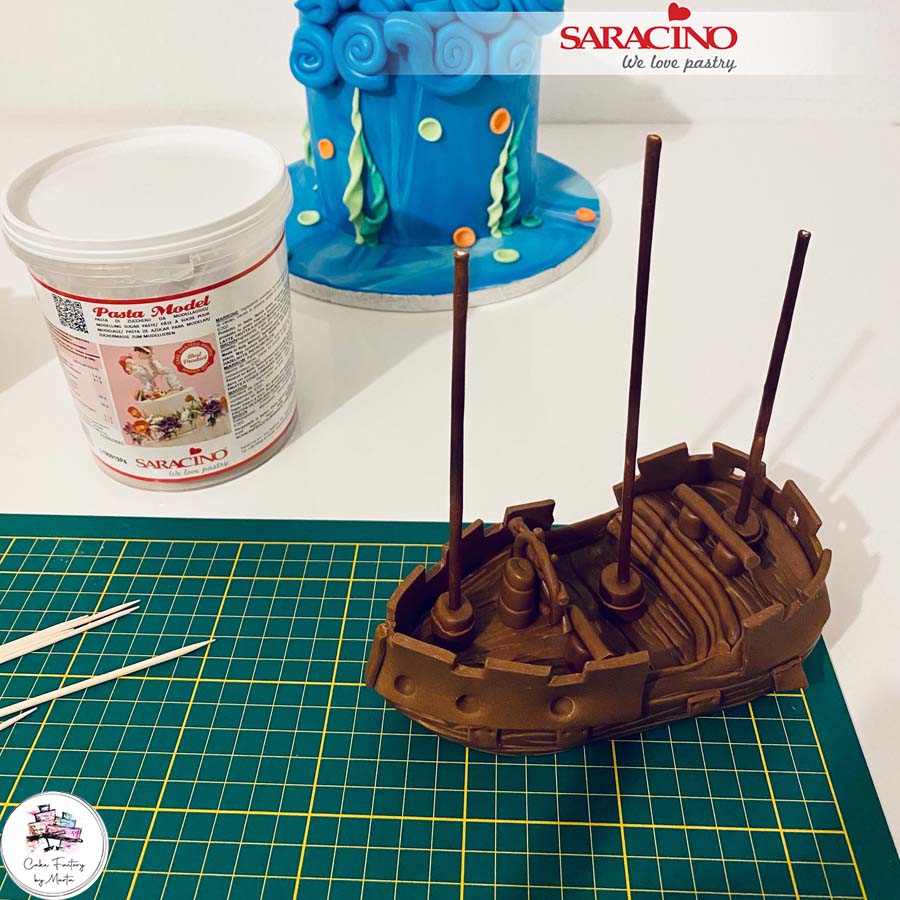
Step 26

Insert each mast into the three bases we fixed earlier.
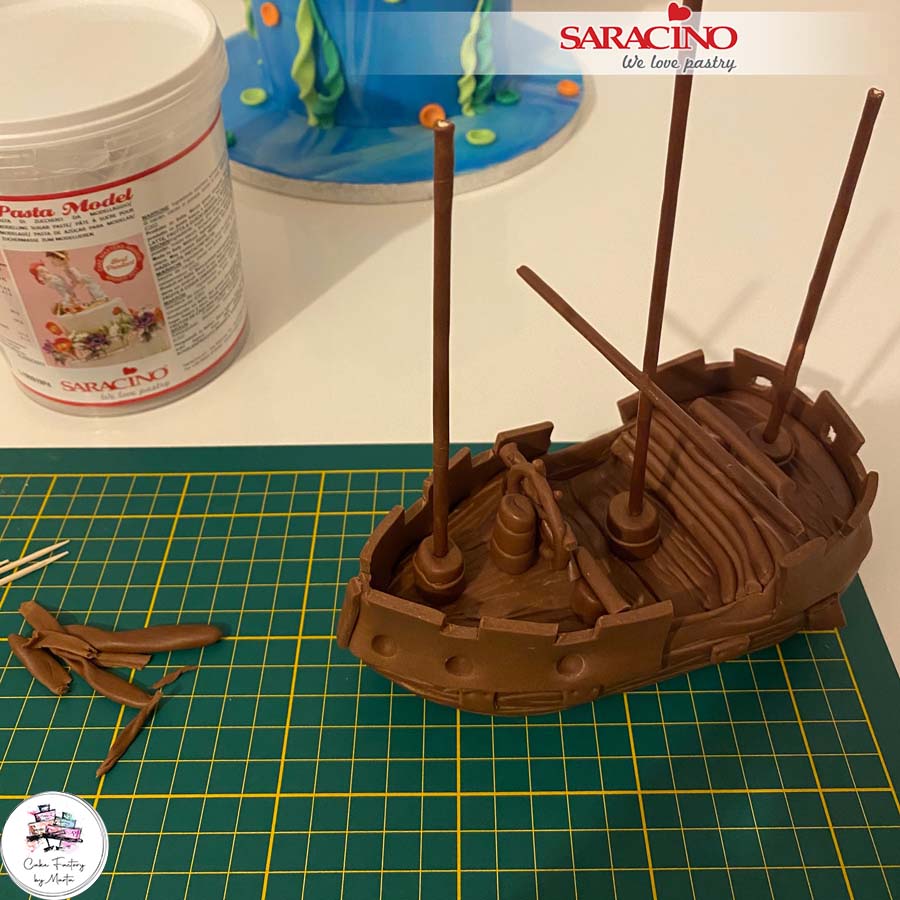
Step 27

Now prepare the horizontal mast pieces. Cover lengths of wooden skewer and toothpick with the soft brown paste. For this ship I have used 7 mast pieces.
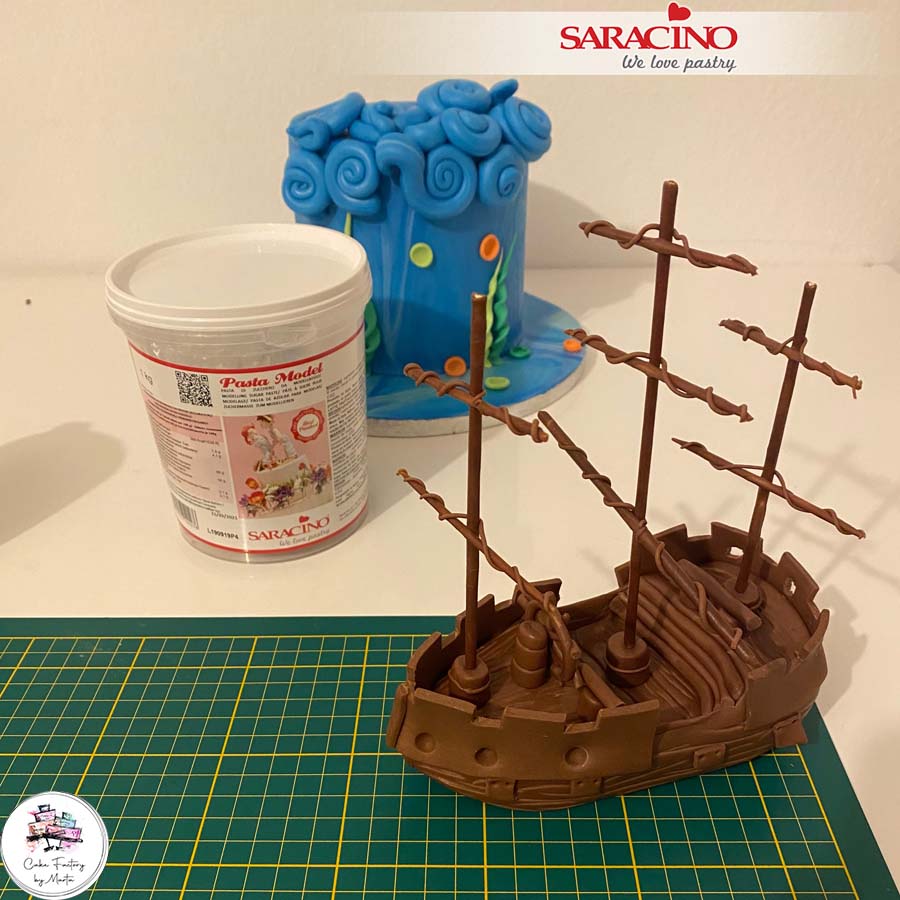
Step 28

Using a little water or edible glue fix each horizontal member to the vertical mast. Roll or extrude a thin line of brown paste. Twist around to give the rope look.
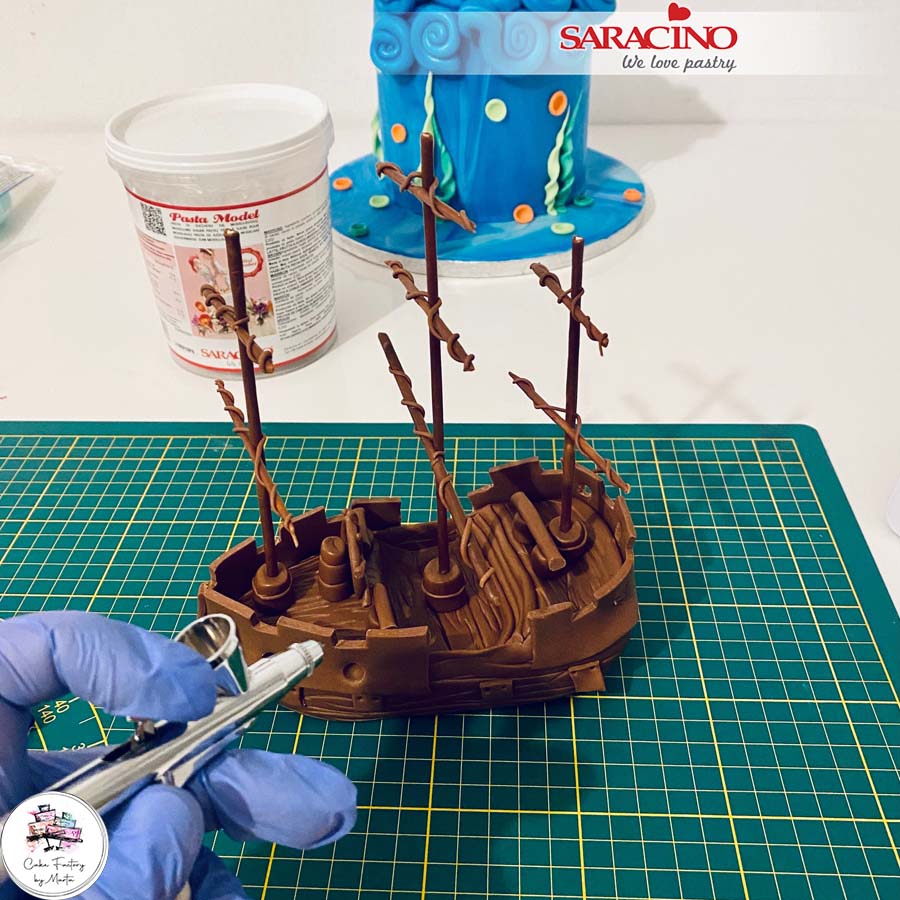
Step 29

Using an airbrush spray with a dark brown. We want to achieve a shipwrecked derelict look.
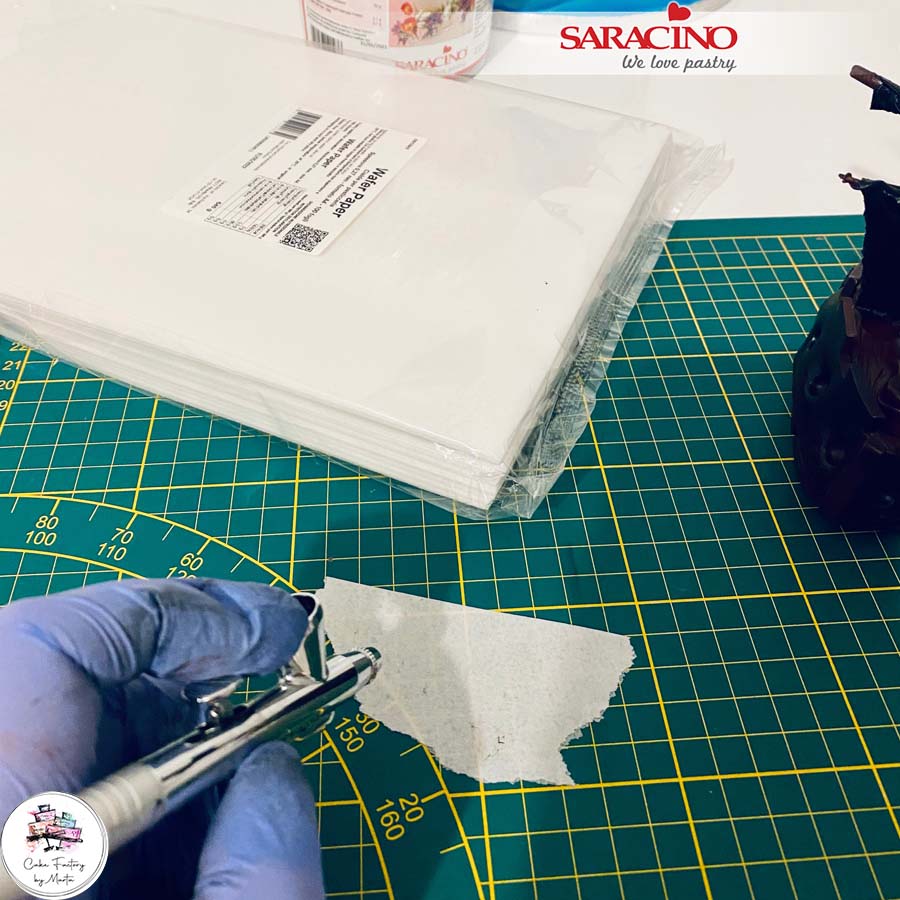
Step 30

For the sails we need to rip pieces of 0.27 wafer paper to give a torn rough look. Use your airbrush to spray both sides black.
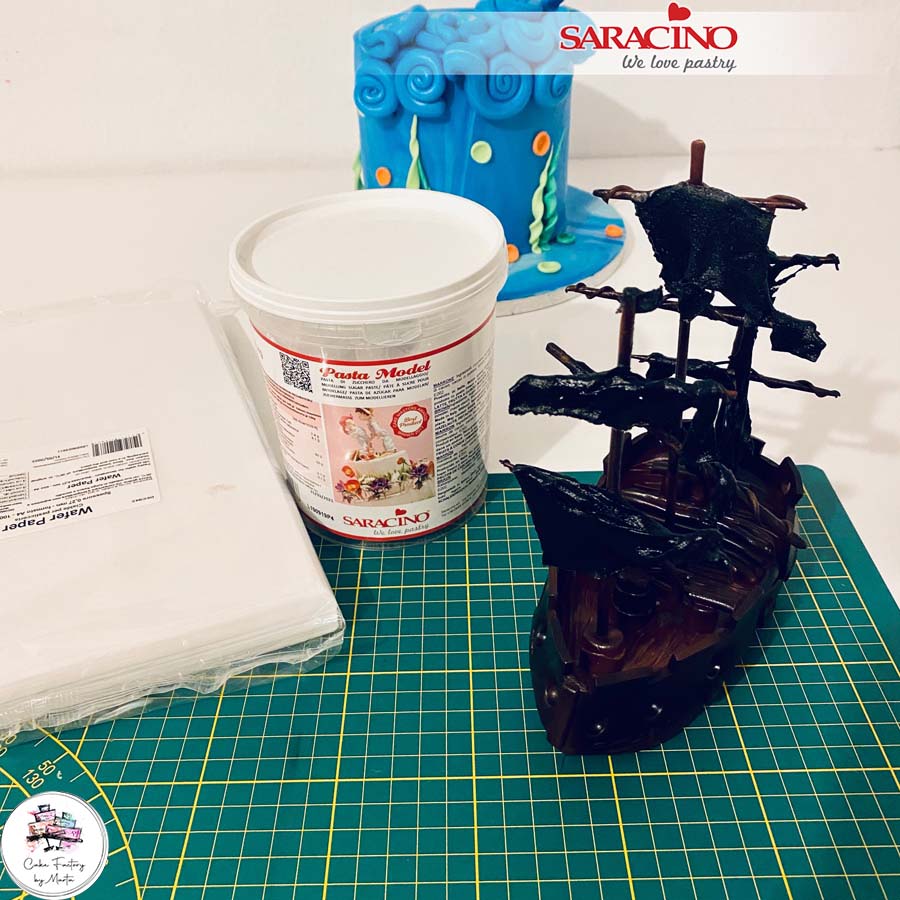
Step 31

Using a little water or edible gluse fix the sails to the masts randomly. We want to achieve a ripped, ghostly, random look. 
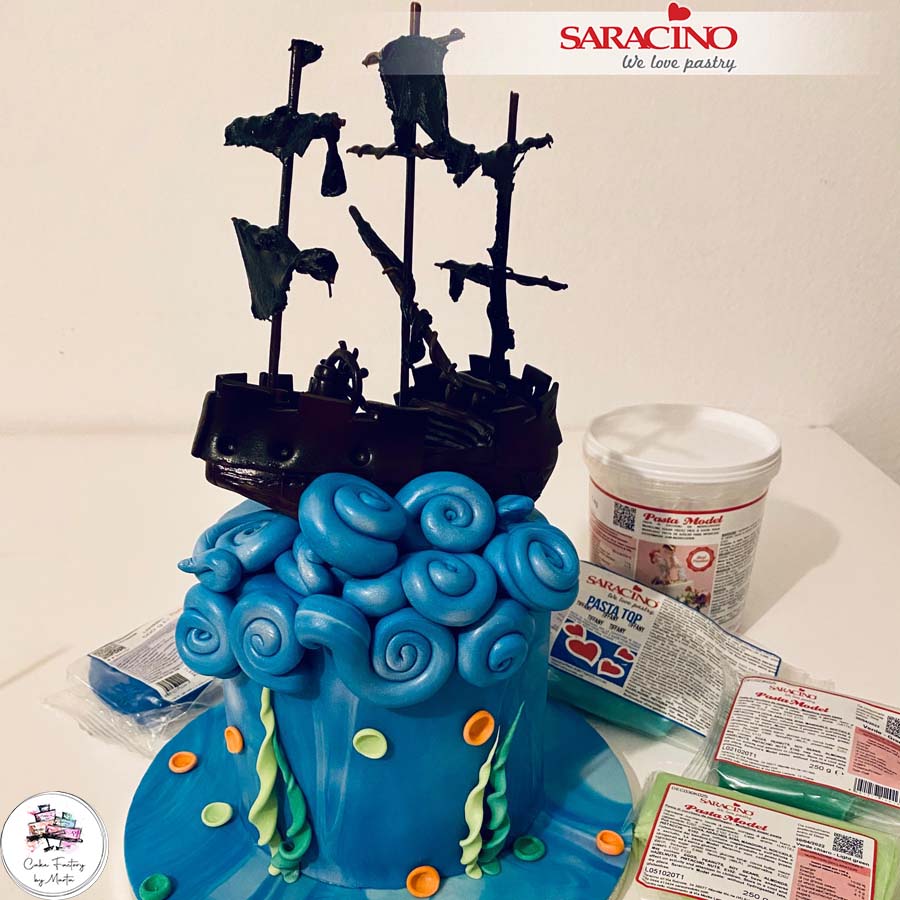
Step 32

Place the ship on the cake so that it sits against the waves. If the ship is not sitting well use a little spare paste underneath were it is not seen.
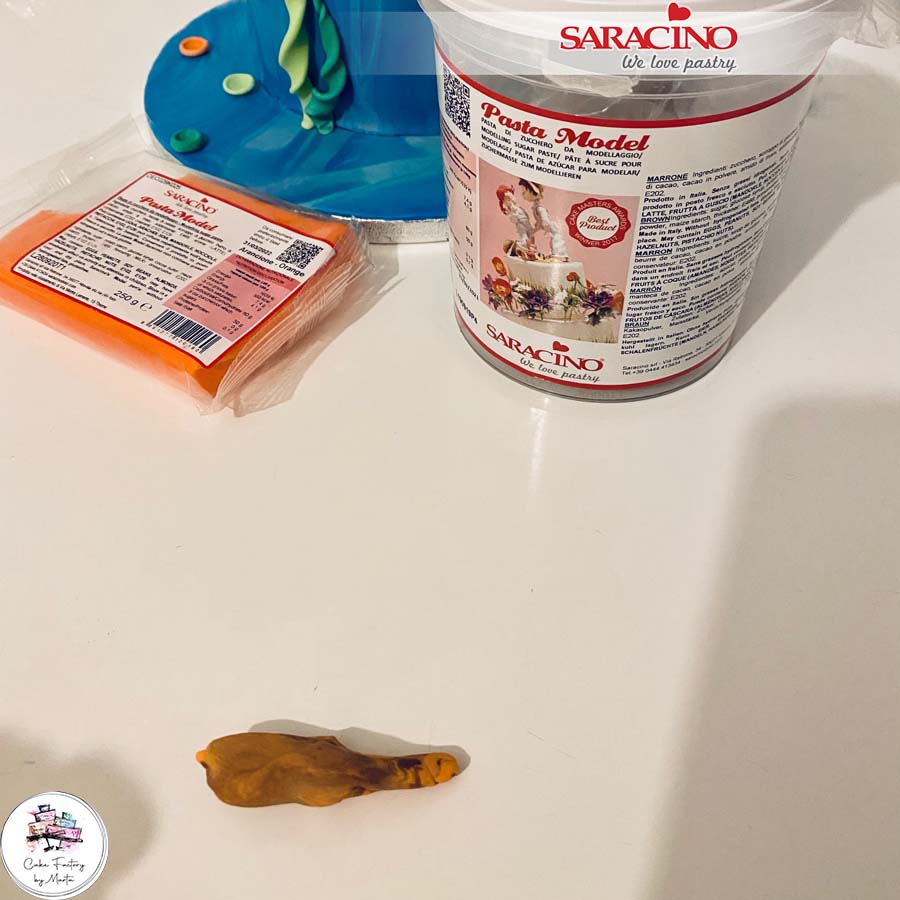
Step 33

To give added dimension and character to the cake add shells. Mix orange and brown pasta model to give a marble effect. 
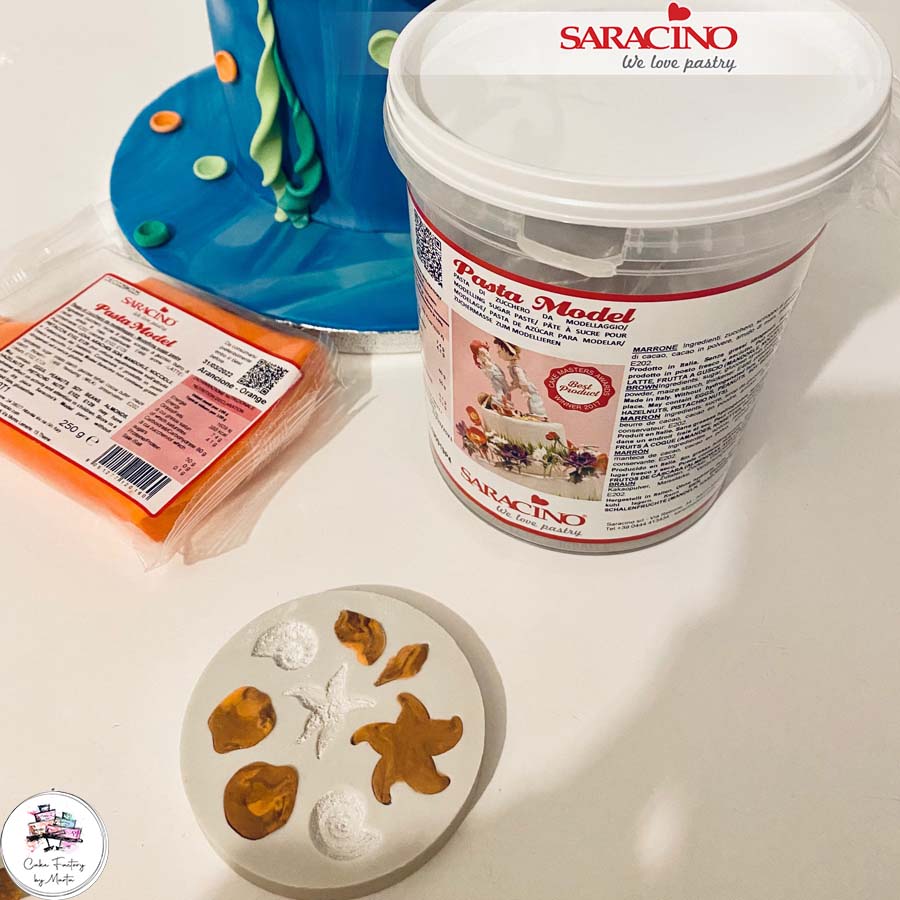
Step 34
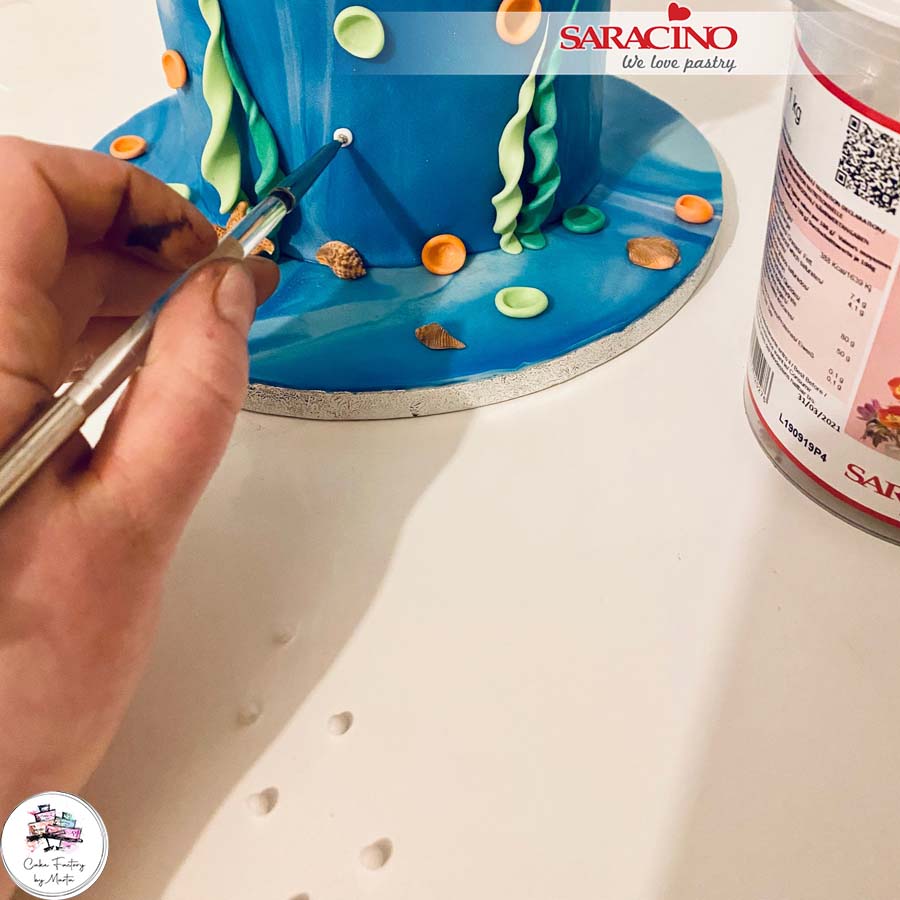
Use a shell mould to make as many pieces as you want for the look of your cake.

Step 35

Add to the look by fixing a few random white ‘bubbles’.
Step 36

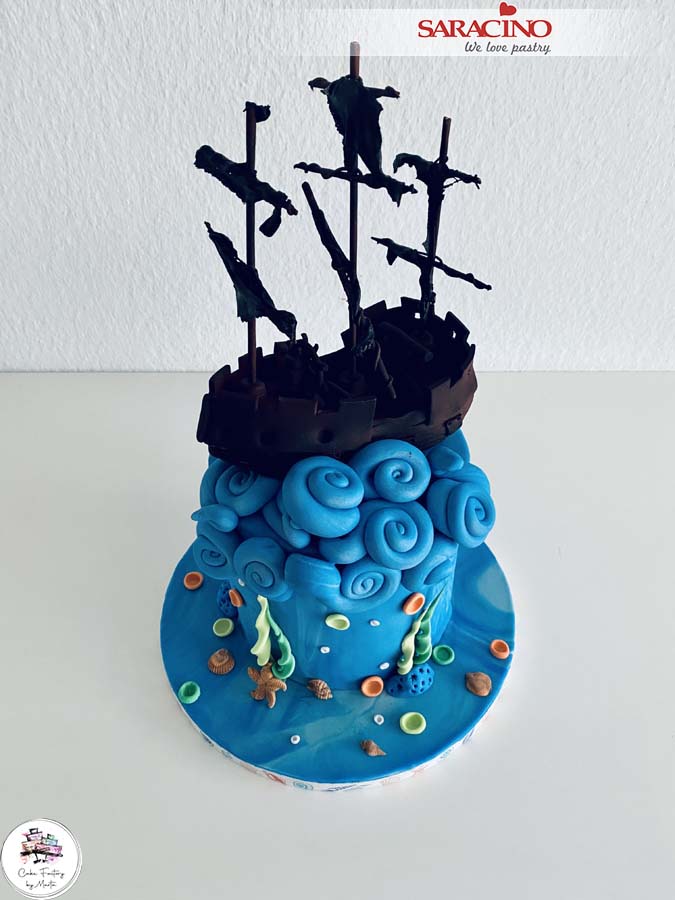
AHOY!! We are ready to set sail.

PIRATES GOLD

PIRATES GOLD

Skill level: INTERMEDIATE

You will need:

  • Download templates HERE
  • Saracino gel colours : red, black, brown, light blue,white
  • Powder colours: gold, pink
  • Cake gel
  • Pasta Top : baby blue and white (for the board colour it with brown and yellow gel colour and a little black)
  • Pasta Model : white, orange, brown, tiffany, red, black, yellow
  • Royal icing
  • Rice paper sheets
  • Cakes : 15cm dia x 19cm high and 10cm dia x 10cm high
  • Clear alcohol
  • Dresden tool
  • Ball tools (small and 10mm size)
  • Scalpel
  • Pointed hard brush
  • Sharp pointed tool
  • Small scissors
  • Straw
  • Piping tube nr 5
  • Easy Eyes green pack
  • Knife
  • Cocktail stick and toothpicks
  • Big brush
  • Fine paint brushes
  • Cake board 25cm diam
  • Rolling pin

Step 1

Cut out all the templates.

Step 2

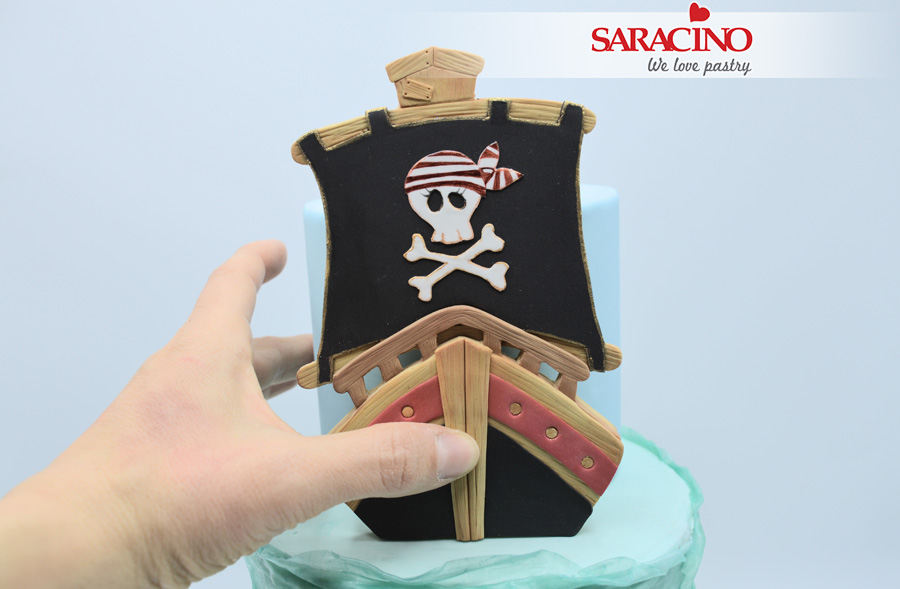
Roll out different colours of Pasta Model and cut out each part of the boat using the templates. Fix them together using a little edible glue, one on top of the other starting from the largest (shape 1). Use a scalpel to add the wood effect.

Step 3

Using red gel colour and gold powder colour (thinned with clear alcohol) paint the details.

Step 4

Using a soft brush and brown powder colour dust the wood sections.

Step 5

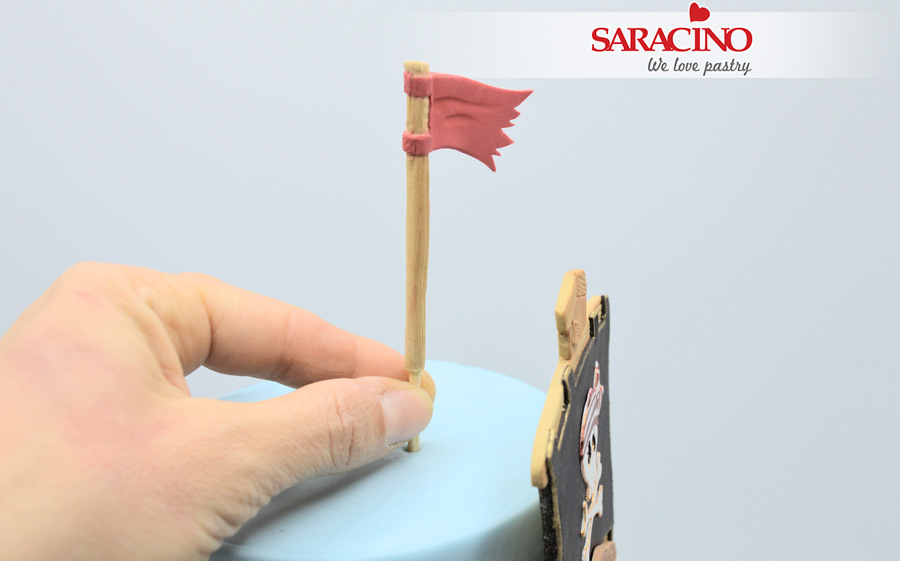
 Wrap a cocktail stick with a thin piece of brown paste and attach the flag to the top.                                                                          

Step 6

Create the treasure chest in the same way you created the boat. Paint the treasure with the gold powder paint made earlier, cut the edible jewels into small pieces and attach them to the treasure chest using a little water.

Step 7

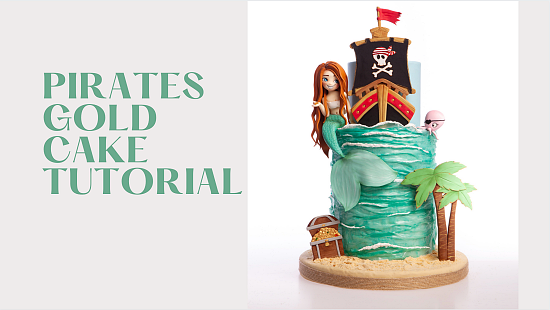
We want it to look like this.

Step 8

Using the template make the palm tree using the same techniques. Using the gold paint we made previously paint stripes on the tree and to the edges of the leaves. Dust the leaves using green powder colour.

Step 9

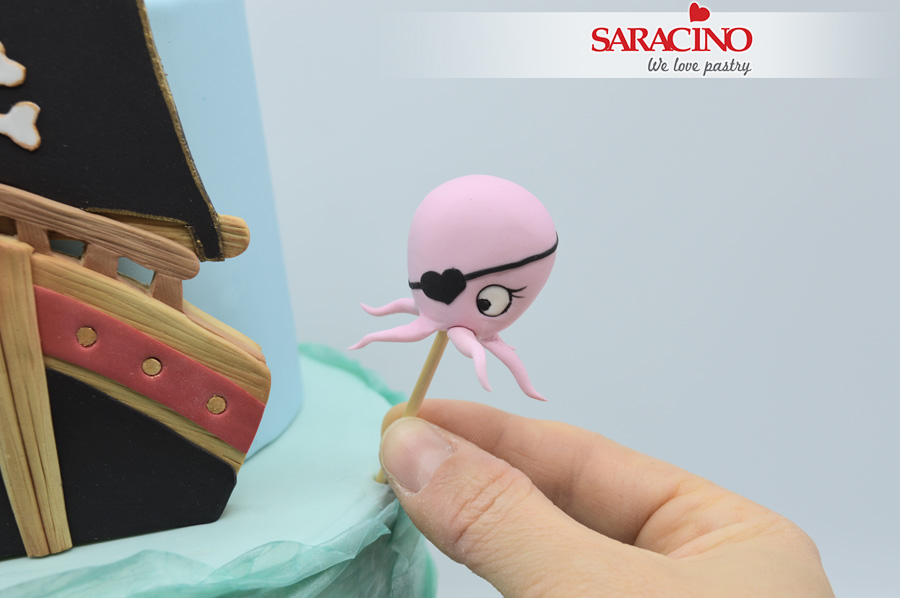
For the Octopus take 15g of pink Pasta Model and roll into a teardrop shape. Use a ball tool to press an eye socket.

Step 10

Using white paste roll a small ball for the eye. Add the eye details. Use black Pasta Model to make a small eye patch for the other eye. Fix to the Octopus head. 

Step 11

Cut a cross shape on the bottom side using a pair of small sharp scissors.

Step 12

Stretch and roll out each of the 4 parts to create the tentacles. Add more tentacles to give 8 in total.

Step 13

For the mermaids tail use 30g of pre-coloured tiffany Pasta Model (as an alternative mix 2/3 light blue + 1/3 green) and roll a long tear drop shape. Use your finger to push the paste to create the back side of the tail .

Step 14

Use a ball tool to form a dent on the top of the wider end.

Step 15

Use a scalpel to remove a small piece of paste on the front side. This will help when we bend.

Step 16

Bend the tail as shown.

Step 17

Secure the tail to a dummy using a cocktail stick. Use a Dresden tool to create two folds. Mark the scales using a straw which has been cut in half lengthways.  

Step 18

For the body use 15g of light skin tone Pasta Model and roll to a shape with one end a little bit smaller than the other.

Step 19

Use your finger to press down across the wider shoulder area.

Step 20

Use your fingers to shape the neck area.

Step 21

Again use your fingers to press in and create the waist, tummy and breast.

Step 22

Bend the back.

Step 23

Fix the torso to the tail.

Step 24

Insert a cocktail stick or wooden skewer through the body and the tail into the dummy. This will be used to secure the mermaid to the cake. Leave enough at the neck to secure the head. Create the navel with a pointed tool.

Step 25

Use a scalpel to mark the cleavage.

Step 26

Cut out a small strip of white Pasta Model and wrap around the chest. Twist at the back and fix.

Step 27

Create some random cuts.

Step 28

For the head use 20g of light skin tone Pasta Model. roll to a teardrop shape then flatten with the palm of your hand. Create the eye area by pressing gently with fingers.

Step 29

Shape the nose using the Dresden tool.

Step 30

Place the Easy Eyes tool (small size of the green pack) centrally above the nose and push gently.

Step 31

Use the Dresden tool to press the eye sockets in away from the edge.

Step 32

Use a sharp pointed tool to define the outline of the eyes.

Step 33

Use a Drseden tool to shape the eyebrows (for added expression make one of them higher than the other).

Step 34

Use a scalpel to cut a smile and carefully remove the paste from inside the mouth.

Step 35

Flatten the surface using a very small ball tool. Replace with a piece of white Pasta Model.

Step 36

Use the Dresden tool to add lines and character to the smile.

Step 37

Using a small brush paint the eyes with white gel colour.

Step 38

Using a fine brush paint the eyebrows. Roll out the light blue paste very thin and cut out two circles using a straw or small circle cutter.

Step 39

Fix the blue circles to the eyes as shown. Press two holes for the pupils and paint them with the black gel colour.

Step 40

Blend the iris with a dark blue gel colour. Paint the eyes contour, the eyelashes and the outline of the smile using the black gel colour. Dust the cheeks with a bit of light pink powder colour. Add the light point to the eyes with white undiluted gel colour.

Step 41

Cover the cake using baby blue Pasta Top. For the sea I found that the rice paper sheets were very versatile and easy to use with a very nice result. Dilute some powder colours in water. Remember that the tone of the colour you see in the bowl is different to when applied so you may want to practice on another piece of paper before you start.

Step 42

Paint the sheet with the colour using a large brush.

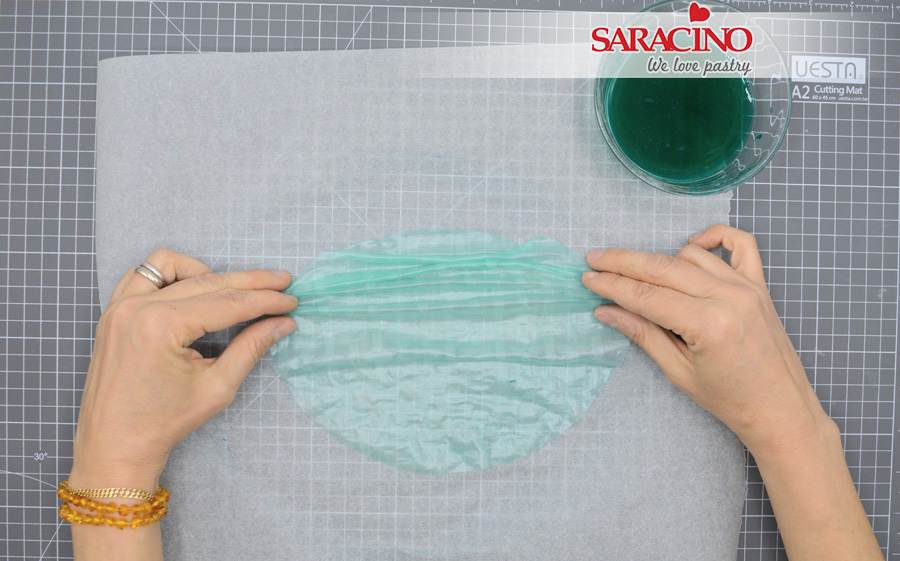
TIP Pay attention not to soak the paper too much.

Step 43

Wait about 5 minutes (touch the paper to check if it is ready or not) then shape the ruffles with the fingers.

Step 44

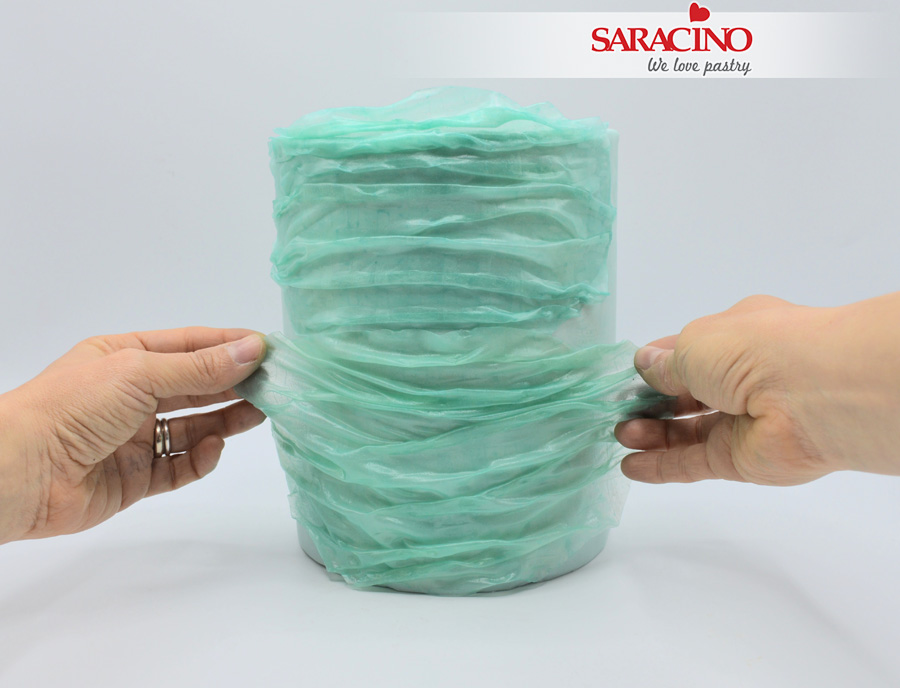
Place it on a dummy (preferably of the same size of the cake) and continue to make another. Don’t let them dry completely so after making three or four pieces start attaching them to the cake using a little water.

Step 45

Overlap each paper but avoid to overlap them too much. The sheets will now be flexible and stretchy so it is not difficult to place and shape them to the right position.

Step 46

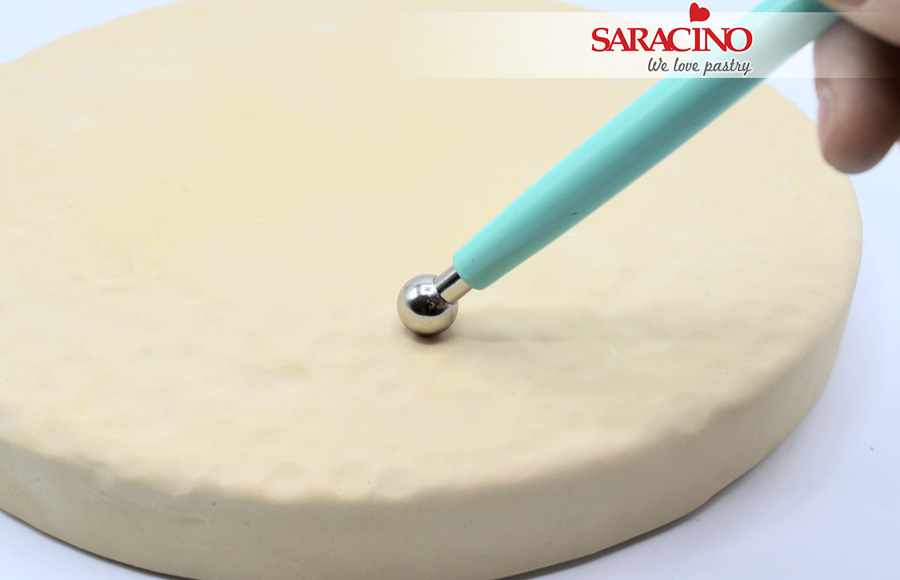
Cover the board with a sand coloured paste and add all the grooves using a large ball tool.

Step 47

Transfer the lower tier cake to the prepared board. Add the smaller top tier. Use dowels to support if required.

Use a little edible glue to fix the boat to the top tier.

Step 48

Insert the flag so that it is visible from the front. If the cake is edible you may want to use a posy pick.

Step 49

Attach the Octopus on the right hand side and the mermaid’s body on the left.

Step 50

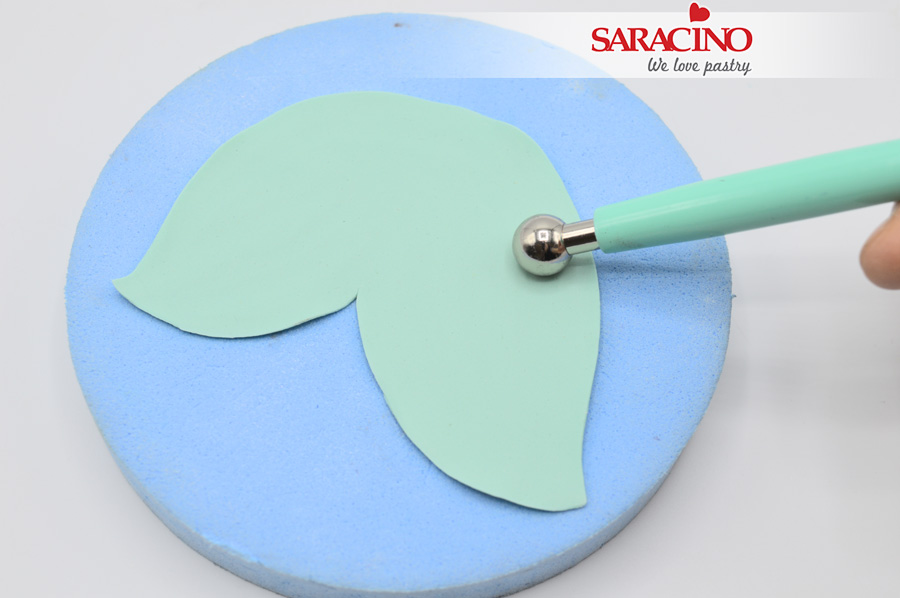
Add a little white paste to the paste you used for the tail and roll it out very thin. Cut out a large tail fin and place on a foam pad. Add texture with a ball tool.

Step 51

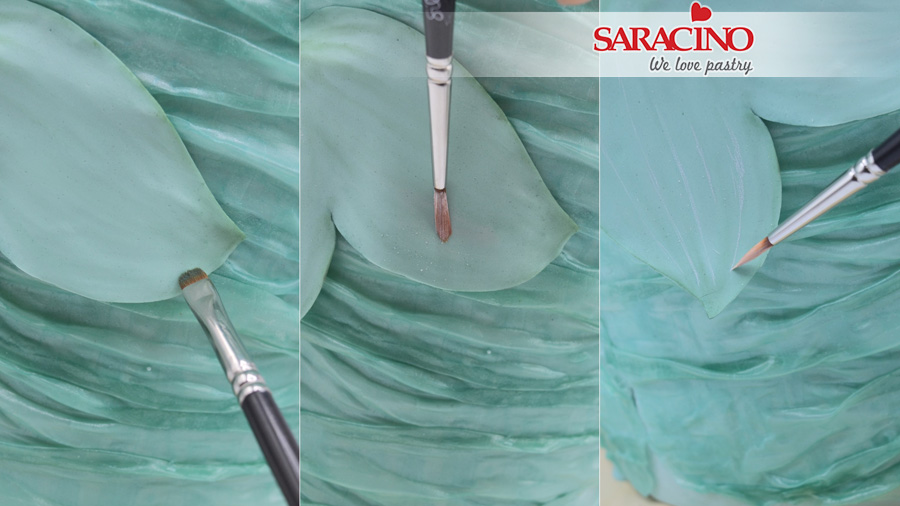
Fix to the end of the tail using a little water. Dust the edges using  green powder colour and the grooves with a white powder colour. Finish the tail by painting white lines.

Step 52

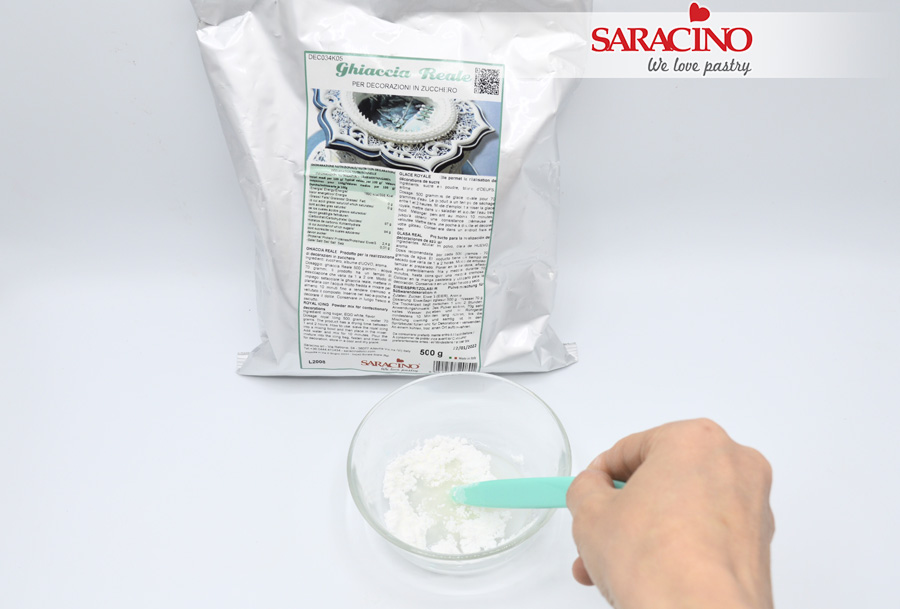
For the waves mix the royal icing as per the instructions on the packet (just add water). We need a medium consistency so be careful not to add too much water.

TIP You can prepare the whole packet of royal icing if you will soon need it for other decorations. The mixed result is likely to be better.

Step 53

Pipe the royal icing along the edges of the waves and use a wet brush to blend and create the crests.

Step 54

Fix the palm tree and the treasure chest on the board to the sides of the cake.

Step 55

For a sand effect crumble some biscuits and spread around the cake.

Step 56

Using  5 – 6g of light skin tone Pasta Model roll a sausage shape with each end narrower. Cut it in half and flatten the hand ends to create the palms. Roll to thin the wrist and the elbow area.

Step 57

Cut out the thumb making a V shaped cut with the scalpel. Push the thumb forward and smooth the edges. Bend the right arm.

Step 58

Fix the arms to the torso using a toothpick and a little water.

Step 59

Use the end of the piping nozzle to cut out some small circles for the coins. Paint with the gold paint we made previously (if it has dried add more clear alcohol).

Step 60

Fix the coins on the hand of the mermaid. Make another arm and attach to the body.

Step 61

Using about 50g of orange Pasta Model cut out strands of hair as shown.

Step 62

Start by attaching the smaller strands to the back of the head.

Step 63

Fix the the largest piece to the back and pinch the excess together on the top of the head. Cut away the excess paste.

Step 64

Continue attaching the other strands.

Step 65

Continue attaching all the other strands until the last one is fixed at the back of the head.

Step 66

Add random marks using the scalpel to add character.  Add some very small strands between the larger ones.

SEA THEMED WEDDING CAKE

SEA THEMED WEDDING CAKE

Skill level: BEGINNERS

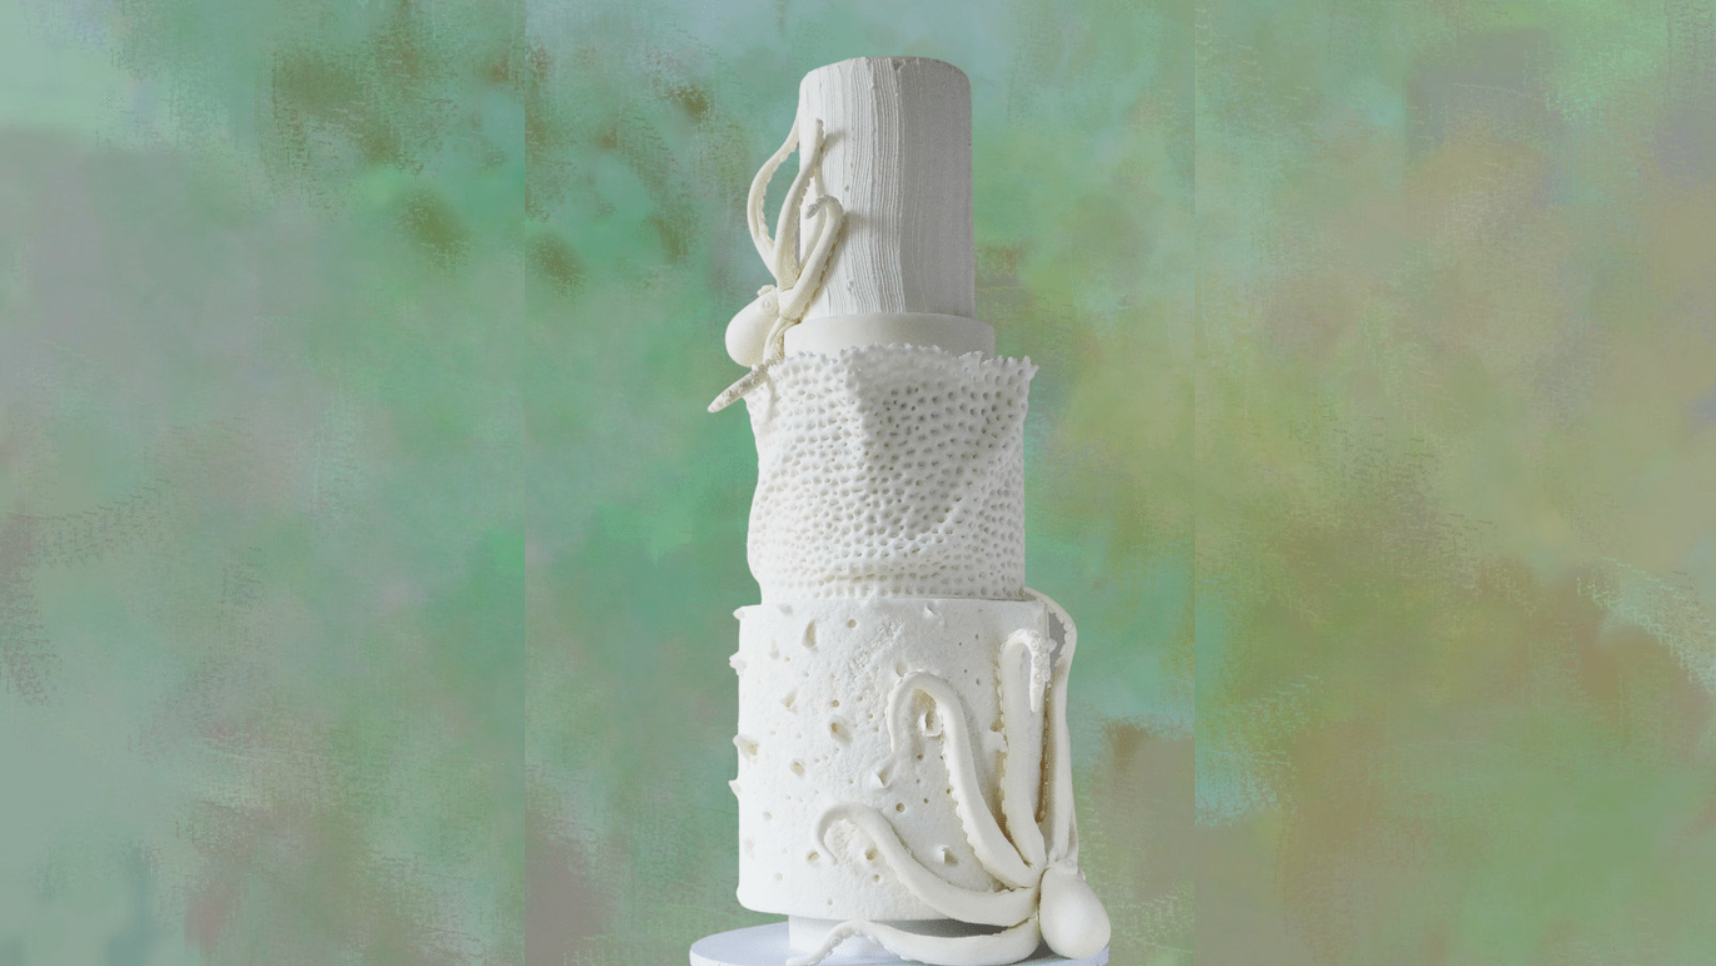
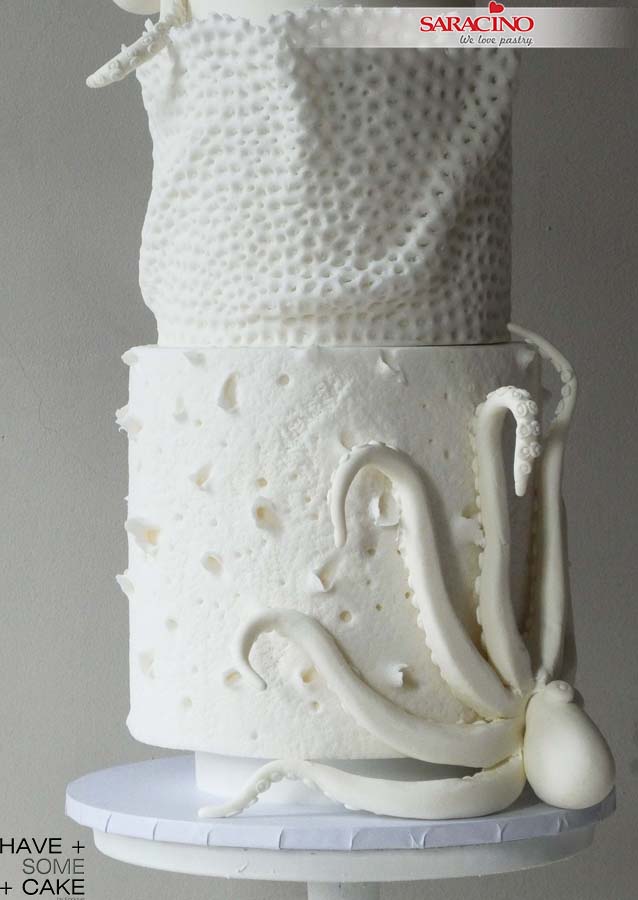
A different kind of Wedding Cake. This tutorial is about textures inspired by live coral reef and the ones washed ashore and dried. On the bottom tier we have a heavily textured tier that reminds you of pieces of coral dried and eroded by the elements. On the middle tier there is a more organic recreation of a live coral as found in reefs and at the top, the tier is textured to simulate sand at the bottom of the sea. The cake is finished by two octopus climbing around it. I went all white because it gives the design a more sculptural/ethereal feeling and because it is a thematic design.

You will need:

  • SARACINO white Pasta Top
  • SARACINO white Pasta Model
  • Rolling Pins
  • Ball Tool
  • Scriber Needle
  • Dresden tool
  • Veining Tool
  • Coarse Brush [Kemper] Tool
  • Pointed Rolling Pin
  • Zig Zag Edge Pottery Spatula
  • Sugarworks Shaper : Pointed Chisel (Light Blue)
  • Sugarworks Shaper : Bone Chisel (Orange)
  • Number 2 Round Piping Nozzle
  • White Royal Icing
  • Craft Knife
  • Pearl White Dust (OPTIONAL)
  • A Cake (Dummy) as shown : 5″ x 1″ Deep Round Separator/ 7″ x 7″ Deep Round Tier/ 6″ x 5″ deep Round Tier/ 5″ x 1.5″ Deep Round Separator /4″ x 6″ Deep Round Top Tier

Step 1

Very thinly roll enough Saracino white Pasta Top to wrap the bottom tier. Using a 9″ rolling pin roll the sugar paste around it as shown.

Step 2

Moist the dummy and roll the sugar paste around the tier as shown. With a knife cut the excess sugar paste at the top edge.

TIP: When cutting the excess sugar paste at the top use a new blade or run the blade in Trex so it cuts smoothly. Try to do the whole cut on a turntable and in one go.

Step 3

Your finished tier doesn’t have to be perfect as we will apply a texture. 

Step 4

Using the Kemper coarse brush start pressing onto the previously covered tier. Use a moderate force when pressing and occasionally press forcefully to create a variation in the texture you are creating.

Step 5

You want this kind of appearance.

Step 6

Using a pointed chisel tool at an angle start creating cavities. You can go as deep as you want and lift them as much as you like as shown.

Step 7

Using differing modelling tools complement the texture with random craters around. You will be able to work with this while the sugar paste has not dried. Be as gentle or as strong as you like. No limits to create your texture.

Step 8

Cover the middle tier as described previosuly. This also does not have to be perfect as we will be adding texture.

Step 9

Roll a piece of Saracino white Pasta Top the length and height of the second tier. Using a small ball tool start pressing onto the strip of sugar paste as shown.

Step 10

Use both ends of the ball tool to create different sizes and as close as possible. This will start deforming the previous round impression creating a more organic coral like structure. Using a veining tool you can perforate even more of the hole as shown in image.

Step 11

Lift the finished strip and wrap it around the tier. When doing this, handle the strip as if you were doing some drapes to create a wavy, organic shape as shown.

Step 12

Once the tier is fully covered use your fingers to tear the top edge randomly to create an imperfect edge.

Step 13

Using a sharp tool, perforate the hole structure where you have some draping creating some space for light to penetrate. 

Step 14

Using the same sharp tool start punching all around to make little tiny holes on it. Live coral is not completely smooth and this will give a second more detailed texture to this tier.

Step 15

Prepare some Saracino Royal Icing to the instructions on the packaging. We need a hard peak mix. Cover the top tier with it.

Step 16

Using a metal scraper remove the excess. We do not need a perfect smooth finish as we are again adding texture.

Step 17

Before the icing dries use the zig zag edge pottery tool to create wavy stripes. It is a very subtle but effective texture.

Step 18

To make the head of the octopus, roll Saracino white Pasta Model in your hands to create an egg shape.

Step 19

Make two smaller balls and flatten them to create the eye sockets and attach them to the thin end of the head as shown.

Step 20

Use a modelling tool to press two eye sockets.

Step 21

Roll a small ball of white modelling paste and place it in the previously make hole in the eye sockets. Leave to dry while you make the tentacles.

TIP: I decided to make the octopus in 2 parts, the head separated from the tentacles so I wouldn’t have to wait for it all to dry. Also as it would be easier to handle the tentacles to position over the cake without the head.

Step 22

For the tentacles roll a ball of white Pasta Model and flatten it. With a knife cut equally into 8.

Step 23

With your hands roll and thin one portion at a time until you have the 8 tentacles.

TIP: Alternatively, you can do each tentacle separately and join them when ready but as the tentacles are placed vertically you will have to join them and leave to dry in position on a dummy as there isn’t anything holding them together. Remember this is not an exact biological octopus recreation.

Step 24

Your tentacles should look like this.

Step 25

To make the tentacle suckers roll small balls of white Pasta Model and start placing them onto the tentacles.

Step 26

Using the number 2 round piping nozzle press each ball to give the sucker look. Repeat for all 8 tentacles. For this project you will make a larger octopus for the bottom tier and smaller one for the top tier.

Step 27

Do the same with the middle.

Step 28

Arrange the tentacles organically as required with the suckers facing the cake. Use a little royal icing to hold in place.

Step 29

Attach the head to the tentacle part using royal icing. You can also fill the gaps between head and body with royal. You will have to hold it in place for a little so the head does not slide off.

Step 30

Your underwater treat is ready!

LITTLE MERMAID TUTORIAL

LITTLE MERMAID TUTORIAL

Skill level: BEGINNERS

You will need:

  • Pasta Model Green

  • Pasta Model Pink

  • Pasta model Fuchsia

  • Pasta Model White

  • Saracino white powder colour

  • Saracino black powder colour

  • Saracino pink powder colour
  • Saracino pink gel colour

  • Saracino blue gel colour

  • Saracino silver glitter powder
  • Cake Gel
  • Straw
  • Brushes – fine and flat
  • Toothpick
  • Clear Alcohol 
  • Scissors
  • Small star cutter
  • Small circle cutter


Step 1

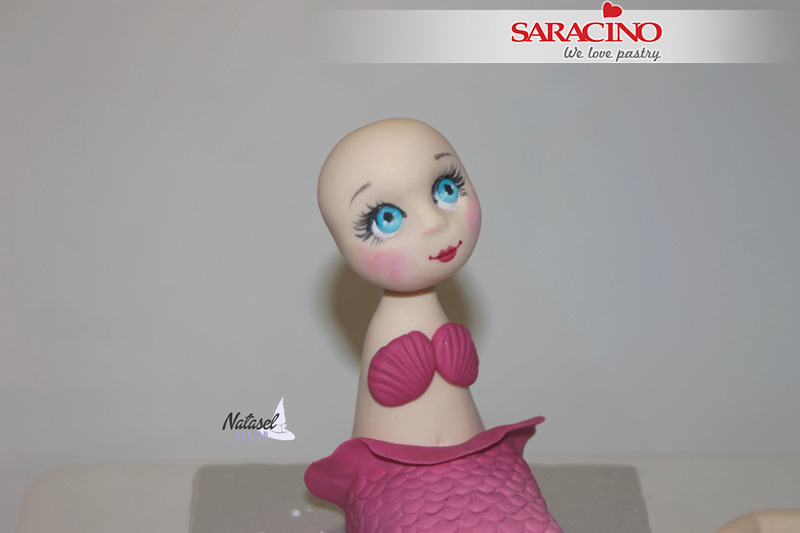
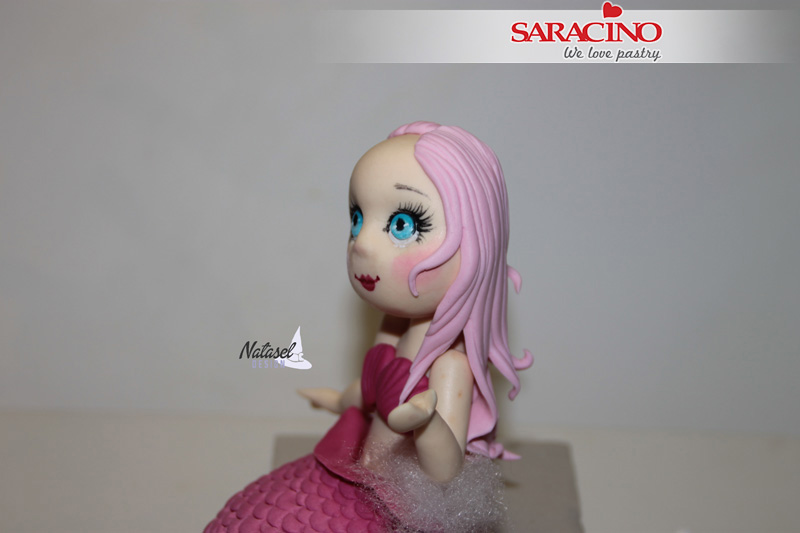
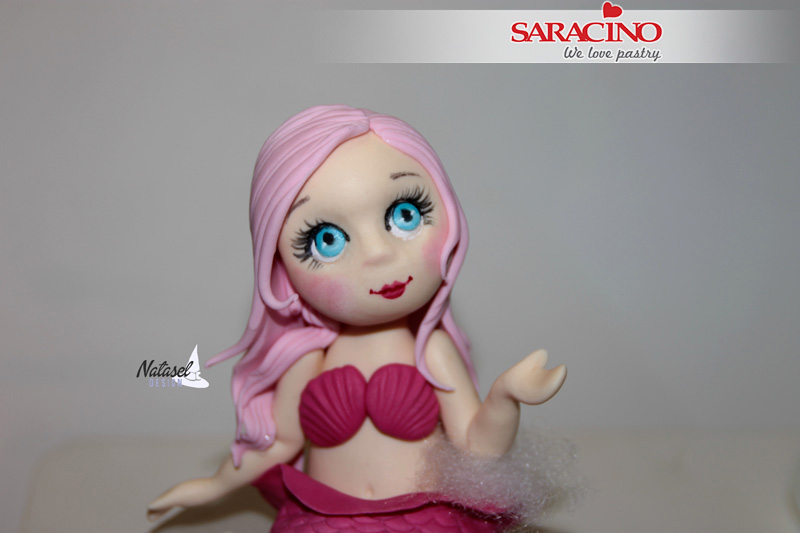
For the head you will need 30g of skin modelling paste. Roll an egg shape and using one of your tools press approximately half way to create the eye area.

Step 2

Using your little finger or a ball tool pass two eye sockets gently into the eye area.

Step 3

Using your fingers press up gently to form the nose 

Step 4

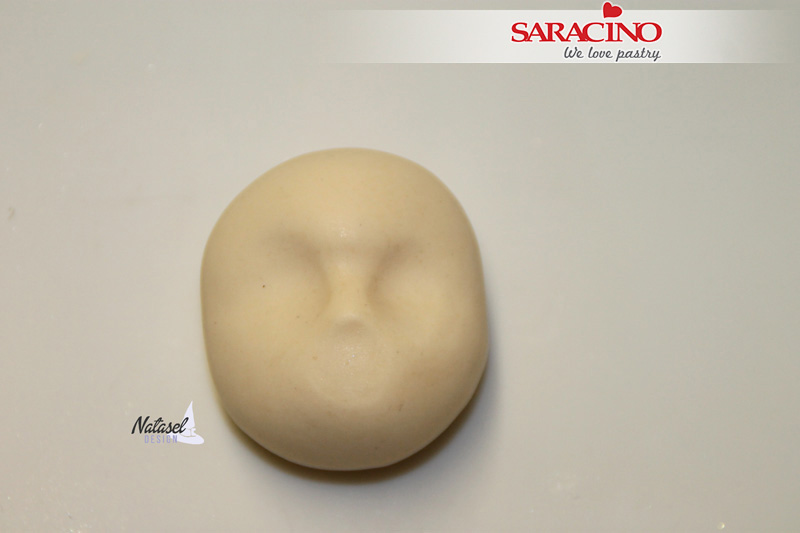
Your face should look similar to this with an indent for the mouth area.

Step 5

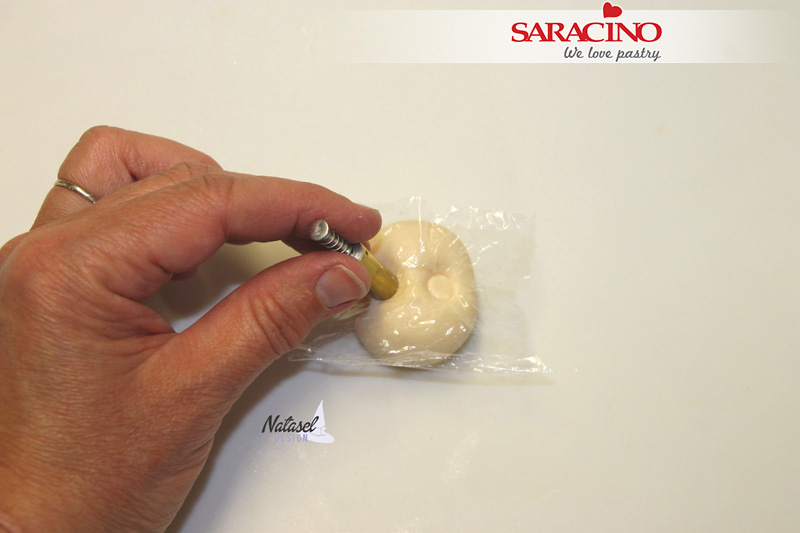
Place a small piece of cling film over your face.Using a small round cutter indent the eyes through the cling film. 

Tip – If you do not have a small enough round cutter you can use the end of a straw.

Step 6

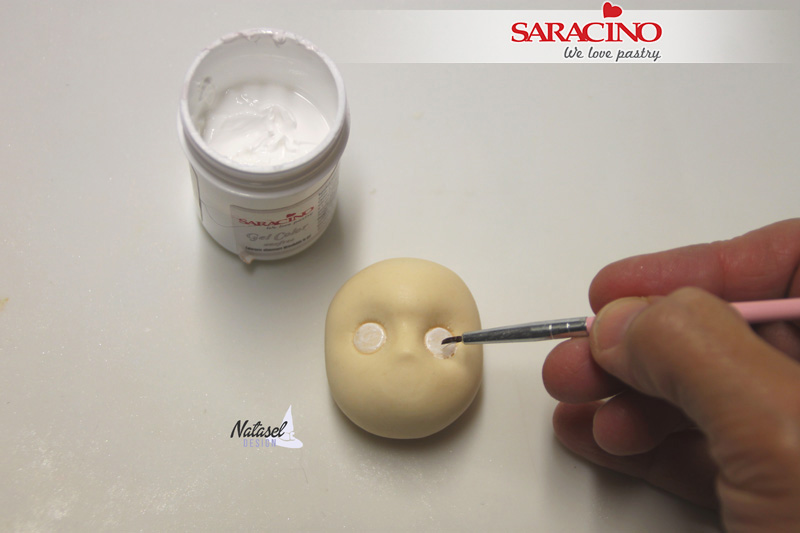
Mix your white gel colour with a little clear alcohol. Paint the eye balls with a small brush.

Step 7

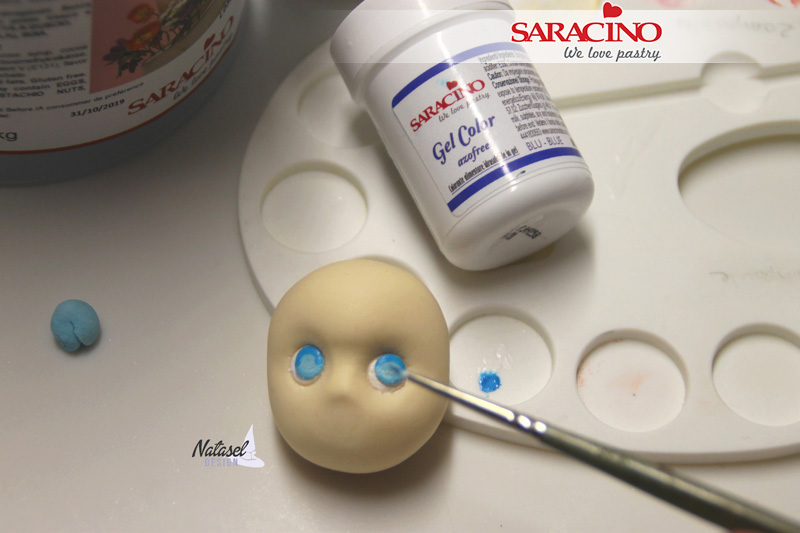
Colour a little of your white paste with the blue gel colour. Roll a small ball and press with your finger to flatten. Place on the white eye balls. Now dilute some of the blue gel with the alcohol and using a small paint brush add highlight and shade around the blue area.

Step 8

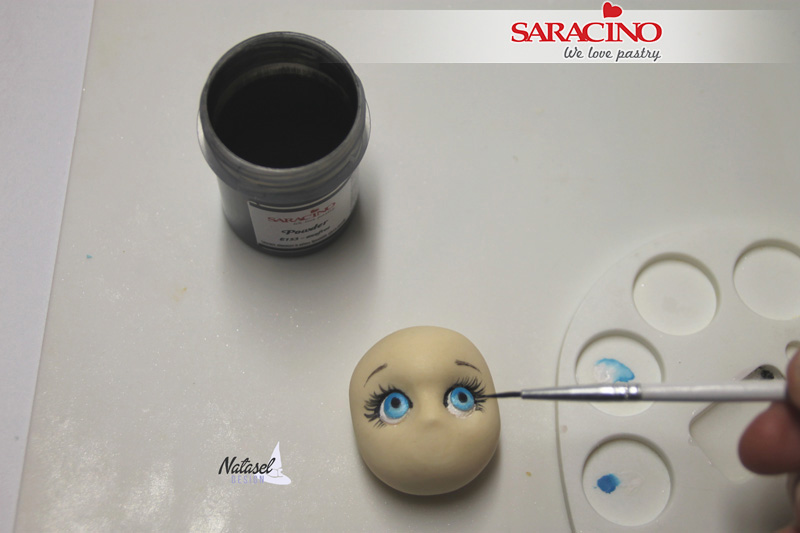
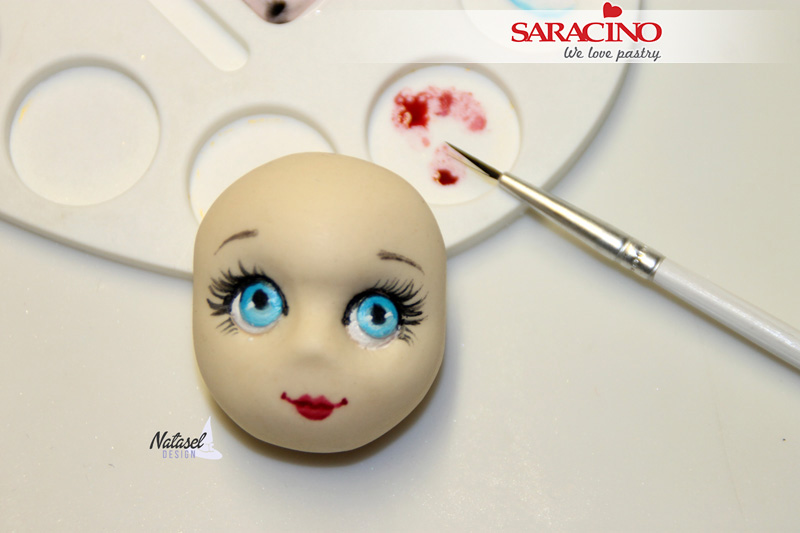
Dilute some of your black powder colour with the clear alcohol. Using a fine paint brush paint the pupils, eyelashes and eyebrows. 

Step 9

Add two small dots of white colour to each eye. Now dilute pink powder colour with the clear alcohol and using a fine brush paint the lips.

Step 10

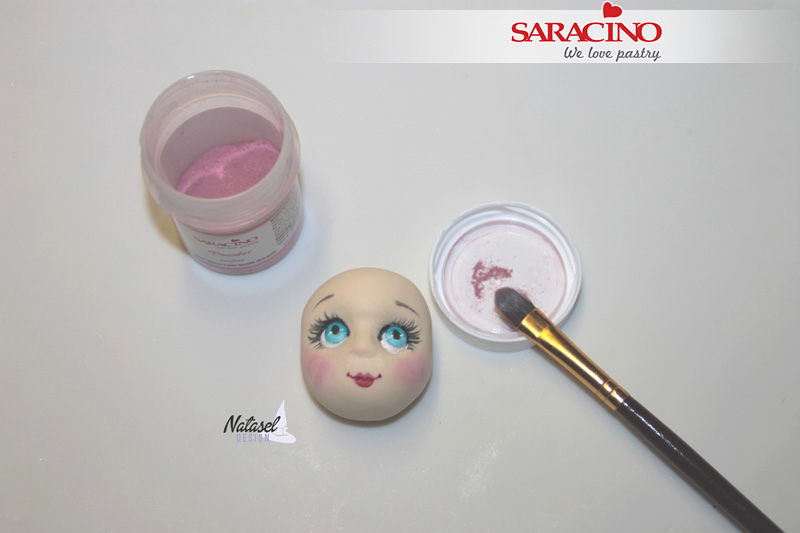
Using your pink powder colour and a soft paint brush lightly dust the cheeks.

Step 11

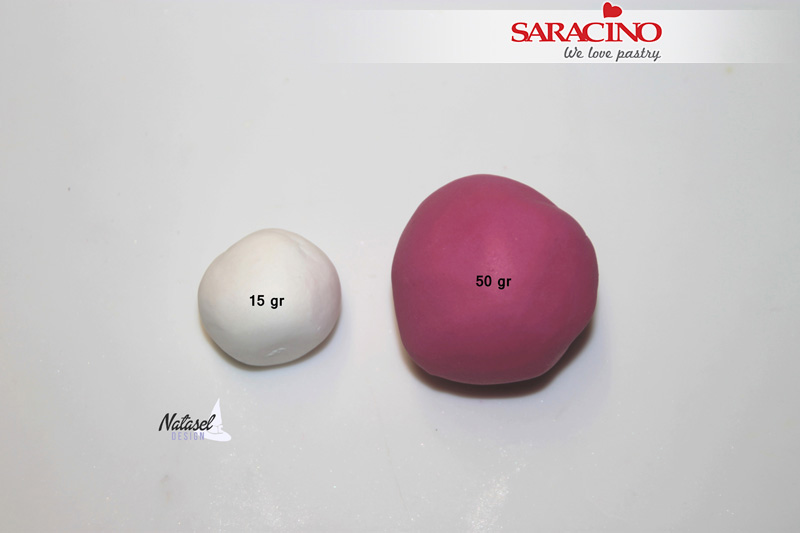
Prepare 15g of white paste and 50g of pink paste.

Step 12

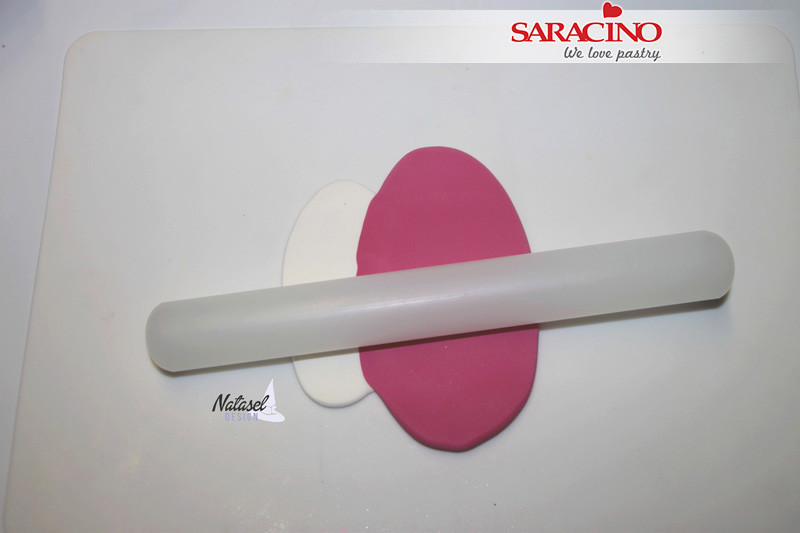
 Roll out each colour and overlap them. Fold down and roll again. We are achieving our colour blend.

Step 13

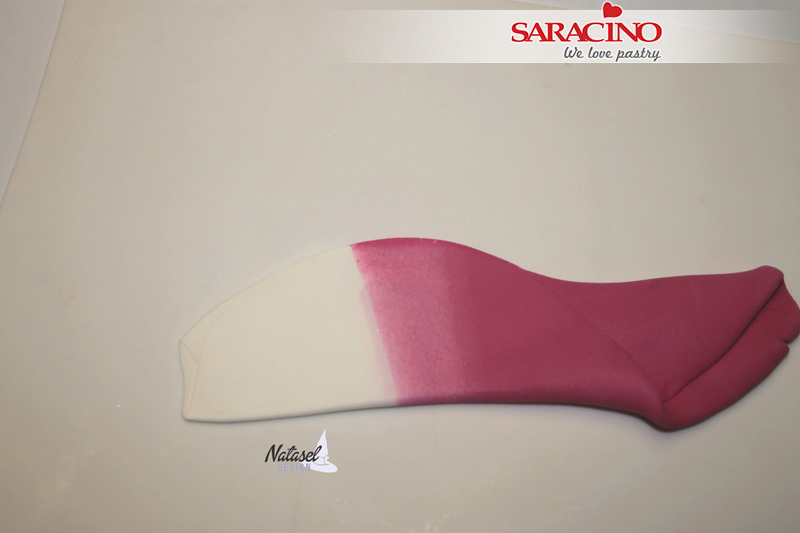
Repeat the same process 5 or 6 times, until you get a gradient from pink to white.

Step 14

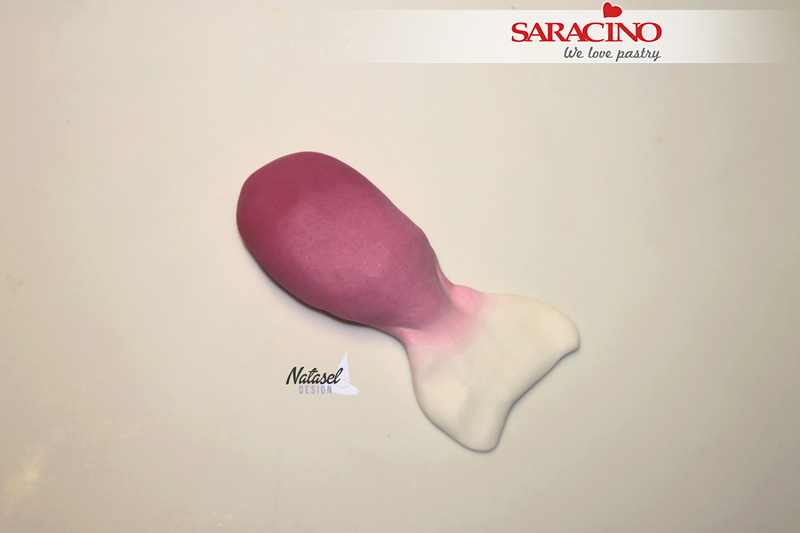
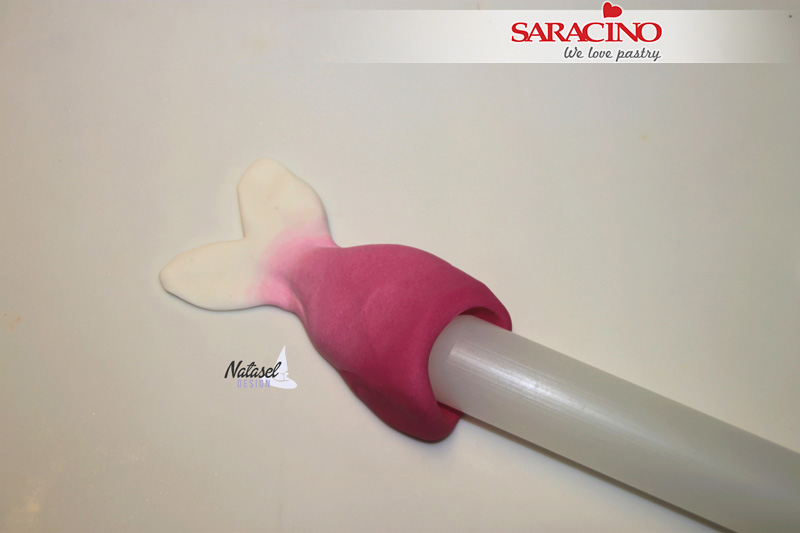
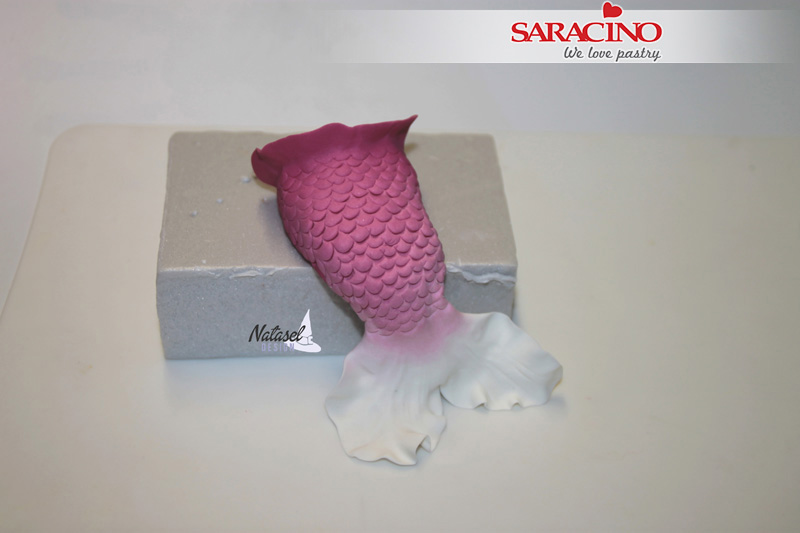
Without mixing colours, shape the body and tail of the mermaid by forming an elongated pear shape ending in the thinner white for the tail.

Step 15

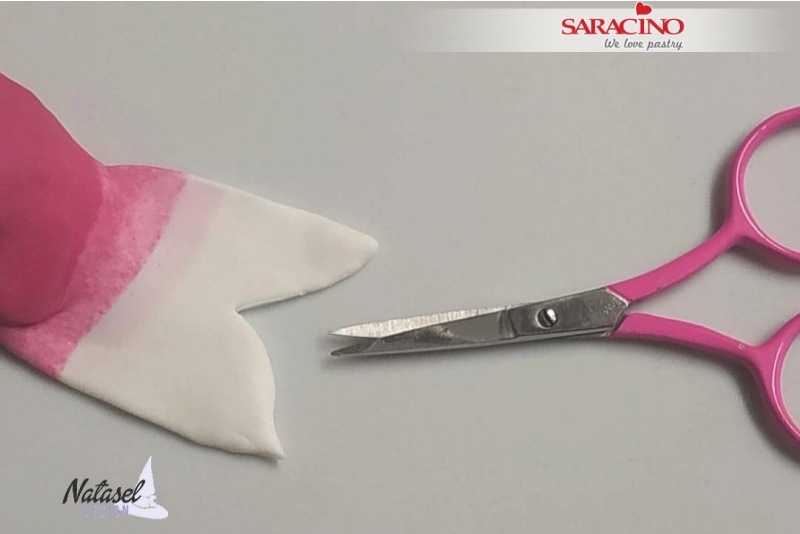
Flatten the tail and using a small scissors or sharp knife cut the tail shape.

Step 16

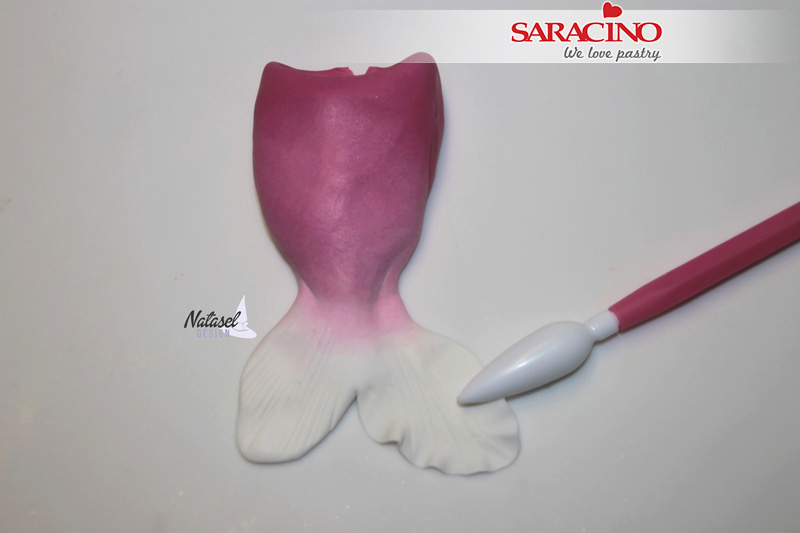
Using the end of a rolling pin push down into the top of the pink to create a dent. Round the edges of the tail as shown.

Step 17

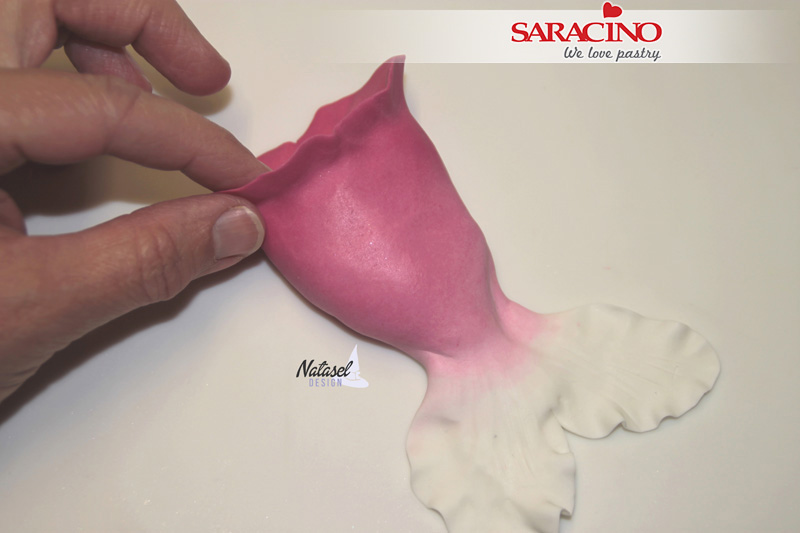
Use your Dresden tool to add lines / texture to the tail. Now use a ball tool or similar to roll out and thin all the edges to create a more natural appearance.

Step 18

Pinch the edge of the upper hollow.

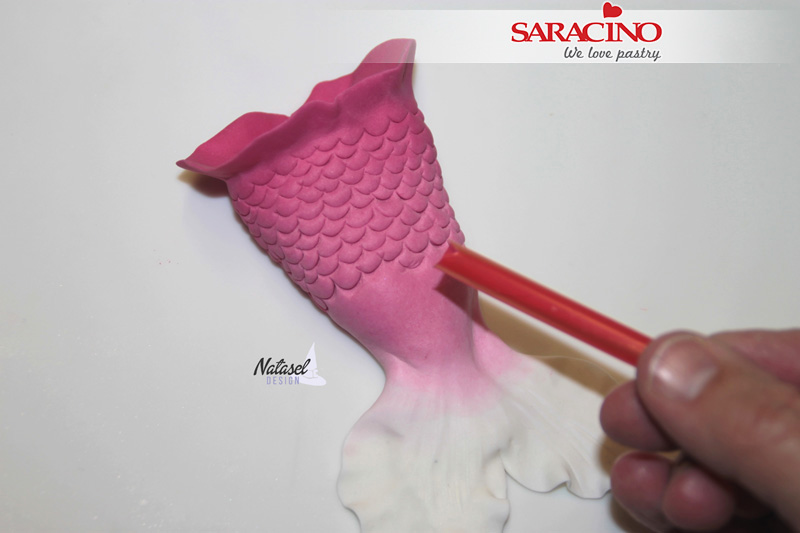
Step 19

Trim your straw, and mark the scales of the tail.


Step 20

Shape the tail area into a sitting position on a piece of polystyrene or something similar. The sitting position should match how you want it to appear on your cake.

Step 21

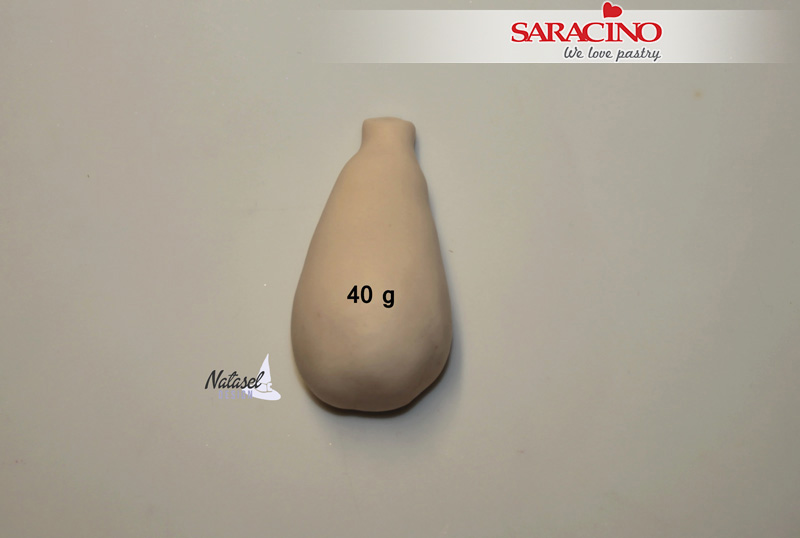
Using 40g of skin tone modelling paste roll a pear shape for the body. Using your fingers gently roll out and form a neck.

Step 22

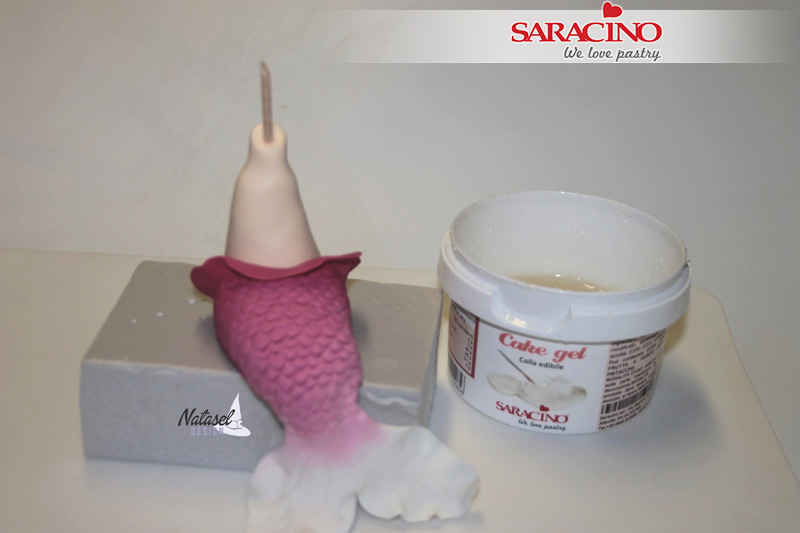
Using a little cake gel fix the body into the top of the tail / lower body. Insert a cocktail stick into the neck ready to attach the head.

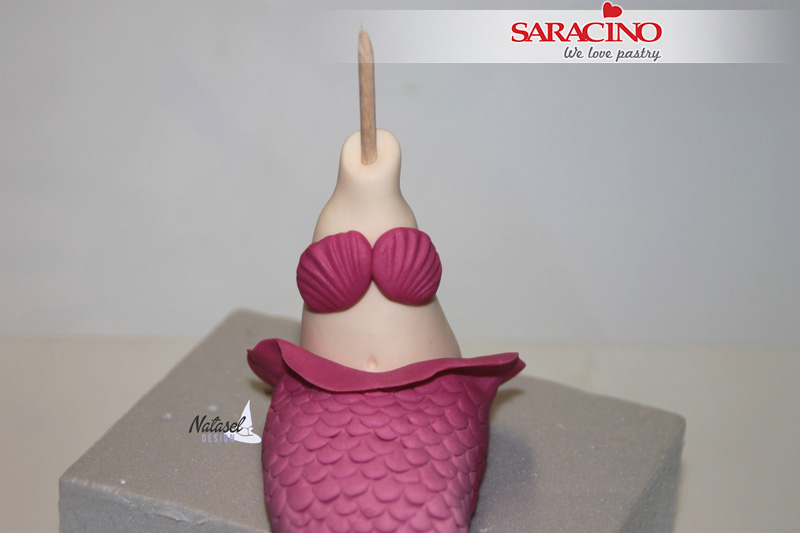
Step 23

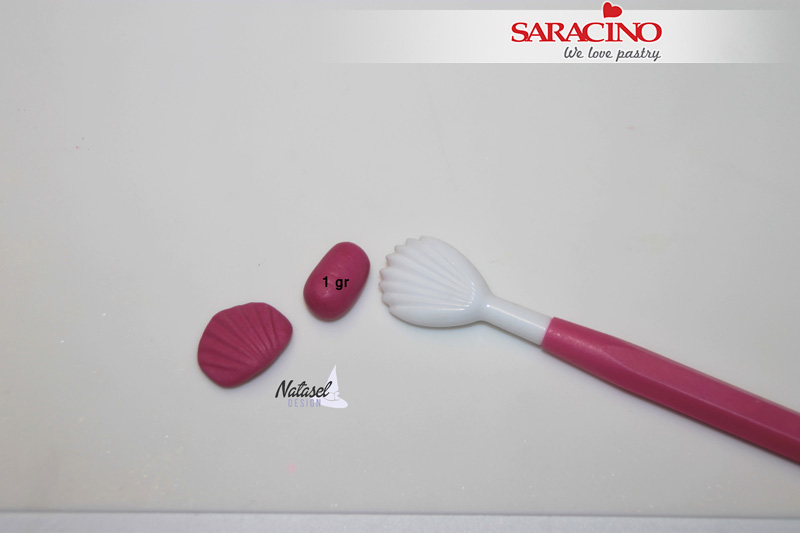
Model two 1g fuchsia ovals, flatten them with the shell tool to form the bra of the swimsuit.

Step 24

Glue to the chest area.

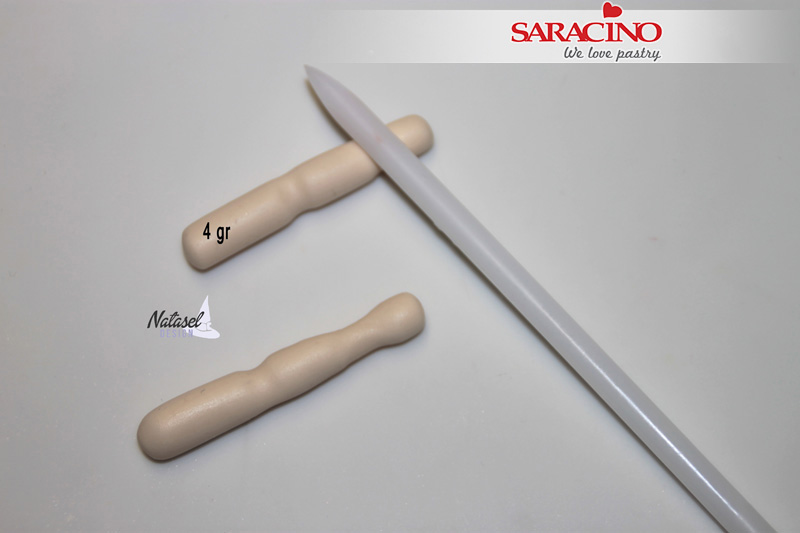
Step 25

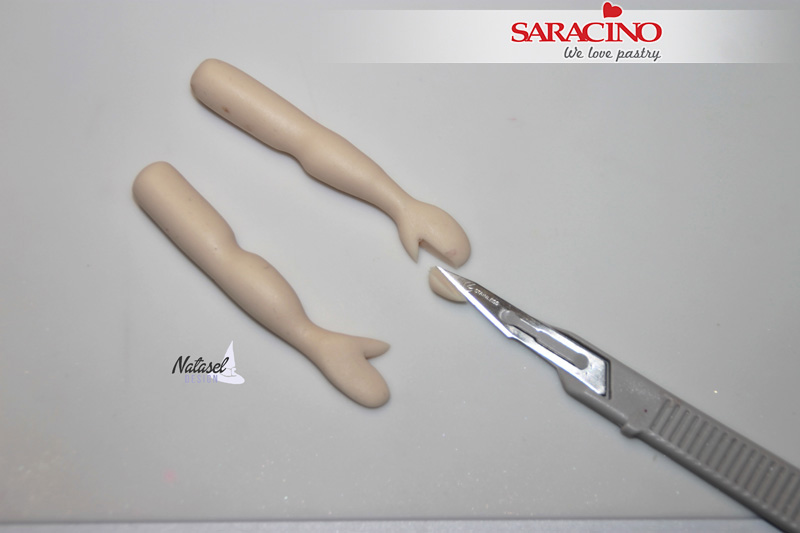
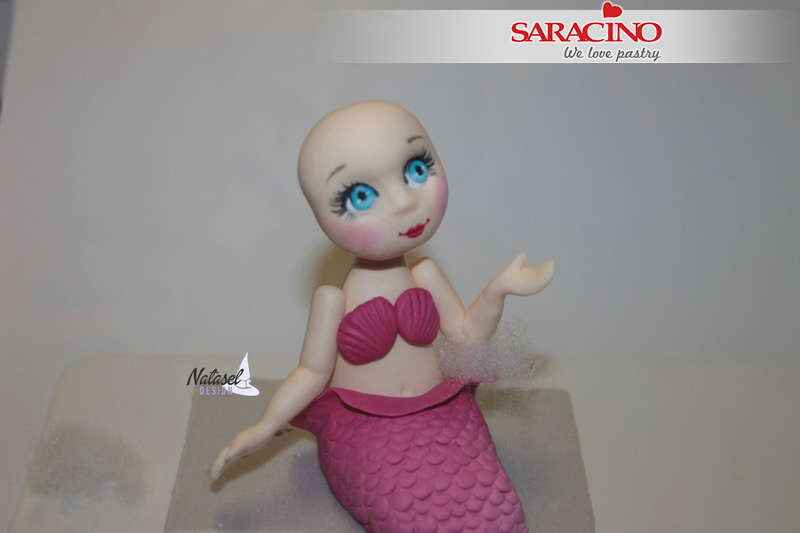
Using 4g of skin modelling paste roll out a sausage shape. You will need two (one for each arm). Now form the elbow and wrist joints using your modelling tool.

Step 26

Flatten the hands and cut a triangle to form the thumbs.

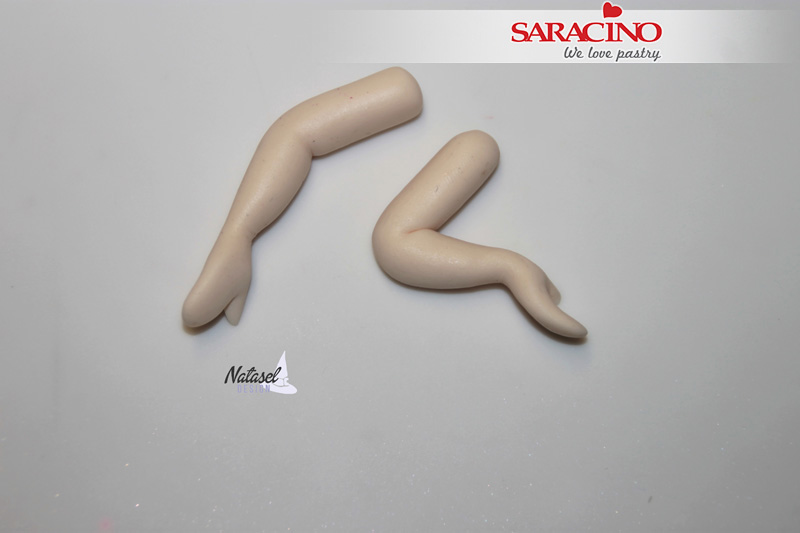
Step 27

Bend your arms to give them their final position.

Step 28

Attach the head to the body

Step 29

Attach arms in the position you require. The left arm will need to be outstretched as this will be holding your oyster shell.

Step 30

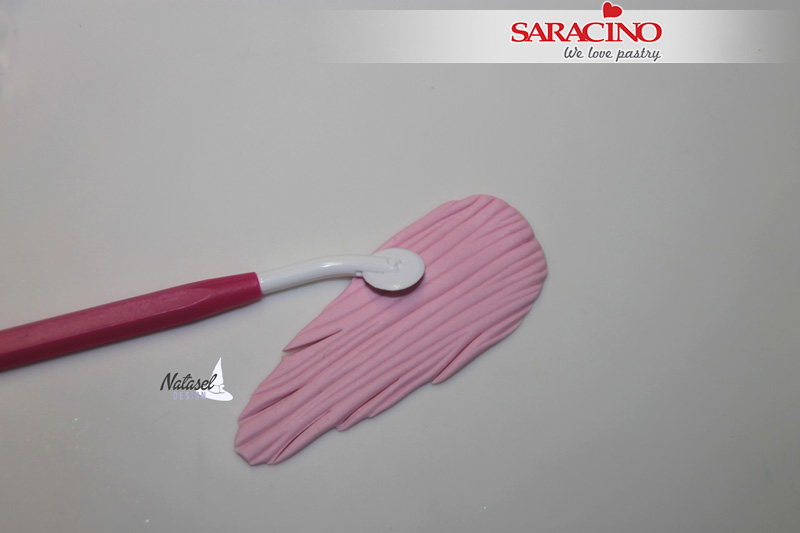
 For the hair you will need to mix a little pink paste with white paste to form light pink. Roll out thinly to approximately 6cm long and then add definition using your Dresden tool or other sharp tool.

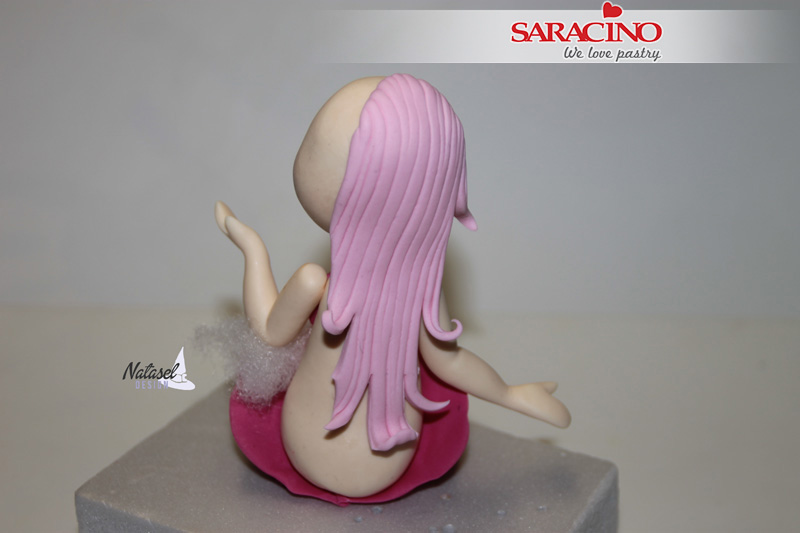
Step 31

Attach the first piece to the back of the head. Now using a sharp knife or scissors form the separate locks of hair. Shape to give a curl and a little character.  

Step 32

Repeat this process around the head. The hair is to cover the shoulders.

Step 33

You can use thinly rolled individual strands to finish off the hairstyle as you desire. 

Step 34

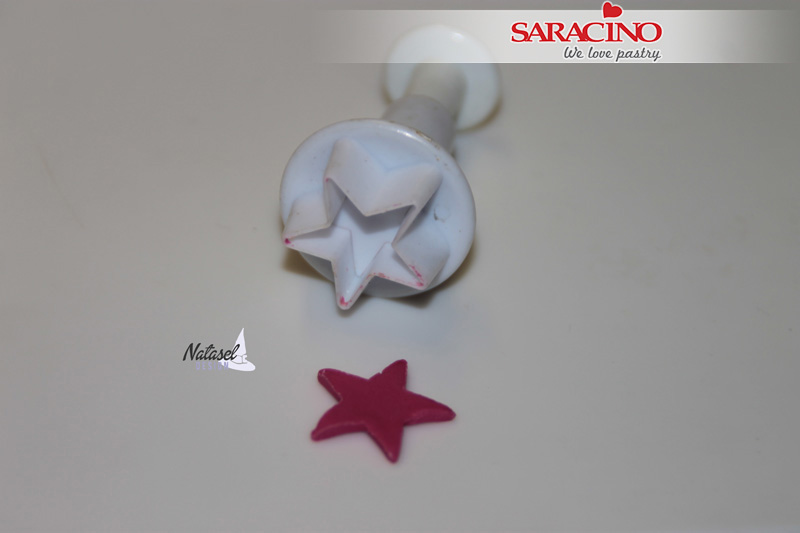
Using your fuchsia paste roll out thinly. Now with your small star cutter cut out a star shape.

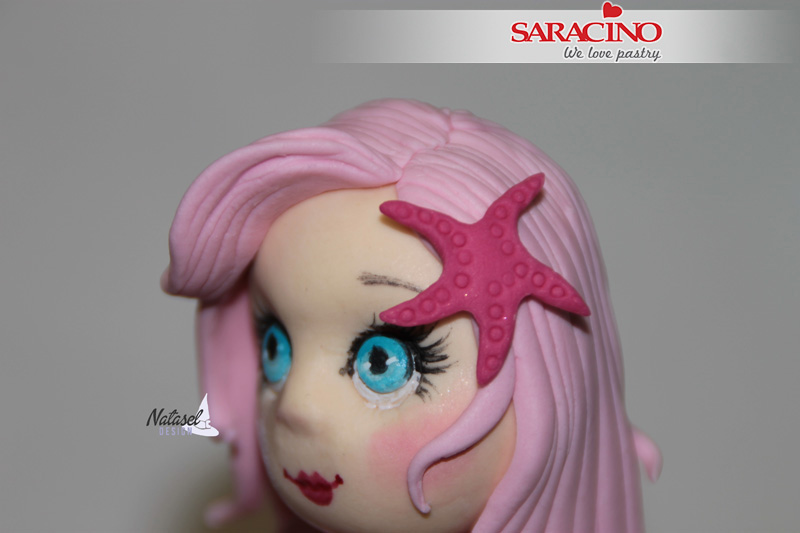
Step 35

Shape to create a starfish. Add texture using the end of a small piping nozzle. Fix to the Mermaids head.

Step 36

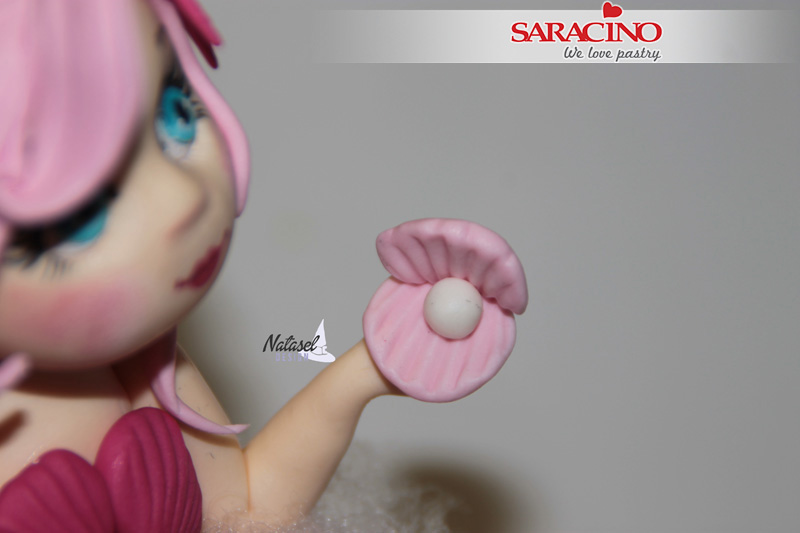
Make the oyster shells with a white pearl in the centre using the same technique as for the bra. Attach to the hand.

Step 37

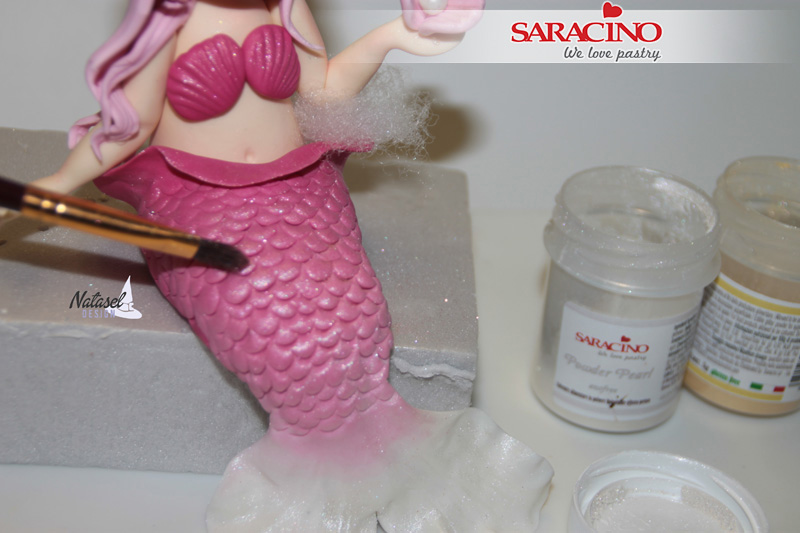
Using your silver powder colour and a soft brush lightly dust the tail. Using the white gel colour and a fine brush add detail to the bra and the starfish.

Step 38

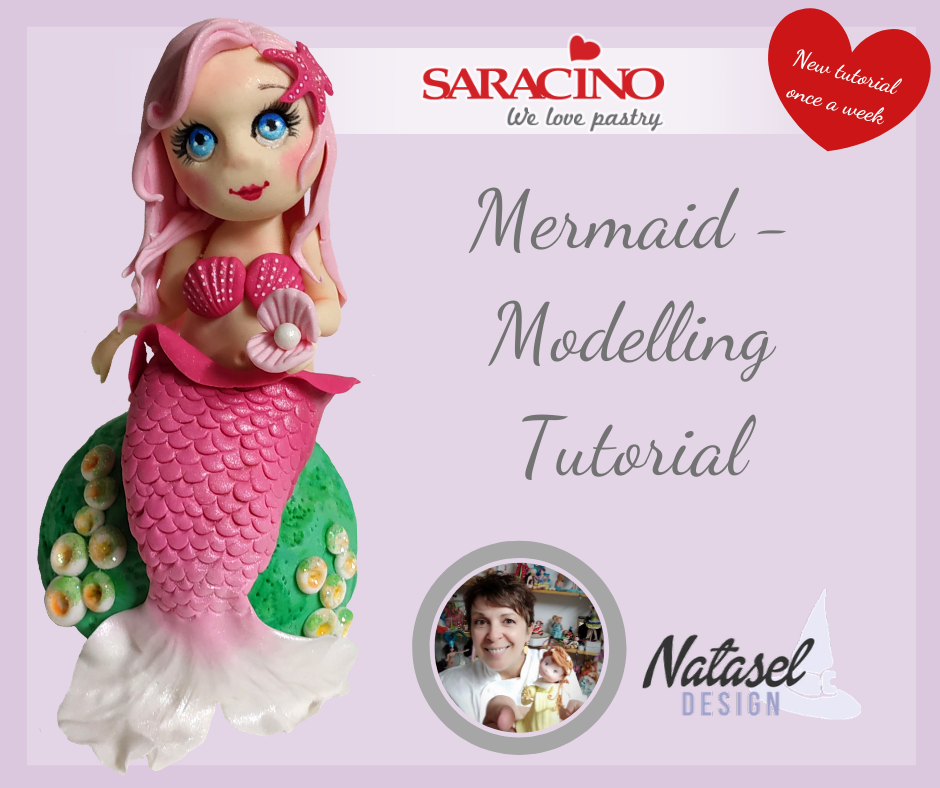
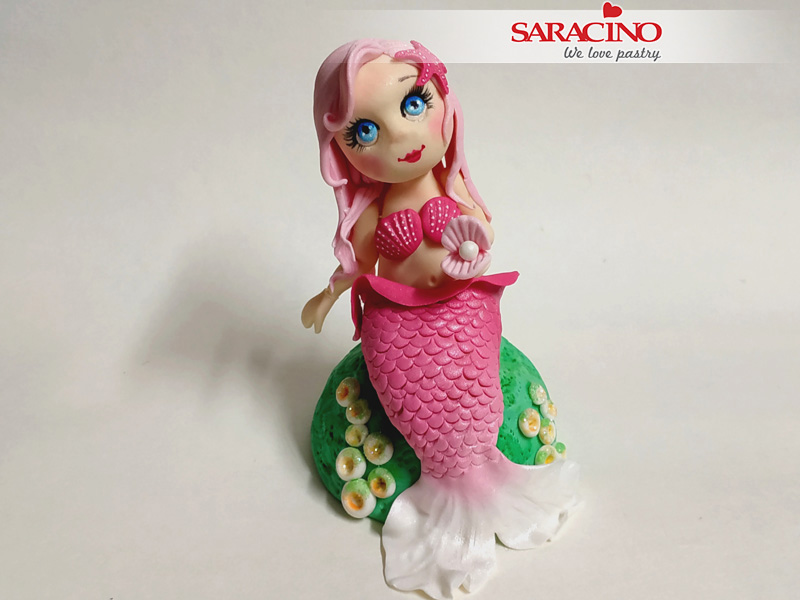
TA DA! Your mermaid is finished!