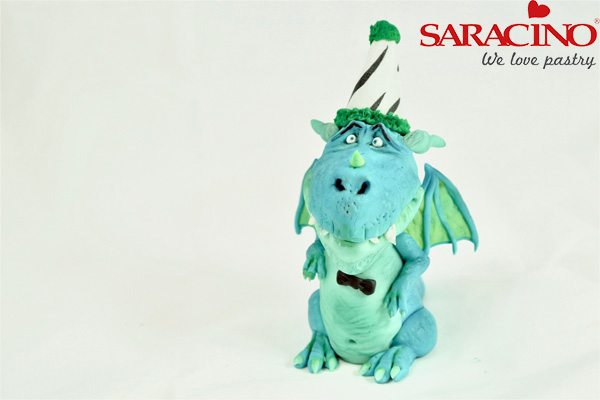
LITTLE DRAGON CAKE TOPPER
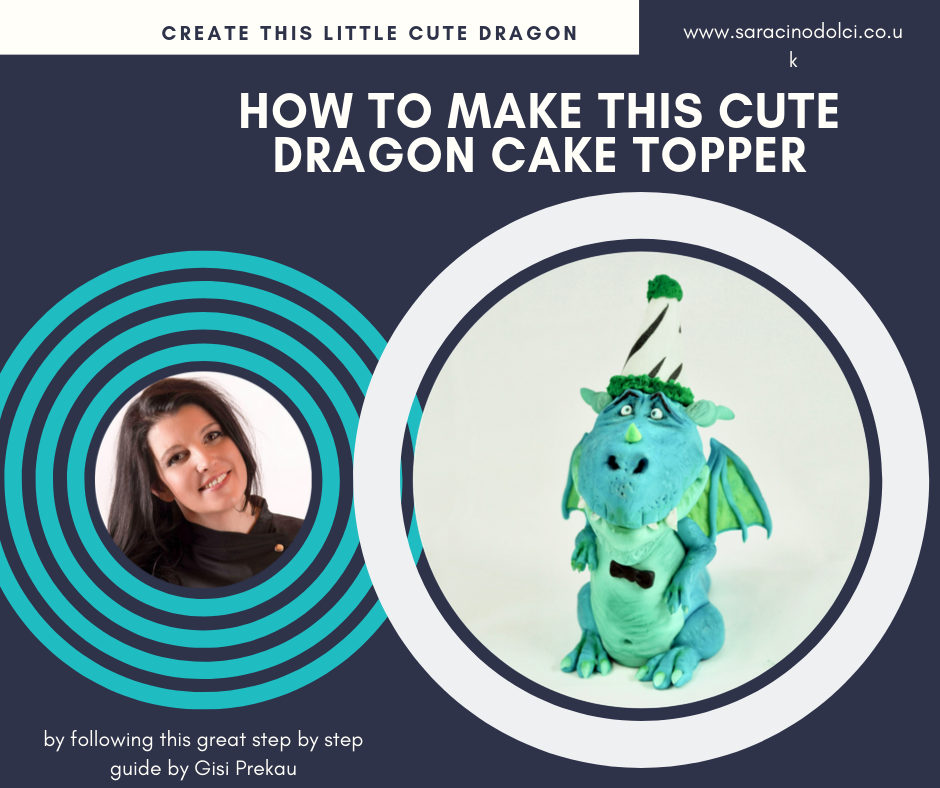
Author: Gisi Prekau
Skill level: BEGINNERS
TIP FROM GISI:
To get fondant smooth and workable blend in some vegetable shortening (Trex).
You will need:
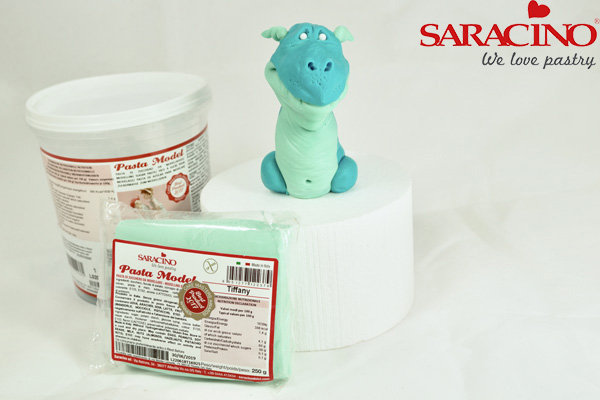
- Pasta Model light blue 220g
- Pasta Model tiffany 40g
- Pasta Model yellow 10g
- Pasta Model green 5g
- Powder colours black, blue, green, white
- Waferpaper “Zebra“
- Floral wire 22 gauge
- Sugar pearls 3mm
- Alcohol
- Cake Gel Glue
- Wooden Skewer
- Rolling pin
- Balltools
- Silicon brush
- Piping tip 1mm
- Scalpel / sharp blade
- Painting palette
- Dresden tool
- Brush 00, Powder Brush


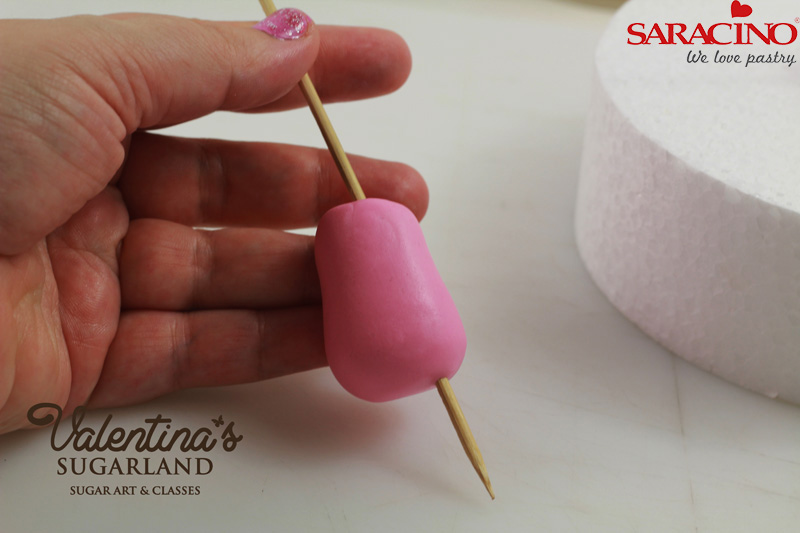
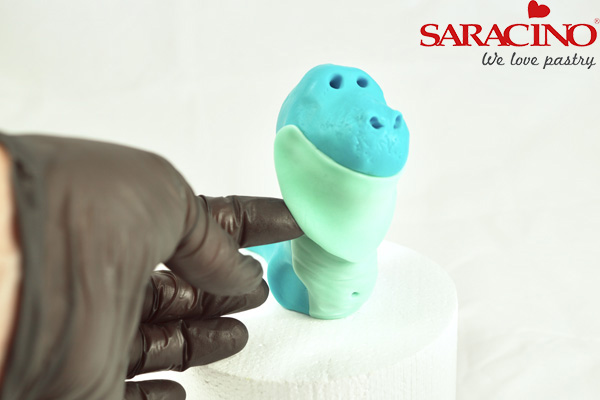
Step 1
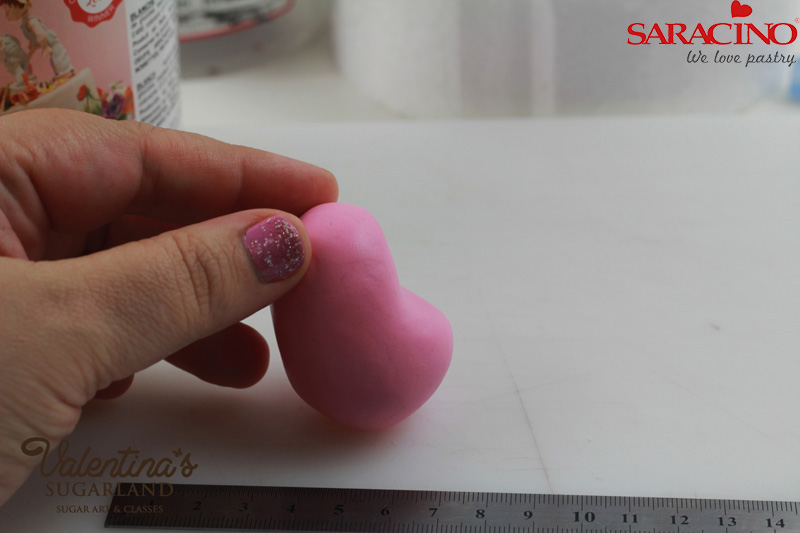
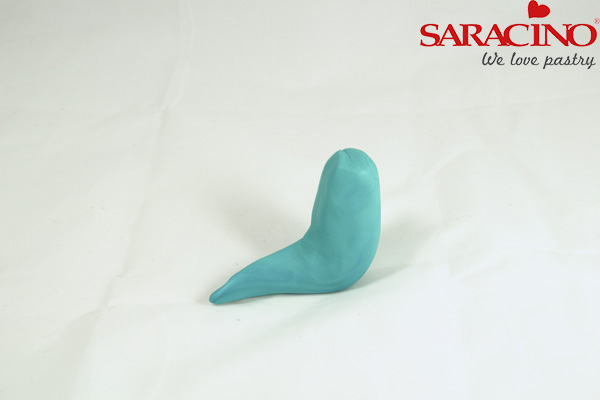
Start by kneading 100g light blue Pasta Model, then form it to a 15cm long sausage shape. Make both ends of the sausage thinner as shown.
Step 2
Bend in the middle as shown.
Step 3
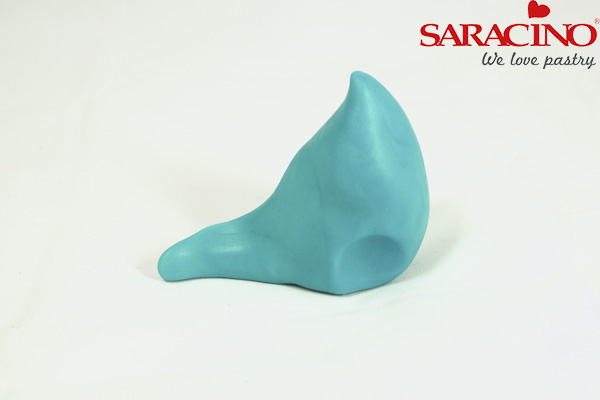
Pinch the upper part to a point to form the neck. Curve the tail a little.
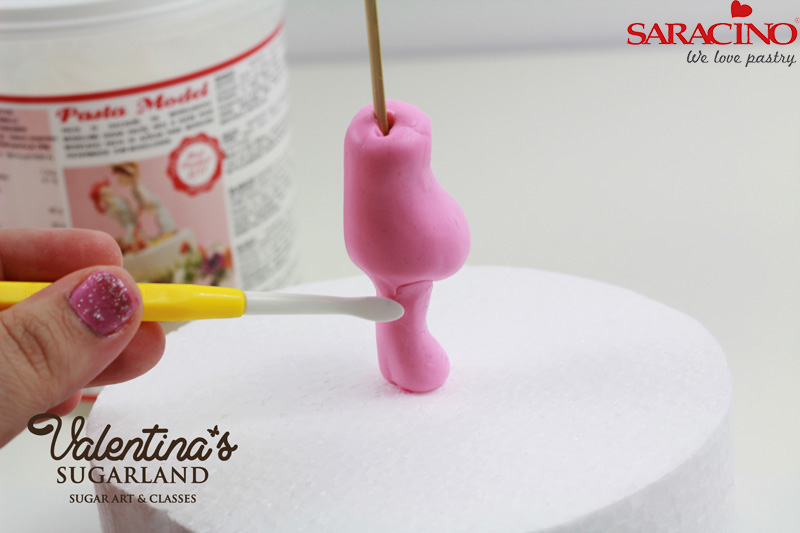
Step 4
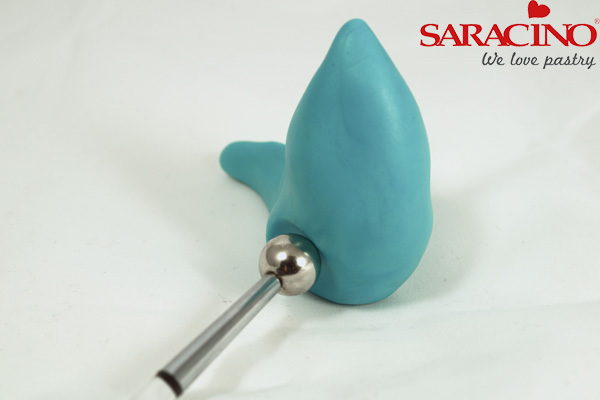
Use a ball tool to create indentations for the legs
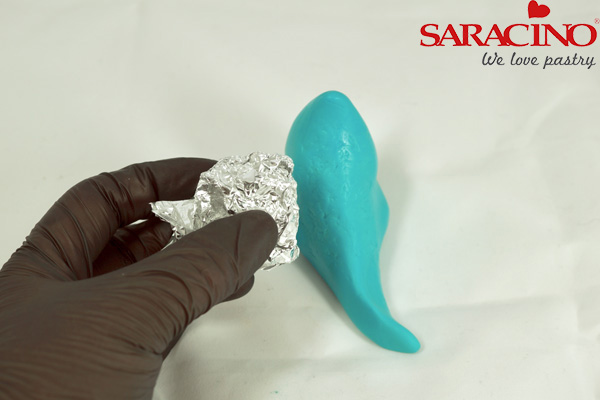
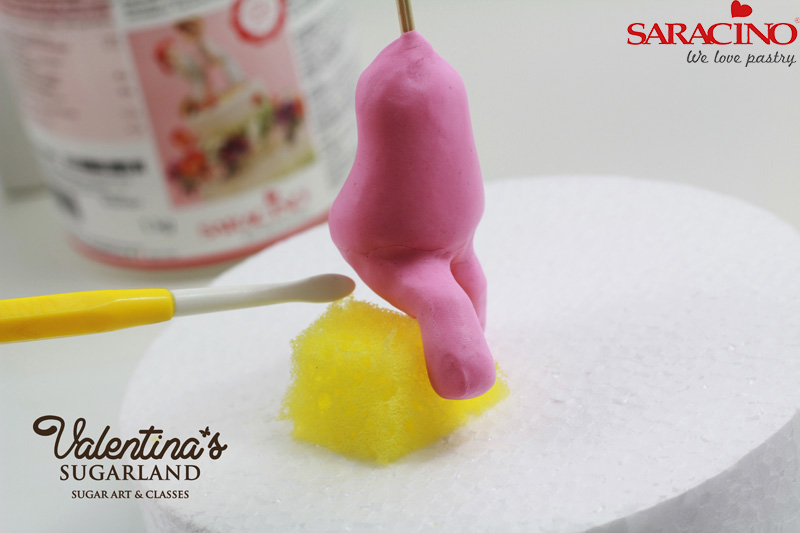
Step 5
Crumpled aluminium foil creates a nice surface texture.
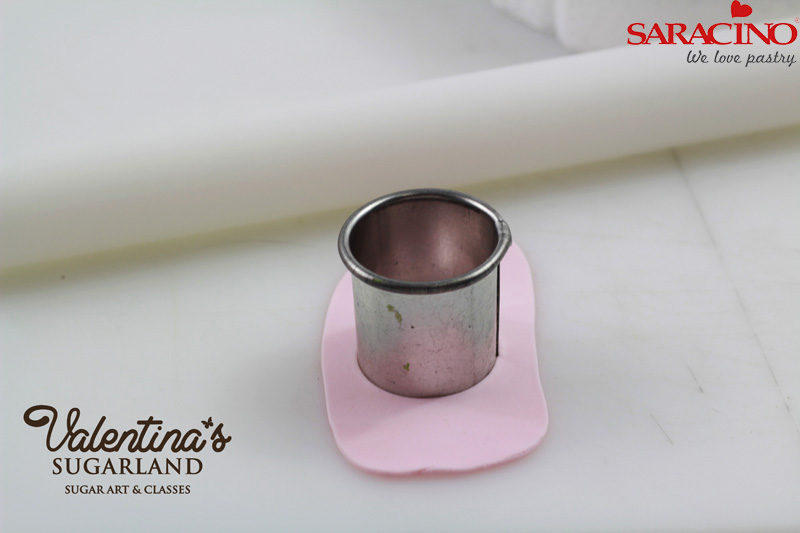
Step 6
For the colored design of the belly knead 10g tiffany Pasta Model and roll it out thin.
Step 7
This is placed on the tummy and slightly pressed in the middle.
Step 8
Cut off the excess and smooth the edges so it blends with the body.
Step 9
Form a belly button with the end of a modelling tool. Make horizontal stripes with a modelling tool on the Tiffany tummy.
Step 10
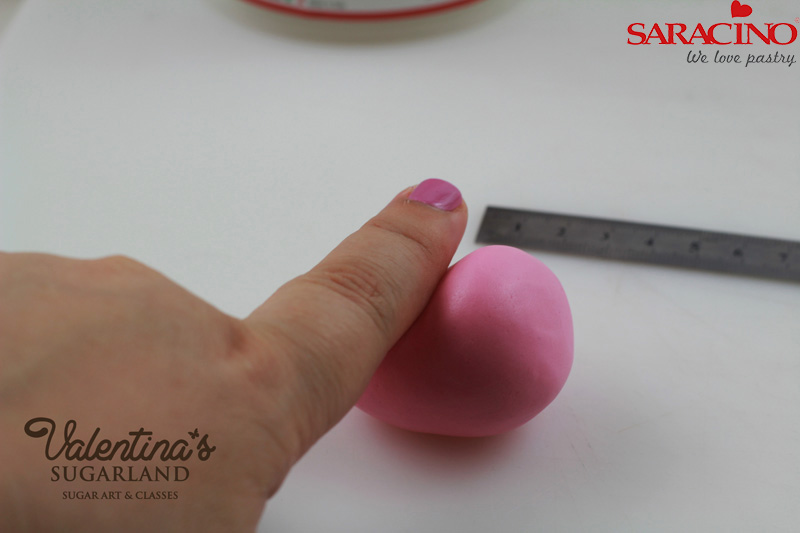
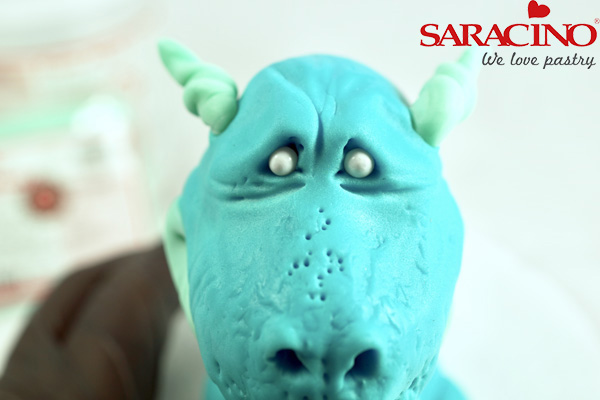
For the head knead 75g light blue Pasta Model and form into an oval shape.
Step 11
Using a small rolling pin or a modelling tool create a dent for the eye area.
Step 12
Pinch with your fingers to form the top of the nose.
Step 13
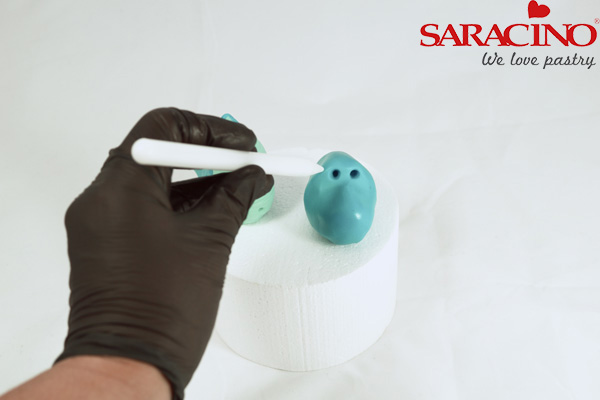
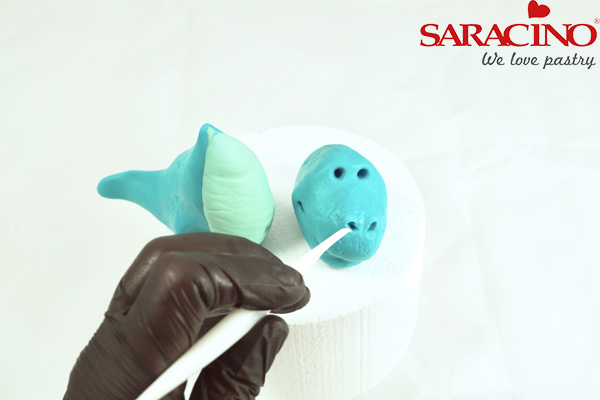
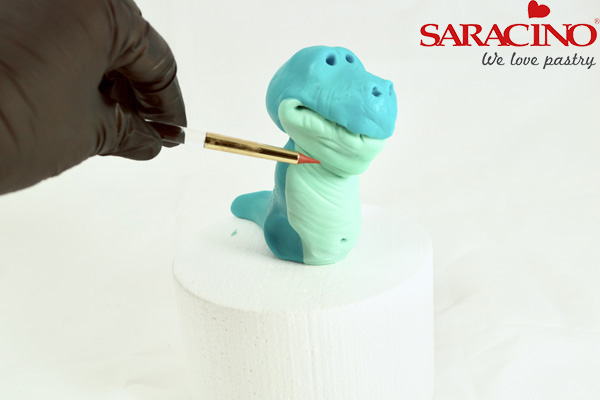
Insert two eye sockets with a pointed tool.
Step 14
Model the mouth and nostrils with the dresden tool
Step 15
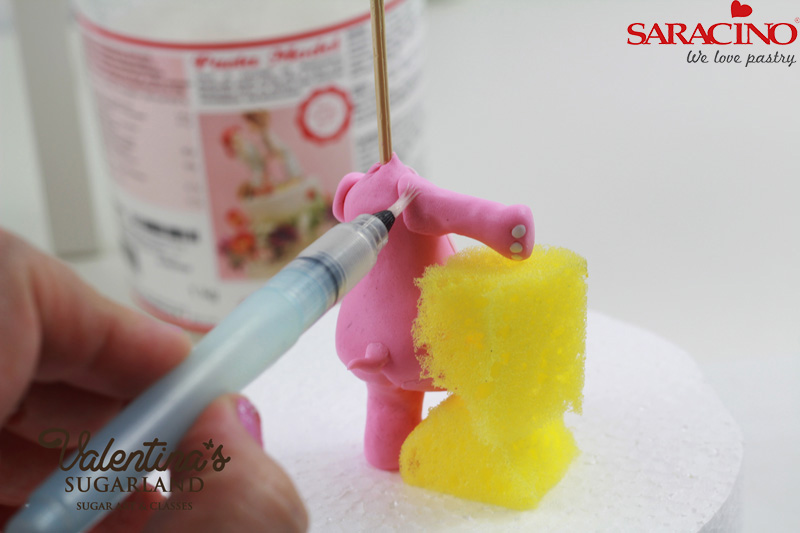
To give the head support insert a wooden skewer through the body and cut off leaving about 1.5cm projecting.
Step 16
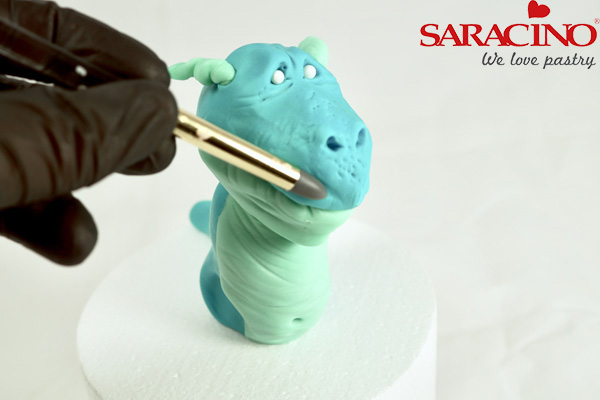
Put the head onto the skewer and blend with the neck / body.
Step 17
For the coloured area of the lower jaw knead 10g tiffany Pasta Model and roll it into a slightly thicker oval. Fix it under the mouth line using edible glue to create the lower jaw and the neck.
Step 18
Cut off the excess paste and blend.
Step 19
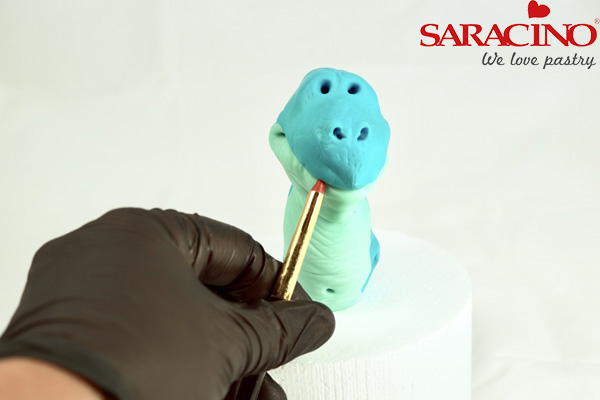
Using a modelling tool make small indents for the teeth
Step 20
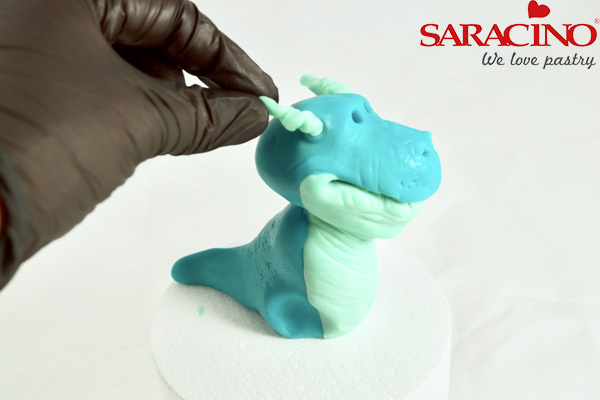
Twist 1g tiffany Pasta Model into spirals to form small horns and attach them in small holes on the left and right side of the head.
Step 21
Attach two sugar pearls in the eye sockets.
Step 22
With a modelling tool form the features of the dragon face.
Step 23
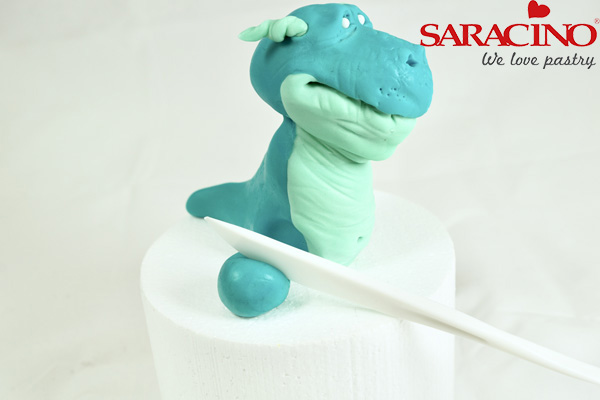
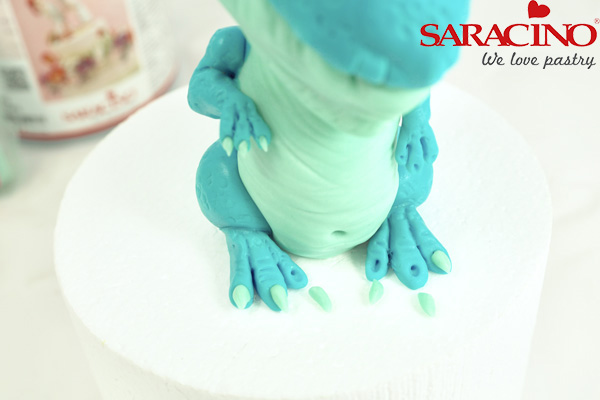
For the legs knead 10g light blue Pasta Model and roll it to a ball. Cut it in half.
Step 24
Using edible glue fix to each side of the body.

Step 25
For the feet use 2g light blue Pasta Model for each. Form a ball, flatten and form it to a tear drop shape. Cut to form the toes.
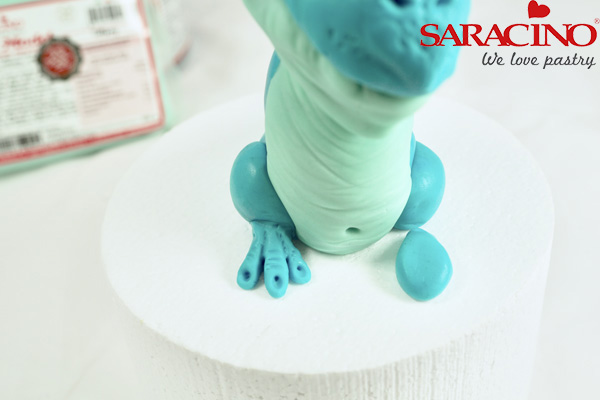
Step 26
Attach to the legs. Model and add form to the toes using a modelling tool. Create small indentations for the claws.
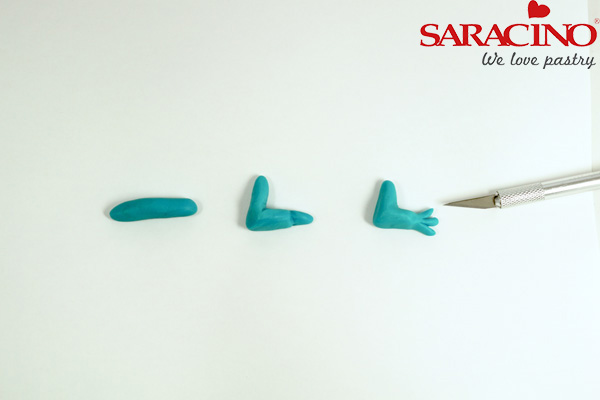
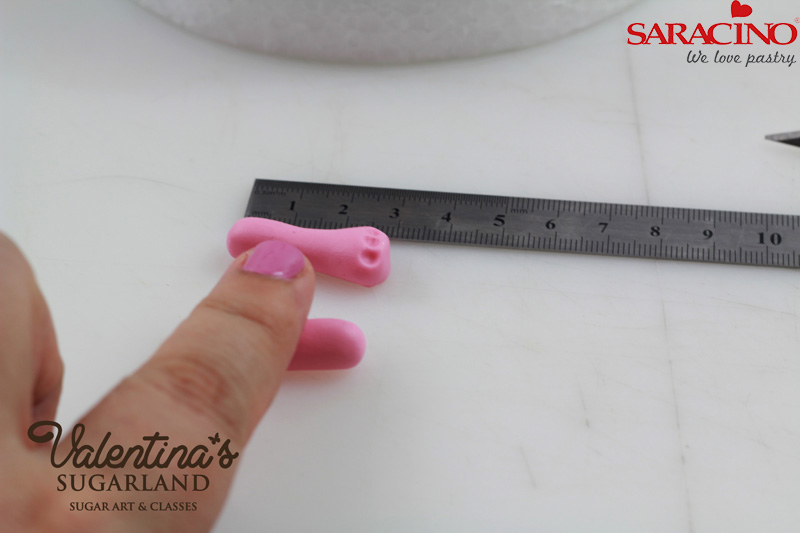
Step 27
For the arms take 2.5g light blue Pasta Model for each and roll to a 2.5cm long sausage shape. Bend it in the middle and make two cuts to form the fingers
Step 28
Attach the arms to the left and right side of the body. Give them shape with the modelling tools.
Step 29
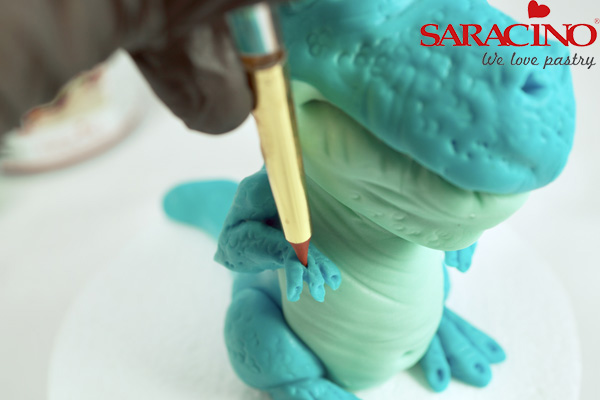
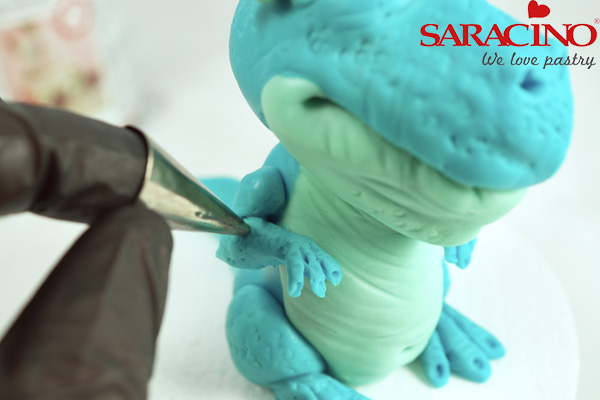
You can use the end of a piping nozzle to create a scaly effect on the body, head, arms and legs.
Step 30
Roll a small amount of paste into tiny cone shapes to form the claws on the hands and feet. Fix them into the holes previously formed.
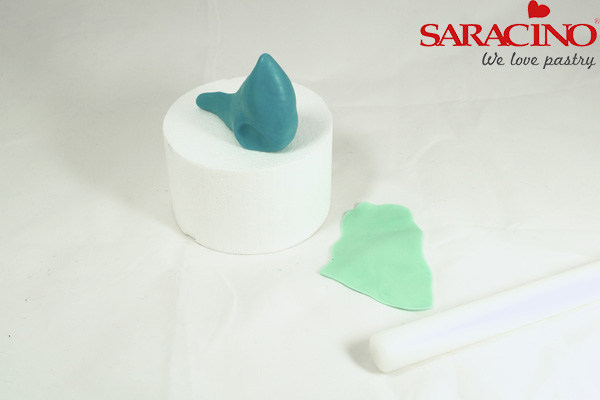
Step 31
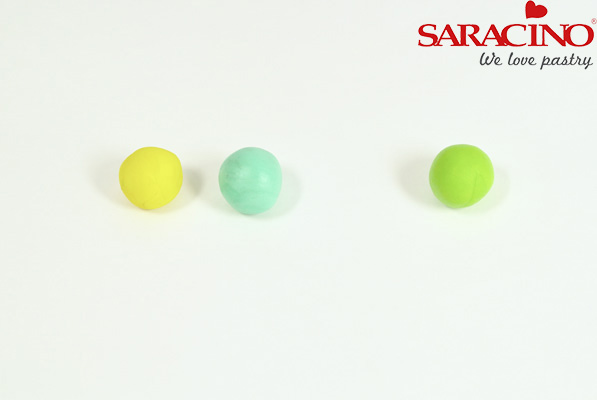
For the inside of the wings knead 8g yellow and 8g tiffany Pasta Model together.
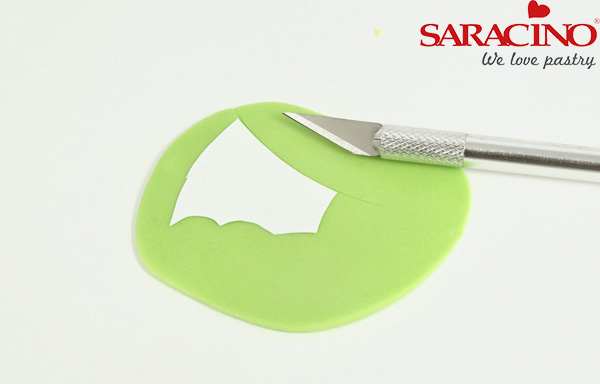
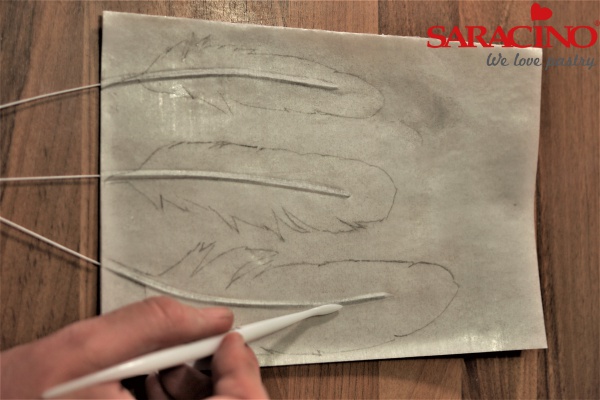
Step 32
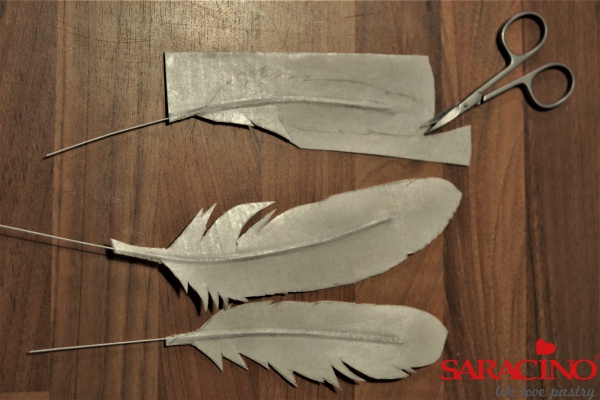
Cut out a wing template to the shape you want. Roll the paste out thin and cut out two wings using your template so they match.
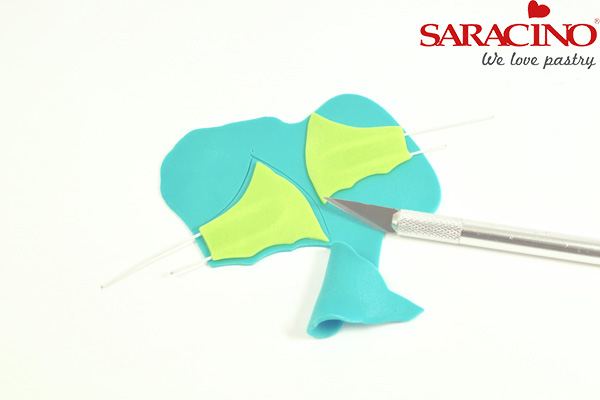
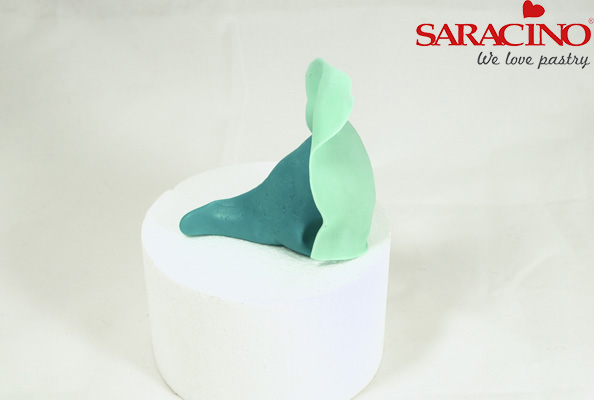
Step 33
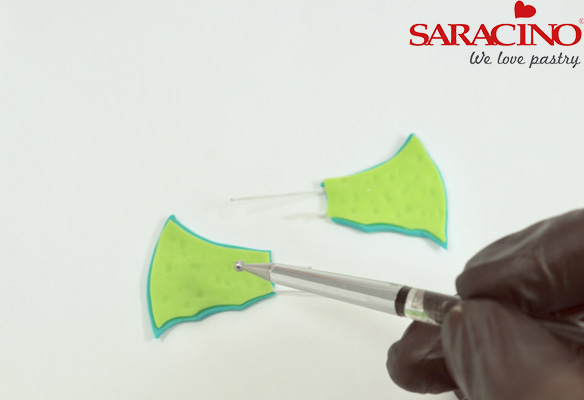
Roll out 20g light blue Pasta Model to the same thickness as the inner wing. Bend two 8cm long 22 gauge wires and place them onto the modelling paste so that the ends project from the bottom of the wing – press them on gently. Now place the inner light green wings onto the blue paste and press them on gently. Cut out the blue wings slightly bigger so you have a blue strip around the inner wing.
Step 34
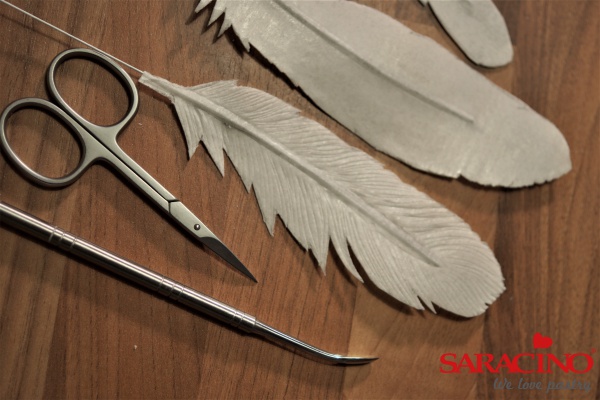
Texture the light green inner wing with a small ball tool .
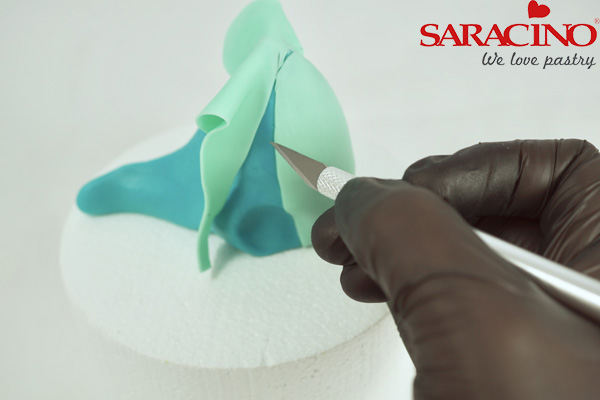
Step 35
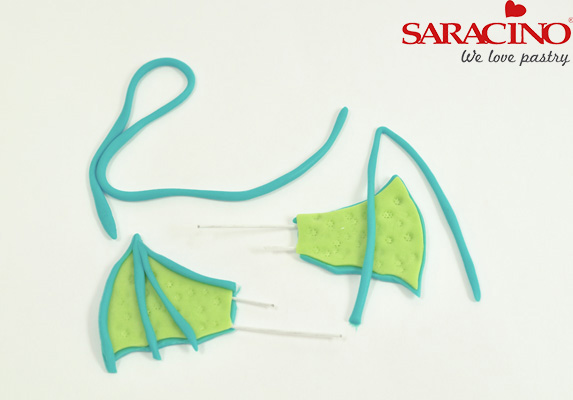
Roll out some light blue Pasta Model to a long string. Place it on the wings and cut to the correct length. Fix in place with edible glue to form the bones in the wing.

Step 36
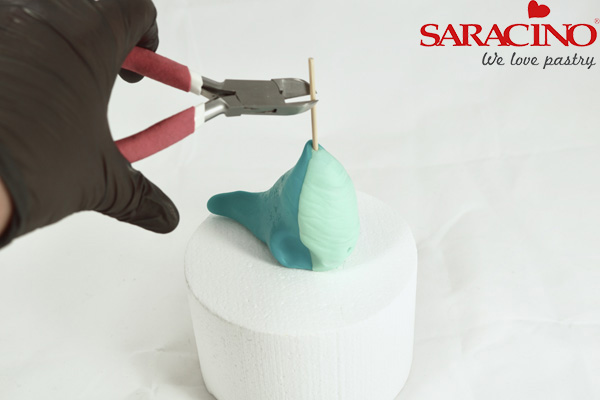
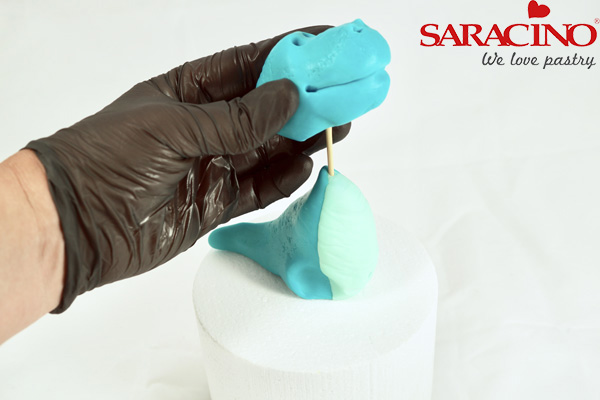
Using a scalpel or sharp blade make a small cut either side of the back. Attach the wings into these pushing the wires into the body.

Step 37
Blend the base of the wing to the body.

Step 38
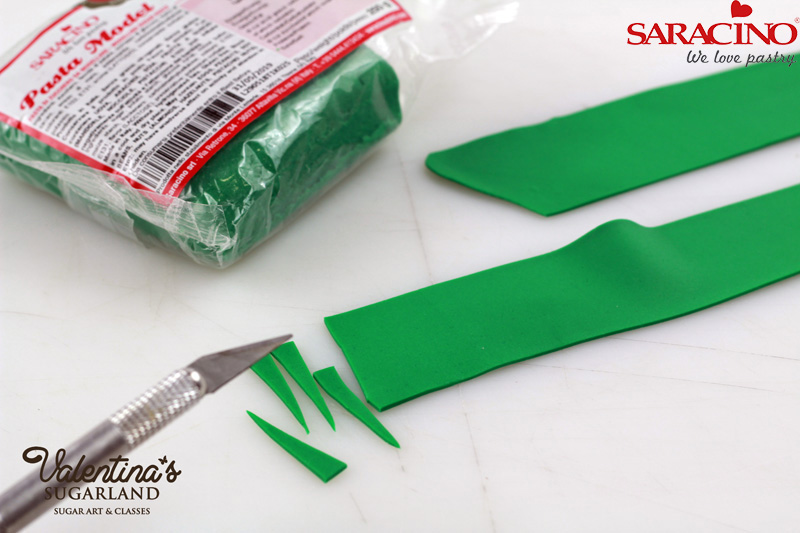
Cut out some small circles from the Tiffany paste and fix on the back of the wings. Form small triangles out of the light green modelling paste and fix them down the centre of the back and tail to give your dragon a crested look.

Step 39
Now for the dragon’s teeth. Roll out some white fondant to form small cone shapes, fix them into the holes previously made for the teeth.

Step 40
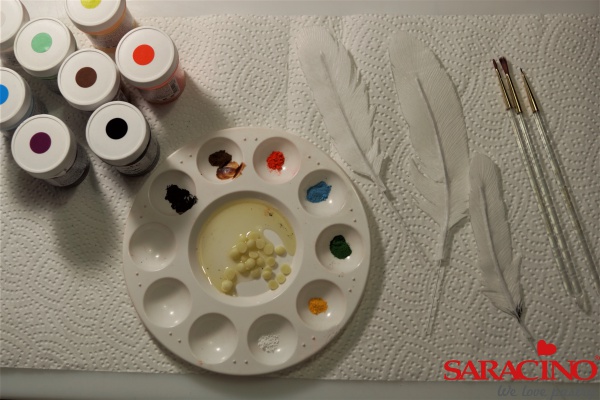
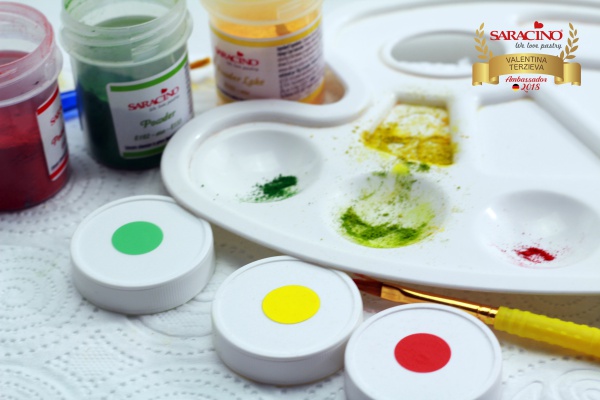
For the eyes mix your powder colours with clear alcohol. Using a small brush paint on a light green iris and a small black dot for the pupil. Also highlight the eyebrows using black.
Step 41
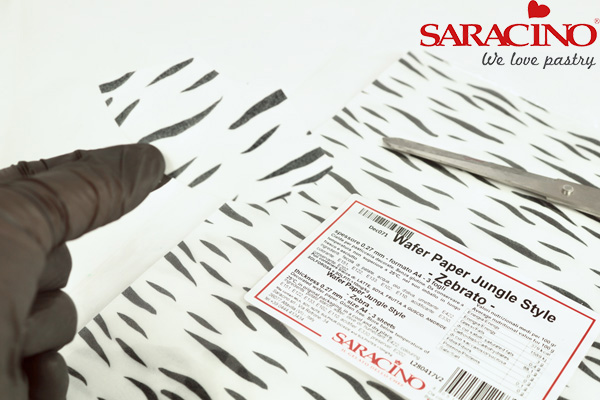
To make the little hat cut out a circle of the zebra wafer paper. Coat the back thinly with piping gel and roll it into a cone shape. The gel helps to soften the paper and at the same time acts as an adhesive on the overlapping edge. Place next to the head to check it is the correct size. Adjust as necessary and set aside to dry.

Step 42
Using 4g of the green Pasta Model roll out a ball. Place it at the base of the hat and flatten. This should be a bit larger than the diameter of the hat cone. Place the wafer paper cone onto the green circle. Use another small ball of the green paste to form the pom pom on the top of the hat. Add texture to the paste using a sharp knife. When finished fix the hat to the dragons head using edible glue.

Step 43
Finally for the finishing touches and to add definition, give your dragon a dust. Using a soft powder brush and black, green, blue, and white powder dust the dragon.
Mix also the turquoise and grey. Dust the belly, horns, arms and legs.
Step 44
Make a little bow from black paste and fix to the neck.
Ta-Da, your little dragon is ready to go onto the cake.