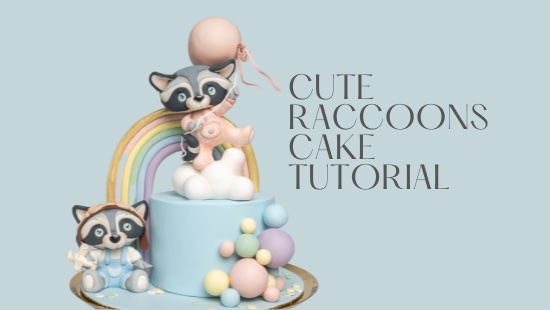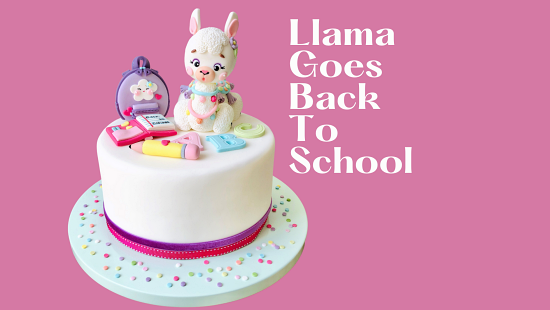
LLAMA GOES BACK TO SCHOOL


You will need:
- Saracino Pasta Model: white, green, violet, tiffany, orange, pink, fuchsia, yellow, brown and black
- Saracino white Pasta Top
- Saracino powder colours: pink, violet
- Saracino Liquid Shiny confectioners glaze
- Saracino gel colours: black and light skin
- Icing sugar
- Dummy or edible cake
- Edible markers: black, brown, red, blue and pink
- Oval cookie cutters
- Ball tools of different sizes
- Flower and heart plunger cutters
- Modelling tools
- Scalpel
- Digital scales
- Knife
- Baking paper
- Small scissors
- Pencil
- Snips for cutting
- Small rolling pin
- Letter plunger cutters
- Oval plunger cutter
- Small teardrop cutter
- Plastic knife
- Artists brushes
- Silicone tip brush
- Silicone bow mould
- Clear alcohol
- Piping nozzles: 1.8cm, 1.5cm, 1cm, 7mm, 5mm, 1mm, 2mm, 4mm
- Chopsticks
- Bamboo stick 20cm long
- Corn flour

Step 1
Using 400g of white Saracino Pasta Model knead and form a ball. Modelling with your hands shape the body of the Llama and cut off the excess at the neck.

Step 2
Bend at the neck and cut off more excess diagonally to get the top of the neck.

Step 3
Your body and neck shape should look like this from the side.

Step 4
Cut a piece of greaseproof paper to the same diameter as your dummy.

Step 5
Place the body on the base and add a little glue or water in the back crease of the neck.

Step 6
Moisten the bamboo skewer with water. Insert it through the center of the neck and into the polystyrene base. Cut the skewer using snips so you have approximately 4cm projecting for the head.

Step 7
Join several toothpicks with an elastic band or with adhesive tape and add the texture of the wool.

Step 8
Take 110g of white Pasta Model and roll a ball to create the head.

Step 9
Position the head on the skewer without adding glue.

Step 10
Use your finger to press a dent across the face in the eye location.

Step 11
Remove the head and create the wool effect on the back with our cocktail stick tool. Using a little glue or water fix the head to the neck.

Step 12
Using a 7mm diameter piping nozzle mark the eyes.

Step 13
For the mouth and nose area mix a little light skin and pink colour Pasta Model. Roll into a ball and flatten the back face. Use a 1.8cm diameter piping nozzle to cut out the mouth and nose area. Fix to the face and add the nostrils using a silicone pointed tool.

Step 14
Using a small ball tool add the mouth.

Step 15
Using a modelling tool or knife mark the central division that joins the nose and mouth.

Step 16
Dilute a little pink powder colour with clear alcohol and using a fine brush paint the nose in the shape of a triangle. Dilute a little black gel colour with a little water and use a fine brush to paint the shape of the nose.

Step 17
Roll a little black Pasta Model until it is 1mm thick. Cut two circles with the 4mm diameter piping nozzle and glue them to the inside of the eyes.

Step 18
Dilute a little purple powder colour with clear alcohol.

Step 19
Use a fine brush to paint the eyelid area.

Step 20
Using black paint the eye lashes with a thinner brush.

Step 21
For the hair on the top of our Llama’s head roll white Pasta Model to a thickness of 0.5cm. Use a large flower cutter to cut out the required shape.

Step 22
Use a little glue to fix the hair into place and add the wool texture. Using white Pasta Model cut two circles with the 1mm diameter piping nozzle and stick them on the black eye circles.

Step 23
For the ears roll a little pink and white Pasta Model. the white needs to be thicker than the pink. Use the oval plunger cutter to cut out two oval shapes from each colour.

Step 24
Fold the pink pieces at the end and cut off the excess.

Step 25
Fix the pink to the white as shown.

Step 26
Fix both ears using a little glue (if required you can add a small piece of cocktail stick into each ear to help secure). Using pink Pasta Model cut two circles and fix to the cheeks.

Step 27
For the eyebrows mix white and brown Pasta Model and roll small teardrop shapes. Fix to the head. Using your 1mm diameter piping nozzle create two small white circles and fix to the pink cheeks.

Step 28
For the flower and leaves mix a small amount of violet and light green Pasta Model with white to achieve pastel colours. Cut out the flower and small leaves.

Step 29
Use a little glue to fix to the head. Add a small ball of yellow to the centre.

Step 30
To form the legs roll white Pasta Model to a sausage shape as shown in the photo. Each leg will weigh approximately 13g. Bend approximately in the middle to give the shape of the leg.

Step 31
Repeat this step for all the legs (the front legs should be slightly smaller). Create the wool texture effect on all of them. Do not add texture to the hoof area as we will paint this later.

Step 32
For the tail roll a teardrop shape of white Pasta Model. Fix to the Llama and add the wool effect.

Step 33
For the necklace collar prepare pastel colors using Pasta Model: light blue, yellow, green, orange, pink, lilac (adding a little white paste to each colour) and fuchsia which does not need white adding. Roll the light blue paste until it forms a long thin sausage.

Step 34
Fix the light blue around the Llama’s neck. Using a ball tool create the holes where the pompoms will go.

Step 35
Take a small equal part of each colour. Roll the balls using your index finger on the palm of the hand. Glue the balls into place.

Step 36
Repeat the steps to create another neckless.

Step 37
Using the letter plunger cutters cut out the letters you would like using your required colours. Leave aside.

Step 38
For the blanket use a large ovel cutter to cut out a thinly rolled piece of white Pasta Model. Use the same cutter to cut a thin piece of light blue paste. Use a smaller cutter to cut out the centre of the blue. Use the same smaller cutter to cut out a thin piece of pink paste and add to the centre of the blue. Cut out a circle from the centre of the pink. Use the same circle cutter to cut out a thin piece of fuchsia paste. Add the fuchsia circle to the centre of the pink.

Step 39
Fix the blanket to the Llama’s back.

Step 40
Use a silicone bow mould to make a small yellow bow. Add a little corn flour to the mould to prevent the paste from sticking. Use a flower plunger cutter to make a small flower. Cut out circles and triangles using colours of your choice.

Step 41
Add the decorations as shown using a little glue if required.

Step 42
Attach the flower to the centre of the blanket and the bow to the back of the neck.

Step 43
For the tassels roll light purple coloured paste thinly and cut a long 1cm wide strip. Use a scalpel to cut small strands.

Step 44
Cut in equal lengths and roll up as shown.

Step 45
Make as many as you require. Cut off the escess paste from the end.

Step 46
Using a little glue or water fix the tassles around the edge of the blanket.

Step 47
Dilute black colour with clear alcohol. Use a small brush to paint the hoof on each leg.

Step 48
For the school bag – Roll lilac coloured Pasta Model to approximately 2cm thickness. Cut out the bag shape using a large ovel cutter.

Step 49
Using various shaped cutters and coloured Pasta Model decorate the front of the bag. Use the same colour as the bag add a rectangle shape for the front pocket.

Step 50

Step 51
Use a stitching tool to add a zipper effect as shown. Fix the triangle fasteners. Add two small light blue circles to the top of the fasteners. Use a little glue to add the straps and the bag handle.
Step 52

Step 53
Using edible pens paint the eyes and lips.

Step 54
The straps should be fixed as shown.

Step 55
To create our notebook cut a rectangle 7cm x 5cm using fuchsia Pasta Model and mark a line down the centre. Cut all the pieces and decoration needed for the book.

Step 56
Glue each of the pieces and decoration. Using the edible pens draw the lines of the page and add the text.

Step 57
For the pencil roll a small 4cm long cylinder using yellow Pasta Model and model the other parts using grey, beige, pink and fuchsia.

Step 58
Glue the pieces together as shown. Paint the end tip of the pencil using black colour.

Step 59
Using a small ball tool add texture to the pompoms.

Step 60
Paint the hooves using Liquid Shiny.
Step 61
Cover your cake using Pasta Top. Add the decorations as required to the cake.