


You will need:
-
White Saracino pasta model approx. 100g
-
Pale blue Saracino pasta model 10g (white coloured using blue edible gel colour)
-
Pale green Saracino pasta model 10g (white coloured using green edible gel colour)
-
Pale green Saracino pasta top approx. 150g (white coloured using green edible gel colour)
-
6” cake (or dummy) covered in pale blue Saracino Pasta Top (white coloured using blue edible gel colour)
-
Boiling water
-
Saracino cocoa butter
-
Saracino edible dusts in white, skin tone, brown, yellow, black, pink
-
Sugar glue
-
Bear image: Download HERE
-
Sharp scissors
-
Dusting pouch
-
Cutting mat
-
Rolling pin
-
Craft knife
-
Small ball tool
-
10” round cake drum
-
Sharp knife
-
Washing up/kitchen brush
-
Small cup
-
Small plate
-
Paintbrush (flat, size 6 is ideal)
-
Fine paintbrush
-
Soft brush
-
Small daisy plunger cutter
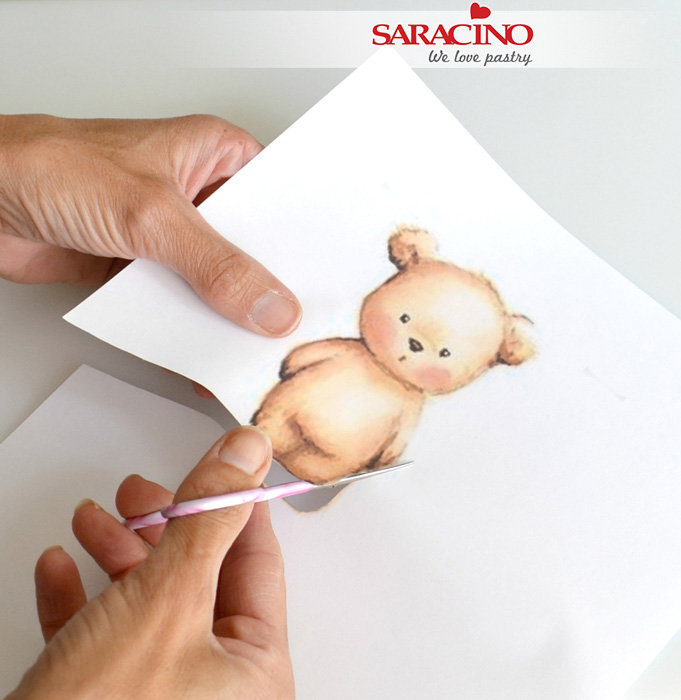
Step 1
Print off the bear image so that it is just over 4” in height (If your cake is taller or shorter adjust the image accordingly) Cut bear out using a sharp pair of scissors.
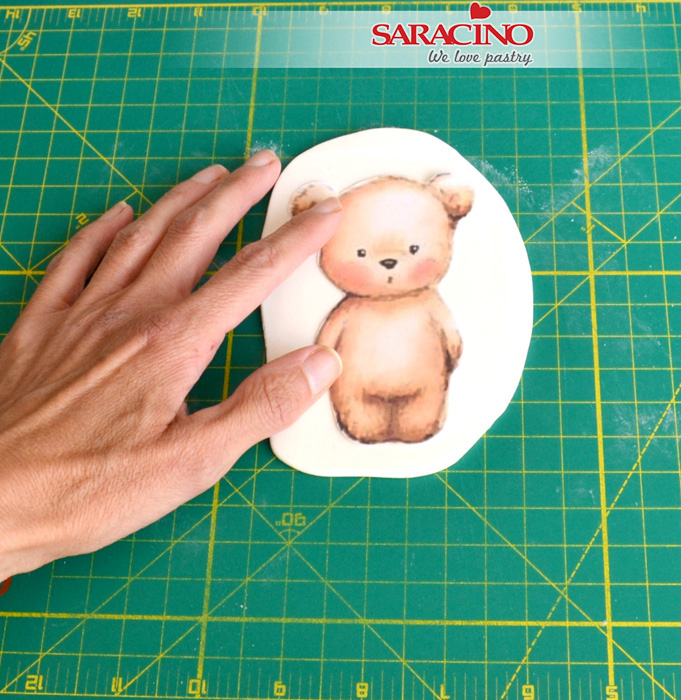
Step 2
Dust cutting mat very lightly with cornflour dusting pouch. Roll out modelling paste to approx. 3-4mm in thickness using a rolling pin. Make sure it is big enough to lay the image on top. Remove the image and let the paste firm up for a few minutes. This makes it much easier to cut cleanly and without the paste dragging as you cut.
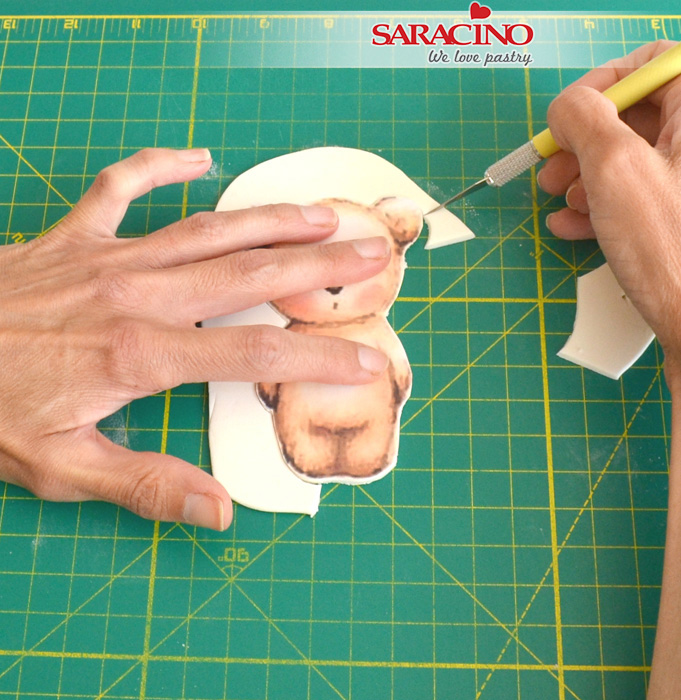
Step 3
Put image back on top and carefully cut around using a craft knife trying not to move the paste or distort the shape.
Step 4
Using a small ball tool gently mark where the eyes, nose, mouth, the bottom of his head, arms and legs are.
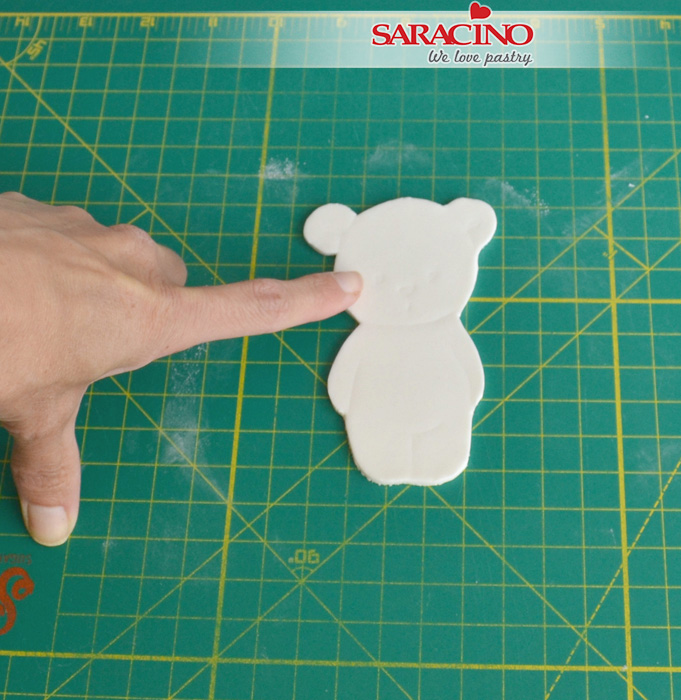
Step 5
This will provide guidelines for painting later on. If possible leave overnight as then painting will be easier.
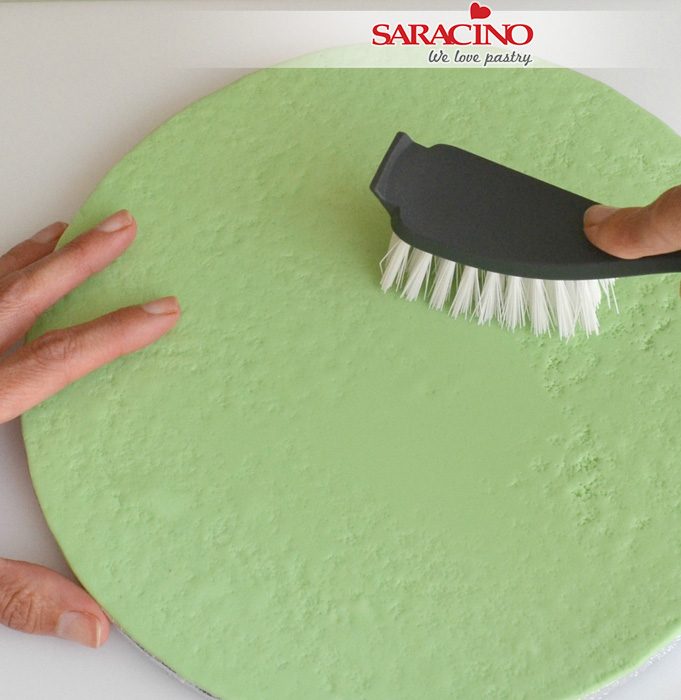
Step 6
Role out pale green Pasta Top and attach to the cake drum with cool boiled water. Trim off the excess with a sharp knife and add texture using the kitchen brush. Leave to dry. Use a small blob of either ganache or royal icing to secure cake to centre of drum and leave to dry.
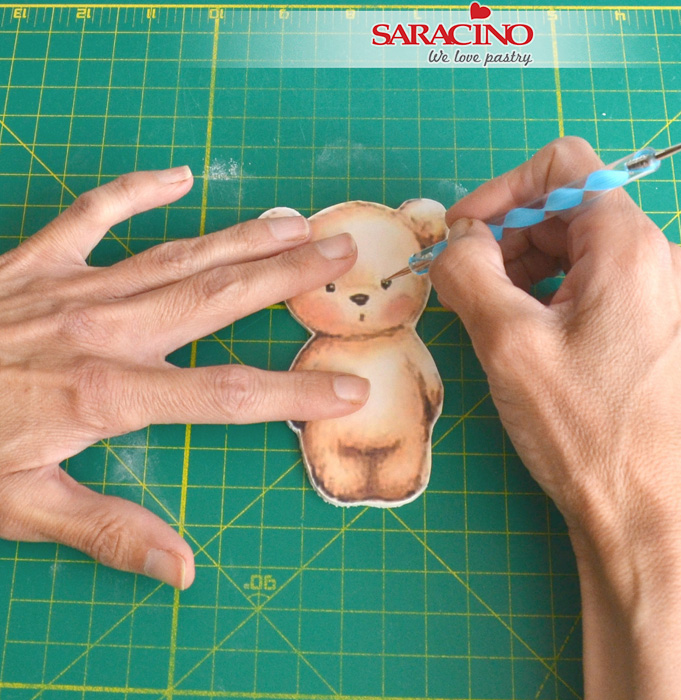
Step 7
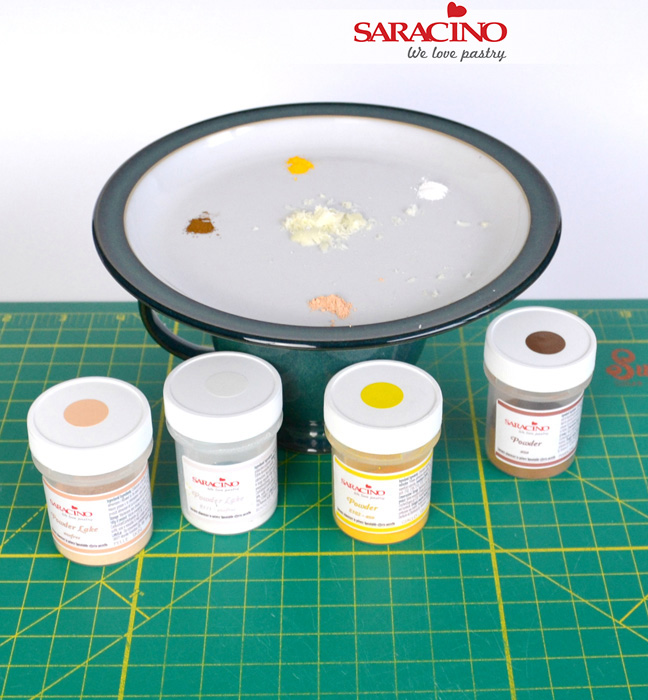
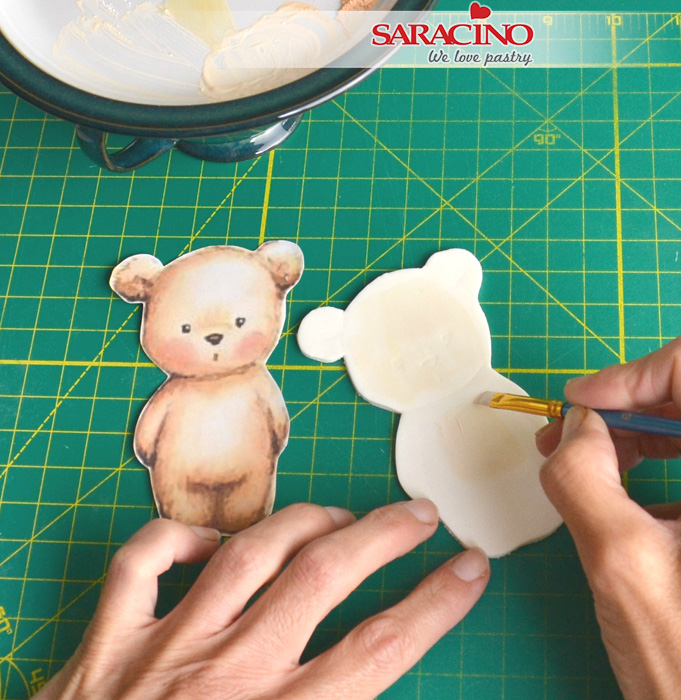
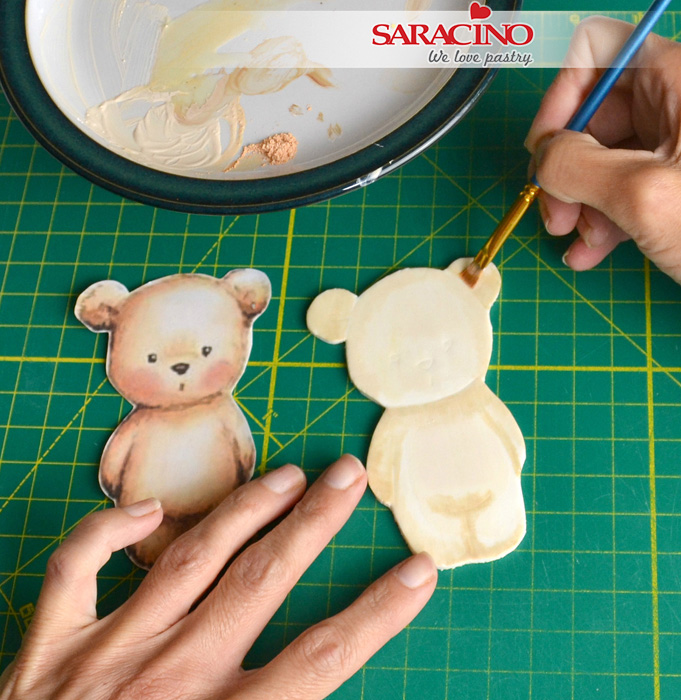
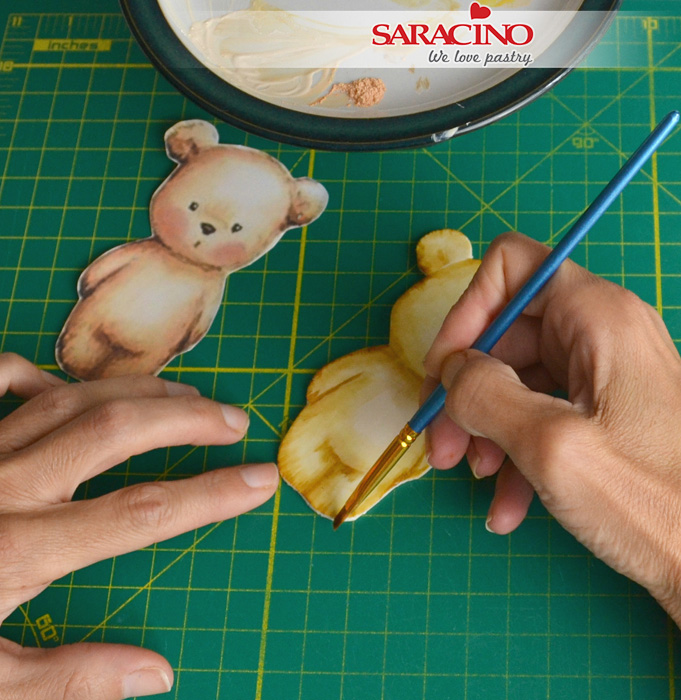
To paint the image you will need a small bowl or cup of boiling water and a plate on top. Add a small amount of cocoa butter to the centre of the plate and some skin tone, brown, yellow and white edible dust around the outside.
(NB you will need to change the water from time to time as the boiled water cools down)
Step 8
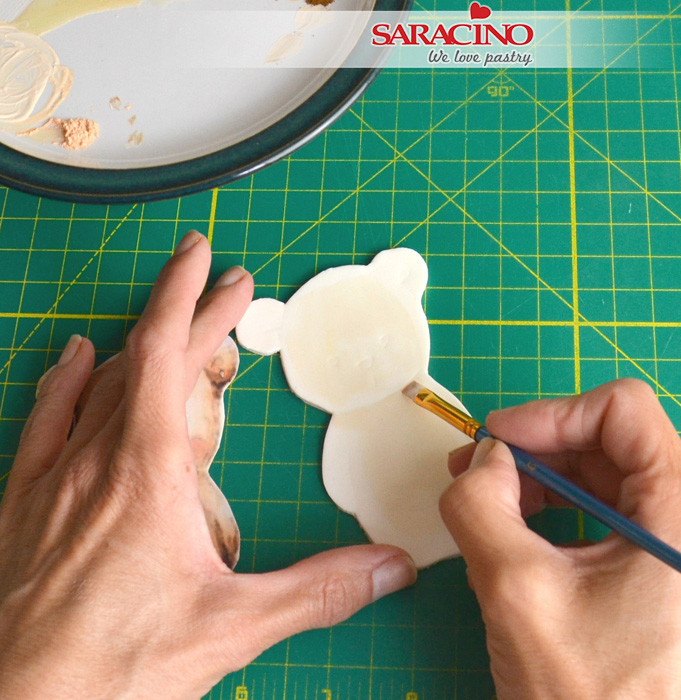
Start by mixing the skin colour dust with white and a tiny speck of brown with the melted cocoa butter. Paint this light colour as a base over the head, tummy and top of the bears legs. In all the lighter areas of the bear.
Step 9
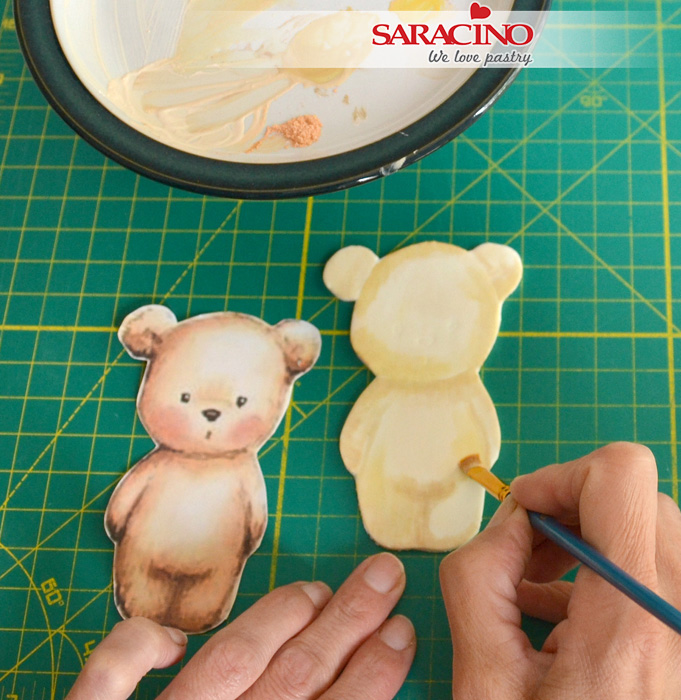
Add a bit more skin colour dust and a speck of brown if necessary to create a slightly darker tone and paint underneath the chin along the line in small downward brush strokes, blending into the lighter colour as you go.
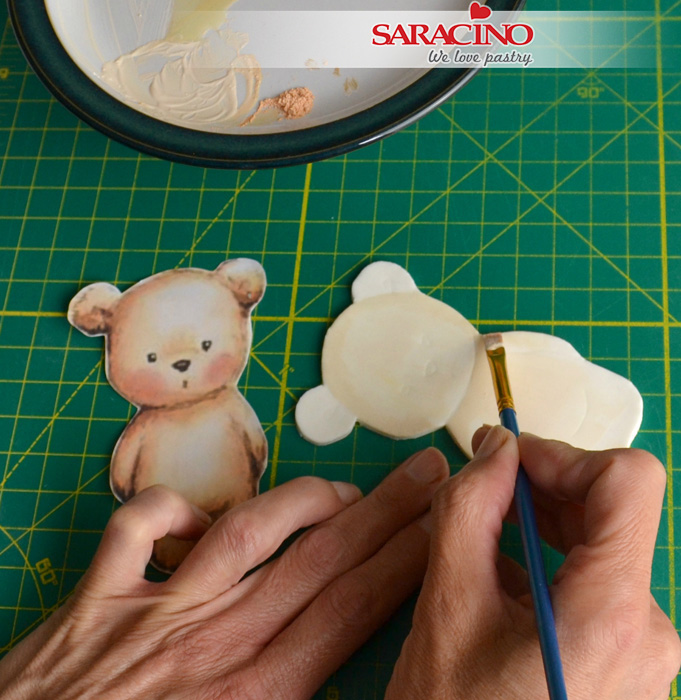
Step 10
Use this darker colour to paint inwards strokes around the edges of the bear.

Step 11
Continue painting in the line between his legs and arms in short horizontal strokes and then on the line where his tummy is. Don’t worry about getting it completely even as this is the style of the bear.
Step 12
Continue adding this darker shade on his arms and ears. When you paint the ears try to leave a small section of the ear on the right unpainted where it is lighter on the picture.
Step 13
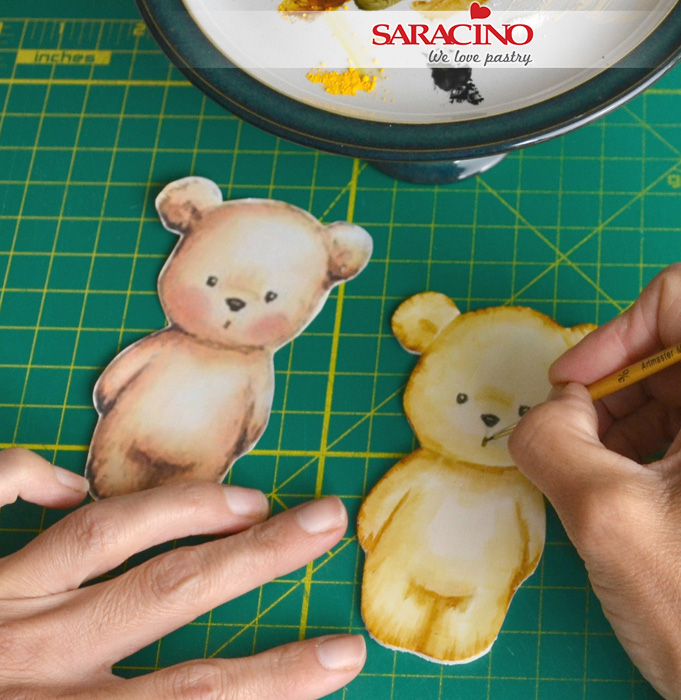
Add a bit more yellow dust (a tiny bit at a time) and a speck of brown to get a straw colour and use this to build up the colour on his face, tummy and legs.
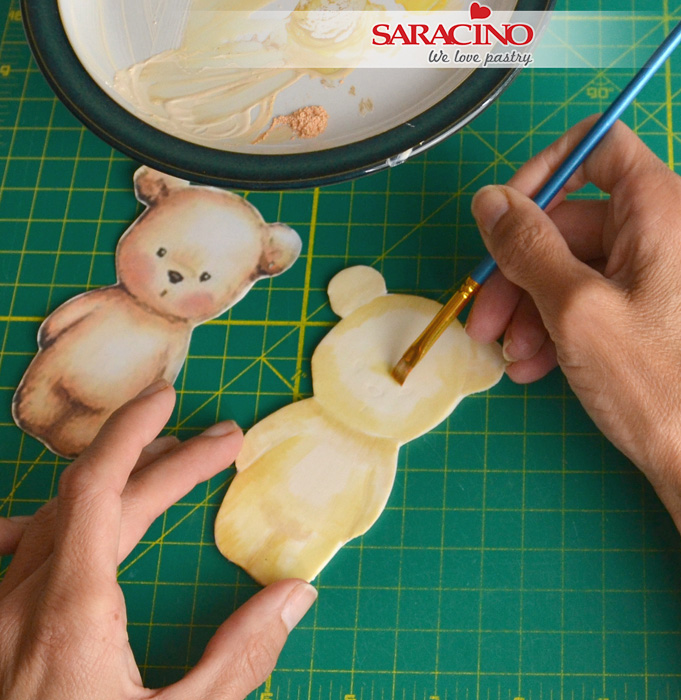
Step 14
Following the line over his nose use this same straw colour to add in the shading. Place the tip of the brush on the top of the line and using short upward strokes to add this shading in. Build up the colour on the bears ears too.
Step 15
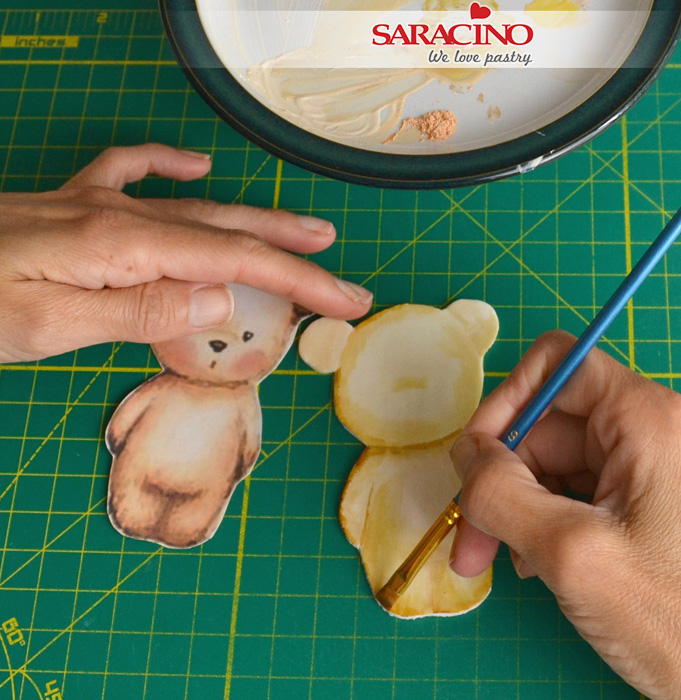
Mix some yellow and brown dust with cocoa butter to create a darker yellowy brown. Use this to go around the edges of the bear. Try to catch the very edges of the bear in light flicky motions.

Step 16
Add further shading to the tummy area and ears using this same shade but with a bit more cocoa butter added. At this stage refer back to the image and just see if any more shading needs to be added.
Tip: I use a spare piece of white paste to test colours on before using them on the piece itself.
Step 17
Using the side of the brush, add little flicks of colour in this darker brown shade to make the bear look a bit more furry. Continue to do this around the edge of the bear.
Step 18
Mix a smaller amount of black dust and melted cocoa butter. Using a fine paintbrush paint in the eyes, nose and mouth. Be careful to leave a tiny speck of the eyes and nose unpainted as this makes them sparkle
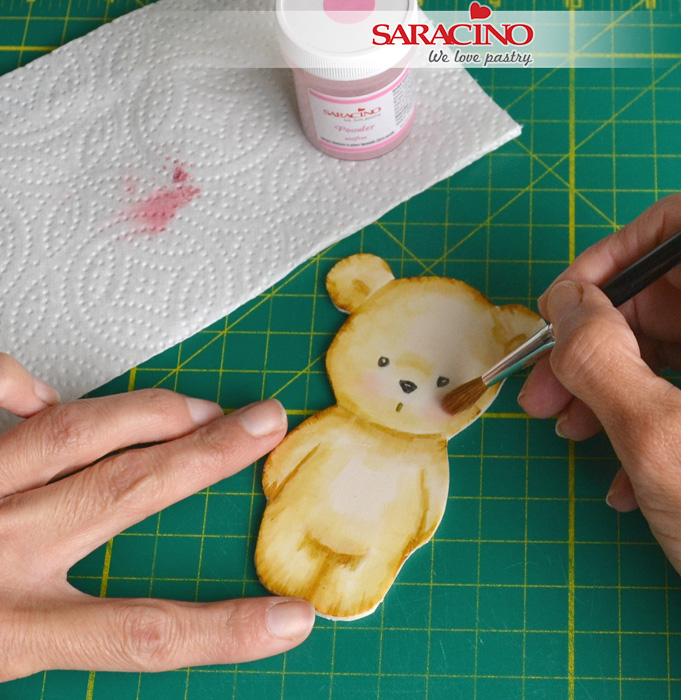
Step 19
When the image is completely dry use a soft brush and some pink dust to add the cheeks. Be careful to remove the excess from your brush before dusting.
Step 20
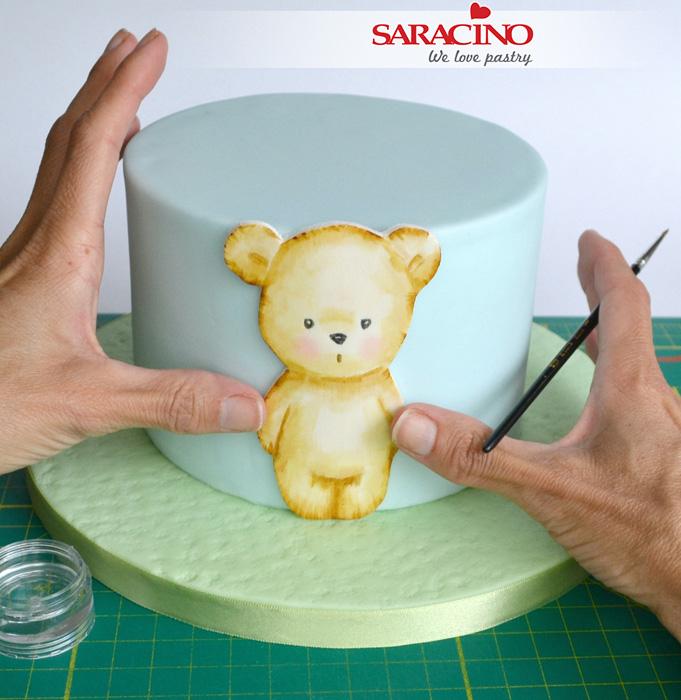
Use sugar glue to attach the image to the front of the cake. As you have left it on the cutting mat whilst working on it, it should still be flexible enough to shape around the cake.
Step 21
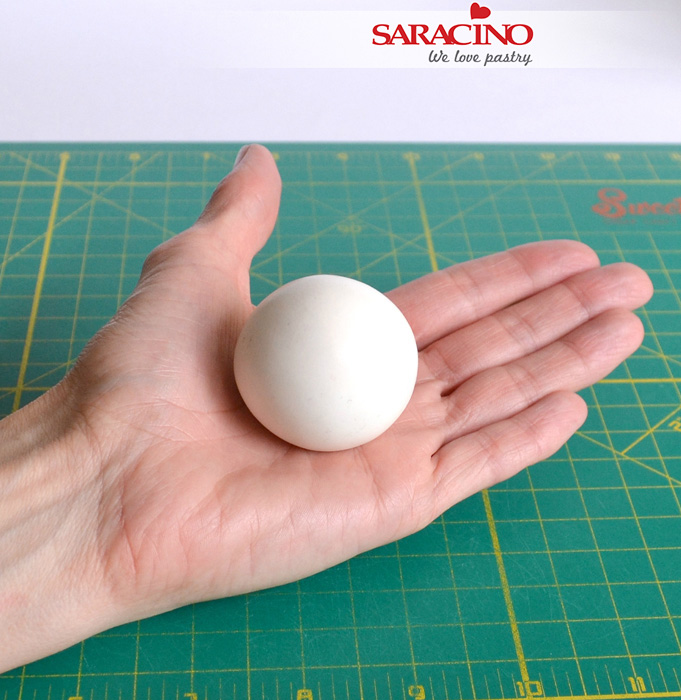
To make the balloon roll a 50g piece of white modelling paste into a ball in the palm of your hands. Try to roll it as smooth as possible.
Step 22
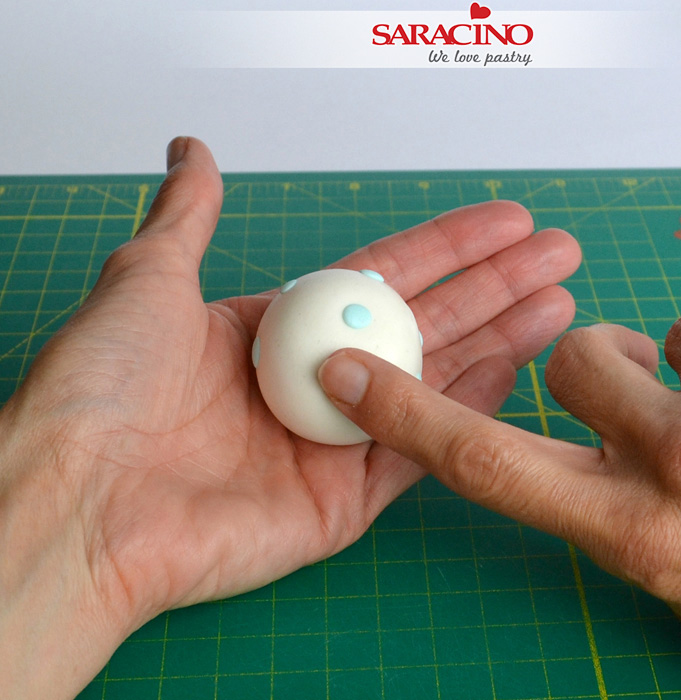
Roll tiny pieces of pale blue modelling paste into little balls with your finger on the palm of your hand. Push these as flat as possible onto the white ball.
Step 23
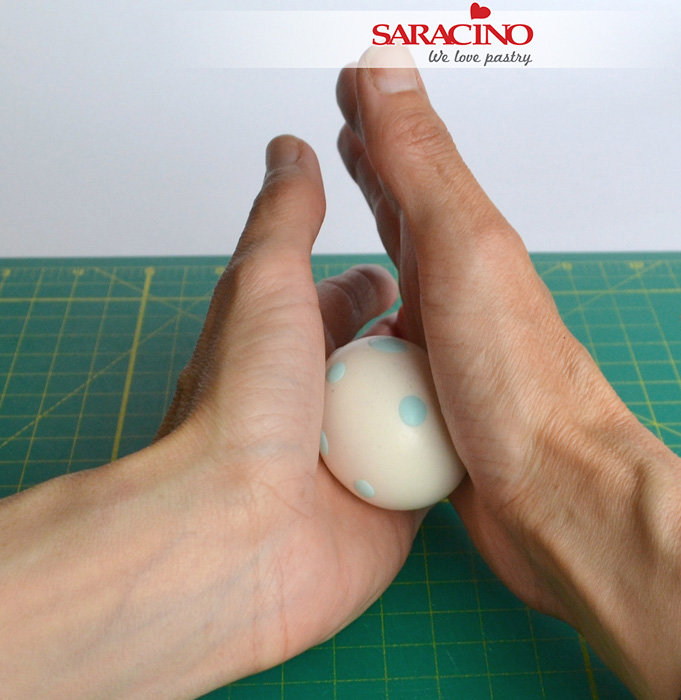
Roll the ball carefully in the palm of your hands to further flatten the spots into the balloon.
Step 24
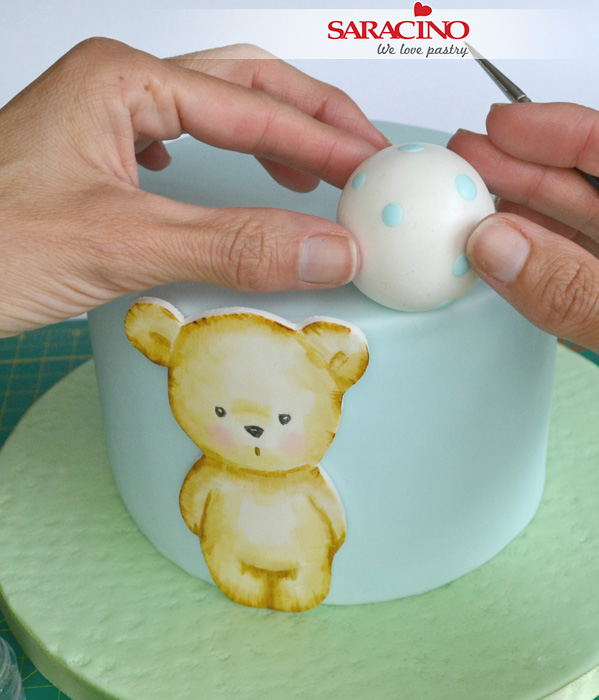
Secure the balloon on the edge of the cake using sugar glue (for extra security you could attach to the cake using a cocktail stick if desired).
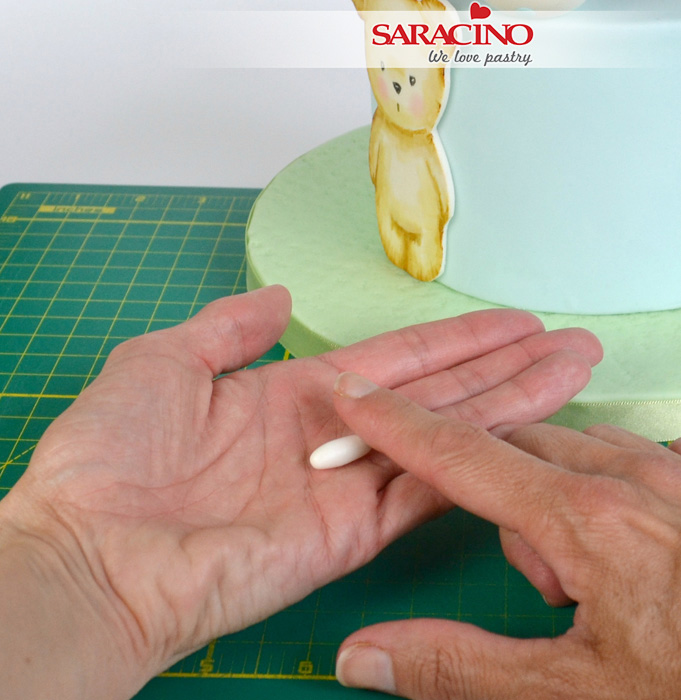
Step 25
Roll a large pea sized ball of white paste into a sausage in the palm of your hand with your finger.

Step 26
Bend the little sausage over in half to form the tie of the balloon.
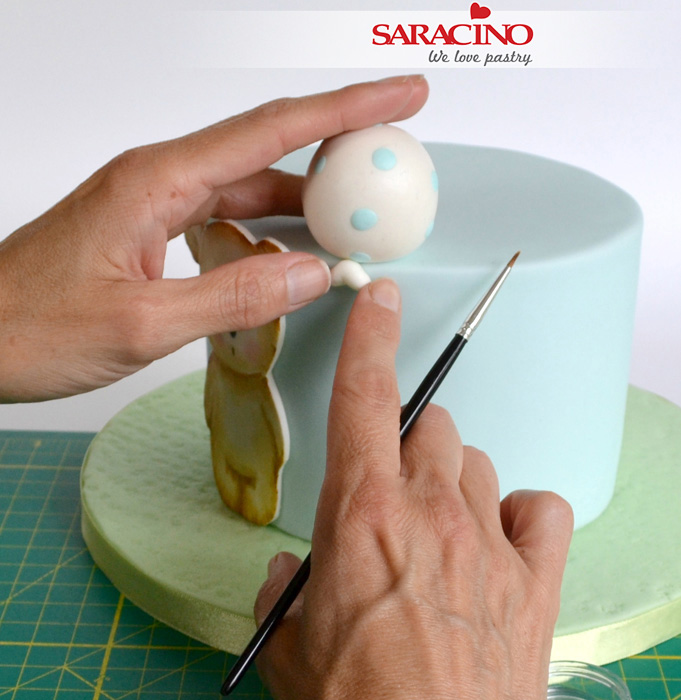
Step 27
Use sugar glue to attach the tie to the bottom of the balloon on the top rim of the cake.
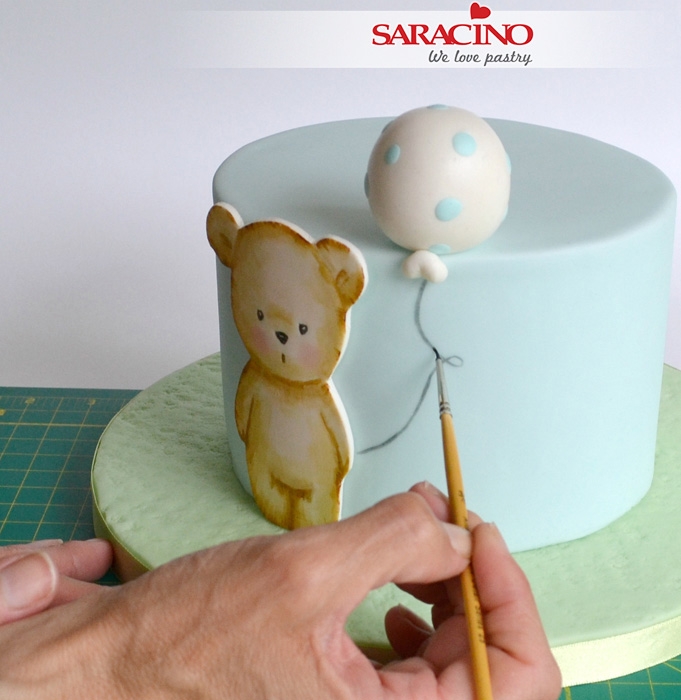
Step 28
Use a fine paintbrush with black dust and cocoa butter to paint on a string for the balloon down to the bears arm.
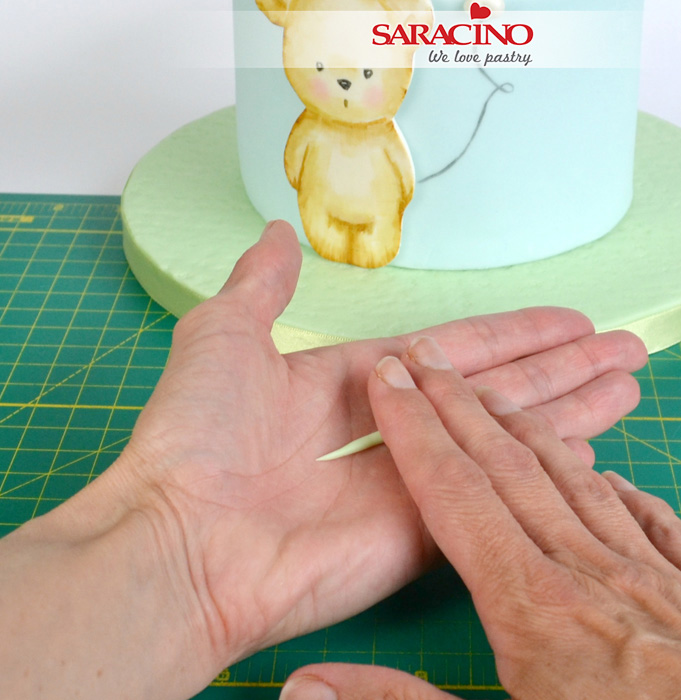
Step 29
Roll little sausage shapes of pale green modelling paste in the palm of your hands with your fingers. Make sure you roll the ends to a point. Repeat to make 6 or 7 of these.
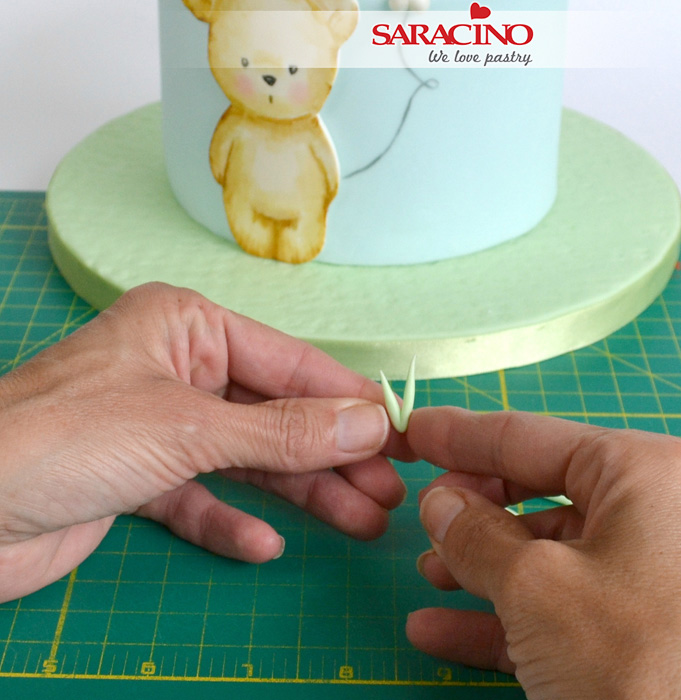
Step 30
Bend each in half to make a little v shape piece of grass.
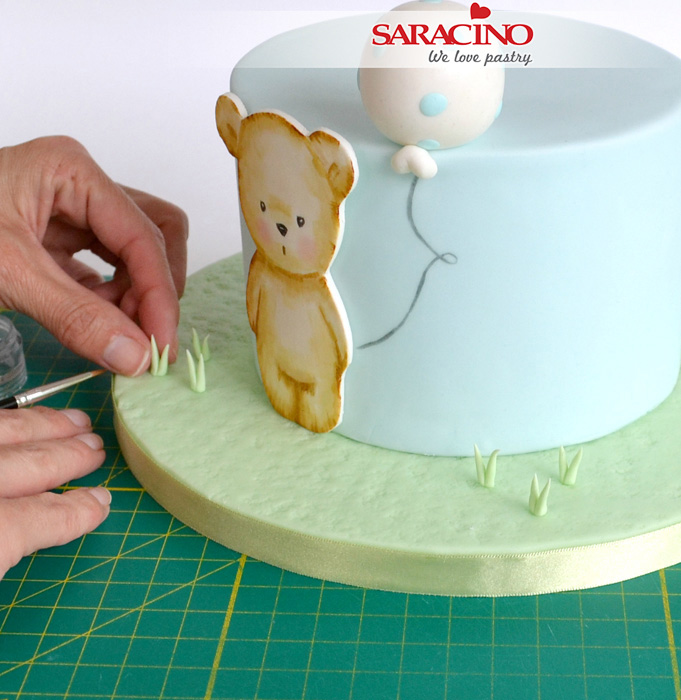
Step 31
Use sugar glue to attach these to the board either side of the bear.
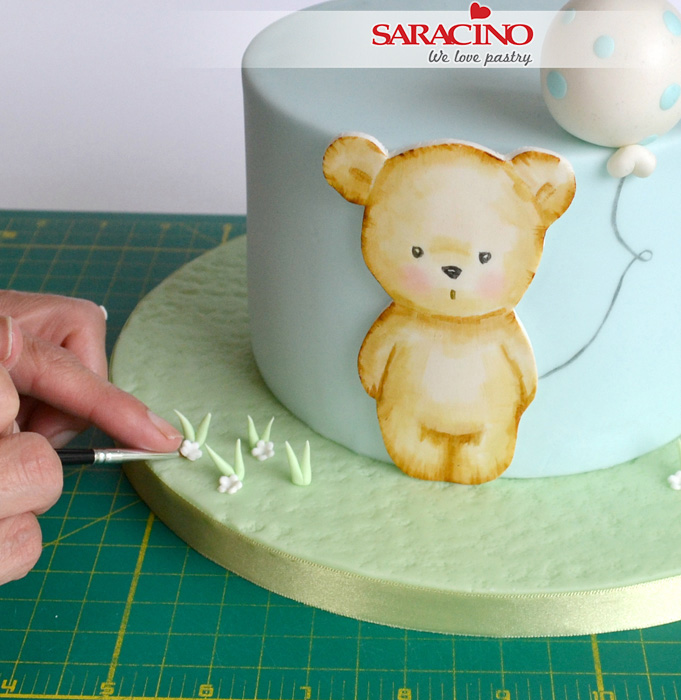
Step 32
Finally roll out a piece of white modelling paste and cut out 5 or 6 daisies using a small plunger cutter. Use sugar glue to stick these near to the grass.
