


You will need:
- Saracino model paste (white, yellow, green, blue, orange, fuchsia, pink)
-
Saracino piping gel
-
Purple gel colouring
-
Ball tool
-
Brush tool with silicone tip
-
PME modelling tool
-
Knife
-
Cutter pliers
-
Brushes
-
Scissors
-
Toothpicks
-
Wood skewers
-
28 gauge flower wire
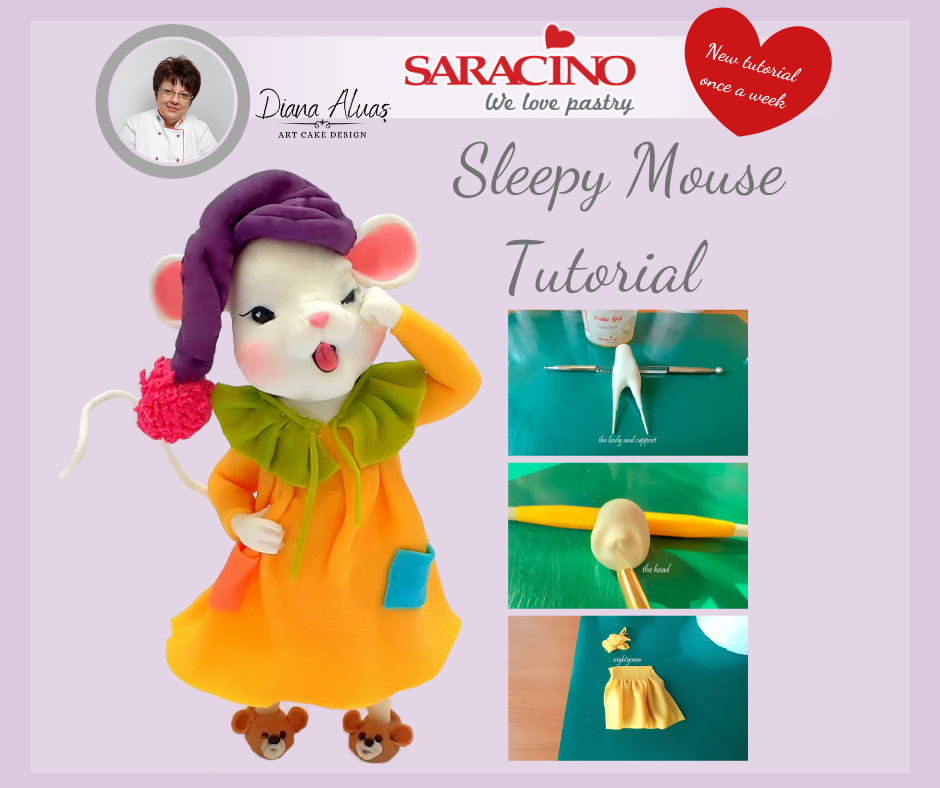
Step 1
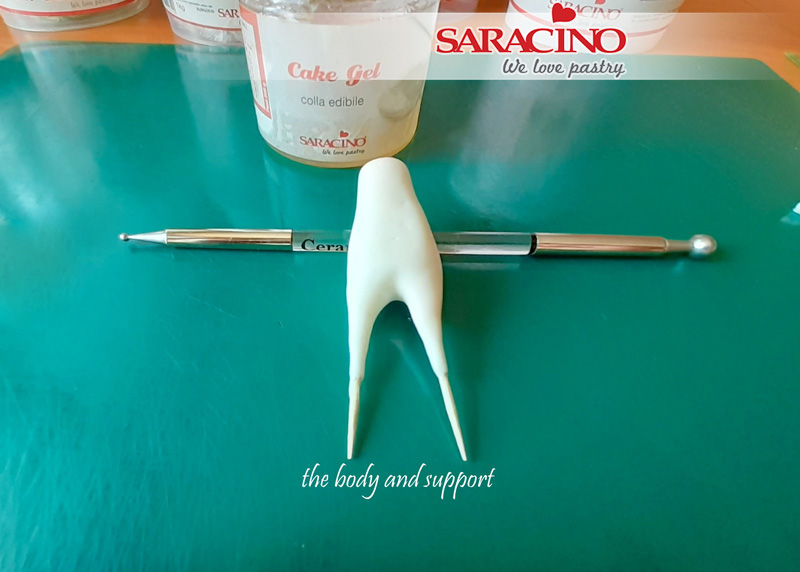
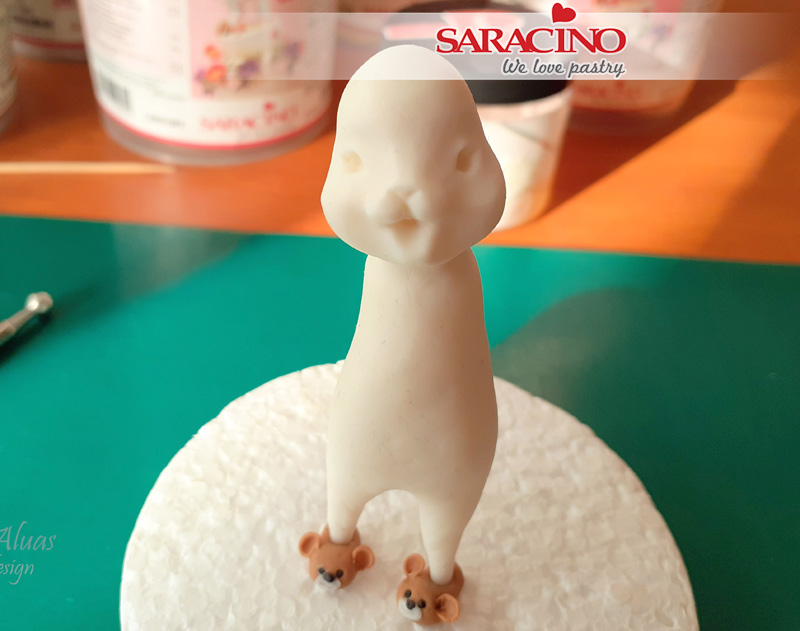
You will need 19g of paste for the body and legs.
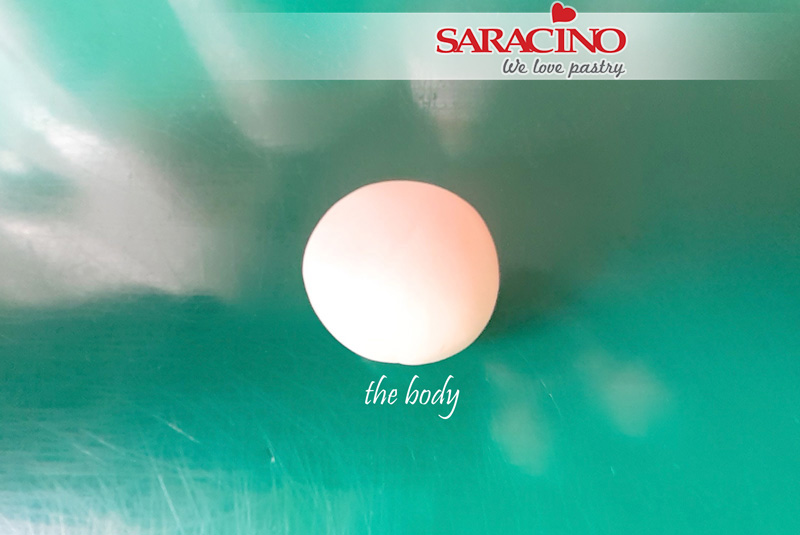
Step 2
Shape the ball into an elongated tear drop.
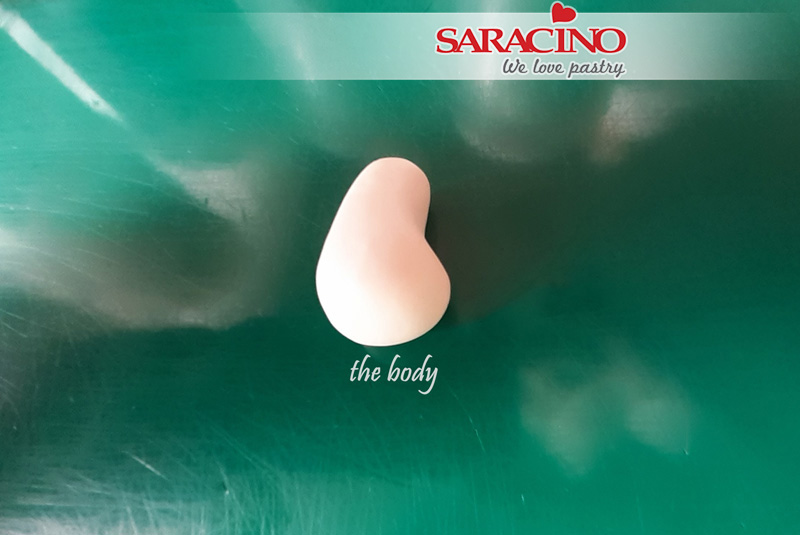
Step 3
On the wider end of the tear drop mark it down the middle. Now using your fingers stretch out to form the two legs. The legs will need to be wider at the top than at the ankle.
Step 4
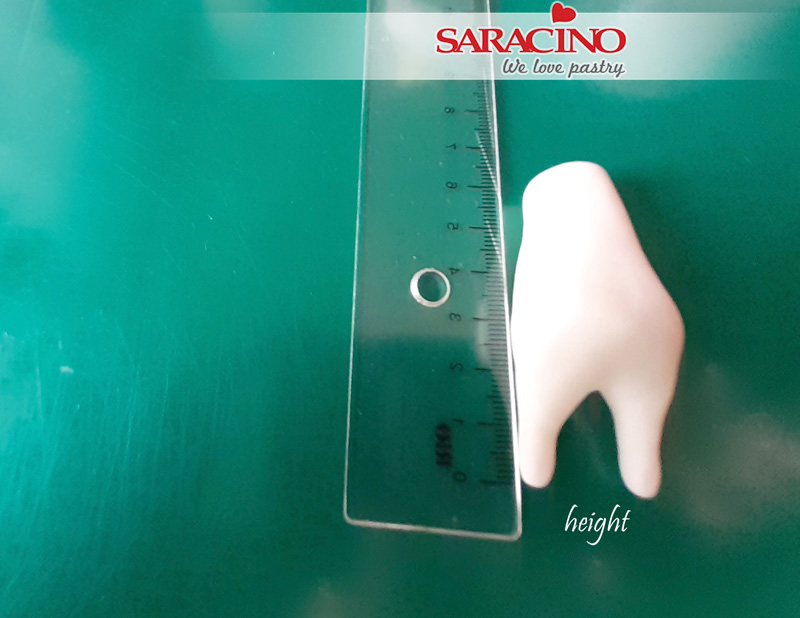
The total height should be 6cm (4cm body and 2cm legs)
Step 5
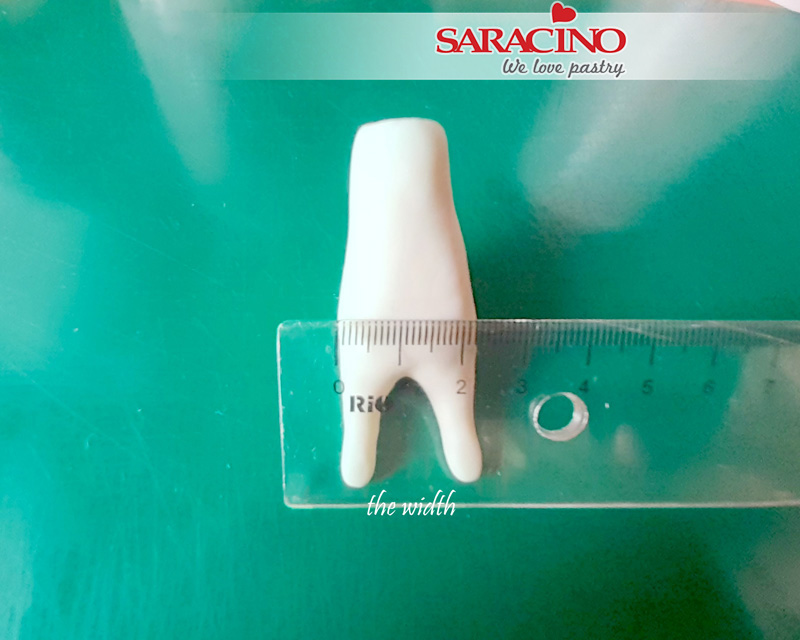
The tummy should measure 2.3cm across.
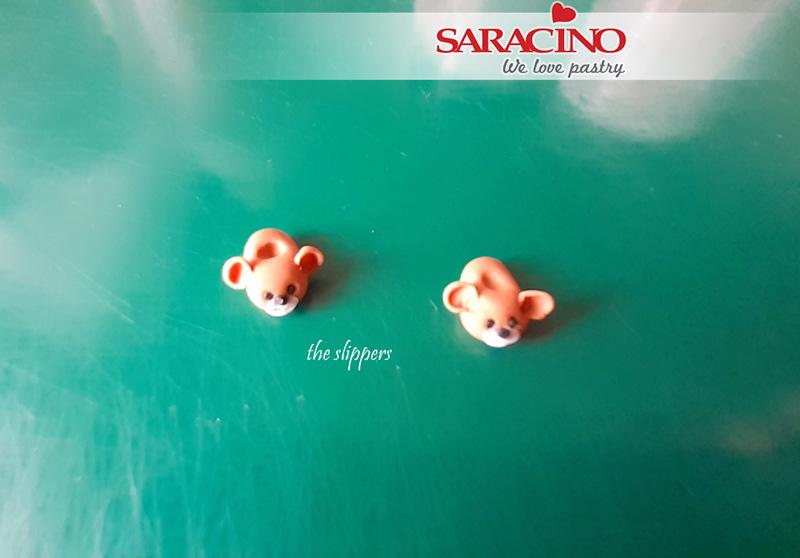
Step 6
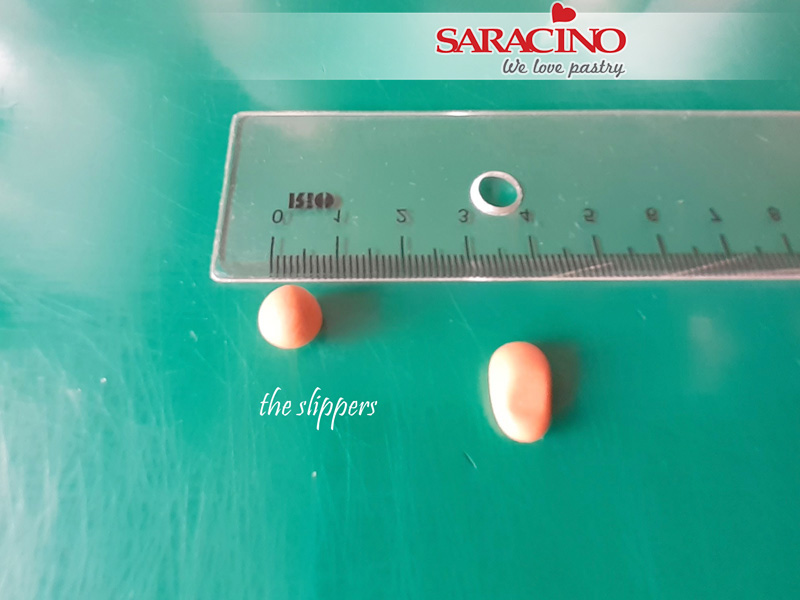
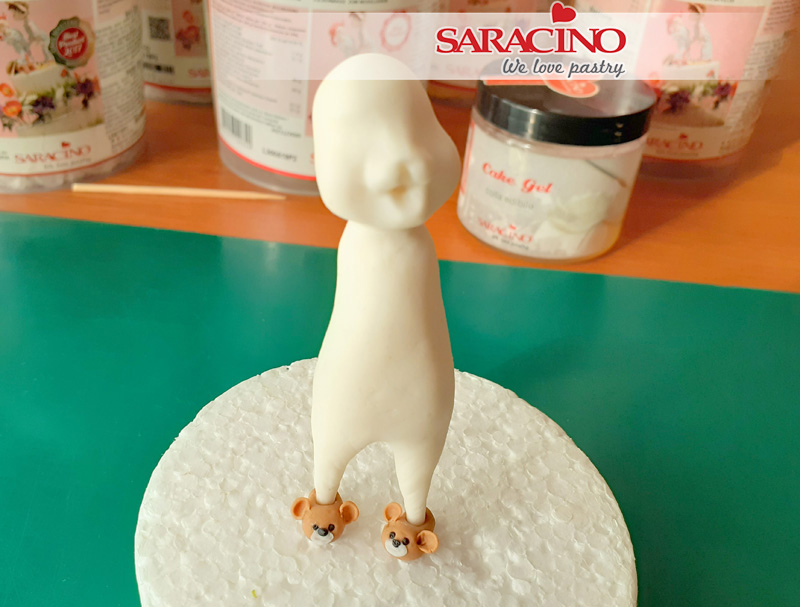
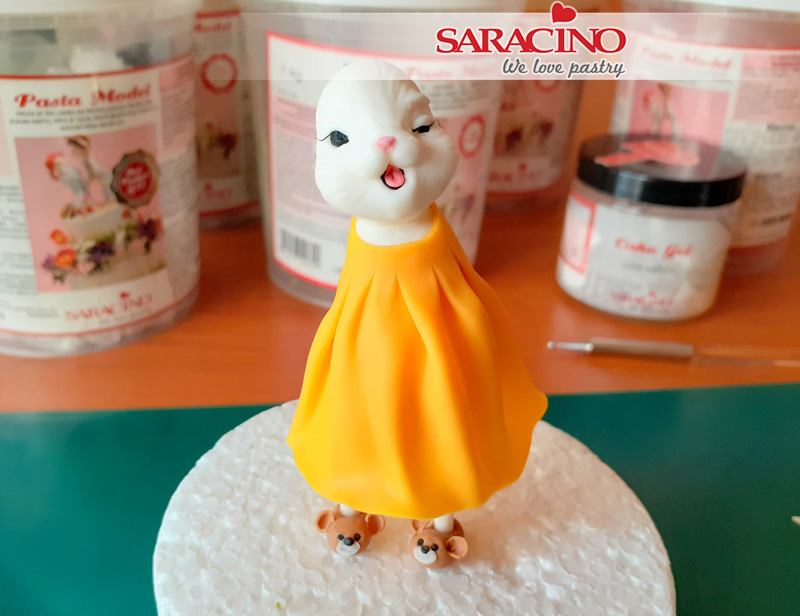
Using your orange paste form two balls with a diameter of 0.7mm. Use finger pressure to press them down in the centre to form the slipper shape.
Step 7
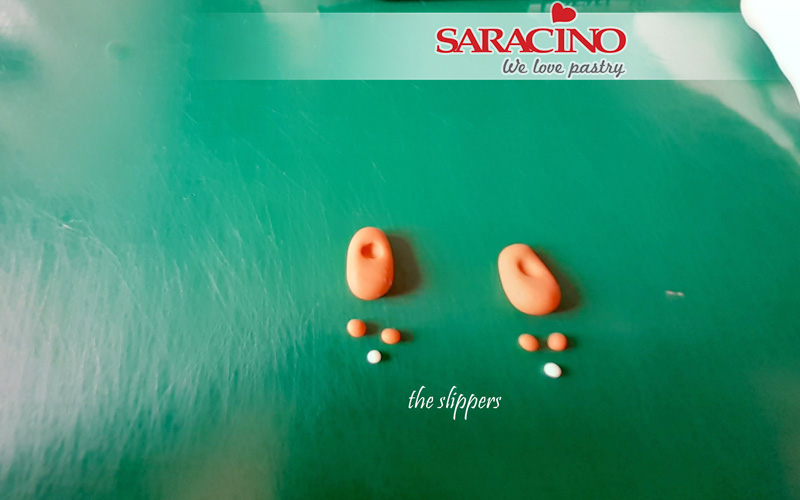
Using a small ball tool or the end of a paintbrush make an indent in each slipper for the legs. Now prepare other smaller balls for the teddy bears ears (orange), snout (white), nose and eyes (black)
Step 8
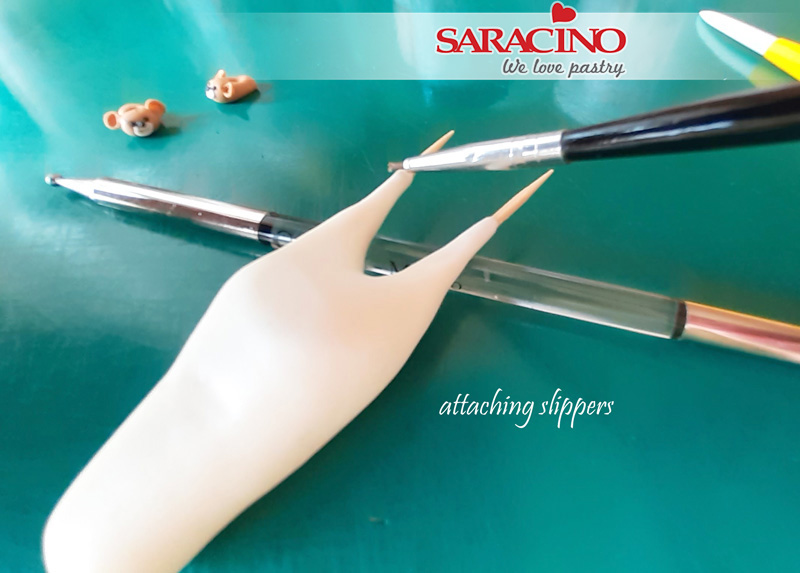
Glue all the elements to the slippers. The ears should be formed and shaped using your small ball tool.
Step 9
Dip two toothpicks into your piping gel. Insert a pick into each leg. The piping gel will act as a glue.
Step 10
Paint a small amount of water around the ankle of each leg. Push the slippers onto each leg.
Step 11
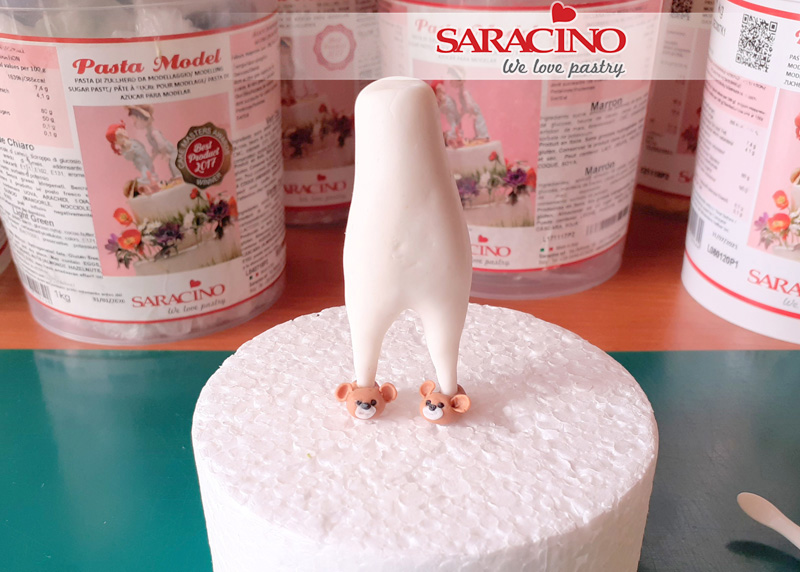
Place the mouse on the dummy.
Step 12
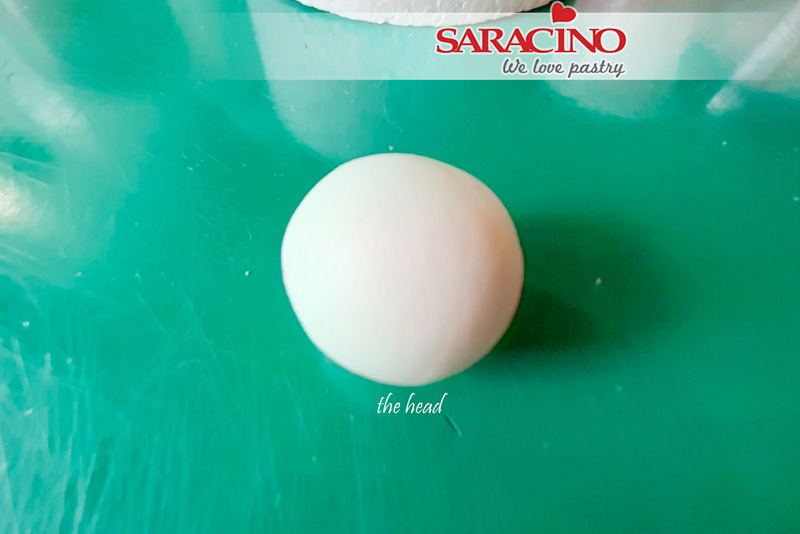
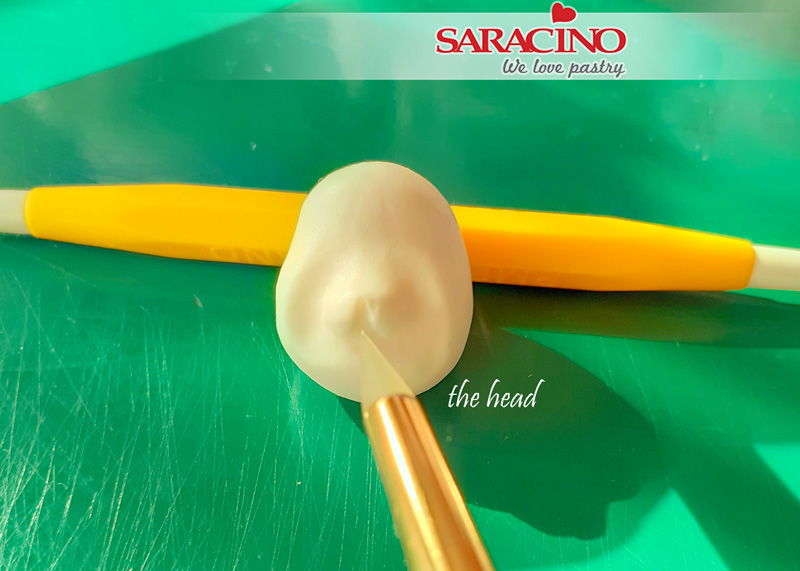
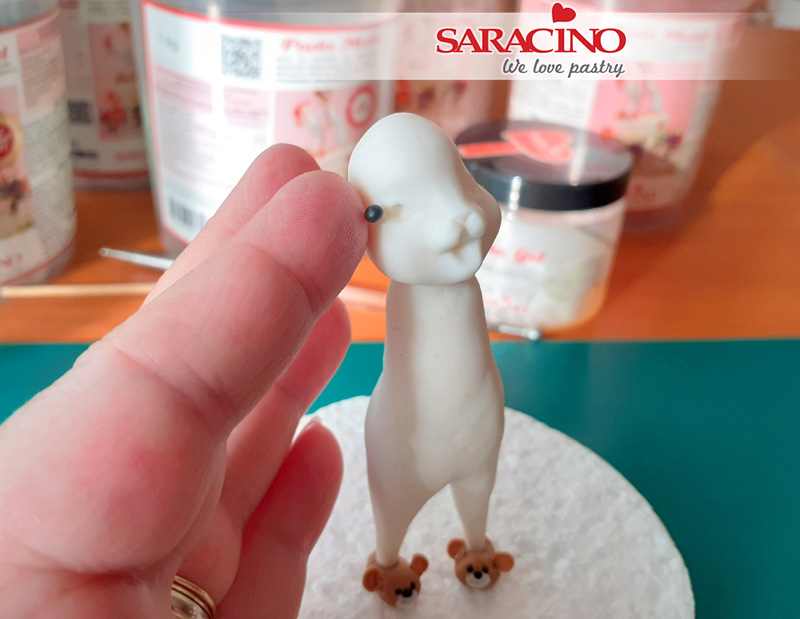
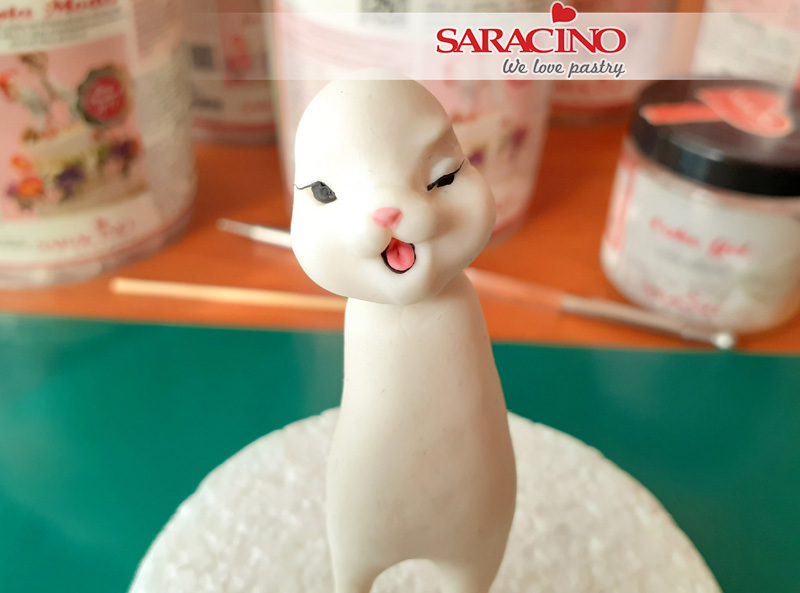
Using 9g of white paste roll a smooth ball to form the mouse’s head.
Step 13
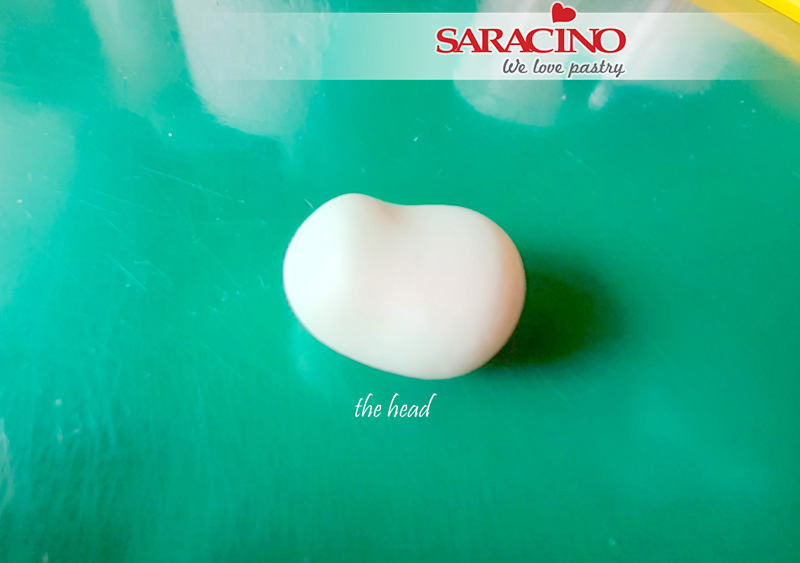
Using finger pressure form a dent centrally to the head so it elongates the white ball slightly.
Step 14
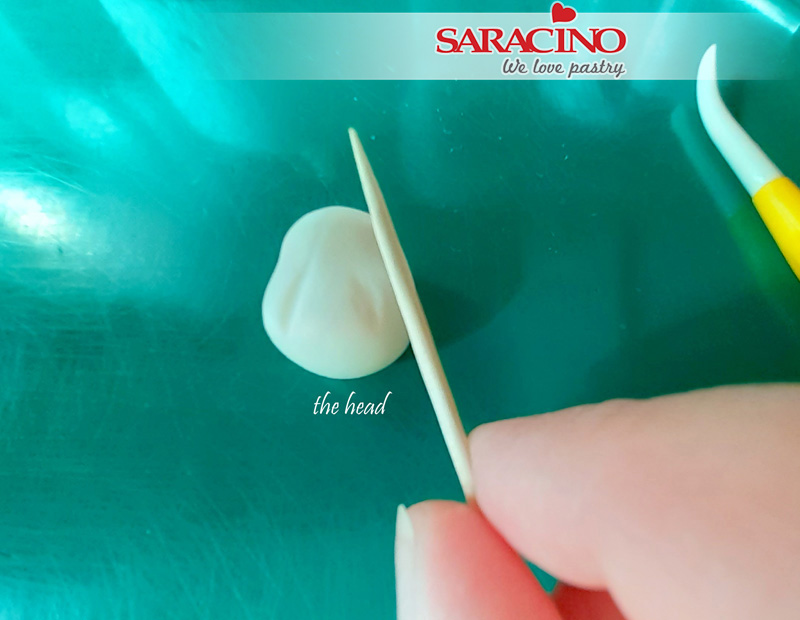
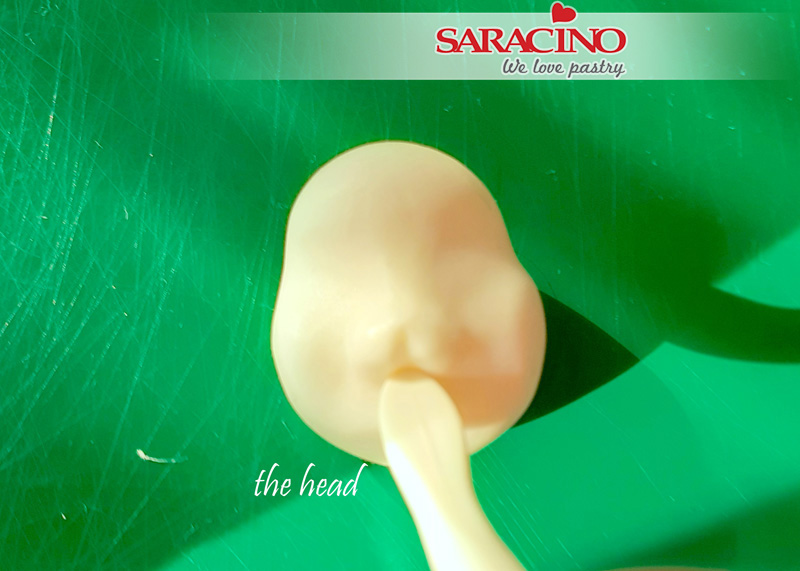
Using a toothpick start to form the facial features.
Step 15
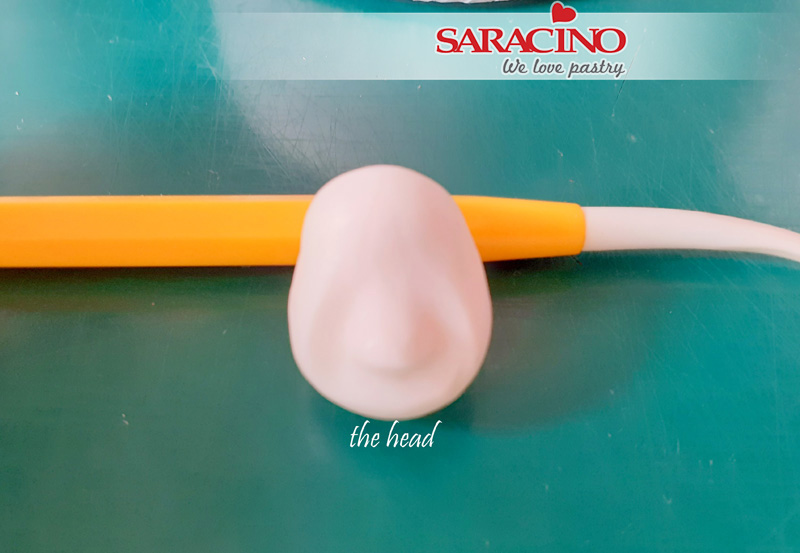
Using your Dresden tool use light pressure to form the snout of the mouse. The excess paste will be pushed outwards to form the chubby cheeks.
Step 16
Using your silicone modelling tool form a groove down the centre of the snout.

Step 17
Using the curved end of the Dresden tool form the indents for the eyes. The eyes should be positioned at the side of the head.
Step 18
Using the same modelling tool form the mouth by gently pressing it in below the snout and pushing downwards towards the chin.
Step 19
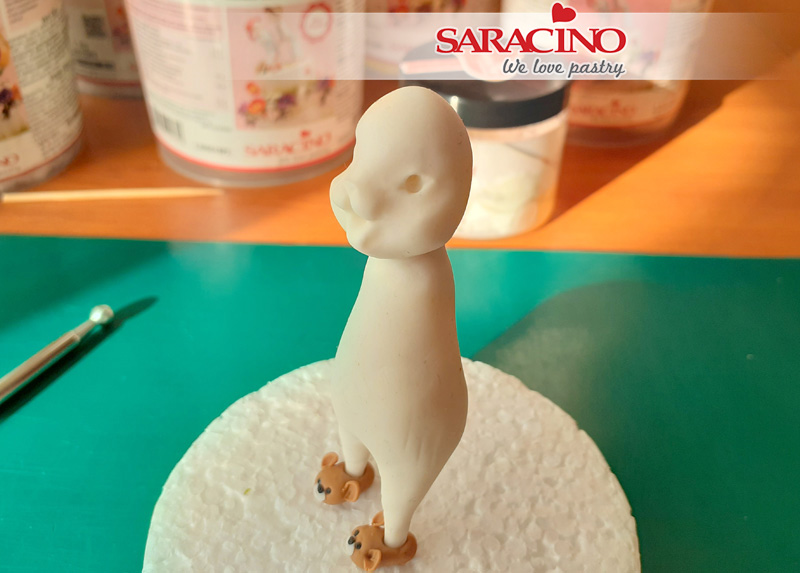
Now measure a length of wooden skewer. It should be long enough to push into the centre of the body and be able to take the depth of the head. Paint the skewer with piping gel and press into the body. Fix the head onto the neck.
Step 20
Using your small ball tool make the sockets for the eyes. The sockets should be symmetrical and the same size.
Step 21
Using a modelling tool shape the eyes.
Step 22
Form two small black balls and insert into each eye socket.
Step 23
Insert a small black ball of paste into the mouth and flatten.
Step 24
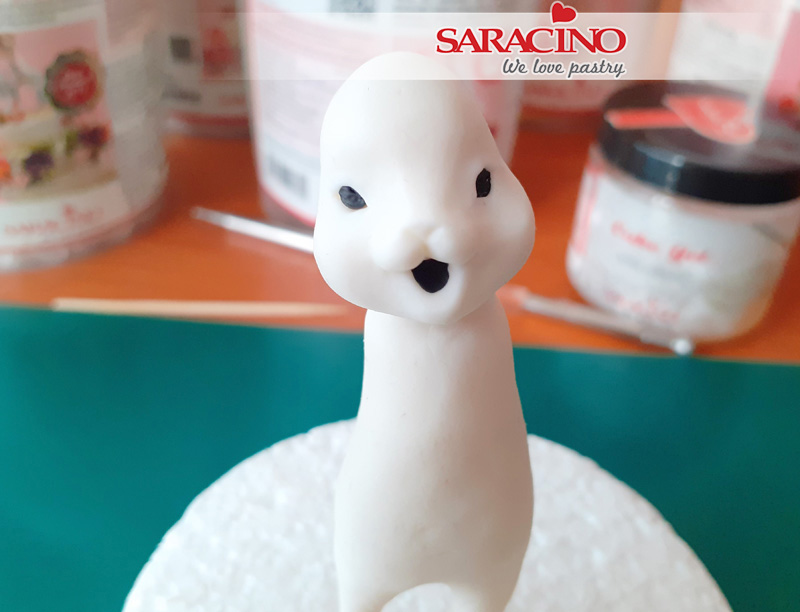
Roll a small piece of white paste thinly. Cover the left eye so about a quarter of the eye is visible. Fix the eyelid with a little water.
Step 25
Roll two very thin lines of black paste and fix over the eyes for eyelashes. Then roll two small balls of the pink paste. Use one for the nose and flatten the other to form the tongue. Press a line down the centre of the tongue.
Step 26
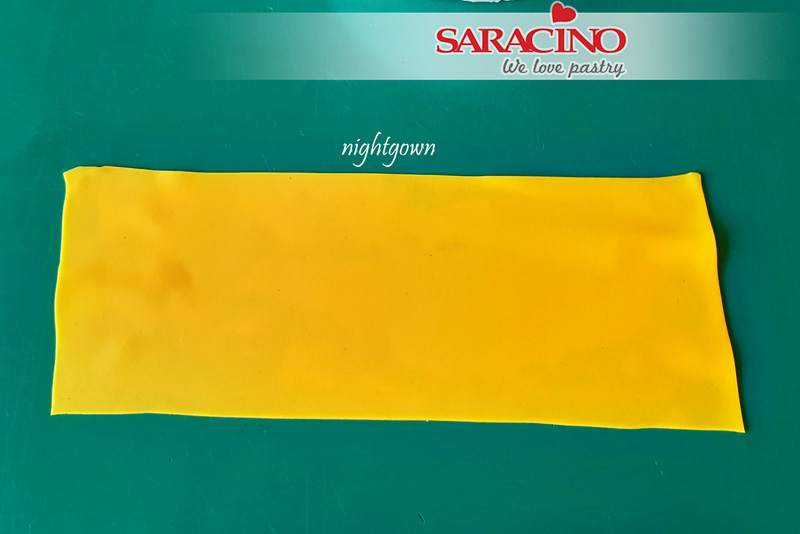
For the nightdress we roll the yellow paste very thinly into a rectangle shape. The width is to be the height of the mouse. The length will need to be longer than needed as we will be folding it to form ruffles in the gown.

Step 27
Pinch the top of the rectangle together with finger pressure to form the pleats. Then roll / flatten the bunched up paste. Trim to provide a nice neat edge around the mouse’s neck.
Step 28
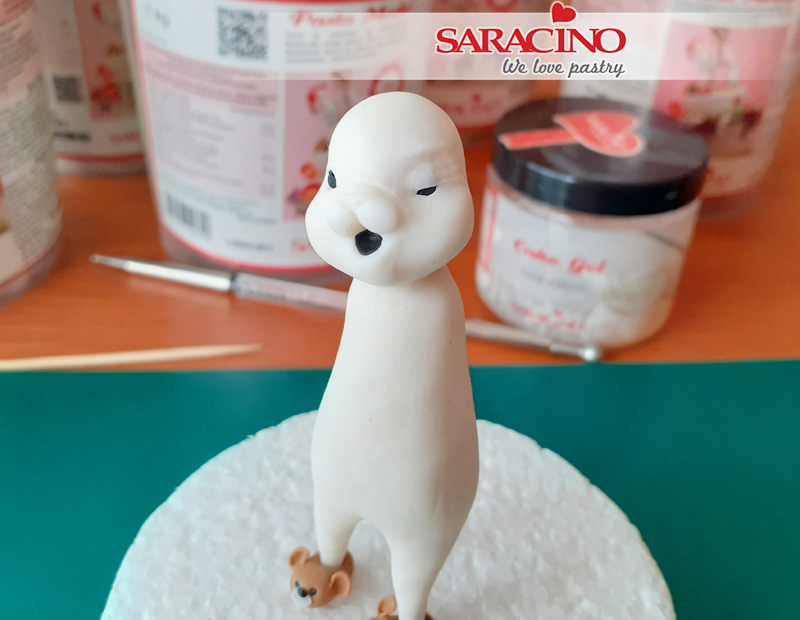
Fix the nightgown using a little water. Using the sharp end of the Dresden tool give the mouse’s head texture.
Step 29
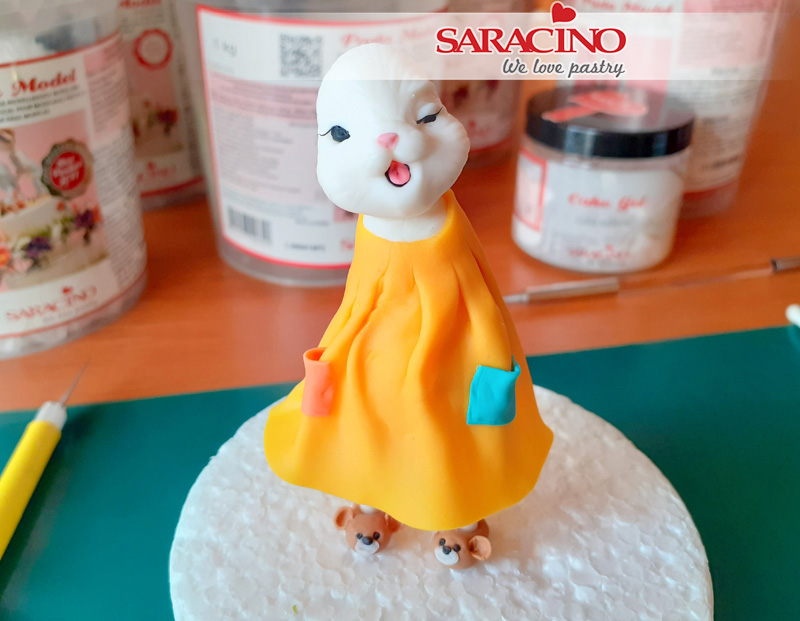
Using a little of the orange and blue paste roll out two small squares (or cut out using a square plunger cutter). Glue the pockets to the dress with the effect that they are hanging open.
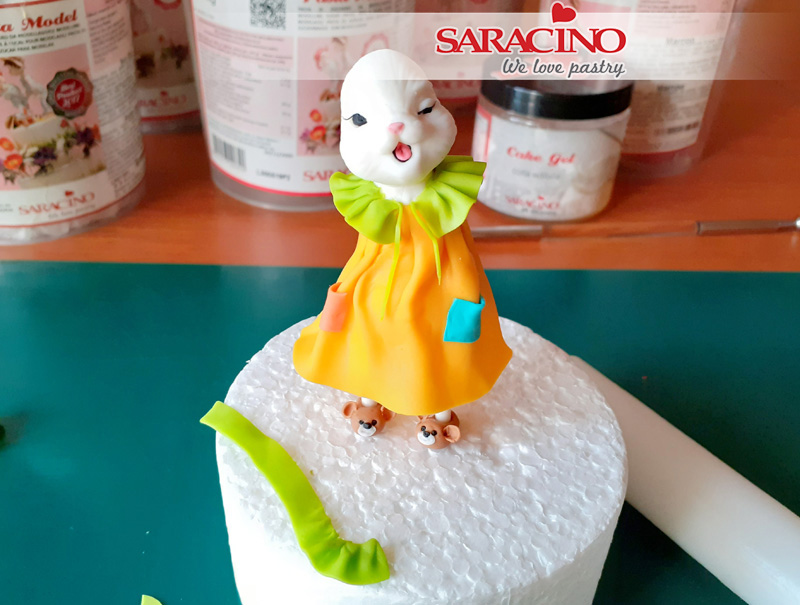
Step 30
Using the light green paste roll out a thin ribbon shape. Ruffle up and fix around the neck / top of the gown to form the collar. Roll out some more green very thinly and fix to the front of the gown to form the tie laces.
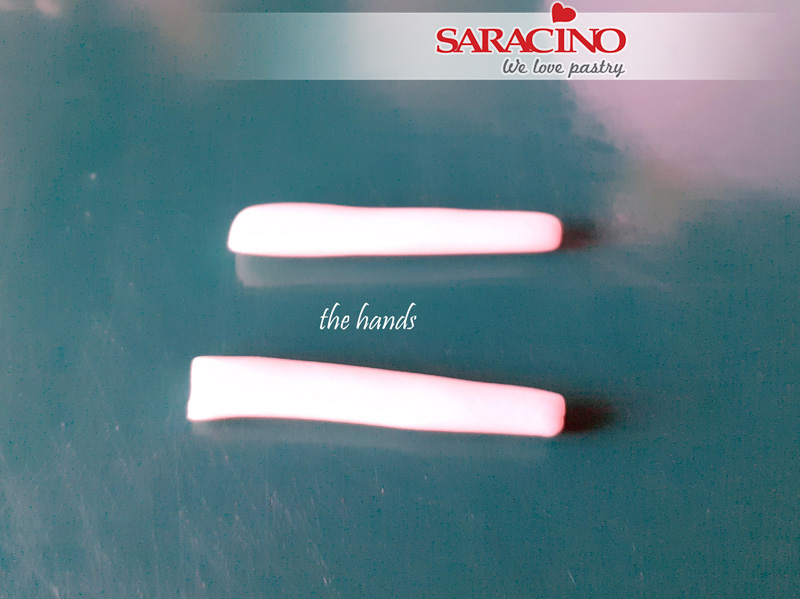
Step 31
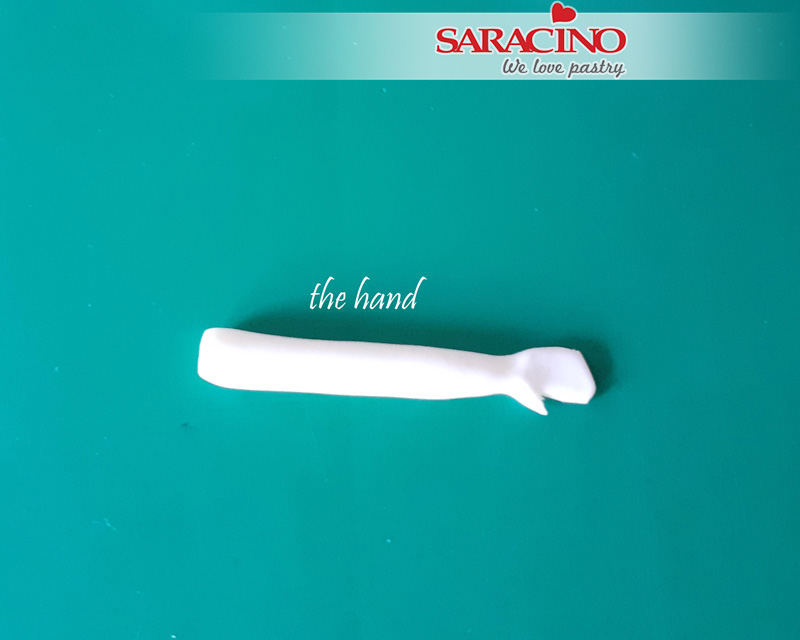
Using 2.5g of the white paste roll out two sausage shapes for the arms. One end is to be rolled thinner ready to form the little paws.
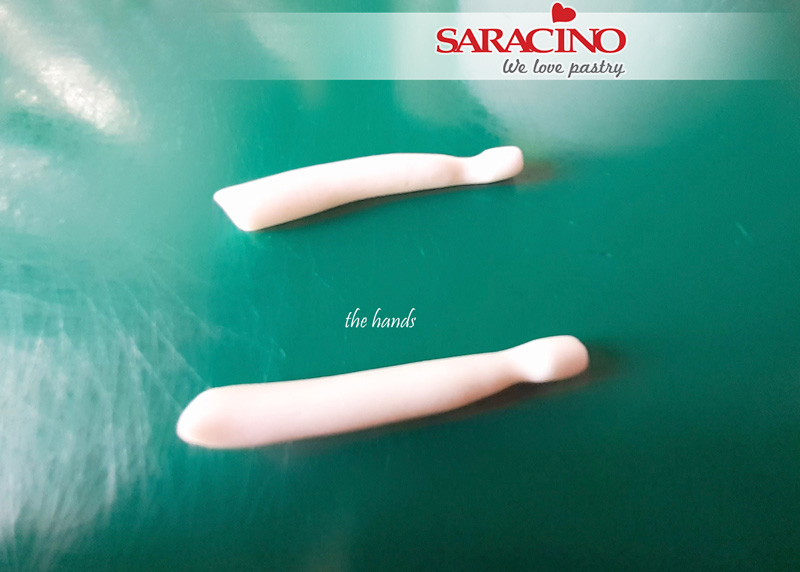
Step 32
Now using your fingers press down the thinner end to form a palm of the paws. Roll the wrist slightly thinner.
Step 33
The arms and paws should look like this.
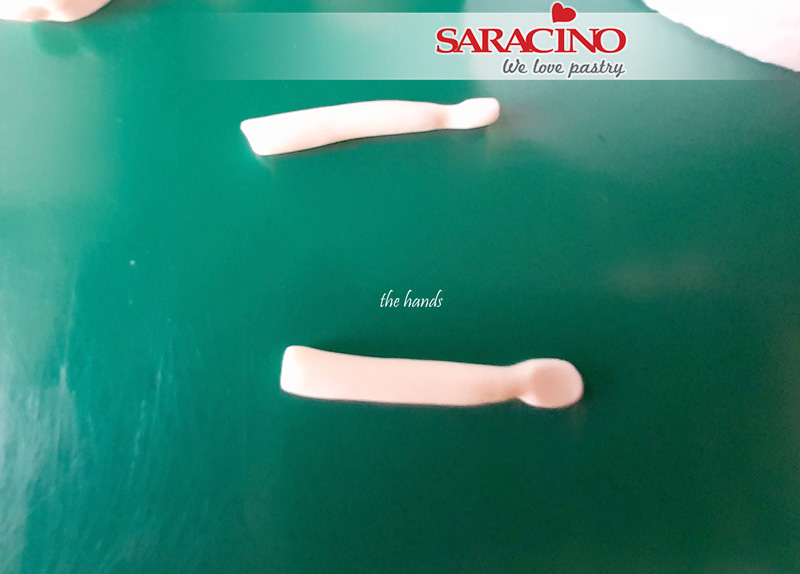
Step 34
Cut a thumb using a sharp knife or scissors. Remove the excess paste from between the thumb and index finger.
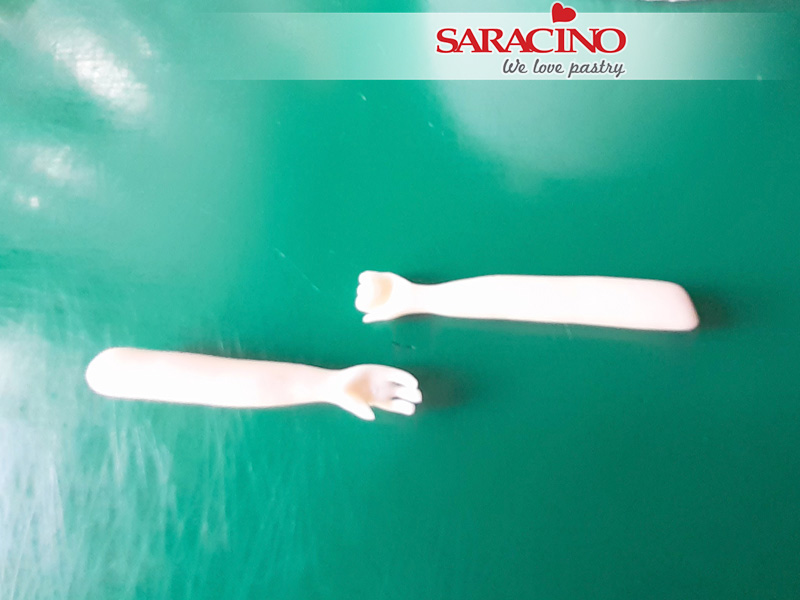
Step 35
Using the sharp end of your Dresden tool form the three fingers on each paw. One paw is to be slightly bent and the other formed into a fist.
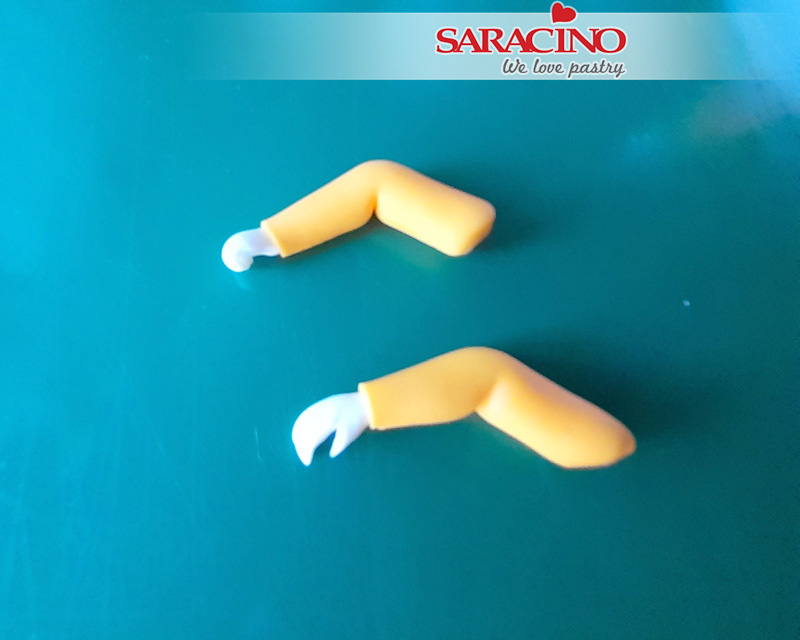
Step 36
Thinly roll some more of the yellow paste. Cut out two rectangles and fix to each arm. Use a little water if required. Remove any excess yellow using a knife or scissors and smooth out any joints. Bend each arm to the required shape.
Step 37
Fix the arms to the mouses body and model to the required shape. The fist hand is to be rubbing her face.
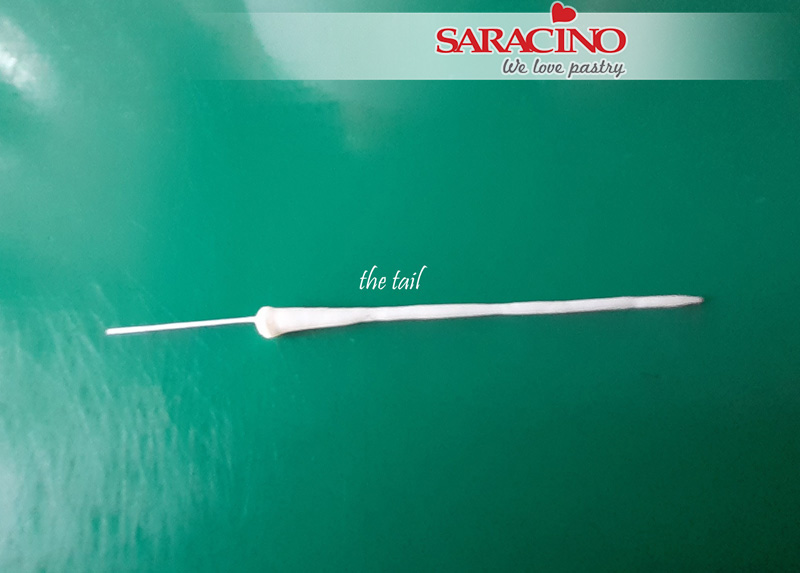
Step 38
For the tail cover the 28 gauge flower wire with white paste. Make this as thin as possible but one end will need to be slightly wider where it meets the body and the other end to a point for the tip of the tail.
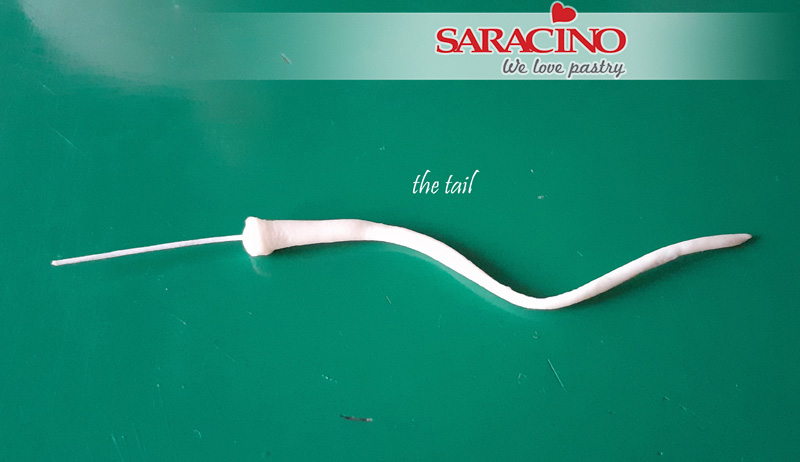
Step 39
Bend to give the shape you would like.
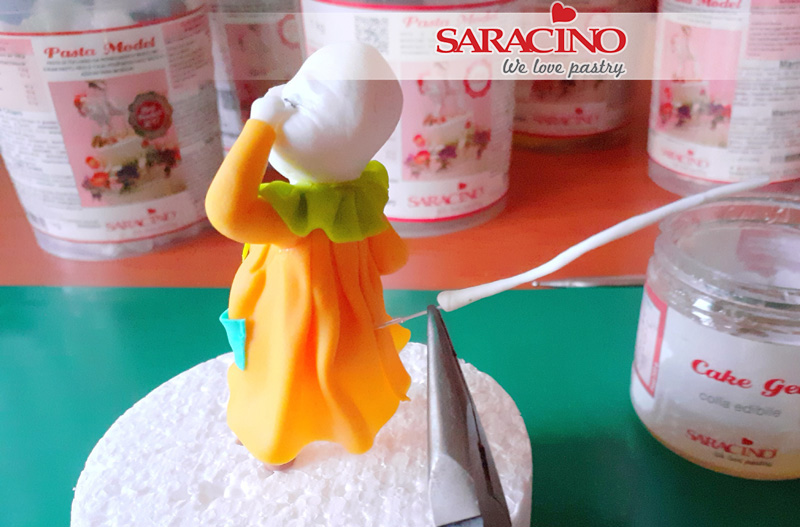
Step 40
Using your thin pliers push the wire into the mouses backside. Use a little piping gel on the wire before inserting.
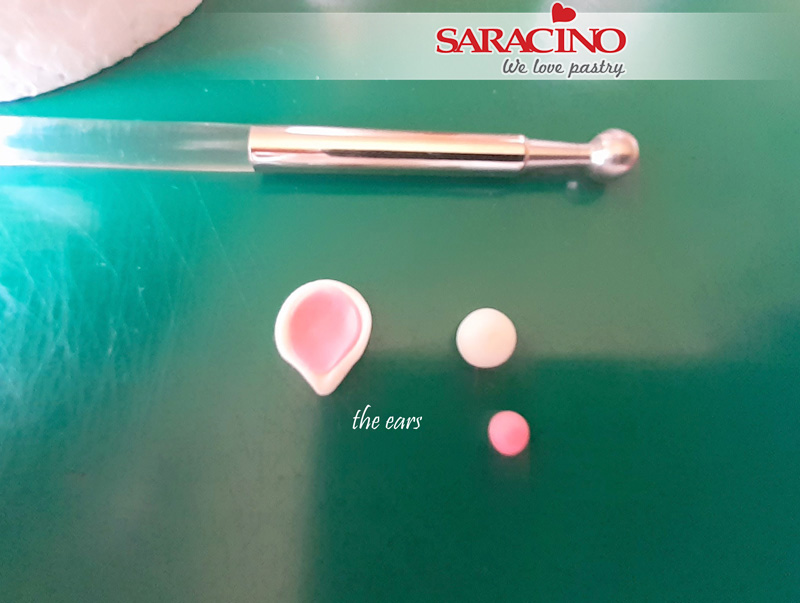
Step 41
For the ears you will need 0.75g of white paste. Roll out into two balls and curve with a ball tool. Then roll out two smaller balls of pink paste and fix inside each ear. Pinch one end of each ear to give it a slightly pointed end where it is attached to the head.
Step 42
Fix the ears to the head using a little water. The ears are to be symmetrical.
Step 43
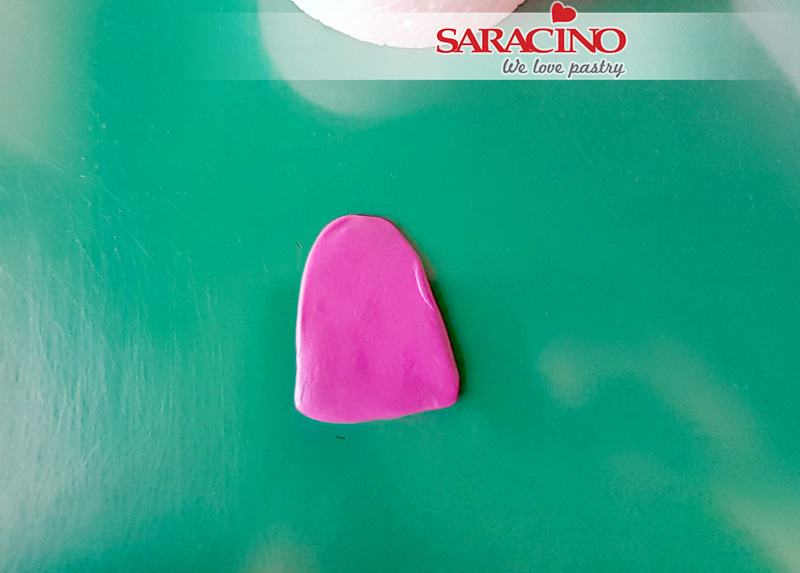
For the night cap roll out a piece of purple paste. This does not have to be too thin.
Step 44
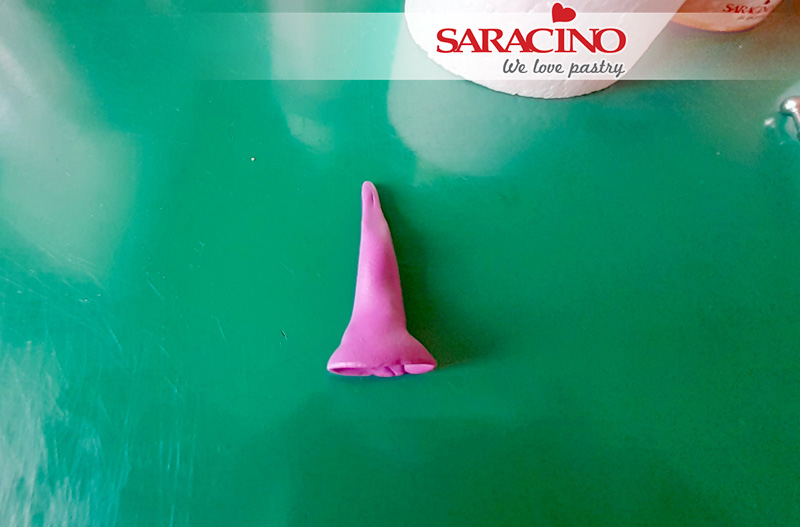
Using the rolled out paste form it into a ‘witches’ hat shape by wrapping around your finger. Position on the head to see if it is the required size and shape.

Step 45
Fix the hat to the head using a little water. Using fuchsia paste roll a small ball for the pompom. Give the ball texture using the end of a piping nozzle or sharp ended tool. Fix to the end of the hat.
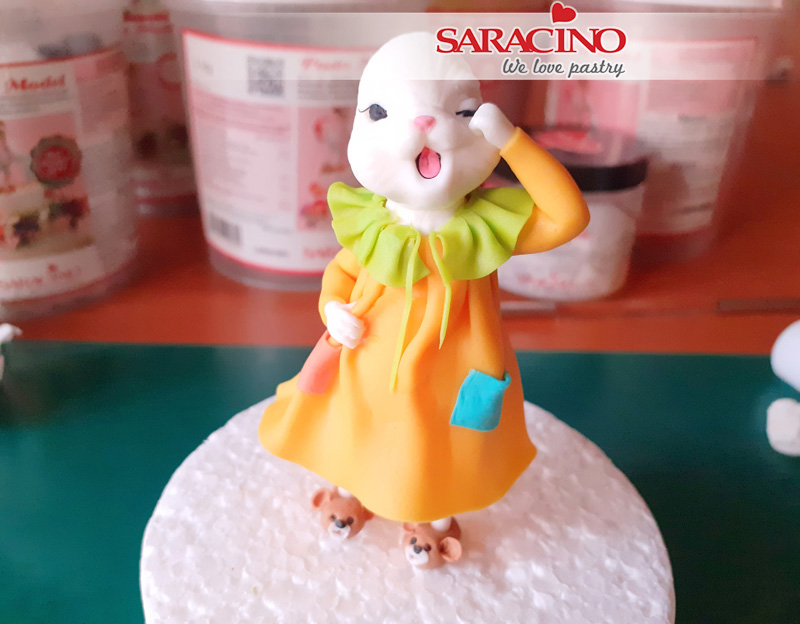
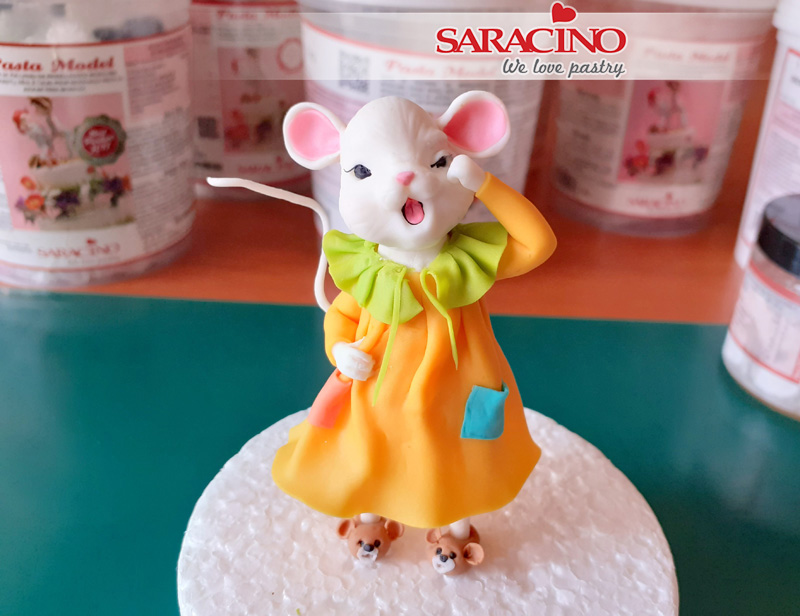
Your sleepy mouse is now ready to go on your cake.
