


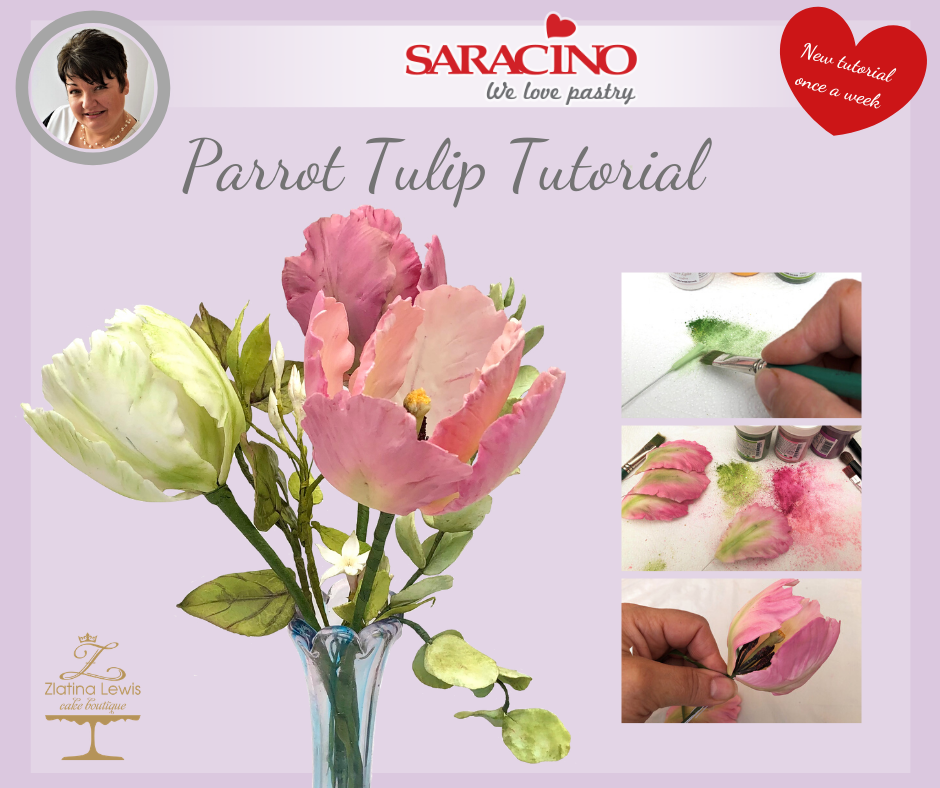
Author: Zlatina Lewis

FB: ZL CAKE BOUTIQUE
Skill level: INTERMEDIATE
FROM ZLATINA
The tulips have three petals and three sepals, but for ease I have referred to petals here.
I’ve made the flower as near to nature as possible, although it is not 100% botanically accurate.
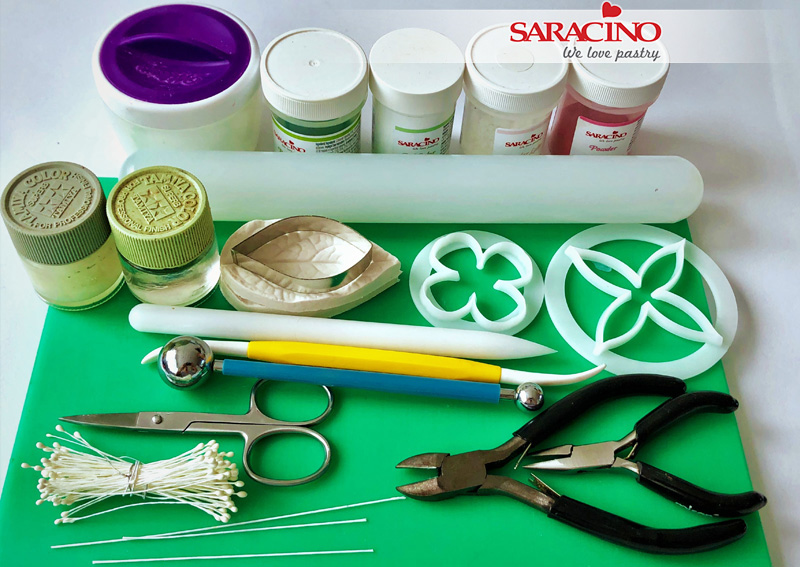
You will need:
- Saracino flower paste – Pasta Bouquet – 70g
- Florist wires white (30, 26 and 20 gauge)
- Florist tape – mid-green
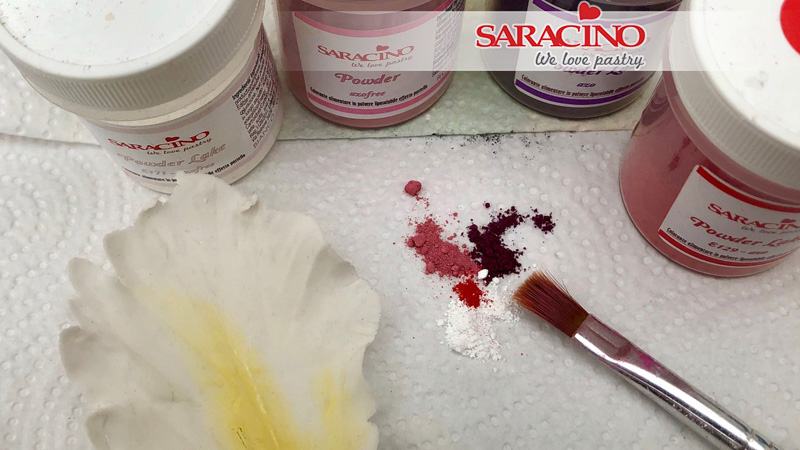
- Edible Saracino colour dusts (yellow, pink, red, violet, white, black)
- Edible glue
- Semolina – coloured in yellow and violet colours
- Cornflour for dusting
- Ball tool
- Dresden tool
- Cutting wheel
- Non-stick rolling pin
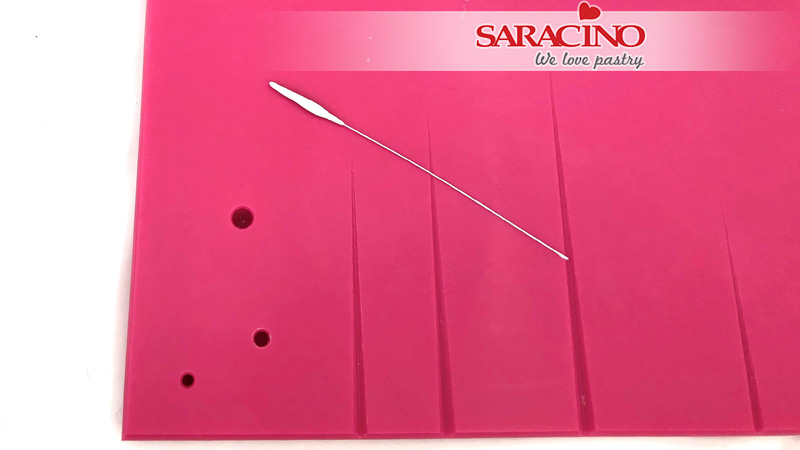
- Cel Board
- Foam Pad
- Parrot tulip cutter & veiner
- Paint brushes (Flat for dusting)
- Wire cutter
- Scissors
- 2 Pipe cleaners
- Drying shapers or sponge
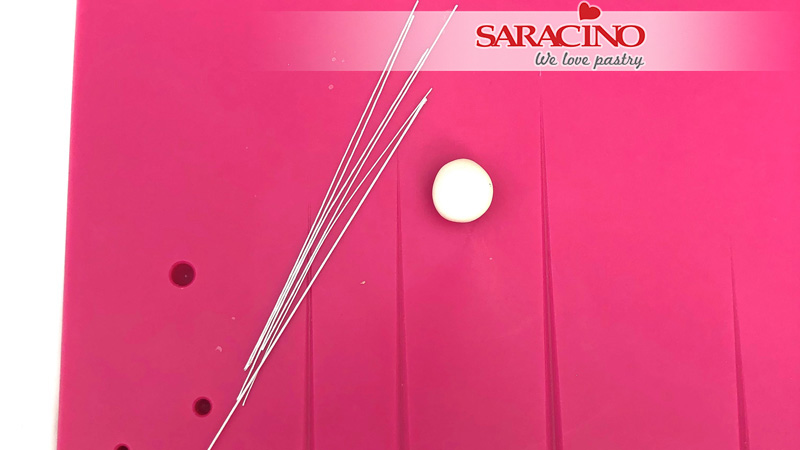
Step 1
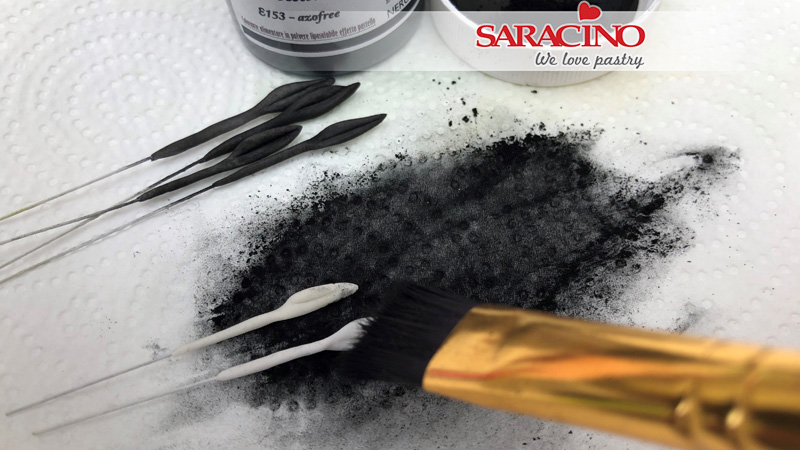
For the stamens of the flower you will need a lentil size of gumpaste and a length of florist wire gauge 30 cut into 6.
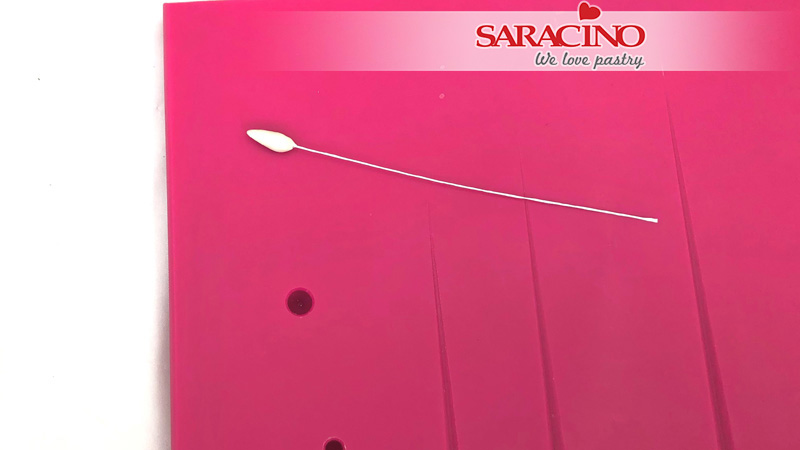
Step 2
Roll out the small piece of gumpaste into a sausage, insert the wire into it and give it a teardrop shape
Step 3
Squeeze and shape the paste as to give it slightly more bulbous tip.
Step 4
Make six stamens. Using your Dresden tool shape a groove down the length of the each stamen. Dust them with black dust colour.
Step 5
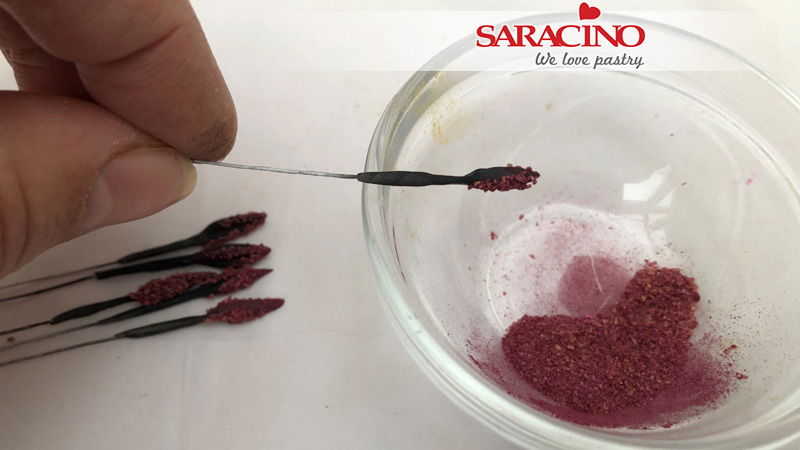
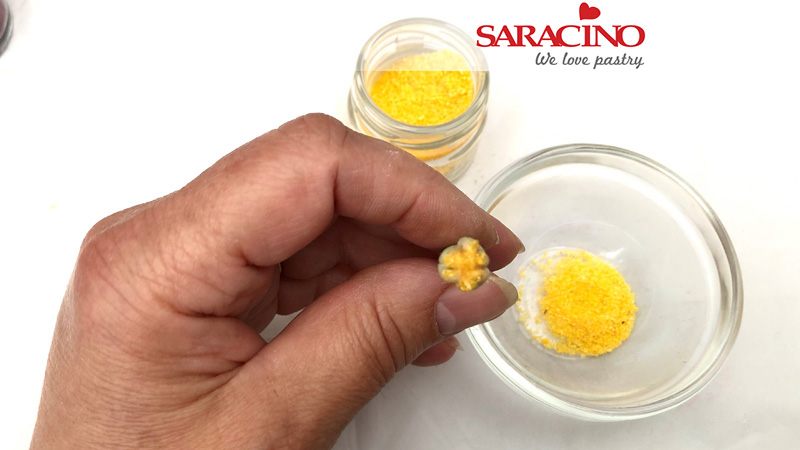
Dip each stamen into a little dish with violet coloured semolina and set aside.
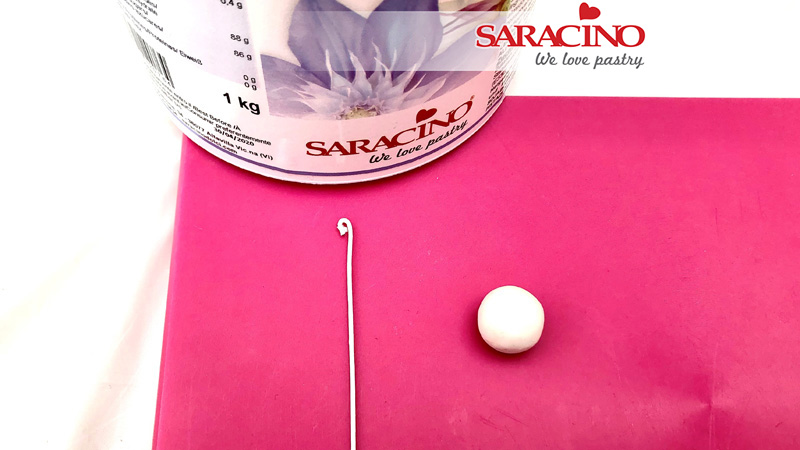
Step 6
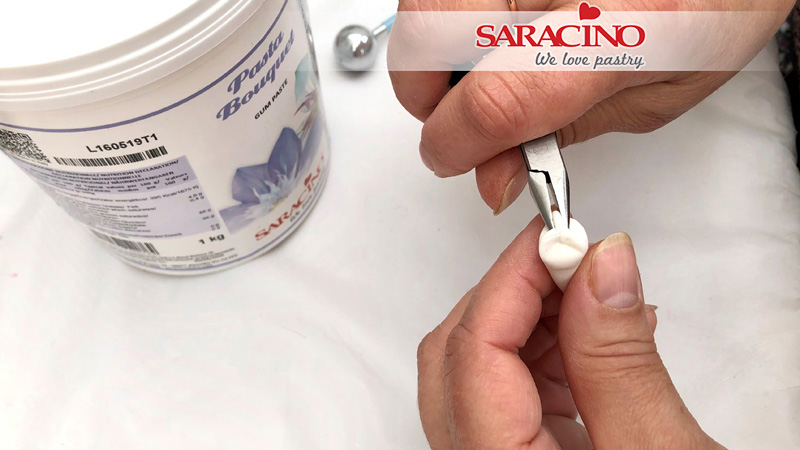
To make the pistil of the tulip, you will need a pea size of pasta bouquet and 20 gauge wire cut in ½ with a hook formed at the end of it.

Step 7
Form the pasta bouquet into a teardrop shape with a length approximately 3cm and insert the hook to the middle of it. With a ball tool push the end side of the paste to flatten the pointy shape of the teardrop.
Step 8
With the tips of a pair of tweezers, squeeze three evenly spaced ridges into the very top of the paste.
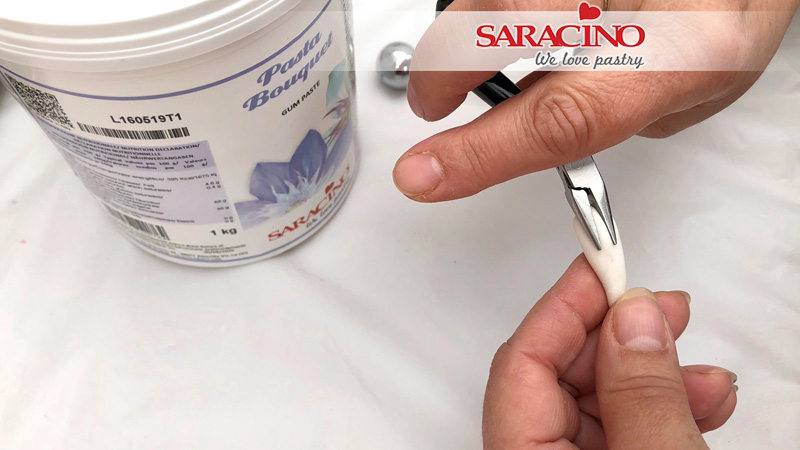
Step 9
With the tweezers, form small ridges at the side of the pistil. With the help of a small cutting wheel, cut a tiny grove into each of the three ridges, made at step 8.
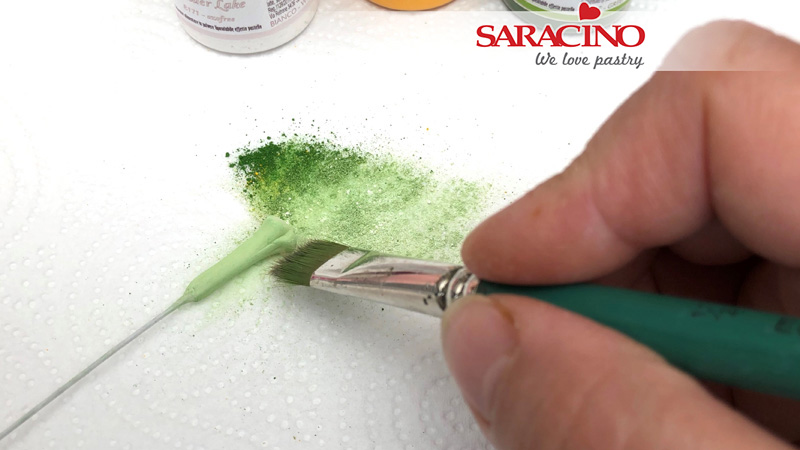
Step 10
Colour the pistil with pale green colour.
Step 11
Dust the top of the pistil with little amount of yellow colour.
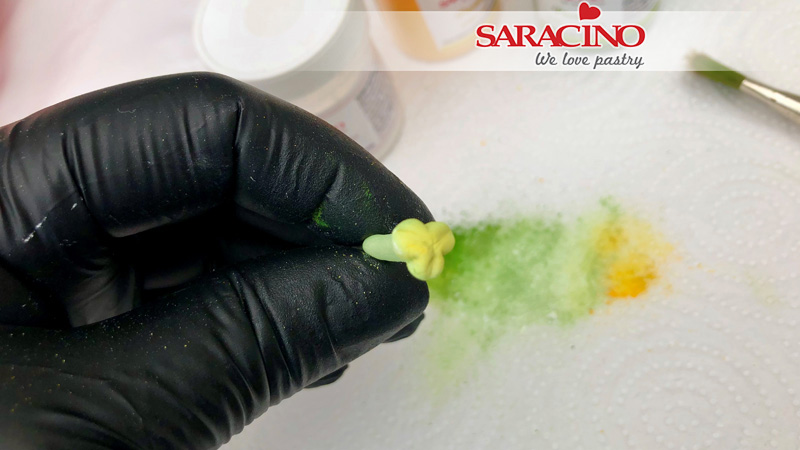
Step 12
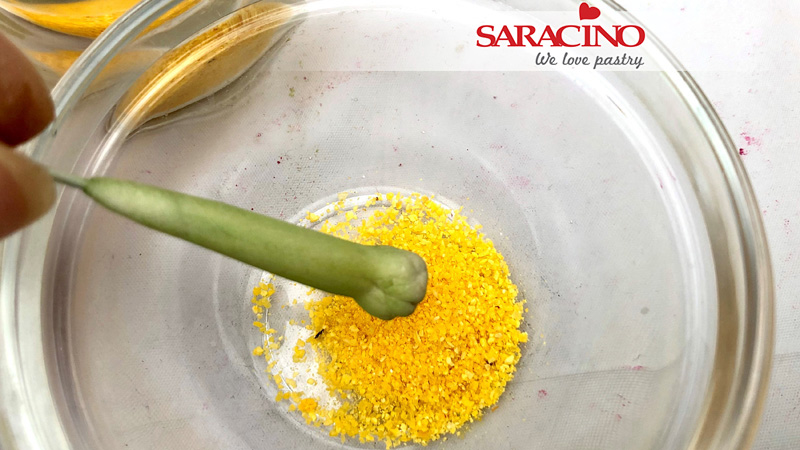
Dip the top of the pistil into yellow coloured semolina
Step 13
Now this resembles the pollen on top of the pistil
Step 14
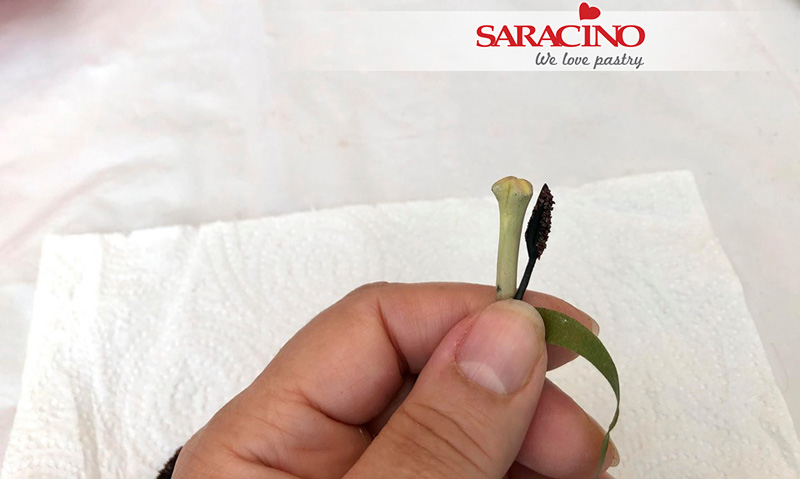
Tape the stamens to the pistil with ½ thickness florist tape
Step 15
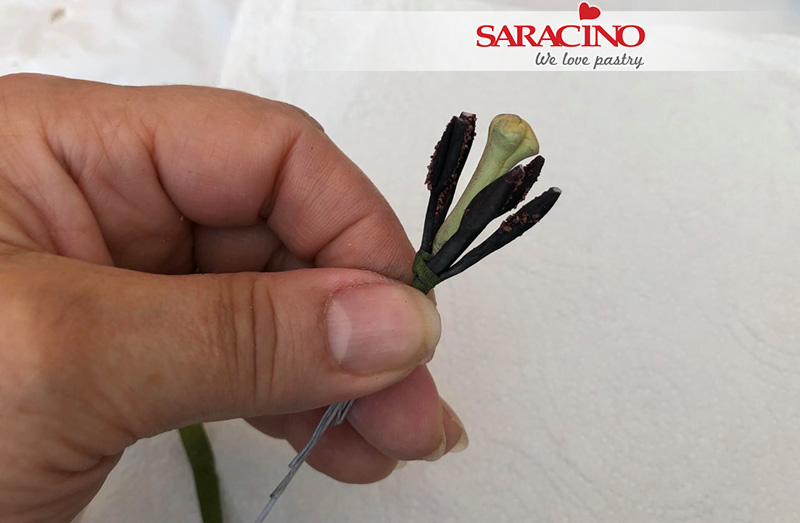
Tape all of the stamens to the pistil and set aside.
Step 16
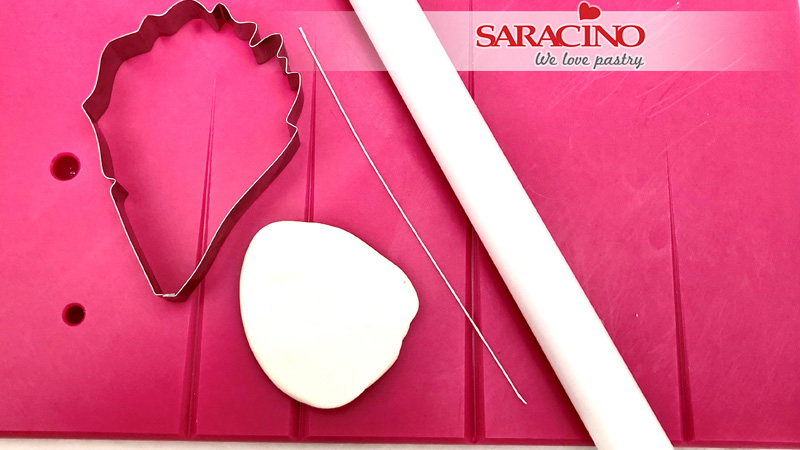
For the petals of the flower you need gumpaste and a ¼ length of a 26 gauge wire
Step 17
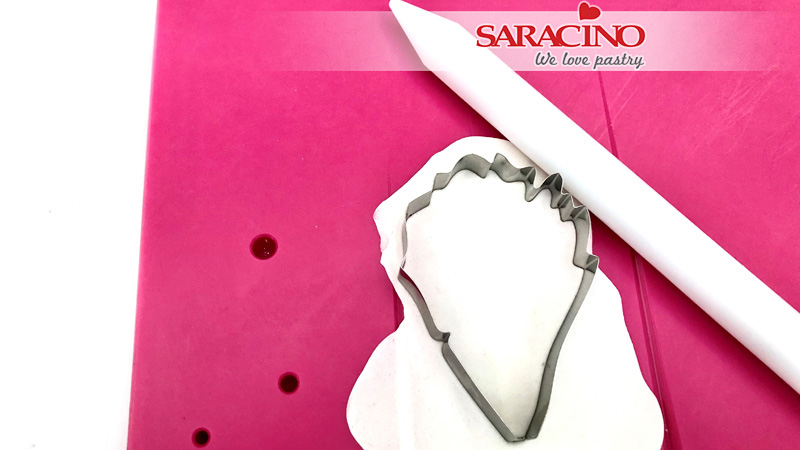
Roll out a piece of flower paste on the grove board and cut your petal shape. Make sure the centre of the petal is over one of the grooves in your board
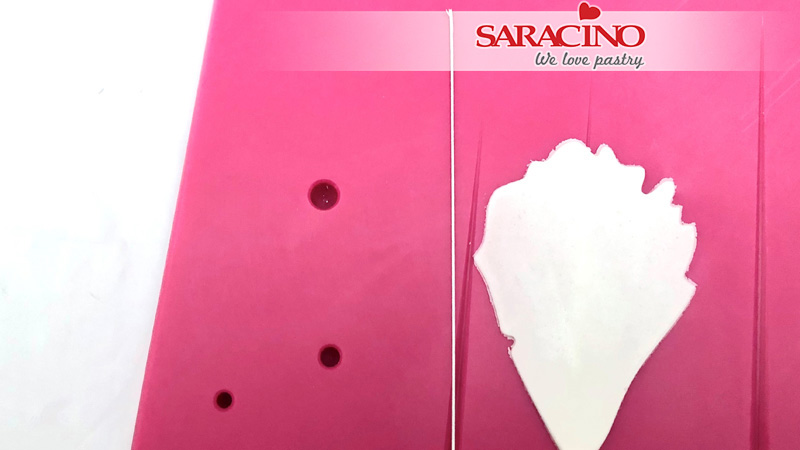
Step 18
Your petal should look like this
Step 19
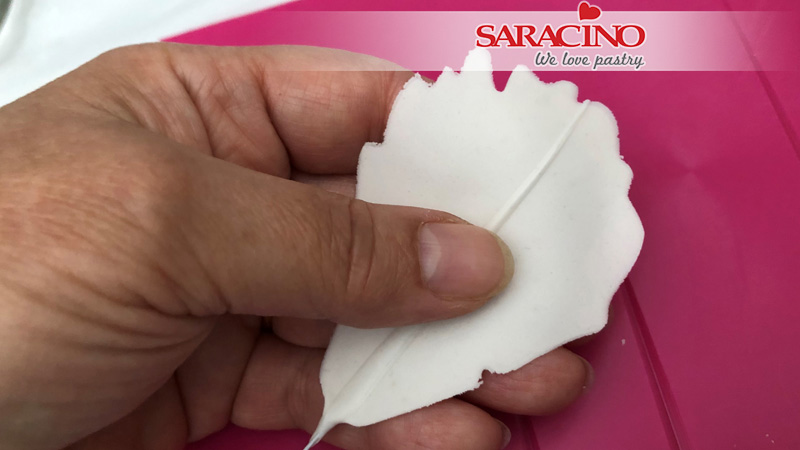
Insert the wire half way into the petal. A slow twisting motion helps to insert the wire
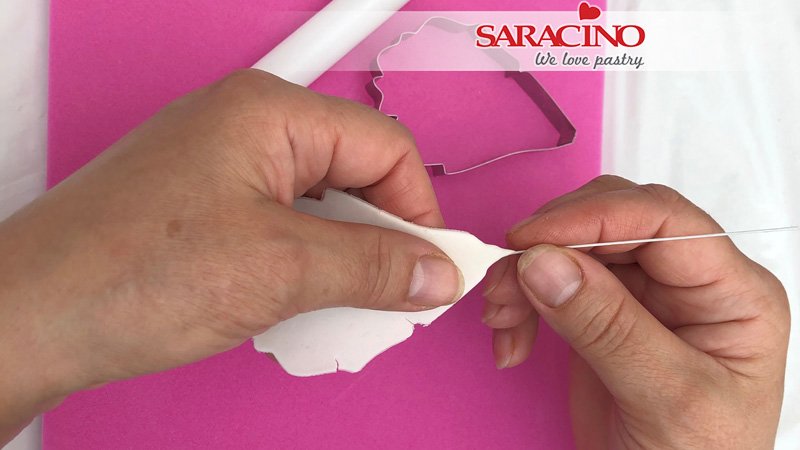
Step 20
Pinch gently the end of the petal to secure it to the wire
Step 21
Lay the petal on the parrot tulip veiner and press carefully to imprint the veins, but not to break the petal.
Step 22
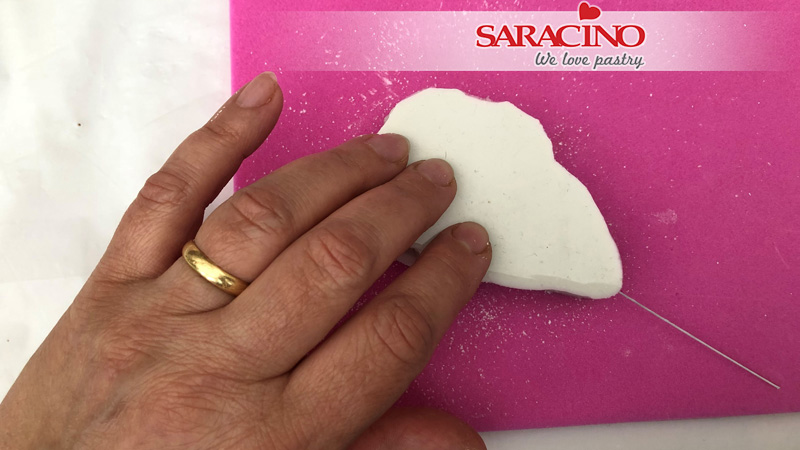
Carefully remove the petal from the veiner and place it on the foam mat.
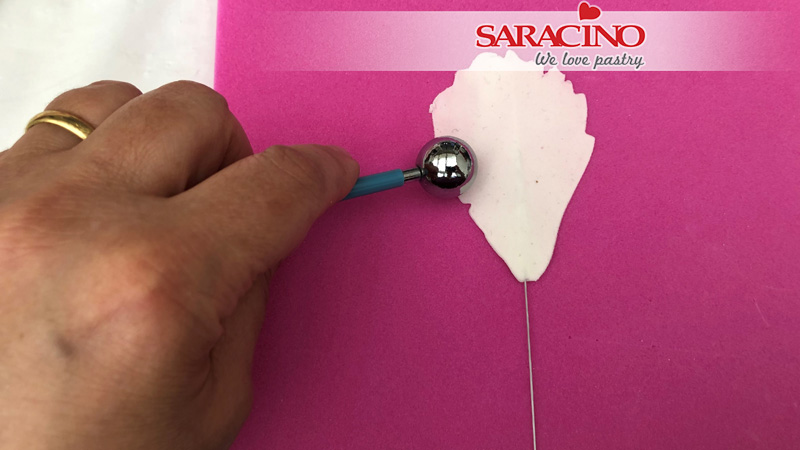
Step 23
Gently roll the ball tool over the edge of the petal – half on the foam mat half on the petal, thin the edges and slightly frill them as you are pressing on top of the petal.
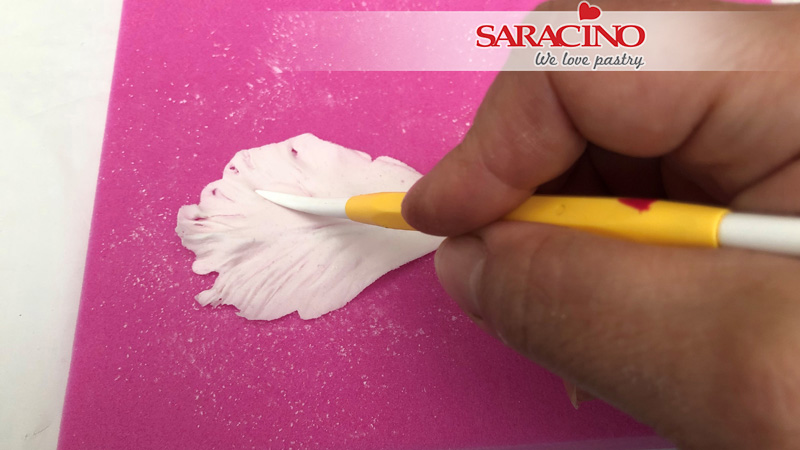
Step 24
Make gentle strokes on the inner side of the petal with the Dresden tool. As you pull inwards this will make the petal edges curl in slightly.
Step 25
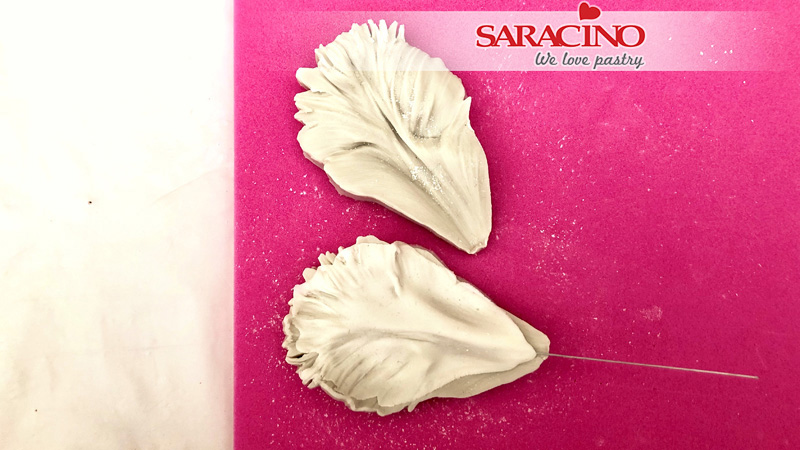
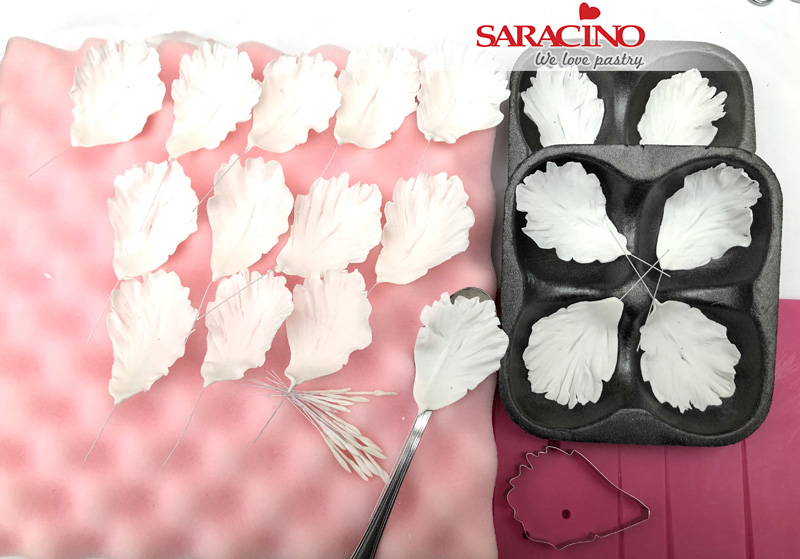
Make six petals for each flower you make. Leave them to dry on a foam shaper sponge or a clean foam fruit tray. Make sure you position the petals correctly during the drying process. You can reposition them now and again, to help them fit nicely when assembling them later.
Step 26
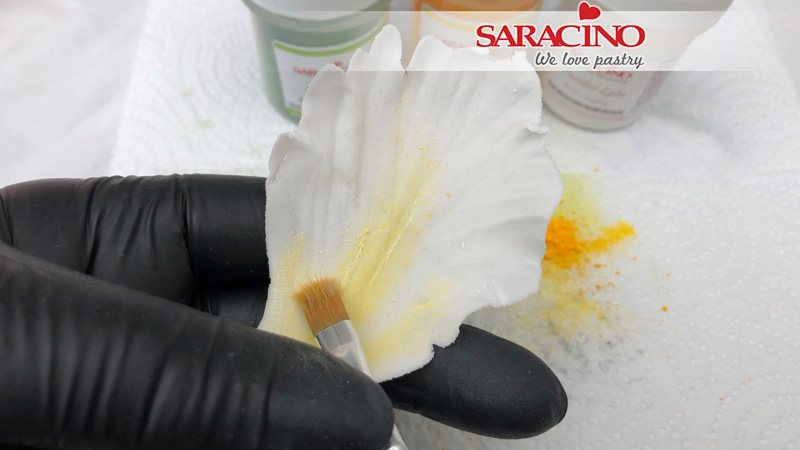
Take yellow colour and mix it with little bit of white dust colour. Use the pale yellow colour to dust the centre of the inner side of the petals.
Step 27
With green colour gently dust the centre of the outer side of the petals
Step 28
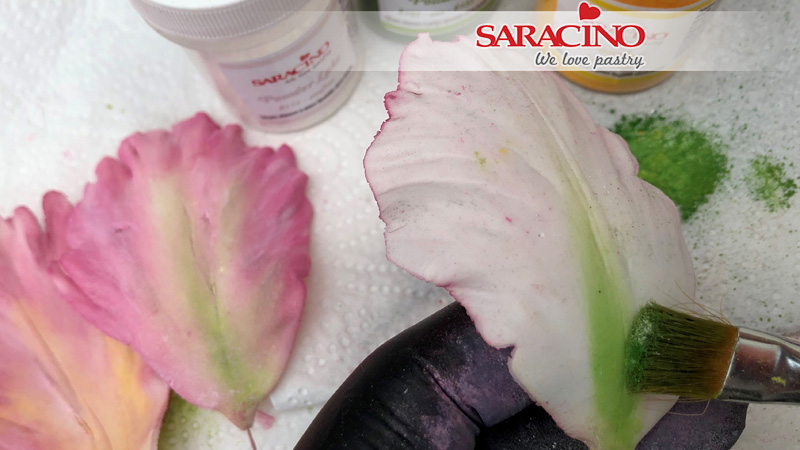
Mix together pink, violet, white and little bit of red dust colours to make a brighter pink colour, or you can also use a ready mix colour of your preference.
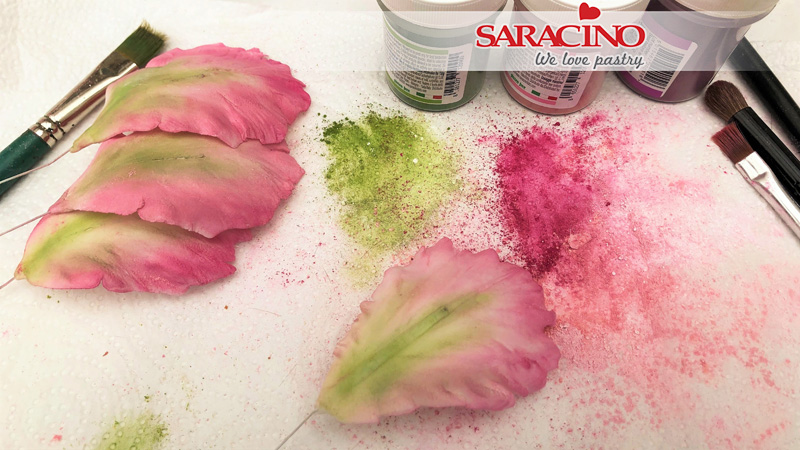
Step 29
Dust with bright pink food colour around the edges of each petal
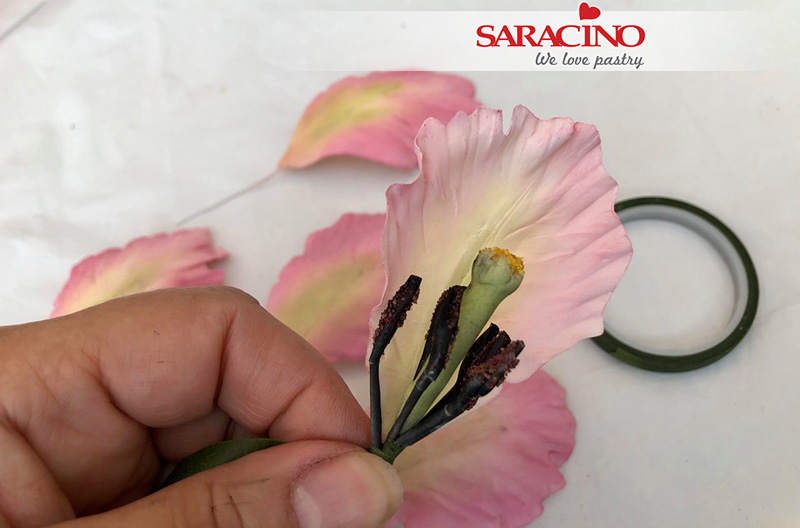
Step 30
Attach each petal closely to the base of the stamens and pistil and tape tightly with half width mid-green florist tape
Step 31
Place the three petals close together around the base of the stamens and tape them down the stem.

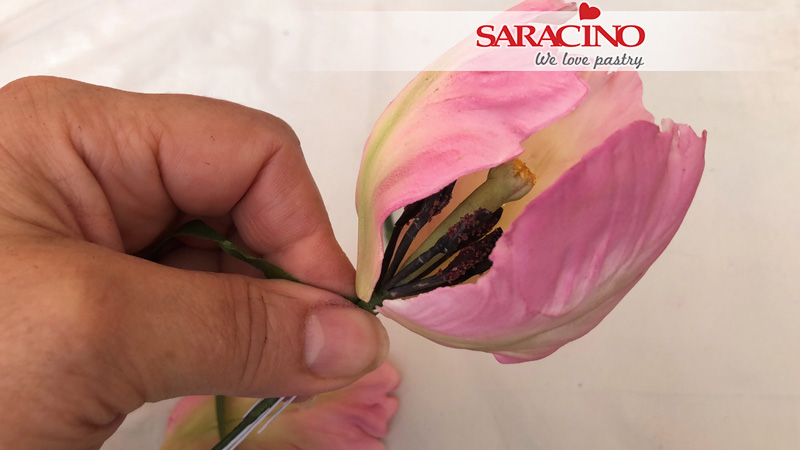
Step 32
Add the next three petals. Using half width florist tape, attach the petals, alternating with the first three, to complete the flower
Step 33
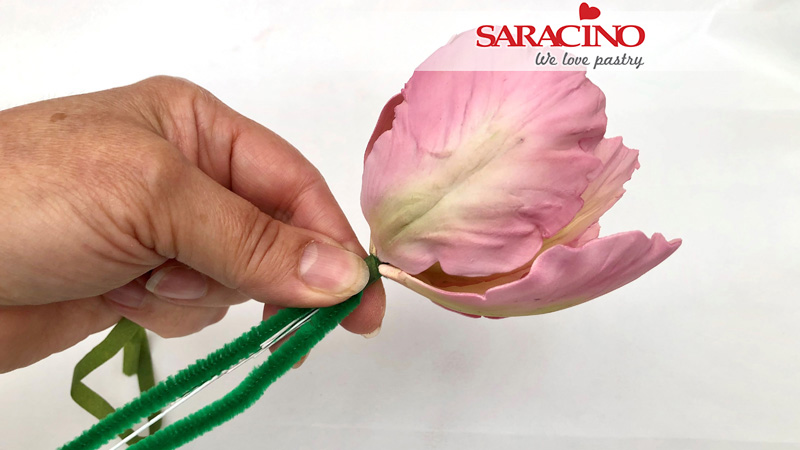
Use pipe cleaners to add to the main stem wire and tape them together using mid green florist tape.
Step 34
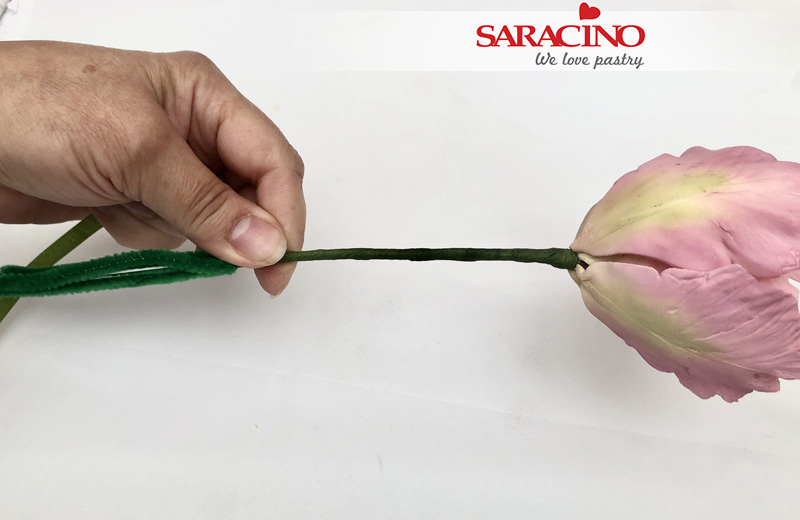
Tape down the pipe cleaners and wire. As this will add to the thickness of the stem and will make it look more natural.
Step 35
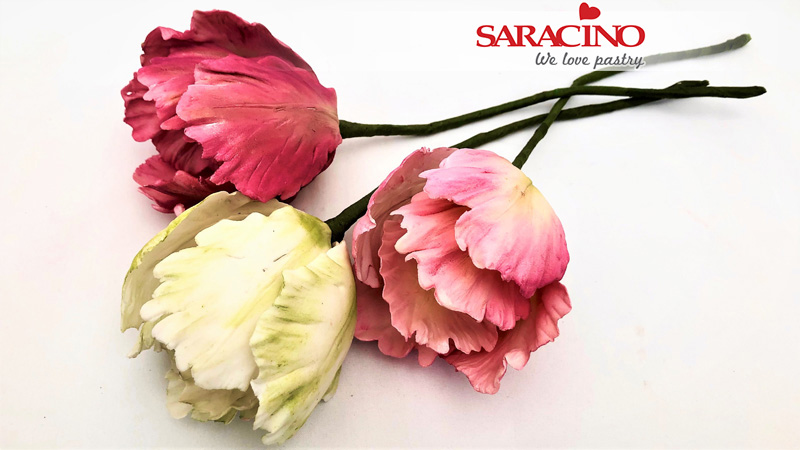
By using different dust colours, you can create different colour blossoms. Let Nature be your inspiration.
