


Author: Vicky Teather

Skill level: BEGINNERS
TOP TIPS:
If you don’t have cocoa butter you can use clear alcohol to create paint with edible dusts, just make sure you add a little edible varnish to the mix. This will stop the dust from shedding later. The varnish will set on your paintbrush and palette, so make sure to keep them covered with cling film to prevent it drying out as you work. Always clean your equipment straight away to avoid the varnish setting and ruining it.
Add White dust to the paint to create an opaque colour.
You will need:
- Saracino modelling paste: 320g White
- Saracino Dust Colour: Black, Brown, Pink, Purple, Skin Tone, White
- Saracino Cocoa Butter
- Round polystyrene dummy, 3” deep: 3”
- Wooden skewer: 2
- Craft knife
- Dresden tool
- Scissors
- Boiling water
- Mug
- Paint Palette
- Paintbrushes
Step 1
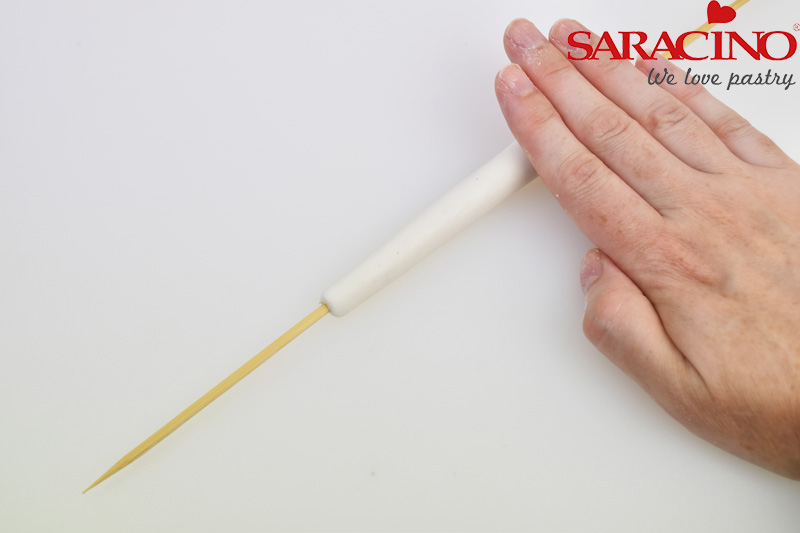
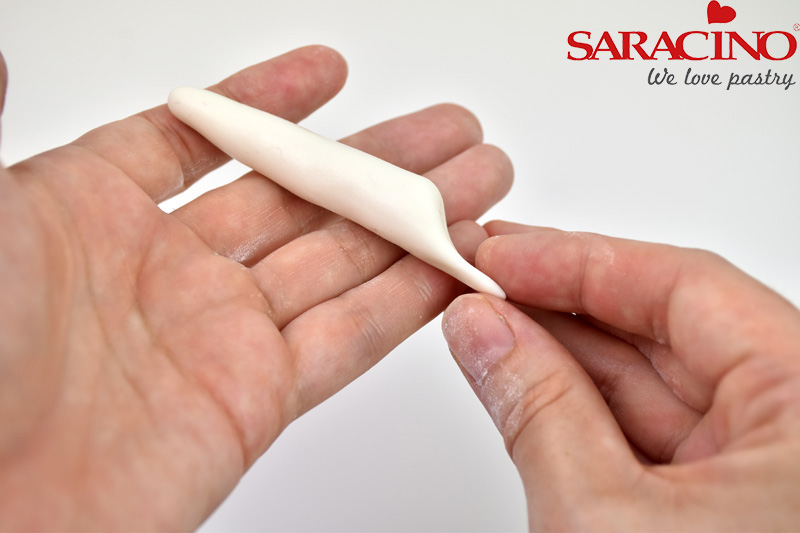
Roll out 15g of White modelling paste into a 10cm long tapered sausage. Insert a wooden skewer through the centre. Repeat for the second leg.
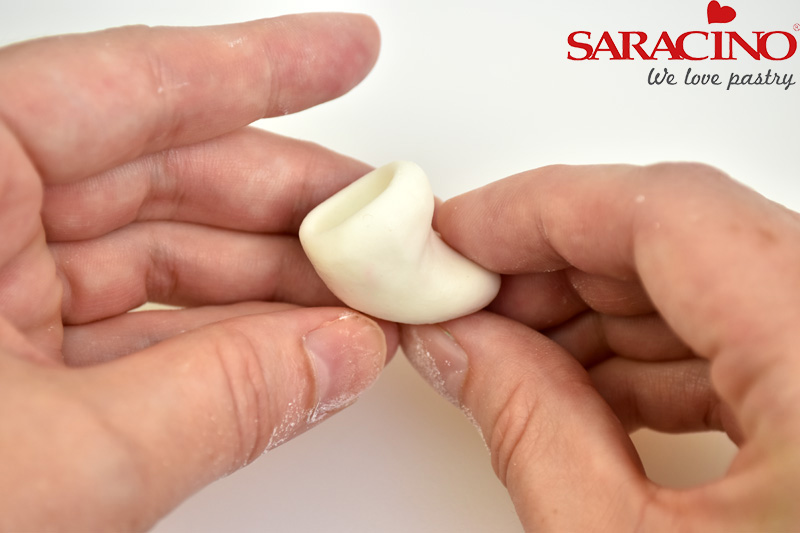
Step 2
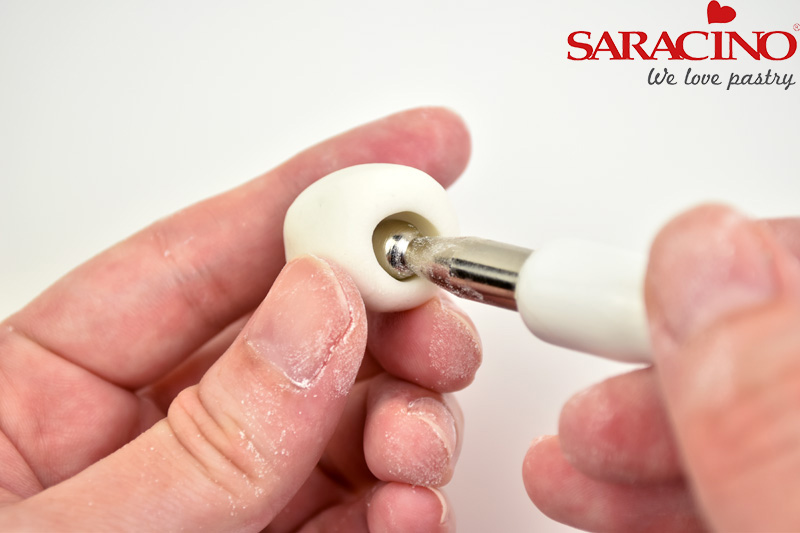
For the boots. Shape 10g of White modelling paste into a ball. Push a medium ball tool into the centre and form a 5-8mm deep well.
Step 3
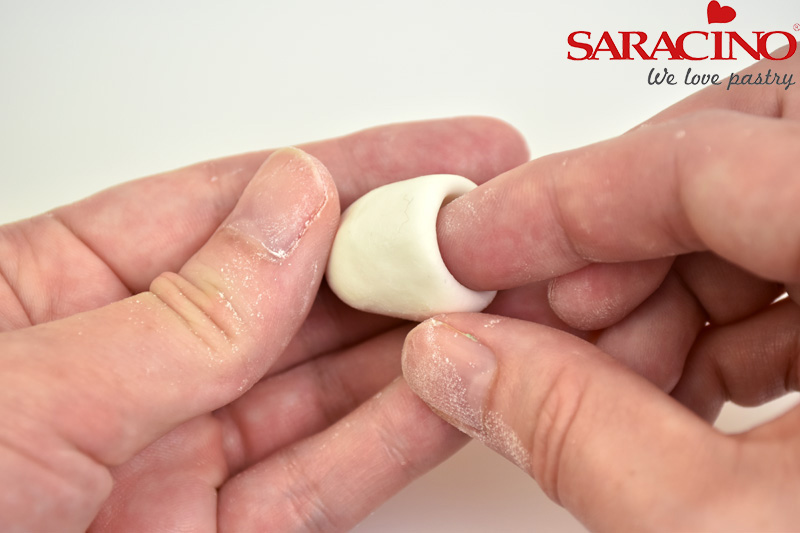
Place a finger inside the well and gently pinch around the edge to thin and shape the paste.
Step 4
To make the toes, pinch the opposite end of the ball into a right angle. Make two cuts on the top edge of the boot above the toes. Repeat to make a second boot.
Step 5
Fit the boot to the end of the leg. Use the wide end of the dresden tool to create folds and grooves in the boots. Use the pointed end to draw the line for the soles. Add two small balls to each boot for the buttons.
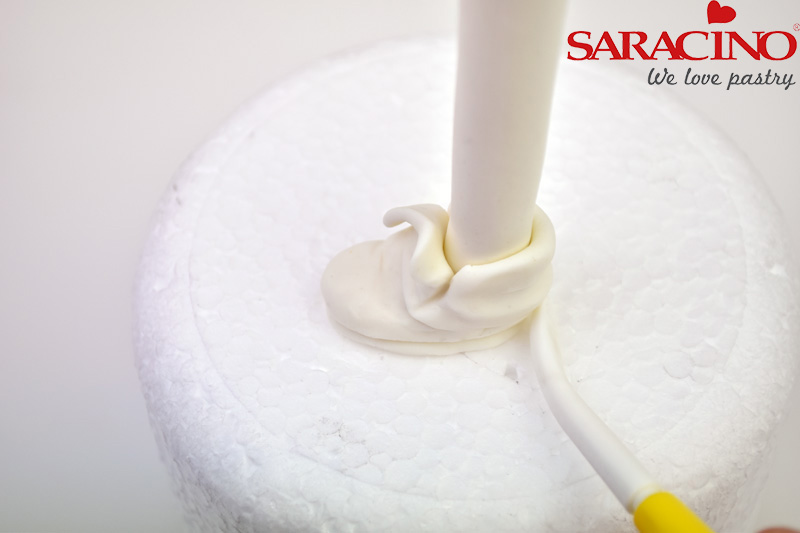
Step 6
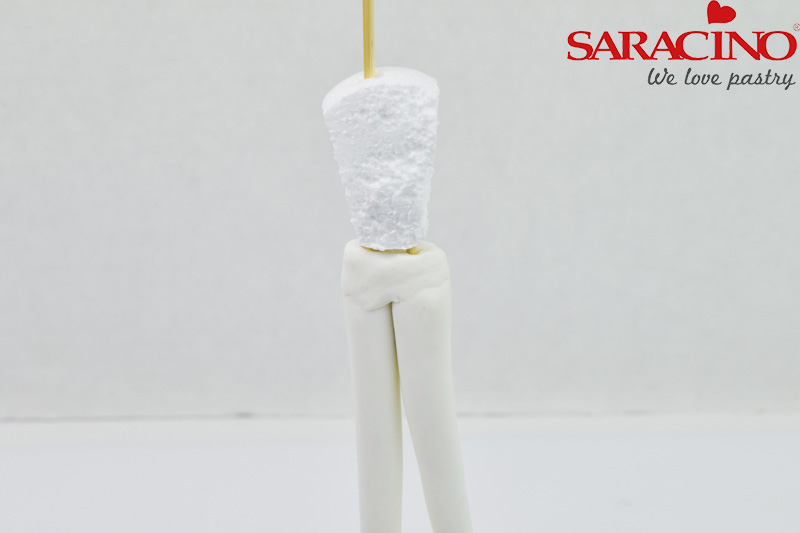
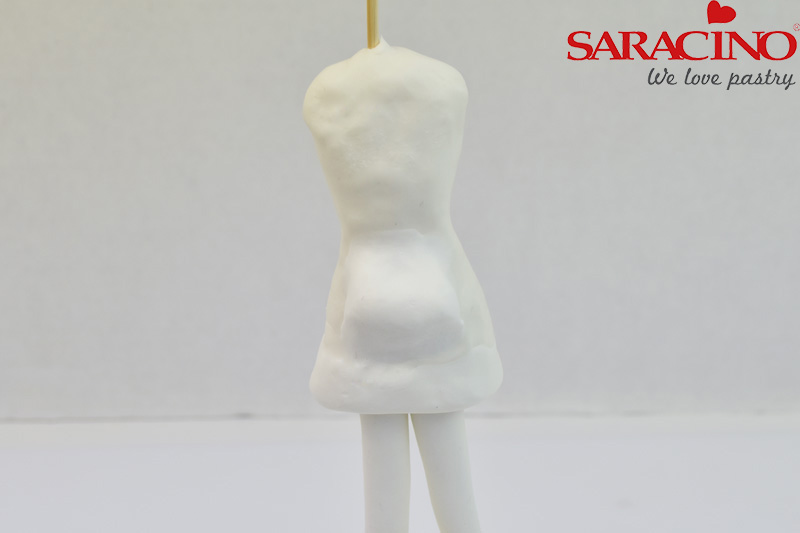
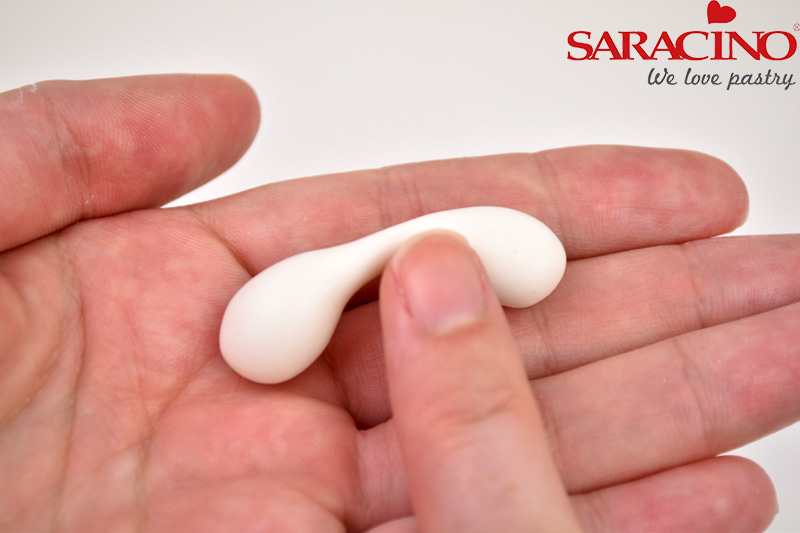
Join the legs together where they meet with 10g of modelling paste. Cut a piece of polystyrene into a 5cm x 2cm x 2cm cuboid. Push down over the wooden skewer.
Step 7
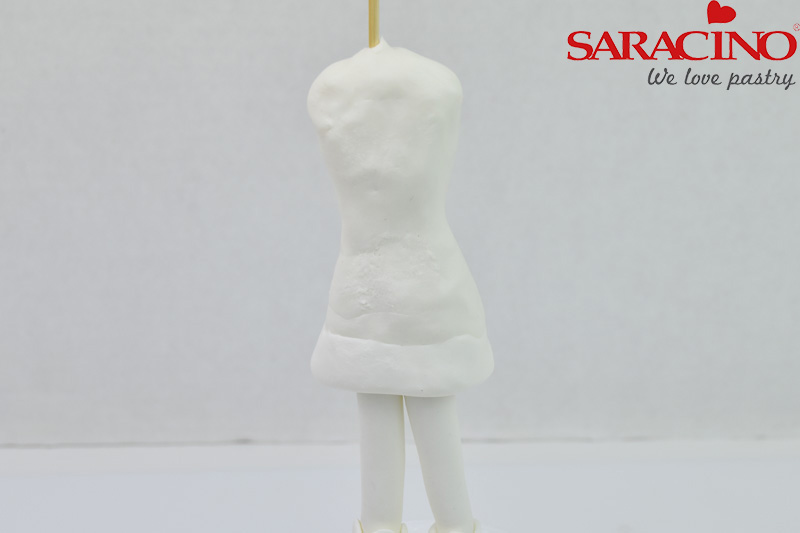
Use around 100g of White modelling paste to shape the body and skirt around the dummy and legs.
Step 8
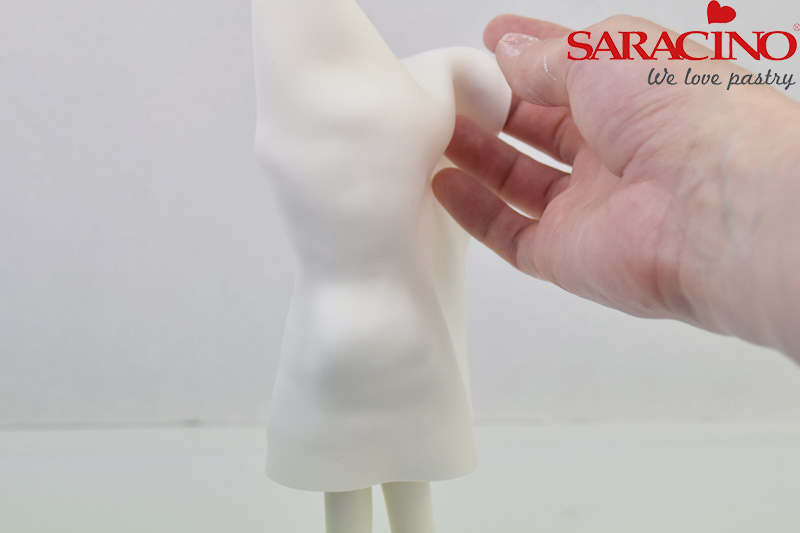
Shape 10g of White modelling paste into a cylinder. Cut in half length ways and glue in place on the lower edge of the body. Use your fingers to smooth the cylinder to blend it into the body. Use your fingers and/or a silicone smoothing tool to smooth the surface of the body.
Step 9
Roll out 40g of White modelling paste thinly. Cut a straight line along one side of the paste. Paint glue over the surface of the body and skirt. Gently lift the paste and line up the straight edge with the bottom of the body/skirt. Use your hands to shape the paste around the body. Trim away the excess paste at the back.
Step 10
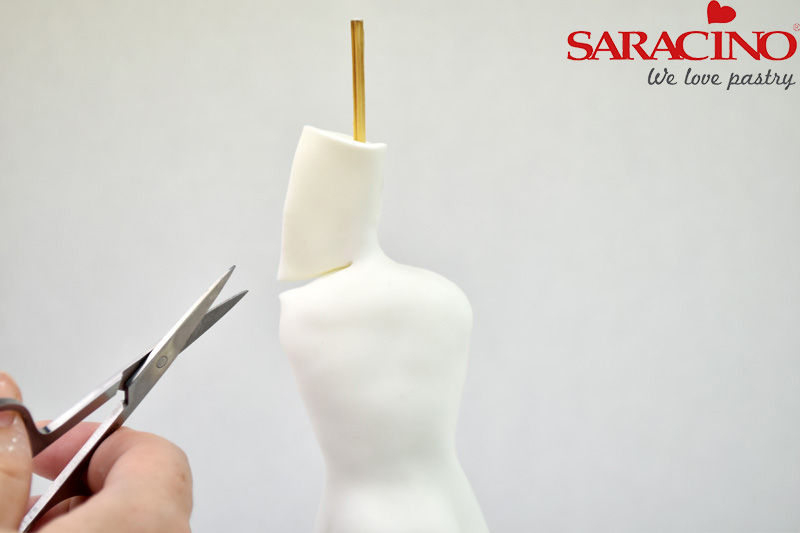
Press the paste together at the top and use a pair of scissors to cut the paste around 1mm above the shoulders. Remove the excess paste and neaten the cut edge with your fingers.
Step 11
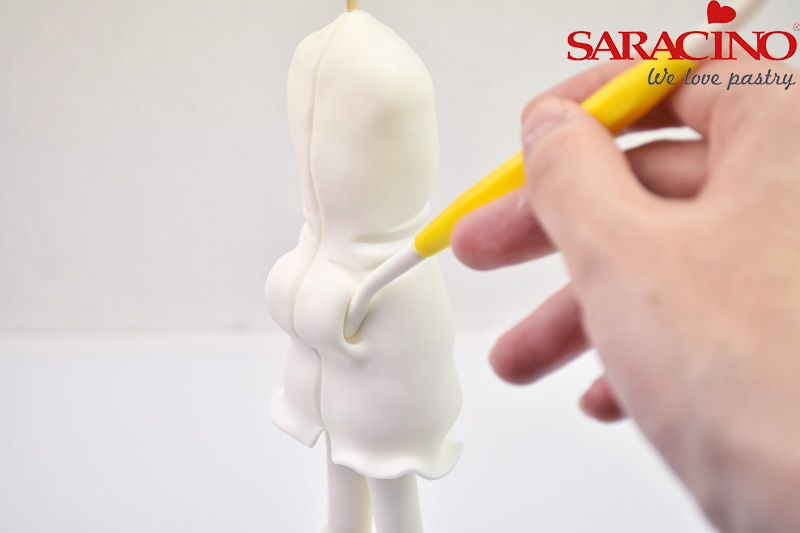
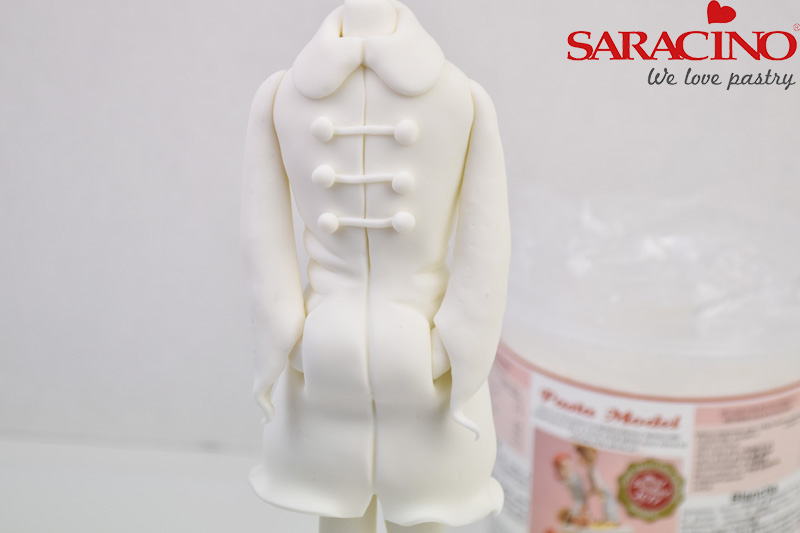
Draw a line down the centre of the coat and add creases to the waist with the dresden tool. Use your fingers to curl and wave the bottom edge of the coat. Press the wide end of the dresden tool into the sides of the pockets to open up the space a little.
Step 12
Shape 8g of White modelling paste into a 5.5cm long tapered sausage. From the wide end, gently pinch the paste into an elongated point.

Step 13
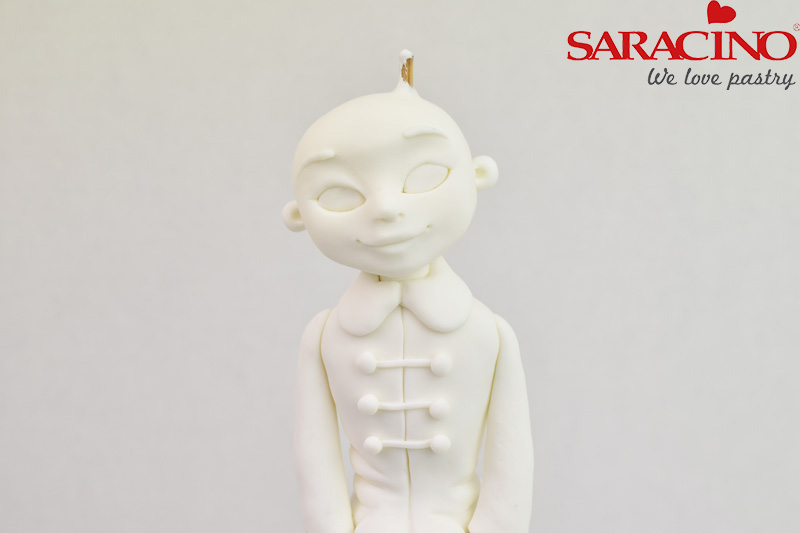
Roll two pea sized cylinders from White modelling paste and glue inside the pockets on the coat. Glue the arms in place. Glue a large pea sized cylinder of White modelling paste at the top of the coat for the neck.
Step 14
Roll 5g of White modelling paste into a ball. Place the side of your finger over the centre of the ball and rock back and forth to create a narrow-centred sausage.
Step 15
Flatten with your fingers and then glue in place around the neck. Add three thin strips and six small balls to either end for the coat buttons.
Step 16
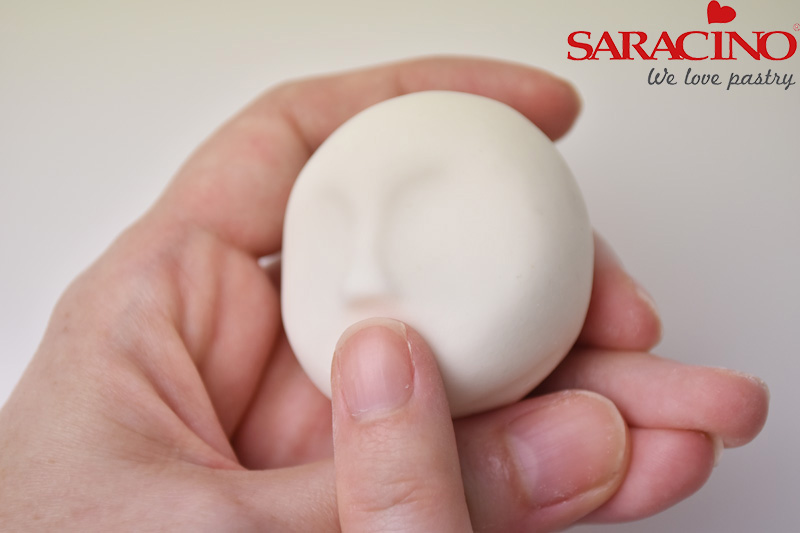
Shape 50g of White modelling paste into a ball. Place the side of your finger half way up the ball and gently rock back and forth to create a groove. Press your fingertips into the paste 5mm apart and gently press to form the eye sockets. Smooth away any harsh lines created by your fingers. Push upwards from below the eye sockets to create a small bump for the nose. Use your fingers to shape the bump and bridge of the nose. Press a small ball tool into the bottom of the nose for the nostrils.
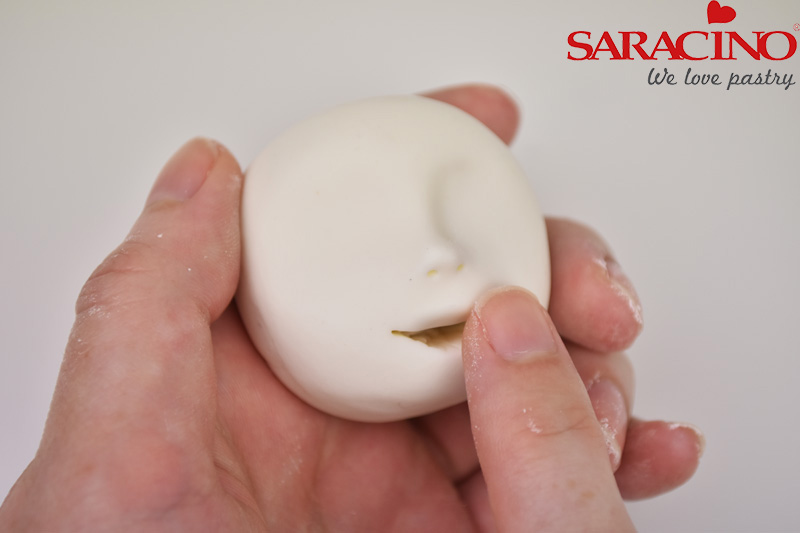
Step 17
Use the craft knife to cut a 1.5cm slightly curved line between the nose and the chin. Use the knife to prize open the mouth. Smooth the upper and lower cut edges with your fingers. Push the top lip upwards.
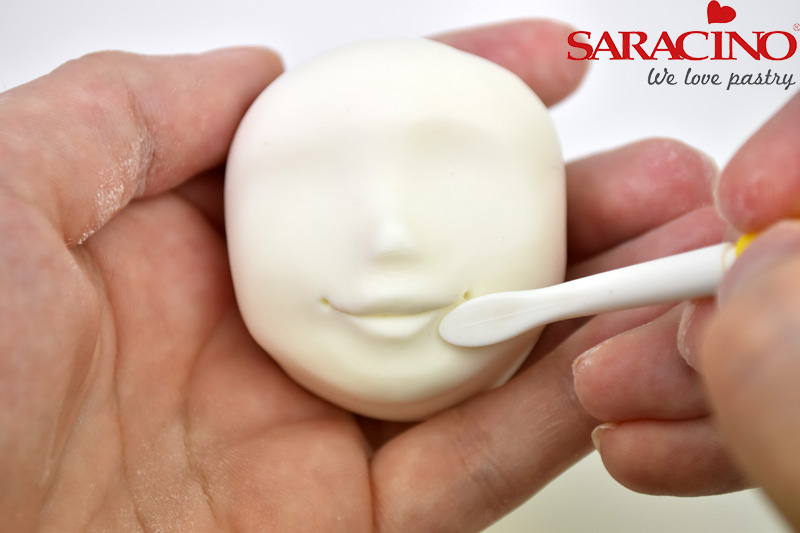
Step 18
Use the dresden tool to push the paste underneath the mouth up towards it, thus creating a bottom lip. Use the dresden tool to shape around the mouth and add dimples with a small ball tool.
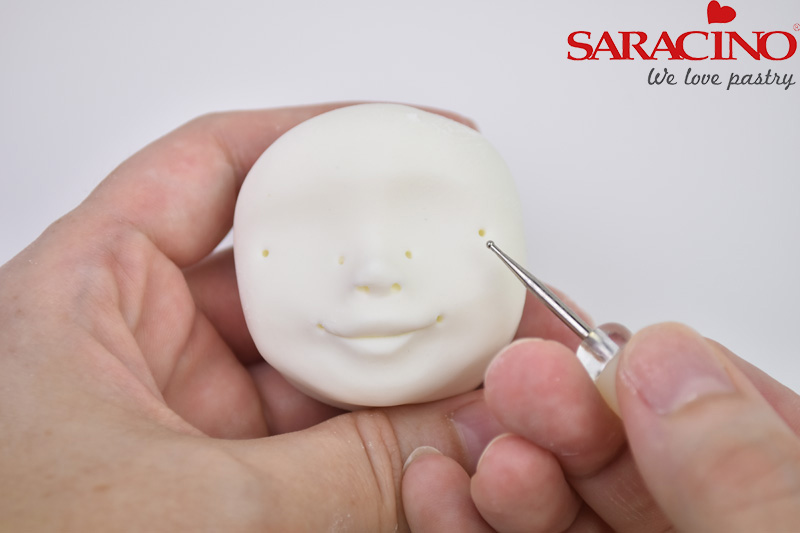
Step 19
Press a ball tool into the eye sockets to mark the inner and outer corners of the eyes.
Step 20
Cut a line between the inner and outer dots as a guide. Then cut a curved line above and below the central line. Remove the paste.
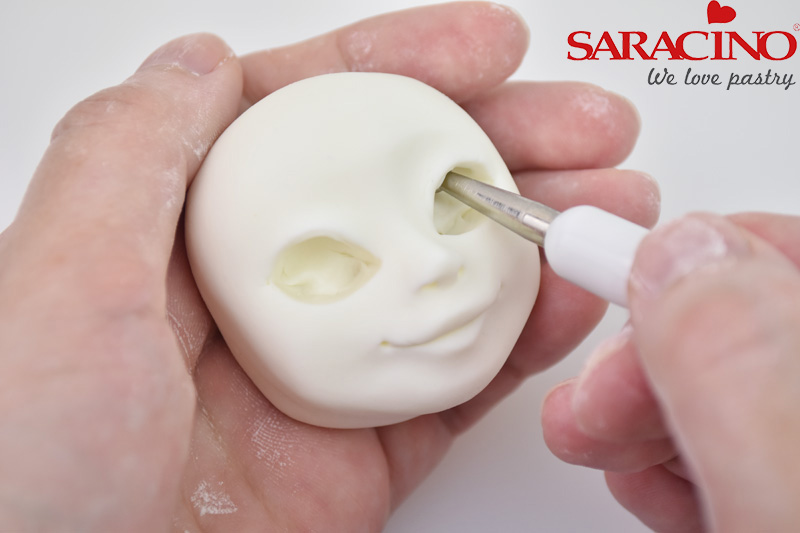
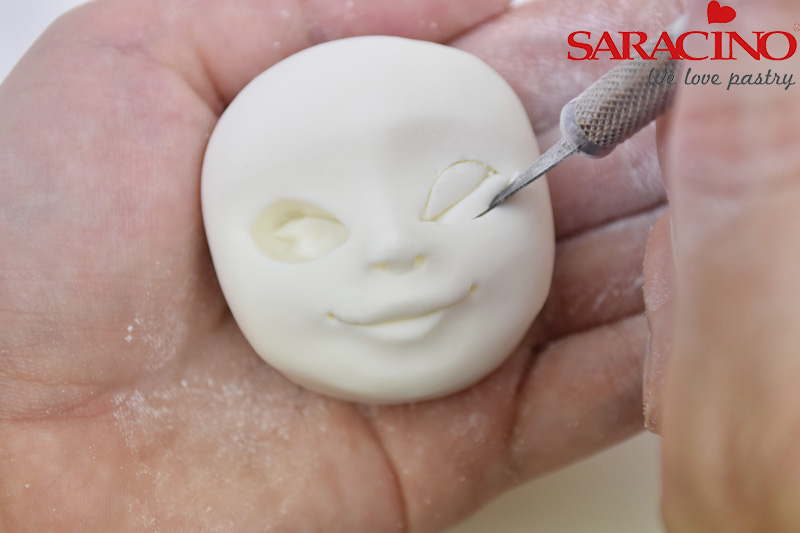
Step 21
Neaten the edges of the eyes with a ball tool. Place the tool under the upper eye lid and gently pull up and outwards to stretch the paste. Fill the eyes with two balls of White modelling paste.
Step 22
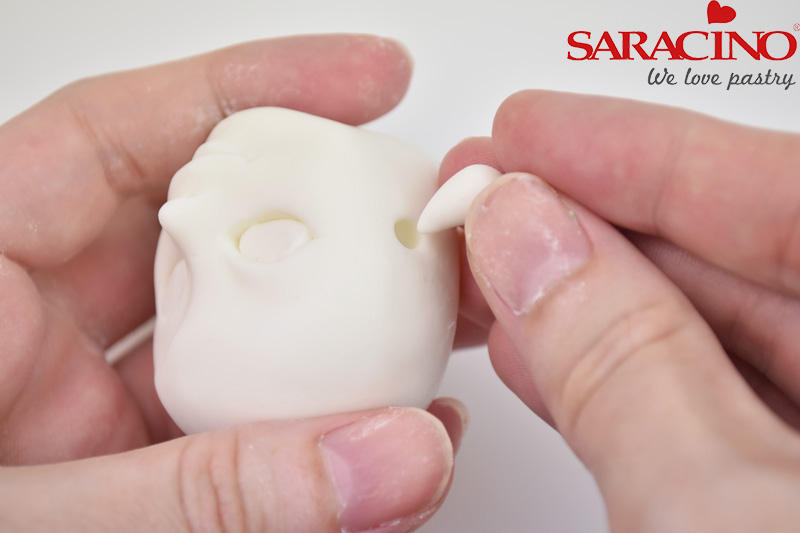
Push a ball tool into the sides of the head, around the same height as the bottom of the eyes. Roll two small cones from White modelling paste and fit inside the holes.
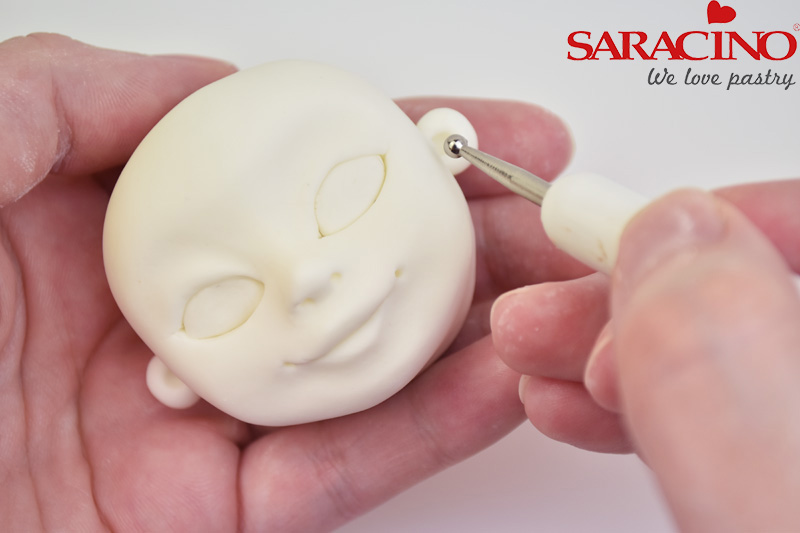
Step 23
Press a ball tool into the centre of the ear and towards the head. Roll two very fine tapered sausages of White modelling paste and glue in place above the eyes.
Step 24
Glue the head onto the body with it leaning ever so slightly to the left.
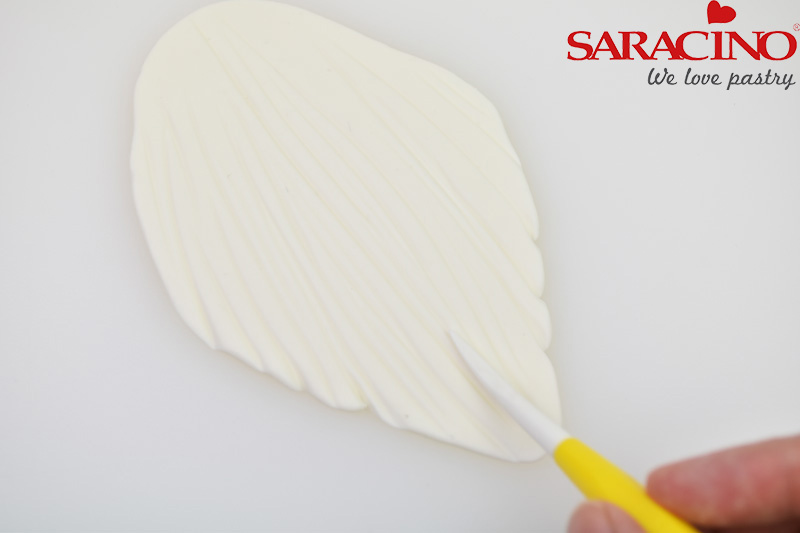
Step 25
Roll out 25g of White modelling paste thinly as per the photo. Draw lines down the length of the paste using the dresden tool.
Step 26
Paint glue over the back of the head and place the sheet of paste in place. Work upwards towards the crown of the head, fitting the paste as you go. Once you get to the top, pinch the paste together and use the scissors to trim away the excess. Use your hands to neaten the cut edge.
Step 27
Add more strands of hair around the front of the hairline by rolling long cones of paste, flattening them and drawing on hair lines. Finish with two chunkier cones along the front of the hair.
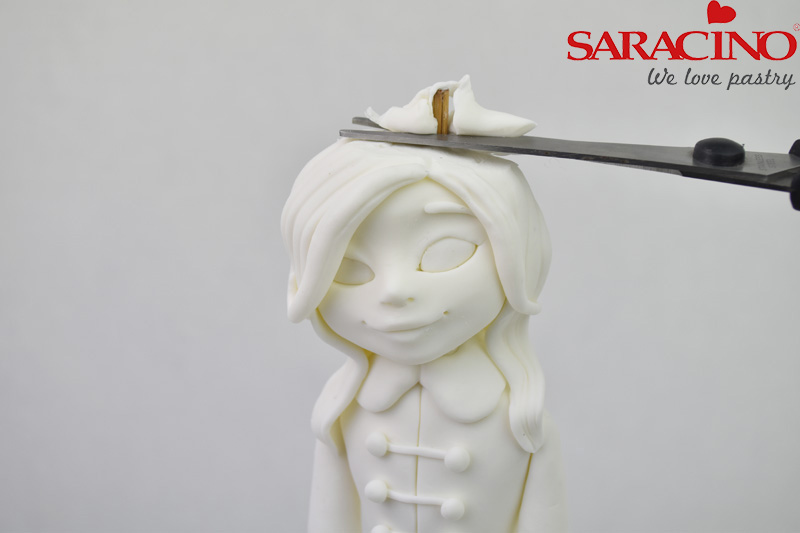
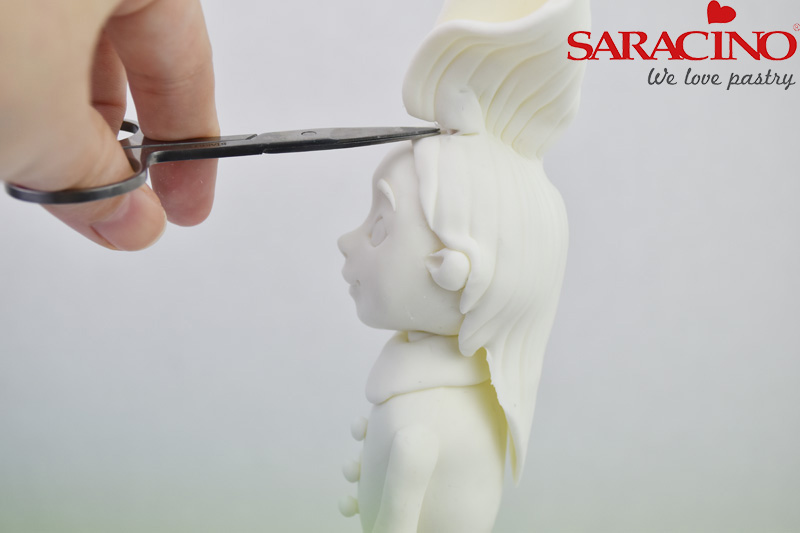
Step 28
Use a pair of scissors to cut away the top of the hair, around the tip of the skewer, to create a flat surface.

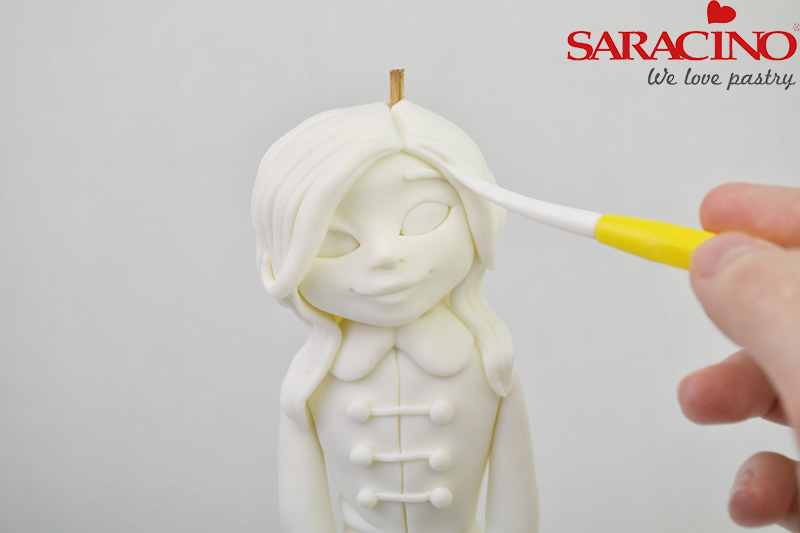
Step 29
Roll out 10g of White modelling paste and cut out a circle with the 5cm circle cutter. Glue in place over the flattened section of the head. Roll a cone from 15g of White modelling paste and glue on top of the circle. Tease the point of the cone into a bend. Add a thin sausage of White modelling paste to hide the join line.
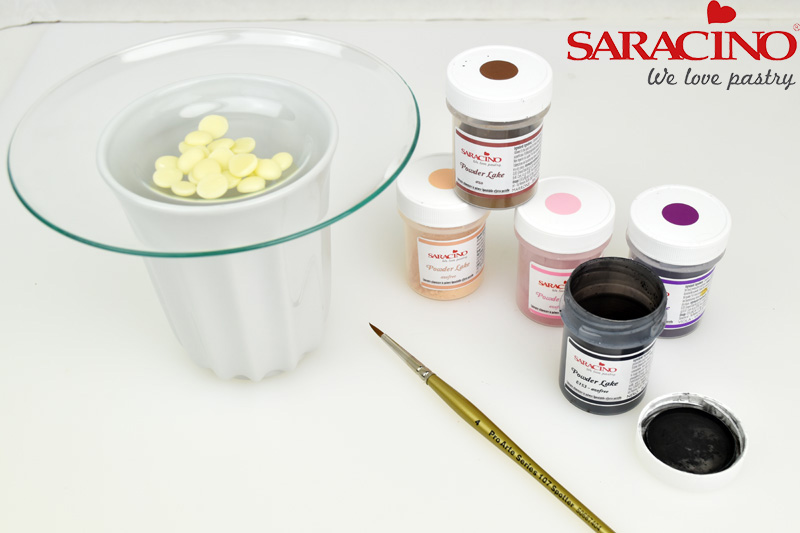
Step 30
Fill a mug half way with boiling water. Place the paint palette on top and add 5g of cocoa butter. Allow the cocoa butter to melt. Remove from the top of the mug and replace with a second paint palette. Add a small amount of the dust colour and mix a little of the melted cocoa butter in to form a paint.
Step 31
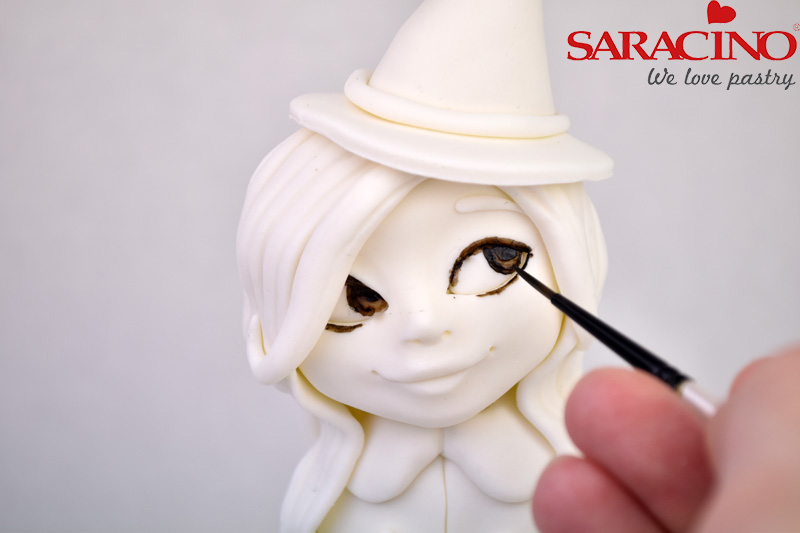
Using a fine 0 paintbrush, paint the eyes and eyelashes with Brown paint, mixed with a little white. The outer edge and top of the eye should be darker brown. Don’t worry about neatness, you can fix any smudges later by painting over it.
Step 32
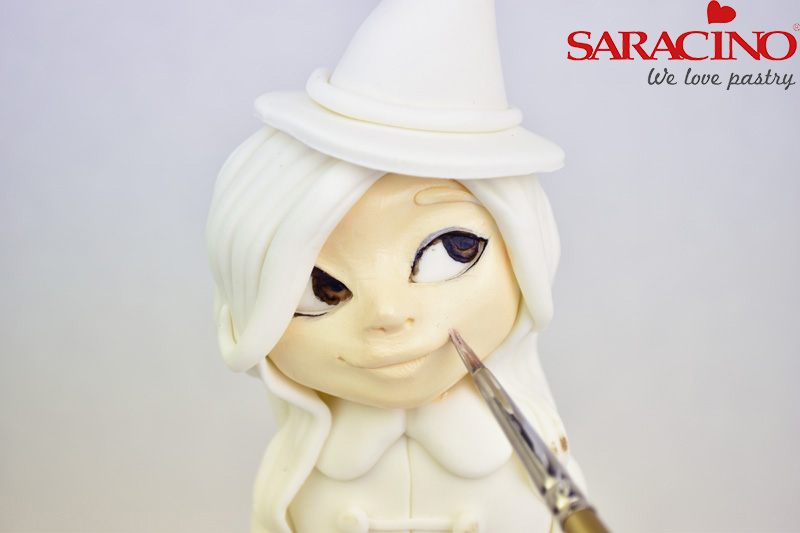
Mix Skin Tone dust with White to create a pale flesh colour. Paint the face and wrists.
Step 33
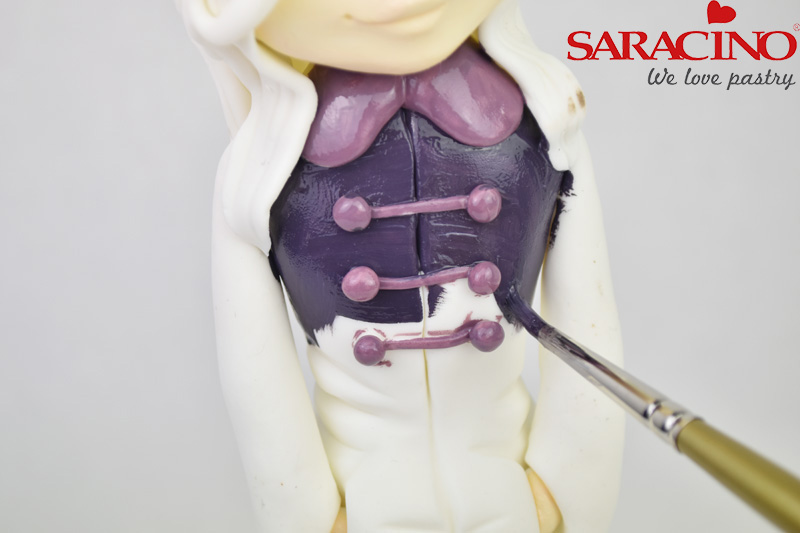
Mix Purple and White to form a paint. Paint the hat. Mix a little Pink in to the paint to form a pinker shade. Paint the rim around the hat and the buttons and collar on the coat. Paint the rest of the coat with the Purple paint.
Step 34
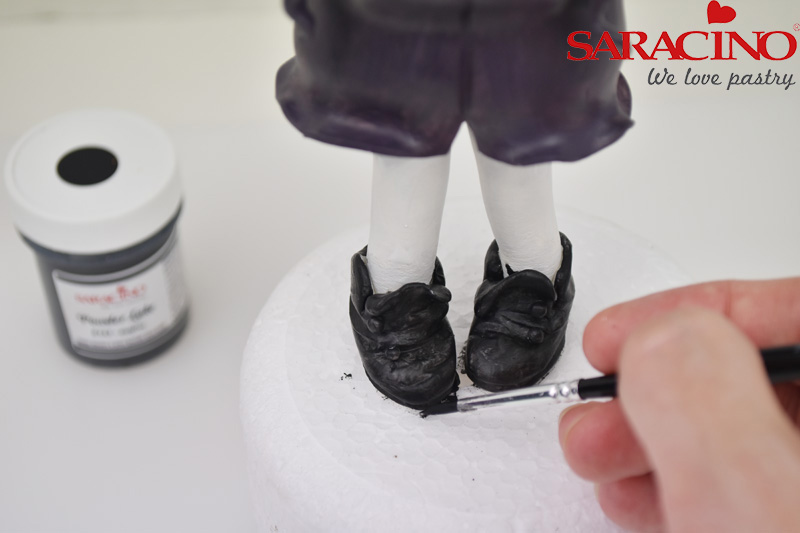
Paint the legs with a pale grey paint (White with a touch of Black) and the boots with Black paint.
Step 35
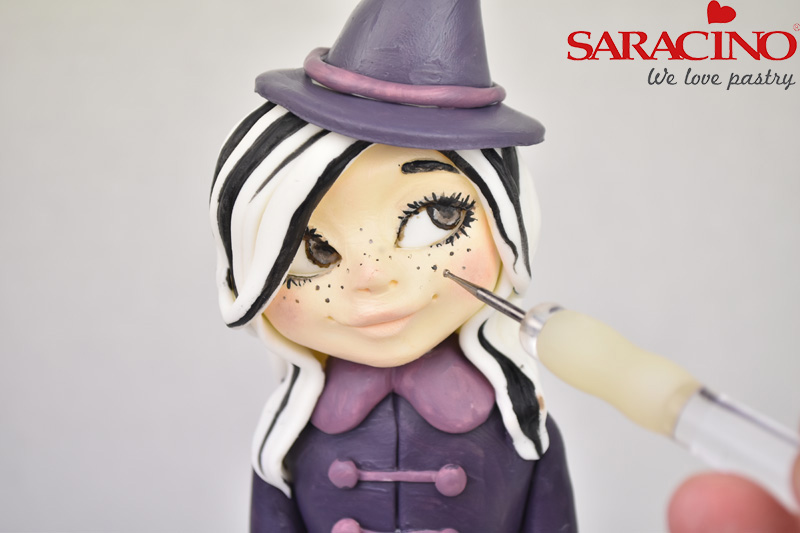
Paint Black streaks in the hair, eyelashes and the eyebrows. Dust the cheeks, nose and lips with Pink dust colour and a soft paintbrush. Dip a small ball tool into the paint and use to create freckles on the face. Add a dot of White to each eye as the highlight.
