


Author: Melanie Williamson
Skill level: BEGINNERS
TIPS:
Improvise with what tools you have available. Don’t have a small ball tool? Use a cocktail stick! Don’t have a small circle cutter? Use an icing tip!
If you use cocktail sticks, or anything else inedible, don’t forget to tell the recipient of your models!
You will need:
- Modelling paste used:
- Brown
- White
- Pink
- Light green
- Black
- Water and paintbrush for gluing
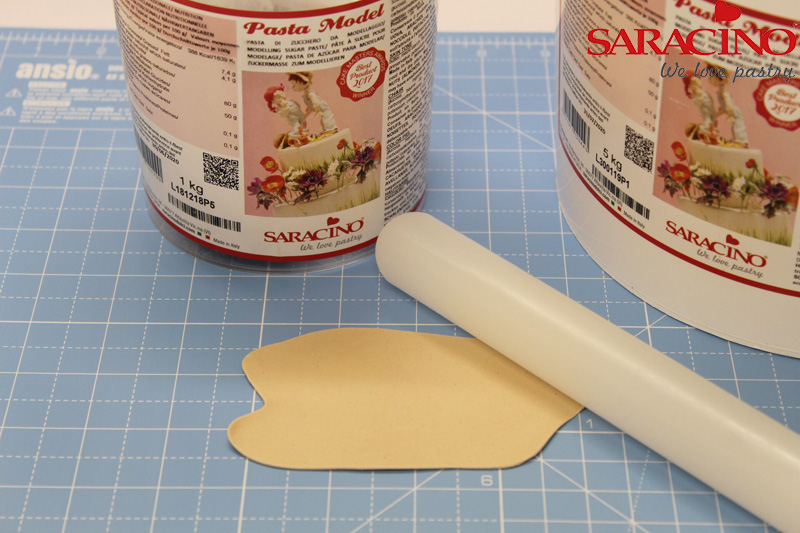
- Rolling pin
- Dresden tool
- Veiner tool
- Ball tools in several sizes
- Heart cutter (approx 4cm high)
- Petal cutter (approx 4cm high)
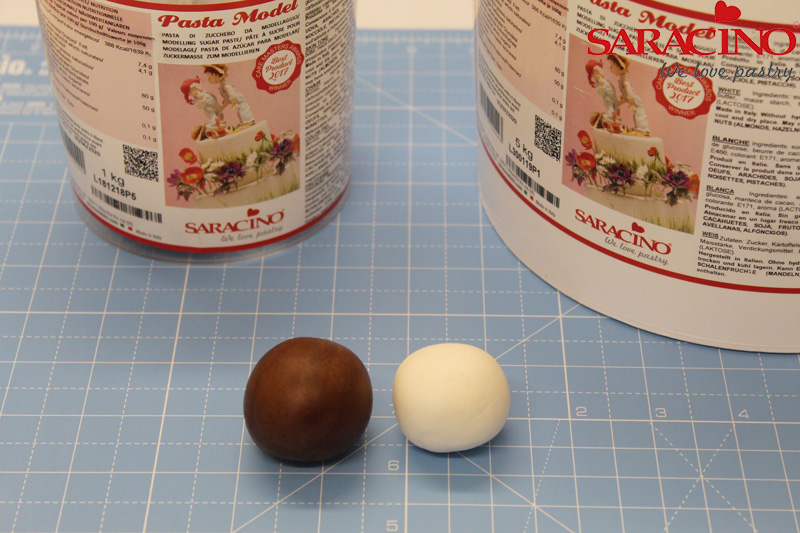
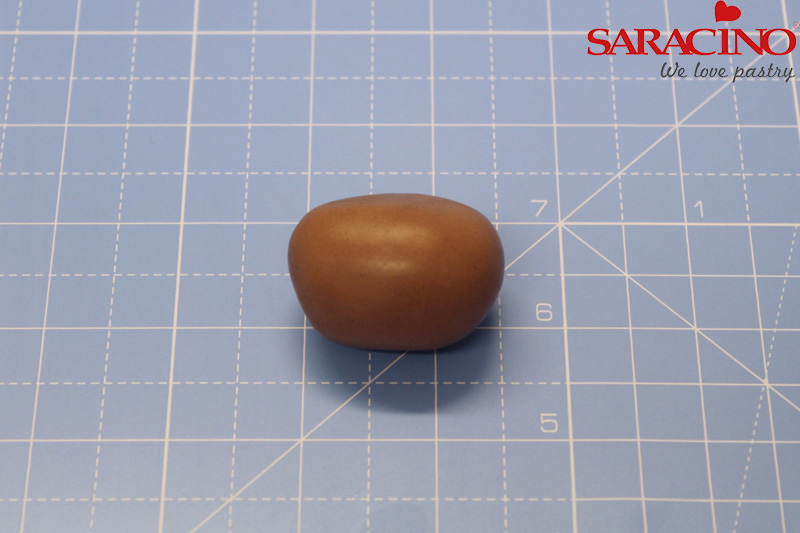
Step 1
Take 40g of brown modelling paste and mix with 25g white modelling paste to create a lighter brown
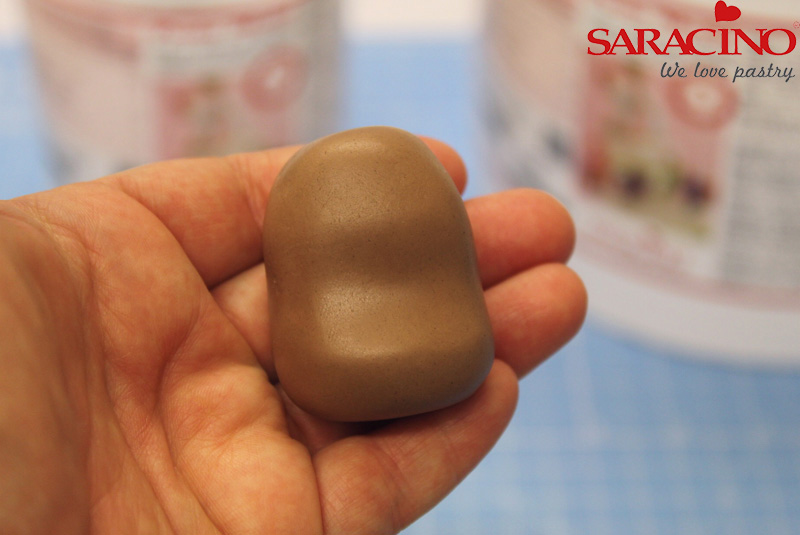
Step 2
Use 35g if this and roll into a cone shape before shaping a ‘waist’ indent with the side of your hand
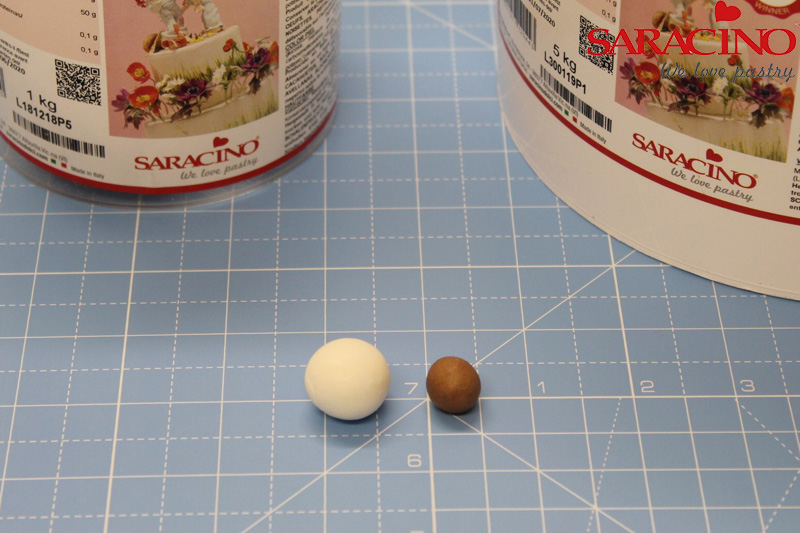
Step 3
Now make a lighter brown using 5g of white paste and a tiny bit of brown modelling paste. Mix well.
Step 4
Roll out this light brown modelling paste
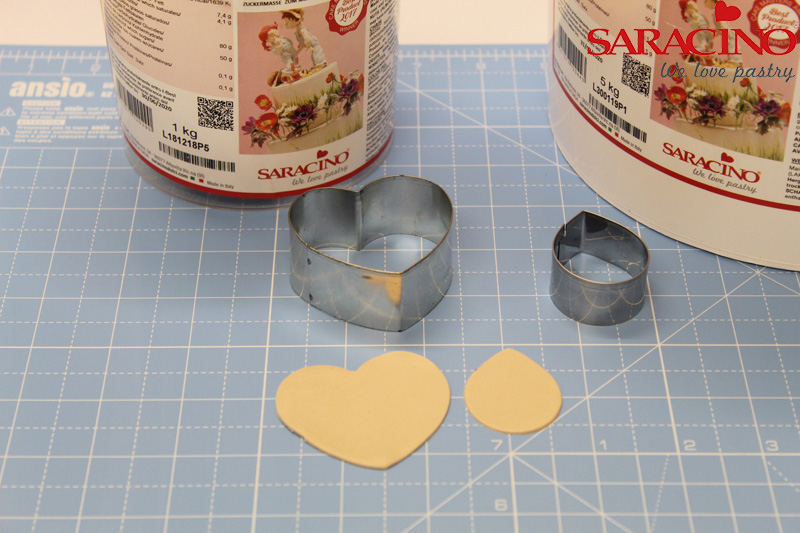
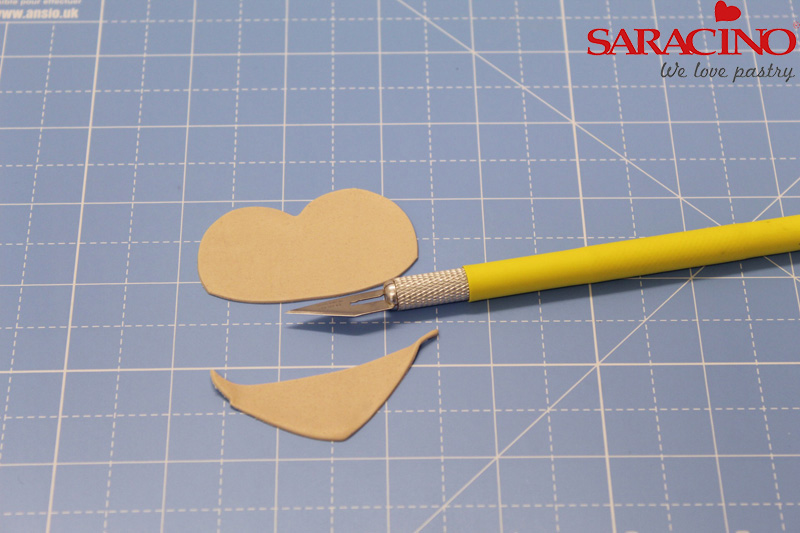
Step 5
Cut out 2 shapes using the petal cutter and the heart cutter. Set the heart shape to one side for use later
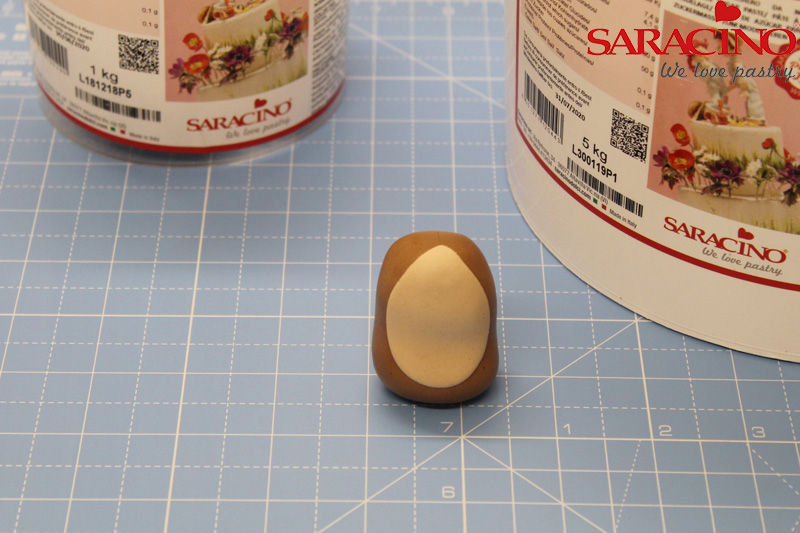
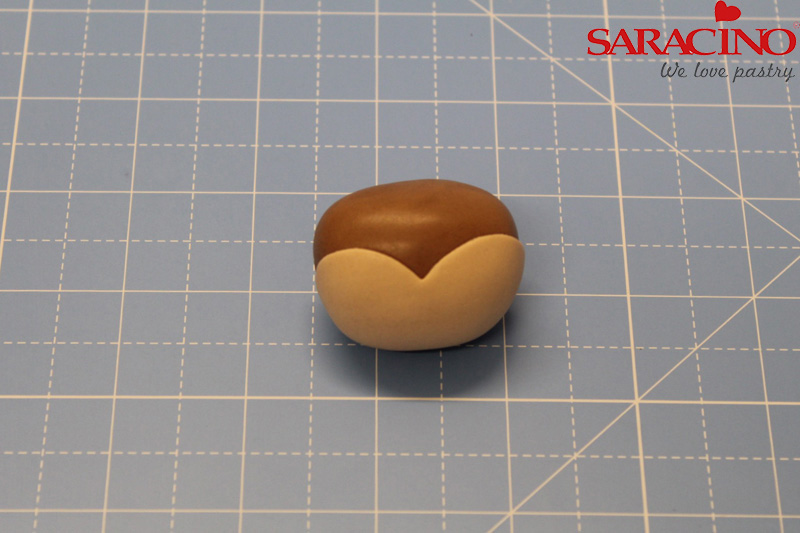
Step 6
Place the petal shape onto the body and smooth the edges with your finger
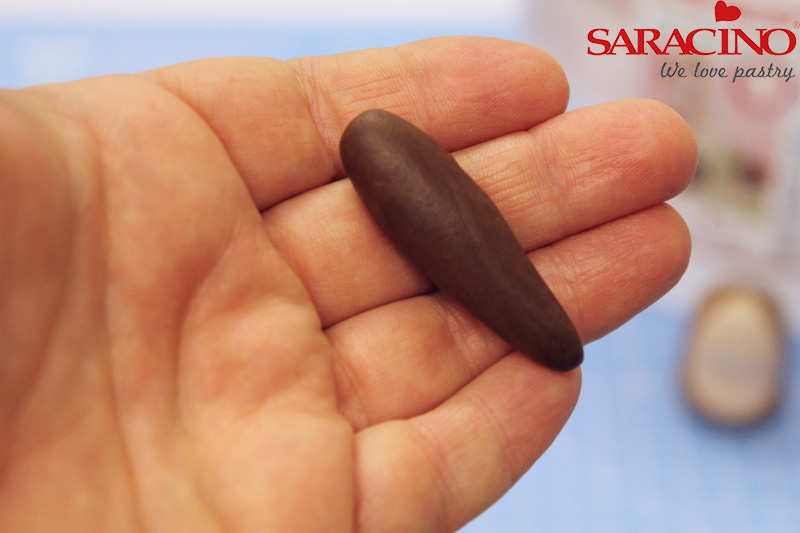
Step 7
Take 5g of brown modelling paste and form into a pointed sausage as shown
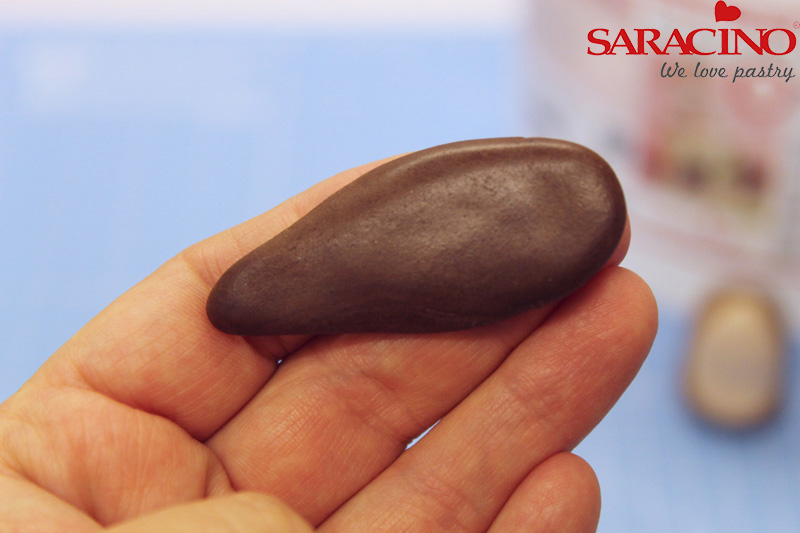
Step 8
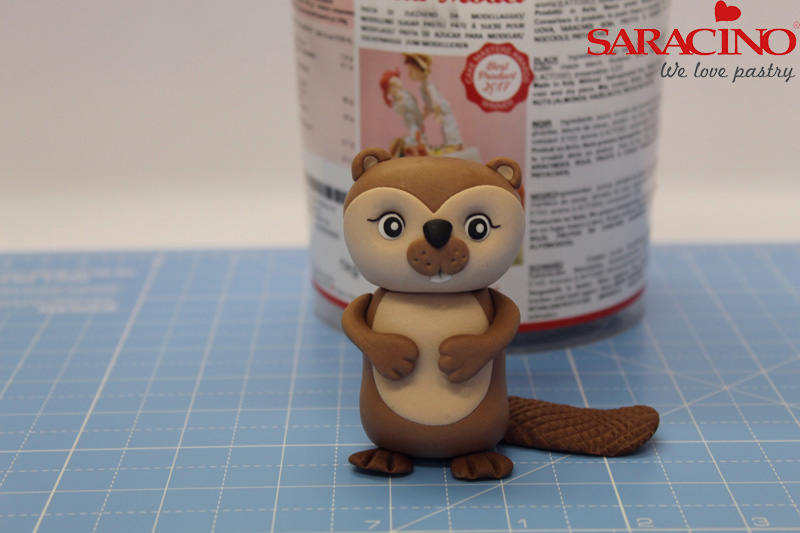
Flatten and smooth this to create the beaver tail
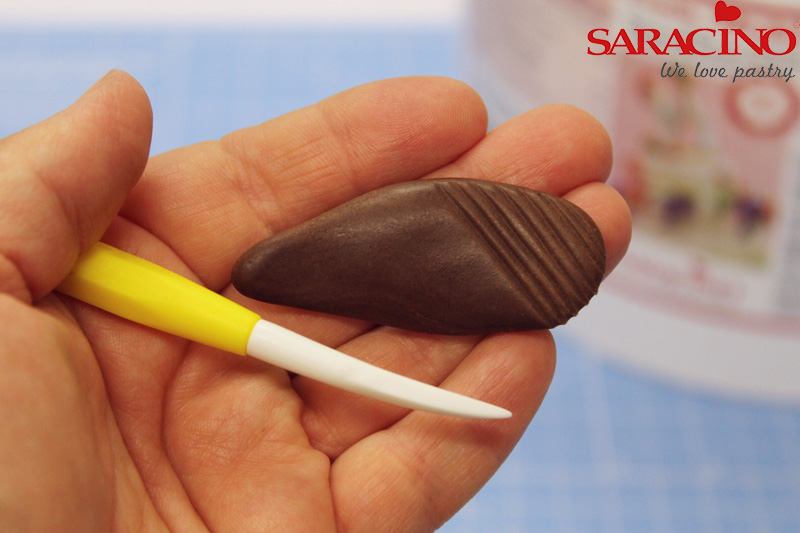
Step 9
Use the veiner tool to create a striped pattern in the tail
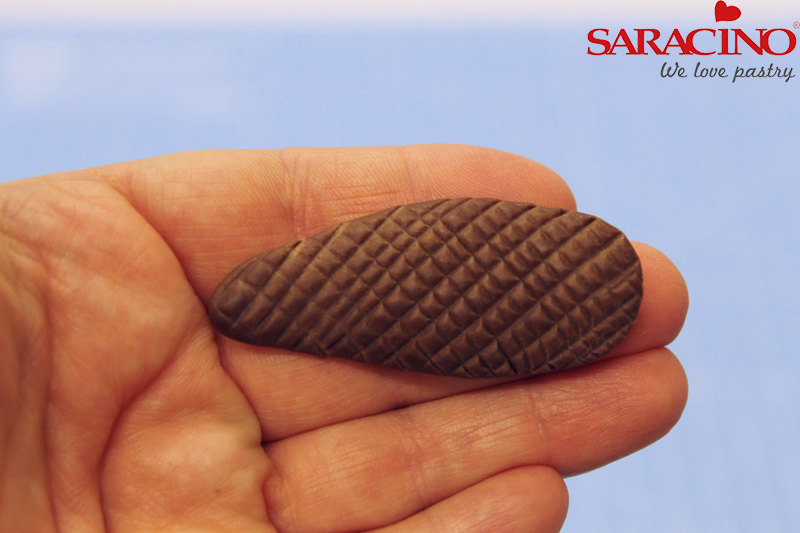
Step 10
Continue same technique in opposite direction to create a criss cross pattern and attach this to the beaver’s body
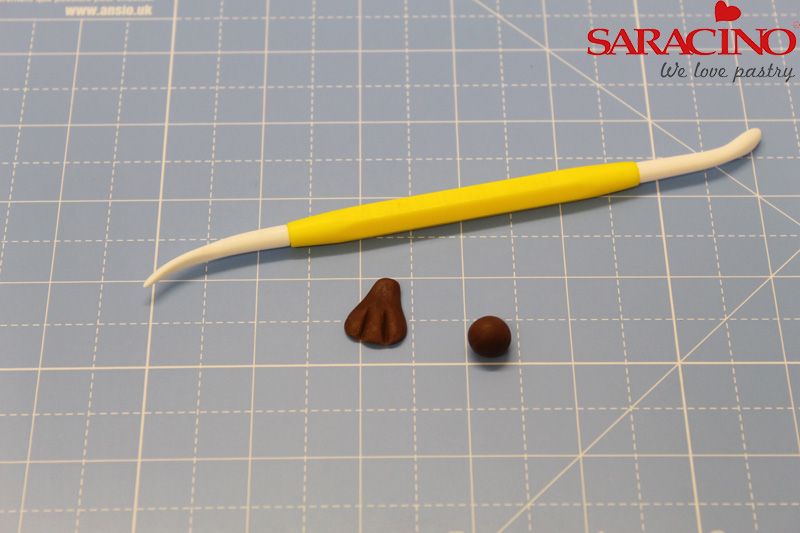
Step 11
Take 1g of brown paste and half. Shape each piece into a soft triangle and indent webbed feet with veiner tool
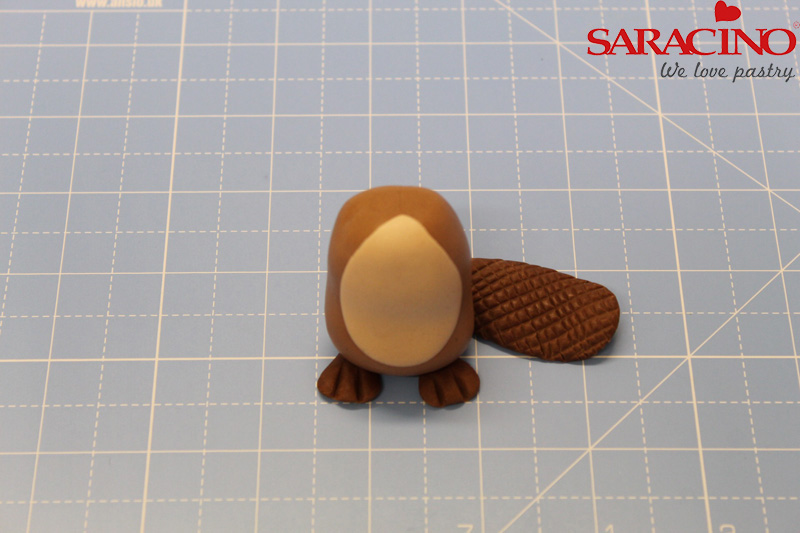
Step 12
Attach onto beaver
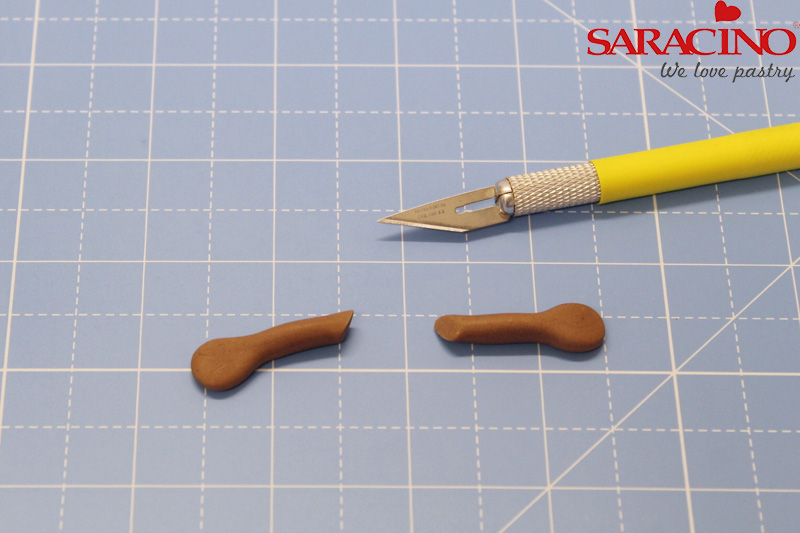
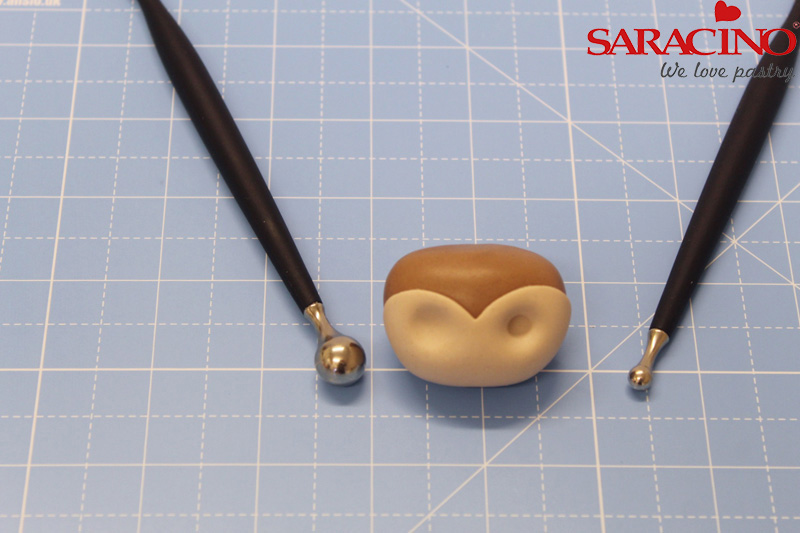
Step 13
Take 2g of the medium brown paste and roll into a sausage. Cut in half diagonally and shape little hands as shown
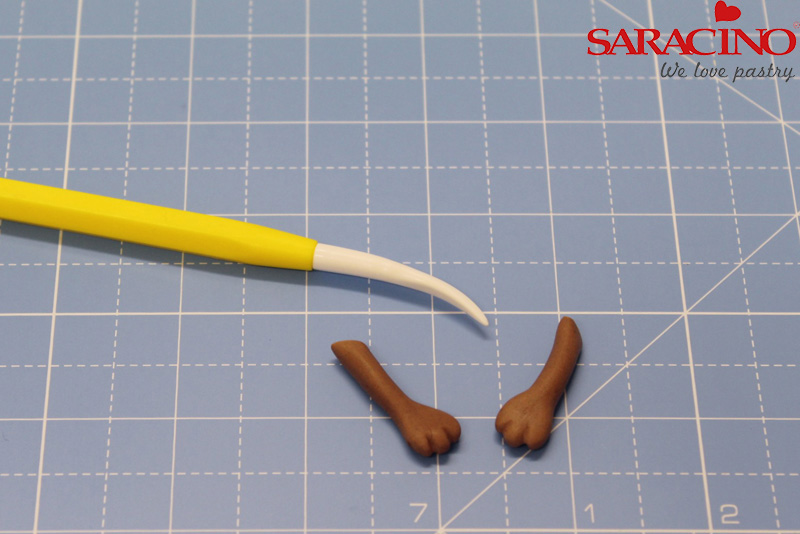
Step 14
Indent the hands using the veiner tool
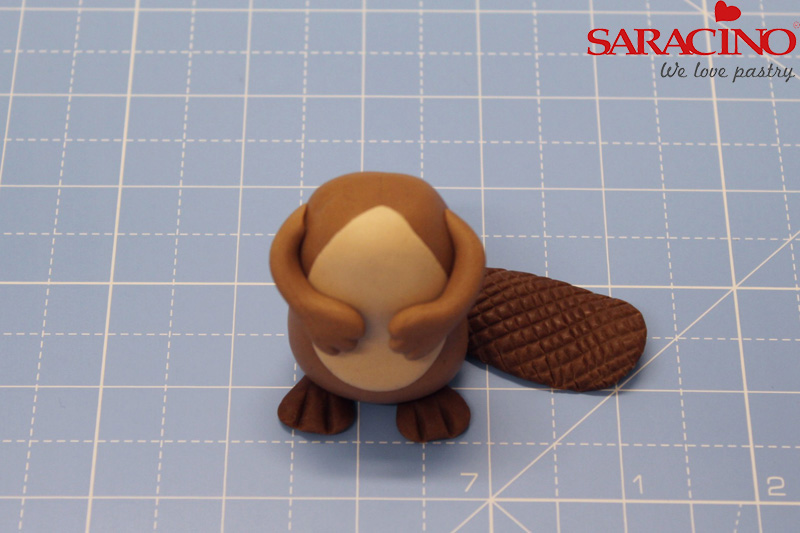
Step 15
Attach onto the body
Step 16
Take the remaining medium brown paste, reserving just a little for ears and snout, and roll this into a ball before shaping as shown
Step 17
Take the heart you cut out earlier and using a craft knife cut as shown. Discard the lower part
Step 18
Attach this to the head, again smoothing the edges with your finger
Step 19
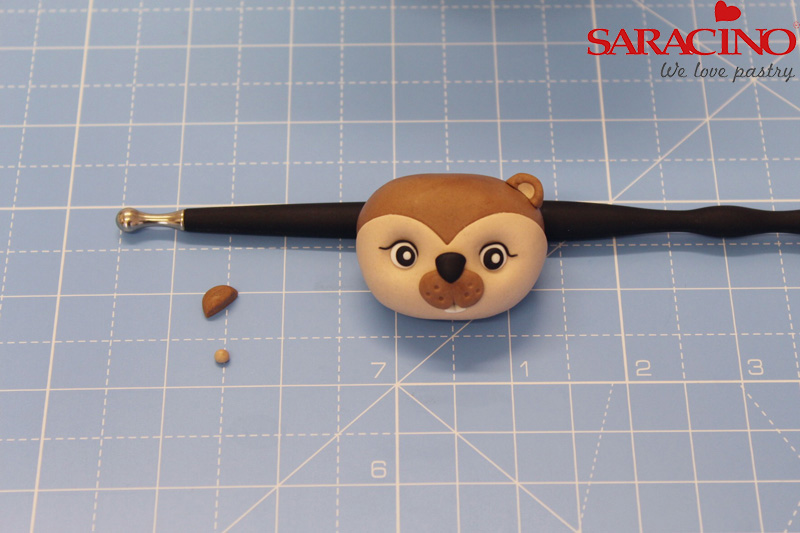
Use a larger ball tool to indent the eyes then use a medium ball tool to deepen the socket.
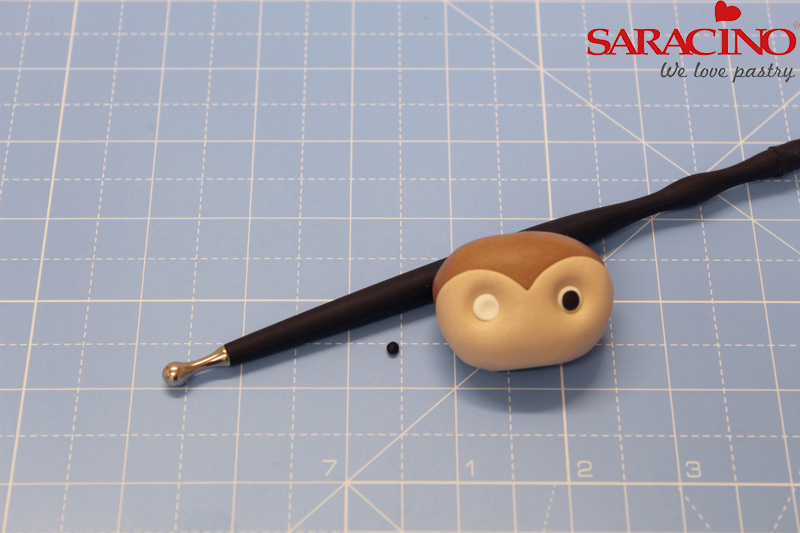
Step 20
Roll two small white balls and drop into the socket before indenting again with the ball tool and this time placing black balls into them
Step 21
Roll two, very thin, black pieces of modelling paste to use as eyelashes. Leave them long enough for a pretty flick on the outer edges

Step 22
Use the smaller ball tool to indent a hole in each eye and insert a little white ‘catch light’ into each eye
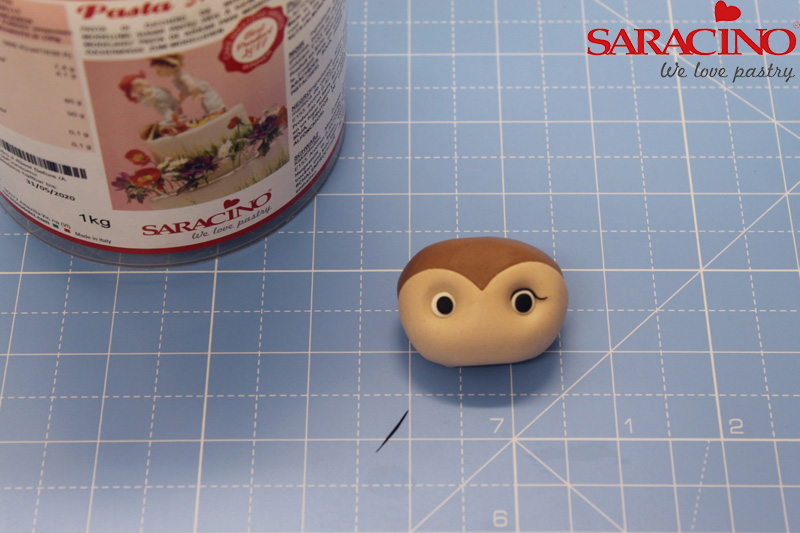
Step 23
Using the Dresden tool create a mouth. Model two little teeth out of white modelling paste, mark the centre with the veiner and place into the mouth
Step 24
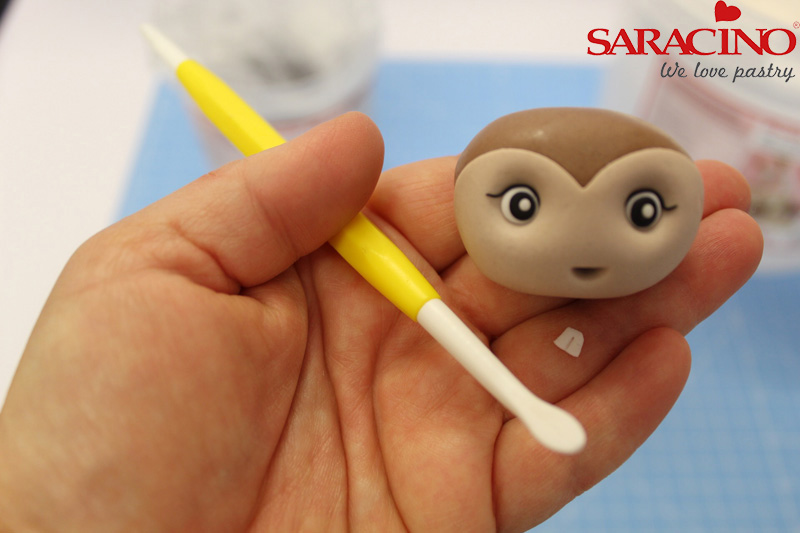
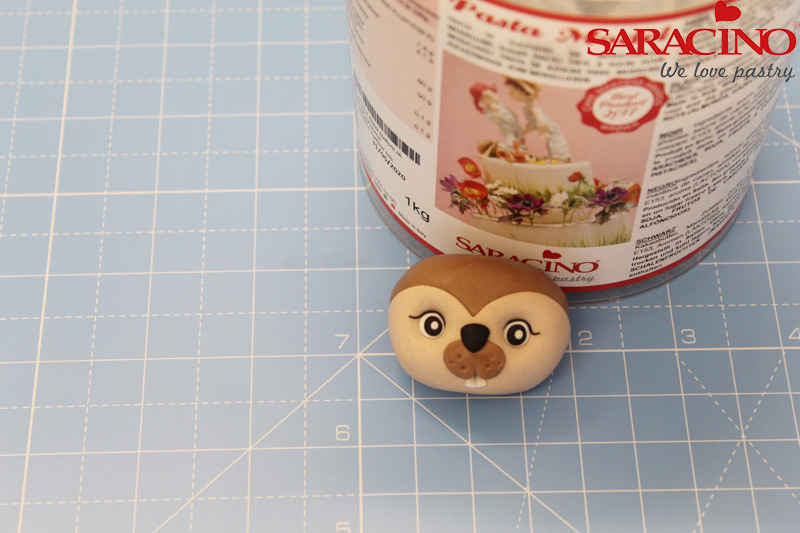
Take a small piece of the reserved medium brown paste and shape into a flat oval. Mark the centre with the veiner and place onto the face. Add little dots on each side with the small ball tool before making the nose from a small triangle of black paste
Step 25
Use the little bit of remaining medium brown paste for the ears. Roll into a ball then cut with the craft knife. Indent with the medium ball tool and add a tiny ball of light brown paste. Indent again, neaten the bottom edge with the craft knife if required. Attach to the beaver.
Step 26
Glue the head into paste using a little water or if you prefer use a cocktail stick
Step 27
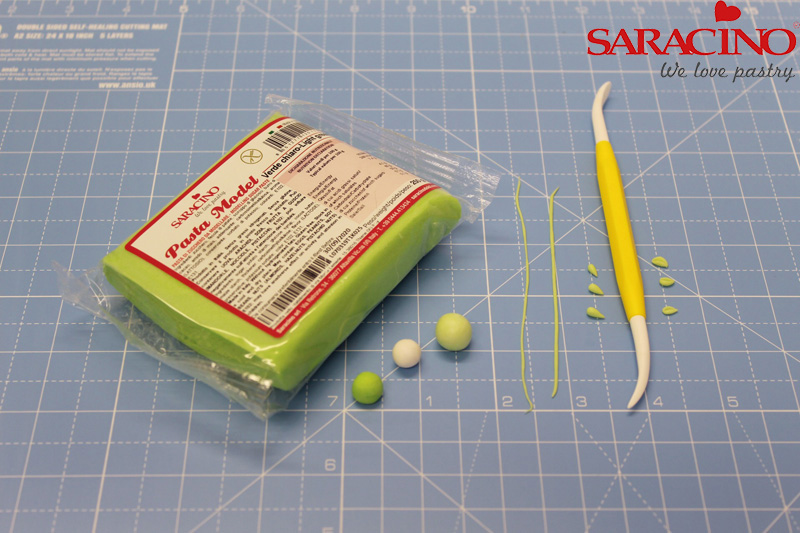
Mix light green modelling paste with white to create a softer shade. Roll some into two thin snakes that are long enough to reach around your beavers head. Use some to make little cone shapes, flatten these and indent with the veiner tool to create leaves
Step 28
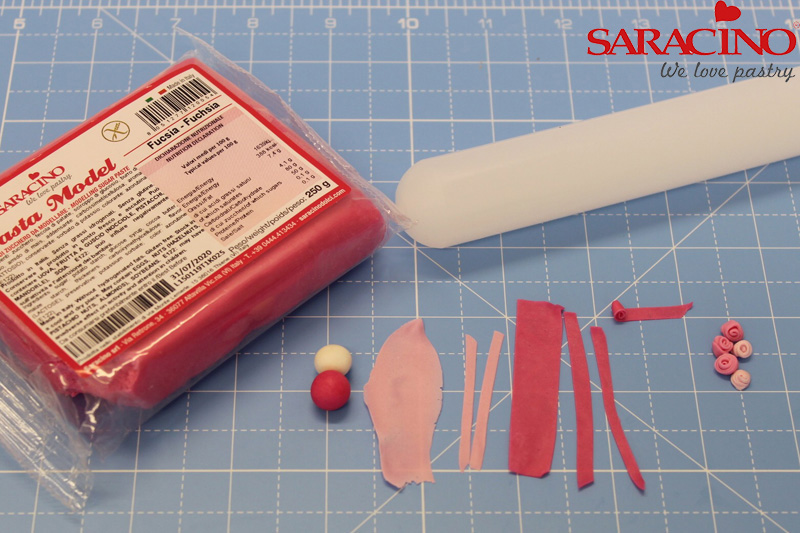
Mix some pink modelling paste with white so you have 2 or 3 different shades of pink. Roll out, cut thin strips and roll these strips to make little flowers
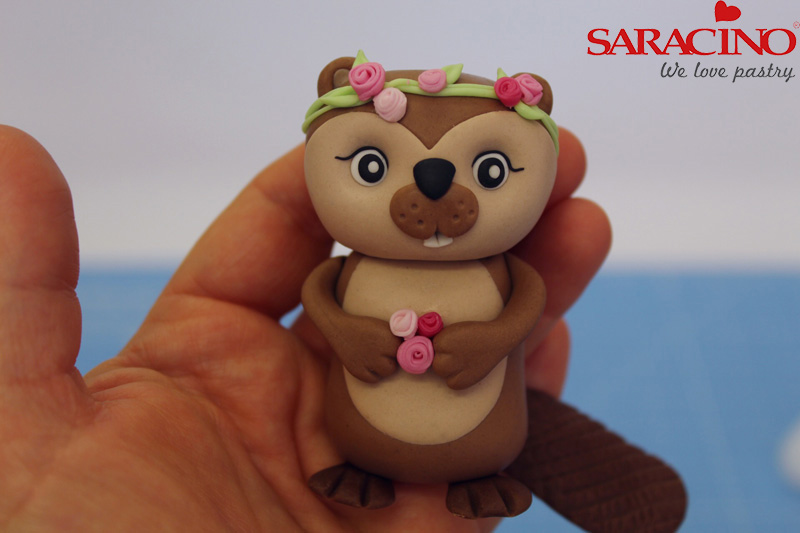
Step 29
Place the green ‘snakes’ onto the beaver’s head to make a garland and decorate with the leaves and flowers. Place some flowers between her hands
Step 30
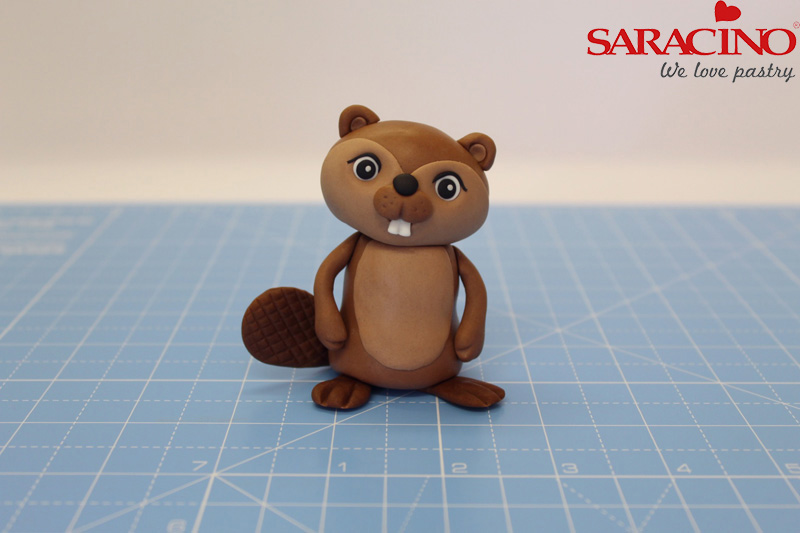
To make Mr Beaver follow these steps again from the beginning, this time without the eyelash flicks. You can match identically or, as I have done, vary the size of tail, feet etc and the shaded of brown you use
Step 31
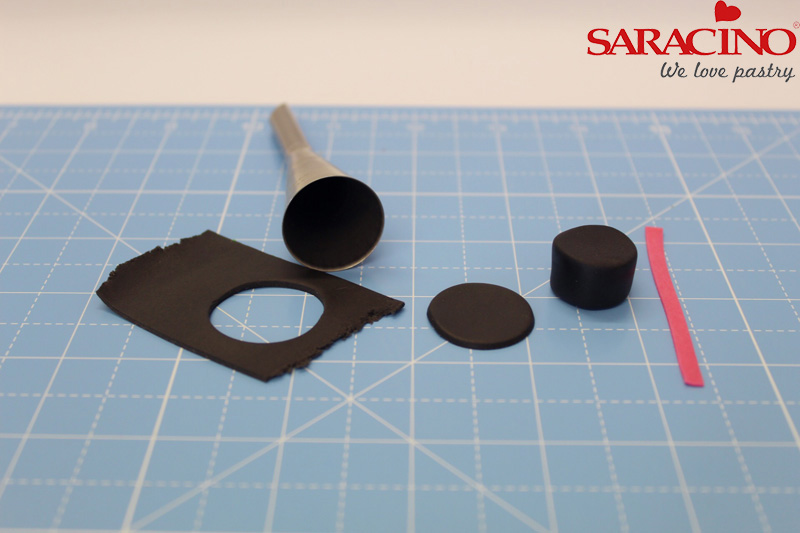
Use a circle cutter to cut a circle of black paste for the base of his hat – make sure it will fit between his ears! Shape a shirt cylinder, with a slightly smaller diameter, for the top of the hat. Finish with a strip of pink trim and any left over flowers
Step 32
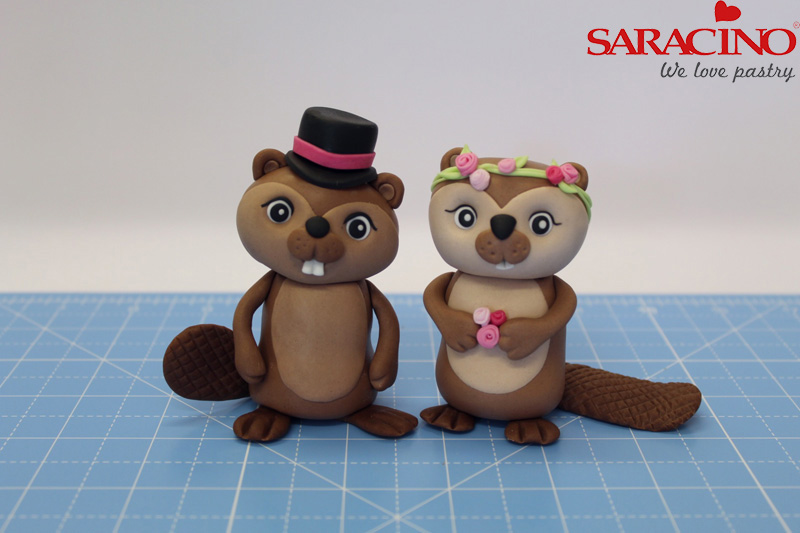
Voila! Mr and Mrs Beaver – don’t they make a lovely couple?!
