


Author: Linsey Wilton-Eddleston

FB: SUGARWHIZZ
Skill level: BEGINNERS
TIP FROM LYNSEY:
This tutorial will show you how to make your very own fairy King. To make his Queen simply change the colour of the clothes and add long hair!
You will need:
Saracino Modelling Paste:
- 100g of White modelling paste coloured as follows:
- 45g Dark brown
- 12g Light Brown
- 20g Purple
- 12g Grey
- 7g Dark blue
- 1g Light blue
- 1g Black
- 2g White
- Saracino Gel Colours – Brown, Violet, Black, Blue, Flesh
- Saracino Powder Pearl – Silver Lustre, Bronze
- Small rolling pin
- Sharp Knife
- Small paintbrush
- Dresden tool
- Cerart balling tools, K500, K501, K502
- 1 x 28g bar Rice crispy treat
- Small amount of clear alcohol for painting
- Cool boiled water for gluing

Step 1
Roll 28g of rice crispy treats into a rough cylinder shape to form the tree stump.

Step 2
Roll 10g of light brown modelling paste into a circle and cover the top of the tree stump. Take 45g of dark brown modelling paste, roll out until it is big enough to wrap around the side of the tree stump, trim the edges as shown.

Step 3
Apply a small amount of boiled water to the back of the paste and stick into place. Use the veining end of the Dresden tool to texture the bark around the sides, and to gently score rings on the top of the stump as shown.

Step 4
Take 15g of purple modelling paste and roll into a teardrop shape. Use the large end of the balling tool (Cerart K500) to indent the neck area. Mark a small line down the chest using the veining end of the Dresden tool. Apply a small amount of water to the base of the body and stick into place.

Step 5
Take 2.5g of purple modelling paste and divide into two. Roll into balls. Roll each ball into a sausage tapered at one end. Bend the leg over and pinch out the knee with your fingertips.

Step 6
Use the remaining 2.5g of purple modelling paste, divide into two. Roll each piece into a sausage tapered at one end. At the thinnest end use the small end of the balling tool (Cerart K501) to indent a hole as shown.
.

Step 7
Take two tiny balls of grey modelling paste, for each one, roll first into a small teardrop. Flatten the teardrop gently with your finger. Cut out the thumb. Use a sharp knife to cut the fingers as shown. Gently round of the tips of each finger. Gently roll the wrist and bend upwards as shown.

Step 8
Use a small amount of water to stick the legs into place as shown. Stick each hand into the end of each arm and glue the arms into place as shown. Roll a tiny ball of grey paste for the neck and stick into place
.

Step 9
Roll 8g of grey paste into a ball. Use the veining end of the Dresden tool to gently mark the mouth.

Step 10
Use the smoothing end of the Dresden tool to smooth along under the mouth and form the bottom lip. Gently indent each corner of the mouth.
.

Step 11
Use a paintbrush to gently indent a groove across the face as shown.

Step 12
Gently push in the Small end of the balling tool (Cerart K501) to form two eye sockets. Mark two little creases at the bas of each eye socket with the Dresden tool.
.

Step 13
To create the eyes, roll two small balls of white modelling paste and stick into place. Roll two small balls of blue modelling paste, flatten and stick on to the eyes to create the iris. Mix 1 drop of black Saracino Gel colour with 1 drop of clear alcohol and paint a thin line around the edge of the iris. Roll two small black balls of modelling paste flatten and stick into the centre of each iris. Add a tiny white ball of modelling paste to the top right of each pupil.

Step 14
Take a small ball of grey modelling paste and taper slightly each side. Stick into place with a small amount of boiled water. Use the small end of the balling tool (Cerart K502) to form the nostrils.
.

Step 15
Take 1g of black modelling paste and roll two long thin sausages. One long enough to fit around the collar, and one long enough to form the belt. Stick into place. Gently push a cocktail stick down through the centre of the neck and into the body.

Step 16
Stick the head into place. Roll two tiny balls of grey modelling paste. Use the small end of the balling tool (Cerart K501) to indent each ball and create the ears, lift carefully and stick them into place.
.
.

Step 17
Take 1g of blue modelling paste. Roll two tiny teardrop shapes and two tiny balls as shown. Stick the balls on top of the teardrop and gently indent with the small end of the balling tool. (Cerart K501)

Step 18
Roll out 6g of blue modelling paste thinly and trim to the shape shown using a sharp knife. Texture the cape using the small end of the balling tool (Cerart K501)
.
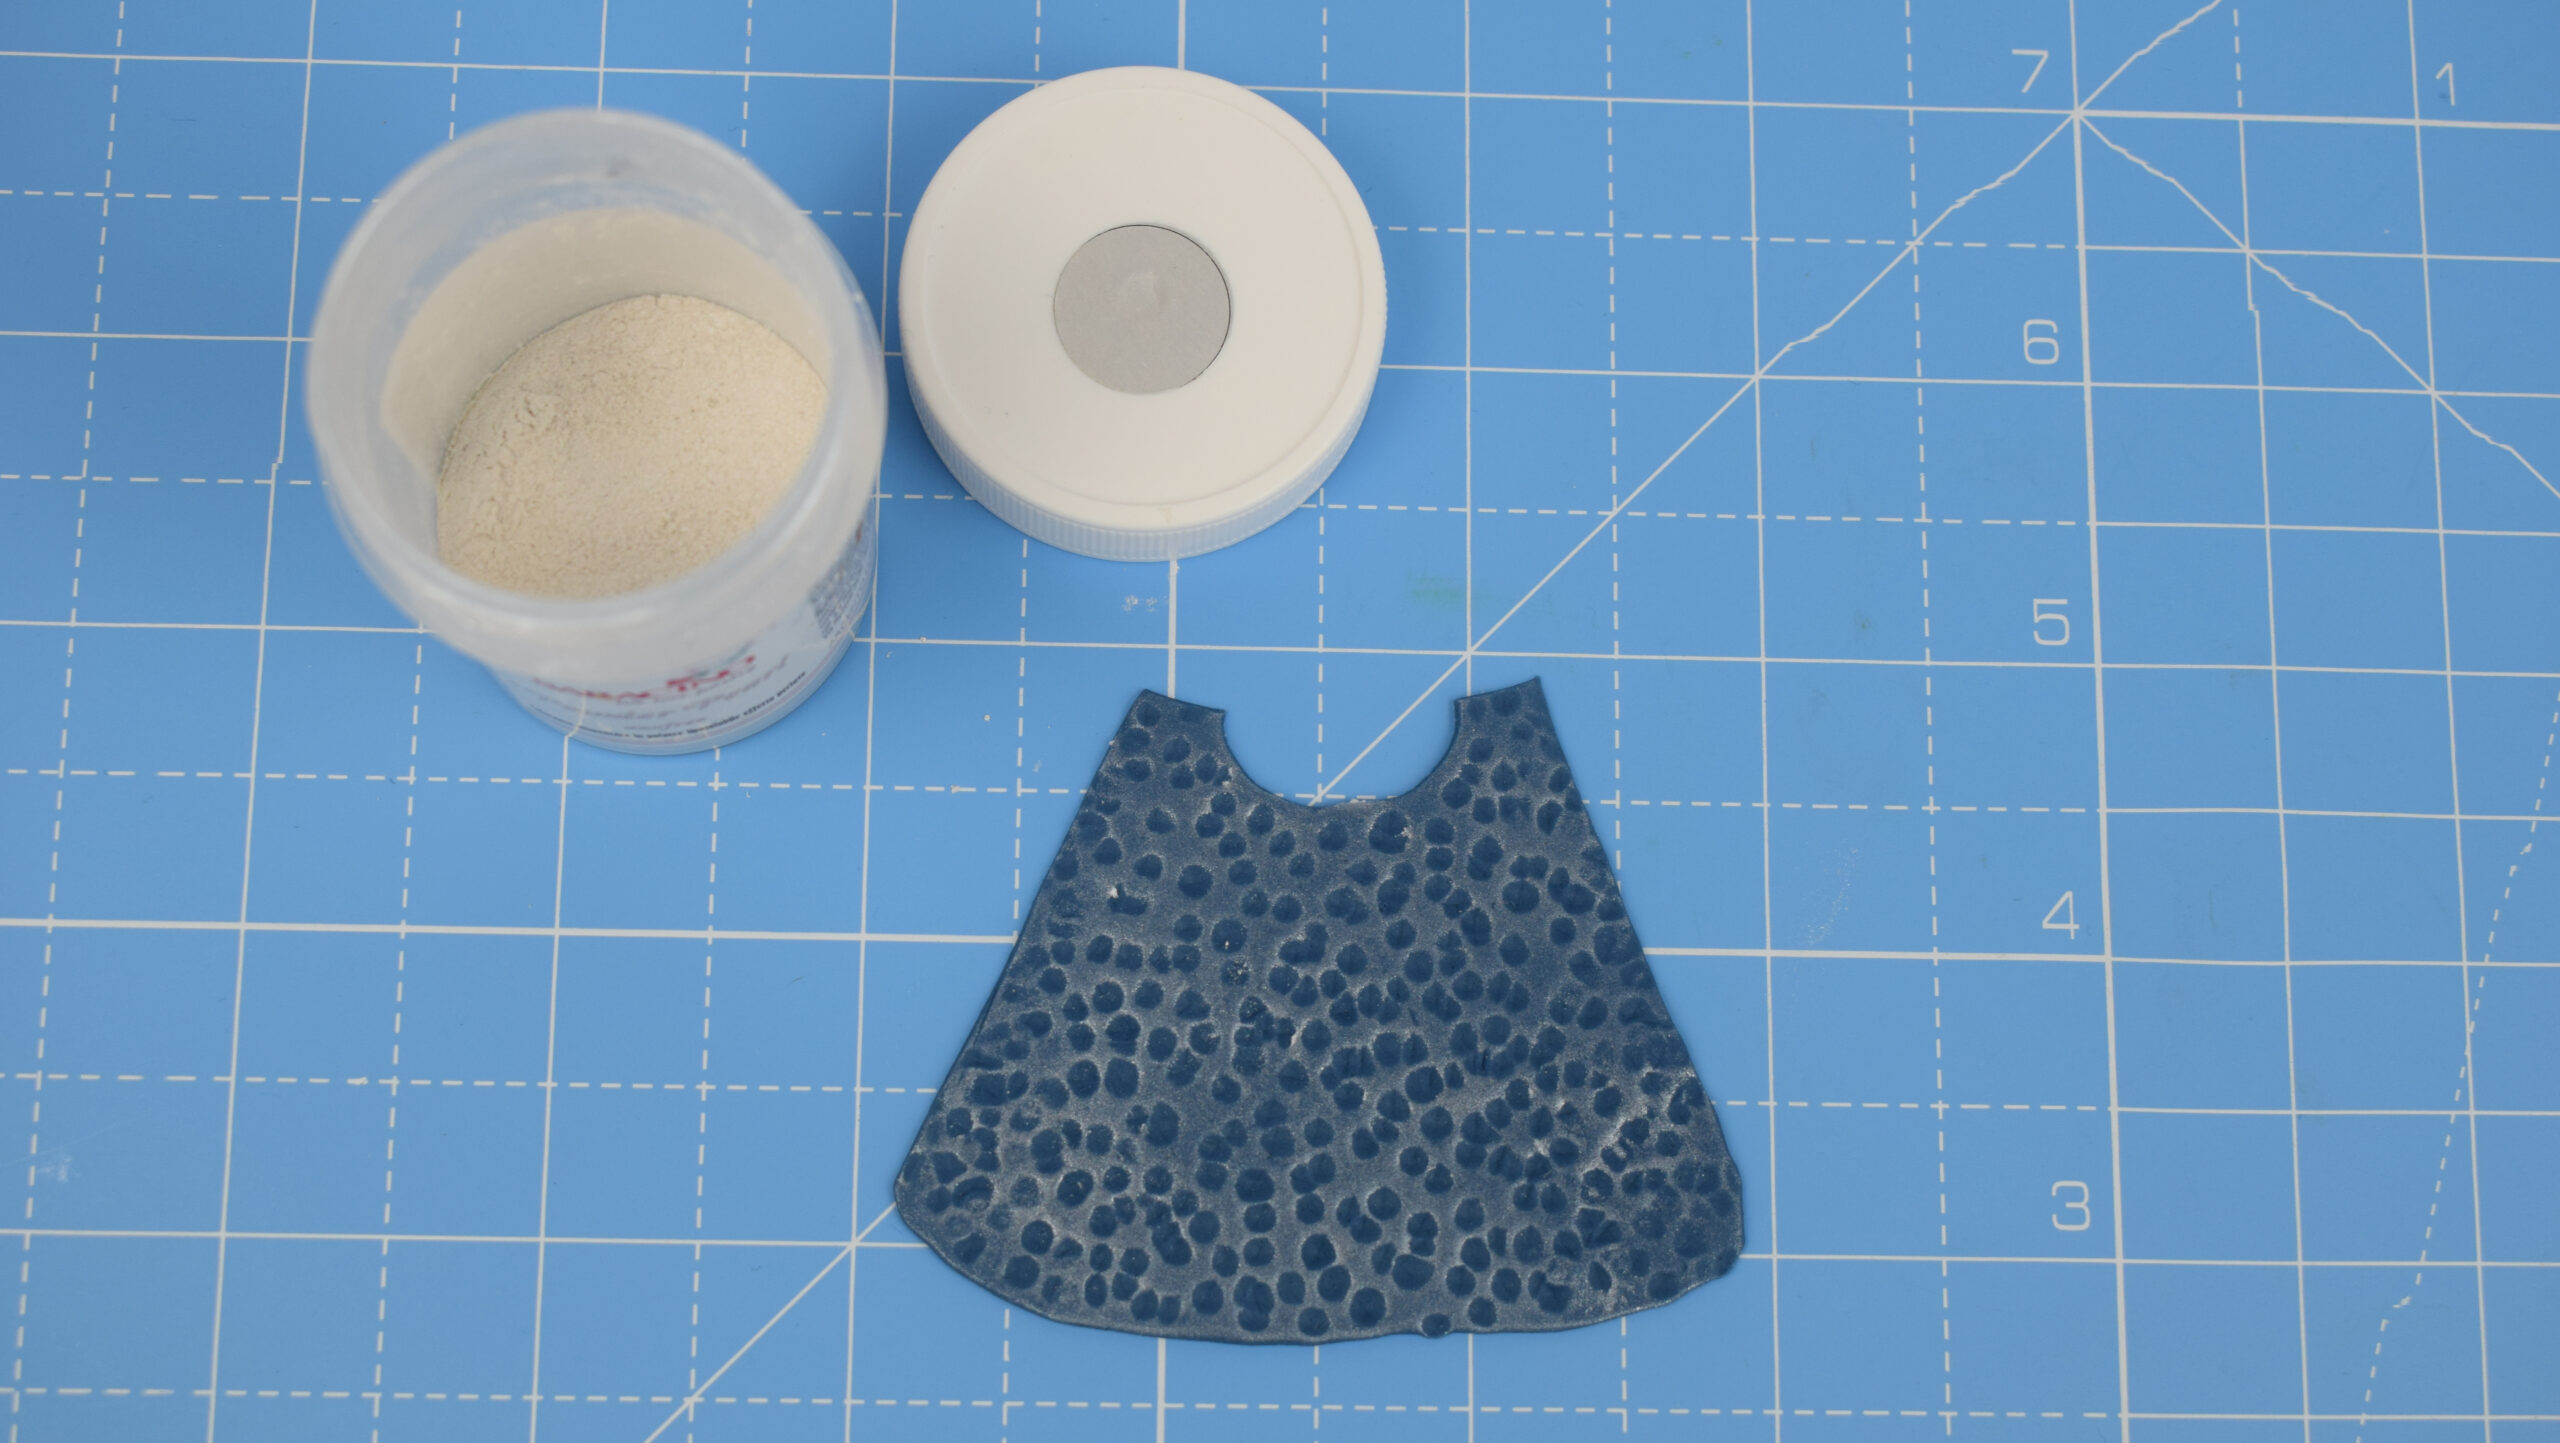
Step 19
Use your fingertip to gently rub a small amount of the silver lustre across the surface of the cape.

Step 20
Use a small amount of water to stick the shoes and cape into place.v
.

Step 21
Take 1g of light brown modelling paste and divide into four equal balls. Indent the centre of two balls with the small balling tool (Cerart K502) Roll the third ball into a long thin strand. Roll the fourth ball into a short sausage tapered at each end, then curl each end to create the S shape shown.

Step 22
To dust – Apply a small amount of the bronze powder pearl to the palm of your hand and gently roll each around piece to coat.
.

Step 23
Stick the long thin stand into place first. Then attach the balls to cover each end of the strand. Lastly stick the S shape into place as shown.

Step 24
Use 1g of light brown modelling paste to create three small teardrops and a long thin strand as shown. Dust with the bronze the same way as before. Take 1g of white modelling paste and roll several thing strands of paste to create the hair, and two tiny strands to create the eyebrows
.

Step 25
Stick the hair and eyebrows into place first. Stick the three bronze teardrops onto the centre of the forehead, then wrap the long thin bronze strand around to finish the crown as show.

Step 26
Mix a drop of skin tone gel with a drop of clear alcohol and paint a small amount across the nose and cheeks, to finish your figure.
.
