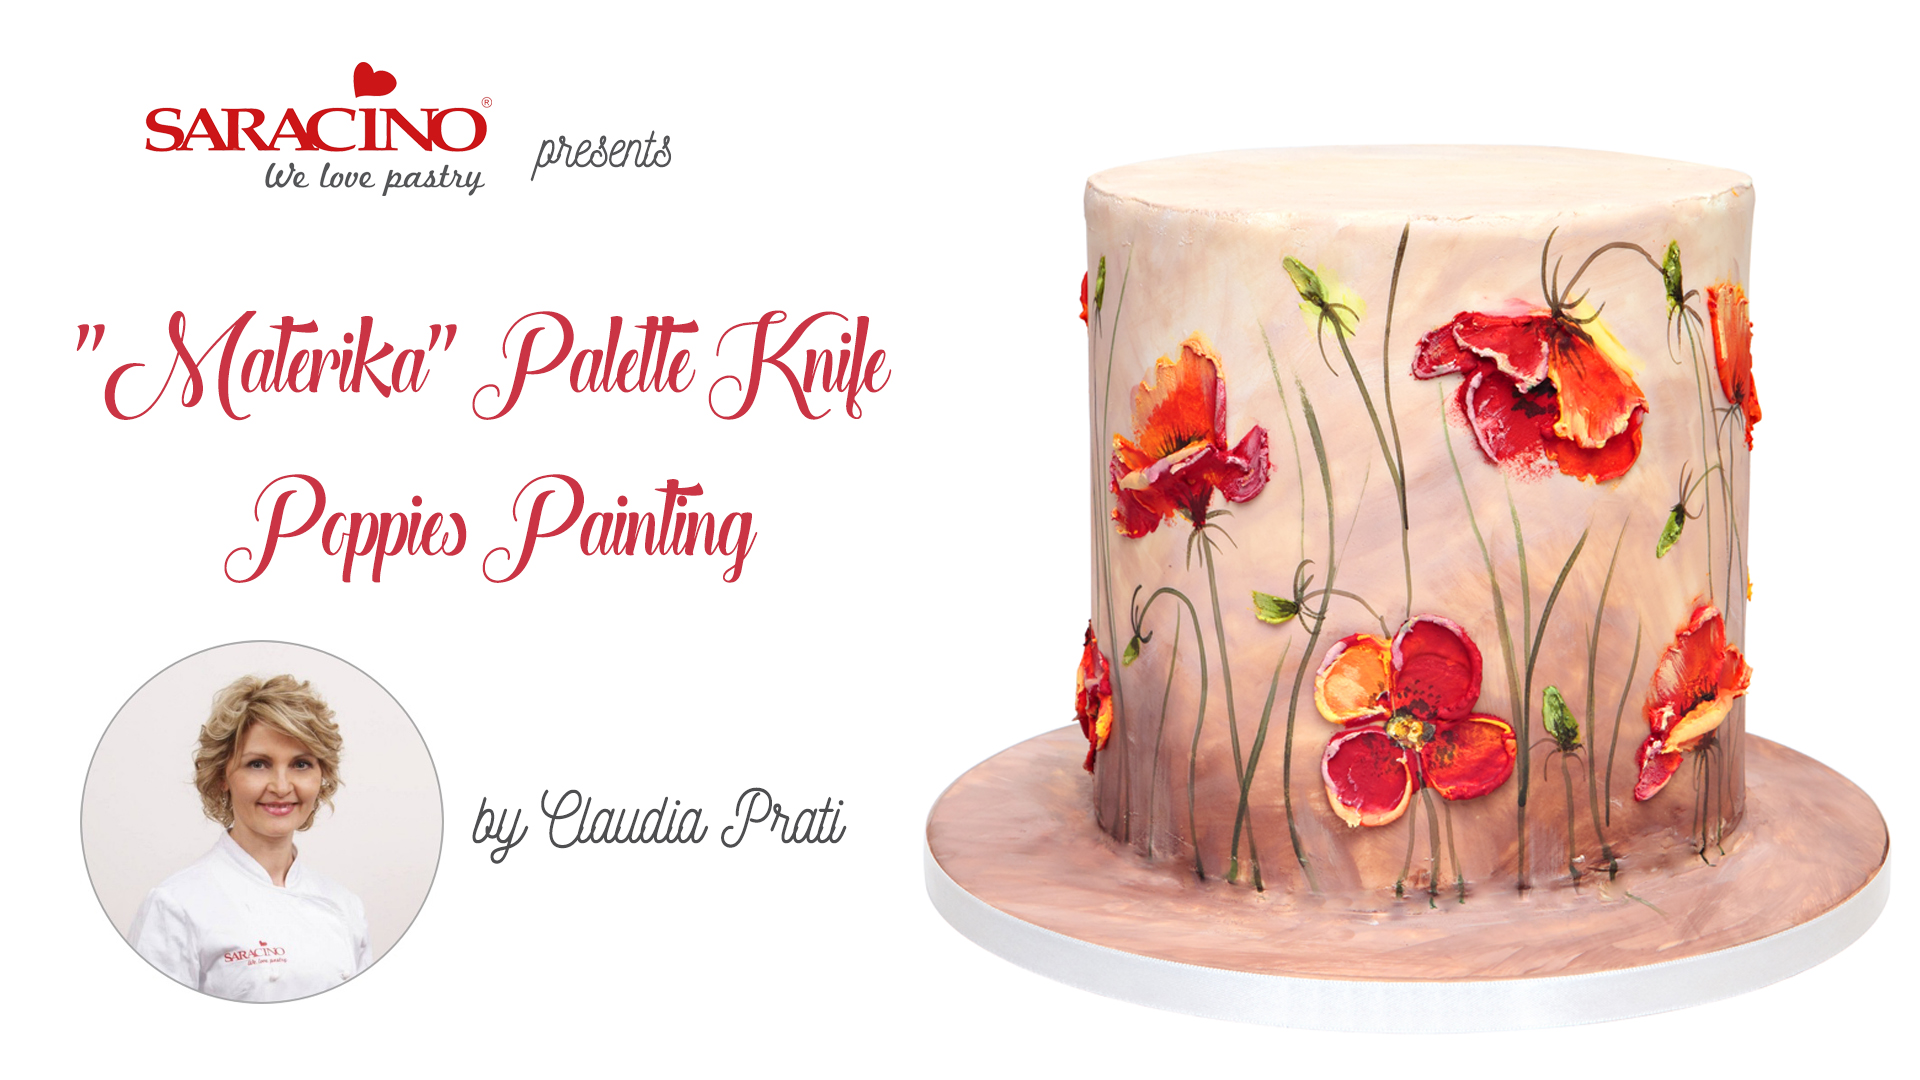
You will need:
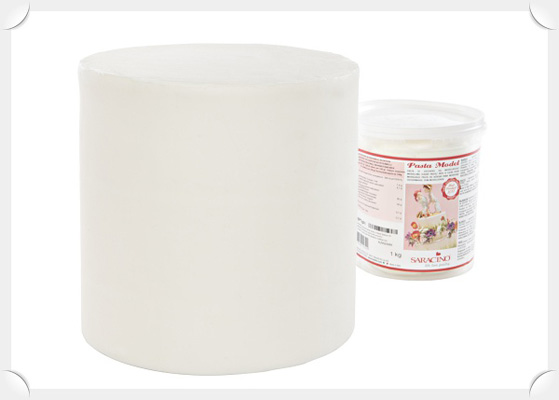
- A round cake of 20cm diameter/15cm high covered with 300g Saracino white top paste
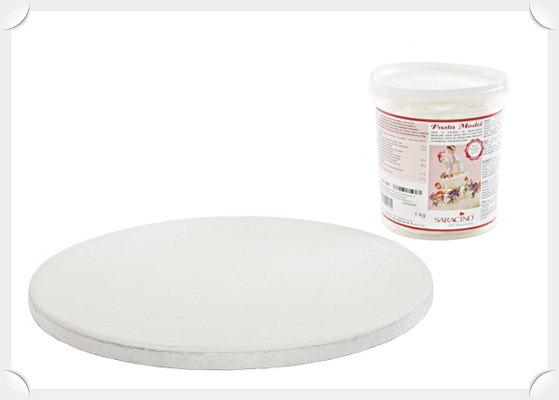
- A 30cm round cake board covered with 150g of Saracino white top paste
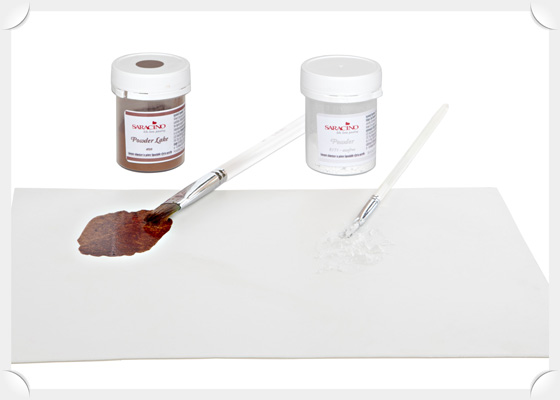
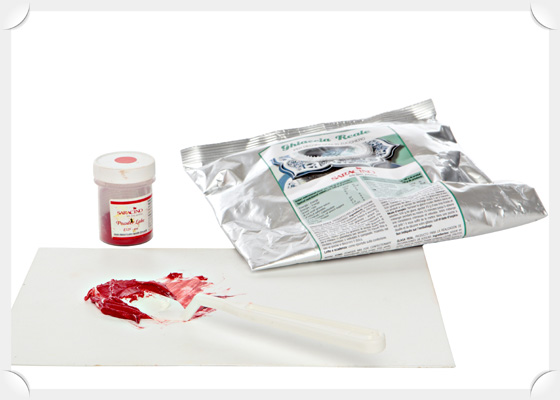
- Saracino Dust colors: white, brown, green, black
- Saracino Dust or gel colors: red, yellow, green
- 500g Saracino royal icing mix
- 100 ml Vodka
- One pointed and one square shaped plastic (or metal) palette knives
- 2 flat brushes: one medium and one large
- 1 small pointed brush
Step 1
Cover the cake with the sugarpaste.
Step 2
Cover the cake board with white sugar paste.
Step 3
Mix some brown dust color with a few drops of vodka, achieve a “paste” consistency. Do the same with some white color.
Step 4
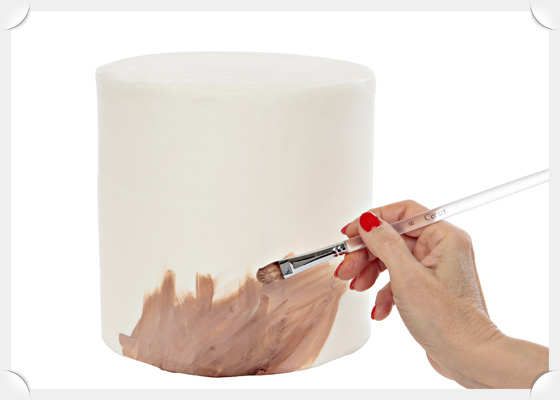
Start painting the bottom of the cake with brown using a large brush.
Step 5
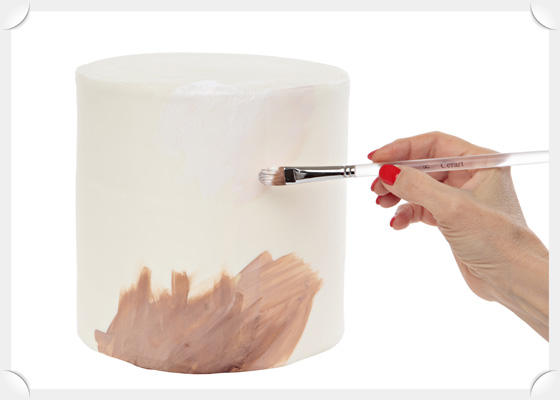
Start painting the top of the cake with white using a large brush.
Step 6
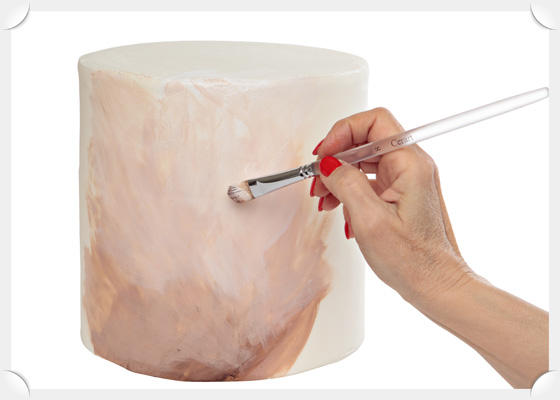
Start to blend the two colors together in the middle of the cake creating a mid-tone color (light brown).

Step 7
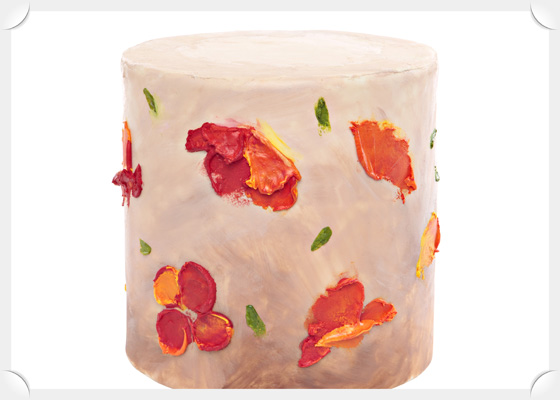
Work fast covering one area of the cake at a time without letting the colors dry then switch to another area until you have colored all the surface.
Step 8
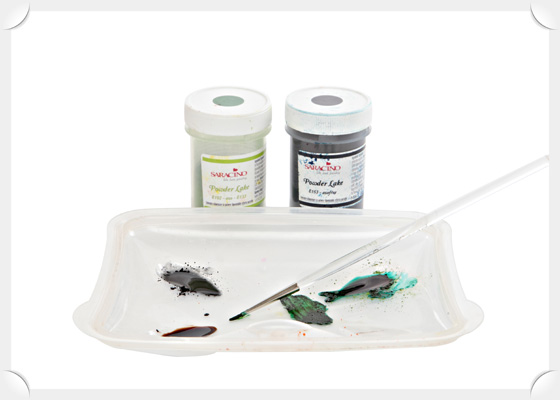
Mix 500g of Saracino royal icing (firm peak consistency) and color a spoon of royal icing with Saracino Red gel or dust color (with dust you will have a “matt” finish effect, with gel a more “shiny” effect). Put it on the left side of a plastic mixing palette.
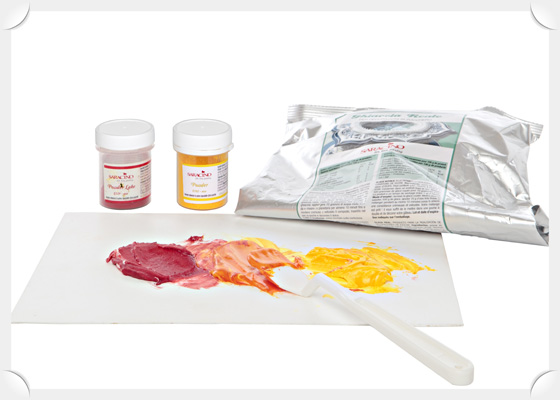
Step 9
On the same plastic mixing palette, to the right side mix a spoon of royal icing with yellow color. Mix the two colors together in the middle of the palette creating a nice orange.
Step 10
Take some orange, red and yellow with the back of the plastic palette knife filling it in this way
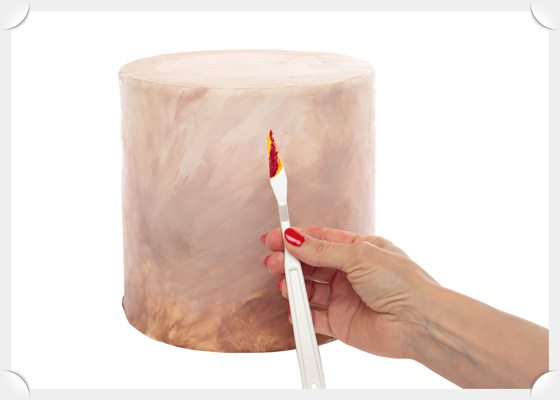
Step 11
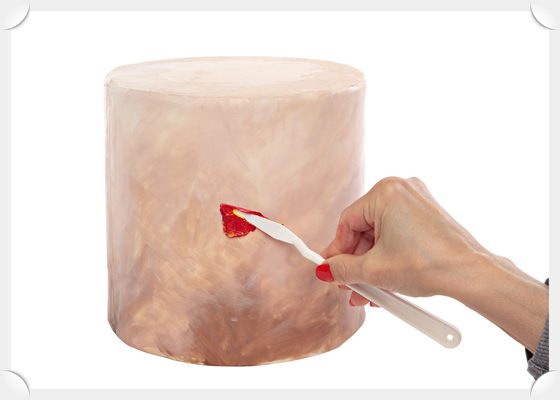
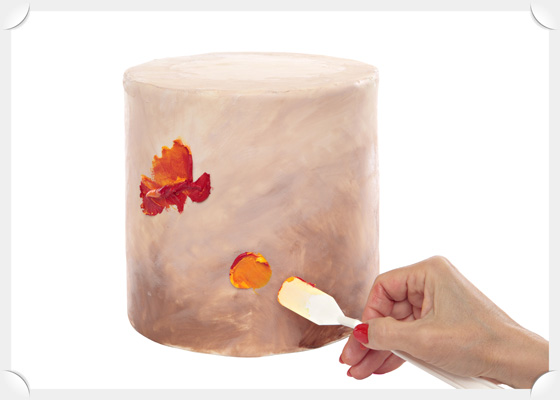
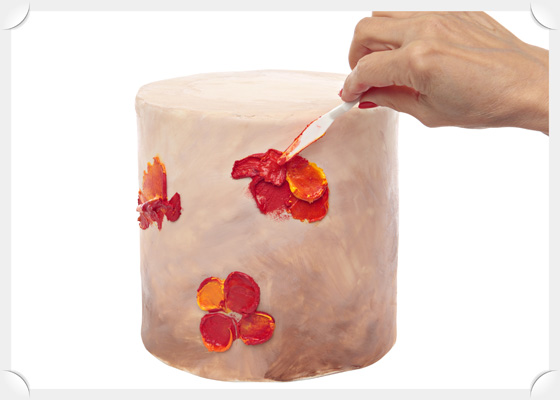
First flower: with a circular motion create a small “fan” shape. This will be our first simple flower. Make 3 or 4 of these ‘one petal’ flowers on the cake make it larger or smaller changing position on the cake.
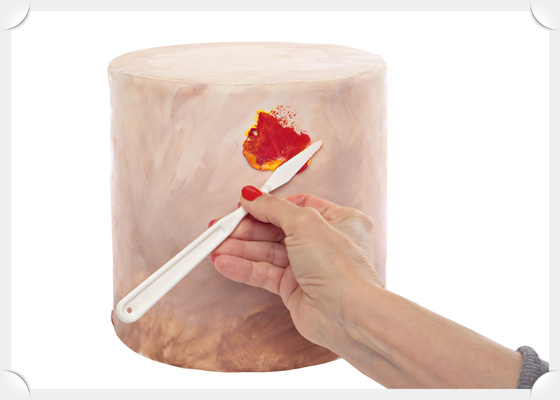
Step 12
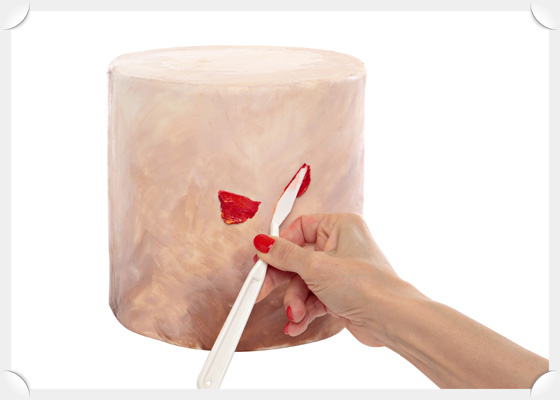
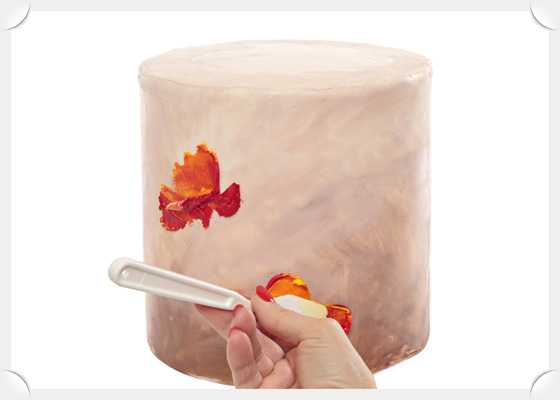
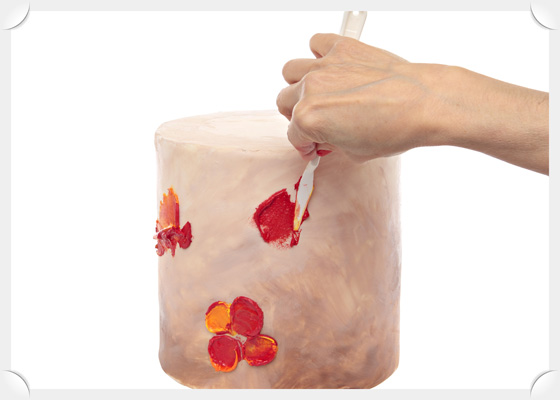
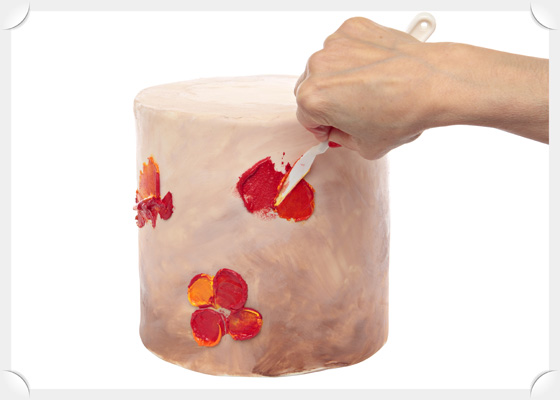
Second flower: Composed of 4 petals. The first petal starts from bottom left and work up with a circular motion. For this petal fill the palette knife only with red.
Step 13
Form another red small petal on the right side of the first petal leaving a space between the two. This second petal starts from the bottom right and work up with a circular motion

Step 14
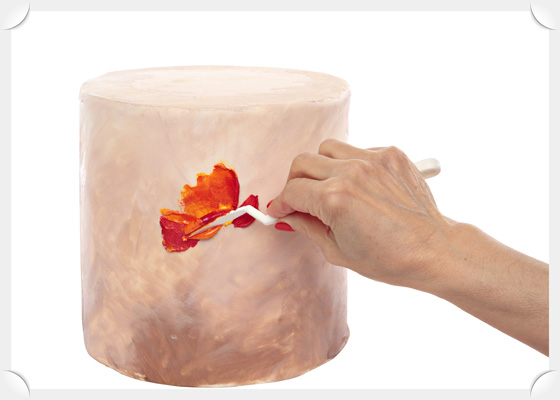
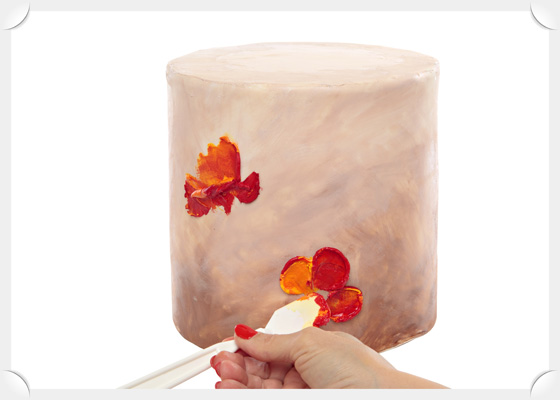
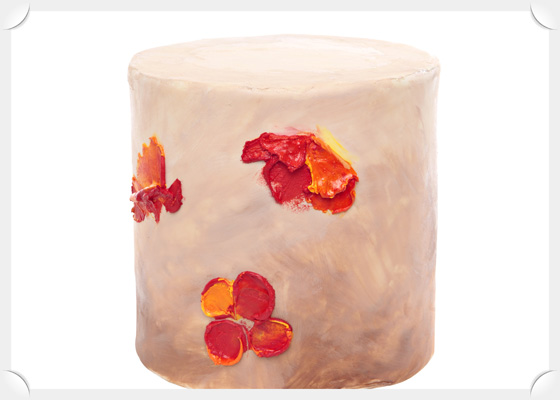
Fill the palette knife mixing some yellow, orange and red and place a third petal in the middle of the previous petals, create the same shape as the first petal we made in step 11
Step 15
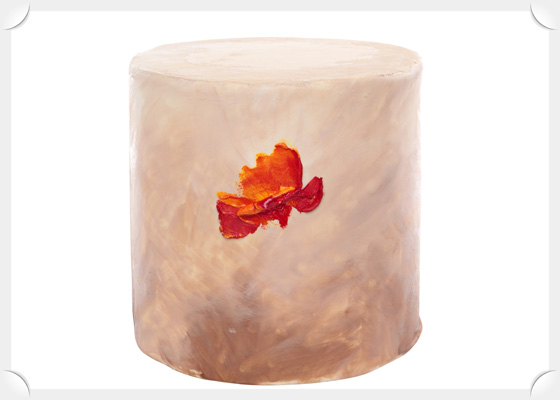
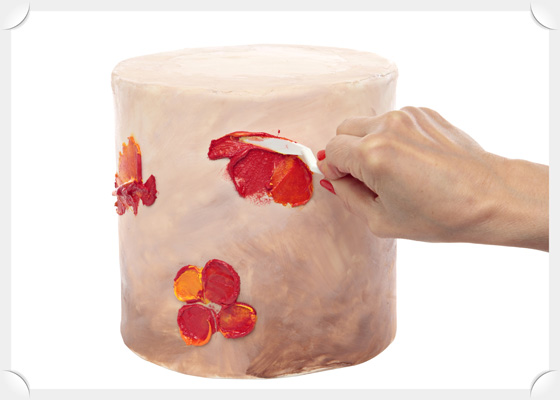
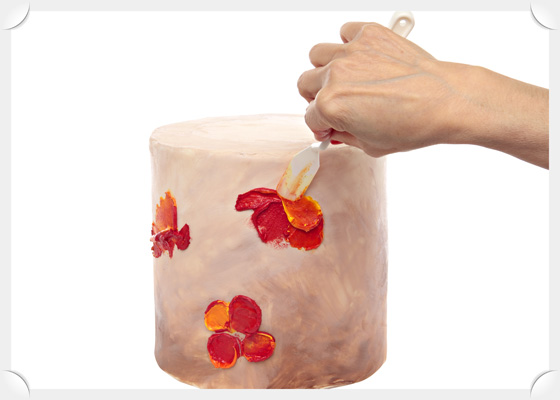
Create a thicker petal filling the palette knife with a large amount of royal icing and holding the palette knife sideways on the cake and not flat as before. Twist the palette knife without moving it from the sideways position.
Step 16
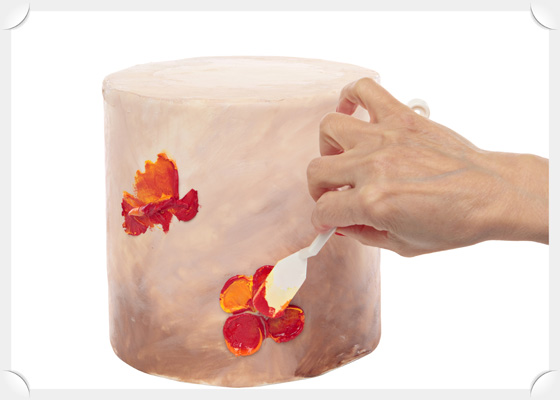
With a medium brush paint underneath the fourth petal to create a “cone shape” for the center of the flower. Make 3 or 4 of these flowers on the cake in different positions.
Step 17
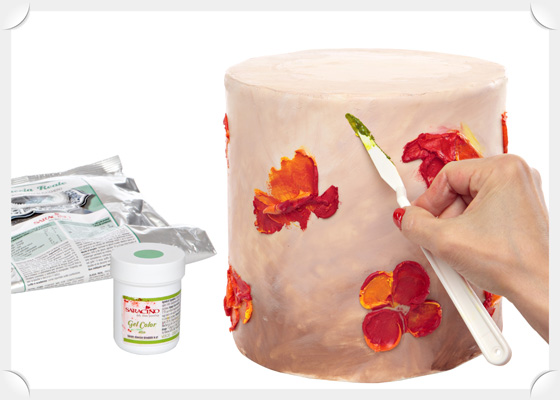
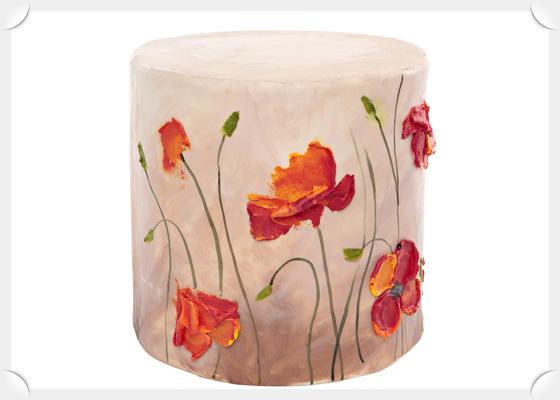
Open flower made of 4 petals: Switch to the square palette knife and fill it with some yellow and orange royal icing. Create one petal starting from one point and working down, applying pressure at the beginning and releasing the pressure while moving down.
Step 18
In the same way do another petal on the opposite side of the first petal. Leave some space in the center.
Step 19
Put a third petal between the first two on the right side of the flower. Leave some space in the center.
Step 20
Complete the flower with the 4thpetal that is positioned on the left side of the flower. Leave some space in the center of the flower. Make a couple of these open flowers on the cake
Step 21
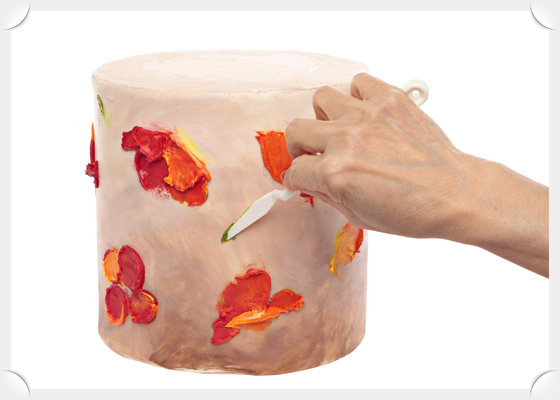
Fill the pointed palette knife with red royal icing and create the same petal as Step 11 but turned upside-down.
Step 22
Put an orange petal close to the first one on the right side. The movement is always the same as the first petal (Step 11)
Step 23
Create a third petal on the left side using the edge of the pointed palette knife working from the outside to the inside of the flower with a flat motion
Step 24
With the square palette knife create an open petal like the one you made in step 20 overlapping the second petal
Step 25
Form another small red petal between the third and the fourth petal filling just the edge of the palette knife with enough royal icing to create a thicker petal
Step 26
Model and form the edge of last two petals with a damp medium brush
Step 27
Mix some gel (or dust) green color with a spoon of royal icing. Fill just the edge of the pointed palette knife with a small quantity of royal icing. Touch the cake just with the edge of the spatula going down from top to bottom.
Step 28
Form green buds on the other side, from bottom to top.
Step 29
Fill the empty spaces with some green buds changing position and direction.
Step 30
Dissolve some green, black and brown dust colors with a few drops of vodka to obtain three different colors.
Step 31
With a small brush create some long and thin lines that start from the bottom and reach the flowers and buds, add other blades of grass all around.
Step 32
Paint the dark parts of the flower starting from the base of the calyx with green and in the center of the flowers with black. Create some small threads at the base of each flower and bud.
Step 33
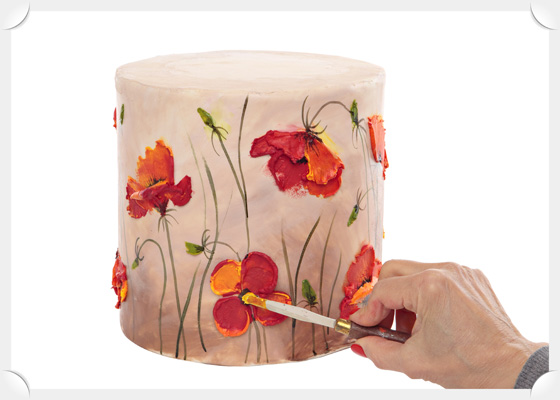
With a pinch of yellow royal icing and a small knife create the center of the open flowers
Step 34
Create some black dots all around the center of the open flowers.
Step 35
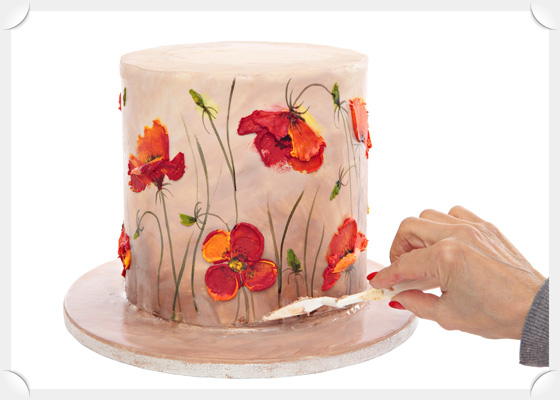
Color some royal icing with a pinch of brown dust and use it to fix the cake to the cake board, filling any gaps with the palette knife. Allow to dry.
Step 36
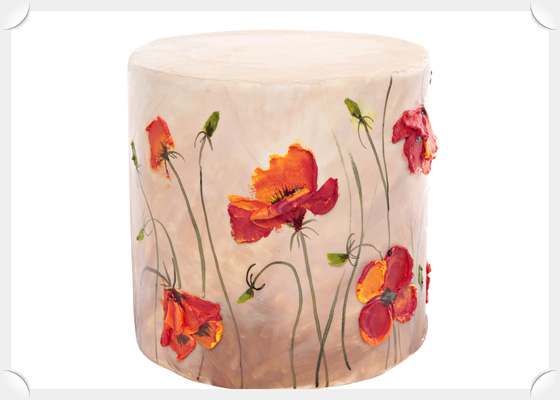
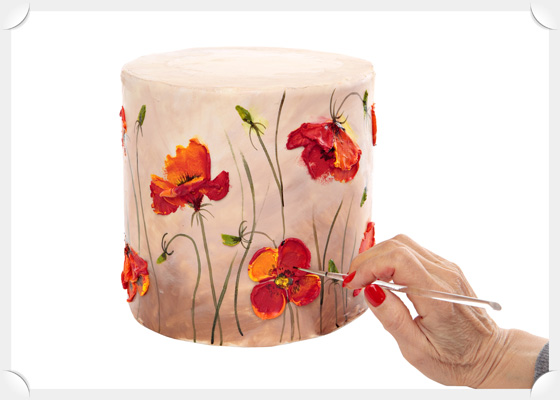
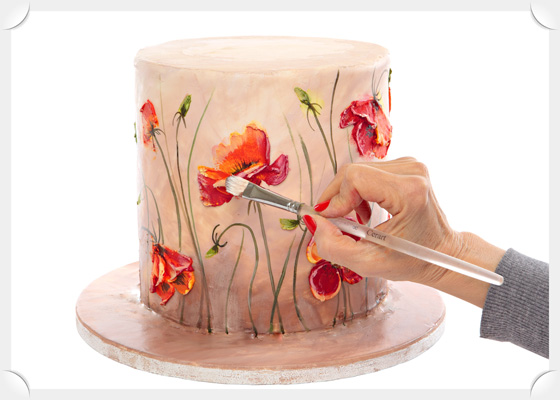
Mix some white dust with vodka. Put some touches of white on the flowers with the large brush (only on the parts that are more in relief).
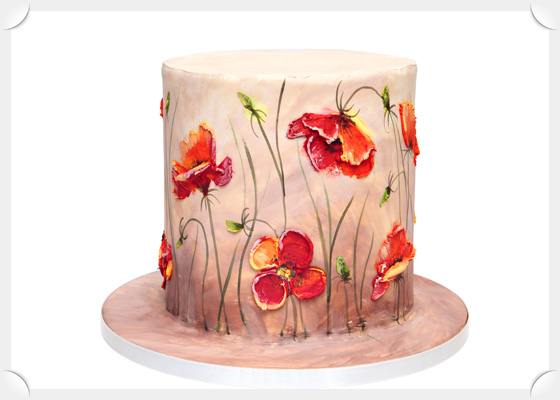
Step 37
Fix an ivory ribbon around the cake board.
