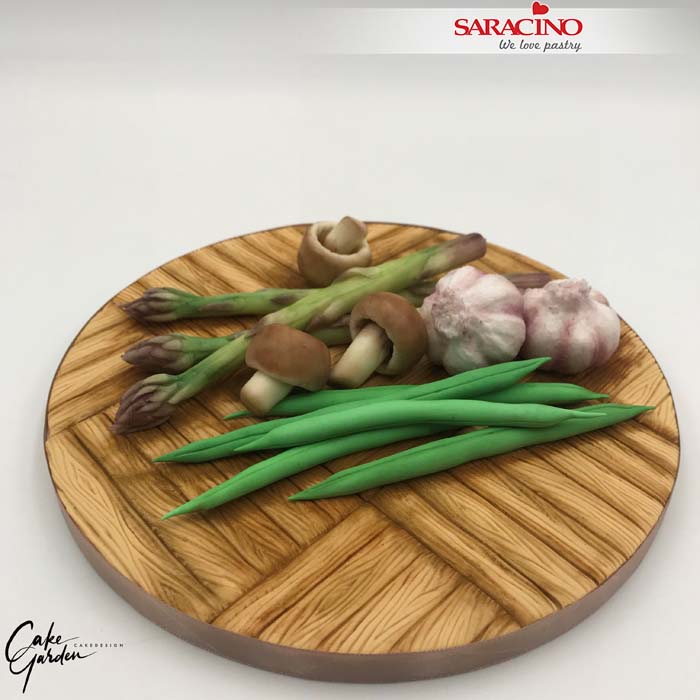
You will need:
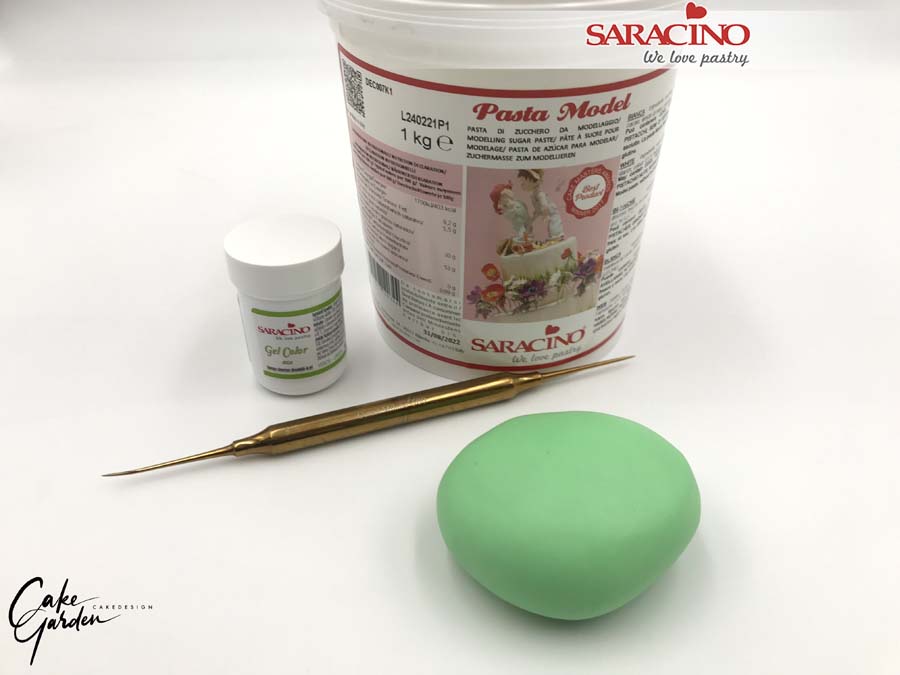
- Saracino Pasta Model
Saracino Modelling Chocolate
- Saracino Wafer Paper 0.27 mm
- Saracino gel colour green and white
- Cerart modelling tool 500 + 301 + 505
- Knife
- Large ball tool
- Water
- Brushes
- Dust colour powders: alpine green, spring green, dark brown, light brown, aubergine, claret, peach

Step 1
To make the asparagus you will need about 18-22g of white modelling chocolate. Knead the modelling chocolate until it is smooth and pliable. Roll a long cone shape to about 17-22cm long. If you create more asparagus make sure they are not exactly the same length. The thickest part has to be 1.2 to 1.5cm in diameter.

Step 2
Create small cone shapes for the asparagus leaves and flatten each of them with your finger. Make sure the leaves are not too thin as they must have some thickness to look realistic.

Step 3
Start attaching the small leaves to the thin end of the stem with your modelling tool. Fix only the bottom of each leaf (the wide side) to your asparagus stem. Smooth the joints so the leaves blend into your stem. Repeat to attach the leaves around until you have a small flowerly like head.

Step 4
Attach a few leaves randomly to the stem. Using your modelling tool create some grooves (not too deep) on the stem and around the bottom.

Step 5
Repeat the previous steps if you want to create more asparagus. If you have enough asparagus made, leave them to harden.

Step 6
For the mushroom heads you will need about 8-14g of modelling chocolate for one mushroom. For the stalk you will need 4-6g of modelling chocolate. You will need about 18-20g for the whole mushroom. Knead the modelling chocolate until it’s smooth. I added some white gel colour to the modelling chocolate so it becomes less yellowish. You will need your modelling and ball tool for the next steps.

Step 7
Roll balls of modelling chocolate for the mushroom caps and a long stalk for the stem.

Step 8
Use your ball tool to create sockets.

Step 9
Cut the long stalk into smaller varying length pieces.

Step 10
Use your modelling tool to create gills inside the caps. Make sure the inside of the cap remains wide enough to attach the stalk.

Step 11
Attach the stalk into the cap, using a modelling tool push some modelling chocolate from the stalk down onto the gills. Use your tool to create some small shallow notches at the bottom of the stalk. Set aside to harden.

Step 12
For the garlic you will need approximately 35g of white Pasta Model. Knead the modelling paste well and roll to a ball shape. Create a small tip at one side of the ball.

Step 13
Use your modelling tool to create the garlic gloves. It doesn’t have to be very neat because we cover later with wafer paper.

Step 14
You will need Saracino wafer paper 0.27mm and scissors.

Step 15
Cut the wafer paper in 4 pieces across the width.

Step 16
Cut the strips narrower. They dont have to be the same size. Cut some narrow and some wider strips. The strips dont have to be cut neatly.

Step 17
Use a brush to add some water to the strips and attach them to your garlic. Start from the bottom of the garlic and attach them up to the top. Don’t wait too long to attach the wafer paper strips.
Attach the wafer paper strips all around the garlic bulb. If your strips are too long you can trim using scissors. I cut around the top of the garlic with small scissors so it looks like real thin skins on top of each other. You can repeat around the bottom to create some small roots. I have left the tops of the garlic quite short but you can leave them longer if you want to. Leave your garlic to dry on a drying rack so the water can evaporate.

Step 18
Repeat step 17 to attach a second layer and leave it to dry for 24 hours until completely dry.
Step 19
For the green beans you will need about 8-9g of modelling paste for one bean.
Add green gel colour to your modelling paste and knead it well. Roll to a ball.

Step 20
Use about 8-10g of modelling paste and create a 16-18cm long sausage shape. Make sure the ends of the bean are rolled to a point.

Step 21
Use your fingers to create a lightly lumpy surface so it looks like it has seeds inside.

Step 22
Use a sharp modelling tool to create two thin grooves at the top and bottom of the bean.
Step 23
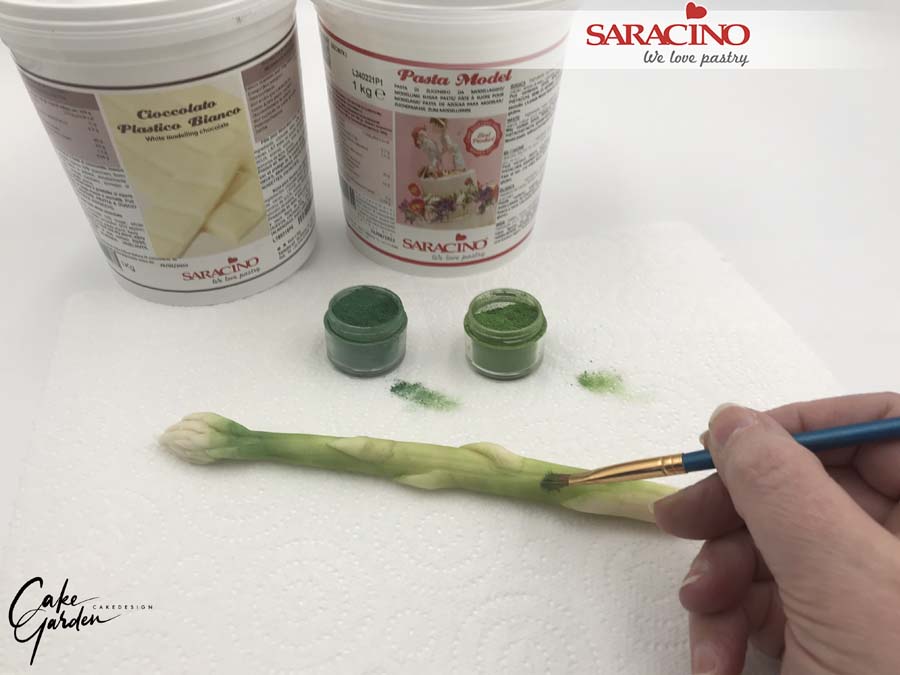
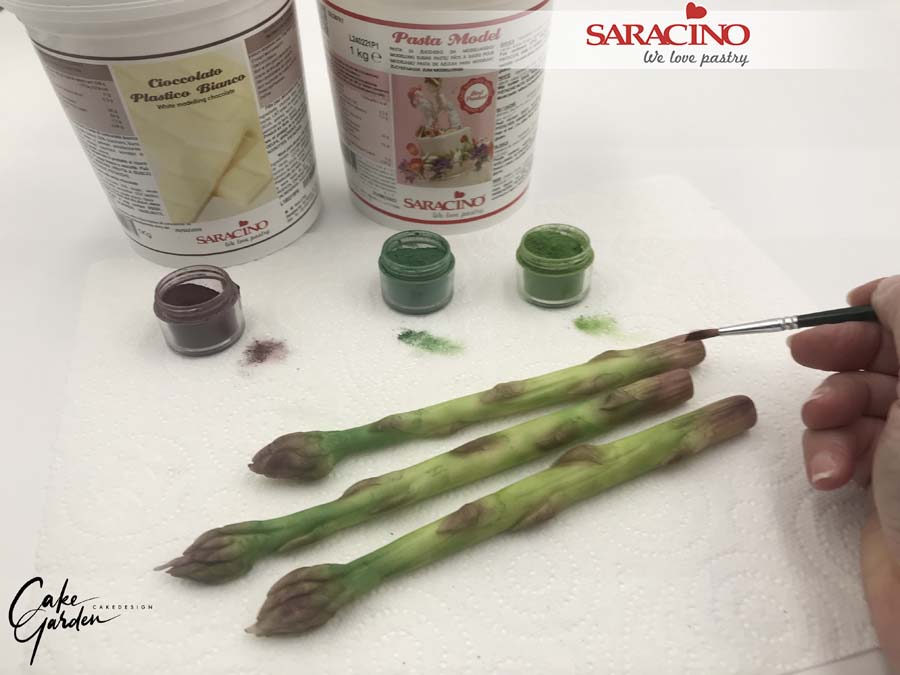
Once the asparagus are dried we are going to dust them to give a realistic appearance. You will need Alpine green, Spring green, aubergine and claret powders. Start by dusting the asparagus stem with the spring green. Don’t use too much dust at once and knock off the excess dust from your brush every time.

Step 24
Using the alpine green dust below the top of the asparagus and add highlights to the stem.

Step 25
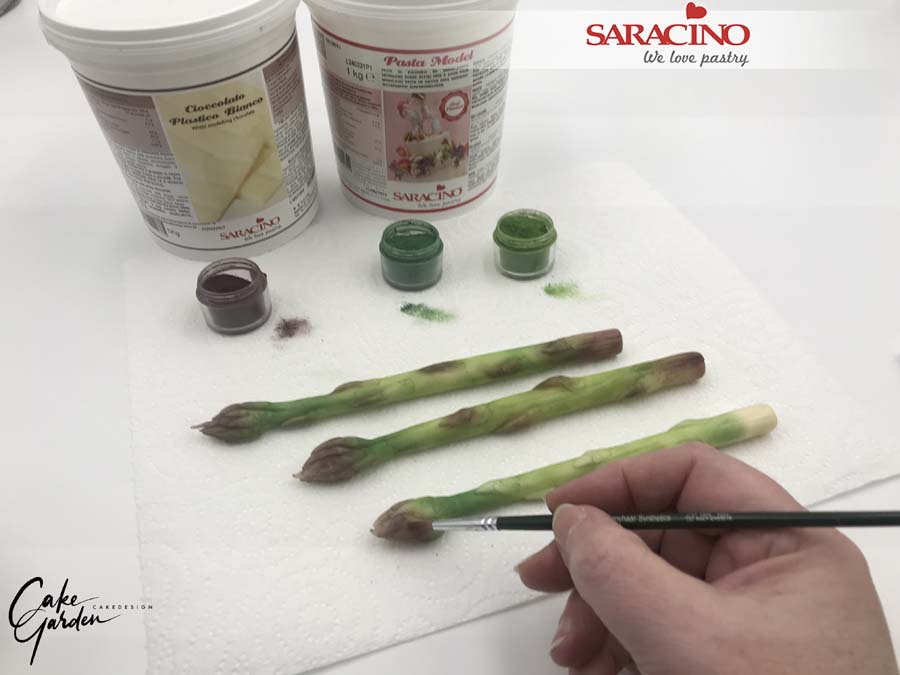
Use the aubergine powder to dust the leaves at the top of the asparagus and the leaves on the stem.
Step 26
Also dust the bottom of the stem with the aubergine powder.
Step 27
Use a little claret dust on top of the aubergine to create a warmer look. I used dry kitchen paper to remove excess dust.
Step 28
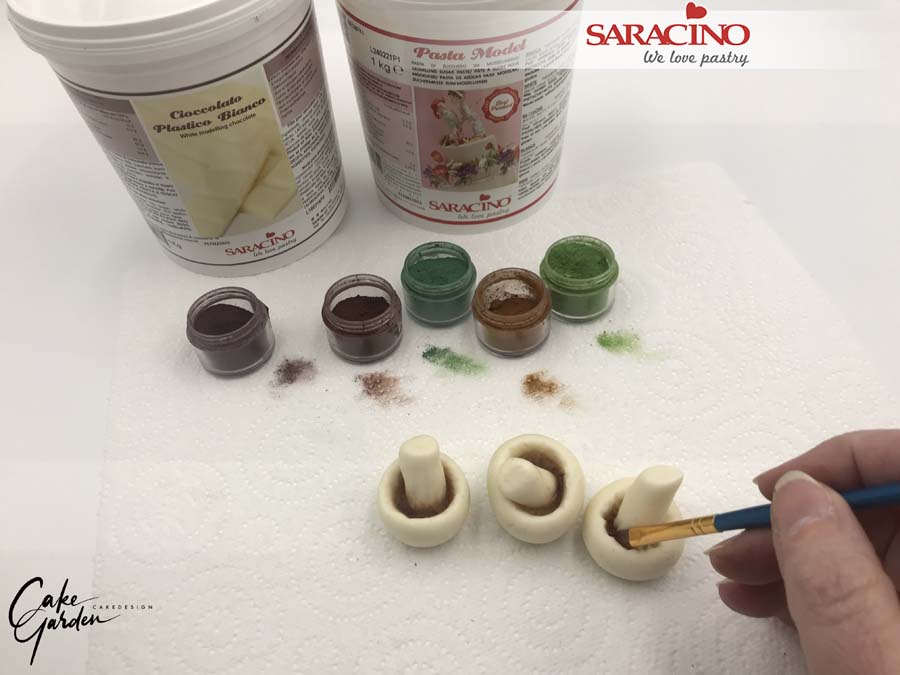
Use the dark brown colour powder to dust the gills of the mushroom.
Step 29
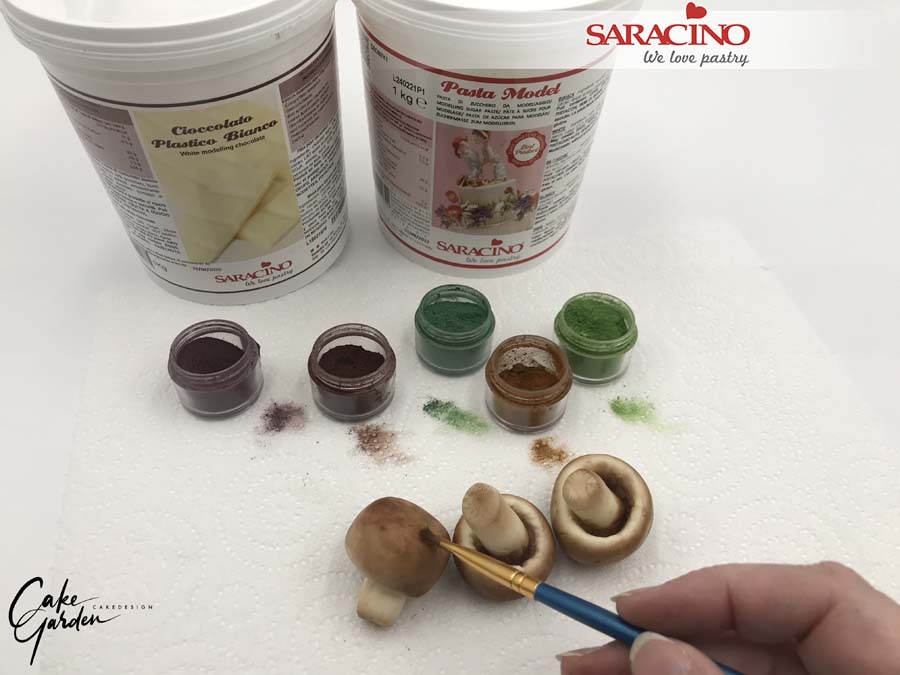
Mix the light and dark brown colours, don’t mix the colours too much as you still have to see the two seperate colours. Use a thin brush to apply the dust onto the cap of the mushroom. Make sure you remove the excess dust on your brush each time. Dust the mushroom all around the cap. And dust the bottom of the stem to give definition to the shallow notches.

Step 30
Mix some alpine green and spring green powders to dust the green beans. Dont over mix and make sure you still see both colours. Dust the beans with a soft brush.

Step 31
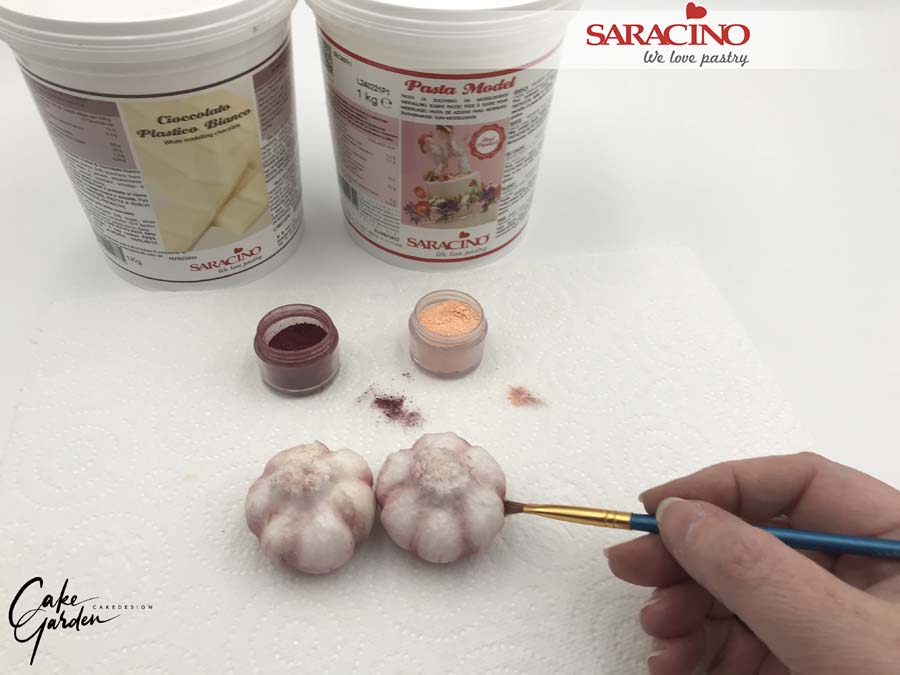
When the garlic is completely dry use the aubergine and peach powder to dust the garlic.
Start with the peach and use the aubergine to highlight the deeper parts between the cloves. If you like you can also use some claret dust to add warmth to the colours.
Step 32
Keep adding shade until you achieve the required look.

Step 33
Now you are ready to decorate your cake! Have fun!


