
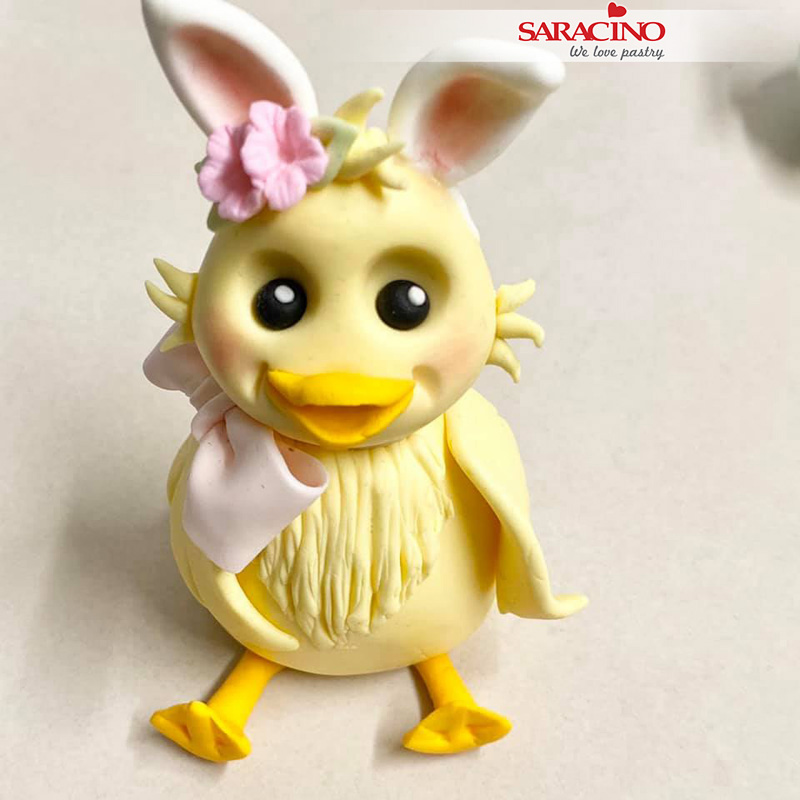
You will need:
- Saracino modelling paste in the following colours: pale yellow, light blue, light green, light pink, white, black
- Saracino pink powder colour
- Flower former or paint palette
- Large and small circle cutters
- Craft knife and a smooth blade knife
- Dresden tool
- Medium and small ball tools
- Foam mat
- Small PME circle plunger cutter
- PME blossom plunger cutters
- Petunia flower mould/veiner
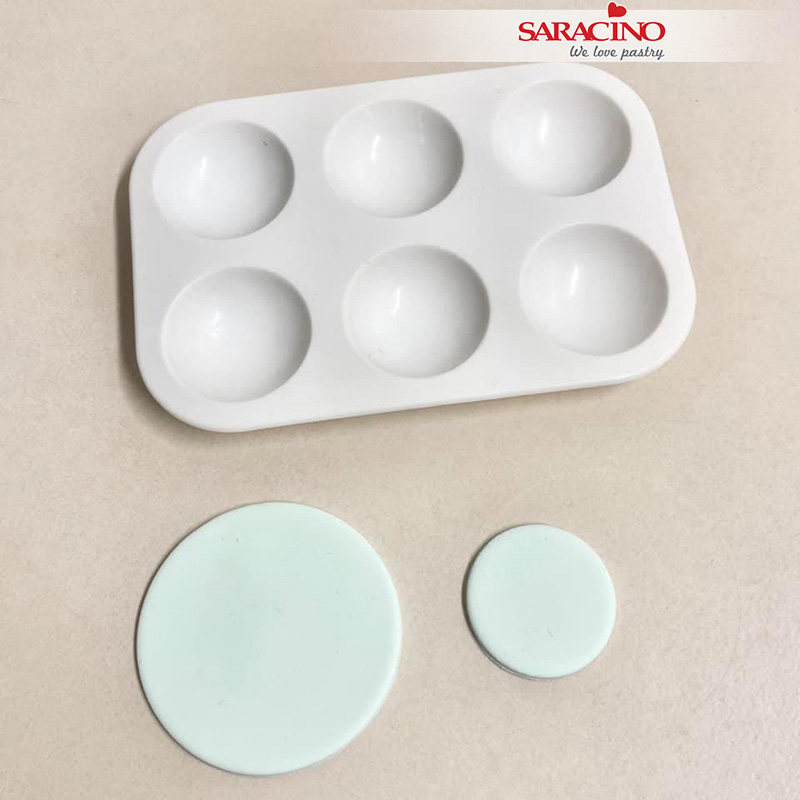
Step 1
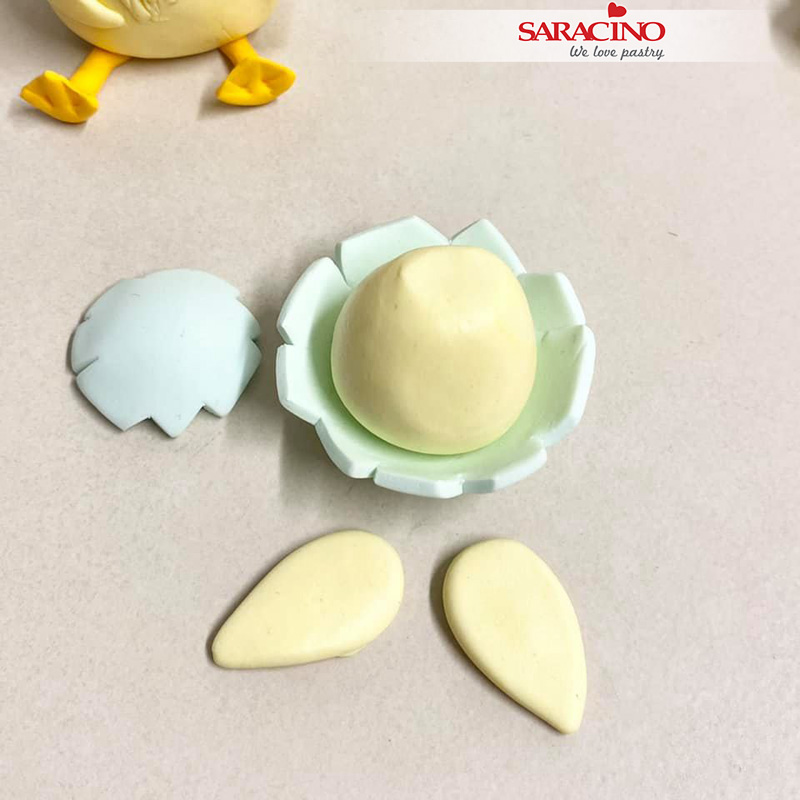
Roll out the light blue paste to approximately 2mm thick and cut out a large and small circle.
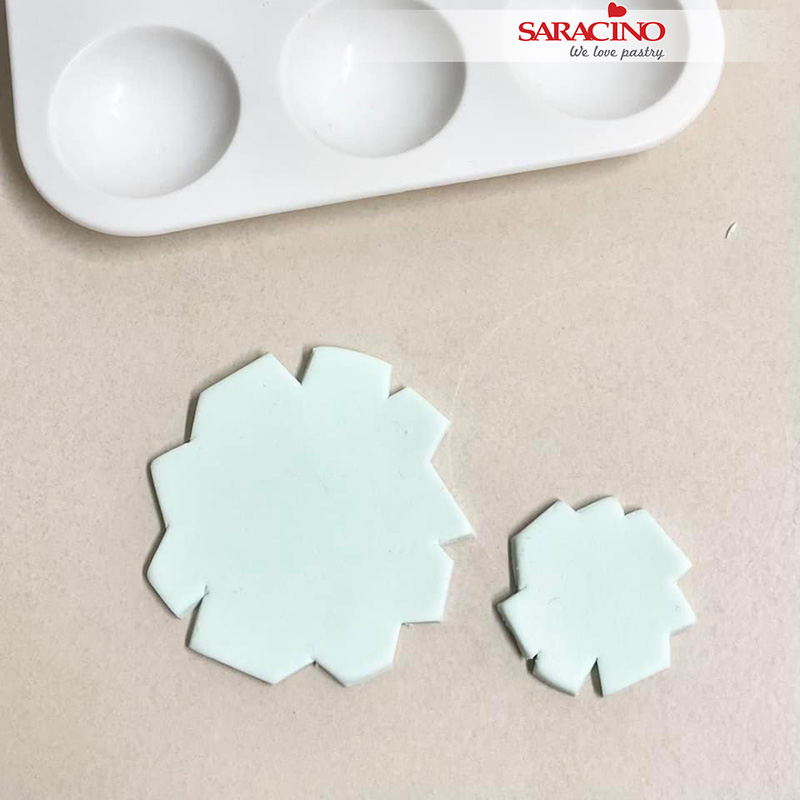
Step 2
Use a sharp craft knife and start cutting the edges of the circles and cut some V shapes and then also cut a few edges straight.
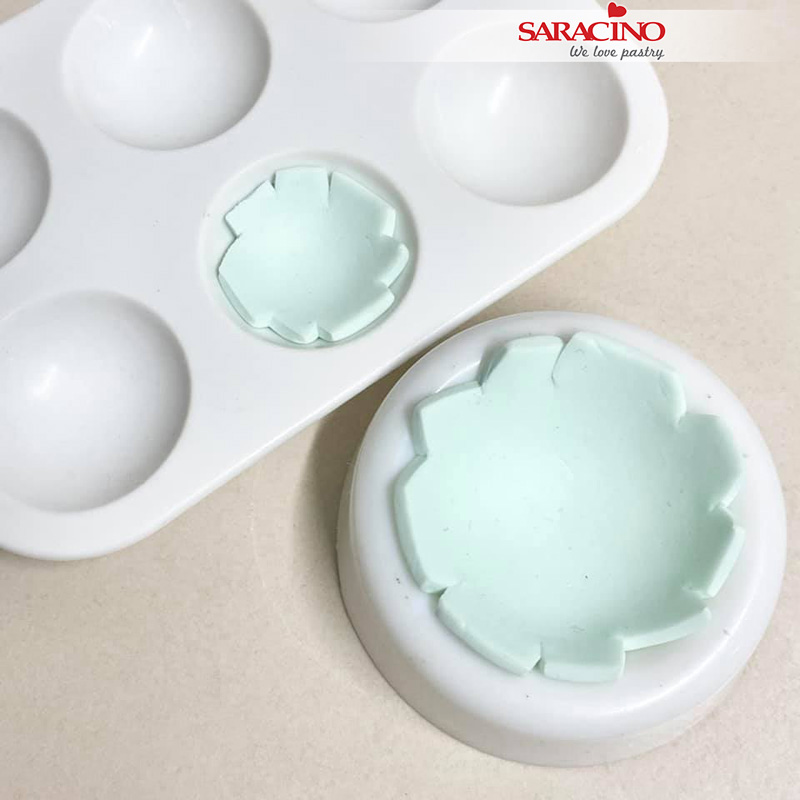
Step 3
Gently press each circle into a former so it can dry rounded, ready to use later.
Step 4
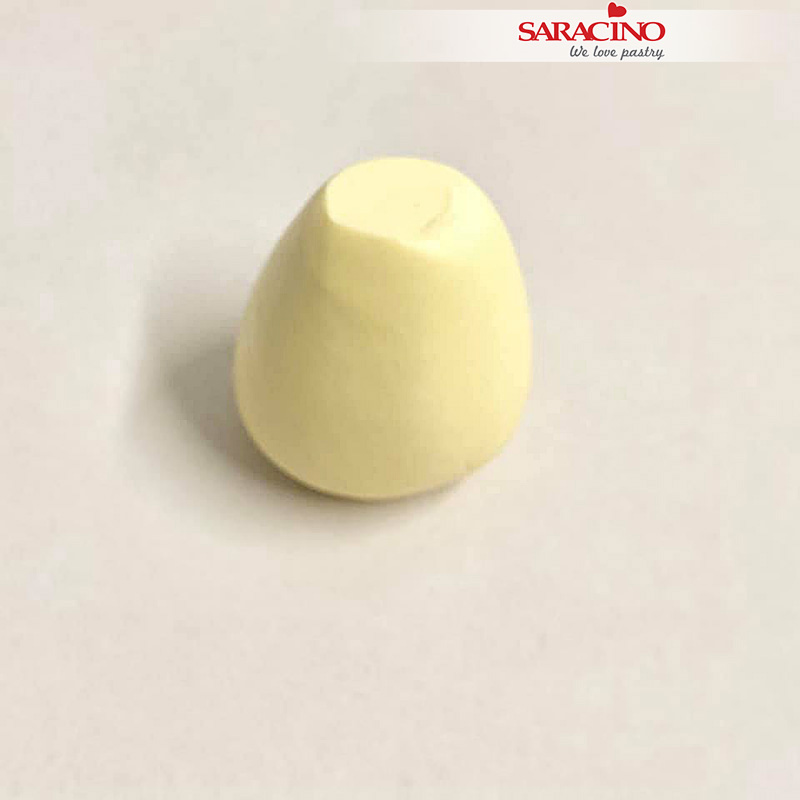
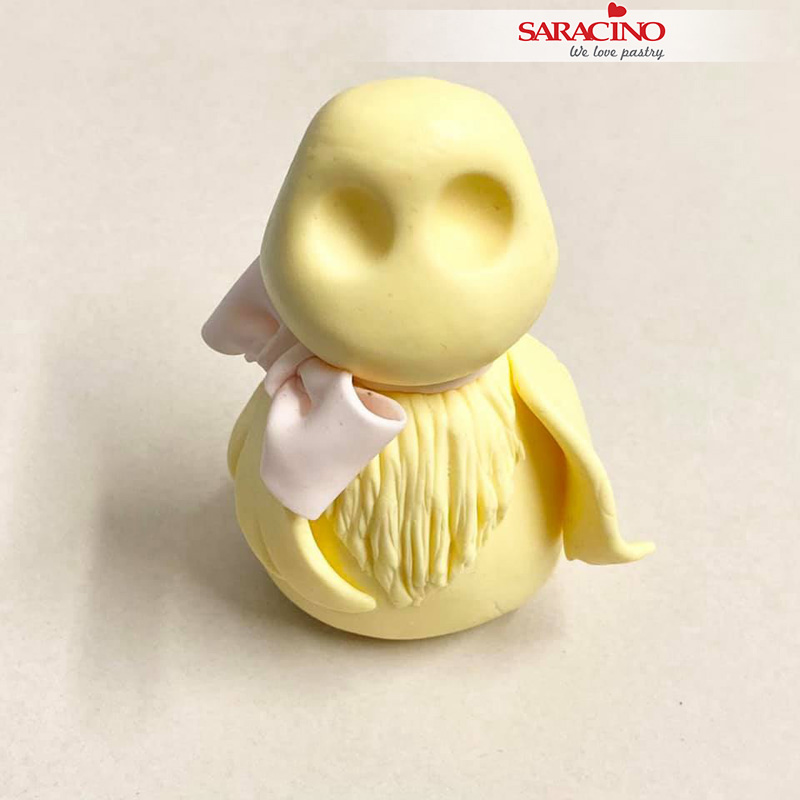
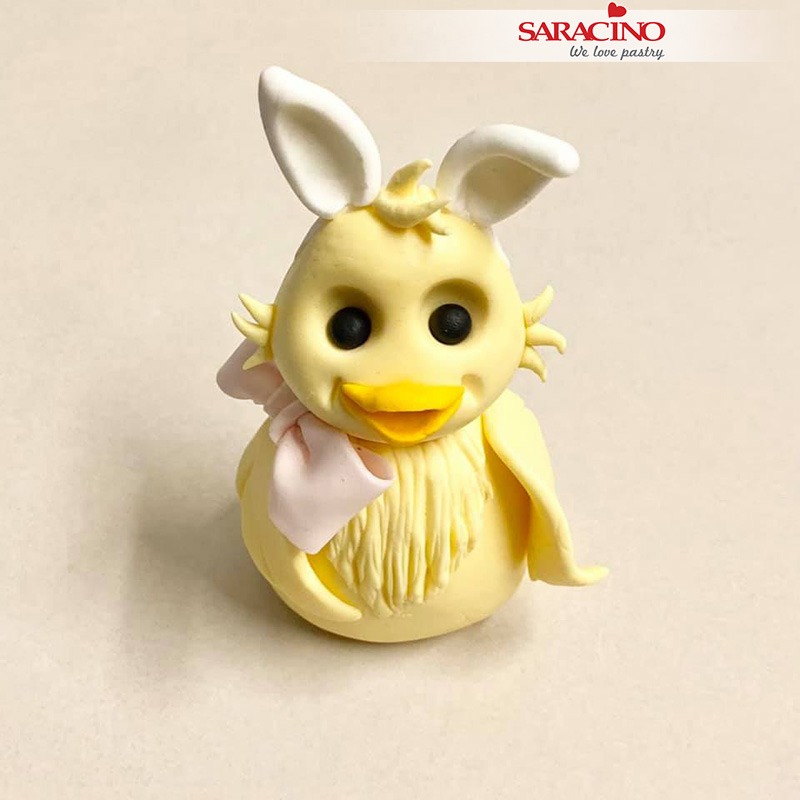
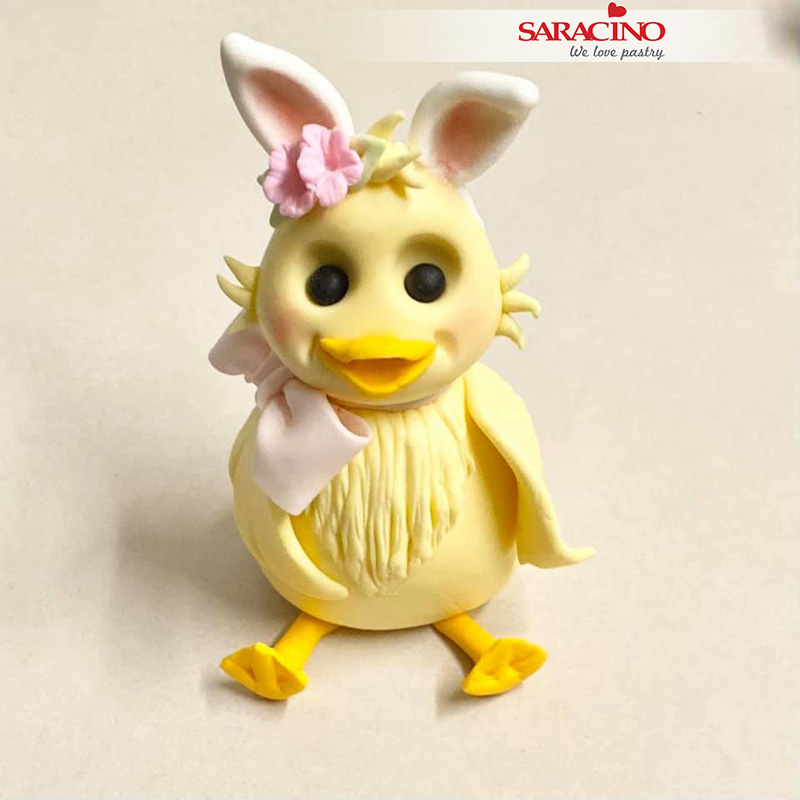
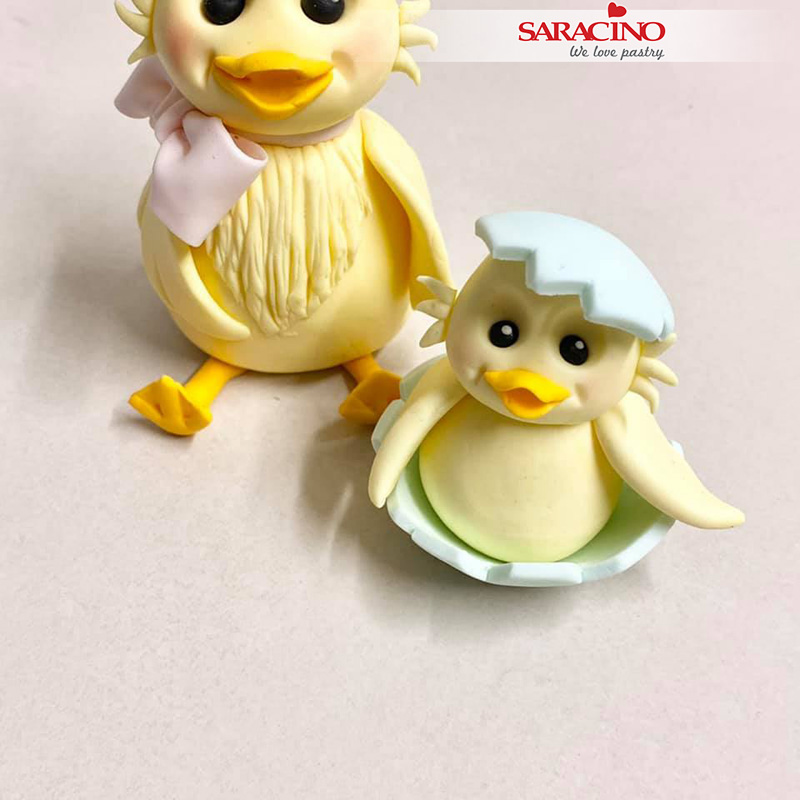
To start the large chick, roll yellow modelling paste into a teardrop shape. Trim off the top part so the head will fit nicely on to the body.

Step 5
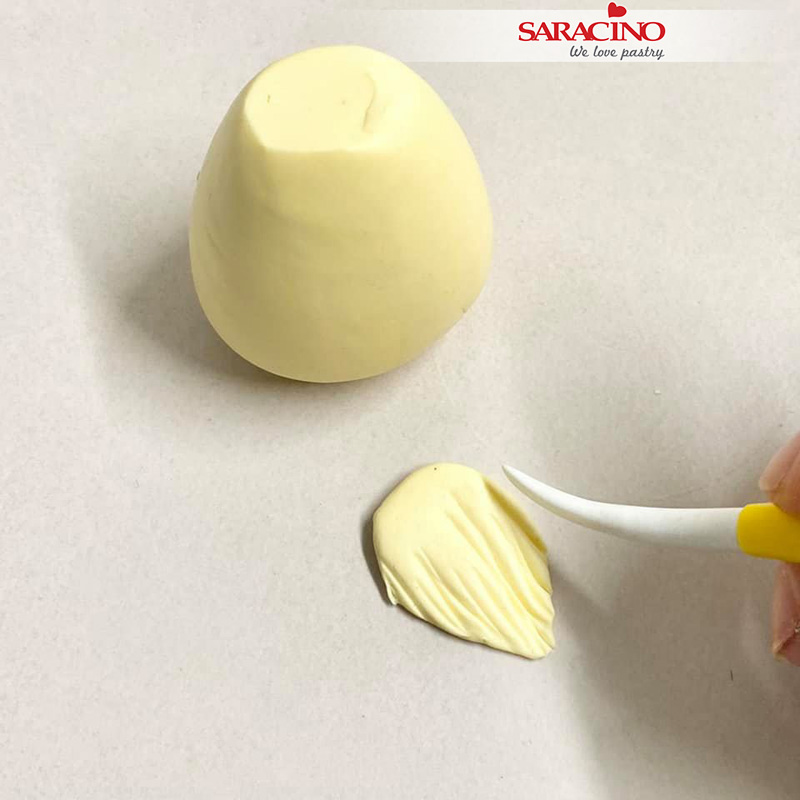
Roll a small teardrop shape for the chest.
Step 6
Flatten the teardrop shape using your finger and use the back of your Dresden tool to texture this piece of icing.
Step 7
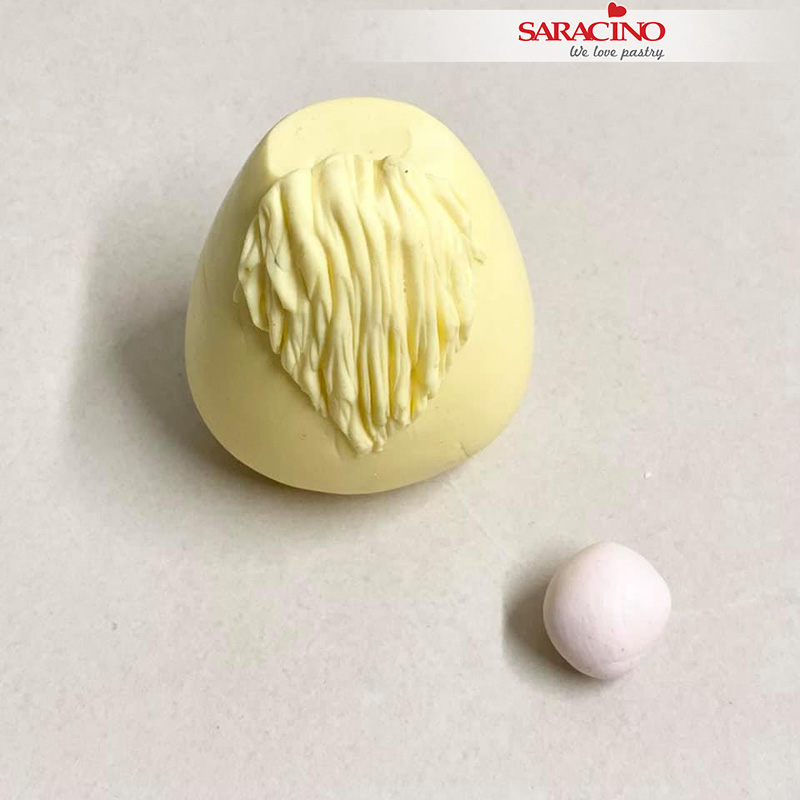
Fix the textured piece to the front of your chick and roll out a small piece of light pink modelling paste.
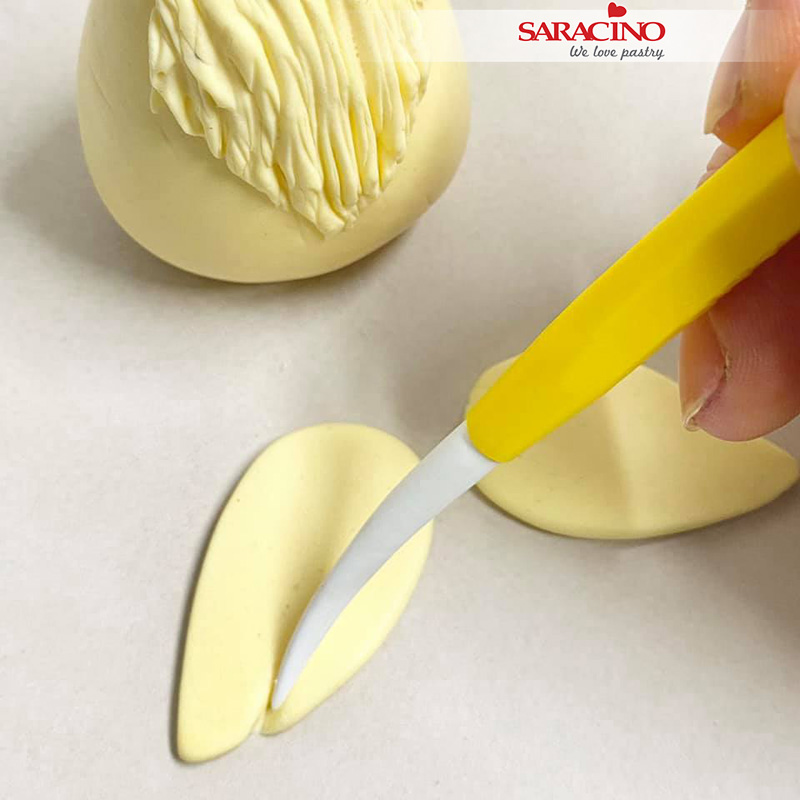
Step 8
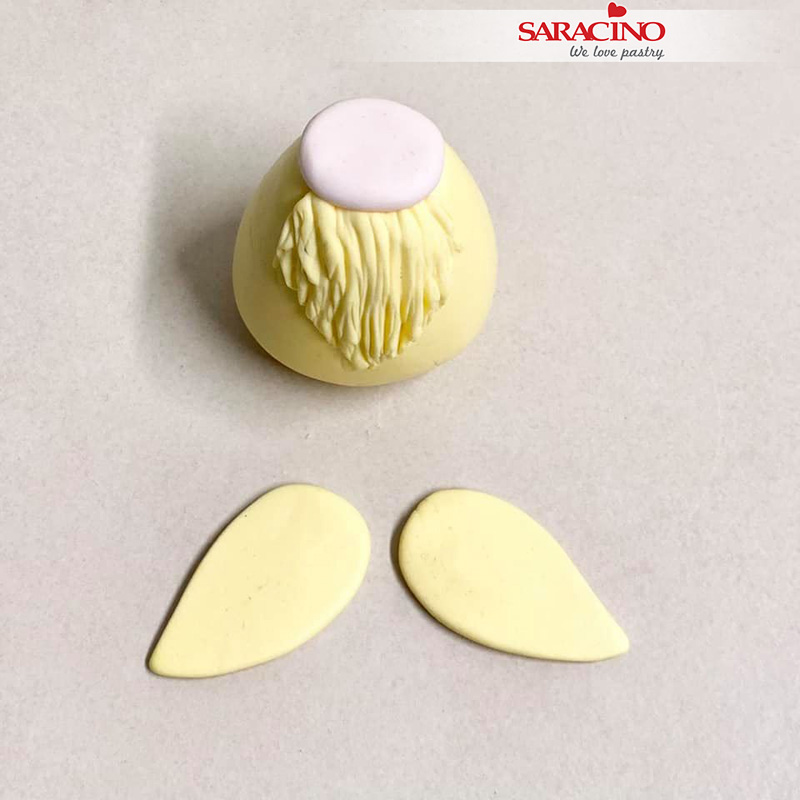
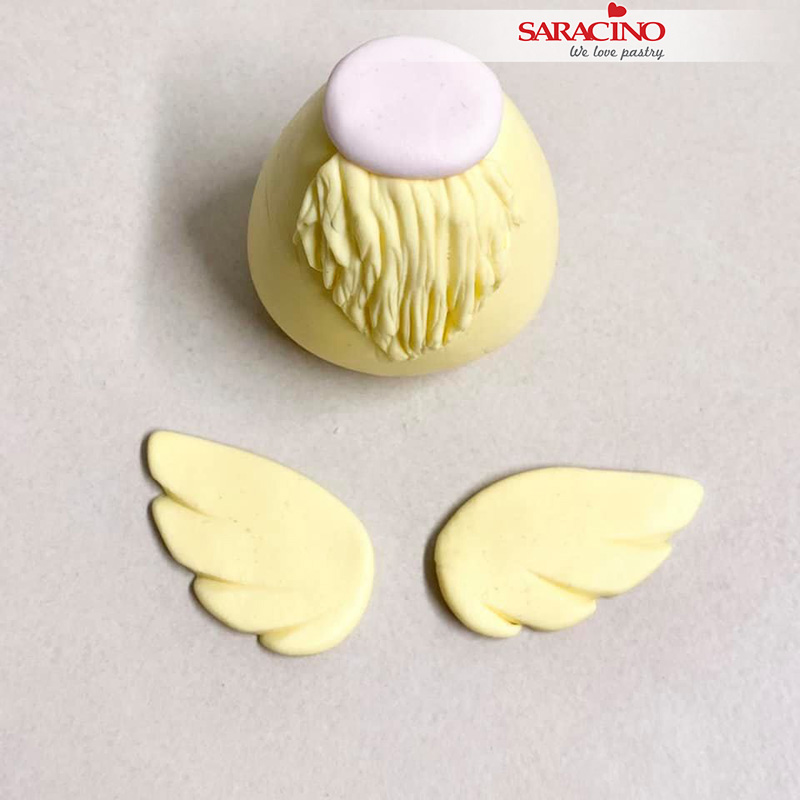
Flatten the pink ball and fix to the top of the body. Roll 2 smaller pieces of yellow paste into teardrop shapes for the wings. Flatten using your finger.
Step 9
Use your Dresden tool to make little wing indents.
Step 10
Mark 3 on each wing
Step 11
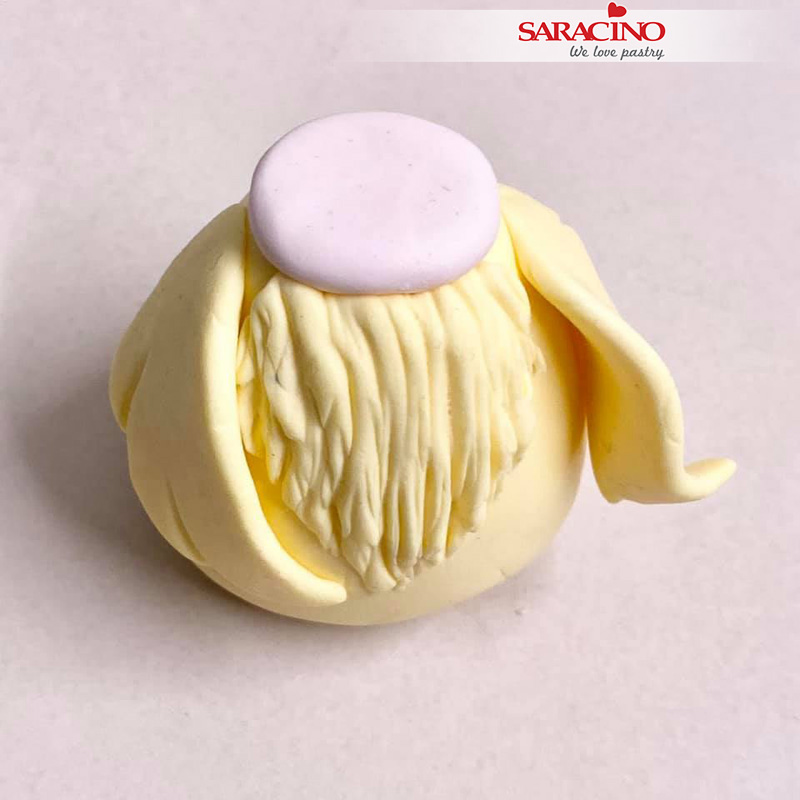
Add the wings to the body.
Step 12
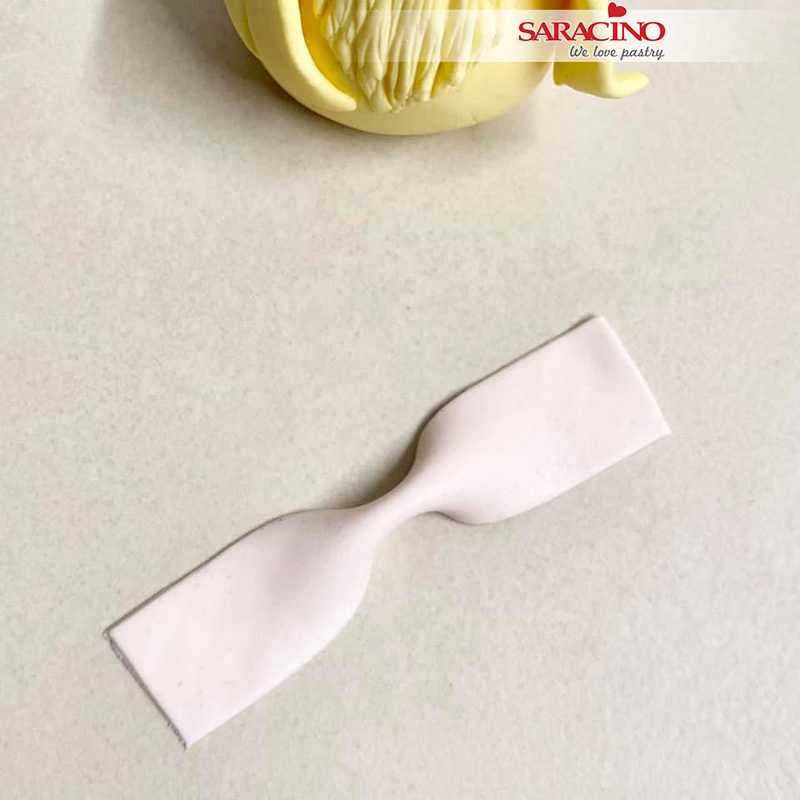
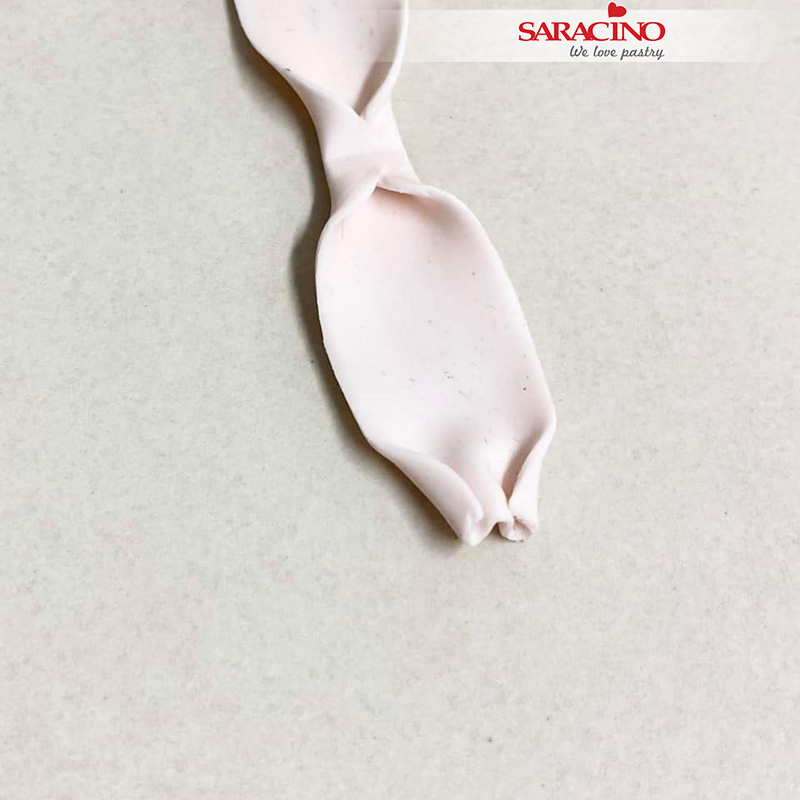
For the bow – roll a long rectangle shape and cut so you have straight edges. Find the middle of the rectangle and pinch it with your fingers to make a dent for the middle of your bow.
Step 13
Turn the bow over and on each end of the bow gather the paste as you would do with fabric

Step 14
Bring one side up and over into the centre. Repeat for the other side.
Step 15
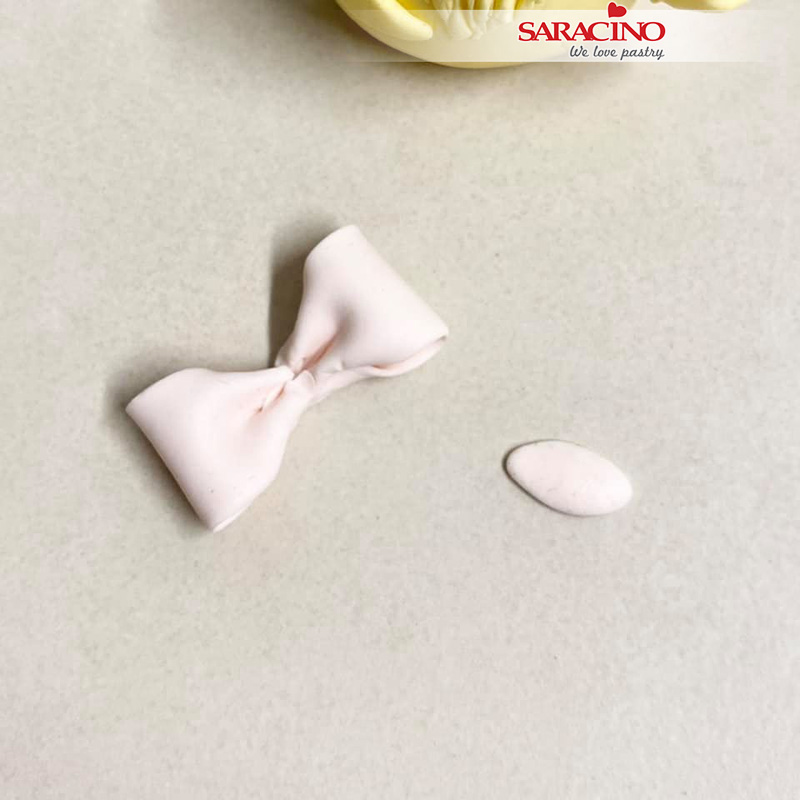
Roll and flatten a little oval piece of pink paste for the centre.
Step 16
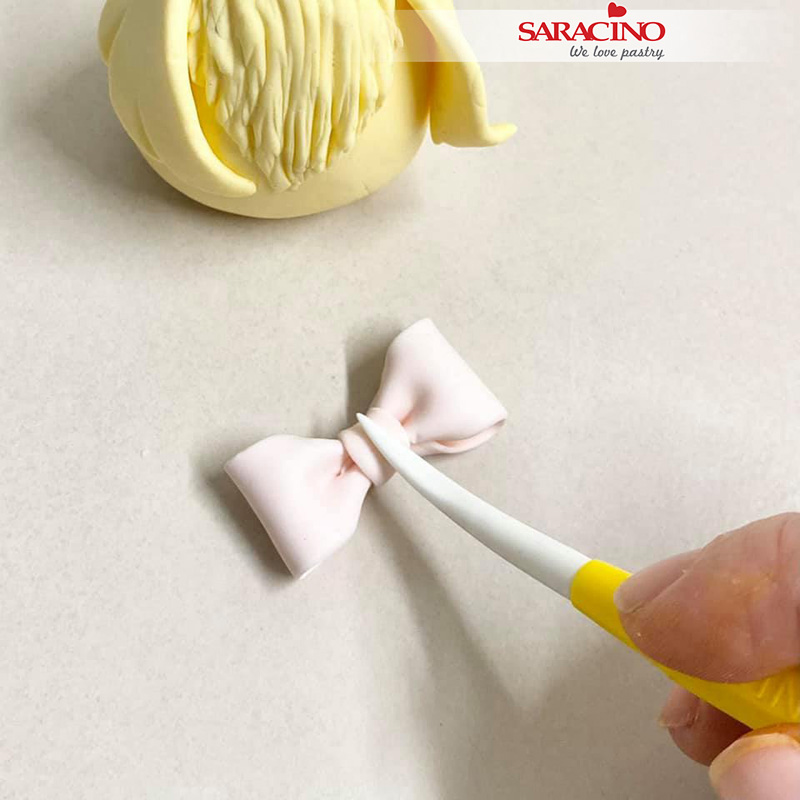
Glue the little piece over the middle of your bow. Use your Dresden tool in the middle of the centre piece to add texture.
Step 17
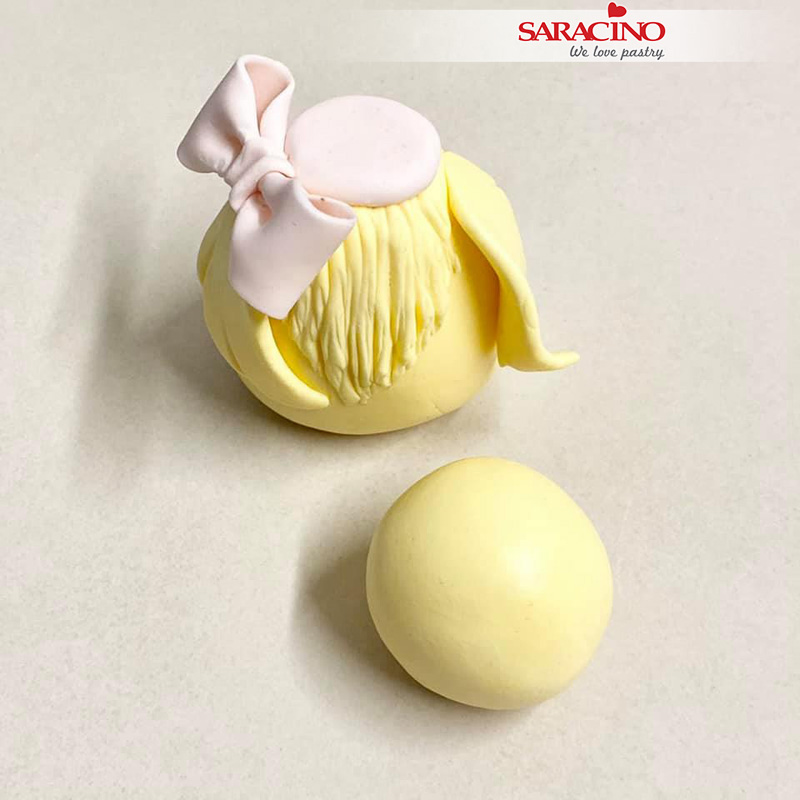
Add the bow to the side of the neck on your chick. Roll a ball for the head.

Step 18
Shape the head a bit so it’s smaller on top and wider at the bottom and add your head to the body.
Step 19
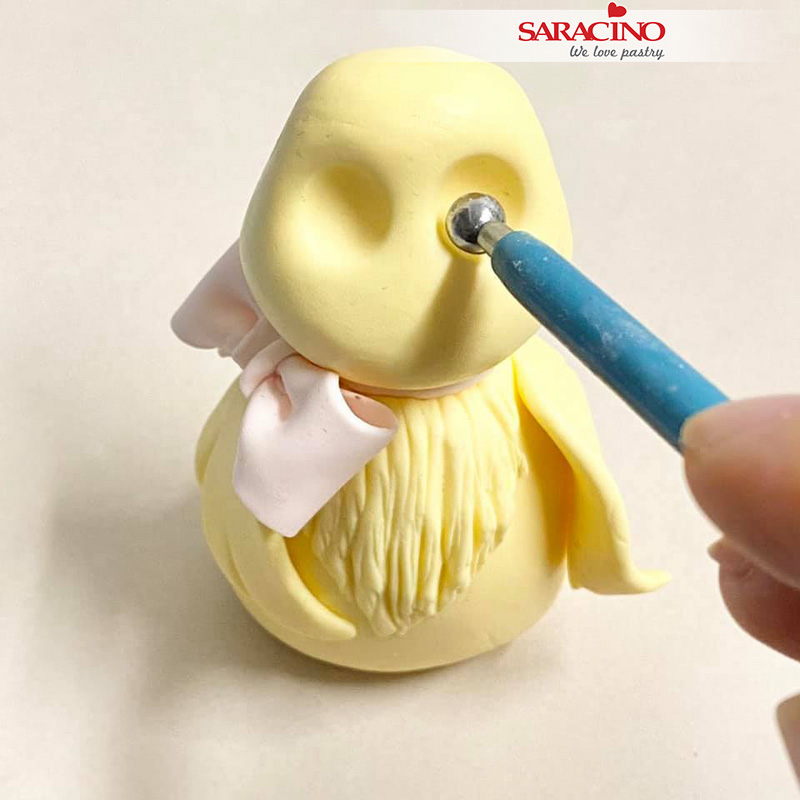
Use a medium ball tool to create some eye sockets. Smooth the edges slightly on the eye sockets to ‘soften’ the look a bit
Step 20
Use a smaller ball tool to make little holes for the eyes
Step 21
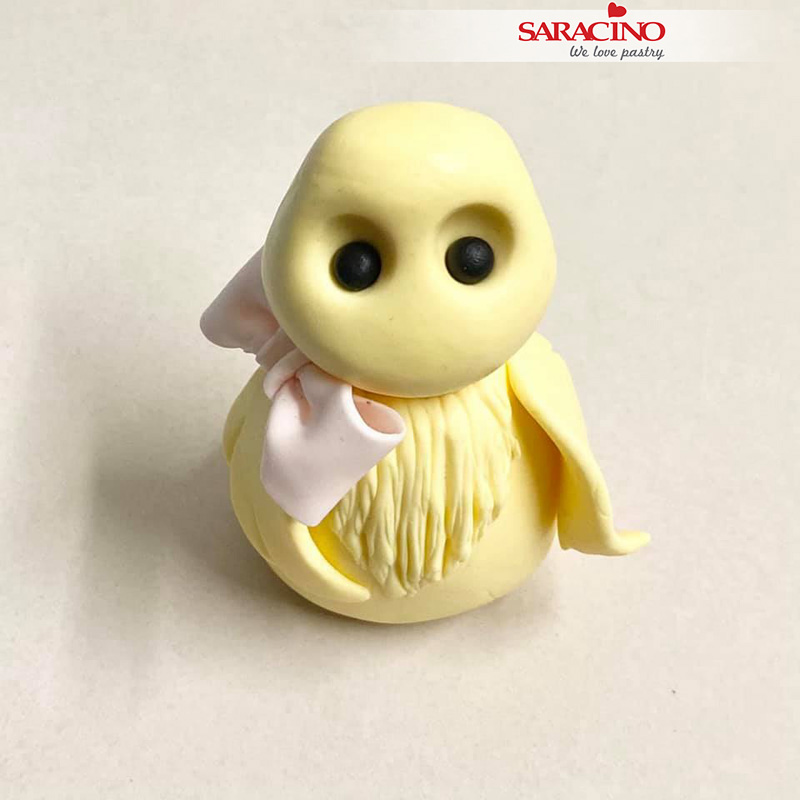
Roll 2 small balls of black modelling paste for the eyes to fit in the smaller holes. Add the eyes to your character.
Step 22
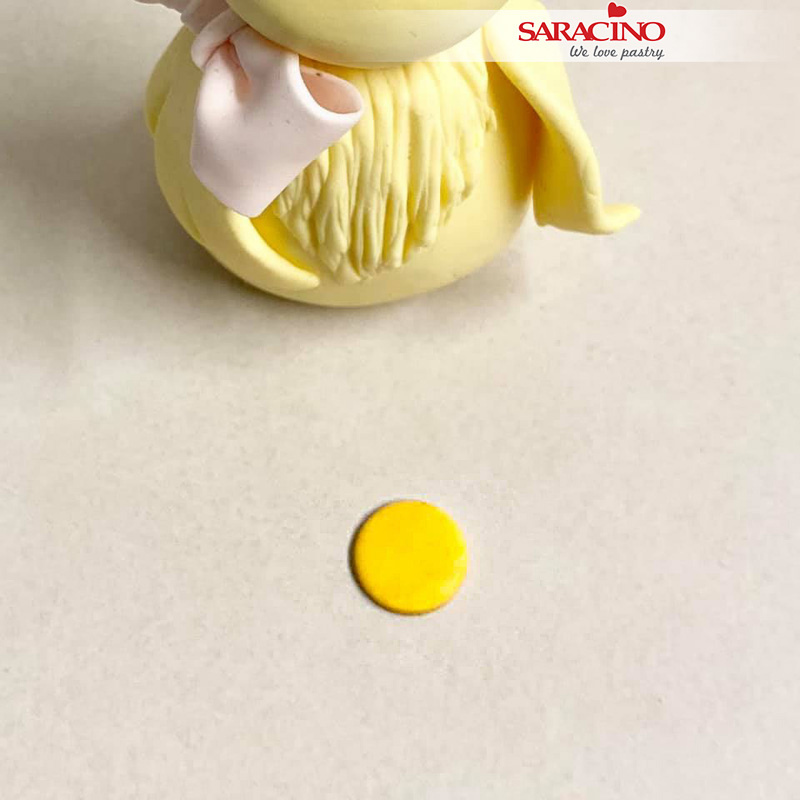
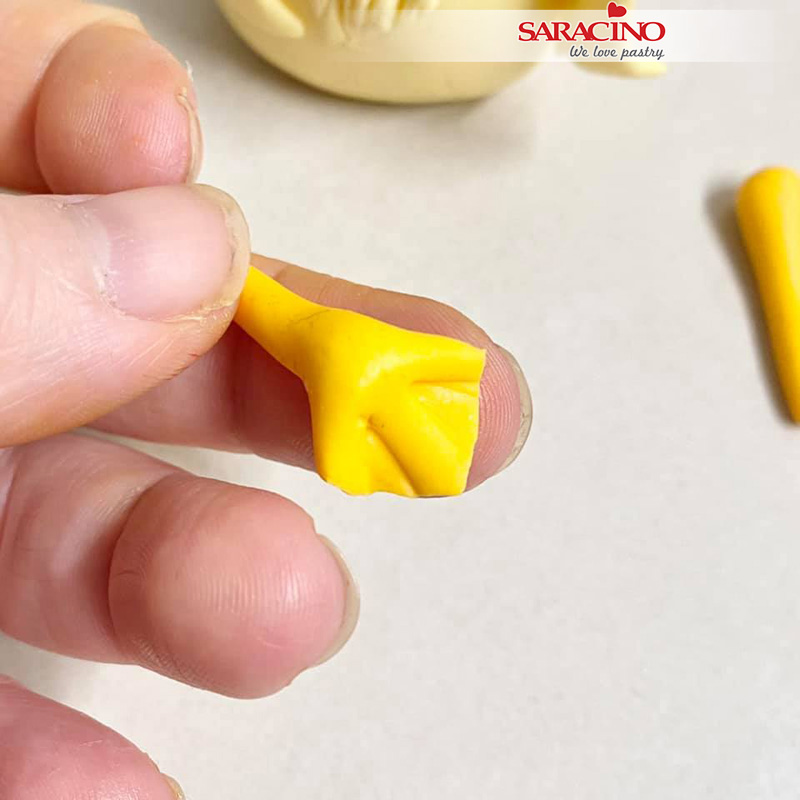
For the beak, cut out a small circle from dark yellow.
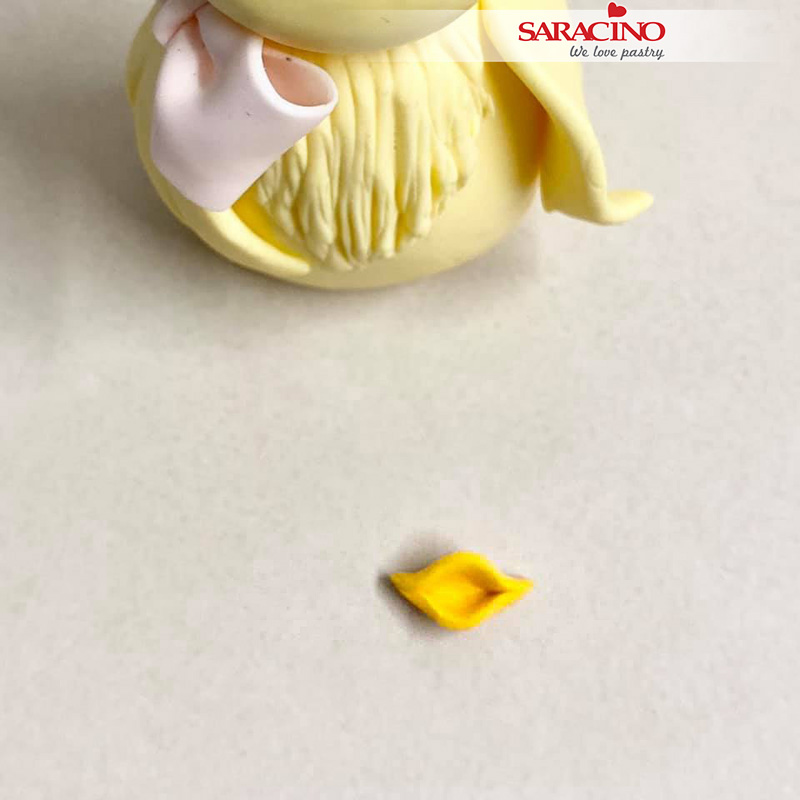
Step 23
Gently fold this circle over and pinch each side, leaving the centre open a little bit.
Step 24
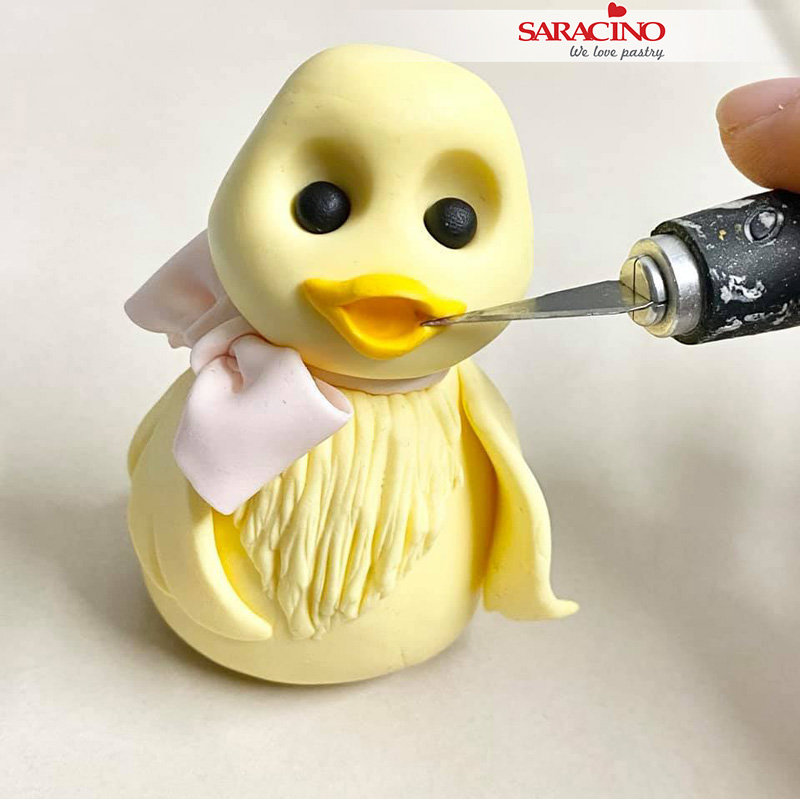
Add the beak to the face, I used a ball tool to press it in place. Use the back of your craft knife for each side of the beak to make it more defined.
Step 25
Use the scoop side of the Dresden tool to make little dimples each side of the beak
Step 26
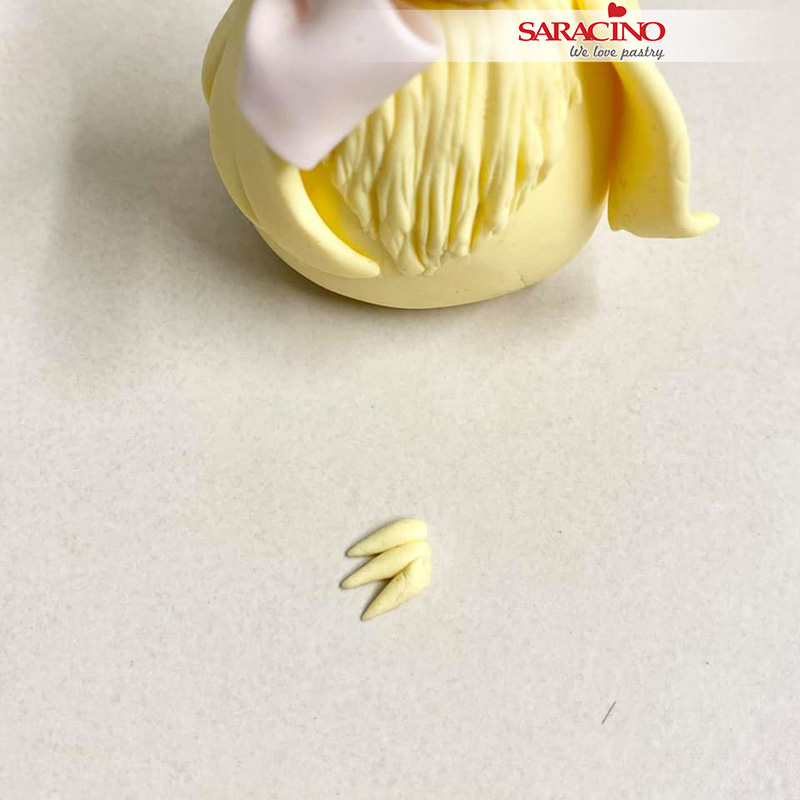
Roll 3 small pieces of yellow icing and press them together for some feather effect on the sides of the face.
Step 27
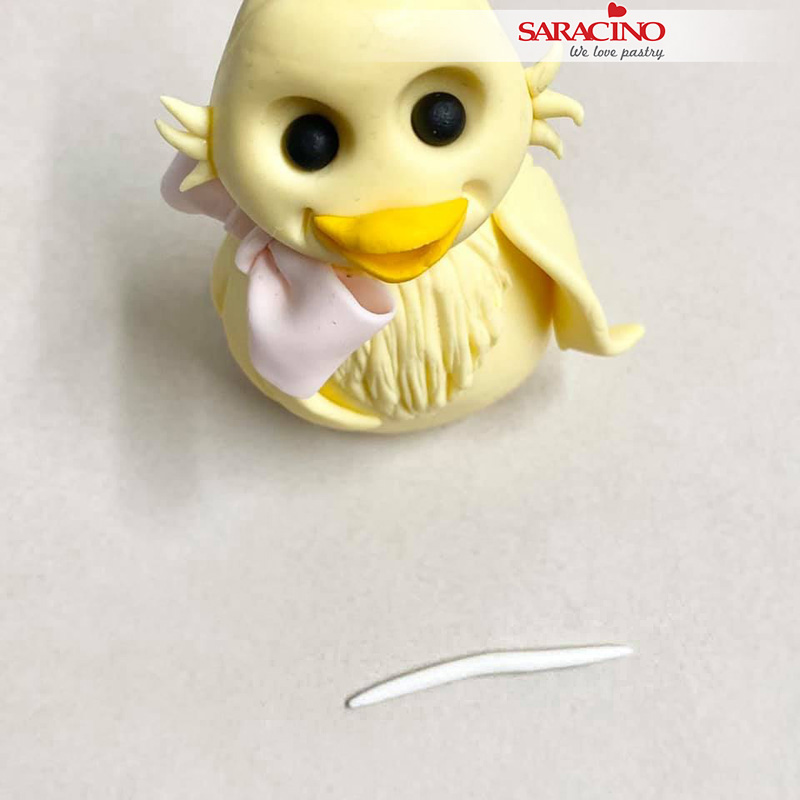
Trim the larger side of these feathers and glue in place on the side of each cheek. Roll a thin white piece of paste to add to the top of the chick’s head.
Step 28
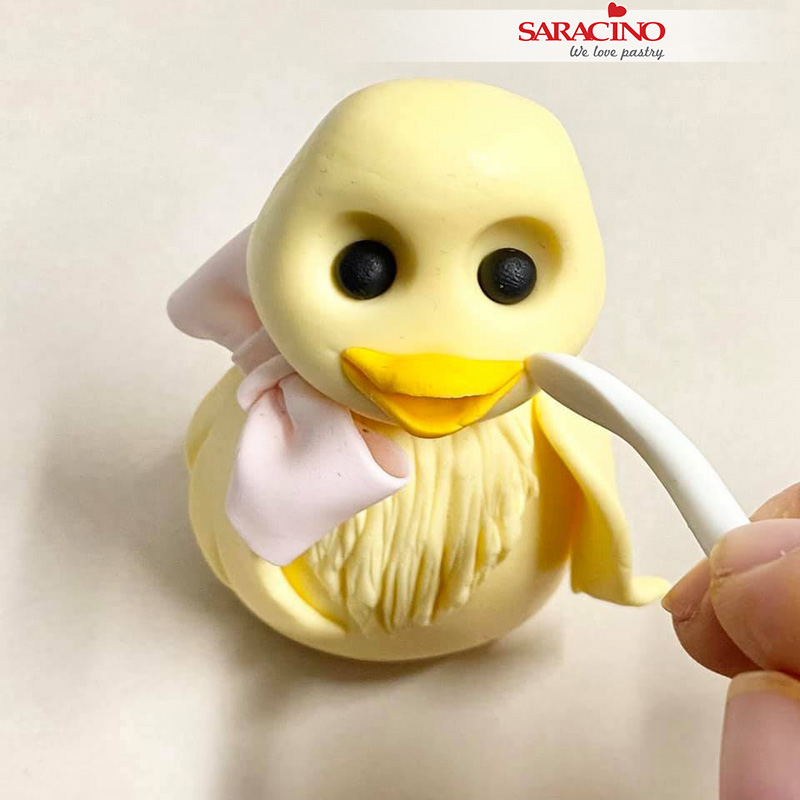
Glue the white piece in place as a head band.
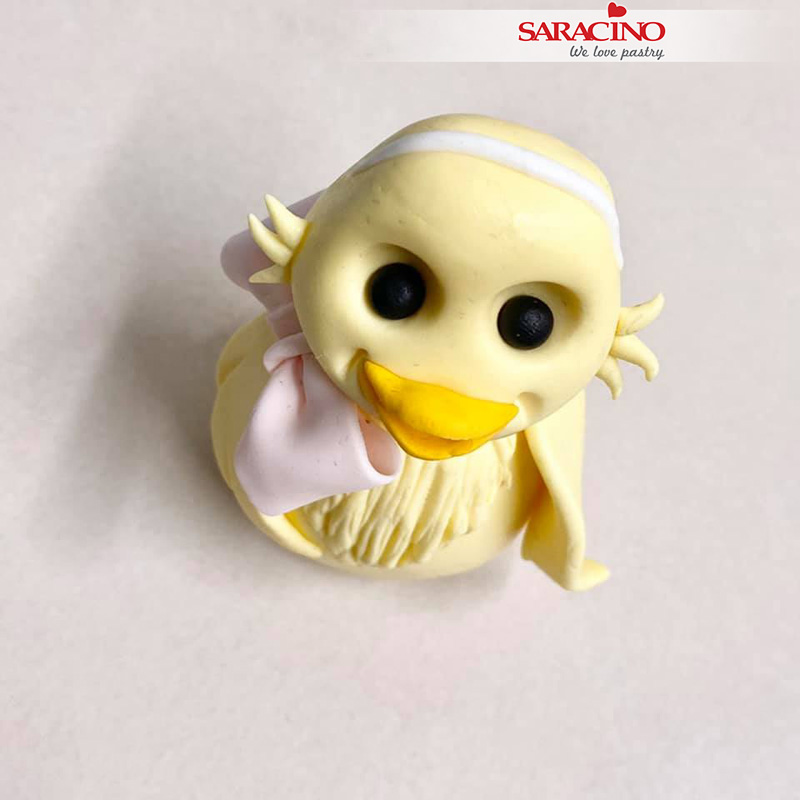
Step 29
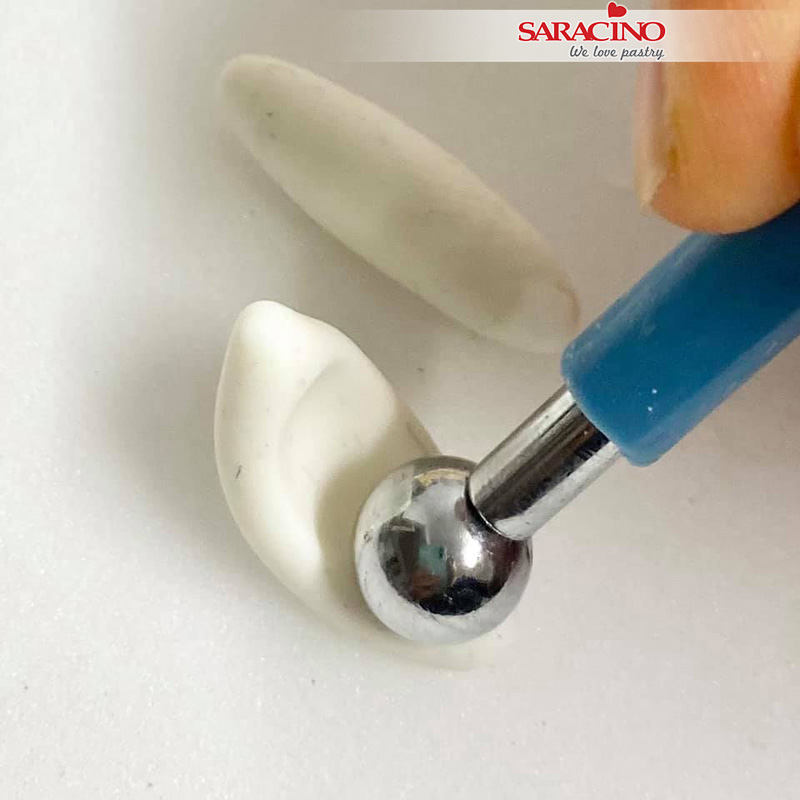
For the ears roll out 2 white pieces of paste. Use a foam mat and ball tool to indent the ears, roll the ball tool up and down the ears.
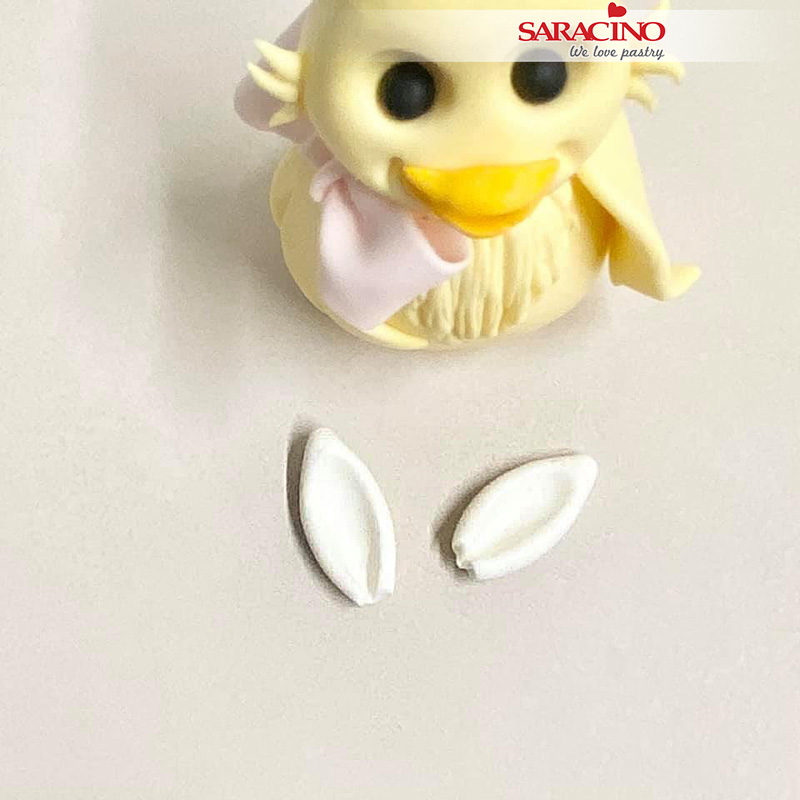
Step 30
Trim off the bottom of each ear. Pinch the base slightly to fold it in a little bit
Step 31
Add the ears to the headband on your chick. Add some little feathers between the ears
Step 32
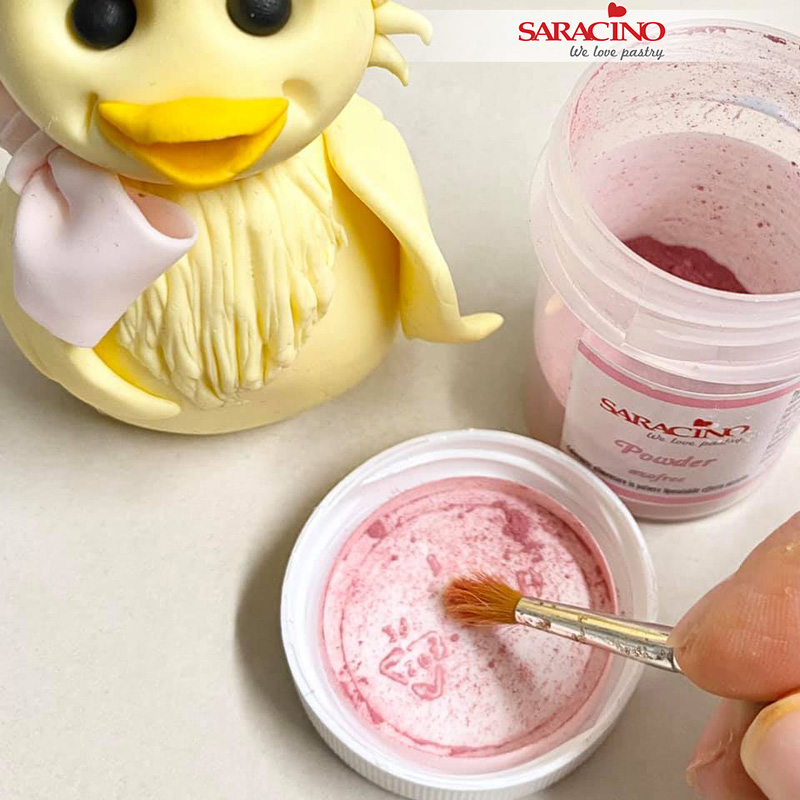
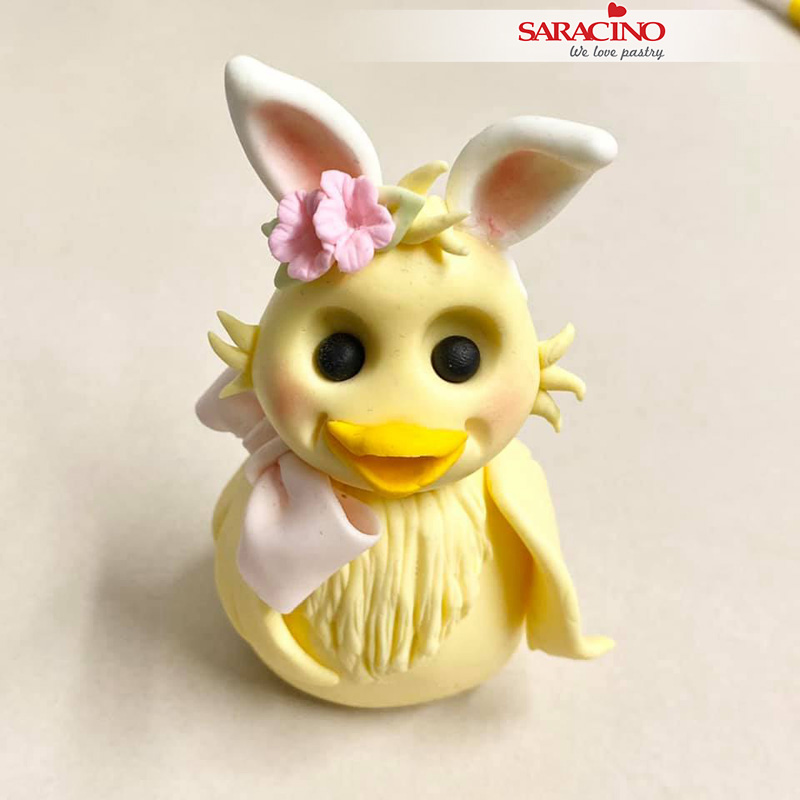
Using pink Saracino dust and a soft brush dust the inside of the ears and the cheeks.

Step 33
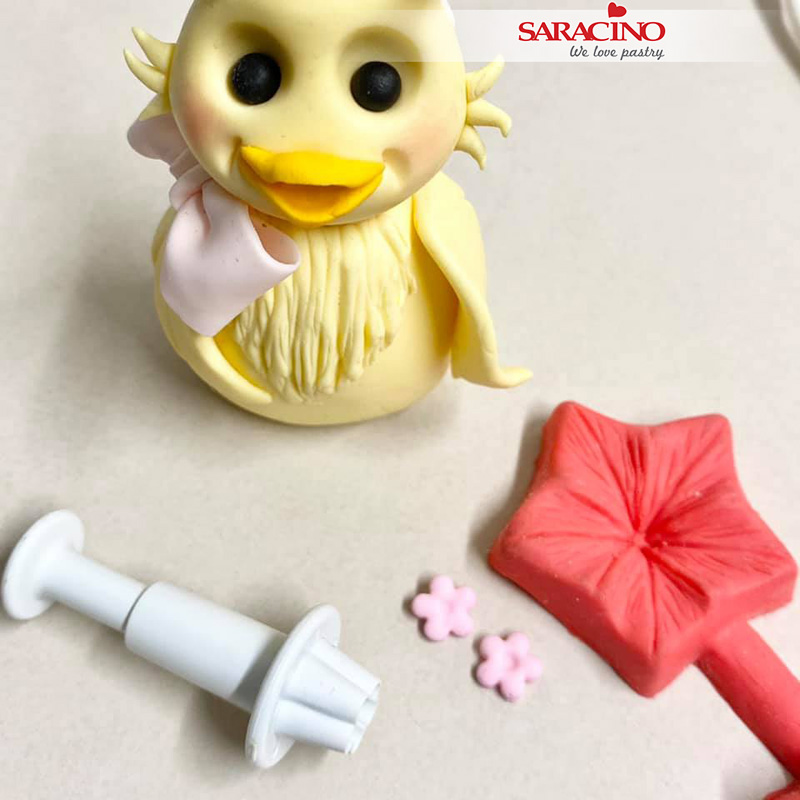
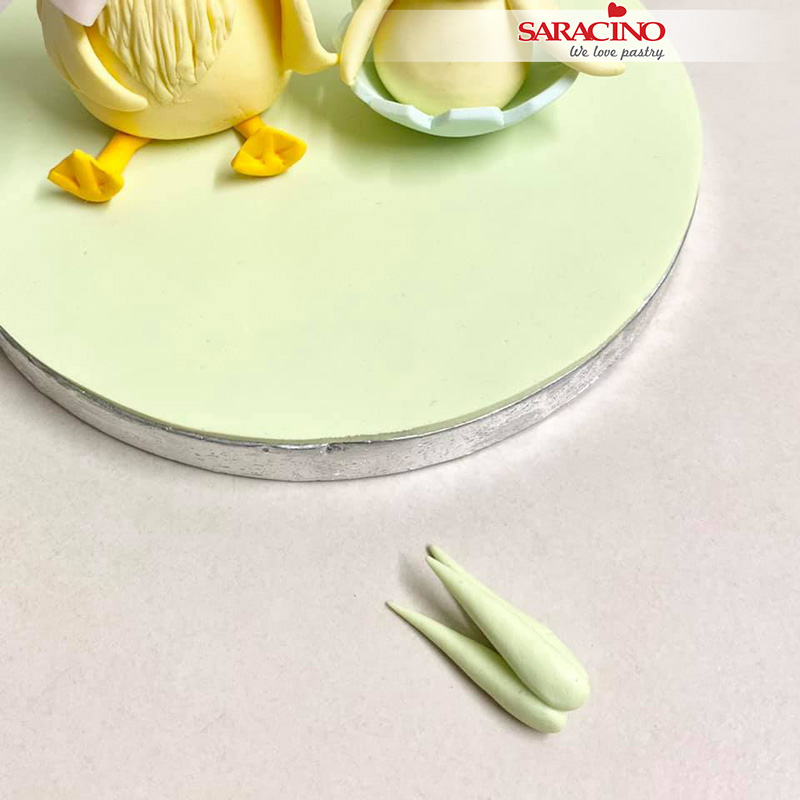
Roll 3 small pieces of light green paste into little teardrop shapes. Use the back of your Dresden tool to indent each shape to make little leaves.
Step 34
Use a small blossom cutter and a petunia mould to make some flowers. Press the flowers in the mould to give them extra texture
Step 35
Add the leaves and flowers to the head next to the ear
Step 36
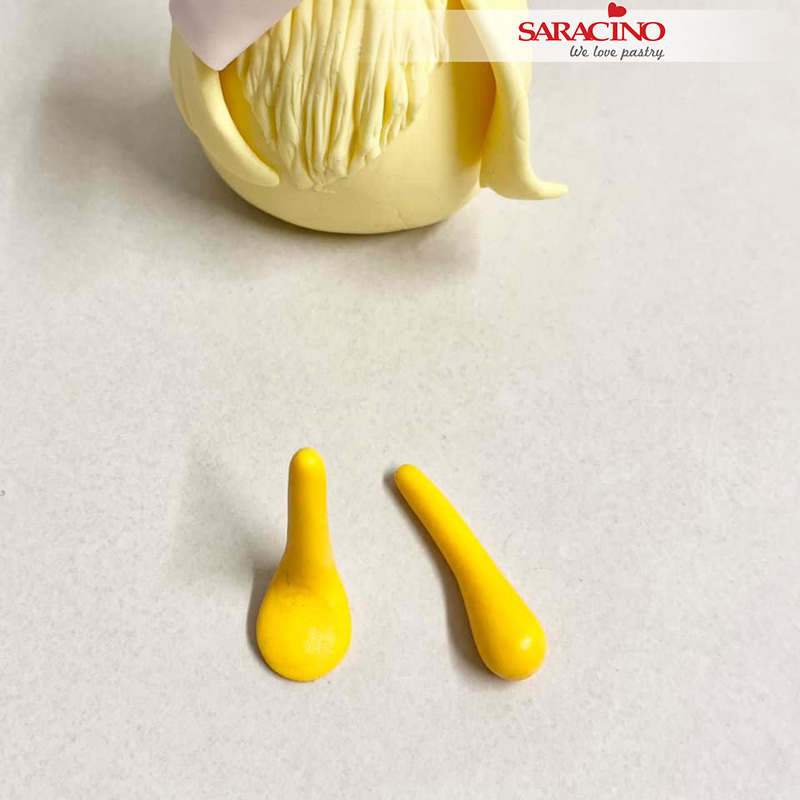
For the legs, roll 2 pieces of dark yellow paste with a wider part on each end. Press the wider part flatter and bend the leg up
Step 37
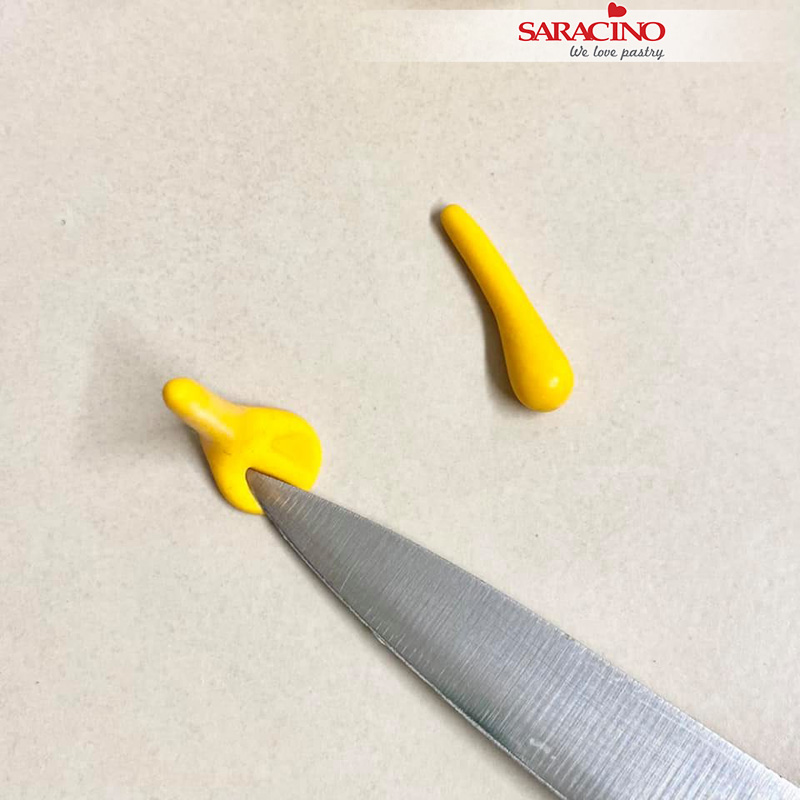
Use the blade of a knife to mark the foot of the chick. Mark each end of the foot
Step 38
Trim each end with a craft knife so you have a V shape. Turn the foot over on your finger and mark it the same underneath
Step 39
Add the legs to the character
Step 40
Using a small ball tool mark each eye and add some small white balls to the eyes.
Step 41
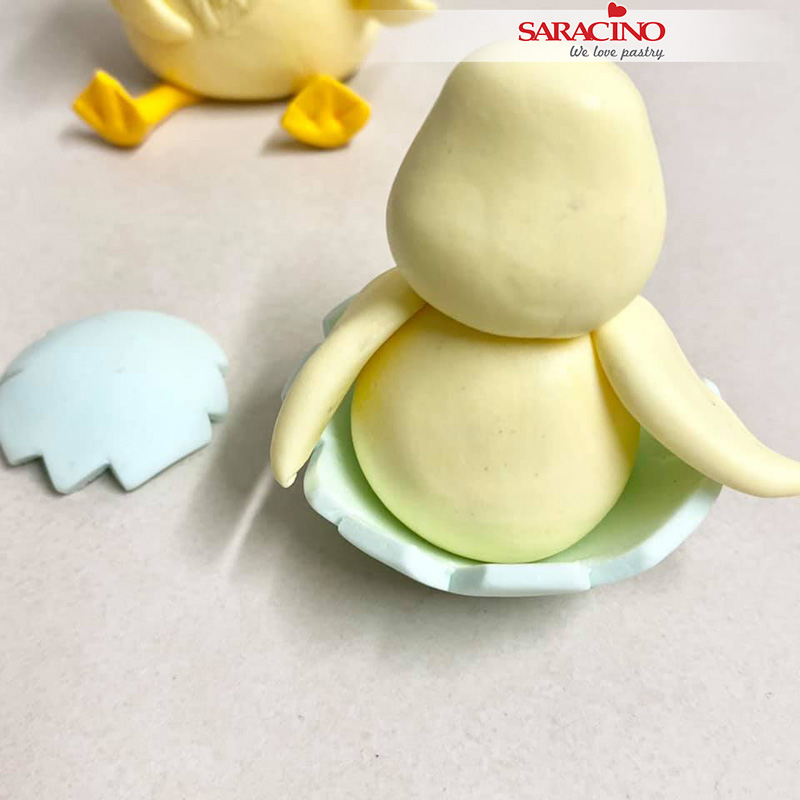
For the body of the baby chick roll a ball of light yellow paste and shape into a pear shape. Cut off the top ready for the head. Roll two teardrop shapes and press with your finger to form the wings.

Step 42
Fix the wings to the body.
Step 43
Shape the head as with the larger chick. Fix to the body.
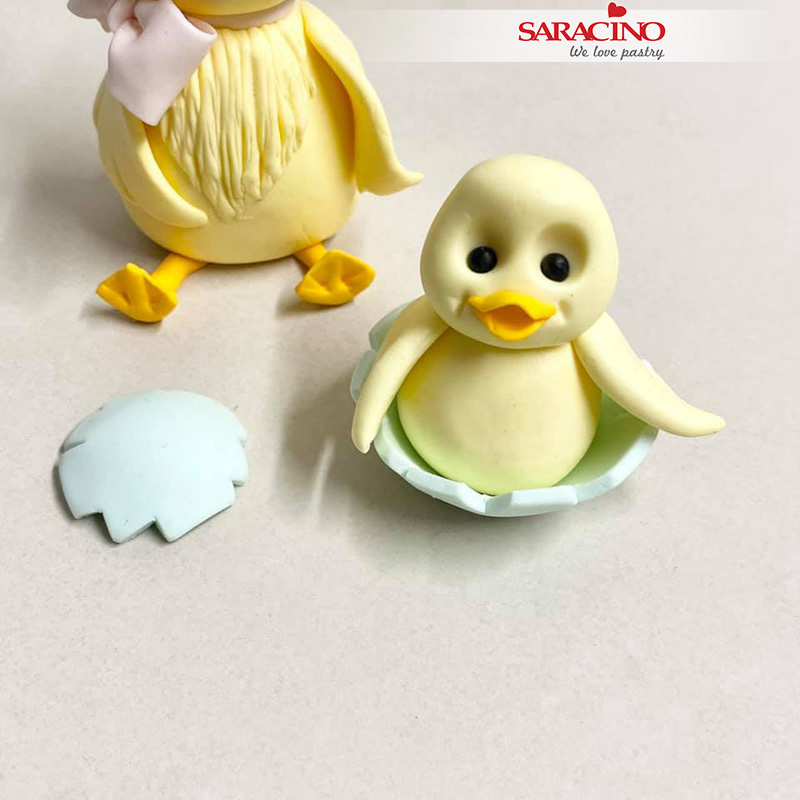
Step 44
Create the eye sockets, eyes, beak and dimples the same as we did for the large character
Step 45
Add some little ‘feathers’ each side of the cheek and the shell on the baby’s head
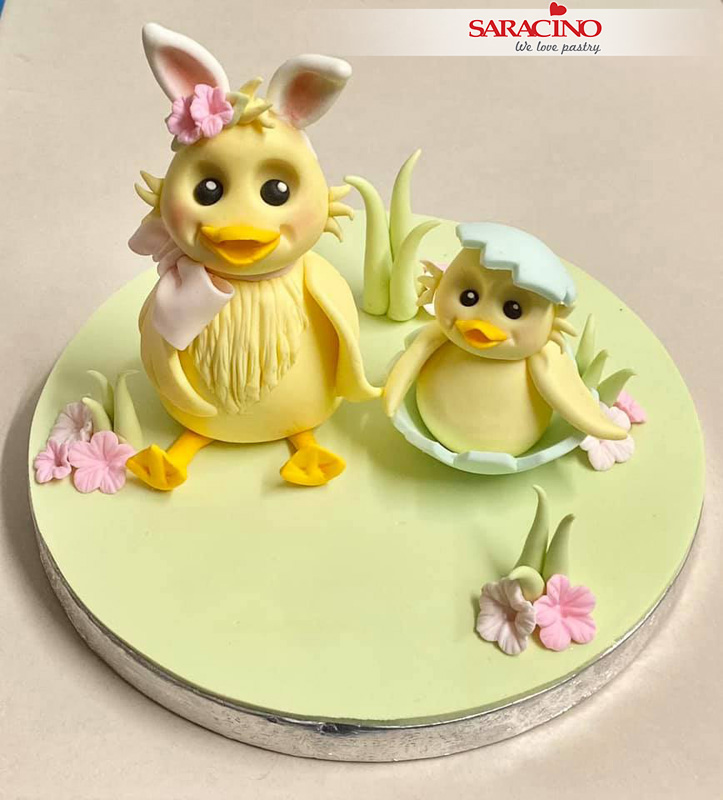
Step 46
Add your characters to a board or cake and using green paste roll 3 long teardrop shapes for grass. Stick the pieces of grass together

Step 47
Trim off the rounded pieces of the grass and add to the cake board
Step 48
Cut some extra flowers in different sizes and add them randomly
