Author: ANJALI TAMBDE

Skill level: BEGINNERS
TIPS:
Tip 1: If you are not confident enough to write directly on the cake using edible pens then use a needle tool to write on the cake and then write with the pen over it, this will avoid any spelling mistakes and save time re-doing things
Tip 2: Use tooth picks or cocktail sticks to secure the figurines on the cake along with some glue, this keeps the figurines safe while travelling with the cakes.
You will need:
INGREDIENTS:
- Saracino pasta model pink
- Saracino pasta model blue
- Saracino pasta model red
- Saracino pasta model skin
- Saracino modelling chocolate brown
- Saracino modelling paste white
- Saracino modelling paste black
- Edible glue
- Pink dust powder colour
- Gel colours: white, brown, black, pink
- Black edible pen
- Cornflour
EQUIPMENT:
- 10” Round cake or dummy
- Polystyrene cone
- Envelope template
- Rolling pin
- Craft knife
- Ball tool
- Dresden tool
- Shell tool
- Soft modelling tools
- Brushes
- Mat
- Heart cutter
Step 1
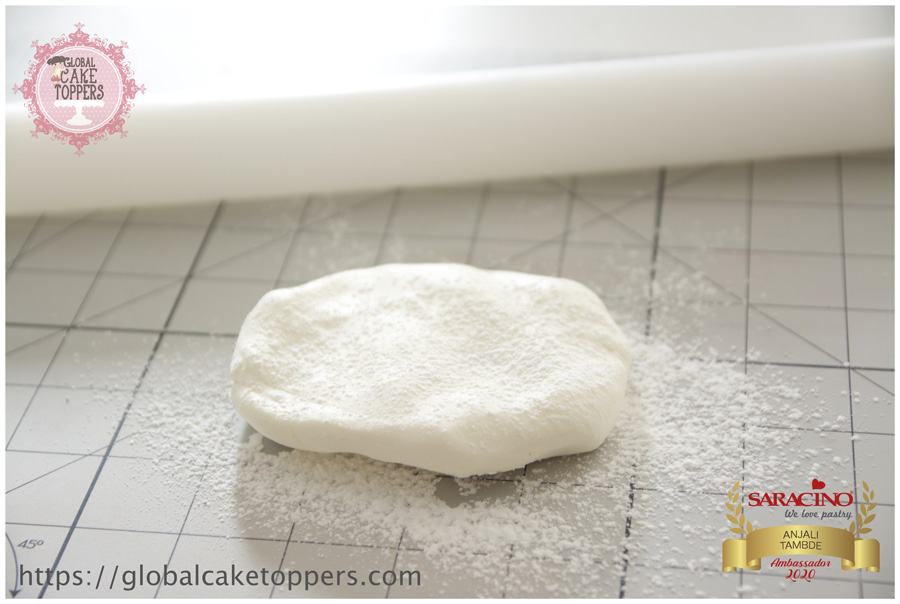
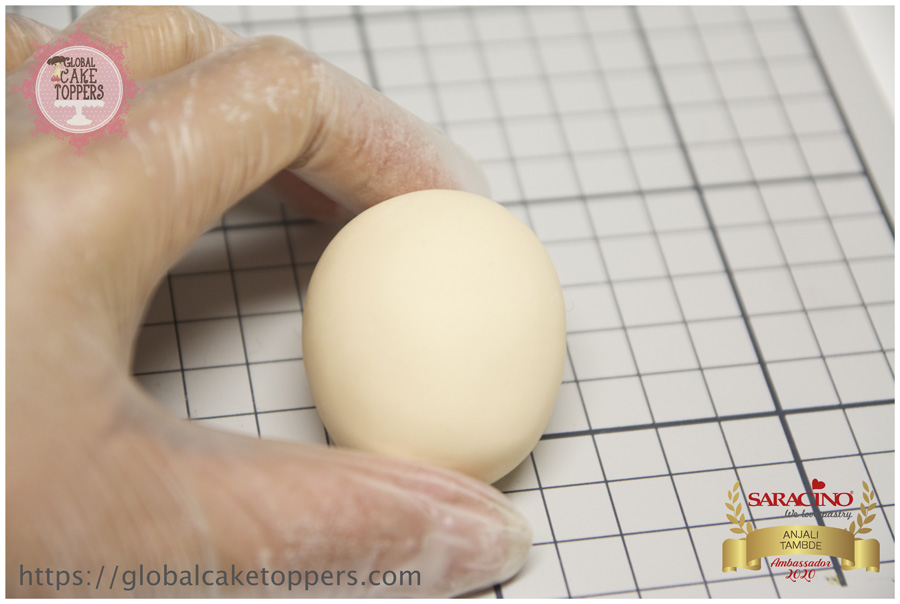
To make an envelope knead some white Saracino Modelling Paste until workable.
Step 2
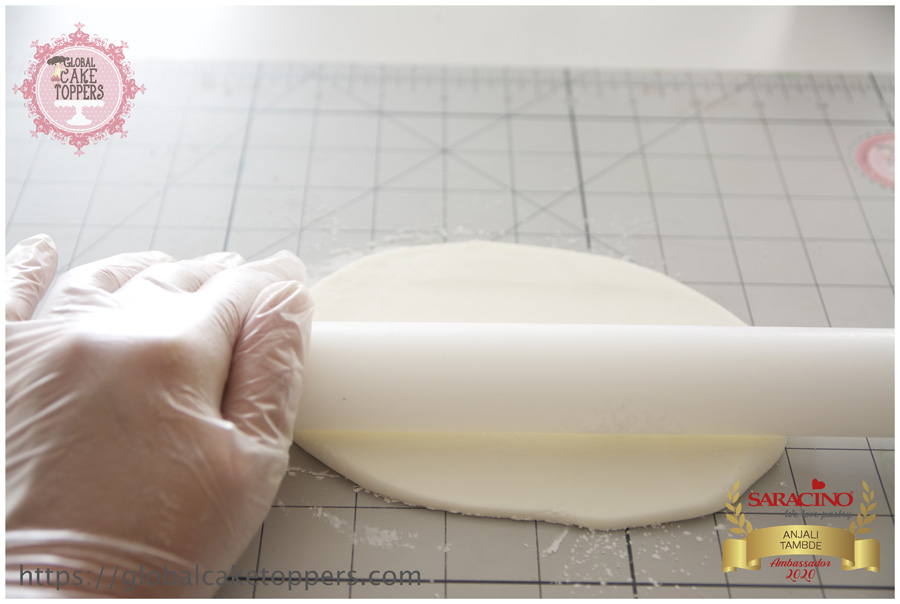
Using rolling pin roll it thinly.
Step 3
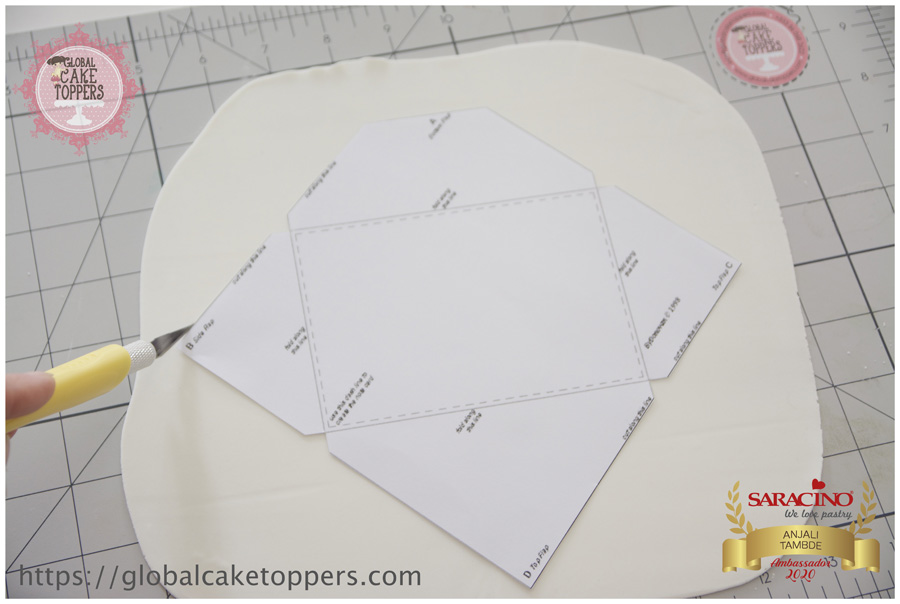
Cut out the envelope template. You can download it HERE. Place on the rolled icing ready for cutting.
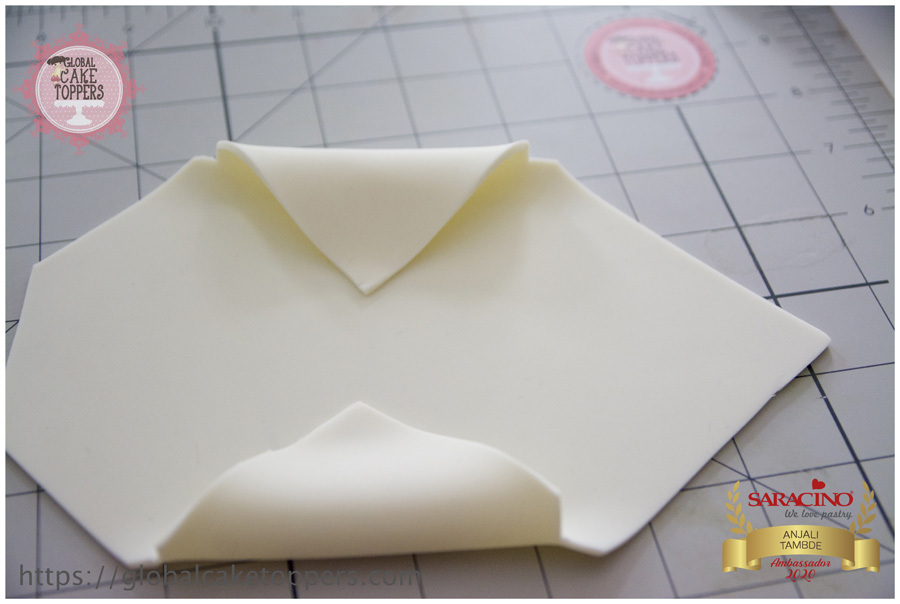
Step 4
Fold both sides
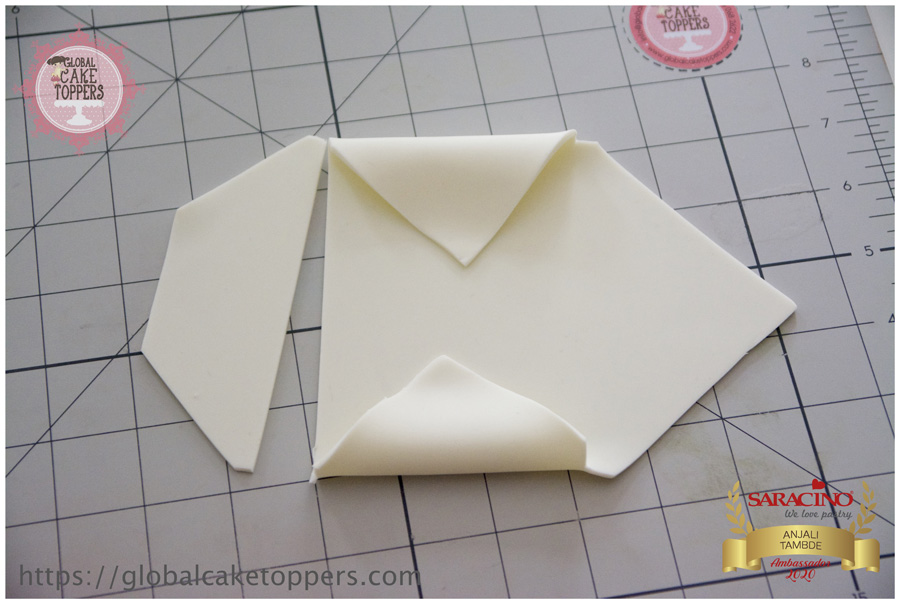
Step 5
Cut the bottom piece and keep aside
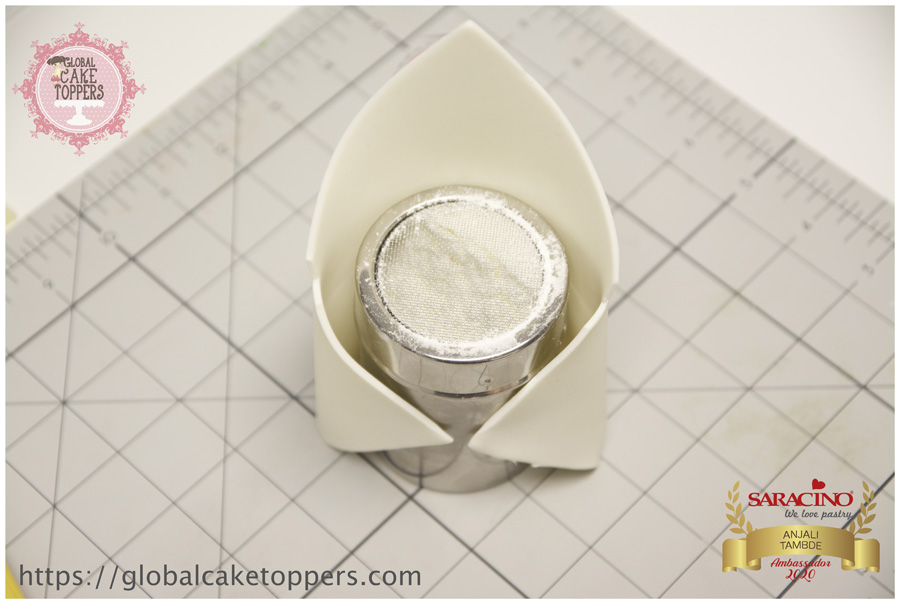
Step 6
Use any cylindrical shape and mould the envelope around
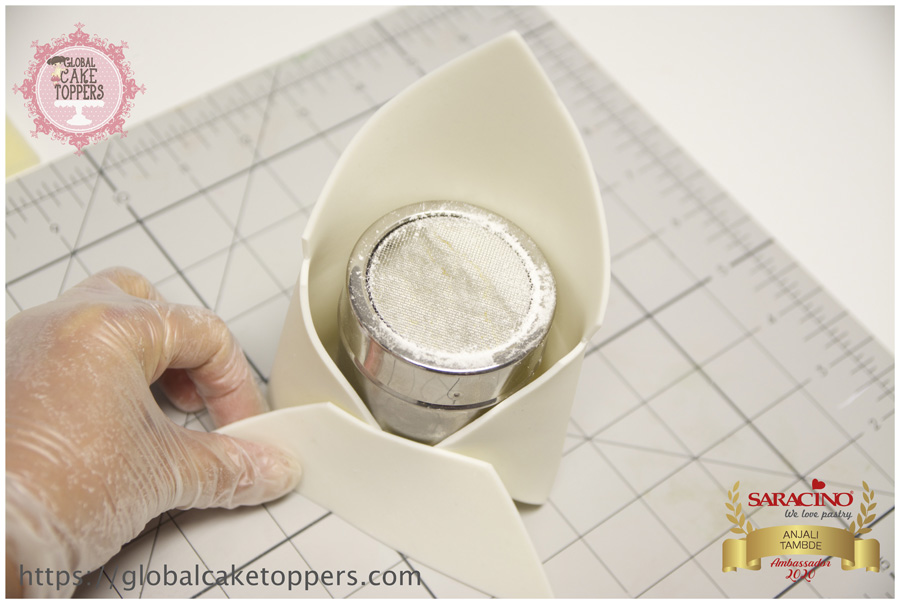
Step 7
Glue the left over piece in such a way that the base is left hollow
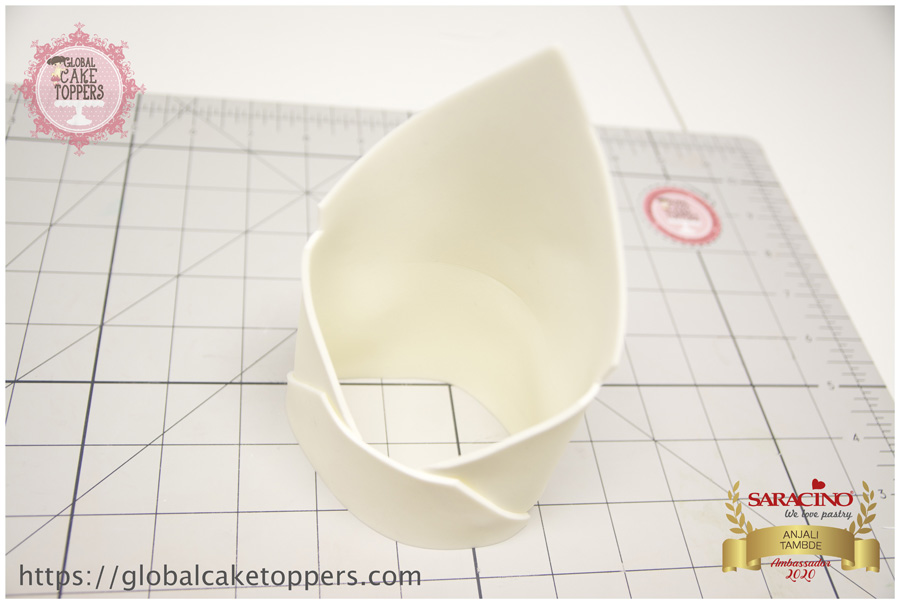
Step 8
Remove the cylinder once the envelope is dry
Step 9
Step 10
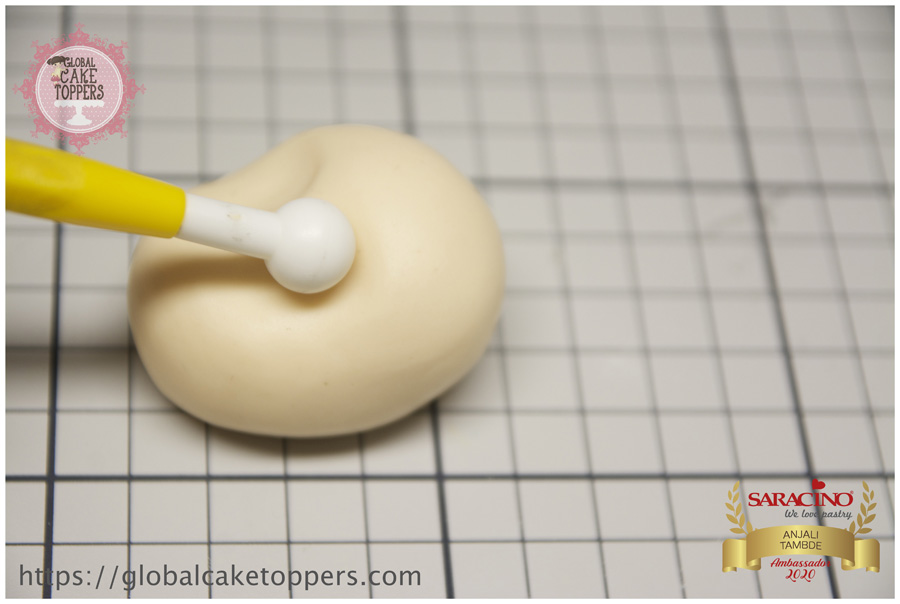
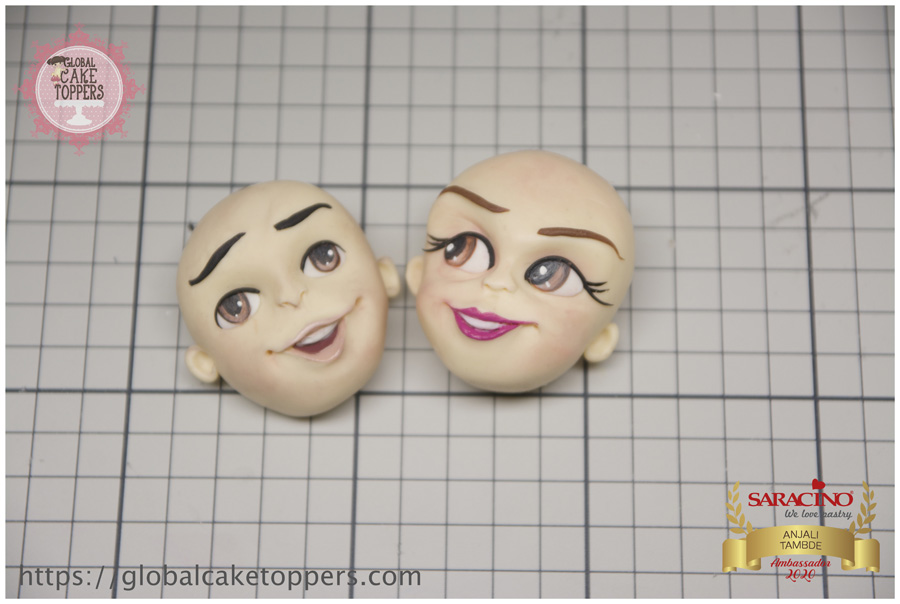
Using the ball tool make indents on either side.
Step 11
With the dresden tool shape the nose
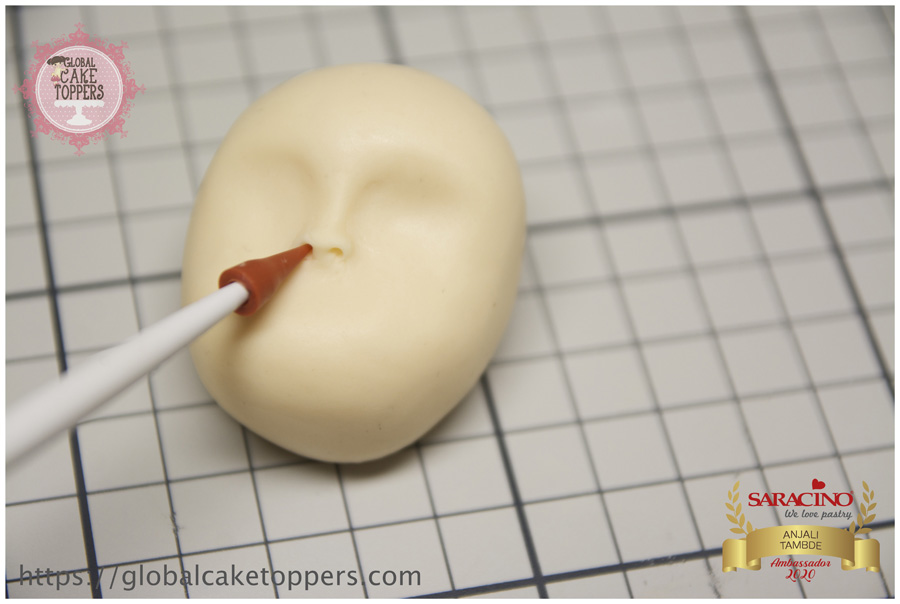
Step 12
Mark the nostrils
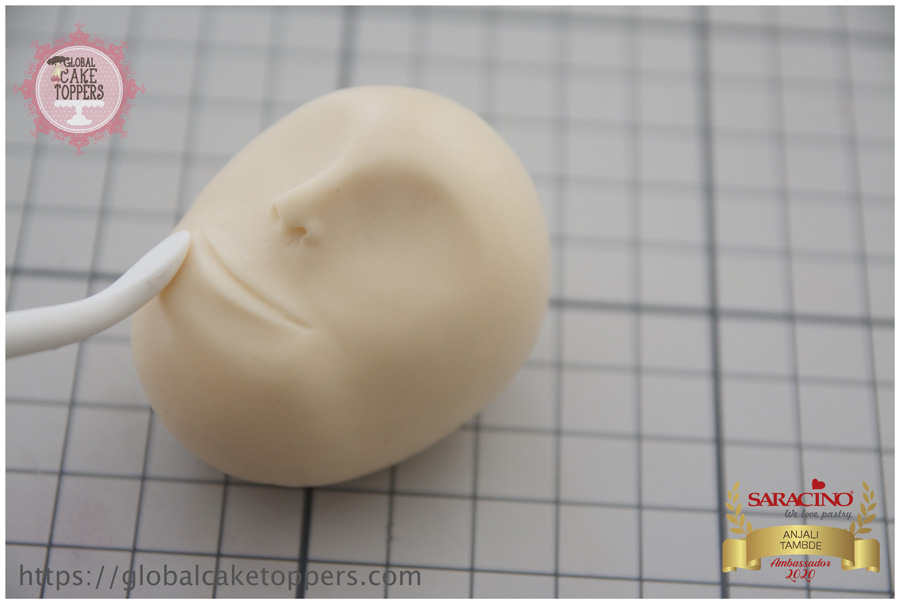
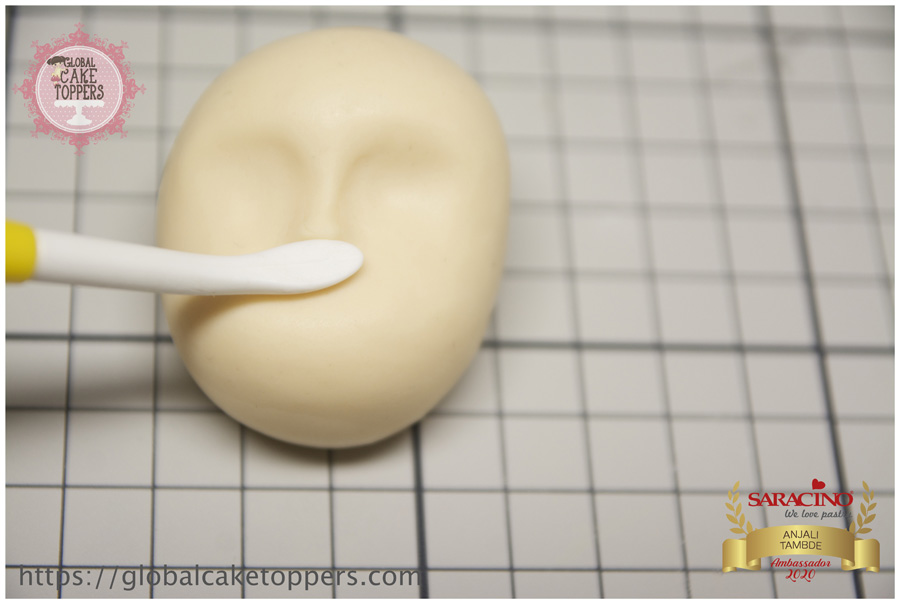
Step 13
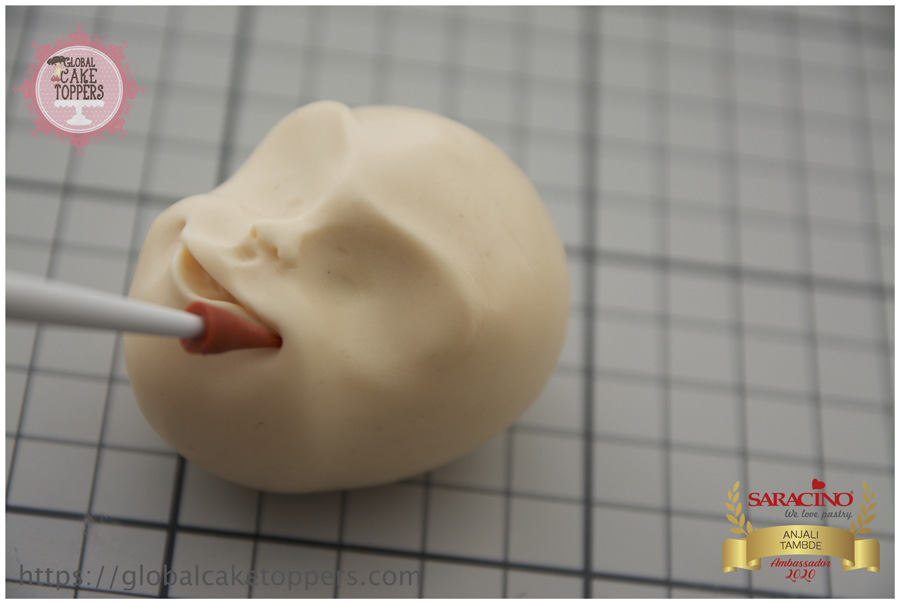
Using your dresden tool gently shape the lower lip and then the upper lip
Step 14
With a dresden tool or sharp knife open up the mouth to give that depth
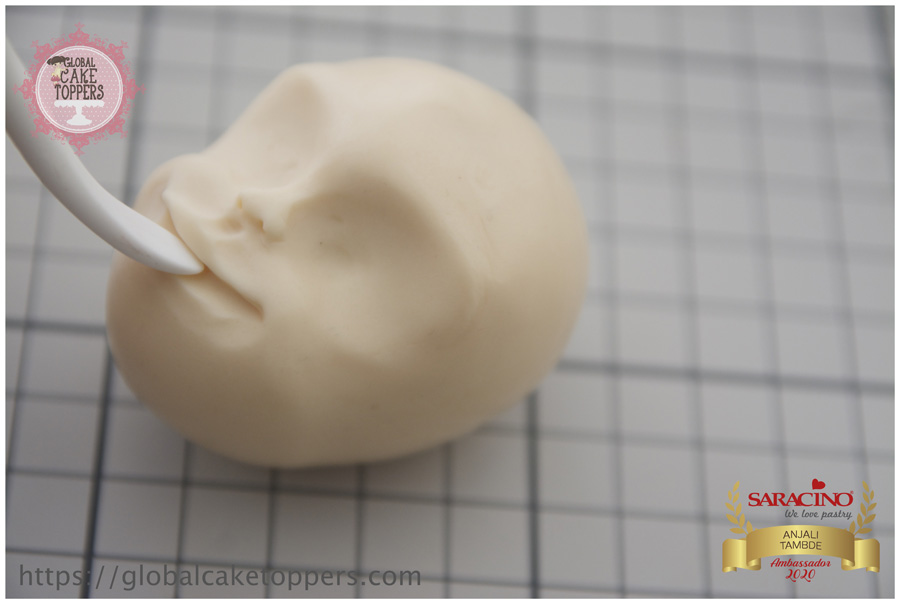
Step 15
Shape the forehead and eyebrow to create expressions
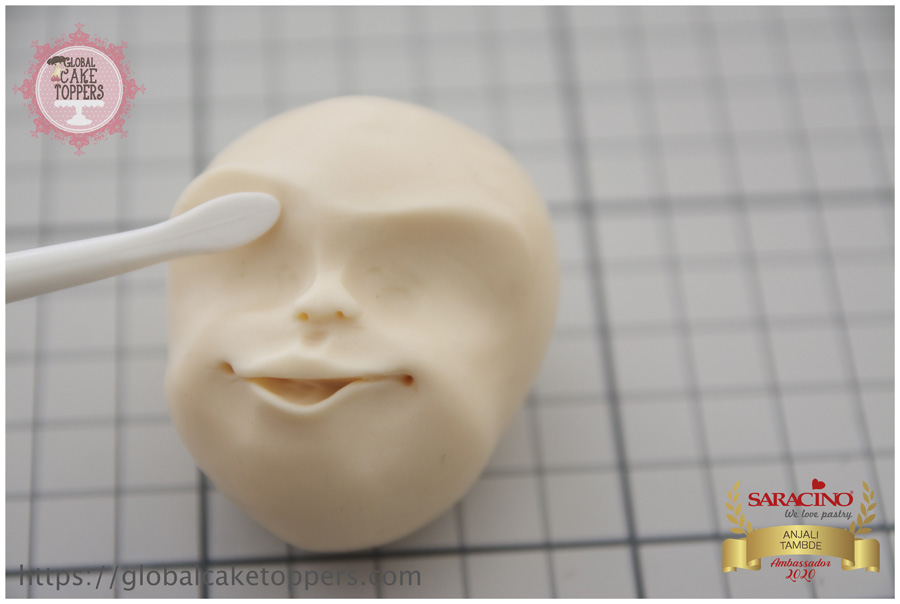
Step 16
Finally finish the lips and make two dimples on either sides
Step 17
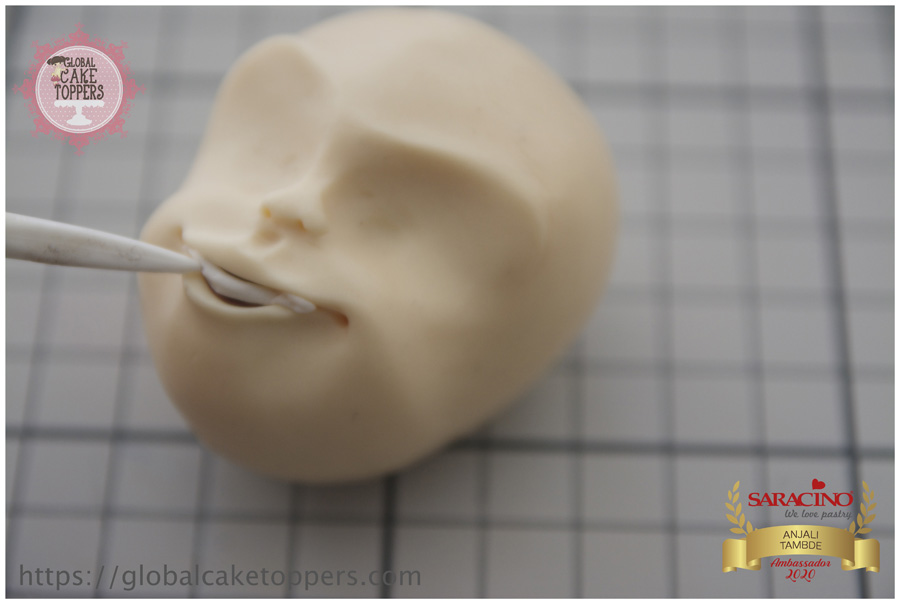
Add small amount of white modelling paste for the teeth
Step 18
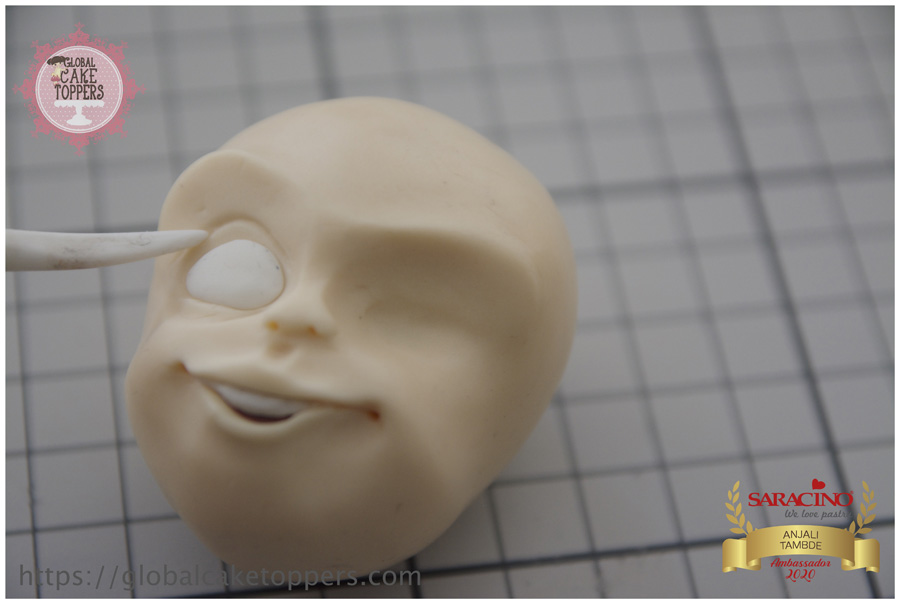
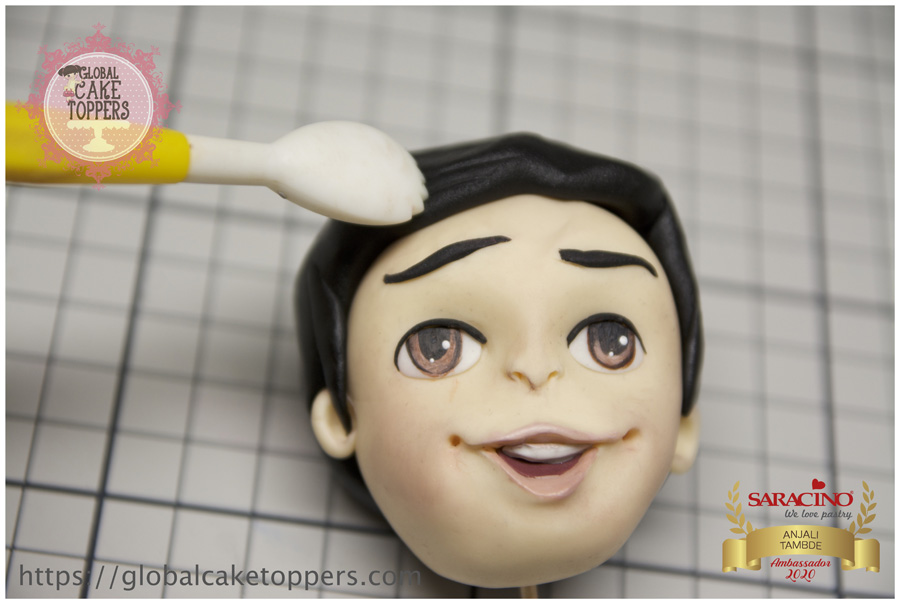
Add small white balls of white paste for the eyes and blend well, mark the eye lids with the sharp end of your Dresden tool.
Step 19
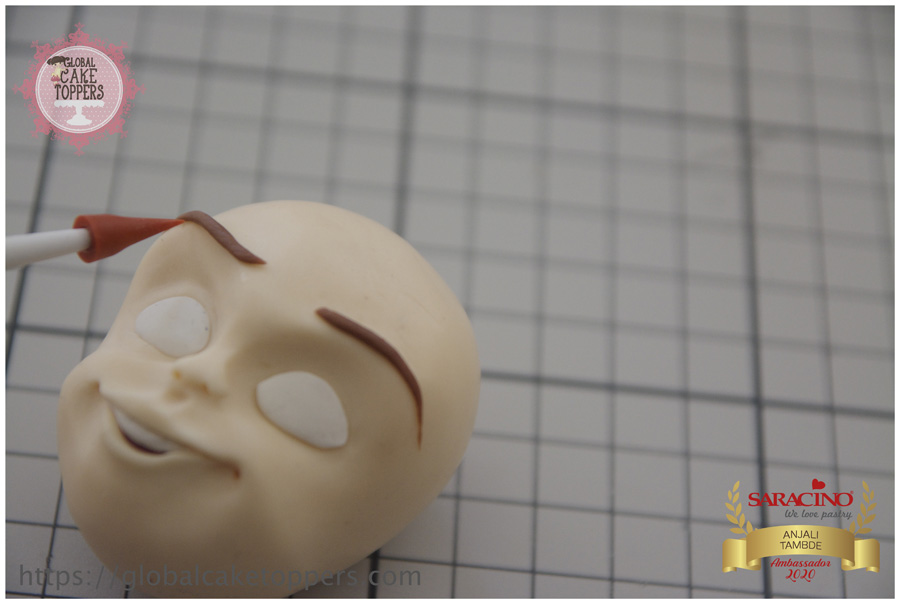
Using brown modelling chocolate make tiny eyebrows by rolling thinly and use a small ball tool or needle tool to place them, apply a small amount of edible glue if required
Step 20
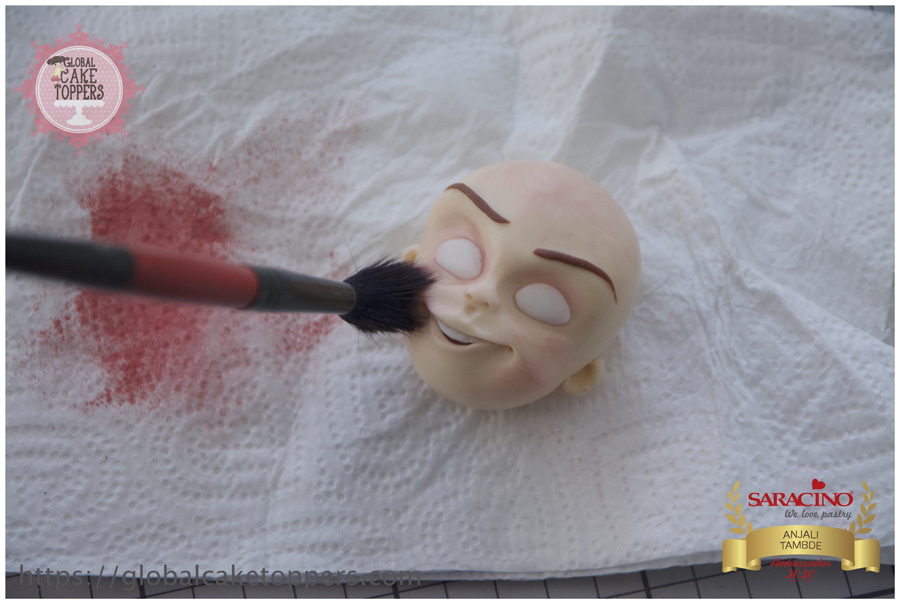
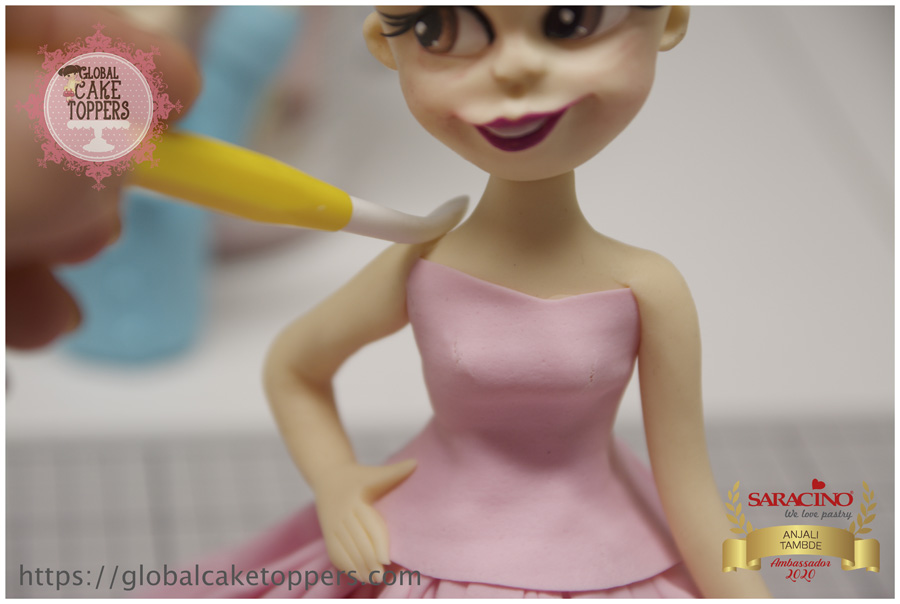
Blush the cheeks, forehead and nose with pink powder colour. Be careful to dust lightly.
Step 21
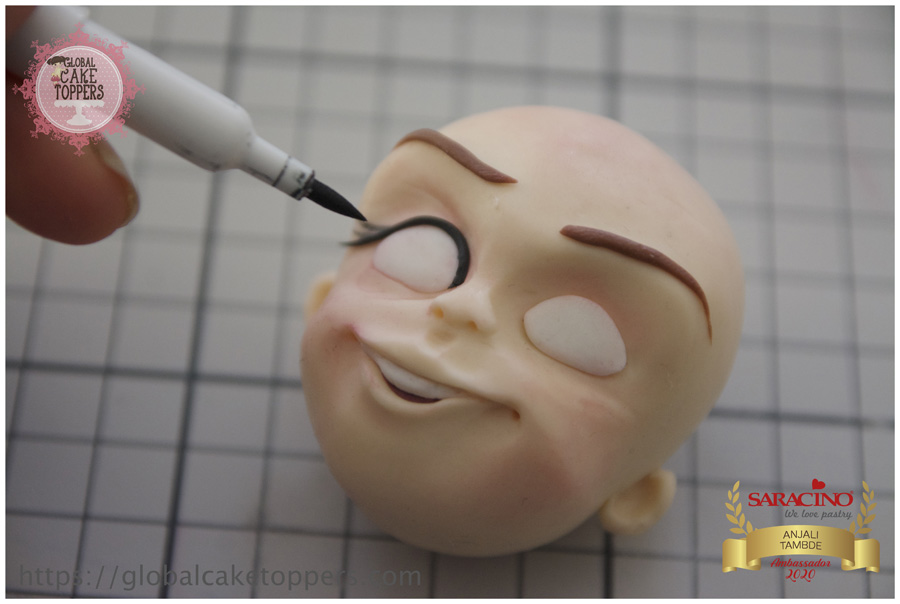
Make thin eyelashes and eyelids using edible black pen
Step 22
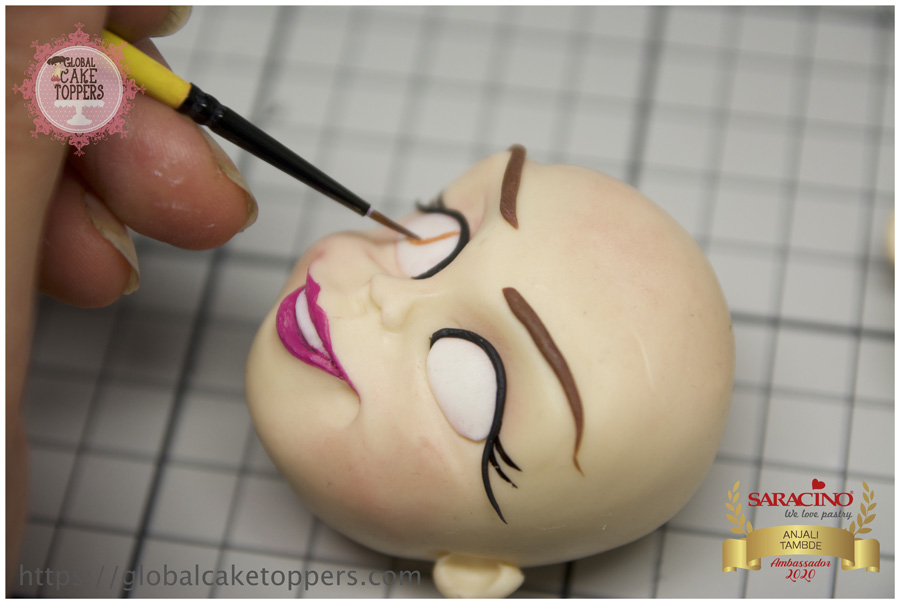
Paint the iris of the eyes with light brown and white edible gel colours
Step 23
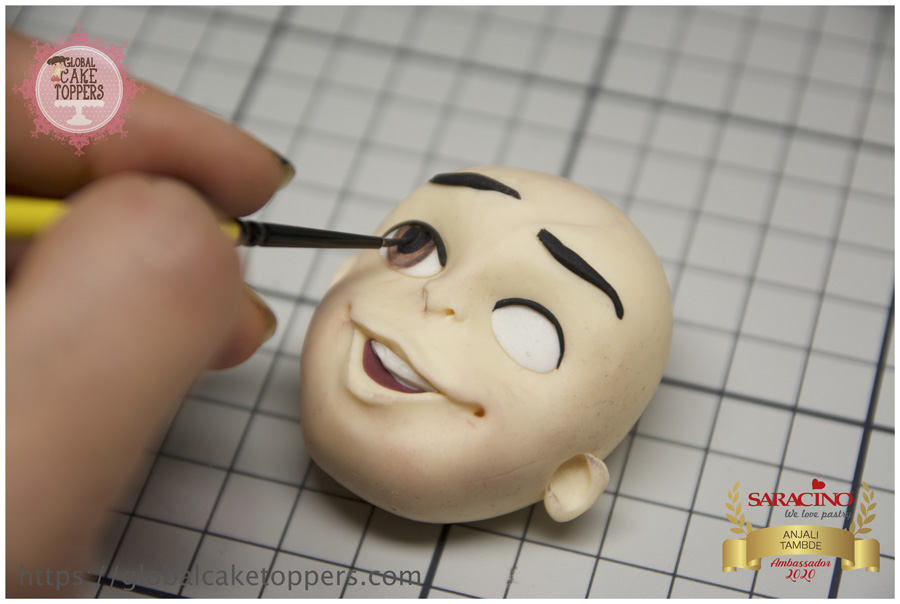
Paint the pupil of the eyes in black
Step 24
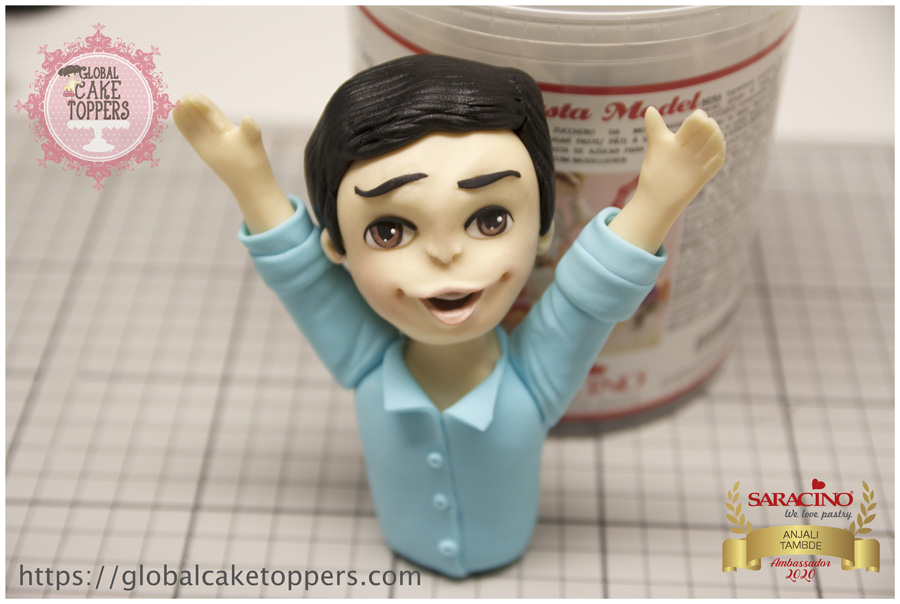
Finish the male and female heads and add a bit of gloss on lips if required using red for the female.
Step 25
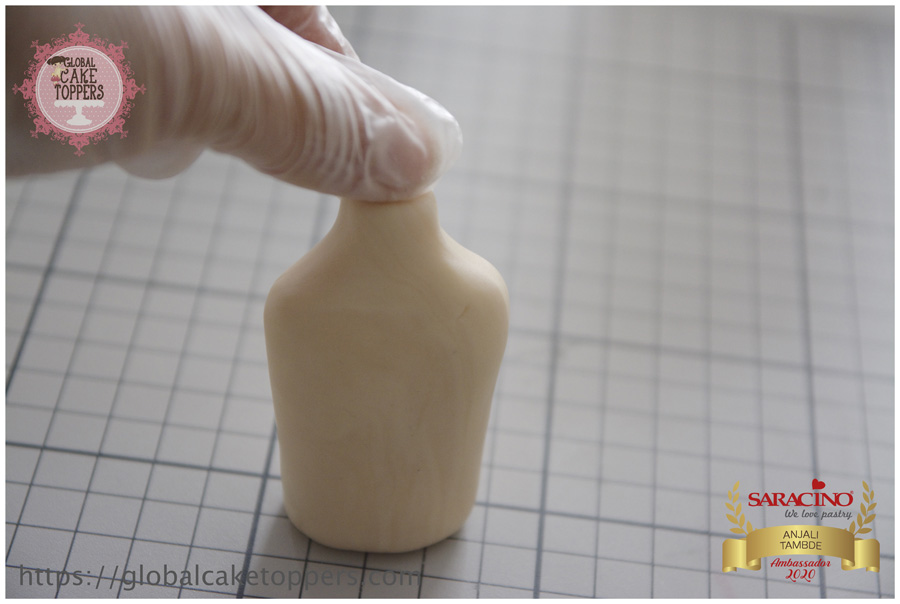
Using skin tone modelling paste model the body for both the male and female
Step 26
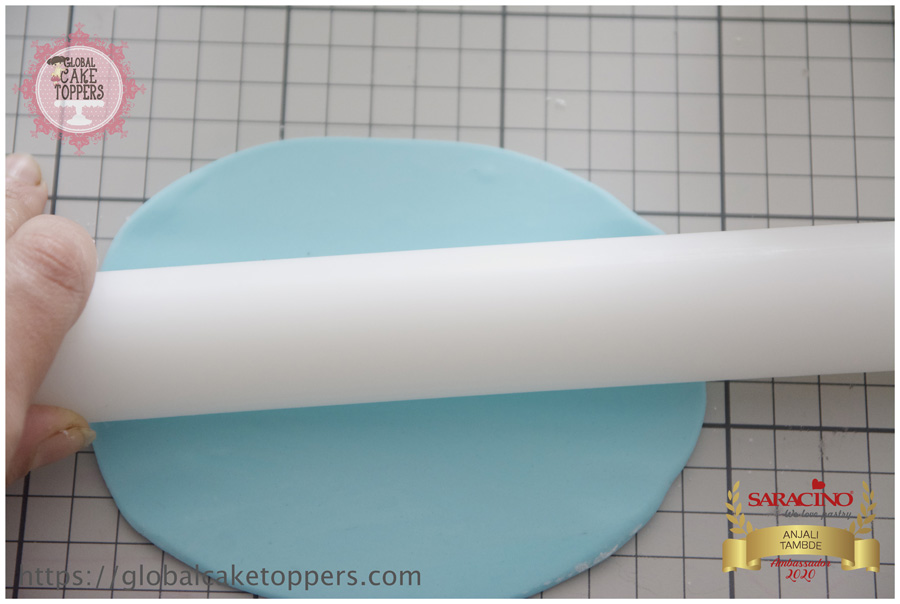
Roll some light blue modelling paste into a thin sheet

Step 27
Wrap around the male body to form the shirt and fold edges to make collar

Step 28
Add small balls of white paste for buttons and press with a sharp modelling tool.
Step 29
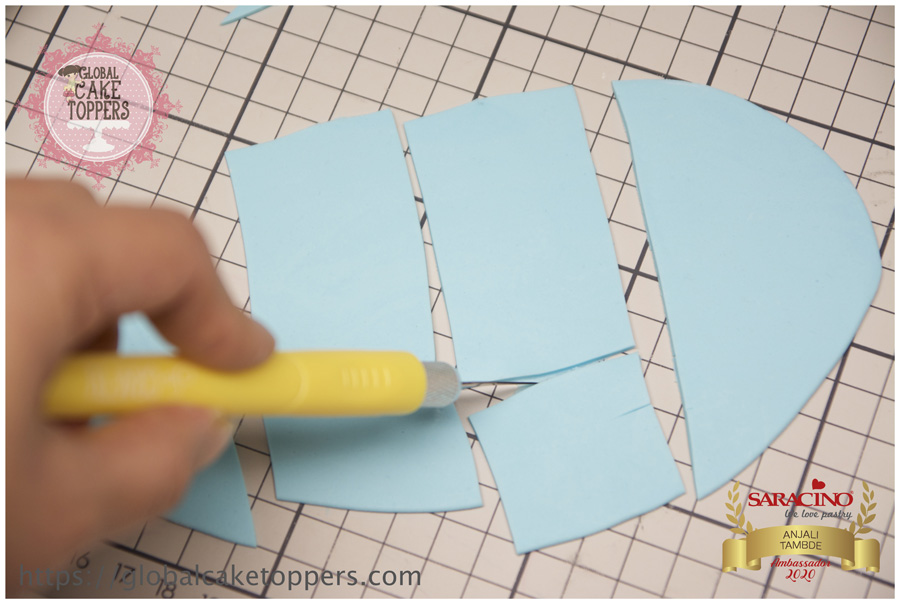
Cut two rectangular pieces for the sleeves out of the same blue sheet

Step 30
Using skin tone paste form a hand by making a ball, press down and cut out the thumb. Then shape to give a natural look. Roll the blue modelling paste to create arms and attach the hand. Add folded thin cuffs to finish off the sleeves.
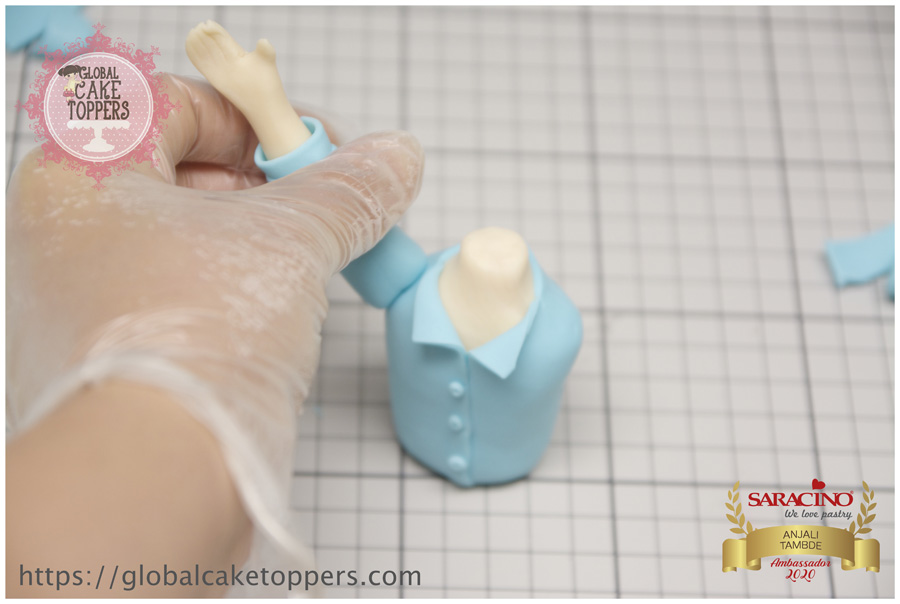
Step 31
Attach the arms over the shoulders and blend the joint. You can use dry pasta inserted into the arm to secure in place.
Step 32
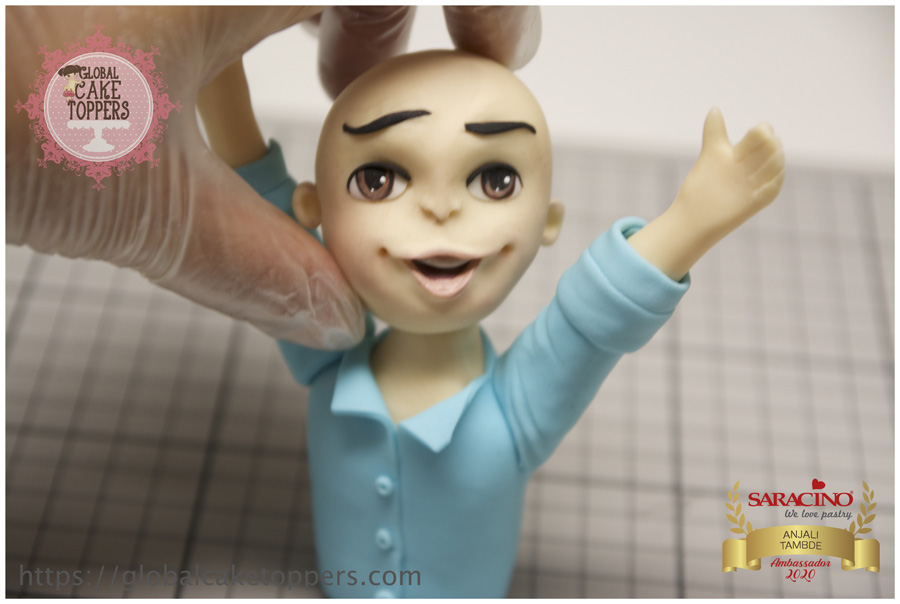
Attach the head to the neck, use a toothpick to keep it in place
Step 33
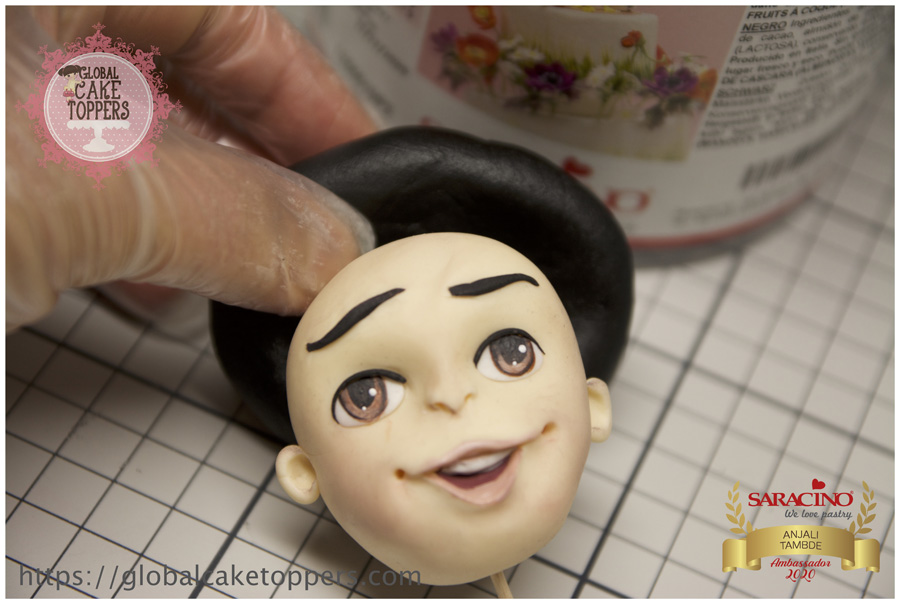
Add a small thick circular piece of black modelling paste over the head to make the hair
Step 34
Use a shell tool to make the texture of the hair
Step 35
Keep the figurine upright and let it set
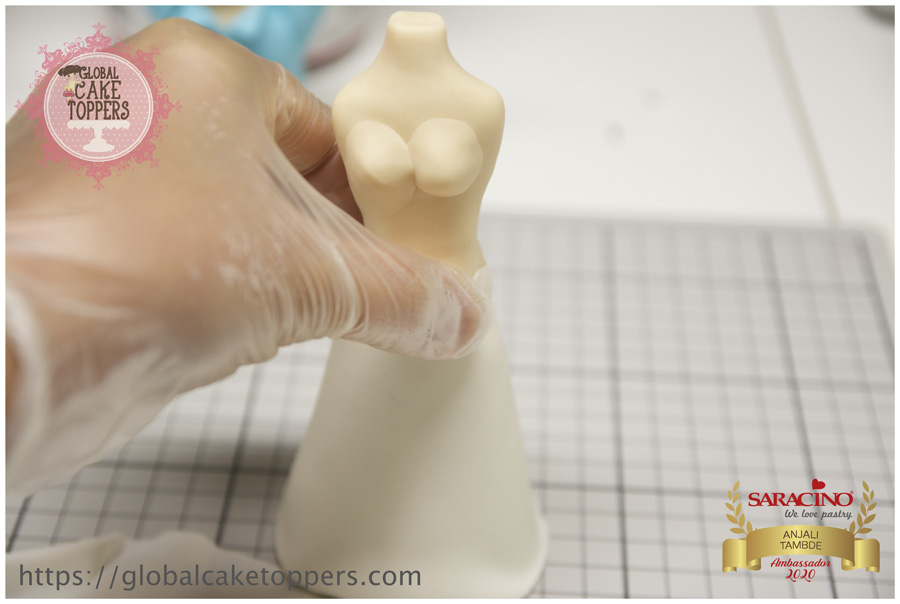
Step 36
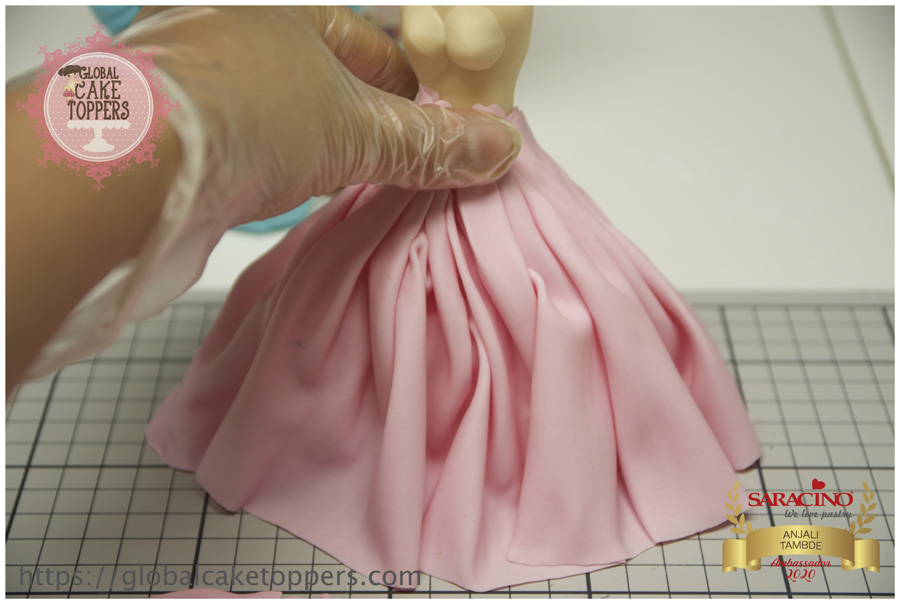
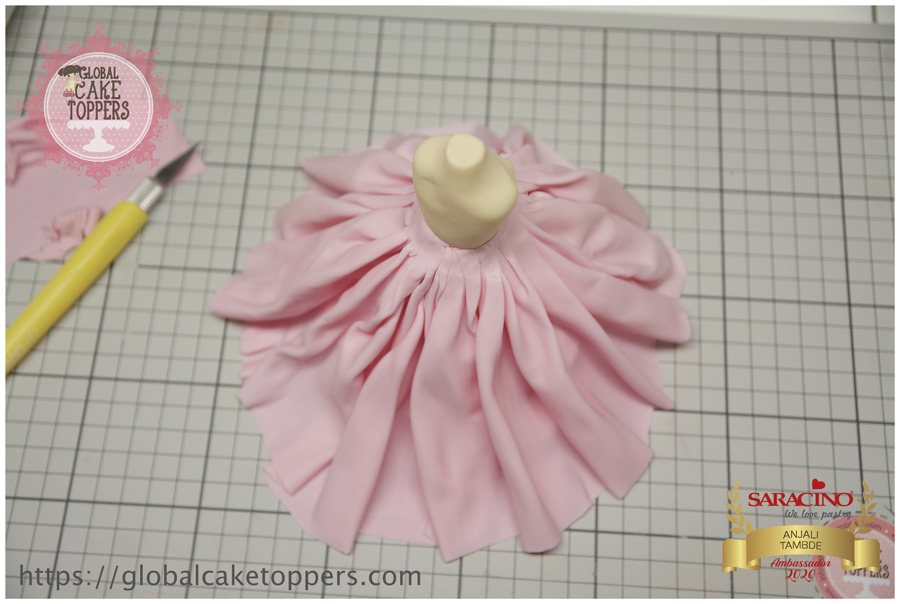
Form the female chest and fix to the body. Glue the female body to the polystyrene cone and cover the cone with white modelling paste to make the skirt
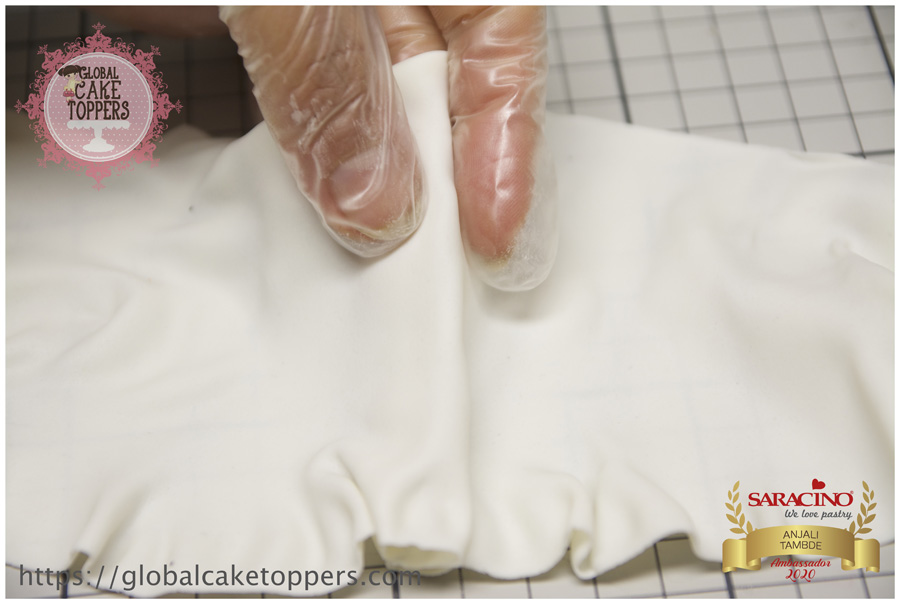
Step 37
Now roll a thin sheet of white modelling paste and form some frills and pleats
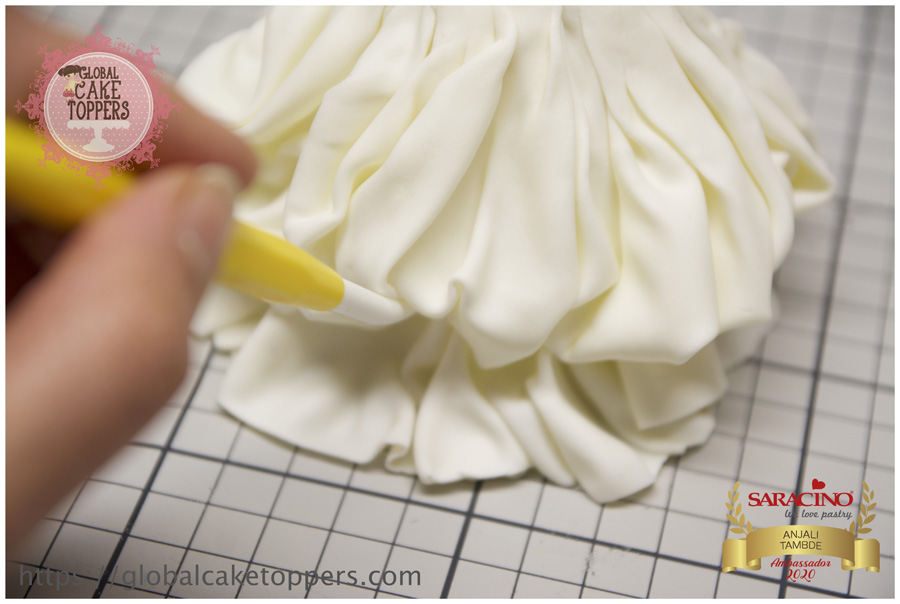
Step 38
Glue the pleated skirt around the waistline and add shape and form with a modelling tool.
Step 39
Now pleat a pink sheet of modelling paste and cover the white skirt
Step 40
Blend the skirt well with the upper body
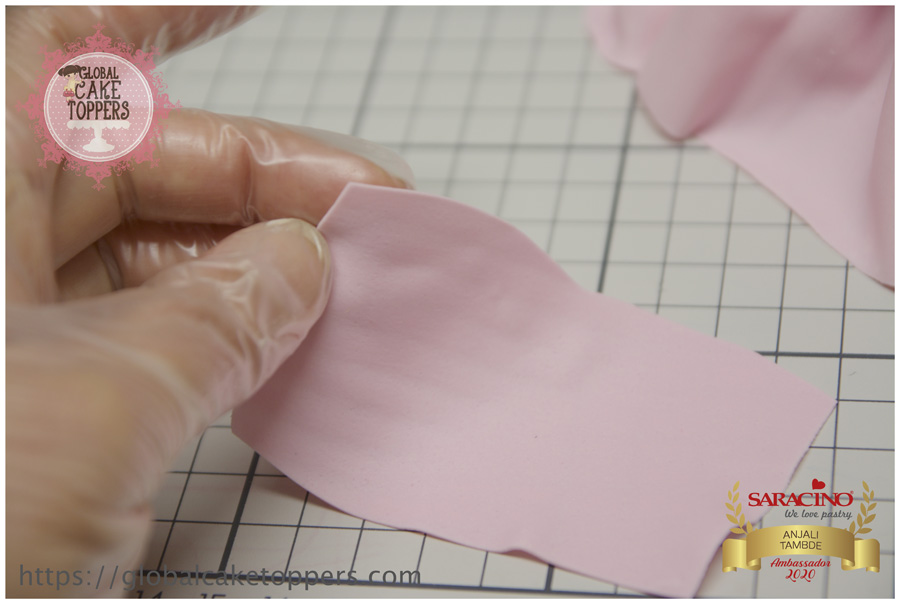
Step 41
Cut a rectangular piece in pink with sweetheart neckline to make the bodice and glue it to the upper body, blend well at the back
Step 42
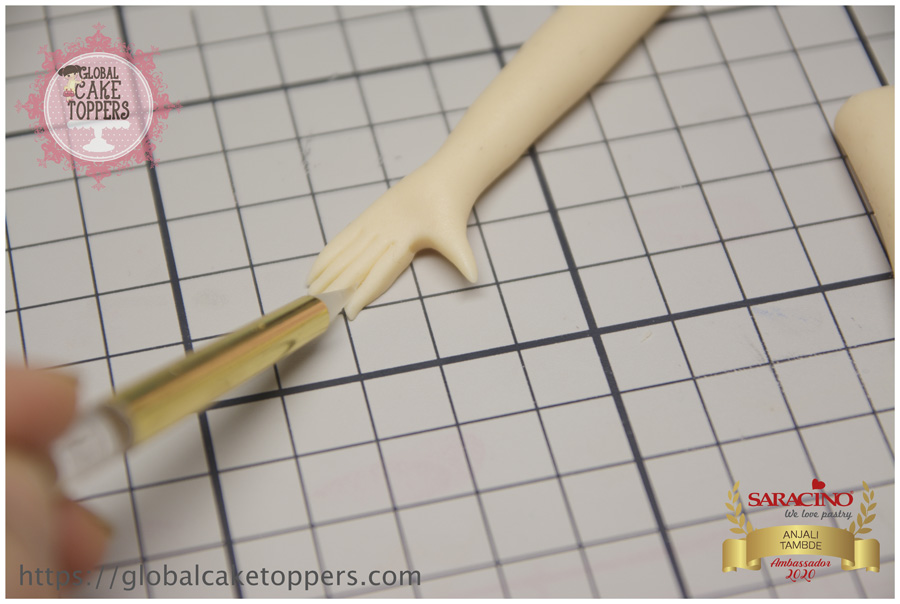
Make the hands and form the fingers.
Step 43
Glue the arms on the body and blend it over the shoulders

Step 44
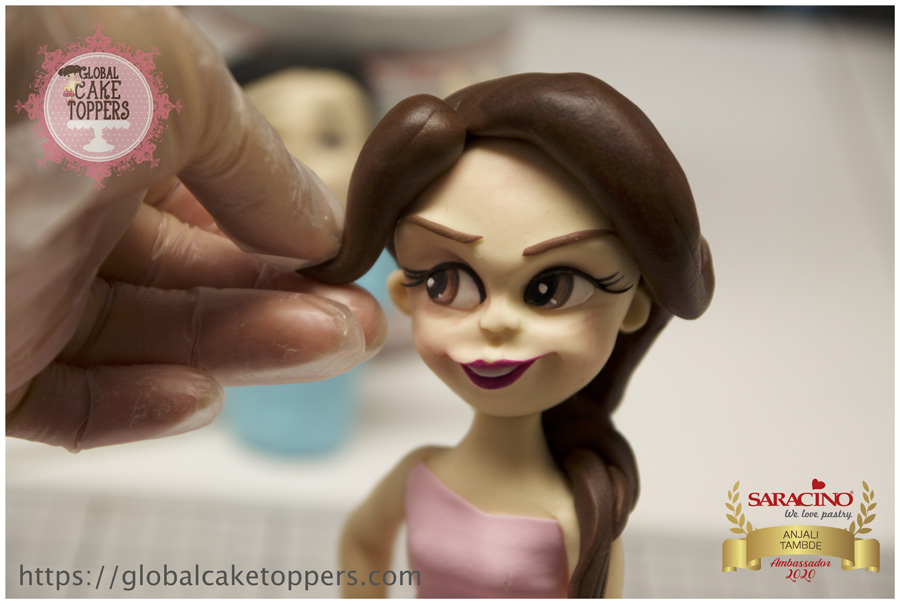
Take some brown modelling chocolate and roll an elongated piece, then cut thin triangular strips and twist for the hair.
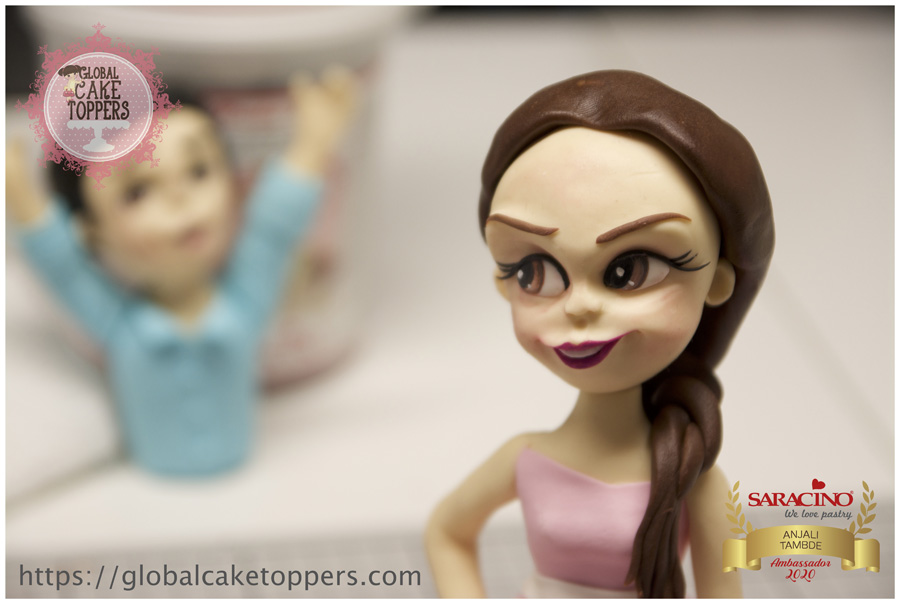
Step 45
Secure it over the head with some glue
Step 46
Using the same chocolate paste add fringes.

Step 47
Texture the hair with the Dresden tool. Roll a thin white strip and add a bow around the waist.
Step 48
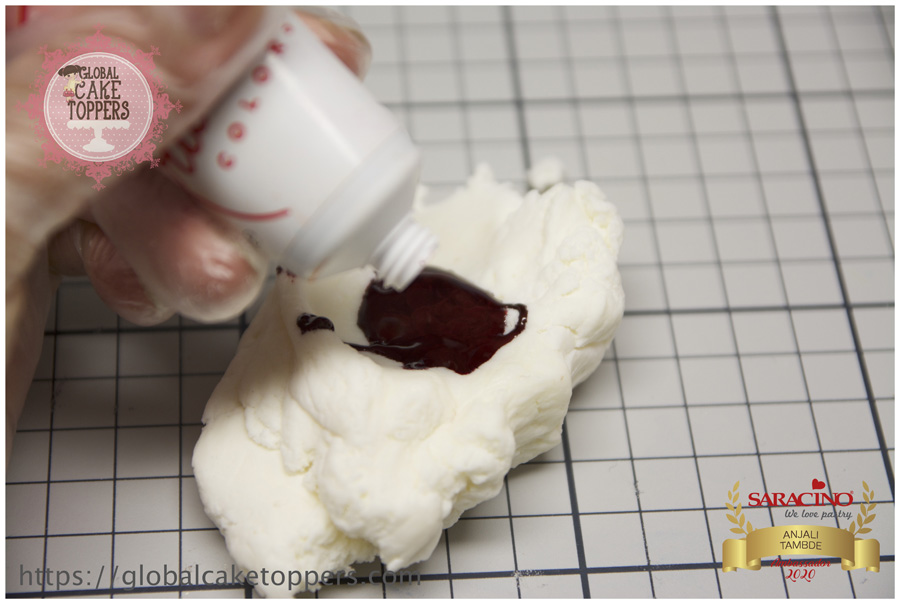
Add some edible red gel colour to white modelling paste to make red or use pre-coloured modelling paste
Step 49
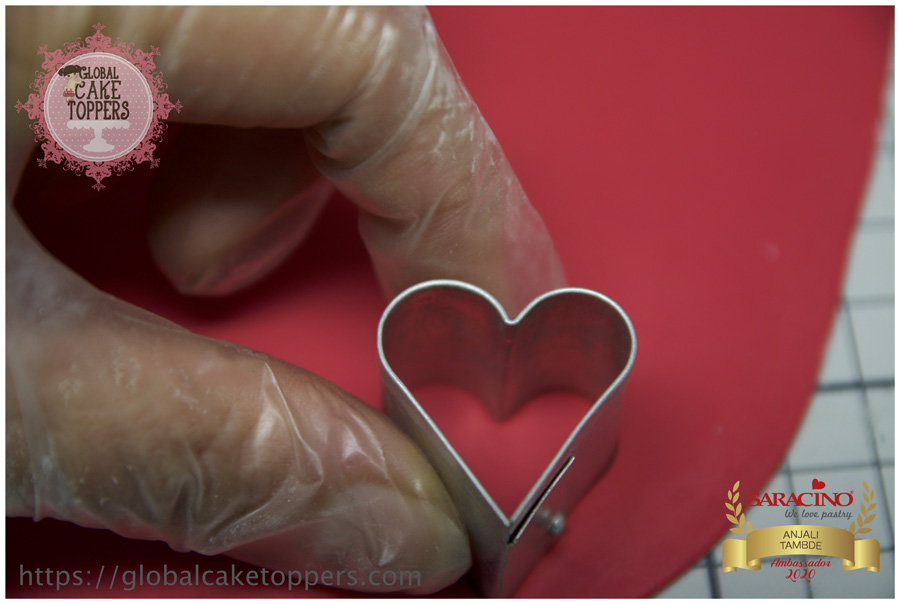
Roll a thin sheet of the red paste and cut heart shapes using heart cutter
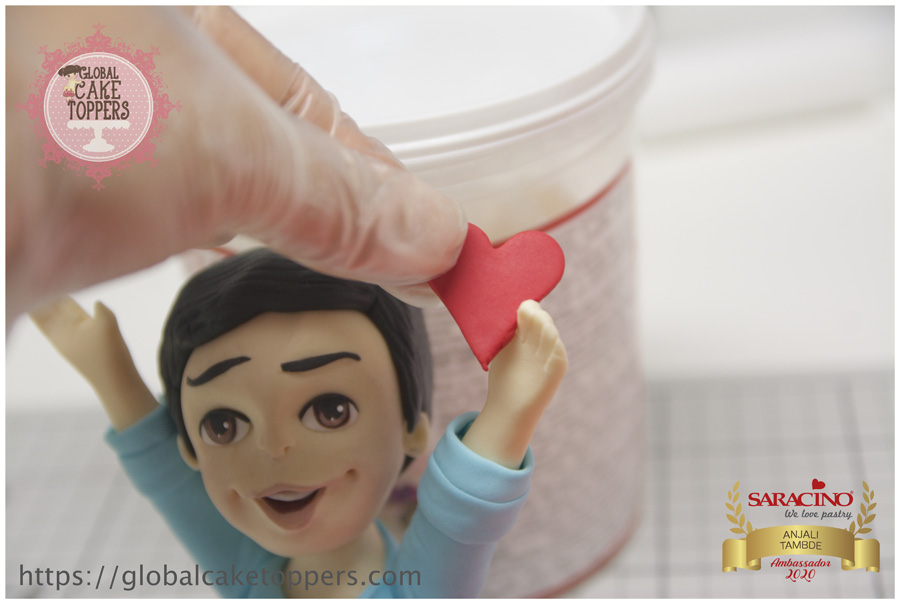
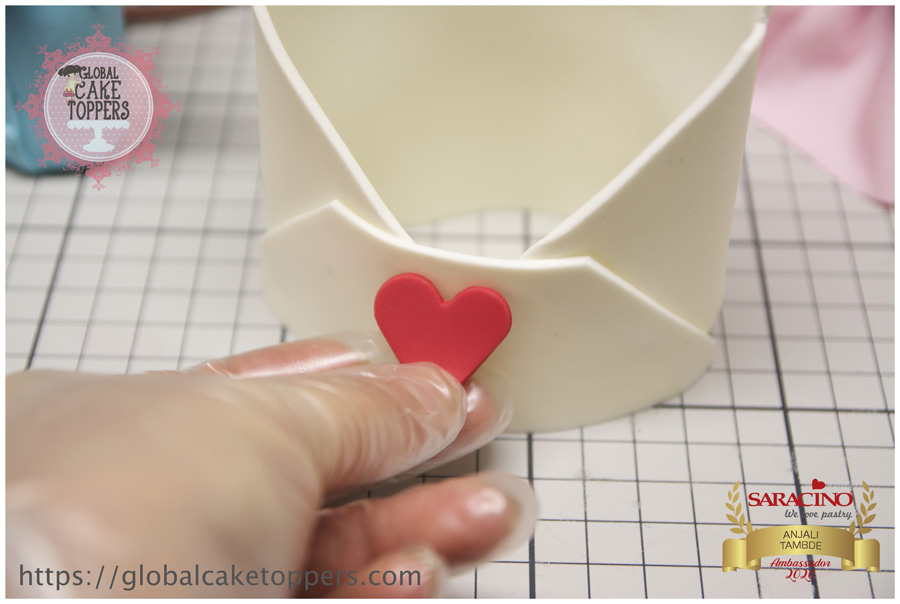
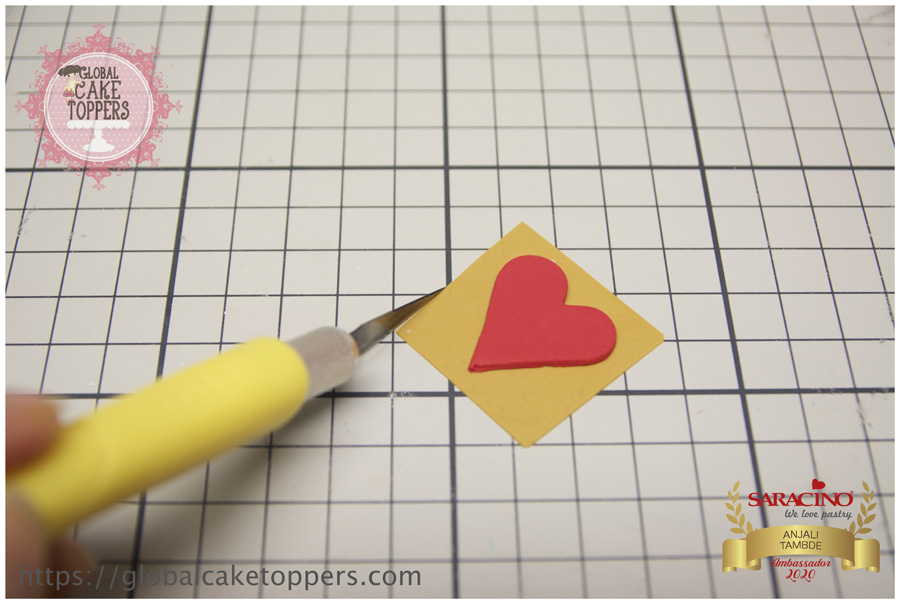
Step 50
Glue the hearts on the hands of the man
Step 51
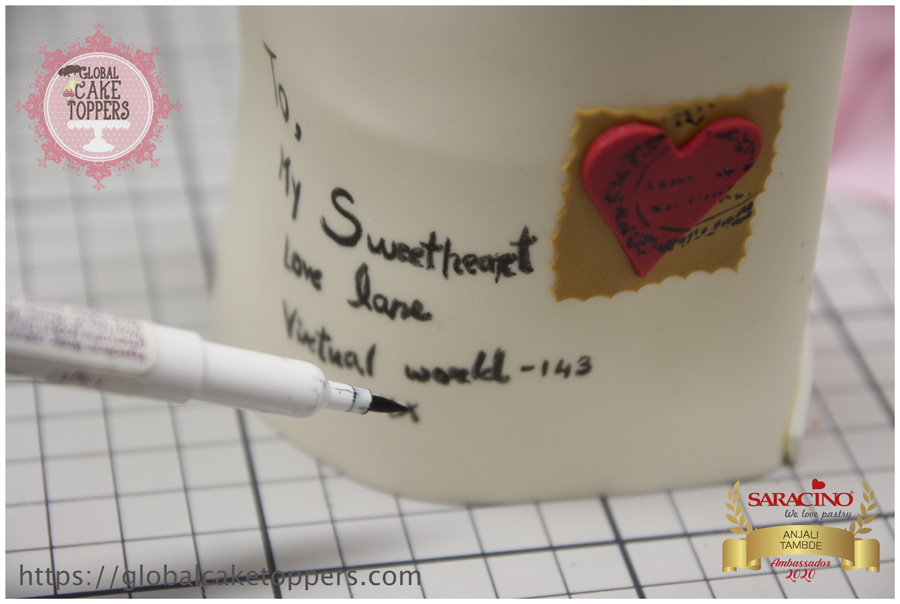
Glue one heart on the envelope
Step 52
Place one heart over a brown square made with modelling paste to make the stamp
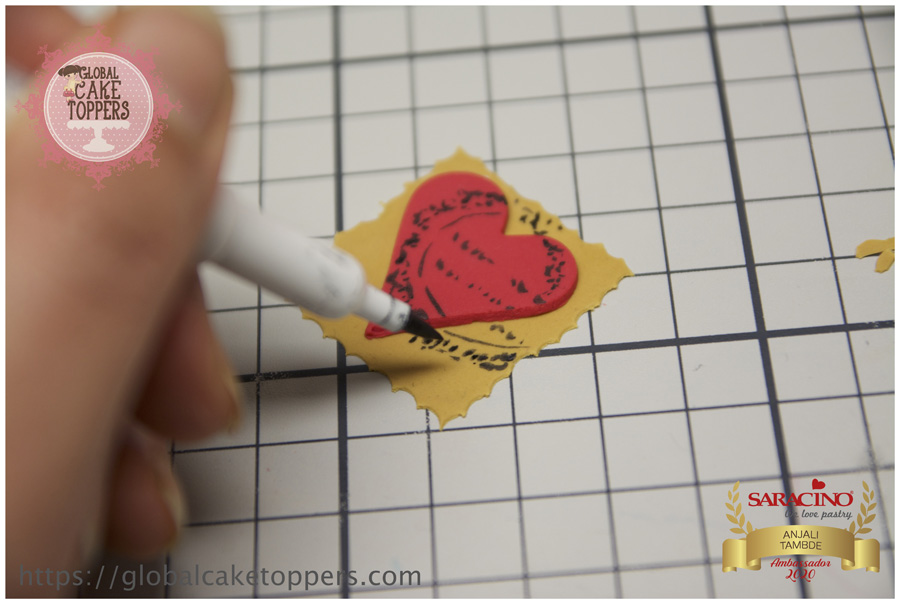
Step 53
Using black edible pen paint the print over the stamp and crimp the edges.
Step 54
Write any imaginary address to give a personal touch
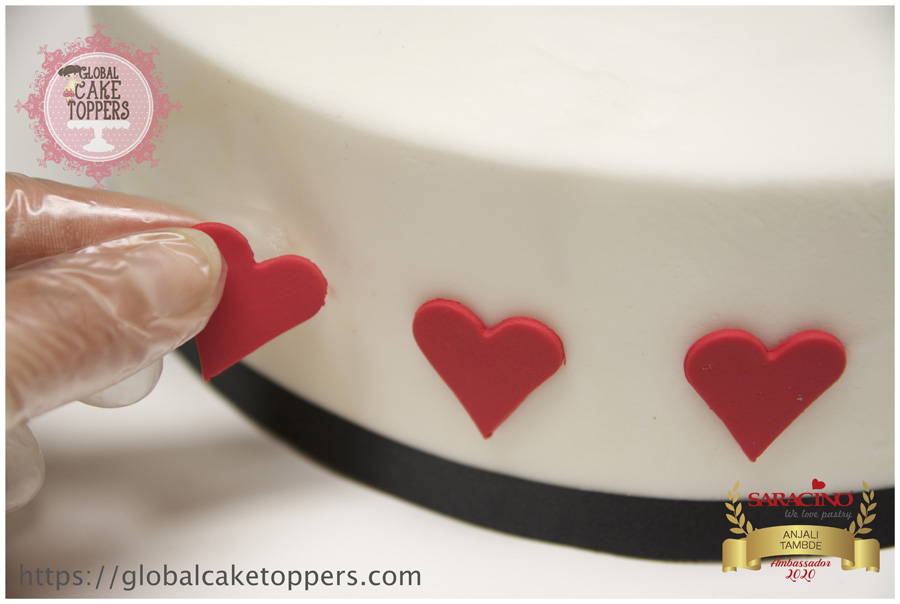
Step 55
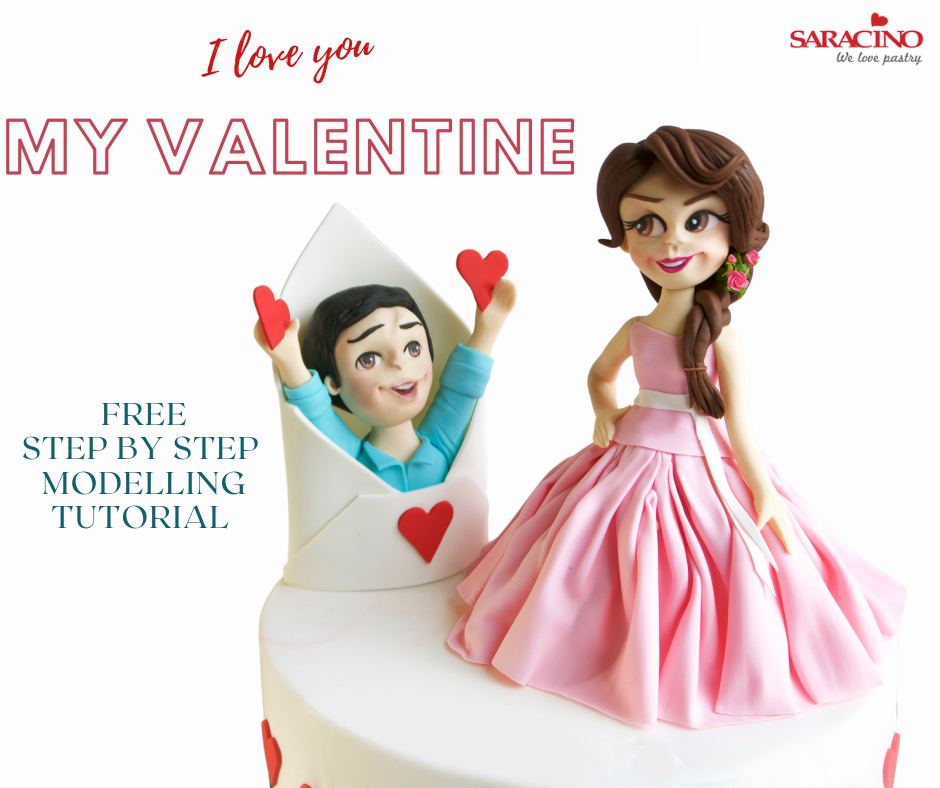
Cover a 10” round cake with Saracino Pasta Top and decorate with some hearts
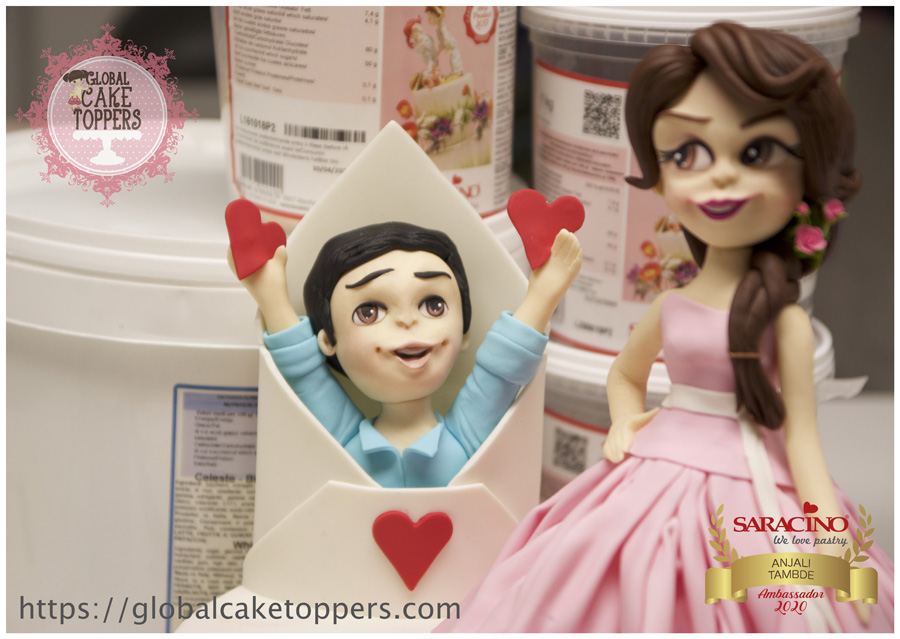
Step 56
Now place the male figurine in the envelope and glue it over the cake, place the female figurine beside him and your “Valentine Cake” is now ready to be served with love
