
You will need:
- Saracino modelling paste – White
- Saracino gel colours: Brown, Pink(Soft Pink), Orange, Yellow
- Cocktail sticks
- Two edible black pearls
- Edible glue
- Soft Pink dust
- Round cutter
- Ball tool
- Small brush for glue
- Small brush for dusting
- Foam pad
- Pointed silicone modelling tool
- Scapel / sharp knife
- Rolling pin
- Spatula
Step 1
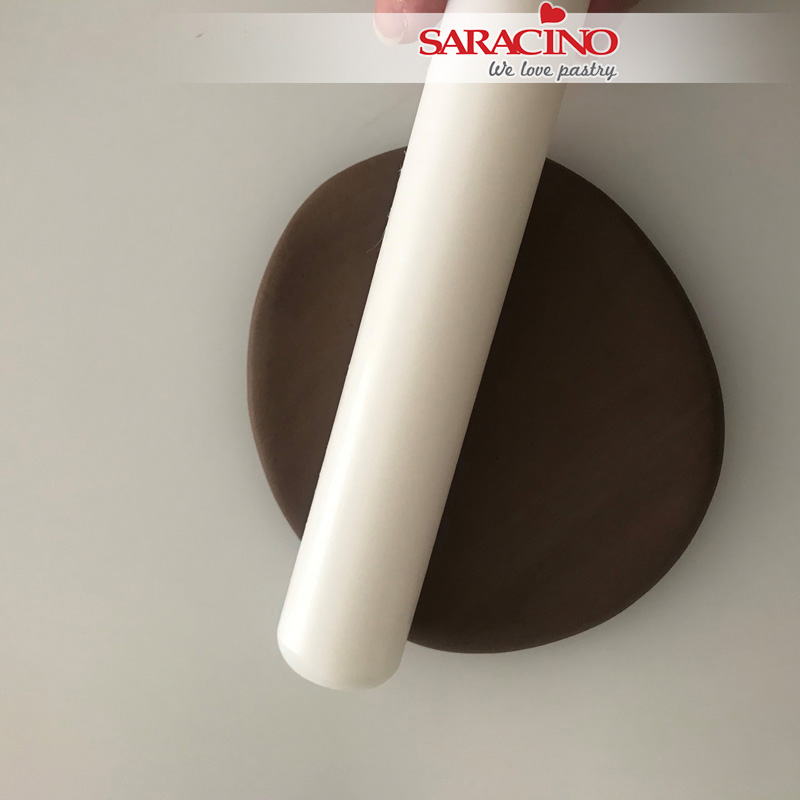
Use Saracino Brown gel colour to colour white modelling paste. Roll the brown model paste about 4 – 5mm thick.
Step 2
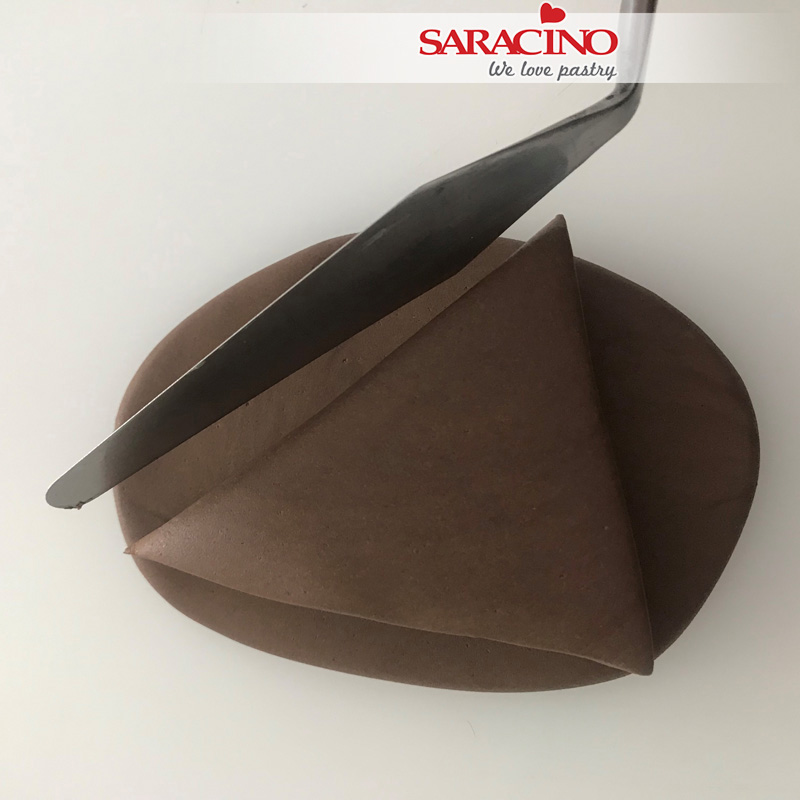
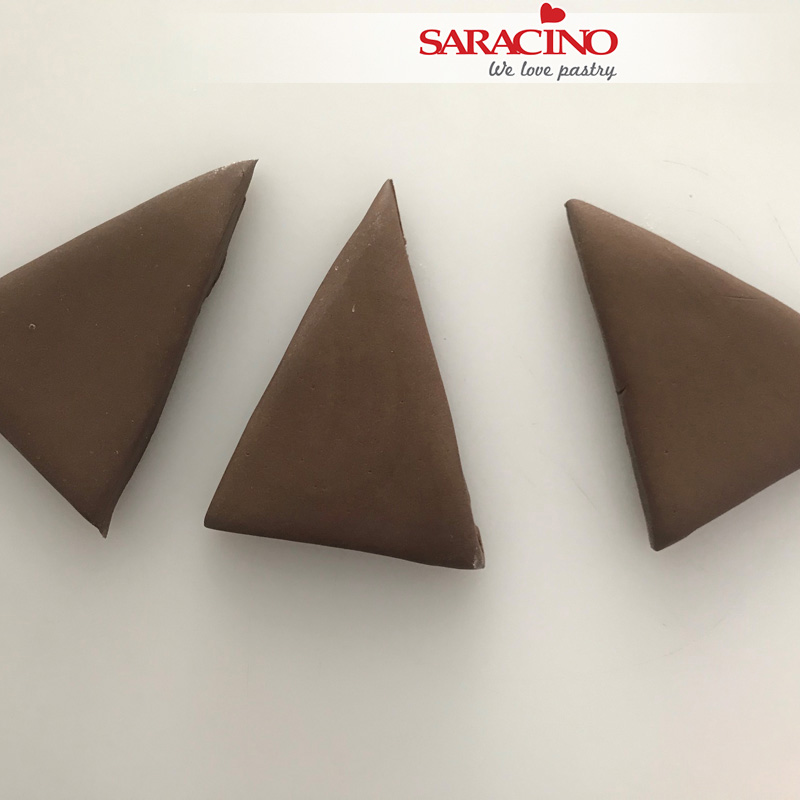
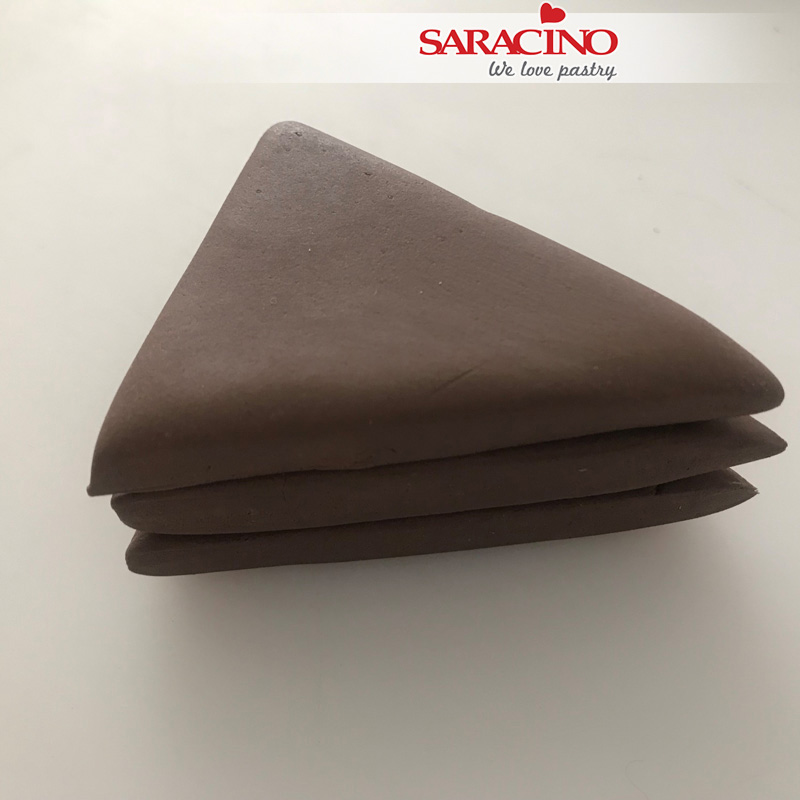
Cut out 3 triangle pieces.
Step 3
The triangles must be the same size
Step 4
Use a little bit of edible glue to fix the three triangles together
Step 5
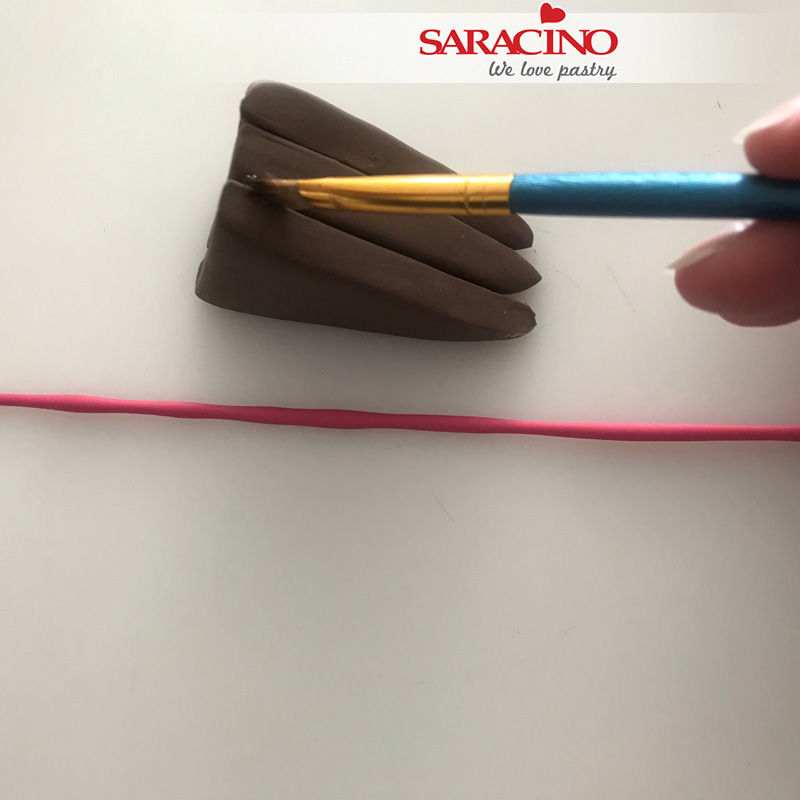
Use pink gel colour to colour white modelling paste. Roll the pink paste to a long thin string (you can also use an extruder to make the string)
Step 6
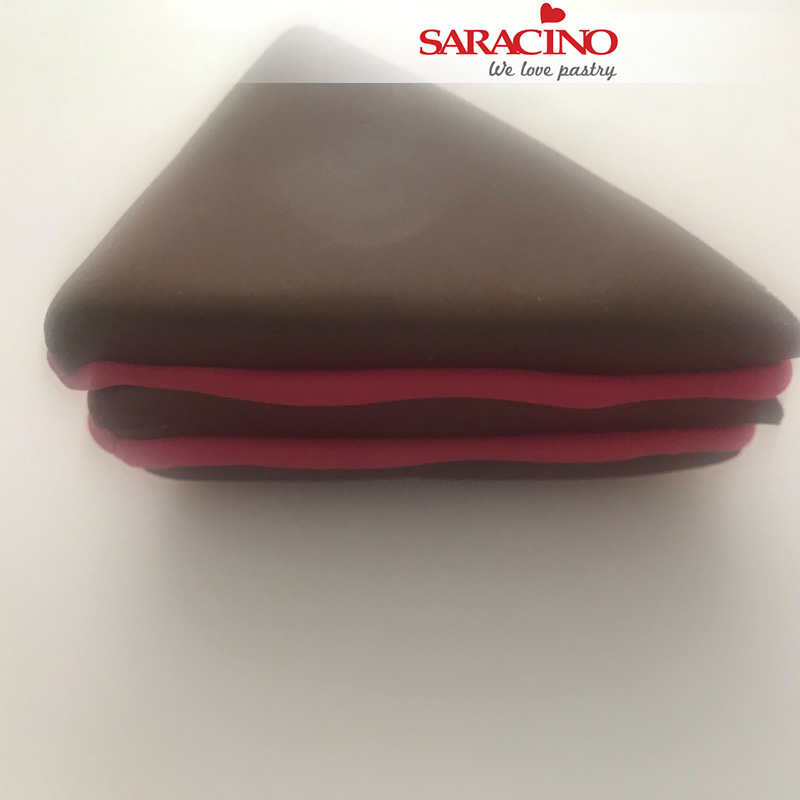
Put a little glue between the brown triangle layers and fix the pink between the brown layers, so it looks like the buttercream filling in the ‘piece of cake’
Step 7
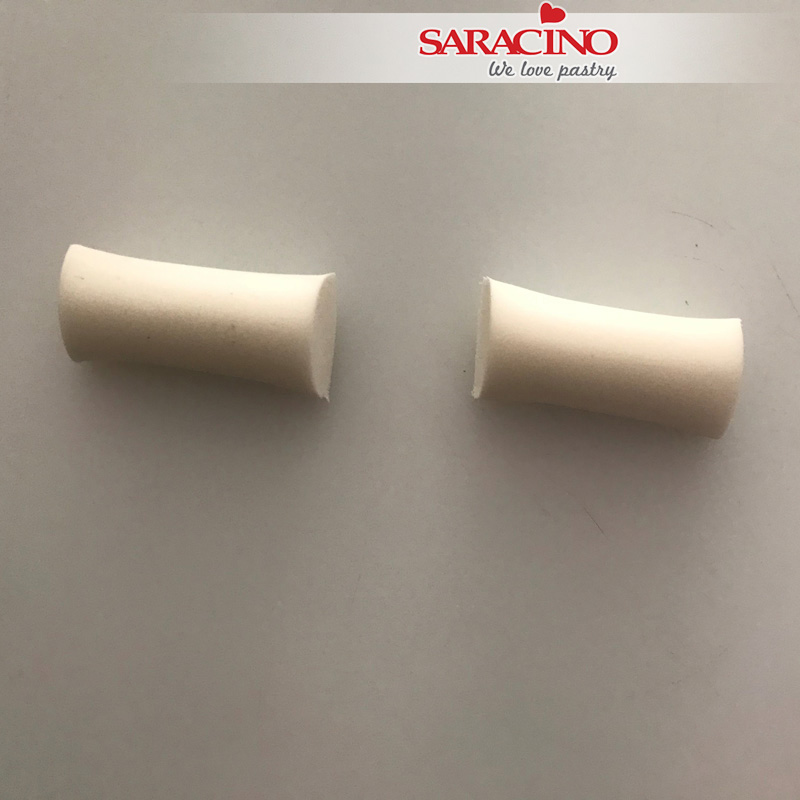
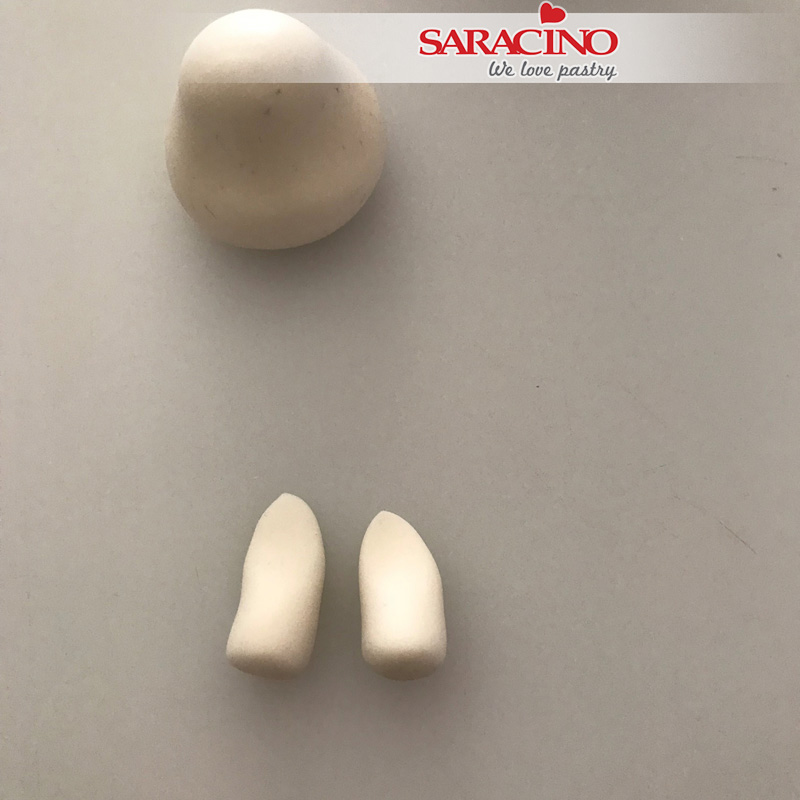
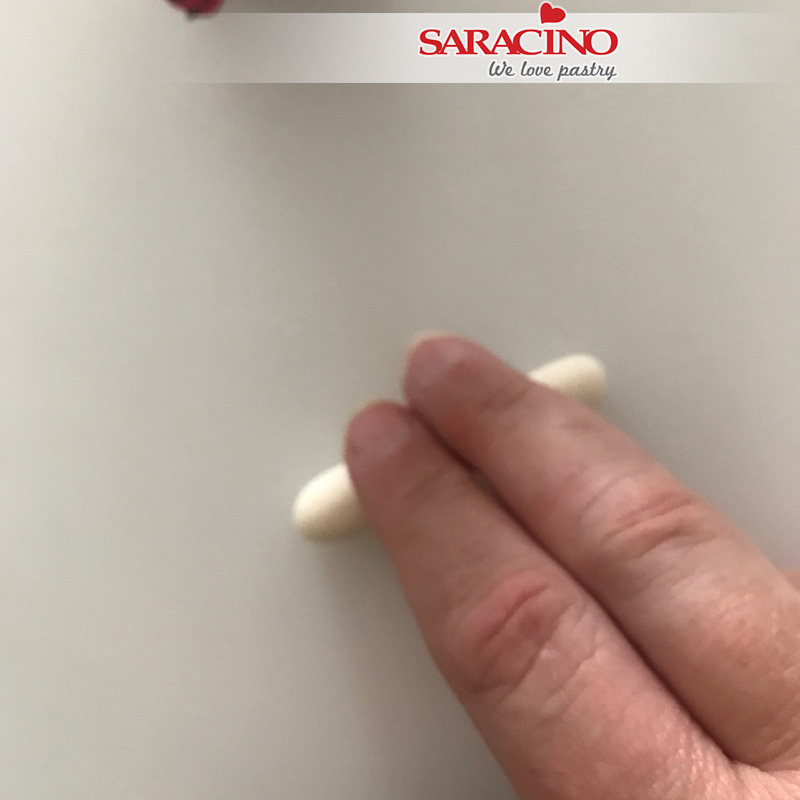
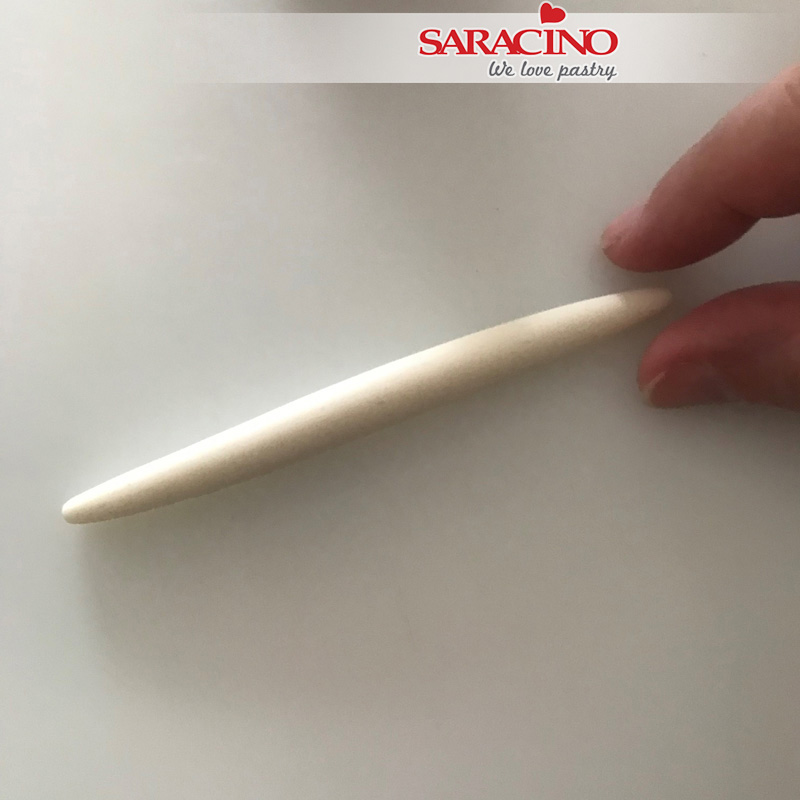
Use white modelling paste and roll out a thick sausage shape to create the legs. Cut the sausage in half to give two equal pieces
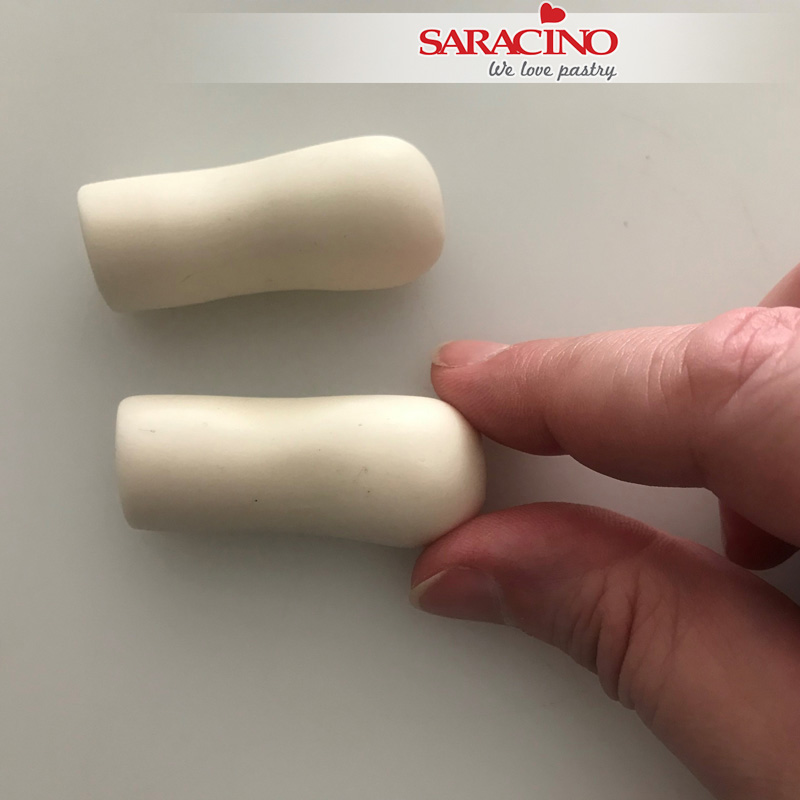
Step 8
Use your fingers to form the rounded feet
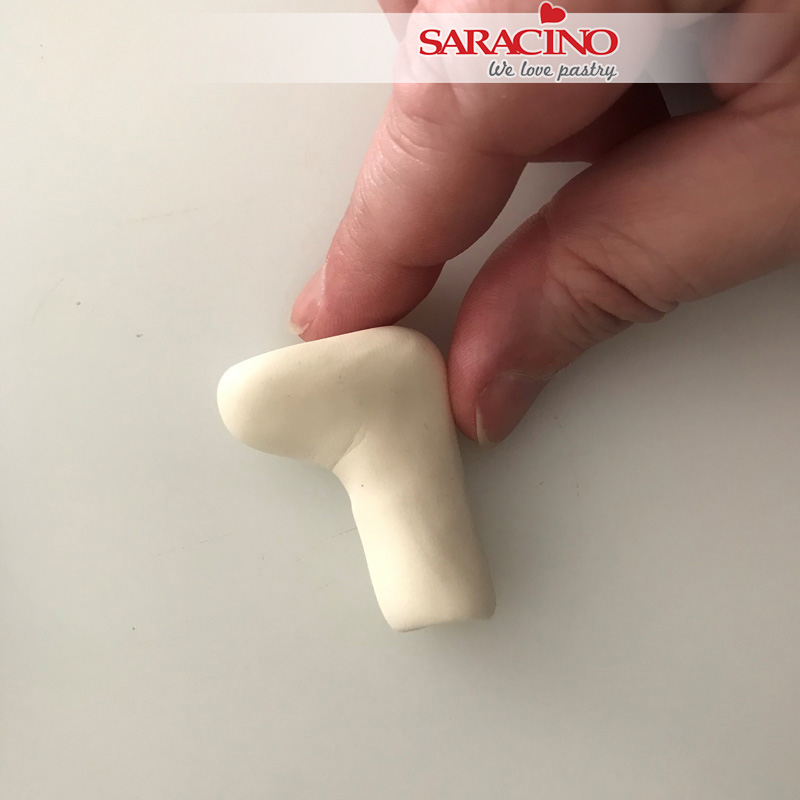
Step 9
Bend the paste at approximately one third of the leg to make the foot / ankle. Push the paste towards the heel with your fingers to blend. Repeat this for both legs
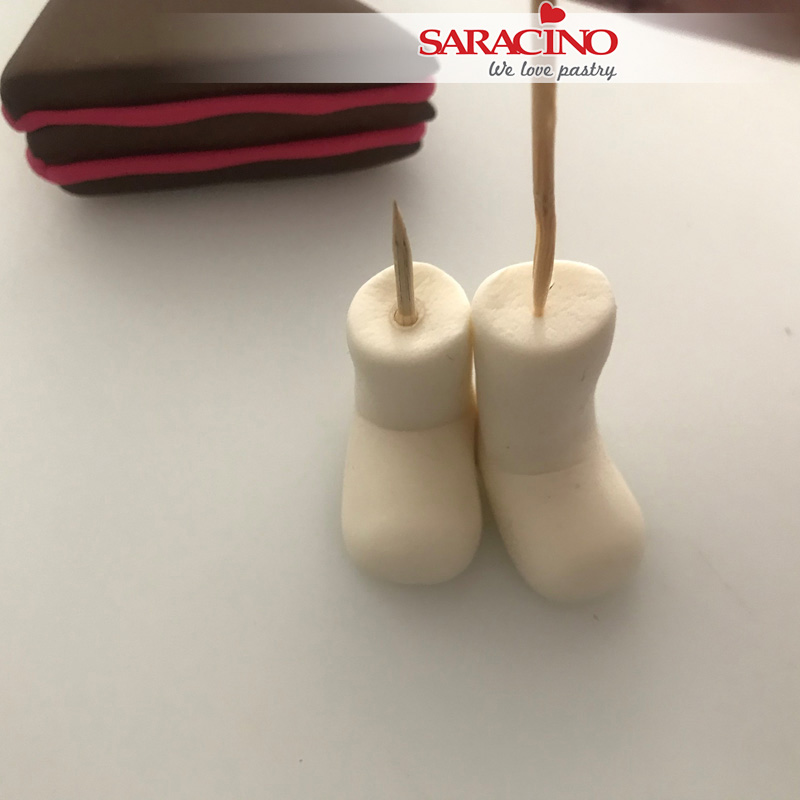
Step 10
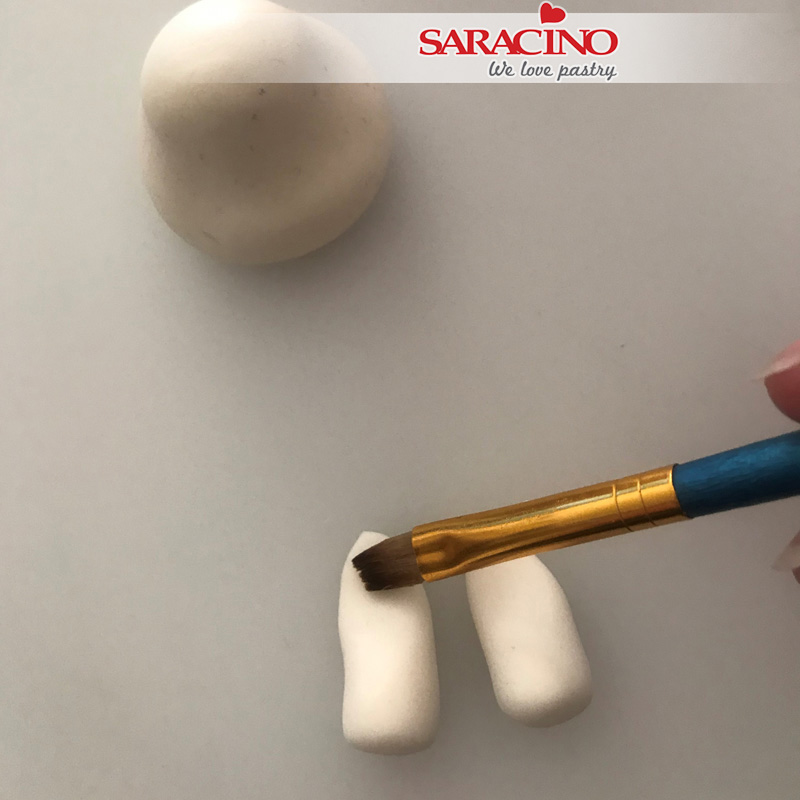
Put a little glue on two lengths of cocktail sticks. Stand the legs upright and put a stick in each leg. The sticks should be sticking out of the top of the legs.
Step 11
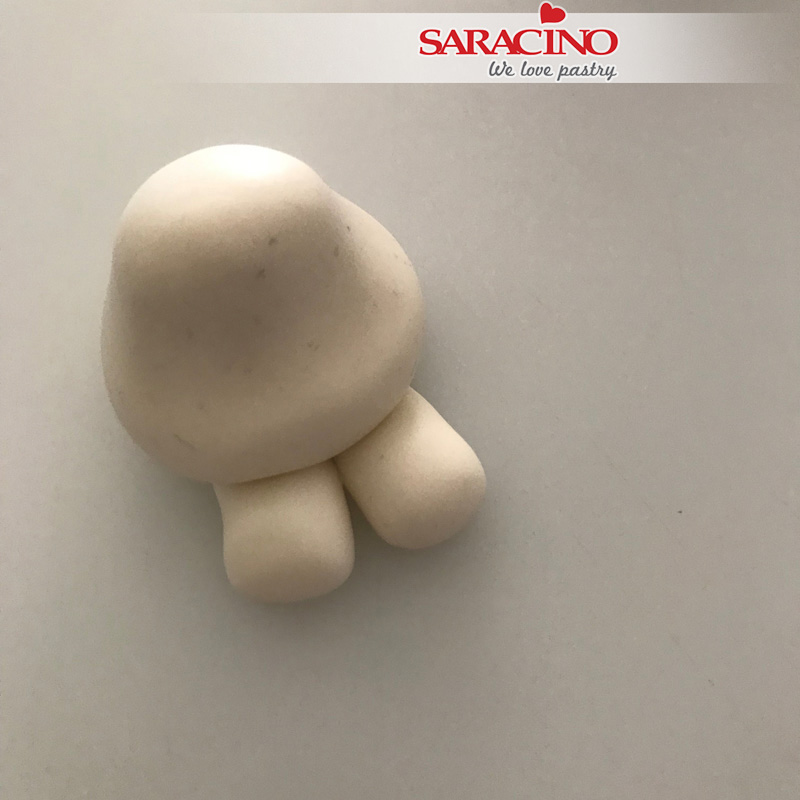
Take the piece of brown ‘cake’ we made earlier and put the ‘cake’ on top of the legs. It’s important to divide the weight of the ‘cake’ over the legs so it balances. If necessary support with sponges until dry enough to support itself.
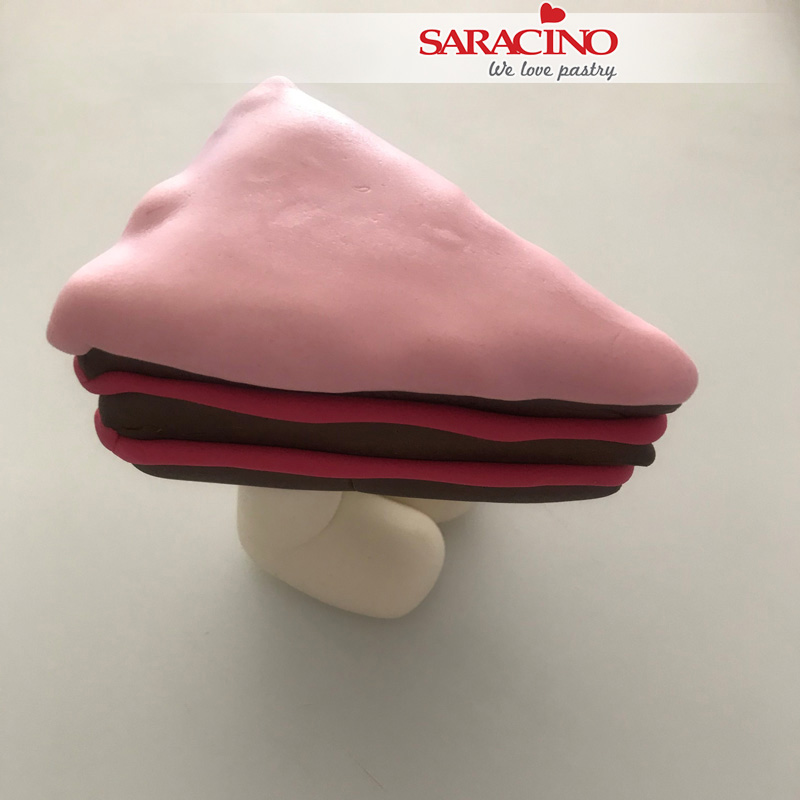
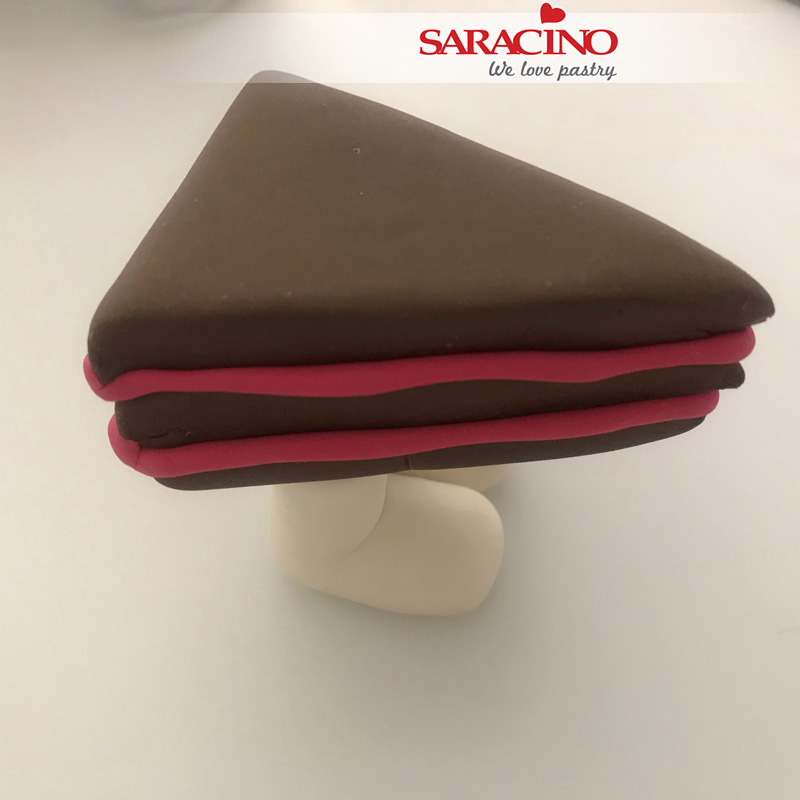
Step 12
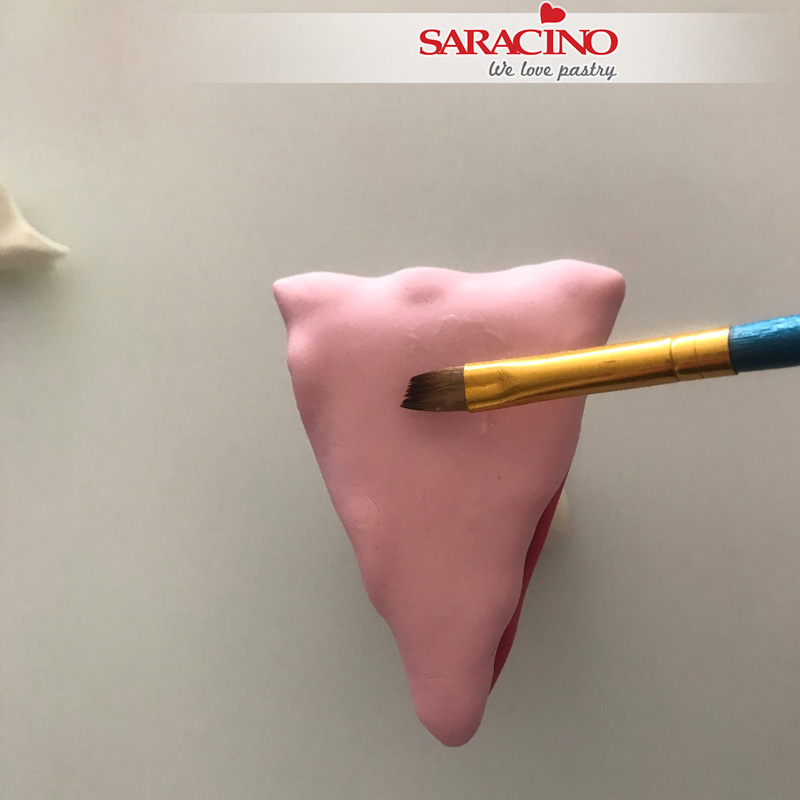
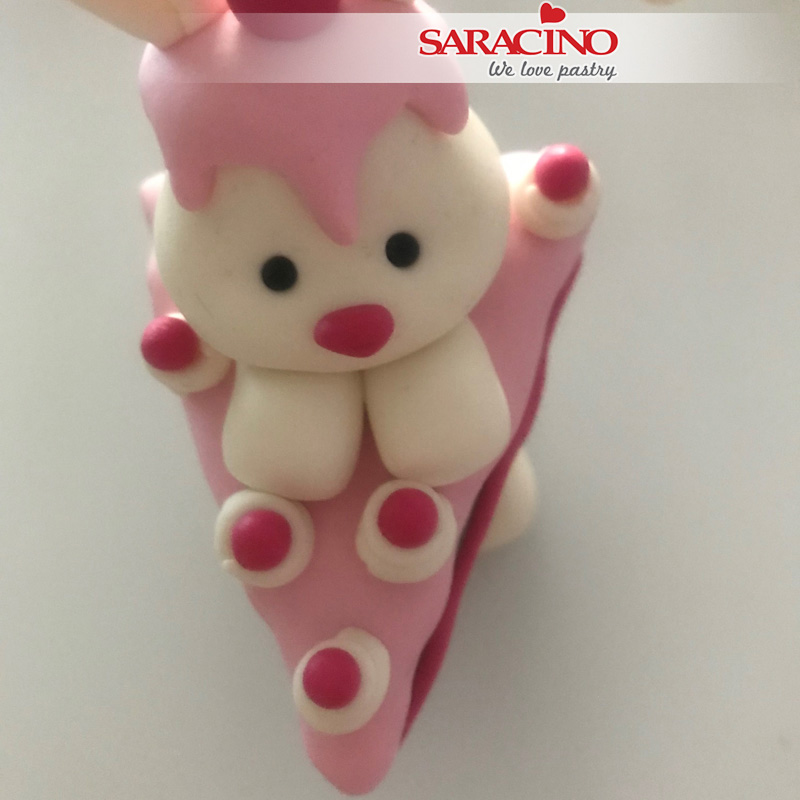
Use some of the colored pink paste and mix some white paste to it to lighten the darker pink paste. When the pink and white is mixed, roll it with a rolling pin until you have a thin layer. Cut a triangle out of the paste. This pink triangle is to be slightly larger than the brown ‘cake’. Glue the pink triangle onto the brown ‘cake’. The pink paste is to look like a pink frosting on the ‘cake’.
Step 13
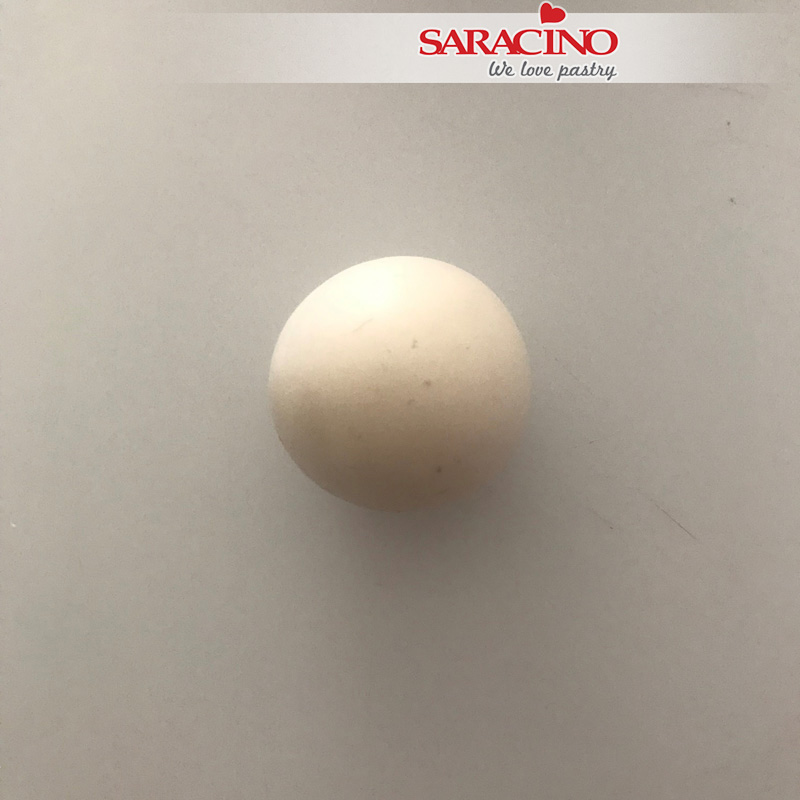
For the head roll a ball of white modelling paste. The size must fit on top of the ‘cake’.
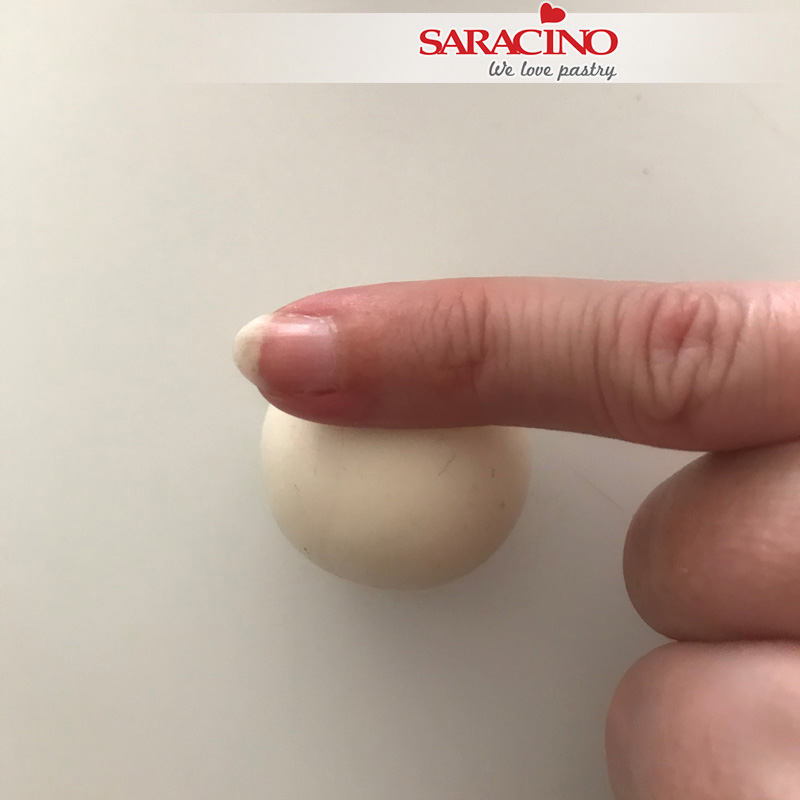
Step 14
Using your fingers roll one end of the ball so it forms an egg shape.
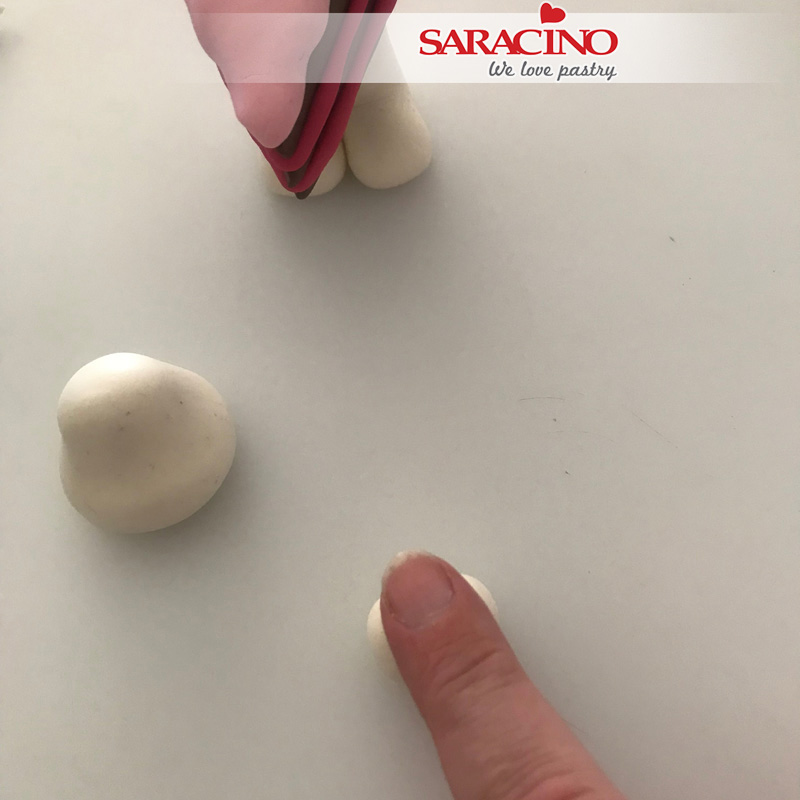
Step 15
Make a sausage of white model paste to make the arms (not to thick), cut the roll in two pieces.
Step 16
Flatten one end of the two pieces.
Step 17
Put a little glue on the flattened sides
Step 18
Put the head on top of the two flattened pieces.
Step 19
Put a little glue on the ‘cake’. Position the head on the ‘cake’ (make sure that you glue the head directly above the legs)
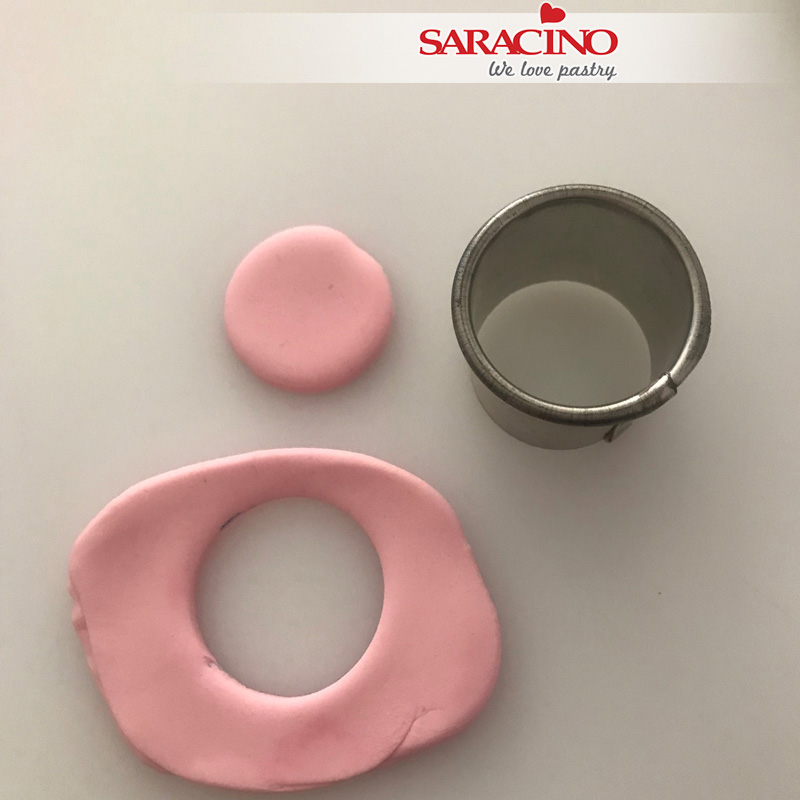
Step 20
Roll out soft pink modelling paste (1-2mm thick) and cut out a circle that’s a little bigger than the top of the head.
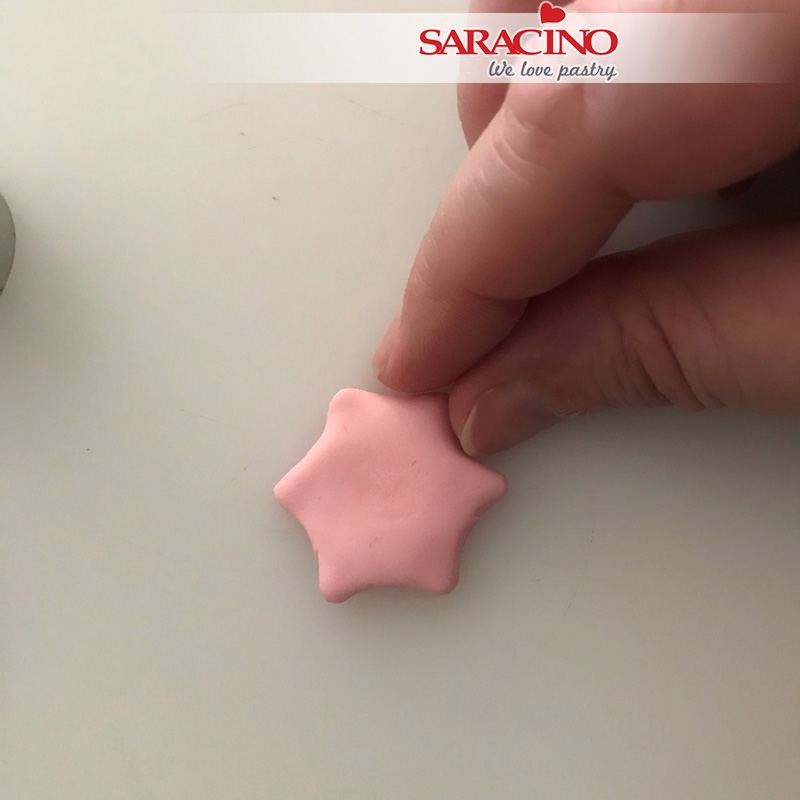
Step 21
Using your fingers make ‘pointy’ edges around the circle, so it looks like pink drip.
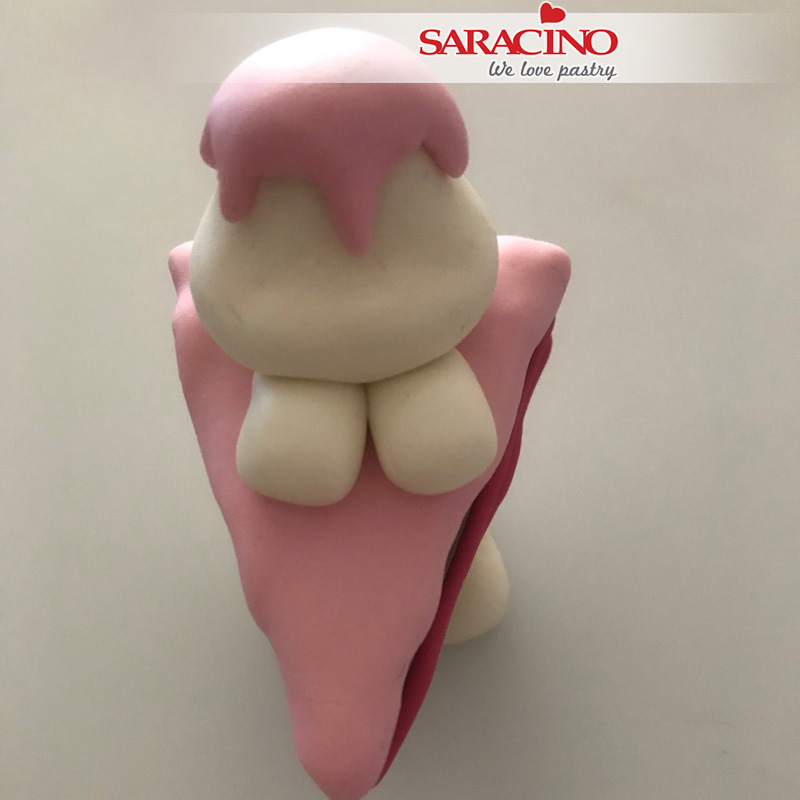
Step 22
Using a little edible glue fix the pink ‘drip’ on top of the head (so it looks like the head is covered with pink dripped glaze).
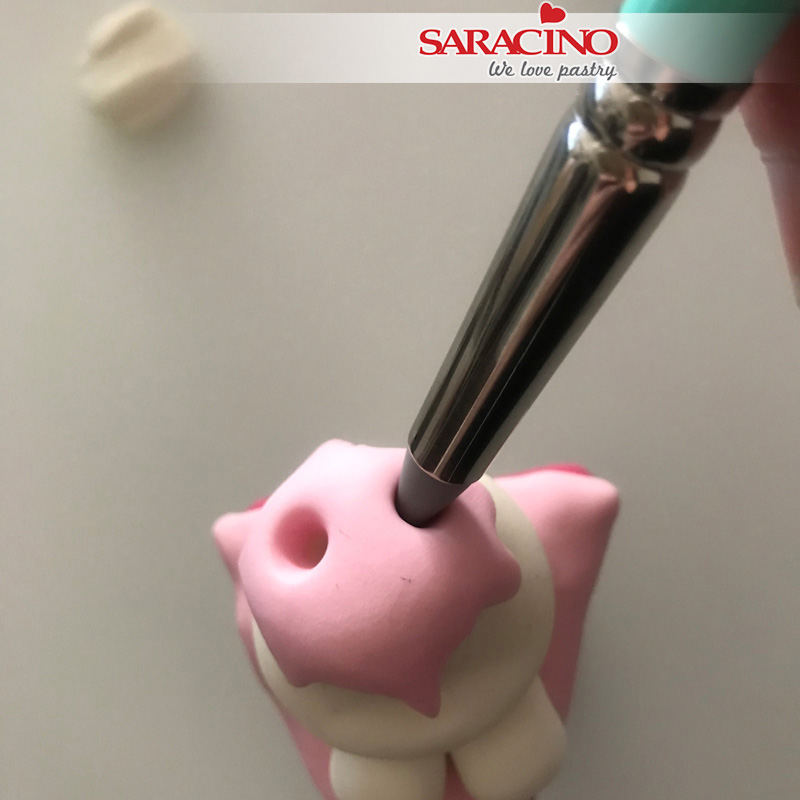
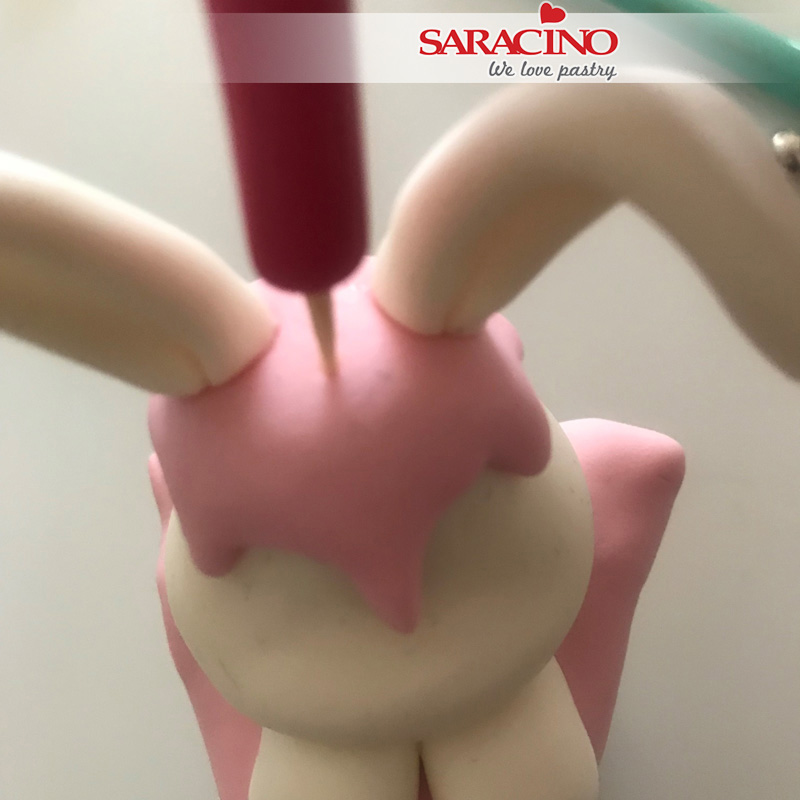
Step 23
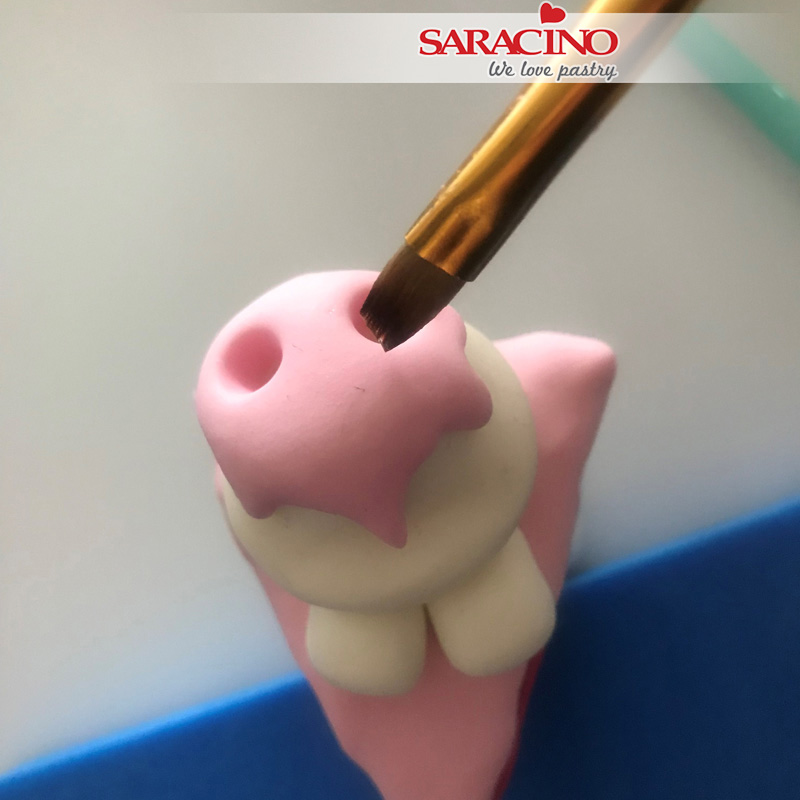
Use the pointed silicone modelling tool to form two holes in the top of the head, the holes need to be large enough to fix the ears into later.
Step 24
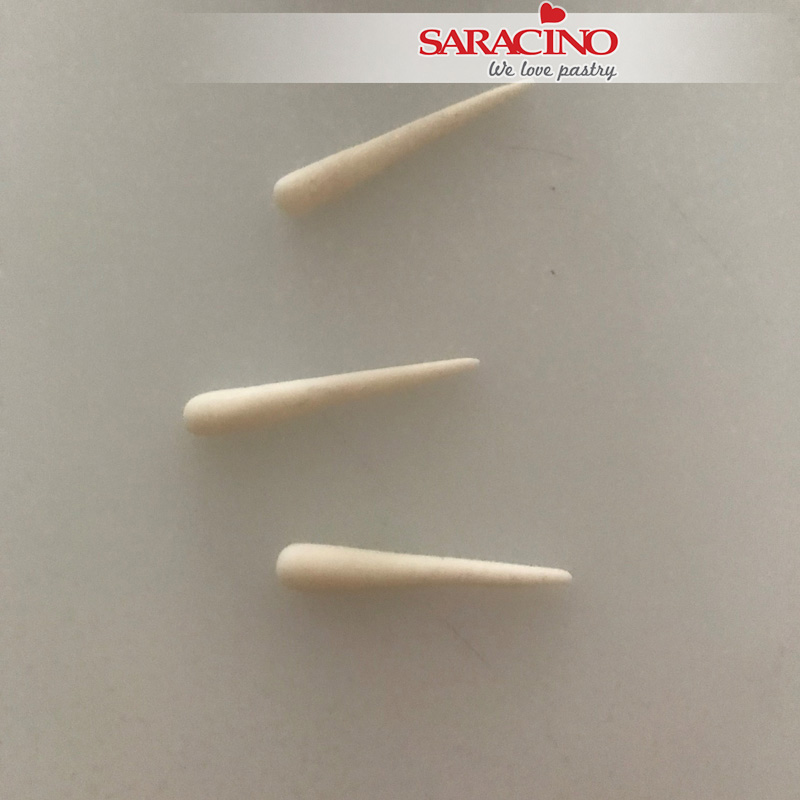
Roll out white modelling paste to a thin sausage shape, make sure the ends of the sausage are slightly pointed.
Step 25
The sausage is to make the ears, use a knife to cut the sausage in half
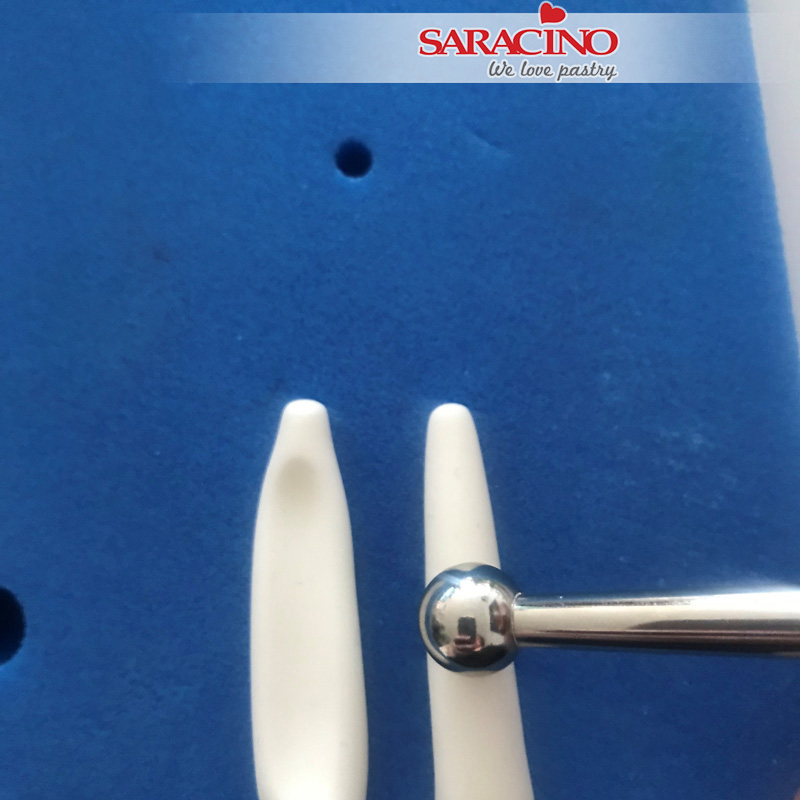
Step 26
Use your ball tool to flatten the ears slightly and to create the inside of the ear
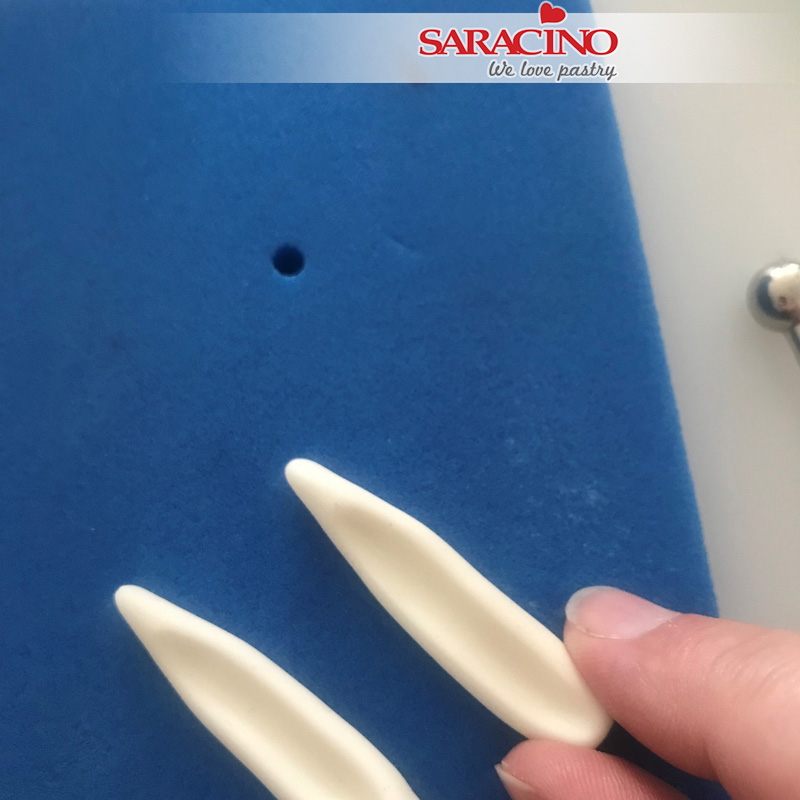
Step 27
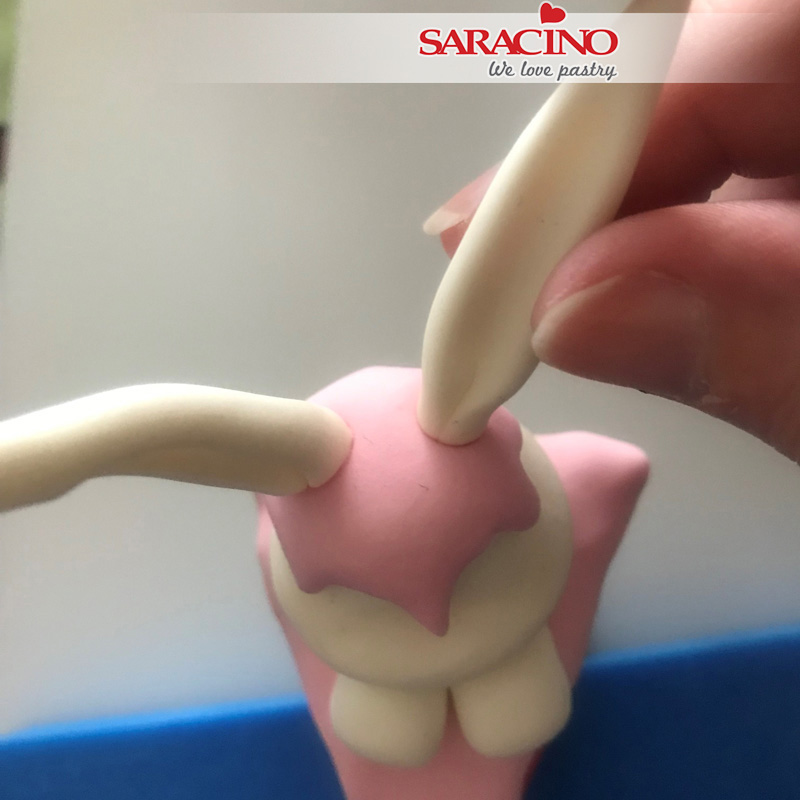
Using your fingers squeeze the end of each ear to fit the holes previously formed in the head
Step 28
Put a little glue in the holes in the head
Step 29
Put the ears in the holes and bend them in the shape you want them to be
Step 30
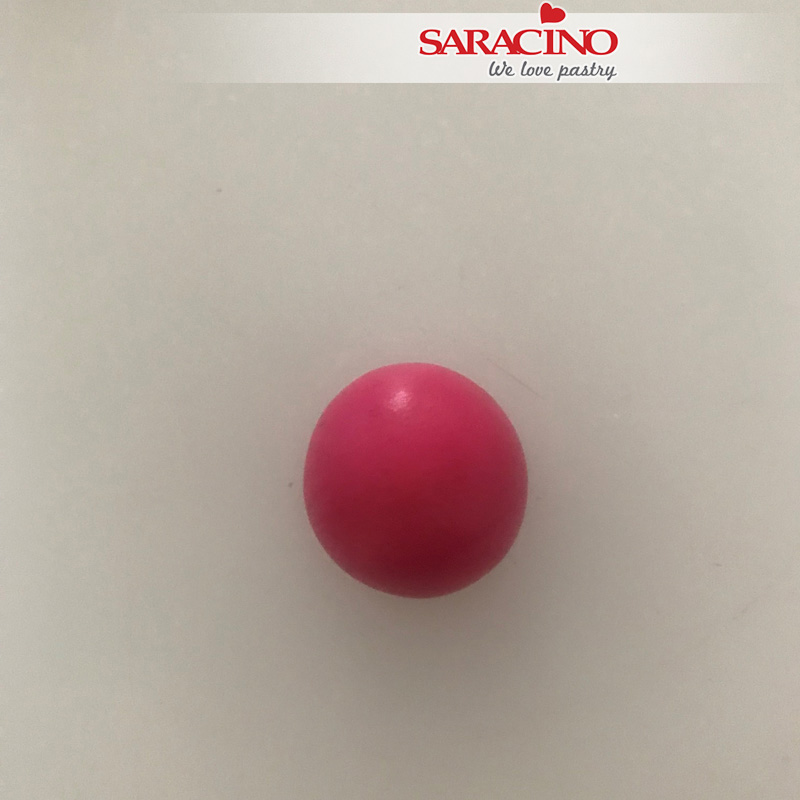
Make a small ball out of the pink coloured modelling paste
Step 31
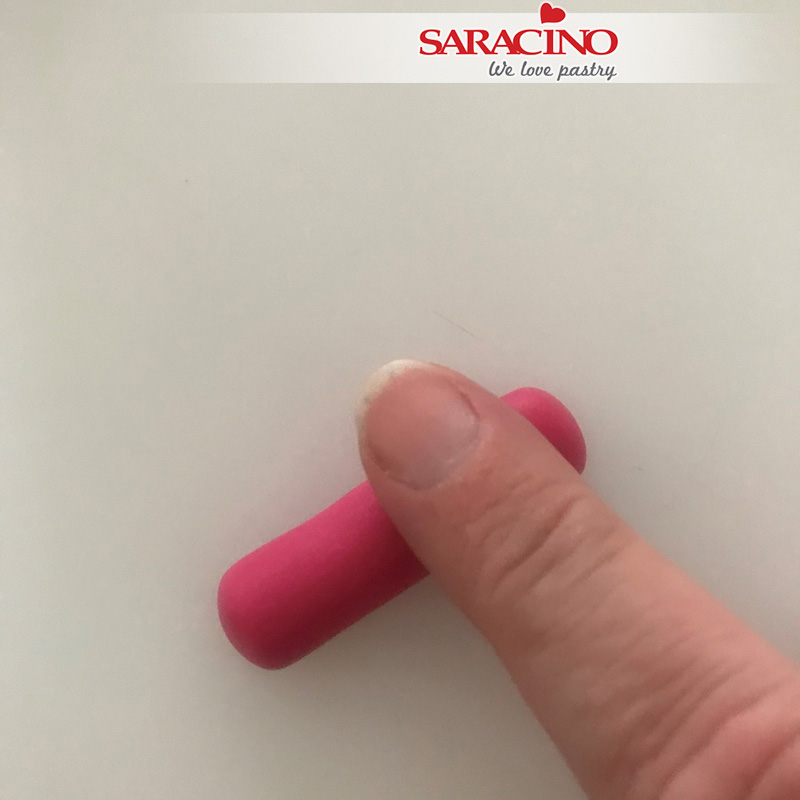
Roll the ball to form a thin sausage. This is to make the candle on top of the head.
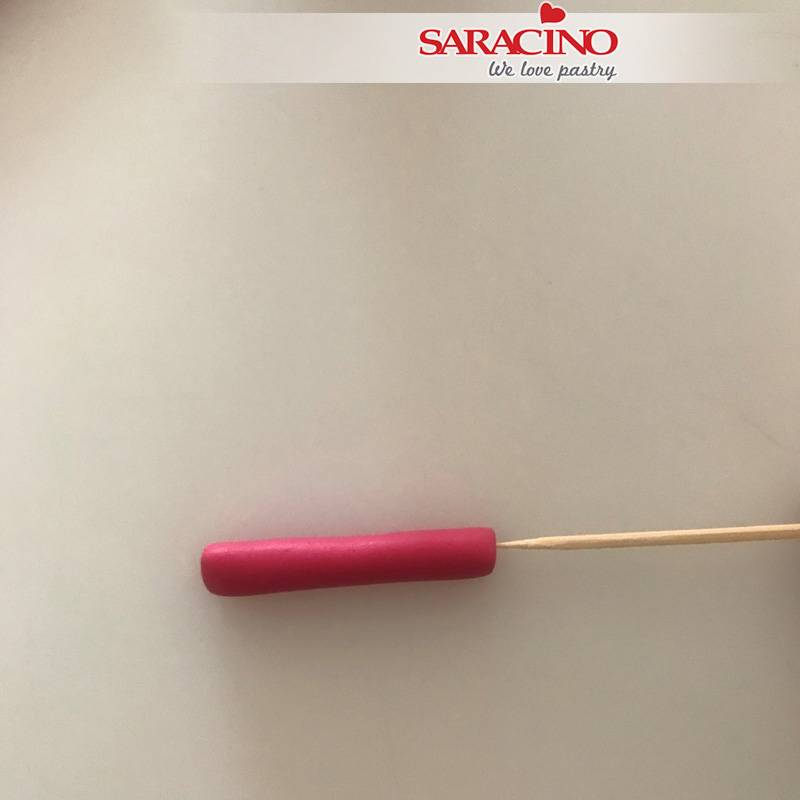
Step 32
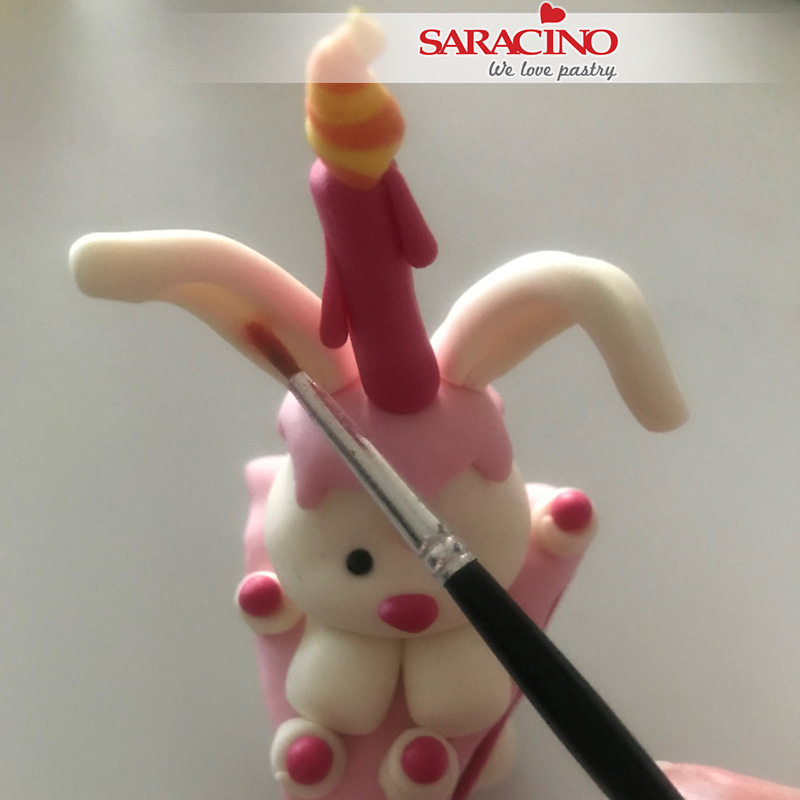
Put a cocktail stick in the sausage, roll the stick back and forth while putting the stick in the paste.
Step 33
Leave a small piece of the cocktail stick sticking out of the bottom of the candle and fix into the top of the head.
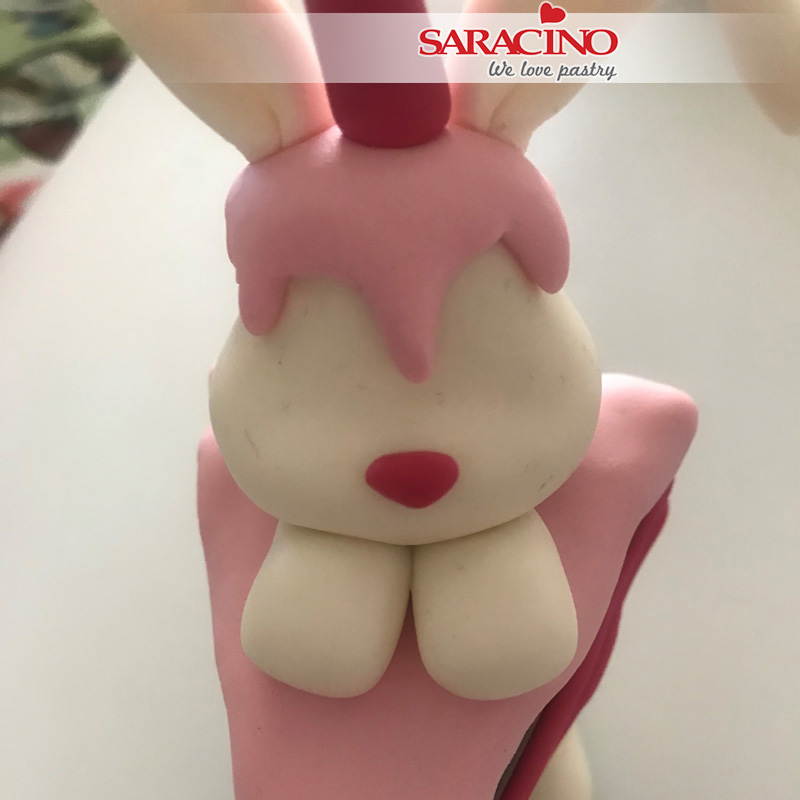
Step 34
The candle should be inserted until no cocktail stick is visible. Use a little piece of the pink modelling paste to create a small triangle nose and fix it to the front of the face.
Step 35
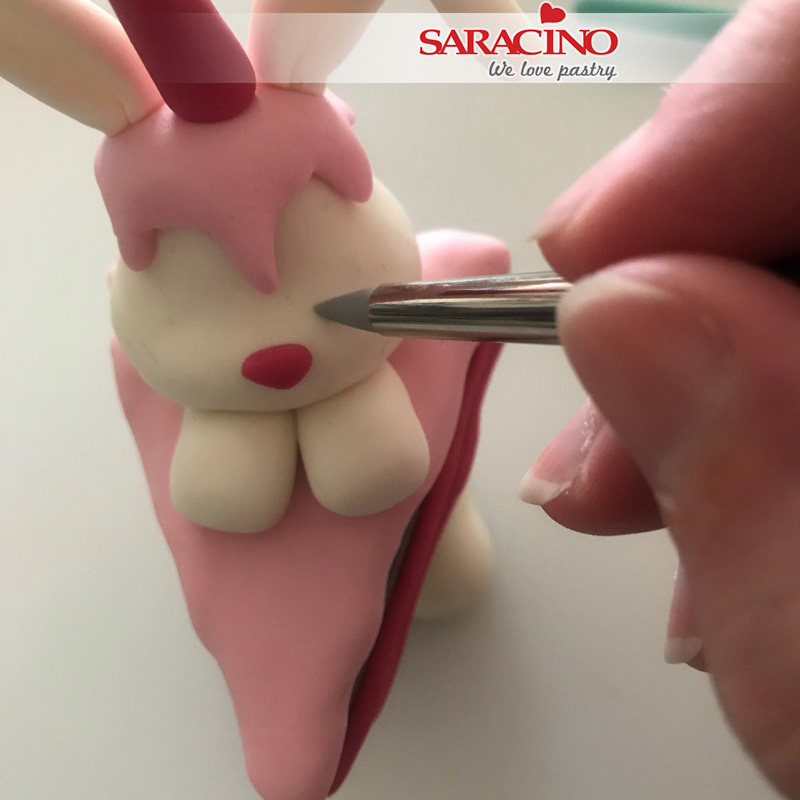
Use the pointed silicone tool to form two small holes in the head to create the eye sockets and push the black pearls in the holes (you don’t want them to stick out of the head)

Step 36
Use a little yellow and orange paste and mix them together slightly to give a marbled effect. Roll out to form a teardrop shape for the candle flame. Put the flame on top of the candle, using a little glue.
Step 37
Roll long white teardrops. Twist each of them up to form the ‘whipped cream’. Fix on top of the pink ‘cake’ covering. Roll small pink balls as cherries and fix on top of the whipped cream.
Step 38
The ‘whipped cream’ with ‘cherries’ should be fixed as shown.
Step 39
Use a small brush with soft pink dust colour and lightly brush the cheeks and the inner ears. Make sure you don’t use too much dust as this will over colour. If you want to add an extra touch you can roll long drops of pink modelling paste, and fix it to the candle (so it looks like the candle is melting).
Step 40
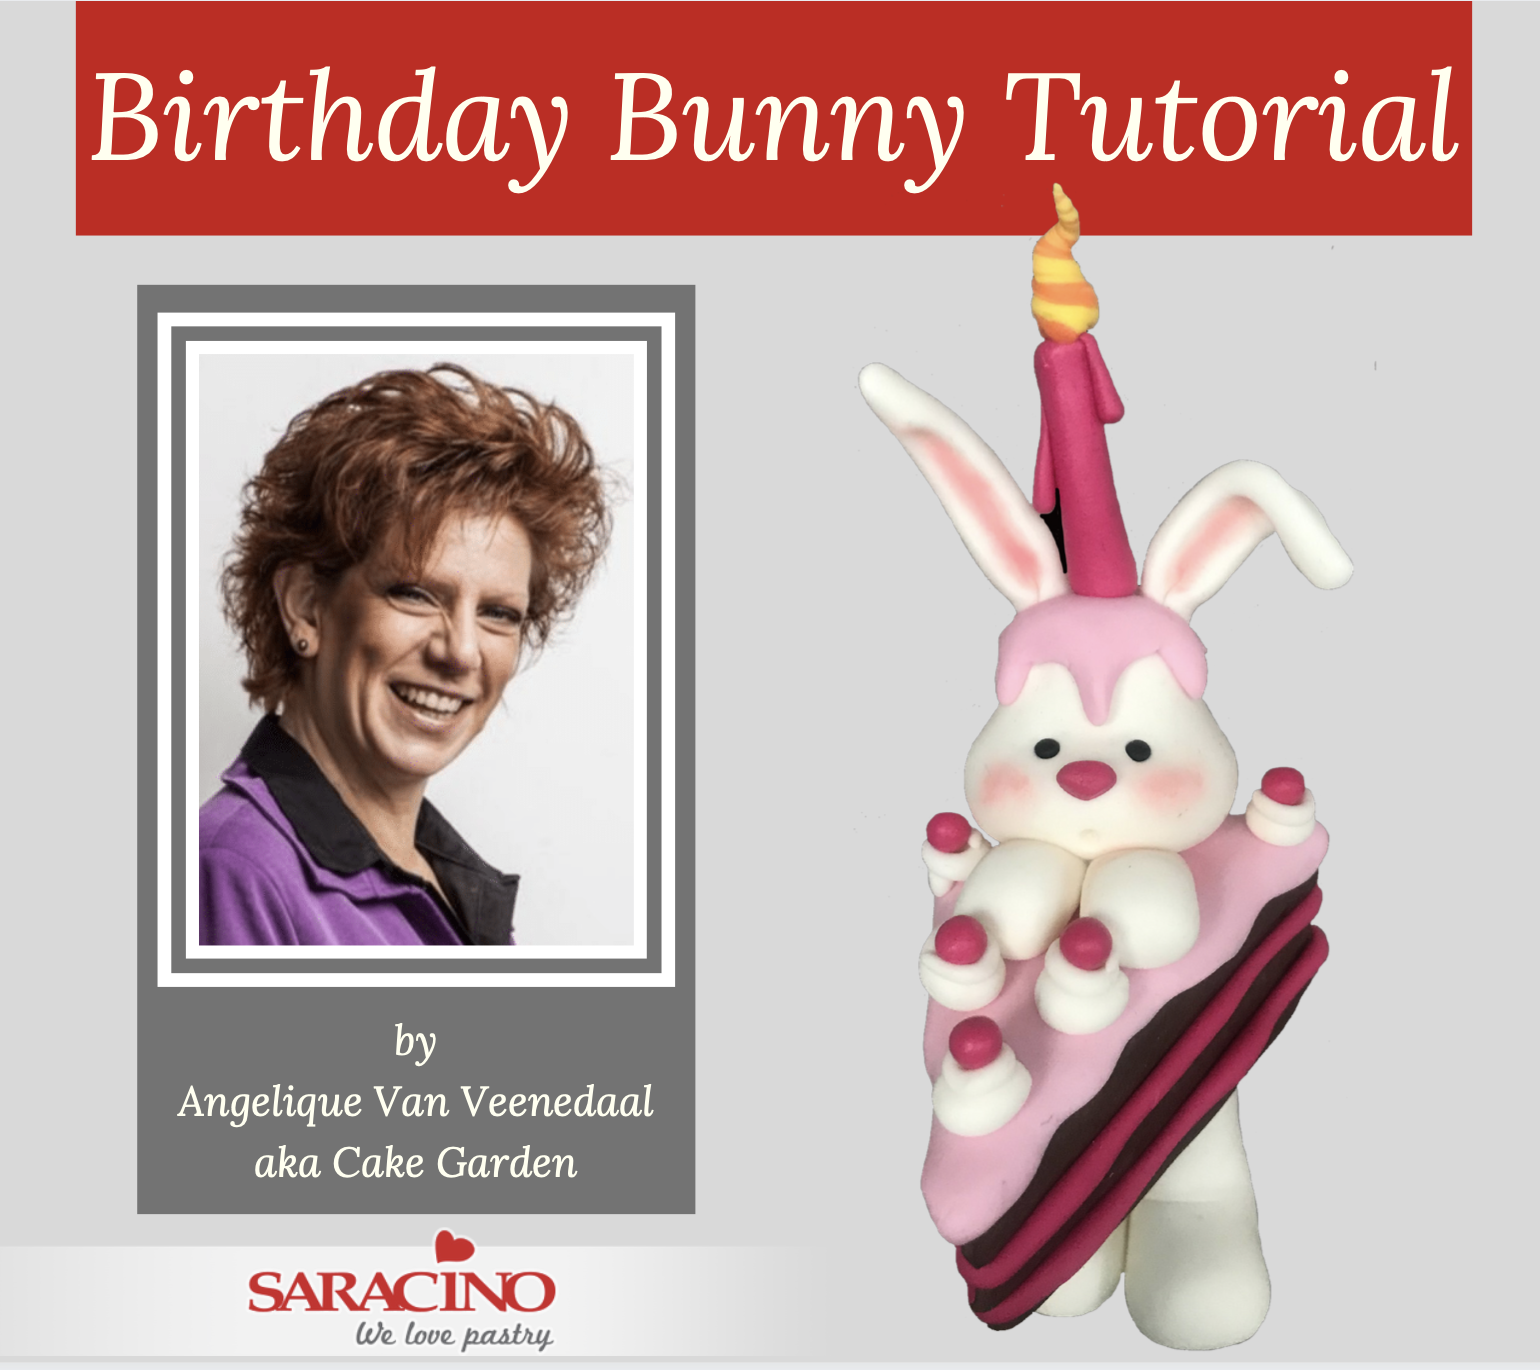
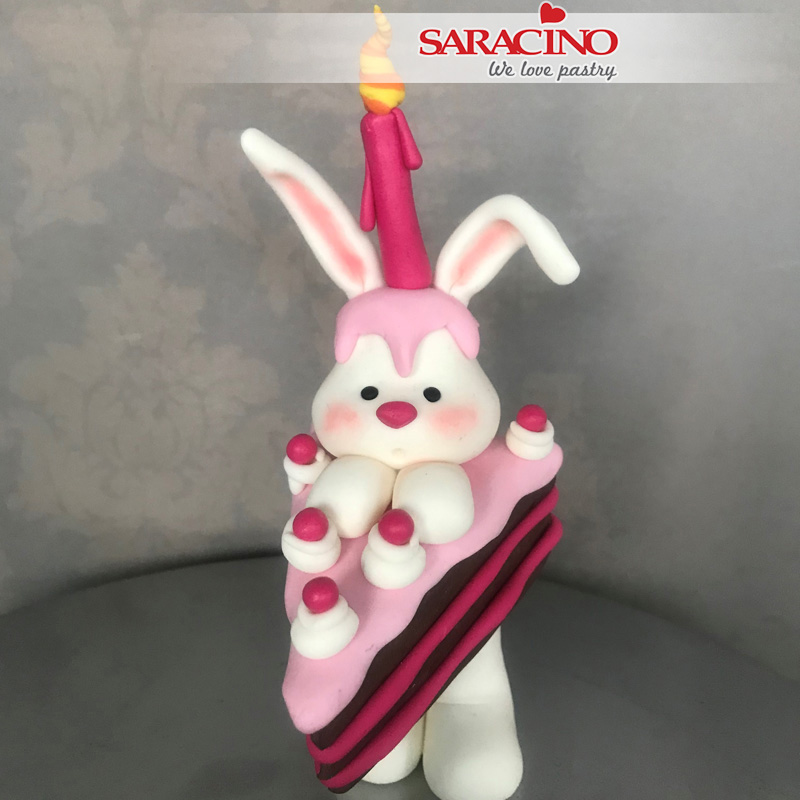
Your happy birthday bunny is now ready!
