
Skill Level: Beginner
You will need:
- 2 Wooden skewers
- 2mm thick aluminium wire (I purchase it from the florist section in Hobbycraft)
- Hot glue gun
- Thick cardboard
- Scissors
- White florist tape
- Polystyrene dummy
- 80g Saracino White modelling chocolate
- Saracino modelling paste: Black, Brown, Red, 175g Skin Tone, 55g White
- Saracino gel colour: Brown, Skin Tone, Yellow
- Saracino Dust colour: Black, Brown, Pink, Red
- Craft knife
- Dresden tool
- Small ball tools
- Rolling pin
- 5mm Circle cutter.
- Colour 175g of Skin Tone modelling paste with the Skin Tone gel colour.
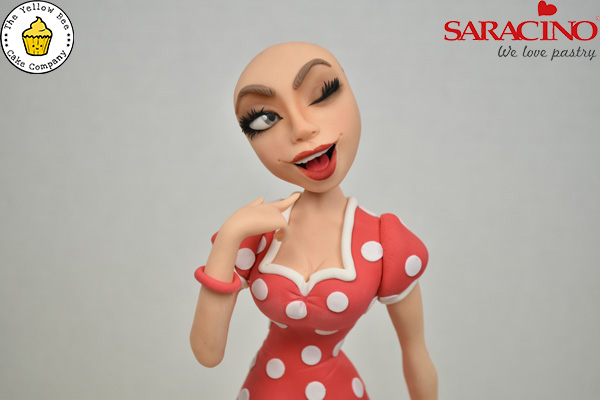
In this tutorial Vicky Teather from the Yellow Bee Cake Co shows you how to create Miss Molly. You’ll learn to work with armatures to create a gravity defying model.
Tip: If you’re a bit clumsy, like me, let each section dry and harden before moving onto the next. It’ll mean you’re less likely to damage the work you’ve already done.
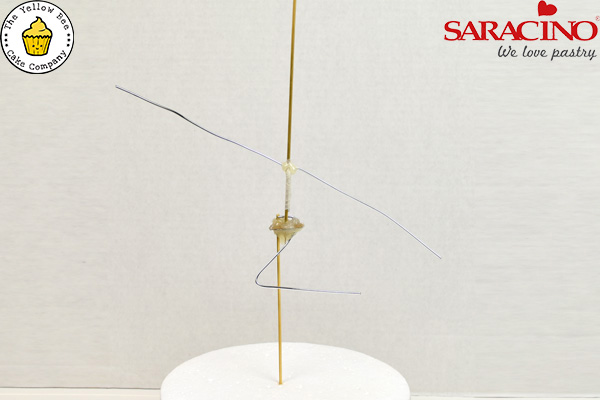
Step 1
Cut out a 2.5 x 1.5cm oval from the carboard. Push a skewer (A) through the card towards the left side and the wire through the right side. Push the other skewer (B) through the centre of the card. Add a layer of hot glue around the top and bottom edge of the card to seal the skewer and wire in place. Trim the skewer (A) to 15cm in length plus the depth of the dummy. And the wire to 15cm. Cut two lengths of wire and attach to skewer (B) 6cm above the cardboard using the florist tape. Bend the wire at a right angle. Add more hot glue to keep it in place.
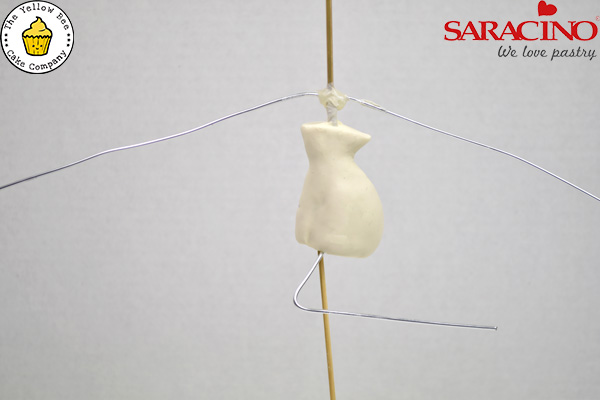
Step 2
Mould 80g of White Modelling Chocolate around the centre of the armature. We will trim this later, so just get it as smooth as you can for now.
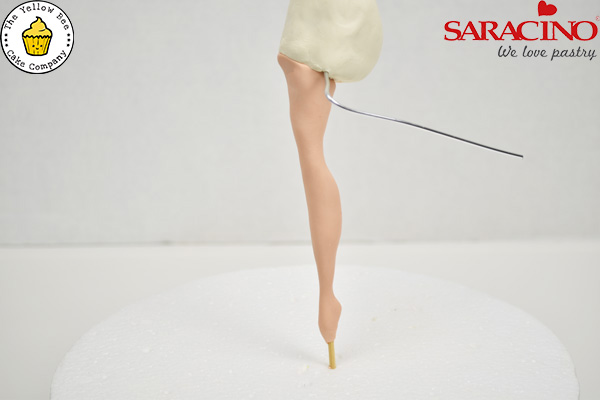
Step 3
Dip the end of skewer (A) into edible glue. Push a 30g sausage of Skin Tone modelling paste up the length of the skewer until it reaches the modelling chocolate. Add a little glue to attach the modelling paste to the chocolate and then shape the paste into a leg. Trim away excess paste from the top and bottom of the leg.

Step 4
Shape 30g of Skin Tone modelling paste into a bent leg shape. Use the craft knife to cut a line into the back of the leg. Paint glue inside the cut and then glue in place around the 15cm long wire. Use your fingers to blend the seam, followed by a dresden or silicone tipped tool.

Step 5
Shape the tops of the legs up onto the modelling chocolate body to create a flush surface. Trim away any excess modelling chocolate to achieve a smooth silhouette.
Step 6
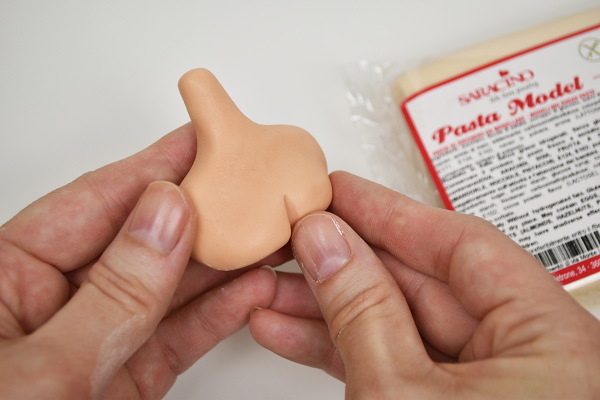
Roll 35g of Skin Tone modelling paste into a ball. From one edge begin to pinch and roll the paste to form a neck. Flatten the opposite edge from the neck and press a dresden tool into the paste to create the beginnings of the bust.
Step 7
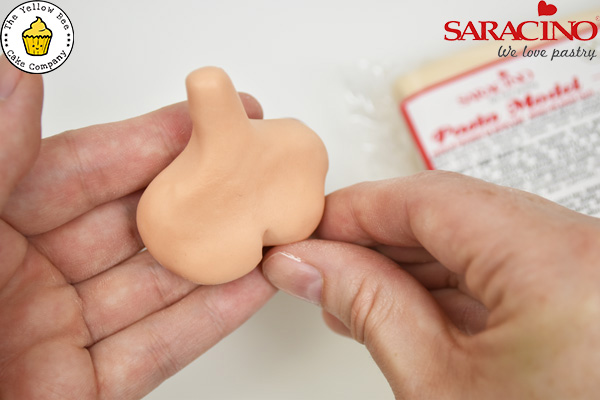
Use your fingers to round off and shape the bust. Shape the neck line by flattening and squaring off the shoulders.
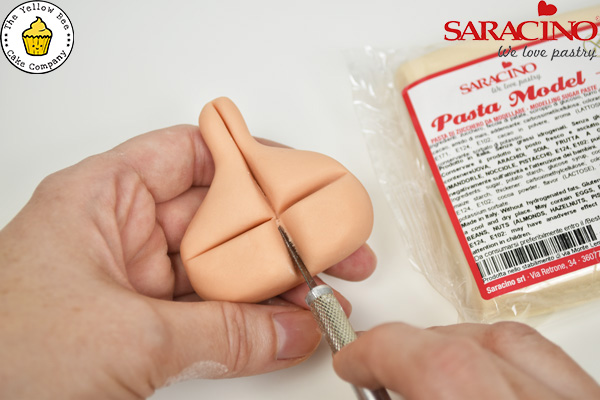
Step 8
Flip the body chest over and press against the wire frame to indent the pattern from the armature. Cut along the marks and then attach with a little glue to the armature.
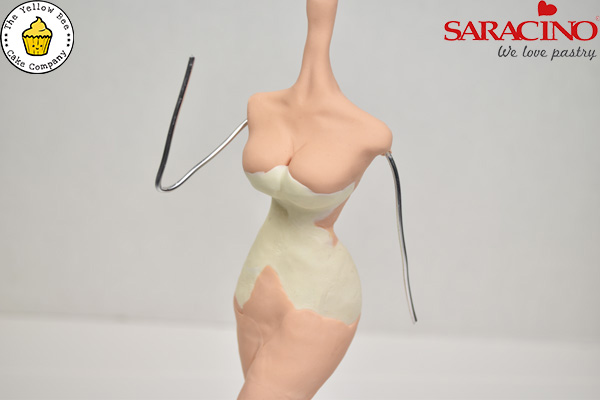
Step 9
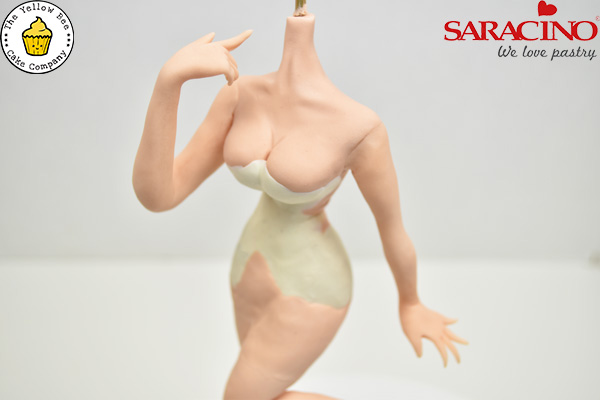
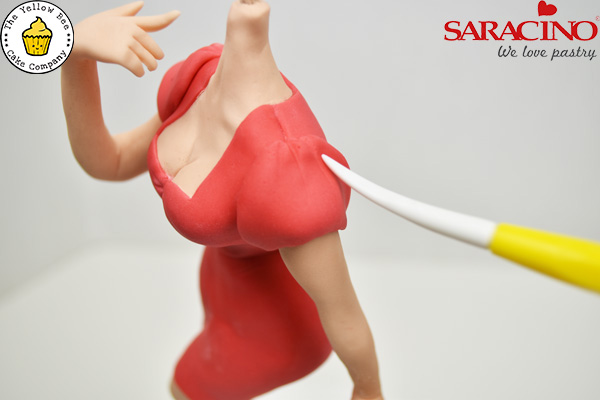
Blend the chest into the modelling chocolate body to create a smooth silhouette. Add more modelling chocolate underneath the bust to round them off. Use the dresden tool to mark the cleavage lines and the collarbone. Bend the arm wire into position.

Step 10
Shape 20g of Skin Tone modelling paste into a spoon shape. Gently flatten the wide spoon end into a hand shape. Cut away a triangle from the left side of the hand. Use your fingers to smooth around the cut edges to round them off.
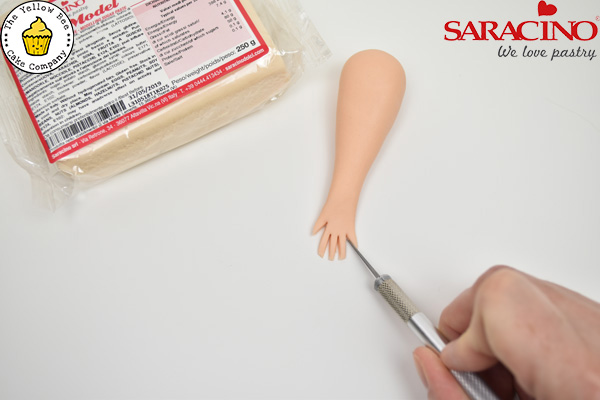
Step 11
Stretch out the area of the hand where the fingers will be. Then cut in half and then half again to reveal the fingers.
Step 12
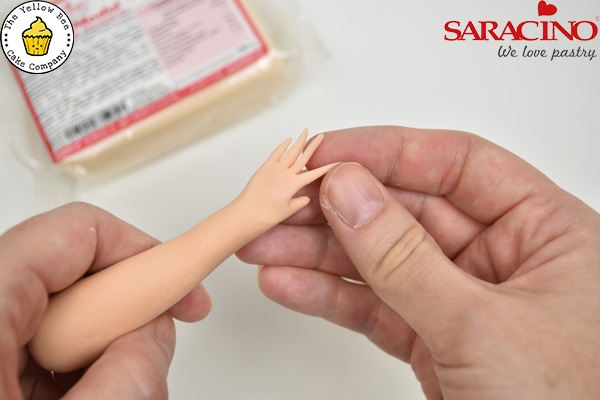
Roll each finger in between your fingers to round off the cut edges. Flip the hand over and press the wide end of the dresden tool into the palm between the thumb and index finger.
Step 13
Cut the arm wires to 7cm in length, bend the left wire half way along. Dip the right arm wire into edible glue and then feed the arm up over the wire. Use your fingers to shape the arm and wrist, cutting away any excess paste. Blend the top of the arm to the chest. Create a second arm, but this time follow step 4 to attach to the bent wire.
Step 14
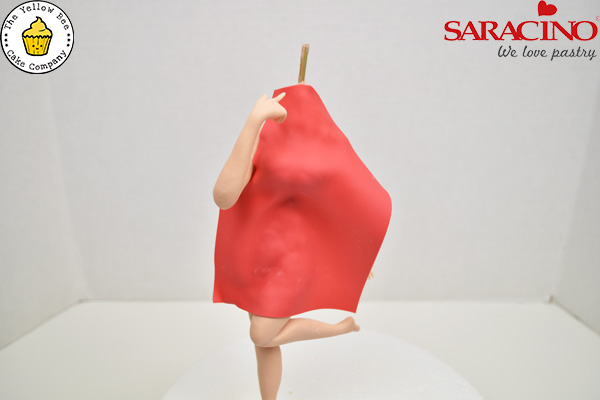
Roll out Red modelling paste to a 1mm thickness. Cut out a rectangle of paste and attach to the front of the model. Use your fingers to shape the paste, so that it fits around her curves.
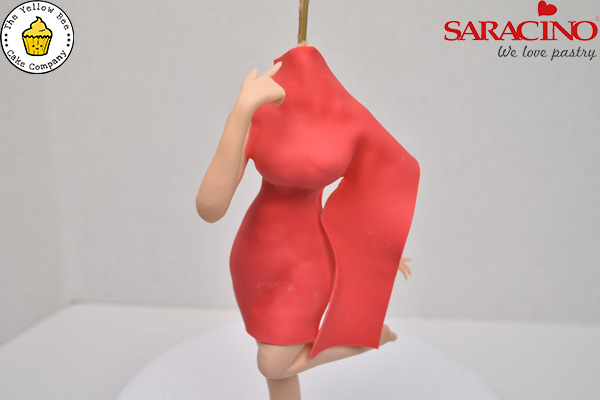
Step 15
Use the craft knife to trim the paste, so that the seam lies against her side. Just like you would find in actual clothes.
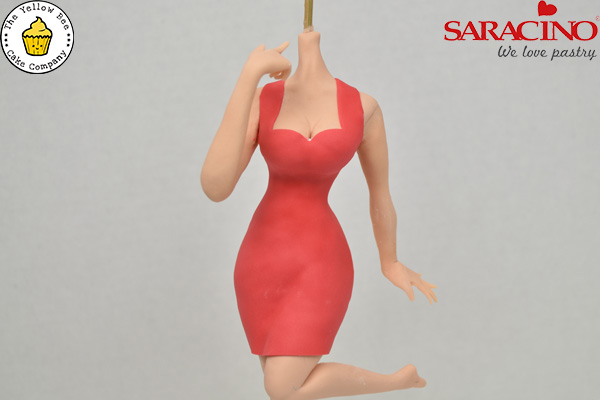
Step 16
Trim the paste to reveal the neckline and sleeves. Cover the back of the model in the same way.
Step 17
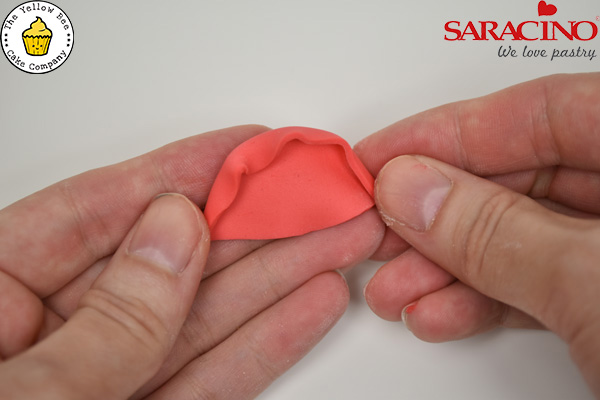
Roll out the Red modelling paste to a 1mm thickness. Cut out a semi-circle and fold the rounded edge over with your fingers.
Step 18
Glue the semi-circle in place at the top of the arms and use the dresden tool to mark creases. Repeat with the second arm. Roll out White modelling paste as thinly as possible and cut out 5mm circles. Glue the circles in place over the dress and sleeves. And add small sausages of paste around the sleeves and neckline. Roll a long thin sausage of White modelling paste and flatten with a rolling pin. Trim the paste to around a 1cm width and then gently gather into a concertina shape. Trim away one edge and then glue in place around the base of the dress.
Step 19
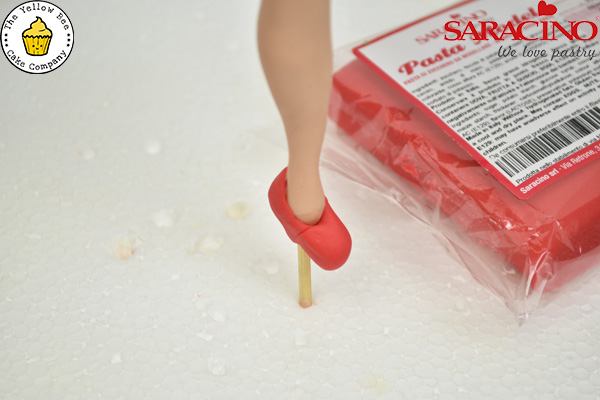
Shape a small marble of Red modelling paste into a sausage. Glue in place around the bottom of the foot. Use your fingers to blend the seam created. Shape the paste into a shoe. Add a small cone for the heel.
Step 20
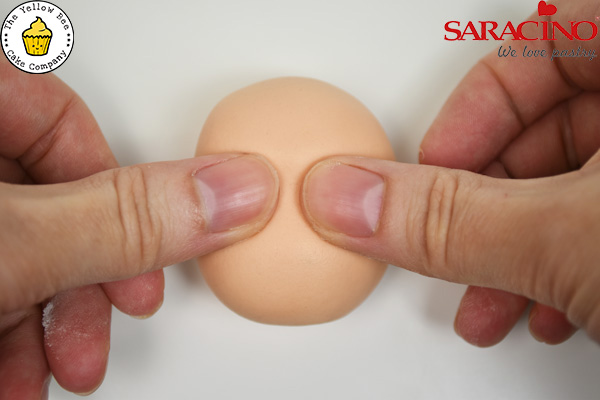
Roll 40g of Skin Tone modelling paste into a ball. Place the side of your finger half way up the ball and rock back and forth to create a shallow groove. Place your thumbs or a ball tool into the groove, leaving a 5mm gap between and lightly press to create the eye sockets.
Step 21
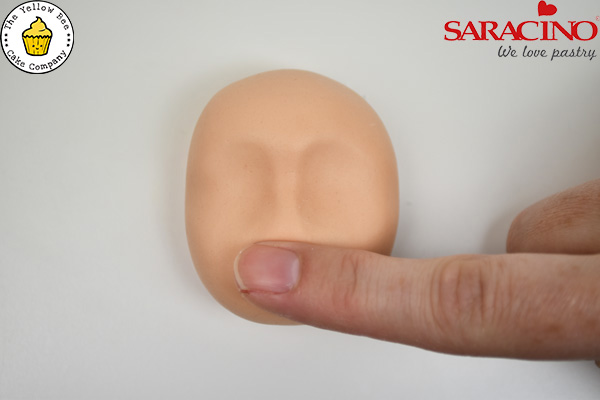
Lightly press down to create the bridge of the nose. Then use your fingers to shape the tip of the nose and define the bridge.
Step 22
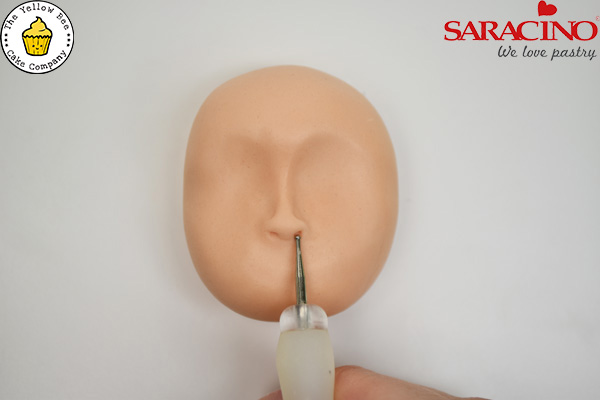
Lightly press down on either side of the tip of the nose to shape the nostrils, then press a small ball tool into the nostril. Use the wide end of the dresden tool to mark the crease around the edge of the nostril.
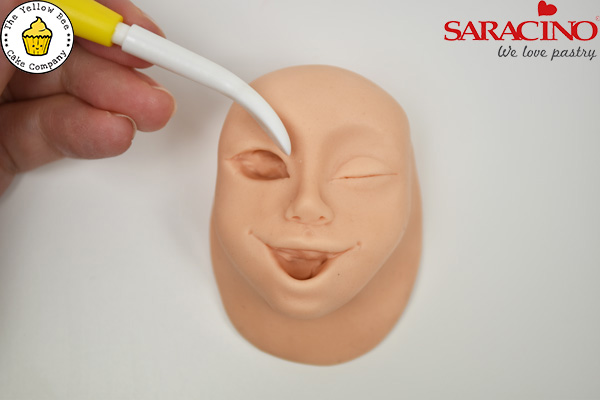
Step 23
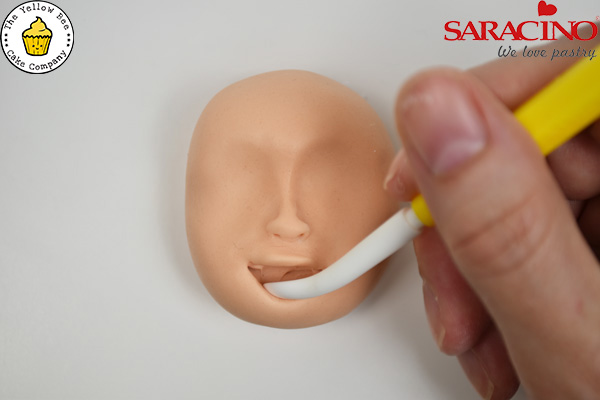
Use the craft knife to cut a smile line half way between the nose and chin. Press the blade into the cut and gently prise the lips apart. Use your finger to gently press the top edge upwards to create the upper lip. Pull the mouth open with the dresden tool.
Step 24
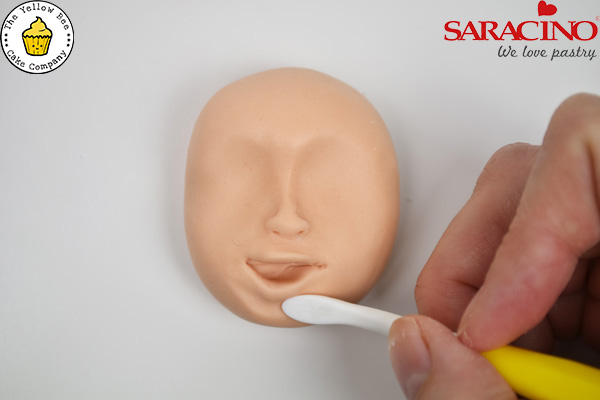
Press the dresden tool into the chin to create the bottom lip and chin area.
Step 25
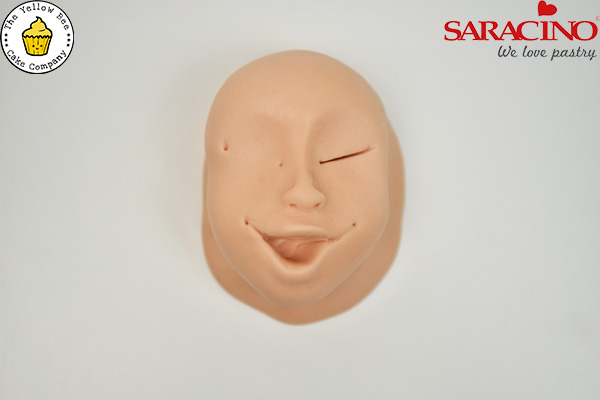
Use a scribe tool to mark the creases in the side of the smile and then press a small ball tool in to add the dimples. Use your fingers to shape the chin and sides of the face by pushing the paste down and away. For the eyes press the mini ball tool into the eye sockets to create guide lines for where the edges of the eyes will sit. Cut a straight line between the two dots on the right eye.
Step 26
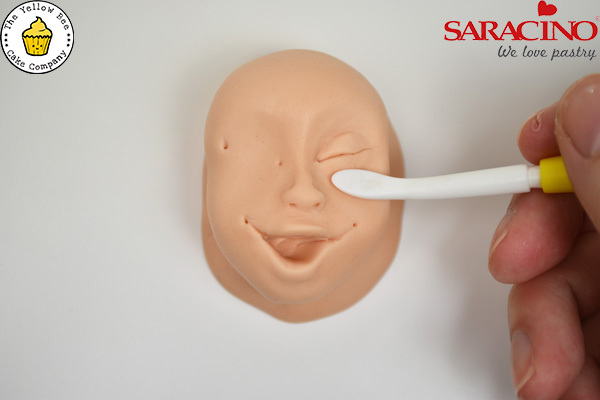
Place the blade into the cut and gently pull the paste away from the central line. Then use the dresden tool to mark a crease for the upper eyelid and the same for the lower eyelid.
Step 27
Cut out an almond shape using the two dots for guidelines and then use the dresden tool to shape the eye socket.
Step 28
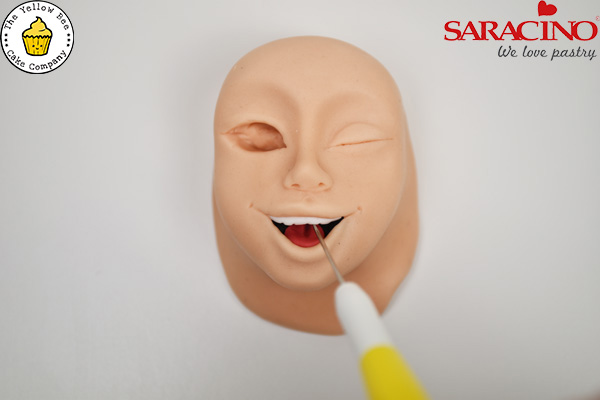
Fill the mouth with a small amount of Black modelling paste. Then roll a small cone from Red modelling paste and glue in place on the lower edge of the mouth. Add a fine strip of White modelling paste along the top edge and use the scribe tool to mark the teeth. Press the dresden tool into the centre of the tongue to mark the central groove.
Step 29
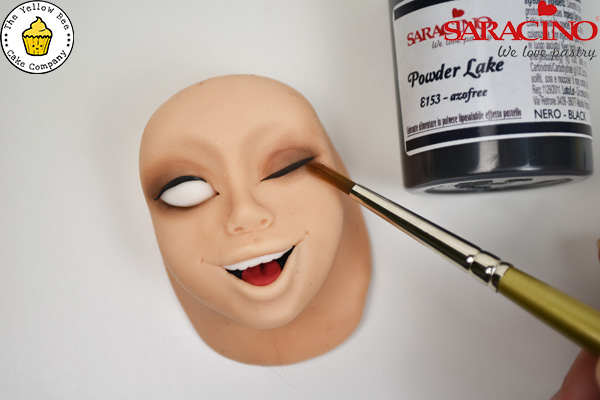
Fill the open eye socket with a small piece of White modelling paste. Add a thin tapered sausage of Black modelling paste to the lash line on both eyes. Lightly dust around both eyes with the Black dust colour.
Step 30
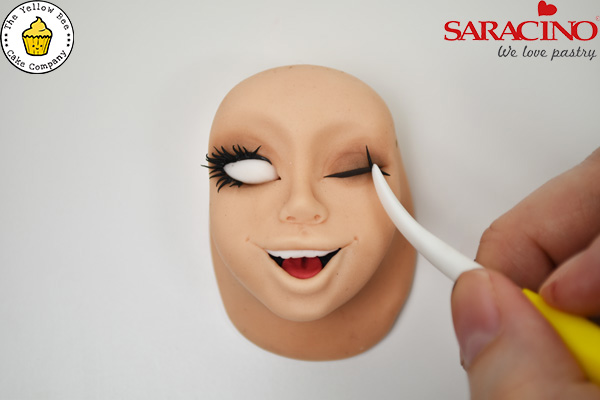
Roll very, very fine tapered sausages. Paint a little glue onto the lashline and then press the centre of the sausage in place. Use the dresden tool to fold the two ends in place.
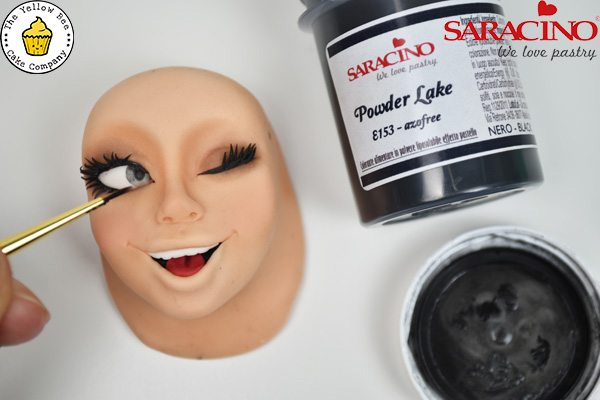
Step 31
Mix a little clear alcohol with the Black dust colour to create paint. Paint the outer edge of the eye, and then pull the colour in towards the centre of the pupil. Add a pupil to the centre. Then finish with a small dot of White modelling paste.
Step 32
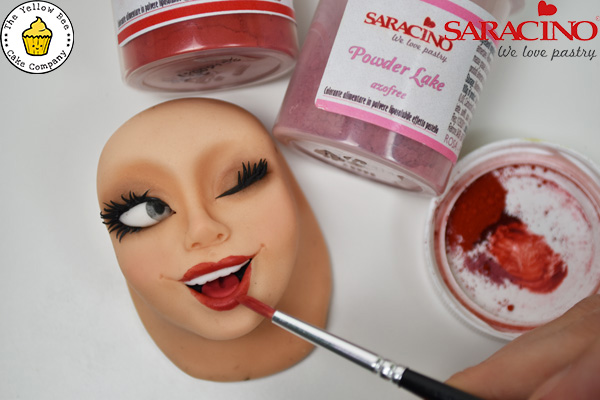
Mix Pink and Red dust colour together and add a little clear alcohol. Paint the lips. Then dust the cheeks and tip of the nose with the Pink dust colour.
Step 33
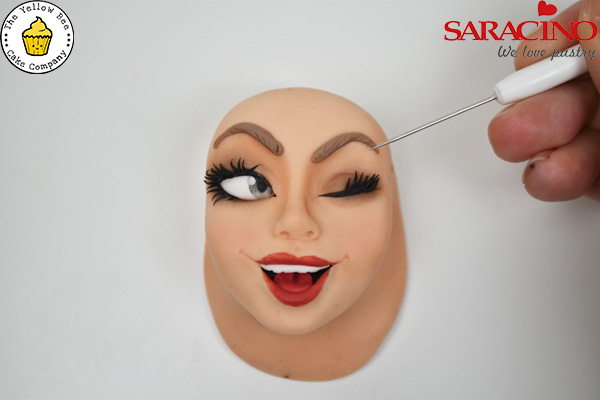
Combine a small amount of Brown modelling paste with White modelling paste. Roll into two fine tapered sausages and glue in place above the eyes. Use the scribe tool to mark hair lines over the surface.
Step 34
Trim away the excess paste on the back of the head and then attach the head to the body. Trim the neck if required. Shape two ears from tiny balls of Skin Tone paste and glue in place.
Step 35
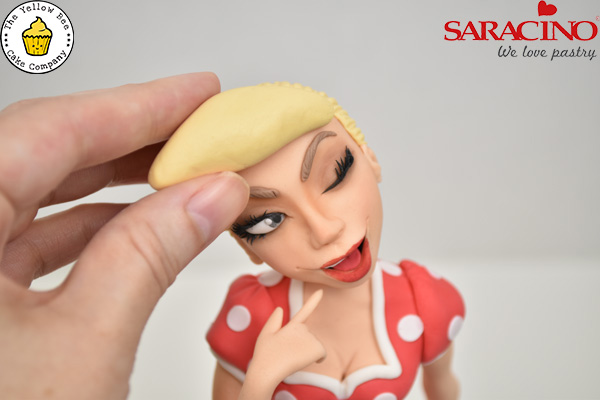
Cover the back of the head with a thin layer of golden paste (mix Yellow and Brown gel colour to achieve this shade). Use the dresden tool to add texture to the paste. Shape 5g of golden paste to cover the forehead. Add lines to the paste and then glue in place.
Step 36
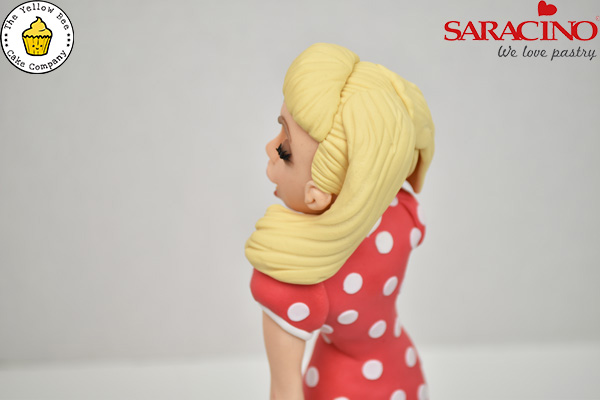
Roll three tapered sausages from 10g of golden paste each. Flatten between your hands and then draw lines with the dresden tool. Attach one on either side of the head, folding and twisting the paste as you work and the third to the back.
Step 37
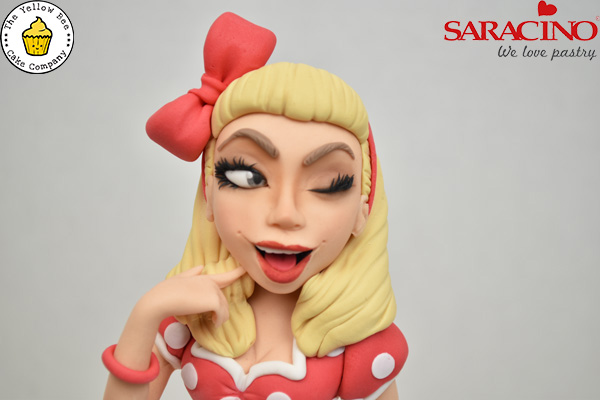
Add a thin strip of Red modelling paste to cover the join lines in the hair and then add a small decorative bow to the left side of the head.
