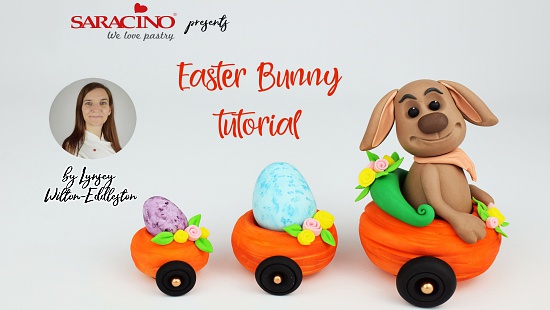
Author: Lynsey Wilton-Eddleston

FB: SUGARWHIZZ
Skill level: BEGINNERS
FROM LYNSEY:
Spring is in the air, the flowers are blooming, the sun is shining! All-around preparations are being made for Easter celebrations!
Here our Brand Ambassador Lynsey from Sugarwhizz shows you how to make your very own cute little Bunny hard at work collecting the eggs!
Enjoy!
You will need:
- Balling tool
- Dresden tool
- Small rolling pin
- Piping tip
- Paintbrushes
- Paint palette
- Cake pop stick
- Sharp knife
- Cool boiled water
- 207g Orange Modelling Paste
- 80g Light brown Modelling Paste
- 24g Black Modelling Paste
- 25g Light blue Modelling Paste
- 10g Dark green Modelling Paste
- 6g Pale purple Modelling Paste
- 5g Yellow Modelling Paste
- 5g Pink Modelling Paste
- 5g Light green Modelling Paste
- 4g Flesh Modelling Paste
- 1g Dark Brown Modelling Paste
- 1g White Modelling Paste
- Gel – Orange, Brown, Black, Green, Violet, Yellow, Pink, Flesh.
- Dusts – Orange, yellow, Red, Brown, Bronze, Sky Blue, Violet.
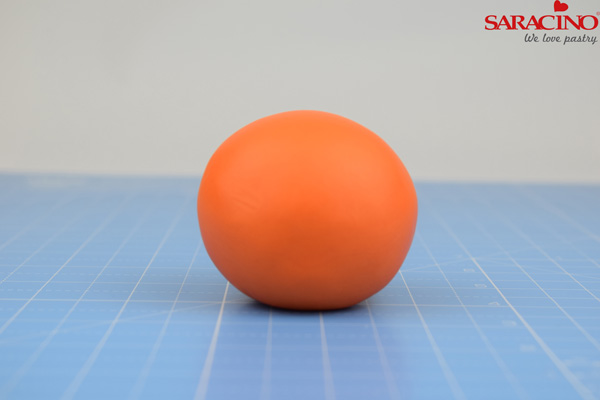
Step 1
Roll 120g of orange paste into a ball. You are forming the carrot carriage.
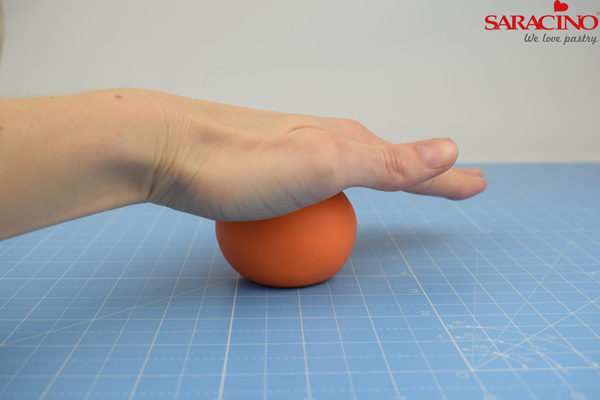
Step 2
Use the palm of your hand to gently flatten the ball.
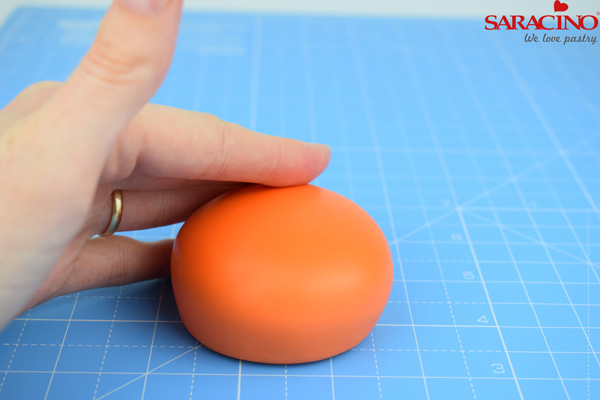
Step 3
Gently smooth and round off the edges with your fingertips.
Step 4
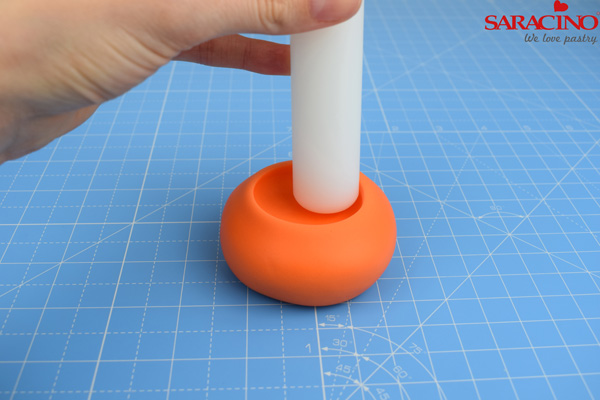
Gently push the end of a small rolling pin into the top of the carrot. Make small circular motions with the rolling pin to open the top of the carrot up.
Step 5
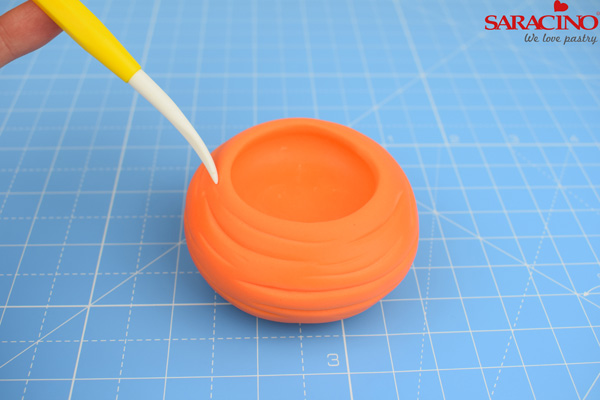
Use the veining end of the Dresden tool to score grooves around the carrot top. Alternate the sizes and follow the curve of the paste.
Step 6
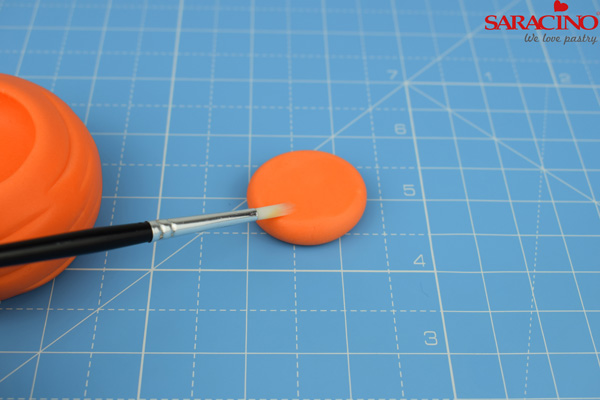
Roll 10g of orange paste into a small ball and flatten with your fingertip to form a disc of paste. Apply a small amount of water to the top of the disc. Sit the carrot on top of the disc to lift it slightly from the worksurface.
Step 7
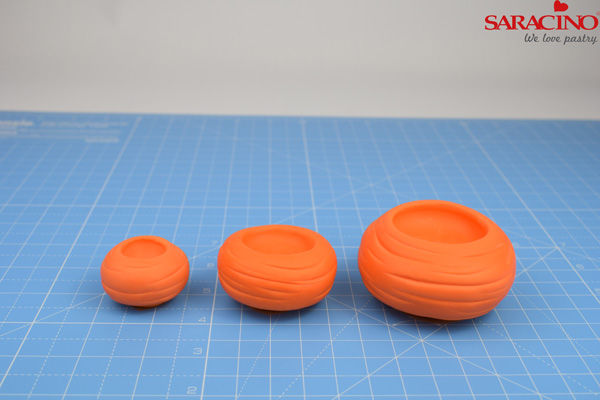
Repeat the steps to make two more carrots. For the medium carrot use 50g of orange paste for the top and 5g for the disc. For the small carrot, use 20g Orange paste for the top and 2g for the disc.
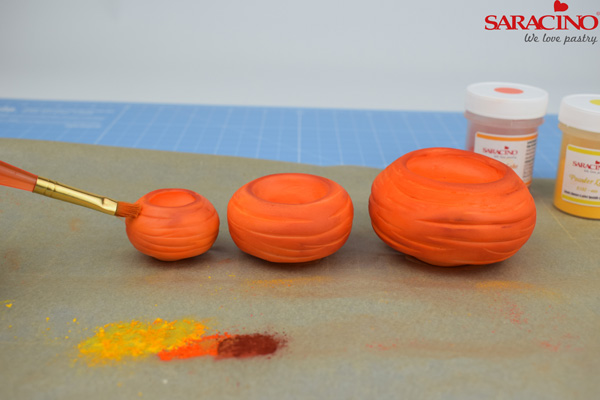
Step 8
Place the carrots on a sheet of greaseproof paper. Using a soft bristled paintbrush apply a small quantity of yellow and orange dust to the carrots. Add a small amount of red and brown dust to the orange dust to create a darker colour and again apply to each carrot.
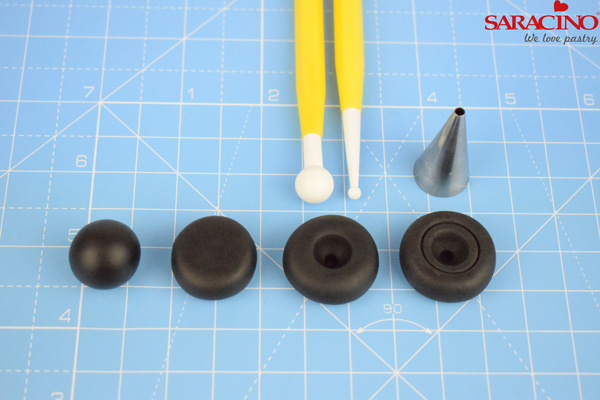
Step 9
For the large carrot wheels – Take 12g of black paste, knead and soften to warm up and divide equally into two pieces. Roll each piece into a ball. Flatten the ball with your fingertip. Use the large end of the balling tool to indent the middle of the paste. Use the small end of the balling tool to indent the centre further. Use the large end of a piping tip to mark a circle around the indents as shown.
Step 10
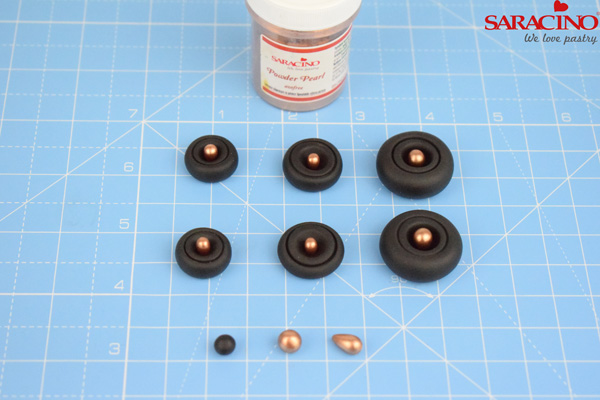
Make the wheels for the other carrots in the same way. For the medium carrot, start with 6g and divide into two. For the small carrot, start with 5g and divide into two. Once all the wheels are made, roll 6 small balls of black modelling paste. Apply a small amount of the bronze dust to the palm of your hand and roll each of the balls around in the dust to coat the paste. Roll each ball into a teardrop shape. Apply a small amount of water to the small indent in the centre of each wheel and stick the teardrops into place as shown.
Step 11
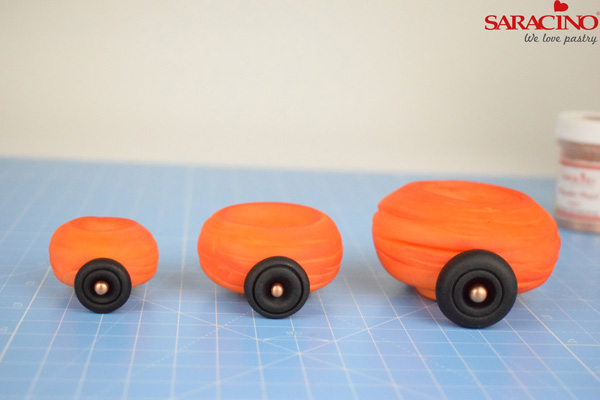
Stick a wheel each to each side of the corresponding carrot with a small amount of water, as shown.
Step 12
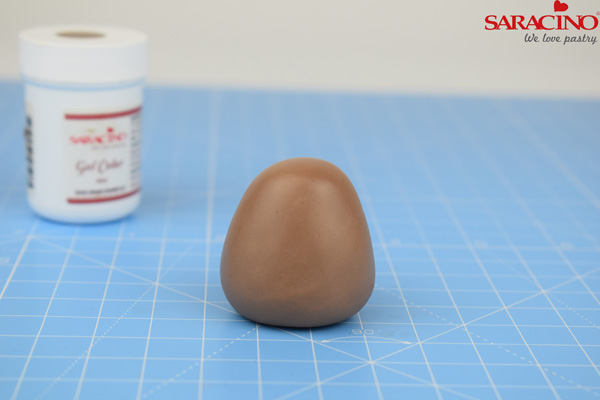
Take 35g of brown modelling paste, knead and soften to warm up. Roll into a teardrop shape and flatten the top slightly with your fingertip.
Step 13
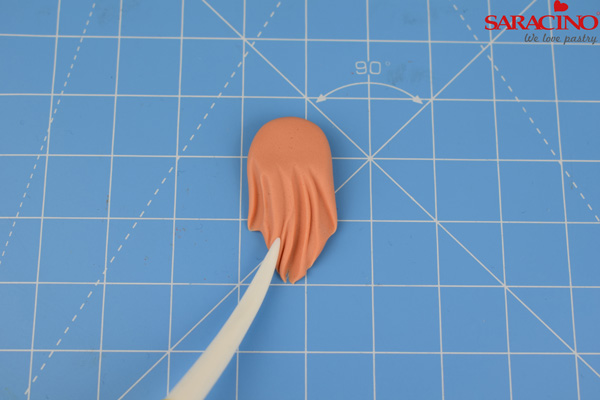
Take 3g of flesh coloured paste, knead and soften to warm up and roll into a teardrop shape. Flatten slightly with your fingertip. Use the veining end of the Dresden tool to texture the fur.
Step 14
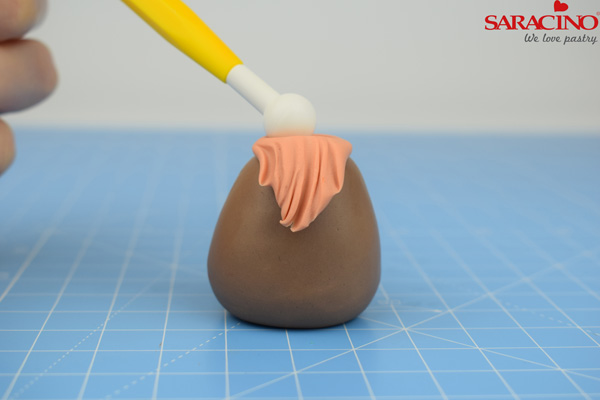
Apply a small amount of water to the top of the body. Stick the fur into place. Use the large end of the balling tool to gently indent the top of the paste ready for the head.

Step 15
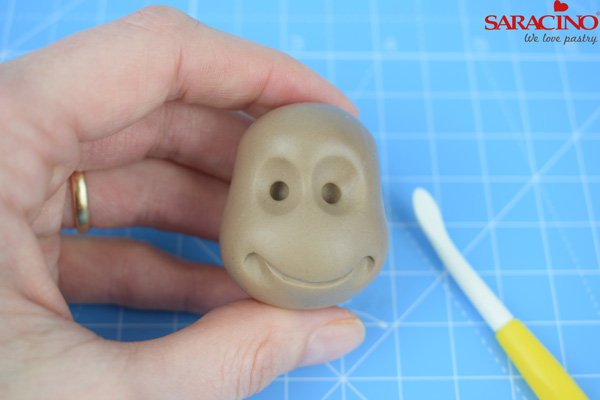
Take 30g of brown modelling paste, knead and soften to warm up. Roll into a ball. Roll the top of the ball backwards and forwards between your fingers to narrow the top of the head.
Step 16
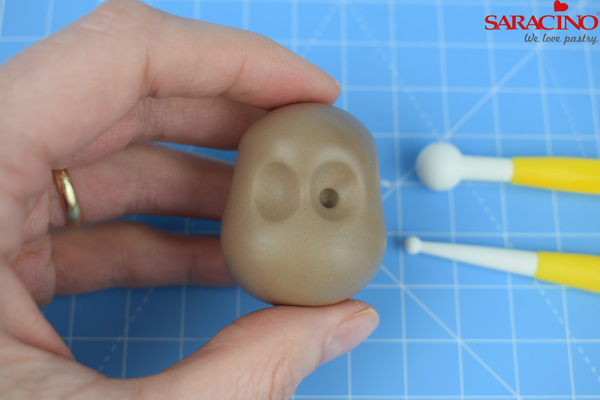
First indent each eye position with the large end of the balling tool. Then use the small end of the balling tool to indent each eye socket as shown.
Step 17
Mark the mouth with the veining end of the Dresden tool. Use the smoothing end of the Dresden tool to indent each corner of the mouth.
Step 18
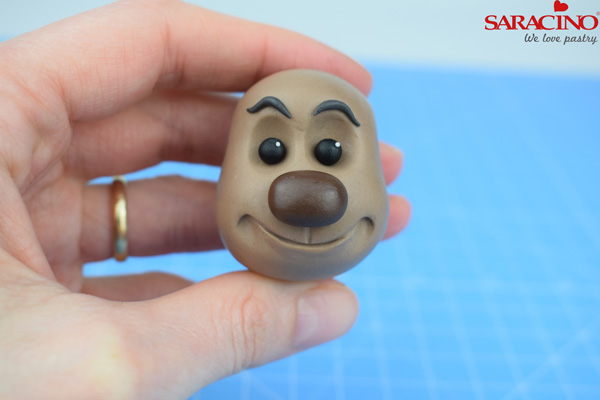
Roll two small balls of black paste for the eyes and stick into place. Roll two tiny balls of white paste and stick to the eyes as shown. Roll a small ball of dark brown paste for the nose and stick into place. Roll two small strands of paste for the eyebrows and stick into place as shown.
Step 19
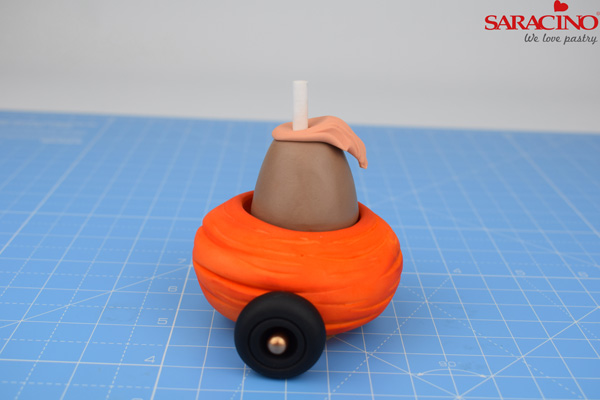
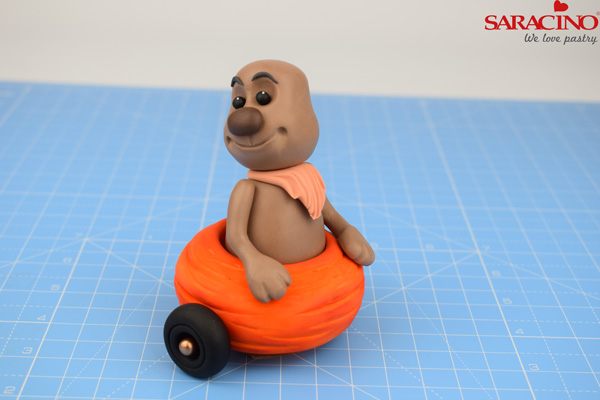
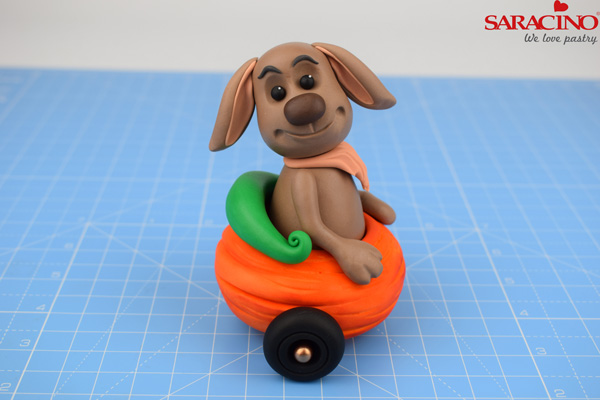
Apply a small amount of water to the inside of the carrot top and stick the body into place, gently push a cake pop stick down through the centre of the body as shown.
Step 20
Apply a small amount of water to the top of the neck and gently slide the head down the cake pop stick until it rests on the body.
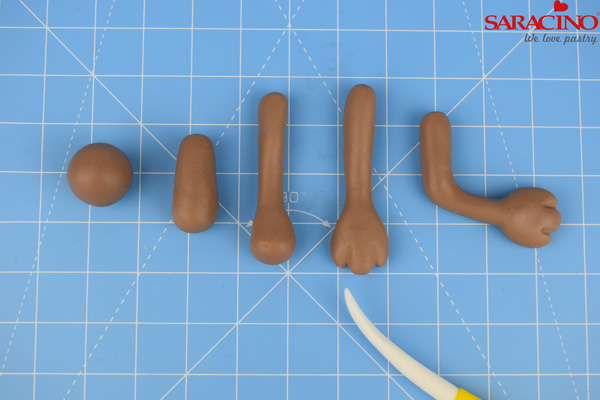
Step 21
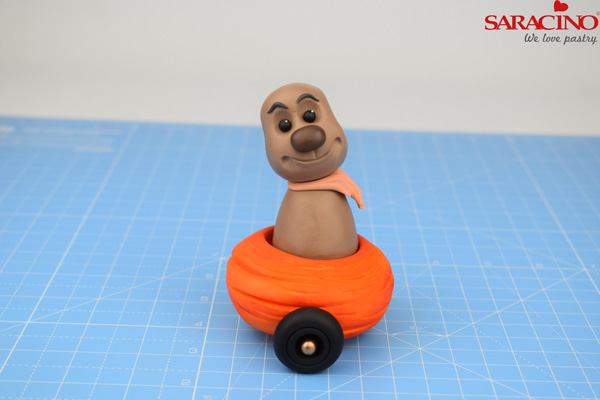
Take 6g of brown modelling paste, knead and soften to warm up then divide equally into two pieces. Roll each piece into a long thin sausage that is fatter at one end. Flatten the fat end gently with your fingertip. Use the veining end of the Dresden tool mark the paws as shown. Bend and pinch out the elbow on each arm.
Step 22
Stick the arms into place as shown.
Step 23
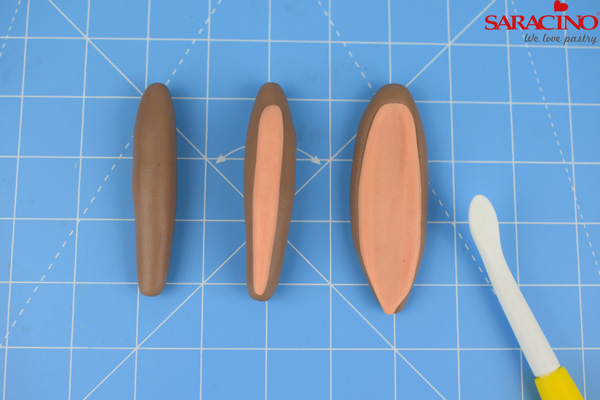
Divide 8g of brown modelling paste equally in half. And roll each piece into a long sausage tapered at one end. Divide 1g of flesh modelling paste equally in half. Roll each piece into a long thin sausage and lay on top of the brown paste as shown. Use the smoothing end of the Dresden tool to gently push and smooth the flesh coloured paste into the brown paste as shown.
Step 24
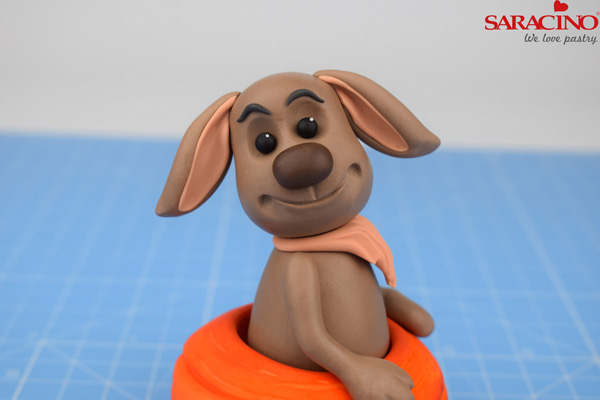
Stick the ears into place as shown.
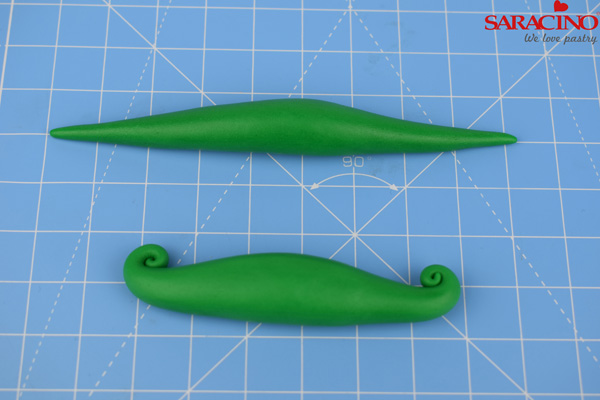
Step 25
Take 12g of dark green paste, knead and soften to warm up. Roll the paste into a sausage that is tapered at each end as shown. Gently roll up the ends.
Step 26
Apply a small amount of water to the underside of the green paste and stick into place as shown.
Step 27
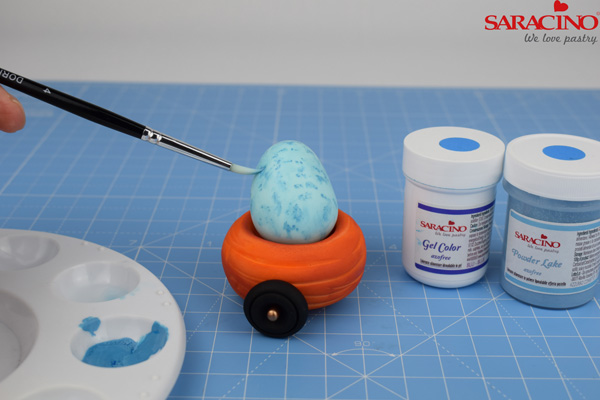
Take 25g of light blue paste, knead and soften to warm up and roll into an egg shape. Stick into place in the middle carrot. Mix a small amount of sky-blue dust with a couple of drops of clear alcohol and paint the egg.
Step 28
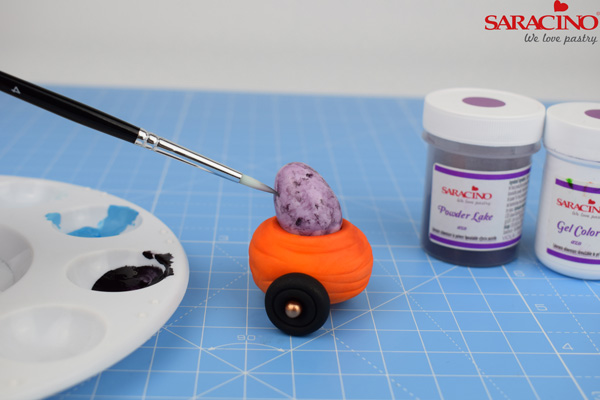
Take 6g of light purple paste, knead and soften to warm up and roll into an egg shape. Stick into place in the small carrot. Mix a small amount of violet dust with a couple of drops of clear alcohol and paint the egg.
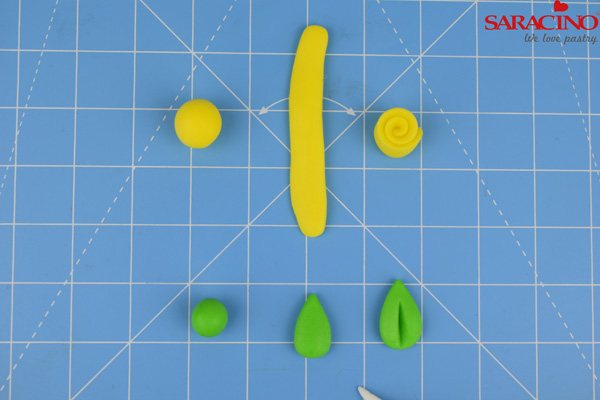
Step 29
Take small various sized balls of yellow and pink paste. Roll them into thin strands, press and smooth one edge of the strand thinning the paste with your fingertips. Gently roll the strands up to form tiny flowers. Take small various sized balls of light green paste, roll into teardrops and press gently with your fingertip. Use the veining end of the Dresden tool, mark a groove down each leaf.

Step 30
Apply a small cluster of flowers and leaves to the front of the middle and small carrots as shown.
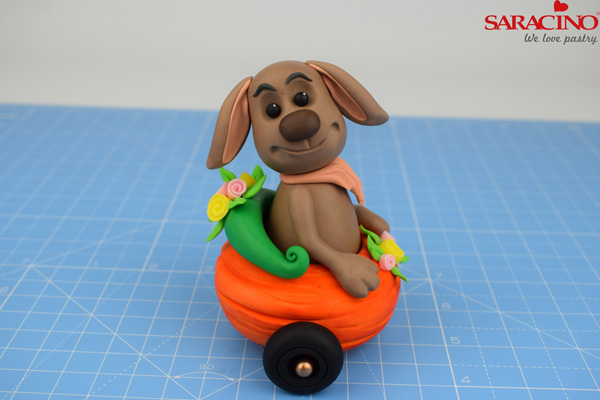
Step 31
Apply a small cluster of flowers to the front and a bigger cluster of flowers to the back of the large carrot as shown.
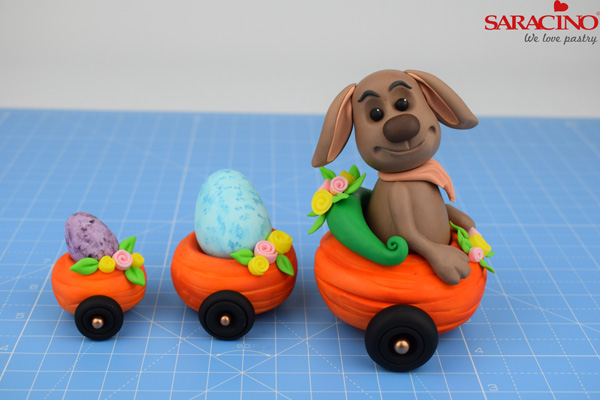
Step 32
Arrange your completed toppers in order, smallest to biggest! Congratulations your bunny is complete!
