
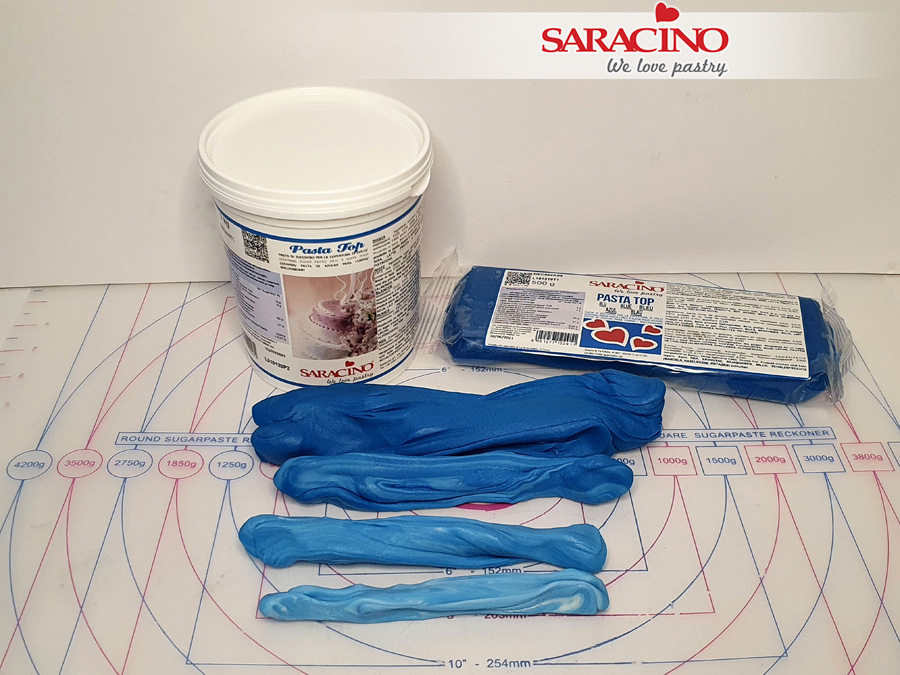
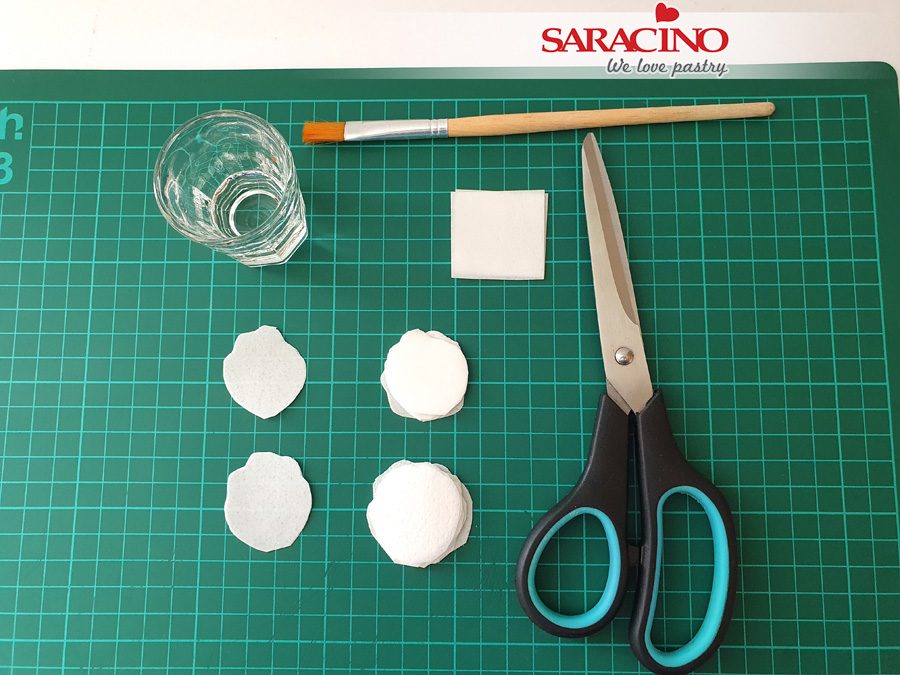
You will need:
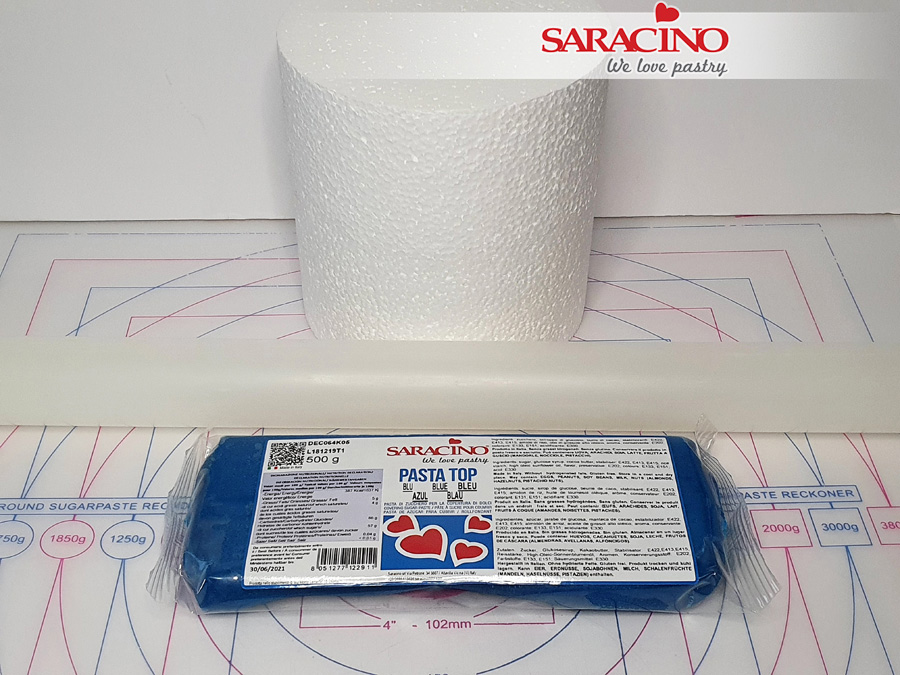
- Saracino Blue Pasta Top
- Saracino White Pasta Top
- Saracino Wafer Paper 0.27mm thick
- Saracino Gold Glitter
- Saracino Silver Glitter
- Saracino Gold Ready to Use Lace Paste
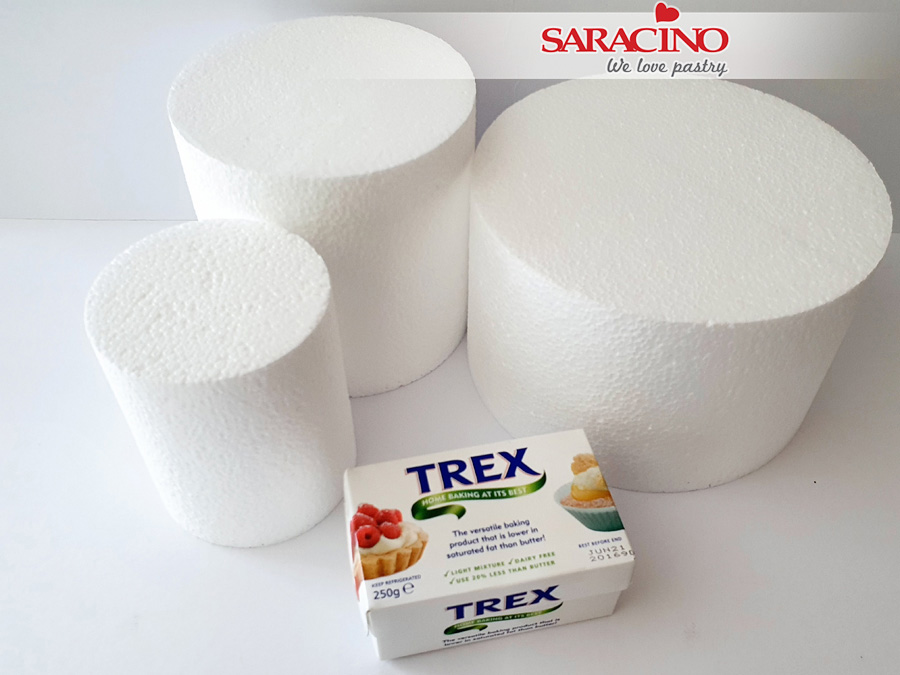
- 4in, 6in, 8in cakes or cake dummies top and bottom 5in deep, middle 6in deep
- Cake lace mat
- Cake lace spreader or spatula
- Rolling pin
- Cake steamer
- Scalpel or sharp knife
- Cake smoothers
- Ball modelling tools
- Paintbrushes: wide flathead, medium flathead, small pointed
- Edible glue, wafer paper glue or water
- Clear alcohol
- Cake drum
- Scissors
- Cooled, boiled water or Trex
- Flower stamen – medium round in pearl white
- 24 gauge white flower wires
- White florist tape
- Saracino ready to mix royal icing
Step 1
Prepare your cakes or dummies. Brush each one before covering with boiled, cool water or Trex to help the fondant to stick.
Step 2
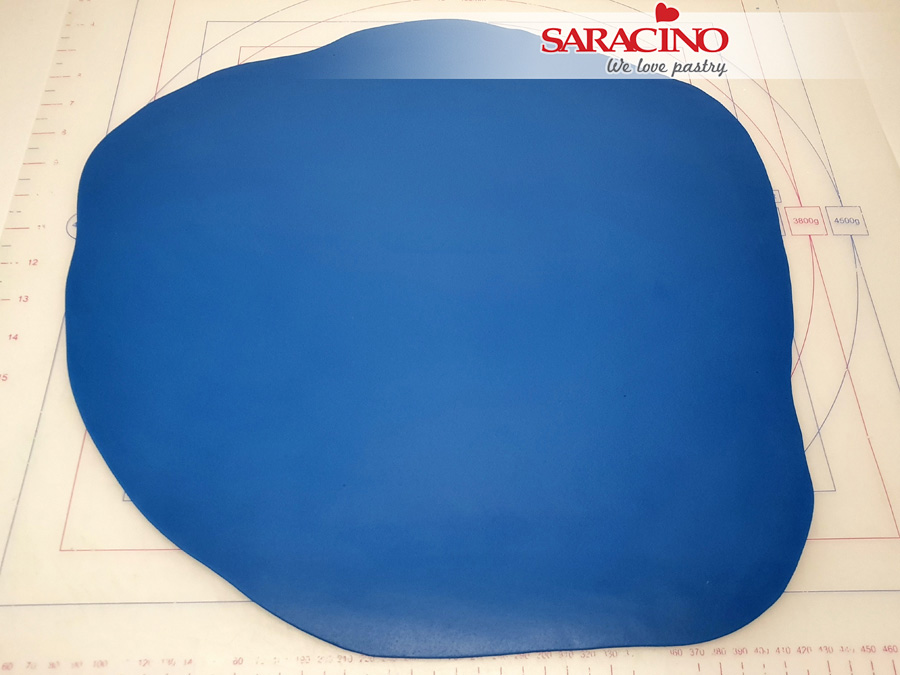
Place the Saracino Blue Pasta Top on your work surface, knead until smooth and pliable.
Tip : Pasta Top is Vegan, Gluten free and has NO hydrogenated fats. It’s very stretchy and can be rolled very thin.
Step 3
Roll out the fondant to your preferred thickness (Saracino Pasta Top can be rolled thin and is very stretchy, perfect to cover even tall cakes).
Step 4
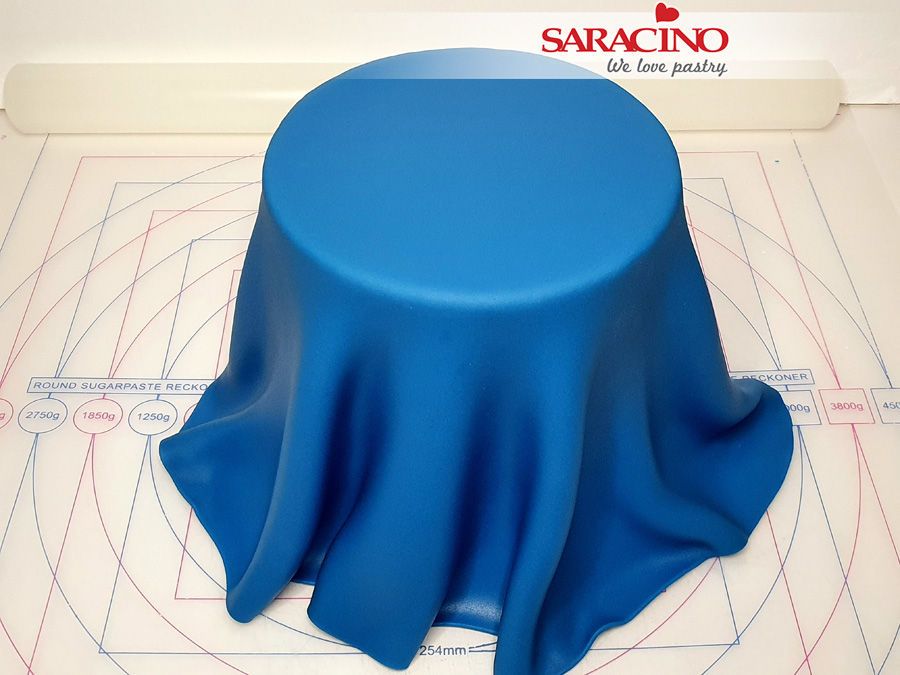
Place the fondant gently over your 6in cake (or dummy). Smooth over the top and edges with your hand. Gently pull out the folds and smooth down with your hand fixing the fondant to the cake until all folds and pleats are gone.
Step 5
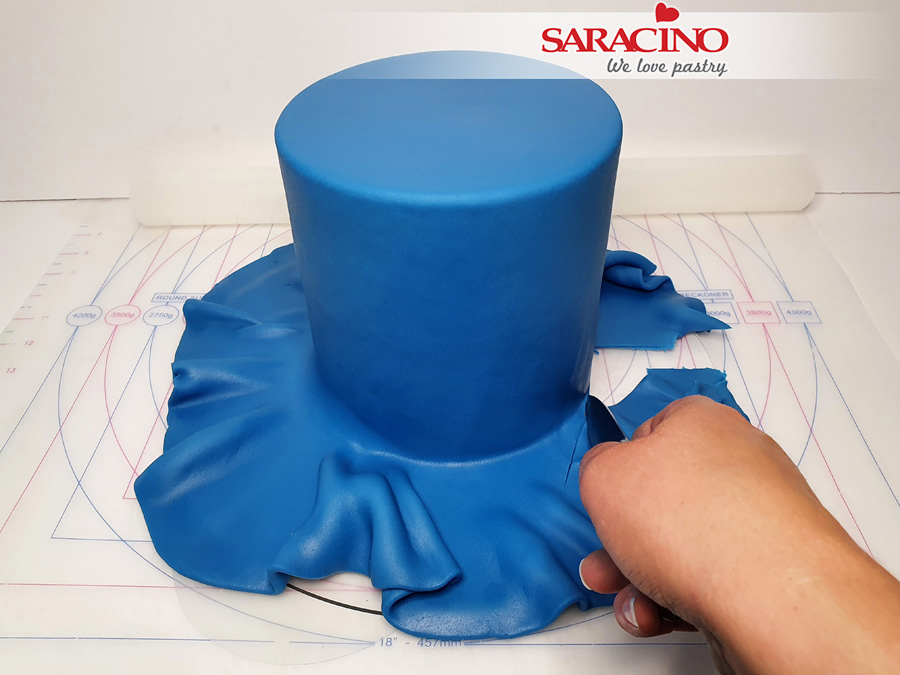
Trim off the excess fondant with a sharp knife. You can keep the trimmed fondant for later use.
Step 6
Use cake smoothers around the side and top of the cake. Smooth until you have a sharp edge. Repeat step 4, 5 and 6 with 8in cake (dummy).
Step 7
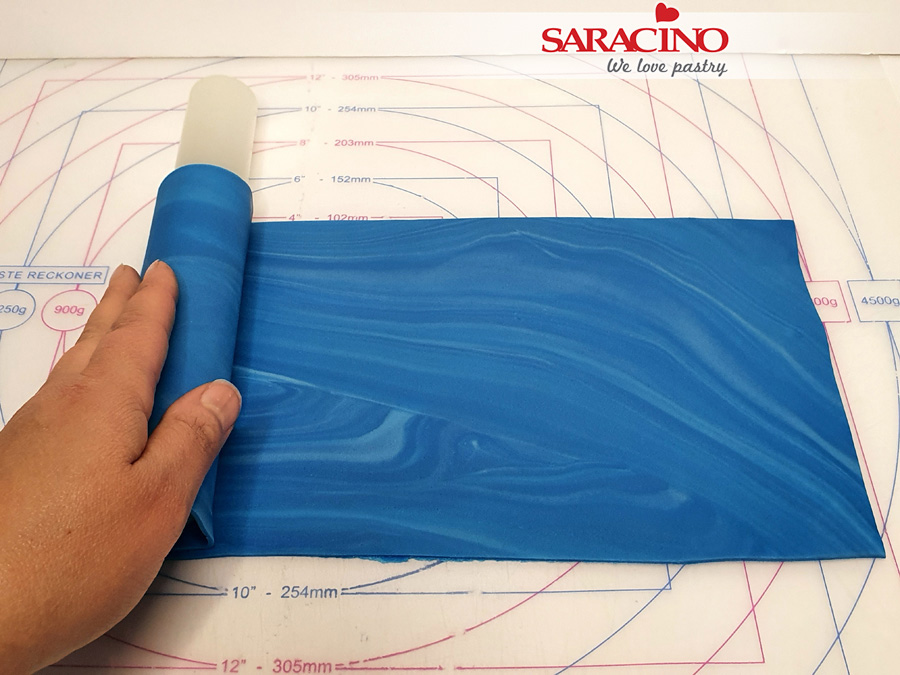
Knead the white and blue Pasta Top separately until smooth. Combine the white and blue fondant to create paler blue. Roll each colour into separate sausage shapes.
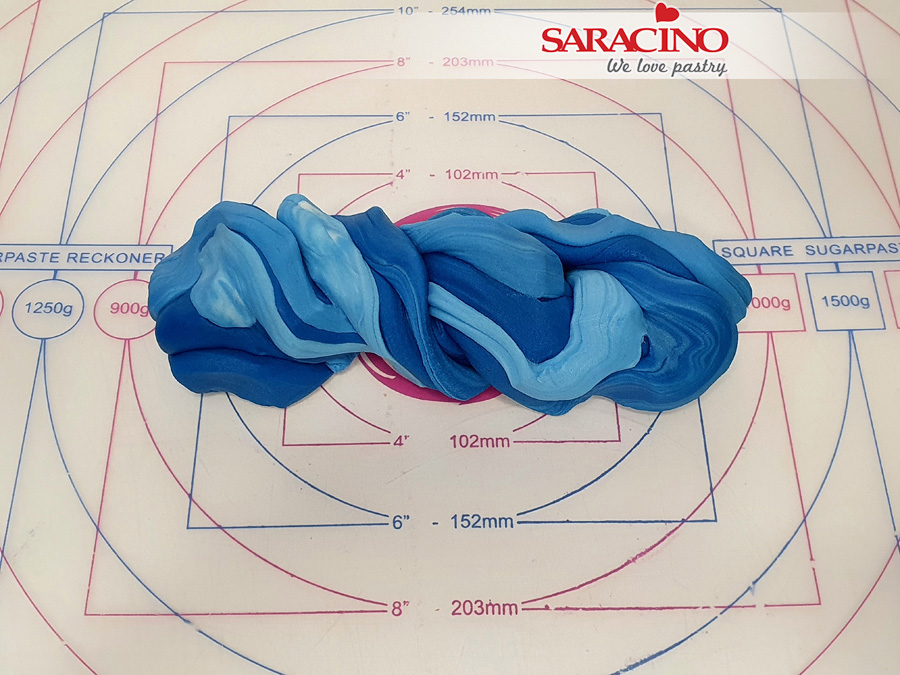
Step 8
Place the colours together then twist, fold in half and repeat until the desired level of marble is reached.
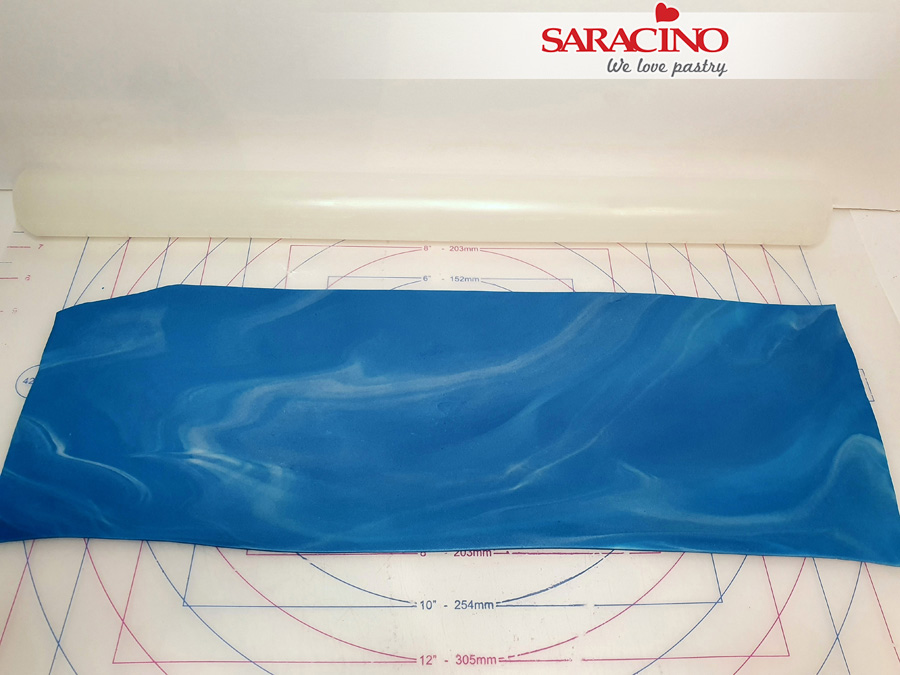
Step 9
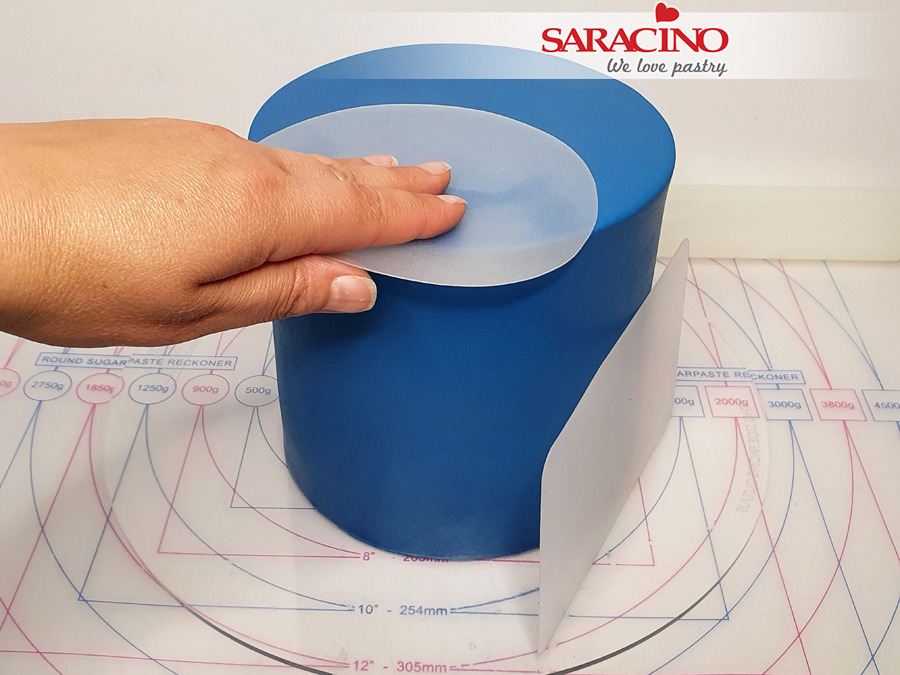
Take the 4in cake (dummy) and brush with cooled, boiled water or trex. Use panelling method to cover your cake at this time (panelling method works well to achieve sharp edges). Roll the fondant into a rectangle, enough to cover the top and the side of your cake.
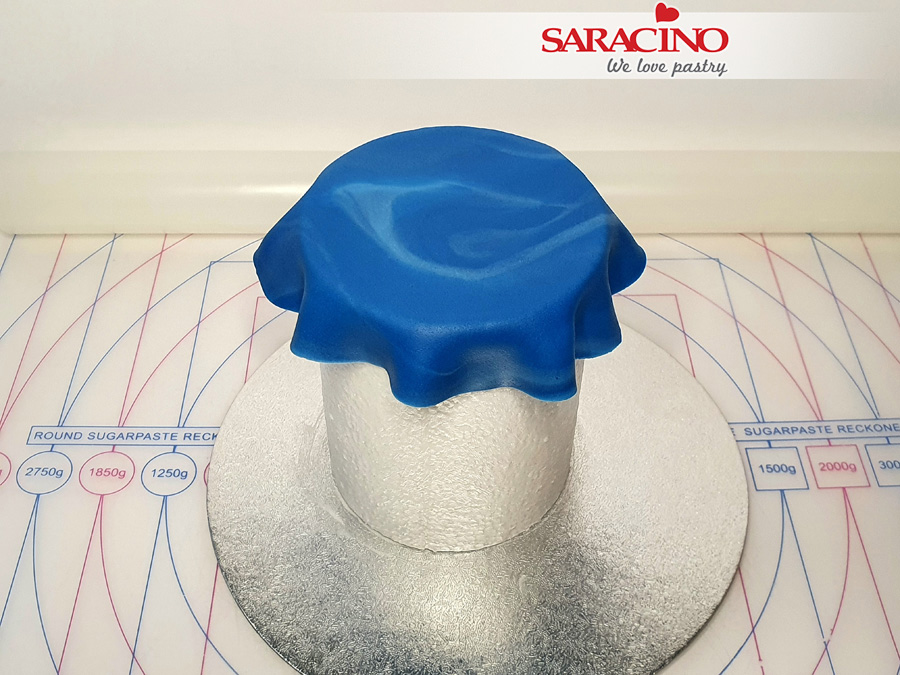
Step 10
Cut out a 11 cm circle and place it on the top surface of the cake (dummy). Cut a rectangle, take the height and length of your cake into account.
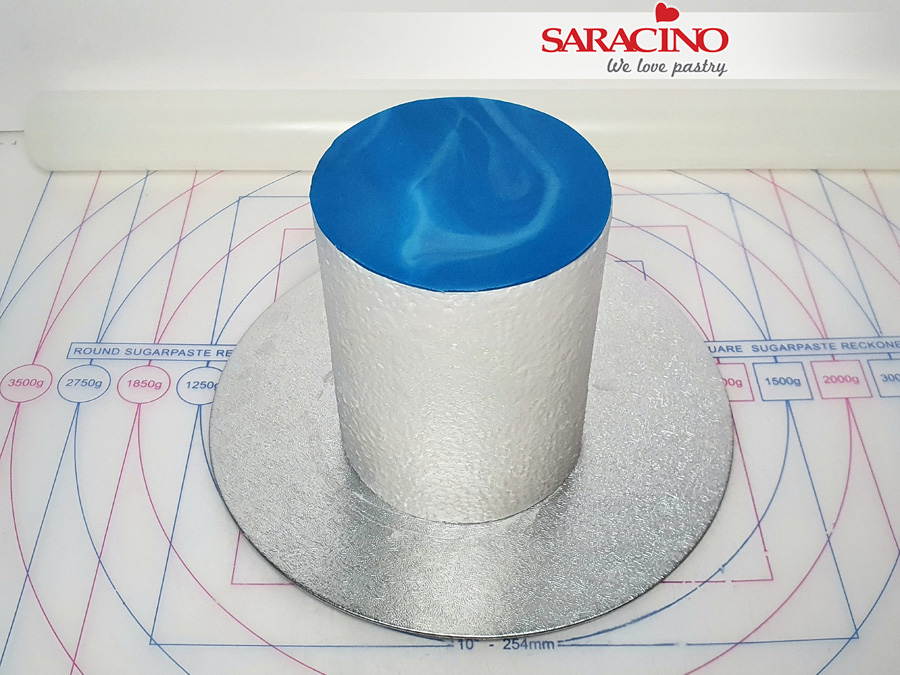
Step 11
Smooth the top using a cake smoother and trim off the excess fondant with a sharp knife.
Step 12
Roll the rectangle piece onto the rolling pin.
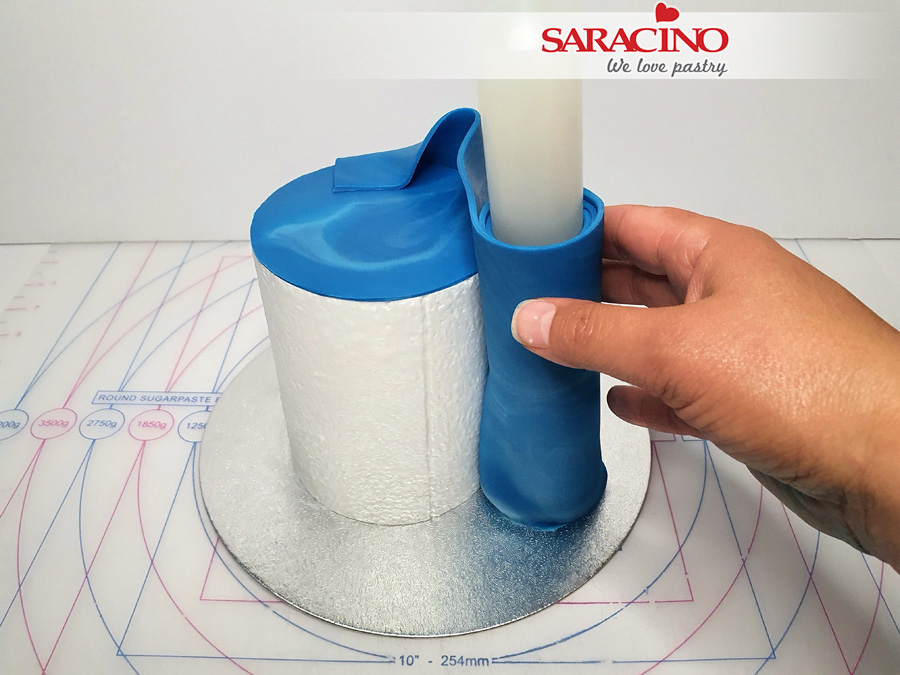
Step 13
Wrap the piece around your cake making sure to press it firmly against the cake sticking it all the way around.
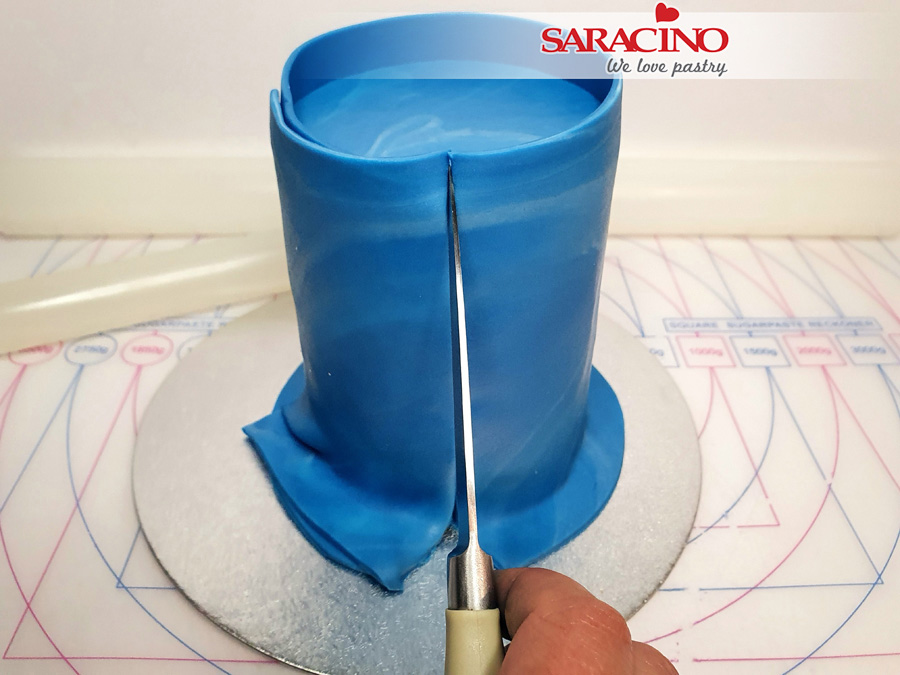
Step 14
With a sharp knife cut the fondant where the two ends overlap. Cut a nice straight line through both pieces of fondant. Push the panel ends together, the ends should line up perfectly giving you a nice straight seam. Take sharp knife once again and keeping it flat on top of your cake, cut off the excess fondant from the top and then cut excess on the bottom of the cake as well.
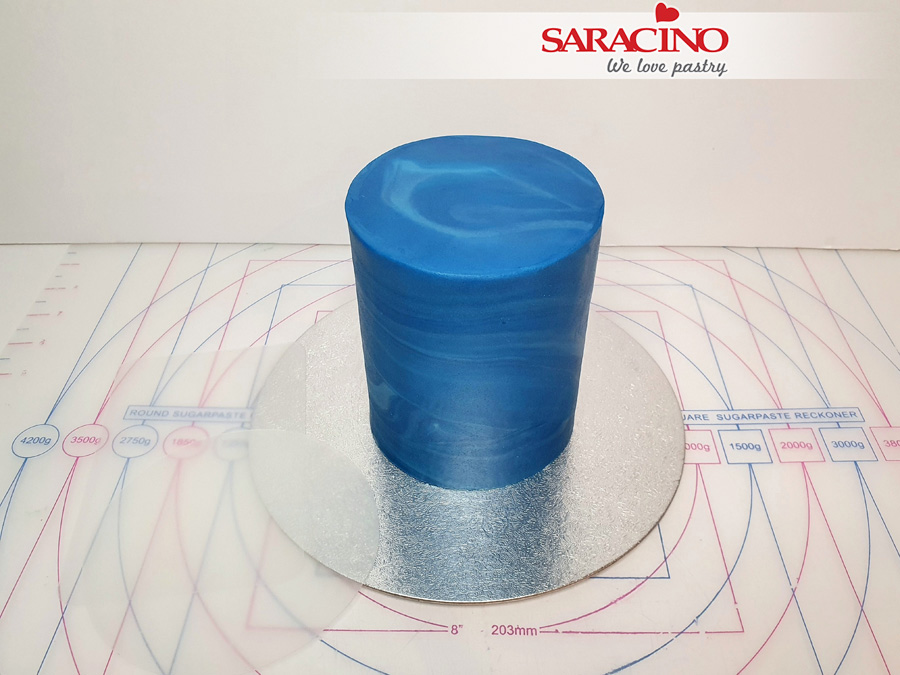
Step 15
Secure seams with water and brush. Use a cake smoother to smooth out fondant and to push the seam together and smooth it until its unnoticeable. Saracino Pasta Top is ideal for seamless smoothing and blending.
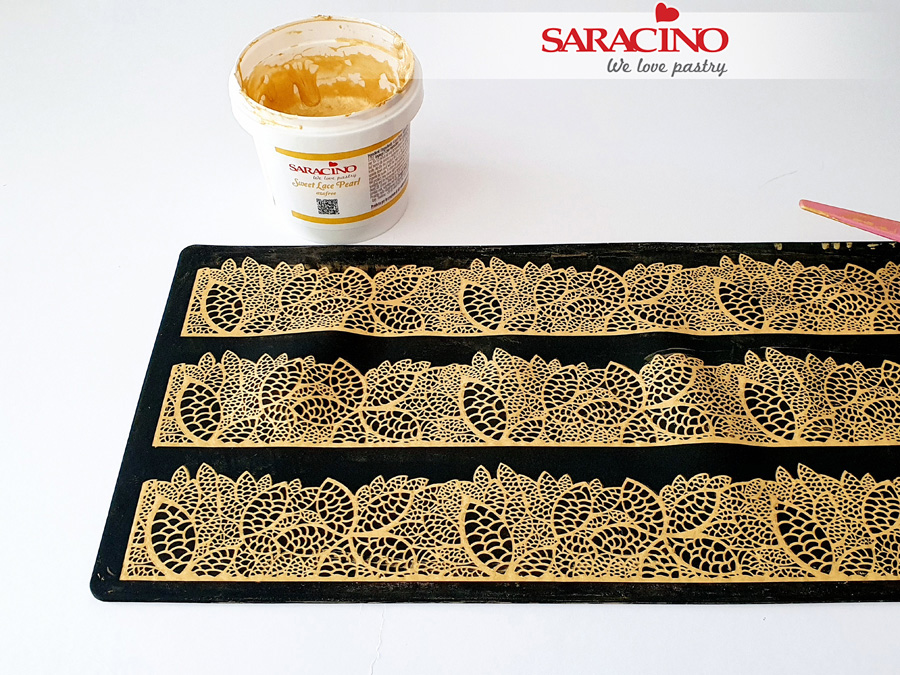
Step 16
Place a lace mat of your preferred pattern on a flat surface. Take a small amount of the Saracino Gold Ready to Use Lace Paste from the container and place on the lace mat. Take a lace spreader and use back and forth strokes to fill the design on the mat and when the mat is filled, use the edge of the lace spreader to remove the excess mix. This may need to be repeated a few times so that all the design is covered and there are no little holes left in the design. Bake it according to the instructions on the container. When ready it should pull away from the mat easily without sticking, if it feels tacky leave for another 5 min and check again.
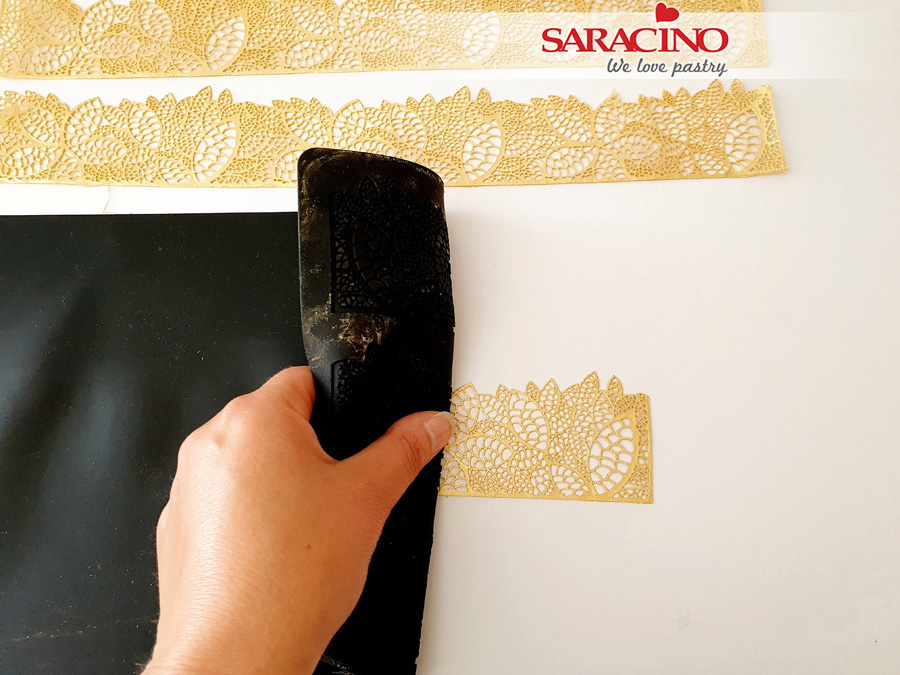
Step 17
To remove the lace, place the mat face down onto a tabletop, gently peel the lace design from the mat, do this slowly to avoid tearing the lace.

Step 18
Once removed from the mat, you will have a nice flexible piece of cake lace. If your lace feels too stiff and dry, run it through a path of steam, or place briefly onto a damp towel, patting gently to allow the decoration to slightly absorb moisture from the towel. After a minute or so, flexibility should be restored.
Step 19
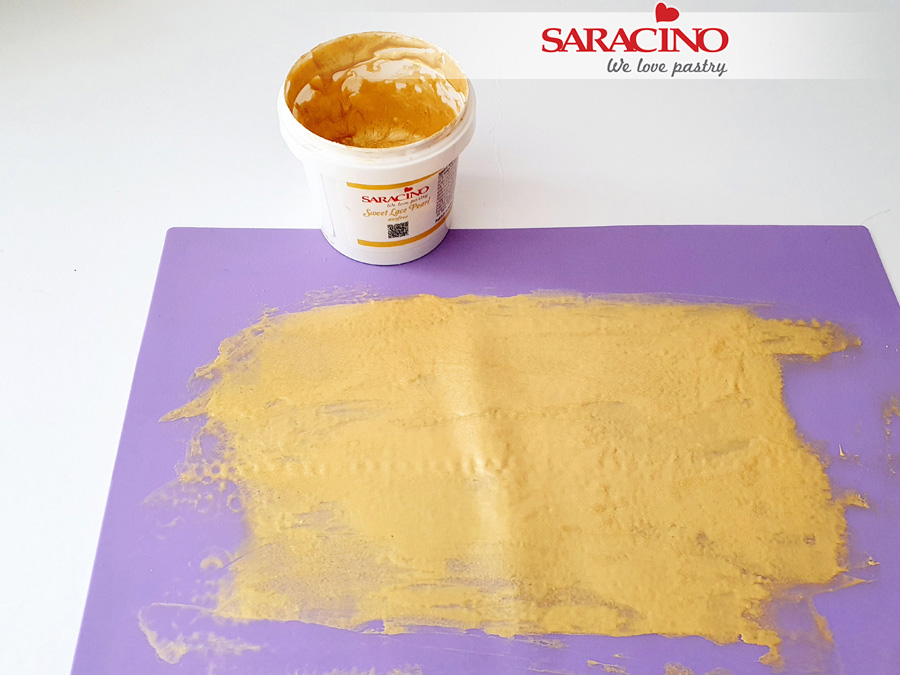
Take the lace mat again and turn it over and use the reverse smooth side of the mat. Spread a layer of the Saracino Gold Ready to Use Lace Paste to create an edible gold sheet.

Step 20
Bake it until the gold sheet is firm and pulls off the mat by itself.
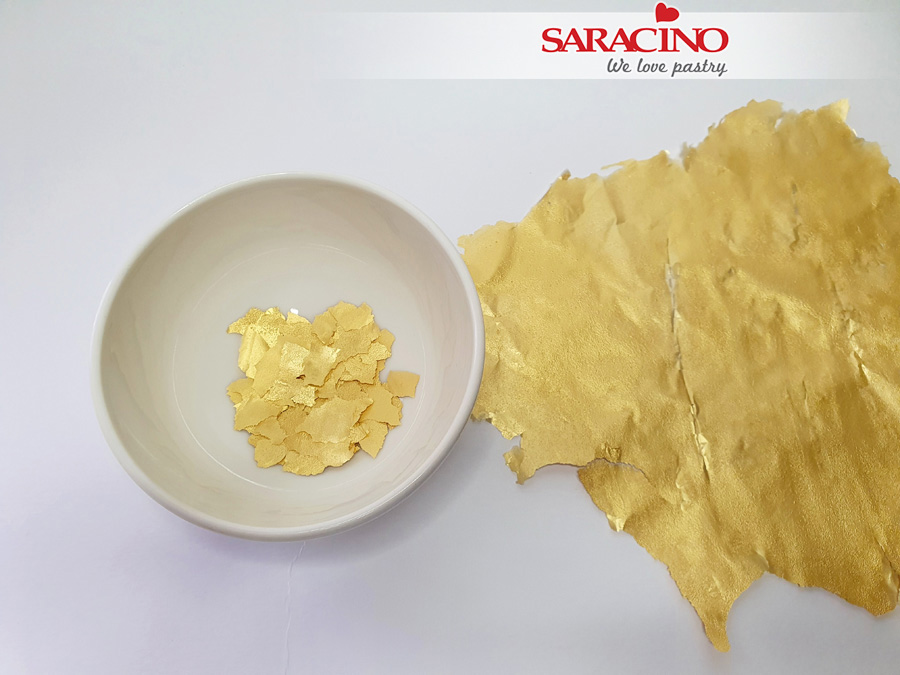
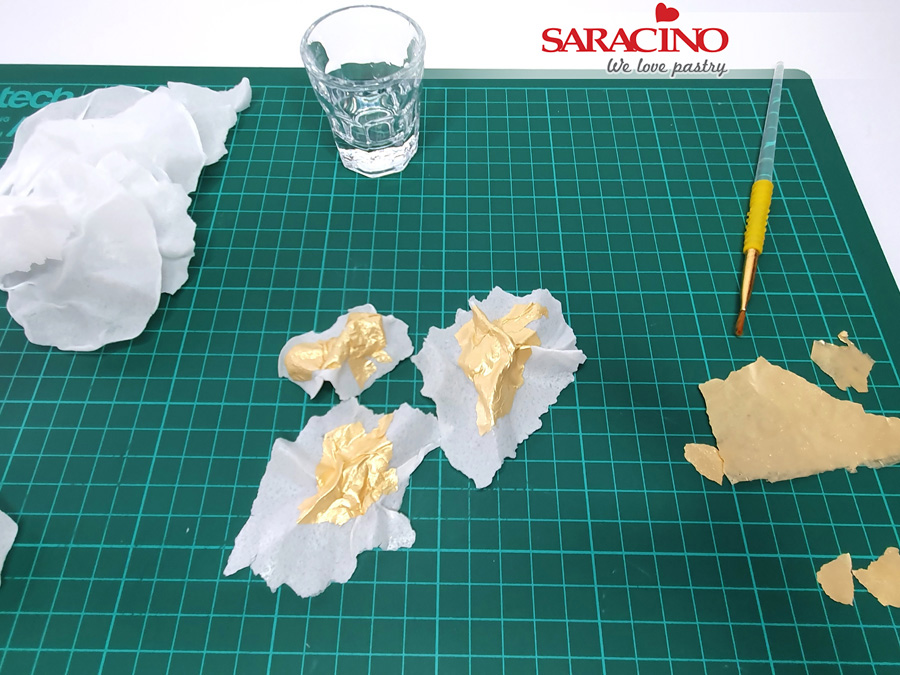
Step 21
Break/tear various sized pieces from the gold sheet.
Step 22
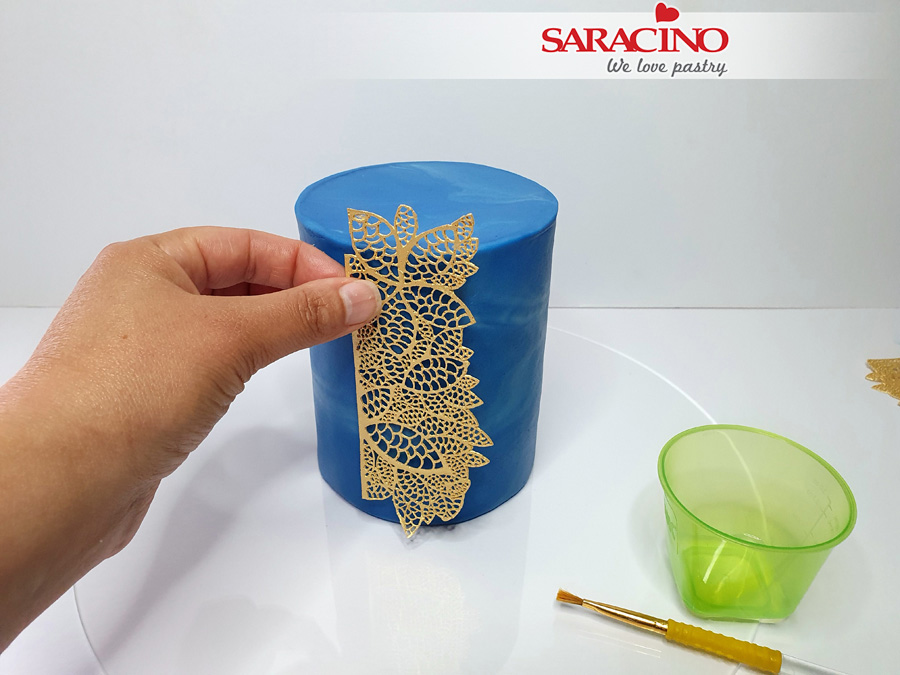
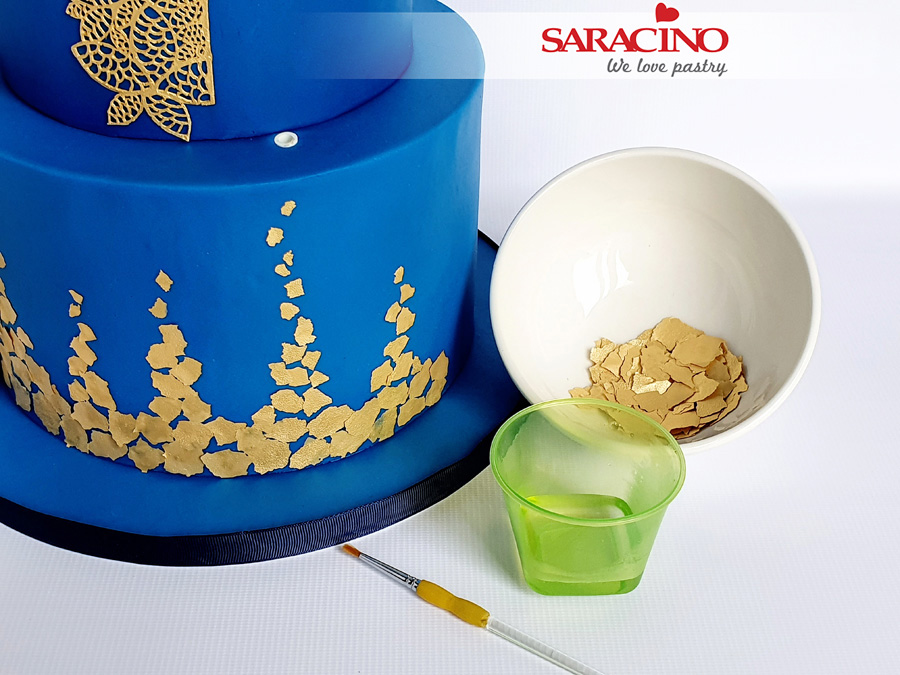
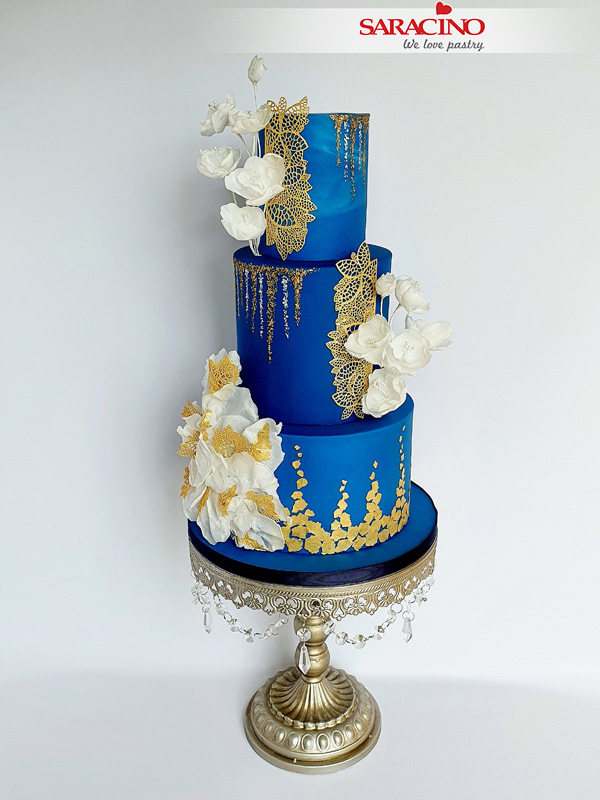
Using scissors, cut 2 pieces of lace to the desired shape and length. Brush a small amount of cooled, boiled water or edible glue onto the reverse of your cake lace. Attach one piece vertically on the top tier and one piece on the middle tier the opposite way.
Step 23
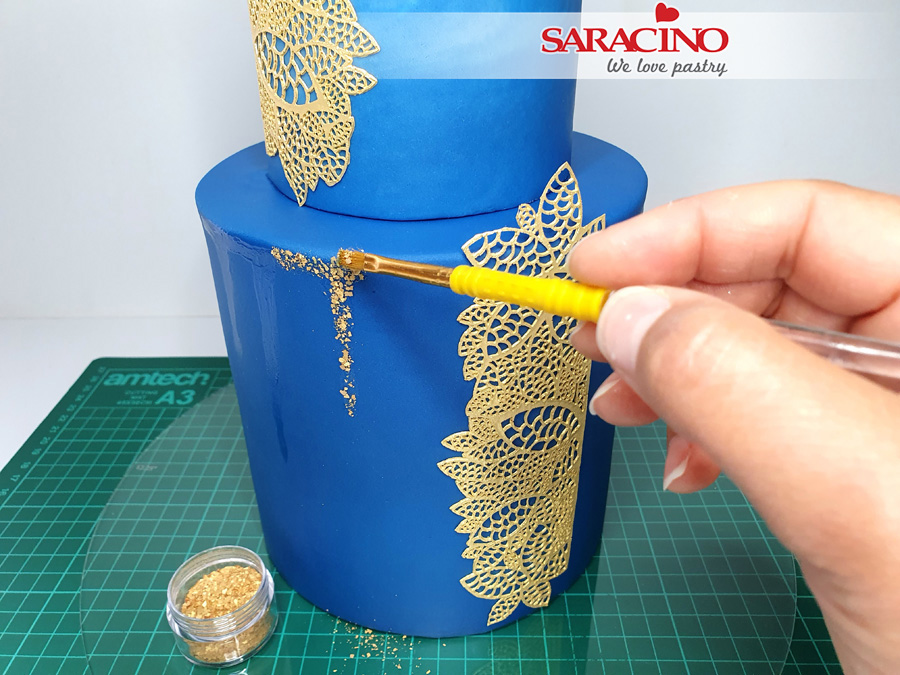
Make a few wide and various length vertical streaks using edible glue or cooled, boiled water on the top and middle tier, next to the attached lace, leaving a gap between each one, then using small flat brush, transfer and stick the Saracino Gold Glitter to the wet places creating something looking like glitter drip design.
Step 24
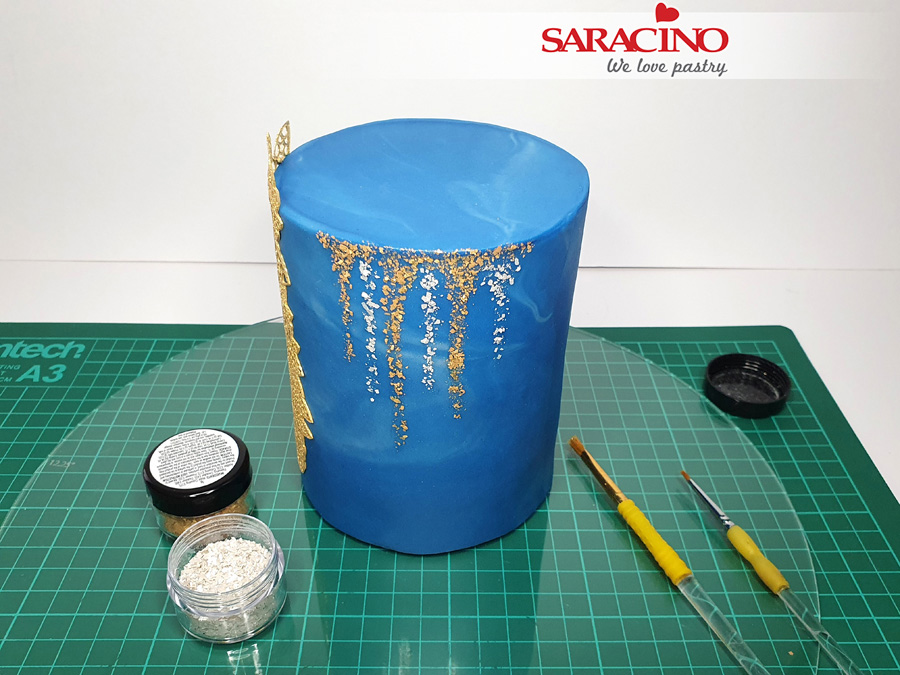
Repeat the process with the Saracino Silver Glitter, creating additional silver glitter drip in the gaps.
Step 25
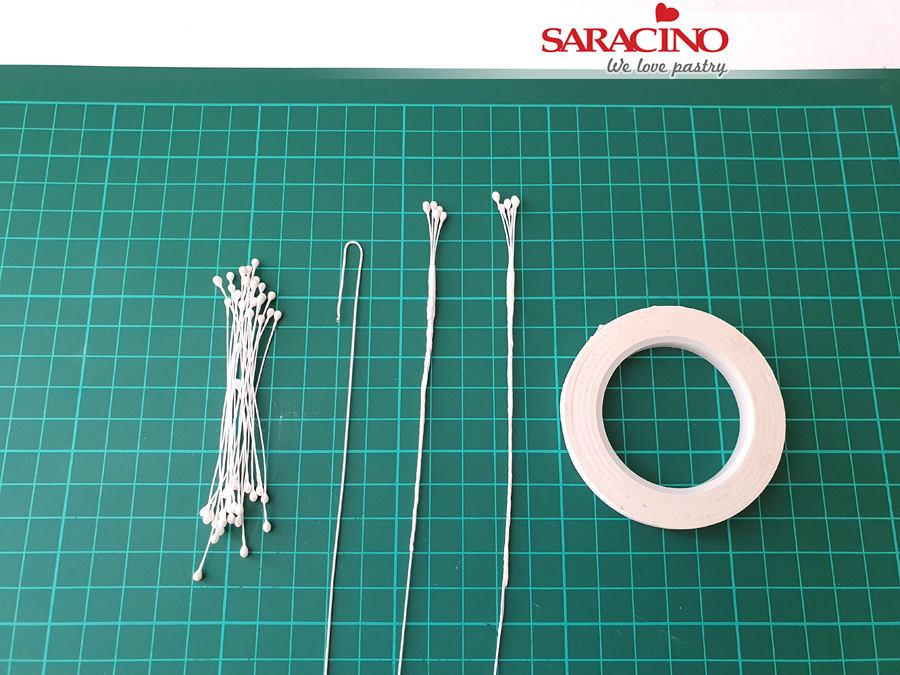
For the simple wafer paper flowers, take 3-6 stamens (medium round in pearl white), fold in half and loop a 24 gauge white wire over. Use white floral tape to secure, starting 3-4mm above the wire. Prepare 10 wires like this.
Step 26
Start cutting the Saracino wafer paper (0.27mm thick) into strips first, then into squares slightly larger than your petal. No special cutters or templates are needed, it’s really up to you how big you want your petals and flowers to be, so cut free-hand squares into tulip/peony shape petals. You will need 3 medium and 3 large petals for each flower and 3-4 small petals for the flower bud, in total you will need to prepare 8 small, 40 medium and 40 large petals.
Step 27
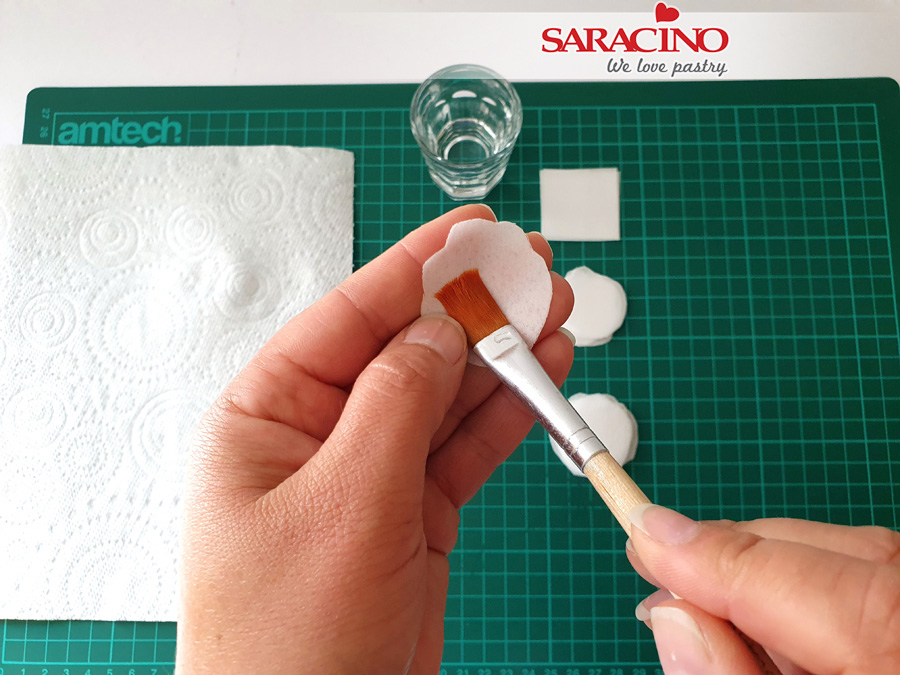
Brush the wafer paper petal with the alcohol using wide flathead brush (not too much alcohol otherwise the petal will damage). If you like your flowers to be in certain colour, add a Saracino gel food colour to the alcohol at this stage.
Step 28
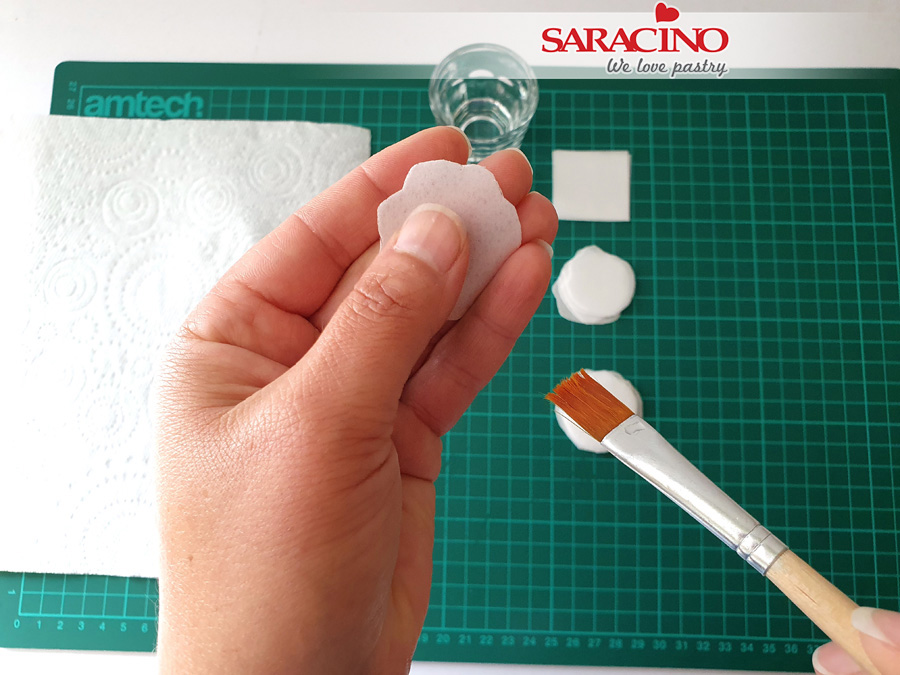
Spread the alcohol evenly with your fingers, making sure the whole surface of the petal is covered and softened.
Step 29
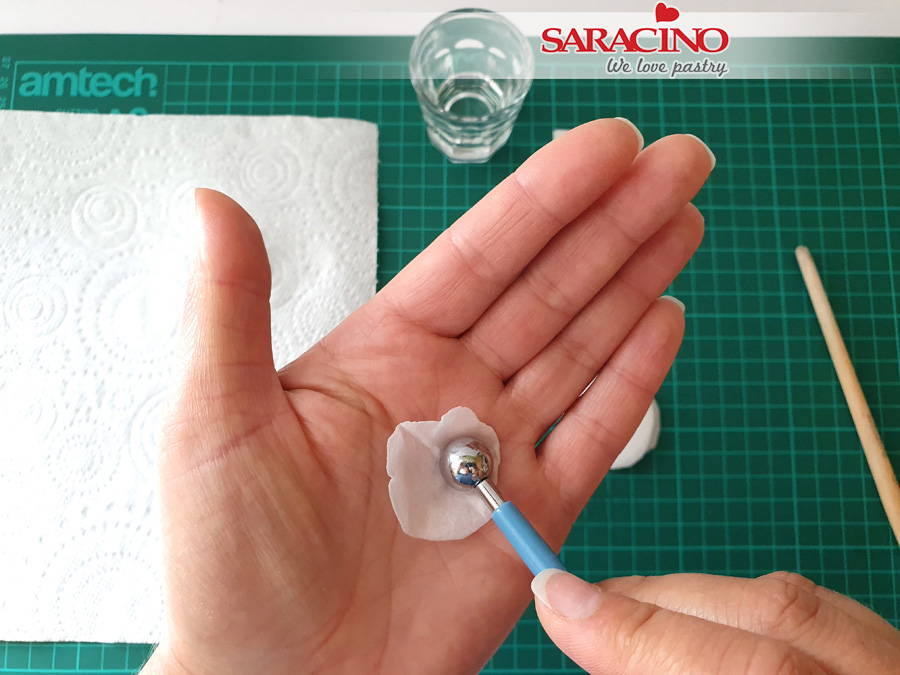
Place the petal on your palm, take the ball tool and press the petal in a few places to indent petal and add extra volume to it. If petals break under the pressure of a ball tool, it means that you haven’t applied enough alcohol to the petal. Petals should curl on the edges themselves, but if not, add a small amount of alcohol on the edges again and help to curl with your fingers.
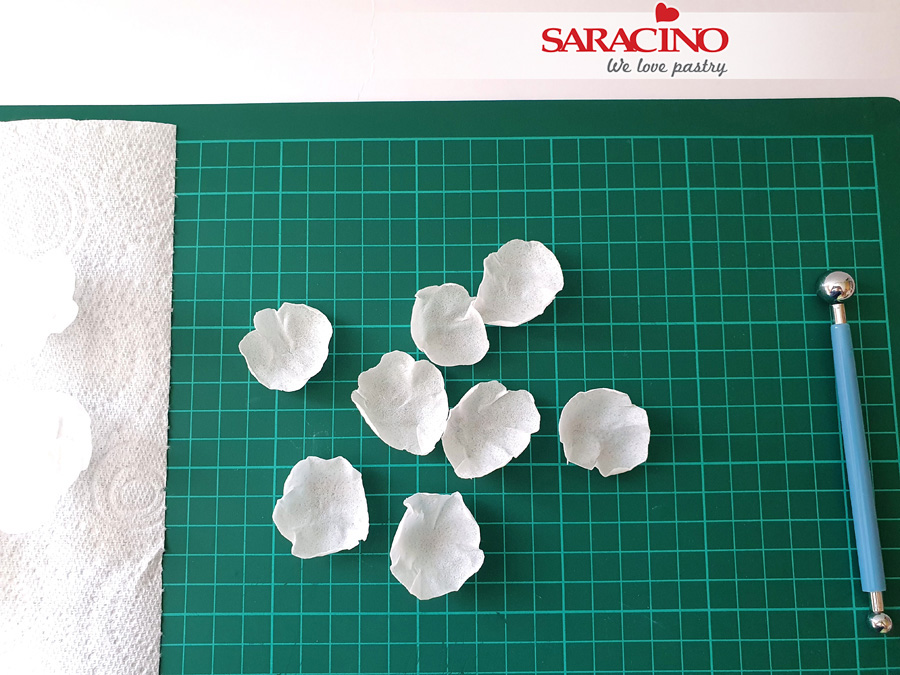
Step 30
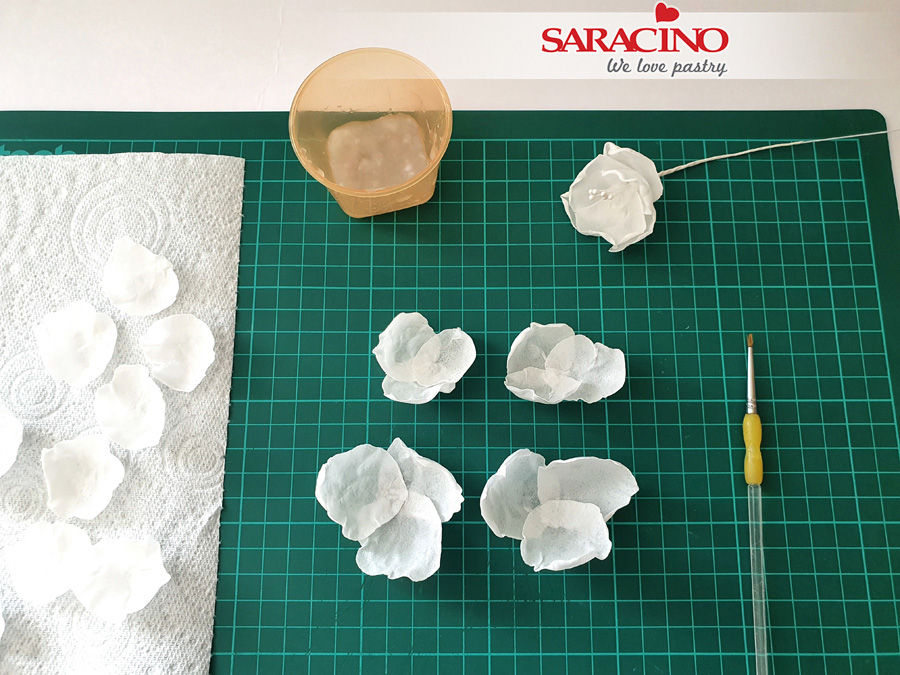
Repeat step 28, 29 and 30 with all petals. Cut a slit on the bottom of each petal (3/4 to the centre), brush a small amount of cooled, boiled water, overlap the slit to form a cup shape to the petal, you can add 28 or 30 gauge wire at this stage if you need every petal to be wired.
Step 31
Select medium petals first and using a small amount of wafer paper glue or cooled, boiled water, adhere them together in a group of three, do the same with larger petals. If you wired your petals, skip this step.
TIP- To make wafer paper glue, cut fine, tiny pieces of leftover scraps of wafer paper and add to a container, cover with boiled water and leave it for a few hours for the paper to dissolve and turn into a glue.
Step 32
Using a small amount of wafer paper glue or cooled, boiled water, glue together the medium and large petals.
Step 33
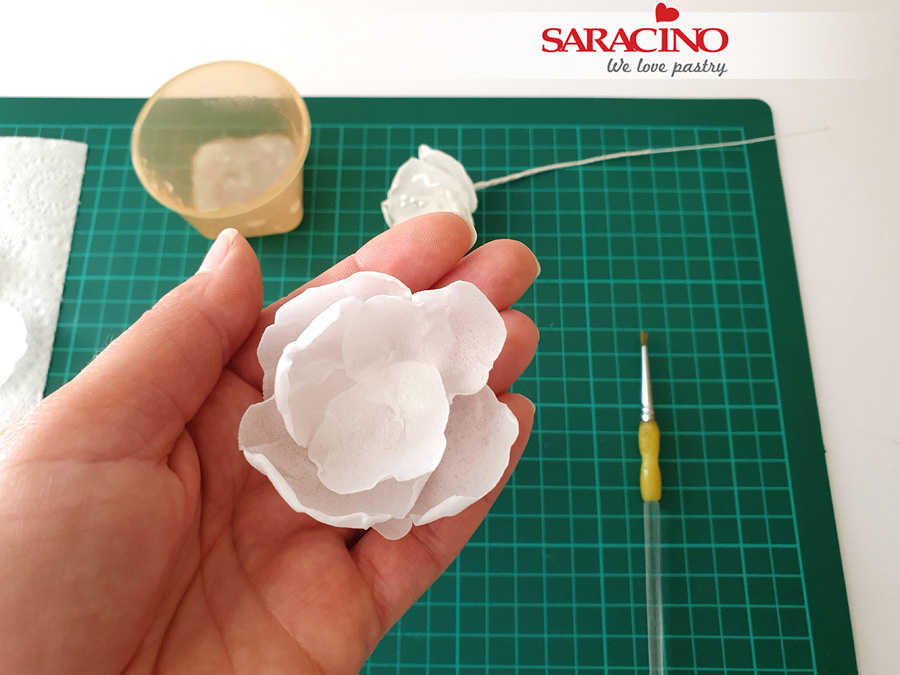
Take the flower middle, brush a small amount of wafer paper glue or cooled, boiled water on the tape underneath the stamen, add a thin strip of wafer paper, (brush the strip first with wafer paper glue or water), this will help the flower middle stick to the petals easier. Leave it for a few minutes to dry. If you wired your petals, skip this step.
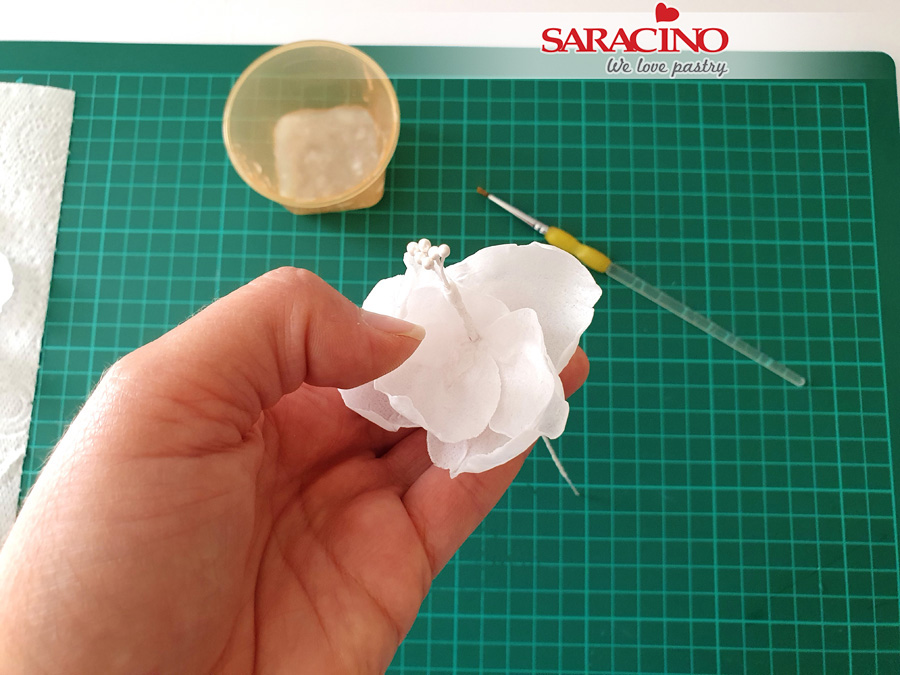
Step 34
Take the petals, if still soft in the centre, thread the flower wire middle through the centre, if the wafer paper has already dried and hardened, dab a small amount of water or wafer paper glue in the centre of the flower to soften the wafer paper. If you wired your petals, take the flower middle, place 3 medium petals directly underneath the stamen, secure petals with white floral tape, then add another layer of 3 larger petals, one by one, continue securing with floral tape all the way down the wire.
Step 35
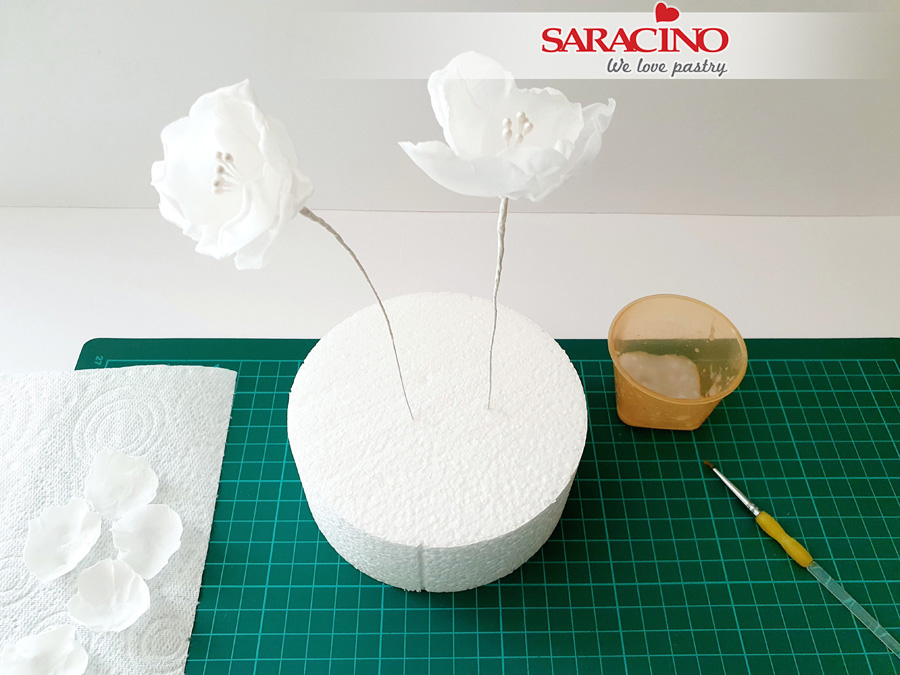
Insert your flowers into a dummy and allow to dry.

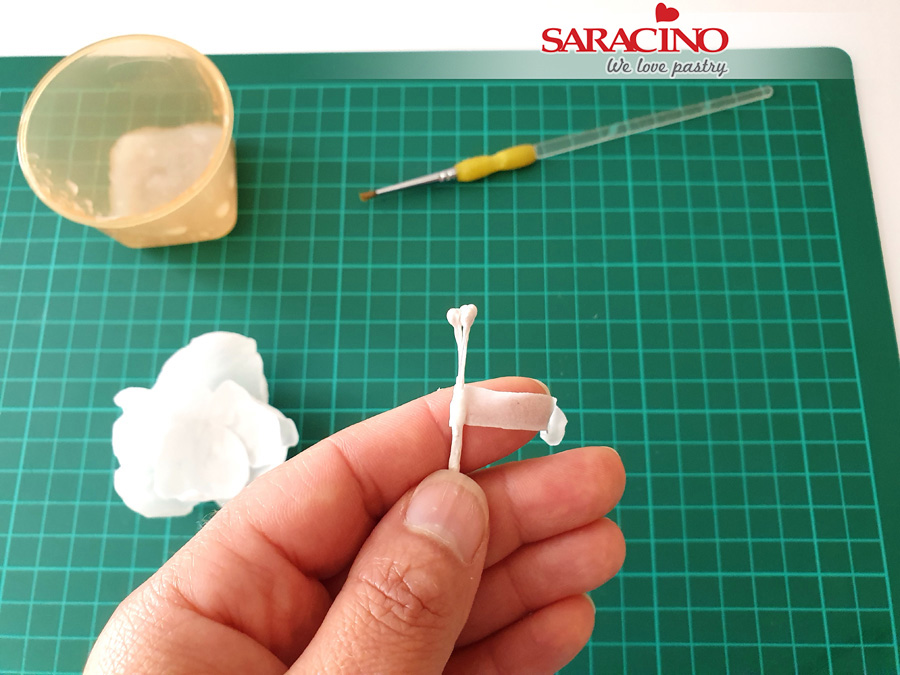
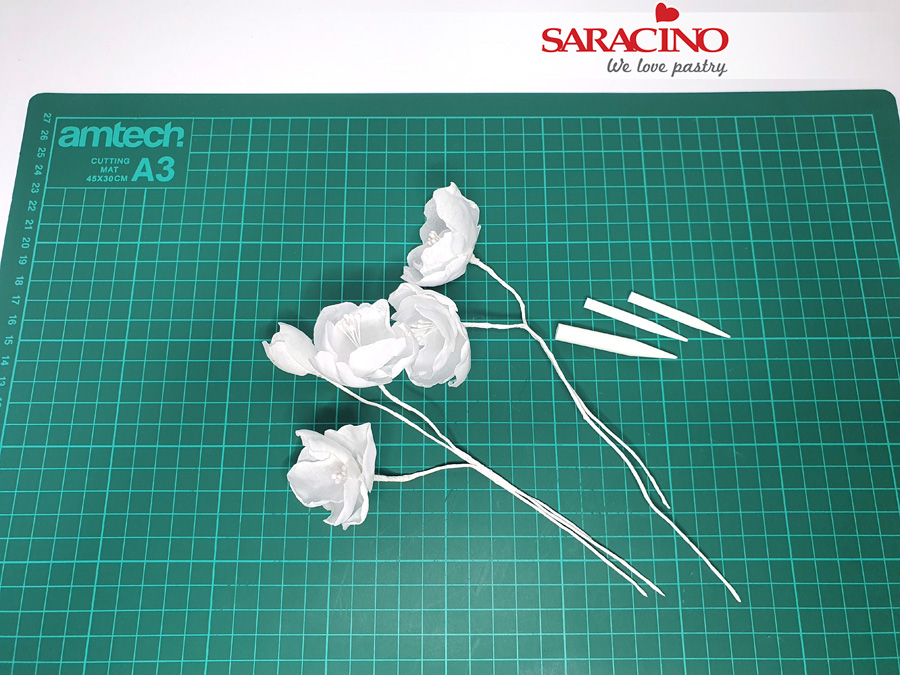
Step 36
For the flower buds, take the 24 gauge white wire, cut in half, make a loop at the end of the wire, wrap a floral white tape over the loop and all the way down the wire. Brush with a glue or cooled, boiled water, wrap a piece of wafer paper, creating a ball shape on the loop.

Step 37
Take 3-4 small petals, attach them to the ball with wafer paper glue or cooled, boiled water, creating a flower bud.
Step 38
Dowel and stack the cakes. Tape the wafer paper flowers in pairs or keep them separate if you prefer. Insert flower picks into the cake where you would like flowers to be placed.
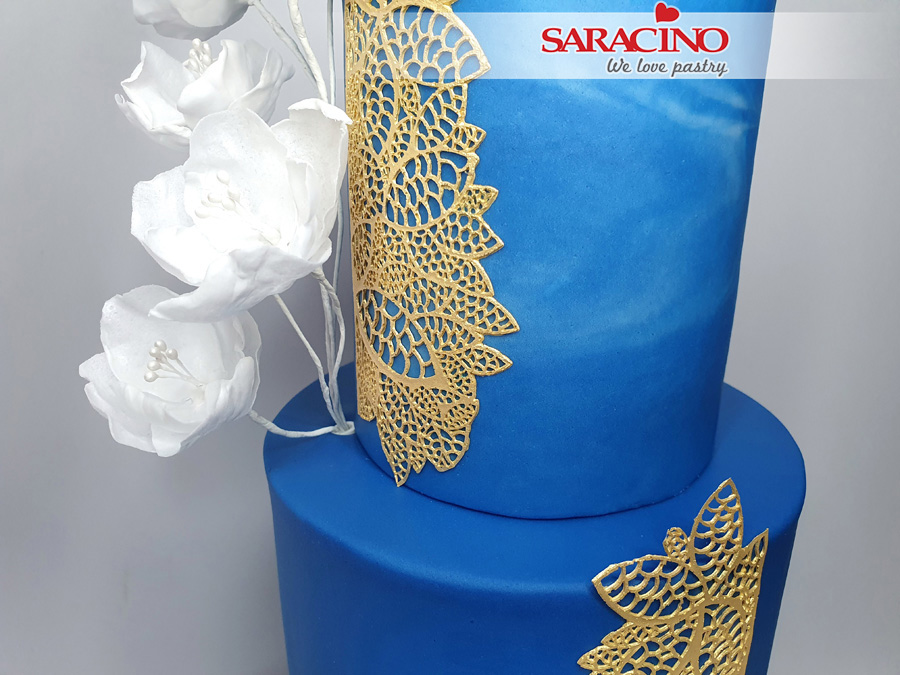
Step 39
Insert the stems into the flower picks, bending the wires to arrange as desired.
Step 40
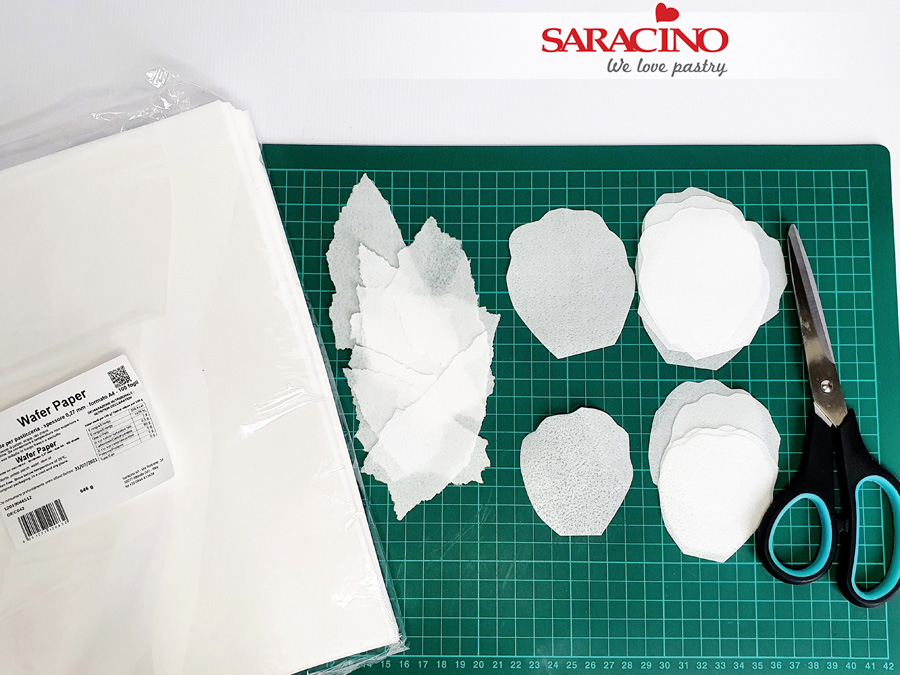
For the wafer paper sail cluster, take 2-3 sheets of the Saracino wafer paper (0.27mm thick). Use scissors to cut free-hand about 20 tulip shape petals, various sizes, approximately between 5 and 8cm long. Take another two sheets of the wafer paper and tear free-hand some irregular pieces for a more jagged edged look.
Step 41
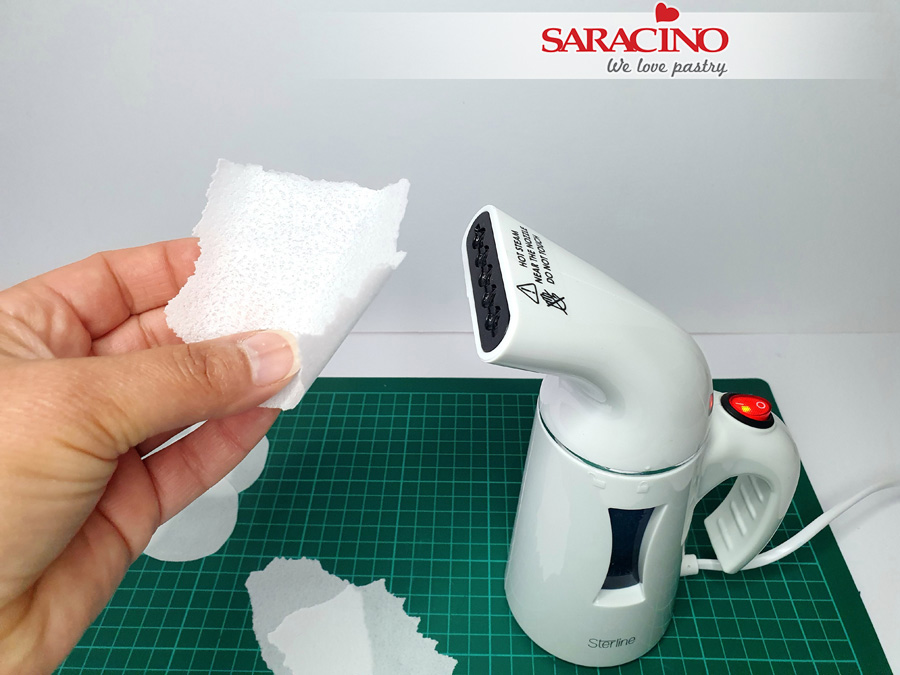
Take prepared pieces of the wafer paper and carefully (do not burn yourself), briefly pass each piece through a path of steam from a cake steamer, form the shape you require.
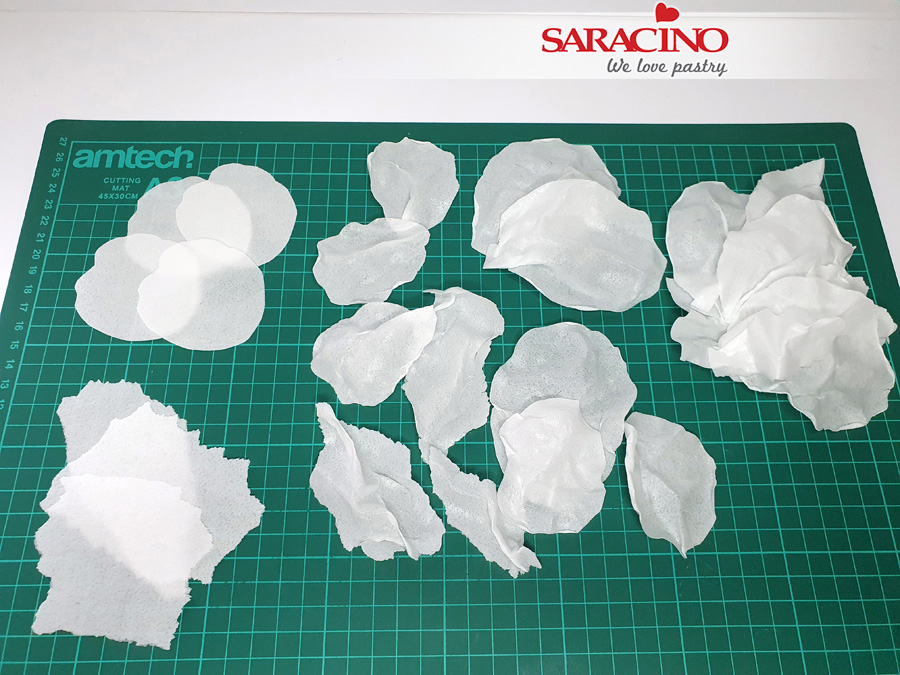
Step 42
If you don’t have a steamer, you can use the steam from a kettle or a pot of boiling water or brush every piece with alcohol (like we did for the petals) and shape, put to dry on a piece of parchment paper.
Step 43
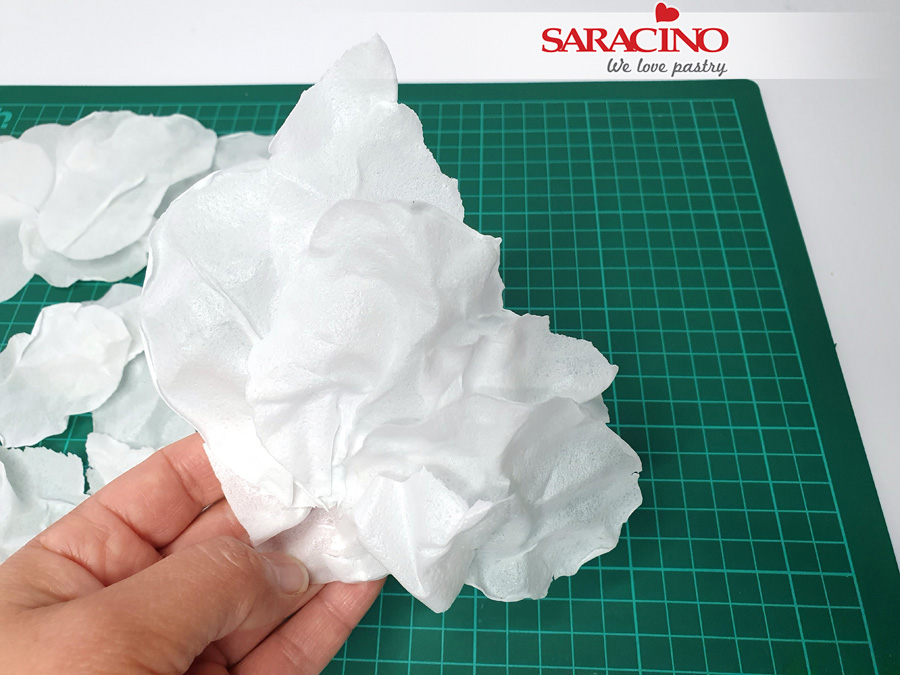
Once all the wafer paper sails are ready, using cooled, boiled water or wafer paper glue arrange them in clusters. Leave some single sails for filling the gaps later on.
Step 44
Tear some pieces from the gold sheet made from the Saracino Gold Ready to Use Lace Paste and attach with a small amount of cooled, boiled water to a few wafer paper sails.
Step 45
Take the 8in cake and the edible gold pieces we prepared earlier (made from Saracino Gold Ready to Use Lace Paste). Use small amount of cooled, boiled water or edible glue to attach pieces to the cake, starting from bigger pieces at the base reducing gradually to smallest ones creating the pattern.
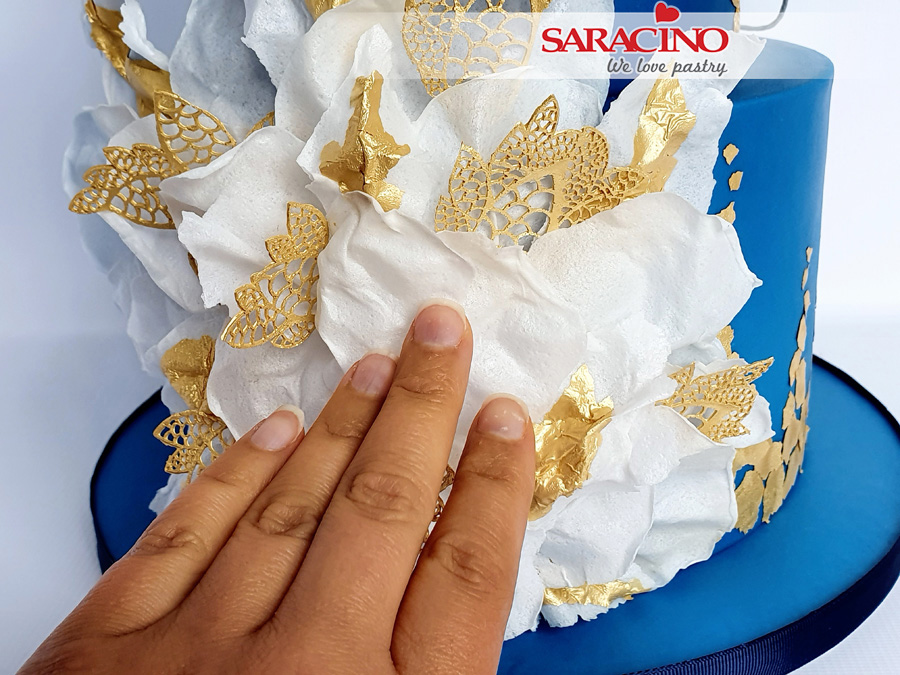
Step 46
Mix a small amount of Saracino Royal Icing. Apply royal icing to the 8in cake in the place you would like the wafer paper clusters to be. Hold the wafer paper clusters in place for a few seconds to allow to fix.
Step 47
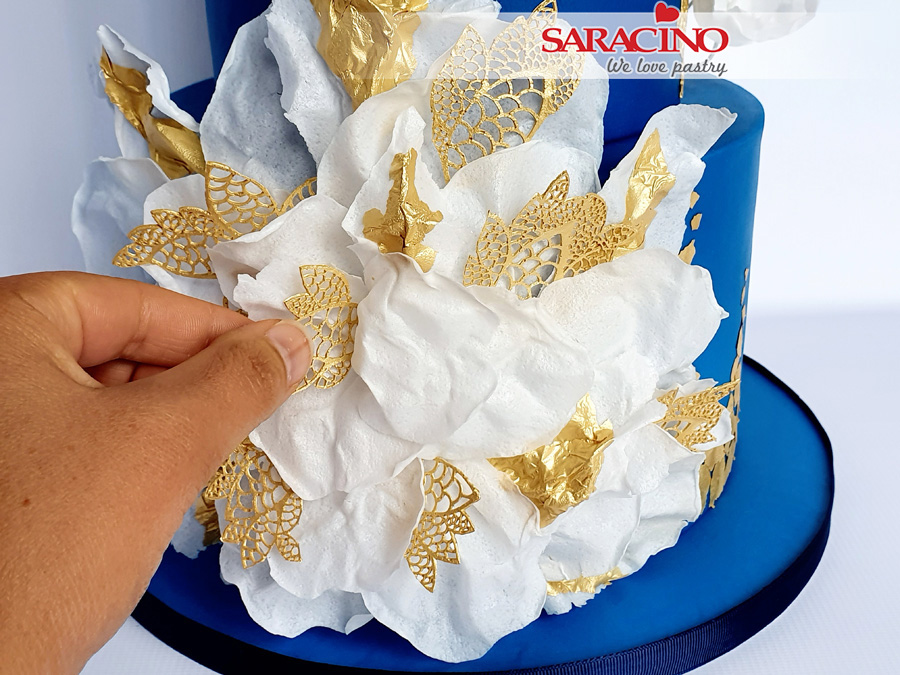
Fill the gaps with single sails and nice pieces of left over edible lace.
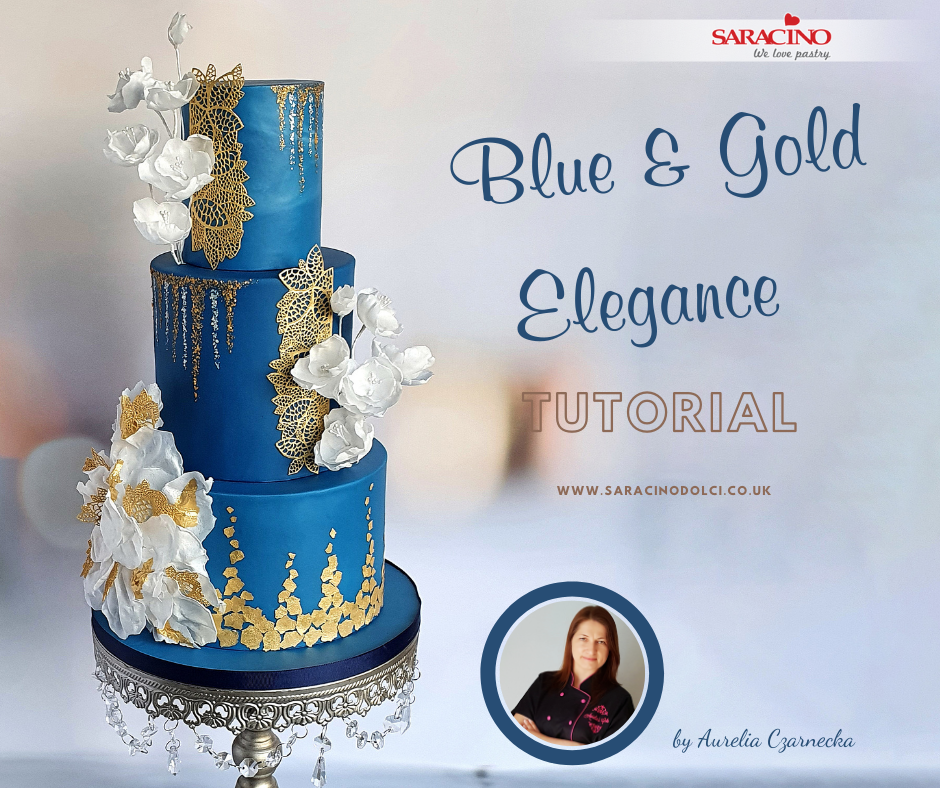
Step 48
Your cake is complete!
