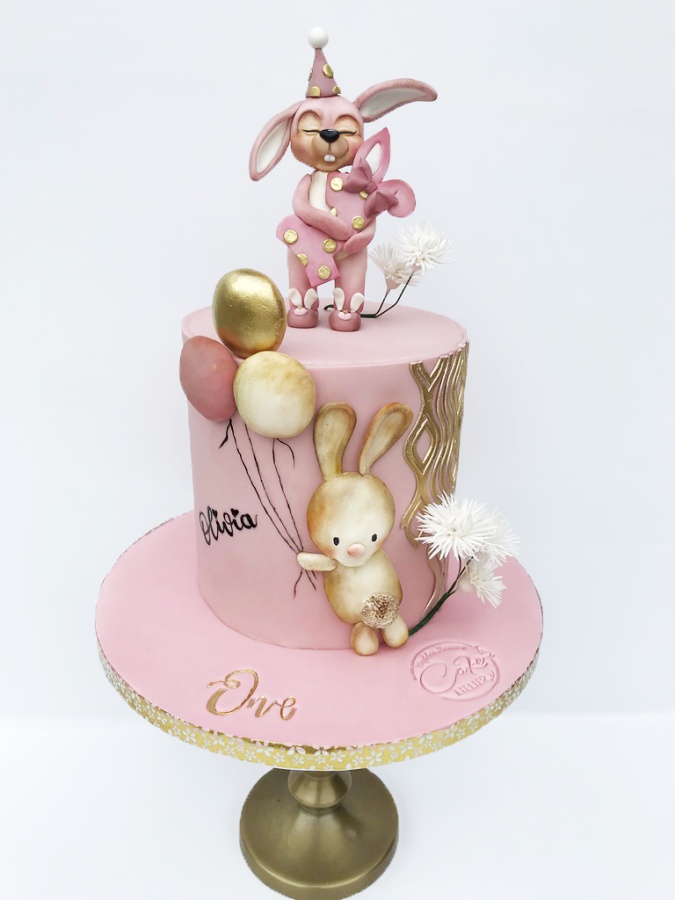
Author: Magdalena Zimmerman

Skill level: BEGINNERS
Covering cake board and cake:
Add 3 drops of Pink Gel Color and one drop of Brown to Saracino Pasta Top. The colour can be deepened and modified by adding more colour. Cover the Cake Dummy and Cake Board. Add a name if you wish. Attach the Washi Tape around the Cake Drum. Set aside to dry
You will need:
- Rolling pin
- Sharp knife
- Dresden tool
- Small, medium and large ball tool
- Number 12 Piping Tip
- Skewers and wooden toothpick
- Green Floral Wire – 22 gauge
- Green Floral Tape
- Soft brushes
- Small paint brush
- Cake lace mould (I used Marvelous mould)
- Mini bows silicone mould
- Number 1 Cookie Cutter
- Edible glue
- 6 inch Cake Dummy
- 10 inch Cake Drum
- Gold Washi Tape
- White, black and skin tone Saracino Modelling Paste
- Saracino Pasta Bouquet
- Saracino White Pasta Top
- Saracino Sweet Lace Pearl
- Saracino Powder Colour (white, skin tone, rose pink, brown and light gold)
- Saracino Gel Colour – Black, Brown and Pink
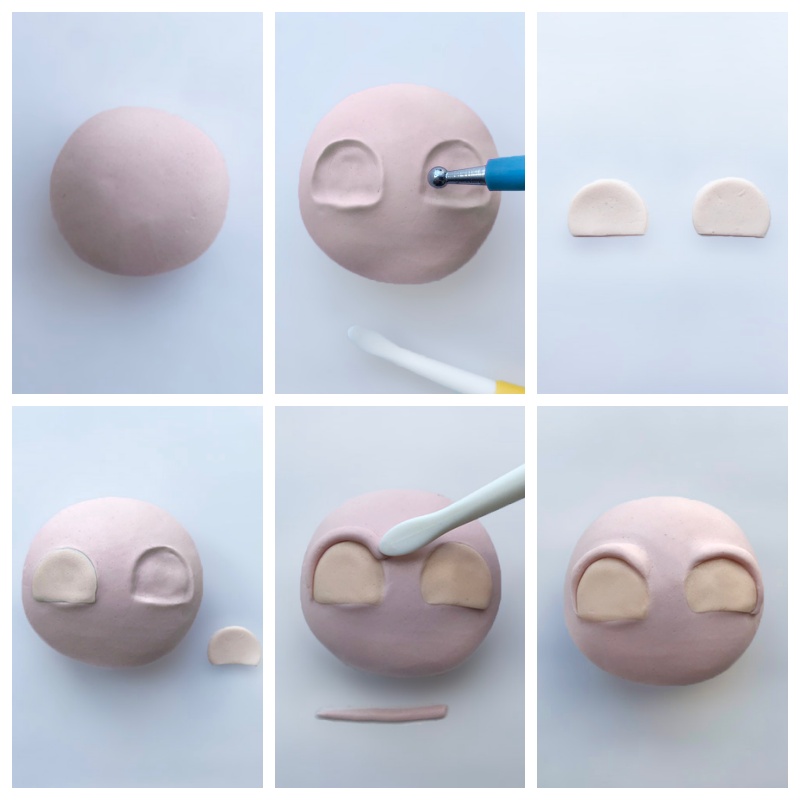
Step 1
Prepare the paste: To the white Modelling Paste, add a small amount of the pink gel colour and a little brown colour (this way you will get Dusty pink). You will also need Skin tone, black and white paste.
For the head knead a ball and roll it with your hand.
For the eyes:
- Using the tool with a small ball, form a half-circle for the eye sockets.
- Using the cutter, cut out small circles from the skin tone and cut off the bottom with a knife to give a flat edge.
- Place into the sockets of the eyes
- Using your fingers roll two thin sausage shapes with one pointed end and fix them over the eyes, then shape and blend them with the Dresden tool to form the eye lids.
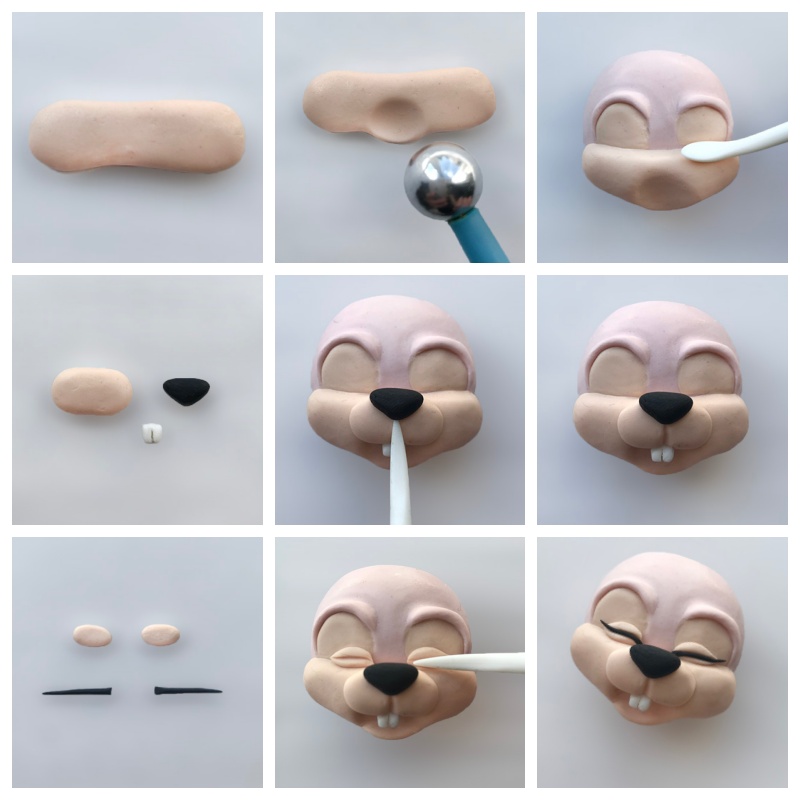
Step 2
To create the face:
- Using skin tone paste roll a long flat sausage shape for the cheeks and mouth area.
- Using a tool with a large ball, make a dent for the mouth
- Fix to the face and shape / blend it
- Shape the nose pieces and teeth, fix them to the mouth and make a line below the nose
- Prepare the details for the eyes and eyelashes. Fix oval eyes where shown, make a line on them with the Dresden tool and fix the black line eyelashes into the line.
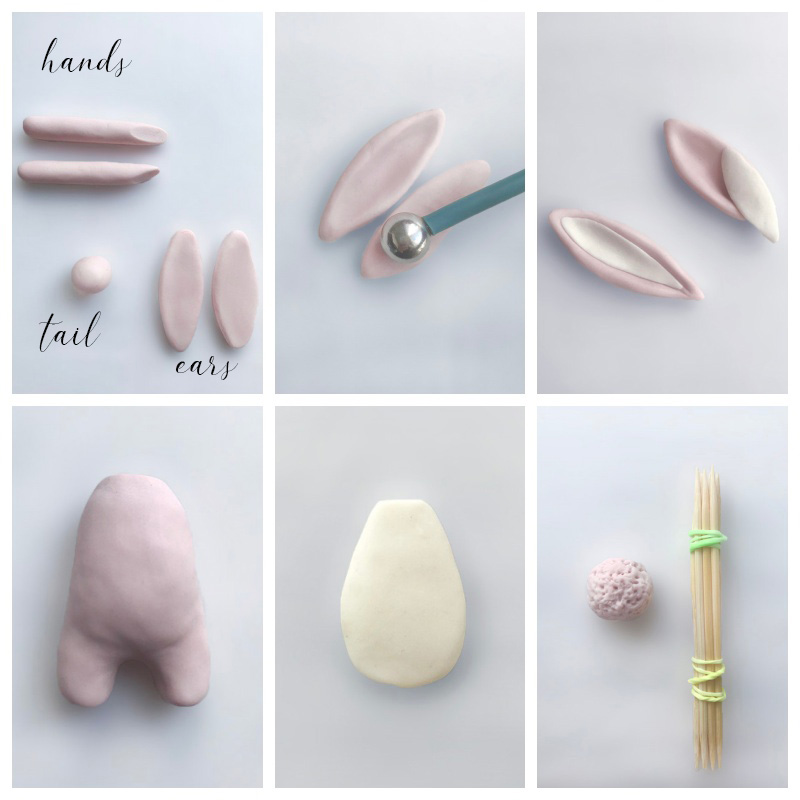
Step 3
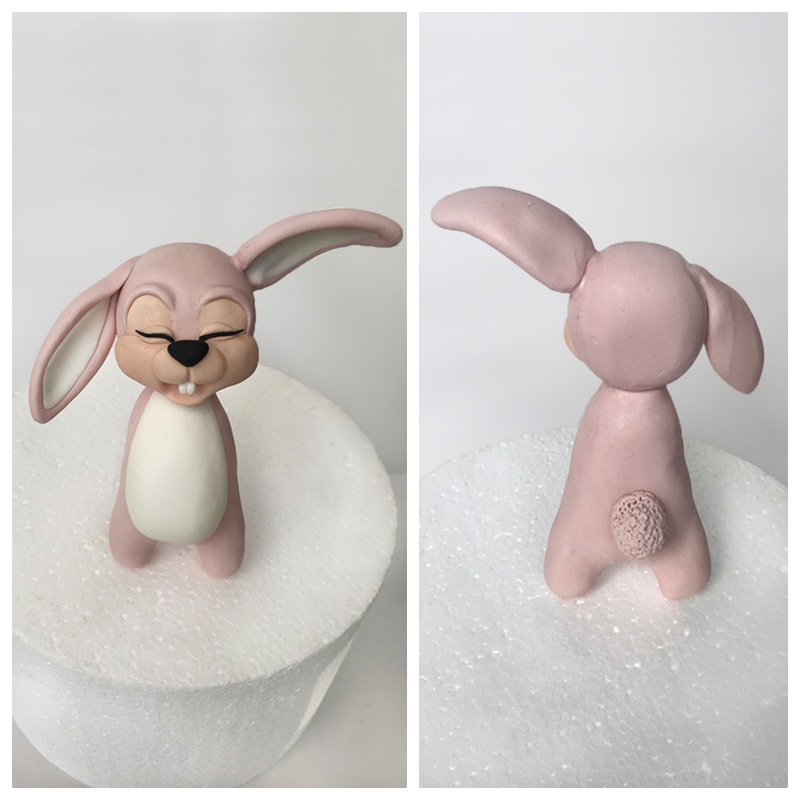
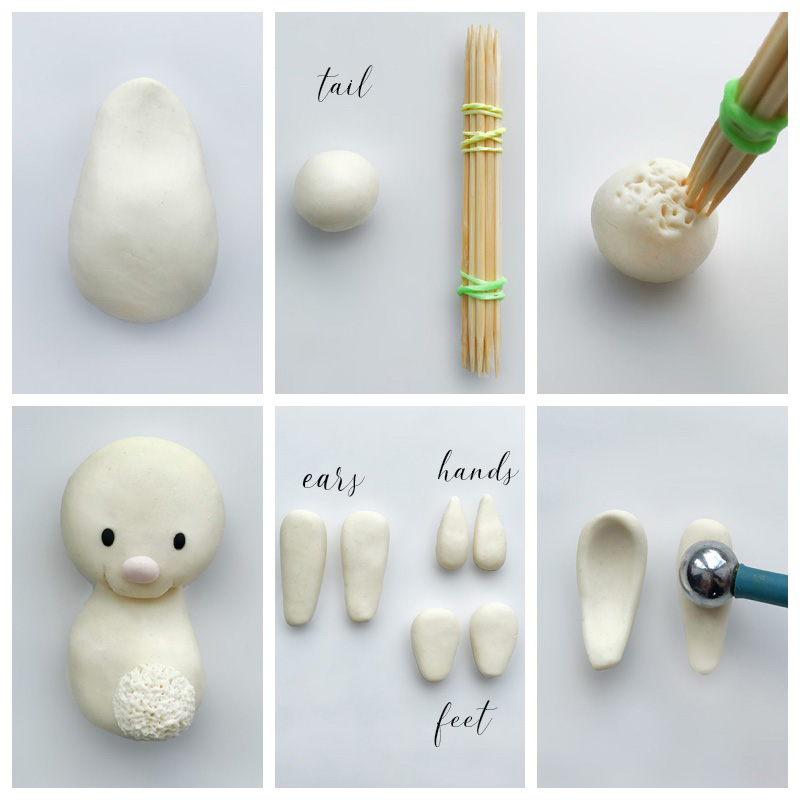
To create the ears, arms, tail and body:
- Use dusty pink to form the ears of the rabbit. For the arms roll the dusty pink colour into a long sausage shape. Cut diagonally into two equal parts. Roll a ball for the tail.
- Using a medium ball tool, shape the ears. Fill them with white paste.
- For the body form a large ball, roll it into a cone shape and flatten at the end. At the large bottom of the cone, make a dent in the centre with your finger and form the legs.
- Using white paste cut out a circle for the tummy
- Using the cocktail sticks as a tool, add texture to the tail.
Step 4
Connect the head to the body using a cocktail stick, fix the ears to the required position, fix the white part of the tummy and the tail.
Step 5
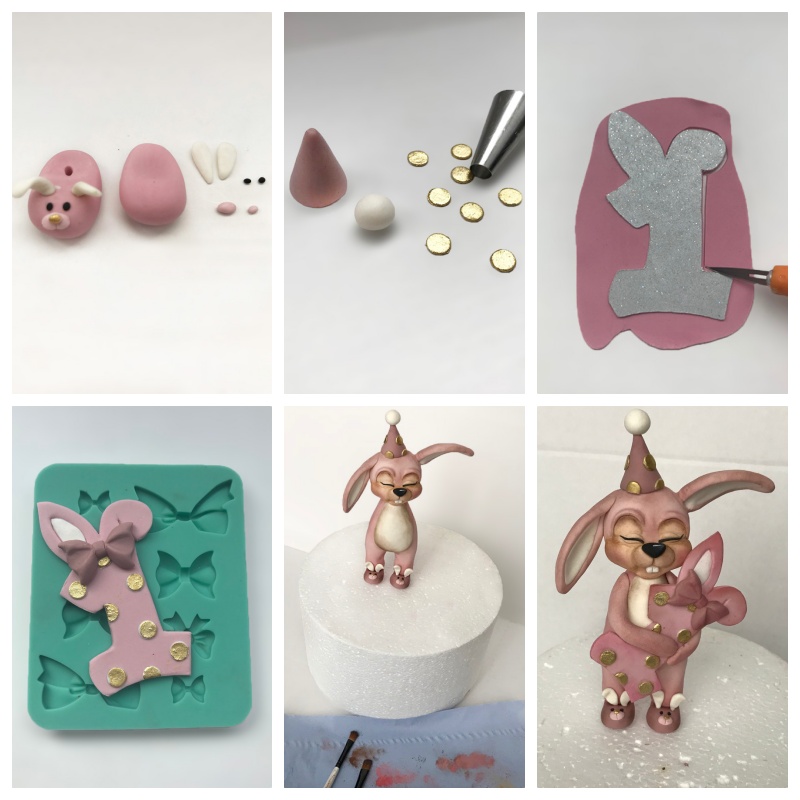
To create details:
- Prepare the slippers and a hat using the shapes shown in the pictures.
- Using Saracino Pasta Bouquet, cut a one shape (you can use a cutter for this) and decorate it. Your bow can be formed in a bow mould ti the required size.
- Attach the bunny slippers and hat. Using a soft brush and powder colours add shade (I used brown and pink)
- Fix the rabbit’s arms and fix the number one in them. Put on the cake!
Step 6
FOR THE SIDE BUNNY DECORATION: Prepare the paste: Add a small amount of Skin tone to the white Modelling Paste. You will also need Black paste and a small amount of pink for the nose
For the head:
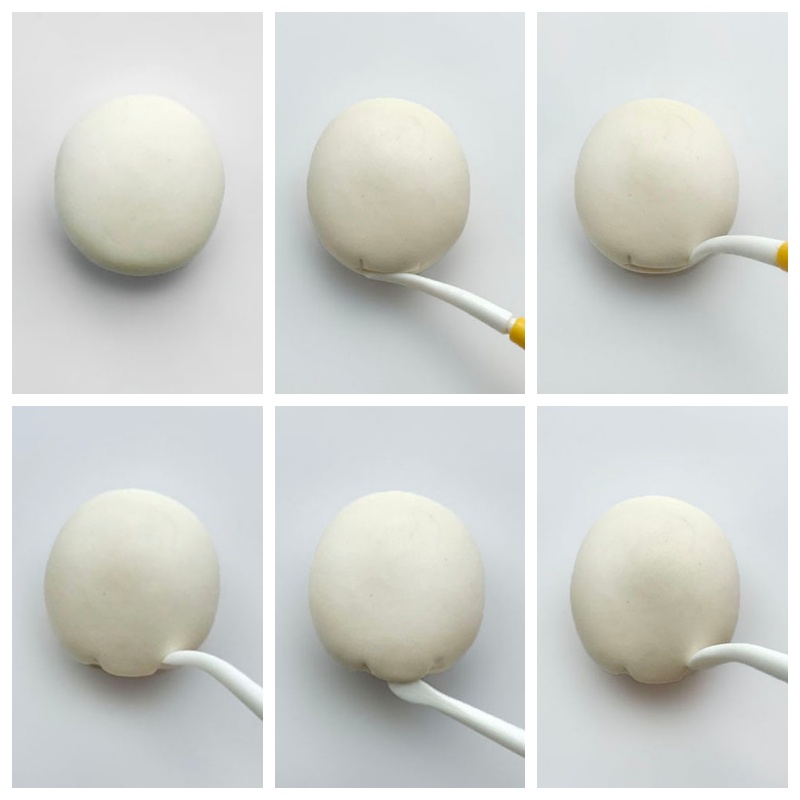
- Form a ball and shape it with your hands.
- Using the Dresden Tool, make an incision in the centre of the lower part of the head for the mouth, then on the sides to shape the rabbit’s face.
- Gently pull out the mouth and shape / blend the sides
Step 7
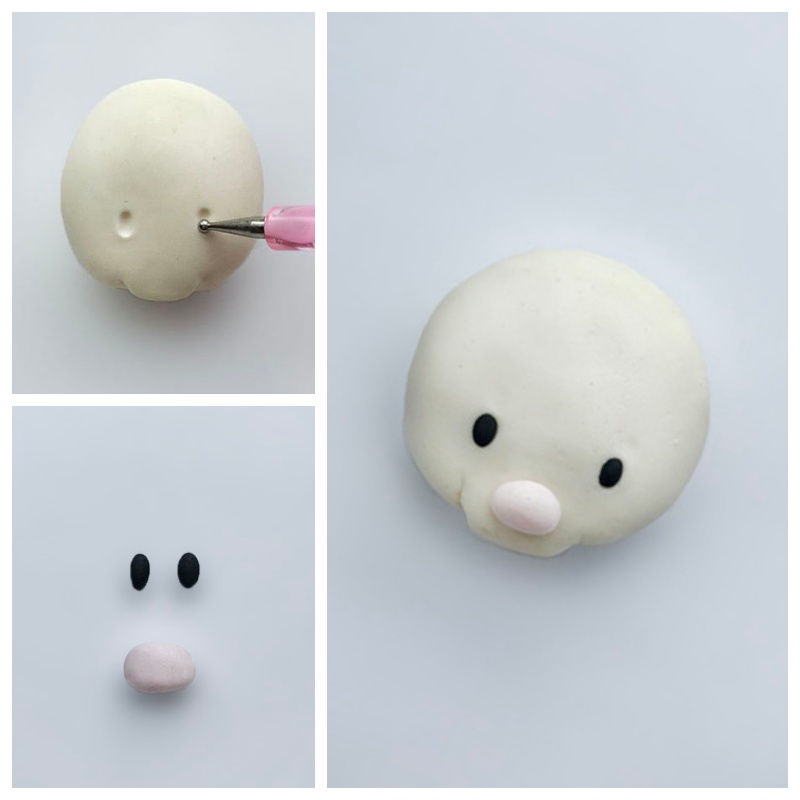
Eyes and nose:
- Using a small metal ball tool, form oblong indentations for the eye sockets
- Prepare black eyes and a pink nose from paste
- Fix the eyes and nose to the bunny’s face
Step 8
For the body:
Form a cone shape and round it at the top, then smooth it with your hand.
For the tail roll a ball. Add texture using the cocktail sticks.
Attach the head to the body and fix the tail
Prepare the rabbit’s ears, hands and feet as shown
Make a dent in the ears using a medium-sized ball tool
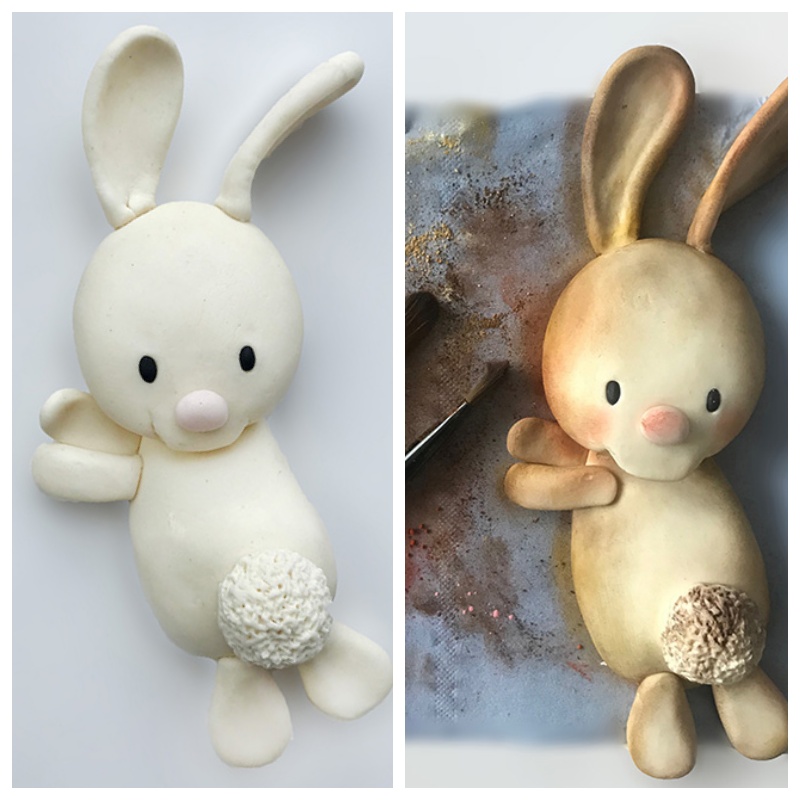
Step 9
Fix the hands and feet. Using a soft brush and powder colours, shade the rabbit (I used brown, skin tone and pink). Use edible glue to attach the rabbit to the cake.
Step 10
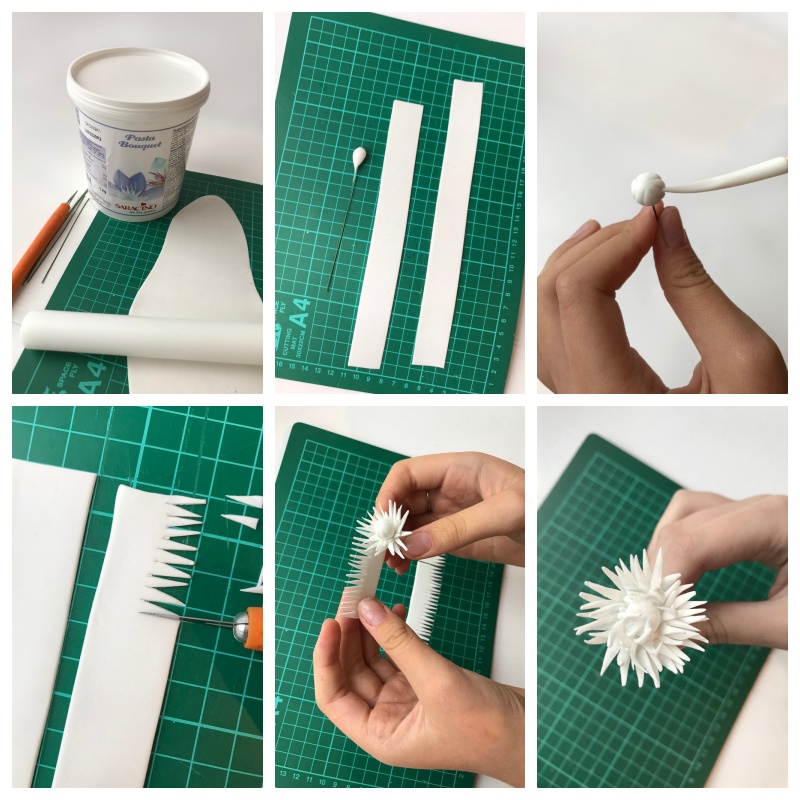
Sugar Flowers:
- Using Pasta Bouquet roll out thinly.
- Using Pasta Bouquet fix a small ball to the end of a flower wire. Using your Dresden tool make lines on the ball and set aside to dry.
- Cut two strips 13cm long
- Use a knife to cut out narrow triangles in each strip
- Cut strips and fix around the flower centre.
- Allow to dry completely, then wrap the wire with floral tape and place on the cake. If inserting into the cake you will need a flower pick.
Step 11
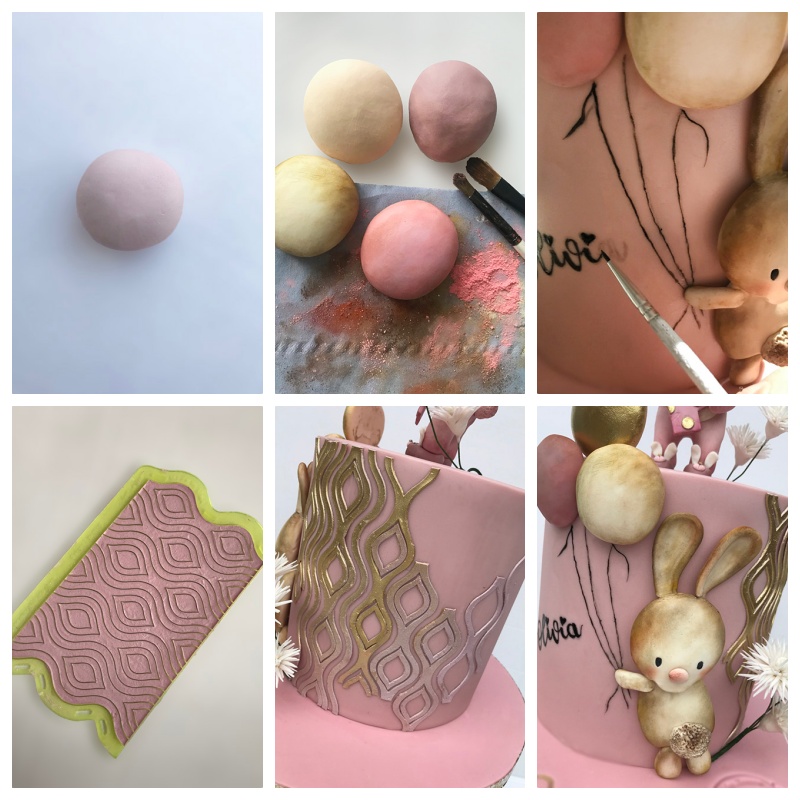
Balloons:
- Roll a Dusty pink ball and two Skin tone balls
- Flatten using your hand
- For two balloons – Dusty pink and Skin tone, dust with Saracino Powder Colour (Pink and Brown)
- Paint the final balloon gold with Saracino Light Gold Powder mixed with alcohol. Using edible glue, fix the balloons to the cake.
Pattern:
- Add drops of pink and brown colours to the Saracino Sweet Lace Pearl. Mix.
- Place in the mould. You can use any Cake Lace mould (I used Marvelous mould)
- Let it dry completely. Due to the deep pattern my lace took 36 hours to dry completely.
- When the lace is dry, paint some parts gold and leave the rest in the Dusty pink colour
- Using edible glue, fix the lace on the cake
Painting the name and the balloon string:
- Use a pencil to make an inscription and add a string of balloons on the cake
- Using the Small paint brush, black gel dye mixed with clear alcohol, paint over the pencil details.